Understanding Disk Partitioning In Windows 11: A Comprehensive Guide
Understanding Disk Partitioning in Windows 11: A Comprehensive Guide
Related Articles: Understanding Disk Partitioning in Windows 11: A Comprehensive Guide
Introduction
With great pleasure, we will explore the intriguing topic related to Understanding Disk Partitioning in Windows 11: A Comprehensive Guide. Let’s weave interesting information and offer fresh perspectives to the readers.
Table of Content
Understanding Disk Partitioning in Windows 11: A Comprehensive Guide

Disk partitioning is a fundamental aspect of computer management, particularly in operating systems like Windows 11. It involves dividing a physical storage drive into distinct sections, each treated as a separate logical drive. This process offers numerous advantages, enhancing data organization, security, and system performance.
The Essence of Partitioning:
Imagine a large, empty room. You could leave it as one vast space, making it challenging to organize and navigate. Alternatively, you could divide the room into smaller, designated areas – a workspace, a bedroom, a library – each serving a specific purpose. Disk partitioning operates similarly, dividing your hard drive into logical units, each with its own unique characteristics and functions.
Benefits of Disk Partitioning:
- Enhanced Data Organization: Partitioning allows you to segregate different types of data. For instance, you can create a dedicated partition for operating system files, another for user data, and a third for backups. This structure simplifies data management, preventing accidental deletion or corruption.
- Improved System Performance: By allocating specific partitions for different purposes, you can optimize system performance. For instance, dedicating a partition solely to the operating system can prevent user data from slowing down system boot times.
- Enhanced Security: Partitioning enables you to isolate sensitive data by storing it on a separate partition, limiting access and protecting it from potential threats.
- Multiple Operating Systems: Partitioning allows you to install multiple operating systems on a single physical drive, enabling dual-booting and switching between different operating environments.
- Data Recovery: In case of a system failure or data corruption, partitioning can facilitate easier data recovery. By isolating the affected partition, you can restore other partitions without affecting the entire drive.
Types of Partitions:
- Primary Partitions: These are the most common partitions, designed for storing operating systems and user data. A hard drive can accommodate up to four primary partitions.
- Extended Partitions: An extended partition acts as a container for multiple logical partitions. This allows for more flexibility in allocating space and creating numerous partitions beyond the primary partition limit.
- Logical Partitions: These are created within an extended partition and are used for storing data and applications.
Partitioning in Windows 11:
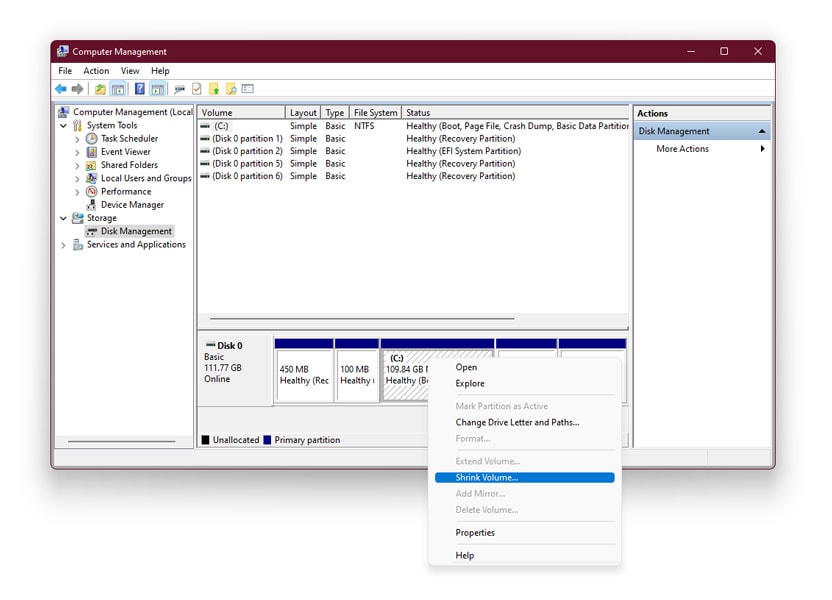
Windows 11 provides a built-in tool called Disk Management for managing partitions. This tool enables users to create, delete, format, and resize partitions. However, for more advanced partitioning options, third-party tools are often preferred.
Steps for Partitioning a Drive in Windows 11:
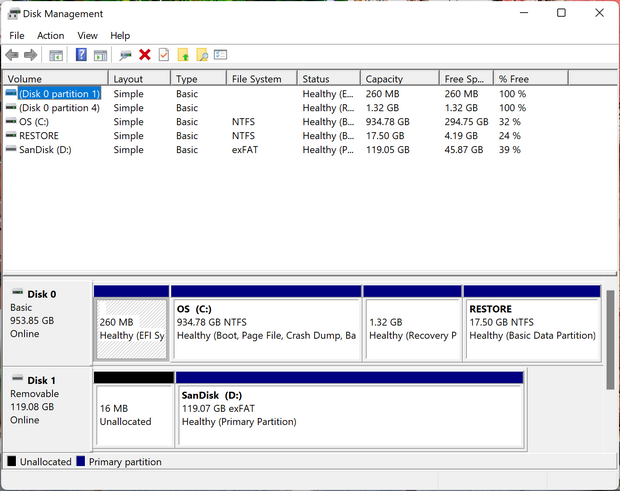
- Open Disk Management: Type "disk management" in the Windows search bar and select the Disk Management option.
- Identify the Drive: Locate the drive you wish to partition. It will be listed as a disk with a specific capacity and label.
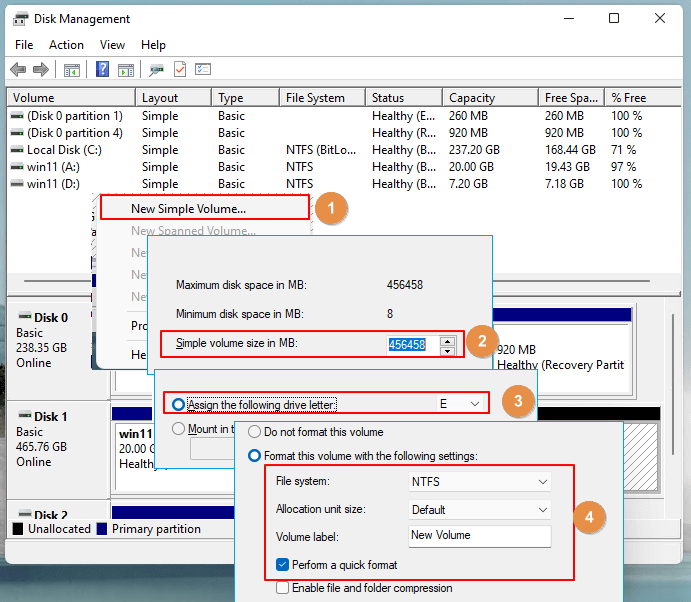
- Create a New Partition: Right-click on the unallocated space on the drive and select "New Simple Volume."
- Specify Partition Size: Enter the desired size for the new partition in megabytes (MB) or gigabytes (GB).
- Assign a Drive Letter: Choose a drive letter to identify the new partition.
- Format the Partition: Select a file system for the partition (e.g., NTFS, FAT32) and choose a volume label for easy identification.
- Complete the Process: Click "Finish" to complete the partitioning process.
Important Considerations:
- Backup Data: Always back up your data before partitioning, as the process can potentially lead to data loss if not executed carefully.
- Understanding Partition Types: Choose the appropriate partition type based on your needs and the intended use of the partition.
- Using Third-Party Tools: For more advanced partitioning options, consider using third-party tools like EaseUS Partition Master or MiniTool Partition Wizard. These tools offer greater flexibility and control over the partitioning process.
- Data Recovery: Ensure you have a reliable data recovery tool in case of accidental data loss during partitioning.
FAQs about Partitioning Drives in Windows 11:
Q1. Can I partition my system drive (C: drive)?
A: Yes, you can partition your system drive. However, it is generally recommended to create a separate partition for your operating system and another for user data. This approach helps isolate system files from user data, enhancing security and system performance.
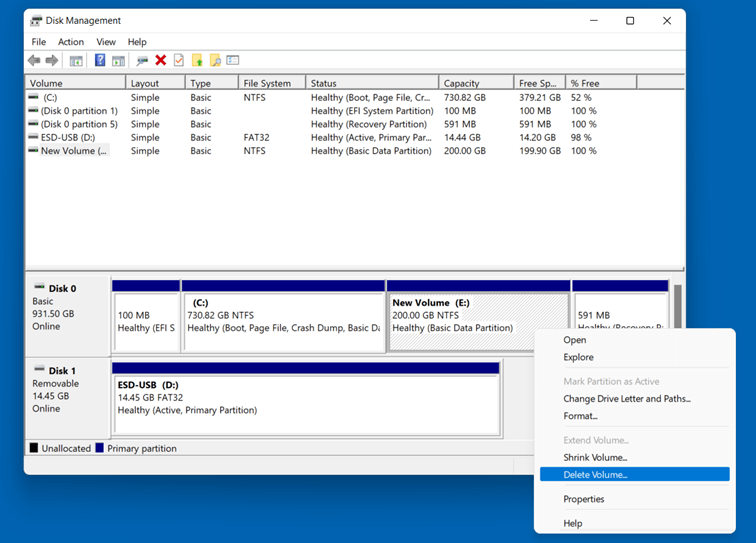
Q2. What happens if I delete a partition?
A: Deleting a partition will erase all data stored within it. Before deleting a partition, ensure you have backed up any essential data.
Q3. Can I resize a partition?
A: Yes, you can resize partitions using Disk Management or third-party tools. However, resizing a partition can be a complex process, and it is crucial to understand the potential risks involved.
Q4. What is the difference between NTFS and FAT32 file systems?
A: NTFS (New Technology File System) is the standard file system for Windows operating systems. It offers features like file compression, security permissions, and larger file size support. FAT32 (File Allocation Table 32) is an older file system that is less secure and has limitations on file size.
Q5. Can I partition a USB drive?
A: Yes, you can partition a USB drive. This can be helpful for organizing data, storing multiple operating systems, or creating bootable drives.
Tips for Partitioning Drives in Windows 11:
- Plan Ahead: Before partitioning, carefully consider the intended purpose of each partition and allocate appropriate storage space.
- Back Up Data: Always back up your data before partitioning to avoid data loss.
- Use Third-Party Tools: For advanced partitioning options, consider using third-party tools.
- Understand the Risks: Partitioning can be a complex process, and it is essential to understand the potential risks involved.
- Seek Professional Assistance: If you are unsure about partitioning or have concerns about data loss, seek professional assistance from a qualified technician.
Conclusion:
Partitioning a drive in Windows 11 offers significant benefits for data organization, system performance, security, and data recovery. Understanding the process and its potential risks is crucial for successful implementation. By following the steps outlined and considering the important considerations, users can effectively partition their drives to optimize their Windows 11 experience. Remember, always back up your data before partitioning and seek professional assistance if needed.

:max_bytes(150000):strip_icc()/002_how-to-partition-a-hard-drive-2626081-5c82c62d46e0fb00010f10b6.jpg)
![Windows 11 - How to Partition Hard Drives [Tutorial] - YouTube](https://i.ytimg.com/vi/C65AA9V2lpU/maxresdefault.jpg)
Closure
Thus, we hope this article has provided valuable insights into Understanding Disk Partitioning in Windows 11: A Comprehensive Guide. We hope you find this article informative and beneficial. See you in our next article!
Leave a Reply