Removing A Microsoft Account From Windows 11: A Comprehensive Guide
Removing a Microsoft Account from Windows 11: A Comprehensive Guide
Related Articles: Removing a Microsoft Account from Windows 11: A Comprehensive Guide
Introduction
With great pleasure, we will explore the intriguing topic related to Removing a Microsoft Account from Windows 11: A Comprehensive Guide. Let’s weave interesting information and offer fresh perspectives to the readers.
Table of Content
Removing a Microsoft Account from Windows 11: A Comprehensive Guide
Windows 11, like its predecessors, offers seamless integration with Microsoft accounts. While this integration provides numerous benefits, such as cloud storage, app synchronization, and personalized settings, there might be instances where users wish to remove their Microsoft account from their Windows 11 device. This can be due to various reasons, including privacy concerns, account sharing, or a desire to revert to a local account.
This article provides a comprehensive guide on how to remove a Microsoft account from Windows 11, addressing the procedure, potential implications, and frequently asked questions.
Understanding the Impact of Removing a Microsoft Account
Before proceeding, it is crucial to understand the implications of removing a Microsoft account from Windows 11. Here are some key points to consider:
- Loss of Cloud Synchronization: Removing the account will disconnect your device from cloud storage services like OneDrive, resulting in the loss of synchronized files, settings, and applications.
- Data Accessibility: Access to data stored on OneDrive will be restricted unless you have a separate local copy.
- App Restrictions: Some applications, particularly those associated with Microsoft services, may require a Microsoft account to function. Removing the account could hinder their functionality.
- Personalized Settings: Removing the account will revert personalized settings, such as desktop backgrounds, themes, and language preferences, to default values.
- Account Recovery: If you plan to re-add the account in the future, ensure you remember the associated password and security information.
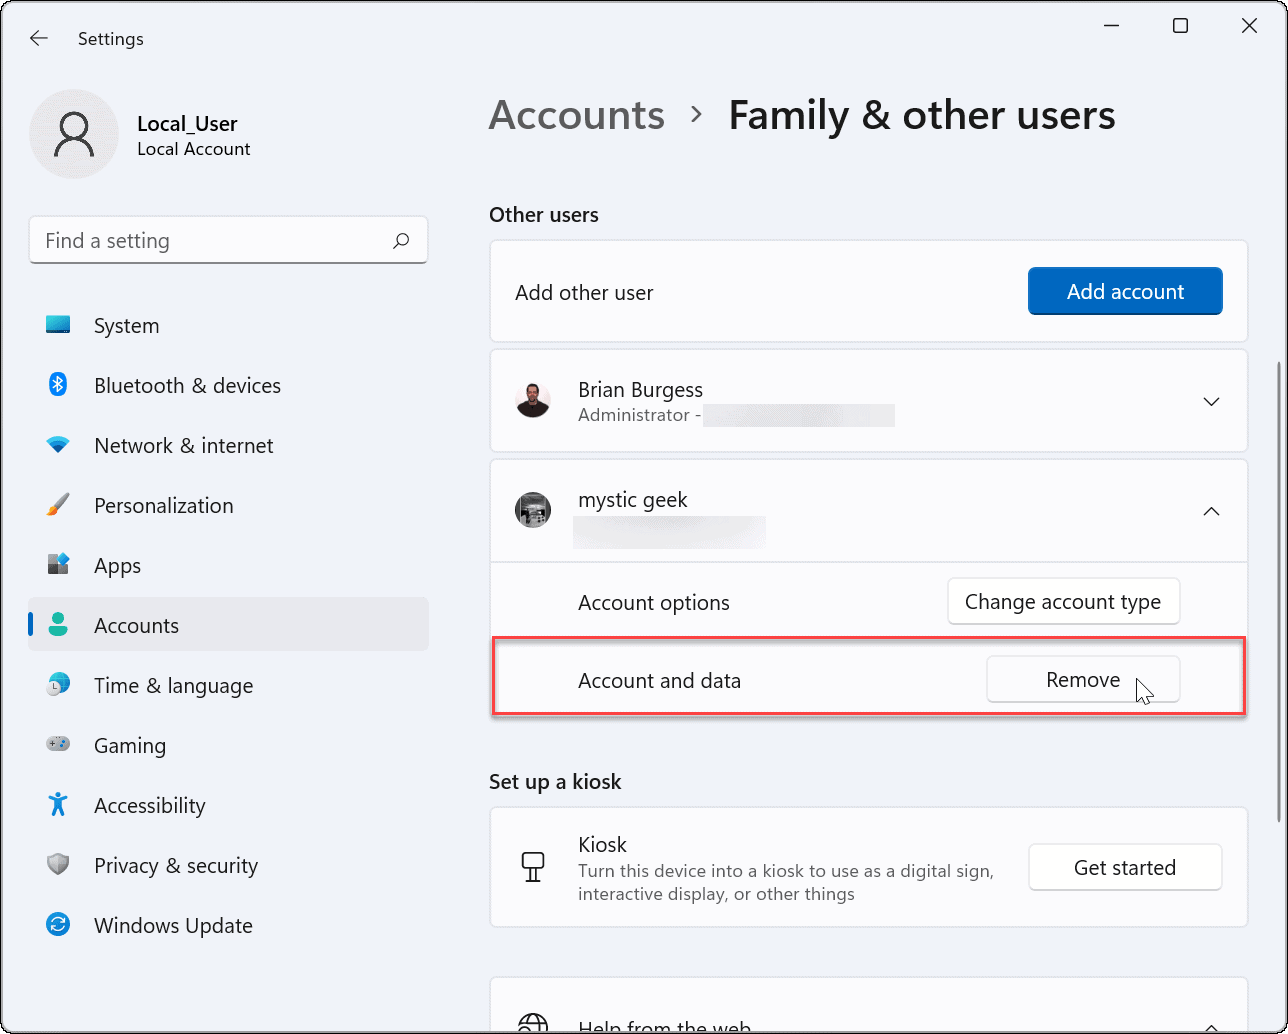
Steps to Remove a Microsoft Account from Windows 11
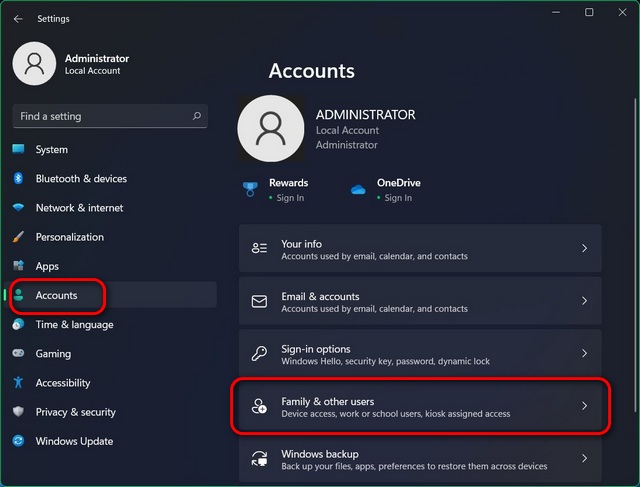
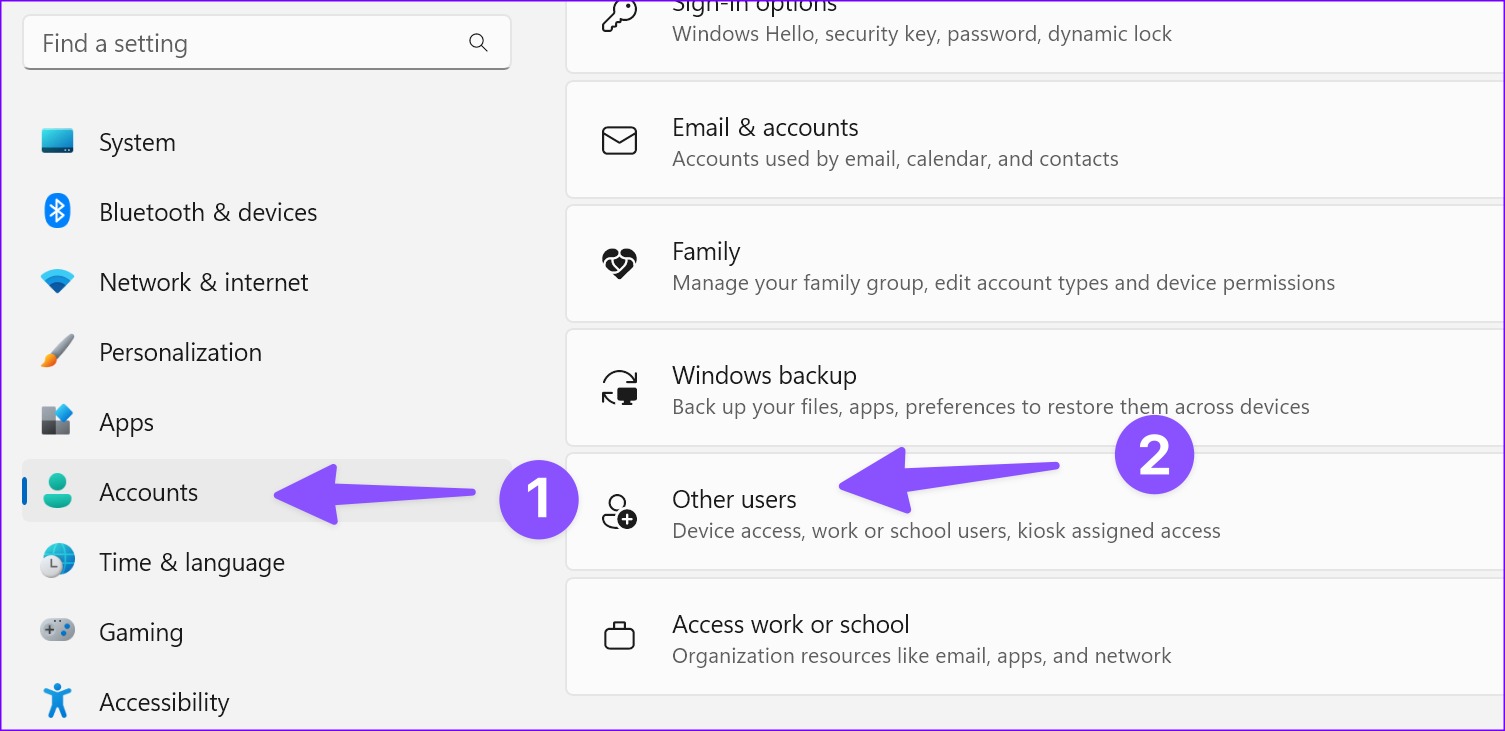
- Navigate to Settings: Open the Windows Settings app by pressing the Windows key + I.
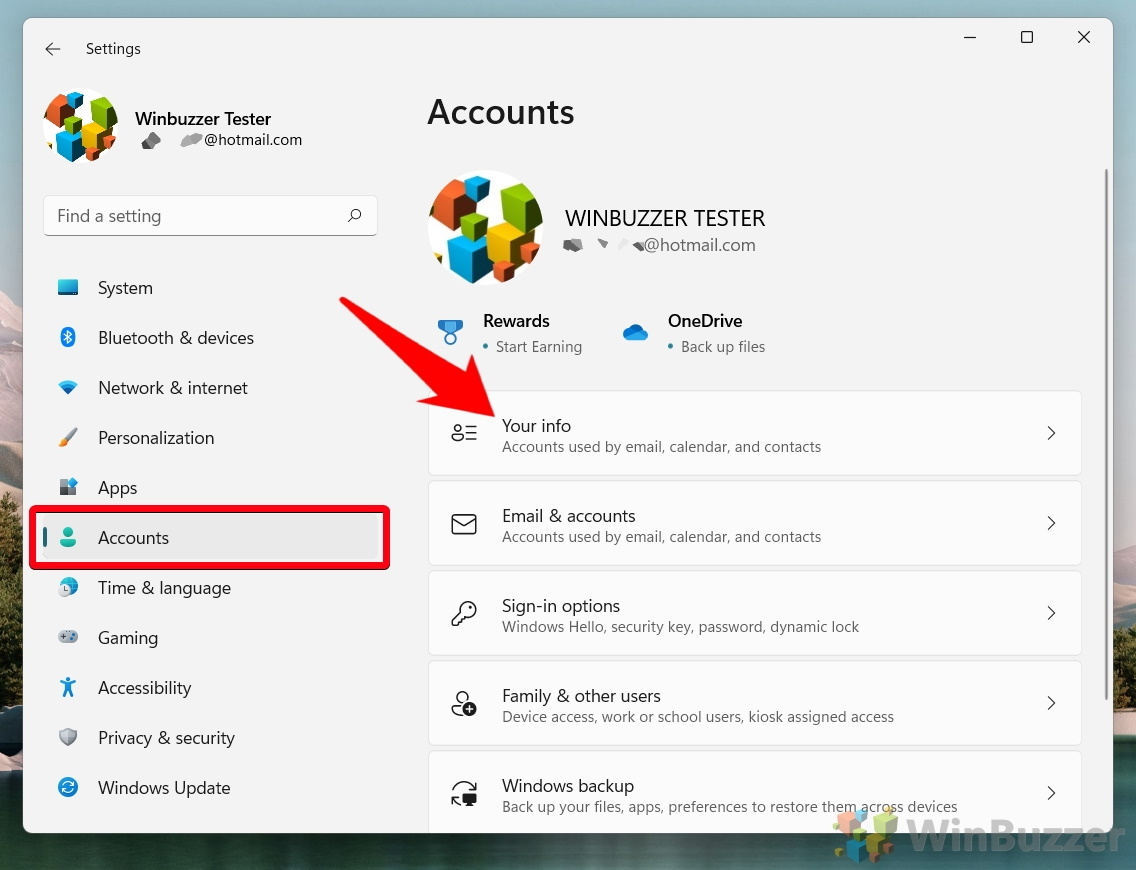
- Access Accounts: Select the "Accounts" option from the left-hand menu.
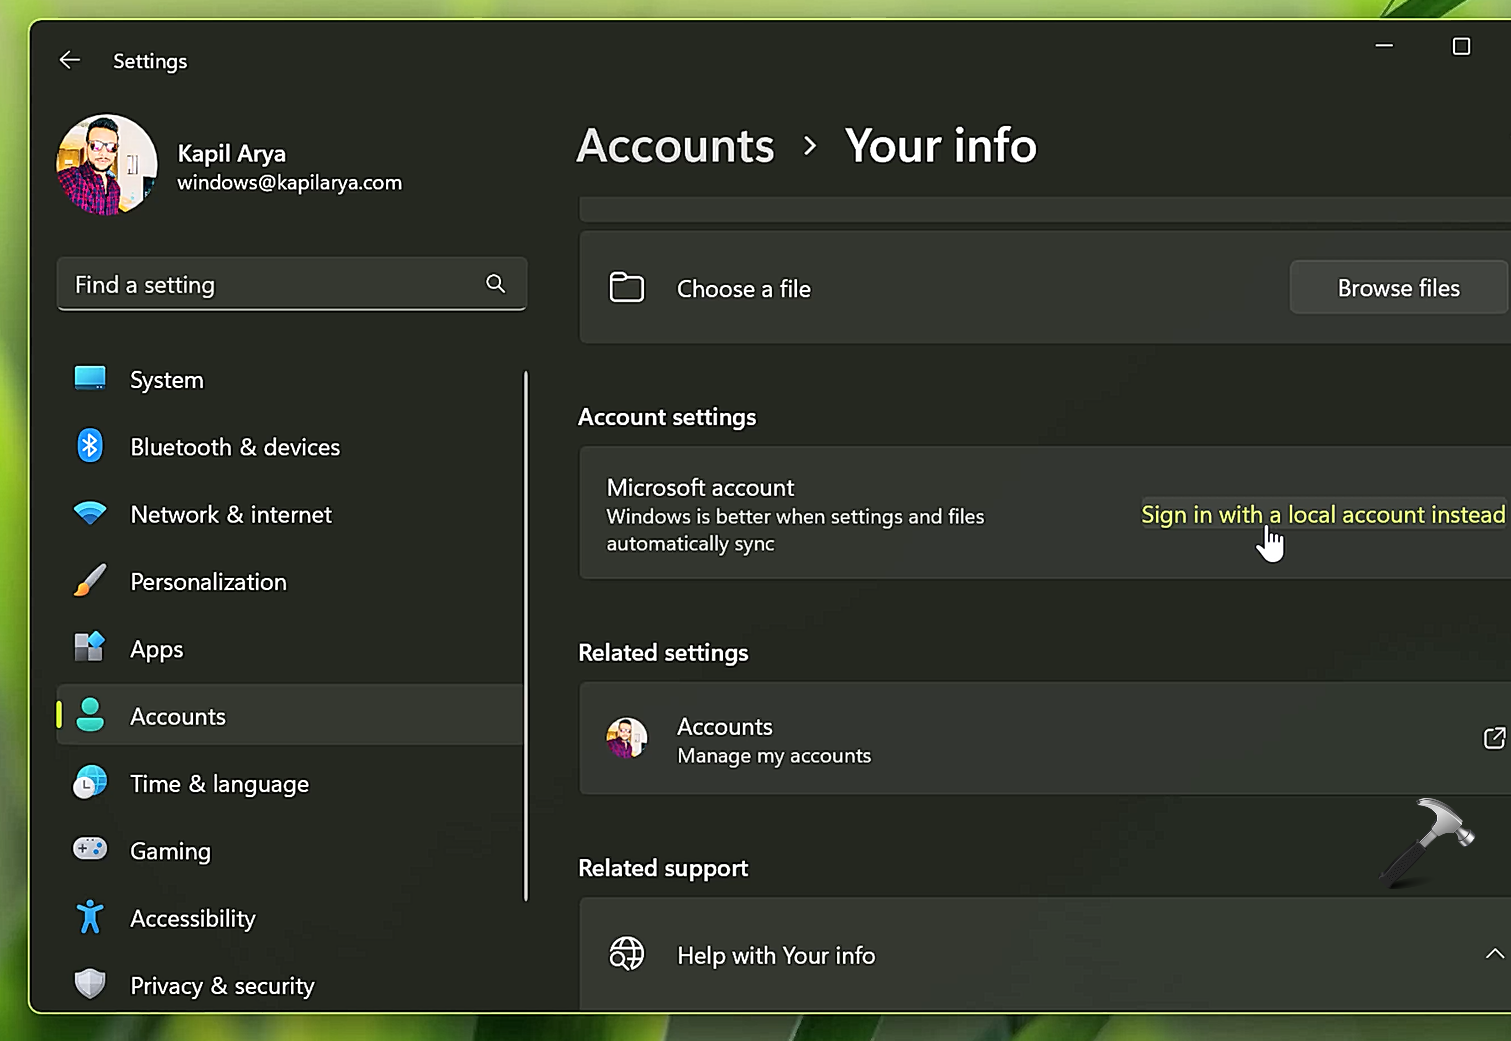
- Choose Your Account: Click on "Your info" located on the right side of the window.
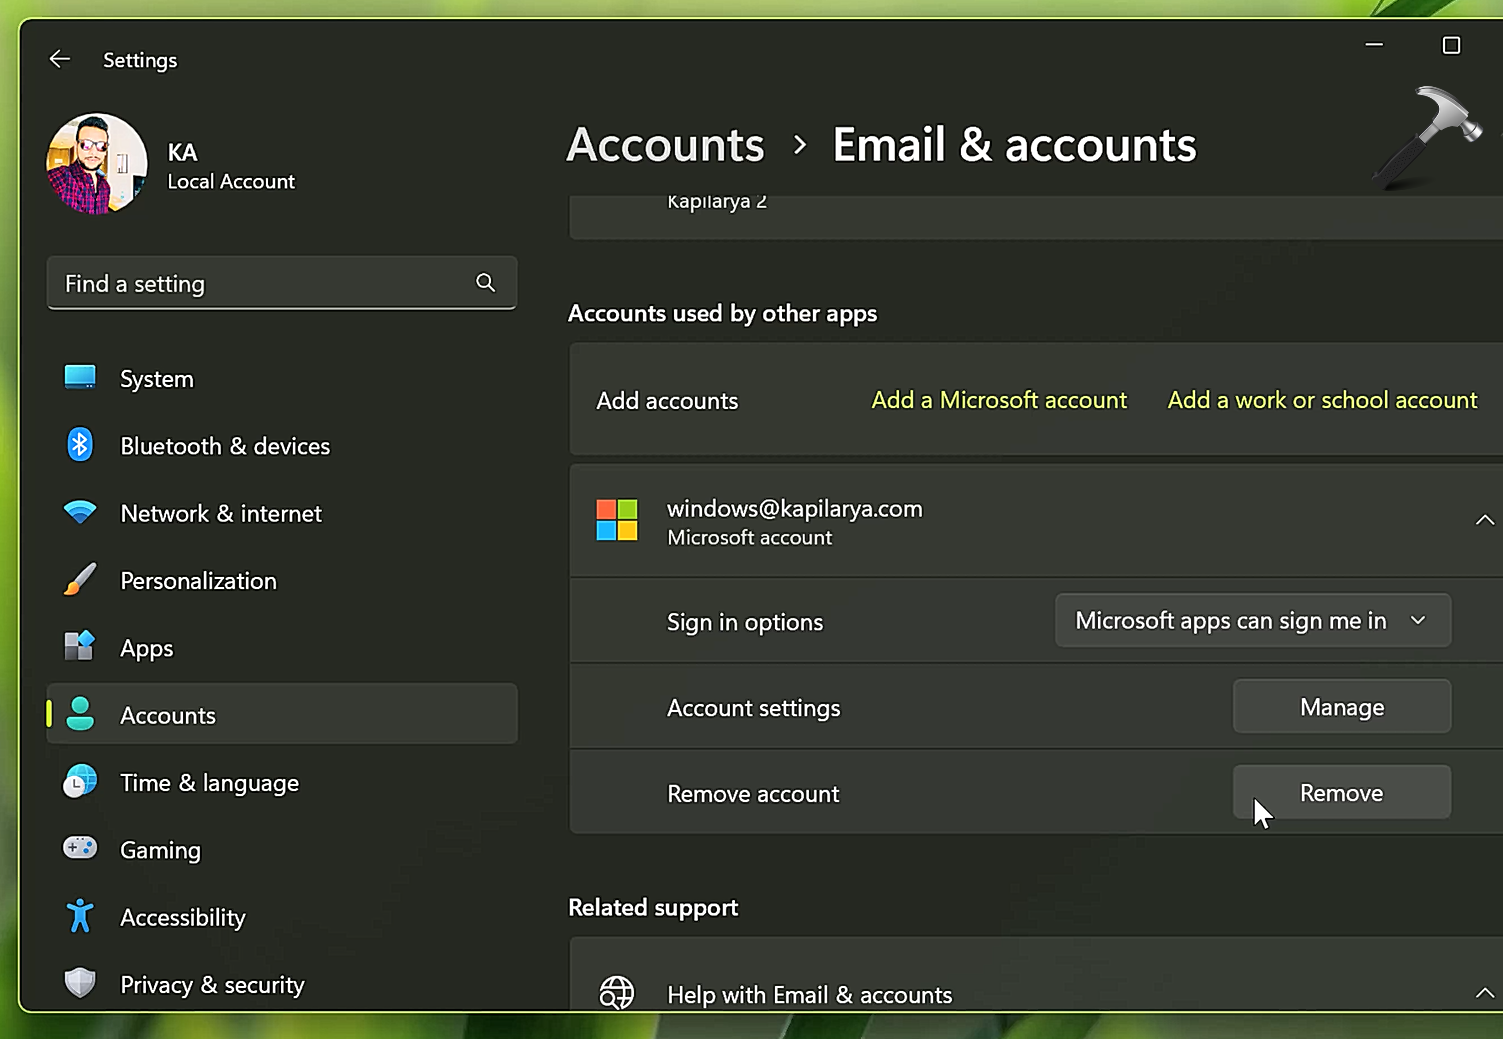
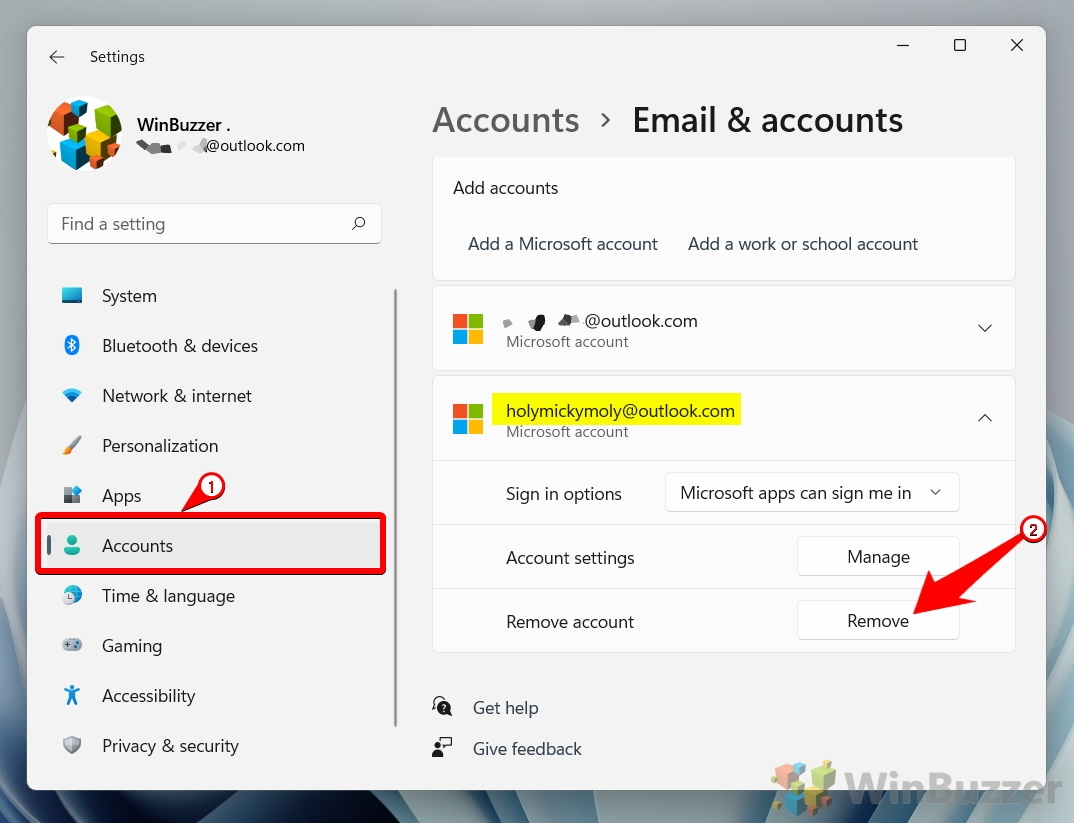
- Select "Sign in with a local account instead": This option will appear under the "Sign-in options" section.
- Enter Your Password: You will be prompted to enter your current Microsoft account password to confirm the removal.
- Create a Local Account: You will then be guided through creating a new local account. This includes choosing a username, password, and other security settings.
Frequently Asked Questions
Q: What happens to my data stored on OneDrive after removing the account?
A: Data stored on OneDrive will remain accessible through the web interface or the OneDrive desktop application, provided you retain access to the associated Microsoft account. However, the data will no longer be synchronized with your Windows 11 device.
Q: Can I re-add my Microsoft account after removing it?
A: Yes, you can re-add your Microsoft account at any time by following the "Sign in with a Microsoft account" option within the "Your info" section of the Settings app.
Q: Will I lose my installed applications after removing the account?
A: Removing the account will not automatically uninstall your applications. However, if an application relies heavily on the Microsoft account for functionality, it might not function correctly after the account removal.
Q: What happens to my Windows 11 license after removing the account?
A: Removing the Microsoft account will not affect your Windows 11 license. The license remains associated with your device and is not tied to your Microsoft account.
Tips for Smooth Account Removal
- Back Up Your Data: Before removing the account, ensure you have a local backup of any important files stored on OneDrive or other cloud services.
- Check Application Compatibility: Verify if any critical applications require a Microsoft account for functionality.
- Create a Local Account: Prioritize creating a new local account before removing the Microsoft account to avoid disruptions.
- Remember Account Credentials: If you plan to re-add the account in the future, ensure you have easy access to your password and security information.
Conclusion
Removing a Microsoft account from Windows 11 can be a necessary step for various reasons. While the process is straightforward, it is crucial to understand the implications and potential consequences before proceeding. By carefully considering the potential data loss, application compatibility, and account recovery, users can make informed decisions and ensure a smooth transition to a local account. This guide provides a comprehensive overview of the process, addressing frequently asked questions and offering helpful tips to facilitate a seamless account removal experience.

![How to Remove Microsoft Account from Windows 11 [Guide] Beebom](https://beebom.com/wp-content/uploads/2021/07/Create-Local-Account-On-Your-Windows-11-PC-body-2.jpg)
Closure
Thus, we hope this article has provided valuable insights into Removing a Microsoft Account from Windows 11: A Comprehensive Guide. We appreciate your attention to our article. See you in our next article!
Leave a Reply