Rejuvenating Your Windows 11: A Guide To Clean Installation With Data Preservation
Rejuvenating Your Windows 11: A Guide to Clean Installation with Data Preservation
Related Articles: Rejuvenating Your Windows 11: A Guide to Clean Installation with Data Preservation
Introduction
With great pleasure, we will explore the intriguing topic related to Rejuvenating Your Windows 11: A Guide to Clean Installation with Data Preservation. Let’s weave interesting information and offer fresh perspectives to the readers.
Table of Content
Rejuvenating Your Windows 11: A Guide to Clean Installation with Data Preservation
Windows 11, like any operating system, can experience performance degradation over time due to accumulated temporary files, outdated drivers, and software conflicts. A clean installation, while seemingly drastic, can often be the most effective way to revitalize your system and address these issues. However, the fear of losing precious data often deters users from undertaking this process. Fortunately, reinstalling Windows 11 can be accomplished without sacrificing your valuable files and applications. This guide will provide a comprehensive understanding of how to perform a clean installation while preserving your data, highlighting the benefits and considerations involved.
Understanding the Need for a Clean Installation
A clean installation involves completely removing the existing operating system from your computer and installing a fresh copy. This process eliminates any corrupted or outdated files, drivers, and software that may be hindering performance. The result is a system that runs smoothly, efficiently, and with minimal bloatware.
The Importance of Data Preservation
While a clean installation offers numerous advantages, losing valuable data is a significant concern. Fortunately, several methods allow you to preserve your data during the process. These methods include:
-
Backup and Restore: The most reliable and comprehensive approach is to create a full system backup before reinstalling Windows 11. This backup can be stored on an external hard drive, USB flash drive, or cloud storage service. Once the installation is complete, you can restore your entire system from the backup, including all your files, applications, and settings.
-
Data Transfer: Instead of restoring an entire backup, you can selectively transfer specific files and folders from your old system to the newly installed one. This approach is less time-consuming than a full system restore, but it requires more manual effort.
-
Cloud Storage: If you use cloud storage services like OneDrive, Google Drive, or Dropbox, your data is already backed up and easily accessible on your new system. This method eliminates the need for manual backup and restoration processes.
Methods for Reinstalling Windows 11 with Data Preservation
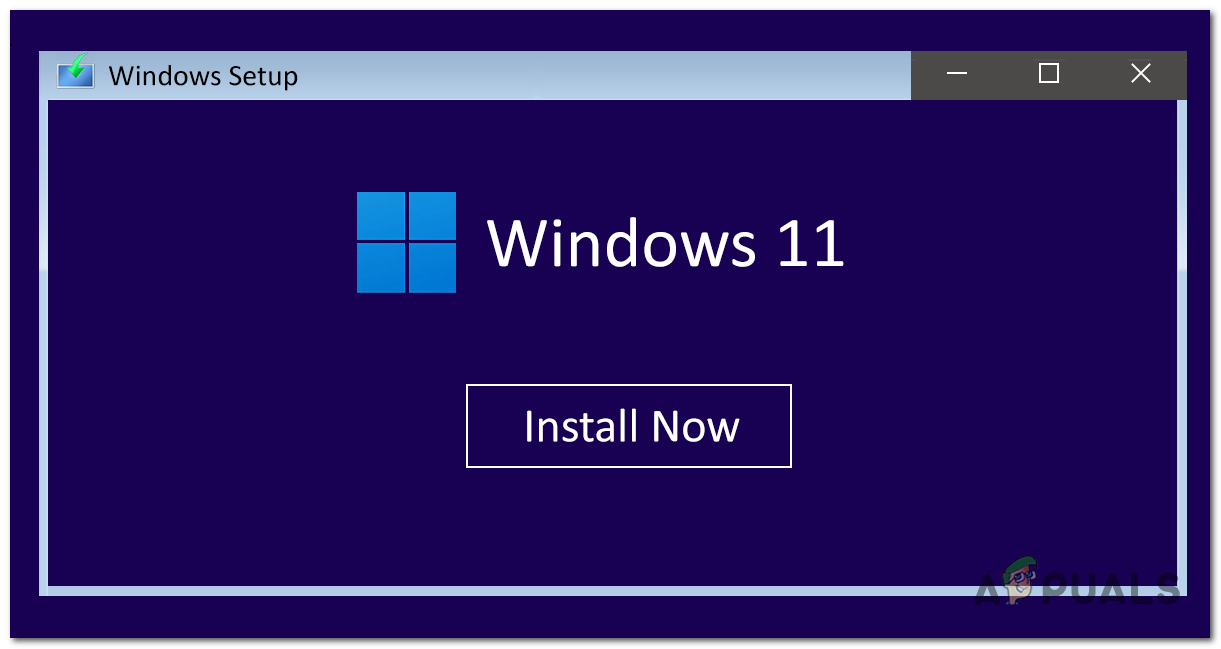
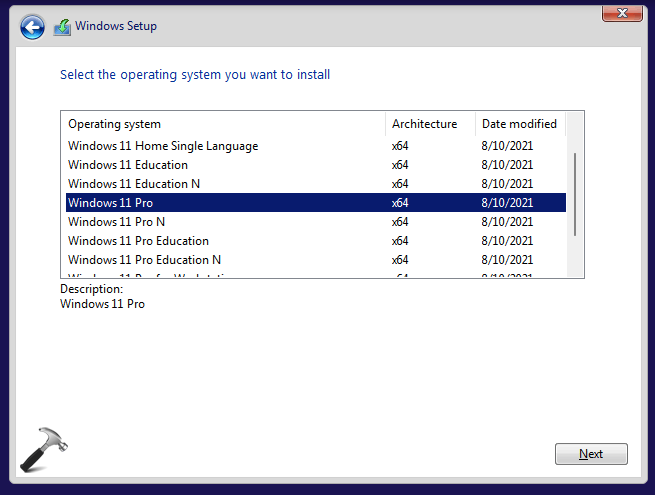
1. Using a USB Drive
- Creating a Bootable USB Drive: The first step is to create a bootable USB drive containing the Windows 11 installation files. Microsoft provides a tool called the Media Creation Tool to facilitate this process.
- Backing Up Your Data: Before proceeding, ensure your important data is backed up using one of the methods described earlier.
- Booting from the USB Drive: Restart your computer and enter the BIOS or UEFI settings. Configure the boot order to prioritize the USB drive. Save the changes and exit.
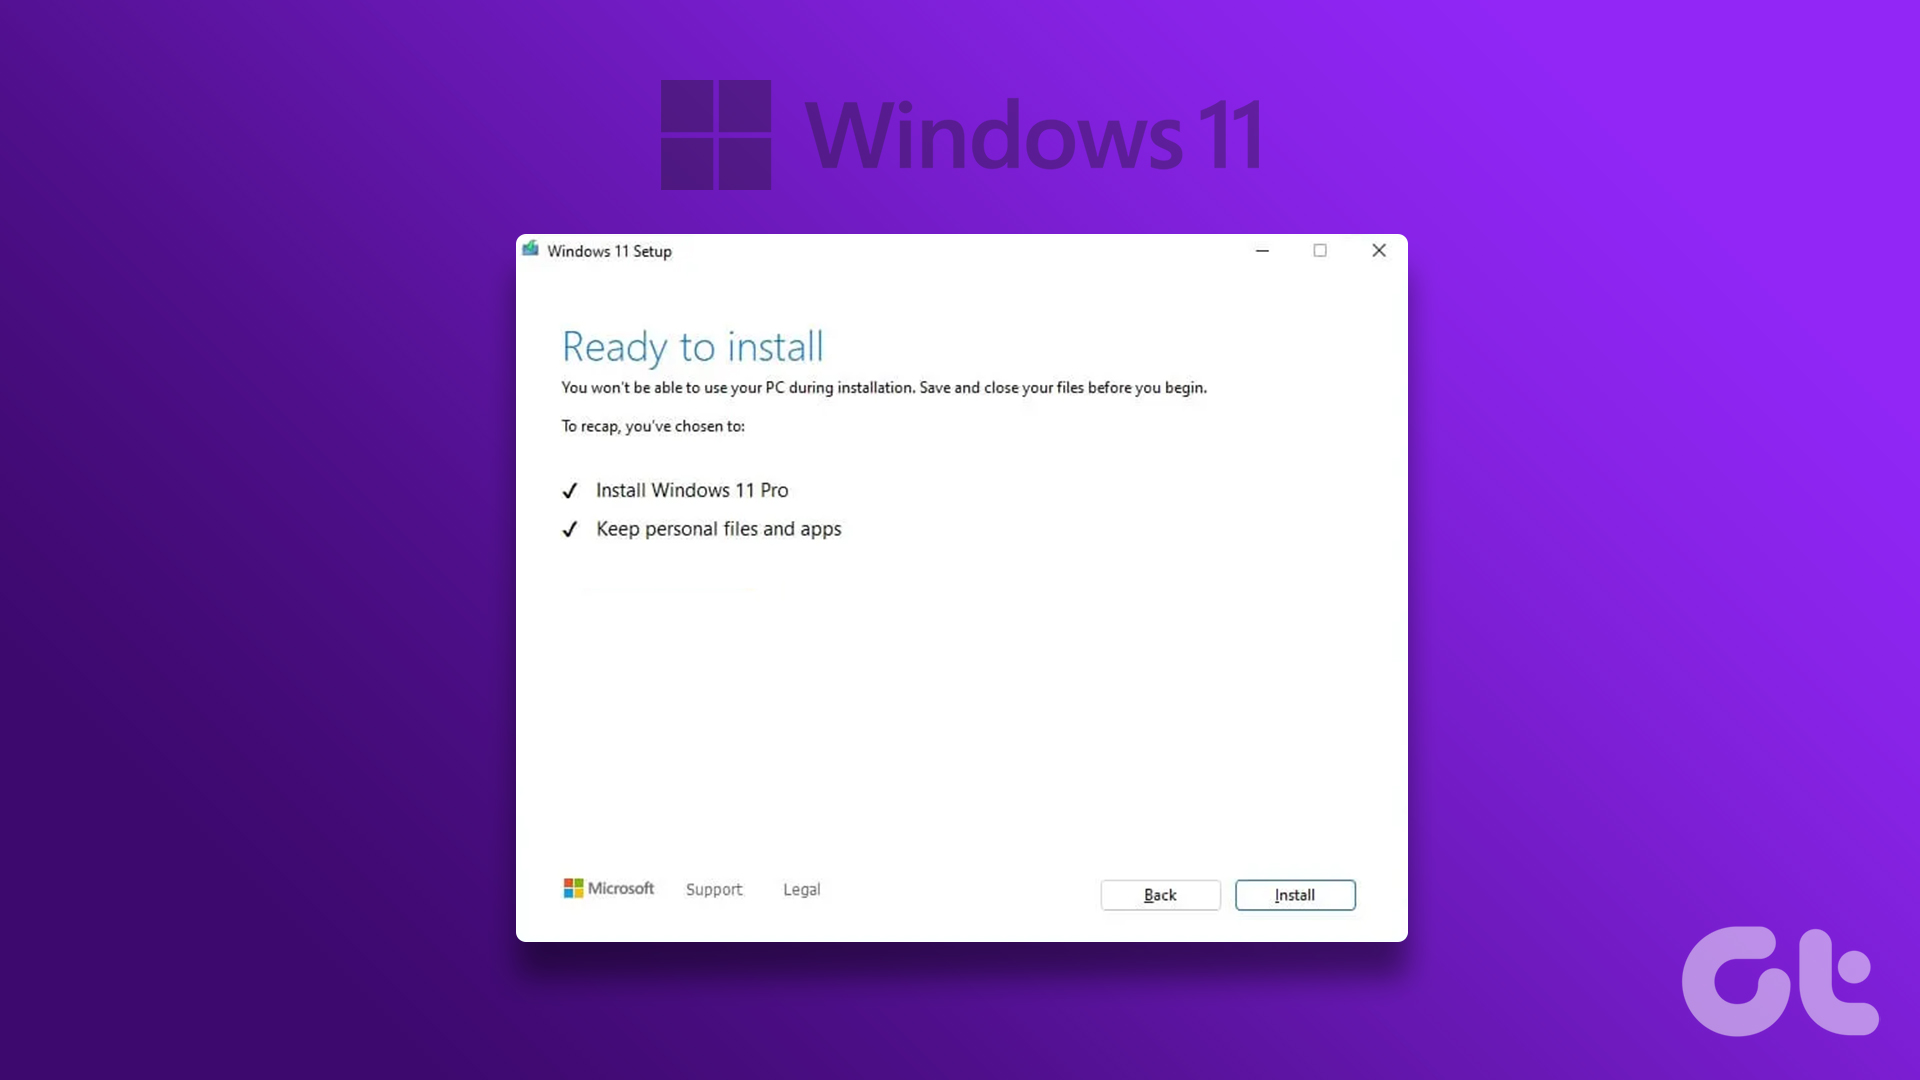
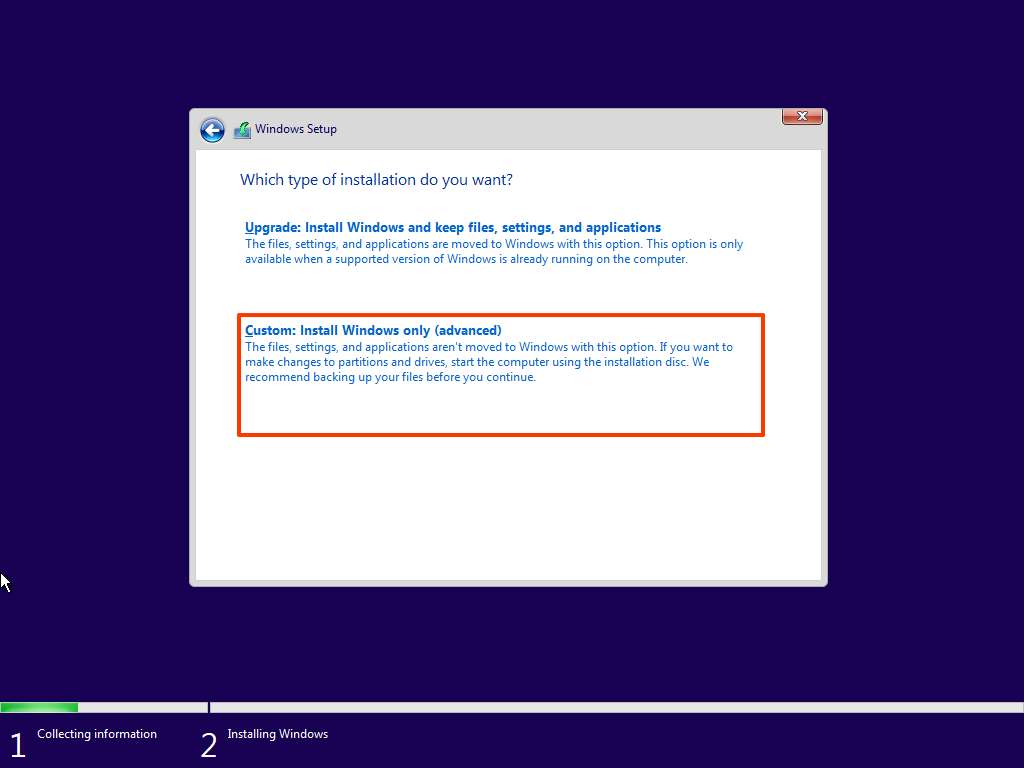
- Installation Process: The Windows 11 installation process will begin. Follow the on-screen prompts and select the "Custom" installation option to choose the drive where you want to install Windows 11.
- Data Preservation: During the installation, you will be presented with options to keep your existing files and applications or perform a clean installation. Select the option to keep your personal files and applications. This will preserve your data while reinstalling Windows 11.
2. Using the Windows Recovery Environment
- Accessing the Recovery Environment: Restart your computer and hold down the Shift key while clicking the "Restart" option. This will launch the Windows Recovery Environment.
- Choosing the Reset Option: From the Recovery Environment menu, select "Troubleshoot" and then "Reset this PC."
- Data Preservation: You will be presented with two options: "Keep my files" and "Remove everything." Choose "Keep my files" to preserve your data during the installation.
- Installation Process: The Windows 11 installation process will begin. The system will automatically download and install the necessary files.
3. Using a Fresh Installation with Data Transfer
- Clean Installation: Perform a clean installation of Windows 11 by following the steps outlined in the "Using a USB Drive" section, but choose the "Custom" installation option and select the drive where you want to install Windows 11 without selecting the option to keep your files.
- Transferring Data: After the clean installation, use one of the data transfer methods described earlier to transfer your files and applications from your old system to the newly installed one.
Benefits of Reinstalling Windows 11 with Data Preservation
- Improved Performance: A clean installation eliminates unnecessary files and software, leading to faster boot times, smoother application performance, and reduced system lag.
- Enhanced Security: A fresh installation removes potentially vulnerable software and outdated drivers, improving overall system security.
- Elimination of Bloatware: Preinstalled software, often referred to as bloatware, can consume valuable system resources and slow down performance. A clean installation eliminates this bloatware, providing a cleaner and more efficient system.
- Troubleshooting Issues: A clean installation is often the most effective solution for resolving persistent errors or system crashes.
FAQs about Reinstalling Windows 11 with Data Preservation
1. What data will be preserved during a clean installation with data preservation?
During a clean installation with data preservation, your personal files, such as documents, photos, music, and videos, will be preserved. However, applications and settings will typically be removed.
2. Will my installed applications be preserved during a clean installation?
No, applications are generally not preserved during a clean installation. You will need to reinstall them after the installation process is complete.
3. Will I lose my Windows license after a clean installation?
No, your Windows license is tied to your computer’s hardware. You can reinstall Windows 11 without affecting your license.
4. How long does it take to reinstall Windows 11 with data preservation?
The time required for the installation process varies depending on your computer’s hardware and the chosen method. It can take anywhere from 30 minutes to several hours.
5. What should I do if I encounter issues during the installation process?
If you encounter any issues during the installation process, consult Microsoft’s official documentation or contact their support team for assistance.
Tips for Reinstalling Windows 11 with Data Preservation
- Back Up Your Data: Always create a full system backup before proceeding with a clean installation.
- Choose the Right Method: Carefully consider the different methods available and select the one that best suits your needs and comfort level.
- Check for Updates: Ensure your Windows 11 installation media is up-to-date before starting the installation process.
- Test the Installation: After the installation is complete, test your system thoroughly to ensure all your files and applications are working correctly.
Conclusion
Reinstalling Windows 11 with data preservation offers a powerful way to rejuvenate your system, improve performance, and enhance security. By understanding the different methods, benefits, and considerations involved, you can confidently undertake this process and enjoy a fresh, optimized system without sacrificing your valuable data.
![Windows 11 Upgrade VS Clean Install [What's the Difference] - EaseUS](https://www.easeus.com/images/en/screenshot/todo-backup/guide/how-to-clean-install-windows-11.jpg)

Closure
Thus, we hope this article has provided valuable insights into Rejuvenating Your Windows 11: A Guide to Clean Installation with Data Preservation. We thank you for taking the time to read this article. See you in our next article!
Leave a Reply