Rejuvenating Your PC: A Comprehensive Guide To Reinstalling Windows 11 From A USB Drive
Rejuvenating Your PC: A Comprehensive Guide to Reinstalling Windows 11 from a USB Drive
Related Articles: Rejuvenating Your PC: A Comprehensive Guide to Reinstalling Windows 11 from a USB Drive
Introduction
With enthusiasm, let’s navigate through the intriguing topic related to Rejuvenating Your PC: A Comprehensive Guide to Reinstalling Windows 11 from a USB Drive. Let’s weave interesting information and offer fresh perspectives to the readers.
Table of Content
Rejuvenating Your PC: A Comprehensive Guide to Reinstalling Windows 11 from a USB Drive
Reinstalling Windows 11 from a USB drive is a powerful tool for revitalizing your computer’s performance, resolving persistent issues, and restoring its factory settings. This process effectively removes all data and applications, creating a clean slate for a fresh start. While it may seem daunting, the process is straightforward and can be accomplished with a few essential steps. This comprehensive guide will walk you through the process, addressing common concerns and providing valuable tips for a smooth and successful experience.
Understanding the Need for a Fresh Start
Over time, your computer can accumulate unnecessary files, corrupted data, and lingering software remnants, leading to sluggish performance and instability. A clean Windows 11 installation eliminates these accumulated issues, effectively addressing:
- Performance Improvements: By removing unnecessary files and programs, a fresh installation optimizes your computer’s resources, leading to faster boot times, quicker application launches, and overall smoother operation.
- Software Conflicts: Conflicts between different programs can cause instability and errors. Reinstalling Windows 11 resolves these conflicts by providing a clean environment for new software installations.
- Virus and Malware Removal: Persistent malware infections can be challenging to remove through conventional methods. A clean installation ensures a malware-free environment, safeguarding your data and privacy.
- Troubleshooting Complex Issues: When troubleshooting complex system issues, a clean installation provides a controlled environment for identifying and resolving the root cause.
- Factory Reset: Reinstalling Windows 11 allows you to restore your computer to its factory settings, eliminating any customizations or modifications made since its initial setup.
Preparing for the Reinstallation
Before embarking on the reinstallation process, it is crucial to prepare adequately. This includes:
- Backing Up Your Data: Reinstalling Windows 11 will erase all data from your hard drive. It is imperative to create a complete backup of your important files, including documents, photos, videos, and any other data you wish to preserve. Consider using external hard drives, cloud storage services, or dedicated backup software for this purpose.
- Gathering Necessary Software Licenses: If you have purchased software licenses for programs like Microsoft Office or antivirus software, ensure you have access to these licenses before reinstalling Windows 11. You will need them to activate these programs after the reinstallation.
-
Creating a Bootable USB Drive: This is the key component for reinstalling Windows 11. You will need a USB drive with at least 8GB of free space. The process of creating a bootable USB drive varies slightly depending on the source of your Windows 11 installation files.
- From an ISO Image: If you have downloaded a Windows 11 ISO image, you can use tools like the Windows USB/DVD Download Tool or Rufus to create a bootable USB drive.
- From a Windows 11 Installation Media: If you have a physical Windows 11 installation disc or an existing USB drive, you can use the "Create Installation Media" tool built into Windows 10 or 11.
- Disabling Secure Boot: Secure Boot is a security feature that prevents unauthorized operating systems from booting. While it is a valuable security measure, it can sometimes interfere with the reinstallation process. Consider disabling Secure Boot in your BIOS settings before attempting the reinstallation.
The Reinstallation Process
Once you have prepared everything, follow these steps to reinstall Windows 11 from your USB drive:
- Restart Your Computer: Insert the bootable USB drive into your computer and restart it.
- Access the Boot Menu: During the startup process, press the appropriate key to access the boot menu. This key varies depending on your computer manufacturer. Common keys include F2, F12, or Esc.
- Select the USB Drive: In the boot menu, choose the USB drive as your boot device.
- Start the Installation: The Windows 11 setup process will begin. Follow the on-screen instructions to choose your language, keyboard layout, and other preferences.
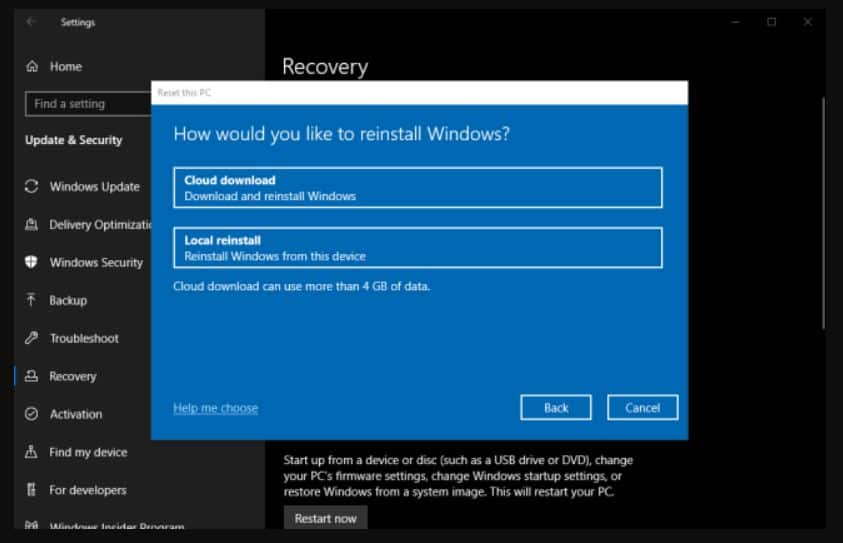
- Choose Custom Installation: Select the "Custom: Install Windows only (advanced)" option to perform a clean installation.
- Format Your Hard Drive: Select the hard drive where you want to install Windows 11 and format it. This will erase all data on the selected drive.
- Install Windows 11: The installation process will begin. This may take several minutes to complete.
- Configure Windows 11: Once the installation is finished, you will be prompted to configure Windows 11, including setting up your user account, connecting to a Wi-Fi network, and choosing your region.
- Install Drivers and Software: After the initial setup, you will need to install necessary device drivers and software. These drivers can be found on your computer manufacturer’s website or on the manufacturer’s website for any hardware you have installed.
Post-Installation Steps
After successfully reinstalling Windows 11, there are a few essential tasks to complete:
- Restore Your Data: Use your backup to restore your important files and data.
- Install Necessary Programs: Install all the software you need, including your antivirus program, productivity tools, and any other essential applications.
- Update Windows 11: Check for and install the latest Windows 11 updates to ensure you have the most recent security patches and features.
Frequently Asked Questions
Q: What happens to my personal files during the reinstallation process?
A: All data on the hard drive where you install Windows 11 will be erased. It is crucial to back up your essential files before proceeding with the reinstallation.
Q: Will I lose my software licenses after reinstalling Windows 11?
A: You will not lose your software licenses if you have them properly registered. However, you may need to reactivate them after the reinstallation.
Q: What if I encounter errors during the reinstallation process?
A: If you encounter errors, try restarting the installation process. If the issue persists, consult the Windows 11 documentation or seek assistance from Microsoft support.
Q: Can I reinstall Windows 11 from a USB drive created on a different computer?
A: Yes, you can use a bootable USB drive created on a different computer to reinstall Windows 11. However, ensure the USB drive is compatible with your computer’s specifications.
Q: Will reinstalling Windows 11 void my warranty?
A: Reinstalling Windows 11 generally does not void your warranty. However, it is always advisable to consult your computer manufacturer’s warranty terms and conditions.
Tips for a Successful Reinstallation
- Use a Reliable USB Drive: Ensure you use a high-quality USB drive with sufficient storage space.
- Download the Correct Windows 11 ISO: Verify that you are downloading the correct Windows 11 ISO image for your computer’s specifications.
- Disconnect Unnecessary Devices: Disconnect any external devices that are not essential for the reinstallation process.
- Check Your BIOS Settings: Before starting the reinstallation, check your BIOS settings and ensure they are compatible with the installation process.
- Be Patient: The reinstallation process can take some time, so be patient and allow the process to complete without interruption.
Conclusion
Reinstalling Windows 11 from a USB drive is a powerful tool for resolving system issues, enhancing performance, and restoring your computer to a clean state. While the process requires careful preparation and execution, it can significantly improve your computer’s stability and performance. By following the steps outlined in this guide, you can confidently rejuvenate your PC and enjoy a seamless Windows 11 experience. Remember to back up your data, gather necessary licenses, and follow the installation process meticulously for a successful reinstallation.


![[GUIDE] How to Reinstall Windows 11 Very Easily & Quickly (Download) - YouTube](https://i.ytimg.com/vi/vsScvaNXQa4/maxresdefault.jpg)
![Reinstall Windows 11 With 2 Easy Steps [Clean Install]](https://cdn.windowsreport.com/wp-content/uploads/2021/09/windows-11-reinstall.jpg)
Closure
Thus, we hope this article has provided valuable insights into Rejuvenating Your PC: A Comprehensive Guide to Reinstalling Windows 11 from a USB Drive. We appreciate your attention to our article. See you in our next article!
Leave a Reply