Reinstalling Windows 10: A Clean Slate For Your PC
Reinstalling Windows 10: A Clean Slate for Your PC
Related Articles: Reinstalling Windows 10: A Clean Slate for Your PC
Introduction
With great pleasure, we will explore the intriguing topic related to Reinstalling Windows 10: A Clean Slate for Your PC. Let’s weave interesting information and offer fresh perspectives to the readers.
Table of Content
Reinstalling Windows 10: A Clean Slate for Your PC
The allure of a fresh start is undeniable, particularly when it comes to a computer. Reinstalling Windows 10 can revitalize your PC’s performance, resolve persistent issues, and create a more streamlined user experience. However, the process often involves navigating a landscape of pre-installed applications, commonly known as bloatware, which can consume valuable resources and hinder overall efficiency. This article aims to provide a comprehensive guide to reinstalling Windows 10 while eliminating bloatware, allowing you to reclaim control over your digital environment.
The Importance of a Clean Installation
A clean installation of Windows 10 offers several advantages:
- Enhanced Performance: By removing unnecessary software, a clean install frees up disk space, RAM, and processing power, resulting in faster boot times, smoother application launches, and improved overall performance.
- Reduced Security Risks: Bloatware often includes vulnerabilities that can be exploited by malicious actors. A clean installation eliminates these risks, creating a more secure computing environment.
- Personalized User Experience: A fresh install provides the opportunity to customize the operating system, selecting only the desired applications and settings. This tailored approach fosters a more efficient and enjoyable user experience.
- Troubleshooting and Repair: Reinstalling Windows 10 can resolve various software conflicts, driver issues, and system errors that may have accumulated over time.
Methods for Reinstalling Windows 10
There are two primary methods for reinstalling Windows 10:
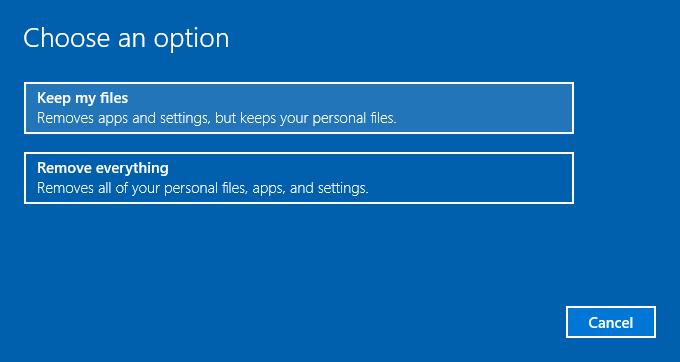
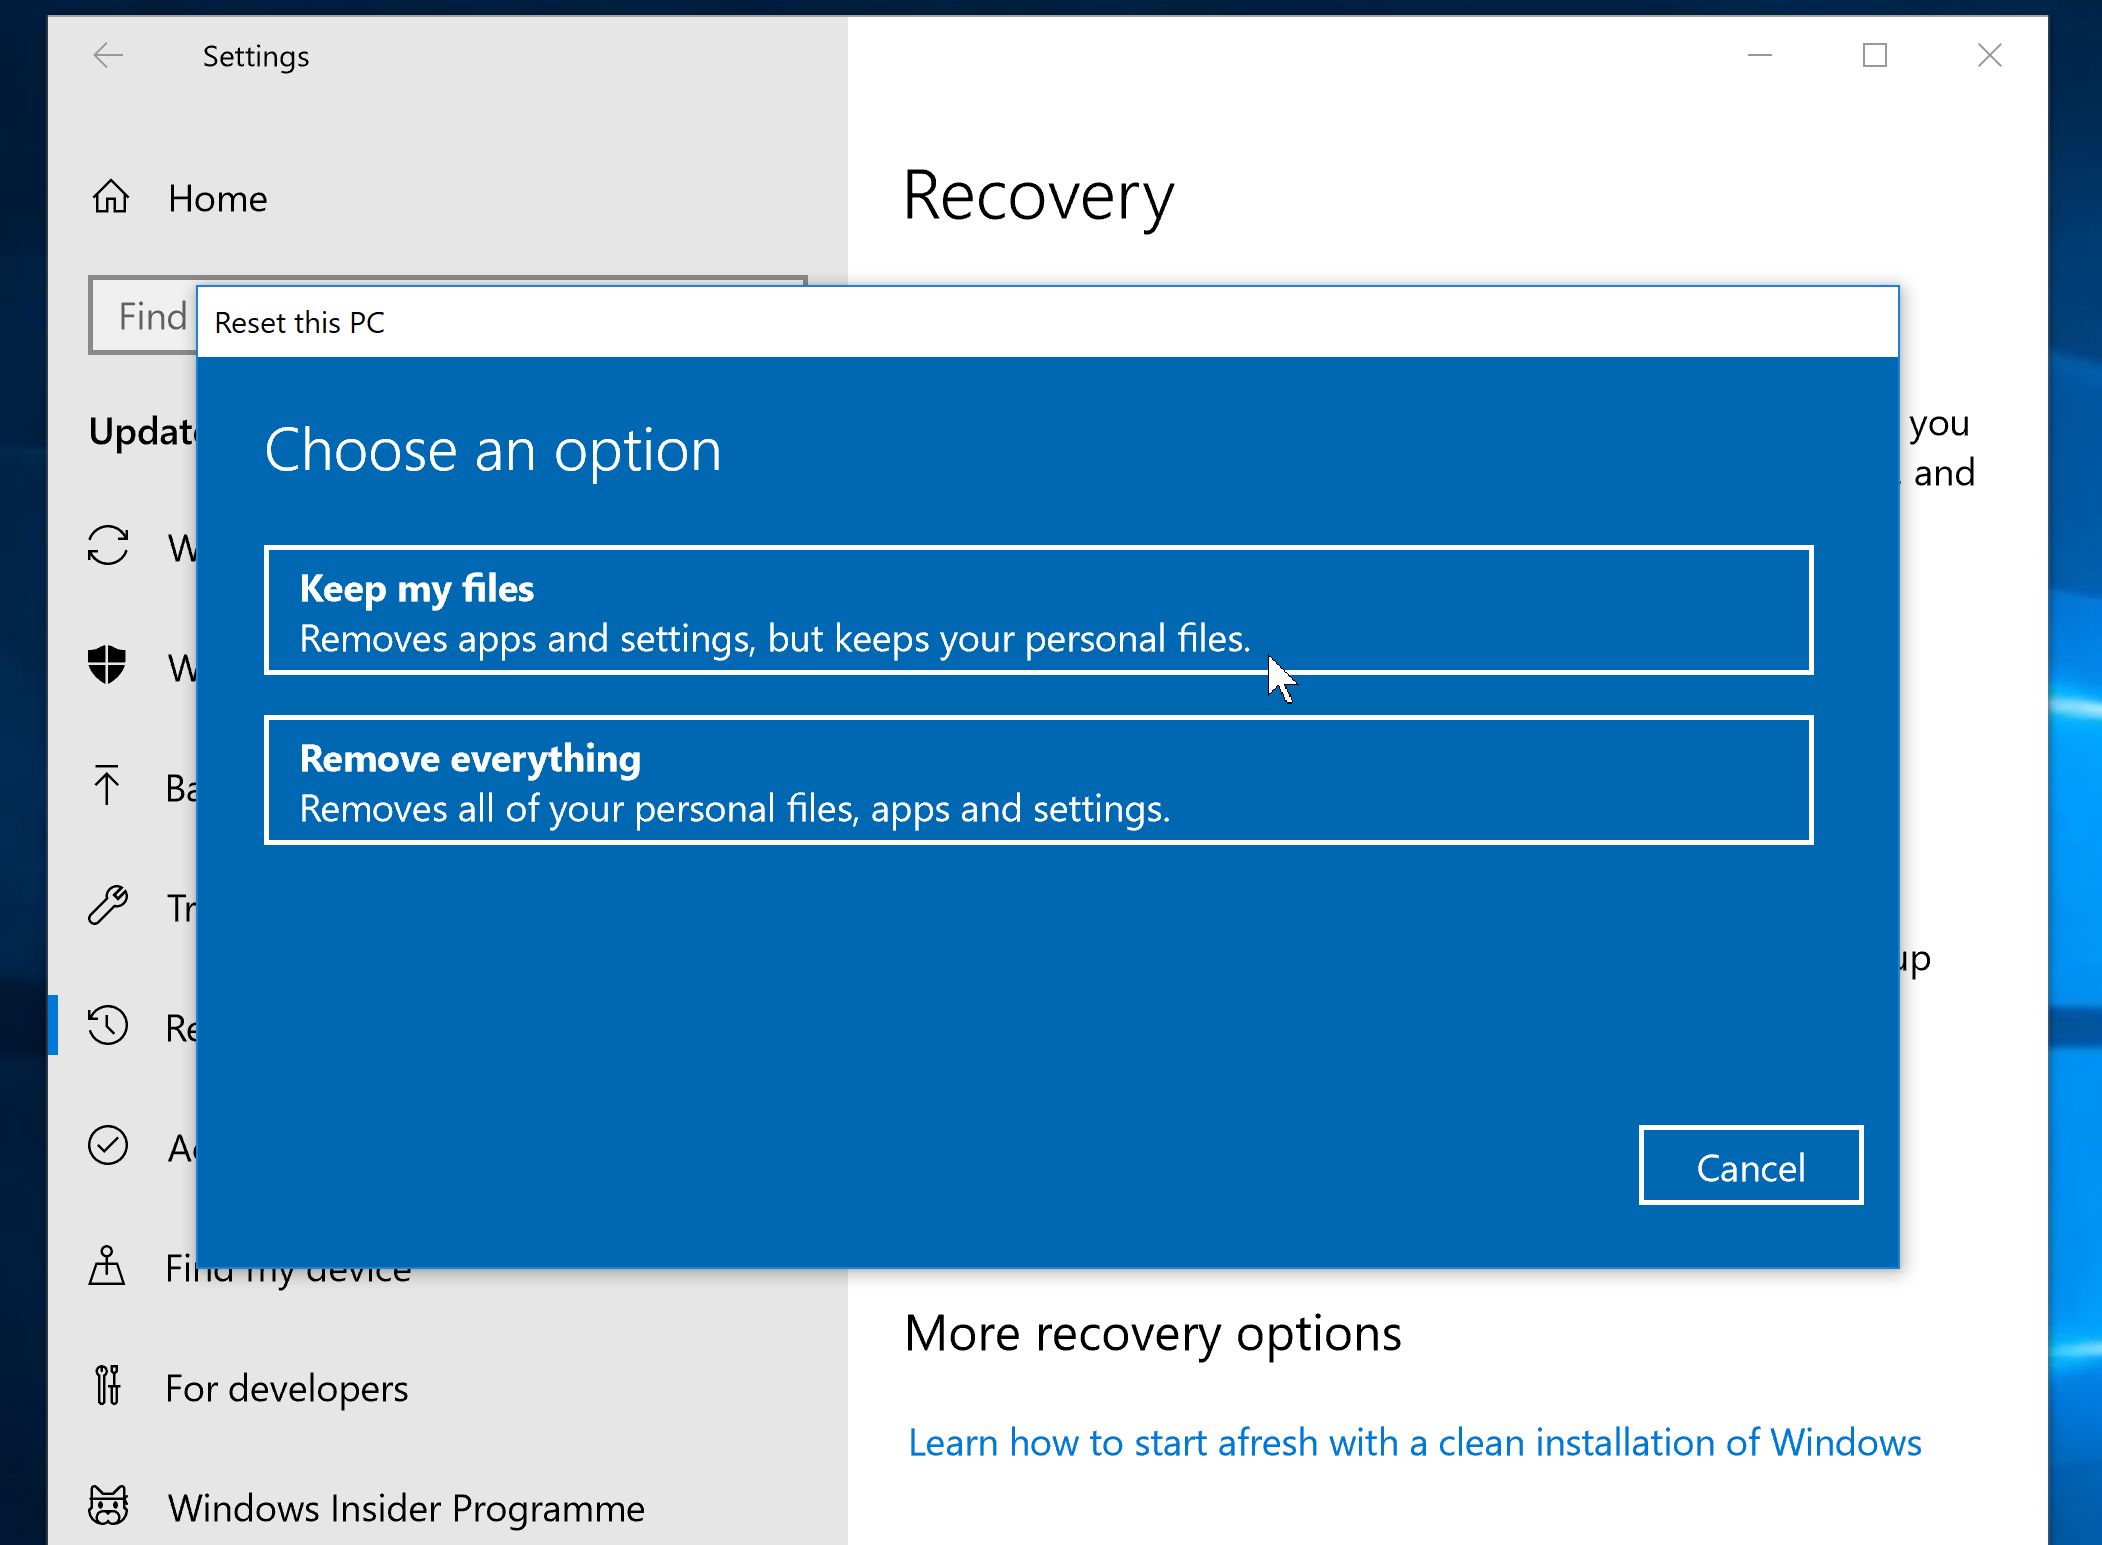
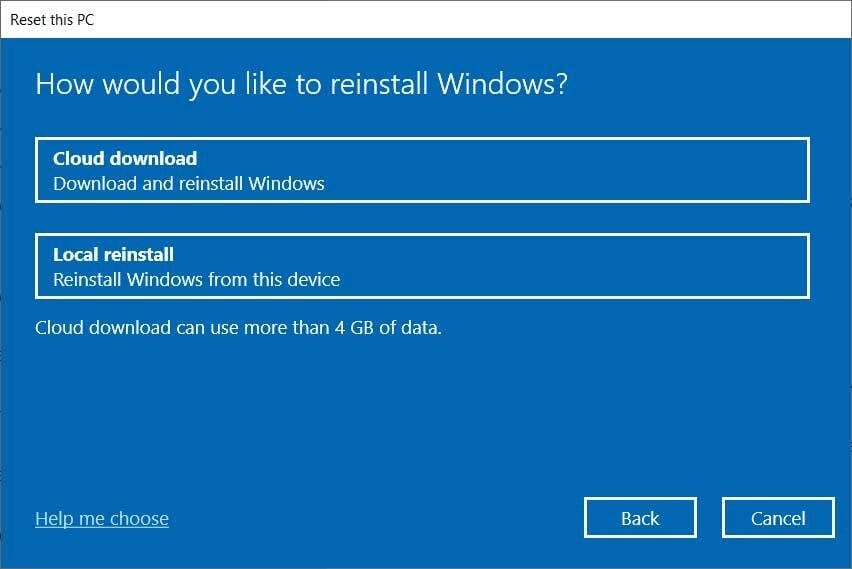
- In-place Upgrade: This method retains your personal files and settings while reinstalling the operating system. However, it does not eliminate bloatware.
- Clean Installation: This method completely wipes the hard drive, removing all data and software, including bloatware. It requires a backup of important files before proceeding.
The Clean Installation Approach: A Step-by-Step Guide
For a truly clean and efficient installation, the clean installation method is recommended. Here’s a detailed guide:
Step 1: Backup Your Data
Before embarking on a clean installation, it is crucial to back up all essential data. This includes documents, photos, videos, music, and any other important files. You can use external hard drives, cloud storage services, or USB drives for this purpose.
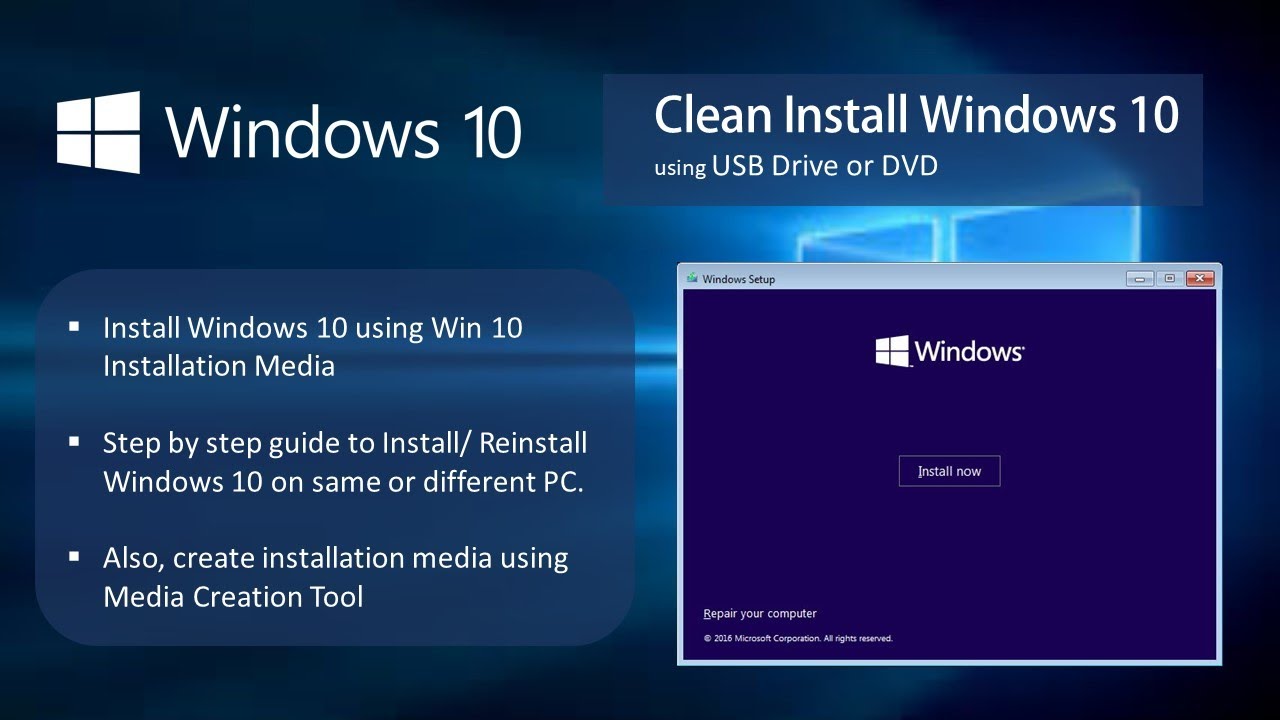
Step 2: Create a Bootable USB Drive
To install Windows 10 from scratch, you need a bootable USB drive containing the installation files. Microsoft provides a tool called the Media Creation Tool for this purpose. Download the tool from the official Microsoft website and follow the on-screen instructions to create a bootable USB drive.
Step 3: Access the BIOS and Boot from USB
Restart your computer and access the BIOS setup menu. This is typically done by pressing a specific key during the boot process, often F2, F12, or Delete. Consult your motherboard’s documentation for the correct key. Within the BIOS menu, navigate to the boot settings and prioritize the USB drive as the boot device. Save the changes and exit the BIOS.
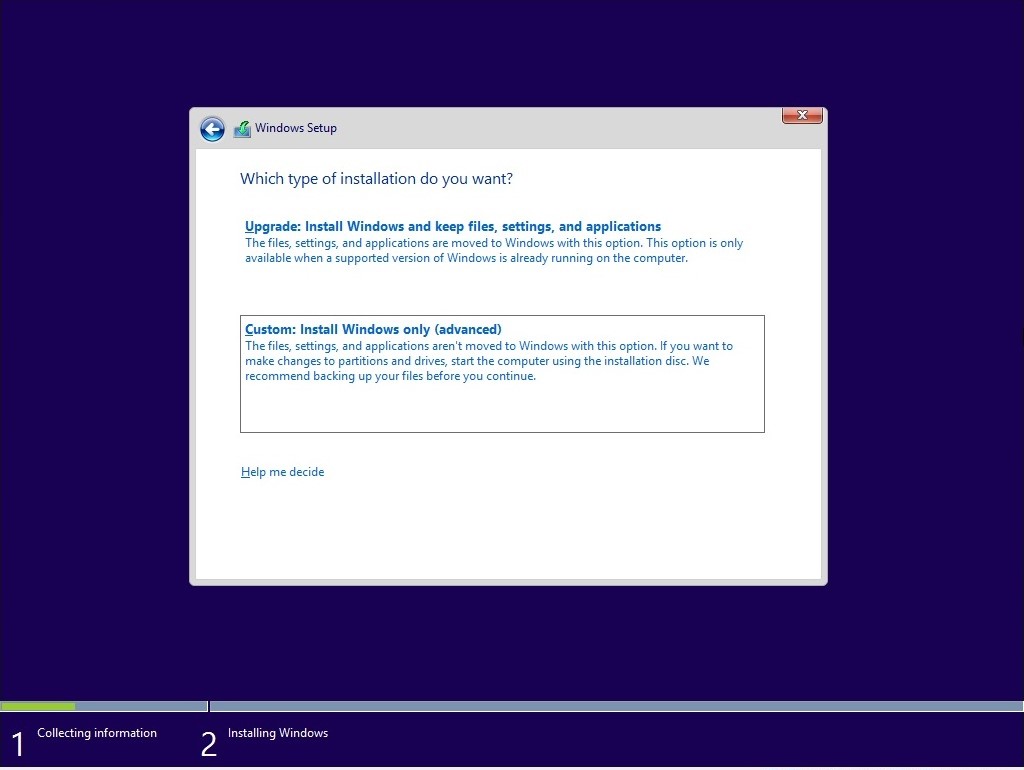
Step 4: Install Windows 10
The computer will now boot from the USB drive and initiate the Windows 10 installation process. Follow the on-screen instructions, including selecting the language, keyboard layout, and time zone. You will then be prompted to choose the installation type. Select "Custom: Install Windows only (advanced)".
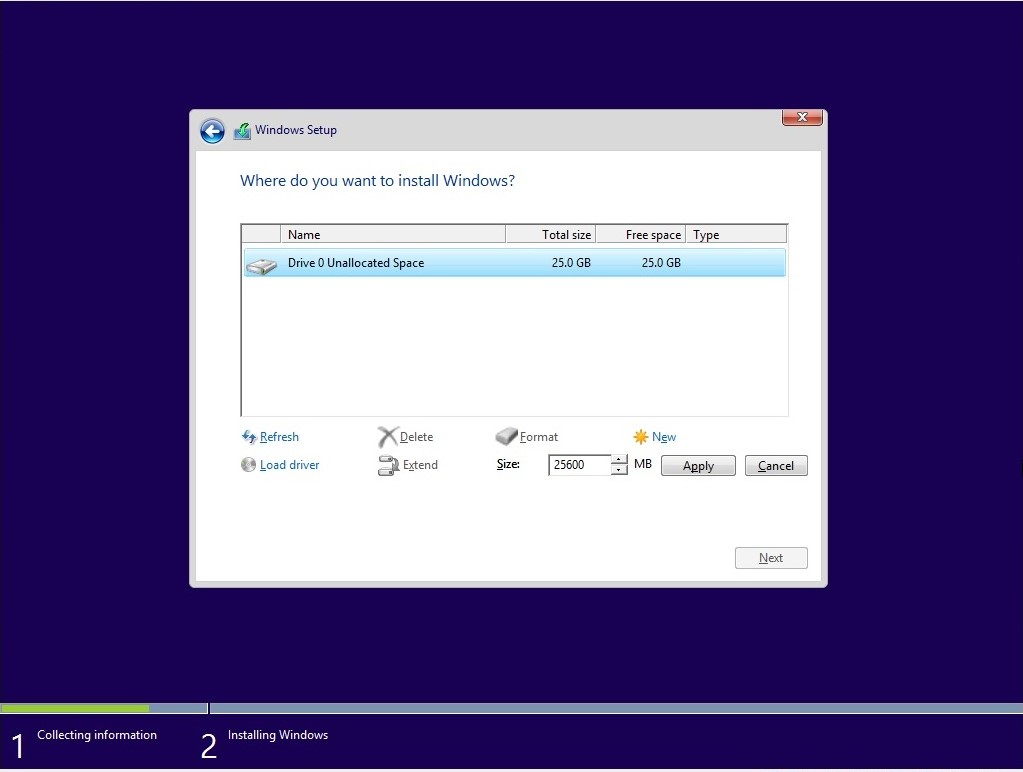
Step 5: Partition the Hard Drive
The next step involves partitioning the hard drive. This allows you to allocate specific space for the operating system and other files. If you are performing a clean installation, you can delete all existing partitions and create a new one for Windows 10.
Step 6: Complete the Installation
Once the partitions are set up, the installation process will continue. This may take some time, depending on the speed of your computer and the size of the hard drive. Once the installation is complete, you will be prompted to create a user account and configure basic settings.
Step 7: Install Essential Drivers
After completing the initial setup, it is essential to install the necessary device drivers. These drivers ensure that your hardware, such as the graphics card, sound card, and network adapter, functions correctly. You can download the drivers from the manufacturer’s website or use a driver update utility.
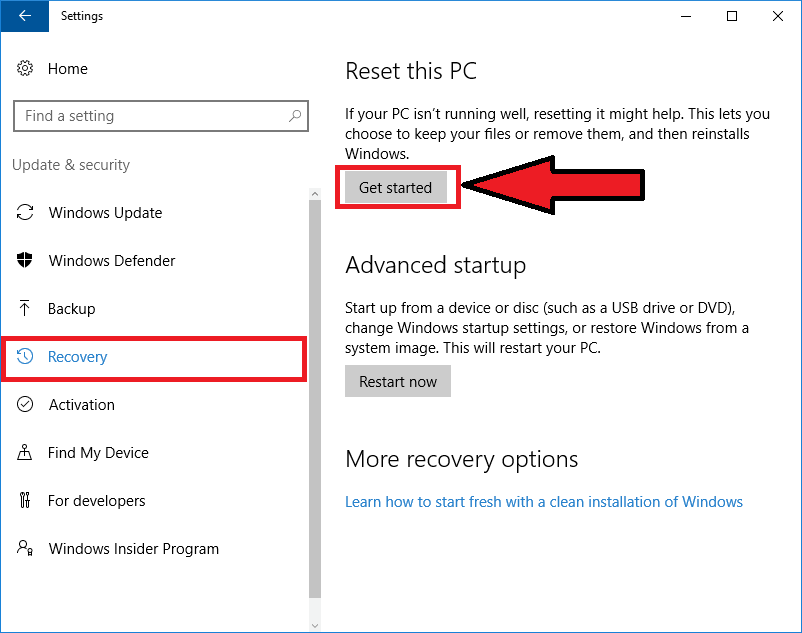
Eliminating Bloatware: The Final Step
With Windows 10 installed, you can now focus on removing any unwanted bloatware. Here are some effective methods:
- Uninstall Through Settings: Access the "Settings" app, navigate to "Apps," and select "Apps & features." From here, you can identify and uninstall unwanted applications.
- Use a Third-Party Uninstaller: Specialized uninstaller tools, such as Revo Uninstaller or IObit Uninstaller, offer advanced features like deep scanning and removal of leftover files.
- Disable Bloatware: For applications you don’t want to uninstall but prefer to disable, you can use the "Disable" option in the "Apps & features" settings or use a third-party tool like Autoruns for a more comprehensive approach.
Tips for a Smooth Reinstallation
- Create a Bootable USB Drive with the Latest Version of Windows 10: Ensure you are using the most up-to-date version of Windows 10 for optimal compatibility and security.
- Back Up Your Drivers: Before reinstalling Windows 10, back up your existing device drivers to avoid reinstalling them manually later.
- Download Essential Applications: Prepare a list of essential applications that you will need after reinstalling Windows 10. Download them beforehand for easy installation.
- Consider a Minimalist Approach: Opt for a clean installation with minimal applications and settings. This creates a leaner and more responsive operating system.
FAQs: Addressing Common Concerns
Q: Will reinstalling Windows 10 erase my data?
A: Yes, a clean installation of Windows 10 will erase all data on the hard drive. It is crucial to back up your data before proceeding.
Q: Can I reinstall Windows 10 without a USB drive?
A: While it is possible to reinstall Windows 10 using a DVD, a USB drive is the preferred method due to its portability and speed.
Q: What if I encounter errors during the installation process?
A: If you encounter errors, consult Microsoft’s support website or seek assistance from a qualified technician.
Q: How often should I reinstall Windows 10?
A: Reinstalling Windows 10 is generally recommended every 1-2 years or when experiencing significant performance issues.
Conclusion: Reclaiming Your Digital Freedom
Reinstalling Windows 10 without bloatware empowers you to regain control over your computing environment. By eliminating unnecessary software, you can enhance performance, improve security, and create a personalized user experience. This comprehensive guide provides a step-by-step approach to a clean installation, ensuring a smooth and efficient process. Remember to back up your data, create a bootable USB drive, and follow the instructions carefully. With a clean installation, you can enjoy a revitalized PC, free from bloatware and ready for a fresh start.
Closure
Thus, we hope this article has provided valuable insights into Reinstalling Windows 10: A Clean Slate for Your PC. We hope you find this article informative and beneficial. See you in our next article!
Leave a Reply