Refreshing Your Windows 11 Pro System: A Guide To Maintaining Performance Without Losing Data
Refreshing Your Windows 11 Pro System: A Guide to Maintaining Performance Without Losing Data
Related Articles: Refreshing Your Windows 11 Pro System: A Guide to Maintaining Performance Without Losing Data
Introduction
With enthusiasm, let’s navigate through the intriguing topic related to Refreshing Your Windows 11 Pro System: A Guide to Maintaining Performance Without Losing Data. Let’s weave interesting information and offer fresh perspectives to the readers.
Table of Content
- 1 Related Articles: Refreshing Your Windows 11 Pro System: A Guide to Maintaining Performance Without Losing Data
- 2 Introduction
- 3 Refreshing Your Windows 11 Pro System: A Guide to Maintaining Performance Without Losing Data
- 3.1 Understanding the Need for a System Refresh
- 3.2 Methods for Refreshing Windows 11 Pro Without Data Loss
- 3.3 Step-by-Step Guide to Refreshing Windows 11 Pro Without Data Loss
- 3.4 FAQs: Refreshing Windows 11 Pro Without Data Loss
- 3.5 Tips for a Successful Refresh:
- 3.6 Conclusion:
- 4 Closure
Refreshing Your Windows 11 Pro System: A Guide to Maintaining Performance Without Losing Data
The Windows operating system, especially its Pro edition, is a powerful tool for both personal and professional use. However, over time, system files can become corrupted, software can accumulate, and performance can decline. While a clean installation might seem like the only solution, it often leads to the dreaded data loss scenario. Fortunately, there are efficient methods to revitalize your Windows 11 Pro system without sacrificing precious files and applications. This article explores these methods, highlighting their benefits and providing a comprehensive guide to ensure a smooth and data-safe rejuvenation of your operating system.
Understanding the Need for a System Refresh
A fresh start for your Windows 11 Pro system offers numerous advantages. It can:
- Boost Performance: A cluttered system with outdated drivers and unnecessary software can significantly impact performance. A refresh clears out these obstacles, leading to faster boot times, smoother application launches, and overall enhanced responsiveness.
- Eliminate Malware and Viruses: A clean installation effectively removes any lingering malware or viruses that might be hindering your system’s security and stability.
- Resolve System Errors: Persistent system errors, often caused by corrupted files or incompatible software, can be resolved by reinstalling the operating system.
- Improve Stability: A clean Windows 11 Pro installation offers a stable foundation for your system, reducing the likelihood of crashes, freezes, and other issues that can disrupt your workflow.
- Upgrade to a New Version: If you wish to upgrade to a newer version of Windows 11 Pro, a fresh installation ensures a smooth transition and eliminates any compatibility conflicts.
Methods for Refreshing Windows 11 Pro Without Data Loss
The key to a successful refresh lies in choosing the appropriate method. Two primary approaches, each with its own advantages and considerations, can be employed:
1. Resetting Your PC: This method offers a thorough clean slate, essentially reverting your system to its factory settings. It effectively removes all unwanted applications, drivers, and system files, leaving a pristine Windows 11 Pro installation.
-
Benefits:
- Comprehensive Clean: Resets your system to its initial state, eliminating all software, settings, and files except for the operating system itself.
- Malware Removal: Effectively eradicates any malware or viruses that may have infected your system.
- System Error Resolution: Solves various system errors and inconsistencies.
-
Considerations:
- Data Backup: It’s crucial to back up all your personal data before initiating a reset, as it will be erased.
- Software Reinstallation: You will need to reinstall all your applications after the reset is complete.
- Time Commitment: The process can be time-consuming, depending on the size of your hard drive and the number of files being deleted.
2. Performing a "Refresh" or "Reset" with Data Preservation: This method offers a more selective approach, allowing you to retain your personal files and settings while removing unwanted software and system files.
-
Benefits:
- Data Preservation: Your personal files, including documents, photos, videos, and music, will remain intact.
- Selective Removal: This method allows you to choose which applications and settings to remove, providing more control over the process.
- Faster Installation: Compared to a full reset, this method can be completed more quickly.
-
Considerations:
- Partial Clean: It may not eliminate all system errors or malware, particularly those deeply ingrained in the system.
- Potential for Conflicts: Retained applications and settings may still lead to performance issues or conflicts if they were the root cause of the initial problems.
Step-by-Step Guide to Refreshing Windows 11 Pro Without Data Loss
1. Back Up Your Data: Regardless of the method you choose, backing up your data is a crucial first step. This ensures that you have a safe copy of all your essential files in case anything goes wrong. Consider using a cloud storage service, an external hard drive, or a network drive for your backup.
2. Choose Your Refresh Method: Carefully consider your needs and the level of cleaning you require. If you’re dealing with significant performance issues or malware, a full reset might be necessary. If you’re looking for a more efficient solution, a refresh with data preservation might be the better option.
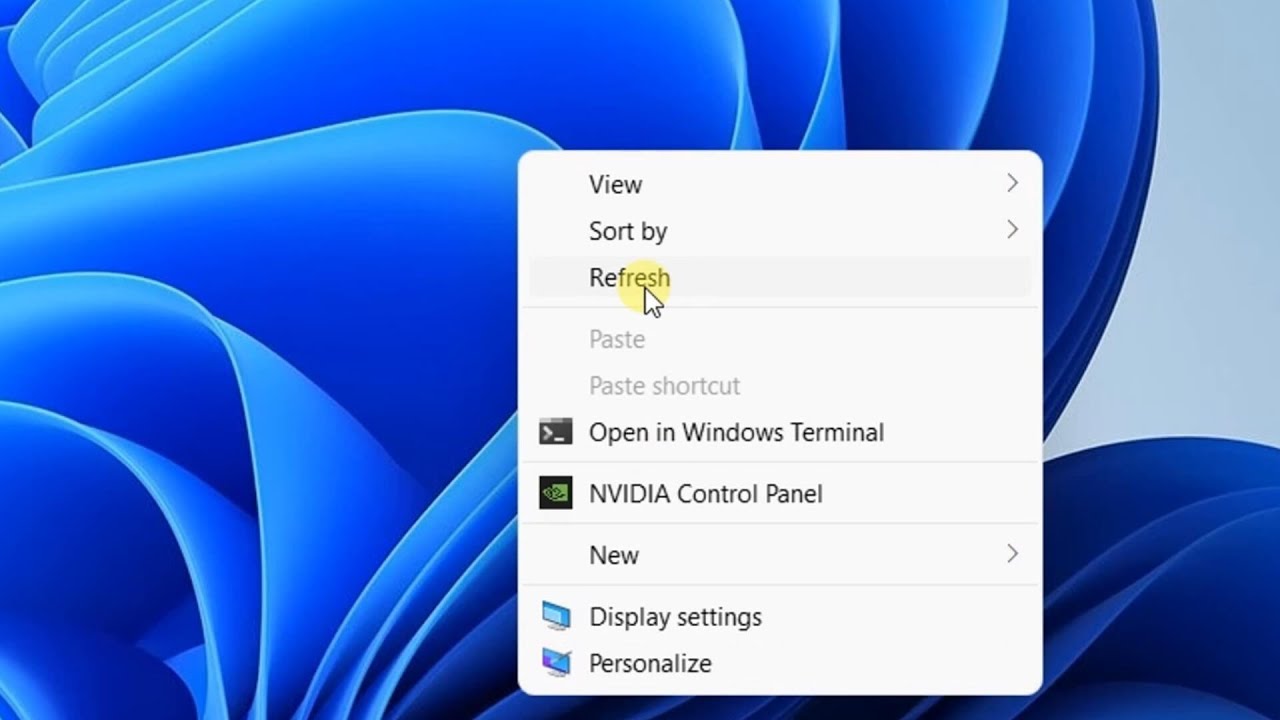
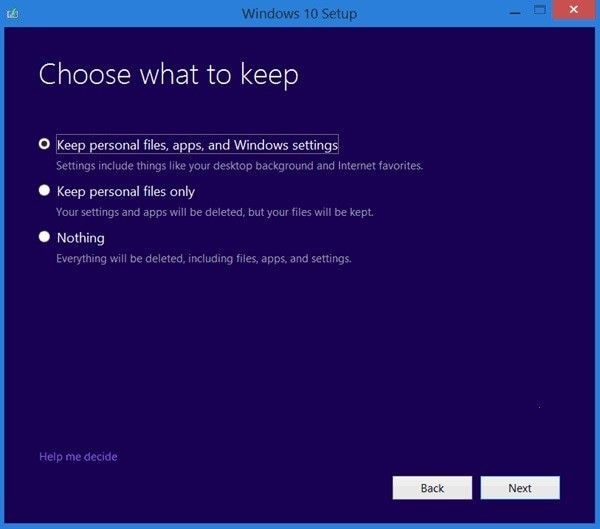
3. Access the "Reset This PC" Feature: In Windows 11 Pro, you can access the "Reset This PC" feature by going to Settings > System > Recovery. Here, you’ll find two options:
- "Reset this PC" (Keep my files): This option performs a refresh, removing unwanted software and settings while preserving your personal files.
- "Reset this PC" (Remove everything): This option performs a full reset, removing all data and reinstalling Windows 11 Pro from scratch.
4. Follow the On-Screen Instructions: Once you’ve selected your desired option, Windows 11 Pro will guide you through the remaining steps. This includes choosing whether to reinstall Windows from a USB drive or a system image, as well as confirming your decision to proceed.
5. Wait for the Process to Complete: The refresh or reset process can take a significant amount of time, depending on the size of your hard drive and the complexity of the operation. Be patient and avoid interrupting the process.
6. Reinstall Your Applications: After the refresh or reset is complete, you’ll need to reinstall any applications that were removed. This can be done by using the installation files or by downloading them from the respective websites.
7. Update Your Drivers: It’s essential to ensure that your system has the latest drivers for all your hardware components. This can be done by manually checking the manufacturer’s websites or by using a driver update utility.
8. Optimize Your System: After the refresh or reset, consider optimizing your system for better performance. This includes disabling unnecessary startup programs, clearing temporary files, and defragmenting your hard drive.
FAQs: Refreshing Windows 11 Pro Without Data Loss
1. What if I forget to back up my data before resetting my PC?
If you fail to back up your data before resetting your PC, it will be permanently lost. There are data recovery tools available, but they are not guaranteed to recover all lost files. Therefore, backing up your data is crucial to prevent data loss.
2. Can I use a different version of Windows 11 Pro during the refresh process?
No, the refresh process will only reinstall the current version of Windows 11 Pro installed on your system. To upgrade to a newer version, you will need to perform a clean installation using a USB drive or system image.
3. How long does the refresh or reset process take?
The time required for the refresh or reset process varies depending on the size of your hard drive and the complexity of the operation. It can range from a few minutes to several hours.
4. What if I encounter errors during the refresh or reset process?
If you encounter errors during the process, try restarting your PC and attempting the refresh or reset again. If the errors persist, consult the Microsoft support website or contact a technical support professional for assistance.
5. Can I use this method to upgrade to a newer version of Windows 11 Pro?
No, this method only refreshes or resets the existing version of Windows 11 Pro installed on your system. To upgrade to a newer version, you will need to perform a clean installation using a USB drive or system image.
Tips for a Successful Refresh:
- Create a System Image: Before initiating any refresh or reset, create a system image backup. This is a snapshot of your entire system, including the operating system, applications, and settings. In case of unexpected issues, you can restore your system to its previous state using this image.
- Use a Reliable Backup Solution: Choose a reputable cloud storage service or external hard drive for your backups. Ensure that the backup solution is regularly updated and tested to guarantee its effectiveness.
- Clean Up Your Hard Drive: Before refreshing or resetting your PC, delete unnecessary files, applications, and data to free up disk space and improve the efficiency of the process.
- Check for Hardware Compatibility: Ensure that your hardware components are compatible with the latest version of Windows 11 Pro. Refer to the manufacturer’s website for compatibility information.
- Consider a Clean Installation: If you’re facing persistent performance issues or malware infections, a clean installation might be the most effective solution. This involves formatting your hard drive and installing Windows 11 Pro from scratch, ensuring a truly fresh start.
Conclusion:
Refreshing your Windows 11 Pro system without losing data is a valuable technique for maintaining optimal performance and resolving system errors. By choosing the appropriate method and following the steps outlined in this guide, you can revitalize your system while safeguarding your precious files and settings. Remember to back up your data before proceeding, and consider consulting a technical support professional if you encounter any difficulties. A well-maintained Windows 11 Pro system will provide a smooth and efficient computing experience for years to come.


Closure
Thus, we hope this article has provided valuable insights into Refreshing Your Windows 11 Pro System: A Guide to Maintaining Performance Without Losing Data. We thank you for taking the time to read this article. See you in our next article!
Leave a Reply