Managing User Accounts In Windows 11: A Comprehensive Guide To User Permissions And Account Removal
Managing User Accounts in Windows 11: A Comprehensive Guide to User Permissions and Account Removal
Related Articles: Managing User Accounts in Windows 11: A Comprehensive Guide to User Permissions and Account Removal
Introduction
In this auspicious occasion, we are delighted to delve into the intriguing topic related to Managing User Accounts in Windows 11: A Comprehensive Guide to User Permissions and Account Removal. Let’s weave interesting information and offer fresh perspectives to the readers.
Table of Content
Managing User Accounts in Windows 11: A Comprehensive Guide to User Permissions and Account Removal

Windows 11, like its predecessors, employs a robust user account system to manage access and privileges within the operating system. This system allows for the creation of multiple user accounts, each with its own set of permissions and limitations. This granular control is crucial for ensuring system security, protecting sensitive data, and fostering a collaborative environment.
Understanding User Account Types and Permissions
In Windows 11, user accounts are categorized into two primary types:
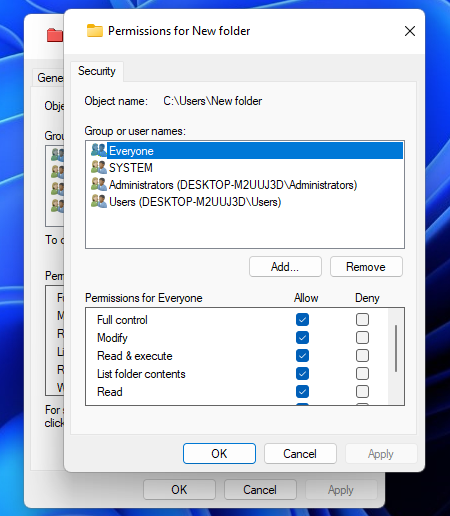
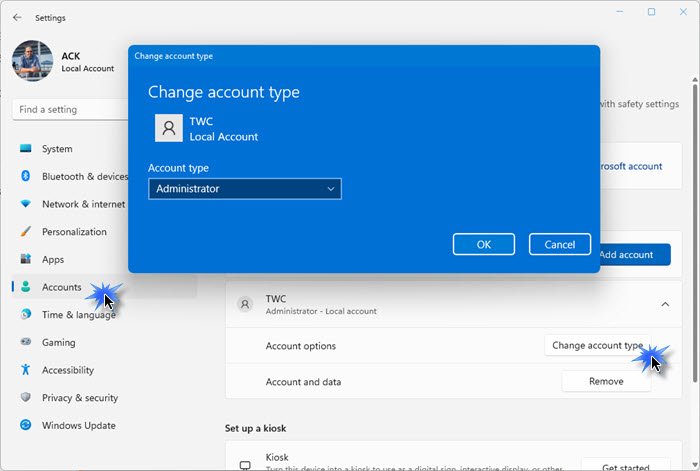
- Administrator Accounts: These accounts possess the highest level of permissions, allowing them to make system-wide changes, install software, manage user accounts, and modify system settings. Typically, only one administrator account is created during the initial setup.
- Standard Accounts: These accounts have limited privileges and can only access and modify files and settings within their own user profile. They cannot install software, make system-wide changes, or manage other user accounts.
The Importance of Managing User Accounts
Managing user accounts in Windows 11 is essential for several reasons:
- Security: Limiting user permissions prevents unauthorized access to sensitive data and system files. This helps mitigate the risk of malware infections, data breaches, and accidental system modifications.
- Stability: Restricting access to system-level settings and applications helps prevent accidental configuration changes that could lead to system instability or crashes.
- Organization: Creating individual accounts for each user allows for a more organized and personalized experience. Users can customize their desktop, install specific applications, and manage their files without affecting other users.
- Collaboration: Standard accounts can be used for shared access to specific files and folders, enabling collaborative work without compromising system security.
Removing a User Account: A Necessary Step
While creating and managing user accounts is crucial for a secure and organized system, there are situations where removing a user account becomes necessary. These situations include:
- Unused accounts: Accounts that are no longer actively used can be removed to streamline system resources and improve security by eliminating potential vulnerabilities.
- Compromised accounts: If a user account is suspected of being compromised, removing it prevents further access and mitigates the risk of data breaches.
- Account changes: When a user’s role or responsibilities change, removing their old account and creating a new one with appropriate permissions can ensure proper access control.
- System cleanup: Removing unnecessary user accounts can help optimize system performance and improve overall system responsiveness.
Removing a User Account in Windows 11: A Step-by-Step Guide
Removing a user account in Windows 11 requires administrator privileges. Here’s a detailed guide:
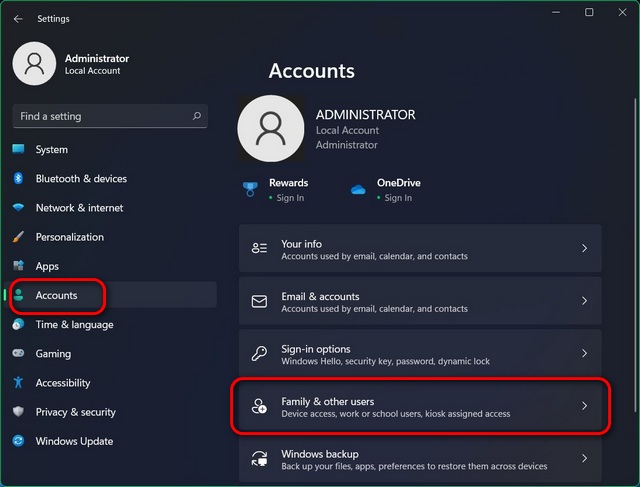
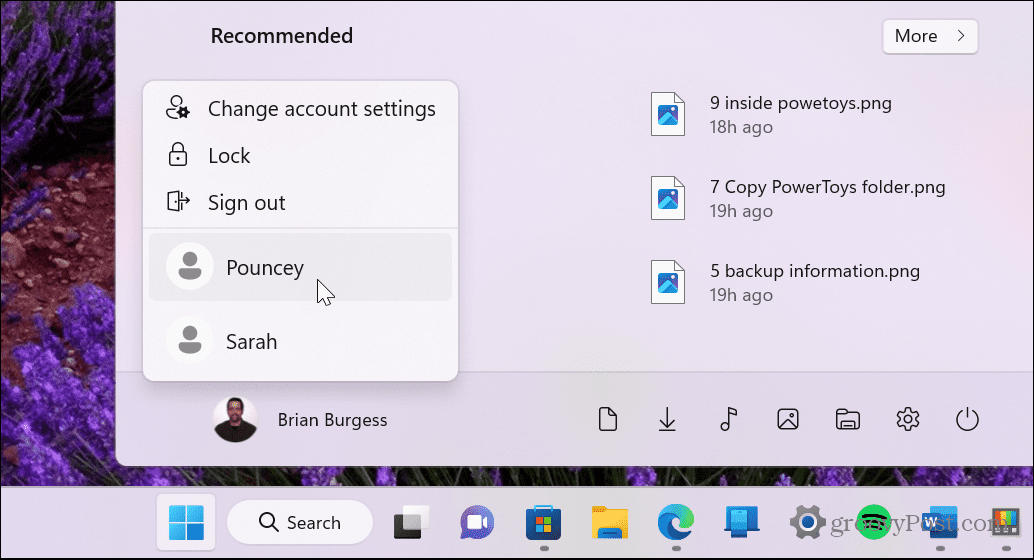
- Open Settings: Click the Start menu and select "Settings" or press the Windows key + I.
- Navigate to Accounts: In the Settings app, click "Accounts."
- Select Family & Other Users: Click "Family & other users" on the left-hand side.
- Locate the Account: Find the user account you wish to remove.
- Remove Account: Click on the user account and select "Remove."
- Confirm Removal: A confirmation dialog will appear. Click "Delete account and data" to proceed.
- Account Removal: The account and its associated data will be permanently removed from the system.
Important Considerations Before Account Removal:
- Data Backup: Before removing a user account, it is crucial to back up any important data stored within that account’s profile. This data includes files, documents, and settings.
- Account Ownership: Ensure that you are authorized to remove the account. If the account belongs to someone else, obtain their permission before proceeding.
- System Impact: Removing an administrator account can potentially disrupt system functionality if no other administrator accounts exist.
FAQs: Addressing Common Questions
Q: Can I remove an administrator account if it is the only one on the system?
A: It is generally not recommended to remove the only administrator account on the system. Doing so could lock you out of your computer. If you need to remove the only administrator account, consider creating a new administrator account beforehand.
Q: What happens to the user’s data when an account is removed?
A: When you remove a user account, all data associated with that account is deleted from the system. This includes files, documents, settings, and any other data stored within the user’s profile folder.
Q: Can I recover a deleted user account?
A: Once a user account is removed, it cannot be recovered. However, you can restore data from a backup if you have one.
Q: Can I remove a user account without deleting its data?
A: No, you cannot remove a user account without deleting its data. However, you can manually move the user’s data to another location before removing the account.
Q: What if I accidentally remove an important user account?
A: If you accidentally remove an important user account, you may need to reinstall Windows to regain access to the system. It is crucial to back up your data regularly to prevent data loss.
Tips for Managing User Accounts
- Regularly review user accounts: Periodically review the user accounts on your system to identify unused or compromised accounts.
- Create standard accounts for everyday use: Use standard accounts for most users to limit their privileges and enhance system security.
- Enable password complexity: Set strong passwords for all user accounts, including administrator accounts, to prevent unauthorized access.
- Use a password manager: A password manager can help you create and manage strong passwords for all your accounts.
- Implement two-factor authentication: Enable two-factor authentication for administrator accounts to add an extra layer of security.
Conclusion
Managing user accounts in Windows 11 is a critical aspect of maintaining system security, organization, and stability. By understanding the different account types, their permissions, and the importance of managing them, users can create a secure and efficient computing environment. Removing user accounts, when necessary, is a straightforward process that can help optimize system resources and enhance security. However, it’s essential to proceed with caution, ensuring data backup and appropriate authorization before removing any account. By following the guidelines outlined in this guide, users can effectively manage their user accounts in Windows 11, ensuring a secure and productive computing experience.


Closure
Thus, we hope this article has provided valuable insights into Managing User Accounts in Windows 11: A Comprehensive Guide to User Permissions and Account Removal. We hope you find this article informative and beneficial. See you in our next article!
Leave a Reply