Navigating The "Out Of Memory" Message In Windows 11: A Comprehensive Guide

Navigating the "Out of Memory" Message in Windows 11: A Comprehensive Guide

Introduction

In this auspicious occasion, we are delighted to delve into the intriguing topic related to Navigating the "Out of Memory" Message in Windows 11: A Comprehensive Guide. Let’s weave interesting information and offer fresh perspectives to the readers.

Not Enough Memory in Windows 11? Hereโ€™s What to do

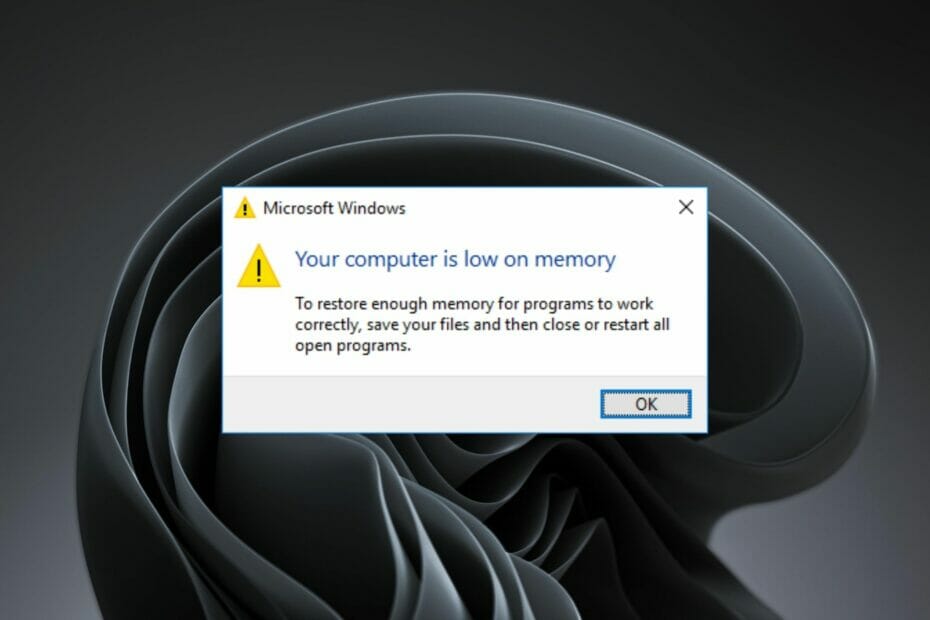
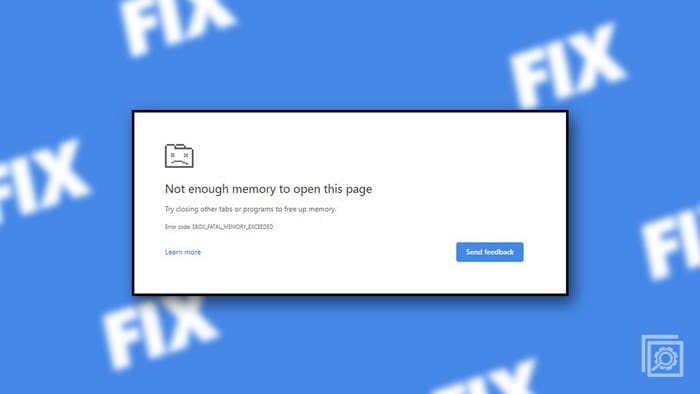
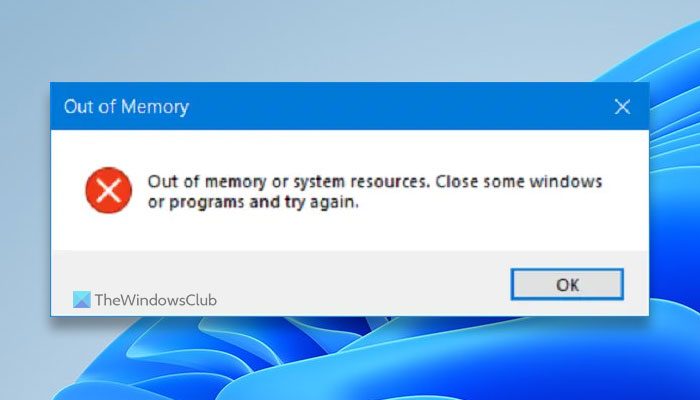
The infamous "out of memory" message, a ubiquitous error across operating systems, can be a frustrating experience for Windows 11 users. This message signals a critical situation where the system’s available memory (RAM) is insufficient to meet the demands of running applications. Understanding the causes behind this error is crucial for resolving it effectively and ensuring a smooth computing experience.

Understanding the Root Causes of Memory Exhaustion

The "out of memory" message in Windows 11 is a symptom of a fundamental issue: the operating system is unable to allocate the required memory for applications to function properly. This can arise from a multitude of factors, each demanding its own approach to resolution:

1. Insufficient RAM: The most straightforward cause is simply not having enough RAM installed. Windows 11, with its advanced features and potential for multitasking, requires a significant amount of RAM to operate efficiently. If your system’s RAM capacity is insufficient, running multiple demanding applications or programs simultaneously can lead to memory exhaustion.

2. Memory Leaks: Memory leaks occur when programs fail to release memory resources they no longer require. This can result in a gradual accumulation of unused memory, eventually leading to a shortage. Memory leaks can be caused by programming errors or faulty applications.

3. System Processes: Windows itself consumes a significant amount of memory to manage system processes, background tasks, and essential services. If these processes are consuming an excessive amount of memory, it can lead to a shortage for user applications.

4. Resource-Intensive Applications: Certain applications, particularly those involving graphics processing, video editing, or gaming, demand substantial memory resources. Running multiple such applications concurrently can easily deplete the available memory.

5. Malware or Viruses: Malicious software can consume system resources, including memory, leading to a shortage. This can occur through background processes, excessive data transfers, or even by intentionally corrupting system files.

6. Hardware Issues: In rare cases, faulty RAM modules or other hardware components can contribute to memory exhaustion. This can involve issues like faulty memory controllers or defective RAM chips.

Identifying the Culprit: Diagnosing the Memory Shortage

Pinpointing the exact cause behind the "out of memory" message requires a systematic approach:

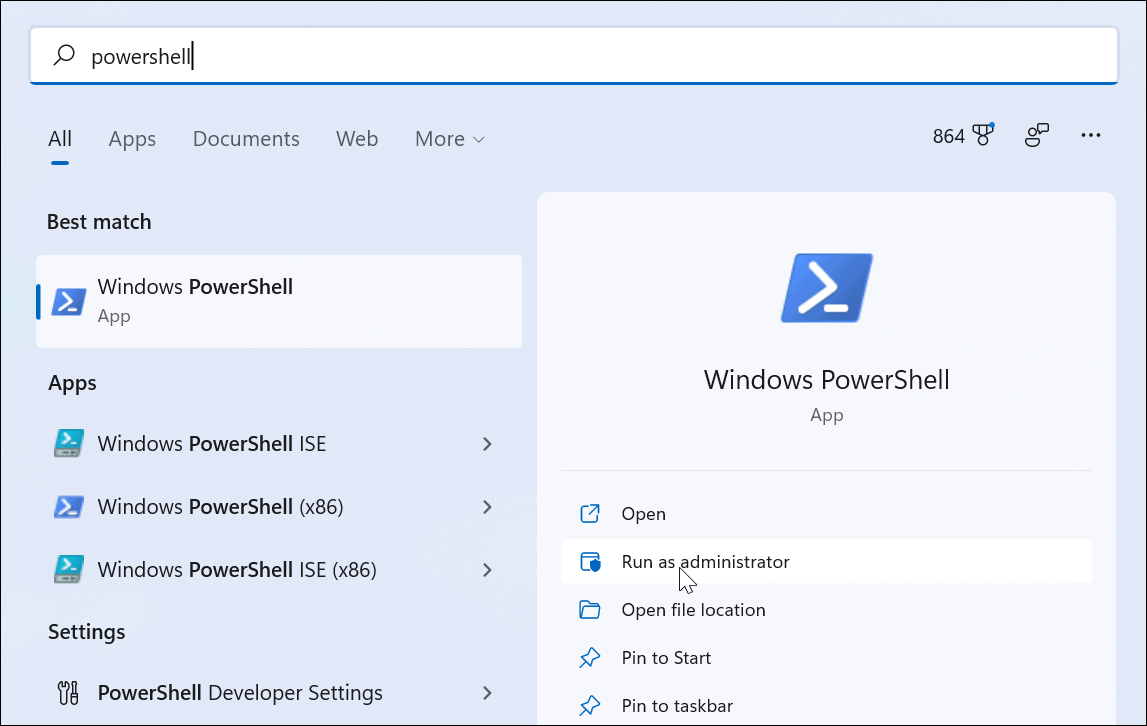
1. Task Manager Analysis: The Task Manager is a powerful tool for monitoring system resource usage. By examining the "Performance" tab, you can observe memory usage patterns and identify potential culprits. Look for applications consuming excessive amounts of memory, particularly those exhibiting a steady increase over time.

2. Event Viewer Inspection: The Event Viewer provides a detailed log of system events, including errors and warnings. Examining the "System" log may reveal specific errors related to memory exhaustion, providing valuable clues about the underlying issue.

3. Memory Diagnostic Tools: Windows 11 includes built-in memory diagnostic tools that can test your RAM for errors. These tools can help identify faulty RAM modules that might be contributing to memory issues.

4. Third-Party Memory Monitoring Tools: Numerous third-party memory monitoring tools offer more advanced features for analyzing memory usage. These tools can provide detailed information about individual processes, memory allocation patterns, and potential leaks.

5. System File Checker (SFC) and Disk Cleanup: Running the SFC command and performing a Disk Cleanup can help identify and resolve issues with corrupted system files that might be contributing to memory exhaustion.

Strategies for Reclaiming Memory and Preventing Future Issues

Once you’ve identified the root cause of the "out of memory" message, you can implement appropriate strategies to resolve the issue and prevent its recurrence:

1. Increase RAM: If your system is consistently experiencing memory shortages, increasing RAM is the most direct solution. This ensures sufficient resources for running applications and system processes without conflict.

2. Close Unnecessary Programs: Regularly close applications you’re not actively using to free up memory. This is particularly important when running resource-intensive programs.

3. Manage Startup Programs: Disable unnecessary programs from launching at startup. These programs consume memory even when not in active use, potentially contributing to memory shortages.

4. Update Drivers and Software: Outdated drivers and software can cause memory leaks or inefficiencies. Ensure your system is running the latest drivers and software versions.

5. Run Disk Cleanup: Regularly perform a Disk Cleanup to remove unnecessary files and free up disk space. This can indirectly improve system performance and memory management.

6. Defragmentation: Defragmenting your hard drive can improve system performance, including memory allocation. This is particularly beneficial if you experience slowdowns or frequent memory errors.

7. Scan for Malware: Regularly scan your system for malware using a reputable antivirus program. Malware can consume system resources, including memory, leading to shortages.

8. Utilize Memory Optimization Tools: Consider using memory optimization tools that can help manage memory usage, close unnecessary processes, and prevent memory leaks.

9. Monitor System Processes: Regularly monitor system processes using the Task Manager to identify those consuming excessive amounts of memory. This can help you identify and potentially terminate resource-hungry processes.

10. Consider Hardware Upgrades: If your system is consistently experiencing memory issues despite optimization efforts, consider upgrading your hardware, including the RAM, to ensure sufficient resources for modern applications.

Frequently Asked Questions: Demystifying the "Out of Memory" Message

1. What are the common symptoms of an "out of memory" issue in Windows 11?

Common symptoms include slow performance, application crashes, unresponsive programs, error messages related to memory allocation, and system freezes.

2. Is "out of memory" always due to insufficient RAM?

While insufficient RAM is a common cause, other factors like memory leaks, resource-intensive applications, and malware can also contribute to memory exhaustion.

3. How much RAM does Windows 11 require?

The recommended RAM for Windows 11 varies depending on usage. For basic tasks, 4GB is sufficient, but for more demanding tasks like gaming or video editing, 8GB or more is recommended.

4. Can I safely increase RAM on my Windows 11 computer?

Yes, you can safely increase RAM on your Windows 11 computer. Ensure you purchase compatible RAM modules for your system and follow the manufacturer’s instructions for installation.

5. What are some common memory optimization tools available for Windows 11?

Popular memory optimization tools include CCleaner, Advanced SystemCare, and Memory Optimizer Pro. These tools can help manage memory usage, close unnecessary processes, and prevent memory leaks.

6. Is it safe to use memory optimization tools?

While many memory optimization tools are safe and effective, it’s important to choose reputable tools from trusted sources. Avoid tools that promise unrealistic performance gains or make claims about "cleaning" the registry.

7. What if I have already upgraded my RAM and am still experiencing memory issues?

If you’ve upgraded your RAM and are still experiencing memory issues, consider investigating other factors like memory leaks, resource-intensive applications, or malware.

8. Can I use a virtual memory file to address "out of memory" issues?

While using a virtual memory file can temporarily alleviate memory shortages, it is not a long-term solution. It involves using hard drive space as a temporary memory buffer, which can significantly slow down system performance.

9. What are some preventative measures to avoid future "out of memory" messages?

Regularly monitor system processes, close unnecessary applications, update drivers and software, scan for malware, and consider increasing RAM if necessary.

10. When should I contact a technician for assistance with "out of memory" issues?

If you’ve exhausted all troubleshooting steps and are still experiencing frequent memory issues, it’s advisable to contact a qualified technician to diagnose and resolve the problem.

Conclusion: Maintaining Memory Health for Optimal Performance

The "out of memory" message in Windows 11 is a clear indication of a critical resource shortage. Understanding the potential causes and implementing effective troubleshooting strategies is crucial for maintaining a smooth and efficient computing experience. By addressing memory issues proactively, you can ensure that your system operates at peak performance, free from the frustrating limitations of memory exhaustion.

Buy Windows 11 User Guide for Beginners: A Comprehensive Guide to Master Windows 11 Operating Fixed Error Code: Out of Memory on Windows 11 Web Browsers Fixed Error Code: Out of Memory on Windows 11 Web Browsers
Memory Management Blue Screen on Windows 11 [Fix] Fix "The Instruction at 0x00*** referenced memory at 0x00***. The memory could not be written Fix Out of memory error while copying files on Windows 11/10
Windows 11 Comprehensive Guide And Cheat Sheet Windows 11 Comprehensive Guide And Cheat Sheet, 54% OFF

Closure

Thus, we hope this article has provided valuable insights into Navigating the "Out of Memory" Message in Windows 11: A Comprehensive Guide. We appreciate your attention to our article. See you in our next article!
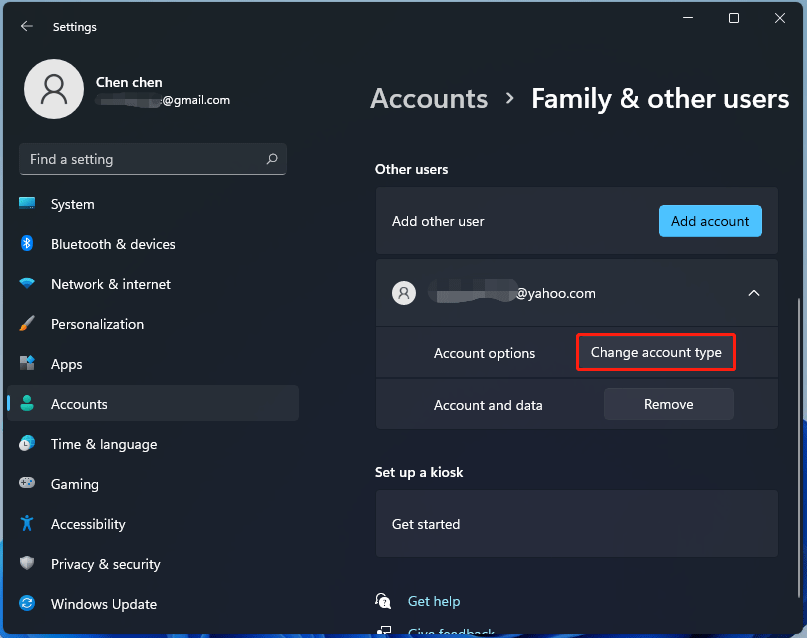
Understanding PPM In Windows 10: A Comprehensive Guide

Understanding PPM in Windows 10: A Comprehensive Guide

Introduction

With enthusiasm, let’s navigate through the intriguing topic related to Understanding PPM in Windows 10: A Comprehensive Guide. Let’s weave interesting information and offer fresh perspectives to the readers.

Understanding PPM in Windows 10: A Comprehensive Guide

Mastering Project Management: A Comprehensive Guide to Microsoft PPM

The term "ppm" in the context of Windows 10 does not refer to a specific feature or application. It is likely an abbreviation for "parts per million," a unit of measurement commonly used to express the concentration of a substance within a larger sample. In the context of Windows 10, this could potentially refer to several aspects, including:

1. Hardware Component Performance:

  • CPU Performance: In this context, "ppm" could represent the frequency of errors or malfunctions within a processor’s operation. For example, a CPU operating with a "ppm" of 100 would mean it experiences 100 errors for every million instructions executed. Lower ppm values indicate greater reliability and stability.
  • RAM Performance: Similarly, "ppm" can reflect the frequency of errors within a RAM module. A higher ppm value in RAM could lead to system crashes, data corruption, or slow performance.
  • Storage Device Performance: While less common, "ppm" could also be used to describe the frequency of errors in hard drives or SSDs. This would be relevant in situations where data integrity and reliability are critical.

2. Software Performance Metrics:

  • Error Rates: In the context of software development, "ppm" can denote the frequency of errors or bugs encountered within a specific software program. This metric is crucial for assessing the quality and stability of software applications.
  • Network Performance: Network performance can also be measured using "ppm," representing the frequency of packet loss or errors within a network connection. This metric is essential for ensuring reliable data transmission and communication.

3. System Health Monitoring:

  • Event Log Analysis: Windows 10’s Event Viewer logs various system events, including errors, warnings, and informational messages. Analyzing these logs using "ppm" can provide insights into the frequency of specific events, potentially identifying potential issues or areas for improvement.
  • Performance Monitoring Tools: Dedicated performance monitoring tools, such as Task Manager or Resource Monitor, can provide detailed system performance statistics, including metrics expressed in "ppm." This information helps identify bottlenecks and areas for optimization.

Importance of PPM in Windows 10:

Understanding and analyzing "ppm" values within the Windows 10 environment is crucial for several reasons:

  • System Stability and Reliability: Monitoring "ppm" values related to hardware components can help identify potential issues before they lead to system instability or data loss.
  • Software Quality Assurance: For software developers, "ppm" metrics are essential for tracking error rates and ensuring the quality and reliability of their applications.
  • Network Performance Optimization: Analyzing "ppm" values related to network performance can help identify bottlenecks and optimize network settings for improved data transmission and communication.
  • Predictive Maintenance: By analyzing "ppm" values, IT professionals can identify potential hardware failures early, allowing for proactive maintenance and reducing downtime.
  • Performance Tuning: "ppm" metrics provide valuable insights into system performance, enabling users to identify bottlenecks and optimize system settings for improved responsiveness and efficiency.

Benefits of Understanding PPM:

  • Improved System Performance: By identifying and addressing potential issues through "ppm" analysis, users can experience improved system performance, reduced downtime, and increased stability.
  • Enhanced Data Integrity: Monitoring "ppm" values related to storage devices helps ensure data integrity and prevent data corruption or loss.
  • Proactive Maintenance: "ppm" analysis allows for proactive maintenance strategies, reducing the likelihood of unexpected system failures and downtime.
  • Optimized Network Performance: By identifying and addressing network performance issues through "ppm" analysis, users can experience faster and more reliable network connectivity.
  • Enhanced Software Quality: For software developers, "ppm" metrics are crucial for ensuring the quality and reliability of their applications, leading to improved user experience and reduced support costs.

FAQs about PPM in Windows 10:

1. How can I monitor ppm values in Windows 10?

There are several methods to monitor "ppm" values in Windows 10:

  • Event Viewer: The Event Viewer logs various system events, including errors, warnings, and informational messages. Analyzing these logs can provide insights into the frequency of specific events.
  • Performance Monitoring Tools: Tools like Task Manager and Resource Monitor provide detailed system performance statistics, including metrics expressed in "ppm."
  • Third-Party Monitoring Software: Specialized monitoring software offers advanced features for tracking and analyzing "ppm" values across different system components.
  • Hardware Manufacturer Tools: Some hardware manufacturers provide dedicated tools for monitoring the performance and health of their components, including "ppm" metrics.

2. What are considered acceptable ppm values?

Acceptable "ppm" values vary depending on the specific component or metric being measured. Generally, lower "ppm" values indicate better performance and reliability. However, it is essential to consult the manufacturer’s specifications or industry standards for specific benchmarks.

3. What should I do if I encounter high ppm values?

If you encounter high "ppm" values, it is essential to investigate the underlying cause and take appropriate action. This may involve:

  • Updating Drivers: Outdated or faulty drivers can contribute to high "ppm" values. Updating drivers to the latest versions can often resolve the issue.
  • Running Hardware Diagnostics: Running hardware diagnostics can help identify faulty components or potential issues.
  • Reinstalling Software: Corrupted software can also contribute to high "ppm" values. Reinstalling the software may resolve the issue.
  • Contacting Support: If the issue persists, it is recommended to contact the hardware manufacturer or software developer for support.

4. How can I improve ppm values in Windows 10?

Improving "ppm" values in Windows 10 involves addressing potential issues and optimizing system performance. Some tips include:

  • Keep System Updated: Ensure your Windows 10 system is up-to-date with the latest updates and patches, as these often include performance enhancements and bug fixes.
  • Optimize System Settings: Adjust system settings, such as power management options, to improve performance and reduce resource consumption.
  • Monitor Background Processes: Identify and disable unnecessary background processes that may be consuming resources and affecting system performance.
  • Defragment Hard Drive: Regularly defragmenting your hard drive can improve system performance and reduce the frequency of errors.
  • Clean Up Disk Space: Freeing up disk space can improve system responsiveness and performance.
  • Run Disk Check: Regularly running a disk check can help identify and repair errors on your hard drive.
  • Use Performance Monitoring Tools: Utilize performance monitoring tools to identify bottlenecks and areas for optimization.

Conclusion:

While "ppm" may not be a widely recognized term within Windows 10, understanding its relevance and application is crucial for optimizing system performance, ensuring data integrity, and achieving a stable and reliable computing experience. By proactively monitoring and analyzing "ppm" values, users can identify potential issues, address them promptly, and enjoy a smoother and more efficient Windows 10 experience.

What is PPM and how to measure it: A Comprehensive Guide High-level Overview of Mechanics of PPM Implementation โ€“ Project Management Best Best Practices Quantum: Disabling C States on a Windows 10 computer โ€“ Knowledge Base  PreSonus
FAQ: How to Miracast to the PPM from Windows 10 - Knowledge Base - Philips Projection A Guide to Understanding and Using PPM Data Modern Microsoft PPM - Stage 1: Foundation
Microsoft PPM Sales Training โ€“ Cadence Preferred PPM Deployment  PPM Works, Inc.

Closure

Thus, we hope this article has provided valuable insights into Understanding PPM in Windows 10: A Comprehensive Guide. We thank you for taking the time to read this article. See you in our next article!

Seamless Sharing: Exploring Nearby Sharing Between Windows 10 And Windows 11

Seamless Sharing: Exploring Nearby Sharing Between Windows 10 and Windows 11

Introduction

In this auspicious occasion, we are delighted to delve into the intriguing topic related to Seamless Sharing: Exploring Nearby Sharing Between Windows 10 and Windows 11. Let’s weave interesting information and offer fresh perspectives to the readers.

Seamless Sharing: Exploring Nearby Sharing Between Windows 10 and Windows 11

How to share files using Nearby Devices in Windows  Nearby sharing between Windows 10 to

In the contemporary digital landscape, seamless data transfer between devices is paramount. Windows 10 and Windows 11, Microsoft’s flagship operating systems, have embraced this need through a feature known as Nearby Sharing. This technology enables users to effortlessly share files, links, and other content between compatible devices within close proximity.

Understanding Nearby Sharing: A Bridge Between Devices

Nearby Sharing operates on a simple principle: it leverages Bluetooth and Wi-Fi to establish a direct connection between devices, facilitating rapid data exchange. This eliminates the need for cloud storage or external drives, streamlining the sharing process and ensuring privacy.

Compatibility and Requirements:

Nearby Sharing is supported on both Windows 10 (version 1803 or later) and Windows 11. To utilize this feature, devices must meet the following criteria:

  • Bluetooth Enabled: Both the sending and receiving devices require Bluetooth functionality.
  • Wi-Fi Connectivity: Both devices must be connected to the same Wi-Fi network, even if they are not actively using the internet.
  • Nearby Sharing Enabled: The Nearby Sharing feature must be activated on both devices.

Enabling Nearby Sharing:

To enable Nearby Sharing on a Windows 10 or Windows 11 device, follow these steps:

  1. Open Settings: Access the Settings app by pressing the Windows key + I.
  2. Navigate to System: Select "System" from the left-hand pane.
  3. Choose Shared Experiences: Click on "Shared experiences" in the right-hand pane.
  4. Enable Nearby Sharing: Toggle the "Nearby sharing" switch to the "On" position.

Sharing Files and Content:

Once Nearby Sharing is enabled, sharing files and content is as easy as a few clicks:

  1. Select the File or Content: Locate the file or content you wish to share.
  2. Right-Click and Choose "Share": Right-click on the selected item and choose "Share."
  3. Select the Receiving Device: A list of nearby devices will appear. Select the device you want to share the content with.
  4. Confirm Sharing: A notification will appear on the receiving device. Confirm the transfer to receive the shared content.

Benefits of Nearby Sharing:

  • Effortless File Transfer: Streamline data exchange without relying on cloud storage or external drives.
  • Enhanced Privacy: Data transfer occurs directly between devices, minimizing exposure to external servers.
  • Increased Efficiency: Save time and effort by simplifying the sharing process.
  • Cross-Platform Compatibility: Share content seamlessly between Windows 10 and Windows 11 devices.
  • No Internet Required: Data exchange occurs locally, eliminating the need for an internet connection.

Troubleshooting Nearby Sharing:

If you encounter issues with Nearby Sharing, consider the following troubleshooting steps:

  • Verify Bluetooth and Wi-Fi Connectivity: Ensure both devices have Bluetooth and Wi-Fi enabled and are connected to the same network.
  • Check Nearby Sharing Status: Ensure Nearby Sharing is enabled on both devices.
  • Restart Devices: Restart both the sending and receiving devices to resolve potential software glitches.
  • Update Drivers: Update Bluetooth and Wi-Fi drivers to ensure compatibility.
  • Check Device Compatibility: Ensure both devices meet the minimum system requirements for Nearby Sharing.

FAQs on Nearby Sharing:

Q: Can I share files with devices running other operating systems?
A: Currently, Nearby Sharing is primarily designed for sharing between Windows 10 and Windows 11 devices. However, some third-party applications might offer cross-platform sharing capabilities.

Q: How secure is Nearby Sharing?
A: Nearby Sharing utilizes Bluetooth and Wi-Fi to establish a direct connection, minimizing exposure to external servers. However, it’s essential to ensure that your devices are protected with strong passwords and up-to-date security software.

Q: What types of files can I share using Nearby Sharing?
A: You can share a wide range of files, including documents, images, videos, music, and more.

Q: How far apart can devices be for Nearby Sharing to work?
A: The range of Nearby Sharing depends on the strength of the Bluetooth and Wi-Fi signals. Typically, devices should be within close proximity, such as a few meters.

Q: Can I share files with multiple devices simultaneously?
A: Currently, Nearby Sharing allows sharing with only one device at a time.

Tips for Optimizing Nearby Sharing:

  • Ensure Bluetooth and Wi-Fi are Enabled: Keep both features activated for seamless sharing.
  • Maintain Proximity: Ensure devices are within close proximity for a stable connection.
  • Update Drivers Regularly: Update Bluetooth and Wi-Fi drivers to ensure compatibility and performance.
  • Check for Updates: Keep both Windows 10 and Windows 11 devices updated with the latest software updates.

Conclusion:

Nearby Sharing is a powerful feature that empowers users to effortlessly share files and content between Windows 10 and Windows 11 devices. Its ease of use, privacy focus, and cross-platform compatibility make it a valuable tool for streamlining data exchange and enhancing collaboration. By understanding its functionality and following the tips outlined, users can leverage this feature to maximize their productivity and efficiency in the digital world.

How to Use Nearby Sharing on Windows 11 How To Use Nearby Sharing On Windows 11  digisrun How to use Nearby sharing on Windows 10 or 11 and Microsoft Edge - YouTube
How to Use Nearby Sharing on Windows 11?  Gear Up Windows How to Enable and Use Nearby Sharing in Windows 11? 2024�� How to Use Nearby Sharing on Windows 10
ุดุฑุญ ุงุณุชุฎุฏุงู… ู…ูŠุฒุฉ Nearby Share ุจูŠู† Windows 11 ูˆ Android - Arabhardware How to Use Nearby Sharing on Windows 11?  Gear up Windows 11 & 10

Closure

Thus, we hope this article has provided valuable insights into Seamless Sharing: Exploring Nearby Sharing Between Windows 10 and Windows 11. We appreciate your attention to our article. See you in our next article!

Removing The Windows 11 Start Menu’s Copilot Integration: A Guide To Enhanced User Control

Removing the Windows 11 Start Menu’s Copilot Integration: A Guide to Enhanced User Control

Introduction

With great pleasure, we will explore the intriguing topic related to Removing the Windows 11 Start Menu’s Copilot Integration: A Guide to Enhanced User Control. Let’s weave interesting information and offer fresh perspectives to the readers.

Removing the Windows 11 Start Menu’s Copilot Integration: A Guide to Enhanced User Control

How to remove Copilot from Taskbar in Windows 11

Microsoft’s Copilot, an AI-powered assistant, has been integrated into the Windows 11 Start menu, aiming to enhance user experience through proactive suggestions and contextual assistance. However, not all users find this integration beneficial. Some may prefer a more streamlined and uncluttered Start menu, while others might have concerns about data privacy or simply desire greater control over their computing environment.

This guide provides a comprehensive explanation of how to remove the Copilot integration from the Windows 11 Start menu, outlining the steps involved and addressing common user queries.

Understanding the Copilot Integration

The Copilot integration within the Windows 11 Start menu manifests as a dedicated section labeled "Copilot," which appears prominently alongside the "Recommended" and "Recent" sections. This section displays AI-generated suggestions based on user activity, offering quick access to relevant applications, files, and tasks.

Reasons for Removal

Users may choose to remove the Copilot integration for various reasons:

  • Preference for a Minimalistic Start Menu: Some users prioritize a clean and uncluttered Start menu, finding the Copilot section distracting or unnecessary.
  • Privacy Concerns: The Copilot integration relies on user data to generate personalized suggestions. Users concerned about data privacy might opt to disable this feature.
  • Control Over Suggestions: The Copilot integration’s suggestions, while often helpful, can sometimes be irrelevant or even disruptive. Users seeking greater control over their computing experience may prefer to disable this feature.
  • Performance Considerations: The Copilot integration requires resources to operate, potentially impacting system performance, especially on older or less powerful devices.

Methods for Removal

There are two primary methods for removing the Copilot integration from the Windows 11 Start menu:

1. Disabling Copilot in Settings

This method offers a straightforward and user-friendly approach to disabling Copilot’s integration with the Start menu.

  • Navigate to Settings: Open the "Settings" app by pressing Windows Key + I.
  • Access System Settings: In the left-hand menu, select "System."
  • Locate Notifications: Under "System," find and click on "Notifications."
  • Disable Copilot Suggestions: Locate the "Copilot suggestions" option and toggle the switch to the "Off" position.

2. Modifying the Registry

This method involves making changes to the Windows Registry, which requires caution and a basic understanding of registry editing.

  • Open Registry Editor: Press Windows Key + R to open the "Run" dialog box. Type "regedit" and press Enter.
  • Navigate to the Copilot Key: Navigate to the following registry key: HKEY_CURRENT_USERSOFTWAREMicrosoftWindowsCurrentVersionExplorerAdvanced.
  • Create a New DWORD Value: Right-click within the "Advanced" key and select "New" > "DWORD (32-bit) Value."
  • Name the Value: Name the new DWORD value "Start_ShowCopilot."
  • Set the Value Data: Double-click the newly created DWORD value and set its "Value data" to "0."
  • Close Registry Editor: Close Registry Editor and restart your computer for the changes to take effect.

Frequently Asked Questions

Q: Will removing Copilot affect other Windows features?

A: Removing the Copilot integration from the Start menu will only disable its suggestions within that specific area. It will not affect other Windows features or functionalities.

Q: Can I re-enable Copilot later?

A: Yes, you can re-enable Copilot at any time by following the same steps mentioned above, but toggling the "Copilot suggestions" switch in Settings back to "On" or changing the "Start_ShowCopilot" value in the Registry back to "1."

Q: What are the potential downsides of removing Copilot?

A: Removing Copilot may result in losing access to its personalized suggestions, which can be helpful for tasks like finding files, launching applications, or accessing relevant information.

Tips for Managing the Start Menu

  • Customize the Start Menu: Use the "Start" settings within the "Personalization" section to customize the Start menu’s appearance, layout, and pinned apps.
  • Use Search: Instead of relying on Copilot suggestions, use the Windows search bar to find files, applications, and settings.
  • Explore Other Productivity Tools: Consider using alternative productivity tools, such as task managers, note-taking apps, or calendar applications, to manage your workflow and enhance productivity.

Conclusion

Removing the Copilot integration from the Windows 11 Start menu provides users with greater control over their computing environment and a cleaner, more streamlined Start menu experience. Whether motivated by privacy concerns, performance considerations, or simply a preference for minimalism, users can choose to disable this feature without impacting other Windows functionalities. By understanding the methods involved and considering the potential implications, users can make informed decisions about how they interact with their Windows 11 system.

Add or remove Windows Copilot button on Windows 11 taskbar Add or remove Windows Copilot button on Windows 11 taskbar Methods to turn off Microsoft Copilot in Windows 11  A Virtual World of Live Pictures
Windows 11 Start Menu Remove Recommended Windows 11 Remove Recommended How To Enable Microsoft Copilot In Windows 11 - Image to u
Windows 11 Recommended Start Menu Windows 11 Copilot tests auto start feature, pinning controls and adaptive interface

Closure

Thus, we hope this article has provided valuable insights into Removing the Windows 11 Start Menu’s Copilot Integration: A Guide to Enhanced User Control. We hope you find this article informative and beneficial. See you in our next article!

Navigating The Landscape Of Windows 11: Understanding And Managing Administrator Accounts

Navigating the Landscape of Windows 11: Understanding and Managing Administrator Accounts

Introduction

With enthusiasm, let’s navigate through the intriguing topic related to Navigating the Landscape of Windows 11: Understanding and Managing Administrator Accounts. Let’s weave interesting information and offer fresh perspectives to the readers.

Manage Your Microsoft Account in Windows 11 โ€“ windows.do

Windows 11, like its predecessors, relies on a hierarchical system of user accounts to manage access and privileges. At the apex of this hierarchy sits the Administrator account, possessing the highest level of permissions, allowing for complete control over the operating system and its functionalities. While this inherent power is crucial for initial setup, system maintenance, and troubleshooting, maintaining an active Administrator account can pose security risks, making it prudent to consider alternative methods for managing your Windows 11 environment.

The Rationale for Removing the Administrator Account:

The primary reason for removing the Administrator account in Windows 11 revolves around security. The unrestricted access granted to the Administrator account makes it an attractive target for malicious actors. If compromised, an attacker could gain complete control of the system, potentially leading to data theft, system instability, or even ransomware attacks.

Furthermore, the constant use of the Administrator account can inadvertently lead to unintentional system modifications, potentially compromising stability or hindering future updates.

Understanding the Alternatives:

Instead of relying solely on the Administrator account, Windows 11 offers a robust system of user accounts, each with varying levels of privileges. These alternatives provide a more secure and manageable approach to everyday computing.

  • Standard User Accounts: These accounts are designed for everyday use, offering access to most system functionalities without the inherent risks associated with the Administrator account. Standard users cannot install or uninstall programs, modify system settings, or make changes that could compromise system stability.

  • Local Administrator Accounts: For specific tasks requiring elevated permissions, such as installing software or troubleshooting issues, a dedicated Local Administrator account can be created. This account provides the necessary privileges without the constant exposure of the main Administrator account.

The Process of Removing the Administrator Account:

While the process might seem daunting, removing the Administrator account in Windows 11 is relatively straightforward. However, it’s crucial to understand that this action should be undertaken only after establishing a secure and functional alternative.

  1. Create a New Local Administrator Account: Before removing the Administrator account, it’s essential to create a new Local Administrator account. This account will be used for system maintenance, software installation, and other tasks requiring elevated privileges.

  2. Log in to the New Administrator Account: After creating the new account, log in using the newly created Local Administrator credentials.

  3. Remove the Original Administrator Account: From the new Local Administrator account, access the "Settings" app, navigate to "Accounts," and then "Family & other users." Select the original Administrator account and choose the option to "Remove."

Important Considerations:

  • Backup: Before removing the Administrator account, ensure a recent backup of your system is available. This precaution safeguards your data in case of unforeseen issues during the process.

  • Permissions: Before removing the Administrator account, review the permissions granted to other accounts, ensuring they have the necessary privileges for their intended use.

FAQs on Removing the Administrator Account in Windows 11:

Q: Can I remove the Administrator account without creating a new one?
A: Removing the Administrator account without creating a new one with elevated privileges is strongly discouraged. It can lead to a situation where you lack the necessary permissions to manage your system effectively.

Q: What if I forget the password for the new Administrator account?
A: If you forget the password for the new Administrator account, you may need to reset it using a Microsoft account or a password reset disk. Ensure you have a reliable method for password recovery before making any changes to your user accounts.

Q: Can I revert the removal of the Administrator account?
A: Recovering a deleted Administrator account is possible, but it requires advanced technical knowledge and may involve using system recovery tools. It’s generally recommended to avoid deleting the account unless you are confident in your ability to restore it if necessary.

Tips for Managing Administrator Accounts in Windows 11:

  • Use a Strong Password: For any account with elevated privileges, including the new Local Administrator account, use a strong password that combines uppercase and lowercase letters, numbers, and symbols. Avoid easily guessable passwords.

  • Enable Two-Factor Authentication: If possible, enable two-factor authentication for the Local Administrator account. This adds an extra layer of security, requiring a second verification step beyond the password.

  • Minimize Administrator Account Use: Only use the Local Administrator account when absolutely necessary. For everyday tasks, use a standard user account, limiting the exposure of the Administrator account to potential threats.

Conclusion:

Removing the Administrator account in Windows 11 is a proactive step towards enhancing system security and minimizing potential risks. While it might seem like a complex process, following the outlined steps and taking necessary precautions ensures a smooth transition to a more secure computing environment. By leveraging the features of Windows 11’s user account system and prioritizing security best practices, you can create a robust and reliable computing experience, safeguarding your system and data from potential vulnerabilities.

How to Enable Default Windows 11 Administrator Account  Enable administrator account in windows How To Change Administrator In Windows 11 In 2021 5 Methods  techdirs How to enable built-in administrator in Windows 11
How to Enable Administrator Account on Windows 11 How to Change Administrator in Windows 11? (5 Simple Ways) - MiniTool Change the Administrator Account in Windows 11 [5 Quick Ways]
How To Run As Administrator On Windows 11 - Itechguides.com How to 'Run as Administrator' on Windows 11

Closure

Thus, we hope this article has provided valuable insights into Navigating the Landscape of Windows 11: Understanding and Managing Administrator Accounts. We appreciate your attention to our article. See you in our next article!

Exploring The World Of Image Editing: A Guide To Adobe Photoshop For Windows 10

Exploring the World of Image Editing: A Guide to Adobe Photoshop for Windows 10

Introduction

In this auspicious occasion, we are delighted to delve into the intriguing topic related to Exploring the World of Image Editing: A Guide to Adobe Photoshop for Windows 10. Let’s weave interesting information and offer fresh perspectives to the readers.

Exploring the World of Image Editing: A Guide to Adobe Photoshop for Windows 10

Download Photoshop for Windows 10: A Step-by-Step Tutorial

Adobe Photoshop, often referred to simply as "Photoshop," is the industry-standard image editing software, renowned for its powerful capabilities and versatility. While a paid subscription model is the norm, the question of obtaining Photoshop for free on Windows 10 continues to be a popular inquiry. This article aims to provide a comprehensive understanding of the various avenues for accessing Photoshop, addressing the complexities involved in obtaining a free version.

Understanding Photoshop’s Value

Photoshop’s dominance in the image editing realm stems from its extensive feature set, catering to a broad spectrum of users, from casual photo enthusiasts to professional graphic designers. Its capabilities encompass:

  • Image Manipulation: Photoshop excels in manipulating images, allowing users to retouch, enhance, and transform them with precision. This includes removing blemishes, adjusting colors, and creating complex composites.
  • Graphic Design: The software empowers users to create logos, brochures, web banners, and other visual elements, offering a wide array of tools for typography, vector graphics, and layout design.
  • Digital Painting: Photoshop provides a robust platform for digital painting, offering a range of brushes, textures, and blending options for creating realistic and artistic works.
  • Photography: Photographers utilize Photoshop for editing raw images, adjusting exposure, color balance, and sharpness, and even creating panoramic images.

The Reality of "Free" Photoshop

While the allure of a free Photoshop download is undeniable, it’s crucial to understand the limitations and potential risks associated with seeking such a solution.

1. Official Free Trials: Adobe offers a free trial of Photoshop for a limited period, typically 7 days. This trial provides full access to all features, enabling users to explore its capabilities before committing to a subscription. However, the trial period is restrictive and requires a valid credit card for activation, making it unsuitable for long-term free use.

2. Adobe Creative Cloud Subscription: The most common way to access Photoshop is through an Adobe Creative Cloud subscription. This subscription-based model offers access to a suite of Adobe applications, including Photoshop, at a monthly or annual cost. While not free, the Creative Cloud subscription provides consistent access to the latest versions and updates, ensuring a reliable and feature-rich experience.

3. Third-Party Websites: The internet is rife with websites claiming to offer free Photoshop downloads. However, caution is advised as these sources often distribute cracked or pirated software. Such downloads can carry significant risks, including:

  • Malware and Viruses: Pirated software can be bundled with malicious software, potentially infecting your computer with viruses, Trojans, or ransomware.
  • Legal Issues: Downloading and using pirated software is illegal and can result in legal repercussions, including fines and even criminal charges.
  • Functionality Issues: Cracked versions may be unstable, lack features, or be prone to crashes, hindering your workflow and potentially causing data loss.

Alternatives to Paid Photoshop

For users seeking free image editing solutions, several alternatives to Photoshop exist:

  • GIMP: GIMP (GNU Image Manipulation Program) is a powerful, free and open-source image editor. It offers a vast array of features comparable to Photoshop, making it a viable option for both casual and professional users.
  • Paint.NET: Paint.NET is a user-friendly free image editor designed for Windows. While not as feature-rich as Photoshop or GIMP, it provides a solid set of tools for basic image editing and manipulation.
  • Pixlr: Pixlr is a web-based image editor available for free. It offers a simplified interface and a range of basic editing tools, suitable for casual image editing tasks.

Navigating the Legal Landscape

The legality of using free Photoshop alternatives depends on the specific software and its licensing terms.

  • Open-Source Software: Open-source software, like GIMP, is freely available for download and use. Its open-source nature allows for modification and redistribution, making it a legally sound and ethical option.
  • Freeware Software: Freeware software, such as Paint.NET, is typically offered for free use without restrictions. However, it’s essential to review the software’s licensing terms to ensure compliance.
  • Commercial Software: Using cracked or pirated versions of commercial software, like Photoshop, is illegal and unethical. This practice infringes on the intellectual property rights of the software developer.

FAQs Regarding Free Photoshop

1. Is there a truly free version of Photoshop available for download?

No, a fully functional and legally obtained version of Photoshop is not available for free download. The only free access to Photoshop is through the limited trial period offered by Adobe.

2. Are there any safe and legal ways to get Photoshop for free?

While there are no completely free versions, using the Adobe Creative Cloud free trial or exploring free alternatives like GIMP or Paint.NET are safe and legal options.

3. What are the risks of downloading Photoshop from unofficial websites?

Downloading Photoshop from unofficial websites can expose your computer to malware, viruses, and legal repercussions. It’s crucial to stick to legitimate sources like Adobe’s official website or reputable software download platforms.

4. Is it ethical to use cracked or pirated versions of Photoshop?

No, using cracked or pirated versions of Photoshop is unethical and illegal. It deprives the software developer of revenue and infringes on their intellectual property rights.

5. What are the best free alternatives to Photoshop?

GIMP and Paint.NET are highly regarded free alternatives to Photoshop, offering a range of features and capabilities for both casual and professional users.

Tips for Using Free Image Editing Software

  • Explore the Software’s Features: Familiarize yourself with the features and capabilities of the chosen free software to maximize its potential.
  • Seek Tutorials and Resources: Online tutorials, documentation, and community forums can provide valuable insights and guidance on utilizing the software effectively.
  • Experiment and Practice: The best way to master any software is through practice. Experiment with different tools and techniques to develop your skills and create compelling results.
  • Consider Paid Options for Advanced Needs: If your image editing needs exceed the capabilities of free software, consider exploring the benefits of paid options like Adobe Creative Cloud.

Conclusion

While the allure of a free Photoshop download is tempting, it’s crucial to approach such searches with caution and prioritize safety and legality. Exploring free alternatives like GIMP or Paint.NET, utilizing Adobe’s free trial, or investing in a Creative Cloud subscription offer legitimate pathways to access powerful image editing tools. Remember, ethical and responsible use of software is paramount, ensuring a secure and productive workflow.

How to Edit Image in Photoshop - Best Image Retouching Service Provider - First Clipping Path Adobe Photoshop Tutorial - The Ultimate Beginner's Guide Buy ADOBE PHOTOSHOP 2023 USER GUIDE: A Detailed and Perfect Guide on How to Master the Art of
Adobe Photoshop Guide For Novice: Master the Photoshop App for Graphic design, Digital Adobe Photoshop 2024 Download For Windows 10 - Maddi Christean Install Adobe Photoshop In Windows 10 / 8 / 7 For FREE!!! 100% Working!!! - YouTube
Revolutionize Your Image Editing with Adobe Photoshop's Generative Fill: A Step-by-Step Guide to Introduction to Adobe Photoshop  VisArts

Closure

Thus, we hope this article has provided valuable insights into Exploring the World of Image Editing: A Guide to Adobe Photoshop for Windows 10. We appreciate your attention to our article. See you in our next article!

Navigating The Windows 10 File System: A Comprehensive Guide

Navigating the Windows 10 File System: A Comprehensive Guide

Introduction

In this auspicious occasion, we are delighted to delve into the intriguing topic related to Navigating the Windows 10 File System: A Comprehensive Guide. Let’s weave interesting information and offer fresh perspectives to the readers.

File Explorer in Windows 10 - Instructions and Video Lesson

The Windows 10 operating system, with its user-friendly interface and robust functionality, relies heavily on its file system for organization and access to data. Understanding how to navigate and open files within this system is crucial for users to effectively manage their digital assets, whether they are documents, images, videos, or applications. This article provides a comprehensive guide to opening files in Windows 10, encompassing various methods, troubleshooting tips, and essential information for efficient file management.

Understanding the Windows 10 File System

The foundation of Windows 10’s file management lies in its hierarchical file system, a structured organization of data in a tree-like structure. This structure consists of directories (folders) and files, with each directory containing files and potentially other subdirectories. The topmost directory, known as the root directory, serves as the starting point for navigating the entire system.

Common File Extensions

Files are typically identified by their file extensions, which are the three or four characters following a period in the file name. These extensions indicate the file type and provide information about the program that created the file. For instance, ".docx" signifies a Microsoft Word document, ".jpg" indicates a JPEG image, and ".mp4" denotes an MP4 video file.

Navigating Through the File System

Windows 10 provides multiple avenues for navigating the file system and accessing desired files:

  • File Explorer: This is the primary tool for navigating the file system. It offers a graphical interface with a tree-like view of directories and a list of files within each directory. Users can access File Explorer by clicking the "File Explorer" icon on the taskbar or using the keyboard shortcut "Windows Key + E."

  • Search Bar: Windows 10 incorporates a powerful search bar within File Explorer and the taskbar. Users can type the file name or a portion of it to quickly locate files across their system.

  • Quick Access: This feature provides quick access to frequently used files and folders. It displays a list of recently accessed items, including documents, pictures, and folders.

  • Libraries: Windows 10 offers libraries that consolidate files from various locations into a single view. For example, the "Documents" library gathers all documents from different folders, making it easier to access them.

Opening Files in Windows 10

Once a file is located, it can be opened in multiple ways:

  • Double-clicking: The most common method is to double-click the file icon. This action triggers the associated program to open the file.

  • Right-click and "Open with": Right-clicking a file opens a context menu. Selecting "Open with" presents a list of programs capable of opening the file. Users can choose the desired program or select "Choose another app" to browse for a different application.

  • Dragging and Dropping: Files can be dragged and dropped onto the icon of the associated application. This method is particularly useful for transferring files between applications or opening multiple files simultaneously.

Troubleshooting File Opening Issues

Occasionally, users may encounter difficulties opening files. Common issues and their solutions include:

  • Missing or Corrupted File: If a file is missing or corrupted, it will not open. Users can try recovering the file from a backup or reinstalling the associated program.

  • Incorrect File Association: If the file is associated with the wrong program, it may not open correctly. Users can change the file association by right-clicking the file, selecting "Open with," and choosing the desired application.

  • Insufficient Permissions: Some files may require specific permissions to access. Users can adjust file permissions by right-clicking the file, selecting "Properties," and navigating to the "Security" tab.

  • Virus or Malware Infection: Virus or malware infections can disrupt file access. Running a full system scan with a reputable antivirus program is recommended to address potential threats.

FAQs About Opening Files in Windows 10

Q1: How do I open a file that is locked or read-only?

A1: To open a locked or read-only file, users need to adjust the file’s permissions. Right-click the file, select "Properties," navigate to the "Security" tab, and modify the permissions to allow access for the current user.

Q2: What if I don’t know which program opens a specific file?

A2: Users can determine the associated program by right-clicking the file, selecting "Properties," and viewing the "Opens with" information. Alternatively, they can search online for the file extension to identify the program that typically handles that file type.

Q3: How do I open multiple files at once?

A3: Users can open multiple files simultaneously by selecting them (using Ctrl or Shift keys) and then double-clicking any of the selected files. Alternatively, they can drag and drop multiple files onto the associated application icon.

Q4: What if a file opens in the wrong program?

A4: To change the program associated with a specific file type, right-click any file with that extension, select "Open with," and choose the desired program. This action sets the default application for that file type.

Q5: How do I recover a deleted file?

A5: Windows 10’s Recycle Bin temporarily stores deleted files. Users can restore deleted files by accessing the Recycle Bin and selecting the desired file. However, files permanently deleted from the Recycle Bin may require data recovery software for retrieval.

Tips for Efficient File Management

  • Organize files into folders: Create folders to categorize files based on their content, purpose, or project. This helps maintain a structured and organized file system.

  • Use descriptive file names: Assign clear and descriptive file names to easily identify files. Avoid using generic names like "document" or "image."

  • Utilize search features: Leverage Windows 10’s powerful search bar to quickly locate files by name, content, or date.

  • Create shortcuts: Create shortcuts for frequently used files or folders on the desktop or taskbar for easy access.

  • Regularly back up data: Regularly back up important files to prevent data loss in case of hardware failure or accidental deletion.

Conclusion

Navigating and opening files in Windows 10 is a fundamental aspect of computer usage. By understanding the file system structure, file extensions, and various methods for opening files, users can effectively manage their digital assets. This comprehensive guide provides a foundation for efficient file management, enabling users to access and utilize their files with ease. By implementing the tips and addressing potential issues, users can optimize their file management experience and ensure seamless access to their important data.

Get Help With File Explorer In Windows 10: Your Ultimate Guide 10 File System Navigation and Management_6 - YouTube How To Find File System of Drive in Windows 10
How to See a Drive's File System on Windows 10 How To Find File System of Drive in Windows 10 How to Find a Drive's File System on Windows 10? - YouTube
Windows 10 Tip: Manage Files and Folders with File Explorer How to change the file system of a drive on Windows 10

Closure

Thus, we hope this article has provided valuable insights into Navigating the Windows 10 File System: A Comprehensive Guide. We hope you find this article informative and beneficial. See you in our next article!

Unlinking Your Microsoft Account From Windows 10: A Comprehensive Guide

Unlinking Your Microsoft Account from Windows 10: A Comprehensive Guide

Introduction

With great pleasure, we will explore the intriguing topic related to Unlinking Your Microsoft Account from Windows 10: A Comprehensive Guide. Let’s weave interesting information and offer fresh perspectives to the readers.

Unlinking Your Microsoft Account from Windows 10: A Comprehensive Guide

How to unlink microsoft account from windows 10 - realtimetoo

Windows 10, Microsoft’s flagship operating system, offers a plethora of features and functionalities, including seamless integration with Microsoft accounts. While this integration provides convenience and synchronization across devices, there are instances where users may prefer to sever this connection. This article provides a comprehensive guide on removing a Microsoft account from Windows 10, outlining the process, benefits, and potential considerations.

Understanding the Significance of Removing a Microsoft Account

Removing a Microsoft account from Windows 10 essentially disconnects the operating system from your Microsoft account credentials. This action has several implications, impacting features and functionalities, which are crucial to understand before proceeding:

  • Data Synchronization: Removing the account will stop synchronization of settings, files, and applications across devices linked to the Microsoft account. This includes cloud storage services like OneDrive and applications like Microsoft Office.
  • Access to Microsoft Services: Access to services like Windows Store, Xbox Live, and other Microsoft-linked applications will be restricted.
  • Personalized Experience: The operating system will revert to a standard configuration, losing personalized settings like wallpaper, themes, and app layouts.
  • Account Recovery: Removing the account will make it harder to recover your system in case of data loss or system failure.

Reasons for Removing a Microsoft Account

While the integration with Microsoft accounts offers advantages, there are legitimate reasons why users might choose to remove their accounts:

  • Privacy Concerns: Some users prioritize privacy and may prefer to avoid linking their personal information to the operating system.
  • Account Security: Removing the account can enhance security by preventing unauthorized access to sensitive data stored on the device.
  • Multiple User Accounts: In a shared computer environment, removing a Microsoft account allows for the creation of local user accounts with individual settings and permissions.
  • Transition to a Local Account: Users may choose to switch to a local account for greater control over their device and data.
  • Selling or Disposing of the Device: Before selling or disposing of a device, removing the Microsoft account ensures the previous user’s data is not accessible.

Detailed Steps for Removing a Microsoft Account from Windows 10

The process of removing a Microsoft account from Windows 10 is relatively straightforward:

  1. Access Settings: Open the Settings app by pressing Windows key + I or clicking the Start menu and selecting Settings.
  2. Navigate to Accounts: In the Settings app, click on Accounts.
  3. Select Your Account: On the left side of the window, click on Your info.
  4. Sign Out: Click on the Sign out button under the Microsoft account section.
  5. Confirm Removal: A confirmation window will appear. Click on Sign out to proceed.

Important Considerations

Before removing a Microsoft account, it is essential to consider the following:

  • Data Backup: Ensure all important data is backed up to an external device or cloud storage service.
  • App Licenses: Verify app licenses and ensure they are tied to a different account or transferable to a local account.
  • Recovery Options: Consider setting up a local administrator account with strong credentials for system recovery purposes.
  • Reinstalling Applications: Applications installed through the Windows Store may need to be reinstalled after removing the account.

FAQs: Addressing Common Concerns

Q: Can I remove my Microsoft account without losing my data?

A: Removing your Microsoft account will not delete your data permanently. However, access to files and settings stored in the cloud will be limited. It is advisable to back up your data before proceeding.

Q: What happens to my installed applications after removing the account?

A: Applications installed through the Windows Store may need to be reinstalled after removing the account. Applications installed from other sources will remain accessible.

Q: Can I sign back into my Microsoft account after removing it?

A: Yes, you can sign back into your Microsoft account at any time. However, the operating system will revert to a default configuration, and data synchronization will need to be re-established.

Q: Can I remove my Microsoft account if I have a local account already?

A: Yes, you can remove your Microsoft account even if you have a local account. However, the local account will become the primary account after the removal.

Q: What are the security implications of removing my Microsoft account?

A: Removing your Microsoft account can enhance security by preventing unauthorized access to your data. However, it is crucial to set up a strong local administrator account for system recovery and management.

Tips for a Smooth Transition

  • Create a Local Administrator Account: Before removing your Microsoft account, create a local administrator account with strong credentials for system management and recovery.
  • Backup Your Data: Ensure you have a complete backup of your data before removing the account.
  • Review App Licenses: Verify app licenses and ensure they are transferable to a local account or tied to a different account.
  • Reinstall Applications: After removing the account, reinstall necessary applications from the Windows Store or other sources.
  • Understand the Implications: Be fully aware of the consequences of removing your Microsoft account before proceeding.

Conclusion

Removing a Microsoft account from Windows 10 can be a necessary step for various reasons, including privacy concerns, security enhancements, or transitioning to a local account. It is essential to understand the implications of this action and take necessary precautions to ensure a smooth transition. By following the steps outlined in this guide and considering the provided tips, users can confidently remove their Microsoft accounts from Windows 10 while minimizing potential disruptions.

How to unlink microsoft account from windows 10 - realtimetoo Working Methods to Unlink Microsoft Account on Windows 10 How Delete or Unlink Microsoft Account from Windows 10 โ€“ IntoPut
How Unlink Microsoft Account from Windows 10 (Switch to Local Account) How Unlink Microsoft Account from Windows 10 (Switch to Local Account) How to unlink windows 10 from microsoft account - poothai
How to unlink windows 10 from microsoft account - denverfreeloads Windows 10 unlink microsoft account - netwatcher

Closure

Thus, we hope this article has provided valuable insights into Unlinking Your Microsoft Account from Windows 10: A Comprehensive Guide. We thank you for taking the time to read this article. See you in our next article!

O Kam Pro Download

o kam pro download

Introduction

With great pleasure, we will explore the intriguing topic related to o kam pro download. Let’s weave interesting information and offer fresh perspectives to the readers.

I understand you’re looking for an article about "o kam pro download," but I need to clarify something important. The term "o kam pro download" is not a recognized or established software, application, or program. It’s possible this is a misspelling or a term specific to a particular community or context that I’m not familiar with.

O-KAM Pro for PC - Free Download: Windows 7,10,11 Edition

To provide you with the best possible response, I need more information about what you’re looking for. Could you please clarify:

  • What is the specific purpose or function of "o kam pro download"? Is it a tool for a specific task, a game, a piece of software, or something else entirely?
  • Where did you encounter this term? Was it in a website, forum, or other online source?
  • Are there any other details or keywords associated with "o kam pro download" that might help identify it?

With more information, I can provide you with a comprehensive and informative article that meets your needs.

O-KAM Pro for PC / Mac / Windows 11,10,8,7 - Free Download - Napkforpc.com O-KAM Pro For Pc : O-KAM Pro Computer Client Download O-KAM Pro for PC - Free Download: Windows 7,10,11 Edition
O-KAM Pro for iOS (iPhone/iPad/iPod touch) - Free Download at AppPure O-KAM Pro for Android - Free App Download O-KAM Pro Camera APP And PC Download (Complete Guide)
O-KAM Pro Camera APP And PC Download (Complete Guide) O-KAM Pro Camera APP And PC Download (Complete Guide)

Closure

Thus, we hope this article has provided valuable insights into o kam pro download. We appreciate your attention to our article. See you in our next article!

QBittorrent: A Comprehensive Guide To Free, Open-Source Torrenting On Windows 11

qBittorrent: A Comprehensive Guide to Free, Open-Source Torrenting on Windows 11

Introduction

With great pleasure, we will explore the intriguing topic related to qBittorrent: A Comprehensive Guide to Free, Open-Source Torrenting on Windows 11. Let’s weave interesting information and offer fresh perspectives to the readers.

qBittorrent: A Comprehensive Guide to Free, Open-Source Torrenting on Windows 11

qBittorrent Free Download for Windows 10, 11, 7 (32 / 64-bit)

In the world of digital downloads, torrenting remains a popular method for obtaining files, especially large ones like movies, music, and software. While various torrent clients exist, qBittorrent stands out as a free, open-source, and feature-rich alternative, particularly well-suited for Windows 11 users.

Understanding the Benefits of qBittorrent

qBittorrent offers a compelling combination of features that make it a preferred choice for many users:

  • Open-Source and Free: Unlike some popular torrent clients with subscription models or bundled software, qBittorrent is entirely free to use. Its open-source nature allows for transparency and community-driven development, ensuring a reliable and secure platform.

  • Lightweight and Resource-Efficient: qBittorrent is designed to be lightweight, consuming minimal system resources. This makes it ideal for systems with limited RAM or processing power, ensuring smooth operation without impacting other applications.

  • Cross-Platform Compatibility: qBittorrent is available for a variety of operating systems, including Windows, macOS, Linux, and even Android. This ensures seamless integration across different devices and environments.

  • Feature-Rich and Customizable: qBittorrent boasts a comprehensive set of features, including:

    • Built-in Search: Search for torrents directly within the application using popular torrent search engines.
    • Advanced Download Management: Schedule downloads, prioritize files, and set download limits for optimal bandwidth management.
    • Magnet Link Support: Seamlessly download files using magnet links, eliminating the need for torrent files.
    • RSS Feed Support: Automatically download new torrents from RSS feeds, ensuring you never miss out on the latest releases.
    • Multiple Download Locations: Choose where to save downloads, including external drives and network locations.
    • Advanced Filtering: Filter torrents based on various criteria, such as size, date, and file type.
    • IP Filtering: Block connections from specific IP addresses to enhance security and privacy.
    • Encryption: Encrypt torrent traffic for enhanced privacy and security.
    • Advanced Settings: Fine-tune qBittorrent’s behavior to optimize performance and customize the user experience.
  • User-Friendly Interface: qBittorrent features a clean and intuitive interface that is easy to navigate, even for novice users.

Downloading and Installing qBittorrent on Windows 11

Downloading and installing qBittorrent on Windows 11 is a straightforward process:

  1. Visit the Official Website: Go to the official qBittorrent website (https://www.qbittorrent.org/).
  2. Download the Installer: Locate the Windows installer file (usually an .exe file) and download it to your computer.
  3. Run the Installer: Double-click the downloaded file to launch the installer.
  4. Follow the Installation Instructions: Follow the on-screen instructions to complete the installation process.
  5. Launch qBittorrent: Once installed, find qBittorrent in your Start menu and launch the application.

Essential Tips for Using qBittorrent Effectively

  • Choose Reliable Torrent Sources: Use reputable torrent websites and avoid suspicious sources to minimize the risk of malware and security threats.
  • Enable Encryption: Always enable encryption for your torrent traffic to protect your privacy and prevent unwanted monitoring.
  • Set Download Limits: Configure download limits to prevent excessive bandwidth consumption and ensure smooth operation of other applications.
  • Utilize Advanced Features: Explore the various features of qBittorrent, such as RSS feed support and magnet link downloads, to enhance your torrenting experience.
  • Regularly Update qBittorrent: Keep qBittorrent updated to benefit from bug fixes, security patches, and new features.

FAQs about qBittorrent

Is qBittorrent legal to use?

qBittorrent itself is a legal software. However, the legality of downloading copyrighted content through torrenting depends on local laws and the specific content being downloaded.

Is qBittorrent safe to use?

qBittorrent is a safe and reliable torrent client, especially compared to some alternatives known for bundling unwanted software or containing malware. However, as with any software, it’s important to download qBittorrent from the official website and be cautious about the sources of torrents you download.

What are the best torrent websites to use with qBittorrent?

While it’s not possible to recommend specific torrent websites due to legal and ethical considerations, users should prioritize websites known for their reputation, community moderation, and a focus on legal content.

How do I protect my privacy while using qBittorrent?

Using a VPN (Virtual Private Network) is highly recommended when torrenting. A VPN encrypts your internet traffic and routes it through a remote server, masking your IP address and protecting your online activity from prying eyes.

Can I use qBittorrent to download movies and music?

Yes, qBittorrent can be used to download movies and music. However, it’s crucial to ensure that you are downloading content legally and respecting copyright laws.

Conclusion

qBittorrent provides a robust and user-friendly solution for torrenting on Windows 11. Its open-source nature, lightweight design, and comprehensive features make it an attractive alternative to other torrent clients. By adhering to best practices and prioritizing reliable sources, users can leverage qBittorrent to efficiently and securely download files while respecting legal and ethical considerations.

Qbittorrent windows - acakit Download qBittorrent โ˜€๏ธ Free Open Source BitTorrent Client qBittorrent  Flathub
qBitTorrent Review 2024 [Features, Security, Pricing & More] How to open a torrent file in qbittorrent - racingtable qBittorrent Review: A Torrenting Client for the Modern Age
QBittorrent - Best Free BitTorrent Clients For Windows 11 Free Download  TOPUWP 10 Best Torrent Clients For Windows 11 in 2024

Closure

Thus, we hope this article has provided valuable insights into qBittorrent: A Comprehensive Guide to Free, Open-Source Torrenting on Windows 11. We thank you for taking the time to read this article. See you in our next article!