The Enduring Legacy Of Nero 7: A Look At Its Compatibility And Relevance In A Modern Windows 10 Environment

The Enduring Legacy of Nero 7: A Look at Its Compatibility and Relevance in a Modern Windows 10 Environment

Introduction

With great pleasure, we will explore the intriguing topic related to The Enduring Legacy of Nero 7: A Look at Its Compatibility and Relevance in a Modern Windows 10 Environment. Let’s weave interesting information and offer fresh perspectives to the readers.

The Enduring Legacy of Nero 7: A Look at Its Compatibility and Relevance in a Modern Windows 10 Environment

Nero 7 essentials downloads - roomjuja

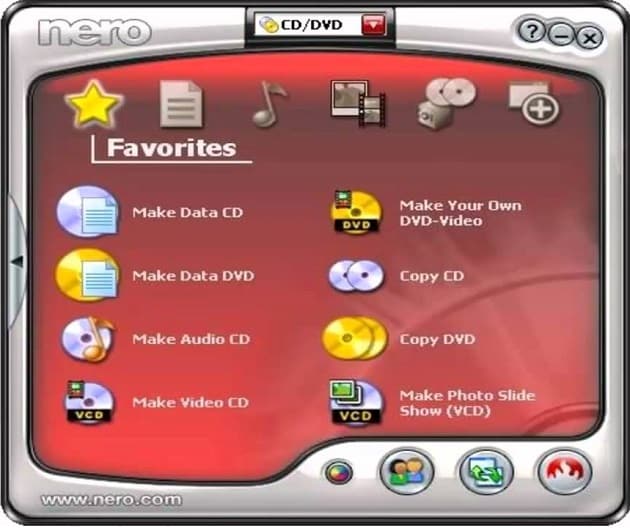
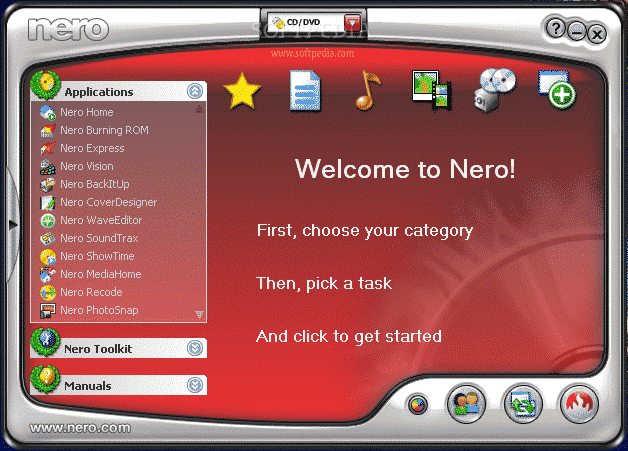
Nero 7, a celebrated multimedia suite released in 2006, holds a significant place in the annals of computer software. Its versatile toolkit, encompassing CD/DVD burning, ripping, and multimedia editing capabilities, made it a popular choice for users seeking comprehensive media management solutions. However, as technology evolves, the question of its compatibility and relevance in a modern Windows 10 environment arises. This article delves into the intricacies of running Nero 7 on Windows 10, exploring its limitations, workarounds, and the potential benefits it still offers.

The Compatibility Challenge: Bridging the Technological Gap

The primary obstacle to running Nero 7 on Windows 10 lies in the software’s inherent design for older operating systems. Windows 10, with its advanced architecture and security protocols, presents a stark contrast to the environment Nero 7 was originally intended for. This incompatibility manifests in various ways:

  • Driver Conflicts: Nero 7’s drivers, specifically those designed for older hardware and operating systems, might not function optimally or at all on Windows 10. This can lead to issues with optical drive recognition, burning processes, and overall software stability.
  • Security Concerns: Windows 10’s stringent security measures might flag Nero 7’s older code as potentially unsafe, leading to blocked installations or restricted access to certain functionalities.
  • Compatibility Mode: While Windows 10 offers compatibility mode to run older programs, it is not a foolproof solution. Nero 7, despite being launched in compatibility mode, might encounter issues with performance, stability, and access to specific features.

Navigating the Challenges: Workarounds and Alternatives

Despite the inherent compatibility challenges, several approaches can help users overcome these obstacles and potentially utilize Nero 7 on Windows 10.

  • Compatibility Mode: Running Nero 7 in compatibility mode can be the initial step to address basic compatibility issues. However, it’s crucial to experiment with different compatibility settings to find the most optimal configuration for your specific system.
  • Driver Updates: Searching for updated drivers for Nero 7’s components, particularly for the optical drive, can mitigate driver conflicts and improve performance. While official updates might be scarce, dedicated online forums and communities might offer user-generated solutions.
  • Virtual Machines: Utilizing virtual machine software like VMware or VirtualBox allows users to create a virtual environment running an older operating system, such as Windows XP or Windows 7, where Nero 7 can function optimally. This approach isolates the software from the modern Windows 10 environment, eliminating potential conflicts.
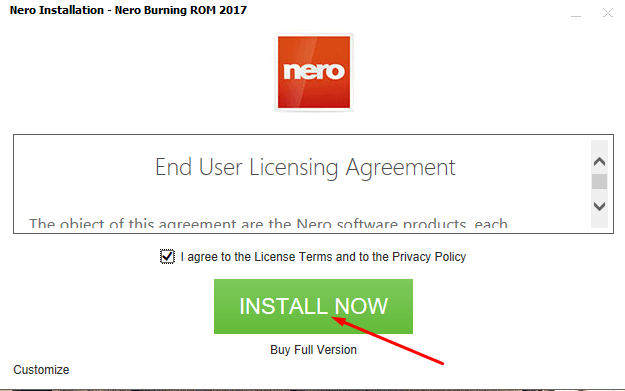
  • Modern Alternatives: Recognizing the limitations of running legacy software, exploring modern alternatives like Nero Burning ROM, ImgBurn, or Ashampoo Burning Studio, which are designed for Windows 10, can be a more reliable and efficient solution for contemporary media management needs.

The Potential Benefits: Exploring the Legacy Value

While running Nero 7 on Windows 10 presents challenges, it’s not without potential benefits.

  • Nostalgia and Familiarity: For users who are accustomed to Nero 7’s interface and functionality, migrating to a new software might feel cumbersome. Running Nero 7 on Windows 10, despite its limitations, allows users to retain a familiar workflow and avoid steep learning curves.
  • Specific Features: Nero 7 might offer specific features or functionalities that are not available in modern alternatives. This could include niche editing tools, unique burning options, or specific codecs support.
  • Legacy Projects: If you have existing projects or data created using Nero 7, running the software on Windows 10 might be necessary to access or modify them.

FAQs on Running Nero 7 on Windows 10

Q: Is it possible to run Nero 7 on Windows 10?

A: It is possible to run Nero 7 on Windows 10, but it is not guaranteed to work flawlessly. Compatibility issues are prevalent, and users might need to employ workarounds to achieve desired functionality.

Q: What are the potential problems with running Nero 7 on Windows 10?

A: Potential problems include driver conflicts, security restrictions, and compatibility mode limitations. These issues can impact performance, stability, and access to certain features.

Q: What are the best alternatives to Nero 7 for Windows 10?

A: Modern alternatives like Nero Burning ROM, ImgBurn, and Ashampoo Burning Studio offer comprehensive media management solutions designed for Windows 10, providing enhanced compatibility, performance, and security.

Q: Can I still use Nero 7 to burn CDs/DVDs on Windows 10?

A: While burning CDs/DVDs with Nero 7 on Windows 10 is possible, it might require tweaking compatibility settings, updating drivers, or utilizing virtual machines to ensure smooth functionality.

Q: Is it safe to run Nero 7 on Windows 10?

A: Windows 10’s security measures might flag Nero 7’s older code as potentially unsafe. It is crucial to ensure the software is obtained from a reliable source and to consider the potential risks associated with running outdated software.

Tips for Running Nero 7 on Windows 10

  • Start with Compatibility Mode: Experiment with different compatibility settings to find the optimal configuration for your system.
  • Update Drivers: Search for updated drivers for Nero 7’s components, particularly for the optical drive.
  • Consider Virtual Machines: Utilize virtual machine software to create a virtual environment running an older operating system where Nero 7 can function optimally.
  • Backup Your Data: Always back up your important data before running any older software on a modern operating system.
  • Stay Informed: Regularly check online forums and communities for user-generated solutions and updates related to running Nero 7 on Windows 10.

Conclusion

Running Nero 7 on Windows 10 presents both challenges and opportunities. While compatibility issues exist, workarounds and alternative solutions can help users access the software’s functionalities. The decision to run Nero 7 on Windows 10 should be based on a careful assessment of its potential benefits, the challenges it poses, and the availability of modern alternatives. Ultimately, the choice lies with the user to weigh the advantages and disadvantages and determine the most suitable approach for their specific needs.

Nero windows 10 compatibility - locatorbilla Nero 7 essentials downloads - roomjuja Nero 7 Premium Download for PC Windows (7/10/11) - Heaven32 - English
Nero 7 Ultra Edition screenshot - X 64-bit Download Nero 7 Premium Download for PC Windows (7/10/11) - Heaven32 - English Nero 7 Premium Descargar para PC Windows (7/10/8), 32/64-bit
Nero windows 10 compatibility - locatorbilla Nero 7 download free - luxuryberlinda

Closure

Thus, we hope this article has provided valuable insights into The Enduring Legacy of Nero 7: A Look at Its Compatibility and Relevance in a Modern Windows 10 Environment. We hope you find this article informative and beneficial. See you in our next article!

Troubleshooting Windows 10 Activation Issues: A Comprehensive Guide

Troubleshooting Windows 10 Activation Issues: A Comprehensive Guide

Introduction

With enthusiasm, let’s navigate through the intriguing topic related to Troubleshooting Windows 10 Activation Issues: A Comprehensive Guide. Let’s weave interesting information and offer fresh perspectives to the readers.

Troubleshooting Windows 10 Activation Issues: A Comprehensive Guide

How to fix Windows 10 Activation Error  All Activation Problems - 100% Solved - YouTube

Activating Windows 10 is a crucial step in ensuring a fully functional and secure operating system. However, users sometimes encounter issues with product key validation, leading to activation failures and limitations on system functionality. This guide aims to provide a comprehensive understanding of potential causes for such issues and offer effective troubleshooting strategies.

Understanding the Importance of Windows 10 Activation

Windows 10 activation serves several key purposes:

  • Licensing Compliance: Activation ensures that the software is used within the terms of its license agreement, protecting both the user and Microsoft.
  • Security Features: Activated copies of Windows 10 benefit from regular security updates and patches, safeguarding the system against malware and vulnerabilities.
  • Full Functionality: Activation unlocks all features of Windows 10, including personalized settings, customization options, and access to the Microsoft Store.
  • System Stability: Activation helps ensure the stability and optimal performance of the operating system, preventing potential errors and crashes.

Common Causes for Activation Issues

A variety of factors can contribute to Windows 10 activation problems. These include:

  • Incorrect Product Key: The most common reason for activation failure is an invalid or mistyped product key.
  • Product Key Usage: A single product key can only be used on a specific number of devices, depending on the license type.
  • Digital License Issues: If Windows 10 was previously activated via a digital license, issues with the digital license itself can prevent reactivation.
  • Hardware Changes: Significant hardware changes, such as replacing the motherboard or hard drive, can affect activation.
  • Software Conflicts: Certain software programs or drivers may interfere with the activation process.
  • Network Connectivity: Activation requires an internet connection to validate the product key with Microsoft servers.
  • Corrupted System Files: Damaged or corrupted system files can hinder the activation process.
  • Previous Activation Issues: Previous unsuccessful activation attempts may leave traces that interfere with subsequent attempts.

Troubleshooting Strategies for Activation Failures

The following steps can help address common Windows 10 activation issues:

1. Verify Product Key Accuracy:

  • Double-check the product key: Ensure that the product key is entered correctly, including hyphens.
  • Review purchase documentation: Verify the product key against the original purchase receipt or confirmation email.
  • Contact the vendor: If you obtained the product key from a third-party vendor, contact them to confirm its validity.

2. Troubleshoot Digital License Issues:

  • Check for a digital license: If you previously activated Windows 10 using a digital license, it should automatically activate after a hardware change.
  • Link your Microsoft account: Ensure that your Microsoft account is linked to your device and that the digital license is associated with the correct account.
  • Troubleshoot digital license problems: If the digital license is not recognized, use the "Troubleshoot" option in the activation settings to attempt automatic resolution.

3. Address Hardware Changes:

  • Re-activate using the product key: If you have made significant hardware changes, you may need to re-activate Windows 10 using the original product key.
  • Contact Microsoft support: If re-activation fails, contact Microsoft support for assistance in linking the product key to the new hardware configuration.

4. Resolve Software Conflicts:

  • Temporarily disable third-party software: Disable any recently installed software or drivers that may be interfering with activation.
  • Run a clean boot: Perform a clean boot to isolate the issue and determine if a specific program is causing the conflict.
  • Update drivers: Ensure all drivers, particularly those related to network connectivity, are up to date.

5. Ensure Network Connectivity:

  • Verify internet connection: Ensure that your device is connected to the internet and that the connection is stable.
  • Check firewall settings: Temporarily disable your firewall or antivirus software to see if it’s interfering with activation.
  • Use a wired connection: If possible, connect your device to the internet using a wired connection for a more reliable connection.

6. Repair System Files:

  • Run the System File Checker (SFC): Use the SFC tool to scan for and repair corrupted system files.
  • Use the Deployment Image Servicing and Management (DISM): If SFC fails to resolve the issue, run the DISM tool to repair the system image.

7. Contact Microsoft Support:

  • Utilize online resources: Explore Microsoft’s online support documentation and forums for troubleshooting tips and solutions.
  • Contact customer service: If you are unable to resolve the issue independently, contact Microsoft customer support for assistance.

FAQs: Addressing Common Concerns

Q: What if my product key is lost or forgotten?

A: If you have lost your product key, you may be able to retrieve it from your purchase documentation, Microsoft account, or by contacting the vendor where you purchased the product. However, if you cannot locate the product key, you may need to purchase a new license.

Q: Can I use a product key from a different version of Windows 10?

A: Product keys are specific to particular editions of Windows 10. Using a product key from a different edition may result in activation failure or limitations in functionality.

Q: Can I transfer my Windows 10 license to a new device?

A: Depending on the type of license, you may be able to transfer your Windows 10 license to a new device. However, certain restrictions may apply, and you may need to contact Microsoft support for guidance.

Q: Is it safe to purchase a product key from a third-party vendor?

A: While purchasing product keys from third-party vendors may seem cost-effective, it is important to exercise caution. Ensure that the vendor is reputable and offers legitimate product keys to avoid potential issues with activation and security.

Tips for Preventing Future Activation Issues

  • Store product keys securely: Keep your product key in a safe and accessible location for future reference.
  • Link your Microsoft account: Link your Microsoft account to your device to simplify activation and ensure access to your digital license.
  • Keep Windows 10 updated: Regularly update Windows 10 to receive the latest security patches and prevent activation issues caused by software conflicts.
  • Back up your system: Regularly back up your system to protect your data and settings in case of hardware failures or activation issues.

Conclusion: Ensuring a Smooth Windows 10 Experience

Activating Windows 10 is a crucial step in ensuring a fully functional and secure operating system. By understanding the importance of activation and following the troubleshooting strategies outlined in this guide, users can effectively address activation issues and enjoy a seamless Windows 10 experience. Remember, if you encounter persistent difficulties, seeking assistance from Microsoft support can provide valuable solutions and guidance.

Use Activation Troubleshooter in Windows 10  Tutorials Windows 10 activation problems. How to resolve — How To Fix Guide Fix Windows 10 activation problems after a hardware upgrade  FileCluster How Tos
Windows 10 activation problems. How to resolve — How To Fix Guide All-in-One Fix: Windows 10 Activation Problems 2024 How to fix Windows 10 Activation Error  All Activation Problems - 100% Helpful Guide
How to Fix Windows 10 Activation Errors Fixing Windows 10 activation problems after a hardware upgrade - CNET

Closure

Thus, we hope this article has provided valuable insights into Troubleshooting Windows 10 Activation Issues: A Comprehensive Guide. We appreciate your attention to our article. See you in our next article!

Unlocking The Potential: Understanding Windows 11’s Flexibility

Unlocking the Potential: Understanding Windows 11’s Flexibility

Introduction

With enthusiasm, let’s navigate through the intriguing topic related to Unlocking the Potential: Understanding Windows 11’s Flexibility. Let’s weave interesting information and offer fresh perspectives to the readers.

Unlocking the Potential: Understanding Windows 11’s Flexibility

Unlocking the Future: Elevating Your Windows 11 Experience with Exciting Innovations!

Windows 11, Microsoft’s latest operating system, presents users with a streamlined and intuitive experience. However, for those seeking greater control and customization, the "S Mode" limitation can feel restrictive. While S Mode offers a secure and simplified environment, it restricts users to apps downloaded from the Microsoft Store. This limitation can be overcome by switching to the standard Windows 11 experience, unlocking a world of possibilities.

Understanding the S Mode Limitation

S Mode, introduced in Windows 10, is designed to provide a more secure and user-friendly environment for individuals who prioritize simplicity. It achieves this by limiting users to apps available on the Microsoft Store. This restriction ensures that users are only installing applications that have been vetted and deemed safe by Microsoft.

However, this limitation can be perceived as a constraint by users who require access to a wider range of software, including programs not available on the Microsoft Store. This is where the option to switch out of S Mode becomes crucial.

The Benefits of Switching Out of S Mode

Switching out of S Mode grants users the freedom to install applications from various sources, including websites and third-party app stores. This expanded access unlocks a world of possibilities, enabling users to:

  • Install Desired Software: Users can install applications not available on the Microsoft Store, including specialized software for creative work, gaming, or productivity.
  • Utilize Legacy Applications: Access to legacy applications, which may not be compatible with the Microsoft Store, becomes possible.
  • Experience Greater Customization: The ability to install third-party applications allows for greater customization of the Windows 11 environment. Users can tailor their experience with themes, widgets, and other tools.
  • Gain Access to Advanced Features: Some applications, including certain security software, require installation outside the Microsoft Store. Switching out of S Mode enables access to these tools.

The Process of Switching Out of S Mode

Switching out of S Mode is a straightforward process that can be completed within the Windows 11 environment. Users can follow these steps:

  1. Open Settings: Access the Windows Settings application by clicking the "Start" menu and selecting "Settings."
  2. Navigate to Activation: Click on "System" in the left-hand menu and then select "Activation" in the right-hand pane.
  3. Switch Out of S Mode: Locate the "Switch out of S mode" option and click on it.
  4. Confirm the Change: Follow the on-screen instructions to confirm the change. The system will reboot, and Windows 11 will be running in the standard mode.

Frequently Asked Questions

Q: Will switching out of S Mode affect my existing apps?

A: Existing apps installed from the Microsoft Store will continue to function after switching out of S Mode.

Q: Can I switch back to S Mode after switching out?

A: Switching back to S Mode is not possible after switching out.

Q: Will switching out of S Mode compromise my system’s security?

A: Switching out of S Mode does not inherently compromise system security. However, it is crucial to practice safe browsing habits and download applications from reputable sources.

Q: Are there any costs associated with switching out of S Mode?

A: Switching out of S Mode is a free process.

Tips for Switching Out of S Mode

  • Backup Important Data: It is always advisable to back up important data before making any significant changes to your operating system.
  • Check for Updates: Ensure that your system is running the latest version of Windows 11 before switching out of S Mode.
  • Understand the Implications: Be aware that switching out of S Mode will remove the security restrictions associated with S Mode.
  • Research Applications: Before installing applications from outside the Microsoft Store, research the application’s legitimacy and potential security risks.

Conclusion

Switching out of S Mode unlocks the full potential of Windows 11, granting users the freedom to install a wider range of applications and customize their experience. While S Mode offers a secure and simplified environment, it can be limiting for users who require greater functionality. By understanding the benefits and process of switching out of S Mode, users can tailor their Windows 11 experience to meet their specific needs and preferences.

What is Windows 11 in S mode?  Deep Dive Unlock the Full Potential of Windows 11 Pro with a Genuine Product Key  by Aadiyogiteam  Medium Unlocking the Full Potential of Windows + Shift + S in Windows 11: 7 Tips and Tricks - Click
Unlocking the Potential: Windows Sandbox in Windows 11 Guide Windows 11 version 23H2: Microsoft previews BIG new… Unleash Your Potential: Get Microsoft Windows 11 Pro for Your Device – The Wasp Factory
Unlock the Full Potential of Windows 11 Pro with a Genuine Product Key  by Aadiyogiteam  Medium Unlocking the Potential: Windows 11 Virtualization for Android  Course Hero

Closure

Thus, we hope this article has provided valuable insights into Unlocking the Potential: Understanding Windows 11’s Flexibility. We thank you for taking the time to read this article. See you in our next article!

Rejuvenating Your Windows 10 PC: A Comprehensive Guide To Formatting And Reinstallation

Rejuvenating Your Windows 10 PC: A Comprehensive Guide to Formatting and Reinstallation

Introduction

With great pleasure, we will explore the intriguing topic related to Rejuvenating Your Windows 10 PC: A Comprehensive Guide to Formatting and Reinstallation. Let’s weave interesting information and offer fresh perspectives to the readers.

Rejuvenating Your Windows 10 PC: A Comprehensive Guide to Formatting and Reinstallation

Formater son PC et réinstaller Windows 10 - Windows - Tutoriels - InformatiWeb

In the digital realm, our computers are our constant companions, housing our data, facilitating our work, and providing avenues for entertainment. However, over time, these digital workhorses can accumulate clutter, experience performance degradation, or become susceptible to malware. This is where the process of formatting and reinstalling Windows 10 comes into play.

Understanding the Process: A Deep Dive

Formatting, in essence, is the act of completely erasing all data from a storage device, such as a hard drive or SSD. This leaves a clean slate, ready for a fresh installation of the operating system. Reinstallation, as the name suggests, involves installing a new copy of Windows 10 onto the formatted drive.

Why Choose Formatting and Reinstallation?

This process offers a multitude of benefits, making it a valuable tool for maintaining a healthy and efficient computing experience:

  • Eliminating Clutter and Enhancing Performance: Over time, our computers accumulate temporary files, program remnants, and system cache data. These files can slow down system performance, leading to lag and sluggishness. Formatting removes all these extraneous files, allowing the system to operate at peak efficiency.

  • Addressing Performance Issues: If your computer is experiencing persistent slowdowns, crashes, or errors, formatting and reinstalling Windows 10 can often resolve these issues. A fresh installation ensures that the operating system is free from corrupted files or registry entries that may be causing problems.

  • Removing Malware and Viruses: Malware and viruses can infiltrate your system, compromising your data and privacy. Formatting and reinstalling Windows 10 eliminates any malicious software, providing a clean and secure environment.

  • Troubleshooting Hardware Issues: If you suspect a hardware issue, formatting and reinstalling Windows 10 can help isolate the problem. If the issues persist after a fresh installation, it’s more likely that the hardware itself is the culprit.

  • Upgrading to a Newer Version: If you’re upgrading to a newer version of Windows 10, formatting and reinstalling ensures a smooth and clean transition. It allows you to start with a fresh slate, eliminating any compatibility issues from the previous version.

The Steps Involved: A Detailed Breakdown

The process of formatting and reinstalling Windows 10 is straightforward, but it requires careful attention to detail. Here’s a step-by-step guide:

  1. Back Up Your Data: Before proceeding, it’s crucial to back up all your important data. This includes documents, photos, videos, music, and any other files you wish to preserve. You can use external hard drives, cloud storage services, or USB drives for this purpose.

  2. Create a Bootable USB Drive: You’ll need a bootable USB drive containing the Windows 10 installation files. Microsoft provides a tool for creating this drive, which can be downloaded from their website.

  3. Access the BIOS: Restart your computer and press the designated key (usually F2, F10, or Del) to access the BIOS setup menu. This varies depending on your motherboard manufacturer.

  4. Change Boot Order: Within the BIOS, navigate to the Boot Order settings and prioritize booting from the USB drive. This ensures that the installation process starts from the USB drive.

  5. Start the Installation: Save the BIOS settings and exit. Your computer will now boot from the USB drive and initiate the Windows 10 installation process.

  6. Format the Hard Drive: During the installation, you’ll be prompted to format the hard drive. This is where you erase all data from the drive, preparing it for a fresh installation.

  7. Install Windows 10: Follow the on-screen instructions to complete the Windows 10 installation process. This includes selecting your language, region, and creating a user account.

  8. Install Drivers and Updates: After the installation is complete, you’ll need to install the necessary drivers for your hardware components, such as the graphics card, network adapter, and sound card. You can download these drivers from the manufacturer’s website. It’s also crucial to install the latest Windows 10 updates to ensure optimal performance and security.

  9. Restore Your Data: Once your computer is fully functional, you can restore your backed-up data to the newly installed Windows 10.

FAQs: Addressing Common Concerns

Q: Will formatting erase all my data?

A: Yes, formatting will erase all data from the drive you choose to format. Therefore, it’s imperative to back up all your important data before proceeding.

Q: Can I reinstall Windows 10 without formatting?

A: While a clean installation is recommended for optimal performance, you can technically reinstall Windows 10 without formatting. However, this may not eliminate all system issues, as it will retain existing files and configurations.

Q: What if I don’t have a USB drive?

A: You can create a bootable DVD or use a different method, such as installing Windows 10 over the network. Consult Microsoft’s documentation for alternative installation methods.

Q: What if I encounter errors during the installation process?

A: If you encounter errors, try troubleshooting them using online resources or contacting Microsoft support for assistance.

Tips for a Smooth Process

  • Create a comprehensive backup: Ensure you back up all your essential data, including documents, photos, and software licenses.
  • Use a reliable USB drive: Choose a high-quality USB drive with sufficient storage space.
  • Download the latest Windows 10 installation files: Ensure you have the most recent version of Windows 10 for optimal compatibility and security.
  • Consult Microsoft’s documentation: Refer to Microsoft’s official documentation for detailed instructions and troubleshooting tips.
  • Consider professional help: If you’re not comfortable with the process, consider seeking assistance from a computer technician.

Conclusion: A Renewed and Optimized Computing Experience

Formatting and reinstalling Windows 10 is a powerful tool for rejuvenating your computer, restoring its performance, and ensuring a secure computing environment. By following the steps outlined above and taking necessary precautions, you can effectively revitalize your PC, making it run faster, smoother, and more reliably. Remember, regular maintenance, including periodic formatting and reinstalling, is crucial for keeping your computer in optimal condition.

How do I force a CD to format in Windows 10? HOW TO FORMAT AND REINSTALL WINDOWS 10 How To Reinstall Windows 10 Step By Step with Pictures
Windows 10 reinstallation tip: How to reset your PC and keep your files  Windows 10, Windows How to format a Windows computer Windows formatting and reinstallation on PC and WorkStation with pre-existing data recovery - RIP3
Formatage et réinstallation de Microsoft Windows 10/11 How to: Perform a Clean Install or Reinstall of Windows 10 - Microsoft Community

Closure

Thus, we hope this article has provided valuable insights into Rejuvenating Your Windows 10 PC: A Comprehensive Guide to Formatting and Reinstallation. We hope you find this article informative and beneficial. See you in our next article!

Protecting Your PC: Understanding And Configuring Overheat Protection In Windows 10

Protecting Your PC: Understanding and Configuring Overheat Protection in Windows 10

Introduction

In this auspicious occasion, we are delighted to delve into the intriguing topic related to Protecting Your PC: Understanding and Configuring Overheat Protection in Windows 10. Let’s weave interesting information and offer fresh perspectives to the readers.

Protecting Your PC: Understanding and Configuring Overheat Protection in Windows 10

Windows 10 CPU Temperature: Fix And Monitor The Heat Issue

Modern computers are marvels of engineering, capable of handling complex tasks with remarkable speed and efficiency. However, these powerful machines are not immune to the effects of excessive heat. Overheating can lead to a range of issues, from performance degradation and system instability to permanent hardware damage. To safeguard your PC, Windows 10 incorporates a robust overheat protection system that monitors crucial components and takes corrective action when necessary. This article delves into the intricacies of this protective mechanism, outlining its importance, configuration options, and best practices for ensuring optimal system health.

Understanding Overheat Protection in Windows 10

Windows 10’s overheat protection system is a multifaceted approach that combines hardware monitoring with software-based responses. The primary goal is to prevent catastrophic failures by identifying and mitigating potential heat-related issues. This system actively monitors various components, including the CPU, GPU, and system memory, constantly assessing their operating temperatures.

The core components of Windows 10’s overheat protection system include:

  • Hardware Monitoring: The system relies on sensors embedded within hardware components, such as the CPU and GPU, to gather real-time temperature readings. These readings are constantly relayed to the operating system.
  • Software-Based Thresholds: Windows 10 defines predefined temperature thresholds for various components. When these thresholds are breached, the system triggers a series of actions to mitigate the overheating situation.
  • Automatic Throttling: As a primary defense mechanism, Windows 10 can automatically throttle the performance of the CPU or GPU when temperatures exceed predefined limits. This reduces the heat generated by these components, preventing further escalation.
  • System Warnings: Windows 10 displays visual warnings and alerts when overheating is detected. These alerts inform the user of the issue and recommend potential solutions, such as closing resource-intensive applications or ensuring proper cooling.
  • Automatic Shutdowns: In severe cases, where overheating persists despite throttling and warnings, Windows 10 may automatically shut down the system to prevent permanent hardware damage.

The Importance of Overheat Protection

The presence of a robust overheat protection system in Windows 10 is crucial for several reasons:

  • Preventing Hardware Damage: Overheating can lead to irreparable damage to sensitive components like the CPU, GPU, and motherboard. Windows 10’s overheat protection mitigates this risk by proactively identifying and addressing overheating situations.
  • Maintaining System Stability: Excessive heat can cause system instability, leading to crashes, freezes, and data loss. Overheat protection ensures that the system operates within safe temperature ranges, minimizing these issues.
  • Optimizing Performance: While throttling may temporarily reduce performance, it prevents more severe consequences such as system crashes or hardware damage. This ensures that the system continues to function reliably, albeit at a slightly reduced performance level.
  • Enhancing User Experience: By providing timely warnings and alerts, Windows 10’s overheat protection system empowers users to take appropriate actions to prevent overheating and maintain optimal system performance.

Configuring Overheat Protection in Windows 10

While Windows 10’s overheat protection system operates automatically, users can fine-tune its behavior to meet specific needs. Here’s a guide to configuring key settings:

1. Managing Power Options:

  • Accessing Power Options: Navigate to the "Control Panel" and select "Power Options." This section allows users to adjust power-related settings, including those affecting system behavior during overheating.
  • Power Plans: Windows 10 offers various power plans (Balanced, High Performance, Power Saver) that influence system performance and energy consumption. Selecting a power plan that prioritizes energy efficiency may help reduce heat generation.
  • Advanced Power Settings: Click on "Change plan settings" and then "Change advanced power settings" to access a comprehensive range of power-related options. Here, you can customize how the system reacts to overheating events, such as the level of CPU throttling and the shutdown behavior.

2. Utilizing the Performance Monitor:

  • Monitoring System Temperatures: The Performance Monitor provides detailed information about system resources, including component temperatures. To access it, search for "Performance Monitor" in the Windows search bar.
  • Customizing Monitoring: Within the Performance Monitor, users can add counters to track specific components’ temperatures. This allows for real-time monitoring and identification of potential overheating issues.

3. Examining System Logs:

  • Event Viewer: Windows 10 keeps a record of system events in the Event Viewer. This tool can be accessed by searching for "Event Viewer" in the Windows search bar.
  • Overheating Events: By reviewing the system logs, users can identify instances of overheating and the corresponding actions taken by the system. This information can help diagnose potential issues and adjust settings accordingly.

4. Updating Drivers and BIOS:

  • Driver Updates: Outdated device drivers can sometimes contribute to overheating issues. Regularly updating drivers ensures compatibility and optimal performance.
  • BIOS Updates: The BIOS (Basic Input/Output System) controls the system’s hardware at a fundamental level. Updating the BIOS can sometimes improve thermal management and enhance the overall efficiency of the system.

Frequently Asked Questions (FAQs)

1. How can I tell if my PC is overheating?

Several indicators suggest potential overheating, including:

  • System Slowdowns: A noticeable drop in performance, especially during demanding tasks, can indicate overheating.
  • Unusual Noise: Fans running at high speeds or making unusual noises can be a sign of the system attempting to cool down.
  • Automatic Shutdowns: If your computer shuts down unexpectedly, especially during intensive tasks, overheating is a likely culprit.
  • Error Messages: Windows 10 may display error messages related to overheating, such as "System Overheating" or "CPU Throttling."

2. What are the common causes of overheating?

  • Dust Accumulation: Dust buildup inside the PC can impede airflow and hinder cooling.
  • Insufficient Cooling: A poorly ventilated case or inadequate cooling solutions, such as insufficient fans or a malfunctioning heatsink, can contribute to overheating.
  • Overclocking: Pushing hardware beyond its default limits can increase heat generation.
  • Resource-Intensive Applications: Running demanding software or games can strain the system and generate excessive heat.

3. What can I do to prevent overheating?

  • Regular Cleaning: Clean the inside of your PC regularly to remove dust and debris.
  • Ensure Proper Ventilation: Ensure adequate airflow by positioning the PC in a well-ventilated area and avoiding obstructions.
  • Use a Cooling Pad: Consider using a cooling pad to enhance airflow and reduce component temperatures.
  • Monitor System Temperatures: Use the Performance Monitor or other monitoring tools to track component temperatures and identify potential overheating issues.
  • Close Unnecessary Applications: Exit programs that you are not actively using to reduce system load and heat generation.

Tips for Maintaining Optimal System Temperature

  • Invest in Quality Cooling Solutions: Consider upgrading to a higher-quality heatsink or adding additional fans for better cooling.
  • Utilize Under-Voltage Settings: If you are familiar with BIOS settings, you can explore under-voltage options to reduce the power consumption and heat generation of your CPU.
  • Monitor System Temperatures Regularly: Use monitoring tools to keep an eye on component temperatures and make adjustments as needed.
  • Consider Liquid Cooling: For extreme performance and cooling needs, liquid cooling systems can offer significant temperature reductions.

Conclusion

Windows 10’s overheat protection system is an essential safeguard for your PC’s health. By monitoring component temperatures, triggering performance throttling, and issuing warnings when necessary, this system effectively prevents catastrophic failures and maintains optimal system stability. Understanding the intricacies of overheat protection, configuring settings appropriately, and following best practices for thermal management will ensure your PC operates reliably and efficiently for years to come.

How To Stop PC From Overheating And Shutting Down  Rendering + GAMING! (2019) Windows 10 - YouTube [Guide] Enable System Protection in Windows 10 Ways To Prevent Your Computer From Overheating - Oscarmini
Computer Overheating & How to Cool It Down How To Stop Your PC Overheating And What Causes It! - YouTube How to Tell If Your Computer is Overheating and What to Do About It
10 Ways to Protect Your Windows 10 System - wikigain Windows Defender SmartScreen: How to Deal With 'Windows Protected Your PC' Warnings

Closure

Thus, we hope this article has provided valuable insights into Protecting Your PC: Understanding and Configuring Overheat Protection in Windows 10. We appreciate your attention to our article. See you in our next article!

The Evolution Of Presentation Software: A Comprehensive Look At PowerPoint On Windows 11

The Evolution of Presentation Software: A Comprehensive Look at PowerPoint on Windows 11

Introduction

With enthusiasm, let’s navigate through the intriguing topic related to The Evolution of Presentation Software: A Comprehensive Look at PowerPoint on Windows 11. Let’s weave interesting information and offer fresh perspectives to the readers.

The Evolution of Presentation Software: A Comprehensive Look at PowerPoint on Windows 11

Software Evolution PowerPoint and Google Slides Template - PPT Slides

Microsoft PowerPoint has long been the cornerstone of visual communication, serving as a powerful tool for creating engaging presentations for diverse audiences. With the advent of Windows 11, this ubiquitous software has undergone significant enhancements, reflecting a commitment to user experience and functionality. This article delves into the intricacies of PowerPoint on Windows 11, exploring its key features, benefits, and impact on the modern world of presentations.

PowerPoint on Windows 11: A Seamless Integration

PowerPoint’s integration with Windows 11 is a testament to Microsoft’s vision of a unified, user-friendly experience. The software seamlessly interacts with the operating system, leveraging its features to deliver a streamlined workflow. This integration manifests in several key areas:

  • Enhanced Performance: Windows 11’s optimized performance benefits PowerPoint, enabling faster loading times, smoother animations, and improved overall responsiveness. The operating system’s resource management capabilities ensure that PowerPoint operates efficiently, even when running alongside other demanding applications.
  • Intuitive User Interface: Windows 11’s refined design language extends to PowerPoint, offering a visually appealing and intuitive interface. The updated ribbon menu and contextual toolbars provide quick access to essential tools, while the improved navigation system ensures effortless movement through slides.
  • Cross-Platform Compatibility: Windows 11’s focus on cross-platform compatibility allows seamless integration with other devices and operating systems. Users can effortlessly collaborate on presentations across different platforms, ensuring smooth communication and efficient workflows.
  • Enhanced Security: Windows 11’s robust security features extend to PowerPoint, safeguarding presentations from unauthorized access and malware. The operating system’s advanced security measures protect sensitive information and ensure the integrity of presentation data.

Key Features and Benefits of PowerPoint on Windows 11

PowerPoint on Windows 11 goes beyond mere integration, offering a comprehensive suite of features designed to elevate the presentation experience:

  • Improved Design Tools: The software boasts a range of powerful design tools, empowering users to create visually compelling presentations. Enhanced image editing capabilities, customizable themes, and a vast library of templates provide the necessary tools for crafting professional-looking presentations.
  • Enhanced Collaboration Features: PowerPoint on Windows 11 facilitates seamless collaboration, allowing users to work together on presentations in real time. Co-authoring features, integrated chat functionalities, and cloud storage solutions ensure efficient collaboration, regardless of location.
  • Immersive Presentation Experience: The software leverages Windows 11’s capabilities to deliver an immersive presentation experience. Features like Ink support, 3D models, and enhanced video integration create dynamic and engaging presentations that captivate audiences.
  • Data Visualization Tools: PowerPoint on Windows 11 offers a range of data visualization tools, enabling users to transform raw data into compelling visual representations. Charts, graphs, and other data visualization elements help communicate complex information effectively, enhancing the clarity and impact of presentations.
  • Accessibility Features: PowerPoint on Windows 11 prioritizes accessibility, offering features that cater to diverse user needs. Text-to-speech capabilities, alternative input methods, and customizable display settings ensure that presentations are accessible to all users.

The Impact of PowerPoint on Windows 11: A New Era of Communication

PowerPoint on Windows 11 represents a significant evolution in presentation software, empowering users to communicate effectively in the digital age. The software’s enhanced features, intuitive interface, and seamless integration with Windows 11 contribute to its widespread adoption across diverse industries and organizations.

The impact of PowerPoint on Windows 11 is evident in several key areas:

  • Enhanced Productivity: The software’s streamlined workflow, intuitive tools, and collaborative features contribute to increased productivity. Users can create, edit, and share presentations efficiently, maximizing their time and resources.
  • Improved Communication: PowerPoint’s visual communication capabilities enable users to convey complex information effectively. The software’s versatility and comprehensive features allow users to tailor presentations to specific audiences, ensuring clear and impactful communication.
  • Enhanced Learning and Education: PowerPoint on Windows 11 plays a crucial role in education, facilitating interactive and engaging learning experiences. Teachers can utilize the software to create dynamic presentations, incorporating multimedia elements and interactive activities to enhance student engagement and comprehension.
  • Innovation in Business and Industry: PowerPoint on Windows 11 empowers businesses and organizations to communicate effectively with stakeholders, clients, and employees. The software’s capabilities enable businesses to present data, pitch ideas, and deliver compelling messages, fostering innovation and growth.

FAQs: Addressing Common Queries

Q: Is PowerPoint on Windows 11 compatible with previous versions?

A: PowerPoint on Windows 11 maintains backward compatibility with previous versions, ensuring that users can access and edit presentations created in earlier versions. However, some features may not be fully supported in older versions.

Q: What are the system requirements for running PowerPoint on Windows 11?

A: PowerPoint on Windows 11 requires a computer that meets the minimum system requirements for Windows 11. These requirements include a compatible processor, sufficient RAM, and adequate storage space.

Q: How can I access PowerPoint on Windows 11?

A: PowerPoint is typically included in the Microsoft Office suite. Users can purchase the Office suite or subscribe to Microsoft 365 to gain access to PowerPoint on Windows 11. Alternatively, a free trial of PowerPoint is available for evaluation purposes.

Q: What are some best practices for creating effective presentations in PowerPoint on Windows 11?

A:

  • Keep it concise and focused: Avoid overwhelming audiences with too much information. Focus on delivering key messages clearly and concisely.
  • Use visuals effectively: Incorporate images, charts, and graphs to enhance engagement and understanding.
  • Practice your presentation: Rehearse your presentation to ensure smooth delivery and confident communication.
  • Engage your audience: Use interactive elements, questions, and polls to keep audiences involved.

Conclusion: Empowering Effective Communication in the Digital Age

PowerPoint on Windows 11 represents a powerful tool for communication and collaboration in the digital age. Its seamless integration with the operating system, enhanced features, and intuitive interface empower users to create engaging presentations that effectively convey information, captivate audiences, and drive results. As technology continues to evolve, PowerPoint on Windows 11 remains a vital tool for individuals and organizations alike, fostering clear and impactful communication in a world increasingly reliant on digital platforms.

Software Evolution PowerPoint and Google Slides Template - PPT Slides Before PowerPoint: The Evolution of Presentations  Presentation, Presentation software Software Evolution PowerPoint and Google Slides Template - PPT Slides
presentation software list Software Evolution PowerPoint and Google Slides Template - PPT Slides Microsoft Powerpoint
Microsoft PowerPoint Reviews, Cost & Features  GetApp Australia 2021 Microsoft PowerPoint

Closure

Thus, we hope this article has provided valuable insights into The Evolution of Presentation Software: A Comprehensive Look at PowerPoint on Windows 11. We appreciate your attention to our article. See you in our next article!

Understanding And Removing Pinned Items In Windows 10: A Comprehensive Guide

Understanding and Removing Pinned Items in Windows 10: A Comprehensive Guide

Introduction

With enthusiasm, let’s navigate through the intriguing topic related to Understanding and Removing Pinned Items in Windows 10: A Comprehensive Guide. Let’s weave interesting information and offer fresh perspectives to the readers.

Understanding and Removing Pinned Items in Windows 10: A Comprehensive Guide

How to Pin to Taskbar and Unpin from Taskbar in Windows 10?  Gear Up Windows

Windows 10’s Start Menu offers a convenient way to access frequently used applications and files through pinned items. These pins serve as shortcuts, streamlining access and enhancing user experience. However, over time, the Start Menu can become cluttered with unnecessary pinned items, hindering navigation and potentially affecting performance. This guide will comprehensively explore the process of removing pinned items from the Windows 10 Start Menu, addressing various aspects and providing valuable insights.

Pinning and Unpinning: A Fundamental Understanding

The concept of pinning in Windows 10 is straightforward. It involves placing a shortcut to an application, folder, or file directly on the Start Menu for easy access. This action essentially creates a visual bookmark, eliminating the need to search through various menus or folders.

Unpinning, the reverse process, involves removing these shortcuts from the Start Menu. This action removes the visual bookmark and does not affect the actual application, folder, or file itself. It simply removes its presence from the Start Menu.

Methods for Removing Pinned Items

Several methods allow users to remove pinned items from the Windows 10 Start Menu, each offering a distinct approach:

1. Right-Clicking and Unpinning:

This method is the most straightforward and accessible. To unpin an item, follow these steps:

  • Locate the pinned item: Identify the specific item you wish to unpin on the Start Menu.
  • Right-click: Right-click on the pinned item.
  • Select "Unpin from Start": A contextual menu will appear. Choose the "Unpin from Start" option.
  • Confirmation: The item will be removed from the Start Menu.

2. Utilizing the Start Menu Settings:

This method provides a more centralized control over pinned items, allowing users to manage multiple items simultaneously.

  • Open the Start Menu: Click the Windows logo in the taskbar to access the Start Menu.
  • Access Settings: Click the "Settings" gear icon located in the lower left corner of the Start Menu.
  • Navigate to Personalization: Select the "Personalization" option from the Settings menu.
  • Choose Start: Click on "Start" from the left-hand navigation menu.
  • Manage Pinned Items: The right-hand pane displays pinned items. Click the "Unpin" button next to the items you wish to remove.

3. Using the Taskbar:

This method offers a convenient way to unpin items directly from the taskbar.

  • Locate the pinned item: Identify the pinned item on the taskbar.
  • Right-click: Right-click on the pinned item.
  • Select "Unpin from Taskbar": A contextual menu will appear. Choose the "Unpin from Taskbar" option.
  • Confirmation: The item will be removed from the taskbar.

4. Utilizing the File Explorer:

This method offers a more direct approach to unpinning items, particularly for folders and files.

  • Open File Explorer: Press the "Windows Key + E" to open File Explorer.
  • Navigate to the item: Locate the folder or file you wish to unpin.
  • Right-click: Right-click on the item.
  • Choose "Unpin from Start": A contextual menu will appear. Select the "Unpin from Start" option.
  • Confirmation: The item will be removed from the Start Menu.

Benefits of Removing Unnecessary Pinned Items

Removing unnecessary pinned items from the Windows 10 Start Menu offers several advantages:

  • Enhanced Navigation: A decluttered Start Menu improves navigation, making it easier to find the desired applications and files.
  • Improved Performance: Removing unnecessary shortcuts can potentially enhance system performance by reducing the load on the Start Menu.
  • Increased Clarity: A streamlined Start Menu provides a cleaner and more visually appealing interface.
  • Personalized Experience: Users can customize the Start Menu to reflect their specific needs and preferences.

FAQs Regarding Pinned Items

1. Can I permanently delete pinned items from my computer?

No. Unpinning items from the Start Menu only removes their shortcuts. The actual files, folders, or applications remain untouched on your computer.

2. Can I pin items from other locations, such as the desktop?

Yes. You can pin items from various locations, including the desktop, File Explorer, or even the web.

3. Can I rearrange the order of pinned items?

Yes. You can drag and drop pinned items to rearrange their order on the Start Menu.

4. Can I pin multiple items at once?

No. You can only pin one item at a time.

5. Can I pin items to the taskbar?

Yes. You can pin items to the taskbar for quick access.

Tips for Managing Pinned Items

  • Regularly Review and Unpin: Periodically review the Start Menu and unpin any items you no longer use.
  • Create Folders: Organize pinned items by creating folders within the Start Menu.
  • Use Search: Utilize the Start Menu’s search bar to quickly find applications and files.
  • Consider Using a Task Manager: Task managers can help identify and close unnecessary programs and processes, potentially improving performance.

Conclusion

Removing pinned items from the Windows 10 Start Menu is a simple yet effective way to enhance user experience, improve system performance, and personalize your desktop environment. By following the methods and tips outlined in this guide, users can effectively manage their Start Menu, ensuring it remains organized, efficient, and tailored to their specific needs. Remember, a decluttered Start Menu leads to a more enjoyable and productive computing experience.

How To Remove All Taskbar Pinned Items Together in Windows 10 How to Remove Your PIN From Windows 10 Rearrange Pinned Items On Jump Lists in Windows 10  Tutorials
How to Remove Your PIN From Windows 10 How To Remove PIN in Windows 10 - YouTube How To Reset And Clear All Pinned Apps On Taskbar In Windows 10 Images
Remove PIN from your Account in Windows 10  Tutorials How to Clear and Reset All Pinned Apps on Taskbar in Windows 10 - YouTube

Closure

Thus, we hope this article has provided valuable insights into Understanding and Removing Pinned Items in Windows 10: A Comprehensive Guide. We hope you find this article informative and beneficial. See you in our next article!

Navigating The World Of NVIDIA GTX 750 Ti Drivers For Windows 11 64-bit

Navigating the World of NVIDIA GTX 750 Ti Drivers for Windows 11 64-bit

Introduction

In this auspicious occasion, we are delighted to delve into the intriguing topic related to Navigating the World of NVIDIA GTX 750 Ti Drivers for Windows 11 64-bit. Let’s weave interesting information and offer fresh perspectives to the readers.

Geforce GTX 750 Ti Latest Driver Download Easily - Driver Easy

The NVIDIA GTX 750 Ti, a popular graphics card released in 2014, continues to find relevance in modern systems. While its performance may not rival the latest high-end graphics cards, it remains a viable option for gamers and professionals seeking a balance between affordability and capability. However, to fully unlock the potential of the GTX 750 Ti on a Windows 11 64-bit system, installing the correct drivers is paramount.

This article aims to provide a comprehensive guide to understanding NVIDIA GTX 750 Ti drivers for Windows 11 64-bit, emphasizing their importance, installation process, and troubleshooting tips.

Understanding the Importance of Drivers

Drivers act as the crucial intermediary between your hardware and software, allowing them to communicate effectively. In the case of a graphics card like the GTX 750 Ti, drivers are responsible for:

  • Translating commands: They interpret instructions from your operating system and applications, translating them into the specific language understood by the graphics card.
  • Managing resources: Drivers optimize the allocation of resources like memory and processing power, ensuring efficient operation.
  • Enhancing performance: They enable advanced features like anti-aliasing and texture filtering, improving visual quality and overall gaming experience.
  • Providing compatibility: Drivers ensure that your graphics card functions correctly with the latest operating system and applications.

The Role of Windows 11 64-bit Compatibility

Windows 11, with its 64-bit architecture, offers enhanced performance and stability compared to its predecessors. However, this transition necessitates compatibility with newer drivers. While NVIDIA regularly releases driver updates, older cards like the GTX 750 Ti might require specific drivers tailored for Windows 11 64-bit.

Finding the Right Drivers

The official NVIDIA website is the primary source for downloading the latest and most compatible drivers for your GTX 750 Ti. Here’s how to locate the correct drivers:

  1. Navigate to the NVIDIA website: Visit https://www.nvidia.com/ and navigate to the "Drivers" section.
  2. Select your graphics card: Enter "GTX 750 Ti" in the search bar and select your specific model.
  3. Choose your operating system: Choose "Windows 11" as the operating system and ensure the "64-bit" option is selected.
  4. Download the driver: Download the latest driver package and follow the on-screen instructions for installation.

Installation and Troubleshooting

Once you have downloaded the driver package, follow these steps for installation:

  1. Run the installer: Double-click the downloaded file to initiate the installation process.
  2. Follow the prompts: The installer will guide you through the necessary steps, including accepting the terms and conditions.
  3. Restart your computer: Once the installation is complete, restart your computer to ensure the new drivers are fully loaded.

Troubleshooting Common Issues

While installing drivers is generally straightforward, you might encounter certain issues:

  • Driver incompatibility: If you install the wrong driver, your system might experience instability, crashes, or display issues. Ensure you download the driver specifically designed for your GTX 750 Ti and Windows 11 64-bit.
  • Driver conflicts: Existing drivers from other applications or older versions might conflict with the new NVIDIA driver. Use the NVIDIA Control Panel to manage and uninstall conflicting drivers.
  • Outdated drivers: If your drivers are outdated, you might experience performance issues, crashes, or lack of support for new features. Regularly check for driver updates and install them promptly.
  • Driver corruption: Corrupted drivers can lead to various problems. Reinstall the driver or use the Windows Device Manager to troubleshoot and update the driver.

Tips for Optimal Performance

To maximize the performance of your GTX 750 Ti on Windows 11 64-bit, consider these tips:

  • Update drivers regularly: Regularly check for driver updates and install them to ensure compatibility and optimize performance.
  • Adjust graphics settings: Experiment with in-game graphics settings to balance visual quality with performance.
  • Monitor system temperature: High temperatures can negatively impact performance. Consider installing a cooling solution or optimizing your system settings.
  • Enable NVIDIA features: Explore the NVIDIA Control Panel to enable features like anti-aliasing and texture filtering to enhance visual quality.

FAQs

Q: Can I use older GTX 750 Ti drivers on Windows 11 64-bit?

A: While older drivers might work, they might not be fully compatible with Windows 11 64-bit, leading to performance issues, instability, or lack of support for new features. It’s highly recommended to use the latest drivers specifically designed for your graphics card and operating system.

Q: What if I can’t find the correct driver on the NVIDIA website?

A: If you can’t locate the appropriate driver, contact NVIDIA support for assistance. They can help identify the correct driver package for your specific system configuration.

Q: Will installing new drivers void my warranty?

A: Installing official drivers from NVIDIA will not void your warranty. However, installing third-party drivers or modifying drivers without proper knowledge can potentially lead to warranty issues.

Q: Can I use the generic Windows 11 drivers for my GTX 750 Ti?

A: While Windows 11 offers generic drivers for various devices, using them for your graphics card might not provide optimal performance or support all features. It’s recommended to use the specific drivers provided by NVIDIA for your GTX 750 Ti.

Conclusion

Installing the correct NVIDIA GTX 750 Ti drivers for your Windows 11 64-bit system is crucial for achieving optimal performance, stability, and compatibility. By following the steps outlined in this guide, you can ensure your graphics card functions seamlessly and unlocks its full potential within your system. Remember to prioritize official drivers from NVIDIA, update them regularly, and troubleshoot any issues promptly to maintain a smooth and enjoyable user experience.

Nvidia web driver gtx 750 ti - magazinesherofMy Site Gtx 750 Ti Driver / MSI GeForce GTX 750 Ti 2GB GAMING LE  VideoCardz.net - * only registered Geforce GTX 750 Ti Latest Driver Download Easily - Driver Easy
Скачать драйвер NVIDIA GeForce GTX 750 Ti  Обзор и тестирование видеокарт NVIDIA Download and install NVIDIA NVIDIA GeForce GTX 750 Ti - driver id 2907 Gtx 750 Ti Driver / MSI GeForce GTX 750 Ti 2GB GAMING LE  VideoCardz.net - * only registered
Venta > asus gtx750ti driver > en stock NVIDIA GeForce GTX 750 Ti Specs  TechPowerUp GPU Database

Closure

Thus, we hope this article has provided valuable insights into Navigating the World of NVIDIA GTX 750 Ti Drivers for Windows 11 64-bit. We hope you find this article informative and beneficial. See you in our next article!

Reliving The Golden Age: A Guide To PS1 Emulation On Windows 10

Reliving the Golden Age: A Guide to PS1 Emulation on Windows 10

Introduction

With great pleasure, we will explore the intriguing topic related to Reliving the Golden Age: A Guide to PS1 Emulation on Windows 10. Let’s weave interesting information and offer fresh perspectives to the readers.

Reliving the Golden Age: A Guide to PS1 Emulation on Windows 10

Most accurate ps1 emulator windows 10 - perkssere

The PlayStation, fondly known as PS1, holds a cherished place in gaming history. Its iconic library, featuring titles like Final Fantasy VII, Metal Gear Solid, and Crash Bandicoot, captivated a generation of players. While the hardware itself may be a relic of the past, the magic of these games can be relived through the power of emulation. This guide delves into the world of PS1 emulators on Windows 10, providing a comprehensive understanding of their capabilities, installation, and potential pitfalls.

Understanding Emulation

Emulation is the process of replicating the functionality of one system on another. In the context of gaming, it allows you to run games designed for older consoles on modern devices like PCs. PS1 emulators essentially recreate the PlayStation’s hardware and software environment, enabling you to play classic titles on your Windows 10 machine.

The Benefits of PS1 Emulation

  • Accessibility: Emulation offers a convenient way to access a vast library of games without the need for physical cartridges or discs. This is especially valuable for titles that are difficult or expensive to acquire in their original form.
  • Enhanced Performance: Modern PCs can significantly outperform the original PlayStation hardware. Emulators can leverage this power to deliver smoother gameplay, higher resolutions, and even the ability to run games at faster speeds.
  • Customization: Emulators provide various options for customizing the gaming experience. This includes adjusting resolution, frame rate, controller mapping, and even applying visual enhancements like texture filters.
  • Preservation: Emulation plays a crucial role in preserving gaming history. By making older games accessible on modern platforms, it helps ensure their continued enjoyment for future generations.

Choosing the Right PS1 Emulator

Several excellent PS1 emulators are available for Windows 10. Each emulator offers unique features and strengths, making the choice largely dependent on individual preferences and needs. Here are some of the most popular options:

  • ePSXe: A long-standing and highly regarded emulator known for its compatibility and stability. It offers a wide range of customization options and supports various controller configurations.
  • PSX4All: A lightweight and easy-to-use emulator ideal for beginners. It boasts excellent compatibility with most PS1 games and provides a straightforward interface.
  • Mednafen: A powerful emulator known for its accuracy and performance. It offers advanced features like CD-ROM emulation and a comprehensive configuration menu.
  • RPCS3: While primarily a PS3 emulator, RPCS3 can also run some PS1 games with impressive performance. It is a good option for those seeking a versatile emulator capable of handling multiple consoles.

Installing and Configuring a PS1 Emulator

Installing and configuring a PS1 emulator typically involves the following steps:

  1. Download and Install the Emulator: Locate the emulator of your choice from a reputable source and follow the installation instructions.
  2. Obtain BIOS Files: Most PS1 emulators require BIOS files to function properly. These files are essentially the boot software for the PlayStation console. You can usually find them online, but ensure they are legitimate and compatible with your chosen emulator.
  3. Configure the Emulator: Once installed, launch the emulator and adjust settings according to your preferences. This may include configuring controller mappings, video settings, and audio options.
  4. Add Games: Locate your PS1 game files (usually in .BIN or .ISO format) and add them to the emulator’s library. You can either download these files online or rip them from physical discs.

Troubleshooting Common Issues

While PS1 emulation is generally reliable, you may encounter occasional difficulties. Here are some common issues and their potential solutions:

  • Game Compatibility: Not all PS1 games run flawlessly on every emulator. If a game doesn’t work, try using a different emulator or updating the emulator to the latest version.
  • BIOS Issues: Ensure you have the correct BIOS files and that they are placed in the emulator’s designated directory. Incorrect BIOS files can lead to crashes or compatibility problems.
  • Controller Issues: If your controller isn’t recognized or doesn’t work as expected, check the emulator’s configuration settings and ensure the correct drivers are installed.
  • Performance Issues: If the game runs slowly or with glitches, try lowering the emulator’s resolution or graphics settings. You can also experiment with different emulator configurations to find optimal performance.

Frequently Asked Questions (FAQs)

Q: Are PS1 emulators legal?

A: The legality of using PS1 emulators is a complex issue. While emulators themselves are generally legal, distributing copyrighted games without permission is not. Downloading ROMs (game files) from unauthorized sources can be considered piracy.

Q: How do I find PS1 game files?

A: You can find PS1 game files (ROMs) online, but ensure you are downloading them from reputable sources. Be cautious of websites offering illegal downloads, as they may contain malware or viruses.

Q: What is the best way to play PS1 games on Windows 10?

A: The best way to play PS1 games on Windows 10 depends on your individual needs and preferences. Consider factors like ease of use, compatibility, and performance when choosing an emulator.

Q: Can I use a PlayStation controller with a PS1 emulator?

A: Yes, you can use a PlayStation controller with a PS1 emulator. Most emulators support various controllers, including original PlayStation controllers, modern USB controllers, and even gamepads connected via Bluetooth.

Tips for a Smooth PS1 Emulation Experience

  • Use a Powerful PC: PS1 emulators run best on computers with decent processing power and sufficient RAM.
  • Install the Latest Drivers: Ensure your graphics card drivers are up-to-date for optimal performance.
  • Experiment with Settings: Don’t be afraid to tweak the emulator’s settings to find the best balance between performance and visual fidelity.
  • Research Compatibility: Before downloading a game, check its compatibility with your chosen emulator to avoid potential issues.
  • Back Up Your Games: Regularly back up your game files to prevent data loss in case of technical problems.

Conclusion

PS1 emulation offers a wonderful opportunity to revisit classic games and experience them in new ways. With a wide selection of emulators, excellent compatibility, and numerous customization options, Windows 10 provides an ideal platform for reliving the golden age of gaming. By following the steps outlined in this guide, you can unlock a world of nostalgia and rediscover the joy of classic PS1 titles. Remember to always download games from legitimate sources and support the developers who created these timeless experiences.

PlayStation One Emulator Setup Windows 10 Test - YouTube 10 best ps1 emulator windows 10 - questtablet Best ps1 emulator for windows 10 - hmholoser
Ps1 emulator for windows 10 64 bit - pilotmember Most accurate ps1 emulator windows 10 - perkssere Top 5 melhores emuladores de PS1 para PC em 2021
10 Best PS1 Emulators for Windows 10. Playstation emulator for pc windows 10 - hoolivids

Closure

Thus, we hope this article has provided valuable insights into Reliving the Golden Age: A Guide to PS1 Emulation on Windows 10. We appreciate your attention to our article. See you in our next article!

Understanding Disk Partitions: A Foundation For Windows 10 Installation

Understanding Disk Partitions: A Foundation for Windows 10 Installation

Introduction

With enthusiasm, let’s navigate through the intriguing topic related to Understanding Disk Partitions: A Foundation for Windows 10 Installation. Let’s weave interesting information and offer fresh perspectives to the readers.

Understanding Disk Partitions: A Foundation for Windows 10 Installation

How to partition and format disk windows 10 - weseast

The act of installing Windows 10 on a computer is often perceived as a straightforward process. However, beneath the surface lies a crucial concept: disk partitioning. Understanding how disk partitions function is essential for a successful and efficient Windows 10 installation.

What are Disk Partitions?

Imagine your hard drive as a large, empty room. Disk partitions are like dividing this room into distinct, organized spaces. Each partition acts as an independent storage area, allowing you to allocate specific portions of your hard drive for different purposes. This structured approach offers numerous advantages:

  • Organization: Partitions enable you to separate operating systems, applications, and data, creating a more organized and manageable storage environment.
  • Security: By partitioning your hard drive, you can isolate sensitive data from potential threats. For instance, installing Windows 10 on a dedicated partition can safeguard your personal files stored on another partition.
  • Flexibility: Partitions provide flexibility in managing your storage space. You can easily resize partitions, merge them, or create new ones as your needs evolve.
  • Dual Booting: Partitions facilitate dual booting, allowing you to install and run multiple operating systems on the same computer. This enables users to switch between different environments, such as Windows 10 and a Linux distribution.

Why is Partitioning Important for Windows 10 Installation?

When installing Windows 10, partitioning your hard drive serves several key purposes:

  • Dedicated Space for Windows 10: Allocating a dedicated partition for Windows 10 ensures that the operating system has sufficient space to function optimally. This prevents potential conflicts with other data or applications stored on the same drive.
  • Data Preservation: If you have existing data on your hard drive, partitioning allows you to preserve it while installing Windows 10 on a separate partition. This prevents accidental data loss during the installation process.
  • Clean Installation: Partitioning enables a clean installation of Windows 10, removing any remnants of previous operating systems or applications. This can enhance performance and stability.
  • Customizable Setup: Partitioning offers greater control over the installation process. You can choose the size of the Windows 10 partition, allocate space for other purposes, and even create separate partitions for specific applications or data.

Understanding Partitioning Tools

Several tools can assist you in partitioning your hard drive:

  • Windows Disk Management: This built-in tool allows basic partition management, including creating, deleting, and resizing partitions. However, it lacks advanced features and may not be suitable for complex partitioning scenarios.
  • Third-Party Partition Managers: Numerous third-party partition managers offer more advanced functionalities, such as cloning partitions, converting between file systems, and creating bootable partitions. Popular options include EaseUS Partition Master, AOMEI Partition Assistant, and MiniTool Partition Wizard.

Tips for Partitioning Before Windows 10 Installation

  • Backup Your Data: Before making any changes to your hard drive, ensure you have a complete backup of all important data. This will prevent data loss in case of unexpected errors.
  • Consider Partition Size: Allocate sufficient space for the Windows 10 partition, taking into account future updates and software installations.
  • Choose the Right File System: Windows 10 primarily uses the NTFS file system. However, consider using FAT32 for external drives that need to be compatible with older devices.
  • Test Before Installing Windows 10: After partitioning, it is recommended to test the partitions by installing a lightweight operating system or a live distribution to ensure they function correctly.

FAQs about Partitioning for Windows 10 Installation

Q: Can I install Windows 10 without partitioning?

A: Yes, Windows 10 can be installed without partitioning. However, this will install Windows 10 on the entire hard drive, potentially leading to data loss and a lack of organization.

Q: How much space should I allocate for the Windows 10 partition?

A: The recommended minimum space for Windows 10 is 64GB, but it is advisable to allocate at least 128GB for optimal performance.

Q: Can I resize a partition after installing Windows 10?

A: Yes, you can resize partitions after installing Windows 10 using Disk Management or a third-party partition manager. However, resizing a partition that contains Windows 10 can be risky and may require advanced knowledge.

Q: Can I create multiple partitions for different purposes?

A: Yes, you can create multiple partitions for different purposes, such as storing operating systems, applications, and data separately.

Q: Can I merge partitions after installing Windows 10?

A: Yes, you can merge partitions after installing Windows 10, but it is important to back up your data before attempting this.

Conclusion

Partitioning your hard drive is a crucial step in preparing for a successful Windows 10 installation. It offers a structured and organized approach to storage management, enabling you to allocate dedicated space for your operating system, applications, and data. By understanding the fundamentals of disk partitioning and utilizing appropriate tools, you can ensure a smooth and efficient Windows 10 installation experience. Remember to always back up your data before making any changes to your hard drive partitions, and seek professional assistance if you are unsure about the process.

SOLVED: Windows 10 Hard Drive Partitions Explained In Simple Terms – Up & Running Inc – Tech How SOLVED: Windows 10 Hard Drive Partitions Explained In Simple Terms – Up & Running Inc – Tech How Understanding Different Disk Partitions In Windows 10
Comprendre les différentes partitions de disque dans Windows 10 How to create custom partition to install Windows 10 - Pureinfotech How to Partition a Hard Drive in Windows 10 (2 Methods)
How to see the disks partitions under Windows 10/11? How to Partition A Hard Drive in Windows 10 - EaseUS

Closure

Thus, we hope this article has provided valuable insights into Understanding Disk Partitions: A Foundation for Windows 10 Installation. We appreciate your attention to our article. See you in our next article!