Windows 11: A Comprehensive Analysis Of Its Strengths And Weaknesses

Windows 11: A Comprehensive Analysis of Its Strengths and Weaknesses

Introduction

In this auspicious occasion, we are delighted to delve into the intriguing topic related to Windows 11: A Comprehensive Analysis of Its Strengths and Weaknesses. Let’s weave interesting information and offer fresh perspectives to the readers.

Windows 11: A Comprehensive Analysis of Its Strengths and Weaknesses

Microsoft SWOT Analysis: A Comprehensive Overview of Its Strengths, Weaknesses, Opportunities

Microsoft’s Windows 11, released in October 2021, marked a significant shift in the operating system landscape. It brought a redesigned interface, new features, and enhanced security measures, aiming to cater to the evolving needs of modern users. However, like any major software update, it also introduced its share of challenges and limitations. This article delves into the pros and cons of Windows 11, providing a balanced perspective on its strengths and weaknesses.

Pros of Windows 11

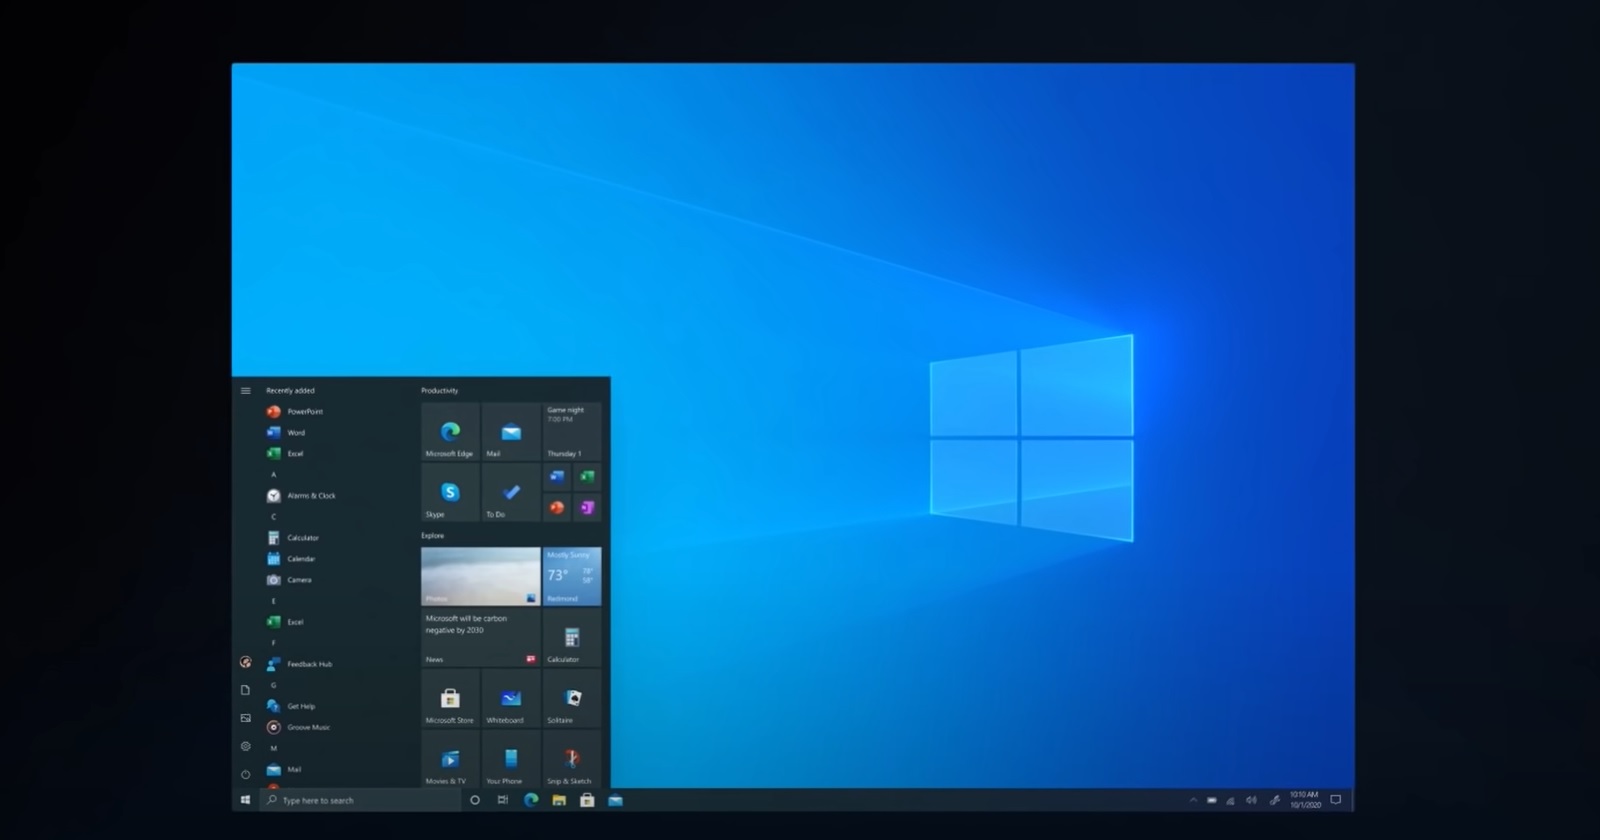
1. Enhanced User Interface: Windows 11 boasts a visually appealing and intuitive interface. The redesigned Start menu, centered and streamlined, provides easy access to frequently used apps and files. Taskbar icons are now centered, creating a more balanced and modern look. The rounded corners and translucent effects add a touch of elegance, enhancing the overall user experience.

2. Improved Performance: Windows 11 benefits from significant performance improvements, particularly in areas like boot time, application loading, and multitasking. The new OS is optimized for modern hardware, delivering smoother and faster operations, especially on systems with ample RAM and storage.

3. Enhanced Security Features: Microsoft has significantly strengthened security in Windows 11. Features like Windows Hello, a biometric authentication system, and Microsoft Defender, a robust antivirus solution, provide comprehensive protection against malware and unauthorized access. Enhanced security protocols and updates ensure a more secure computing environment.

4. Integration with Android Apps: One of the most significant additions is the ability to run Android apps directly on Windows 11. This integration, powered by the Amazon Appstore, opens up a vast library of mobile applications to Windows users, expanding functionality and convenience.

5. Focus on Gaming: Windows 11 prioritizes gaming experiences, offering features like DirectStorage and Auto HDR, which enhance game loading times and visual fidelity. The integration with Xbox Cloud Gaming allows users to stream games directly to their PCs, further expanding the gaming landscape.

6. Modernized Features: Windows 11 introduces several modern features that enhance productivity and user experience. Snap layouts simplify window management, allowing for efficient multitasking. Focus Assist minimizes distractions by silencing notifications, enabling uninterrupted concentration. The new Widgets panel provides quick access to relevant information and personalized content.

Cons of Windows 11

1. System Requirements: Windows 11 has stringent system requirements, particularly in terms of processor, RAM, and storage. Many older computers, even those with recent hardware upgrades, may not meet these requirements, limiting compatibility and accessibility.

2. Hardware Compatibility Issues: The new OS has encountered compatibility issues with certain hardware components, including older printers, scanners, and webcams. This can lead to frustration for users who rely on specific peripherals that are not yet fully supported.

3. Limited Customization Options: While Windows 11 offers a visually appealing interface, it lacks the extensive customization options available in previous versions. Some users may find the limited customization frustrating, especially those who prefer to personalize their computing environment.

4. Controversial Updates: Windows 11’s update policy has drawn criticism. The mandatory updates, which cannot be postponed, can disrupt workflows and cause unintended issues. This lack of user control over updates raises concerns about potential downtime and software conflicts.

5. Limited Support for Older PCs: Windows 11’s focus on modern hardware comes at the expense of older PCs. While Microsoft has extended support for older systems, the lack of native support for certain features and the potential for compatibility issues can discourage users from upgrading.

6. Privacy Concerns: While Windows 11 offers enhanced security, some users have expressed concerns regarding its data collection practices. The increased reliance on cloud services and data sharing raises questions about user privacy and data security.

FAQs about Windows 11

Q1: What are the minimum system requirements for Windows 11?

A: Windows 11 requires a 1 GHz or faster processor with at least 2 cores, 4 GB RAM, 64 GB storage, and a compatible UEFI firmware with Secure Boot. It also requires a graphics card compatible with DirectX 12 and a display with a resolution of at least 1280 x 720 pixels.

Q2: Is Windows 11 compatible with my current hardware?

A: The best way to determine compatibility is to check the PC Health Check app, which Microsoft provides. This tool assesses your system and identifies potential compatibility issues.

Q3: How do I upgrade to Windows 11?

A: If your system meets the requirements, you can upgrade to Windows 11 through the Windows Update settings. You can also download the Windows 11 installation media from Microsoft’s website and perform a clean install.

Q4: Can I still use Windows 10 after upgrading to Windows 11?

A: Microsoft has extended support for Windows 10 until October 14, 2025. You can continue using Windows 10, but you will no longer receive security updates after this date.

Q5: What are the advantages of using Windows 11 over Windows 10?

A: Windows 11 offers a redesigned interface, improved performance, enhanced security features, integration with Android apps, and a focus on gaming. It also introduces modern features like Snap layouts and Focus Assist.

Q6: What are the disadvantages of using Windows 11 over Windows 10?

A: Windows 11 has stringent system requirements, limited customization options, and potential hardware compatibility issues. It also has a controversial update policy and raises concerns about privacy due to increased reliance on cloud services.

Tips for Using Windows 11

1. Check System Requirements: Before upgrading, ensure your system meets the minimum requirements to avoid compatibility issues and ensure optimal performance.

2. Backup Your Data: Always back up your important files and data before upgrading to Windows 11. This safeguards your information in case of any unexpected problems during the upgrade process.

3. Update Drivers: Keep your hardware drivers updated to ensure compatibility with Windows 11 and prevent potential issues.

4. Explore New Features: Take the time to explore the new features and settings in Windows 11, such as Snap layouts, Focus Assist, and the Widgets panel.

5. Consider a Clean Install: If you encounter compatibility issues or prefer a fresh start, consider performing a clean install of Windows 11.

Conclusion

Windows 11 represents a significant evolution in the Windows operating system, introducing a modern interface, enhanced performance, and new features. While it offers several benefits, it also presents challenges in terms of system requirements, hardware compatibility, and privacy concerns. The decision to upgrade to Windows 11 ultimately depends on individual needs and preferences. Users with compatible hardware and a willingness to embrace the new features will likely find Windows 11 a compelling upgrade. However, those with older systems or concerns about privacy and customization may choose to remain on Windows 10 for the time being. It is crucial to carefully weigh the pros and cons before making a decision to ensure a smooth and satisfying computing experience.

Microsoft SWOT Analysis 2019  SWOT Analysis of Microsoft  Business Strategy Hub Microsoft SWOT 2024  SWOT Analysis of Microsoft  Business Strategy Hub Strengths / weaknesses analysis - ConWISE
Example Swot Analysis Strengths Weaknesses Explained - vrogue.co The Strengths Weaknesses Opportunities And Threats Sw - vrogue.co SWOT Analysis: A Framework to Analyze Strengths, Weaknesses, Opportunities and Threats
SWOT Analysis โ€“ How to Conduct a Proper One - Business2Community Strengths Weaknesses Opportunities And Threats Swot Factors  Hot Sex Picture

Closure

Thus, we hope this article has provided valuable insights into Windows 11: A Comprehensive Analysis of Its Strengths and Weaknesses. We thank you for taking the time to read this article. See you in our next article!

The Enduring Legacy Of Microsoft Windows: A Balanced Perspective

The Enduring Legacy of Microsoft Windows: A Balanced Perspective

Introduction

With great pleasure, we will explore the intriguing topic related to The Enduring Legacy of Microsoft Windows: A Balanced Perspective. Let’s weave interesting information and offer fresh perspectives to the readers.

The Enduring Legacy of Microsoft Windows: A Balanced Perspective

A Short History of Microsoft

Microsoft Windows, the ubiquitous operating system that has dominated personal computing for decades, continues to be a focal point in the digital landscape. Its influence is undeniable, shaping the way we interact with technology and impacting countless industries. However, as with any dominant force, its reign is not without its critics and detractors. This article delves into the merits and drawbacks of Microsoft Windows, providing a comprehensive overview of its strengths and weaknesses, and examining its ongoing relevance in the ever-evolving world of technology.

The Advantages of Windows: A Foundation for Productivity and Innovation

1. Widespread Compatibility and Ecosystem: Windows boasts a vast ecosystem of compatible hardware, software, and peripherals. This compatibility ensures a seamless user experience, allowing users to choose from a wide range of options to suit their specific needs. From gaming to professional applications, the extensive library of software available for Windows caters to a diverse range of users.

2. User-Friendly Interface and Intuitive Design: Windows has consistently prioritized user-friendliness, offering an intuitive interface that is relatively easy to navigate, even for novice users. This accessibility has contributed to its widespread adoption, making it a popular choice for both personal and professional use.

3. Robust Security Features: While security concerns have historically plagued Windows, Microsoft has made significant strides in bolstering its security features. Advanced security measures like Windows Defender, multi-factor authentication, and regular security updates help protect users from malware and other cyber threats.

4. Powerful Performance and Stability: Windows has a reputation for offering reliable performance and stability, capable of handling demanding tasks and applications. The operating system’s robust architecture and continuous updates ensure a smooth and efficient user experience.

5. Strong Support Network: Microsoft provides extensive support for Windows, offering a comprehensive range of resources including online documentation, troubleshooting tools, and dedicated support channels. This robust support network ensures users have access to assistance when they encounter issues or require guidance.

6. Extensive Gaming Support: Windows is the dominant platform for PC gaming, with a vast library of games and a thriving community. The platform’s powerful hardware capabilities and dedicated gaming features make it an ideal choice for gamers seeking immersive and high-performance experiences.

7. Integration with Microsoft Services: Windows seamlessly integrates with other Microsoft services like OneDrive, Office 365, and Azure, providing a cohesive and streamlined experience for users who rely on these services.

The Challenges of Windows: Addressing Concerns and Limitations

1. Cost and Licensing Restrictions: Windows, particularly its professional versions, can be expensive, posing a significant barrier for budget-conscious users. Additionally, licensing restrictions can limit the number of devices or users that can access the operating system, potentially increasing costs for businesses and organizations.

2. Resource Consumption and System Performance: Windows, with its extensive features and capabilities, can be resource-intensive, requiring substantial processing power and memory. This can impact system performance, particularly on older or less powerful hardware, leading to slowdowns and sluggishness.

3. Security Vulnerabilities and Malware Threats: Despite advancements in security, Windows remains a target for malware and cyberattacks. This vulnerability stems from its widespread use and the vast attack surface it presents, making it crucial for users to stay vigilant and implement robust security measures.

4. Bloatware and Unnecessary Software: Windows often comes pre-installed with bloatware โ€“ unwanted software that can consume resources and slow down the system. While Microsoft has made efforts to reduce bloatware in recent versions, it remains a concern for users seeking a clean and streamlined experience.

5. Lack of Customization and Flexibility: Compared to alternative operating systems like Linux, Windows offers limited customization options, potentially hindering users who prefer a highly personalized experience. This lack of flexibility can also limit the ability to tailor the system to specific needs and workflows.

6. Dependence on Microsoft Ecosystem: While integration with Microsoft services can be advantageous, it also creates a degree of dependence on the company’s ecosystem. This can be limiting for users who prefer to use alternative services or applications.

7. System Updates and Maintenance: Windows requires regular updates and maintenance to ensure optimal performance and security. While these updates are essential, they can sometimes be disruptive, requiring system restarts and consuming valuable time.

FAQs about Microsoft Windows

Q: Is Windows still relevant in today’s tech landscape?

A: Windows remains highly relevant, especially for personal computing and business applications. Its vast ecosystem, user-friendly interface, and robust performance continue to make it a popular choice for a wide range of users and industries.

Q: What are the alternatives to Windows?

A: Alternatives to Windows include macOS, Linux, and ChromeOS. Each operating system has its own strengths and weaknesses, catering to different user preferences and needs.

Q: Is Windows secure enough for my personal data?

A: Windows has significantly improved its security measures in recent years. However, it’s crucial to implement strong security practices, including using strong passwords, enabling multi-factor authentication, and keeping your system updated.

Q: How can I improve the performance of my Windows system?

A: To improve system performance, consider upgrading your hardware, closing unnecessary programs, running a disk cleanup, and ensuring your system is up to date with the latest updates.

Tips for Using Windows Effectively

1. Optimize System Performance: Regularly check your system for unnecessary files and programs that can consume resources and slow down performance.

2. Implement Strong Security Practices: Use strong passwords, enable multi-factor authentication, and keep your system updated with the latest security patches.

3. Choose the Right Version of Windows: Select the version that best suits your needs and budget, considering factors like features, hardware requirements, and licensing costs.

4. Explore Alternative Software Options: While Windows offers a vast ecosystem of software, consider exploring alternative options that may be more affordable, efficient, or tailored to your specific needs.

Conclusion: Navigating the Future of Windows

Microsoft Windows has undeniably played a pivotal role in shaping the digital landscape. Its impact on personal computing, business, and technology as a whole is undeniable. While it faces challenges and competition from alternative operating systems, its widespread compatibility, user-friendly interface, and powerful features continue to make it a dominant force. As technology evolves, Windows will need to adapt and innovate to remain relevant and competitive. By addressing user concerns, enhancing security, and fostering a more open and customizable environment, Microsoft can ensure that Windows continues to be a vital part of the digital future.

Windows Fundamentals for Legacy PCs  Microsoft Wiki  Fandom 5 Legacy Windows Features Microsoft Can't Retire Yet microsoft windows legacy software - SWK NWS
Classic Microsoft Windows Games: The Enduring Legacy of Five Timeless Favorites - Gamespedition.com Windows11ใฎใƒฌใ‚ฌใ‚ทใƒผใ‚ขใƒ—ใƒชใŒMicaใงใ‚‚ใ†ๅฐ‘ใ—่ฆ–่ฆš็š„ใช่ผใใฎๆฉๆตใ‚’ๅ—ใ‘ใ‚‹ - Gamingdeputy Japan PPT โ€“ New Perspectives on Microsoft Windows XP Tutorial 1 PowerPoint presentation  free to view
ใ€ŽNew Perspectives on Microsoft Windows 8ใ€(June JamrichParsons)ใฎๆ„Ÿๆƒณ - ใƒ–ใ‚ฏใƒญใ‚ฐ Windows' Enduring Market Dominance: 10 Ways Microsoft Maintains It - Enterprise Applications

Closure

Thus, we hope this article has provided valuable insights into The Enduring Legacy of Microsoft Windows: A Balanced Perspective. We appreciate your attention to our article. See you in our next article!

The Quick Access Toolbar In Windows 11: A Powerful Tool For Streamlining Your Workflow

The Quick Access Toolbar in Windows 11: A Powerful Tool for Streamlining Your Workflow

Introduction

With great pleasure, we will explore the intriguing topic related to The Quick Access Toolbar in Windows 11: A Powerful Tool for Streamlining Your Workflow. Let’s weave interesting information and offer fresh perspectives to the readers.

The Quick Access Toolbar in Windows 11: A Powerful Tool for Streamlining Your Workflow

The Quick Access Toolbar in Windows 11 (Complete Guide) - DekiSoft  Toolbar, Quick access, Windows

The Quick Access Toolbar (QAT) in Windows 11 is a valuable tool that empowers users to streamline their workflow by providing instant access to frequently used commands and features. Situated at the top left corner of the application window, it offers a customizable interface, allowing users to tailor its contents to their specific needs and preferences. This article explores the QAT’s functionality, its benefits, and how users can maximize its potential for enhanced productivity.

Understanding the Quick Access Toolbar

The QAT is essentially a miniature toolbar that houses a collection of commands and features commonly used within an application. It provides a convenient alternative to navigating through menus or searching for specific functions within the application’s interface. This streamlined access significantly reduces the time and effort required to execute frequently used actions, enhancing overall efficiency.

Benefits of Utilizing the Quick Access Toolbar

The QAT offers a multitude of advantages for Windows 11 users, including:

  • Increased Efficiency: By providing quick access to frequently used commands, the QAT reduces the time spent navigating through menus or searching for specific features. This translates to a significant boost in overall productivity, particularly for tasks that involve repetitive actions.

  • Customization: The QAT is highly customizable, allowing users to add, remove, and rearrange commands based on their individual needs and workflow preferences. This flexibility ensures that the QAT remains a relevant and efficient tool across various tasks and applications.

  • Improved Accessibility: For users with mobility impairments, the QAT can be a valuable tool for accessing essential commands without navigating through complex menus. It can be configured to include keyboard shortcuts for even faster access, further enhancing accessibility.

  • Streamlined Workflow: The QAT helps to create a more streamlined and efficient workflow by reducing the number of clicks and actions required to complete tasks. This can be particularly beneficial for users who work with multiple applications or perform complex tasks regularly.

Customizing the Quick Access Toolbar

Customizing the QAT is a straightforward process that involves adding, removing, and rearranging commands based on individual preferences. Here’s a step-by-step guide:

  1. Open an application: The customization process can be performed within any application that utilizes the QAT.

  2. Locate the Quick Access Toolbar: It is typically located at the top left corner of the application window, appearing as a small toolbar with icons representing frequently used commands.

  3. Customize the Toolbar:

    • Adding Commands: Right-click on the QAT and select "Customize Quick Access Toolbar." A drop-down menu will appear, displaying a list of available commands. Select the desired commands to add them to the QAT.
    • Removing Commands: Right-click on a command within the QAT and select "Remove from Quick Access Toolbar."
    • Rearranging Commands: Simply drag and drop commands within the QAT to reorder them according to preference.
  4. Save Changes: Once the QAT is customized to your liking, close the "Customize Quick Access Toolbar" window to save the changes.

Frequently Asked Questions about the Quick Access Toolbar

Q1: Can I customize the Quick Access Toolbar for specific applications?

A: Yes, the QAT can be customized for each individual application. This allows users to tailor the toolbar to the specific commands and features used within that application.

Q2: How do I add a keyboard shortcut to a command on the Quick Access Toolbar?

A: While the QAT itself does not directly support assigning keyboard shortcuts, you can assign them to commands within the application itself. This will then enable you to access those commands quickly using the keyboard shortcut, even if they are not present on the QAT.

Q3: Can I add commands from different applications to the Quick Access Toolbar?

A: No, the QAT is specific to the application it is currently used within. You cannot add commands from other applications to the QAT.

Q4: Is it possible to remove the Quick Access Toolbar entirely?

A: While the QAT cannot be entirely removed, it can be minimized by clicking the "Show Quick Access Toolbar" button, which is located on the left side of the QAT itself. This hides the toolbar while still allowing access to its commands through the button.

Tips for Optimizing the Quick Access Toolbar

  • Prioritize Frequently Used Commands: Focus on adding commands that are used most often, ensuring that the QAT remains a valuable tool for streamlining your workflow.

  • Categorize Commands: Consider grouping similar commands together within the QAT to maintain a logical and intuitive arrangement.

  • Use Keyboard Shortcuts: Assign keyboard shortcuts to frequently used commands within the QAT to further enhance efficiency and speed up your workflow.

  • Experiment and Customize: The QAT is highly customizable, so don’t be afraid to experiment with different configurations to find what works best for your individual needs and preferences.

Conclusion

The Quick Access Toolbar in Windows 11 is a powerful tool that can significantly enhance user productivity by providing instant access to frequently used commands and features. By understanding its functionality, benefits, and customization options, users can leverage the QAT to streamline their workflow, reduce repetitive actions, and ultimately achieve greater efficiency in their daily tasks. The QAT is a testament to Microsoft’s commitment to providing users with tools that empower them to work smarter and achieve more, ultimately contributing to a more seamless and productive user experience within the Windows 11 ecosystem.

Windows 11 : Add The Quick Launch Toolbar to the Taskbar - YouTube How to Use Quick Access in Windows 11 - Guiding Tech The Quick Access Toolbar in Windows 11 2024 (Complete How-To Guide)
How To Enable Or Disable Quick Access Feature In Windows 11 Add the Quick Launch Toolbar to the Taskbar in Windows 11 - YouTube How to Use Quick Access in Windows 11 - Guiding Tech
New Microsoft Office UI Launched to Windows 11/10 Users How to use Quick Launch Toolbar in Windows 11

Closure

Thus, we hope this article has provided valuable insights into The Quick Access Toolbar in Windows 11: A Powerful Tool for Streamlining Your Workflow. We thank you for taking the time to read this article. See you in our next article!

Essential Tools For A Streamlined Windows 11 Experience: A Comprehensive Guide

Essential Tools for a Streamlined Windows 11 Experience: A Comprehensive Guide

Introduction

With enthusiasm, let’s navigate through the intriguing topic related to Essential Tools for a Streamlined Windows 11 Experience: A Comprehensive Guide. Let’s weave interesting information and offer fresh perspectives to the readers.

Essential Tools for a Streamlined Windows 11 Experience: A Comprehensive Guide

Buy Windows 11 User Guide for Beginners: A Comprehensive Guide to Master Windows 11 Operating

Windows 11, with its refined interface and enhanced features, offers a compelling platform for productivity and entertainment. However, maximizing its potential necessitates a carefully curated suite of programs tailored to specific needs. This comprehensive guide explores essential software categories and recommends top-tier applications for a seamless Windows 11 experience.

1. Productivity and Efficiency:

  • Microsoft Office Suite: The industry standard for document creation, editing, and collaboration, Microsoft Office remains a cornerstone of productivity. Word, Excel, PowerPoint, and Outlook provide comprehensive tools for managing documents, spreadsheets, presentations, and email.

  • Google Workspace: A powerful alternative to Microsoft Office, Google Workspace offers a cloud-based suite encompassing Gmail, Docs, Sheets, Slides, and Forms. Its collaborative features and seamless integration with other Google services make it an attractive option for team projects and online workflows.

  • Adobe Acrobat Reader DC: For viewing and managing PDF documents, Adobe Acrobat Reader DC is a reliable and versatile tool. It enables users to annotate, sign, and convert PDFs, ensuring efficient document handling.

  • Evernote: A robust note-taking and task management platform, Evernote allows users to capture ideas, organize notes, and manage to-do lists across multiple devices. Its powerful search functionality and cross-platform accessibility make it an invaluable tool for staying organized.

  • Todoist: A popular task management application, Todoist prioritizes tasks, sets deadlines, and offers project management tools. Its intuitive interface and seamless integration with other platforms streamline daily workflow.

2. Web Browsing and Security:

  • Google Chrome: The most popular web browser globally, Google Chrome boasts a user-friendly interface, lightning-fast performance, and a vast library of extensions. Its seamless integration with Google services and robust security features make it a top choice.

  • Mozilla Firefox: Known for its privacy-focused approach and extensive customization options, Mozilla Firefox provides a secure and personalized browsing experience. Its add-on ecosystem and commitment to user privacy make it a compelling alternative to Chrome.

  • Microsoft Edge: Windows 11’s native browser, Microsoft Edge has undergone significant improvements, offering a modern design, performance enhancements, and integration with other Microsoft services. Its built-in features like Collections and Read Aloud enhance browsing efficiency.

  • NordVPN: For securing online privacy and accessing geo-restricted content, NordVPN provides a robust VPN solution. Its extensive server network, strong encryption protocols, and no-logs policy ensure secure and private browsing.

  • Malwarebytes Premium: Protecting against malware and other online threats, Malwarebytes Premium offers real-time protection, advanced threat detection, and malware removal tools. Its proactive approach ensures a secure digital environment.

3. Multimedia and Entertainment:

  • VLC Media Player: A versatile and free media player, VLC Media Player supports a wide range of video and audio formats, offering seamless playback and advanced features like subtitles and audio equalization.

  • Spotify: A leading music streaming service, Spotify offers a vast library of songs, podcasts, and curated playlists. Its user-friendly interface and offline listening capabilities make it a go-to choice for music lovers.

  • Netflix: The world’s most popular streaming service, Netflix provides a vast library of movies, TV shows, and documentaries. Its personalized recommendations and high-quality streaming ensure an immersive entertainment experience.

  • Adobe Photoshop Express: For basic photo editing needs, Adobe Photoshop Express offers a user-friendly interface and essential tools for cropping, resizing, and applying filters. Its cloud-based functionality allows for easy access and sharing.

  • GIMP: A powerful and free image editor, GIMP offers professional-level tools for photo editing, graphic design, and image manipulation. Its extensive functionality and customizability make it a popular choice for creative professionals.

4. System Optimization and Maintenance:

  • CCleaner: A popular system optimization tool, CCleaner helps remove unnecessary files, clean the registry, and optimize system performance. Its regular use can enhance system speed and stability.

  • Defraggler: For optimizing hard drive performance, Defraggler helps defragment files, improving read and write speeds. Its user-friendly interface and powerful features make it a valuable tool for maintaining system health.

  • Recuva: A data recovery tool, Recuva helps retrieve accidentally deleted files from hard drives, memory cards, and other storage devices. Its efficient recovery algorithms and user-friendly interface make it a reliable solution for data retrieval.

  • Windows Defender: Windows 11’s built-in antivirus software, Windows Defender offers real-time protection, malware detection, and threat removal capabilities. Its integration with the operating system provides a comprehensive security solution.

  • Advanced SystemCare: A comprehensive system optimization suite, Advanced SystemCare offers a range of tools for cleaning junk files, optimizing system performance, and enhancing security. Its user-friendly interface and multiple features make it a versatile solution for system maintenance.

5. Communication and Collaboration:

  • Zoom: A popular video conferencing platform, Zoom offers reliable video calls, screen sharing, and virtual meeting features. Its user-friendly interface and cross-platform compatibility make it a go-to choice for online meetings and webinars.

  • Microsoft Teams: A comprehensive collaboration platform, Microsoft Teams offers instant messaging, video conferencing, file sharing, and team management tools. Its integration with other Microsoft services makes it a powerful tool for team collaboration.

  • Discord: A popular communication platform, Discord offers voice and text chat, screen sharing, and community features. Its user-friendly interface and customizable features make it a popular choice for gamers and online communities.

  • Slack: A popular workplace communication platform, Slack offers instant messaging, file sharing, and integration with various third-party apps. Its powerful search functionality and team collaboration tools make it an efficient communication platform for businesses.

  • Skype: A long-standing communication platform, Skype offers voice and video calls, instant messaging, and file sharing. Its cross-platform compatibility and user-friendly interface make it a reliable option for staying connected.

FAQs:

  • Q: What are the essential programs for a new Windows 11 user?

    A: For new users, focusing on productivity, security, and essential multimedia tools is crucial. This includes Microsoft Office or Google Workspace, a web browser like Chrome or Firefox, a reliable antivirus like Malwarebytes, a media player like VLC, and a music streaming service like Spotify.

  • Q: Are all these programs necessary for Windows 11?

    A: The necessity of specific programs depends on individual needs and preferences. While some programs like a web browser and antivirus are essential for a safe and functional system, others like specialized productivity tools or entertainment apps are optional.

  • Q: How do I find free alternatives to paid programs?

    A: Several free alternatives exist for most paid programs. For example, LibreOffice is a free and open-source alternative to Microsoft Office, and GIMP is a powerful free image editor comparable to Adobe Photoshop. Online searches can help locate free alternatives for specific software needs.

Tips:

  • Prioritize essential programs: Start with a core set of applications for productivity, security, and basic multimedia needs.
  • Explore free alternatives: Consider free and open-source alternatives for non-essential programs to save costs.
  • Customize your setup: Tailor your software suite to your specific needs and preferences.
  • Stay updated: Regularly update programs to benefit from new features and security patches.

Conclusion:

Choosing the right programs for Windows 11 is crucial for maximizing its potential and creating a seamless user experience. This comprehensive guide provides a starting point for building a software suite tailored to individual needs, encompassing productivity, security, multimedia, system optimization, and communication. By carefully selecting and utilizing these tools, users can unlock the full potential of Windows 11 and enhance their digital workflow. Remember to prioritize essential programs, explore free alternatives, customize your setup, and stay updated for optimal performance and security.

Buy Windows 11: Discover From Beginner to Expert with this Ultimate & Complete Step-by-Step User What Are the Most Helpful Features of Windows 11? Windows 11: A Comprehensive Guide about Features and Updates Perunity - Latest Business Story
Buy WINDOWS 11 PRO USER GUIDE: A Comprehensive User Guide for Beginners and Seniors to Master Microsoft Edge introduces a streamlined experience on Windows 11 with new feature - Click This Blog Mastering Windows 11 a Comprehensive Guide - Moreira, Amรฉrico: 9798223424888 - AbeBooks
Microsoft Intune Gets New Feature to Streamline Windows 11 Upgrade Experience - Petri IT How to Deploy Windows 11: A Comprehensive Guide - TechBink

Closure

Thus, we hope this article has provided valuable insights into Essential Tools for a Streamlined Windows 11 Experience: A Comprehensive Guide. We thank you for taking the time to read this article. See you in our next article!

The Crucial Role Of Realtek Audio Drivers In Windows 11: A Comprehensive Guide

The Crucial Role of Realtek Audio Drivers in Windows 11: A Comprehensive Guide

Introduction

With enthusiasm, let’s navigate through the intriguing topic related to The Crucial Role of Realtek Audio Drivers in Windows 11: A Comprehensive Guide. Let’s weave interesting information and offer fresh perspectives to the readers.

The Crucial Role of Realtek Audio Drivers in Windows 11: A Comprehensive Guide

Unleashing the Power of Realtek Driver for Windows 11

In the realm of modern computing, sound is no longer a mere accessory but an integral part of the user experience. From crystal-clear audio for video calls and multimedia enjoyment to immersive gaming experiences, the quality of sound output hinges on the effectiveness of the audio driver. For a vast majority of Windows 11 users, the Realtek audio driver reigns supreme, silently orchestrating the harmonious flow of sound from their devices.

Understanding the Essence of Audio Drivers:

An audio driver acts as a translator, bridging the gap between the complex language of hardware and the user-friendly interface of the operating system. It enables the computer to recognize and communicate with the audio hardware, translating digital signals into the audible sounds we hear.

Realtek: A Dominant Force in Audio Technology:

Realtek Semiconductor Corporation, a Taiwanese multinational company, is a leading provider of integrated circuits (ICs) for audio, networking, and other applications. Its audio drivers are widely used in a diverse range of devices, including desktop PCs, laptops, motherboards, and even smartphones.

The Significance of Realtek Audio Drivers in Windows 11:

For Windows 11 users, Realtek audio drivers play a pivotal role in ensuring optimal sound performance. They enable:

  • Clear and Crisp Audio Output: Realtek drivers are known for their ability to deliver high-quality audio, enhancing the listening experience for music, movies, and games.
  • Enhanced Microphone Functionality: Whether for video conferencing or recording, Realtek drivers optimize microphone performance, ensuring clear and noise-free audio capture.
  • Support for Advanced Audio Features: Realtek drivers enable access to a range of features, such as surround sound, audio effects, and customizable settings, allowing users to tailor their audio experience.
  • Compatibility and Stability: Realtek drivers are meticulously engineered for compatibility with Windows 11, ensuring seamless integration and stable operation.

Navigating the Installation and Management of Realtek Audio Drivers:

Installing and managing Realtek audio drivers in Windows 11 is a straightforward process:

  1. Automatic Installation: Upon installation of Windows 11, the operating system automatically searches for and installs compatible drivers, including Realtek audio drivers, if available.
  2. Manual Installation: If automatic installation fails or if you wish to update your drivers, you can download the latest version from the Realtek website or your motherboard manufacturer’s website.
  3. Driver Management Tools: Windows 11 offers built-in tools for managing drivers, including the Device Manager, where you can update, uninstall, or troubleshoot drivers.
  4. Realtek Audio Console: Realtek provides a dedicated audio console application that allows users to customize audio settings, adjust volume levels, and manage audio effects.

Troubleshooting Common Audio Issues:

While Realtek audio drivers are generally reliable, users may occasionally encounter issues such as:

  • No Sound Output: This could be due to incorrect driver installation, a disabled audio device, or a malfunctioning audio hardware.
  • Distorted or Crackling Sound: This might indicate driver incompatibility, corrupted drivers, or a hardware issue.
  • Microphone Problems: Microphone issues could stem from driver problems, incorrect settings, or physical damage to the microphone.

Resolving Audio Issues:

To troubleshoot audio problems, consider the following steps:

  1. Restart Your Computer: A simple restart can often resolve temporary glitches.
  2. Check Audio Device Settings: Ensure your audio device is selected as the default output and input device in Windows settings.
  3. Update Drivers: Download and install the latest Realtek audio drivers from the manufacturer’s website.
  4. Run Audio Troubleshooter: Windows 11 offers a built-in audio troubleshooter that can automatically diagnose and fix common audio issues.
  5. Check Hardware Connections: Verify that all audio cables are securely connected and that the audio hardware is functioning correctly.

FAQs About Realtek Audio Drivers in Windows 11:

Q1: Why are Realtek audio drivers essential for Windows 11?

A: Realtek audio drivers enable communication between the audio hardware and the operating system, ensuring optimal sound quality, microphone functionality, and access to advanced audio features.

Q2: How do I update my Realtek audio drivers in Windows 11?

A: You can update drivers automatically through Windows Update or manually by downloading the latest version from the Realtek or motherboard manufacturer’s website.

Q3: What if my Realtek audio driver is not working properly?

A: Try restarting your computer, checking audio device settings, updating drivers, running the audio troubleshooter, and verifying hardware connections.

Q4: What are some common audio issues related to Realtek drivers?

A: Common issues include no sound output, distorted or crackling sound, and microphone problems.

Q5: Can I customize audio settings with Realtek drivers?

A: Yes, Realtek provides a dedicated audio console application that allows users to customize settings, adjust volume levels, and manage audio effects.

Tips for Optimizing Realtek Audio Drivers in Windows 11:

  • Keep Drivers Updated: Regularly update your Realtek drivers to ensure compatibility and optimal performance.
  • Use Realtek Audio Console: Utilize the Realtek audio console to customize audio settings and enhance your listening experience.
  • Check for Driver Conflicts: If you encounter audio issues, consider disabling or uninstalling other audio drivers that might be conflicting with Realtek drivers.
  • Disable Audio Enhancements: In some cases, disabling audio enhancements in Windows settings can improve sound quality.
  • Run a Hardware Check: If audio problems persist, consider running a hardware check to rule out any physical issues with the audio hardware.

Conclusion:

Realtek audio drivers play a crucial role in ensuring a seamless and enjoyable audio experience for Windows 11 users. By understanding the importance of these drivers, navigating their installation and management, and troubleshooting common issues, users can unlock the full potential of their audio hardware and enjoy clear, crisp, and immersive sound. Whether listening to music, watching movies, or engaging in video calls, Realtek audio drivers silently orchestrate the symphony of sound, enhancing the overall computing experience.

Windows 11 realtek audio driver - tkpase Realtek Audio Driver Windows 11 Pro Windows 11 Realtek Audio Driver
Realtek Audio Drivers Windows 11 Lenovo Realtek Audio Drivers Windows 11 Realtek R Audio Driver Windows 11
Realtek audio driver for windows 11 - jasfit Realtek audio driver for windows 11 - travelerase

Closure

Thus, we hope this article has provided valuable insights into The Crucial Role of Realtek Audio Drivers in Windows 11: A Comprehensive Guide. We hope you find this article informative and beneficial. See you in our next article!

Reassessing The Landscape: Why Windows 10 Remains A Viable Choice In 2023

Reassessing the Landscape: Why Windows 10 Remains a Viable Choice in 2023

Introduction

With great pleasure, we will explore the intriguing topic related to Reassessing the Landscape: Why Windows 10 Remains a Viable Choice in 2023. Let’s weave interesting information and offer fresh perspectives to the readers.

Reassessing the Landscape: Why Windows 10 Remains a Viable Choice in 2023

2023 - Windows 10 is heading towards pre-retirement

The tech landscape is in constant flux, with new operating systems and software constantly vying for users’ attention. However, despite the rise of Windows 11 and the allure of alternative operating systems, Windows 10 remains a robust and reliable choice for many users. This article explores the reasons why Windows 10 continues to hold its ground, offering a comprehensive analysis of its strengths and suitability for various user needs.

Stability and Familiarity: A Foundation of Trust

Windows 10 has been meticulously refined over the years, resulting in a mature and stable operating system. Its long-standing presence has fostered a deep understanding among users, making it a familiar and predictable platform. This familiarity translates to a smoother user experience, reducing the learning curve associated with new operating systems.

Extensive Hardware Compatibility: A Broad Spectrum of Choice

One of Windows 10’s key strengths is its vast compatibility with a wide range of hardware. From budget laptops to high-end gaming PCs, Windows 10 seamlessly integrates with a diverse array of components, ensuring a wider selection for users. This broad compatibility allows users to tailor their systems to their specific needs and budget, without limitations imposed by operating system restrictions.

A Rich Ecosystem of Software: Empowering Productivity and Creativity

Windows 10 boasts an extensive ecosystem of software, catering to diverse needs and interests. From productivity suites like Microsoft Office to creative tools like Adobe Photoshop, the availability of a wide range of applications enhances the user’s ability to work, learn, and express themselves. This rich software landscape ensures that users can find the tools they need to accomplish their tasks and pursue their passions.

Security Features: Safeguarding Against Threats

Windows 10 incorporates robust security features designed to protect users from online threats. From built-in antivirus and firewall protection to regular security updates, Windows 10 proactively guards against malware, phishing attempts, and other cyber threats. These features provide users with peace of mind, knowing that their data and privacy are well-protected.

Continual Updates and Support: A Commitment to Longevity

Microsoft continues to provide regular updates for Windows 10, ensuring users have access to the latest features, security patches, and bug fixes. This commitment to ongoing support ensures that Windows 10 remains a viable and up-to-date platform for years to come. Users can rely on Microsoft to address vulnerabilities and enhance the user experience through regular updates, promoting a secure and stable environment.

Accessibility and Customization: Adapting to Individual Needs

Windows 10 offers a high degree of accessibility and customization, allowing users to tailor their experience to their individual needs. From accessibility features for visually impaired users to keyboard shortcuts for power users, Windows 10 provides options to enhance the user experience for diverse needs. This adaptability ensures that users can comfortably navigate and interact with the operating system, maximizing their productivity and enjoyment.

Cost-Effectiveness: A Value-Driven Solution

Compared to newer operating systems, Windows 10 offers a cost-effective solution for many users. Existing users can continue to utilize their current systems without the need to upgrade to a new operating system. This economic advantage makes Windows 10 an attractive option for budget-conscious individuals and organizations.

Beyond the Basics: Exploring Windows 10’s Potential

While the aforementioned points highlight Windows 10’s core strengths, it’s important to recognize the operating system’s potential beyond basic functionality. Windows 10 supports a range of advanced features, including:

  • Gaming: Windows 10 is a popular platform for gaming, with a wide range of games available and support for DirectX 12, ensuring smooth and immersive gameplay.
  • Virtualization: Windows 10 allows users to run virtual machines, enabling them to test new software, access different operating systems, or create isolated work environments.
  • Development: Windows 10 provides a robust development environment, supporting various programming languages and frameworks, making it a suitable platform for software development.
  • Cloud Integration: Windows 10 seamlessly integrates with cloud services like OneDrive and Microsoft 365, enabling users to access their files and applications from any device.

FAQ: Addressing Common Concerns

Q: Is Windows 10 still receiving updates?
A: Yes, Microsoft continues to provide regular updates for Windows 10, including security patches, bug fixes, and feature enhancements.

Q: What are the differences between Windows 10 and Windows 11?
A: Windows 11 features a redesigned user interface, improved performance, and enhanced security features. However, Windows 10 remains a stable and reliable operating system with a mature ecosystem of software.

Q: Can I upgrade my existing Windows 10 system to Windows 11?
A: Windows 11 has specific hardware requirements, and not all systems running Windows 10 are eligible for an upgrade. Check Microsoft’s website for compatibility information.

Q: Is Windows 10 still supported by Microsoft?
A: Yes, Windows 10 will continue to receive security updates until October 14, 2025.

Tips for Optimizing Windows 10 Performance

  • Keep your system updated: Regularly install the latest updates to ensure optimal performance and security.
  • Manage your startup programs: Disable unnecessary programs that launch automatically at startup to improve boot times.
  • Clean your hard drive: Regularly delete temporary files and unnecessary data to free up disk space.
  • Use a lightweight antivirus: Choose a reputable antivirus program with minimal system resource consumption.
  • Optimize your power settings: Adjust your power settings to balance performance and energy efficiency.

Conclusion: Windows 10 Remains a Valid Choice

While the tech world continues to evolve, Windows 10 remains a robust and reliable operating system, offering a compelling blend of stability, compatibility, security, and affordability. Its mature ecosystem of software, ongoing support, and accessibility features make it a suitable choice for diverse user needs. Whether you’re a casual user, a power user, or a professional, Windows 10 offers a solid foundation for your digital endeavors.

Windows 10 remains significantly more popular than Windows 11 10 reasons why Windows remain the best choice among corporates Why Windows 10 Is So Important to Microsoft's Future  Time
Why Windows 10 ?  ALM Informatique Why Windows 10 has so many versions! - YouTube Windows 11 Adoption Lags Behind as Windows 10 Remains Firm: What Lies Ahead  Cryptopolitan
Windows 10 21H2 is now widely available, Windows 11 remains optional Giblets: Microsoft explains why Windows 10 builds were taken down  NAG

Closure

Thus, we hope this article has provided valuable insights into Reassessing the Landscape: Why Windows 10 Remains a Viable Choice in 2023. We hope you find this article informative and beneficial. See you in our next article!

Disabling Network Ports In Windows 10: A Guide To Enhanced Security And Network Control

Disabling Network Ports in Windows 10: A Guide to Enhanced Security and Network Control

Introduction

With great pleasure, we will explore the intriguing topic related to Disabling Network Ports in Windows 10: A Guide to Enhanced Security and Network Control. Let’s weave interesting information and offer fresh perspectives to the readers.

Disabling Network Ports in Windows 10: A Guide to Enhanced Security and Network Control

How to Disable Network Adapters on Windows 10

Network ports serve as virtual pathways through which data flows between devices on a network. While essential for communication and connectivity, they can also be vulnerabilities exploited by malicious actors. Disabling unnecessary network ports in Windows 10 can significantly enhance system security by reducing the attack surface and minimizing potential risks. This guide provides a comprehensive overview of how to disable network ports, emphasizing the importance and benefits of this practice.

Understanding Network Ports

Imagine a network as a bustling city, with various buildings representing devices and streets representing communication channels. Network ports are like doorways on these buildings, each assigned a specific number (port number) to identify its purpose. For example, port 80 is typically used for web traffic, port 22 for secure shell (SSH) connections, and port 443 for secure web traffic (HTTPS).

Why Disable Network Ports?

Disabling unnecessary ports in Windows 10 offers several advantages:

  • Reduced Attack Surface: By closing unused doors, you limit the number of potential entry points for malicious actors. This reduces the likelihood of successful attacks, particularly from automated scans seeking vulnerable ports.
  • Enhanced Security: Disabling ports associated with services that are not required or are not essential for normal operation enhances system security. It prevents unauthorized access to sensitive data and resources.
  • Improved Network Performance: Disabling ports that are not actively used can optimize network performance by reducing unnecessary traffic and bandwidth consumption.
  • Increased Privacy: By restricting network access, you can minimize the amount of data transmitted over the network, thereby enhancing privacy and confidentiality.

Methods to Disable Network Ports in Windows 10

Several methods can be employed to disable network ports in Windows 10:

1. Using Windows Firewall:

  • Windows Firewall is a built-in security feature that can be used to block incoming and outgoing connections on specific ports.
  • To access Windows Firewall, search for "Windows Firewall" in the Start menu.
  • Click on "Advanced settings" to access the advanced firewall configuration.
  • Navigate to "Inbound Rules" or "Outbound Rules" depending on the desired direction of blocking.
  • Click on "New Rule" and select "Port" as the rule type.
  • Specify the port number and protocol (TCP or UDP) to be blocked.
  • Choose an appropriate action, such as "Block the connection" or "Allow the connection."
  • Configure the scope of the rule, specifying the profiles (domain, private, public) and the specific applications or services to which the rule applies.
  • Assign a name and description to the rule for easy identification.
  • Click on "Finish" to create the rule.

2. Using Command Prompt:

  • The Command Prompt can be used to disable specific ports using the "netsh" command.
  • Open the Command Prompt as an administrator.
  • Execute the following command to disable a specific port (replace "port number" with the actual port number):
netsh advfirewall firewall add rule name="Block port number" dir=in action=block protocol=tcp localport=port number
  • To enable the port again, use the following command:
netsh advfirewall firewall delete rule name="Block port number"

3. Using Third-Party Firewall Software:

  • Several third-party firewall software applications offer advanced features and granular control over network port management.
  • These applications provide user-friendly interfaces and often offer more detailed configuration options compared to the built-in Windows Firewall.
  • Popular examples include:
    • Comodo Firewall: A robust and customizable firewall with advanced features for network port management.
    • ZoneAlarm: A comprehensive security suite that includes a powerful firewall with port blocking capabilities.
    • Kaspersky Total Security: A comprehensive security solution that features a firewall with advanced port control options.

4. Using Registry Editor:

  • The Registry Editor can be used to disable specific ports by modifying certain registry keys.
  • This method is more advanced and requires caution, as incorrect modifications can lead to system instability.
  • To access the Registry Editor, search for "regedit" in the Start menu.
  • Navigate to the following registry key:
HKEY_LOCAL_MACHINESYSTEMCurrentControlSetServicesTcpipParameters
  • Create a new DWORD value named "DisableSpecificPorts" and set its value to the port number to be blocked.
  • Multiple ports can be blocked by separating them with commas.
  • This method requires a system restart for the changes to take effect.

Important Considerations:

  • Essential Ports: Before disabling any ports, it is crucial to identify essential ports required for normal system operation. Disabling critical ports can disrupt network connectivity and functionality.
  • System Services: Disabling a port may affect the functionality of associated system services. Ensure that the service is not essential before disabling its corresponding port.
  • Remote Access: If you need to access your computer remotely, ensure that the necessary ports are not blocked.
  • Firewall Configuration: Carefully review and configure firewall rules to prevent unintentional blocking of legitimate traffic.
  • Security Best Practices: Disabling unnecessary ports is a crucial security measure, but it should be combined with other security best practices, such as using strong passwords, keeping software up to date, and implementing anti-virus protection.

Frequently Asked Questions

Q: What ports should I disable in Windows 10?

A: The specific ports to disable depend on your individual needs and the services you use. As a general guideline, consider disabling ports associated with services that are not actively used, such as:

  • Remote Desktop Protocol (RDP) (port 3389): If you do not require remote access to your computer, disable this port.
  • Telnet (port 23): This port is often used for remote administration but is considered insecure. Disable it unless absolutely necessary.
  • FTP (port 21): File Transfer Protocol is often used for file sharing but can be vulnerable to attacks. Disable it if you do not need it.
  • Unused Ports: Any ports associated with services that are not used or are not essential for normal operation can be disabled.

Q: Can I disable all ports in Windows 10?

A: Disabling all ports is not recommended. This will prevent all network communication, including essential services and applications. It will effectively isolate your computer from the network, making it unusable.

Q: What are the risks of disabling network ports?

A: Disabling essential ports can disrupt network connectivity and functionality. It can also prevent access to critical services and applications. Additionally, incorrect configuration of firewall rules can lead to unintended blocking of legitimate traffic.

Tips for Disabling Network Ports:

  • Research Port Numbers: Before disabling any ports, research the purpose of each port to ensure that you are not disabling essential services.
  • Start Small: Begin by disabling a few ports and monitor system behavior to identify any potential issues.
  • Backup System: Before making significant changes to network settings, create a system backup to ensure data recovery in case of errors.
  • Consult a Security Professional: If you are unsure about the best practices for disabling ports or have complex network configurations, consult a security professional for guidance.

Conclusion

Disabling unnecessary network ports in Windows 10 is a vital security measure that can significantly reduce the risk of cyberattacks and enhance system security. By limiting the attack surface and restricting access to sensitive data and resources, you can create a more secure and resilient network environment. However, it is essential to proceed with caution, carefully identify essential ports, and ensure that you are not disrupting critical services. By implementing these best practices, you can effectively manage network ports and enhance the overall security of your Windows 10 system.

How to enable or disable Wi-Fi and Ethernet network adapters on Windows 10  Windows Central How to Enable or Disable Network Connections in Windows How to Disable or Enable Ethernet Port (LAN Adapter) in Windows 11, Windows 10 - YouTube
How to disable or enable Ethernet port adapter in Windows 10 ,8.1, 8, 7 - YouTube How to enable or disable Wi-Fi and Ethernet network adapters on Windows 10  Windows Central How to Enable or Disable Network Connections in Windows
How to Disable Network Adapters on Windows 10 How to Disable a Network Adapter in Windows 10

Closure

Thus, we hope this article has provided valuable insights into Disabling Network Ports in Windows 10: A Guide to Enhanced Security and Network Control. We thank you for taking the time to read this article. See you in our next article!

Connecting Your Windows 10 PC And Laptop: A Comprehensive Guide

Connecting Your Windows 10 PC and Laptop: A Comprehensive Guide

Introduction

With enthusiasm, let’s navigate through the intriguing topic related to Connecting Your Windows 10 PC and Laptop: A Comprehensive Guide. Let’s weave interesting information and offer fresh perspectives to the readers.

Connecting Your Windows 10 PC and Laptop: A Comprehensive Guide

How to Connect Laptop to PC / How to Connect PC to PC - YouTube

Connecting a Windows 10 PC and laptop offers a multitude of advantages, enhancing productivity, streamlining workflows, and fostering seamless collaboration. This guide provides a detailed explanation of the various methods available for establishing a connection between these devices, outlining their respective benefits and considerations.

Understanding Connection Types:

Connecting a PC and laptop in a Windows 10 environment can be achieved through various methods, each catering to specific needs and offering unique capabilities. The primary connection types include:

  1. Wired Connections:

    • Ethernet Cable: This traditional method provides the most reliable and stable connection, offering high bandwidth and minimal latency. It is ideal for tasks requiring high data transfer speeds, such as large file sharing, gaming, or video streaming.
    • USB Cable: While primarily used for data transfer and charging, USB cables can also be used to establish a connection between a PC and a laptop, enabling file sharing and peripheral access. However, the bandwidth is significantly lower compared to Ethernet, and this method is generally less preferred for high-demand tasks.
  2. Wireless Connections:

    • Wi-Fi: This ubiquitous technology offers the convenience of wireless connectivity, enabling the connection of multiple devices within a network. However, Wi-Fi performance can be affected by factors like network congestion, distance from the router, and interference from other devices.
    • Bluetooth: Primarily used for connecting peripherals like mice, keyboards, and headphones, Bluetooth can also establish a connection between a PC and a laptop. However, its bandwidth is limited, making it unsuitable for large file transfers or high-demand tasks.
  3. Network Sharing:

    • HomeGroup: A feature specifically designed for Windows 10, HomeGroup allows seamless sharing of files, printers, and other resources between PCs and laptops within the same home network. It provides a user-friendly interface for managing shared content.
    • Workgroup: This method offers more granular control over shared resources compared to HomeGroup. It allows users to create a network with specific access permissions for individual devices, making it suitable for small businesses or collaborative environments.

Setting Up a Connection:

The process of connecting a PC and laptop in a Windows 10 environment involves a few simple steps, depending on the chosen method:

  1. Wired Connections:

    • Ethernet Cable: Simply connect one end of the Ethernet cable to the network port on the PC and the other end to the network port on the laptop. Windows will automatically detect the connection and establish a network.
    • USB Cable: Connect one end of the USB cable to the USB port on the PC and the other end to the USB port on the laptop. Windows will recognize the connection and prompt you to choose the desired data transfer mode.
  2. Wireless Connections:

    • Wi-Fi: Ensure both the PC and laptop are within range of the Wi-Fi router. On both devices, open the Wi-Fi settings and select the desired network from the available list. Enter the network password if required.
    • Bluetooth: Enable Bluetooth on both the PC and laptop. On the PC, navigate to the "Add Bluetooth or other device" settings and select "Bluetooth" as the connection type. The laptop should appear in the list of available devices. Select it and follow the on-screen instructions to establish the connection.
  3. Network Sharing:

    • HomeGroup: On both the PC and laptop, navigate to the "Network and Sharing Center" and select "HomeGroup." Follow the prompts to create or join a HomeGroup. Once joined, you can manage shared resources and access them from either device.
    • Workgroup: On both the PC and laptop, navigate to "System Properties" and choose "Change settings." Under "Computer Name, Domain, and Workgroup settings," select "Change" and enter the desired workgroup name. Ensure both devices are within the same workgroup to share resources.

Benefits of Connecting Your PC and Laptop:

Connecting your PC and laptop offers a range of advantages, improving efficiency, collaboration, and overall user experience:

  • Seamless File Sharing: Transfer files effortlessly between devices, eliminating the need for external storage devices or cloud services for smaller files.
  • Peripheral Sharing: Access peripherals like printers, scanners, and external hard drives from either device, eliminating the need for separate connections.
  • Remote Access: Control your laptop from your PC or vice versa, enabling remote work or accessing files on a distant device.
  • Enhanced Collaboration: Collaborate on projects seamlessly, share files and documents in real-time, and work together on presentations or spreadsheets.
  • Streamlined Workflow: Access and manage files from both devices, centralizing your work and eliminating the need to switch between devices frequently.
  • Improved Security: Utilize the shared network connection to enhance security measures, allowing for centralized management of firewalls and antivirus software.
  • Cost Savings: Eliminate the need for separate peripherals or cloud storage subscriptions, reducing overall expenses.

Troubleshooting Connection Issues:

While connecting a PC and laptop is generally straightforward, certain issues may arise. Here are some common troubleshooting steps:

  • Verify Network Connectivity: Ensure both devices are connected to the network. Check the network connection status on both devices and troubleshoot any connectivity issues.
  • Check Firewall Settings: Ensure that the firewall on both devices is not blocking the connection. Temporarily disable the firewall to test if it resolves the issue.
  • Restart Devices: Sometimes, a simple restart of both devices can resolve connectivity problems.
  • Update Network Drivers: Outdated network drivers can cause connection issues. Update the network drivers on both devices to ensure compatibility.
  • Network Configuration: Double-check the network settings on both devices, ensuring that the network names, passwords, and sharing settings are consistent.
  • Antivirus Software: Antivirus software can sometimes interfere with network connections. Temporarily disable the antivirus software on both devices to see if it resolves the issue.

FAQs:

Q: Can I connect my PC and laptop without a router?

A: Yes, you can connect your PC and laptop directly using an Ethernet cable. This method creates a peer-to-peer connection, bypassing the need for a router. However, it limits the connection to those two devices and does not allow for internet access.

Q: What is the best way to connect my PC and laptop for gaming?

A: For optimal gaming performance, a wired connection via an Ethernet cable is recommended. It provides the highest bandwidth and lowest latency, minimizing lag and ensuring smooth gameplay.

Q: Can I access files on my laptop from my PC remotely?

A: Yes, you can access files on your laptop remotely from your PC using various methods, including remote desktop software like Microsoft Remote Desktop or third-party solutions.

Q: Is it safe to share files between my PC and laptop?

A: Sharing files between your PC and laptop is generally safe if you are using a trusted network and have implemented proper security measures like strong passwords and antivirus software.

Q: Can I connect my PC and laptop using Bluetooth for file sharing?

A: While Bluetooth can establish a connection between devices, its limited bandwidth makes it unsuitable for large file transfers. It is more appropriate for connecting peripherals or transferring small files.

Q: How can I improve the performance of my wireless connection?

A: You can improve the performance of your wireless connection by ensuring a strong Wi-Fi signal, minimizing interference from other devices, and using a dual-band router that supports faster Wi-Fi standards like Wi-Fi 6.

Tips:

  • Use a Strong Password: When connecting your devices, ensure you use a strong password to secure your network and prevent unauthorized access.
  • Enable Network Discovery: Ensure that network discovery is enabled on both devices to allow them to find and connect to each other.
  • Configure Sharing Settings: Adjust the sharing settings on both devices to control which folders and resources are accessible to other devices on the network.
  • Use a VPN: If connecting to a public network, consider using a VPN to encrypt your data and enhance your privacy.
  • Keep Devices Updated: Regularly update your operating system and network drivers to ensure compatibility and security.

Conclusion:

Connecting a PC and laptop in a Windows 10 environment provides numerous benefits, enhancing productivity, collaboration, and overall user experience. By understanding the various connection methods, their respective benefits, and troubleshooting steps, you can establish a seamless and reliable connection between your devices, maximizing their potential and streamlining your workflow. Remember to prioritize security and implement appropriate measures to protect your data and network from unauthorized access.

How To Set Up A Windows 10 Laptop To Work With Two Monitors Connect App Windows 10 See All Devices Connected to Your Windows 10 Computer - dummies
How to connect your phone to your Windows 10 PC - CNET How to Setup Multiple Monitors in Microsoft Windows 10  Dell UK 5 Easy Ways to Connect a Laptop to a Monitor - Recompute
How To Add Multiple Monitors To Your Windows 10 PC Cables How To Connect Internet from Mobile to PC or Laptop via hotspot - YouTube

Closure

Thus, we hope this article has provided valuable insights into Connecting Your Windows 10 PC and Laptop: A Comprehensive Guide. We thank you for taking the time to read this article. See you in our next article!

Navigating The Digital Landscape: A Guide To Online Driver Installation For Windows 10

Navigating the Digital Landscape: A Guide to Online Driver Installation for Windows 10

Introduction

In this auspicious occasion, we are delighted to delve into the intriguing topic related to Navigating the Digital Landscape: A Guide to Online Driver Installation for Windows 10. Let’s weave interesting information and offer fresh perspectives to the readers.

How to Install Windows Drivers Using DriverPack Solution, AIDA and Online Updates - HubPages

In the intricate world of modern computing, hardware and software must seamlessly coexist. This delicate balance relies heavily on drivers, specialized programs that enable the operating system to communicate with and control connected devices. For Windows 10 users, the process of obtaining and installing drivers has evolved significantly, with online resources becoming the preferred method. This shift presents both advantages and complexities, requiring a nuanced understanding of the process and its implications.

The Importance of Drivers in a Digital Ecosystem

Imagine a symphony orchestra without sheet music. Each instrument, though capable of producing sound, would lack the instructions to harmonize and create a cohesive performance. Similarly, without drivers, hardware components โ€“ the instruments of your computer โ€“ remain silent and unusable. Drivers act as the sheet music, providing the operating system with the necessary instructions to interact with specific devices, such as graphics cards, sound cards, printers, and network adapters.

The Evolution of Driver Acquisition: From Disks to the Cloud

Historically, drivers were distributed on physical media, typically CDs or DVDs. This approach, while reliable, presented limitations. Users needed to physically access the disk, requiring storage space and potentially hindering portability. Moreover, driver updates were often cumbersome, necessitating manual downloads and installations.

The advent of the internet revolutionized driver acquisition. Online repositories, maintained by hardware manufacturers and third-party providers, offer a vast library of drivers, readily accessible through a simple search. This shift has significantly streamlined the process, enabling users to obtain the latest drivers with minimal effort.

Online Driver Installation: A Simplified Approach

Windows 10, with its inherent focus on user-friendliness, further enhances the online driver installation experience. The operating system employs a sophisticated driver management system, automatically detecting connected devices and attempting to locate and install compatible drivers from its internal repository or online sources.

This automatic driver installation process, while convenient, can sometimes lead to outdated or incompatible drivers, potentially impacting device performance and system stability. To ensure optimal functionality, users should proactively seek and install the latest drivers directly from the manufacturer’s website.

Navigating the Online Landscape: A Step-by-Step Guide

  1. Identify the Device: Begin by identifying the specific hardware component requiring a driver update. This information is often printed on the device itself or can be found in the device manager within Windows 10.

  2. Manufacturer’s Website: The most reliable source for drivers is the official website of the hardware manufacturer. Navigate to the support section and use the search function to locate drivers for your specific device model.

  3. Driver Download: Once located, download the driver package to your computer. Ensure the downloaded file is compatible with your version of Windows 10 (32-bit or 64-bit).

  4. Driver Installation: After the download is complete, run the installation file. Follow the on-screen instructions, providing necessary permissions and accepting any license agreements.

  5. Device Verification: After installation, verify that the device is functioning correctly. Open the device manager and check if the driver is successfully installed and recognized by the system.

Beyond the Basics: Advanced Techniques and Considerations

Driver Updates: Regular driver updates are crucial for maintaining optimal performance and security. Manufacturers release updates to address bugs, improve compatibility, and enhance device functionality. Windows Update can automatically download and install driver updates, but it’s often advisable to manually check for updates directly from the manufacturer’s website.

Driver Rollback: If a driver update causes issues, you can usually revert to a previous version. Access the device manager, locate the problematic device, and select "Roll Back Driver" from the properties menu.

Third-Party Driver Download Sites: While convenient, using third-party websites for driver downloads can pose risks. These sites may offer outdated, corrupted, or even malicious drivers. It is recommended to prioritize official manufacturer websites for driver downloads.

Troubleshooting Driver Issues: If a driver installation leads to system instability or device malfunction, consider the following troubleshooting steps:

  • Restart your computer: A simple restart can often resolve temporary driver conflicts.
  • Uninstall and reinstall the driver: Remove the problematic driver and reinstall it from the manufacturer’s website.
  • Check for system updates: Ensure your Windows 10 operating system is up to date, as system updates can address driver compatibility issues.
  • Contact the manufacturer: If all else fails, reach out to the hardware manufacturer’s technical support for assistance.

FAQs: Addressing Common Concerns

Q: What happens if I don’t update my drivers?

A: Outdated drivers can lead to performance issues, compatibility problems, and security vulnerabilities. It’s essential to keep drivers updated to ensure optimal functionality and security.

Q: Can I install drivers for a different device on my computer?

A: Installing drivers for a different device is generally not recommended. Drivers are specifically designed for individual hardware components, and installing incompatible drivers can lead to system instability or device malfunction.

Q: What if I accidentally delete a driver?

A: If you accidentally delete a driver, the operating system may attempt to automatically reinstall it. If not, you can download and install the driver from the manufacturer’s website.

Q: How do I know if I have the latest drivers?

A: The easiest way to check is to visit the manufacturer’s website and compare the version number of the driver you have installed with the latest available version.

Tips for Successful Online Driver Installation

  • Backup your system: Before installing any drivers, create a system restore point or backup your data to protect against potential issues.
  • Read the installation instructions: Carefully review the installation instructions provided by the manufacturer to ensure proper installation.
  • Disconnect unnecessary devices: Disconnect any peripherals not essential for the driver installation to minimize potential conflicts.
  • Restart your computer after installation: Restarting your computer after installing a driver helps ensure the driver is properly loaded and integrated into the system.

Conclusion: Embracing the Digital Evolution

Online driver installation has revolutionized the way we interact with our computers. By leveraging the vast resources available online, users can easily access and install the latest drivers, ensuring optimal performance and compatibility. While the process is generally straightforward, it’s crucial to understand the importance of driver updates, the potential risks associated with third-party websites, and the troubleshooting steps to address any issues that may arise. By embracing this digital evolution, users can navigate the complex world of driver management with confidence, ensuring their computer systems operate smoothly and efficiently.

Windows 10 How To Configure Windows 10 After Installation Windows 10 How to Install/Update Drivers in Windows 10 - YouTube Navigating the Digital Landscape E-Book
How to Enable or Disable Automatic Driver Installation in Windows 10 Device Driver Automatic Installation - Turn On or Off in Windows 10 - Windows 10 Windows Update How to Enable or Disable Automatic Driver Installation in Windows 10
Learn to install windows 10 from usb with driver 2020 (Step by Step) - YouTube How To Enable Or Disable Automatic Driver Installation In Windows 10 Updates - Vrogue

Closure

Thus, we hope this article has provided valuable insights into Navigating the Digital Landscape: A Guide to Online Driver Installation for Windows 10. We appreciate your attention to our article. See you in our next article!

Enhancing The Command Line Experience: A Deep Dive Into Oh My Zsh On Windows 11

Enhancing the Command Line Experience: A Deep Dive into Oh My Zsh on Windows 11

Introduction

With great pleasure, we will explore the intriguing topic related to Enhancing the Command Line Experience: A Deep Dive into Oh My Zsh on Windows 11. Let’s weave interesting information and offer fresh perspectives to the readers.

Enhancing the Command Line Experience: A Deep Dive into Oh My Zsh on Windows 11

Installing Zsh and Oh-my-zsh on Windows 11 with WSL2 - DEV Community

The command line interface (CLI) remains a fundamental tool for developers, system administrators, and power users alike. While Windows 11’s built-in command prompt provides basic functionality, users often seek a more streamlined, customizable, and feature-rich experience. This is where Oh My Zsh steps in, offering a powerful and extensible framework for transforming the Windows 11 command line into a highly personalized and efficient tool.

What is Oh My Zsh?

Oh My Zsh is not simply a shell; it is a community-driven framework that enhances the Zsh shell, adding a plethora of features, themes, and plugins. Zsh, or the Z shell, is a powerful Unix-like shell known for its advanced features and customization options. Oh My Zsh acts as a bridge, making Zsh more accessible and user-friendly by providing a curated collection of plugins and themes, streamlining the setup process.

Why Choose Oh My Zsh on Windows 11?

The benefits of using Oh My Zsh on Windows 11 are manifold:

  • Enhanced Productivity: Oh My Zsh’s plugins streamline common tasks, automating repetitive commands and providing shortcuts for frequently used tools. This saves valuable time and improves efficiency, particularly for developers and system administrators.
  • Enhanced Customization: With a vast library of themes, users can personalize their command line environment to match their preferences and workflows. This includes altering colors, fonts, and layout, creating a visually appealing and functional workspace.
  • Improved Functionality: Oh My Zsh extends the capabilities of the Zsh shell with a wide range of plugins. These plugins provide access to powerful features like Git integration, command history search, auto-completion, and more.
  • Simplified Setup: Oh My Zsh’s framework simplifies the installation and configuration process, making it easier for users to adopt Zsh and its powerful features without extensive manual configuration.

Installing and Configuring Oh My Zsh on Windows 11

Installing Oh My Zsh on Windows 11 is a straightforward process:

  1. Install Git: Oh My Zsh relies on Git for managing its plugins and themes. Ensure Git is installed on your Windows 11 system.
  2. Download the Installer: Download the Oh My Zsh installer from the official website.
  3. Run the Installer: Execute the installer and follow the on-screen instructions.
  4. Configure Your Shell: Upon successful installation, you can modify your shell’s settings in the ~/.zshrc file. This file allows customization of themes, plugins, and other preferences.

Exploring the Features of Oh My Zsh

Plugins: Oh My Zsh’s plugins are the heart of its functionality. They extend the shell’s capabilities, adding features and shortcuts for various tasks. Some popular plugins include:

  • Git: Provides seamless Git integration, offering commands for managing repositories, staging changes, and committing code.
  • Zsh-autosuggestions: Offers intelligent command suggestions based on previous commands and context.
  • Zsh-syntax-highlighting: Adds syntax highlighting to commands, making them more readable and easier to debug.
  • Zsh-history-substring-search: Enables fast and efficient search through command history using substrings.
  • Zsh-kubectl: Provides shortcuts and auto-completion for interacting with Kubernetes clusters.

Themes: Themes define the visual appearance of your command line. Oh My Zsh offers a vast library of themes, allowing you to customize colors, fonts, and layouts to suit your preferences. Some popular themes include:

  • Powerlevel10k: A highly customizable theme with advanced features like status indicators and progress bars.
  • Agnoster: A minimalist theme known for its clean and efficient design.
  • Solarized: A theme designed to be visually appealing and accessible, with color palettes optimized for readability.
  • Dracula: A dark theme with vibrant colors and high contrast, ideal for low-light environments.

Customizing Your Oh My Zsh Experience

Oh My Zsh offers extensive customization options. Users can tailor their environment by:

  • Choosing Plugins: Selecting plugins based on their needs and workflows.
  • Choosing Themes: Selecting a theme that suits their preferences and visual style.
  • Modifying the .zshrc File: Directly editing the .zshrc file to adjust settings, define aliases, and customize the shell’s behavior.
  • Creating Custom Plugins: Developing custom plugins to extend Oh My Zsh’s functionality for specific needs.

FAQs about Oh My Zsh on Windows 11

Q: Is Oh My Zsh compatible with Windows 11?

A: Yes, Oh My Zsh is fully compatible with Windows 11. It requires Git, which is readily available for Windows.

Q: How do I install Oh My Zsh on Windows 11?

A: The installation process is straightforward. Download the installer from the official website and follow the on-screen instructions.

Q: Can I use Oh My Zsh with other shells?

A: Oh My Zsh is specifically designed for the Zsh shell. However, there are similar frameworks available for other shells like Bash.

Q: What are the system requirements for Oh My Zsh on Windows 11?

A: Oh My Zsh has minimal system requirements. It requires a recent version of Windows 11 and Git.

Q: How do I customize my Oh My Zsh environment?

A: You can customize Oh My Zsh by choosing plugins and themes, editing the .zshrc file, and even creating custom plugins.

Q: Are there any security concerns associated with using Oh My Zsh?

A: As with any third-party software, it is essential to download and install Oh My Zsh from trusted sources. Ensure your system is up-to-date with security patches.

Tips for Using Oh My Zsh on Windows 11

  • Explore the Plugin Library: Browse the available plugins and select those that align with your workflows and needs.
  • Experiment with Themes: Try different themes to find one that matches your visual preferences.
  • Use the .zshrc File Effectively: Leverage the .zshrc file to create aliases, customize settings, and enhance your command line experience.
  • Join the Community: Engage with the Oh My Zsh community for support, tips, and inspiration.

Conclusion

Oh My Zsh transforms the Windows 11 command line into a powerful, customizable, and efficient tool. Its vast library of plugins and themes provides a rich and extensible environment for developers, system administrators, and power users alike. By embracing Oh My Zsh, users can unlock the full potential of the Zsh shell, streamlining their workflows, enhancing their productivity, and enjoying a personalized command line experience. The framework’s ease of use, vast community support, and continuous development ensure that Oh My Zsh remains a valuable asset for any Windows 11 user seeking to optimize their command line interaction.

How to install Oh My Zsh on Windows 11 without WSL  Luna's Piece How to set up an amazing terminal for data science with oh-my-zsh plugins  Engineering for Data Using zsh on Windows  Walter Teng
Windows 11 has a new default command line experience  Windows Central OH MY ZSH Tutorial - Bring Your Terminal To Another Level - YouTube Installing Zsh And Oh My Zsh In Windows Git Bash Domi - vrogue.co
Oh My ZSH dans Windows Terminal โ€“ Dayo Power up your Terminal using Oh-my-Zsh + iTerm2  by Adesh Gautam  The Startup  Medium

Closure

Thus, we hope this article has provided valuable insights into Enhancing the Command Line Experience: A Deep Dive into Oh My Zsh on Windows 11. We thank you for taking the time to read this article. See you in our next article!