Net Framework 3 5 Windows 11 Download

net framework 3 5 windows 11 download

Introduction

With great pleasure, we will explore the intriguing topic related to net framework 3 5 windows 11 download. Let’s weave interesting information and offer fresh perspectives to the readers.

How to Install .NET Framework 3.5 on Windows 11/10 PC - YouTube

The .NET Framework 3.5, despite its age, remains a crucial component for many legacy applications and software. While Windows 11 prioritizes newer technologies like .NET 6 and .NET 7, the need to run older applications built on .NET Framework 3.5 persists. This guide provides a comprehensive understanding of the intricacies involved in installing and utilizing .NET Framework 3.5 on Windows 11, addressing common concerns and offering practical tips for a seamless experience.

Understanding the Importance of .NET Framework 3.5

.NET Framework 3.5 is a software framework developed by Microsoft, released in 2007. It provides a comprehensive environment for building and running applications on Windows operating systems. The framework’s core strength lies in its ability to simplify the development process, enabling developers to create applications that are highly efficient, secure, and compatible with various Windows versions.

While newer versions of .NET have emerged, .NET Framework 3.5 continues to be relevant due to its compatibility with a vast library of legacy applications. Many software programs, especially those developed before the advent of .NET Core and .NET 5, rely on .NET Framework 3.5 for their functionality.

The Challenge of Compatibility: .NET Framework 3.5 on Windows 11

Windows 11, with its focus on modern technologies, does not include .NET Framework 3.5 by default. This means users who need to run applications requiring .NET Framework 3.5 will have to manually install it. The process can be slightly more complex than installing software directly from the Microsoft Store.

Installation Methods: A Detailed Breakdown

There are two primary methods to install .NET Framework 3.5 on Windows 11:

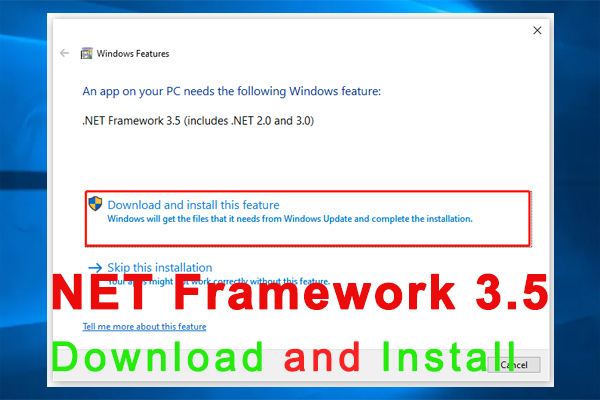
1. Using Windows Features:

  • This is the recommended method for most users. It leverages Windows’ built-in functionality to enable .NET Framework 3.5.
  • Navigate to Settings > Apps > Apps & features > Optional features.
  • Click on Add a feature and select .NET Framework 3.5.
  • Windows will download and install the necessary files.

2. Using the Offline Installer:

  • This method is useful if you lack internet connectivity or prefer a manual approach.
  • Download the .NET Framework 3.5 offline installer from the official Microsoft website.
  • Run the installer as administrator and follow the on-screen instructions.

Addressing Potential Issues and Troubleshooting

During installation, you might encounter errors or issues. Here’s a breakdown of common problems and their solutions:

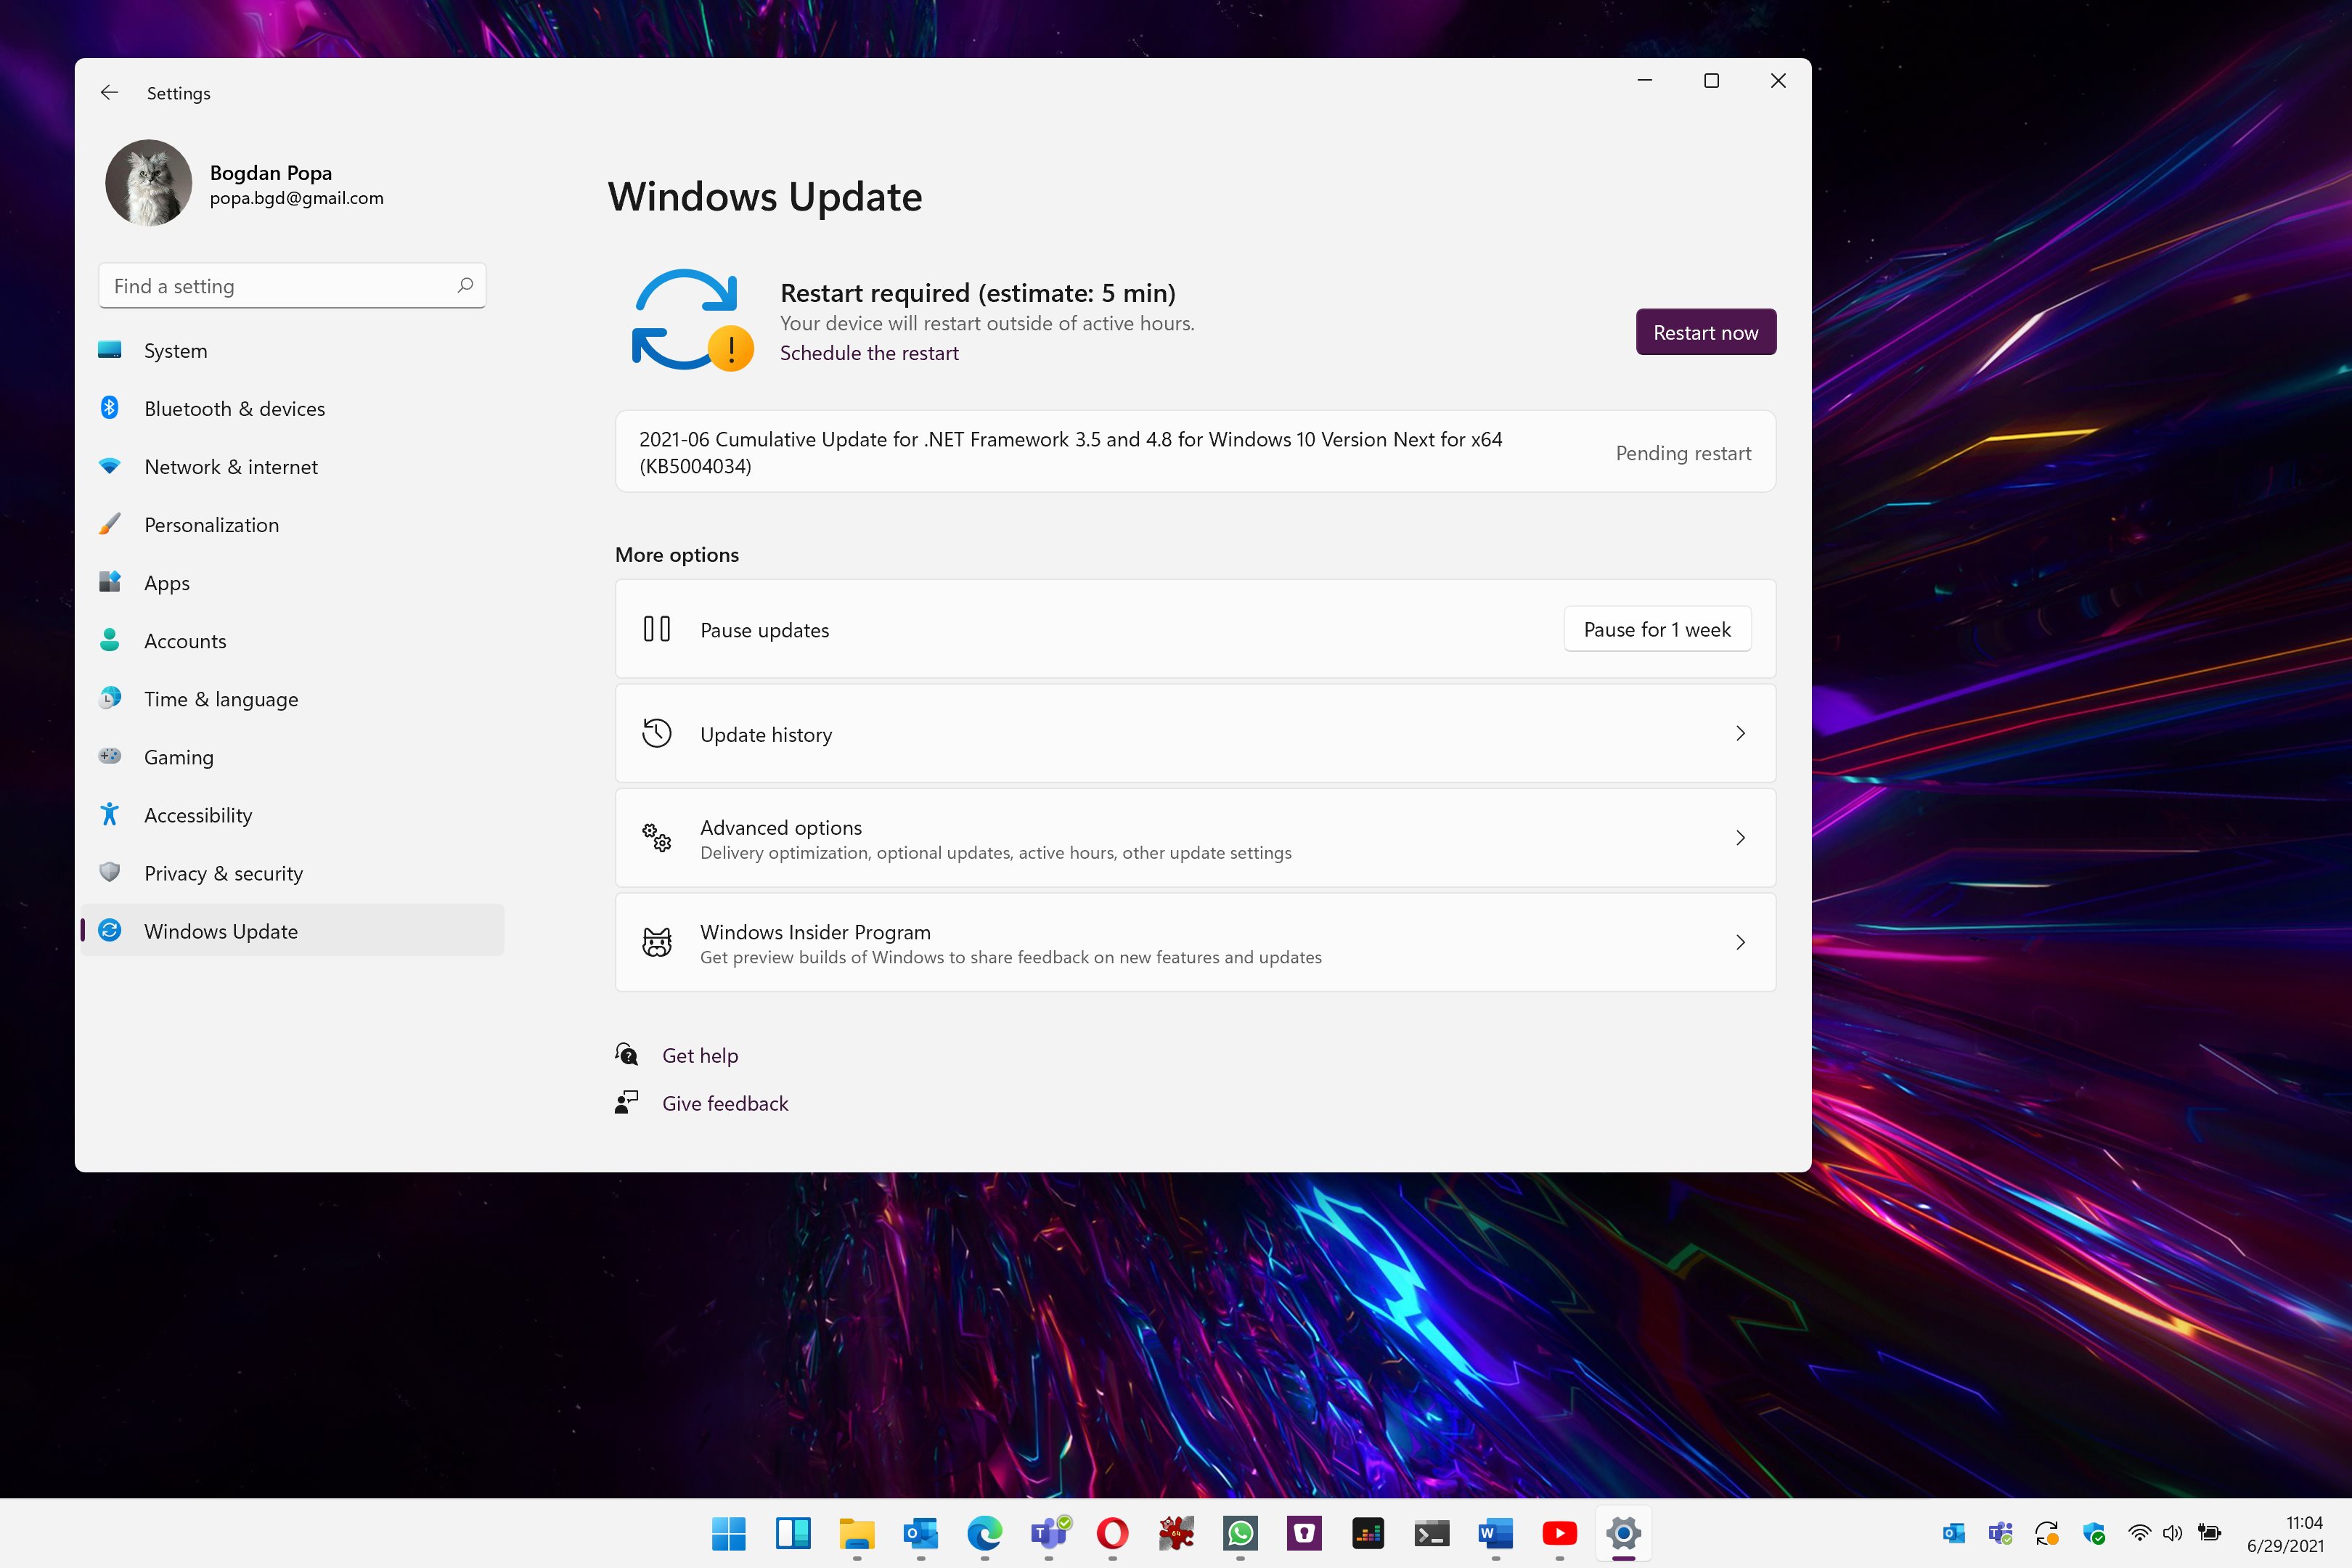
  • Error Code 0x800F0906: This indicates a problem with Windows Update. Ensure that your system is up-to-date and try the installation again.
  • Error Code 0x800F0907: This error suggests that the necessary files are not available. Use the offline installer method to install .NET Framework 3.5.
  • Missing Components: If the installation process fails due to missing components, you might need to run the Windows Update troubleshooter.

Tips for a Smooth Installation Experience:

  • Ensure Internet Connectivity: A stable internet connection is crucial for the installation process, especially when using the Windows Features method.
  • Admin Privileges: Run the installer or Windows Features with administrator privileges to avoid potential access issues.
  • Compatibility Check: Before installing .NET Framework 3.5, verify that the application you need it for is compatible with Windows 11.
  • System Updates: Keep your system up-to-date with the latest Windows updates to avoid potential compatibility conflicts.

Frequently Asked Questions (FAQs)

Q: Is .NET Framework 3.5 compatible with Windows 11?
A: Yes, .NET Framework 3.5 is compatible with Windows 11. However, it needs to be installed manually as it is not included by default.

Q: What are the benefits of installing .NET Framework 3.5 on Windows 11?
A: Installing .NET Framework 3.5 allows you to run older applications that were built using this framework. It also ensures compatibility with a vast library of legacy software.

Q: Can I uninstall .NET Framework 3.5 after I’ve installed it?
A: Yes, you can uninstall .NET Framework 3.5 using the same Windows Features method. Navigate to Settings > Apps > Apps & features > Optional features and select .NET Framework 3.5. Choose Uninstall to remove the framework.

Q: What are the potential risks of installing .NET Framework 3.5 on Windows 11?
A: Installing .NET Framework 3.5 on Windows 11 is generally safe. However, it’s essential to download the installer from a trusted source like the official Microsoft website to avoid potential security risks.

Conclusion

While Windows 11 embraces modern technologies, the need for .NET Framework 3.5 persists for users who rely on legacy applications. By understanding the installation process and addressing potential issues, users can ensure a smooth and successful experience. Remember, installing .NET Framework 3.5 on Windows 11 allows you to access a vast library of older software, ensuring continued functionality and compatibility.

Install Net Framework 3 5 On Windows 11 How To 10 8 1 - Vrogue How to Download & Install .NET Framework 3.5 on Windows 11 - YouTube How to Install Net Framework 3.5 in Windows 11 Offline Installer Using CMD Command Line - YouTube
How to Install .Net Framework 3.5 on Windows 11 [ See Pinned Comment ] - YouTube How To Install Net Framework 3 5 On Windows 11 - vrogue.co How To Download Net Framework 3 5 For Windows 1011 Offline - Vrogue
Enable Net Framework 2 0 And Net Framework 3 5 In Windows 11  thewindowsclub How to install .Net Framework 3.5 on Windows 11 .ISO Installer - YouTube

Closure

Thus, we hope this article has provided valuable insights into net framework 3 5 windows 11 download. We hope you find this article informative and beneficial. See you in our next article!

Connecting Two Computers: A Comprehensive Guide To Building A Home Network

Connecting Two Computers: A Comprehensive Guide to Building a Home Network

Introduction

In this auspicious occasion, we are delighted to delve into the intriguing topic related to Connecting Two Computers: A Comprehensive Guide to Building a Home Network. Let’s weave interesting information and offer fresh perspectives to the readers.

Connecting Two Computers: A Comprehensive Guide to Building a Home Network

How to setup a home network between two computers - Network Shelf

The ability to connect two computers together, forming a local network, offers a plethora of benefits for both home and office users. This interconnectedness unlocks the potential for file sharing, resource sharing, and collaborative work, simplifying workflows and enhancing productivity. This guide provides a comprehensive overview of the methods and considerations involved in establishing a network connection between two computers.

Understanding the Basics

Before diving into the intricacies of network setup, it is essential to understand the fundamental concepts. A network is essentially a system that allows multiple devices to communicate with each other. This communication is facilitated through a common language, known as a protocol, and a physical infrastructure that connects the devices.

The most common type of network for home use is a Local Area Network (LAN). A LAN typically involves connecting devices within a limited geographical area, such as a house or office. To establish a LAN, one needs a network interface card (NIC) in each computer, a network cable to physically link them, and a network protocol for communication.

Methods of Connecting Two Computers

There are two primary methods to connect two computers: wired and wireless.

Wired Connection:

  • Ethernet Cable: This is the most traditional and reliable method, utilizing a physical cable to connect the computers directly. Ethernet cables provide high speeds and stability, making them ideal for tasks that require a consistent connection, such as file transfers and online gaming.
  • Crossover Cable: While Ethernet cables are typically used for connecting computers to a router, a crossover cable is specifically designed to directly connect two computers without the need for a router. This method is less common nowadays but can be useful in specific situations.

Wireless Connection:

  • Wi-Fi: This method utilizes radio waves to establish a wireless connection between devices. Wi-Fi offers flexibility and convenience, allowing users to connect their computers from anywhere within the range of the wireless router. However, wireless connections can be slower and less secure than wired connections.

Setting Up a Wired Network

  1. Verify Network Cards: Ensure that both computers have functional network interface cards (NICs). Most modern computers have built-in NICs.
  2. Connect with Ethernet Cable: Use an Ethernet cable to physically connect the two computers. Ensure that the cable is securely plugged into the Ethernet ports on both devices.
  3. Configure IP Addresses: Assign static IP addresses to each computer within the same subnet. This ensures that the computers can communicate with each other.
  4. Enable File and Printer Sharing: On both computers, enable file and printer sharing to allow access to resources on the other computer.
  5. Test the Connection: Open a file explorer on one computer and attempt to access the other computer’s shared folders. If the connection is successful, you will be able to browse the files on the other computer.

Setting Up a Wireless Network

  1. Configure Wireless Router: Set up a wireless router and configure its settings, including the network name (SSID) and password.
  2. Connect Computers to Router: Connect both computers to the wireless network using the configured SSID and password.
  3. Enable File and Printer Sharing: On both computers, enable file and printer sharing to allow access to resources on the other computer.
  4. Test the Connection: Open a file explorer on one computer and attempt to access the other computer’s shared folders. If the connection is successful, you will be able to browse the files on the other computer.

Key Considerations

  • Network Security: When establishing a network, it is crucial to implement security measures to protect your data. This includes setting strong passwords, enabling firewalls, and regularly updating security software.
  • Network Performance: The speed and stability of your network can be affected by various factors, including the type of network cable, the router’s capabilities, and the number of devices connected.
  • Network Management: Effective network management involves monitoring network performance, troubleshooting issues, and ensuring the security of the network.

Benefits of Connecting Two Computers

  • File Sharing: Easily share files between computers, eliminating the need for physical transfer methods like USB drives.
  • Resource Sharing: Access printers, scanners, and other peripherals connected to one computer from the other.
  • Collaborative Work: Work on shared documents and projects simultaneously, enhancing team productivity.
  • Remote Access: Access files and applications on one computer from the other, even when not physically present.
  • Home Entertainment: Stream movies, music, and photos from one computer to another, creating a multimedia hub.

FAQs

Q: What are the different types of network cables?

A: The most common types of network cables are:

  • Ethernet Cable: Used for connecting devices to a router or switch.
  • Crossover Cable: Used to directly connect two computers without a router.

Q: What is a subnet mask?

A: A subnet mask is a number that defines the network address range for a particular network. It helps identify which devices belong to the same network.

Q: What is the difference between static and dynamic IP addresses?

A: A static IP address is permanently assigned to a device, while a dynamic IP address is assigned automatically by the router.

Q: What is a network protocol?

A: A network protocol defines the rules and standards for communication between devices on a network. Common protocols include TCP/IP and UDP.

Q: How can I secure my network?

A: To secure your network, consider the following measures:

  • Strong Passwords: Use strong and unique passwords for your router and network accounts.
  • Firewall: Enable a firewall on all devices connected to the network.
  • Security Updates: Regularly update your operating system and security software.
  • Wireless Security: Use WPA2 or WPA3 encryption for your wireless network.

Tips

  • Use a Wired Connection When Possible: Wired connections offer faster speeds and better stability than wireless connections.
  • Optimize Network Performance: Regularly check your network settings and make adjustments as needed to ensure optimal performance.
  • Back Up Your Data: Regularly back up important data to protect against data loss.
  • Monitor Network Activity: Use network monitoring tools to track network usage and identify potential security threats.

Conclusion

Connecting two computers together can significantly enhance productivity, collaboration, and entertainment possibilities. By understanding the different methods, key considerations, and best practices outlined in this guide, users can establish a reliable and secure network that meets their specific needs. Remember to prioritize network security and performance, and to regularly update your network and security settings to ensure optimal functionality and data protection.

Home Networking How to Set up a Home Network: A Complete Guide Home Network Setup: Step by Step Guide - The Ad Buzz
How to Connect Two Computers Via LAN Cable / Networking Tutorials for Beginners - YouTube Home Networking - Altech IT Guía para construir una red doméstica - Noticias - Focc Technology Co., Ltd
How to Set Up a Home Network- Beginners Guide How To Set Up A Home Network - Ultimate Guide

Closure

Thus, we hope this article has provided valuable insights into Connecting Two Computers: A Comprehensive Guide to Building a Home Network. We hope you find this article informative and beneficial. See you in our next article!

Understanding And Addressing An Enlarged Taskbar

Understanding and Addressing an Enlarged Taskbar

Introduction

With enthusiasm, let’s navigate through the intriguing topic related to Understanding and Addressing an Enlarged Taskbar. Let’s weave interesting information and offer fresh perspectives to the readers.

Understanding and Addressing an Enlarged Taskbar

How to fix 100% Taskbar too Big on window 10 - YouTube

The taskbar, a ubiquitous element of modern operating systems, serves as a central hub for accessing applications, managing open windows, and navigating the system. While its design aims for both functionality and aesthetics, users sometimes encounter a scenario where the taskbar appears larger than expected, potentially disrupting the visual flow of the desktop and impacting user experience. This article delves into the reasons behind an enlarged taskbar, explores potential solutions, and provides a comprehensive guide to restoring the desired appearance and functionality.

Understanding the Causes of an Enlarged Taskbar

Several factors can contribute to an enlarged taskbar, each stemming from different aspects of the operating system’s configuration. Understanding these root causes is crucial for effectively addressing the issue.

  • Scaling Settings: Windows operating systems offer scaling options to adjust the display size for users with visual impairments or preferences for larger icons and text. When scaling is applied, the taskbar, along with other elements on the screen, may increase in size proportionally.
  • Taskbar Properties: The taskbar’s appearance can be customized through its properties settings. Options like "Use small icons" and "Show labels" can affect the taskbar’s height and overall size.
  • Third-Party Software: Certain applications, particularly those designed for touch-based devices or those that prioritize visual clarity, might override system-wide settings and enlarge the taskbar to accommodate their design elements.
  • System Fonts: The default system fonts play a role in the visual representation of elements like the taskbar. Changing to larger font sizes can influence the taskbar’s appearance, making it appear wider.
  • Taskbar Icons: The number and size of icons displayed on the taskbar can impact its width. An abundance of open applications or pinned icons can contribute to a wider taskbar.

Troubleshooting and Solutions

Armed with an understanding of the possible causes, troubleshooting an enlarged taskbar involves systematically addressing each potential contributor.

1. Reviewing Scaling Settings:

  • Locate the Display Settings: Access the display settings through the Windows Settings app (Windows key + I) or the Control Panel.
  • Adjust Scaling Level: In the "Scale and layout" section, check the current scaling percentage. If it’s set to a value other than 100%, reducing it might shrink the taskbar.
  • Consider System-Wide Scaling: If the scaling is set to a value other than 100%, ensure that the "Let Windows try to fix apps so they’re not blurry" option is enabled to prevent scaling issues with individual applications.

2. Optimizing Taskbar Properties:

  • Access Taskbar Properties: Right-click on an empty area of the taskbar and select "Taskbar settings" or "Properties" depending on the operating system version.
  • Customize Icon Size: In the "Taskbar" settings, locate the "Taskbar alignment" section and adjust the icon size to "Small icons" if it’s not already selected. This can reduce the taskbar’s height.
  • Hide Taskbar Labels: Consider hiding the labels for open applications by unchecking the "Show labels" option. This can significantly reduce the taskbar’s width, especially if there are numerous open applications.
  • Disable Taskbar Overflow: If the taskbar is displaying an overflow icon (a small arrow), this indicates that there are more icons than can fit in the available space. Consider unpinning unnecessary applications or using a taskbar customization tool to manage icon visibility.

3. Investigating Third-Party Software:

  • Identify Conflicting Software: If the taskbar enlargement coincided with the installation of a new application, that application might be responsible.
  • Disable or Uninstall: Temporarily disable or uninstall the suspected application and observe the taskbar’s behavior. If the issue resolves, the application is likely the culprit.
  • Consult Application Settings: Check the application’s settings for any options related to taskbar customization or scaling.

4. Examining System Fonts:

  • Access Font Settings: Open the "Control Panel" and navigate to "Appearance and Personalization" followed by "Fonts".
  • Review Font Sizes: Examine the default system fonts, particularly those used for the taskbar and its labels. If the font size is significantly large, consider switching to a smaller font or reducing the font size through the "Font Settings" window.

5. Managing Taskbar Icons:

  • Unpin Unnecessary Applications: Unpin applications that are not frequently used to reduce the number of icons displayed on the taskbar.
  • Use Taskbar Customization Tools: Consider using third-party taskbar customization tools that allow for grouping icons, hiding specific icons, or adjusting their size.

FAQs: Addressing Common Concerns

Q: Why is my taskbar so big on my laptop?

A: Laptops often have smaller screens, making the taskbar appear larger in proportion. Scaling settings, taskbar properties, and third-party software can also contribute to an enlarged taskbar on laptops.

Q: What is the normal size of a taskbar?

A: The "normal" size of a taskbar varies depending on the screen resolution, scaling settings, and icon size. However, a typical taskbar occupies a relatively small portion of the screen height, usually around 40-50 pixels when using small icons and no labels.

Q: How do I fix a taskbar that is too big on Windows 10?

A: Follow the troubleshooting steps outlined above, focusing on scaling settings, taskbar properties, and third-party software. Windows 10 offers a wide range of customization options for the taskbar, allowing for fine-tuning its appearance.

Q: Can I resize the taskbar manually?

A: While the taskbar cannot be resized manually using a mouse or keyboard, its size can be indirectly adjusted through the settings mentioned earlier.

Tips for Managing Taskbar Size

  • Regularly Review Settings: Periodically check scaling settings, taskbar properties, and installed applications for any changes that might affect the taskbar’s size.
  • Use Taskbar Customization Tools: Consider using third-party tools designed specifically for managing and customizing the taskbar, providing more granular control over its appearance.
  • Experiment with Settings: Try different combinations of scaling levels, icon sizes, and font settings to find the optimal balance between functionality and visual aesthetics.
  • Keep Software Updated: Regularly update your operating system and applications to ensure compatibility and prevent potential issues that could affect the taskbar’s size.

Conclusion

An enlarged taskbar can be a nuisance, disrupting the desktop’s visual flow and impacting productivity. By understanding the potential causes, applying systematic troubleshooting steps, and utilizing available settings and tools, users can effectively address this issue and restore the desired appearance and functionality to their taskbar. A well-managed taskbar ensures a seamless user experience, allowing for efficient navigation and access to vital system elements.

Windows 11 Separate Taskbar Icons Windows 10 - Taskbar Shortcuts Larger With Toolbar - YouTube How to add Address Bar to Taskbar in Windows 10
How do I enlarge the taskbar & address bar views? More improvements coming to Windows 11 Taskbar, addressing app overflow How to Enable Tablet Optimized Taskbar UI in Windows 11 - 25227
Windows 11 Address Bar Windows 11 taskbar will be enlarged with the overflow menu

Closure

Thus, we hope this article has provided valuable insights into Understanding and Addressing an Enlarged Taskbar. We appreciate your attention to our article. See you in our next article!

The Android Ecosystem On Windows: Exploring The Possibilities Of Play Store Integration

The Android Ecosystem on Windows: Exploring the Possibilities of Play Store Integration

Introduction

With great pleasure, we will explore the intriguing topic related to The Android Ecosystem on Windows: Exploring the Possibilities of Play Store Integration. Let’s weave interesting information and offer fresh perspectives to the readers.

The Android Ecosystem on Windows: Exploring the Possibilities of Play Store Integration

Install Android Subsystem with Google Play Store on Windows 11

The world of computing has long been divided between two major operating systems: Windows and macOS. While Windows has traditionally dominated the desktop and laptop market, Android has reigned supreme in the mobile sphere. However, this clear-cut division has begun to blur in recent years, with the rise of Android emulators and the prospect of a more unified computing experience. This convergence is most evident in the growing interest in accessing the Google Play Store on Windows 10 laptops, opening up a world of Android apps and games for users who prefer the familiarity of their Windows environment.

Understanding the Play Store on Windows 10

The Play Store, Google’s official app marketplace for Android devices, offers a vast library of applications, games, books, movies, and music. Its presence on Windows 10 laptops, though not a native feature, is facilitated through third-party emulators. These emulators create a virtual environment within Windows, mimicking the Android operating system, allowing users to download and run Android apps as if they were on a smartphone or tablet.

Benefits of Accessing the Play Store on Windows 10

The integration of the Play Store on Windows 10 laptops presents numerous benefits for users:

  • Expanding the App Ecosystem: Windows users gain access to a vast library of Android apps, exceeding the selection available through the Microsoft Store. This allows for greater flexibility and choice in finding the perfect tools for productivity, entertainment, and communication.

  • Seamless Multi-Device Experience: Users can seamlessly transition between their Windows laptops and Android devices, using the same apps and services. This promotes a more integrated and convenient computing experience, especially for users who rely heavily on mobile apps.

  • Enhanced Productivity: Many Android apps are specifically designed for productivity tasks, such as note-taking, project management, and document editing. These apps can be incredibly valuable for users seeking to enhance their workflow on Windows 10 laptops.

  • Gaming Opportunities: The Play Store offers a plethora of Android games, catering to various tastes and preferences. This provides Windows users with a new avenue for gaming, especially those who enjoy casual or mobile-friendly titles.

Popular Emulators for Accessing the Play Store on Windows 10

Several emulators allow Windows 10 users to access the Play Store. Some of the most popular options include:

  • BlueStacks: Renowned for its performance and user-friendly interface, BlueStacks is a popular choice for casual users and gamers.

  • NoxPlayer: Designed specifically for gaming, NoxPlayer offers features like keyboard mapping and macro recording, enhancing the gaming experience on Windows 10.

  • MEmu Play: This emulator is known for its lightweight design and compatibility with a wide range of Android apps and games.

  • LDPlayer: LDPlayer focuses on providing a smooth and stable gaming experience, with optimized performance for demanding games.

Considerations for Using the Play Store on Windows 10

While accessing the Play Store on Windows 10 offers many advantages, there are certain considerations to keep in mind:

  • Performance: Emulators require system resources to function. Users with older or less powerful laptops may experience performance issues, particularly when running resource-intensive apps or games.

  • Compatibility: Not all Android apps are compatible with emulators. Some apps may require specific hardware or software features that are not available in the emulated environment.

  • Security: As with any software, it’s important to download emulators from reputable sources and ensure they are up-to-date with the latest security patches.

Frequently Asked Questions

Q: Is it legal to use the Play Store on a Windows 10 laptop?

A: Yes, using the Play Store on a Windows 10 laptop via emulators is generally legal. However, it’s crucial to use emulators from trusted sources and avoid any modifications or hacks that may violate copyright laws.

Q: Can I use my existing Google account to access the Play Store on my Windows 10 laptop?

A: Yes, you can use your existing Google account to sign in to the Play Store on your Windows 10 laptop. This allows you to access your apps, games, and purchases from your Android devices.

Q: What are the system requirements for running emulators on Windows 10?

A: Emulator requirements vary, but generally, you will need a modern processor, sufficient RAM, and a dedicated graphics card for optimal performance. Check the specific requirements for the emulator you choose.

Q: Are there any limitations to using the Play Store on Windows 10?

A: Some Android apps may not function correctly or may have limited features when run on emulators. Additionally, some apps may require specific hardware features that are not available in the emulated environment.

Tips for Using the Play Store on Windows 10

  • Choose a reputable emulator: Opt for emulators from well-known developers with a good reputation for performance and security.

  • Check system requirements: Ensure your laptop meets the minimum system requirements for the emulator you choose.

  • Keep your emulator updated: Regular updates are essential for security and performance.

  • Use a dedicated Google account: Consider creating a separate Google account for your emulator to avoid potential conflicts with your personal account.

  • Experiment with different emulators: If one emulator doesn’t meet your needs, try others to find the best fit for your specific requirements.

Conclusion

The integration of the Play Store on Windows 10 laptops is a significant development in the computing landscape. It offers users a wealth of opportunities to expand their app ecosystem, enhance productivity, and enjoy a more seamless multi-device experience. While there are considerations regarding performance and compatibility, the benefits of accessing the Play Store on Windows 10 outweigh the challenges for many users. As the technology continues to evolve, we can expect even greater integration between Android and Windows, blurring the lines between these two dominant operating systems and opening up new possibilities for users in the years to come.

How to install Google Play Store on Windows Subsystem for Android How Install google play store on windows 11 । windows subsystem for android_windows 11 android Google Play Store Integration: Step-by-step guide - Juphy
Google Play Store Integration: Step-by-step guide - Juphy Install play store on windows 11 windows subsystem for android wsa windows 11 google services Install Google play store on windows 11  windows subsystem of android WSA install  Mr Jugaad
How to Install the Google Play Store on Windows 11 - The RSS Feeds from Seaside Cambodia How to Download & Install Google Play Store on Windows 10

Closure

Thus, we hope this article has provided valuable insights into The Android Ecosystem on Windows: Exploring the Possibilities of Play Store Integration. We thank you for taking the time to read this article. See you in our next article!

Navigating The Windows 11 Upgrade: Understanding System Compatibility

Navigating the Windows 11 Upgrade: Understanding System Compatibility

Introduction

In this auspicious occasion, we are delighted to delve into the intriguing topic related to Navigating the Windows 11 Upgrade: Understanding System Compatibility. Let’s weave interesting information and offer fresh perspectives to the readers.

Windows 11 Compatibility Test Tool Microsoft 2024 - Win 11 Home Upgrade 2024

The release of Windows 11 brought with it a wave of excitement and anticipation, but also a degree of confusion for many users. Microsoft’s new operating system promised a host of improvements, but the stringent system requirements introduced a hurdle for some, leaving them wondering if their existing computers were compatible. To address this, Microsoft introduced the PC Health Check app, a tool designed to assess a user’s system and determine if it meets the minimum specifications for running Windows 11.

While the PC Health Check app initially faced criticism for its perceived lack of transparency and its tendency to provide vague error messages, it has since undergone improvements and serves as a valuable resource for users seeking to upgrade to Windows 11. Understanding the information provided by the PC Health Check app is crucial for making informed decisions about upgrading.

The Importance of System Compatibility:

Windows 11 represents a significant shift in Microsoft’s operating system philosophy, incorporating new features and architectural changes that require specific hardware capabilities. These requirements are not arbitrary. They are designed to ensure optimal performance, security, and stability for the new operating system.

  • Performance: Windows 11 relies on modern hardware to deliver its promised performance enhancements. Features like DirectStorage, which accelerates game loading times, and the new Windows Subsystem for Android, which enables running Android apps, require specific hardware components.

  • Security: Windows 11 incorporates enhanced security measures that rely on hardware-based security features, such as TPM 2.0 and Secure Boot. These features provide a more robust defense against malware and other security threats.

  • Stability: Windows 11 is optimized for modern hardware, ensuring a smoother and more reliable user experience. Older hardware may struggle to keep up with the demands of the new operating system, leading to performance issues and instability.

Understanding the PC Health Check App:

The PC Health Check app is designed to be straightforward and user-friendly. It performs a comprehensive assessment of your computer’s hardware and software, comparing it against the minimum requirements for Windows 11. The app provides a clear indication of whether your system meets the necessary specifications, along with detailed information about any areas where your system falls short.

Key Factors Assessed by the PC Health Check App:

  • Processor (CPU): Windows 11 requires a 1 GHz or faster processor with at least two cores. The app checks the processor model and its core count to ensure it meets this requirement.

  • RAM: A minimum of 4 GB of RAM is required for Windows 11. The PC Health Check app verifies the installed RAM capacity.

  • Storage: The app checks for at least 64 GB of storage space available for installation. It also verifies the type of storage drive (SSD or HDD) and its connection interface (SATA, NVMe).

  • TPM (Trusted Platform Module): Windows 11 requires a TPM 2.0 module for enhanced security. The PC Health Check app checks the presence and functionality of this module.

  • Secure Boot: This security feature is enabled by default on most modern PCs. The app checks if Secure Boot is enabled and functioning correctly.

  • Graphics Card: Windows 11 requires a compatible graphics card with DirectX 12 support. The app verifies the graphics card model and its DirectX capabilities.

Interpreting the Results:

The PC Health Check app provides a clear and concise assessment of your system’s compatibility with Windows 11. The results are presented in a straightforward manner, with a clear indication of whether your system meets the minimum requirements. If your system is deemed compatible, the app will indicate that you are ready to upgrade.

If your system fails to meet the minimum requirements, the app will provide specific details about the areas that need improvement. This information is crucial for making informed decisions about upgrading.

Troubleshooting Compatibility Issues:

While the PC Health Check app provides valuable information about your system’s compatibility, it’s important to understand that it’s not always foolproof. There may be instances where the app incorrectly flags a system as incompatible, or where it misses certain hardware components.

Here are some common scenarios and troubleshooting steps:

  • TPM 2.0 Not Detected: If the PC Health Check app reports that your system lacks a TPM 2.0 module, it may be disabled in the BIOS settings. Check your BIOS settings and enable TPM 2.0 if it is available.

  • Secure Boot Not Enabled: Similar to TPM 2.0, Secure Boot may be disabled in your BIOS settings. Access your BIOS and enable Secure Boot.

  • Outdated Drivers: Outdated drivers can sometimes cause compatibility issues. Update your device drivers to the latest versions to ensure optimal performance.

  • BIOS Updates: Newer BIOS versions often include compatibility improvements for Windows 11. Check for BIOS updates for your motherboard to resolve potential issues.

  • Hardware Compatibility List: Microsoft maintains a list of certified hardware components that are known to be compatible with Windows 11. Refer to this list if you’re considering upgrading and want to ensure compatibility.

Making Informed Decisions:

The PC Health Check app is an invaluable tool for determining your system’s compatibility with Windows 11. However, it’s important to remember that it’s just one piece of the puzzle.

Consider the following factors when making a decision about upgrading:

  • Performance Needs: Evaluate your current workload and assess whether Windows 11 would provide a significant performance improvement.

  • Security Considerations: Windows 11 offers enhanced security features, which may be particularly important for users handling sensitive data.

  • Software Compatibility: Ensure that your essential software applications are compatible with Windows 11 before upgrading.

  • Cost of Upgrading: If your system fails to meet the minimum requirements, consider the cost of upgrading your hardware components to ensure compatibility.

Conclusion:

The PC Health Check app is a valuable resource for navigating the Windows 11 upgrade process. It provides a clear and concise assessment of your system’s compatibility, enabling you to make informed decisions about upgrading. While the app is a useful tool, it’s important to consider other factors, such as your performance needs, security considerations, and the cost of upgrading, before making a final decision.

Compatibility Test For Windows 11 2024 - Win 11 Home Upgrade 2024 Download whynotwin11 compatibility checker tool to check if you can upgrade to Windows 11 Windows 11 Upgrade Compatibility Checker - Get Latest Windows 11 Update
Win 11 Hardware Compatibility Test 2024 - Win 11 Home Upgrade 2024 Windows 11 Upgrade Compatibility Tool 2024 - Win 11 Home Upgrade 2024 Check windows 11 compatibility - withdsa
Tool To Check For Windows 11 Compatibility 2024 - Win 11 Home Upgrade 2024 Windows 11 Compatibility Check - Enable TPM & Secure Boot

Closure

Thus, we hope this article has provided valuable insights into Navigating the Windows 11 Upgrade: Understanding System Compatibility. We appreciate your attention to our article. See you in our next article!

The Future Of Windows 10: A Comprehensive Analysis

The Future of Windows 10: A Comprehensive Analysis

Introduction

With enthusiasm, let’s navigate through the intriguing topic related to The Future of Windows 10: A Comprehensive Analysis. Let’s weave interesting information and offer fresh perspectives to the readers.

The Future of Windows 10: A Comprehensive Analysis

Meet the Future of Windows 10 (Concept) - YouTube

The question of Windows 10’s future is a subject of frequent discussion and speculation, particularly in light of Microsoft’s evolving strategies and the rapidly changing technological landscape. While there’s no official announcement of a complete end to Windows 10 support, it’s crucial to understand the factors influencing its trajectory and the implications for users.

Understanding Windows 10’s Lifecycle

Microsoft operates on a well-defined product lifecycle for its operating systems. This lifecycle typically involves several phases:

  • Release: The initial release of a new operating system, marked by significant features and innovations.
  • Mainstream Support: A period of active development and support, including regular security updates, bug fixes, and new features.
  • Extended Support: A period of continued security updates, but with no new features or bug fixes.
  • End of Support: The point at which Microsoft ceases all support for the operating system, leaving users vulnerable to security risks.

Windows 10, initially released in 2015, is currently in its extended support phase. This means that while Microsoft continues to provide security updates, no new features are being developed for the operating system. This extended support phase is scheduled to end on October 14, 2025, signifying a crucial turning point for Windows 10 users.

Factors Influencing Windows 10’s Future

Several factors contribute to the evolving landscape surrounding Windows 10, shaping its future direction:

  • Microsoft’s Focus on Windows 11: The release of Windows 11 in 2021 marked a significant shift in Microsoft’s strategy. Windows 11 represents the company’s latest vision for its operating system, emphasizing modern design, enhanced security features, and seamless integration with cloud services. This focus on Windows 11 naturally influences the future of Windows 10, as Microsoft directs its development efforts towards its newest offering.
  • Security Concerns: As Windows 10 reaches its end of support, security becomes a paramount concern. Without regular updates and patches, the operating system becomes increasingly vulnerable to exploits and malware. This vulnerability can expose users to significant risks, including data theft and system failures.
  • Hardware Compatibility: While Windows 10 has a broad range of hardware compatibility, some older systems may not meet the minimum requirements for Windows 11. This can create a barrier for users who wish to upgrade, potentially extending the lifespan of Windows 10 on certain devices.
  • Software Compatibility: Some software applications may not be compatible with Windows 11, forcing users to rely on older versions. This can present a challenge for users who rely on specific software applications that are not yet updated for Windows 11.
  • User Adoption: The rate of Windows 11 adoption is a key factor in determining the future of Windows 10. If users rapidly transition to Windows 11, it will accelerate the decline of Windows 10. However, if user adoption remains slow, Windows 10 may continue to be used for a longer period.

Implications for Users

The end of Windows 10 support presents several implications for users:

  • Security Risks: As mentioned earlier, the absence of security updates leaves users vulnerable to exploits and malware. This vulnerability can have severe consequences, including data breaches, system failures, and potential financial losses.
  • Software Updates: Users may experience difficulties in accessing the latest software updates, as developers may prioritize compatibility with newer operating systems.
  • Hardware Compatibility: Users may encounter limitations in accessing the latest hardware features and technologies, as these are often optimized for newer operating systems.
  • Technical Support: Users may find it challenging to obtain technical support for Windows 10 issues, as Microsoft’s focus shifts towards Windows 11.

The Path Forward: Options for Users

Users have several options to navigate the evolving landscape of Windows 10:

  • Upgrade to Windows 11: This is the most straightforward option, offering access to the latest features, security updates, and hardware compatibility. However, users need to ensure their hardware meets the minimum requirements for Windows 11 and that their software applications are compatible.
  • Continue using Windows 10: Users can continue using Windows 10 beyond the end of support, but they will need to take extra precautions to mitigate security risks. This includes using strong passwords, installing antivirus software, and avoiding suspicious websites and downloads.
  • Migrate to a different operating system: Users can choose to migrate to a different operating system, such as Linux or macOS. This option provides a fresh start and access to alternative ecosystems, but it may require significant time and effort to adjust to a new environment.

FAQs

Q: Will Windows 10 suddenly stop working after October 14, 2025?

A: No, Windows 10 will not immediately cease functioning after the end of support. However, it will no longer receive security updates, leaving it vulnerable to exploits and malware.

Q: Can I still use Windows 10 after October 14, 2025?

A: Yes, but it is strongly discouraged. Using Windows 10 without security updates exposes your system to significant risks.

Q: What are the minimum requirements for upgrading to Windows 11?

A: Microsoft provides a detailed list of minimum system requirements for Windows 11 on its website. These requirements include specifications for processor, RAM, storage, and display.

Q: Is it safe to continue using Windows 10 after the end of support?

A: It is not recommended to continue using Windows 10 after the end of support due to the increased security risks.

Q: What are the benefits of upgrading to Windows 11?

A: Windows 11 offers enhanced security features, a modern user interface, improved performance, and seamless integration with cloud services.

Tips for Windows 10 Users

  • Back up your data: Regularly back up your important data to ensure you can recover it in case of system failure.
  • Install a reliable antivirus software: Protect your system from malware and other threats.
  • Keep your software updated: Ensure that all your software applications are up to date to mitigate security vulnerabilities.
  • Consider upgrading to Windows 11: If your hardware meets the requirements, upgrading to Windows 11 is the most secure and feature-rich option.

Conclusion

While Windows 10 has served as a reliable operating system for millions of users, its future is inevitably tied to the evolution of technology and Microsoft’s strategies. The end of support in 2025 marks a significant milestone, emphasizing the importance of planning for the future. Users need to carefully consider their options, weigh the benefits and risks, and make informed decisions that align with their needs and priorities. Whether it’s upgrading to Windows 11, adopting alternative operating systems, or taking extra precautions to mitigate security risks, navigating the transition from Windows 10 requires proactive planning and informed action.

The future of Windows 10 - YouTube The Future of Windows 10 - YouTube The 'Future Vision' of Windows 10 is everything we could hope for
The 'Future Vision' of Windows 10 is everything we could hope for What Is The Future Of Windows 10, if Windows 11 released An Early Look at the Future of Windows 10 - WindowsMode.com
The Future of Windows and Windows 10 in a evolving tech world - YouTube Windows 10: a closer look at the future of Microsoft's vision for PCs  The Verge

Closure

Thus, we hope this article has provided valuable insights into The Future of Windows 10: A Comprehensive Analysis. We thank you for taking the time to read this article. See you in our next article!

Maintaining Peak Performance: A Comprehensive Guide To Windows 10 Pro Health Checks

Maintaining Peak Performance: A Comprehensive Guide to Windows 10 Pro Health Checks

Introduction

With great pleasure, we will explore the intriguing topic related to Maintaining Peak Performance: A Comprehensive Guide to Windows 10 Pro Health Checks. Let’s weave interesting information and offer fresh perspectives to the readers.

Maintaining Peak Performance: A Comprehensive Guide to Windows 10 Pro Health Checks

How to health check windows 10 for best performance

The smooth operation of a Windows 10 Pro system relies on a delicate balance of hardware and software components working in harmony. Over time, factors like software updates, file accumulation, and background processes can lead to performance degradation, system instability, and even security vulnerabilities. Recognizing these potential issues and proactively addressing them is crucial for maintaining a healthy and efficient computing experience.

Windows 10 Pro, with its focus on enterprise-grade features and security, offers a range of built-in tools and utilities designed to assess and enhance system health. This comprehensive guide will delve into the various aspects of Windows 10 Pro health checks, their importance, and how to effectively utilize them for optimal system performance.

Understanding the Importance of System Health Checks

Regular system health checks are akin to preventive maintenance for your computer. They provide valuable insights into the current state of your system, identifying potential issues before they escalate into major problems. The benefits of proactive health checks include:

  • Improved Performance: Identifying and addressing resource-intensive processes, outdated drivers, or fragmented hard drives can significantly enhance system responsiveness and overall performance.
  • Enhanced Security: Health checks can detect vulnerabilities, outdated security software, and malicious software, bolstering system security and protecting sensitive data.
  • Increased Stability: Regularly addressing potential issues like corrupted files, registry errors, or driver conflicts can improve system stability, reducing crashes and blue screen errors.
  • Prolonged Lifespan: By addressing problems before they become critical, health checks can extend the lifespan of your hardware and software, maximizing its value and minimizing costly replacements.

Navigating Windows 10 Pro Health Check Tools

Windows 10 Pro offers several built-in tools and utilities to assess and maintain system health. These tools are readily accessible within the operating system and provide a comprehensive approach to system diagnostics and optimization.

1. System Information: This tool provides a detailed overview of your system’s hardware and software configuration. It displays information like processor specifications, memory size, installed software, and network connections. This information is crucial for understanding your system’s capabilities and identifying potential hardware limitations or software conflicts.

2. Event Viewer: The Event Viewer records system events, including errors, warnings, and informational messages. Analyzing these logs can help pinpoint specific issues causing performance problems or system instability. It can also reveal security events, providing valuable information for troubleshooting security breaches.

3. Task Manager: Task Manager provides real-time information about running processes, resource utilization, and system performance. It allows you to identify resource-intensive processes, terminate unnecessary programs, and monitor system performance metrics like CPU usage, memory consumption, and disk activity.

4. Disk Cleanup: This tool helps free up disk space by identifying and deleting unnecessary files, including temporary files, system files, and older versions of files. By optimizing disk space, you can improve system performance and reduce the risk of disk space limitations.

5. Defragmentation: Defragmentation reorganizes fragmented files on your hard drive, improving access times and enhancing overall performance. This tool is especially beneficial for older hard drives where file fragmentation can significantly impact performance.

6. Windows Update: Regularly updating Windows ensures you have the latest security patches, bug fixes, and performance improvements. It also keeps your system compatible with the latest software and hardware.

7. Device Manager: Device Manager allows you to view and manage all the devices connected to your computer. It enables you to update drivers, troubleshoot device conflicts, and ensure all devices are functioning correctly.

8. Security Center: Windows Security Center provides a centralized location for managing your system’s security settings, including antivirus protection, firewall configuration, and user account control settings. Regularly reviewing and updating these settings is crucial for maintaining a secure computing environment.

9. Performance Monitor: This advanced tool provides detailed system performance metrics, enabling you to monitor resource utilization, identify performance bottlenecks, and troubleshoot system issues. It offers a wide range of performance counters and graphs, allowing for in-depth system analysis.

10. Reliability Monitor: This tool provides a history of system events, including crashes, freezes, and other performance issues. It helps identify patterns and pinpoint specific events that might be causing system instability.

Proactive Steps for Maintaining System Health

While Windows 10 Pro offers a comprehensive suite of tools for assessing and maintaining system health, proactive measures can further optimize system performance and enhance overall stability.

  • Regularly Update Drivers: Outdated drivers can lead to system instability, performance issues, and even security vulnerabilities. Ensure you have the latest drivers for all your hardware components.
  • Run Antivirus Scans: Regularly scan your system for malware and viruses using a reputable antivirus software. This protects your system from malicious attacks and ensures data security.
  • Clean Up Disk Space: Regularly delete unnecessary files, uninstall unused software, and empty your recycle bin to free up disk space and improve performance.
  • Manage Startup Programs: Reduce the number of programs that automatically launch at startup to minimize system resource consumption and improve boot times.
  • Disable Unnecessary Services: Identify and disable services that are not essential for your system’s operation to minimize background processes and improve performance.
  • Use a Registry Cleaner: While caution is advised, a registry cleaner can help identify and remove invalid or corrupted registry entries that might be affecting system performance.
  • Perform Regular System Backups: Regularly back up your important data to protect it from data loss caused by hardware failures, software issues, or malicious attacks.
  • Monitor System Temperature: Overheating can damage hardware components. Monitor your system’s temperature and ensure adequate cooling to prevent overheating.
  • Check for Hardware Issues: Regularly check for hardware issues like loose connections, failing hard drives, or overheating components.
  • Maintain a Clean System: Keep your system clean and dust-free to prevent overheating and hardware malfunctions.

FAQs about Windows 10 Pro Health Checks

Q: How often should I perform system health checks?

A: Ideally, you should perform comprehensive system health checks at least once a month. However, you can run specific checks more frequently, such as daily antivirus scans or weekly disk cleanups.

Q: Are there any signs that my system needs a health check?

A: Several signs indicate that your system might need a health check, including slow performance, frequent crashes or freezes, blue screen errors, excessive disk activity, and high CPU usage.

Q: Can I use third-party software for system health checks?

A: While Windows 10 Pro offers a comprehensive suite of tools, you can use third-party software for additional system health checks and optimization. However, ensure you choose reputable software from trusted sources.

Q: What are the potential risks of performing system health checks?

A: The risks of performing system health checks are minimal, especially when using built-in Windows tools. However, using third-party software can pose risks if the software is not reputable or if you make unintended changes to your system settings.

Conclusion

Maintaining a healthy Windows 10 Pro system is crucial for ensuring optimal performance, security, and stability. By utilizing the built-in tools and following proactive measures, you can identify and address potential issues before they become critical. Regularly performing health checks and implementing preventative measures will significantly enhance your computing experience, minimizing downtime and maximizing system efficiency. Remember, a healthy system is a productive system.

How to check your device health on Windows 10 - Pureinfotech PC health checks - Jolly IT shows you how to use Win 10 tools How to Rate and Optimize PC Performance in Windows 10/8/7
How to download pc health check app in windows 10 - productver How to Check Your Computer Performance on Windows 10: 4 Steps How to Speed Up Your Windows 10 Performance (Best Settings Ever)
How to use Performance Monitor on Windows 10  Windows Central Microsoft's PC Health Check App Can Tell Why Your PC Can't Run Windows 11

Closure

Thus, we hope this article has provided valuable insights into Maintaining Peak Performance: A Comprehensive Guide to Windows 10 Pro Health Checks. We hope you find this article informative and beneficial. See you in our next article!

Understanding And Resolving PC Freezes After Windows 11 Startup: A Comprehensive Guide

Understanding and Resolving PC Freezes After Windows 11 Startup: A Comprehensive Guide

Introduction

With great pleasure, we will explore the intriguing topic related to Understanding and Resolving PC Freezes After Windows 11 Startup: A Comprehensive Guide. Let’s weave interesting information and offer fresh perspectives to the readers.

Understanding and Resolving PC Freezes After Windows 11 Startup: A Comprehensive Guide

Windows 11 Computer Freezes and Unresponsive when Idle [FAST GUIDE] - YouTube

A frozen PC, unresponsive to any input, can be a frustrating experience, especially when it occurs immediately after the Windows 11 startup sequence. This issue, while seemingly perplexing, often stems from a variety of factors, ranging from simple software conflicts to more complex hardware problems. This article delves into the root causes of this issue, offering a comprehensive guide to troubleshooting and resolution strategies.

The Importance of Addressing the Issue

A PC freezing after startup severely disrupts workflow and productivity, hindering users from accessing files, applications, and completing tasks. This issue can be particularly problematic for users reliant on their computers for work, education, or entertainment, causing significant inconvenience and potential loss of data. Promptly addressing the issue is crucial to restore normal functionality and prevent further complications.

Understanding the Underlying Causes

The phenomenon of a PC freezing after the Windows 11 startup process can be attributed to various factors, each requiring a distinct approach for resolution. These causes can be broadly categorized as follows:

1. Software Conflicts and Errors:

  • Driver Issues: Outdated, corrupted, or incompatible drivers can lead to system instability, causing the PC to freeze during the startup process. This is particularly common with graphics card drivers, network drivers, or drivers for peripheral devices.
  • Corrupted System Files: Essential system files may become corrupted due to malware, power outages, or faulty installations. These corrupted files can disrupt the normal boot sequence, leading to a frozen state.
  • Software Conflicts: Newly installed software or updates can clash with existing programs or system settings, causing conflicts that disrupt the startup process.
  • Malware Infections: Malware can interfere with system processes, leading to various issues, including freezes, slowdowns, and crashes.

2. Hardware Problems:

  • Failing Hard Drive: A failing hard drive can cause errors during the boot process, resulting in system freezes. This can be indicated by unusual noises, slow performance, or frequent blue screen errors.
  • Overheating: Excessive heat can damage hardware components, leading to system instability and freezes. This can be caused by inadequate cooling solutions, dust accumulation, or faulty fans.
  • RAM Issues: Faulty RAM modules can cause system instability, leading to unpredictable behavior, including freezes.
  • Power Supply Issues: A failing power supply can provide insufficient power to the system, leading to unpredictable behavior and potential hardware damage.

3. System Configuration Issues:

  • Startup Applications: Excessive startup applications can overload the system during the boot process, leading to slow performance and potential freezes.
  • Boot Sequence Issues: Incorrect boot order settings in the BIOS can cause delays or errors during the startup process, leading to freezes.

Troubleshooting and Resolution Strategies

Addressing the issue of a PC freezing after Windows 11 startup requires a methodical approach, systematically eliminating potential causes and implementing appropriate solutions. The following steps can be used as a guide:

1. Restart the PC:

  • A simple restart can sometimes resolve temporary glitches or software conflicts that might have caused the freeze.

2. Check for Hardware Issues:

  • Visual Inspection: Inspect the PC for any visible signs of damage, dust accumulation, or loose connections.
  • Temperature Monitoring: Use a temperature monitoring software to check if any components are overheating.
  • Memory Test: Run a memory test to check for faulty RAM modules.
  • Hard Drive Health Check: Use a hard drive diagnostic tool to check for errors or signs of failure.

3. Update Drivers:

  • Device Manager: Check for outdated or corrupted drivers in the Device Manager and update them to the latest versions.
  • Manufacturer Websites: Download the latest drivers directly from the manufacturer’s website for optimal compatibility.

4. Run System File Checker:

  • Command Prompt: Open the Command Prompt as administrator and run the command sfc /scannow to scan for and repair corrupted system files.

5. Perform a Clean Boot:

  • System Configuration: Open the System Configuration utility and disable all non-essential startup applications to isolate potential conflicts.

6. Remove Recently Installed Software:

  • Control Panel: Uninstall any software installed recently to rule out potential conflicts.

7. Run a Malware Scan:

  • Antivirus Software: Use a reputable antivirus software to scan for and remove any malware infections.

8. Check Boot Order:

  • BIOS: Access the BIOS settings and ensure the boot order is set correctly, prioritizing the hard drive with the operating system.

9. Reinstall Windows 11:

  • Clean Installation: If all other troubleshooting steps fail, a clean installation of Windows 11 can resolve underlying system issues.

FAQs Regarding PC Freezes After Windows 11 Startup

Q: Is a PC freeze after Windows 11 startup always a serious issue?

A: While a freeze can be frustrating, it’s not necessarily a sign of a major problem. It could be a temporary glitch, a software conflict, or a minor hardware issue. However, if the freeze persists or becomes frequent, it’s essential to investigate the underlying cause.

Q: Can I prevent my PC from freezing after startup?

A: While completely eliminating the risk of a freeze is difficult, proactive measures can minimize the chances of encountering this issue. Keeping your system updated, regularly running antivirus scans, and monitoring hardware temperatures can significantly reduce the likelihood of freezes.

Q: Is a PC freeze after startup always a hardware issue?

A: No, a freeze can be caused by software conflicts, corrupted system files, or malware infections. It’s important to investigate both software and hardware aspects before concluding the cause.

Q: Can I recover data from a PC that freezes after startup?

A: Data recovery is possible, but the success rate depends on the cause of the freeze. If the freeze is due to a software issue, data recovery is generally straightforward. However, if the freeze is caused by a failing hard drive, data recovery may be more challenging.

Tips to Prevent PC Freezes After Windows 11 Startup

  • Regular Updates: Keep your operating system, drivers, and software applications updated to the latest versions.
  • Antivirus Protection: Install a reputable antivirus software and run regular scans to protect your system from malware.
  • Hardware Maintenance: Regularly clean your PC from dust and ensure proper ventilation to prevent overheating.
  • Monitor System Health: Use system monitoring tools to track hardware temperatures, disk usage, and other performance metrics.
  • Minimize Startup Applications: Disable unnecessary startup applications to reduce the load on the system during boot.
  • Backup Data: Regularly back up important data to an external storage device or cloud service.

Conclusion

PC freezes after Windows 11 startup can be a frustrating experience, but with a systematic approach to troubleshooting, the underlying cause can be identified and resolved. By understanding the potential causes, utilizing diagnostic tools, and implementing appropriate solutions, users can restore their PC to normal functionality and prevent future occurrences of this issue. It’s essential to prioritize regular maintenance, proactive security measures, and data backups to ensure a smooth and reliable computing experience.

How to fix if your Windows 11 keeps freezing? How to fix Windows 11 freezing at startup? How to Fix Windows 11 Freezing Issue
How to Fix Windows 11 Freezing Issue at Startup? How to Fix Windows 11 Freezing Issue at Startup? How to Solve Computer Freezes on Windows 11 OS - TechQuack
How To Fix Windows 11 Computer Freezes and Becomes Unresponsive When Idle - YouTube Why Does Windows 11 Keep Freezing? Explained - SmartWindows

Closure

Thus, we hope this article has provided valuable insights into Understanding and Resolving PC Freezes After Windows 11 Startup: A Comprehensive Guide. We appreciate your attention to our article. See you in our next article!

The Allure Of Upgraded Computing: A Comprehensive Look At PCWorld’s Windows 10 Sales

The Allure of Upgraded Computing: A Comprehensive Look at PCWorld’s Windows 10 Sales

Introduction

With enthusiasm, let’s navigate through the intriguing topic related to The Allure of Upgraded Computing: A Comprehensive Look at PCWorld’s Windows 10 Sales. Let’s weave interesting information and offer fresh perspectives to the readers.

The Allure of Upgraded Computing: A Comprehensive Look at PCWorld’s Windows 10 Sales

Microsoft has added $20 to the price of Windows 10 Home, but there are sales elsewhere  PCWorld

PCWorld, a prominent name in the technology sphere, periodically offers substantial discounts on Windows 10 licenses, aiming to make the upgrade accessible to a broader audience. These sales events are not merely promotional endeavors; they represent a strategic move to encourage users to embrace the latest operating system, ultimately contributing to a more robust and secure digital landscape.

Understanding the Windows 10 Upgrade: A Key to Modern Computing

Windows 10 represents a significant leap forward in operating system technology. It boasts a user-friendly interface, enhanced security features, and seamless integration with a vast ecosystem of apps and devices. The upgrade offers numerous benefits, including:

  • Enhanced Performance and Stability: Windows 10 is optimized for modern hardware, resulting in smoother performance and improved stability compared to its predecessors.
  • Modern User Interface: The intuitive and visually appealing interface makes navigation effortless, even for users unfamiliar with the Windows environment.
  • Security Enhancements: Windows 10 incorporates advanced security features like Windows Defender, which actively protects against malware and other threats.
  • Cross-Device Compatibility: The operating system seamlessly integrates with various devices, including smartphones, tablets, and laptops, enabling a unified experience across different platforms.
  • Regular Updates: Microsoft provides regular updates to Windows 10, ensuring users benefit from the latest security patches, bug fixes, and feature improvements.

The Significance of PCWorld’s Windows 10 Sales

PCWorld’s Windows 10 sales play a crucial role in promoting the adoption of this modern operating system. By offering significant discounts, they make the upgrade financially feasible for a wider range of users, particularly those who may have been hesitant due to cost considerations. This initiative directly contributes to the following:

  • Increased Security: By encouraging users to upgrade to Windows 10, PCWorld helps ensure a more secure digital environment. The enhanced security features of Windows 10 actively combat cyber threats, safeguarding users’ data and privacy.
  • Improved User Experience: The upgrade offers a smoother, more efficient, and visually appealing computing experience, enhancing productivity and overall satisfaction.
  • Technological Advancement: As more users adopt Windows 10, the ecosystem grows stronger, leading to increased innovation and development of new applications and technologies.
  • Digital Inclusion: PCWorld’s sales democratize access to modern computing technology, enabling individuals with limited budgets to enjoy the benefits of the latest operating system.

FAQ: Addressing Common Questions About PCWorld’s Windows 10 Sales

Q: What types of Windows 10 licenses are offered during these sales?

A: PCWorld typically offers both full versions and upgrade licenses. Full versions are suitable for new computers or those without a previous Windows installation. Upgrade licenses are designed for users who wish to upgrade from an older version of Windows.

Q: Are these licenses genuine and legitimate?

A: Yes, all licenses offered by PCWorld are genuine and directly sourced from Microsoft. This ensures users receive a legitimate and fully functional operating system.

Q: How long do these sales typically last?

A: The duration of PCWorld’s Windows 10 sales varies. It is recommended to subscribe to their newsletter or follow their social media accounts for timely updates on ongoing promotions.

Q: What are the system requirements for Windows 10?

A: Windows 10 has specific system requirements, including processor speed, RAM, and storage space. It is advisable to check the official Microsoft website for detailed specifications before purchasing a license.

Tips for Maximizing the Benefits of PCWorld’s Windows 10 Sales

  • Compare Prices: Before purchasing, it is always advisable to compare prices from different retailers to ensure you are getting the best deal.
  • Consider Your Needs: Determine whether you need a full version or an upgrade license based on your existing operating system and computer configuration.
  • Check for Bundles: PCWorld often offers bundled deals that include other software or services, which can provide additional value.
  • Act Quickly: Windows 10 sales are typically time-limited, so it is important to act promptly to secure the desired license.
  • Read Reviews: Before purchasing, read reviews from other users to gain insights into the quality and reliability of the product.

Conclusion: A Gateway to Modern Computing

PCWorld’s Windows 10 sales represent a valuable opportunity for individuals and businesses to upgrade their computing experience. By offering significant discounts, they make the transition to the latest operating system more accessible, fostering a more secure, efficient, and innovative digital landscape. By following the tips outlined above, users can make informed decisions and maximize the benefits of these promotions, ultimately embracing the power and potential of modern computing.

How to upgrade from Windows 10 S to Windows 10 Pro  PCWorld Windows 10 S explained: Features, release date, laptops, price, specs  PCWorld Get Windows 10 Pro for 75% off! Then upgrade to Windows 11 for free  PCWorld
Windows 10: Review, price, release date, features, FAQs, video  PCWorld Windows 10 Pro Windows 10  PC World
Microsoft announces the Windows 10 May 2020 Update, the next Windows for your PC  PCWorld Windows 10 at 5 years: How it transformed the PC

Closure

Thus, we hope this article has provided valuable insights into The Allure of Upgraded Computing: A Comprehensive Look at PCWorld’s Windows 10 Sales. We hope you find this article informative and beneficial. See you in our next article!

The Silent Enigma: Troubleshooting No Sound After Reinstalling Windows 10

The Silent Enigma: Troubleshooting No Sound After Reinstalling Windows 10

Introduction

With great pleasure, we will explore the intriguing topic related to The Silent Enigma: Troubleshooting No Sound After Reinstalling Windows 10. Let’s weave interesting information and offer fresh perspectives to the readers.

The Silent Enigma: Troubleshooting No Sound After Reinstalling Windows 10

How To Fix No Sound In Windows 10 - Vrogue

The joy of a fresh Windows 10 installation can be quickly dampened by the absence of sound. This frustrating issue can arise from various factors, each requiring a specific approach to resolution. This article provides a comprehensive guide to understanding the root causes of this problem and offers practical solutions to restore your audio functionality.

Understanding the Causes

The lack of sound after reinstalling Windows 10 can be attributed to a multitude of factors, categorized as follows:

1. Driver Issues:

  • Missing or Incompatible Drivers: Windows 10 requires specific drivers to recognize and interact with your audio hardware. During the installation process, these drivers might not be automatically installed, leading to a silent system.
  • Outdated Drivers: Even if drivers are present, they might be outdated and incompatible with the current Windows version, causing sound problems.

2. Hardware Malfunctions:

  • Faulty Audio Device: A damaged sound card or speaker system can prevent audio output.
  • Loose Connections: Improperly connected cables or loose connections within the system can disrupt audio transmission.

3. Software Conflicts:

  • Conflicting Audio Software: Third-party audio applications or settings within Windows itself can interfere with the default sound output.
  • Corrupted System Files: Issues with Windows system files can affect audio functionality.

4. Windows Settings:

  • Incorrect Audio Output Device: The system might be configured to output sound through a device that is not functioning or connected.
  • Muted Audio: The system’s audio output might be muted inadvertently.

5. BIOS Settings:

  • Disabled Audio: Some BIOS settings might disable audio output, preventing sound from reaching the speakers.

Troubleshooting Steps: A Systematic Approach

Addressing the issue of no sound after reinstalling Windows 10 requires a systematic approach, starting with the simplest solutions and progressing to more complex troubleshooting steps.

1. Basic Checks:

  • Verify Speaker Connection: Ensure that the speakers are properly connected to the system and the volume knob is turned up.
  • Check for Mute: Verify that the system’s volume is not muted. This can be checked through the taskbar icon or the Windows sound settings.
  • Test Different Audio Outputs: If multiple audio devices are connected, try switching the output to another device to identify if the issue is specific to a particular output.
  • Restart the System: A simple restart can resolve temporary glitches that might be causing the sound issue.

2. Driver Verification and Updates:

  • Driver Updates: Use the Device Manager to check for available driver updates for your audio device. Right-click the "Sound, video and game controllers" category in the Device Manager, select "Scan for hardware changes," and follow the prompts.
  • Driver Installation: If drivers are missing, download and install the latest compatible drivers from the manufacturer’s website.
  • Driver Rollback: If recent driver updates caused the problem, consider rolling back to a previous version. Right-click the audio device in the Device Manager, select "Properties," go to the "Driver" tab, and click "Roll Back Driver."

3. Hardware Diagnostics:

  • Speaker Testing: Connect the speakers to a different device to ensure they are functioning correctly.
  • Sound Card Test: If the issue persists, run a sound card test by using the Windows built-in diagnostic tool. Search for "Sound troubleshooter" in the Windows search bar and follow the prompts.
  • External Audio Device: Connect an external audio device, like a USB speaker or headphones, to check if the issue is specific to the internal audio hardware.

4. Software and System File Troubleshooting:

  • Uninstall Conflicting Audio Software: Temporarily uninstall any third-party audio software that might be interfering with the default audio settings.
  • System File Checker (SFC) Scan: Run the System File Checker tool to repair corrupted system files that might be causing the sound issue. Open Command Prompt as administrator and type "sfc /scannow."
  • Disable Audio Enhancements: Disable any audio enhancements that might be interfering with sound output. Open the "Sound" settings in Windows, right-click the default audio device, select "Properties," go to the "Enhancements" tab, and disable all enhancements.

5. BIOS Settings:

  • Enable Audio Output: Access the BIOS settings by pressing the appropriate key during system boot (usually F2, F10, or Del). Navigate to the audio settings and ensure that audio output is enabled.
  • Reset BIOS Settings: If you’re unsure about the BIOS settings, consider resetting the BIOS to its default configuration.

6. Windows Audio Services:

  • Restart Audio Services: Restart the Windows Audio services to reset their configuration. Open the "Services" window (search for "services.msc" in the Windows search bar), locate "Windows Audio," right-click, select "Restart," and repeat for "Windows Audio Endpoint Builder."
  • Check Audio Services Status: Ensure that the Windows Audio services are running properly. In the "Services" window, look for the "Windows Audio" and "Windows Audio Endpoint Builder" services. If they are stopped or disabled, start or enable them.

7. Advanced Troubleshooting:

  • Clean Boot: Perform a clean boot to isolate the issue by temporarily disabling non-essential services and startup programs.
  • System Restore: If the problem occurred recently, consider using a system restore point to revert to a previous working state.
  • Reinstall Windows: As a last resort, reinstalling Windows can resolve the issue if it’s caused by a system-wide problem.

FAQs: Addressing Common Concerns

1. "I’ve tried updating drivers, but the sound is still missing."

This could indicate a deeper issue. Consider reinstalling the audio drivers completely, ensuring that the system is rebooted after the installation. Additionally, check the Device Manager for any error codes or yellow exclamation marks next to the audio device, indicating a hardware or driver problem.

2. "My speakers work on other devices, but not on my computer."

This suggests that the issue lies with the computer’s audio hardware or drivers. Check for loose connections, run a sound card test, and consider updating or reinstalling the audio drivers. If the issue persists, a faulty sound card might be the culprit.

3. "I’ve checked all the settings, but the sound is still muted."

If you’ve thoroughly checked the system volume, audio output device, and BIOS settings, the issue might be related to a software conflict or a corrupted system file. Consider uninstalling conflicting audio software, running the System File Checker tool, or performing a clean boot to isolate the problem.

4. "My sound is distorted or crackling."

Distorted or crackling sound can be caused by outdated or corrupted audio drivers, incompatible audio settings, or a hardware issue. Update or reinstall the audio drivers, disable audio enhancements, and check for loose connections or faulty hardware.

5. "My microphone isn’t working."

Microphone problems can be related to driver issues, incorrect microphone settings, or hardware malfunctions. Check the microphone settings in Windows, update or reinstall the microphone drivers, and test the microphone on a different device to rule out hardware failure.

Tips for Preventing Sound Issues:

  • Install Drivers Before Connecting Hardware: Before connecting new audio hardware, install the appropriate drivers from the manufacturer’s website to ensure compatibility.
  • Keep Drivers Updated: Regularly update audio drivers to ensure optimal performance and compatibility with the latest Windows updates.
  • Back Up Drivers: Before installing new drivers, back up the existing ones to allow for easy rollback if necessary.
  • Avoid Unnecessary Audio Software: Limit the use of third-party audio software to minimize potential conflicts with Windows audio settings.
  • Regular System Maintenance: Perform regular system maintenance, including disk cleanup and system file checks, to prevent software conflicts and corrupted system files.

Conclusion:

Resolving the issue of no sound after reinstalling Windows 10 requires a systematic approach, starting with basic checks and progressing to more advanced troubleshooting steps. By carefully analyzing the symptoms and following the provided solutions, you can identify and address the root cause of the problem, restoring audio functionality and enjoying a fully functional Windows 10 experience. Remember, patience and a methodical approach are key to successfully troubleshooting this common issue.

Fix "No Sound After Windows 10 Update" How to Fix No Sound Issue on Windows 10?  iSeePassword Blog Fix "No Sound After Windows 10 Update"
Fix "No Sound After Windows 10 Update" How to fix no sound, PC audio problems after Windows update? How To Get Help In Windows 10 No Audio – Lates Windows 10 Update
How To Fix No Sound In Windows 10 - Vrogue No audio windows 10 - vsabridge

Closure

Thus, we hope this article has provided valuable insights into The Silent Enigma: Troubleshooting No Sound After Reinstalling Windows 10. We thank you for taking the time to read this article. See you in our next article!