Windows 11: A Look Ahead To The Future Of Computing

Windows 11: A Look Ahead to the Future of Computing

Introduction

In this auspicious occasion, we are delighted to delve into the intriguing topic related to Windows 11: A Look Ahead to the Future of Computing. Let’s weave interesting information and offer fresh perspectives to the readers.

Windows 11: A Look Ahead to the Future of Computing

Windows 11: A Leap Into The Future Of Computing  TechDuffer

While Microsoft has not yet officially announced a "Windows 11 2025 Update," the company consistently releases feature updates and improvements to its operating system. These updates aim to enhance user experience, improve security, and introduce new functionalities. Based on the company’s history and current trends in technology, we can anticipate a significant update to Windows 11 in the coming years, likely incorporating features designed to address the evolving needs of users and the changing landscape of computing.

The Evolution of Windows 11:

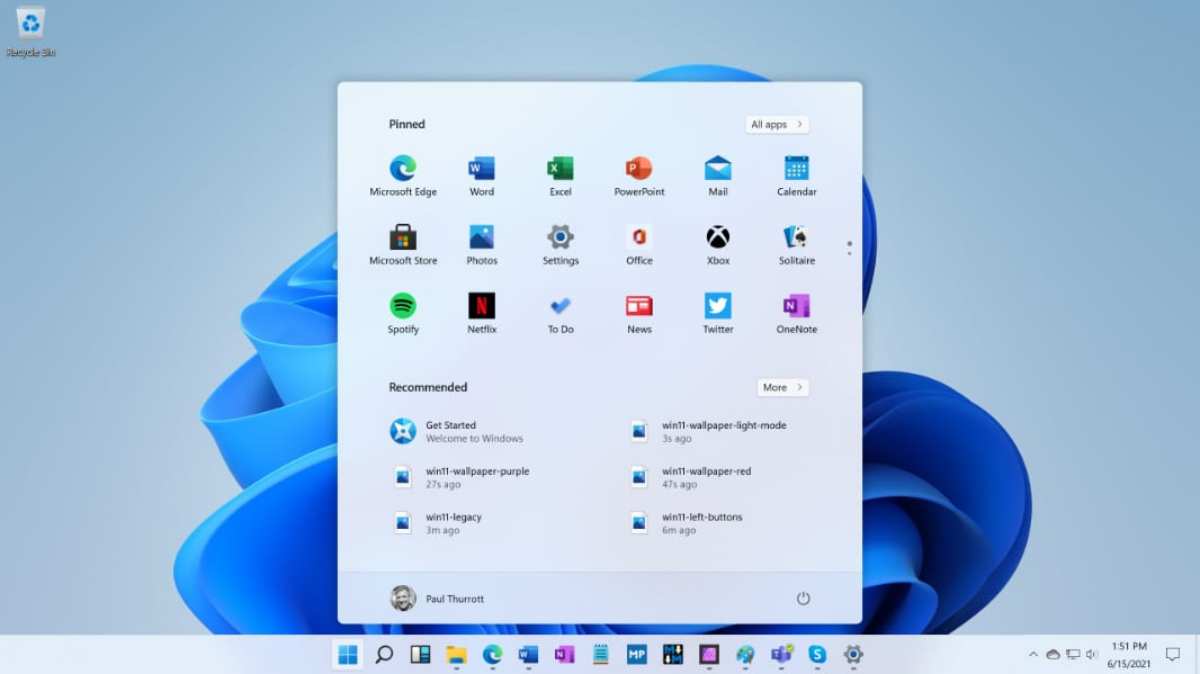
Windows 11 has been met with a mix of positive and negative reception since its release in 2021. While its modern design and improved performance were appreciated, users also expressed concerns about certain features and limitations. Microsoft has been actively listening to user feedback and responding with regular updates. This iterative approach suggests a future where Windows 11 will continue to evolve, addressing user concerns and introducing new innovations.

Anticipated Features and Improvements:

Based on current trends and Microsoft’s past updates, we can speculate about potential features and improvements that might be included in a future major update to Windows 11:

1. Enhanced AI Integration:

Artificial intelligence (AI) is rapidly transforming various aspects of our lives, and computing is no exception. A future update to Windows 11 could see a deeper integration of AI features. This could include:

  • AI-powered search: Improved search capabilities that understand natural language queries and provide more relevant results.
  • AI-assisted productivity tools: Tools that help users automate tasks, manage their time effectively, and collaborate seamlessly.
  • AI-driven security enhancements: Improved malware detection and prevention, along with proactive security measures based on user behavior analysis.

2. Advanced Multitasking and Collaboration:

The rise of remote work and hybrid work models has underscored the need for improved multitasking and collaboration tools. A future update to Windows 11 could introduce:

  • Enhanced virtual desktop management: More robust tools for organizing and switching between virtual desktops, facilitating efficient task management.
  • Improved collaboration features: Streamlined integration with collaboration platforms, enabling seamless communication and file sharing.
  • Advanced window management: More intuitive and flexible ways to arrange and manage open windows, maximizing screen space and productivity.

3. Improved Gaming Experience:

Gaming remains a significant aspect of the Windows ecosystem. Future updates could enhance the gaming experience through:

  • Optimized game performance: Improved graphics drivers, resource management, and hardware utilization for smoother gameplay.
  • Advanced gaming features: Integration with cloud gaming platforms, enhanced accessibility options, and support for new gaming technologies.
  • Improved gaming community features: Enhanced integration with social media platforms and gaming communities, fostering a stronger sense of belonging and engagement.

4. Enhanced Security and Privacy:

Cybersecurity is a growing concern in today’s digital world. Future updates to Windows 11 could focus on strengthening security and privacy features:

  • Improved threat detection and prevention: More robust malware detection and prevention mechanisms, leveraging AI and machine learning.
  • Enhanced privacy controls: Greater control over user data collection and sharing, with more transparent and granular privacy settings.
  • Improved security protocols: Enhanced authentication mechanisms and data encryption, ensuring secure access and data protection.

5. Focus on Sustainability:

Sustainability is becoming increasingly important in the tech industry. A future update to Windows 11 could incorporate features that promote energy efficiency and reduce the environmental impact of computing:

  • Optimized power management: Improved power management settings to reduce energy consumption and extend battery life.
  • Sustainable software design: Emphasis on developing software that minimizes resource usage and promotes eco-friendly practices.
  • Integration with green technology: Support for eco-friendly hardware and devices, encouraging a shift towards sustainable computing practices.

FAQs:

Q: When will the "Windows 11 2025 Update" be released?

A: Microsoft has not yet announced any specific plans for a "Windows 11 2025 Update." However, the company typically releases major updates to Windows every year or two. It is likely that a significant update will be released sometime in 2025 or 2026.

Q: Will this update be free for all Windows 11 users?

A: Microsoft generally makes major updates to Windows available for free to users who have a valid license for the operating system. It is highly likely that the future update will also be free for existing Windows 11 users.

Q: What are the system requirements for this update?

A: The system requirements for a future update to Windows 11 will likely be similar to the current system requirements. Microsoft typically provides detailed information about system requirements closer to the release date of the update.

Q: Will this update be available for all Windows 11 devices?

A: Microsoft typically releases updates for all supported versions of Windows. However, the availability of specific features may vary depending on the device’s hardware and software configuration.

Tips:

  • Stay informed: Keep an eye on Microsoft’s official announcements and news channels for updates on the development and release of future Windows 11 updates.
  • Back up your data: Before installing any major update, it is always advisable to back up your important data to prevent any potential data loss.
  • Check your system requirements: Ensure your device meets the minimum system requirements for the upcoming update to avoid compatibility issues.
  • Participate in the Windows Insider Program: If you’re interested in testing out new features and providing feedback, consider joining the Windows Insider Program to get early access to pre-release updates.

Conclusion:

While a "Windows 11 2025 Update" remains unconfirmed, the continuous evolution of Windows 11 suggests a future where the operating system will continue to adapt to the changing needs of users and the evolving landscape of computing. With a focus on AI integration, advanced multitasking and collaboration, enhanced gaming experiences, improved security and privacy, and sustainability, the future of Windows 11 promises to be exciting and transformative. As Microsoft continues to develop and refine Windows 11, it will be crucial to stay informed about upcoming updates and ensure that your device meets the necessary system requirements for a smooth transition to the latest features and innovations.

Windows 11 Leaks Ahead Of Microsoft Announcement; Showcases New UI, Start Menu - Lowyat.NET Windows 11 leaked ahead of launch, new UI and other features revealed Windows 11 leaked ahead of launch! Here's everything that's changed
Microsoft Windows 11 Leaked Ahead Of Launch Windows 11 ISO leaked ahead of launch, reveals new UI, Start menu, and icons for PCs How to get the first Windows 11 Preview builds
Windows 11 is a new and refreshing approach to an old and familiar home - The Verge Windows 11 Unleashes Exciting New Features: A Peek into the Future - IT Manager

Closure

Thus, we hope this article has provided valuable insights into Windows 11: A Look Ahead to the Future of Computing. We appreciate your attention to our article. See you in our next article!

R In Windows 11: Unlocking Statistical Power And Data Analysis

R in Windows 11: Unlocking Statistical Power and Data Analysis

Introduction

With great pleasure, we will explore the intriguing topic related to R in Windows 11: Unlocking Statistical Power and Data Analysis. Let’s weave interesting information and offer fresh perspectives to the readers.

R in Windows 11: Unlocking Statistical Power and Data Analysis

Install R on Windows 11  TestingDocs.com

R, a free and open-source programming language and software environment, has become a cornerstone of data analysis and statistical computing. Its versatility and extensive library of packages make it an invaluable tool for researchers, data scientists, and anyone seeking to extract meaningful insights from data. While R is highly compatible across platforms, its seamless integration with Windows 11 enhances its accessibility and functionality, making it a powerful option for users seeking a robust data analysis environment.

R’s Strengths in Windows 11

Windows 11 provides a stable and familiar operating system environment for R, allowing users to leverage its full potential without encountering compatibility issues. Here are some key advantages of using R in Windows 11:

1. Seamless Integration: Windows 11’s native support for R allows for smooth installation and execution. Users can easily download and install R from the official website or use package managers like RStudio, which offers a user-friendly interface and enhanced features for R development.

2. Comprehensive Ecosystem: The extensive R ecosystem boasts a vast collection of packages, each specializing in a specific area of data analysis. This includes packages for statistical modeling, machine learning, data visualization, text mining, and more. This rich ecosystem empowers users to tackle complex data analysis tasks efficiently.

3. Powerful Visualization Capabilities: R excels in data visualization, offering users a wide range of packages like ggplot2 and plotly for creating visually compelling and informative charts, graphs, and interactive plots. This ability to present data effectively is crucial for communicating insights and facilitating decision-making.

4. Collaboration and Reproducibility: R promotes collaboration through its ability to share code and results easily. Users can create reproducible research by documenting their analysis steps and code, ensuring transparency and facilitating verification.

5. Community Support: The vibrant R community provides a wealth of resources, including online forums, documentation, and tutorials. This support network allows users to connect with fellow R practitioners, seek assistance, and learn from shared experiences.

Installing R in Windows 11

Installing R in Windows 11 is a straightforward process. Users can follow these steps:

  1. Download R: Visit the official R website (https://cran.r-project.org/) and download the latest version of R for Windows.
  2. Run the Installer: Double-click the downloaded installer file and follow the on-screen instructions.
  3. Choose Installation Location: Select the desired installation directory for R.
  4. Install R Packages: Once R is installed, users can install additional packages using the install.packages() function or through a package manager like RStudio.

Using R in Windows 11

R’s versatility makes it suitable for various data analysis tasks. Here are some common applications:

1. Statistical Analysis: R provides a comprehensive set of functions for statistical analysis, including hypothesis testing, regression analysis, and time series analysis. Users can leverage these functions to explore data, test hypotheses, and draw statistically sound conclusions.

2. Data Visualization: R’s powerful visualization capabilities allow users to create insightful and visually appealing charts and graphs. This helps in understanding data patterns, identifying trends, and communicating findings effectively.

3. Machine Learning: R offers a growing collection of machine learning packages, enabling users to build predictive models, classify data, and perform other machine learning tasks.

4. Data Manipulation and Cleaning: R provides functions for data manipulation and cleaning, allowing users to transform, filter, and prepare data for analysis. This includes tasks like data aggregation, reshaping, and handling missing values.

5. Scripting and Automation: R can be used to automate repetitive tasks, such as data processing, analysis, and report generation. This automation can significantly improve efficiency and reduce errors.

FAQs on R in Windows 11

1. What is the best IDE for R in Windows 11?

RStudio is a popular and highly recommended IDE for R, offering a user-friendly interface, code completion, debugging tools, and features for managing projects and packages.

2. How can I install packages in R on Windows 11?

You can install packages using the install.packages() function in R. For example, to install the ggplot2 package, you would type install.packages("ggplot2").

3. How do I manage R packages in Windows 11?

You can use the library() function to load packages into your R session. To list installed packages, use installed.packages(). To remove a package, use remove.packages().

4. What are some useful R packages for data visualization?

Some popular R packages for data visualization include ggplot2, plotly, and lattice. These packages offer a wide range of charting options and customization capabilities.

5. How can I learn R in Windows 11?

There are numerous resources available for learning R, including online courses, tutorials, books, and documentation. The official R website (https://www.r-project.org/) provides comprehensive documentation and links to other learning resources.

Tips for Using R in Windows 11

1. Start with the Basics: Begin by learning the fundamental concepts of R, including data types, operators, functions, and control structures.

2. Explore the R Ecosystem: Familiarize yourself with the extensive collection of R packages. Explore packages relevant to your area of interest and learn how to install and use them.

3. Practice Regularly: Consistent practice is essential for mastering R. Work on small projects, analyze datasets, and experiment with different functions and packages.

4. Leverage Online Resources: Utilize online resources like forums, tutorials, and documentation to seek assistance, learn new techniques, and stay updated on the latest developments in R.

5. Consider RStudio: RStudio provides a powerful and user-friendly environment for R development. It offers features like code completion, debugging tools, and project management capabilities.

Conclusion

R, with its seamless integration into Windows 11, empowers users to unlock the potential of data analysis and statistical computing. Its rich ecosystem, powerful visualization capabilities, and robust community support make it an invaluable tool for researchers, data scientists, and anyone seeking to extract meaningful insights from data. By leveraging R’s capabilities in Windows 11, users can enhance their data analysis skills, gain valuable insights, and make informed decisions. As data continues to proliferate, R remains a vital tool for navigating the complexities of the information age.

R Basics 14 - Initial Statistical Analysis of Data - YouTube Data Analysis in R - YouTube r Programming Language for Statistical Analysis - Finance Train
Statistical Analysis in R  Know Why We Use Statistical Analysis in R Best Free Statistical Analysis Software for Windows 11/10 Install R on Windows 11  TestingDocs.com
Statistical Analysis with R  Guide to Statistical Analysis with R Solved Lock, Statistics: Unlocking the Power of Data, 2e  Chegg.com

Closure

Thus, we hope this article has provided valuable insights into R in Windows 11: Unlocking Statistical Power and Data Analysis. We thank you for taking the time to read this article. See you in our next article!

Unveiling The Future Of Windows 11: A Deep Dive Into The Upcoming Update

Unveiling the Future of Windows 11: A Deep Dive into the Upcoming Update

Introduction

With great pleasure, we will explore the intriguing topic related to Unveiling the Future of Windows 11: A Deep Dive into the Upcoming Update. Let’s weave interesting information and offer fresh perspectives to the readers.

Unveiling the Future of Windows 11: A Deep Dive into the Upcoming Update

Windows 11 deep dive: Checking out the Widgets pane

Microsoft’s Windows 11 has been steadily evolving since its launch in 2021, with a series of updates introducing new features and refinements. The next major update, while not officially announced with a specific date, is anticipated to bring significant enhancements and further solidify Windows 11’s position as a modern, versatile operating system. While details remain under wraps, we can glean insights from existing trends, rumors, and Microsoft’s development roadmap to anticipate what this update might hold.

The Evolution of Windows 11: A Look Back

Since its release, Windows 11 has received several updates, focusing on refining existing features and introducing new functionalities. These updates have addressed user feedback, introduced new accessibility features, and improved overall system performance. Key highlights include:

  • Improved Start Menu and Taskbar: The Start Menu has been redesigned to be more user-friendly, while the taskbar has gained new functionalities, including the ability to align icons to the center.
  • Enhanced Widgets: Windows 11 introduced widgets, providing quick access to relevant information. Updates have focused on expanding the widget library and improving their functionality.
  • Focus Modes and Do Not Disturb: These features aim to enhance productivity by reducing distractions and creating a focused work environment.
  • New Security Features: Updates have strengthened security measures, including improved malware protection and enhanced privacy settings.
  • Improved Gaming Experience: Windows 11 has seen enhancements to its gaming capabilities, including support for Auto HDR and DirectX 12 Ultimate.

Anticipating the Next Big Update: Key Areas of Focus

While details are scarce, the next major Windows 11 update is likely to focus on several key areas:

1. AI Integration: Microsoft has been heavily investing in artificial intelligence (AI), and the upcoming update is expected to showcase this commitment. AI-powered features could include:

  • Enhanced Search: AI could significantly improve search capabilities within Windows, providing more accurate and contextually relevant results.
  • Intelligent Assistant: A more robust AI assistant could offer personalized recommendations, automate tasks, and provide proactive support.
  • Content Creation: AI could assist with content creation tasks, such as generating text, images, and even videos.

2. Enhanced Productivity and Collaboration: The update could introduce features that streamline workflows and foster seamless collaboration:

  • Improved Multitasking: New tools and features might enhance multitasking capabilities, allowing users to manage multiple applications and windows more efficiently.
  • Enhanced Cloud Integration: Deeper integration with cloud services could enable seamless file sharing, collaboration, and access to data across devices.
  • Improved Communication Tools: The update could include enhancements to built-in communication tools, making it easier to connect with colleagues and clients.

3. Focus on Security and Privacy: Security and privacy remain paramount for Microsoft. The next update could introduce:

  • Advanced Threat Detection: Enhanced security features could offer real-time protection against emerging cyber threats.
  • Enhanced Privacy Controls: Users could gain more granular control over their data and privacy settings.
  • Improved Data Encryption: Advanced encryption techniques could further protect sensitive data stored on Windows devices.

4. Gaming Enhancements: Gaming remains a crucial aspect of Windows 11. The update could include:

  • Support for New Hardware: Improved support for the latest gaming hardware, including GPUs and VR devices.
  • Enhanced Performance: Optimization for better frame rates and smoother gameplay.
  • New Gaming Features: The introduction of new features, such as cloud gaming integration or advanced graphics settings.

5. User Interface Refinements: The update could include subtle but significant refinements to the user interface:

  • Improved Visual Aesthetics: The update might introduce new themes, color palettes, and visual elements to enhance the overall user experience.
  • Enhanced Accessibility: Improvements to accessibility features could make Windows 11 more inclusive for users with disabilities.
  • Streamlined Navigation: The update could introduce new navigation methods or refine existing ones for a smoother user experience.

Beyond the Speculation: What We Know

While much of the next update remains shrouded in mystery, Microsoft has provided some glimpses into its direction. The company has hinted at the integration of AI, improved gaming capabilities, and enhanced security features. These hints suggest that the next update will be a significant step forward for Windows 11, addressing key user needs and further solidifying its position as a leading operating system.

FAQs: Addressing the Unknowns

Q: When will the next big Windows 11 update be released?

A: Microsoft has not officially announced a release date for the next major update. However, based on past release cycles, it is likely to arrive in the second half of 2023 or early 2024.

Q: Will the update be free for all Windows 11 users?

A: Microsoft typically makes major updates to Windows free for all users. The next update is expected to follow this pattern, making it accessible to all Windows 11 users without additional costs.

Q: What are the system requirements for the next update?

A: While specific system requirements are not yet available, the update is likely to be compatible with devices that meet the current minimum requirements for Windows 11.

Q: Will the update be available for all versions of Windows 11?

A: Microsoft typically releases major updates for all supported versions of Windows 11. It is highly probable that the next update will be available for all currently supported versions.

Tips for Preparing for the Next Update:

  • Keep Your System Updated: Ensure your Windows 11 installation is up to date with the latest updates to ensure compatibility with the upcoming update.
  • Backup Your Data: It’s always a good practice to back up your important data before installing any major software update.
  • Check System Requirements: Verify that your computer meets the minimum system requirements for the next update.
  • Free Up Disk Space: The update might require significant disk space for installation. Free up space on your hard drive to avoid any issues.
  • Stay Informed: Keep an eye on official Microsoft announcements and news sources for the latest information on the update’s release date and features.

Conclusion: The Future of Windows 11

The next major update for Windows 11 promises to be a significant milestone, further enhancing its capabilities and solidifying its position as a leading operating system. With a focus on AI integration, improved productivity, enhanced security, and a refined user experience, the update is poised to deliver a more intuitive, powerful, and secure computing experience for users. While details remain under wraps, the anticipation surrounding this update underscores its importance and the ongoing evolution of Windows 11 as a platform for innovation and progress.

Windows 11 Deep Dive: Walking Through The New OS - YouTube Exploring The Features Of Windows 11: A Deep Dive Feature Deep Dive โ€“ Windows 11 Readiness
Microsoft windows 11 upgrade release date - jestm Windows 11 Deep-Dive: Die Neuerungen im รœberblick - WindowsUnited Microsoft releases new Windows 11 22H2 update to Release Preview
Leak suggests Microsoft's Windows 11 "Moment 3" update might be coming to life - The Tech Bloom What is Windows 11 in S mode?  Deep Dive - YouTube

Closure

Thus, we hope this article has provided valuable insights into Unveiling the Future of Windows 11: A Deep Dive into the Upcoming Update. We appreciate your attention to our article. See you in our next article!

Refreshing Your Windows 10 System: A Comprehensive Guide To Maintaining Data While Reinstalling

Refreshing Your Windows 10 System: A Comprehensive Guide to Maintaining Data While Reinstalling

Introduction

With enthusiasm, let’s navigate through the intriguing topic related to Refreshing Your Windows 10 System: A Comprehensive Guide to Maintaining Data While Reinstalling. Let’s weave interesting information and offer fresh perspectives to the readers.

Refreshing Your Windows 10 System: A Comprehensive Guide to Maintaining Data While Reinstalling

Reinstall Windows 10 using Refresh Windows Tool from Microsoft

Windows 10, like any software, can experience performance issues, glitches, or even malware infections over time. These issues can lead to slowdowns, instability, and even data loss. A clean installation of Windows 10 can often address these problems and restore your system to peak performance. However, the prospect of reinstalling Windows can be daunting, especially for users concerned about losing valuable data and applications.

Fortunately, there are methods to achieve a fresh Windows 10 installation while preserving your personal files, programs, and settings. This comprehensive guide will delve into the intricacies of this process, exploring various approaches, addressing common concerns, and offering practical tips for a seamless experience.

Understanding the Benefits of Reinstalling Windows 10

Reinstalling Windows 10 offers numerous advantages, including:

  • Enhanced Performance: A clean installation eliminates unnecessary files, temporary data, and potentially corrupt registry entries that can accumulate over time, leading to improved system speed and responsiveness.
  • Resolution of Software Conflicts: Reinstallation resolves conflicts between software programs that might be causing errors or instability.
  • Malware Removal: A fresh installation effectively removes malware, viruses, and other threats that might be embedded within the system, ensuring a secure computing environment.
  • System Optimization: Reinstalling Windows 10 allows you to optimize settings, customize configurations, and install only the necessary software, resulting in a leaner and more efficient system.
  • Troubleshooting and Repairs: Reinstallation can often resolve persistent issues that are difficult to address through conventional troubleshooting methods.

Methods for Reinstalling Windows 10 Without Losing Data

There are two primary approaches to reinstalling Windows 10 without losing data:

1. Resetting Your PC:

This built-in Windows feature allows you to restore your system to its factory settings while preserving your personal files. It essentially performs a clean install of Windows 10, removing unwanted applications and settings, while keeping your documents, pictures, music, and videos intact.

Steps to Reset Your PC:

  • Access Settings: Open the Settings app (Windows key + I).
  • Navigate to Update & Security: Select "Update & Security" from the left-hand menu.
  • Choose Recovery: Click on "Recovery" from the left-hand menu.
  • Select "Reset this PC": Click the "Reset this PC" button.
  • Choose an option: You have two options:
    • "Keep my files": This option preserves your personal data, but removes all applications and settings.
    • "Remove everything": This option completely wipes your hard drive, including all data and applications.
  • Follow the on-screen instructions: The system will guide you through the reset process.

2. Using a Backup Image:

This method involves creating a complete backup of your system, including the operating system, applications, and data, before reinstalling Windows 10. After the clean installation, you can restore the backup image, effectively replicating your previous system configuration.

Steps to Create and Restore a Backup Image:

  • Create a Backup Image:
    • Use built-in tools: Windows 10 includes a built-in backup feature. Go to "Settings" > "Update & Security" > "Backup" and create a backup image.
    • Use third-party software: Many third-party backup solutions offer advanced features and flexibility.
  • Reinstall Windows 10: Perform a clean installation of Windows 10.
  • Restore the Backup Image:
    • Using built-in tools: Go to "Settings" > "Update & Security" > "Recovery" and choose "Recovery from a drive."
    • Using third-party software: Follow the instructions provided by the backup software.

Important Considerations Before Reinstalling Windows 10

  • Backup Your Data: Regardless of the method you choose, it is crucial to back up all your important data to an external drive or cloud storage service. This ensures that your files are safe even if something goes wrong during the reinstallation process.
  • Software Licenses: Ensure that you have access to the product keys or licenses for all the software you intend to reinstall.
  • Device Drivers: Keep your device drivers readily available as you will need to install them after the reinstallation.
  • System Requirements: Verify that your hardware meets the minimum system requirements for the latest version of Windows 10.
  • Time Commitment: The reinstallation process can take several hours, depending on the size of your hard drive and the amount of data being restored.

FAQs: Reinstalling Windows 10 Without Losing Data

Q: What happens to my installed applications after a clean installation?

A: All installed applications will be removed during a clean installation. You will need to reinstall them after the process is complete.

Q: Will my personal files be deleted if I choose the "Remove everything" option?

A: Yes, the "Remove everything" option will delete all data on your hard drive, including personal files. It is crucial to back up your data before choosing this option.

Q: Can I reinstall Windows 10 without a product key?

A: You will need a valid product key to activate Windows 10 after reinstalling it.

Q: How do I find my Windows 10 product key?

A: You can find your product key in several ways:

  • Check your PC: The product key may be attached to your PC case or on a sticker underneath the device.
  • Check your purchase receipt: The product key might be included in your purchase receipt.
  • Use a product key finder tool: Several online tools can help you locate your product key.

Q: What if I forget my Windows 10 password after reinstalling?

A: If you forget your password, you will need to reset it using a Microsoft account or a local account recovery disk.

Tips for a Smooth Reinstallation Experience

  • Create a Bootable USB Drive: Create a bootable USB drive with the Windows 10 installation files for a more streamlined installation process.
  • Disable Antivirus Software: Temporarily disable your antivirus software to avoid potential conflicts during the reinstallation.
  • Disconnect Peripherals: Disconnect unnecessary peripherals, such as printers and external drives, to minimize potential issues.
  • Check for Updates: Ensure that you have the latest Windows 10 updates installed before beginning the reinstallation process.
  • Verify System Requirements: Confirm that your hardware meets the minimum system requirements for Windows 10.
  • Back Up Your Data: This cannot be emphasized enough. Back up all your important data before starting the reinstallation process.

Conclusion: A Renewed Windows 10 Experience

Reinstalling Windows 10 can be a powerful tool for revitalizing your system, resolving issues, and improving performance. By understanding the various methods and following the outlined steps, you can achieve a clean installation without losing valuable data. Remember to back up your data, research and gather necessary licenses, and take the necessary precautions to ensure a smooth and successful reinstallation experience. With a fresh start, your Windows 10 system will be ready to deliver optimal performance and a renewed user experience.

Convenient Options For Reinstalling Windows 10  TechLoris Refresh Windows 10  Tutorials Windows 10 System Restore, Refresh, Reset, Fresh Start & Reinstall guide
How to Refresh Windows 10? How to Refresh Windows 10? Refresh Windows 10  Tutorials
Windows 10 Refresh & Reset Easily - Driver Easy How To Perform A Clean Install Of Windows 10 With The Refresh Tool Images

Closure

Thus, we hope this article has provided valuable insights into Refreshing Your Windows 10 System: A Comprehensive Guide to Maintaining Data While Reinstalling. We appreciate your attention to our article. See you in our next article!

Navigating The Digital Landscape: A Comprehensive Look At PC Magazine’s Desktop Computer Reviews

Navigating the Digital Landscape: A Comprehensive Look at PC Magazine’s Desktop Computer Reviews

Introduction

With great pleasure, we will explore the intriguing topic related to Navigating the Digital Landscape: A Comprehensive Look at PC Magazine’s Desktop Computer Reviews. Let’s weave interesting information and offer fresh perspectives to the readers.

Navigating The Digital Landscape: A Comprehensive Guide To The Best Map And Directions Websites

In the ever-evolving world of technology, choosing the right desktop computer can be a daunting task. With a myriad of options available, navigating the complexities of hardware specifications, performance benchmarks, and software compatibility can feel overwhelming. This is where trusted sources like PC Magazine’s desktop computer reviews come into play.

PC Magazine, a leading authority in technology journalism, has consistently provided comprehensive and insightful reviews of desktop computers for decades. Their reviews serve as a vital resource for both seasoned tech enthusiasts and novice users, offering a clear and unbiased guide to making informed purchasing decisions.

Understanding the Value of PC Magazine’s Reviews:

PC Magazine’s reviews stand out for their meticulous approach, encompassing a wide range of aspects crucial for evaluating a desktop computer. They go beyond mere technical specifications, delving into real-world performance, user experience, and overall value proposition.

Key Components of PC Magazine’s Reviews:

  • Comprehensive Specifications and Benchmarks: PC Magazine meticulously analyzes the hardware components of each desktop, including processor, RAM, storage, graphics card, and motherboard. They then conduct rigorous benchmarks to assess the system’s performance in various tasks, such as gaming, video editing, and general productivity.
  • User Experience Evaluation: PC Magazine considers the user experience beyond technical specifications. They assess the overall design, ergonomics, and ease of use, including factors like keyboard and mouse quality, display resolution, and software interface.
  • Software and Feature Analysis: PC Magazine reviews go beyond hardware, examining the software bundled with the desktop, its compatibility with popular applications, and the overall user experience. They also consider the system’s security features and upgradeability.
  • Value for Money Assessment: PC Magazine carefully considers the price point of each desktop in relation to its performance, features, and overall value. This allows users to compare different options based on their budget and needs.
  • Expert Opinions and Insights: PC Magazine’s reviewers are seasoned technology professionals who offer their expert opinions and insights on the strengths and weaknesses of each desktop. They provide valuable context and guidance based on their extensive knowledge and experience.

The Importance of PC Magazine’s Reviews:

PC Magazine’s reviews hold significant value for both individuals and businesses seeking to make informed desktop computer purchases. They provide:

  • Objective and Unbiased Information: PC Magazine’s reviews are independent and unbiased, ensuring users receive objective information without any promotional influence.
  • In-Depth Analysis: The reviews offer detailed analyses of the technical specifications, performance, and user experience of each desktop, providing a comprehensive understanding of its strengths and weaknesses.
  • Real-World Performance Insights: The benchmarks and user experience evaluations provide valuable insights into how the desktop performs in real-world scenarios, allowing users to assess its suitability for their specific needs.
  • Cost-Effective Decision Making: PC Magazine’s reviews help users make informed decisions by considering the value proposition of each desktop in relation to its price point.
  • Expert Guidance: The reviews are backed by the expertise of seasoned technology professionals, providing valuable insights and recommendations.

FAQs by PC Magazine Desktop Computer Reviews:

Q: What are the most important factors to consider when choosing a desktop computer?

A: The most important factors include your budget, intended use, desired performance, and required features. Consider factors like processor speed, RAM capacity, storage type and size, graphics card capabilities, and software compatibility.

Q: How do I know which desktop computer is right for me?

A: PC Magazine’s reviews provide comprehensive information on various desktop computers, allowing you to compare different models based on your specific needs and budget. Consider factors like intended use, desired performance, and required features.

Q: What is the difference between a desktop computer and a laptop?

A: Desktop computers are typically more powerful and have greater upgradeability than laptops. They offer more storage space and can be customized to meet specific needs. Laptops, on the other hand, are portable and more compact, making them suitable for mobile use.

Q: How do I read PC Magazine’s desktop computer reviews?

A: PC Magazine’s reviews are structured in a clear and concise manner. They provide a detailed overview of the desktop’s specifications, performance benchmarks, user experience, and value proposition. They also offer expert opinions and insights to help you make an informed decision.

Tips by PC Magazine Desktop Computer Reviews:

  • Define your needs: Before purchasing a desktop computer, clearly define your intended use, desired performance, and required features.
  • Consider your budget: Set a realistic budget and stick to it. PC Magazine’s reviews can help you find the best value for your money.
  • Read multiple reviews: Don’t rely solely on one review. Consult multiple sources, including PC Magazine, to get a comprehensive understanding of the desktop computer.
  • Check for software compatibility: Ensure that the desktop computer is compatible with the software you need, such as productivity applications, games, or creative software.
  • Consider upgradeability: If you plan to upgrade your desktop computer in the future, choose a model with expandable storage, RAM slots, and other upgradeable components.

Conclusion by PC Magazine Desktop Computer Reviews:

PC Magazine’s desktop computer reviews play a crucial role in empowering users to make informed purchasing decisions. By providing comprehensive analyses, unbiased information, and expert insights, their reviews help users navigate the complex world of desktop computers and find the best fit for their needs and budget. Whether you are a seasoned tech enthusiast or a novice user, PC Magazine’s reviews serve as a valuable resource for making confident and informed choices in the digital landscape.

Wondered how the digital landscape worked? Take a look hereโ€ฆ โ€“ howtododigital PPT - Navigating the Digital Landscape: A Comprehensive Guide to GDPR Compliance PowerPoint Navigating Digital Landscape: Chatbots & AI/ML Essentials 2023 - Ciente
Navigating the Digital Landscape with a Holistic Mindset for The Future Composer - Credly Premium AI Image  Navigating the Digital Landscape Strategies for Success background ai generative Navigating the Digital Landscape: A Comprehensive Exploration of Portal Builders - Technology
Navigating the Digital Landscape: Crafting Your Online Success Story โ€” Productive and Free Premium AI Image  Navigating the Digital Landscape Strategies for Success background ai generative

Closure

Thus, we hope this article has provided valuable insights into Navigating the Digital Landscape: A Comprehensive Look at PC Magazine’s Desktop Computer Reviews. We appreciate your attention to our article. See you in our next article!

Understanding Open Local Users And Groups In Windows 10: A Comprehensive Guide

Understanding Open Local Users and Groups in Windows 10: A Comprehensive Guide

Introduction

With enthusiasm, let’s navigate through the intriguing topic related to Understanding Open Local Users and Groups in Windows 10: A Comprehensive Guide. Let’s weave interesting information and offer fresh perspectives to the readers.

Understanding Open Local Users and Groups in Windows 10: A Comprehensive Guide

How to open Local Users and Groups in Windows 10 [Tip]  dotTech

Windows 10, like its predecessors, utilizes a robust system of local users and groups to manage access and permissions within a computer. This intricate framework plays a crucial role in maintaining security and ensuring smooth operation. While many users interact with their computers on a basic level, understanding the intricacies of local users and groups can empower them to take control of their system’s security and functionality.

The Fundamentals of Local Users and Groups

At its core, a local user account represents a specific individual who can interact with a Windows 10 computer. Each user account possesses a unique username and password, granting them access to specific resources and functionalities. These resources can range from simple files and folders to system-level applications and settings.

Local groups, on the other hand, serve as containers for multiple user accounts. They provide a convenient way to manage permissions for a collection of users simultaneously. By assigning a user to a group, administrators can grant or restrict access to specific resources or functionalities for all members of that group.

The Importance of Open Local Users and Groups

The concept of "open" in the context of local users and groups refers to accounts that are not explicitly restricted in their access. These accounts, often referred to as "standard" or "guest" accounts, are typically granted access to a limited set of functionalities, including basic file exploration, document creation, and web browsing.

While seemingly straightforward, the existence of open local users and groups can have significant implications for a computer’s security posture. Let’s explore these implications in detail:

1. Security Risks:

Open local users and groups can pose a significant security risk if they are not properly managed. If an attacker gains unauthorized access to a computer, they can potentially leverage an open user account to escalate their privileges, granting them access to sensitive data and system resources.

2. Unintentional Access:

Open local user accounts can unintentionally grant access to individuals who should not have it. For instance, a guest account left open on a shared computer could be accessed by anyone, potentially leading to data breaches or accidental modifications.

3. Administrative Oversight:

Open local user accounts can make it difficult for administrators to track and manage user access. If numerous users have access to the system through open accounts, it becomes challenging to monitor their activities and ensure compliance with security policies.

4. Vulnerability to Exploits:

Open local user accounts can be exploited by malware and other malicious software. Attackers can leverage these accounts to gain access to the system, install malicious programs, or steal sensitive information.

5. Resource Consumption:

Open local user accounts, especially if they are not actively used, can consume system resources, potentially leading to performance degradation.

Understanding the Types of Local Users and Groups

Windows 10 offers several predefined local user and group types, each with its own set of privileges and functionalities:

1. Administrator:

The Administrator account is the most powerful local user account. It has full control over the system, including the ability to install software, modify system settings, and manage other user accounts. It is crucial to protect the Administrator account with a strong password and avoid using it for everyday tasks.

2. Standard User:

Standard User accounts are the most common type of user account. They have limited access to the system and can only perform tasks that are allowed by the Administrator. This restriction helps to prevent accidental or malicious changes to the system.

3. Guest:

Guest accounts are designed for temporary users who need limited access to the computer. They have very restricted privileges and cannot install software, modify system settings, or access sensitive data.

4. Built-in Groups:

Windows 10 includes several built-in groups, such as Administrators, Users, and Guests. These groups are pre-configured with specific permissions and are used to manage user access to system resources.

5. Custom Groups:

Administrators can create custom groups to manage user access to specific resources or functionalities. This allows for a more granular level of control over user permissions.

Best Practices for Managing Open Local Users and Groups

To mitigate the security risks associated with open local users and groups, it is crucial to adopt best practices for their management:

1. Minimize Open Accounts:

Limit the number of open local user accounts on your computer. Only create accounts for individuals who require access and ensure that these accounts are appropriately configured with limited privileges.

2. Use Strong Passwords:

Ensure that all local user accounts, including open accounts, are protected with strong and unique passwords. Avoid using easily guessable passwords or passwords that are shared across multiple accounts.

3. Regularly Review Accounts:

Periodically review all local user accounts, including open accounts, to ensure that they are still necessary and that their permissions are appropriate. Remove or disable accounts that are no longer needed.

4. Enable Account Lockout Policies:

Configure account lockout policies to prevent brute force attacks. This policy limits the number of failed login attempts before locking the account, preventing attackers from repeatedly trying different passwords.

5. Use Local Group Policies:

Utilize local group policies to manage user permissions effectively. Configure policies to restrict access to specific resources or functionalities for open local user accounts.

6. Implement Multi-Factor Authentication (MFA):

Consider using multi-factor authentication (MFA) for all local user accounts, including open accounts. MFA adds an extra layer of security by requiring users to provide two or more forms of authentication, such as a password and a code generated by a mobile app.

7. Regularly Update Windows:

Keep your Windows 10 operating system up to date with the latest security patches and updates. These updates often include fixes for vulnerabilities that could be exploited by attackers.

8. Use Antivirus Software:

Install and maintain a reliable antivirus software solution on your computer. Antivirus software can help detect and remove malware that may attempt to exploit open local user accounts.

9. Educate Users:

Educate users about the importance of security and the risks associated with open local user accounts. Encourage them to use strong passwords, avoid clicking on suspicious links, and report any suspicious activity.

10. Implement Security Monitoring:

Implement security monitoring tools to track user activity and detect potential threats. These tools can alert administrators to suspicious behavior, such as unauthorized access attempts or unusual file modifications.

Frequently Asked Questions (FAQs)

1. What is the difference between a local user account and a domain user account?

A local user account is associated with a specific computer and has access to resources on that computer only. In contrast, a domain user account is managed by a central directory service (like Active Directory) and can access resources on multiple computers within a network.

2. How can I create a new local user account in Windows 10?

To create a new local user account in Windows 10, follow these steps:

  • Open Settings by pressing the Windows key + I.
  • Go to Accounts > Family & other users.
  • Click on Add someone else to this PC.
  • Choose I don’t have this person’s sign-in information.
  • Select Add a user without a Microsoft account.
  • Enter a username and password for the new account.

3. How can I change the permissions of a local user account?

To change the permissions of a local user account in Windows 10, follow these steps:

  • Open Control Panel.
  • Go to User Accounts > Manage another account.
  • Select the user account you want to modify.
  • Click on Change account type.
  • Choose the desired account type, such as Administrator or Standard User.

4. How can I delete a local user account?

To delete a local user account in Windows 10, follow these steps:

  • Open Settings.
  • Go to Accounts > Family & other users.
  • Select the user account you want to delete.
  • Click on Remove.

5. What are some common security risks associated with open local user accounts?

Common security risks associated with open local user accounts include:

  • Unauthorized access: Attackers can exploit open accounts to gain access to the system.
  • Data breaches: Attackers can steal sensitive data stored on the computer.
  • Malware installation: Attackers can install malicious software that can compromise the system.
  • System modifications: Attackers can modify system settings or install unauthorized software.

Tips for Managing Open Local Users and Groups

  • Prioritize security: Always prioritize security when managing local users and groups.
  • Limit access: Grant the minimum level of access necessary for each user.
  • Regularly review permissions: Periodically review user permissions to ensure they are still appropriate.
  • Use strong passwords: Enforce the use of strong and unique passwords for all accounts.
  • Enable account lockout policies: Configure account lockout policies to prevent brute force attacks.
  • Implement multi-factor authentication: Consider using MFA for all user accounts.
  • Keep Windows updated: Ensure your system is up to date with the latest security patches.
  • Use antivirus software: Install and maintain a reliable antivirus solution.
  • Educate users: Teach users about security best practices.
  • Monitor user activity: Implement security monitoring tools to track user behavior.

Conclusion

Open local users and groups, while seemingly innocuous, can pose significant security risks if not properly managed. By understanding the implications of open accounts and adopting best practices for their management, users can strengthen their computer’s security posture and minimize the risk of unauthorized access, data breaches, and other security threats.

It is crucial to prioritize security when managing local user accounts and groups, ensuring that only necessary accounts exist with appropriate permissions. Regularly reviewing and updating security measures is essential to adapt to evolving threats and maintain a robust defense against malicious actors. By implementing these practices, users can create a secure and reliable computing environment.

Open Local Users And Groups In Windows 10 How to open Local Users and Groups on Windows 10 - YouTube How to open Local Users and Groups in Windows 10 [Tip]  dotTech
Local Users and Groups In Windows 10 Home - YouTube Open Local Users and Groups in Windows 10 [Manage Swiftly] How to open Local Users and Groups in Windows 10 [Tip]  dotTech
Windows 10 Local Users And Groups How to open Local Users and Groups in Windows 10 [Tip]  dotTech

Closure

Thus, we hope this article has provided valuable insights into Understanding Open Local Users and Groups in Windows 10: A Comprehensive Guide. We appreciate your attention to our article. See you in our next article!

A Comprehensive Guide To Utilizing "o Kam Pro" For PC

A Comprehensive Guide to Utilizing "o Kam Pro" for PC

Introduction

In this auspicious occasion, we are delighted to delve into the intriguing topic related to A Comprehensive Guide to Utilizing "o Kam Pro" for PC. Let’s weave interesting information and offer fresh perspectives to the readers.

A Comprehensive Guide to Utilizing "o Kam Pro" for PC

O-KAM Pro Camera APP And PC Download (Complete Guide)

"o Kam Pro" is a versatile application designed to enhance user productivity and streamline various tasks on personal computers. This article aims to provide a comprehensive understanding of "o Kam Pro" for PC users, exploring its features, benefits, and practical applications.

Understanding the Core Functionality

At its core, "o Kam Pro" functions as a multi-faceted productivity tool. It empowers users to automate repetitive tasks, manage time effectively, and optimize workflows across different platforms. This versatility makes it a valuable asset for individuals and businesses alike.

Key Features and Capabilities

"o Kam Pro" boasts a range of features designed to address diverse user needs:

  • Task Automation: "o Kam Pro" simplifies repetitive tasks by automating them. Users can create custom scripts or utilize pre-built templates to automate actions like data entry, file organization, and web browsing.
  • Time Management: The application provides tools for effective time management. Users can set reminders, schedule appointments, and track their progress on projects, ensuring efficient allocation of time and resources.
  • Workflow Optimization: "o Kam Pro" integrates seamlessly with popular productivity applications and platforms. This enables users to streamline workflows by automating data transfer, communication, and other processes.
  • Data Management: "o Kam Pro" offers tools for managing and organizing data. Users can create databases, categorize information, and automate data entry, enhancing efficiency and reducing errors.
  • Customization: "o Kam Pro" allows for extensive customization to suit individual preferences and workflows. Users can personalize settings, create custom shortcuts, and configure the interface to match their specific needs.

Benefits of Using "o Kam Pro"

Leveraging "o Kam Pro" offers several tangible benefits for PC users:

  • Increased Productivity: Automating repetitive tasks and streamlining workflows frees up valuable time and mental energy, leading to increased productivity across all tasks.
  • Reduced Errors: "o Kam Pro" minimizes errors by automating data entry and other processes, ensuring accuracy and consistency in results.
  • Enhanced Efficiency: The application’s time management features help users allocate time effectively, leading to improved efficiency and reduced wasted effort.
  • Improved Collaboration: Seamless integration with other platforms facilitates smoother collaboration among team members, enhancing productivity and communication.
  • Cost Savings: "o Kam Pro" can automate tasks that would otherwise require manual intervention, leading to cost savings in the long run.

Practical Applications of "o Kam Pro"

"o Kam Pro" finds practical applications in diverse fields and industries:

  • Businesses: Automate customer service responses, manage inventory, and streamline sales processes.
  • Education: Automate grading, create interactive learning materials, and manage student data.
  • Healthcare: Automate appointment scheduling, manage patient records, and streamline administrative tasks.
  • Finance: Automate financial reporting, analyze data, and manage investments.
  • Creative Professionals: Automate design tasks, manage projects, and streamline creative workflows.

FAQs Regarding "o Kam Pro"

Q: Is "o Kam Pro" compatible with my operating system?

A: "o Kam Pro" is designed to be compatible with various operating systems, including Windows, macOS, and Linux. However, it is recommended to check the application’s official website for the latest compatibility information.

Q: What are the system requirements for "o Kam Pro"?

A: The system requirements for "o Kam Pro" vary depending on the specific version and features you intend to use. Generally, it requires a modern computer with sufficient RAM and storage space. Refer to the application’s website for detailed system requirements.

Q: How secure is "o Kam Pro"?

A: "o Kam Pro" utilizes industry-standard security protocols to protect user data and privacy. However, it is always advisable to practice good cybersecurity habits, such as using strong passwords and keeping the software updated.

Q: Is there a free trial available for "o Kam Pro"?

A: Yes, "o Kam Pro" typically offers a free trial period for users to explore its features and capabilities before making a purchase decision.

Q: Does "o Kam Pro" offer customer support?

A: Yes, "o Kam Pro" provides customer support channels, including online documentation, FAQs, and contact forms. The availability of live chat or phone support may vary depending on the subscription plan.

Tips for Maximizing "o Kam Pro" Usage

  • Start Small: Begin by automating simple tasks to familiarize yourself with the application’s features and capabilities.
  • Utilize Templates: Explore pre-built templates for common tasks to expedite the automation process.
  • Customize Settings: Tailor settings and preferences to match your specific workflow and needs.
  • Regularly Update: Ensure you have the latest version of "o Kam Pro" to benefit from new features and security updates.
  • Seek Support: Don’t hesitate to contact customer support if you encounter any issues or require assistance.

Conclusion

"o Kam Pro" is a powerful productivity tool that can significantly enhance efficiency and streamline workflows for PC users across various fields. Its versatility, automation capabilities, and integration with other platforms make it a valuable asset for individuals and businesses seeking to optimize their processes and maximize productivity. By leveraging its features effectively, users can achieve greater efficiency, reduce errors, and unlock their full potential.

O-KAM Pro Camera APP And PC Download (Complete Guide) O-KAM Pro Camera APP And PC Download (Complete Guide) O-KAM Pro For Pc : O-KAM Pro Computer Client Download
O-KAM Pro Camera APP And PC Download (Complete Guide) O-KAM Pro Camera APP And PC Download (Complete Guide) O-KAM Pro for PC / Mac / Windows 11,10,8,7 - Free Download - Napkforpc.com
O-KAM Pro Camera APP And PC Download (Complete Guide) O-KAM Pro  VStarcam

Closure

Thus, we hope this article has provided valuable insights into A Comprehensive Guide to Utilizing "o Kam Pro" for PC. We appreciate your attention to our article. See you in our next article!

Exploring The Enhanced Window Management Features In Windows 10

Exploring the Enhanced Window Management Features in Windows 10

Introduction

In this auspicious occasion, we are delighted to delve into the intriguing topic related to Exploring the Enhanced Window Management Features in Windows 10. Let’s weave interesting information and offer fresh perspectives to the readers.

Exploring the Enhanced Window Management Features in Windows 10

Windows 10 will now get features and improvements in a new way

Windows 10, Microsoft’s flagship operating system, has undergone significant evolution since its release in 2015. One of the key areas of improvement has been the user interface, particularly the way users interact with and manage windows on their desktops. This article delves into the enhanced window management features introduced in Windows 10, examining their benefits and impact on user productivity.

Snap Assist: A New Era of Multitasking

Snap Assist, a feature introduced in Windows 10, revolutionizes multitasking by allowing users to quickly and efficiently arrange windows on their screens. By dragging a window to the edge of the screen, the system automatically snaps it to half the screen, leaving space for another application. This intuitive feature empowers users to work with multiple applications simultaneously, maximizing screen real estate and minimizing distractions.

Virtual Desktops: Expanding the Workspace

Windows 10’s virtual desktops feature provides users with multiple independent desktops, each capable of hosting a unique set of applications. This allows for better organization and separation of tasks, eliminating the clutter associated with numerous windows on a single desktop. Users can easily switch between virtual desktops using keyboard shortcuts or the taskbar, seamlessly navigating between different workspaces.

Task View: A Centralized Overview

Task View, a central hub for managing open applications and virtual desktops, provides a comprehensive overview of all active windows. Users can quickly switch between open applications, create new virtual desktops, or access recently used files directly from Task View. This feature streamlines the process of multitasking, enabling users to effortlessly navigate their work environment.

Window Sizing and Placement: Precision and Flexibility

Windows 10 offers enhanced control over window sizing and placement. Users can resize windows by dragging their corners or edges, allowing for precise adjustments to fit their needs. The system also provides customizable window snapping options, allowing users to choose specific screen proportions for their windows. This granular control empowers users to create an optimal workspace tailored to their specific workflow.

Enhanced Window Management: Beyond the Basics

Beyond the core features discussed above, Windows 10 offers a range of additional tools for efficient window management. These include:

  • Cascade Windows: Arranges open windows in a cascading fashion, allowing users to easily view the contents of each window.
  • Show Windows Side by Side: Displays two selected windows side by side, maximizing screen space for comparison or collaborative work.
  • Minimize All Windows: Quickly minimizes all open windows, providing a clean desktop view.
  • Shake to Minimize: A unique feature that allows users to minimize all windows except the one being shaken.

Benefits of Enhanced Window Management

The enhanced window management features in Windows 10 offer a multitude of benefits for users, including:

  • Increased Productivity: Efficiently managing multiple applications simultaneously leads to improved productivity, allowing users to accomplish more in less time.
  • Reduced Clutter: The ability to organize windows and tasks into virtual desktops minimizes clutter on the desktop, creating a more focused and efficient workspace.
  • Enhanced Workflow: The flexibility and precision offered by window management features allow users to tailor their workspace to their specific workflow, maximizing efficiency.
  • Improved User Experience: The intuitive and user-friendly nature of these features enhances the overall user experience, making multitasking a more enjoyable and productive process.

FAQs on Enhanced Window Management in Windows 10

Q: How do I access Task View?

A: Task View can be accessed by clicking the Task View button on the taskbar or by using the keyboard shortcut Alt + Tab.

Q: How many virtual desktops can I create?

A: There is no limit to the number of virtual desktops you can create.

Q: How do I switch between virtual desktops?

A: You can switch between virtual desktops using the Task View button, the keyboard shortcut Windows Key + Ctrl + Right/Left Arrow, or by clicking on the virtual desktop icons on the taskbar.

Q: Can I customize the snapping options?

A: Yes, you can customize snapping options by going to Settings > System > Multitasking.

Q: How do I use Snap Assist?

A: To use Snap Assist, drag a window to the edge of the screen. The system will automatically snap the window to half the screen, leaving space for another application.

Tips for Optimizing Window Management in Windows 10

  • Use Keyboard Shortcuts: Leverage keyboard shortcuts for quicker navigation between applications and virtual desktops.
  • Customize Snapping Options: Configure snapping options to suit your workflow and screen size.
  • Experiment with Virtual Desktops: Explore different ways to organize tasks and applications into virtual desktops.
  • Utilize Task View: Regularly use Task View to manage open applications and virtual desktops.
  • Consider Third-Party Tools: Explore third-party window management tools for advanced features and customization options.

Conclusion

The enhanced window management features in Windows 10 significantly improve user productivity and efficiency. From the intuitive Snap Assist to the powerful virtual desktops and Task View, these features provide users with a range of tools to manage their workspaces effectively. By embracing these features, users can unlock a more organized, focused, and productive work environment, maximizing their time and effort. As Windows 10 continues to evolve, users can expect further refinements and improvements to these essential window management features, further enhancing the user experience and productivity.

How to manage Windows 10's many 'optional features'  Windows Central How to Supercharge Window Management in Windows 10  MakeUseOf Windows 10 window management - ktjas
Windows 10 window management quick tip - Video  ZDNET How to Troubleshoot High CPU Usage Caused by the Desktop Window Manager in Windows 10 - JOE TECH Computing 101: Window Management in Windows 10 - YouTube
Microsoft reveals how the new Windows 10 Enhanced Search feature works Turn Windows Features On or Off in Windows 10  Tutorials

Closure

Thus, we hope this article has provided valuable insights into Exploring the Enhanced Window Management Features in Windows 10. We appreciate your attention to our article. See you in our next article!

Unlinking A Microsoft Account From Windows 11: A Comprehensive Guide

Unlinking a Microsoft Account from Windows 11: A Comprehensive Guide

Introduction

With great pleasure, we will explore the intriguing topic related to Unlinking a Microsoft Account from Windows 11: A Comprehensive Guide. Let’s weave interesting information and offer fresh perspectives to the readers.

Unlinking a Microsoft Account from Windows 11: A Comprehensive Guide

How To Sign In To Microsoft Account on Windows 11/10

The seamless integration of Microsoft accounts within Windows 11 offers numerous benefits, including cloud storage synchronization, personalized settings, and access to Microsoft services. However, there are situations where removing a Microsoft account from a Windows 11 device becomes necessary or desirable. This guide aims to provide a comprehensive understanding of the process, its implications, and the reasons behind this action.

Understanding the Implications of Removing a Microsoft Account

Before proceeding, it is crucial to understand the consequences of removing a Microsoft account from a Windows 11 PC. This action will result in the following:

  • Loss of Cloud Synchronization: All data and settings linked to the Microsoft account, such as OneDrive files, personalized themes, and app settings, will no longer be automatically synchronized.
  • Limited Access to Microsoft Services: Features like Windows Update, Microsoft Store, and Xbox services may be limited or require a different Microsoft account to function.
  • Local Account Creation: The device will transition to a local account, requiring a separate username and password for login. This account will not be linked to any Microsoft services.

Reasons for Removing a Microsoft Account

Several scenarios might prompt users to consider removing their Microsoft account from a Windows 11 device:

  • Privacy Concerns: Some users might prefer a local account to maintain a greater level of privacy and control over their data.
  • Account Sharing: If a device is shared among multiple individuals, removing the primary account allows each user to create their own local account with personalized settings.
  • Troubleshooting Issues: Removing and re-adding a Microsoft account can sometimes resolve software issues or conflicts.
  • Selling or Donating the Device: Before selling or donating a PC, removing the Microsoft account ensures that the new owner has a clean slate and can set up their own account.
  • Switching to a Different Account: If a user intends to use a different Microsoft account for their Windows 11 device, removing the existing account is necessary.

Methods for Removing a Microsoft Account

Windows 11 provides two primary methods for removing a Microsoft account:

1. Using Settings:

  • Navigate to Settings: Open the Windows Start menu and click on the gear icon to access Settings.
  • Select Accounts: In the Settings window, click on "Accounts."
  • Choose Your Account: Under "Your info," select the Microsoft account you wish to remove.
  • Click "Sign out" or "Remove Account": Depending on the specific account type, you will see either "Sign out" or "Remove Account." Click the appropriate option.
  • Confirm Removal: A confirmation dialog box will appear. Confirm the removal by clicking "Yes."

2. Using Control Panel:

  • Open Control Panel: Search for "Control Panel" in the Windows Start menu and open it.
  • Navigate to User Accounts: Click on "User Accounts."
  • Choose "Manage another account": Select this option to access the account management panel.
  • Select the Account: Choose the Microsoft account you want to remove.
  • Click "Remove the account": This option will initiate the removal process.
  • Confirm Removal: A confirmation dialog box will appear. Confirm the removal by clicking "Yes."

Additional Considerations:

  • Account Recovery: Before removing the account, ensure you have access to the email address associated with it. This is essential for account recovery if needed.
  • Data Backup: Back up any important data stored on the device, as removing the Microsoft account will disconnect it from cloud storage.
  • Local Account Security: Once the Microsoft account is removed, the device will be secured by the local account password. Ensure you choose a strong and unique password.

FAQs: Addressing Common Concerns

Q: What happens to my files stored in OneDrive after removing my Microsoft account?

A: Files stored in OneDrive will remain accessible through the web interface or the OneDrive app using the same account credentials. However, they will no longer be automatically synchronized with the local device.

Q: Can I re-add my Microsoft account later?

A: Yes, you can re-add your Microsoft account to the device at any time by signing in through the Settings app.

Q: Will removing my Microsoft account affect my other Microsoft services?

A: Removing the account from your Windows 11 device will not affect your access to other Microsoft services like Outlook, Office 365, or Xbox Live.

Q: Can I transfer my files from a Microsoft account to a local account?

A: You can manually copy files from OneDrive to your local storage or use file transfer tools to move data between accounts.

Tips for a Seamless Transition

  • Plan Ahead: Before removing the Microsoft account, take the time to understand the implications and back up any critical data.
  • Check for Updates: Ensure your Windows 11 device is up-to-date before proceeding with the removal.
  • Use File Transfer Tools: Utilize file transfer utilities to move data between accounts, especially for large files.
  • Consider a Local Account Backup: Create a backup of the local account to ensure data security and facilitate account recovery if needed.

Conclusion:

Removing a Microsoft account from a Windows 11 device can be a necessary step for various reasons, including privacy concerns, account sharing, troubleshooting, or device disposal. By understanding the implications and following the provided instructions, users can effectively remove their Microsoft account while preserving data and maintaining device security. Remember to back up important files, choose strong passwords for local accounts, and carefully consider the impact of this action before proceeding.

How to unlink microsoft account from computer - burgertoo How to Link and Unlink Onedrive with microsoft account in Windows 11 - YouTube How to Remove Microsoft Account from Windows 11 [Guide]  Beebom
How do I unlink a separate Microsoft account from Windows 11? - Microsoft Community Cant Reactivate Windows 11 Pro Digital License After Unlinking Device from Microsoft Account How do I unlink my Microsoft Account from my computer?
Link or Unlink OneDrive with Microsoft Account in Windows 11 - YouTube How to unlink microsoft account from computer - kartzoom

Closure

Thus, we hope this article has provided valuable insights into Unlinking a Microsoft Account from Windows 11: A Comprehensive Guide. We appreciate your attention to our article. See you in our next article!

Navigating The Labyrinth: A Comprehensive Guide To Windows 11 Settings

Navigating the Labyrinth: A Comprehensive Guide to Windows 11 Settings

Introduction

With enthusiasm, let’s navigate through the intriguing topic related to Navigating the Labyrinth: A Comprehensive Guide to Windows 11 Settings. Let’s weave interesting information and offer fresh perspectives to the readers.

Buy Windows 11 User Guide: A Complete Guide to Master the New Windows 11 OS with Tips and Tricks

Windows 11, with its sleek design and enhanced features, offers a user experience that is both intuitive and powerful. However, beneath the surface lies a complex network of settings that can sometimes feel overwhelming, particularly for those who are new to the operating system or are accustomed to previous versions of Windows. This guide aims to provide a comprehensive exploration of Windows 11 settings, demystifying their functions and offering practical insights to enhance your computing experience.

Understanding the Settings App:

The Windows 11 Settings app serves as the central hub for customizing your operating system. Accessible through the Start menu or by pressing the Windows key + I, it provides a streamlined interface to manage various aspects of your PC, from system performance to privacy and security.

Essential Settings to Master:

1. System: This section encompasses core system functionalities, including:

  • Display: Adjust screen resolution, brightness, and color settings for optimal visual experience.
  • Sound: Control audio output devices, adjust volume levels, and personalize sound effects.
  • Notifications: Manage system notifications, configure their appearance, and determine which apps can send notifications.
  • Power & Battery: Optimize power consumption, adjust sleep settings, and manage battery life.
  • Storage: Monitor disk space usage, manage storage drives, and optimize storage performance.
  • Bluetooth & Devices: Connect and manage Bluetooth devices, configure wireless connections, and access device settings.
  • Printing: Configure printers, manage print queues, and access printing preferences.
  • About: Access system information, including hardware specifications, version details, and system updates.

2. Personalization: Customize the visual appearance and functionality of your Windows experience:

  • Themes: Choose from pre-defined themes or create custom themes to personalize your desktop.
  • Background: Set a background image, solid color, or slideshow for your desktop.
  • Colors: Customize accent colors, app mode, and title bar colors to match your preferences.
  • Start: Customize the Start menu layout, pin frequently used apps, and manage the appearance of live tiles.
  • Taskbar: Manage taskbar icons, adjust taskbar size, and configure taskbar settings.
  • Lock Screen: Set a background image, choose a lock screen app, and manage lock screen notifications.

3. Apps: Manage installed applications, control their permissions, and configure default settings:

  • Apps & Features: Uninstall or modify installed applications, view app usage, and manage app permissions.
  • Default Apps: Set default applications for various file types, protocols, and actions.
  • Offline Maps: Download offline maps for navigation and exploration.
  • Optional Features: Install or remove optional features, such as Windows Subsystem for Linux or .NET Framework.

4. Accounts: Manage user accounts, sign in options, and privacy settings:

  • Your Account: Access your Microsoft account settings, manage sign-in options, and synchronize data across devices.
  • Family & Other Users: Add or manage user accounts, set parental controls, and manage guest access.
  • Sync Your Settings: Configure settings synchronization across your devices, including themes, passwords, and other preferences.

5. Privacy & Security: Control data collection, manage privacy settings, and enhance system security:

  • General: Manage location services, microphone access, camera access, and other privacy-related settings.
  • App Permissions: Control app access to specific features, such as camera, microphone, location, and contacts.
  • Windows Security: Manage antivirus protection, firewall settings, and other security features.
  • Recovery: Configure system recovery options, create a recovery drive, and manage system backups.

6. Update & Security: Manage system updates, configure security settings, and access recovery options:

  • Windows Update: Check for and install system updates, configure update settings, and manage update history.
  • Windows Security: Manage antivirus protection, firewall settings, and other security features.
  • Recovery: Configure system recovery options, create a recovery drive, and manage system backups.

7. Accessibility: Configure accessibility settings to enhance usability for individuals with disabilities:

  • Narrator: Use a screen reader to navigate the computer and access content.
  • Magnifier: Enlarge the screen to improve visibility.
  • High Contrast: Enhance visual contrast to improve readability.
  • Keyboard: Configure keyboard shortcuts and input settings.
  • Mouse: Customize mouse settings, including pointer speed and sensitivity.

Beyond the Basics: Advanced Settings and Customization

1. Performance Options: Optimize system performance and resource allocation:

  • Visual Effects: Adjust visual effects to balance performance and aesthetics.
  • Advanced System Settings: Access advanced system settings, including system properties, environment variables, and performance options.
  • Startup: Manage programs that launch automatically at startup.
  • Power Options: Fine-tune power settings for optimal power consumption and performance.

2. Network & Internet: Configure network settings, manage Wi-Fi connections, and access network troubleshooting tools:

  • Wi-Fi: Manage Wi-Fi networks, connect to hidden networks, and configure Wi-Fi settings.
  • Ethernet: Configure wired network connections, manage network adapters, and access network properties.
  • VPN: Configure and manage virtual private networks for secure internet access.
  • Mobile Hotspot: Share your internet connection with other devices.

3. Time & Language: Configure date and time settings, manage language preferences, and adjust regional settings:

  • Region: Configure language, region, and time zone settings.
  • Language: Add and manage languages, set preferred languages, and configure input methods.
  • Date & Time: Configure date and time settings, synchronize with internet time, and manage time zone settings.

4. Gaming: Configure gaming settings, manage game bar features, and access game mode settings:

  • Game Mode: Optimize system performance for gaming.
  • Game Bar: Manage game bar features, such as recording gameplay and capturing screenshots.
  • Xbox Game Pass: Access Xbox Game Pass subscriptions and manage game libraries.

5. Developer Settings: Access developer tools and features, including debugging tools and SDKs:

  • For Developers: Enable developer mode, access developer tools, and manage developer settings.
  • Windows SDK: Install and manage Windows Software Development Kits.
  • Developer Features: Access advanced development features, such as debugging tools and simulators.

Frequently Asked Questions (FAQs) about Windows 11 Settings

Q: How can I change my desktop background in Windows 11?

A: Navigate to Settings > Personalization > Background and select your preferred background image, solid color, or slideshow.

Q: How do I adjust the screen brightness in Windows 11?

A: You can use the brightness slider in the Action Center (accessible by clicking the notification icon in the taskbar) or adjust it through Settings > System > Display.

Q: How can I connect a Bluetooth device to my Windows 11 PC?

A: Go to Settings > Bluetooth & Devices and turn on Bluetooth. Then, put your Bluetooth device in pairing mode and select it from the list of available devices.

Q: How do I manage notifications in Windows 11?

A: Access Settings > System > Notifications to manage notification settings for individual apps and adjust notification preferences.

Q: How can I uninstall an app in Windows 11?

A: Navigate to Settings > Apps > Apps & Features, find the app you want to uninstall, and click Uninstall.

Q: How do I change the default browser in Windows 11?

A: Go to Settings > Apps > Default Apps, select Web Browser, and choose your preferred browser from the list.

Q: How can I access system information in Windows 11?

A: Open Settings > System > About to view system information, including hardware specifications, version details, and system updates.

Tips for Efficiently Navigating Windows 11 Settings:

  • Utilize the search bar: The search bar at the top of the Settings app allows you to quickly find specific settings by typing keywords.
  • Explore the navigation pane: The navigation pane on the left side of the Settings app provides a clear overview of all available settings categories.
  • Use keyboard shortcuts: Keyboard shortcuts can streamline navigation and access specific settings quickly. For example, Windows key + I opens the Settings app, and Windows key + X opens the Quick Link menu.
  • Familiarize yourself with common settings: Spend time exploring the most frequently used settings to become comfortable with their locations and functions.
  • Consult online resources: Numerous online resources, including Microsoft’s official documentation, provide detailed explanations and tutorials on specific settings.

Conclusion:

Mastering Windows 11 settings is essential for unlocking the full potential of your PC and tailoring it to your specific needs. By understanding the different categories and options within the Settings app, you can personalize your computing experience, optimize system performance, enhance security, and ensure smooth operation. This guide provides a comprehensive starting point for navigating the intricate world of Windows 11 settings, empowering you to personalize and optimize your computing environment for maximum efficiency and satisfaction. Remember, continuous exploration and experimentation are key to discovering the hidden depths of Windows 11 settings and maximizing your computing experience.

Buy Windows 11 User Guide for Beginners: A Comprehensive Guide to Master Windows 11 Operating Navigating The Labyrinth: A Comprehensive Guide To Legend Piece Map Levels - France Location on Navigating The Labyrinth: A Comprehensive Guide To Map Run 6 - Map France of Lourdes labeled
Navigating The Labyrinth: A Comprehensive Guide To The Full Run 3 Map - Map France of Lourdes Navigating The Labyrinth System Requirements - Can I Run It? - PCGameBenchmark Navigating The Labyrinth Screenshots ยท SteamDB
Navigating The Labyrinth on Steam Navigating The Labyrinth: A Comprehensive Guide To The Long Walk Map - Map France of Lourdes labeled

Closure

Thus, we hope this article has provided valuable insights into Navigating the Labyrinth: A Comprehensive Guide to Windows 11 Settings. We appreciate your attention to our article. See you in our next article!