Bridging The Gap: A Comprehensive Guide To Windows 10’s Phone Link Feature

Bridging the Gap: A Comprehensive Guide to Windows 10’s Phone Link Feature

Introduction

With great pleasure, we will explore the intriguing topic related to Bridging the Gap: A Comprehensive Guide to Windows 10’s Phone Link Feature. Let’s weave interesting information and offer fresh perspectives to the readers.

How To use Phone Link on Windows 11 and 10 - Tech Advisor

The modern world demands seamless connectivity, and bridging the gap between our mobile devices and personal computers is crucial for enhanced productivity and streamlined workflows. Windows 10, recognizing this need, introduced a powerful feature known as "Your Phone" – a bridge that allows users to access their Android phone’s functionalities directly on their Windows 10 PC. This feature, now simply called "Phone Link," transcends basic synchronization, offering a range of capabilities that enhance the user experience and simplify daily tasks.

Understanding Phone Link’s Capabilities

Phone Link empowers users to seamlessly integrate their Android phone into their Windows 10 environment. This integration manifests in various ways, offering a range of benefits:

  • Messaging Integration: Phone Link enables users to send and receive SMS messages directly from their PC. This eliminates the need to constantly switch between devices, allowing users to manage their communications from a single point.
  • Notification Synchronization: No more missing crucial notifications. Phone Link mirrors notifications from your Android phone onto your PC, ensuring you never miss important messages, calls, or reminders.
  • File Sharing: Easily transfer files between your phone and PC. Phone Link enables drag-and-drop functionality, simplifying the process of sharing photos, documents, and other files between devices.
  • Screen Mirroring: Experience a seamless extension of your phone’s screen on your PC. Phone Link allows you to mirror your phone’s display, enabling you to view and interact with your Android phone’s content directly from your computer.
  • Call Management: Phone Link allows users to answer and make calls directly from their PC, using their phone’s cellular connection. This feature eliminates the need to constantly reach for your phone, streamlining communication and enhancing productivity.

The Power of Integration: A Deeper Look at Phone Link’s Advantages

Phone Link’s significance lies in its ability to seamlessly integrate the functionalities of two distinct devices, enhancing user experience and productivity in several ways:

  • Enhanced Productivity: Phone Link allows users to manage multiple tasks simultaneously, eliminating the need to constantly switch between devices. This streamlined workflow enhances productivity and efficiency, allowing users to focus on their work without distractions.
  • Increased Accessibility: Phone Link makes accessing crucial information and managing tasks easier. Users can readily access their phone’s content, including notifications, messages, and calls, directly from their PC, ensuring a seamless and convenient experience.
  • Enhanced Communication: Phone Link simplifies communication by enabling users to manage calls and messages directly from their PC. This feature eliminates the need to constantly switch between devices, enhancing communication flow and reducing distractions.
  • Improved Workflow: Phone Link enables seamless file sharing between devices, simplifying the process of transferring data and documents. This streamlined workflow enhances productivity and efficiency, allowing users to focus on their work without interruptions.

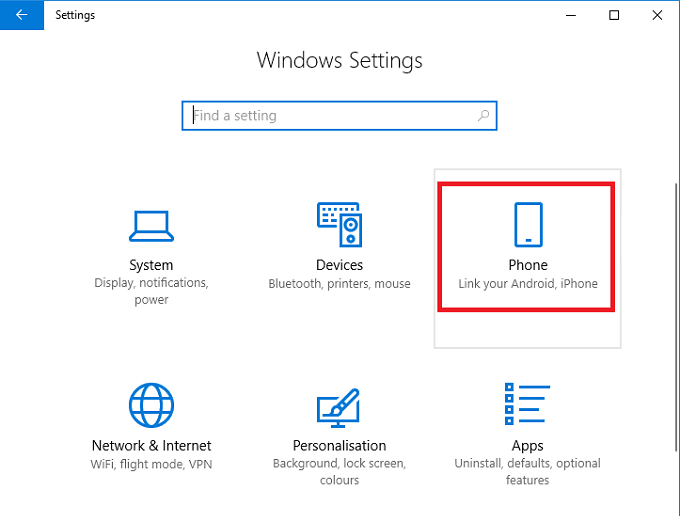
System Requirements and Compatibility

To utilize Phone Link, ensure your devices meet the following requirements:

  • Windows 10 PC: Phone Link is compatible with Windows 10 version 1803 or later.
  • Android Phone: The phone must be running Android 7.0 or later.
  • Bluetooth Connection: A stable Bluetooth connection between your phone and PC is required to establish a connection.
  • Phone Link App: You need to install the Phone Link app on your Android phone and the Your Phone Companion app on your PC.

Setting Up Phone Link: A Step-by-Step Guide

Setting up Phone Link is a straightforward process:

  1. Install Phone Link App: Download and install the Phone Link app from the Google Play Store on your Android phone.
  2. Install Your Phone Companion: Download and install the Your Phone Companion app from the Microsoft Store on your Windows 10 PC.
  3. Pair Devices: Open both apps and follow the on-screen instructions to pair your phone and PC using Bluetooth.
  4. Grant Permissions: Allow necessary permissions on your phone to enable Phone Link to access your notifications, messages, and other functionalities.
  5. Connect and Explore: Once paired, Phone Link will automatically sync your phone’s data and notifications to your PC. You can now access and manage your phone’s functionalities directly from your computer.

Addressing Common Concerns and FAQs

Q: Is Phone Link Secure?

A: Phone Link utilizes a secure connection to ensure the safety of your data. It uses encryption to protect your information during transmission and storage. However, it is always advisable to be cautious about granting access to sensitive data and to keep your software updated for the latest security patches.

Q: Does Phone Link Drain My Phone Battery?

A: Phone Link’s impact on battery life is minimal. It only consumes a small amount of battery power when actively used. You can manage battery consumption by adjusting the settings within the Phone Link app.

Q: Can I Use Phone Link with Multiple Devices?

A: Phone Link can be used with one Android phone at a time. However, you can switch between different phones by unpairing the current device and pairing a new one.

Q: What Happens If My Phone is Out of Range?

A: Phone Link requires a Bluetooth connection to function. If your phone is out of range, you will lose access to its functionalities on your PC. However, you can still access your phone’s data and notifications once you reconnect within range.

Q: Can I Use Phone Link with an iPhone?

A: Currently, Phone Link is only compatible with Android devices. There is no official support for iPhone devices at this time.

Tips for Optimizing Phone Link Usage

  • Enable Bluetooth Connectivity: Ensure a stable Bluetooth connection between your phone and PC for optimal performance.
  • Grant Necessary Permissions: Allow Phone Link to access your notifications, messages, and other functionalities for a seamless experience.
  • Keep Apps Updated: Regularly update both the Phone Link app on your phone and the Your Phone Companion app on your PC to ensure compatibility and security.
  • Manage Notifications: Customize notification settings within Phone Link to control which notifications are mirrored to your PC.
  • Utilize File Transfer Feature: Leverage Phone Link’s file transfer capability to seamlessly share files between your phone and PC.
  • Explore Screen Mirroring: Utilize the screen mirroring feature to view and interact with your phone’s content directly from your PC.
  • Optimize Battery Usage: Adjust settings within Phone Link to manage battery consumption and ensure a long-lasting experience.

Conclusion

Phone Link represents a significant advancement in device integration, bridging the gap between Android phones and Windows 10 PCs. This powerful feature offers a range of capabilities that enhance productivity, communication, and overall user experience. By leveraging Phone Link, users can seamlessly manage their mobile and desktop environments, streamlining their workflows and unlocking new possibilities for productivity and efficiency. As technology continues to evolve, Phone Link is likely to become an increasingly integral part of the modern computing experience, empowering users to harness the full potential of their devices.

How To use Phone Link on Windows 11 and 10 - Tech Advisor Guide: How to connect your Android phone to your Windows PC with Phone Link - Neowin How to Connect Windows 10 and Android smartphone Using Microsoft's Phone Link app
How To use Phone Link on Windows 11 and 10 - Tech Advisor What is Phone Link Windows App and How does it Work - YouTube Neue Funktion für Microsofts Phone Link-App für Windows aufgetaucht – Tech-Blogs.de
How To Link Your Android or iOS Device To Windows 10?  Connect Phone To Windows 10 - YouTube How To Link Up Your Android Smartphone With Windows 10  technotips

Closure

Thus, we hope this article has provided valuable insights into Bridging the Gap: A Comprehensive Guide to Windows 10’s Phone Link Feature. We hope you find this article informative and beneficial. See you in our next article!

Navigating The Labyrinth Of Windows 10 Pro Repair Apps And Programs: A Comprehensive Guide

Navigating the Labyrinth of Windows 10 Pro Repair Apps and Programs: A Comprehensive Guide

Introduction

With great pleasure, we will explore the intriguing topic related to Navigating the Labyrinth of Windows 10 Pro Repair Apps and Programs: A Comprehensive Guide. Let’s weave interesting information and offer fresh perspectives to the readers.

How To Repair Apps & Programs In Windows 10  Screen Rant

Windows 10 Pro, despite its robust nature, is not immune to the occasional hiccup. Whether it’s a stubborn error message, a sluggish performance, or a system crash, encountering these issues can be frustrating. Fortunately, a diverse array of repair apps and programs exist to help users diagnose and resolve these problems, restoring their Windows 10 Pro experience to its optimal state. This comprehensive guide delves into the world of these tools, providing insights into their functionalities, benefits, and considerations for selection.

Understanding the Need for Repair Tools

Windows 10 Pro, like any complex software system, relies on a delicate balance of components working in harmony. Errors can arise from various sources, including:

  • Software Conflicts: Incompatible or outdated programs can clash with other software or system components, causing malfunctions.
  • Malware Infections: Viruses, trojans, and other malicious software can corrupt system files, compromise security, and disrupt normal operations.
  • Hardware Issues: Faulty or aging hardware components can lead to system instability and crashes.
  • Registry Errors: The Windows Registry, a database containing system settings, can become corrupted, leading to erratic behavior and performance issues.
  • System Updates: While updates aim to enhance security and functionality, they can occasionally introduce bugs or compatibility problems.

Types of Repair Apps and Programs

Repair tools for Windows 10 Pro can be broadly categorized based on their primary functions:

1. System Optimization and Cleaning Tools:

  • Purpose: These applications focus on enhancing system performance by identifying and removing unnecessary files, optimizing system settings, and managing startup programs.
  • Examples: CCleaner, Advanced SystemCare, IObit Smart Defrag, Wise Care 365.

2. Registry Cleaners and Repairers:

  • Purpose: They scan and repair errors in the Windows Registry, addressing issues that can cause system instability and slowdowns.
  • Examples: Reg Organizer, Registry Mechanic, Wise Registry Cleaner, CCleaner.

3. Antivirus and Anti-Malware Programs:

  • Purpose: These tools protect the system from viruses, malware, spyware, and other threats, ensuring data security and system integrity.
  • Examples: Bitdefender, Norton AntiVirus, Kaspersky Anti-Virus, Malwarebytes Premium.

4. System Recovery and Repair Tools:

  • Purpose: Designed to address more severe problems, these tools can restore system files, repair boot issues, and even perform a clean install of Windows 10 Pro.
  • Examples: Windows Recovery Environment (WinRE), System Restore, Startup Repair, Windows 10 Installation Media.

5. Driver Updaters:

  • Purpose: These programs scan the system for outdated or missing drivers and automatically update them to ensure optimal hardware performance.
  • Examples: Driver Booster, Driver Easy, Snappy Driver Installer.

6. Disk Management and Partitioning Tools:

  • Purpose: These applications allow users to manage hard drive space, create partitions, format drives, and perform other disk-related tasks.
  • Examples: EaseUS Partition Master, AOMEI Partition Assistant, MiniTool Partition Wizard.

7. System Performance Monitoring Tools:

  • Purpose: These programs monitor system resources like CPU usage, memory consumption, and disk activity, providing insights into potential performance bottlenecks.
  • Examples: Resource Monitor (built-in Windows tool), Task Manager (built-in Windows tool), HWMonitor.

Choosing the Right Tools for Your Needs

Selecting the appropriate repair apps and programs requires careful consideration of your specific needs and the nature of the issues you’re facing.

Factors to Consider:

  • Severity of the Problem: For minor performance issues, optimization and cleaning tools may suffice. More serious problems, like system crashes or malware infections, may require dedicated recovery and security tools.
  • Technical Expertise: Some tools are user-friendly with intuitive interfaces, while others require a deeper understanding of system configurations and processes.
  • Cost: Many repair tools are available for free, while others require a paid subscription or one-time purchase.
  • Reputation and Reviews: Research the tool’s reputation and read user reviews to assess its effectiveness and reliability.
  • System Compatibility: Ensure that the chosen tool is compatible with your specific version of Windows 10 Pro.

Key Considerations for System Stability and Performance

  • Avoid Over-Optimization: While cleaning and optimizing tools can be helpful, excessive use can negatively impact system performance.
  • Regular Maintenance: Adopt a proactive approach to system maintenance by regularly scanning for malware, updating drivers, and cleaning up temporary files.
  • Backup Regularly: Create regular backups of your important data to prevent data loss in case of system failures.
  • Use Reputable Software: Download and install repair tools only from trusted sources like official websites or reputable app stores.
  • Understand System Processes: Familiarize yourself with basic system processes and common error messages to better understand the issues you encounter.

Frequently Asked Questions (FAQs)

Q: What is the best repair tool for Windows 10 Pro?

A: The "best" tool depends on your specific needs and the issue you’re trying to resolve. There is no single universal solution. It’s best to research and compare different tools based on your requirements.

Q: Are repair tools safe to use?

A: Reputable repair tools from trusted sources are generally safe. However, be cautious of freeware or tools from unknown sources, as they may contain malware or compromise your system security.

Q: Can I use multiple repair tools simultaneously?

A: While using multiple tools might seem beneficial, it’s generally not recommended. Some tools might conflict with each other, leading to unexpected issues.

Q: How often should I use repair tools?

A: There’s no fixed schedule. Use them when needed, such as after a malware infection, after installing new software, or if you notice performance issues.

Q: Can I restore my system to an earlier point in time?

A: Yes, Windows 10 Pro includes a built-in System Restore feature that allows you to revert your system to a previous restore point, effectively undoing recent changes.

Tips for Using Repair Apps and Programs Effectively

  • Read the Documentation: Before using any tool, carefully read the user manual or online documentation to understand its features and functionalities.
  • Run a Full System Scan: Perform a comprehensive scan to identify any potential issues or threats before taking any corrective actions.
  • Back Up Your Data: Always create a backup of your important data before running any repair tool, especially those that modify system files.
  • Restart Your Computer: After running a repair tool, restart your computer to apply the changes and ensure that the tool has effectively resolved the issues.
  • Monitor System Performance: After using a repair tool, closely monitor your system’s performance to ensure that it’s running smoothly and that the issue has been resolved.
  • Update Regularly: Keep your repair tools updated to benefit from the latest bug fixes and security enhancements.

Conclusion

Repair apps and programs for Windows 10 Pro offer valuable assistance in maintaining system stability and performance. By understanding their functionalities, benefits, and limitations, users can choose the right tools to address specific issues and ensure a smooth and efficient computing experience. Remember to adopt a proactive approach to system maintenance, prioritize data backup, and use only reputable and trustworthy software. By taking these precautions, users can minimize the risk of encountering serious system problems and enjoy a seamless and productive Windows 10 Pro experience.

How to Repair Apps/Programs Common Problems Windows 10 - MiniTool How to Repair Apps/Programs Common Problems Windows 10 - MiniTool Windows 10 Photo App
Repair Windows 10 Using Automatic Repair [Tutorial] - YouTube Repair Windows 10 Best Windows repair Tools and Services (Windows 10/11) - EaseUS
verticalnomad.blogg.se - Microsoft software repair tool for windows 10 pro 5 Best Windows 10 Repair Software 2024

Closure

Thus, we hope this article has provided valuable insights into Navigating the Labyrinth of Windows 10 Pro Repair Apps and Programs: A Comprehensive Guide. We hope you find this article informative and beneficial. See you in our next article!

Rejuvenating Your Windows 11: A Data-Preserving Approach

Rejuvenating Your Windows 11: A Data-Preserving Approach

Introduction

With great pleasure, we will explore the intriguing topic related to Rejuvenating Your Windows 11: A Data-Preserving Approach. Let’s weave interesting information and offer fresh perspectives to the readers.

Rejuvenating Your Windows 11: A Data-Preserving Approach

How to Backup and Restore Data on Windows 11? - TECHNIG

Windows 11, Microsoft’s latest operating system, offers a plethora of enhancements and features designed to elevate the user experience. However, like any software, it can encounter issues over time, leading to performance degradation, instability, or even security vulnerabilities. In such scenarios, reinstalling Windows 11 might seem like the only solution, but the prospect of losing valuable data can be daunting. Fortunately, there are methods to refresh your Windows 11 installation while preserving your precious files and settings. This article delves into these techniques, providing a comprehensive guide to rejuvenate your system without sacrificing your data.

Understanding the Need for Reinstallation

Before embarking on the process of reinstalling Windows 11, it is crucial to understand why such a step might be necessary. While Windows 11 is a robust operating system, it can be susceptible to issues stemming from various sources:

  • Software Conflicts: Installing or uninstalling programs can introduce conflicts that disrupt the smooth functioning of Windows 11. These conflicts can manifest as application crashes, system slowdowns, or even system instability.

  • Malware Infection: Malicious software can infiltrate your system, compromising your data, security, and overall performance. Reinstalling Windows 11 can effectively remove these threats and restore your system’s integrity.

  • Corrupted System Files: Over time, essential system files can become corrupted, leading to errors and malfunctions. A fresh installation of Windows 11 ensures that all system files are intact and operating correctly.

  • Performance Degradation: As your system accumulates temporary files, browser cache, and other unnecessary data, its performance can decline. Reinstalling Windows 11 provides a clean slate, boosting your system’s speed and responsiveness.

The Power of a Data-Preserving Reinstall

Reinstalling Windows 11 without losing data is a powerful tool for system rejuvenation. It allows you to address various issues while preserving your valuable files, applications, and personal settings. This approach offers several benefits:

  • Preservation of Critical Data: Your personal documents, photos, videos, and other essential files remain untouched, eliminating the need for time-consuming backups and restoration processes.

  • Enhanced System Performance: Reinstalling Windows 11 removes unnecessary files and outdated software, leading to improved system performance and responsiveness.

  • Resolution of Software Conflicts: A fresh installation eliminates potential conflicts that may have arisen from incompatible programs, ensuring a smoother and more stable operating environment.

  • Enhanced Security: Reinstalling Windows 11 effectively removes any malicious software that may have infected your system, strengthening its security posture.

Methods for Data-Preserving Reinstallation

While the concept of reinstalling Windows 11 without losing data might seem paradoxical, various methods allow you to achieve this objective. Let’s explore the most common and effective approaches:

1. Resetting Windows 11:

Windows 11 includes a built-in "Reset this PC" feature that offers two options:

  • Keep my files: This option reinstalls Windows 11 while preserving your personal files, applications, and settings. It essentially performs a clean installation of Windows 11, removing unnecessary files and outdated software, while retaining your data.

  • Remove everything: This option completely erases all data from your system, effectively performing a clean installation of Windows 11. This option is suitable for situations where you want a completely fresh start.

To access the "Reset this PC" feature:

  • Open Settings by pressing Windows key + I.
  • Navigate to System > Recovery.
  • Click Reset this PC.
  • Choose the desired option: Keep my files or Remove everything.

2. Using a Recovery Drive:

A recovery drive is a bootable USB drive containing a backup of your Windows 11 installation. It allows you to reinstall Windows 11 without needing to download the installation files again. To create a recovery drive:

  • Open Settings by pressing Windows key + I.
  • Navigate to System > Recovery.
  • Click Create a recovery drive.
  • Follow the on-screen instructions to create the recovery drive.

To reinstall Windows 11 using a recovery drive:

  • Connect the recovery drive to your computer.
  • Restart your computer and press the appropriate key (usually F12 or Esc) to access the boot menu.
  • Select the recovery drive from the boot menu.
  • Follow the on-screen instructions to reinstall Windows 11.

3. Performing a Clean Install with Data Backup:

If you prefer a more manual approach, you can perform a clean install of Windows 11 while preserving your data by backing it up beforehand.

  • Backup Your Data: Use a reliable backup solution to create a complete backup of your important files and settings. This can be done using external hard drives, cloud storage services, or specialized backup software.
  • Download Windows 11 Installation Media: Download the Windows 11 installation files from Microsoft’s website.
  • Create a Bootable USB Drive: Use a tool like Rufus or the Media Creation Tool to create a bootable USB drive with the Windows 11 installation files.
  • Boot from USB Drive: Restart your computer and boot from the USB drive.
  • Install Windows 11: Follow the on-screen instructions to install Windows 11.
  • Restore Your Data: After the installation is complete, restore your data from the backup you created earlier.

4. Utilizing Third-Party Tools:

Several third-party tools can assist in reinstalling Windows 11 without data loss. These tools often offer more advanced features and customization options than the built-in Windows 11 tools. Some popular options include:

  • Macrium Reflect: A comprehensive backup and recovery tool that can create images of your entire system, allowing you to restore your system to a previous state.

  • EaseUS Todo Backup: Another powerful backup and recovery tool with features like system cloning and disk management.

  • Acronis True Image: A renowned backup and recovery solution offering data protection, system cloning, and disaster recovery capabilities.

Important Considerations:

  • Data Backup: Regardless of the method you choose, it is crucial to have a reliable backup of your important data before proceeding with the reinstallation process. This serves as a safety net in case of unforeseen issues.

  • System Compatibility: Before reinstalling Windows 11, ensure your system meets the minimum requirements for the operating system.

  • Software Licensing: Reinstalling Windows 11 does not affect your software licenses. You can continue to use the same licenses after the reinstallation.

  • Driver Updates: After reinstalling Windows 11, you might need to update your device drivers to ensure proper functionality.

  • Personalization: You might need to reconfigure your personal settings and preferences after reinstalling Windows 11.

FAQs:

Q: Will I lose all my programs after reinstalling Windows 11?

A: If you choose the "Keep my files" option during the reset process, your installed programs will be preserved. However, you might need to reinstall certain programs that are not compatible with the latest version of Windows 11.

Q: What happens to my personal files during the reinstallation process?

A: Your personal files will be preserved if you choose the "Keep my files" option. These files will be untouched during the reinstallation process.

Q: Can I reinstall Windows 11 without a product key?

A: No, you need a valid Windows 11 product key to activate the operating system after reinstalling it.

Q: Can I reinstall Windows 11 on a different computer?

A: You can only reinstall Windows 11 on the same computer where it was originally activated.

Q: What if my reinstallation fails?

A: If the reinstallation process fails, you can try the process again or use a recovery drive to restore your system to a previous state.

Tips:

  • Create a Recovery Drive: Creating a recovery drive is a good idea, even if you don’t plan to reinstall Windows 11 immediately. It can be helpful in case of system failures or other issues.

  • Backup Your Data Regularly: Make it a habit to back up your important data regularly, regardless of whether you plan to reinstall Windows 11 or not. This ensures that your data is protected from potential data loss.

  • Check System Requirements: Before reinstalling Windows 11, ensure your system meets the minimum requirements for the operating system. This helps avoid compatibility issues.

  • Update Drivers: After reinstalling Windows 11, update your device drivers to ensure proper functionality.

  • Personalize Your Settings: After reinstalling Windows 11, take the time to personalize your settings and preferences to create a comfortable and efficient working environment.

Conclusion:

Reinstalling Windows 11 without losing data is a powerful tool for rejuvenating your system and addressing various issues. It allows you to restore your system’s performance, stability, and security without sacrificing your valuable files and settings. By understanding the various methods and considerations involved, you can confidently embark on this process, ensuring a smooth and data-preserving reinstallation experience. Remember, data backup is crucial, and it is always advisable to consult with a qualified technician if you encounter any difficulties during the process.

Reinstall Windows 11 Without Losing Data Now Possible - Blog Mr Key Shop How to change the look and feel of Windows 11  Windows Central Why Does Home windows 11 Preserve Freezing? Defined - Abdul Ali Tech
Preserve Serene! Microsoft Promises To Reconsider Home Windows 11 Specifications, And Your Clean windows 11 - powerlio Customize Your Windows 11 Desktop « TOP NEW Review
These Are The Best Apps To Customize Your Windows 11 Appearance Customize Your Windows 11 Desktop « TOP NEW Review

Closure

Thus, we hope this article has provided valuable insights into Rejuvenating Your Windows 11: A Data-Preserving Approach. We hope you find this article informative and beneficial. See you in our next article!

Ra Pc Windows 11

ra pc windows 11

Introduction

With enthusiasm, let’s navigate through the intriguing topic related to ra pc windows 11. Let’s weave interesting information and offer fresh perspectives to the readers.

It appears you are asking for an article about "ra pc windows 11" which is not a recognized term or concept in the context of computer technology. It is likely a misunderstanding or a typo.

[THỦ THUẬT] Cách đưa This PC ra Desktop Win 11

If you are looking for information about a specific aspect of Windows 11, please clarify your request. For example, you could ask:

  • "An article about the features of Windows 11"
  • "An article about the performance of Windows 11 on different PCs"
  • "An article about the differences between Windows 11 and Windows 10"

Once you provide a clearer topic, I can help you create a comprehensive and informative article.

Cách đưa ứng dụng ra màn hình máy tính Win 11 - QuanTriMang.com Cách đưa This PC ra Desktop Windows 11, hiển thị My Computer Cách đơn giản để mang "My Computer" ra ngoài Desktop trên Windows 11  Hoàng Hà Mobile
Windows 11 ra mắt: Đơn giản hóa giao diện người dùng, cải thiện Window Công ty Nhật ra mắt PC chạy Windows 11: Màn 5,5 inch, thiết kế siêu nhỏ nhét được vào túi quần [THỦ THUẬT] Cách đưa This PC ra Desktop Win 11
Những điều bạn cần biết trước khi cập nhật lên Windows 11 : Win 11 có gì mới, cấu hình tối thiểu Windows 11 Ra Mắt Chính Thức Trong Tháng 10 Năm Nay

Closure

Thus, we hope this article has provided valuable insights into ra pc windows 11. We thank you for taking the time to read this article. See you in our next article!

Net Framework 4 7 2 Download For Windows 10

net framework 4 7 2 download for windows 10

Introduction

In this auspicious occasion, we are delighted to delve into the intriguing topic related to net framework 4 7 2 download for windows 10. Let’s weave interesting information and offer fresh perspectives to the readers.

A Comprehensive Guide to .NET Framework 4.7.2 for Windows 10

NET Framework 4.7.2 Download & Install for Windows 10/8.1/7 PCs

The .NET Framework, a cornerstone of Microsoft’s development ecosystem, provides a robust foundation for building and running applications on Windows. While newer versions like .NET 5 and .NET 6 have emerged, .NET Framework 4.7.2 remains a vital component for many Windows 10 users, especially those running legacy applications or encountering compatibility issues. This article aims to provide a comprehensive understanding of .NET Framework 4.7.2, its significance, and its role in ensuring smooth operation of applications on Windows 10.

Understanding the .NET Framework

The .NET Framework is a software framework that provides a consistent environment for developing and executing applications. It consists of a common language runtime (CLR), a set of libraries, and a collection of tools that streamline the development process.

The Importance of .NET Framework 4.7.2

While newer versions of .NET have been released, .NET Framework 4.7.2 continues to be relevant for several reasons:

  • Legacy Application Compatibility: Many applications, particularly those developed before the advent of .NET Core, rely on .NET Framework 4.7.2 for functionality. Installing this framework ensures these applications run smoothly on Windows 10.
  • Wide Applicability: .NET Framework 4.7.2 is supported on a wide range of Windows 10 versions, making it a reliable choice for diverse systems.
  • Security Updates: Microsoft continues to provide security updates for .NET Framework 4.7.2, addressing vulnerabilities and ensuring a secure environment for applications.
  • Stability and Performance: .NET Framework 4.7.2 offers a proven track record of stability and performance, making it a dependable choice for critical applications.

Downloading and Installing .NET Framework 4.7.2

Installing .NET Framework 4.7.2 is a straightforward process:

  1. Check for Compatibility: Ensure your Windows 10 version supports .NET Framework 4.7.2. You can find this information on Microsoft’s official website.
  2. Download the Installer: Visit the Microsoft website and download the .NET Framework 4.7.2 offline installer for your specific Windows 10 version (32-bit or 64-bit).
  3. Run the Installer: Execute the downloaded installer file. Follow the on-screen instructions to complete the installation process.

Benefits of Using .NET Framework 4.7.2

Installing .NET Framework 4.7.2 provides several benefits:

  • Improved Application Performance: The framework optimizes application execution, leading to faster loading times and smoother operation.
  • Enhanced Security: .NET Framework 4.7.2 incorporates security enhancements, protecting applications and data from potential threats.
  • Expanded Functionality: The framework provides access to a wide range of libraries and features, empowering developers to build more complex and robust applications.
  • Simplified Development: .NET Framework 4.7.2 offers a comprehensive set of tools and libraries, simplifying the development process and reducing development time.

Troubleshooting Common Issues

While .NET Framework 4.7.2 is generally stable, users might encounter issues during installation or execution. Here are some common problems and their solutions:

  • Installation Errors: Errors during installation can arise due to insufficient disk space, conflicting software, or incomplete downloads. Ensure adequate disk space, temporarily disable antivirus software, and redownload the installer if necessary.
  • Application Compatibility: Applications developed for earlier versions of .NET Framework might not be compatible with .NET Framework 4.7.2. Check for application updates or contact the software developer for support.
  • Security Updates: Ensure you have installed the latest security updates for .NET Framework 4.7.2 to address vulnerabilities and maintain a secure environment.

Frequently Asked Questions (FAQs)

Q: Is .NET Framework 4.7.2 compatible with all versions of Windows 10?

A: .NET Framework 4.7.2 is supported on a wide range of Windows 10 versions, but it’s essential to check for specific compatibility information on Microsoft’s website.

Q: Do I need to install .NET Framework 4.7.2 if I have a newer version of .NET installed?

A: If you have a newer version of .NET installed, you might not need .NET Framework 4.7.2. However, if you’re running legacy applications that require this specific version, installing it is recommended.

Q: Is it safe to download and install .NET Framework 4.7.2 from Microsoft’s website?

A: Yes, it is safe to download and install .NET Framework 4.7.2 from Microsoft’s official website. Ensure you download the installer from a trusted source to avoid malware or unauthorized software.

Q: What are the minimum system requirements for installing .NET Framework 4.7.2?

A: Refer to the official Microsoft documentation for detailed system requirements for .NET Framework 4.7.2. Generally, it requires a minimum processor speed, RAM, and available disk space.

Tips for Using .NET Framework 4.7.2

  • Regular Updates: Keep .NET Framework 4.7.2 updated with the latest security patches and bug fixes to ensure stability and security.
  • Compatibility Check: Before installing .NET Framework 4.7.2, check if your applications are compatible with this version.
  • Troubleshooting Resources: Utilize online forums and Microsoft support resources to address any installation or runtime issues.

Conclusion

.NET Framework 4.7.2 remains a valuable component for Windows 10 users, especially those running legacy applications or needing a stable and secure environment. By understanding its importance, benefits, and installation process, users can ensure their applications function seamlessly on Windows 10. While newer versions of .NET have emerged, .NET Framework 4.7.2 continues to play a vital role in maintaining a robust and reliable software ecosystem for Windows 10.

How to Download .NET Framework 4.7.2 on Windows 7/8/8.1/10 I How to install.NET Framework 4.7.2 How to download NET Framework 4.7.2 offline installer - YouTube Microsoft .Net Framework 4.7.2 released - gHacks Tech News
COMO INSTALAR .NET FRAMEWORK 4.7.2 en WINDOWS 7/8/10 - YouTube NET Framework 4.7.2 Download & Install for Windows 10/8.1/7 PCs - MiniTool Partition Wizard Net framework 4-7 download offline installer - topsupermarket
how to Download .NET Framework 4.7.2 windows 10 - YouTube Microsoft Net Framework 4.7.2 Download - YouTube

Closure

Thus, we hope this article has provided valuable insights into net framework 4 7 2 download for windows 10. We thank you for taking the time to read this article. See you in our next article!

Word 2025: A Glimpse Into The Future Of Document Creation

Word 2025: A Glimpse into the Future of Document Creation

Introduction

With great pleasure, we will explore the intriguing topic related to Word 2025: A Glimpse into the Future of Document Creation. Let’s weave interesting information and offer fresh perspectives to the readers.

Word 2025: A Glimpse into the Future of Document Creation

The Future of Document Creation and Distribution

The landscape of document creation is constantly evolving, driven by technological advancements and shifting user needs. While Microsoft Word 2025 remains shrouded in speculation, it is likely to build upon existing features and introduce new functionalities that streamline workflows, enhance collaboration, and elevate the user experience. This article explores potential features that could define Word 2025, examining their impact on document creation and the broader digital landscape.

Enhanced AI Integration:

Word 2025 is expected to leverage the power of artificial intelligence (AI) more extensively, offering sophisticated features that automate tasks and improve content quality. This includes:

  • Contextual Grammar and Style Suggestions: AI-powered grammar and style checkers will go beyond basic errors, offering context-sensitive suggestions based on document type, audience, and purpose. This will ensure consistency, clarity, and professional tone across all documents.
  • Automated Content Generation: Users can leverage AI to generate content outlines, summaries, and even entire sections of text. This will be particularly beneficial for tasks requiring research, report writing, or content creation in a specific style.
  • Real-time Content Translation: Seamless integration with translation services will enable real-time translation of documents, facilitating communication and collaboration across language barriers. This feature will streamline global communication and break down language barriers.
  • Image and Video Analysis: AI will analyze images and videos within documents, extracting relevant information and generating captions, descriptions, and even summaries. This will enhance accessibility and provide a more comprehensive understanding of visual content.

Collaborative Features:

Word 2025 will likely prioritize seamless collaboration, enabling users to work together on documents in real-time regardless of location. This will be facilitated by:

  • Enhanced Co-authoring Tools: Real-time co-authoring features will be further refined, allowing multiple users to edit and contribute to a single document simultaneously. This will enhance team productivity and streamline collaborative workflows.
  • Improved Version Control: Robust version control systems will track changes, allowing users to revert to previous versions and ensure transparency in collaborative projects. This will prevent data loss and facilitate seamless collaboration.
  • Integrated Communication Tools: Word 2025 could integrate communication tools like instant messaging and video conferencing, facilitating direct communication within the document editing environment. This will streamline collaboration and reduce the need for external communication channels.

Advanced Formatting and Design:

Word 2025 is expected to offer advanced formatting and design tools, providing users with greater control over document aesthetics and visual appeal. These features could include:

  • Dynamic Layout Options: Users will have access to dynamic layouts that adapt automatically to different screen sizes and devices. This will ensure optimal viewing and readability across platforms.
  • Enhanced Object Manipulation: Improved tools for manipulating images, videos, and other objects within documents will allow for more creative and engaging presentations. This will enable users to create visually appealing and informative documents.
  • Interactive Content Features: Word 2025 could incorporate interactive elements like embedded quizzes, polls, and forms, creating engaging and dynamic documents. This will enhance user engagement and provide interactive learning experiences.

Accessibility and Inclusivity:

Word 2025 will prioritize accessibility and inclusivity, making document creation and consumption easier for users with diverse needs. This will be achieved through:

  • Improved Accessibility Features: Built-in accessibility features will be enhanced, ensuring documents are readily accessible to users with visual, auditory, or cognitive impairments. This will promote inclusivity and ensure everyone can access and interact with documents.
  • Enhanced Readability Tools: AI-powered readability tools will analyze text and provide suggestions for improving clarity, conciseness, and overall readability. This will make documents easier to understand and consume for all users.
  • Multilingual Support: Comprehensive multilingual support will ensure that documents can be created and edited in multiple languages, facilitating global communication and collaboration. This will break down language barriers and promote inclusivity in the digital space.

FAQs:

Q: Will Word 2025 be cloud-based?

A: While Microsoft has emphasized cloud-based services in recent years, it is likely that Word 2025 will offer both cloud-based and desktop versions, catering to diverse user preferences and needs.

Q: What about security in Word 2025?

A: Security will remain a top priority, with enhanced encryption protocols and robust authentication measures safeguarding user data and documents.

Q: Will Word 2025 be compatible with older versions?

A: Microsoft typically maintains backward compatibility, ensuring that users can open and edit documents created in previous versions of Word. However, some advanced features might require newer versions for full functionality.

Q: What will be the pricing for Word 2025?

A: Pricing details are not yet available. However, it is likely to follow a similar pricing model to previous versions, offering subscription-based and standalone options.

Tips for Using Word 2025 Effectively:

  • Embrace AI Assistance: Utilize AI-powered features to enhance content quality, streamline tasks, and improve overall efficiency.
  • Prioritize Collaboration: Leverage co-authoring tools and integrated communication features to foster seamless collaboration and teamwork.
  • Experiment with Design: Explore advanced formatting and design options to create visually appealing and engaging documents.
  • Ensure Accessibility: Utilize accessibility features to create inclusive documents that are accessible to all users.

Conclusion:

Word 2025 promises to be a significant leap forward in document creation, leveraging the power of AI, enhancing collaboration, and prioritizing accessibility. By incorporating these innovative features, Word 2025 will empower users to create high-quality, engaging, and accessible documents that meet the evolving demands of the digital landscape. As we move closer to 2025, it will be exciting to see how these advancements shape the future of document creation and communication.

Document creation - past and future Assignment: Create Document with Tables and Images  Computer Applications for Managers How to save a document as a template in Microsoft Word
A Glimpse into the Future Economy after the Pandemic - UPCEA A Glimpse of the Future: AI Will Change Everything   Observer A Glimpse Into The Future
CatBlox on Twitter: "A glimpse into the future" Sustainability  Free Full-Text  Happy and Engaged Workforce in Industry 4.0: A New Concept of

Closure

Thus, we hope this article has provided valuable insights into Word 2025: A Glimpse into the Future of Document Creation. We appreciate your attention to our article. See you in our next article!

Navigating And Accessing Files On The D Drive In Windows 10: A Comprehensive Guide

Navigating and Accessing Files on the D Drive in Windows 10: A Comprehensive Guide

Introduction

With great pleasure, we will explore the intriguing topic related to Navigating and Accessing Files on the D Drive in Windows 10: A Comprehensive Guide. Let’s weave interesting information and offer fresh perspectives to the readers.

如何使用 D 盤 Windows 10? - 今日操作系統

The D drive, along with other lettered drives (such as C, E, F, etc.), represents a storage location within your Windows 10 computer. These drives can be physical hard drives, solid-state drives (SSDs), external storage devices like USB drives, or even network drives. Understanding how to access and manage files on the D drive is crucial for effective file organization and system administration.

Understanding Drive Letters and File Systems

Windows assigns a letter to each storage device connected to your computer. The C drive usually represents the primary hard drive where the operating system is installed. The D drive, and subsequent letters, are allocated to additional storage devices.

Each drive utilizes a file system, which is a hierarchical structure that organizes files and folders. Windows typically uses the NTFS (New Technology File System) for its internal drives, providing advanced features like security permissions, data compression, and journaling. Understanding the file system is crucial for navigating and managing files effectively.

Accessing Files on the D Drive

There are several ways to access files stored on the D drive in Windows 10:

1. Using File Explorer:

  • Open File Explorer: Click the File Explorer icon on the taskbar or press the Windows key + E.
  • Navigate to the D Drive: In the left pane, you will see a list of drives. Click on "This PC" or "Computer" to view the available drives. Locate the D drive and double-click it to access its contents.
  • Browse Folders and Files: Once you’re in the D drive, you can navigate through folders and locate specific files using the navigation pane or the address bar.

2. Using the Search Bar:

  • Open the Search Bar: Click the search bar on the taskbar or press the Windows key + S.
  • Type the File Name: Enter the name of the file you are looking for.
  • Filter by Location: Click the "Show more" button and select "This PC" or "Computer" from the drop-down menu.
  • Select the D Drive: Check the box next to the D drive to limit the search to that specific drive.

3. Using the Run Command:

  • Open the Run Command: Press the Windows key + R.
  • Type the Path: In the "Open" field, type "D:" followed by the path to the file or folder you want to access. For example, to open a folder named "Documents" on the D drive, type "D:Documents" and click "OK."

4. Using Shortcuts:

  • Create a Shortcut: Right-click on the desired file or folder on the D drive and select "Create shortcut."
  • Move the Shortcut: Drag and drop the shortcut to a convenient location, like the desktop or the Quick Access bar in File Explorer.

5. Using Network Drives:

  • Connect to a Network Drive: If the D drive is a network drive, you can access it by clicking "This PC" or "Computer" in File Explorer, selecting "Map network drive," and entering the network path.

Managing Files on the D Drive

Once you have accessed the D drive, you can perform various file management operations, including:

  • Creating Folders: Right-click on an empty space in the D drive window and select "New" > "Folder." Give the folder a name and click "OK."
  • Copying Files: Select the files you want to copy, right-click, and choose "Copy." Then, navigate to the desired destination folder on the D drive and right-click, selecting "Paste."
  • Moving Files: Select the files you want to move, right-click, and choose "Cut." Then, navigate to the desired destination folder on the D drive and right-click, selecting "Paste."
  • Deleting Files: Select the files you want to delete, right-click, and choose "Delete."
  • Renaming Files: Right-click on the file you want to rename, select "Rename," and type the new name.

Benefits of Using the D Drive

  • Increased Storage Capacity: The D drive provides additional storage space beyond the primary hard drive (C drive).
  • File Organization: Separating files onto different drives allows for better organization and easier retrieval.
  • Data Backup and Recovery: The D drive can be used to store backups of important data, ensuring its safety in case of system failure.
  • System Performance Enhancement: By moving large files or programs from the C drive to the D drive, you can potentially improve system performance.

Troubleshooting Common Issues

  • Drive Not Showing: If the D drive is not visible in File Explorer, ensure it is properly connected and powered on. Check the device manager for any errors related to the drive.
  • Access Denied: If you encounter an "Access denied" error, you may not have sufficient permissions to access the drive or its files. Contact the system administrator or change the permissions accordingly.
  • Drive Not Recognized: If the D drive is not recognized by Windows, check the drive’s connection, ensure the driver software is up-to-date, and try troubleshooting using the Device Manager.

FAQs

Q: How do I format the D drive?

A: Formatting a drive erases all data on it. To format the D drive, open Disk Management (right-click "This PC" or "Computer" and select "Manage" > "Disk Management"), right-click the D drive, and select "Format." Choose a file system (typically NTFS) and click "Start."

Q: Can I change the drive letter of the D drive?

A: Yes, you can change the drive letter using Disk Management. Right-click the D drive, select "Change Drive Letter and Paths," and click "Change." Choose a new letter and click "OK."

Q: How do I transfer files from the C drive to the D drive?

A: To transfer files, use the copy or move methods described earlier in the "Managing Files on the D Drive" section.

Q: What happens if I delete the D drive?

A: Deleting a drive erases all data on it and makes it unusable. Ensure you have backed up any important data before deleting a drive.

Tips

  • Regularly Back Up Data: Back up important files and folders to the D drive or external storage to prevent data loss.
  • Use File Explorer’s Search Function: Utilize the search bar to quickly locate files on the D drive.
  • Organize Files into Folders: Create folders to categorize files and improve file management.
  • Monitor Drive Space: Keep track of available space on the D drive to avoid running out of storage.
  • Maintain Drive Health: Regularly check the D drive for errors and perform disk cleanup to optimize its performance.

Conclusion

Understanding how to access and manage files on the D drive is essential for maximizing storage capacity, organizing data, and enhancing overall system performance. By utilizing the methods and tips outlined in this guide, you can effectively navigate the D drive and ensure your files are safely stored and easily accessible. Remember to regularly back up important data, keep your storage devices healthy, and maintain proper file organization to optimize your Windows 10 experience.

How to Fully Use D Drive in Windows 10 - 3 Ways How to Fully Use D Drive in Windows 10 - 3 Ways How to Find D Drive on Windows 10?
4 Methods To Transfer Files From C Drive To D Drive In Windows - Vrogue How to Move Folders from C Drive to D Drive in Windows 11/10/8/7? How to Access an External Hard Drive on Windows 10
How to Create D Drive in Windows 10? D drive not showing in Windows 10  How to access d drive - YouTube

Closure

Thus, we hope this article has provided valuable insights into Navigating and Accessing Files on the D Drive in Windows 10: A Comprehensive Guide. We hope you find this article informative and beneficial. See you in our next article!

Navigating The News And Interests Feed In Windows 11: A Guide To Customization And Control

Navigating the News and Interests Feed in Windows 11: A Guide to Customization and Control

Introduction

In this auspicious occasion, we are delighted to delve into the intriguing topic related to Navigating the News and Interests Feed in Windows 11: A Guide to Customization and Control. Let’s weave interesting information and offer fresh perspectives to the readers.

Personalize your interests for Widgets in Windows 11

Windows 11, with its focus on visual appeal and user-friendliness, introduced the "News and Interests" feed, a dynamic panel designed to keep users informed and engaged. This feature, accessible from the taskbar, offers a curated stream of news headlines, weather updates, and personalized content. However, for users who prioritize a streamlined interface or prefer a more focused work environment, the News and Interests feed can become a distraction. This article delves into the various methods for managing and customizing the News and Interests feed, empowering users to tailor their Windows 11 experience to their specific needs.

Understanding the Functionality and Customization Options

The News and Interests feed, by default, displays a mix of news articles, weather forecasts, and personalized recommendations based on user activity and preferences. This information is sourced from various reputable news providers and tailored to the user’s location and interests. However, the level of personalization can be adjusted to suit individual preferences.

Users have the option to customize the feed’s content, including:

  • Choosing news sources: Users can select their preferred news providers from a wide range of options, ensuring that the information presented aligns with their interests.
  • Filtering content: The feed can be filtered based on specific topics, such as technology, business, or entertainment, allowing users to focus on areas of particular interest.
  • Adjusting the frequency of updates: Users can control how often the feed refreshes with new information, preventing unnecessary interruptions or distractions.

Methods for Disabling or Minimizing the News and Interests Feed

For users who wish to disable the News and Interests feed entirely, several options are available:

  • Using the taskbar settings: Right-clicking on the taskbar provides access to "Taskbar settings." Within this menu, users can toggle the "News and Interests" option on or off, effectively removing the feed from the taskbar.
  • Disabling through the Windows settings: Navigating to "Settings" > "Personalization" > "Taskbar" offers a more comprehensive control panel for taskbar customization. Here, users can disable the News and Interests feature, as well as fine-tune its appearance and behavior.
  • Utilizing third-party tools: Several third-party applications offer advanced customization options for Windows 11, including the ability to disable or modify the News and Interests feed. These tools may provide more granular control over the feed’s functionality, allowing users to tailor it to their specific needs.

FAQ: Addressing Common Concerns

Q: Can I disable the News and Interests feed without affecting other taskbar features?

A: Yes, disabling the News and Interests feed does not impact other taskbar functionalities, such as the system tray or the search bar. It simply removes the dedicated panel for news and interest updates.

Q: Does disabling the News and Interests feed affect the functionality of other Windows features?

A: No, disabling the News and Interests feed does not impact the functionality of other Windows features. It is an independent component of the operating system and can be managed without affecting other aspects of the user experience.

Q: Are there any alternative ways to access news and information within Windows 11?

A: Users can access news and information through dedicated apps or websites. The Microsoft Store offers a variety of news apps, and users can access their preferred news websites through their web browser.

Tips for Optimizing the News and Interests Feed

  • Utilize the "Customize" button: The News and Interests feed offers a "Customize" button that provides access to various options for tailoring the content and appearance of the feed.
  • Experiment with different news sources: Explore the diverse range of news providers available to find sources that align with your interests and provide reliable information.
  • Adjust the refresh frequency: Determine the optimal refresh rate for the News and Interests feed based on your usage patterns and preferences. A less frequent refresh can minimize distractions and conserve system resources.

Conclusion: A Personalized Windows 11 Experience

Windows 11’s News and Interests feed offers a convenient way to stay informed and engaged. However, its presence can be distracting for users who prioritize a streamlined work environment. By understanding the various customization options and methods for disabling or minimizing the feed, users can tailor their Windows 11 experience to their specific needs, creating a more focused and productive environment. The ability to control the News and Interests feed allows users to prioritize their tasks and maximize their productivity, ultimately enhancing their overall Windows 11 experience.

Personalize your interests for Widgets in Windows 11 Personalize your interests for Widgets in Windows 11 Personalize your interests for Widgets in Windows 11
How to Disable the News and Interests Taskbar Widget in Windows 11 How to customize the News and Interests taskbar widget in Windows 11/10 Personalize News Feed on Widgets Board in Windows 11 Tutorial  Windows 11 Forum
Windows 11 news - tradesmilo How to customize the News and Interests taskbar widget in Windows 11/10

Closure

Thus, we hope this article has provided valuable insights into Navigating the News and Interests Feed in Windows 11: A Guide to Customization and Control. We hope you find this article informative and beneficial. See you in our next article!

Unburdening Windows 11: A Guide To Removing Pre-installed Applications

Unburdening Windows 11: A Guide to Removing Pre-installed Applications

Introduction

With enthusiasm, let’s navigate through the intriguing topic related to Unburdening Windows 11: A Guide to Removing Pre-installed Applications. Let’s weave interesting information and offer fresh perspectives to the readers.

Unburdening Windows 11: A Guide to Removing Pre-installed Applications

How To Remove Preinstalled Apps In Windows 11 - Vrogue

Windows 11, like its predecessors, comes pre-loaded with a suite of applications designed to enhance user experience. While these applications can be useful, they often consume valuable disk space, introduce potential security vulnerabilities, and can contribute to system slowdowns. This article provides a comprehensive guide to removing these pre-installed applications, outlining the process, benefits, and considerations involved.

Understanding Pre-installed Applications

Pre-installed applications, often referred to as bloatware, are software programs bundled with a new operating system or device. These applications are typically developed by Microsoft or third-party companies and serve various purposes, ranging from productivity tools to entertainment apps. While some pre-installed applications may be beneficial, others are often seen as unnecessary or even detrimental.

Reasons for Removing Pre-installed Applications

Several compelling reasons motivate users to remove pre-installed applications from their Windows 11 systems. These include:

  • Disk Space Optimization: Pre-installed applications can occupy significant disk space, particularly on systems with limited storage capacity. Removing these applications frees up valuable storage for user-installed programs, files, and data.
  • Performance Enhancement: Unnecessary applications running in the background can consume system resources, leading to slower performance and increased battery drain. Removing these applications can improve system responsiveness and efficiency.
  • Security Considerations: Some pre-installed applications may contain vulnerabilities that could be exploited by malicious actors. Removing these applications reduces the potential attack surface, enhancing system security.
  • Customization and Control: Removing pre-installed applications allows users to customize their Windows 11 environment, removing unwanted or unused applications and streamlining the user experience.

Methods for Removing Pre-installed Applications

Windows 11 offers several methods for removing pre-installed applications:

  • Using the "Apps" Settings: This method is the most straightforward and user-friendly option. Navigate to "Settings" > "Apps" > "Apps & Features" and select the application you wish to remove. Click "Uninstall" and confirm the action.
  • Using the "Programs and Features" Control Panel: This traditional method provides a more detailed view of installed applications. Access the "Programs and Features" control panel by searching for it in the Windows search bar. Locate the application you want to remove, select it, and click "Uninstall."
  • Using PowerShell: For advanced users, PowerShell offers greater control and flexibility in managing installed applications. Open PowerShell with administrator privileges and use the Get-AppxPackage cmdlet to list all installed applications. Identify the package name of the application you want to remove and use the Remove-AppxPackage cmdlet to uninstall it.
  • Using Third-Party Uninstaller Tools: Several third-party uninstaller tools are available, offering advanced features like complete removal of application files and registry entries. However, caution is advised when using these tools, as incorrect usage could damage the system.

Considerations Before Removing Applications

Before removing any pre-installed applications, consider the following:

  • Essential Applications: Some pre-installed applications may be essential for the proper functioning of Windows 11. These applications should not be removed.
  • System Stability: Removing certain applications, particularly those related to system security or hardware drivers, could negatively impact system stability. It is crucial to understand the role of each application before removing it.
  • Data Loss: Removing an application may result in the loss of associated data. Ensure that any important data is backed up before removing the application.

FAQs Regarding Removing Pre-installed Applications

Q: Can I remove all pre-installed applications?

A: While it is possible to remove most pre-installed applications, removing essential system applications can lead to system instability and functionality issues. It is recommended to carefully evaluate each application before removing it.

Q: Are there any applications that I should never remove?

A: Some critical system applications, such as Windows Defender, Windows Update, and the operating system core components, should never be removed. Removing these applications can render your system unusable.

Q: What happens if I remove a pre-installed application and later need it?

A: Most pre-installed applications can be reinstalled from the Microsoft Store or through the Windows Update process. However, some applications may require a system restore or a fresh installation of Windows 11 to be restored.

Q: Can removing pre-installed applications void my warranty?

A: Removing pre-installed applications typically does not void your warranty. However, it is recommended to consult your device manufacturer’s warranty policy for specific details.

Tips for Removing Pre-installed Applications

  • Back up your system before removing any applications. This ensures that you can restore your system to its previous state if any issues arise.
  • Research the purpose of each application before removing it. Understand its functionality and potential impact on system stability.
  • Use the built-in Windows tools for removing applications whenever possible. These tools are designed to ensure safe and efficient removal.
  • Avoid using third-party uninstaller tools unless absolutely necessary. These tools can be complex and may lead to unintended consequences.

Conclusion

Removing pre-installed applications from Windows 11 can significantly enhance system performance, optimize disk space, and improve security. By carefully evaluating the purpose and potential impact of each application, users can tailor their Windows 11 experience to their specific needs and preferences. Remember to proceed with caution and prioritize system stability and data security throughout the process.

How to Remove Preinstalled Apps in Windows 11 Remove Pre-Installed Apps on Win 11: Streamline Your Experience How to Remove Pre-Installed Apps from Windows 11
How To Remove Preinstalled Apps In Windows 11 - www.vrogue.co Remove Pre-Installed Apps on Win 11: Streamline Your Experience Windows 11 uninstall preinstalled apps
Windows 11: How to Remove Pre-installed, Including Hidden Apps - Techtrickz Installed Apps Windows 11

Closure

Thus, we hope this article has provided valuable insights into Unburdening Windows 11: A Guide to Removing Pre-installed Applications. We thank you for taking the time to read this article. See you in our next article!

R Software For Windows 11: A Comprehensive Guide

R Software for Windows 11: A Comprehensive Guide

Introduction

With enthusiasm, let’s navigate through the intriguing topic related to R Software for Windows 11: A Comprehensive Guide. Let’s weave interesting information and offer fresh perspectives to the readers.

R Software for Windows 11: A Comprehensive Guide

Install R on Windows 11  TestingDocs.com

R is a powerful and versatile programming language and free software environment for statistical computing and graphics. Its popularity in the realm of data science and analytics stems from its comprehensive capabilities, extensive package library, and active community support. This guide explores R’s installation, functionalities, and applications on Windows 11, providing a comprehensive overview for both beginners and experienced users.

Understanding R: A Foundation for Data Analysis

R’s core strength lies in its ability to handle statistical analysis, data visualization, and model building. It provides a wide range of functions for:

  • Data Manipulation and Transformation: R offers tools for cleaning, filtering, merging, and transforming data, preparing it for analysis.
  • Statistical Analysis: From basic descriptive statistics to complex hypothesis testing and regression analysis, R provides a comprehensive toolkit for exploring data patterns and drawing inferences.
  • Data Visualization: R excels in creating informative and visually appealing charts and graphs, enabling effective communication of data insights.
  • Modeling and Machine Learning: R supports a wide array of statistical models, including linear and logistic regression, decision trees, and support vector machines, for building predictive models and uncovering hidden relationships within data.

Installing R on Windows 11: A Step-by-Step Guide

Installing R on Windows 11 is a straightforward process. Follow these steps:

  1. Download the R Installer: Visit the official CRAN (Comprehensive R Archive Network) website (https://cran.r-project.org/) and download the latest version of R for Windows.
  2. Run the Installer: Execute the downloaded installer file. Follow the on-screen prompts to install R on your system.
  3. Verify Installation: After the installation completes, open R by searching for it in the Windows Start menu. You should see the R console window, indicating a successful installation.

RStudio: A User-Friendly Interface for R

While R provides a powerful command-line interface, RStudio offers a more user-friendly environment for working with R. It enhances productivity by providing:

  • Code Editor: RStudio’s code editor provides syntax highlighting, autocompletion, and code navigation features, making coding more efficient and error-free.
  • Interactive Console: The interactive console allows you to execute R commands and view the output directly.
  • Workspace Management: RStudio facilitates managing your R projects, scripts, and data files effectively.
  • Visualizations: It provides integrated tools for creating and exploring data visualizations within the R environment.

To install RStudio, visit its official website (https://rstudio.com/products/rstudio/download/) and download the free version for Windows. Follow the installation instructions, and you’ll be ready to start using RStudio.

R Packages: Expanding R’s Capabilities

R’s true power lies in its extensive package library, which offers pre-built functions and tools for various tasks. Installing and using packages is a fundamental aspect of working with R.

  1. Installing Packages: You can install packages directly from the R console using the install.packages() function. For example, to install the ggplot2 package for data visualization, use the following command:

    install.packages("ggplot2")
  2. Loading Packages: Once installed, you need to load the packages into your R session before using their functions. Use the library() function to load a package. For instance, to load the ggplot2 package:

    library(ggplot2)

Exploring R’s Functionality: A Practical Example

Let’s explore R’s capabilities through a simple example: analyzing a dataset of student grades.

1. Importing Data:

First, you need to import the data into R. You can use the read.csv() function for reading data from a CSV file. Assuming your data is stored in a file named "grades.csv," use the following code:

grades <- read.csv("grades.csv")

2. Exploring Data:

Use the head() and summary() functions to get a glimpse of the data.

head(grades) # Displays the first few rows of the data
summary(grades) # Provides summary statistics for each variable

3. Creating a Visualization:

Let’s create a histogram to visualize the distribution of student scores in a particular subject.

library(ggplot2)

ggplot(grades, aes(x = MathScore)) +
  geom_histogram(binwidth = 5) +
  labs(title = "Distribution of Math Scores",
       x = "Math Score",
       y = "Frequency")

4. Performing Statistical Analysis:

You can calculate the mean, standard deviation, or perform other statistical tests on the data using R’s built-in functions. For example, to calculate the mean Math score:

mean(grades$MathScore)

R for Data Science and Machine Learning

R’s capabilities extend beyond basic statistical analysis. It is a powerful tool for data science and machine learning tasks.

  • Data Mining: R can be used to extract valuable insights from large datasets, identifying patterns and trends.
  • Predictive Modeling: R supports a wide range of algorithms for building predictive models, enabling you to forecast future outcomes based on historical data.
  • Machine Learning: R is widely used for implementing machine learning algorithms, including classification, regression, and clustering, for tasks like image recognition, sentiment analysis, and fraud detection.

FAQs on R Software for Windows 11

1. Is R free to use?
Yes, R is an open-source software, meaning it is free to download, use, and distribute.

2. What are the system requirements for running R on Windows 11?
R has minimal system requirements. A modern computer with a reasonable amount of RAM and storage space is sufficient.

3. Can I use R for data visualization?
Yes, R has excellent data visualization capabilities. Packages like ggplot2 provide a wide range of charting options.

4. What is the best way to learn R?
There are many resources available for learning R, including online courses, tutorials, and books. The R community also offers extensive documentation and support forums.

5. Is R suitable for beginners?
While R can be challenging for absolute beginners, its extensive documentation and online resources make it accessible for learning.

Tips for Using R Software on Windows 11

  • Start with a Simple Project: Begin with a small project to familiarize yourself with R’s syntax and functionalities.
  • Explore the R Packages: Utilize the package library to discover tools for specific tasks.
  • Practice Regularly: Consistent practice is key to mastering R.
  • Seek Help When Needed: The R community is very active and helpful. Utilize forums and online resources to resolve any issues.
  • Stay Updated: Regularly update R and its packages to benefit from new features and bug fixes.

Conclusion

R software for Windows 11 empowers users with a robust and versatile tool for data analysis, visualization, and model building. Its open-source nature, extensive package library, and active community support make it a valuable resource for both beginners and experienced data scientists. By mastering R’s functionalities, users can unlock the power of data to gain valuable insights, make informed decisions, and drive innovation.

Install R On Windows 11, 46% OFF How to download R and install RStudio on Windows 11 - TechDecode Tutorials Install R on Windows 11  TestingDocs.com
R Software For Windows 11 2024 - Win 11 Home Upgrade 2024 Buy Windows 11 User Guide for Beginners: A Comprehensive Guide to Master Windows 11 Operating Buy WINDOWS 11 PRO USER GUIDE: A Comprehensive User Guide for Beginners and Seniors to Master
R Software For Windows 11 - Get Latest Windows 11 Update Windows 11: A Comprehensive Guide about Features and Updates Perunity - Latest Business Story

Closure

Thus, we hope this article has provided valuable insights into R Software for Windows 11: A Comprehensive Guide. We appreciate your attention to our article. See you in our next article!