Navigating The World Of Panasonic Toughbook CF-53 Drivers For Windows 10: A Comprehensive Guide

Navigating the World of Panasonic Toughbook CF-53 Drivers for Windows 10: A Comprehensive Guide

Introduction

In this auspicious occasion, we are delighted to delve into the intriguing topic related to Navigating the World of Panasonic Toughbook CF-53 Drivers for Windows 10: A Comprehensive Guide. Let’s weave interesting information and offer fresh perspectives to the readers.

Set Up Your Panasonic Toughbook CF-53

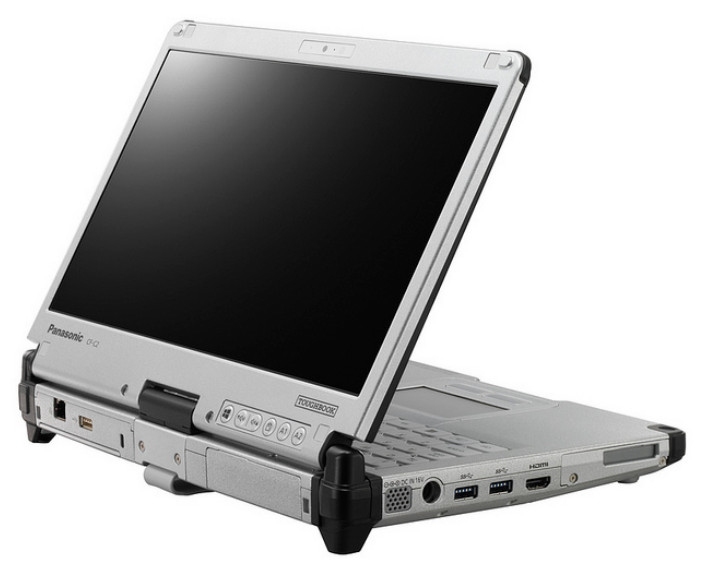
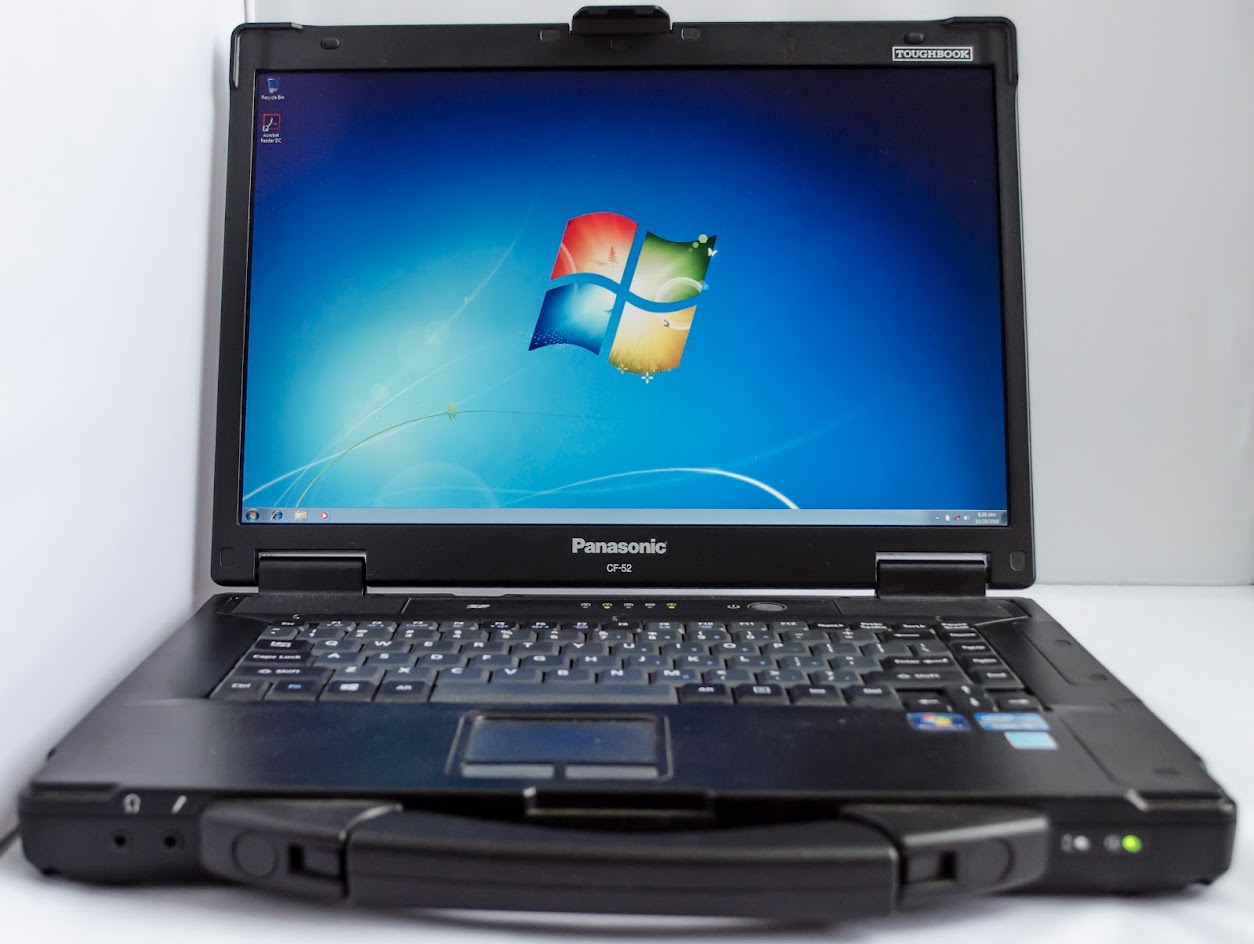
The Panasonic Toughbook CF-53, renowned for its rugged durability and reliable performance, is a popular choice for professionals in various demanding fields. However, ensuring optimal functionality of this powerful device necessitates a careful approach to driver installation, particularly when transitioning to Windows 10. This guide provides a comprehensive understanding of Panasonic Toughbook CF-53 drivers for Windows 10, exploring their importance, installation methods, troubleshooting techniques, and common FAQs.

The Importance of Drivers: Unlocking the Full Potential of Your Toughbook CF-53

Drivers act as the crucial link between your operating system (Windows 10 in this case) and the hardware components of your Toughbook CF-53. They translate the commands from the operating system into language that specific hardware components understand, enabling seamless communication and optimal performance.

Without the appropriate drivers, your Toughbook CF-53’s hardware components might not function correctly, leading to a range of issues:

  • Non-functional peripherals: Your touchpad, keyboard, webcam, or even the integrated display might not work as intended.
  • Performance degradation: The lack of drivers can hinder the overall performance of your device, resulting in slow response times and sluggish operation.
  • Hardware incompatibility: Certain hardware components might not be recognized by Windows 10 without the proper drivers, leading to system instability or even crashes.
  • Missed updates: Critical updates and security patches for your hardware might not be installed without the appropriate drivers.

Therefore, installing the correct drivers for your Toughbook CF-53 is essential to maximize its capabilities, ensure optimal performance, and maintain its security.

Identifying and Acquiring the Right Drivers: A Step-by-Step Approach

  1. Determine your Toughbook CF-53 model: The specific driver requirements vary depending on the exact model of your Toughbook CF-53. You can identify your model by checking the label on the device or consulting the documentation that came with it.

  2. Visit the Panasonic Support Website: The official Panasonic Support website is the primary source for acquiring the correct drivers for your Toughbook CF-53. Navigate to the website and utilize the search function to locate your specific model.

  3. Download the drivers: Once you have identified your model, search for the "Drivers and Downloads" section on the support page. Select Windows 10 as your operating system and download the relevant drivers for each component.

  4. Organize your downloads: Create a dedicated folder on your computer to store the downloaded drivers. This will make the installation process more organized and efficient.

Installing Drivers: A Straightforward Process

  1. Run the installation file: Locate the downloaded driver files and double-click the installation file for each component. Follow the onscreen instructions provided by the driver installer.

  2. Restart your computer: After installing the drivers, it is recommended to restart your computer to ensure that the new drivers are properly loaded and activated.

  3. Verify functionality: Once your computer has restarted, test the functionality of the corresponding hardware components to ensure that the drivers have been installed successfully.

Troubleshooting Common Driver Issues: Addressing Potential Challenges

While the driver installation process is generally straightforward, you might encounter certain issues. Here are some common challenges and solutions:

  • Missing or outdated drivers: If you are experiencing hardware issues, ensure that you have downloaded and installed the latest drivers from the Panasonic Support website.

  • Driver conflicts: If installing a new driver causes system instability or crashes, try uninstalling the driver and restarting your computer. You can also attempt to update other drivers to resolve any conflicts.

  • Incompatible drivers: If you are unable to find the correct drivers for your Toughbook CF-53 model on the Panasonic Support website, try searching for generic drivers for the specific hardware component on the manufacturer’s website.

  • Driver corruption: If you suspect driver corruption, try reinstalling the driver from the original installation file or downloading a fresh copy from the Panasonic Support website.

FAQs: Addressing Common Concerns about Panasonic Toughbook CF-53 Drivers for Windows 10

Q: Can I use drivers from other Panasonic Toughbook models on my CF-53?

A: While some drivers might be compatible across different Toughbook models, it is strongly recommended to use the drivers specifically designed for your CF-53 model. Using incompatible drivers can lead to performance issues, system instability, or even hardware damage.

Q: Are there any third-party driver providers for my CF-53?

A: While third-party driver providers might offer drivers for your CF-53, using drivers from unofficial sources is not recommended. These drivers may not be compatible, contain malware, or lack proper support. Stick to the official Panasonic Support website for reliable and secure drivers.

Q: How often should I update my drivers?

A: It is recommended to regularly check for driver updates, especially when new versions of Windows 10 are released. You can also configure Windows Update to automatically install driver updates.

Q: What should I do if I encounter a driver issue that I cannot resolve?

A: If you are unable to resolve driver issues on your own, contact Panasonic Support for assistance. They can provide guidance, troubleshooting steps, or even remote support to help you resolve the problem.

Tips for Maintaining Optimal Driver Performance

  • Regularly check for updates: Visit the Panasonic Support website periodically to check for driver updates for your CF-53.

  • Use Windows Update: Configure Windows Update to automatically install driver updates for your device.

  • Back up your drivers: Before installing new drivers, create a backup of your current drivers to facilitate easy rollback if necessary.

  • Avoid unnecessary driver installations: Only install drivers that are specifically required for your CF-53 or its components. Installing unnecessary drivers can lead to conflicts and performance issues.

Conclusion: Empowering Your Toughbook CF-53 with the Right Drivers

Installing the correct drivers for your Panasonic Toughbook CF-53 is crucial for maximizing its performance, ensuring optimal functionality, and maintaining its security. By following the steps outlined in this guide, you can confidently navigate the world of drivers and unlock the full potential of your rugged and reliable Toughbook CF-53.

Remember to always use drivers from official sources, such as the Panasonic Support website, to ensure compatibility, security, and proper support. Regularly check for updates, and seek assistance from Panasonic Support if you encounter any driver-related issues. With the right drivers, your Toughbook CF-53 will be equipped to tackle even the most demanding tasks with unwavering performance and reliability.

Panasonic Toughbook Cf 53 Vga Drivers - historyever vladimirovruslan739: PANASONIC TOUGHBOOK CF-53 DRIVERS Panasonic Toughbook Cf 53 User Manual
Panasonic Toughbook CF-53 - Notebookcheck.net External Reviews Panasonic Toughbook CF-53S i5-3340M 2.7GHz 8GB 320GB Windows 10 Pro – Refresh Computers Online Panasonic Toughbook 53 CF-53SJCZYLM 14" Laptop CF-53SJCZYLM B&H
Panasonic Toughbook CF-53.2 i5-4310U 2.0GHz 8GB 320GB Windows 10 Pro – Refresh Computers Online Panasonic Toughbook CF-53 Reviews and Ratings - TechSpot

Closure

Thus, we hope this article has provided valuable insights into Navigating the World of Panasonic Toughbook CF-53 Drivers for Windows 10: A Comprehensive Guide. We appreciate your attention to our article. See you in our next article!

Unlocking The Power Of Compressed Files: A Guide To Opening RAR Files On Windows 11

Unlocking the Power of Compressed Files: A Guide to Opening RAR Files on Windows 11

Introduction

In this auspicious occasion, we are delighted to delve into the intriguing topic related to Unlocking the Power of Compressed Files: A Guide to Opening RAR Files on Windows 11. Let’s weave interesting information and offer fresh perspectives to the readers.

Unlocking the Power of Compressed Files: A Guide to Opening RAR Files on Windows 11

Open Rar Files Windows 11

In the digital age, we encounter compressed files frequently. These files, often ending in extensions like .rar, .zip, or .7z, are efficient ways to store and share large amounts of data. While Windows 11 provides native support for .zip files, opening .rar files requires a dedicated program. This article explores the various methods available to open .rar files on Windows 11, focusing on free, reliable options.

The Importance of .RAR Files

RAR, short for Roshal Archive, is a popular compression format known for its robust compression algorithms and strong encryption capabilities. It offers several advantages:

  • Efficient Storage: RAR files can significantly reduce the size of data, making it easier to store and transmit.
  • Enhanced Security: RAR supports encryption, safeguarding sensitive data from unauthorized access.
  • Archive Management: RAR allows for the creation of multi-volume archives, splitting large files into smaller parts for easier transfer.
  • Self-Extracting Archives: RAR supports the creation of self-extracting archives, enabling users to extract files without needing a dedicated program.

Free Options for Opening RAR Files on Windows 11

Several free and reliable software options are available to open .rar files on Windows 11:

1. 7-Zip:

  • Features: 7-Zip is a powerful open-source file archiver and extractor, supporting a wide range of compression formats, including RAR, ZIP, 7z, and more. It boasts high compression ratios, robust encryption, and a user-friendly interface.
  • Availability: 7-Zip is available for free download from its official website (https://www.7-zip.org/).
  • Benefits: 7-Zip offers excellent performance, a vast array of supported formats, and a completely free license.

2. PeaZip:

  • Features: PeaZip is another free and open-source file archiver that supports a wide range of compression formats, including RAR, ZIP, 7z, and many others. It features a user-friendly interface, multi-core processing support for faster extraction, and robust security features.
  • Availability: PeaZip is available for free download from its official website (https://peazip.org/).
  • Benefits: PeaZip offers a comprehensive feature set, a clean interface, and excellent compatibility with various archive formats.

3. WinRAR:

  • Features: WinRAR is a popular commercial file archiver, known for its extensive features, including robust compression, encryption, and archive management capabilities. It offers a free trial period, after which a license is required for continued use.
  • Availability: WinRAR can be downloaded from its official website (https://www.win-rar.com/).
  • Benefits: WinRAR provides a comprehensive feature set, excellent compression ratios, and a long history of reliability.

4. Online RAR Extractors:

  • Features: Several online RAR extractors are available, allowing users to extract files directly from their web browser without needing to download any software. These services often have limitations on file size and may require an internet connection.
  • Availability: Numerous online RAR extractors can be found through a simple web search.
  • Benefits: Online RAR extractors offer convenience and accessibility, especially when limited storage space or software installation is a concern.

Choosing the Right Option

The best option for opening RAR files on Windows 11 depends on individual needs and preferences.

  • For users seeking a free, powerful, and feature-rich solution, 7-Zip or PeaZip are excellent choices.
  • Those willing to invest in a commercial solution with a comprehensive feature set may prefer WinRAR.
  • For occasional use or when convenience is paramount, online RAR extractors provide a quick and easy solution.

FAQs

Q: Can I open a RAR file without any software?

A: While Windows 11 does not natively support RAR files, some self-extracting RAR archives can be executed directly, automatically extracting their contents. However, this functionality is limited and may not be available for all RAR files.

Q: Is it safe to use online RAR extractors?

A: While many online RAR extractors are legitimate, it’s essential to exercise caution. Ensure the website is reputable, has a secure connection (HTTPS), and avoids asking for sensitive personal information. Be aware that some online extractors might contain malware or attempt to collect user data.

Q: What are the benefits of using a dedicated RAR extractor over online services?

A: Dedicated RAR extractors offer several advantages over online services, including:

  • Offline Access: You can access and extract files without an internet connection.
  • Enhanced Security: Dedicated software typically offers better security features, like password protection and encryption.
  • Advanced Features: Dedicated extractors often provide additional features like archive management, file splitting, and self-extracting archive creation.

Q: Can I extract individual files from a RAR archive?

A: Yes, most RAR extraction software allows you to select specific files within an archive for extraction. This feature is useful when you only need a portion of the archive’s contents.

Tips

  • Always scan downloaded RAR files for viruses before opening them, especially if the source is unknown.
  • Back up important data before extracting files from a RAR archive to avoid accidental data loss.
  • Consider using a password manager to securely store passwords for encrypted RAR archives.
  • If you frequently work with RAR files, invest in a dedicated RAR extractor for improved performance and features.

Conclusion

Opening RAR files on Windows 11 is a straightforward process with various free and reliable software options available. 7-Zip, PeaZip, and WinRAR are excellent choices, each offering its unique features and benefits. By understanding the different options and following best practices, users can easily access and utilize the data stored within RAR archives.

Open Rar Files Windows 11 Open Rar Files Windows 11 How to Extract or Unzip Files in Windows 11 - Open Compressed Files in Windows 11 - YouTube
How to Open RAR Files on Windows 11 How to Open RAR Files on Windows 11?  Blowing Ideas Open Rar Files Windows 11
How to Open RAR Files in Windows 11 Easy Steps To Open RAR Files On Windows 10 And 11

Closure

Thus, we hope this article has provided valuable insights into Unlocking the Power of Compressed Files: A Guide to Opening RAR Files on Windows 11. We thank you for taking the time to read this article. See you in our next article!

Unlinking Work Accounts From Windows 11: A Comprehensive Guide

Unlinking Work Accounts from Windows 11: A Comprehensive Guide

Introduction

With enthusiasm, let’s navigate through the intriguing topic related to Unlinking Work Accounts from Windows 11: A Comprehensive Guide. Let’s weave interesting information and offer fresh perspectives to the readers.

Unlinking Work Accounts from Windows 11: A Comprehensive Guide

How to Remove Account and Unlink a PC from OneDrive in Windows 11 - Geek Rewind

In the contemporary digital landscape, work and personal lives are increasingly intertwined. Many individuals utilize their personal Windows 11 devices for both professional and personal tasks, often linking their work accounts for seamless access to company resources. However, circumstances may arise where removing a work account from Windows 11 becomes necessary. This could be due to a change in employment, security concerns, or simply a desire to maintain a clear separation between work and personal data.

This article aims to provide a comprehensive guide on removing work accounts from Windows 11, outlining the process, benefits, and potential considerations.

Understanding the Implication of Removing a Work Account

Before delving into the removal process, it’s crucial to understand the implications of removing a work account from Windows 11. Removing a work account will result in the following:

  • Loss of access to work-related files and applications: Any documents, applications, or data associated with the work account will no longer be accessible on the device.
  • Disconnection from company resources: The user will no longer have access to shared drives, company email, or other work-related services.
  • Potential impact on company policies: Depending on the company’s policies, removing a work account might trigger specific actions, such as the automatic deletion of local data or the requirement to return company-owned equipment.

Methods to Remove a Work Account from Windows 11

There are two primary methods to remove a work account from Windows 11:

1. Through Settings:

  • Step 1: Open the Windows 11 Settings app by pressing the Windows key + I.
  • Step 2: Navigate to "Accounts" and then select "Access work or school."
  • Step 3: Locate the work account you wish to remove and click on it.
  • Step 4: Click on the "Disconnect" button.
  • Step 5: Confirm the removal by clicking "Disconnect" again.

2. Through Control Panel:

  • Step 1: Open the Control Panel by searching for it in the Windows search bar.
  • Step 2: Navigate to "User Accounts" and then click on "Manage another account."
  • Step 3: Select the work account you wish to remove.
  • Step 4: Click on the "Remove the account" option.
  • Step 5: Confirm the removal by clicking "Delete the account."

Important Considerations

  • Data backup: Before removing a work account, ensure you have backed up any essential data stored locally on your device. This is particularly important if the company’s policies dictate the deletion of local data upon account removal.
  • Company policies: Familiarize yourself with the company’s policies regarding work account removal. Some companies might have specific procedures or requirements that need to be followed.
  • Alternative access methods: If you require access to work resources after removing the account, explore alternative methods, such as using a company-provided VPN or accessing files through a cloud storage platform.

Benefits of Removing a Work Account

Removing a work account from Windows 11 offers several benefits, including:

  • Enhanced privacy and security: Separating personal and work data enhances privacy and reduces the risk of data breaches or unauthorized access.
  • Improved performance: Removing a work account can potentially improve system performance, especially if the account is associated with numerous files or applications.
  • Reduced clutter: Removing a work account can declutter your Windows 11 environment, making it easier to navigate and manage your personal files and applications.
  • Clearer separation: It provides a clearer separation between work and personal life, allowing for a more focused and productive work experience.

FAQs on Removing a Work Account from Windows 11

1. What happens to my work data after removing the account?

The fate of your work data depends on the company’s policies. Some companies may automatically delete local data upon account removal, while others might retain it on their servers. It’s crucial to clarify the company’s policy before removing the account.

2. Can I re-add the work account later?

Yes, you can re-add the work account later if needed. However, you might need to contact your IT administrator or follow specific procedures to re-establish the connection.

3. Does removing the work account affect my personal account?

No, removing a work account does not affect your personal account. Your personal files, applications, and settings will remain unaffected.

4. What if I encounter issues during the removal process?

If you encounter any issues, consult your IT administrator or refer to Microsoft’s official documentation for troubleshooting steps.

Tips for Removing a Work Account from Windows 11

  • Communicate with your IT administrator: Before removing the work account, inform your IT administrator to ensure a smooth transition and address any potential concerns.
  • Document the process: Keep a record of the steps taken during the removal process, including any relevant company policies or instructions.
  • Review your data: Before proceeding, review your data to ensure that all essential files and applications have been backed up or saved elsewhere.
  • Test access: After removing the account, test your access to work resources to confirm the removal was successful and to address any potential issues.

Conclusion

Removing a work account from Windows 11 can be a necessary step for various reasons. By following the outlined process and considering the associated implications, users can effectively remove work accounts while maintaining their personal data and privacy. Remember to communicate with your IT administrator, back up essential data, and review company policies before proceeding. This approach ensures a smooth transition and minimizes any potential disruptions.

Unlink OneDrive from your Windows 11 computer 5 Ways  Your Organization Manages Updates on this PC in Windows 11 How to remove a Work Account from Windows 11 - Super User
How To Remove Work Or School Account In Windows 11 10  thewindowsclub How to Disable OneDrive on Windows 11 Unlink OneDrive from your Windows 11 computer
How to Disable OneDrive in Windows 11 - Itechguides How to remove a Work Account from Windows 11 - Super User

Closure

Thus, we hope this article has provided valuable insights into Unlinking Work Accounts from Windows 11: A Comprehensive Guide. We hope you find this article informative and beneficial. See you in our next article!

The Power Of 16GB RAM: A Comprehensive Look At Windows 11 Performance

The Power of 16GB RAM: A Comprehensive Look at Windows 11 Performance

Introduction

In this auspicious occasion, we are delighted to delve into the intriguing topic related to The Power of 16GB RAM: A Comprehensive Look at Windows 11 Performance. Let’s weave interesting information and offer fresh perspectives to the readers.

The Power of 16GB RAM: A Comprehensive Look at Windows 11 Performance

How to find out your RAM specs on a Windows 11 PC

In the realm of modern computing, RAM (Random Access Memory) plays a pivotal role in determining a system’s responsiveness and overall performance. With the advent of Windows 11, the demand for sufficient RAM has become even more pronounced, as the operating system leverages its capabilities to deliver a seamless and efficient user experience. This article delves into the significance of 16GB RAM in the context of Windows 11, exploring its benefits, potential limitations, and practical considerations for users seeking optimal system performance.

Understanding the Role of RAM

RAM serves as the computer’s short-term memory, holding data that the processor needs to access quickly. Think of it as a temporary workspace where the computer stores the information it’s actively using, allowing for rapid retrieval and processing.

Why 16GB RAM is Crucial for Windows 11

Windows 11, with its advanced features and demanding applications, requires substantial RAM to function efficiently. Here’s why 16GB RAM is becoming the standard for a smooth and productive Windows 11 experience:

  • Enhanced Multitasking: Modern users often juggle multiple applications simultaneously, demanding a significant amount of RAM to handle each process effectively. 16GB allows users to run demanding programs like video editing software, web browsers with numerous tabs, and resource-intensive games without encountering noticeable lag or slowdowns.

  • Improved Application Responsiveness: With sufficient RAM, applications load faster, respond to user inputs promptly, and navigate seamlessly. This translates to a more intuitive and enjoyable user experience, eliminating frustrating delays and interruptions.

  • Faster Boot Times: Windows 11’s boot process utilizes a significant amount of RAM. Having 16GB ensures a faster startup time, allowing users to access their system quickly and efficiently.

  • Increased System Stability: Insufficient RAM can lead to system instability, crashes, and erratic behavior. 16GB provides a buffer, preventing these issues and ensuring a more reliable and stable computing experience.

  • Support for Virtualization and Cloud Gaming: Modern technologies like virtualization and cloud gaming rely heavily on RAM to deliver a smooth and immersive experience. 16GB allows users to run virtual machines or stream high-quality games without sacrificing performance.

Potential Limitations and Considerations

While 16GB RAM is generally considered sufficient for most users, certain scenarios might necessitate more RAM for optimal performance:

  • Heavy Gaming: High-end gaming requires substantial RAM to handle complex graphics rendering and large game files. Users who engage in demanding gaming might benefit from 16GB or more, depending on the specific game’s requirements.

  • Professional Workloads: Video editing, 3D modeling, and other resource-intensive professional applications can benefit from even larger amounts of RAM, exceeding 16GB.

  • Multiple Virtual Machines: Running multiple virtual machines simultaneously requires a significant amount of RAM to allocate resources effectively.

FAQs

Q: Is 16GB RAM enough for Windows 11?

A: Generally, 16GB RAM is considered sufficient for most users running Windows 11. However, users with specific demanding workloads, such as professional applications or high-end gaming, might require more RAM for optimal performance.

Q: Will Windows 11 run smoothly with 8GB RAM?

A: Windows 11 can run on 8GB RAM, but users might experience performance limitations, particularly when multitasking or running resource-intensive applications. 16GB or more is recommended for a smoother and more responsive experience.

Q: Can I upgrade my RAM to 16GB?

A: Most modern computers allow RAM upgrades. Consult your motherboard’s specifications to determine the maximum supported RAM capacity and compatibility with specific RAM modules.

Q: How do I check my current RAM usage?

A: You can check your RAM usage through the Windows Task Manager. Press Ctrl+Shift+Esc to open the Task Manager, then click on the "Performance" tab. The "Memory" section displays the current RAM usage and available memory.

Tips for Optimizing RAM Usage

  • Close Unused Applications: Regularly close applications you are not actively using to free up RAM for other processes.

  • Limit Startup Programs: Reduce the number of applications that automatically launch at startup to minimize RAM consumption.

  • Use Disk Cleanup: Regularly run Disk Cleanup to remove unnecessary files and free up disk space, indirectly improving RAM performance.

  • Consider RAM Upgrades: If you consistently experience performance issues due to insufficient RAM, consider upgrading to 16GB or more, depending on your specific needs.

Conclusion

In conclusion, 16GB RAM is a crucial component for a smooth and efficient Windows 11 experience. It enables users to run multiple applications simultaneously, enjoy faster boot times, and benefit from improved system stability. While 16GB is generally sufficient for most users, those with demanding workloads might require more RAM for optimal performance. By understanding the importance of RAM and implementing optimization strategies, users can ensure a responsive and productive computing experience with Windows 11.

How to Check RAM, GPU, and CPU Usage in Windows 11 Windows 11 Performance Test Windows 10 vs. Windows 11 Performance Test (2022)
How Much RAM Does Windows 11 Use? 16GB RAM Installed Only 8GB Usable in Windows 11 How to fix high RAM usage when Windows 11 is idle?
How to find out your RAM specs on Windows 11 PCs How to display CPU, GPU and RAM usage natively on Windows 11 - gHacks Tech News

Closure

Thus, we hope this article has provided valuable insights into The Power of 16GB RAM: A Comprehensive Look at Windows 11 Performance. We hope you find this article informative and beneficial. See you in our next article!

Understanding Windows 10 ISO Files: A Comprehensive Guide

Understanding Windows 10 ISO Files: A Comprehensive Guide

Introduction

With great pleasure, we will explore the intriguing topic related to Understanding Windows 10 ISO Files: A Comprehensive Guide. Let’s weave interesting information and offer fresh perspectives to the readers.

Understanding Windows 10 ISO Files: A Comprehensive Guide

[GUIDE] How To Upgrade To Windows 10 Using ISO File

Windows 10 ISO files are digital representations of the entire Windows 10 operating system. They contain all the necessary files and data to install or reinstall Windows 10 on a computer. These files are typically downloaded from Microsoft’s official website and serve as a foundational tool for various scenarios related to Windows 10 management.

Understanding the Significance of Windows 10 ISO Files

Windows 10 ISO files are crucial for several reasons:

  • Clean Installation: They allow for a fresh, clean installation of Windows 10, eliminating any potential issues caused by pre-existing software or data. This is often recommended when troubleshooting system errors or upgrading from an older version of Windows.
  • Reinstallation: In case of system failure, a Windows 10 ISO file can be used to reinstall the operating system, restoring it to its original state.
  • Customizing Installation: ISO files enable users to customize the installation process by selecting specific features and components, tailoring the operating system to their individual needs.
  • Offline Installation: These files can be used to install Windows 10 on a computer without an internet connection, making them ideal for situations where network access is limited.
  • Creating Bootable Media: Windows 10 ISO files are used to create bootable USB drives or DVDs, allowing for a clean installation or repair of the operating system.

Exploring the Benefits of Using Windows 10 ISO Files

The use of Windows 10 ISO files offers numerous benefits:

  • Control and Flexibility: They provide users with complete control over the installation process, allowing for customization and tailored configurations.
  • Troubleshooting and Repair: ISO files are invaluable tools for troubleshooting system errors and repairing corrupted installations.
  • Upgrading and Maintaining: They facilitate seamless upgrades to newer versions of Windows 10 and ensure the system’s stability and performance.
  • Data Preservation: By creating a bootable media, users can back up important data before reinstalling Windows, preventing accidental loss.
  • Accessibility: Windows 10 ISO files are readily available for download from Microsoft’s official website, making them accessible to all users.

Frequently Asked Questions (FAQs) Regarding Windows 10 ISO Files

Q: How do I download a Windows 10 ISO file?

A: To download a Windows 10 ISO file, visit the official Microsoft website and navigate to the "Download Windows 10" section. You will be required to select the desired edition and language, and then the download will begin.

Q: What is the difference between a Windows 10 ISO file and a Windows 10 setup file?

A: A Windows 10 ISO file is a complete image of the operating system, while a setup file is a smaller, executable file used to initiate the installation process.

Q: Can I use a Windows 10 ISO file to upgrade from a previous version of Windows?

A: While it is possible to use a Windows 10 ISO file to upgrade from a previous version, it is generally recommended to use the built-in upgrade feature offered by Microsoft.

Q: Is it legal to download a Windows 10 ISO file?

A: Yes, downloading a Windows 10 ISO file from Microsoft’s official website is entirely legal. However, downloading it from unofficial sources may be illegal and could pose security risks.

Q: How do I create a bootable USB drive using a Windows 10 ISO file?

A: Several tools are available to create bootable USB drives from Windows 10 ISO files, such as the Microsoft Media Creation Tool or Rufus. These tools guide you through the process, making it straightforward.

Tips for Using Windows 10 ISO Files

  • Download from a Trusted Source: Always download Windows 10 ISO files from Microsoft’s official website to ensure legitimacy and security.
  • Verify File Integrity: After downloading the ISO file, verify its integrity using a checksum tool to ensure it has not been corrupted during the download process.
  • Back Up Your Data: Before proceeding with any installation or repair using a Windows 10 ISO file, back up all essential data to avoid accidental loss.
  • Understand the Installation Process: Familiarize yourself with the installation process before starting to avoid any unexpected issues or complications.
  • Use a Reliable USB Drive: When creating a bootable USB drive, use a high-quality, reliable drive to ensure a successful and smooth installation.

Conclusion

Windows 10 ISO files are essential tools for managing and maintaining your Windows 10 operating system. They provide users with flexibility, control, and a reliable method for clean installations, reinstallation, upgrades, and troubleshooting. By understanding the importance of these files and following best practices, users can leverage their capabilities to ensure a smooth and efficient Windows 10 experience.

See Full Details about a Windows 10 ISO file  Windows 10 Tutorials [GUIDE] How To Upgrade To Windows 10 Using ISO File How to create a Windows 10 ISO file using an Install.ESD image  Windows Central
Windows 10 iso file - qlerotd [GUIDE] How To Upgrade To Windows 10 Using ISO File [GUIDE] How To Upgrade To Windows 10 Using ISO File
How to upgrade to Windows 10 using Windows 10 ISO file - Microsoft Community Windows 10 ISO files: What you need to know  Bingalo

Closure

Thus, we hope this article has provided valuable insights into Understanding Windows 10 ISO Files: A Comprehensive Guide. We thank you for taking the time to read this article. See you in our next article!

Connecting PCs In Windows 11: A Comprehensive Guide To Enhanced Collaboration And Resource Sharing

Connecting PCs in Windows 11: A Comprehensive Guide to Enhanced Collaboration and Resource Sharing

Introduction

With enthusiasm, let’s navigate through the intriguing topic related to Connecting PCs in Windows 11: A Comprehensive Guide to Enhanced Collaboration and Resource Sharing. Let’s weave interesting information and offer fresh perspectives to the readers.

Connecting PCs in Windows 11: A Comprehensive Guide to Enhanced Collaboration and Resource Sharing

Windows 11 Comprehensive Guide And Cheat Sheet, 54% OFF

The ability to connect computers together has revolutionized the way we work, share files, and access resources. Windows 11, with its advanced networking capabilities, offers several methods to seamlessly connect PCs, enabling users to unlock a world of possibilities. This comprehensive guide delves into the different approaches to connecting PCs in Windows 11, highlighting their benefits and intricacies.

Understanding the Fundamentals of Network Connectivity

Before exploring specific methods, it’s crucial to understand the basic concepts of network connectivity:

  • Local Area Network (LAN): A LAN connects devices within a limited geographical area, typically a home, office, or building, using wired or wireless connections.
  • Wide Area Network (WAN): A WAN connects devices across geographically dispersed locations, often using the internet as the underlying infrastructure.
  • Network Protocols: These are sets of rules that govern communication between devices on a network, ensuring data is transmitted and received correctly. Common protocols include TCP/IP (Transmission Control Protocol/Internet Protocol) and SMB (Server Message Block).

Methods for Connecting PCs in Windows 11

Windows 11 provides a variety of methods to connect PCs, each with its own advantages and use cases:

1. Wired Ethernet Connection:

  • Mechanism: This method utilizes Ethernet cables to physically connect PCs to a network switch or router.
  • Benefits: Offers high speed and stability, ideal for demanding tasks like video editing or gaming.
  • Considerations: Requires physical cabling, limiting mobility and flexibility.

2. Wireless Wi-Fi Connection:

  • Mechanism: PCs connect to a wireless router using Wi-Fi signals.
  • Benefits: Offers mobility and flexibility, allowing devices to connect without physical cables.
  • Considerations: Signal strength and potential interference can affect connection stability and speed.

3. HomeGroup:

  • Mechanism: A feature built into Windows that allows PCs on the same network to share files, printers, and other resources.
  • Benefits: Simple setup and user-friendly interface, ideal for sharing files between PCs in a home environment.
  • Considerations: Limited security features, making it unsuitable for sensitive data sharing.

4. Workgroup:

  • Mechanism: A more flexible approach compared to HomeGroup, allowing PCs on the same network to share resources with greater control.
  • Benefits: Offers more granular control over shared resources and security settings.
  • Considerations: Requires more technical knowledge for setup and configuration.

5. Network File Sharing (SMB):

  • Mechanism: A robust protocol that allows PCs to share files and folders over a network.
  • Benefits: Offers advanced security features, including password protection and access control.
  • Considerations: Requires some technical knowledge for configuration and troubleshooting.

6. Remote Desktop:

  • Mechanism: Enables users to control a remote PC from another device, as if they were sitting in front of it.
  • Benefits: Allows access to resources on a remote PC, ideal for remote work or accessing files from another location.
  • Considerations: Requires a secure network connection and can be resource-intensive.

7. Cloud Storage Services:

  • Mechanism: Utilizes online services like OneDrive, Google Drive, or Dropbox to store and share files across devices.
  • Benefits: Provides easy access to files from any device with an internet connection, offering high accessibility and flexibility.
  • Considerations: Requires an internet connection and relies on third-party services for data storage and security.

Benefits of Connecting PCs in Windows 11

Connecting PCs in Windows 11 unlocks a range of benefits, including:

  • Enhanced Collaboration: Seamlessly share files, documents, and projects with colleagues or family members.
  • Resource Sharing: Access printers, scanners, and other peripherals connected to other PCs on the network.
  • Centralized Data Storage: Store important files on a shared drive, ensuring easy access and backup.
  • Remote Access: Control and manage PCs remotely, ideal for troubleshooting or accessing files from different locations.
  • Improved Productivity: Optimize workflow by sharing resources and collaborating on projects efficiently.

FAQs on Connecting PCs in Windows 11

1. How do I connect two PCs using an Ethernet cable?

  • Connect one end of the Ethernet cable to the Ethernet port on the first PC and the other end to the Ethernet port on the second PC.
  • Both PCs should automatically detect the connection and establish a network.

2. How do I create a HomeGroup in Windows 11?

  • Open the Control Panel and navigate to "HomeGroup".
  • Click on "Create a HomeGroup" and follow the on-screen instructions.
  • Choose the types of resources to share and set a password for the HomeGroup.

3. How do I enable file sharing in Windows 11?

  • Open the File Explorer and navigate to the folder you want to share.
  • Right-click on the folder and select "Properties".
  • Click on the "Sharing" tab and select "Advanced sharing".
  • Enable file sharing and set permissions for users who can access the folder.

4. How do I set up Remote Desktop in Windows 11?

  • Open the "System" settings and navigate to "Remote Desktop".
  • Enable Remote Desktop and set a password for remote access.
  • On the remote PC, open the "Remote Desktop Connection" app and enter the IP address of the target PC.

5. What are the security risks associated with connecting PCs?

  • Data Breaches: Unsecured networks can expose sensitive data to unauthorized access.
  • Malware Infections: Malicious software can spread through shared resources or insecure connections.
  • Denial-of-Service Attacks: Malicious actors can disrupt network connectivity, hindering access to resources.

Tips for Connecting PCs in Windows 11

  • Use Strong Passwords: Protect your network and shared resources with strong and unique passwords.
  • Enable Firewall: Utilize the built-in Windows Firewall to block unauthorized access to your network.
  • Keep Software Updated: Regularly update your operating system and security software to patch vulnerabilities.
  • Use Secure Connections: Utilize VPNs or encrypted connections when accessing sensitive data over the internet.
  • Back Up Your Data: Regularly back up important files to prevent data loss in case of network failures or security breaches.

Conclusion

Connecting PCs in Windows 11 offers a multitude of benefits, from enhanced collaboration and resource sharing to remote access and improved productivity. By understanding the various methods and implementing appropriate security measures, users can leverage the power of network connectivity to unlock a world of possibilities. Whether connecting PCs within a home environment or across a corporate network, Windows 11 provides the tools and flexibility to seamlessly connect devices and enhance the user experience.

How to share files on Windows 11 - Pureinfotech Ethernet And Wifi At The Same Time Windows 11 The new Windows 11 features coming in 2024
Windows 11 Comprehensive Guide And Cheat Sheet, 54% OFF Windows 11 Comprehensive Guide And Cheat Sheet, 54% OFF Let’s Connect you to a network - Windows 11 SOLVED!
How to Connect Two Computers and share files using LAN Cable on WINDOWS 10 - YouTube Что такое соединение компьютеров друг с другом для обмена информацией

Closure

Thus, we hope this article has provided valuable insights into Connecting PCs in Windows 11: A Comprehensive Guide to Enhanced Collaboration and Resource Sharing. We appreciate your attention to our article. See you in our next article!

A Comprehensive Guide To Notepad For Windows 11 64-bit

A Comprehensive Guide to Notepad for Windows 11 64-bit

Introduction

In this auspicious occasion, we are delighted to delve into the intriguing topic related to A Comprehensive Guide to Notepad for Windows 11 64-bit. Let’s weave interesting information and offer fresh perspectives to the readers.

A Comprehensive Guide to Notepad for Windows 11 64-bit

Get Help with Notepad in Windows 11: Your Ultimate Guide

Notepad, a simple yet powerful text editor, has been an integral part of Windows operating systems since the early days. It remains a valuable tool for a wide range of users, from casual note-takers to programmers and web developers. While Windows 11 introduces a plethora of modern features and applications, Notepad retains its relevance, offering a streamlined and efficient approach to text editing. This guide delves into the nuances of Notepad for Windows 11 64-bit, exploring its functionality, benefits, and potential use cases.

Understanding the Basics: What is Notepad?

Notepad is a basic text editor that comes pre-installed with every version of Windows. It allows users to create and edit plain text files, devoid of any formatting or complex features. Its primary purpose is to provide a simple and efficient way to create and manage text documents.

Notepad’s Core Functionality

Despite its simplicity, Notepad boasts a set of essential features that make it a valuable tool for various tasks:

  • Text Editing: The core functionality of Notepad lies in its ability to create, edit, and save plain text files. Users can type, copy, paste, cut, and delete text as needed.
  • Basic Formatting: While Notepad does not offer extensive formatting options, it provides basic capabilities like changing font styles, sizes, and colors.
  • File Management: Users can create, open, save, and rename text files with ease. Notepad also supports the ability to open multiple files simultaneously.
  • Search and Replace: Notepad allows for quick and efficient searching and replacing of text within a document. This feature proves useful for editing large text files or making global changes.
  • Line Numbers: For developers and programmers, Notepad offers the option to display line numbers, aiding in code navigation and debugging.
  • Word Wrap: This feature automatically adjusts the text to fit within the window’s width, preventing text from spilling over to the next line.

The Advantages of Using Notepad

Notepad’s simplicity and streamlined functionality offer several advantages for users:

  • Lightweight and Resource-Efficient: Notepad consumes minimal system resources, making it ideal for systems with limited memory or processing power. It launches quickly and operates smoothly, even on older machines.
  • Cross-Platform Compatibility: Text files created in Notepad are universally compatible across various operating systems, ensuring seamless file sharing and collaboration.
  • Accessibility for Beginners: Its straightforward interface and lack of complex features make Notepad an excellent starting point for users new to text editing.
  • Ideal for Simple Tasks: Notepad excels in handling basic text editing tasks, such as taking notes, creating lists, or editing simple code snippets.
  • Flexibility for Programmers: While Notepad may lack advanced features, it remains a valuable tool for programmers, especially for editing configuration files, scripting, and creating basic code files.

Beyond the Basics: Exploring Notepad’s Hidden Capabilities

While Notepad is primarily known for its simplicity, it offers several hidden capabilities that enhance its functionality:

  • Creating Batch Files: Notepad can be used to create batch files, which are simple scripts that automate tasks within the Windows environment.
  • Editing Configuration Files: Many applications use plain text files for configuration settings. Notepad can be used to edit these files, allowing users to customize application behavior.
  • Creating HTML Files: Notepad can be used to create basic HTML files, allowing users to create simple web pages.
  • Using Shortcuts: Notepad supports a variety of keyboard shortcuts that streamline text editing, such as Ctrl+C for copy, Ctrl+V for paste, and Ctrl+Z for undo.

Notepad: A Versatile Tool for Diverse Applications

Notepad’s versatility extends beyond simple text editing, finding applications in various fields:

  • Note-taking and List Making: Notepad serves as a convenient tool for jotting down quick notes, creating to-do lists, or organizing ideas.
  • Web Development: While more advanced editors exist, Notepad can be used for creating basic HTML files and editing CSS and JavaScript code.
  • Programming and Scripting: Notepad provides a simple environment for writing and editing code in various programming languages, especially for basic scripting tasks.
  • Data Analysis and Manipulation: Notepad can be used to analyze and manipulate simple data sets, especially when combined with other tools like Excel.
  • Creating Text-Based Games: Some developers utilize Notepad to create simple text-based games, leveraging its basic functionality and scripting capabilities.

FAQs: Addressing Common Queries

Q: How do I download Notepad for Windows 11 64-bit?

A: Notepad is pre-installed with every version of Windows, including Windows 11 64-bit. You do not need to download it separately.

Q: Is there a difference between Notepad for 32-bit and 64-bit Windows?

A: While the operating system architecture differs, Notepad itself remains the same across both 32-bit and 64-bit versions of Windows.

Q: Can I use Notepad to create and edit documents with formatting?

A: Notepad is a plain text editor, meaning it does not support formatting features like bolding, italics, or font changes. For documents with formatting, you would need to use a word processor like Microsoft Word.

Q: Are there any alternatives to Notepad for Windows 11?

A: Yes, several alternative text editors exist, offering more advanced features and functionality. Some popular options include:

  • Notepad++: A free and open-source text editor known for its extensive features and customization options.
  • Sublime Text: A powerful and versatile text editor popular among programmers and web developers.
  • Visual Studio Code: A free and open-source code editor developed by Microsoft, offering a wide range of features and extensions.

Tips for Getting the Most Out of Notepad

  • Explore Keyboard Shortcuts: Learn and utilize Notepad’s keyboard shortcuts to streamline your workflow.
  • Use the Find and Replace Feature: This feature can save time when making global changes or searching for specific text within a document.
  • Customize Notepad’s Settings: Explore Notepad’s settings to adjust features like word wrap, line numbers, and font preferences.
  • Consider Notepad++ for Enhanced Functionality: If you require more advanced features, consider using Notepad++ or other alternatives.

Conclusion

Notepad remains a valuable tool for Windows 11 users, offering a simple and efficient way to create and edit text files. Its lightweight nature, cross-platform compatibility, and basic functionality make it ideal for a wide range of tasks, from note-taking to scripting and web development. While more advanced editors exist, Notepad’s simplicity and accessibility continue to make it a valuable resource for users of all skill levels. By understanding its capabilities and utilizing its features effectively, users can leverage Notepad’s power to streamline their workflow and enhance their productivity.

Get Help with Notepad in Windows 11: Your Ultimate Guide Get Help with Notepad in Windows 11: Your Ultimate Guide Microsoft Brings Revamped Version of Notepad for Windows 11
How To Find And Use The New Notepad In Windows 11 How to Install New Notepad on Windows 11 All Version - YouTube Get Help with Notepad in Windows 11: Your Ultimate Guide
Get Help With Notepad In Windows 11: Your Ultimate Guide How To Install Notepad On Windows 11 [Tutorial] - YouTube

Closure

Thus, we hope this article has provided valuable insights into A Comprehensive Guide to Notepad for Windows 11 64-bit. We hope you find this article informative and beneficial. See you in our next article!

Unlocking The Potential Of Windows 11’s Sharing Feature: Troubleshooting And Optimizing Nearby Sharing

Unlocking the Potential of Windows 11’s Sharing Feature: Troubleshooting and Optimizing Nearby Sharing

Introduction

In this auspicious occasion, we are delighted to delve into the intriguing topic related to Unlocking the Potential of Windows 11’s Sharing Feature: Troubleshooting and Optimizing Nearby Sharing. Let’s weave interesting information and offer fresh perspectives to the readers.

Unlocking the Potential of Windows 11’s Sharing Feature: Troubleshooting and Optimizing Nearby Sharing

Nearby Share Not Working on Windows 11? How to Fix it

Windows 11 introduced a streamlined approach to file sharing, making it easier than ever to transfer data between devices. This feature, often referred to as "Nearby Sharing," leverages Bluetooth and Wi-Fi to facilitate seamless file exchange. However, like any technology, it can encounter hiccups, leaving users frustrated and unable to utilize its convenience. This article delves into the common reasons behind "Nearby Sharing" malfunctions in Windows 11, providing solutions and strategies to ensure a smooth and efficient file transfer experience.

Understanding the Importance of Nearby Sharing

In a world increasingly reliant on digital information, the ability to share files quickly and effortlessly is paramount. Nearby Sharing in Windows 11 offers a compelling alternative to traditional methods like USB drives or cloud storage. It eliminates the need for physical connections or internet dependence, enabling swift transfers between devices in close proximity. The benefits of this feature extend beyond mere convenience:

  • Enhanced Productivity: Sharing documents, presentations, or project files between colleagues or collaborators becomes a breeze, accelerating workflow and fostering efficient teamwork.
  • Streamlined Collaboration: Artists, designers, and other creative professionals can effortlessly share their work with peers, fostering real-time feedback and collaborative development.
  • Effortless Content Sharing: Transferring photos, videos, and other multimedia content between devices becomes a simple and intuitive process, facilitating instant sharing with friends and family.
  • Simplified Device Setup: Sharing files during the initial setup of a new device, like transferring photos from an old phone, becomes a smooth and hassle-free experience.

Common Reasons for Nearby Sharing Malfunctions

When "Nearby Sharing" fails to function as expected, it can be frustrating and disruptive to workflow. The root cause can often be attributed to one or more of the following factors:

  • Bluetooth and Wi-Fi Issues: The core functionality of "Nearby Sharing" relies on Bluetooth and Wi-Fi. If either of these wireless connections is unstable or disabled, the feature will not operate correctly.
  • Incorrect Settings: The "Nearby Sharing" settings in Windows 11 require careful configuration. Incorrectly set permissions or disabled features can lead to sharing failures.
  • Device Compatibility: While "Nearby Sharing" is designed for seamless compatibility between Windows 11 devices, certain older devices or those running different operating systems may not support the feature.
  • Network Interference: Interference from other wireless devices or conflicting network settings can disrupt the "Nearby Sharing" connection, causing transfer failures.
  • Software Glitches: Occasionally, software bugs or updates can introduce glitches that affect the functionality of "Nearby Sharing."

Troubleshooting "Nearby Sharing" Issues

Identifying and resolving "Nearby Sharing" issues requires a methodical approach. Here’s a breakdown of common troubleshooting steps:

  1. Verify Bluetooth and Wi-Fi Connectivity:

    • Enable Bluetooth and Wi-Fi: Ensure that both Bluetooth and Wi-Fi are enabled on both the sending and receiving devices.
    • Check Signal Strength: Verify that both devices have a strong Bluetooth and Wi-Fi signal. Weak signals can significantly impact "Nearby Sharing" performance.
    • Device Discovery: Confirm that both devices can discover each other through Bluetooth or Wi-Fi.
  2. Review "Nearby Sharing" Settings:

    • Enable Nearby Sharing: Ensure that "Nearby Sharing" is enabled on both devices.
    • Device Visibility: Verify that the "Nearby Sharing" settings allow the devices to be visible to each other.
    • Sharing Permissions: Review the sharing permissions and ensure that the desired files and folders are accessible for sharing.
  3. Check Device Compatibility:

    • Operating System Compatibility: Confirm that both devices are running Windows 11 or a compatible operating system that supports "Nearby Sharing."
    • Device Model Compatibility: Refer to the device specifications to ensure that both devices are compatible with "Nearby Sharing."
  4. Address Network Interference:

    • Disable Other Wireless Devices: Temporarily disable other wireless devices in the vicinity to minimize potential interference.
    • Restart Network Devices: Restart the router or modem to refresh the network connection.
    • Check Network Settings: Review the network settings on both devices and ensure that there are no conflicting configurations.
  5. Troubleshoot Software Issues:

    • Restart Devices: Restart both devices to resolve any temporary software glitches.
    • Check for Updates: Ensure that both devices have the latest Windows updates installed.
    • Run Troubleshooting Tools: Utilize the built-in Windows troubleshooting tools to diagnose and resolve any potential software issues.

Tips for Optimizing "Nearby Sharing" Performance

To enhance the effectiveness and reliability of "Nearby Sharing," consider the following tips:

  • Keep Devices Close: Maintain a close proximity between the devices to ensure a strong Bluetooth and Wi-Fi connection.
  • Minimize Interference: Avoid using other wireless devices or applications that might interfere with "Nearby Sharing" during file transfers.
  • Prioritize "Nearby Sharing" Traffic: If network bandwidth is limited, prioritize "Nearby Sharing" traffic to improve transfer speeds.
  • Check for Updates Regularly: Keep both devices updated with the latest Windows updates to ensure optimal performance and compatibility.

FAQs about "Nearby Sharing" Issues

Q1: Why is "Nearby Sharing" not working between my two Windows 11 devices?

A: The most common reasons for "Nearby Sharing" not working include:

  • Disabled Bluetooth or Wi-Fi: Ensure both devices have Bluetooth and Wi-Fi enabled.
  • Incorrect Settings: Verify that "Nearby Sharing" is enabled and devices are set to be visible to each other.
  • Device Compatibility: Check if both devices support "Nearby Sharing" and run compatible operating systems.
  • Network Interference: Minimize interference by disabling other wireless devices or restarting network equipment.
  • Software Glitches: Restart devices, check for updates, and run troubleshooting tools to resolve potential software issues.

Q2: Can I share files with devices that are not running Windows 11?

A: "Nearby Sharing" is primarily designed for Windows 11 devices. However, some Android devices may support file sharing through Bluetooth or Wi-Fi Direct.

Q3: Why is "Nearby Sharing" so slow?

A: Slow transfer speeds can be caused by:

  • Weak Bluetooth or Wi-Fi Signal: Ensure both devices have strong connections.
  • Network Interference: Minimize interference from other wireless devices.
  • Limited Bandwidth: Prioritize "Nearby Sharing" traffic if network bandwidth is limited.

Q4: Can I share files with someone who is not in the same room?

A: "Nearby Sharing" relies on Bluetooth and Wi-Fi, which have limited range. You cannot share files with someone who is not in close proximity.

Q5: How do I ensure that my files are shared securely?

A: "Nearby Sharing" uses Bluetooth and Wi-Fi, which are generally considered secure. However, it is always advisable to share files only with trusted individuals and devices.

Conclusion

"Nearby Sharing" in Windows 11 offers a convenient and efficient way to transfer files between devices, fostering collaboration, productivity, and effortless content sharing. However, encountering issues with this feature can be frustrating. By understanding the common causes of "Nearby Sharing" malfunctions and implementing the troubleshooting steps outlined in this article, users can ensure a smooth and reliable file transfer experience, unlocking the full potential of this powerful feature.

How to Use Nearby Sharing on Windows 11 Nearby Share Not Working on Windows 11? Try These Proven Solutions How to enable and use Nearby Sharing on Windows 11/10
How to Use Nearby Sharing on Windows 11?  Gear Up Windows Change Nearby Sharing Setting in Windows 11 - YouTube How to Enable and Use Nearby Sharing in Windows 11? 2024��
How to Enable Nearby Sharing in Windows 11?  Gear up Windows 11 & 10 How to enable and use Nearby Sharing on Windows 11/10

Closure

Thus, we hope this article has provided valuable insights into Unlocking the Potential of Windows 11’s Sharing Feature: Troubleshooting and Optimizing Nearby Sharing. We thank you for taking the time to read this article. See you in our next article!

Unpacking The Power Of RAR: A Comprehensive Guide To Free Download And Use On Windows 10

Unpacking the Power of RAR: A Comprehensive Guide to Free Download and Use on Windows 10

Introduction

With enthusiasm, let’s navigate through the intriguing topic related to Unpacking the Power of RAR: A Comprehensive Guide to Free Download and Use on Windows 10. Let’s weave interesting information and offer fresh perspectives to the readers.

Unpacking the Power of RAR: A Comprehensive Guide to Free Download and Use on Windows 10

Unlocking the Power of WinRAR Download and Activation Guide for PC - YouTube

RAR, short for Roshal Archive, is a widely recognized and powerful file compression and archiving format. It is renowned for its high compression ratios, robust security features, and versatile functionality. While the software itself is not free, a robust and widely used free alternative exists: WinRAR. This article explores the significance of WinRAR on Windows 10, delving into its benefits, download process, and essential tips for optimal use.

Understanding the Importance of RAR and WinRAR

File compression plays a crucial role in modern digital life. It allows for efficient storage, faster transmission, and convenient sharing of large files. RAR, with its advanced compression algorithms, excels in minimizing file size while preserving data integrity. WinRAR, the free alternative, empowers users to utilize the benefits of the RAR format without any cost.

Benefits of Using WinRAR on Windows 10

  • High Compression Ratios: WinRAR consistently delivers superior compression rates compared to other archiving tools. This translates to smaller file sizes, reduced storage requirements, and faster download and upload times.
  • Enhanced Security: RAR archives can be protected with strong passwords, ensuring the confidentiality of sensitive data. WinRAR facilitates secure password management, safeguarding information from unauthorized access.
  • Versatile Functionality: WinRAR offers a comprehensive set of features, including:
    • Creating and Extracting Archives: Effortlessly create and extract RAR, ZIP, and other popular archive formats.
    • Splitting and Joining Archives: Divide large archives into smaller parts for easier transfer or storage on multiple media.
    • Self-Extracting Archives: Create executable files that automatically extract the contents when run, simplifying file distribution.
    • File Repair: Recover data from damaged archives, minimizing data loss.
    • Multi-Volume Archives: Combine multiple files into a single archive, streamlining large file management.
  • Cross-Platform Compatibility: RAR archives are compatible across various operating systems, ensuring seamless file sharing and collaboration.
  • User-Friendly Interface: WinRAR boasts an intuitive and straightforward interface, making it easy for users of all skill levels to navigate and utilize its features.

Downloading WinRAR on Windows 10

  1. Visit the Official WinRAR Website: Navigate to the official WinRAR website (www.win-rar.com).
  2. Choose the Download Link: Locate the "Download" section and select the appropriate download link for your Windows 10 version (32-bit or 64-bit).
  3. Start the Download: Click on the download link, and the WinRAR installer will begin downloading.
  4. Run the Installer: Once the download is complete, locate the installer file and double-click to run it.
  5. Follow the On-Screen Instructions: The installer will guide you through the installation process. Choose your preferred installation location and accept the license agreement.
  6. Complete the Installation: Click "Finish" to complete the installation.

Tips for Using WinRAR Effectively

  • Utilize Compression Settings: Experiment with different compression levels to find the optimal balance between file size and compression speed.
  • Enable Password Protection: Secure your sensitive data by setting strong passwords for your archives.
  • Explore Advanced Features: WinRAR offers a variety of advanced features, such as multi-volume archives, self-extracting archives, and file repair. Explore these features to enhance your file management capabilities.
  • Stay Updated: Regularly check for updates to ensure you have the latest version of WinRAR with the latest security patches and bug fixes.
  • Consider Using Alternative Archiving Tools: Explore other free and open-source archiving tools like 7-Zip and PeaZip, which offer similar functionalities and may suit your specific needs.

FAQs

Q: Is WinRAR safe to use?

A: WinRAR is a reputable and widely used archiving tool. However, as with any software, it’s essential to download the installer from the official WinRAR website to avoid potentially malicious downloads.

Q: Is WinRAR compatible with other archiving formats?

A: Yes, WinRAR supports various archive formats, including ZIP, 7z, CAB, and more. It can create and extract archives in these formats, ensuring compatibility with other archiving software.

Q: Can I use WinRAR for personal and commercial purposes?

A: WinRAR offers a free trial period, after which a license is required for continued use. However, it can be used for both personal and commercial purposes once a license is purchased.

Q: How do I create a self-extracting archive?

A: WinRAR allows you to create self-extracting archives. When creating an archive, select the "SFX" option and configure the desired settings.

Q: How do I repair a damaged archive?

A: WinRAR includes a built-in repair function. Right-click on the damaged archive, select "Repair" from the context menu, and follow the on-screen instructions.

Conclusion

WinRAR, a powerful and versatile archiving tool, provides a free and efficient way to manage files on Windows 10. Its high compression ratios, robust security features, and user-friendly interface make it an invaluable asset for individuals and businesses alike. By understanding its benefits, navigating the download process, and utilizing its features effectively, users can significantly enhance their file management capabilities and streamline their digital workflow.

WinRAR Free Download My Software Free, 50% OFF How To Unpack RAR Files Using Winrar - YouTube How To Get Winrar For Free Windows 10
Unlocking the Power of WinRAR: A Comprehensive Guide  by PC indir Web  Apr, 2024  Medium Windows 10 RAR Opener App To Unzip Rar Files, Convert to Zip How to Download WinRAR on PC & Laptop - Install WinRAR on Windows 10 - YouTube
Download WinRAR for Windows 10 (64 bit / 32 bit) for free Como Instalar Winrar En Windows 10 8 O 7 Instalar Winrar 2021 Paso Images

Closure

Thus, we hope this article has provided valuable insights into Unpacking the Power of RAR: A Comprehensive Guide to Free Download and Use on Windows 10. We hope you find this article informative and beneficial. See you in our next article!

A Comprehensive Guide To "O Kam" For Windows 10

A Comprehensive Guide to "O Kam" for Windows 10

Introduction

With great pleasure, we will explore the intriguing topic related to A Comprehensive Guide to "O Kam" for Windows 10. Let’s weave interesting information and offer fresh perspectives to the readers.

A Comprehensive Guide to "O Kam" for Windows 10

Télécharger O-KAM sur PC - Windows 10 et 11 - Windowsapp.fr

The phrase "O Kam" does not correspond to any known software, program, or application for Windows 10. It is possible that the term is a misspelling or a colloquial expression specific to a particular community.

However, the request suggests an interest in learning about specific tools and techniques for optimizing Windows 10 performance. This guide will explore various methods and applications that can enhance the overall experience of using Windows 10, addressing areas such as system speed, resource management, and security.

Understanding Windows 10 Optimization

Windows 10, while a robust operating system, can sometimes experience performance issues due to various factors like:

  • System Clutter: Over time, unnecessary files, temporary data, and outdated programs can accumulate, slowing down system processes.
  • Resource-Intensive Applications: Certain applications, particularly those with complex graphics or demanding tasks, can strain system resources, leading to lag and slowdowns.
  • Background Processes: Numerous background processes run automatically, consuming system resources even when not actively in use.
  • Outdated Drivers: Outdated drivers can cause compatibility issues and affect system performance.
  • Malware and Viruses: Malicious software can consume system resources and compromise security, hindering performance.

Methods to Optimize Windows 10 Performance

Here are several strategies to enhance Windows 10 performance:

1. Disk Cleanup and Storage Management:

  • Disk Cleanup Tool: This built-in tool removes temporary files, system files, and other unnecessary data from the hard drive. It can be accessed through the "This PC" window, right-clicking on the drive, and selecting "Properties" followed by "Disk Cleanup."
  • Storage Sense: This feature automatically deletes temporary files, downloads, and other unused data to free up storage space. It can be accessed through "Settings > System > Storage."
  • Manually Delete Unnecessary Files: Regularly delete downloaded files, temporary files, and other unused files from the "Downloads" folder and other locations.
  • Uninstall Unused Programs: Remove applications that are not frequently used to free up disk space and resources. This can be done through the "Settings > Apps > Apps & features" menu.

2. Manage Startup Programs:

  • Task Manager: Open Task Manager (Ctrl + Shift + Esc) and navigate to the "Startup" tab. Disable programs that are not essential for system startup.
  • System Configuration Utility: Use the "msconfig" command to access the System Configuration utility. Go to the "Startup" tab and disable unnecessary programs.

3. Optimize Visual Effects:

  • Adjust Visual Effects: Access "System Properties" through the "This PC" window. Navigate to the "Advanced" tab and click "Settings" under "Performance." Choose the "Adjust for best performance" option to minimize visual effects and improve speed.

4. Update Drivers:

  • Device Manager: Open "Device Manager" (Right-click "This PC" > "Manage" > "Device Manager"). Update drivers for each device by right-clicking and selecting "Update driver."
  • Manufacturer Websites: Visit the websites of hardware manufacturers for the latest driver updates specific to your system.

5. Run a Virus Scan:

  • Windows Defender: Windows 10 comes with built-in antivirus protection. Run a full system scan through "Windows Security" in the Start menu.
  • Third-Party Antivirus: Consider using a reputable third-party antivirus program for additional protection.

6. Disable Unnecessary Background Processes:

  • Task Manager: Open Task Manager and navigate to the "Processes" tab. Identify and disable processes that are not necessary for system operation.
  • Startup Programs: Using Task Manager or System Configuration Utility, disable unnecessary programs from running at startup.

7. Use Performance Monitoring Tools:

  • Task Manager: Task Manager provides real-time performance data for CPU, memory, and disk usage. This information can be used to identify resource-intensive processes and troubleshoot performance issues.
  • Resource Monitor: Access "Resource Monitor" through the "Performance" section in Task Manager. It offers a more detailed view of system resource usage.

8. Defragment Hard Drive:

  • Defragmentation Tool: While less crucial for modern SSDs, defragmenting a hard disk drive can improve read/write speeds and overall performance. This can be accessed through "This PC" > "Properties" > "Tools" > "Optimize drives."

9. Use a System Optimization Tool:

  • Third-Party Tools: Several third-party tools, such as CCleaner, Advanced SystemCare, and IObit Smart Defrag, offer comprehensive system optimization features, including disk cleanup, registry cleaning, and performance optimization.

10. Consider a System Upgrade:

  • Hardware Upgrade: If performance issues persist, consider upgrading hardware components like RAM, SSD, or CPU to improve system capabilities.
  • Operating System Upgrade: Ensure your system is running the latest version of Windows 10 for the best performance and security updates.

FAQs about Optimizing Windows 10

Q: What are the common signs of a slow Windows 10 system?

A: Common signs include slow startup times, sluggish application loading, lag during multitasking, frequent freezes, and overall system unresponsiveness.

Q: Is it safe to disable background processes in Windows 10?

A: Disabling background processes should be done cautiously. While some processes can be safely disabled, others are essential for system operation. Research the function of each process before disabling it.

Q: Can I use multiple system optimization tools simultaneously?

A: Using multiple optimization tools concurrently can lead to conflicts and instability. Choose one reputable tool and use it consistently.

Q: How often should I optimize my Windows 10 system?

A: Regular optimization is recommended. Run disk cleanup and storage management tools weekly. Update drivers and run virus scans monthly. Consider using a system optimization tool every few months.

Tips for Maintaining Optimal Performance

  • Regularly Clean Up: Delete unnecessary files, empty the Recycle Bin, and uninstall unused programs to free up disk space.
  • Manage Startup Programs: Disable unnecessary programs from starting automatically to reduce startup time and resource consumption.
  • Use Task Manager: Monitor system resource usage and identify resource-intensive processes.
  • Keep Drivers Updated: Ensure drivers for all devices are up to date for optimal compatibility and performance.
  • Run Regular Scans: Use built-in or third-party antivirus software to scan for malware and viruses.
  • Disable Unnecessary Features: Turn off features like "Windows Search" or "Cortana" if not frequently used to save resources.
  • Use a System Optimization Tool: Consider using a trusted third-party tool for comprehensive system optimization.

Conclusion

Optimizing Windows 10 performance involves a combination of strategies and tools. By regularly cleaning up the system, managing startup programs, updating drivers, and using performance monitoring tools, users can significantly improve system speed and responsiveness. While third-party optimization tools can be helpful, it is essential to use them cautiously and avoid over-optimization, which can lead to instability. By adopting a proactive approach to system maintenance, users can ensure that Windows 10 runs smoothly and efficiently, providing a seamless and productive experience.

O-KAM APP cloud storage offers a variety of packages to choose from - YouTube O-KAM Pro Camera APP And PC Download (Complete Guide) O-KAM Pro Camera APP And PC Download (Complete Guide)
O-KAM para PC / Mac / Windows 11,10,8,7 - Descarga gratis - Napkforpc.com O-KAM Pro For Pc : O-KAM Pro Computer Client Download O-KAM Pro Camera APP And PC Download (Complete Guide)
O-KAM pc ダウンロード- Windows バージョン10/8/7 (2022) O-KAM Pro Camera APP And PC Download (Complete Guide)

Closure

Thus, we hope this article has provided valuable insights into A Comprehensive Guide to "O Kam" for Windows 10. We hope you find this article informative and beneficial. See you in our next article!