Net Framework Repair Tool Windows 10

net framework repair tool windows 10

Introduction

In this auspicious occasion, we are delighted to delve into the intriguing topic related to net framework repair tool windows 10. Let’s weave interesting information and offer fresh perspectives to the readers.

Troubleshooting .NET Framework Issues in Windows 10: A Comprehensive Guide

Download Microsoft .NET Framework Repair Tool For Windows 10

The .NET Framework is a foundational component of Windows, providing a robust environment for running various applications. It facilitates the development and execution of software, enabling users to interact with a wide range of programs. However, like any software, the .NET Framework can encounter issues, leading to application crashes, errors, and general system instability.

This article will delve into the common problems associated with the .NET Framework in Windows 10, explore the importance of maintaining its health, and provide a comprehensive guide to troubleshooting and repairing potential issues.

Understanding the .NET Framework and its Importance

The .NET Framework is a software framework developed by Microsoft. It acts as a bridge between applications and the underlying operating system, providing a consistent environment for application development and execution. It offers a range of features, including:

  • Common Language Runtime (CLR): The core of the .NET Framework, the CLR manages the execution of applications written in various programming languages. It handles memory management, exception handling, and thread management, ensuring efficient and secure program execution.
  • Base Class Library (BCL): A collection of pre-written code that provides developers with ready-to-use functionalities for common tasks, such as file handling, networking, and data manipulation.
  • Windows Forms and WPF: These frameworks offer tools for creating graphical user interfaces (GUIs) for applications, enabling developers to create visually appealing and interactive user experiences.
  • ASP.NET: A framework for building web applications and services, enabling developers to create dynamic and interactive websites.

The .NET Framework is critical for the functionality of numerous Windows applications, including:

  • Office applications: Word, Excel, PowerPoint, and other Office programs rely on the .NET Framework for their features and functionality.
  • Games: Many popular games utilize the .NET Framework for their graphics, physics, and gameplay mechanics.
  • Business applications: Enterprise resource planning (ERP) systems, customer relationship management (CRM) software, and other business applications often rely on the .NET Framework for their robust functionality.

Common .NET Framework Issues in Windows 10

While the .NET Framework is a robust platform, various factors can lead to issues, causing applications to malfunction or even fail to launch. Some common problems include:

  • Corrupted or Missing .NET Framework Files: Improper installations, software conflicts, or system errors can lead to corrupted or missing .NET Framework files. This can prevent applications from accessing the necessary components, resulting in crashes or errors.
  • Incompatible .NET Framework Versions: Applications may require specific versions of the .NET Framework. If the correct version is not installed or outdated, the application may encounter issues.
  • Security Updates and Patches: While updates are essential for security and stability, they can sometimes introduce conflicts or bugs, leading to .NET Framework problems.
  • System Registry Issues: Errors in the Windows registry, which stores system settings and configuration data, can affect the .NET Framework’s functionality.
  • Third-Party Software Conflicts: Certain third-party software applications may interfere with the .NET Framework, causing conflicts and instability.

The Importance of Maintaining a Healthy .NET Framework

A healthy .NET Framework is crucial for a stable and reliable Windows 10 experience. Maintaining its health ensures:

  • Application Compatibility: A properly functioning .NET Framework ensures that applications run smoothly and without errors, maximizing user productivity.
  • System Stability: A healthy .NET Framework contributes to overall system stability, preventing crashes and system freezes.
  • Security: Regular updates and repairs ensure that the .NET Framework is protected against vulnerabilities and exploits, safeguarding your system from malicious attacks.

Troubleshooting .NET Framework Issues in Windows 10: A Step-by-Step Guide

When encountering .NET Framework issues, it’s essential to troubleshoot the problem systematically. Here’s a step-by-step guide to help you identify and resolve common problems:

Step 1: Identify the Issue

  • Determine the affected application: Identify the specific program that is experiencing issues related to the .NET Framework. This will help narrow down the potential causes.
  • Check error messages: Pay attention to any error messages displayed by the application. These messages can provide valuable clues about the underlying issue.
  • Review recent system changes: Consider any recent software installations, system updates, or hardware changes that might have affected the .NET Framework.

Step 2: Basic Troubleshooting Steps

  • Restart your computer: A simple restart can sometimes resolve temporary issues and refresh the system’s memory.
  • Run a system scan: Use the Windows built-in tools like "System File Checker" (SFC) or "DISM" to scan for and repair corrupted system files. These tools can help identify and fix potential issues within the .NET Framework.
  • Check for updates: Ensure that your Windows 10 operating system and the .NET Framework are up to date. Updates often include bug fixes and security patches that can resolve known issues.

Step 3: Repairing the .NET Framework

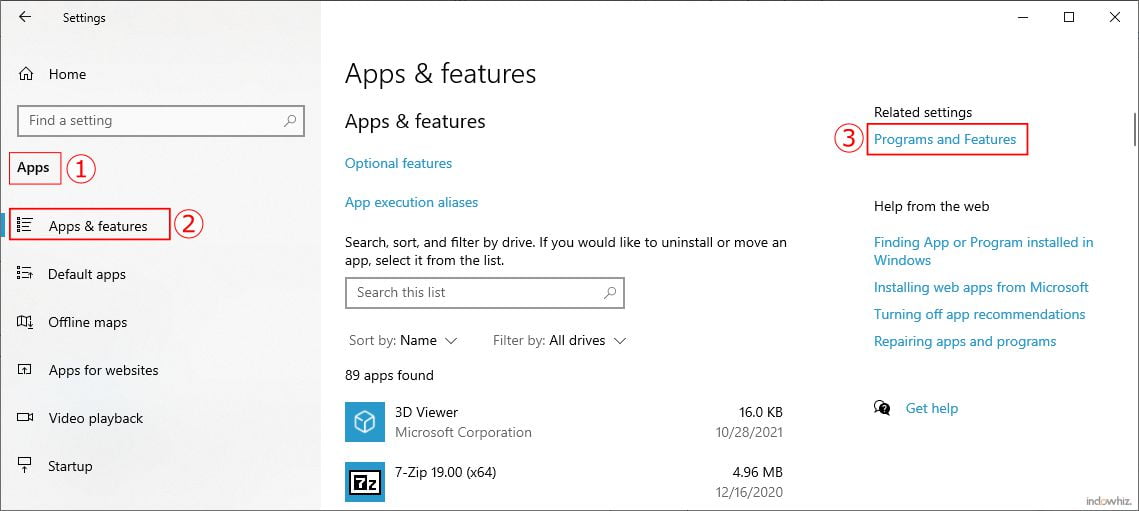
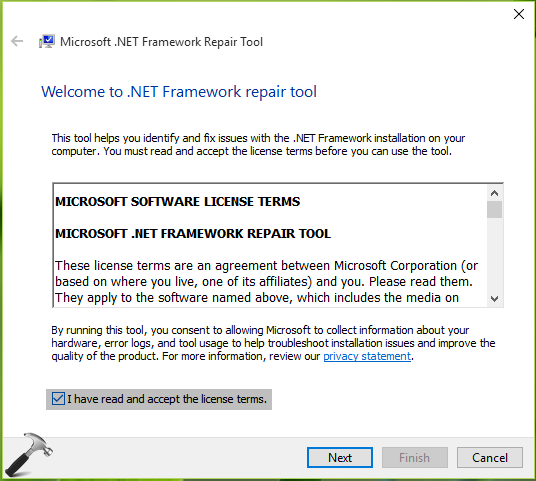
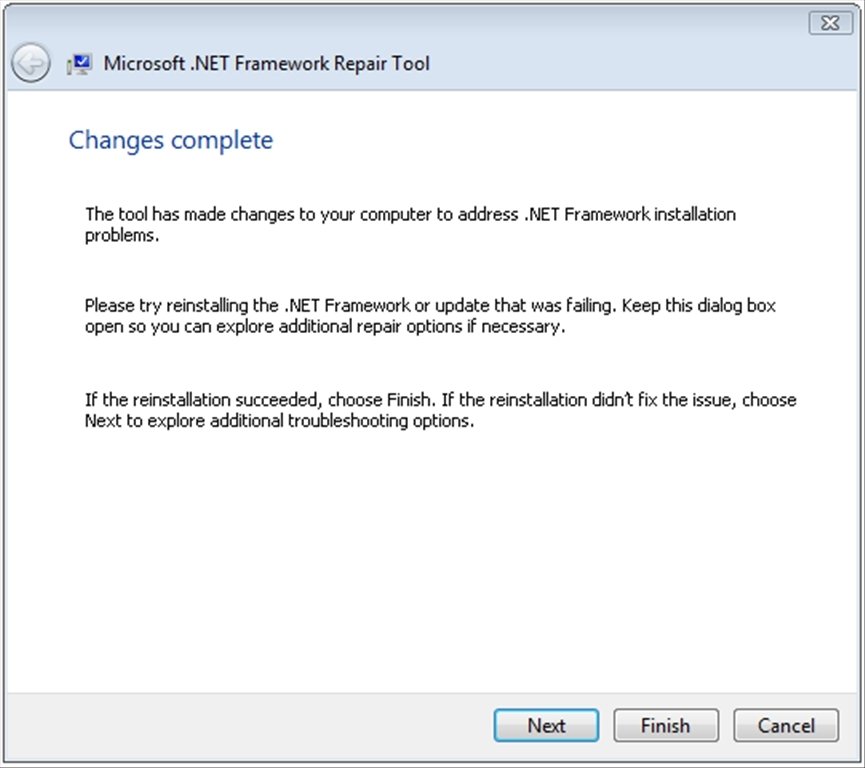
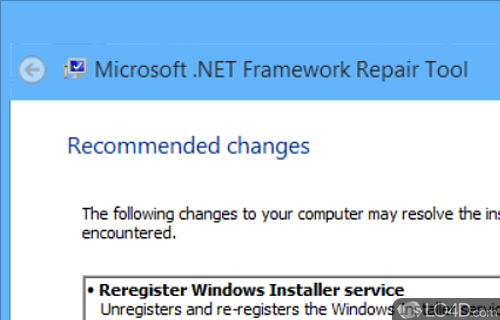
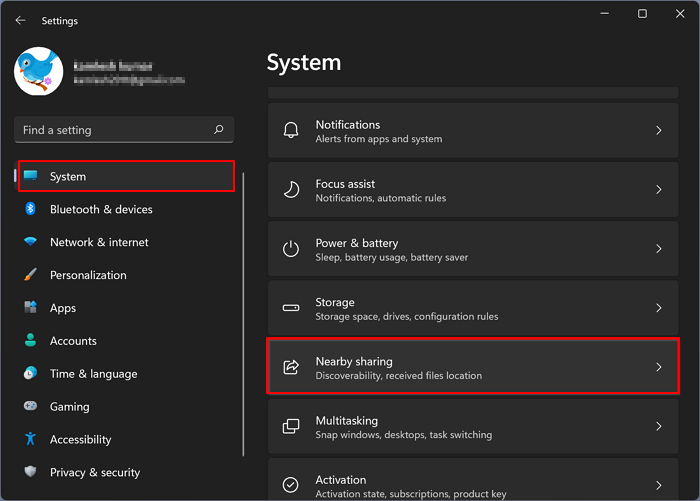
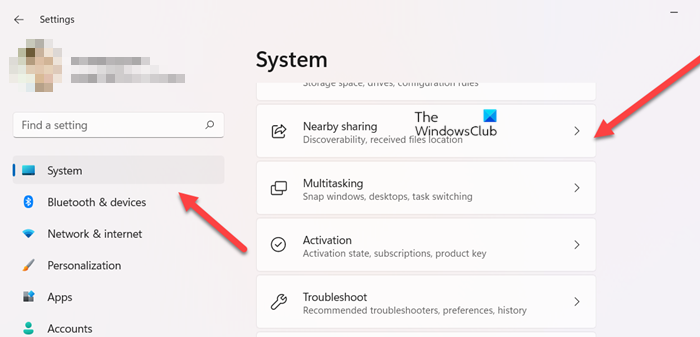
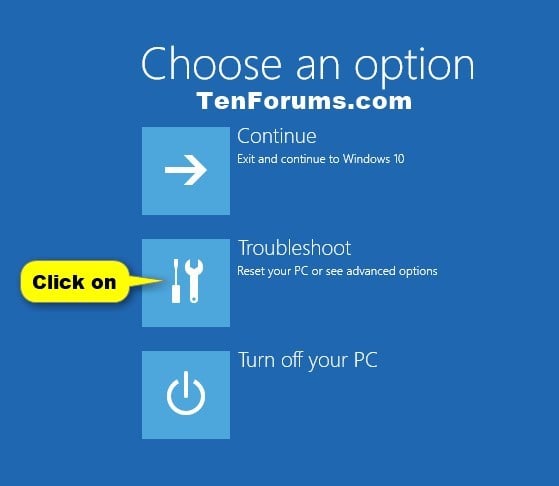
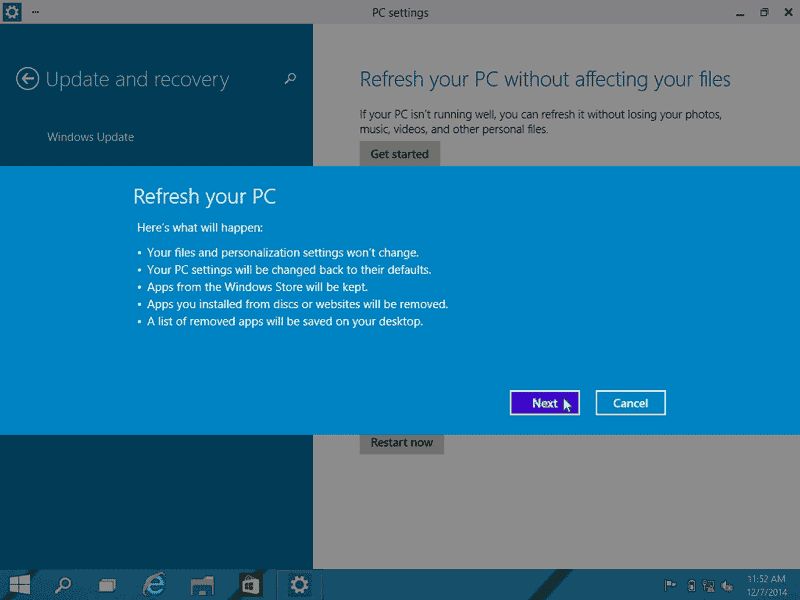
  • Repairing existing .NET Framework installations: Windows 10 includes a built-in repair tool that can attempt to fix corrupted or damaged .NET Framework files. To access this tool, navigate to "Control Panel" > "Programs and Features" and select the .NET Framework version you want to repair. Click "Change" and choose the "Repair" option.
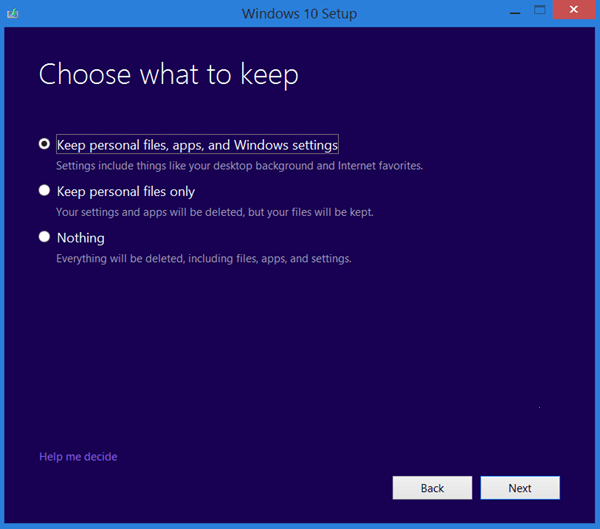
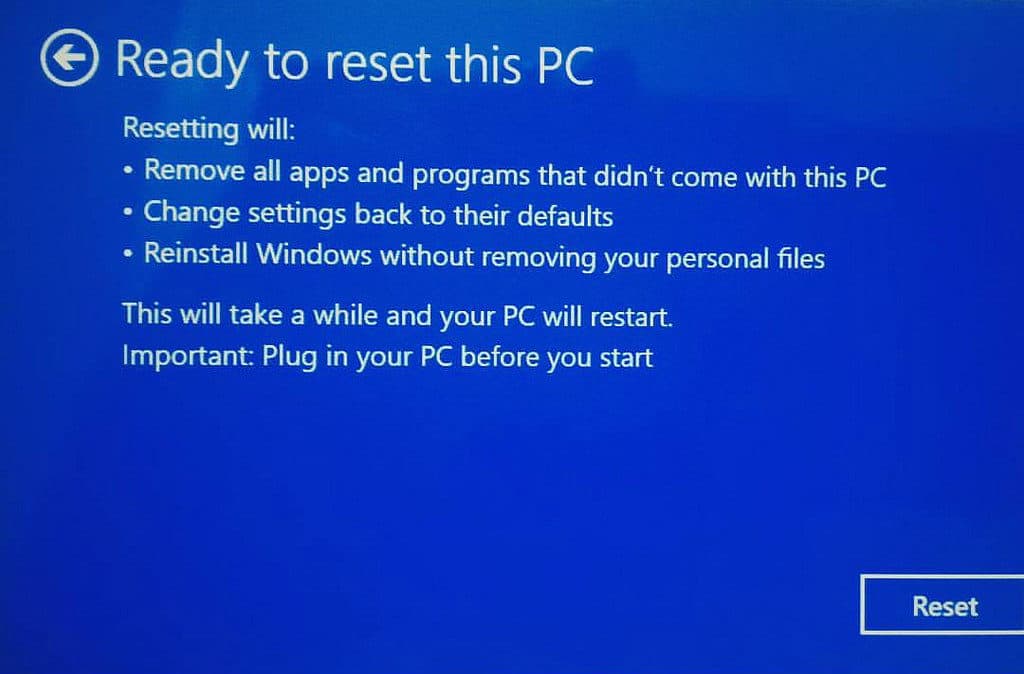
  • Reinstalling the .NET Framework: If repairing the existing installation fails to resolve the issue, consider reinstalling the .NET Framework. This process will overwrite existing files and ensure a clean installation. You can download the latest version of the .NET Framework from the Microsoft website.

Step 4: Advanced Troubleshooting

  • Disable third-party software: Temporarily disable any third-party software that might be interfering with the .NET Framework. This can help identify if a specific program is causing the issue.
  • Check system registry: If registry issues are suspected, consider using a reliable registry cleaner to scan for and fix potential errors. However, exercise caution when using registry cleaners, as they can potentially cause further damage if not used correctly.
  • Contact Microsoft support: If all else fails, contact Microsoft support for assistance in troubleshooting complex .NET Framework issues. They can provide expert guidance and potentially offer specialized solutions.

Frequently Asked Questions (FAQs)

Q: What are the different versions of the .NET Framework available in Windows 10?

A: Windows 10 typically includes multiple .NET Framework versions, including .NET Framework 3.5, 4.5, 4.6, 4.7, and 4.8. The specific versions included depend on the Windows 10 edition and any subsequent updates.

Q: How do I know which version of the .NET Framework I need?

A: The specific .NET Framework version required for an application is usually listed in its system requirements or installation instructions. You can also check the application’s official website for compatibility information.

Q: Can I install multiple versions of the .NET Framework on my Windows 10 computer?

A: Yes, you can install multiple versions of the .NET Framework on your Windows 10 computer. The framework is designed to coexist with different versions, allowing applications to run with the specific version they require.

Q: Is it safe to download and install the .NET Framework from third-party websites?

A: It is generally recommended to download and install the .NET Framework from the official Microsoft website. Third-party websites may offer outdated, corrupted, or even malicious versions of the framework, posing security risks to your system.

Q: How do I enable or disable the .NET Framework in Windows 10?

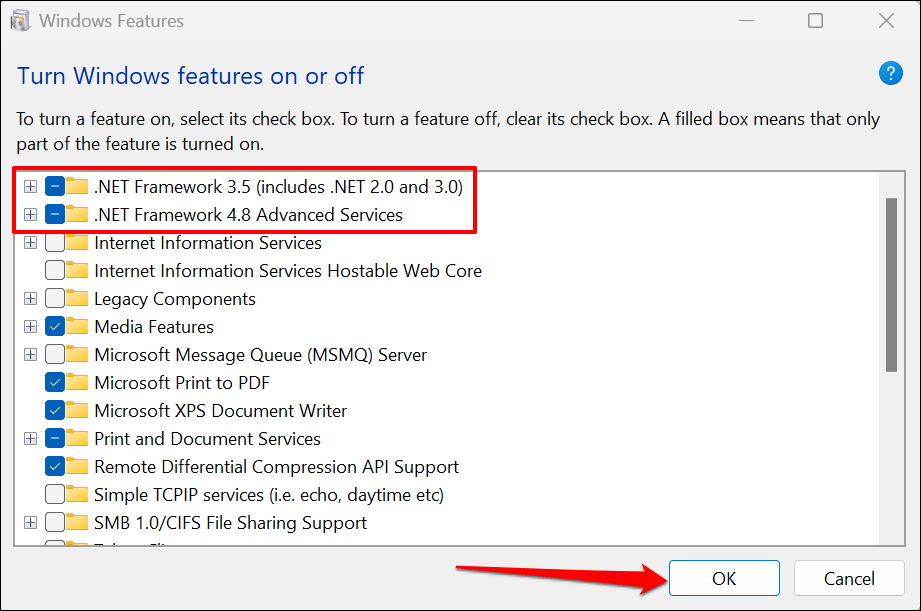
A: You can enable or disable specific .NET Framework versions using the "Windows Features" control panel. Go to "Control Panel" > "Programs and Features" > "Turn Windows features on or off." From there, you can check or uncheck the desired .NET Framework versions.

Tips for Preventing .NET Framework Issues

  • Install updates regularly: Keep your Windows 10 operating system and the .NET Framework up to date with the latest security patches and bug fixes.
  • Avoid installing unnecessary software: Limit the installation of third-party applications that might introduce conflicts with the .NET Framework.
  • Use reputable software sources: Download and install software only from trusted sources to minimize the risk of installing corrupted or malicious files.
  • Run regular system scans: Use built-in tools like "System File Checker" (SFC) and "DISM" to scan for and repair system file corruption, which can affect the .NET Framework.
  • Backup your system: Regularly create backups of your important data and system settings. This will help you restore your system in case of major issues or accidental data loss.

Conclusion

The .NET Framework is a vital component of Windows 10, enabling a wide range of applications to run smoothly and securely. While the framework is generally robust, issues can arise due to various factors. By understanding the common problems, following the troubleshooting steps, and implementing preventative measures, users can ensure a healthy and stable .NET Framework environment, maximizing system performance and application compatibility.

Microsoft -net framework repair tool for windows 10 - chartpilot NET Framework Repair Tool to Repair .NET Framework  Download Now Microsoft -net framework repair tool for windows 10 - chartpilot
NET Framework Repair Tool to Repair .NET Framework  Download Now - MiniTool Partition Wizard Repair .Net Framework with the .Net Framework repair tool from Microsoft - HowPChub How To Use The Microsoft Net Framework Repair Tool And Why  helpdeskgeek
Microsoft .NET Framework Repair Tool - Download Microsoft .NET Framework Repair Tool - Download

Closure

Thus, we hope this article has provided valuable insights into net framework repair tool windows 10. We appreciate your attention to our article. See you in our next article!

Troubleshooting Nearby Sharing In Windows 11: A Comprehensive Guide

Troubleshooting Nearby Sharing in Windows 11: A Comprehensive Guide

Introduction

In this auspicious occasion, we are delighted to delve into the intriguing topic related to Troubleshooting Nearby Sharing in Windows 11: A Comprehensive Guide. Let’s weave interesting information and offer fresh perspectives to the readers.

Troubleshooting Nearby Sharing in Windows 11: A Comprehensive Guide

Nearby Share Not Working on Windows 11? Try These Proven Solutions

Windows 11’s "Nearby Sharing" feature, a successor to the popular "Nearby" app on Android, allows for the seamless transfer of files between compatible devices. This feature leverages Bluetooth and Wi-Fi Direct, enabling users to share photos, documents, and other files quickly and easily without relying on cloud services. However, users may encounter situations where Nearby Sharing fails to function as expected. This article provides a comprehensive guide to troubleshooting these issues, ensuring a smooth and efficient file transfer experience.

Understanding the Importance of Nearby Sharing

Nearby Sharing, in essence, is a modern take on file transfer, offering a convenient and secure alternative to traditional methods. Its significance lies in its ability to:

  • Streamline File Sharing: By eliminating the need for cloud services, Nearby Sharing facilitates faster and more efficient file transfer, particularly for larger files.
  • Promote Privacy: Unlike cloud-based sharing, Nearby Sharing keeps files within the user’s network, enhancing privacy and control over data.
  • Expand Device Compatibility: Windows 11’s Nearby Sharing feature extends the reach of file transfer capabilities, enabling seamless sharing between Windows devices and Android smartphones or tablets.

Common Issues with Nearby Sharing

While Nearby Sharing is generally reliable, several factors can impede its functionality:

  • Bluetooth and Wi-Fi Issues: The primary communication channels for Nearby Sharing, Bluetooth and Wi-Fi Direct, require proper functioning. Any issues with these connections can hinder the transfer process.
  • Network Configuration: Network settings, including firewall configurations and network sharing settings, can influence Nearby Sharing’s performance.
  • Device Compatibility: Not all devices are compatible with Nearby Sharing. Older devices or those lacking Bluetooth and Wi-Fi Direct support may not be able to participate in file transfers.
  • Software Bugs or Glitches: As with any software, Nearby Sharing may encounter occasional bugs or glitches that can disrupt its normal operation.
  • Security Settings: Strict security settings, particularly those related to network access and file sharing, can prevent Nearby Sharing from functioning as intended.

Troubleshooting Steps for Nearby Sharing

When encountering issues with Nearby Sharing, the following troubleshooting steps can help identify and resolve the problem:

  1. Verify Device Compatibility: Ensure that both sending and receiving devices are compatible with Nearby Sharing. Check the device specifications or manufacturer’s documentation for confirmation.

  2. Enable Nearby Sharing: Ensure Nearby Sharing is enabled on both devices. Navigate to Settings > System > Shared experiences > Nearby sharing and ensure the toggle is switched on.

  3. Check Bluetooth and Wi-Fi Connections: Verify that Bluetooth and Wi-Fi are enabled on both devices and that they are connected to the same network.

  4. Enable Bluetooth Discovery: Navigate to Settings > Bluetooth & devices > Bluetooth and ensure the "Discoverable" option is enabled for both devices.

  5. Restart Devices: Restarting both the sending and receiving devices can often resolve minor software glitches that may be hindering Nearby Sharing.

  6. Verify Network Connectivity: Ensure both devices are connected to the same network and that the network connection is stable.

  7. Adjust Network Settings: Review firewall settings and network sharing settings to ensure they do not block Nearby Sharing.

  8. Temporarily Disable Antivirus Software: In some cases, antivirus software can interfere with Nearby Sharing. Temporarily disable your antivirus software to test if it is the source of the problem.

  9. Update Windows: Ensure both devices have the latest Windows updates installed. Updates often include bug fixes and improvements that can resolve Nearby Sharing issues.

  10. Troubleshoot Network Issues: If you suspect network issues, try connecting to a different network or restarting your router.

Frequently Asked Questions (FAQs)

Q: My Nearby Sharing is not showing up on my device. What should I do?

A: Ensure that Nearby Sharing is enabled in Settings > System > Shared experiences > Nearby sharing. If it is already enabled, try restarting your device and checking again.

Q: My Nearby Sharing is not working between my Windows 11 PC and my Android phone. What could be the problem?

A: Check if both devices are on the same network and have Bluetooth enabled. Ensure that the "Discoverable" option is enabled on both devices. If the issue persists, try updating both Windows and Android to the latest versions.

Q: Why is my Nearby Sharing not working even though I can see other devices?

A: The issue could be related to network connectivity. Ensure both devices are connected to the same stable network. You can also try restarting your router to resolve any network issues.

Q: Can I use Nearby Sharing to transfer files between my Windows 11 PC and an iOS device?

A: Currently, Nearby Sharing is not compatible with iOS devices.

Q: Is Nearby Sharing secure?

A: Nearby Sharing uses Bluetooth and Wi-Fi Direct, which are generally secure protocols. However, it is important to be aware of the potential risks of sharing files with unknown devices.

Tips for Optimizing Nearby Sharing

  • Ensure Strong Network Connectivity: A stable and fast network connection is crucial for efficient file transfers.
  • Minimize Background Processes: Close unnecessary applications and processes running in the background to free up resources for Nearby Sharing.
  • Check for Updates: Regularly update both Windows and your device’s Bluetooth drivers to ensure optimal performance.
  • Clear Cache: If you are experiencing persistent issues, consider clearing the Nearby Sharing cache by going to Settings > System > Shared experiences > Nearby sharing and selecting "Clear cache."

Conclusion

Nearby Sharing in Windows 11 offers a convenient and secure way to transfer files between compatible devices. While it is a robust feature, occasional issues may arise. By following the troubleshooting steps outlined in this guide, users can effectively identify and resolve these issues, ensuring a seamless file transfer experience. With its simplicity and flexibility, Nearby Sharing continues to be a valuable tool for users seeking efficient and secure file sharing options.

Nearby Share Not Working on Windows 11? How to Fix it Nearby Sharing Not Working on Windows 11: Fix it Now! How to Use Nearby Sharing on Windows 11?  Gear Up Windows
How To Use Nearby Sharing On Windows 11  digisrun how to fix Enable Nearby Sharing in Windows 11 - YouTube How to enable and use Nearby Sharing on Windows 11/10
How to Enable and Use Nearby Sharing in Windows 11? 2024�� How to Enable and Use Nearby Sharing in Windows 11? 2024��

Closure

Thus, we hope this article has provided valuable insights into Troubleshooting Nearby Sharing in Windows 11: A Comprehensive Guide. We appreciate your attention to our article. See you in our next article!

A Look Back: Exploring The Evolution Of Windows 10

A Look Back: Exploring the Evolution of Windows 10

Introduction

In this auspicious occasion, we are delighted to delve into the intriguing topic related to A Look Back: Exploring the Evolution of Windows 10. Let’s weave interesting information and offer fresh perspectives to the readers.

A Look Back: Exploring the Evolution of Windows 10

Evolution of Microsoft Windows from 1986 to 2021 Shows Just How Far We've Come - TechEBlog

Windows 10, the current flagship operating system from Microsoft, has undergone a significant evolution since its initial release in 2015. While the core functionality and user interface remain largely consistent, numerous updates and feature additions have shaped the platform into the versatile and powerful system it is today. Understanding these previous versions provides insight into the development of Windows 10 and its adaptation to changing user needs and technological advancements.

The Initial Release: Windows 10 Version 1507 (July 2015)

This inaugural release marked a significant shift in Microsoft’s operating system strategy. It aimed to unify the Windows experience across devices, from desktops and laptops to tablets and smartphones. Key features included:

  • Universal Apps: A new app model designed to function seamlessly across different devices, offering a consistent experience.
  • Cortana: The introduction of Microsoft’s voice assistant, providing hands-free control and personalized assistance.
  • Start Menu Reimagined: A combination of the familiar Windows 7 Start Menu and the tiled interface of Windows 8, providing a user-friendly access point for applications and settings.
  • Continuum: A feature designed for hybrid devices, allowing them to switch between desktop and tablet modes seamlessly.

This version established the foundation for Windows 10 and introduced many features that have become integral to the platform. However, it also faced criticism for its initial stability and performance issues, prompting Microsoft to release subsequent updates to address these concerns.

Windows 10 Version 1511 (November 2015)

This update primarily focused on bug fixes and performance improvements, addressing user feedback from the initial release. It also introduced new features such as:

  • Microsoft Edge: The new default browser, built from the ground up for modern web standards and enhanced security.
  • Windows Hello: Biometric authentication for enhanced security, allowing users to log in using facial recognition or fingerprint scanning.
  • Enhanced Task View: Improved multitasking capabilities, providing a more intuitive way to manage open windows and virtual desktops.

Windows 10 Version 1607 (August 2016)

This update, known as the "Anniversary Update," brought a significant number of improvements and new features, including:

  • Windows Ink: A suite of tools designed for pen-based interaction, allowing users to take notes, draw, and interact with applications more naturally.
  • Bash on Ubuntu on Windows: The ability to run Linux command-line utilities directly within Windows, providing a powerful tool for developers and system administrators.
  • Improved Security Features: Enhanced security measures, including Windows Defender Advanced Threat Protection, to protect against evolving cyber threats.

Windows 10 Version 1703 (April 2017)

This update, also known as the "Creators Update," focused on enhancing creativity and productivity, introducing features such as:

  • Paint 3D: A new 3D modeling and painting application, allowing users to create and share 3D content.
  • Mixed Reality: Support for virtual and augmented reality experiences, opening up new possibilities for gaming, education, and entertainment.
  • Dynamic Lock: A feature that automatically locks your device when you move away from it, enhancing security.

Windows 10 Version 1709 (October 2017)

This update, known as the "Fall Creators Update," focused on refining existing features and introducing new tools for productivity and creativity, including:

  • Timeline: A feature that allows users to see their recent activities across multiple devices, enabling them to easily pick up where they left off.
  • OneDrive Files On-Demand: A feature that allows users to access their files in OneDrive without taking up space on their local device, saving storage and improving performance.
  • Story Remix: A tool that allows users to create personalized video stories from their photos and videos.

Windows 10 Version 1803 (April 2018)

This update, known as the "April 2018 Update," focused on improving performance, security, and user experience, introducing features such as:

  • Timeline Improvements: Enhancements to Timeline, making it easier to navigate and manage past activities.
  • Focus Assist: A feature that helps users minimize distractions by silencing notifications and alerts during specific times or when using certain applications.
  • Improved Windows Defender: Enhanced protection against malware and other threats.

Windows 10 Version 1809 (October 2018)

This update, known as the "October 2018 Update," focused on refining existing features and introducing new tools for productivity and creativity, including:

  • Your Phone: A feature that allows users to mirror their Android phone’s screen on their Windows PC, enabling them to interact with their phone directly from their computer.
  • Improved Search: Enhanced search capabilities, making it easier to find files, settings, and applications.
  • Cloud Clipboard: A feature that allows users to copy and paste content between their Windows devices.

Windows 10 Version 1903 (May 2019)

This update, known as the "May 2019 Update," focused on improving performance, security, and user experience, introducing features such as:

  • Light Theme: A new light theme option, providing a more modern and visually appealing interface.
  • Improved Sandbox: A feature that allows users to run applications in a secure environment, preventing them from affecting the main operating system.
  • Windows Update Improvements: Enhanced Windows Update process, making it more reliable and efficient.

Windows 10 Version 1909 (November 2019)

This update, known as the "November 2019 Update," focused on refining existing features and introducing new tools for productivity and creativity, including:

  • Enhanced File Explorer: Improvements to File Explorer, making it easier to navigate and manage files.
  • Improved Cortana: Enhancements to Cortana, making it more intelligent and responsive.
  • Windows Sandbox Improvements: Further improvements to Windows Sandbox, making it more secure and reliable.

Windows 10 Version 2004 (May 2020)

This update, known as the "May 2020 Update," focused on improving performance, security, and user experience, introducing features such as:

  • Windows Subsystem for Linux 2: A significant upgrade to the Windows Subsystem for Linux, providing improved performance and compatibility.
  • Enhanced Taskbar: Improvements to the taskbar, making it more efficient and user-friendly.
  • Improved Start Menu: Enhancements to the Start Menu, making it more responsive and customizable.

Windows 10 Version 20H2 (October 2020)

This update, known as the "October 2020 Update," focused on refining existing features and introducing new tools for productivity and creativity, including:

  • Chromebook Compatibility: Improved compatibility with Chromebooks, allowing users to access their files and applications on their Chromebook from their Windows device.
  • Enhanced Security Features: Further improvements to security features, including Windows Defender Application Guard, to protect against evolving cyber threats.
  • Improved Performance: Optimization for improved performance and battery life.

Windows 10 Version 21H1 (May 2021)

This update, known as the "May 2021 Update," focused on improving performance, security, and user experience, introducing features such as:

  • Windows Hello for Business: Enhanced security features for businesses, allowing employees to log in using biometric authentication.
  • Improved Windows Update: Further enhancements to Windows Update, making it more reliable and efficient.
  • Enhanced Performance: Further optimization for improved performance and battery life.

Windows 10 Version 21H2 (November 2021)

This update, known as the "November 2021 Update," focused on refining existing features and introducing new tools for productivity and creativity, including:

  • New Start Menu: A redesigned Start Menu, providing a more modern and user-friendly interface.
  • Enhanced File Explorer: Further improvements to File Explorer, making it easier to navigate and manage files.
  • Improved Performance: Further optimization for improved performance and battery life.

Windows 10 Version 22H2 (September 2022)

This update, known as the "September 2022 Update," focused on refining existing features and introducing new tools for productivity and creativity, including:

  • Enhanced Task Manager: Improvements to the Task Manager, providing a more comprehensive and informative overview of system resources.
  • New Features for Creators: New features for creators, including improved support for 3D models and animations.
  • Improved Security: Further improvements to security features, including Windows Defender SmartScreen, to protect against evolving cyber threats.

Windows 10 Version 23H2 (October 2023)

This update, known as the "October 2023 Update," focused on refining existing features and introducing new tools for productivity and creativity, including:

  • Improved Search: Enhancements to the search function, making it easier to find files, settings, and applications.
  • New Features for Gamers: New features for gamers, including improved support for high-performance gaming devices.
  • Improved Performance: Further optimization for improved performance and battery life.

FAQs about Previous Versions of Windows 10

Q: What are the key differences between the different versions of Windows 10?

A: The key differences between the different versions of Windows 10 lie in the features they introduce, the improvements they bring to existing features, and the performance optimizations they implement. Each version focuses on specific areas of enhancement, whether it’s productivity, creativity, security, or performance.

Q: Which version of Windows 10 is the most stable?

A: The stability of a Windows 10 version can vary depending on the individual user’s hardware and software configuration. However, generally speaking, later versions tend to be more stable than earlier versions, as they incorporate bug fixes and performance improvements based on user feedback and testing.

Q: How do I upgrade to a newer version of Windows 10?

A: You can upgrade to a newer version of Windows 10 through the Windows Update feature. To do so, open Settings, go to Update & Security, and then click on "Check for updates." If a newer version is available, you can download and install it.

Q: Is it necessary to upgrade to the latest version of Windows 10?

A: Upgrading to the latest version of Windows 10 is not strictly necessary, but it is recommended to ensure you have the latest features, security updates, and performance improvements. However, if you are satisfied with your current version and do not require the newest features, you can choose to stay on your current version.

Tips for Using Previous Versions of Windows 10

  • Regularly update your system: Ensure you have the latest updates installed to benefit from security patches, bug fixes, and performance improvements.
  • Optimize your system: Consider using system optimization tools to clean up your hard drive, manage startup programs, and improve performance.
  • Use a reliable antivirus: Protect your system from malware and other threats by installing and regularly updating a reputable antivirus program.
  • Back up your data: Regularly back up your important files to ensure you do not lose them in case of system failure or data corruption.
  • Explore customization options: Windows 10 offers various customization options, allowing you to personalize your system according to your preferences.

Conclusion

Windows 10 has evolved significantly since its initial release, with each version building upon the foundation laid by its predecessors. This ongoing evolution has ensured the platform remains relevant and adaptable to changing user needs and technological advancements. While each version has its own unique strengths and focuses, the core functionality and user experience remain consistent, providing a familiar and intuitive platform for users across devices. Understanding the history of Windows 10 provides valuable insight into the development of the operating system and its role in shaping the modern computing landscape.

The Windows 10 Evolution (TH1 and TH2) - YouTube Evolution of Windows  Windows 1 to Windows 10  TechTasic - YouTube Evolution of Microsoft Windows 1985-2020 - YouTube
Windows 10 Evolution - YouTube Windows 10 Evolution Time-lapse - YouTube The Evolution of Microsoft Windows Through The Years
Exploring the Evolution: The Key Differences between Windows 10 and Windows 11 - Blog - Forzaslan The Evolution of Windows #infographic - Visualistan

Closure

Thus, we hope this article has provided valuable insights into A Look Back: Exploring the Evolution of Windows 10. We thank you for taking the time to read this article. See you in our next article!

Unlocking The Potential Of Seamless Sharing: Troubleshooting Nearby Share In Windows 11

Unlocking the Potential of Seamless Sharing: Troubleshooting Nearby Share in Windows 11

Introduction

With enthusiasm, let’s navigate through the intriguing topic related to Unlocking the Potential of Seamless Sharing: Troubleshooting Nearby Share in Windows 11. Let’s weave interesting information and offer fresh perspectives to the readers.

Unlocking the Potential of Seamless Sharing: Troubleshooting Nearby Share in Windows 11

How to Use Nearby Sharing on Windows 11

Windows 11 introduced a powerful feature called Nearby Share, designed to facilitate effortless file transfer between devices. This technology leverages Bluetooth and Wi-Fi to enable the sharing of files, photos, documents, and even links between Windows PCs, Android devices, and even some iOS devices. However, like any technology, Nearby Share can encounter issues, preventing users from fully utilizing its potential for seamless collaboration and content exchange.

Understanding the Importance of Nearby Share

The ability to seamlessly transfer files between devices holds immense value in today’s interconnected world. Nearby Share, with its focus on simplicity and ease of use, offers a compelling alternative to traditional methods like email attachments, cloud storage, or physical connections. Its significance lies in:

  • Enhanced Productivity: Sharing documents, presentations, and project files becomes effortless, streamlining collaboration and accelerating workflows.
  • Simplified Content Sharing: Transferring photos, videos, and music between devices becomes a breeze, eliminating the need for cumbersome procedures.
  • Streamlined Collaboration: Working on projects with others becomes more intuitive, allowing for quick and easy file sharing without the need for complex setups.
  • Increased Efficiency: Sharing files directly between devices eliminates the need for cloud storage uploads and downloads, saving time and bandwidth.
  • Improved Accessibility: Nearby Share empowers users to easily share content with others, regardless of their technical expertise, promoting accessibility and inclusivity.

Common Issues and Troubleshooting Steps

When Nearby Share malfunctions, it can significantly disrupt workflows and hinder the seamless exchange of information. Identifying the underlying cause of the issue is crucial to restoring functionality. Here are some common problems and troubleshooting steps:

1. Nearby Share Not Enabled or Discovered:

  • Solution: Ensure Nearby Share is enabled on both devices. On Windows 11, navigate to Settings > System > Shared experiences > Nearby Share. Verify the toggle switch is in the "On" position.
  • Solution: Ensure both devices are within Bluetooth range and have Bluetooth enabled.
  • Solution: On Windows 11, navigate to Settings > System > Shared experiences > Nearby Share > Advanced settings and verify that the device is discoverable.
  • Solution: Restart both devices and try again.

2. Incorrect Device Name or Visibility Settings:

  • Solution: Check the device name on both devices and ensure they are easily recognizable.
  • Solution: Verify that the device is set to be discoverable. On Windows 11, navigate to Settings > System > Shared experiences > Nearby Share > Advanced settings and ensure "Discoverable" is selected.

3. Firewall or Antivirus Interference:

  • Solution: Temporarily disable the firewall or antivirus software on both devices to see if it resolves the issue. If the problem is resolved, consider creating an exception for Nearby Share within your security software settings.
  • Solution: Check if your firewall or antivirus software has any rules that might be blocking Nearby Share.

4. Network Connectivity Issues:

  • Solution: Ensure both devices are connected to the same network, whether it’s Wi-Fi or Bluetooth.
  • Solution: Restart your router or modem and try again.
  • Solution: Check for network outages or service interruptions.

5. Outdated Drivers or Operating System:

  • Solution: Update your Bluetooth drivers on both devices.
  • Solution: Ensure both devices are running the latest version of their respective operating systems.

6. Incorrect Device Pairing:

  • Solution: Remove any existing Bluetooth pairings between the devices and try pairing them again.

7. Insufficient Permissions:

  • Solution: Ensure that the user account on both devices has the necessary permissions to use Nearby Share.

8. Incompatible Devices:

  • Solution: Verify that both devices are compatible with Nearby Share. Some older devices might not support this feature.

9. System Errors or Glitches:

  • Solution: Try restarting both devices and try again.
  • Solution: Consider performing a system reset or reinstalling the operating system if the problem persists.

FAQs

1. Can I use Nearby Share to transfer large files?

While Nearby Share is designed for quick and efficient file sharing, it’s not ideal for transferring extremely large files. For larger files, consider using cloud storage services or external hard drives.

2. Is Nearby Share secure?

Nearby Share uses encryption to protect data during transfer. However, it’s essential to be aware of the potential risks associated with sharing files with unknown devices.

3. Can I use Nearby Share with non-Windows devices?

Nearby Share is primarily designed for Windows devices, but it can also be used with Android devices and some iOS devices.

4. How can I improve the speed of Nearby Share?

Nearby Share’s speed depends on factors like network conditions, file size, and device capabilities. For faster transfers, ensure both devices are connected to a strong Wi-Fi network.

5. What happens if I lose connection during a transfer?

If the connection is interrupted during a transfer, the process will likely fail. Consider restarting the transfer or attempting it again later.

Tips for Using Nearby Share Effectively

  • Enable Nearby Share on all your devices: Ensure that Nearby Share is activated on all devices you plan to use for sharing.
  • Ensure devices are discoverable: Set your devices to be discoverable to allow other devices to detect them for sharing.
  • Use a strong Wi-Fi connection: A robust Wi-Fi network will significantly improve the speed and reliability of Nearby Share.
  • Check for updates: Keep your devices and operating systems up-to-date to ensure compatibility and optimal performance.
  • Test with a small file: Before sharing large files, test Nearby Share with a small file to verify connectivity and functionality.
  • Be mindful of security: Only share files with trusted devices and individuals.

Conclusion

Nearby Share is a valuable tool for seamless file sharing between devices. While it offers convenience and efficiency, troubleshooting potential issues is essential to fully utilize its benefits. By understanding common problems and implementing the recommended solutions, users can unlock the potential of Nearby Share and enjoy its advantages for enhanced productivity, collaboration, and content exchange.

Nearby Share Not Working on Windows 11? How to Fix it Nearby Share Not Working on Windows 11? Try These Proven Solutions Nearby Sharing Not Working on Windows 11: Fix it Now!
How to enable and use Nearby Sharing on Windows 11/10 How to Fix Nearby Sharing Not Working on Windows How to Use Nearby Sharing on Windows 11?  Gear Up Windows
How to enable and use Nearby Sharing on Windows 11/10 How to Enable and Use Nearby Sharing in Windows 11? 2024��

Closure

Thus, we hope this article has provided valuable insights into Unlocking the Potential of Seamless Sharing: Troubleshooting Nearby Share in Windows 11. We thank you for taking the time to read this article. See you in our next article!

Rejuvenating Your Windows 10: A Guide To Refreshing Your System Without Data Loss

Rejuvenating Your Windows 10: A Guide to Refreshing Your System Without Data Loss

Introduction

In this auspicious occasion, we are delighted to delve into the intriguing topic related to Rejuvenating Your Windows 10: A Guide to Refreshing Your System Without Data Loss. Let’s weave interesting information and offer fresh perspectives to the readers.

Rejuvenating Your Windows 10: A Guide to Refreshing Your System Without Data Loss

How to Refresh Windows 10 Without Losing Apps or Data - YouTube

Windows 10, while a robust operating system, can occasionally encounter performance issues, software conflicts, or even malware infections. These situations often necessitate a system refresh, but the fear of data loss can be a major deterrent. Fortunately, there are methods to revitalize your Windows 10 installation without sacrificing your precious files and applications. This comprehensive guide will explore the various techniques for achieving a clean Windows 10 installation while preserving your data, outlining the benefits and considerations associated with each method.

Understanding the Need for a Fresh Start

A clean Windows 10 installation, often referred to as a "fresh start," can be highly beneficial for various reasons:

  • Enhanced Performance: Over time, Windows 10 can accumulate temporary files, registry entries, and other system clutter that can slow down performance. A fresh installation removes these unnecessary files and optimizes system resources.
  • Resolving Software Conflicts: Conflicting software can lead to instability, crashes, and unexpected errors. A clean installation provides a fresh slate, eliminating potential conflicts and ensuring smooth operation.
  • Malware Removal: Malware can deeply embed itself within the operating system, making traditional removal methods ineffective. A clean installation effectively removes malware and its associated files, restoring system security.
  • Troubleshooting Complex Issues: When facing persistent errors or system malfunctions, a clean installation can pinpoint the root cause and provide a stable platform for troubleshooting.
  • Upgrading to a New Version: If upgrading to a newer version of Windows 10, a clean installation ensures compatibility and optimal performance.

Methods for Reinstalling Windows 10 Without Data Loss

The most common methods for reinstalling Windows 10 without data loss fall into two primary categories:

1. In-Place Upgrade:

This method involves upgrading your existing Windows 10 installation to the same version, effectively refreshing the system while preserving your data and applications. It is the simplest and fastest approach.

  • Steps:

    • Open Settings > Update & Security > Recovery.
    • Select "Get Started" under "Reset this PC."
    • Choose "Keep my files" to retain data and applications.
    • Follow the on-screen instructions to complete the upgrade.
  • Benefits:

    • Minimal time commitment.
    • Retains all personal files, applications, and settings.
    • Requires no external media (USB drive or DVD).
  • Considerations:

    • May not completely resolve all performance issues or software conflicts.
    • Existing system errors might persist.
    • May not be suitable for severe malware infections.

2. Creating a Backup and Performing a Clean Installation:

This method involves backing up your data, performing a clean installation of Windows 10, and then restoring your files and applications. It offers a more thorough system refresh but requires more time and effort.

  • Steps:

    • Backup: Create a complete backup of your personal files, applications, and system settings using a reliable backup solution.
    • Installation: Download the Windows 10 installation media (USB drive or DVD) and boot from it.
    • Clean Installation: Choose the "Custom" installation option during setup and format the system drive to perform a clean installation.
    • Restore: After installation, restore your backed-up data and applications.
  • Benefits:

    • Completely removes old files and system settings, providing a fresh start.
    • Resolves most performance issues and software conflicts.
    • Effectively eliminates malware infections.
  • Considerations:

    • Requires a reliable backup solution and adequate storage space.
    • More time-consuming process than an in-place upgrade.
    • Requires knowledge of system partitioning and installation procedures.

Choosing the Right Method:

The most suitable method depends on your specific needs and technical expertise. If you are looking for a quick and easy refresh, an in-place upgrade is sufficient. However, for a more thorough system overhaul and complete malware removal, a clean installation with backup is recommended.

Essential Considerations:

  • Backup: Regardless of the chosen method, creating a comprehensive backup is crucial. This ensures that you can restore your data and applications in case of unforeseen issues.
  • Software Compatibility: Ensure that your applications are compatible with the latest version of Windows 10 before proceeding with the installation.
  • System Requirements: Verify that your hardware meets the minimum system requirements for Windows 10.
  • Drivers: After installation, download and install the latest drivers for your hardware components.
  • Activation: Ensure that your Windows 10 license is valid and activated after the installation.

Frequently Asked Questions (FAQs)

1. Can I reinstall Windows 10 without a product key?

You can reinstall Windows 10 without a product key, but you will be limited to using the free trial version. To activate Windows 10 permanently, you will need a valid product key.

2. Will reinstalling Windows 10 delete my applications?

An in-place upgrade will retain your applications. However, a clean installation will remove all applications, and you will need to reinstall them manually after the installation is complete.

3. Will reinstalling Windows 10 delete my personal files?

An in-place upgrade will preserve your personal files. A clean installation will delete all files on the system drive, so it is crucial to back up your data beforehand.

4. Can I reinstall Windows 10 from a USB drive?

Yes, you can create a bootable USB drive with the Windows 10 installation media and install it from there.

5. What if I encounter errors during the installation process?

If you encounter errors, refer to the Microsoft support website or contact technical support for assistance.

Tips for a Smooth Reinstallation:

  • Backup: Create a complete backup of your data before starting the installation process.
  • Download Drivers: Download the latest drivers for your hardware components before installing Windows 10.
  • Update BIOS: Update your BIOS to the latest version for optimal compatibility with Windows 10.
  • Use a Clean USB Drive: Use a clean USB drive for creating the Windows 10 installation media.
  • Disable Antivirus: Temporarily disable your antivirus software during the installation process.

Conclusion

Reinstalling Windows 10 without data loss can effectively revitalize your system, resolving performance issues, software conflicts, and malware infections. Choosing the right method, creating a comprehensive backup, and following the steps outlined in this guide will ensure a smooth and successful reinstallation process. By taking the necessary precautions and understanding the benefits of a fresh start, you can enjoy a revitalized Windows 10 experience without sacrificing your valuable data.

Reset or Refresh Windows 10 without Losing Programs and Data Windows 10 System Restore, Refresh, Reset, Fresh Start & Reinstall guide Two Solutions to Refresh Windows 10 Without Losing Programs - MiniTool
Windows 10 Refresh & Reset Easily - Driver Easy How to Refresh Windows 10? Refresh Windows 10 to its default state in a few clicks, keeping your files and settings  TechSpot
Refresh Windows 10  Tutorials How to Refresh Windows 10?

Closure

Thus, we hope this article has provided valuable insights into Rejuvenating Your Windows 10: A Guide to Refreshing Your System Without Data Loss. We appreciate your attention to our article. See you in our next article!

Navigating The Digital Landscape: A Guide To Windows 10 Forums

Navigating the Digital Landscape: A Guide to Windows 10 Forums

Introduction

In this auspicious occasion, we are delighted to delve into the intriguing topic related to Navigating the Digital Landscape: A Guide to Windows 10 Forums. Let’s weave interesting information and offer fresh perspectives to the readers.

Navigating the Digital Landscape E-Book

The digital world is a complex and ever-evolving landscape, filled with a multitude of resources and communities. For users of Windows 10, a critical resource often overlooked is the vibrant and diverse community of online forums dedicated to troubleshooting, sharing knowledge, and fostering a sense of collective understanding. These forums serve as virtual hubs where users can connect, exchange ideas, and find solutions to challenges they encounter while navigating the Windows 10 operating system.

Understanding the Importance of Windows 10 Forums

While Microsoft provides official support channels, the unique nature of user experiences and the vast array of potential issues often necessitate a more specialized and personalized approach. Windows 10 forums cater to this need, offering a platform for users to connect with others facing similar challenges and benefit from the collective wisdom of the community. These forums act as invaluable resources, offering:

  • Troubleshooting Assistance: Forums provide a space for users to seek and share solutions to technical problems. Whether it’s a driver issue, a software conflict, or an unexpected error, the collective experience of forum members often holds the key to resolving these challenges.
  • Knowledge Sharing: Forums are repositories of information, allowing users to access a vast pool of knowledge accumulated by other users. This collective knowledge base covers a wide range of topics, from basic troubleshooting tips to advanced customization techniques.
  • Community Building: Forums foster a sense of community among Windows 10 users, enabling them to connect with like-minded individuals, share experiences, and collaborate on solutions. This sense of shared purpose can empower users and contribute to a more positive and supportive digital environment.
  • Early Access to Information: Forums are often the first places where users share news, updates, and insights about new Windows 10 features, updates, and potential issues. This provides users with a valuable source of information and allows them to stay informed about the latest developments.

Exploring the Landscape: A Look at Popular Windows 10 Forums

Numerous forums cater specifically to Windows 10 users, each with its unique strengths and focus. Some of the most popular and widely recognized forums include:

  • Microsoft Answers: This official Microsoft forum serves as a central hub for users to seek support and engage with Microsoft experts. It offers a structured environment for troubleshooting, with dedicated categories for various Windows 10 topics.
  • TenForums: This independent forum is known for its comprehensive coverage of Windows 10 topics, including troubleshooting, customization, and hardware compatibility. Its active community and knowledgeable members provide a wealth of information and support.
  • Windows 10 Forums: This forum, dedicated specifically to Windows 10, offers a wide range of discussions, from basic troubleshooting to advanced customization techniques. Its user-friendly interface and active community make it a popular choice for many users.
  • Reddit’s r/Windows10: This subreddit, part of the larger Reddit platform, provides a dynamic space for Windows 10 discussions, news, and troubleshooting. Its diverse community offers a wide range of perspectives and insights.

Navigating the Forums Effectively: Tips for Success

To maximize the benefits of Windows 10 forums, it’s essential to approach them strategically. Here are some tips for navigating these online communities effectively:

  • Be Specific and Clear: When posting a question or seeking help, clearly articulate the issue you’re facing. Provide specific details about your setup, the steps you’ve already taken, and the desired outcome.
  • Search Before Posting: Many forums have extensive search functions. Before posting a new question, utilize these tools to see if similar issues have been discussed previously. This can save time and avoid redundant inquiries.
  • Be Patient and Respectful: Understand that forum members are volunteering their time and expertise. Be patient, respectful, and avoid using inflammatory language.
  • Engage with the Community: Participating in discussions, sharing your knowledge, and offering assistance to others can strengthen the community and foster a more supportive environment.
  • Follow Forum Guidelines: Each forum has its own set of rules and guidelines. Familiarize yourself with these rules and adhere to them to ensure a positive and productive experience.

Frequently Asked Questions (FAQs) about Windows 10 Forums

Q: Are Windows 10 forums safe to use?

A: While most forums are safe and secure, it’s always wise to exercise caution. Avoid sharing personal information or sensitive data in public forums, and be wary of suspicious links or attachments.

Q: What are the benefits of using Windows 10 forums?

A: Forums provide access to a vast knowledge base, troubleshooting assistance, community support, and early access to information about new features and updates.

Q: How can I find the right forum for my needs?

A: Consider your specific needs and interests. Some forums focus on troubleshooting, while others specialize in customization or specific Windows 10 features.

Q: What if I can’t find a solution to my problem on the forum?

A: If you’re unable to find a solution on the forum, consider contacting Microsoft support or seeking assistance from a qualified IT professional.

Conclusion

Windows 10 forums represent a valuable resource for users seeking support, information, and community. By navigating these forums effectively and engaging with the community, users can enhance their Windows 10 experience, troubleshoot problems, and expand their knowledge of the operating system. The collective wisdom and shared experience of the forum community can empower users to overcome challenges and navigate the digital landscape with greater confidence and understanding.

Navigating The Digital Landscape: A Comprehensive Guide To The Best Map And Directions Websites Wondered how the digital landscape worked? Take a look hereโ€ฆ โ€“ howtododigital Webinar - How to navigate the new digital landscape  BIMobject
Digital landscape in stages What Is the Digital Landscape? Evaluate Your Strategy Today - yorCMO Navigating Digital Landscape: Chatbots & AI/ML Essentials 2023 - Ciente
Navigating the Digital Landscape: Effective Strategies for Online Business Navigating the Digital Landscape: Crafting Your Online Success Story โ€” Productive and Free

Closure

Thus, we hope this article has provided valuable insights into Navigating the Digital Landscape: A Guide to Windows 10 Forums. We thank you for taking the time to read this article. See you in our next article!

Reliving The Golden Age: A Comprehensive Guide To PlayStation 1 Emulation On PC

Reliving the Golden Age: A Comprehensive Guide to PlayStation 1 Emulation on PC

Introduction

In this auspicious occasion, we are delighted to delve into the intriguing topic related to Reliving the Golden Age: A Comprehensive Guide to PlayStation 1 Emulation on PC. Let’s weave interesting information and offer fresh perspectives to the readers.

Reliving the Golden Age: A Comprehensive Guide to PlayStation 1 Emulation on PC

[PC] Retroarch PS1 Emulation Setup Guide - 2023 Edition - The GamePad Gamer

The PlayStation 1, launched in 1994, ushered in a new era of gaming, leaving an indelible mark on the industry. Its vast library of titles, ranging from iconic platformers and RPGs to groundbreaking racing and fighting games, cemented its status as a gaming legend. While the original console may be gathering dust in attics or relegated to the realm of nostalgia, its legacy lives on through emulation. Emulation allows modern PC users to experience the PlayStation 1’s rich catalogue, bridging the gap between past and present.

Understanding Emulation: The Power of Re-creation

Emulation, in the context of gaming, involves replicating the functionality of a specific console on a different platform, typically a PC. This process involves a complex interplay of software and hardware, where a program, known as an emulator, mimics the original console’s behavior. The emulator interprets the game’s data, translates its instructions, and renders the visual output on the PC screen. Essentially, it creates a virtual environment that mirrors the original console, allowing users to play games designed for that system on a different platform.

The Advantages of PlayStation 1 Emulation

Emulating PlayStation 1 games on a PC offers a compelling array of benefits:

  • Accessibility: Emulation removes the limitations of hardware compatibility, allowing users to experience PlayStation 1 games on modern PCs without needing to acquire or maintain the original console. This accessibility is particularly valuable for gamers who may not have access to the original hardware or who wish to avoid the potential complications of hardware maintenance.
  • Enhanced Performance: Modern PCs possess significantly more processing power than the original PlayStation 1. Emulators can leverage this power to enhance performance, resulting in smoother gameplay, improved frame rates, and potentially higher resolutions. This can lead to a more enjoyable and immersive gaming experience.
  • Customization Options: Emulation provides a degree of customization that was not possible on the original console. Users can adjust settings such as resolution, frame rate, and even controller mapping, allowing for a more tailored gaming experience.
  • Preservation: Emulation plays a vital role in preserving gaming history. As original hardware ages and becomes less reliable, emulation ensures that these classic games remain accessible for future generations. This preservation effort is crucial for maintaining the legacy of PlayStation 1 titles and ensuring their continued enjoyment.
  • Cost-Effectiveness: Emulation offers a cost-effective alternative to acquiring original PlayStation 1 hardware and games, which can be expensive, particularly for rare or sought-after titles. Emulators are often free, and game ROMs (read-only memory) files, which contain the game data, can be obtained legally through various online resources.

Choosing the Right Emulator: A Guide to Navigating the Options

While numerous PlayStation 1 emulators exist, some stand out for their user-friendliness, performance, and feature set. Here’s a brief overview of popular options:

  • ePSXe: One of the most well-established and widely used PlayStation 1 emulators, ePSXe boasts high compatibility with a vast library of games. It offers a user-friendly interface, a range of configuration options, and compatibility with various controllers.
  • PCSX2: While primarily known for its PlayStation 2 emulation capabilities, PCSX2 also offers support for PlayStation 1 games. It provides a robust feature set, including advanced graphics rendering options and support for high-resolution displays.
  • Mednafen: This emulator is known for its accuracy and performance. It offers a command-line interface, which may be less user-friendly for beginners but provides a high level of control for advanced users.
  • RetroArch: RetroArch is a multi-system emulator that supports a wide range of consoles, including the PlayStation 1. It offers a unified interface and a vast library of core emulators, providing a convenient platform for emulating multiple systems.

Setting Up Your PlayStation 1 Emulation Environment

The process of setting up a PlayStation 1 emulation environment involves several steps:

  1. Download and Install an Emulator: Choose an emulator based on your preferences and technical expertise. Download the emulator from a reputable source and install it on your PC.
  2. Obtain Game ROMs: Game ROMs are digital files that contain the game data. It is essential to obtain ROMs legally through methods such as buying physical copies of games and creating backups or downloading them from legitimate sources.
  3. Configure the Emulator: Once the emulator is installed, configure its settings according to your preferences. This may involve adjusting graphics settings, controller mapping, and other options to optimize your gaming experience.
  4. Load and Play Your Games: Use the emulator’s interface to load the ROM file for the game you want to play. The emulator will launch the game, and you can begin playing using your chosen controller.

FAQs: Addressing Common Questions about PlayStation 1 Emulation

Q: Is PlayStation 1 emulation legal?

A: Emulating PlayStation 1 games is generally considered legal, provided you own the original game and are using the ROM for personal use. Downloading ROMs from unauthorized sources or distributing them without proper permission is illegal and unethical.

Q: What are the system requirements for running a PlayStation 1 emulator?

A: Modern PCs can easily run PlayStation 1 emulators. While specific requirements may vary depending on the emulator and game, most emulators can run smoothly on systems with a modern processor, adequate RAM, and a graphics card.

Q: How do I connect a PlayStation controller to my PC?

A: Most emulators support various controllers, including PlayStation controllers. You can use a USB adapter to connect a PlayStation controller to your PC or use a wireless adapter for a more convenient setup.

Q: Are there any potential issues with PlayStation 1 emulation?

A: While emulation is generally a reliable way to play PlayStation 1 games, some potential issues may arise. These may include compatibility issues with certain games, performance issues, or potential glitches.

Tips for Optimizing Your PlayStation 1 Emulation Experience

  • Use a Dedicated Controller: Using a PlayStation controller, or a controller with similar button layout, can enhance the authenticity and enjoyment of the gaming experience.
  • Adjust Graphics Settings: Experiment with graphics settings to find the optimal balance between visual fidelity and performance. Higher resolutions can improve visual quality but may impact performance.
  • Explore Emulator Features: Familiarize yourself with the emulator’s features, including save state functionality, controller mapping, and other settings that can enhance your gaming experience.
  • Seek Community Support: Join online communities dedicated to PlayStation 1 emulation for troubleshooting tips, game recommendations, and other helpful resources.

Conclusion: A Bridge to the Past, a Gateway to Nostalgia

PlayStation 1 emulation offers a compelling way to revisit the golden age of gaming, allowing modern PC users to experience the console’s rich library of titles. Emulation bridges the gap between generations, preserving gaming history and ensuring that these classic games remain accessible for future generations. By leveraging the power of modern PCs and the dedication of the emulation community, the legacy of the PlayStation 1 continues to thrive, providing an opportunity to relive cherished memories and discover new gaming experiences.

RetroBat 12TB PlayStation 1 and 2 Complete Emulation Hard Drive for Windows - RetroMini Store Sony PlayStation (1) - Reliving Golden Age - Pixel Refresh PlayStation Emulation on PC: Duckstation setup guide / tutorial - YouTube
Sony PlayStation (1) - Reliving Golden Age - Pixel Refresh PlayStation Emulation Guide - YouTube [PC] Retroarch PS1 Emulation Setup Guide - The GamePad Gamer
The ultimate PS1/PSX 4k emulation guide using Ducksation, includes bios files for all regions What's the Difference Between Hardware and Software Emulation? - History-Computer

Closure

Thus, we hope this article has provided valuable insights into Reliving the Golden Age: A Comprehensive Guide to PlayStation 1 Emulation on PC. We hope you find this article informative and beneficial. See you in our next article!

The Rise Of Achievement Systems: How Gamification Enhances PC Gaming

The Rise of Achievement Systems: How Gamification Enhances PC Gaming

Introduction

With great pleasure, we will explore the intriguing topic related to The Rise of Achievement Systems: How Gamification Enhances PC Gaming. Let’s weave interesting information and offer fresh perspectives to the readers.

The Rise of Achievement Systems: How Gamification Enhances PC Gaming

Gamification: Rise of a New Gaming Era - Aegon Studio

The world of PC gaming has undergone a dramatic transformation since its inception. From rudimentary text-based adventures to immersive, visually stunning experiences, the evolution has been fueled by technological advancements and a constant desire for greater engagement. One key element contributing to this evolution has been the introduction of achievement systems, a gamification technique that has profoundly impacted how players interact with and experience video games.

The Genesis of Achievements: From Simple Goals to Complex Systems

The origins of achievement systems can be traced back to the early days of gaming. Games like "Doom" and "Quake" featured basic goals, such as completing levels or achieving high scores, which provided a sense of accomplishment. However, it was the advent of online gaming platforms like Steam that truly revolutionized the concept.

In 2008, Steam introduced its achievement system, which allowed developers to embed specific objectives within their games, rewarding players with digital badges and accolades for completing them. This simple yet effective innovation sparked a widespread adoption of achievement systems across the PC gaming landscape.

The Mechanics of Achievement Systems

At their core, achievement systems present players with a set of challenges or goals that, upon completion, unlock a corresponding reward. These rewards can range from simple, cosmetic items like profile banners or virtual currency, to more substantial benefits such as in-game bonuses or access to exclusive content.

The design of achievements varies greatly, reflecting the diversity of games they are embedded within. Some games feature linear achievement systems, where players progress through a series of predetermined goals, while others offer a more open-ended approach, allowing players to pursue achievements based on their individual playstyles and preferences.

The Benefits of Achievement Systems: Engaging Players and Fostering Community

The introduction of achievement systems has brought numerous benefits to the PC gaming landscape, enhancing the overall player experience in a variety of ways:

  • Increased Engagement and Motivation: Achievement systems provide players with a clear sense of purpose and direction, encouraging them to explore different aspects of the game and strive for mastery. The prospect of unlocking achievements acts as a powerful motivator, pushing players to spend more time engaging with the game and its content.
  • Enhanced Replayability: By offering a diverse range of challenges and rewards, achievement systems incentivize players to revisit games even after completing the main story or reaching the endgame. This extended engagement fosters a deeper appreciation for the game’s design and mechanics.
  • Community Building and Social Interaction: Achievements often serve as conversation starters, allowing players to share their progress and accomplishments with friends and fellow gamers. This shared experience can lead to increased social interaction and a stronger sense of community around the game.
  • Data Collection and Feedback: From a developer’s perspective, achievement systems provide valuable insights into player behavior and preferences. By tracking which achievements are most frequently unlocked, developers can gain a better understanding of how players interact with their game, informing future design decisions and content creation.

Beyond the Digital Trophies: The Psychology of Achievement Systems

The success of achievement systems can be attributed to their ability to tap into fundamental psychological principles that drive human behavior. Achievements trigger a sense of accomplishment and satisfaction, activating the reward centers in our brains and reinforcing positive behaviors. This psychological response, coupled with the social recognition and competitive spirit fostered by achievements, creates a powerful loop that keeps players engaged and motivated.

The Potential Drawbacks of Achievement Systems

While achievement systems have undoubtedly enriched the PC gaming experience, they are not without their potential drawbacks.

  • Overly Prescriptive Gameplay: In some cases, achievement systems can lead to a more rigid and less organic gameplay experience. Players may feel pressured to prioritize achievement completion over natural exploration and experimentation, potentially hindering their enjoyment of the game’s core mechanics.
  • Focus on Quantifiable Goals: Achievement systems often emphasize quantifiable goals and metrics, potentially overshadowing the more subjective aspects of the gaming experience. This focus on numbers can lead to a sense of pressure and competition, diminishing the enjoyment of the game for some players.
  • Potential for Exploitation: Some players may engage in unethical practices, such as exploiting glitches or using third-party software, to unlock achievements more easily. This can undermine the integrity of the achievement system and create an unfair playing field for other players.

Balancing the Benefits and Drawbacks: A Future for Achievement Systems

Despite their potential drawbacks, achievement systems remain a powerful tool for enhancing the PC gaming experience. By carefully designing and implementing achievement systems, developers can strike a balance between fostering engagement and encouraging natural exploration, ensuring that achievements remain a positive force in the gaming landscape.

FAQs on PC Games with Achievements

1. What are the most common types of achievements in PC games?

Common types of achievements include:

  • Story-Related: Completing the main story, reaching specific points in the narrative.
  • Gameplay-Based: Reaching certain milestones, mastering skills, completing challenges.
  • Collectibles: Gathering all items, finding hidden secrets.
  • Multiplayer: Winning matches, achieving high scores, completing cooperative tasks.
  • Miscellaneous: Performing unique actions, completing easter eggs, interacting with the game world in specific ways.

2. How do achievement systems benefit developers?

Achievement systems provide developers with valuable data on player behavior, allowing them to:

  • Identify popular game features: Analyze which achievements are frequently unlocked to understand what players enjoy most.
  • Track player engagement: Monitor achievement completion rates to assess player retention and game longevity.
  • Improve game design: Use player feedback from achievement systems to inform future updates and content creation.

3. Can achievements be earned in offline games?

While online connectivity is often required for achievement tracking and syncing, some games offer offline achievements that can be unlocked without an internet connection. These achievements are usually tied to specific in-game milestones or accomplishments.

4. Are achievement systems always positive for players?

While achievement systems can enhance the gaming experience, they can also lead to:

  • Pressure to complete achievements: Some players may feel pressured to complete all achievements, potentially diminishing their enjoyment of the game.
  • Focus on quantifiable goals: The emphasis on achieving specific goals can overshadow the more subjective aspects of the gaming experience.
  • Unethical practices: Some players may exploit glitches or use third-party software to unlock achievements more easily, creating an unfair playing field.

5. What is the future of achievement systems in PC gaming?

Achievement systems are likely to continue evolving, becoming more sophisticated and integrated into the overall gaming experience. Developers will likely focus on:

  • More creative and engaging achievements: Designing unique and rewarding challenges that encourage players to explore the game’s depth.
  • Improved integration with social features: Creating systems that allow players to share achievements and compete with friends.
  • More personalized experiences: Tailoring achievements to individual player preferences and playstyles.

Tips for Players: Navigating the World of Achievements

  • Focus on enjoying the game: Don’t let achievements dictate your gameplay experience. Play the game for its own sake and let achievements be a bonus.
  • Explore different playstyles: Try different strategies and approaches to unlock a wider range of achievements.
  • Don’t be afraid to experiment: Experiment with different features and mechanics, even if they don’t directly contribute to achievement progress.
  • Don’t be discouraged by difficult achievements: Some achievements may be challenging, but focus on the satisfaction of overcoming obstacles.
  • Share your accomplishments: Share your achievements with friends and fellow gamers to enhance the social aspect of the gaming experience.

Conclusion: A Lasting Legacy

Achievement systems have become an integral part of the modern PC gaming landscape, enriching the player experience by providing a sense of purpose, rewarding progress, and fostering community. While they are not without their potential drawbacks, their positive impact on engagement, replayability, and social interaction is undeniable. As technology continues to advance and gaming experiences evolve, achievement systems are likely to remain a prominent feature, shaping the future of PC gaming for years to come.

What is Gamification?  The Gamfication tool for everyone Gamification: Rise of a New Gaming Era - Aegon Studio Work Smarter, Not Harder: How Gamification Enhances Productivity - Access Information
Gamification in Learning Apps to Make Education Fun and Get Positive Outcomes - Aimprosoft Essential Elements of Gamification in eLearning  Medium (PDF) The limits of gamification
The Science of Gamification: How it Boosts Innovation  by Ramon Scott / Innovaciรณn  Medium Gamification At Work: What is Gamification?  Interaction Design Foundation

Closure

Thus, we hope this article has provided valuable insights into The Rise of Achievement Systems: How Gamification Enhances PC Gaming. We thank you for taking the time to read this article. See you in our next article!

The Absence Of Windows Defender In Windows 10: A Comprehensive Exploration

The Absence of Windows Defender in Windows 10: A Comprehensive Exploration

Introduction

In this auspicious occasion, we are delighted to delve into the intriguing topic related to The Absence of Windows Defender in Windows 10: A Comprehensive Exploration. Let’s weave interesting information and offer fresh perspectives to the readers.

The Absence of Windows Defender in Windows 10: A Comprehensive Exploration

How to disable Windows Defender on Windows 10

Windows Defender, a robust and comprehensive security solution, is a cornerstone of Windows 10’s security infrastructure. Its absence, while seemingly improbable, can arise from various factors, each demanding a distinct approach to remediation. This article will delve into the potential scenarios leading to the non-appearance of Windows Defender in Windows 10, exploring the implications and offering solutions for each scenario.

Understanding Windows Defender’s Role

Windows Defender serves as the built-in antivirus and anti-malware protection for Windows 10. It operates in real-time, constantly monitoring the system for malicious threats, including viruses, spyware, ransomware, and other forms of malware. Its functionalities extend beyond basic threat detection, encompassing:

  • Real-time Protection: This feature scans files and applications as they are downloaded, opened, or executed, preventing potentially harmful programs from accessing the system.
  • Scheduled Scans: Regular scans ensure that the system is consistently checked for threats, even when not actively downloading or opening files.
  • Firewall: Windows Defender Firewall acts as a barrier between the system and the internet, blocking unauthorized connections and preventing potential attacks.
  • Exploit Protection: This feature helps mitigate vulnerabilities in the system, preventing attackers from exploiting weaknesses to gain unauthorized access.
  • Cloud-based Protection: Leveraging Microsoft’s vast cloud infrastructure, Windows Defender can access real-time threat intelligence, enhancing its ability to identify and neutralize emerging threats.

Scenarios Leading to the Absence of Windows Defender

The absence of Windows Defender in Windows 10 can be attributed to several factors, each requiring a unique approach to resolution. These scenarios include:

1. Accidental Deactivation or Removal:

Windows Defender, like many other system components, can be inadvertently disabled or removed. This might occur due to:

  • Third-party security software: Installing another antivirus program might automatically disable Windows Defender to avoid conflicts.
  • System configuration changes: Accidental modifications to system settings, particularly those related to security, could disable Windows Defender.
  • Manual removal: Users might mistakenly remove Windows Defender components, believing them to be unnecessary or redundant.

2. System Corruption or Errors:

Windows Defender, like any software, can be affected by system corruption or errors. These problems might arise from:

  • Malware infections: Malicious programs can deliberately disable or corrupt Windows Defender to evade detection and gain control over the system.
  • System updates or installations: Faulty updates or installations can introduce errors that interfere with Windows Defender’s functionality.
  • Hardware failures: Malfunctioning hard drives or other hardware components can lead to data corruption, affecting system files, including those associated with Windows Defender.

3. Specific Windows 10 Versions or Settings:

Certain versions or configurations of Windows 10 might not include Windows Defender by default or might have it disabled by design. This might occur in:

  • Enterprise editions: Some enterprise editions of Windows 10 might allow administrators to disable Windows Defender and rely on alternative security solutions.
  • Specific system configurations: Advanced system configurations or policies might restrict or disable certain system components, including Windows Defender.

4. System Limitations:

Windows Defender’s presence and functionality might be limited or unavailable in specific scenarios, including:

  • Limited hardware resources: Older or low-powered devices might not meet the minimum requirements for Windows Defender to function effectively.
  • Virtual machines: Virtualized environments might require specific configurations to enable Windows Defender functionality.

Solutions and Troubleshooting Steps

Addressing the absence of Windows Defender requires a systematic approach, focusing on identifying the underlying cause and implementing appropriate solutions. Here’s a step-by-step guide:

1. Check for Accidental Deactivation:

  • Verify Windows Defender status: Navigate to Windows Security (previously known as Windows Defender Security Center) in the Start Menu and check the status of real-time protection, scheduled scans, and firewall.
  • Review third-party security software: If another antivirus program is installed, check its settings to see if it’s disabling Windows Defender. You might need to adjust the settings or temporarily disable the third-party software to re-enable Windows Defender.
  • Restore system settings: If recent changes were made to system settings, consider restoring the system to a previous restore point.

2. Troubleshoot System Corruption or Errors:

  • Run System File Checker (SFC): This tool scans system files for corruption and attempts to repair them. Open Command Prompt as administrator and run the command: sfc /scannow.
  • Run DISM tool: The Deployment Image Servicing and Management (DISM) tool can repair corrupted system images. Open Command Prompt as administrator and run the command: DISM /Online /Cleanup-Image /RestoreHealth.
  • Perform a clean boot: This isolates the problem by starting the system with minimal programs and services running. This can help identify if a third-party program is interfering with Windows Defender.
  • Run a full system scan: Use Windows Defender to perform a full system scan to detect and remove any malware that might be interfering with its functionality.
  • Update Windows: Ensure the system is running the latest Windows updates, as they often include security patches and fixes that can address issues with Windows Defender.

3. Review Windows 10 Version and Settings:

  • Verify Windows 10 edition: If using an enterprise edition, check with your system administrator to confirm if Windows Defender is enabled or if alternative security solutions are in place.
  • Review Group Policy settings: If using a domain-joined computer, check the Group Policy settings to see if they are restricting or disabling Windows Defender.

4. Address System Limitations:

  • Upgrade hardware: If the system’s hardware resources are insufficient, consider upgrading to a more powerful device.
  • Optimize virtual machine settings: If running in a virtualized environment, ensure that the virtual machine’s settings are configured to support Windows Defender.

FAQs on the Absence of Windows Defender in Windows 10

Q: Is it safe to use Windows 10 without Windows Defender?

A: It is strongly recommended to use Windows Defender or a comparable security solution to protect your system from threats. Operating without a robust security program significantly increases the risk of malware infections, data loss, and other security breaches.

Q: Can I use another antivirus program alongside Windows Defender?

A: While technically possible, it’s generally not recommended to run multiple antivirus programs simultaneously. This can lead to conflicts, performance issues, and potentially reduce the effectiveness of both programs.

Q: How do I know if my system is protected without Windows Defender?

A: If Windows Defender is not present or disabled, you can check if another antivirus program is installed and active. Look for its icon in the system tray or within the Windows Security app. You can also verify the status of the firewall and other security features.

Tips for Maintaining Windows Defender Functionality

  • Keep Windows Defender updated: Ensure that Windows Defender is regularly updated to benefit from the latest threat definitions and security enhancements.
  • Perform regular scans: Schedule regular scans to proactively identify and remove threats before they can compromise your system.
  • Enable real-time protection: Real-time protection provides continuous monitoring for threats, ensuring that your system is protected at all times.
  • Review security settings: Periodically review and adjust your security settings to ensure they meet your specific needs and security requirements.

Conclusion

The absence of Windows Defender in Windows 10 can be a cause for concern, leaving your system vulnerable to various threats. Identifying the underlying cause is crucial for implementing the appropriate solutions. Whether it’s accidental deactivation, system corruption, specific Windows 10 configurations, or system limitations, understanding the root of the problem allows for targeted troubleshooting and remediation. By addressing the issue promptly and diligently, you can restore Windows Defender’s crucial role in protecting your system from malware and other cyber threats, ensuring a secure and reliable computing experience.

How to turn off Windows Defender in Windows 10 - javatpoint How to disable Windows Defender on Windows 10 How to Disable Windows Defender in Windows 10 โ€“ WindowsInstructed
3 Ways To Disable Windows Defender In Windows 10 PC 2024 - Technowizah Scroll down to Virus & threat protection settings , and click on Manage Settings How to Turn Off Windows Defender on Windows 10 - Venn Oppostis
How to configure Windows Defender in Windows 10 How to Disable or Enable Windows Defender on Windows 10 - YouTube

Closure

Thus, we hope this article has provided valuable insights into The Absence of Windows Defender in Windows 10: A Comprehensive Exploration. We appreciate your attention to our article. See you in our next article!

Navigating The Windows 10 Ecosystem: A Comprehensive Guide To Programs And Features Settings

Navigating the Windows 10 Ecosystem: A Comprehensive Guide to Programs and Features Settings

Introduction

In this auspicious occasion, we are delighted to delve into the intriguing topic related to Navigating the Windows 10 Ecosystem: A Comprehensive Guide to Programs and Features Settings. Let’s weave interesting information and offer fresh perspectives to the readers.

Open Programs and Features in Windows 10 [The Fastest Way]

Windows 10, Microsoft’s flagship operating system, boasts a comprehensive set of features and functionalities designed to cater to diverse user needs. A crucial aspect of this ecosystem is the "Programs and Features" settings, a central hub for managing installed applications, customizing system behavior, and ensuring optimal performance. This guide delves into the intricacies of this vital section, providing a detailed understanding of its importance and potential.

Understanding the Programs and Features Settings:

The "Programs and Features" settings, accessible through the Windows Settings app (accessible by pressing the Windows key + I), serves as a centralized control panel for managing software installed on your computer. It empowers users to:

  • Uninstall Programs: Remove unwanted or unnecessary applications from the system, freeing up valuable disk space and potentially improving performance.
  • Modify Program Settings: Adjust application configurations, such as default settings, language preferences, or installation directories.
  • View Installed Programs: Gain a comprehensive overview of all software currently installed on the system, including their version numbers and installation dates.
  • Turn Windows Features On or Off: Enable or disable optional components of the operating system, such as .NET Framework or Windows Media Player, depending on specific user needs and preferences.
  • Repair Programs: Attempt to resolve issues with existing applications by reinstalling or repairing corrupted files.

Benefits of Utilizing Programs and Features Settings:

Effectively utilizing the "Programs and Features" settings offers several advantages for Windows 10 users:

  • Enhanced System Performance: Removing unused or unwanted applications can significantly improve system responsiveness, reduce boot times, and free up valuable resources.
  • Optimized Storage Management: Uninstalling unnecessary software liberates disk space, preventing potential storage constraints and ensuring optimal system performance.
  • Customizable User Experience: Modifying program settings allows users to tailor the operating system to their specific preferences, enhancing overall usability and comfort.
  • Troubleshooting and Repair: The "Programs and Features" settings facilitate troubleshooting and repair of problematic applications by providing options for reinstalling or repairing corrupted files.
  • Security and Privacy Control: By managing installed software, users can maintain a secure system by removing potentially malicious or unwanted applications.

Exploring the Programs and Features Settings in Detail:

1. Uninstalling Programs:

The "Uninstall or change a program" section within the "Programs and Features" settings allows users to remove unwanted applications from their system. This process is straightforward:

  • Locate the Program: Browse the list of installed programs, either alphabetically or by installation date.
  • Select the Program: Click on the desired program to highlight it.
  • Initiate Uninstallation: Click the "Uninstall" button to begin the removal process.
  • Follow On-Screen Instructions: Adhere to the prompts provided by the uninstaller to complete the removal.

2. Modifying Program Settings:

Some applications offer the ability to modify their settings directly from the "Programs and Features" settings. This typically involves:

  • Selecting the Program: Highlight the program whose settings you wish to modify.
  • Accessing Modify Options: Click the "Change" button, which may appear alongside the "Uninstall" button.
  • Following On-Screen Instructions: Navigate through the program’s setup menus to adjust desired settings.

3. Viewing Installed Programs:

The "Programs and Features" settings provide a comprehensive list of all installed applications, allowing users to:

  • Identify Installed Software: Easily view all programs currently installed on the system.
  • Check Installation Dates: Determine when each program was installed on the computer.
  • View Version Numbers: Identify the specific version of each installed program.

4. Turning Windows Features On or Off:

This section allows users to enable or disable optional components of the Windows 10 operating system, such as:

  • .NET Framework: A software framework essential for running various applications.
  • Windows Media Player: A multimedia player for playing audio and video files.
  • Hyper-V: A virtualization platform for running virtual machines.
  • Internet Information Services (IIS): A web server for hosting websites and web applications.

5. Repairing Programs:

In cases of corrupted or malfunctioning applications, the "Programs and Features" settings offer a repair option. This process typically involves:

  • Selecting the Program: Highlight the program requiring repair.
  • Initiating Repair: Click the "Repair" button, which may appear alongside the "Uninstall" button.
  • Following On-Screen Instructions: Adhere to the prompts provided by the repair tool to restore the program’s functionality.

FAQs: Addressing Common Queries about Programs and Features Settings:

Q: How do I find the "Programs and Features" settings?

A: The "Programs and Features" settings are accessible through the Windows Settings app. Press the Windows key + I, then navigate to "Apps" > "Apps & features."

Q: What happens when I uninstall a program?

A: Uninstalling a program removes its files and associated data from your computer. This frees up disk space and potentially improves system performance.

Q: Can I uninstall pre-installed Windows apps?

A: While some pre-installed Windows apps can be uninstalled, others may be essential for the operating system’s functionality and cannot be removed.

Q: What are Windows Features, and why should I care about them?

A: Windows Features are optional components of the operating system that can be enabled or disabled based on user needs. These components may include specific functionalities like .NET Framework or virtualization tools.

Q: How do I repair a program if it’s not working properly?

A: If a program is malfunctioning, attempt to repair it through the "Programs and Features" settings. Select the program, click "Repair," and follow the on-screen instructions.

Q: Can I reinstall a program after uninstalling it?

A: Yes, you can typically reinstall a program after uninstalling it. However, you may need to download the installer file again from the original source.

Tips for Effective Program and Feature Management:

  • Regularly Review Installed Programs: Periodically review the list of installed programs to identify and remove unused or unwanted applications.
  • Utilize the "Repair" Option: Before resorting to complete uninstallation, attempt to repair malfunctioning programs using the "Repair" option in the "Programs and Features" settings.
  • Be Aware of Essential Programs: Before uninstalling any program, ensure it is not essential for the operating system’s functionality or for running other important applications.
  • Keep Software Up to Date: Regularly update installed programs to ensure they are running optimally and to receive security patches.
  • Consider Using Third-Party Software Managers: Explore using third-party software management tools for advanced features like automatic updates, bulk uninstallation, and detailed program analysis.

Conclusion:

The "Programs and Features" settings in Windows 10 are a powerful tool for managing installed applications, customizing system behavior, and optimizing performance. By understanding its functionalities and utilizing its features effectively, users can maintain a clean, efficient, and personalized computing environment. Regularly reviewing and managing installed programs ensures a smooth and secure operating experience, maximizing the potential of Windows 10.

Windows 10 Ecosystem Review  Xbox, Mobile, Desktop  Digital Trends Understanding the Microsoft Ecosystem and Its Advantages โ€“ Part 2 Windows 10 Ecosystem Review  Xbox, Mobile, Desktop  Digital Trends
Navigating the Microsoft Ecosystem: An Insider's Guide to Copilot in Products Windows 10 Ecosystem: Take Advantage Of The Windows 10 Ecosystem by Theron Dimascio  Goodreads Windows: Solving 0x0000011b Error When Connecting to Shared Printer โ€“ Indowhiz
Microsoft Ecosystem Map Tips for navigating the Microsoft ecosystem  Sherweb

Closure

Thus, we hope this article has provided valuable insights into Navigating the Windows 10 Ecosystem: A Comprehensive Guide to Programs and Features Settings. We appreciate your attention to our article. See you in our next article!