The Silent Symphony: Troubleshooting Audio Issues After Windows 11 Installation
The Silent Symphony: Troubleshooting Audio Issues After Windows 11 Installation
Related Articles: The Silent Symphony: Troubleshooting Audio Issues After Windows 11 Installation
Introduction
With enthusiasm, let’s navigate through the intriguing topic related to The Silent Symphony: Troubleshooting Audio Issues After Windows 11 Installation. Let’s weave interesting information and offer fresh perspectives to the readers.
Table of Content
The Silent Symphony: Troubleshooting Audio Issues After Windows 11 Installation
The transition to a new operating system, particularly one as significant as Windows 11, often brings about a wave of anticipation and excitement. However, the initial setup can sometimes be marred by unexpected hiccups. One such issue, frequently encountered by users, is the absence of sound after installing Windows 11. This seemingly simple problem can stem from a variety of underlying factors, requiring a systematic approach to diagnosis and resolution.
Understanding the Importance of Audio Functionality
In today’s digitally driven world, sound is integral to a seamless and enjoyable computing experience. From the subtle notification chimes to the immersive soundscapes of multimedia content, audio plays a crucial role in enhancing user interaction and engagement. The absence of sound can significantly hinder productivity, entertainment, and overall usability of the computer.
Identifying the Root Cause: A Multifaceted Approach
The lack of sound after a Windows 11 installation can be attributed to a multitude of factors, each requiring a distinct troubleshooting method. Here’s a comprehensive breakdown of potential causes and their respective solutions:
1. Driver Issues: The Silent Conductor
Drivers are software programs that enable the operating system to communicate with hardware components, including audio devices. If the correct drivers are not installed or are outdated, the sound system might fail to function.
Troubleshooting Steps:
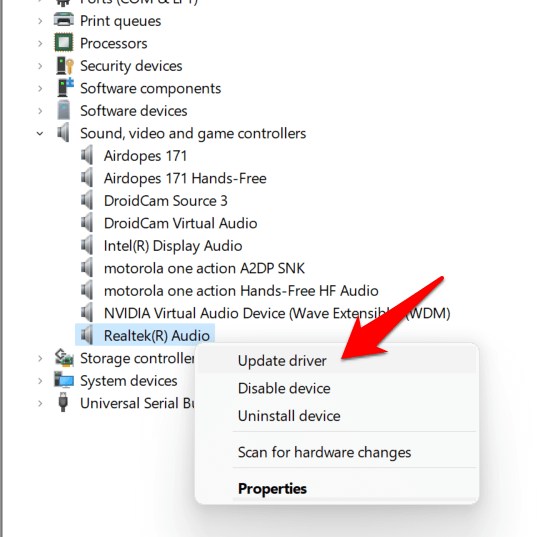
- Driver Update: The most common solution is to update the audio drivers. This can be achieved through the Device Manager, where users can locate the audio device, right-click, and select "Update driver."
- Driver Reinstallation: If updating the drivers doesn’t resolve the issue, consider completely reinstalling the drivers. This can be done by uninstalling the current drivers and then downloading and installing the latest versions from the manufacturer’s website.
- Compatibility Check: Ensure that the audio drivers are compatible with Windows 11. Older drivers might not function correctly with the new operating system. Check the manufacturer’s website for Windows 11-compatible drivers.
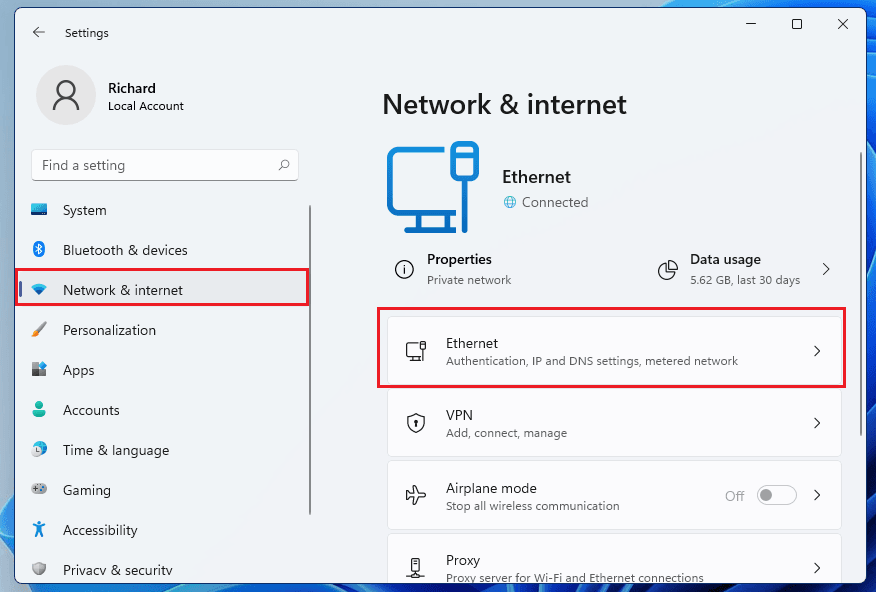
2. Audio Service Configuration: The Sound Maestro
Windows 11 relies on various services to manage audio output. If these services are not running correctly, sound might be disabled.
Troubleshooting Steps:
- Service Restart: Open the Services window (search for "services.msc" in the Start menu) and locate the "Windows Audio" service. Right-click and select "Restart" to ensure the service is operational.
- Service Enablement: If the "Windows Audio" service is disabled, right-click and select "Start." Additionally, check the "Startup type" and ensure it is set to "Automatic" to guarantee the service starts automatically upon system boot.
3. Hardware Malfunction: The Silent Instrument
While less common, hardware issues with the audio device itself can lead to sound problems.
Troubleshooting Steps:
- Hardware Check: Inspect the audio device for any physical damage or loose connections. Ensure the device is properly connected to the computer.
- Device Test: If possible, test the audio device on another computer to rule out a hardware failure.
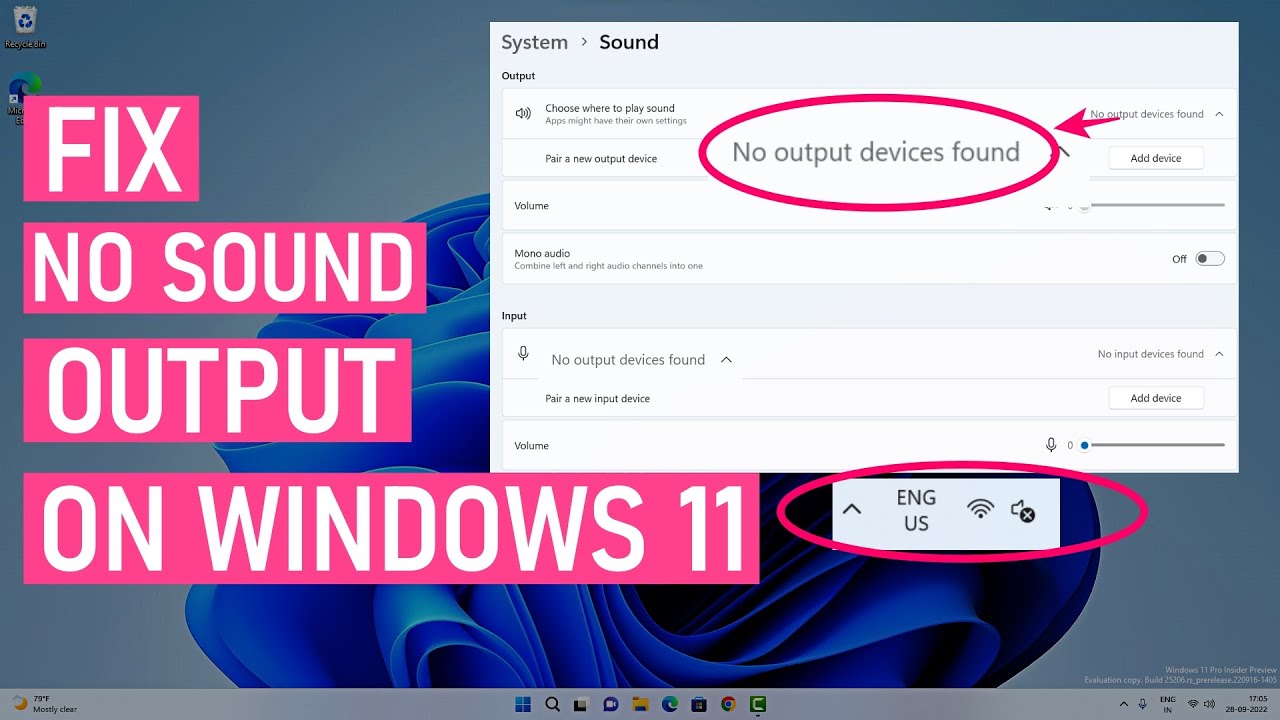
4. System Settings: The Sound Mixer
Windows 11 offers a range of settings that can affect audio output. These settings might unintentionally mute the sound or redirect it to a different output device.
Troubleshooting Steps:
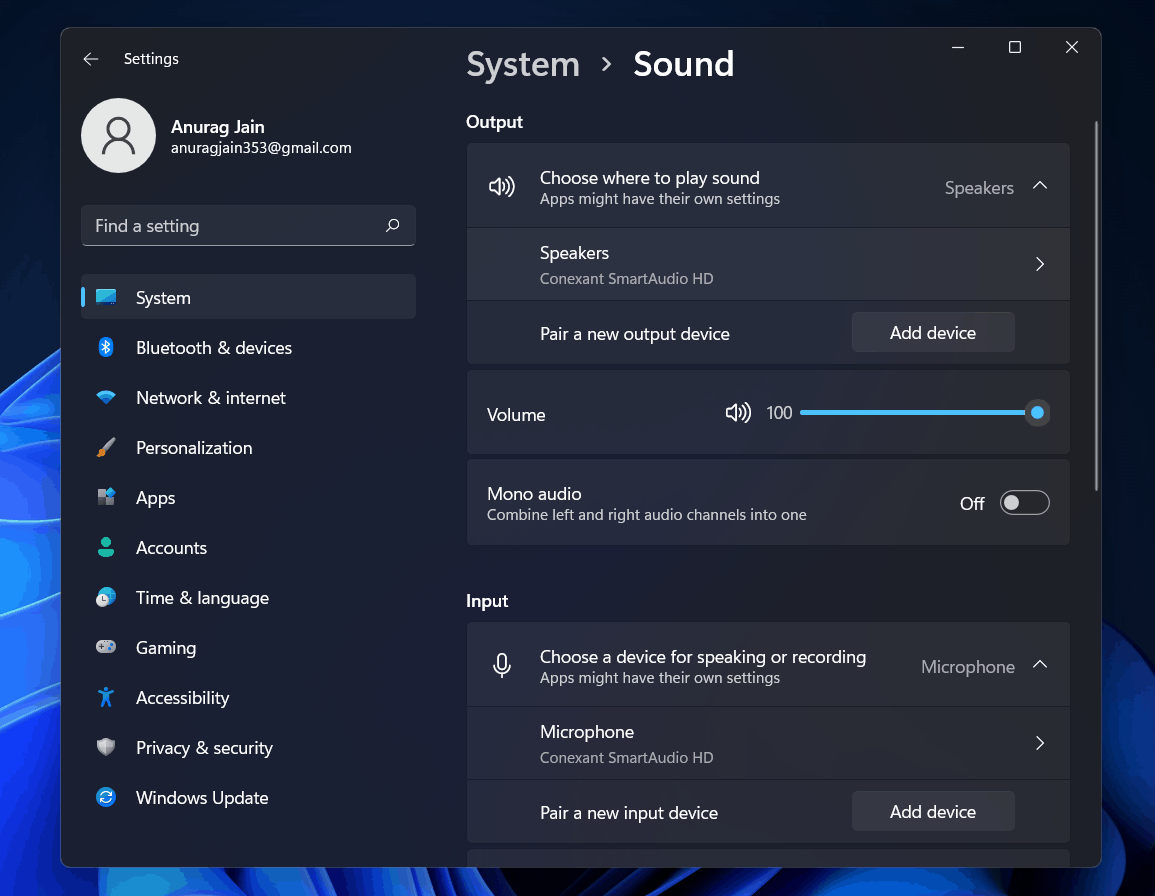
- Volume Control: Check the volume control in the taskbar and ensure the sound is not muted.
- Output Device: Verify that the correct audio output device is selected in the Sound settings.
- System-wide Mute: Ensure that the system-wide mute option is not enabled in the Sound settings.
5. Software Conflicts: The Interfering Melody
Certain software applications might interfere with the audio system, causing sound problems.
Troubleshooting Steps:
- Software Uninstall: If the issue arose after installing a particular program, consider uninstalling it to see if it resolves the sound problem.
- Compatibility Check: Ensure that all installed software is compatible with Windows 11.
6. Windows Updates: The Sound Patch
Windows updates often include bug fixes and driver updates, which can sometimes resolve audio issues.
Troubleshooting Steps:
- Update Check: Check for any pending Windows updates and install them.
- Update Rollback: If the sound issue arose after a recent update, consider rolling back to a previous version of Windows.
7. BIOS Settings: The Silent Symphony’s Conductor
The BIOS (Basic Input/Output System) controls the basic hardware settings of the computer. Incorrect BIOS settings can sometimes affect audio output.
Troubleshooting Steps:
- BIOS Access: Access the BIOS settings by pressing a specific key (usually F2 or Del) during system startup.
- Audio Settings: Check for any audio-related settings in the BIOS and ensure they are correctly configured.
8. Audio Output Device: The Sound Source
The audio output device, such as speakers or headphones, might be the source of the problem.
Troubleshooting Steps:
- Device Check: Verify that the audio output device is powered on and properly connected to the computer.
- Device Test: Test the device on another computer to confirm its functionality.
FAQs: Addressing Common Concerns
Q: How do I know if the problem is with the driver or the hardware?
A: To isolate the issue, try connecting a different audio device to the computer. If the problem persists, it is likely a driver issue. If the new device works, the original device might be faulty.
Q: I have updated the drivers, but the sound is still not working. What should I do?
A: Consider reinstalling the drivers completely. This can sometimes resolve driver-related issues.
Q: I can hear sound from other applications, but not from games or videos. What could be the cause?
A: This could indicate a problem with the specific application’s audio settings. Check the application’s settings for any audio-related options and ensure they are configured correctly.
Tips for Preventing Future Audio Issues
- Regular Driver Updates: Keep audio drivers updated to ensure compatibility and optimal performance.
- Software Compatibility: Ensure that all software applications are compatible with Windows 11.
- System Maintenance: Regularly clean and optimize the system to prevent software conflicts.
- Backup Creation: Create regular system backups to facilitate quick recovery in case of unexpected issues.
Conclusion: A Symphony Restored
Resolving audio issues after a Windows 11 installation requires a methodical approach, considering various potential causes. By systematically troubleshooting the drivers, services, hardware, settings, and software, users can identify and rectify the problem, restoring the harmonious symphony of sound to their computing experience.


Closure
Thus, we hope this article has provided valuable insights into The Silent Symphony: Troubleshooting Audio Issues After Windows 11 Installation. We thank you for taking the time to read this article. See you in our next article!
:max_bytes(150000):strip_icc()/005-pin-to-taskbar-windows-10-4584056-523b469f49fb42b8b1d9438f43acccc7.jpg)


/00-Main-5c3f330846e0fb0001a954d7.jpg)

:max_bytes(150000):strip_icc()/Rectangle9-83c26933cf69400ca802f9fa2640f7f4.jpg)
:max_bytes(150000):strip_icc()/Rectangle14-9041862fe1f340efa8b8af0ee57b92fb.jpg)


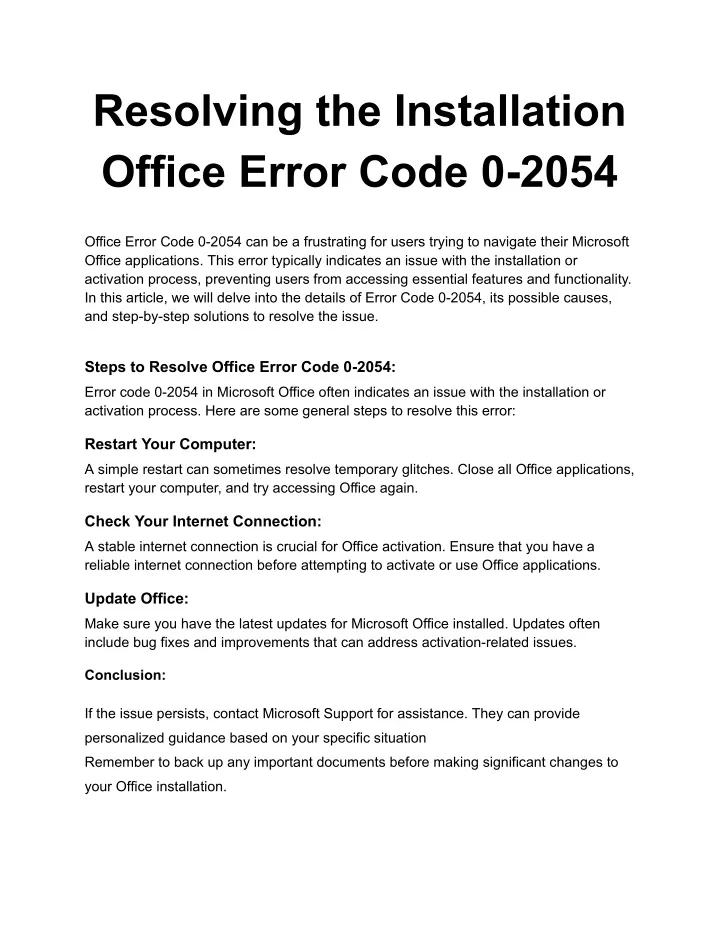


![[ SOLVED ] How to fix Office 365 Error code 0-2054 - Live Support](http://microsoftask.com/wp-content/uploads/2017/09/Firewall-disabling.jpg)


![5 Best Ransomware Removal Tools Software 2023 [Windows 11, 10, 7] Get PC Apps](https://www.getpcapps.com/wp-content/uploads/2018/09/Wana-Decrypt0r-2.0-Ransomware-removal-tools-windows-pc.jpg)


-png-1.png)