The Mystery Of The Red Border: A Comprehensive Guide To Understanding And Resolving Visual Anomalies In Windows 11

The Mystery of the Red Border: A Comprehensive Guide to Understanding and Resolving Visual Anomalies in Windows 11

Introduction

With great pleasure, we will explore the intriguing topic related to The Mystery of the Red Border: A Comprehensive Guide to Understanding and Resolving Visual Anomalies in Windows 11. Let’s weave interesting information and offer fresh perspectives to the readers.

The Mystery of the Red Border: A Comprehensive Guide to Understanding and Resolving Visual Anomalies in Windows 11

Windows 11 Startup Problems: Troubleshooting and Resolving Boot Issues - GadgetMates

Windows 11, with its sleek design and enhanced features, has been met with a mixture of excitement and frustration. Among the issues reported by users is the appearance of a red border surrounding windows on their screens. This unexpected visual anomaly can be disconcerting, raising questions about the functionality and stability of the operating system. This article delves into the causes, implications, and potential solutions for this red border phenomenon, providing a comprehensive understanding of the issue.

Understanding the Red Border: A Visual Anomaly

The appearance of a red border around windows in Windows 11 is not a standard feature of the operating system. It is a visual anomaly that can manifest in different ways, including:

  • Solid Red Border: A consistent, unbroken red line encircling the window frame.
  • Intermittent Red Border: The red border appears and disappears sporadically, sometimes triggered by specific actions or applications.
  • Partial Red Border: Only certain sections of the window frame are highlighted with red, while other parts remain unaffected.

The cause of this red border issue is not always immediately apparent. It can be attributed to a variety of factors, ranging from software glitches to hardware problems. Understanding the potential causes is crucial in identifying the appropriate solution.

Causes of the Red Border Issue

Several factors can contribute to the appearance of a red border around windows in Windows 11. These can be broadly categorized into software and hardware-related issues:

Software-Related Issues:

  • Driver Conflicts: Outdated or incompatible drivers for graphics cards, monitors, or other peripherals can lead to visual anomalies like the red border.
  • Software Glitches: Bugs or errors within specific applications or Windows itself might trigger the red border issue.
  • Corrupted System Files: Damaged or missing system files can disrupt the normal operation of Windows, resulting in visual inconsistencies.
  • Third-Party Software Interference: Certain software applications, particularly those related to visual customization or system optimization, might interfere with Windows’ rendering processes, causing the red border.
  • Display Settings: Incorrect display settings, such as resolution or color profile, can sometimes lead to visual distortions, including the red border.

Hardware-Related Issues:

  • Faulty Graphics Card: A malfunctioning graphics card can lead to a range of visual problems, including the red border.
  • Monitor Problems: Issues with the monitor itself, such as faulty cables or a damaged display panel, might cause visual distortions.
  • Overheating: Excessive heat can affect the performance of components like the graphics card, leading to visual anomalies.

Implications of the Red Border:

The appearance of the red border is not merely an aesthetic issue. It can indicate underlying problems within the system, potentially affecting other aspects of the user experience. These implications can include:

  • Performance Degradation: The red border might be a symptom of a larger performance issue, leading to slower loading times, lag, or crashes.
  • Visual Distortions: The red border can interfere with the user’s ability to view content clearly, making it difficult to work or enjoy multimedia content.
  • System Instability: The red border might be a sign of system instability, potentially leading to unexpected shutdowns or crashes.

Troubleshooting and Solutions:

Resolving the red border issue requires a systematic approach, starting with basic troubleshooting steps and progressing towards more advanced solutions.

Basic Troubleshooting:

  • Restart Your Computer: A simple restart can often resolve temporary glitches or software conflicts.
  • Update Drivers: Ensure your graphics card drivers are up-to-date by checking for updates from the manufacturer’s website or through Windows Update.
  • Run System File Checker: The System File Checker (SFC) tool can scan for and repair corrupted system files. To run SFC, open Command Prompt as administrator and type "sfc /scannow".
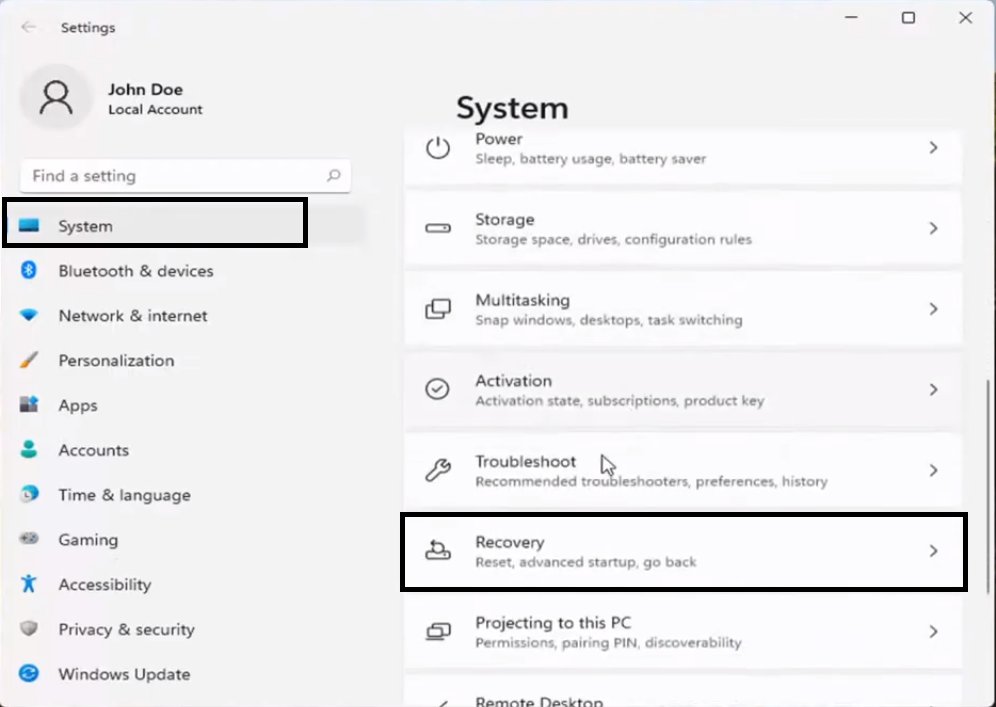
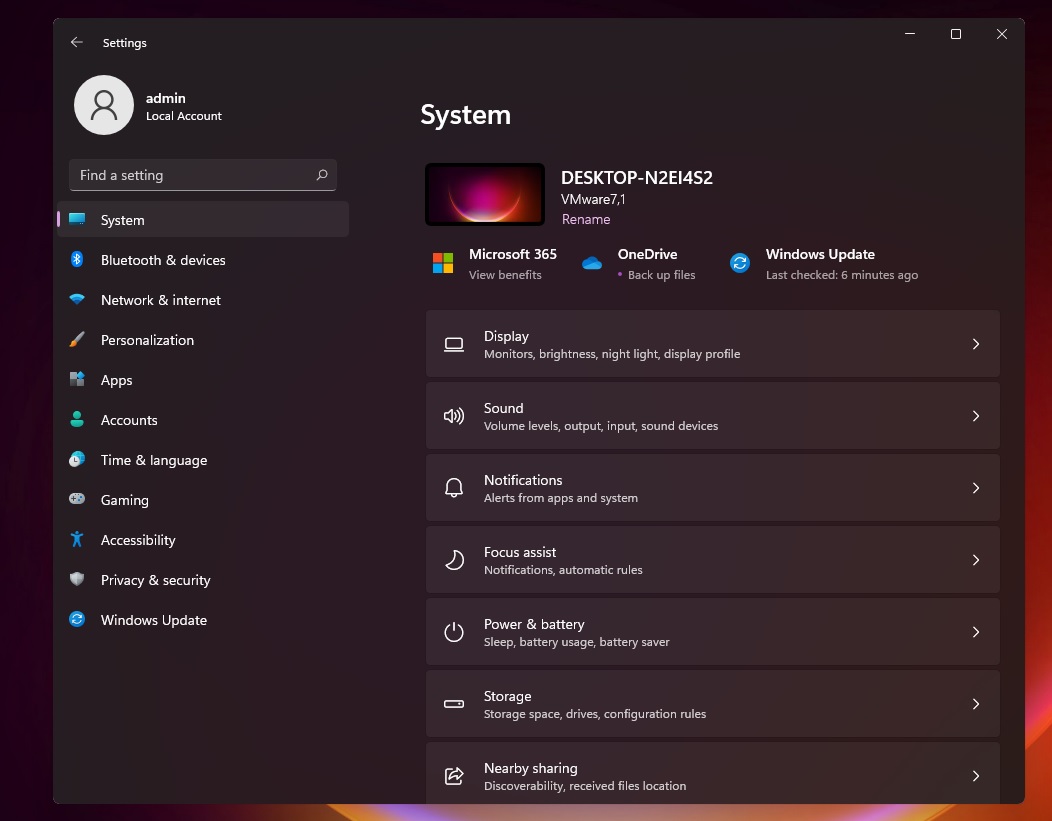
  • Check Display Settings: Verify that your display settings are optimal for your monitor. Go to Settings > System > Display and adjust resolution, refresh rate, and color profile as needed.

Advanced Troubleshooting:

  • Reinstall Graphics Drivers: If updating drivers doesn’t resolve the issue, try reinstalling the graphics drivers completely.
  • Run a Clean Boot: Performing a clean boot disables unnecessary startup programs and services, helping to isolate the cause of the red border.
  • Check for Malware: Run a full system scan with a reputable antivirus software to rule out malware infection.
  • Rollback Windows Updates: If the red border appeared after a recent Windows update, try rolling back to a previous version.
  • Perform a System Restore: If the issue persists, consider restoring your system to an earlier point in time before the red border appeared.

Hardware Troubleshooting:

  • Check Monitor Cables: Ensure that the monitor cable is securely connected and functioning properly. Try a different cable if available.
  • Test Monitor on Another Device: Connect the monitor to a different computer to see if the red border persists.
  • Monitor Settings: Check the monitor’s settings for any unusual configurations that might cause visual distortions.
  • Graphics Card Inspection: If the red border persists even after troubleshooting software issues, consider inspecting the graphics card for any signs of damage or overheating.

FAQs

Q: What are the most common causes of the red border issue?

A: The most common causes are outdated or incompatible graphics drivers, software glitches, and corrupted system files.

Q: Is the red border harmful to my computer?

A: The red border itself is not harmful to your computer. However, it can indicate underlying problems that could potentially affect system performance or stability.

Q: How can I prevent the red border from appearing in the future?

A: Keeping your system updated with the latest drivers, software updates, and security patches can help prevent the red border and other system anomalies.

Q: What should I do if I can’t resolve the red border issue myself?

A: If you have exhausted all troubleshooting steps and the red border persists, consider seeking professional assistance from a computer technician or Microsoft support.

Tips

  • Keep Your System Updated: Regularly update your operating system, drivers, and software to ensure optimal system performance and stability.
  • Perform Regular System Maintenance: Run system maintenance tasks like disk cleanup, defragmentation, and error checking to keep your system running smoothly.
  • Monitor System Temperature: Keep an eye on the temperature of your graphics card and other components to prevent overheating.
  • Back Up Your Data: Regularly back up your important data to prevent data loss in case of unexpected system issues.

Conclusion

The red border issue in Windows 11, while visually unsettling, is often a symptom of underlying problems that can be addressed through proper troubleshooting. By understanding the potential causes, implementing appropriate solutions, and taking preventive measures, users can mitigate the risk of encountering this visual anomaly and maintain a smooth and stable user experience. Remember, if you find yourself unable to resolve the issue independently, don’t hesitate to seek professional help.

Resolving Blue Screen Errors In Windows Microsoft Sup - vrogue.co Understanding and Resolving Runtime Error 91 - Windows 11 Central Windows 11 KB5032288 Update โ€“ Empowering Copilot and Resolving 11 Bugs โ€“ exaltbase.com
Windows 11 KB5032288 Update - Empowering Copilot and Resolving 11 Bugs  Cryptopolitan 0x800f0801 Windows 11 Update: Troubleshooting and Resolving Issues Resolving DPC Watchdog Violation Error in Windows 11
[Fix] Windows 11 is slow and freezing after adding a second monitor Microsoft releases update KB5034204 for Windows 11, resolving issues with corrupted zip files

Closure

Thus, we hope this article has provided valuable insights into The Mystery of the Red Border: A Comprehensive Guide to Understanding and Resolving Visual Anomalies in Windows 11. We appreciate your attention to our article. See you in our next article!

The Power Of Proximity: Exploring Windows 10’s Nearby Sharing Capabilities

The Power of Proximity: Exploring Windows 10’s Nearby Sharing Capabilities

Introduction

In this auspicious occasion, we are delighted to delve into the intriguing topic related to The Power of Proximity: Exploring Windows 10’s Nearby Sharing Capabilities. Let’s weave interesting information and offer fresh perspectives to the readers.

The Power of Proximity: Exploring Windows 10’s Nearby Sharing Capabilities

How to Use Nearby Sharing in Windows 10

Windows 10’s Nearby Sharing feature, a robust wireless technology, empowers users to seamlessly transfer files, links, and even app content between nearby devices. This functionality leverages Bluetooth and Wi-Fi Direct, eliminating the need for cumbersome cables or complex cloud storage setups. While seemingly simple, Nearby Sharing offers a powerful and versatile solution for enhancing productivity, collaboration, and file sharing in various scenarios.

Understanding the Mechanism of Nearby Sharing

At its core, Nearby Sharing relies on a combination of Bluetooth and Wi-Fi Direct, enabling devices to discover and connect with each other without an internet connection. The process is intuitive and user-friendly:

  1. Discovery: When a user initiates a share, the sending device broadcasts a signal, making itself discoverable to nearby compatible devices.
  2. Pairing: Upon detecting a suitable device, the user selects the intended recipient, initiating a pairing process.
  3. Transfer: Once paired, the data is transferred securely over a direct connection, bypassing the need for an internet connection or cloud storage services.

Benefits of Utilizing Nearby Sharing

The convenience and versatility of Nearby Sharing make it a valuable tool for various purposes, offering benefits that extend beyond basic file transfers:

  • Streamlined Collaboration: Seamlessly share documents, presentations, and project files with colleagues in close proximity, fostering real-time collaboration and eliminating the need for email attachments or cloud storage uploads.
  • Effortless File Sharing: Transfer photos, videos, and other files between personal devices, eliminating the need for physical connections or complex cloud syncing procedures.
  • Enhanced Productivity: Quickly share information with colleagues or students, facilitating instant access to essential data and reducing time spent on file transfer processes.
  • Simplified App Sharing: Share apps and their associated data between devices, enabling users to seamlessly transfer their digital environment to new devices without the need for re-installation or cloud syncing.
  • Secure Data Transfers: Nearby Sharing utilizes encryption protocols to ensure the secure transmission of data between paired devices, safeguarding sensitive information during the transfer process.

Navigating Nearby Sharing: A Step-by-Step Guide

Enabling and utilizing Nearby Sharing in Windows 10 is straightforward:

  1. Enable Nearby Sharing: Navigate to the "Settings" app, select "System," and then "Shared experiences." Enable the "Nearby sharing" toggle and select the desired sharing options.
  2. Share Files: Open the desired file or content, right-click, and select "Share." Choose the recipient device from the list of nearby devices, and the transfer will commence.
  3. Receive Files: When a device attempts to share data, a notification will appear on the receiving device. Select "Accept" to initiate the transfer.

Troubleshooting Common Issues

While Nearby Sharing is generally reliable, users may encounter occasional issues. Addressing these problems is often straightforward:

  • Ensure Bluetooth and Wi-Fi are enabled: Verify that both Bluetooth and Wi-Fi are enabled on both devices and that they are within range.
  • Check compatibility: Ensure both devices are running a compatible version of Windows 10 and that Nearby Sharing is enabled on both.
  • Restart devices: Restarting both devices can often resolve connectivity issues.
  • Verify device visibility: Ensure that both devices are set to discoverable for Nearby Sharing.
  • Update drivers: Ensure that all relevant drivers, particularly Bluetooth and Wi-Fi drivers, are up-to-date.
  • Check for network interference: Interference from other devices or wireless networks can affect Nearby Sharing functionality.

FAQs About Nearby Sharing

Q: What types of files can be shared using Nearby Sharing?

A: Nearby Sharing supports a wide range of file types, including documents, photos, videos, music, and even apps.

Q: How secure is Nearby Sharing?

A: Nearby Sharing utilizes encryption protocols to safeguard data during transfer, providing a secure connection between paired devices.

Q: Is Nearby Sharing compatible with all Windows 10 devices?

A: Nearby Sharing is compatible with most Windows 10 devices, but older devices may require a system update or specific driver installations to support the feature.

Q: Can I share files with devices that are not running Windows 10?

A: Currently, Nearby Sharing is primarily designed for Windows 10 devices. However, third-party applications may offer similar functionality for cross-platform sharing.

Q: How does Nearby Sharing differ from traditional Bluetooth file transfer?

A: Nearby Sharing utilizes both Bluetooth and Wi-Fi Direct, offering faster transfer speeds and a more robust connection compared to traditional Bluetooth file transfers.

Q: Is Nearby Sharing limited to sharing with devices in close proximity?

A: Yes, Nearby Sharing relies on Bluetooth and Wi-Fi Direct, which have limited range. Devices need to be within a reasonable distance for successful sharing.

Tips for Optimizing Nearby Sharing

  • Enable "Always discoverable" for faster sharing: Set your device to "Always discoverable" in Nearby Sharing settings for quicker pairing and faster file transfers.
  • Ensure sufficient battery life: Sharing large files can drain battery quickly, so ensure both devices have adequate battery life.
  • Clear the "Recent devices" list: Regularly clear the "Recent devices" list in Nearby Sharing settings to prevent unwanted connections.
  • Check for software updates: Regularly update your Windows 10 operating system and device drivers to ensure compatibility and optimal performance.

Conclusion

Windows 10’s Nearby Sharing feature offers a user-friendly and efficient way to share files, links, and even app content between nearby devices. Its versatility, security, and ease of use make it a valuable tool for personal and professional use, streamlining collaboration, enhancing productivity, and simplifying file sharing in various scenarios. By understanding the intricacies of Nearby Sharing and implementing the provided tips, users can fully harness its potential, unlocking a world of seamless data transfer possibilities.

How to Use Nearby Sharing in Windows 10 How to Use Nearby Sharing on Windows 10 Use Nearby sharing in Windows 10  HUAWEI Support Global
How to Use Nearby Sharing on Windows 10 How to Use Nearby Sharing in Windows 10 How to Use Nearby Sharing to Share Files in Windows 10
How Windows 10's Near Share feature wirelessly beams files to nearby PCs  PCWorld How to Use Nearby Sharing in Windows 10  PCMag

Closure

Thus, we hope this article has provided valuable insights into The Power of Proximity: Exploring Windows 10’s Nearby Sharing Capabilities. We hope you find this article informative and beneficial. See you in our next article!

Navigating The World Of Windows 10: A Comprehensive Guide To Installation And Beyond

Navigating the World of Windows 10: A Comprehensive Guide to Installation and Beyond

Introduction

In this auspicious occasion, we are delighted to delve into the intriguing topic related to Navigating the World of Windows 10: A Comprehensive Guide to Installation and Beyond. Let’s weave interesting information and offer fresh perspectives to the readers.

Install Windows 10 The Complete Guide - Riset

Windows 10, Microsoft’s flagship operating system, has become a ubiquitous presence on personal computers worldwide. Its user-friendly interface, robust security features, and extensive application compatibility have cemented its place as a leading choice for users seeking a reliable and versatile computing experience. This guide delves into the intricacies of obtaining and installing Windows 10, addressing common queries and providing practical advice for a seamless transition.

Understanding the Download Process:

Acquiring Windows 10 is a straightforward process, with several options catering to diverse needs.

  • Microsoft’s Official Website: The most reliable source for obtaining Windows 10 is directly from Microsoft’s website. Users can download the operating system as an ISO file, which can then be burned to a DVD or USB drive for installation. This method offers the most up-to-date version and guarantees the legitimacy of the software.
  • Microsoft Store: The Microsoft Store provides a convenient platform for purchasing and downloading Windows 10. Users can select their preferred edition and purchase it digitally. This method offers a streamlined installation process and is ideal for users who prefer an online transaction.
  • Retail Purchase: Traditional retail outlets also sell Windows 10 on physical media, such as DVDs or USB drives. This option is suitable for users who prefer physical copies or require a backup for future installations.

Pre-Installation Considerations:

Before embarking on the installation process, it’s crucial to assess system requirements and prepare for a smooth transition.

  • System Requirements: Windows 10 has specific hardware requirements that must be met for optimal performance. These requirements include processor speed, RAM, storage space, and graphics capabilities. It’s essential to verify that the computer meets these criteria before attempting installation.
  • Backup: Data loss can be a significant concern during any operating system upgrade. Creating a comprehensive backup of all important files, applications, and settings is paramount to prevent data loss and ensure a seamless transition.
  • Software Compatibility: While Windows 10 offers compatibility with a vast array of software, some applications might not be fully compatible or require updates. It’s advisable to check for compatibility information before proceeding with the installation.

Installation Process:

The installation process for Windows 10 is relatively straightforward.

  • Boot from Installation Media: Once the installation media is prepared (DVD or USB drive), boot the computer from it. This can be achieved by modifying the boot order in the BIOS settings.
  • Installation Options: The installation wizard will guide users through the process, presenting options for language, keyboard layout, and installation type.
  • Product Key: During the installation, users will be prompted to enter their Windows 10 product key. This key is required to activate the operating system and access all features.
  • Customization: After the installation completes, users can personalize their Windows 10 experience by selecting a theme, setting up accounts, and customizing the start menu.

Post-Installation Tasks:

Once Windows 10 is successfully installed, there are several essential post-installation tasks to ensure a smooth and secure computing experience.

  • Software Updates: Windows 10 automatically downloads and installs updates to enhance performance, security, and stability. It’s crucial to keep the system updated to benefit from the latest improvements and security patches.
  • Driver Updates: Drivers are software programs that allow the operating system to communicate with hardware components. Updating drivers ensures optimal performance and compatibility with all devices.
  • Security Software: Installing a reliable antivirus and firewall is essential to protect the system from malware, viruses, and other threats.
  • Data Transfer: If migrating from a previous operating system, users can transfer data, settings, and applications to their new Windows 10 installation using tools like Windows Easy Transfer or file copying methods.

Frequently Asked Questions:

Q: Can I upgrade from an older version of Windows to Windows 10?

A: Yes, Microsoft offers a free upgrade path from Windows 7 and Windows 8.1 to Windows 10. However, this offer is no longer active, and users must now purchase a license for Windows 10.

Q: What are the different editions of Windows 10?

A: Windows 10 comes in various editions, each catering to specific user needs. These editions include Home, Pro, Enterprise, and Education. Each edition offers different features and functionalities.

Q: Is Windows 10 compatible with my existing hardware?

A: Windows 10 has specific hardware requirements that must be met for optimal performance. It’s crucial to check the system specifications before attempting installation.

Q: How do I activate Windows 10?

A: Windows 10 can be activated using a product key, which is typically provided with a retail purchase or obtained during an upgrade.

Q: How do I recover data from my previous operating system?

A: Users can transfer data, settings, and applications to their new Windows 10 installation using tools like Windows Easy Transfer or file copying methods.

Tips for a Smooth Transition:

  • Research System Requirements: Ensure the computer meets the minimum and recommended system requirements for Windows 10 before proceeding with installation.
  • Create a Backup: Back up all important data, applications, and settings before starting the installation process to prevent data loss.
  • Check Software Compatibility: Verify that essential software programs are compatible with Windows 10 before upgrading.
  • Understand Installation Options: Familiarize yourself with the various installation options available, including clean installs, upgrades, and custom installations.
  • Keep the System Updated: Regularly update Windows 10, drivers, and security software to maintain optimal performance and security.

Conclusion:

Installing Windows 10 can be a rewarding experience, offering a user-friendly interface, robust security features, and a vast ecosystem of applications. By carefully considering pre-installation steps, understanding the installation process, and following post-installation recommendations, users can ensure a seamless transition to the world of Windows 10.

This comprehensive guide has provided insights into the download, installation, and post-installation processes, addressing common queries and offering practical tips for a smooth and successful experience. With proper planning and execution, users can unlock the full potential of Windows 10, maximizing their computing experience and reaping the benefits of this powerful operating system.

How to Install Windows 10: a Simple Step-by-Step Guide with Pictures PPT - A Comprehensive Guide to Installing Windows 10_ Step-by-Step Tutorial PowerPoint How To Install Windows 10? โ€“ Complete Guide  DESKDECODE.COM
Your complete guide for installation of windows 10 - wholesale laptops - Page 1 - 8  Flip PDF How To Install Windows 10 Complete Guide Deskdecode Com - Vrogue How to Install Windows 10 Complete Guide - INCPak
How To Install Windows 10 Complete Guide Deskdecode Com - Vrogue HOW TO INSTALL WINDOWS 10. COMPLETE GUIDE - YouTube

Closure

Thus, we hope this article has provided valuable insights into Navigating the World of Windows 10: A Comprehensive Guide to Installation and Beyond. We hope you find this article informative and beneficial. See you in our next article!

A Comprehensive Guide To Q Reduce Lite: Optimizing Your Digital Life

A Comprehensive Guide to Q Reduce Lite: Optimizing Your Digital Life

Introduction

With enthusiasm, let’s navigate through the intriguing topic related to A Comprehensive Guide to Q Reduce Lite: Optimizing Your Digital Life. Let’s weave interesting information and offer fresh perspectives to the readers.

A Comprehensive Guide to Q Reduce Lite: Optimizing Your Digital Life

QReduce LiteเฅฅQReduce Photo Reducer/Compressor Mobile Appเฅฅ How To Reduce Photo Sizeเฅฅ compress

In today’s digital landscape, information overload is a pervasive issue. We are constantly bombarded with emails, notifications, and messages, making it challenging to maintain focus and productivity. This is where tools like Q Reduce Lite come into play. Q Reduce Lite is a powerful application designed to help users manage and minimize distractions, fostering a more focused and efficient digital experience.

Understanding the Core Functionality of Q Reduce Lite

Q Reduce Lite operates on the principle of "Quiet Mode", a feature that effectively silences or minimizes distractions by:

  • Filtering Notifications: The application allows users to customize notification settings, enabling them to block unwanted notifications from specific apps or categories. This ensures that only critical alerts reach the user’s attention.
  • Limiting App Usage: Q Reduce Lite provides tools to set time limits for specific applications, effectively preventing excessive usage and promoting a balanced digital lifestyle. This feature is particularly beneficial for individuals prone to procrastination or excessive social media consumption.
  • Scheduling Quiet Hours: Users can schedule specific time blocks throughout the day where distractions are minimized. This allows for dedicated periods of focused work, study, or relaxation without the constant interruptions of notifications and alerts.

Benefits of Utilizing Q Reduce Lite

The benefits of implementing Q Reduce Lite extend beyond simply reducing distractions. By optimizing digital usage and promoting a more focused environment, the application contributes to:

  • Enhanced Productivity: By minimizing interruptions and fostering a more focused state, Q Reduce Lite empowers users to accomplish tasks more efficiently, leading to increased productivity and output.
  • Improved Time Management: By setting time limits and scheduling quiet hours, Q Reduce Lite helps individuals prioritize tasks and allocate time effectively, leading to a more balanced and productive schedule.
  • Reduced Stress and Anxiety: The constant barrage of notifications and alerts can contribute to stress and anxiety. By minimizing these distractions, Q Reduce Lite promotes a calmer and more relaxed digital experience.
  • Improved Focus and Concentration: The application’s ability to create a distraction-free environment allows users to focus their attention on the task at hand, improving concentration and cognitive performance.
  • Enhanced Digital Wellness: By promoting mindful digital usage and encouraging a balanced approach to technology, Q Reduce Lite contributes to a healthier and more fulfilling digital life.

Navigating the Q Reduce Lite Interface

Q Reduce Lite is designed with user-friendliness in mind. The application’s intuitive interface makes it easy for users of all skill levels to navigate and customize settings. Key features include:

  • Dashboard: The central hub of the application, providing a clear overview of current notification settings, app usage limits, and scheduled quiet hours.
  • App Management: Users can easily add, remove, or modify settings for specific applications, tailoring the application to their individual needs.
  • Notification Filters: Q Reduce Lite offers a variety of filters for customizing notification settings, including blocking notifications from specific apps, categories, or senders.
  • Quiet Hours Scheduling: Users can create custom schedules for quiet hours, ensuring uninterrupted periods for focused work, study, or relaxation.
  • Usage Reports: The application provides detailed reports on app usage, allowing users to track their digital habits and identify areas for improvement.

FAQs about Q Reduce Lite

Q: Is Q Reduce Lite compatible with all devices?

A: Q Reduce Lite is compatible with a wide range of devices, including smartphones, tablets, and computers. However, compatibility may vary depending on the operating system and device model.

Q: Can I customize the notification blocking settings?

A: Yes, Q Reduce Lite offers extensive customization options for notification blocking. Users can block notifications from specific apps, categories, or senders, tailoring the settings to their individual needs.

Q: How do I schedule quiet hours?

A: Scheduling quiet hours is straightforward. Users can create custom schedules by selecting specific time blocks throughout the day where notifications and distractions are minimized.

Q: Can I use Q Reduce Lite for specific tasks or projects?

A: Yes, Q Reduce Lite can be used to create focused environments for specific tasks or projects. Users can schedule quiet hours or block notifications from distracting apps to achieve maximum productivity.

Q: Is Q Reduce Lite free to use?

A: Q Reduce Lite is available in both free and paid versions. The free version offers basic functionality, while the paid version unlocks advanced features and customization options.

Tips for Optimizing Q Reduce Lite

  • Start with a Minimalist Approach: Begin by blocking notifications from a few distracting apps and gradually expand the settings as needed.
  • Prioritize Essential Notifications: Identify critical notifications that require immediate attention and ensure they are not blocked by the application.
  • Schedule Regular Quiet Hours: Dedicate specific time blocks throughout the day for focused work, study, or relaxation, minimizing distractions during these periods.
  • Track Your Digital Habits: Monitor your app usage reports to identify patterns and areas for improvement in your digital habits.
  • Experiment with Different Settings: Explore the application’s various features and settings to find the combination that best suits your individual needs and workflow.

Conclusion

Q Reduce Lite empowers users to regain control over their digital lives, fostering a more focused, productive, and balanced experience. By minimizing distractions, promoting mindful digital usage, and providing valuable tools for managing time and notifications, the application offers a comprehensive solution for navigating the increasingly complex digital landscape. Whether you are a student, professional, or simply seeking a more peaceful digital experience, Q Reduce Lite can be a valuable tool for optimizing your digital wellbeing and unlocking your full potential.

Decrease image size via mobile  using Q reduce lite app - YouTube ุชุญู…ูŠู„ ุจุฑู†ุงู…ุฌ ุถุบุท ุญุฌู… ุงู„ุตูˆุฑ ุฏูุนุฉ ูˆุงุญุฏุฉ ู„ู„ุงู†ุฏุฑูˆูŠุฏ Download Qreduce Lite - ุชุตู…ูŠู… ู…ูŠูƒุณ 8 Best Free Android Apps To Reduce Image Size in 2023
Q Reduce Lite  Compress any File  World in Hand Mobile IT - YouTube 7 Aplikasi Resize Foto dengan Ukuran Ringan di HP - Rancah Post 5 Ways to Compress Photo Size on phone with & without Using Applications
Reduce photo size in mb or kb/#Q REDUCE LITE APP - YouTube 10 Aplikasi Kompres Foto Terbaik untuk Laptop dan Android

Closure

Thus, we hope this article has provided valuable insights into A Comprehensive Guide to Q Reduce Lite: Optimizing Your Digital Life. We hope you find this article informative and beneficial. See you in our next article!

Mastering Windows 10: A Comprehensive Guide To Enhancing Your Computing Experience

Mastering Windows 10: A Comprehensive Guide to Enhancing Your Computing Experience

Introduction

In this auspicious occasion, we are delighted to delve into the intriguing topic related to Mastering Windows 10: A Comprehensive Guide to Enhancing Your Computing Experience. Let’s weave interesting information and offer fresh perspectives to the readers.

Mastering Windows 10: A Comprehensive Guide to Enhancing Your Computing Experience

How To Master Windows 10: Step by Step Tutorial - YouTube

Windows 10, the latest iteration of Microsoft’s operating system, continues to dominate the desktop and laptop landscape. Its robust features, constant updates, and user-friendly interface make it a powerful tool for work, play, and everything in between. This guide will delve into the core functionalities and hidden gems of Windows 10, offering insights into how to maximize your computing experience.

Navigating the Windows 10 Interface

The Windows 10 interface is designed for intuitive navigation, offering a familiar layout with modern enhancements. The Start Menu, a cornerstone of the operating system, provides quick access to applications, settings, and recently used files. Its dynamic tiles display information at a glance, including news updates, weather forecasts, and calendar reminders.

Taskbar and Notification Area

The Taskbar, located at the bottom of the screen, houses open applications, the Start Menu button, and the system tray, which displays notifications and system icons. The Notification Area provides quick access to system settings, network connectivity, volume control, and other essential functions.

File Explorer and File Management

File Explorer, the primary file management tool, allows users to browse, organize, and access files and folders on their computer. It offers a familiar tree-like structure, enabling users to navigate through drives, libraries, and folders with ease. Users can create new folders, rename files, and move or copy files between locations.

Windows Settings and Personalization

The Settings app, accessible through the Start Menu, provides a centralized hub for configuring system preferences, managing accounts, and customizing the user experience. Users can personalize their desktop background, adjust display settings, manage privacy options, and control system-wide behavior.

Microsoft Store and App Management

The Microsoft Store serves as a digital marketplace for applications, games, and other software. Users can browse, download, and install a wide range of applications, including productivity tools, entertainment software, and creative utilities. The Store also allows for managing installed applications, updating them to the latest versions, and uninstalling those no longer required.

Edge Browser and Web Experience

Microsoft Edge, the default web browser in Windows 10, provides a modern and secure browsing experience. It features a streamlined interface, integrated search functionality, and built-in tools for managing passwords and browsing history. Edge also supports extensions, allowing users to customize their browsing experience with additional features.

Windows Security and Privacy

Windows 10 incorporates robust security features to protect users from malware, viruses, and other online threats. Windows Defender Antivirus, a built-in security solution, offers real-time protection against malicious software. Users can also configure firewall settings, manage user accounts, and adjust privacy settings to control data access and sharing.

Cortana and Voice Control

Cortana, Microsoft’s virtual assistant, provides a hands-free way to interact with the operating system. Users can use voice commands to search the web, launch applications, set reminders, and control playback. Cortana integrates with other Microsoft services, such as Outlook and Calendar, offering a seamless experience across devices.

Windows Update and System Maintenance

Windows Update automatically downloads and installs the latest software updates, security patches, and feature enhancements. Regular updates ensure that the operating system remains secure, stable, and up-to-date. Users can also manually check for updates and schedule updates to occur at specific times.

Beyond the Basics: Exploring Advanced Features

Windows 10 offers a wealth of advanced features designed to enhance productivity, creativity, and entertainment.

Virtual Desktops and Multitasking

Virtual desktops allow users to create multiple desktop environments, each with its own set of open applications and windows. This feature enables efficient multitasking, allowing users to separate work projects, personal tasks, or different applications into distinct virtual spaces.

Windows Ink and Digital Pen Support

Windows Ink allows users to interact with their computer using a digital pen or stylus. This feature enables natural handwriting input, drawing, and annotation, enhancing productivity and creativity in various applications.

Gaming and Entertainment

Windows 10 features a dedicated gaming mode that optimizes system performance for gaming. Xbox Game Bar, a built-in overlay, provides access to game recording, streaming, and other gaming-related features. The operating system also supports a wide range of entertainment applications, including music players, video streaming services, and gaming platforms.

Remote Desktop and Access

Remote Desktop allows users to connect to and control another computer remotely. This feature enables remote access to files, applications, and resources, facilitating collaboration and troubleshooting.

Windows Subsystem for Linux

Windows Subsystem for Linux (WSL) allows users to run Linux distributions directly on Windows 10. This feature provides access to a powerful command-line environment and a wide range of Linux tools, enabling developers and system administrators to work seamlessly across platforms.

Frequently Asked Questions (FAQs)

Q: How do I update Windows 10?

A: Windows Update automatically downloads and installs the latest updates. Users can check for updates by navigating to Settings > Update & Security > Windows Update and selecting Check for updates.

Q: How do I create a new user account?

A: To create a new user account, navigate to Settings > Accounts > Family & other users and select Add someone else to this PC. Follow the prompts to create a new account.

Q: How do I recover lost files?

A: Windows 10 includes a built-in file recovery tool called File History. To access File History, navigate to Settings > Update & Security > Backup and select Manage.

Q: How do I troubleshoot common Windows 10 problems?

A: Microsoft provides a comprehensive troubleshooting guide on their website, offering solutions to common problems. Users can also access troubleshooting resources within the Windows 10 Settings app.

Tips for Optimizing Windows 10

  • Regularly clean up your hard drive: Delete unnecessary files, uninstall unused applications, and empty the Recycle Bin to free up disk space and improve system performance.
  • Disable unnecessary startup programs: Many applications launch automatically when Windows starts, slowing down the boot process. Use the Task Manager to disable unnecessary startup programs.
  • Keep your drivers updated: Outdated drivers can cause system instability and performance issues. Use Windows Update or the manufacturer’s website to update drivers.
  • Use a solid-state drive (SSD): SSDs offer significantly faster read and write speeds compared to traditional hard disk drives, improving system responsiveness and application launch times.
  • Adjust power settings: Optimize power settings to balance performance and energy consumption.
  • Enable automatic updates: Keep your system secure and up-to-date by enabling automatic updates.

Conclusion

Windows 10 offers a comprehensive and versatile operating system experience, catering to a wide range of user needs. By mastering the core functionalities, exploring advanced features, and implementing optimization tips, users can unlock the full potential of Windows 10 and enhance their computing experience. Regular updates, ongoing learning, and a proactive approach to system maintenance ensure a smooth and efficient computing journey.

Mastering Windows 10: A Comprehensive Guide to Essential Tips and Tricks Windows 10: The Beginner's Guide to Mastering Windows 10  9781541017382  Eric  bol.com Microsoft Windows 10 Tutorial: Essential Video Guide to Mastering Windows 10 โ€“ Brien Posey
Boosting Productivity and Mastering Windows 10: A Comprehensive Guide โ€“ ictsd.org Windows 10 Tutorial - Satu Trik Mastering Windows 10: Ultimate Step-by-Step Guide to Download, Install & Activatation  100% Free
Mastering windows 10 (English version)  PPT Mastering Windows 10: A Beginner's Guide to Navigating the Operating System

Closure

Thus, we hope this article has provided valuable insights into Mastering Windows 10: A Comprehensive Guide to Enhancing Your Computing Experience. We hope you find this article informative and beneficial. See you in our next article!

Unlocking Your Windows 10 Account: A Guide To Reclaiming Forgotten Passwords

Unlocking Your Windows 10 Account: A Guide to Reclaiming Forgotten Passwords

Introduction

With great pleasure, we will explore the intriguing topic related to Unlocking Your Windows 10 Account: A Guide to Reclaiming Forgotten Passwords. Let’s weave interesting information and offer fresh perspectives to the readers.

Unlocking Your Windows 10 Account: A Guide to Reclaiming Forgotten Passwords

How to Unlock Windows 10 Admin Password Forgot on PC/Laptop/Tablet

Windows 10, with its intuitive interface and robust security features, has become a ubiquitous operating system. However, the very security measures designed to protect user data can sometimes become an obstacle, particularly when a password is forgotten. This article aims to provide a comprehensive guide for users facing the common issue of forgotten Windows 10 passwords, offering practical solutions and highlighting the importance of password management.

Understanding the Problem:

Forgetting a password is a frustrating experience, especially when it comes to a crucial account like Windows 10. It can lead to a locked-out user, unable to access their files, applications, and settings. This situation arises due to various factors, including:

  • Weak Passwords: Using simple, easily guessable passwords increases the risk of forgetting them.
  • Multiple Passwords: Managing numerous passwords across different accounts can make it challenging to remember all of them.
  • Infrequent Usage: If a user rarely accesses their Windows 10 account, it is more likely they will forget the password.
  • Cognitive Issues: Memory lapses or cognitive decline can contribute to password forgetting.

Reclaiming Access: A Step-by-Step Approach

Fortunately, Windows 10 provides several methods to recover forgotten passwords. These methods vary in complexity and effectiveness, but they offer a path to regaining access:

1. Using a Local Account:

If the forgotten password is associated with a local account, the process is relatively straightforward.

  • Using a Microsoft Account: If the forgotten password is associated with a Microsoft account, users can utilize the "Forgot Password" option on the Microsoft website. This option allows users to reset their password by answering security questions or receiving a verification code via email or phone.

  • Using a Local Account: If the forgotten password is associated with a local account, users can attempt to reset it through the "Forgot Password" option during the login process. However, this option requires a previously set security question, and if this information is not available, more advanced solutions are required.

2. Resetting the Password Using a Recovery Drive:

A recovery drive, created beforehand, acts as a safety net for password recovery.

  • Creating a Recovery Drive: Users can create a recovery drive using the "Create a recovery drive" option in the "Settings" app. This drive contains system recovery tools, including the option to reset the password.

  • Using the Recovery Drive: Once created, the recovery drive can be used to boot the computer into recovery mode. From there, users can access the "Reset this PC" option and choose to "Keep my files," which will reset the password without deleting personal data.

3. Utilizing the Command Prompt:

For more advanced users, the Command Prompt offers a direct way to reset the password.

  • Booting into Safe Mode: Accessing the Command Prompt requires booting the computer into Safe Mode. This can be achieved by repeatedly pressing the F8 key during startup.

  • Using the "net user" Command: Once in Safe Mode, the Command Prompt can be accessed. Using the "net user" command, users can change the password of any account on the system.

4. Seeking Professional Assistance:

If all other methods fail, seeking professional assistance from a computer technician or data recovery specialist is recommended. These professionals have specialized tools and expertise to bypass password protection and regain access to the locked account.

Preventing Future Password Mishaps: Best Practices

Preventing password-related issues requires proactive measures. Implementing these best practices can significantly reduce the risk of forgetting passwords and enhance overall account security:

  • Strong Passwords: Use complex passwords with a combination of uppercase and lowercase letters, numbers, and symbols. Avoid using personal information or common words.

  • Password Managers: Employ password management software to store and manage passwords securely. These tools generate strong passwords and automatically fill them in during logins.

  • Multi-Factor Authentication (MFA): Enable MFA for all accounts, especially critical ones like Windows 10. This adds an extra layer of security by requiring a second verification step beyond the password.

  • Password Hints: Utilize password hints or security questions to aid in remembering passwords, but avoid using easily guessable information.

  • Regular Password Changes: Change passwords regularly, at least every few months, to minimize the risk of unauthorized access.

FAQs: Addressing Common Concerns

Q: What if I forget the password for my Microsoft account?

A: If you forget the password for your Microsoft account, you can use the "Forgot password" option on the Microsoft website. This option will allow you to reset your password by answering security questions or receiving a verification code via email or phone.

Q: Can I recover my password without a recovery drive?

A: While a recovery drive is the most straightforward method, there are other options, such as using the Command Prompt or seeking professional assistance. However, these methods require more technical knowledge and can be more complex.

Q: Is it possible to recover a forgotten password for a local account without a recovery drive?

A: If a security question was set during the initial account setup, you might be able to reset the password through the "Forgot Password" option during the login process. However, if no security question was set, professional assistance might be necessary.

Q: What are the risks of using a weak password?

A: Weak passwords make it easier for hackers to guess or crack your account, potentially leading to unauthorized access to your personal data, financial information, and other sensitive files.

Q: How often should I change my passwords?

A: It is generally recommended to change your passwords at least every few months, especially if you use the same password for multiple accounts.

Conclusion:

Forgetting a Windows 10 password can be a frustrating experience, but it is not insurmountable. By understanding the available methods and implementing best practices for password management, users can minimize the risk of such situations and ensure secure access to their valuable data. Remember, a strong password, coupled with responsible security practices, is the foundation of a secure and accessible digital environment.

Forgot Windows 10 Password on My Laptop How to Unlock? Unlocking Windows 10 Account Quick and Easy Solution How to Unlock Password in Windows 10
Reset Your Forgotten Password in Windows 10 - Ultimate Guide How to Unlock Password in Windows 10 How to Unlock Password in Windows 10
How To Reset Forgotten Windows 10 Password - YouTube How to unlock windows 10 password with built-in admin account - YouTube

Closure

Thus, we hope this article has provided valuable insights into Unlocking Your Windows 10 Account: A Guide to Reclaiming Forgotten Passwords. We hope you find this article informative and beneficial. See you in our next article!

Navigating The Windows 11 Pro Download: A Comprehensive Guide

Navigating the Windows 11 Pro Download: A Comprehensive Guide

Introduction

With enthusiasm, let’s navigate through the intriguing topic related to Navigating the Windows 11 Pro Download: A Comprehensive Guide. Let’s weave interesting information and offer fresh perspectives to the readers.

Buy WINDOWS 11 PRO USER GUIDE: A Comprehensive User Guide for Beginners and Seniors to Master

Microsoft’s Windows 11 Pro represents a significant advancement in the operating system landscape, offering a refined user interface, enhanced security features, and improved performance. This comprehensive guide delves into the intricacies of obtaining a Windows 11 Pro download, outlining the prerequisites, available methods, and considerations for a seamless installation process.

Understanding the Prerequisites

Before embarking on the download journey, it is crucial to ensure your system meets the minimum requirements for Windows 11 Pro. These specifications guarantee optimal performance and compatibility:

  • Processor: 1 gigahertz (GHz) or faster with 2 or more cores.
  • RAM: 4 gigabytes (GB).
  • Storage: 64 GB or larger storage device.
  • System Firmware: UEFI, Secure Boot capable.
  • Graphics Card: Compatible with DirectX 12 or later, WDDM 2.x driver.
  • Display: High Definition (720p) display, 9 inches or greater.
  • Internet Connection: Required for initial setup and some features.

Navigating the Download Options

Microsoft offers several avenues for obtaining a Windows 11 Pro download, each catering to specific user needs and preferences:

1. Microsoft Store: The Microsoft Store is the official and most straightforward method for acquiring a digital copy of Windows 11 Pro. Users can purchase a license directly from the store and download the installation file. This method provides a secure and verified download, ensuring authenticity and access to the latest updates.

2. Windows 11 Pro Upgrade: If your current system runs a supported version of Windows, you may be eligible for a free upgrade to Windows 11 Pro. This option requires verification through the Windows Update service, ensuring compatibility and eligibility.

3. Media Creation Tool: For a more flexible approach, Microsoft provides the Media Creation Tool. This utility allows users to download an ISO file, enabling them to create a bootable USB drive or DVD. This method offers greater control over the installation process, allowing users to perform a clean install or upgrade from a previous version.

4. Retail Copies: Physical copies of Windows 11 Pro are available through authorized retailers. These copies typically come with a product key, which is required for activation. While this method offers convenience for those preferring a tangible product, it may be less cost-effective than digital options.

5. OEM Pre-installed: Some manufacturers pre-install Windows 11 Pro on new devices. This option simplifies the setup process, as the operating system comes pre-configured and activated. However, it restricts user control over customization and potentially limits future upgrades.

Essential Considerations for a Smooth Download

  • System Backup: Before proceeding with any installation, it is crucial to back up your existing data. This safeguards your files and settings in case of unexpected issues during the installation process.

  • Internet Connection: A stable and reliable internet connection is essential for downloading the installation files and activating Windows 11 Pro.

  • Product Key: For retail copies and upgrades, you will require a valid product key for activation. This key is typically provided with the purchase or during the upgrade process.

  • Compatibility: Ensure your hardware and software are compatible with Windows 11 Pro. Refer to the official Microsoft website for a comprehensive list of supported devices and applications.

  • Storage Space: The Windows 11 Pro installation file requires significant storage space. Ensure you have sufficient free space on your hard drive before initiating the download.

Frequently Asked Questions (FAQs)

Q: Can I download Windows 11 Pro for free?

A: While a free upgrade path exists for eligible Windows 10 users, a purchase is generally required for a standalone copy of Windows 11 Pro.

Q: How do I activate Windows 11 Pro?

A: Activation can be accomplished through a product key provided with the purchase or during the upgrade process. Alternatively, you may be able to activate through your Microsoft account or by contacting Microsoft support.

Q: What are the differences between Windows 11 Pro and Home editions?

A: Windows 11 Pro offers advanced features tailored for business users, including BitLocker encryption, Hyper-V virtualization, and remote desktop access. Windows 11 Home caters to general users with a streamlined interface and essential features.

Q: Can I install Windows 11 Pro on a virtual machine?

A: Yes, Windows 11 Pro can be installed on a virtual machine, but it may require specific settings and configurations. Refer to your virtualization software documentation for detailed instructions.

Q: What happens if I upgrade to Windows 11 Pro and later decide to revert to Windows 10?

A: Windows 11 Pro allows you to revert to your previous version of Windows within a specific timeframe after the upgrade. However, this option may not always be available, and data loss could occur.

Tips for a Successful Download and Installation

  • Verify System Compatibility: Ensure your system meets the minimum requirements before proceeding with the download.

  • Back Up Your Data: Create a complete system backup to safeguard your files and settings.

  • Use a Stable Internet Connection: A reliable internet connection is crucial for a seamless download and installation process.

  • Follow Installation Instructions: Adhere to the instructions provided by Microsoft during the installation process.

  • Check for Updates: After installation, ensure your system is up-to-date by checking for available updates.

Conclusion

Obtaining a Windows 11 Pro download and installation requires careful planning and execution. By understanding the prerequisites, available download methods, and essential considerations, users can navigate the process effectively. With a stable internet connection, a compatible system, and a reliable backup strategy, users can enjoy the benefits of Windows 11 Pro, including its enhanced security, performance, and user experience.

[GUIDE] How to Windows 11 Pro Download Very Easily & Quickly Windows 11 Pro. How To Download, Install And Activate? WINDOWS 11 PRO DOWNLOAD AND FEATURES. - YouTube
"Get More Done with Windows 11 Pro: A Comprehensive Guide to Features, Benefits, and Why it How to Download Windows 11 Pro  Windows 11 Pro Download  Bootable Windows 11 Pro  Simple and Windows 11 Pro- Download install & Activation guide - Xware42
Easy 5 Ways to Download, Install & Activate Windows 11 Pro Microsoft Windows 11 Pro

Closure

Thus, we hope this article has provided valuable insights into Navigating the Windows 11 Pro Download: A Comprehensive Guide. We thank you for taking the time to read this article. See you in our next article!

Unlocking Your Windows 11 Account: A Guide To Password Recovery

Unlocking Your Windows 11 Account: A Guide to Password Recovery

Introduction

With enthusiasm, let’s navigate through the intriguing topic related to Unlocking Your Windows 11 Account: A Guide to Password Recovery. Let’s weave interesting information and offer fresh perspectives to the readers.

Unlocking Your Windows 11 Account: A Guide to Password Recovery

How to Unlock Windows 11 Admin Account If Forgot Password

Windows 11, like any modern operating system, relies on robust security measures to safeguard user data. A core element of this security is the user account password, which acts as a digital key to access the system and its contents. However, situations arise where users find themselves locked out of their accounts, often due to forgotten passwords.

This scenario, commonly referred to as a "forgotten password," can be a frustrating experience, leaving users unable to access their files, applications, and essential system settings. Fortunately, Windows 11 offers a range of recovery options designed to help users regain access to their accounts.

Understanding the Problem: Why Passwords Are Forgotten

The human mind, while capable of remarkable feats, is not a perfect memory repository. Numerous factors can contribute to password forgetfulness:

  • Complexity: Strong passwords, while essential for security, often involve a mix of uppercase and lowercase letters, numbers, and symbols, making them harder to remember.
  • Frequency of Use: Passwords used infrequently, for accounts accessed only occasionally, are more likely to be forgotten.
  • Multiple Accounts: Managing passwords for numerous online accounts can lead to confusion and memory overload.
  • Cognitive Factors: Age, stress, and certain medical conditions can impact memory function.

Navigating the Recovery Process: A Step-by-Step Guide

Windows 11 provides a multi-pronged approach to password recovery, catering to various situations and user preferences. The following steps outline the most common methods:

1. Local Account Password Reset

  • Requirement: This method applies to local accounts, not those linked to Microsoft accounts.
  • Process:
    • Boot into Windows 11 Recovery Environment (using a bootable USB or DVD).
    • Select "Troubleshoot" > "Advanced Options" > "Command Prompt."
    • Execute the following commands:
      • net user <username> <new_password> (replace <username> and <new_password> with the actual values).
      • exit (to close the command prompt).
    • Restart Windows 11.

2. Microsoft Account Recovery

  • Requirement: This method applies to accounts linked to a Microsoft account.
  • Process:
    • Access the Microsoft Account Recovery page.
    • Enter your email address or phone number associated with the account.
    • Follow the on-screen instructions, verifying your identity using security information (e.g., alternate email, phone number, security questions).
    • Once verified, you’ll be able to reset your password.

3. Using a Password Manager

  • Requirement: This method requires a previously configured password manager.
  • Process:
    • Launch your password manager application.
    • Log in using your master password.
    • Access the stored password for your Windows 11 account.

4. Resetting Your Windows 11 Installation

  • Requirement: This is a last resort, as it involves data loss.
  • Process:
    • Boot into Windows 11 Recovery Environment.
    • Select "Troubleshoot" > "Reset this PC."
    • Choose "Remove everything" to perform a clean installation.
    • Follow the on-screen instructions to complete the reset process.

Important Considerations:

  • Backup: Regularly back up your important data to avoid losing it during the recovery process.
  • Security: Be cautious of phishing attempts and suspicious websites. Only use official Microsoft resources for password recovery.
  • Account Recovery Information: Keep your security information (alternate email, phone number, security questions) up-to-date to ensure smooth recovery.

FAQs: Addressing Common Concerns

Q: What if I don’t remember any of my security information?

A: If you cannot verify your identity using security information, contacting Microsoft support might be necessary. They may be able to assist with additional verification methods or escalate the case for further investigation.

Q: Can I change my password without resetting it?

A: Yes, you can change your password directly from within Windows 11. Go to "Settings" > "Accounts" > "Sign-in options" and select "Change."

Q: Is it possible to recover a password for a deleted account?

A: Unfortunately, deleted accounts are usually unrecoverable. The data associated with the account may be permanently lost.

Q: Are there any risks associated with using third-party password recovery tools?

A: Using third-party tools is not recommended. These tools can be unreliable, potentially expose your account to security risks, or even contain malware.

Tips for Enhanced Password Security:

  • Strong Passwords: Use a combination of uppercase and lowercase letters, numbers, and symbols. Avoid easily guessable information like names, dates, or common words.
  • Password Manager: Utilize a reliable password manager to store and manage your passwords securely.
  • Two-Factor Authentication: Enable two-factor authentication (2FA) for your Microsoft account to add an extra layer of security.
  • Regular Updates: Keep your operating system and applications up-to-date with the latest security patches.
  • Beware of Phishing: Be cautious of emails or websites requesting your password or personal information.

Conclusion: A Secure and Accessible Windows 11 Experience

While forgetting a password can be a frustrating experience, Windows 11 provides robust recovery mechanisms to help users regain access to their accounts. By understanding the available options and following the recommended steps, users can navigate the recovery process effectively.

Remember, prioritizing password security through strong passwords, regular updates, and cautious online practices is crucial for maintaining a secure and accessible Windows 11 experience.

Enter The Windows 11 Recovery Mode: 4 Easy Ways To Do It Reset Your Forgotten Password In 10 How to reset a forgotten Windows 11 password for free 5 Methods to Reset Windows 11 Password without Logging in
Proven Ways to Fix: Locked out of Windows 11 Computer  Password Recovery How To Reset Forgotten Windows 11 Password Microsoftl - vrogue.co 5 Ways to Reset Forgotten Windows 11 password / PIN for Administrator or Microsoft Account
How To Unlock Windows 11 Admin Account If Forgot Password - www.vrogue.co How to Unlock Locked out Account in Windows 11?  Gear Up Windows

Closure

Thus, we hope this article has provided valuable insights into Unlocking Your Windows 11 Account: A Guide to Password Recovery. We hope you find this article informative and beneficial. See you in our next article!

Picasa 3 On Windows 11: A Comprehensive Guide

Picasa 3 on Windows 11: A Comprehensive Guide

Introduction

With great pleasure, we will explore the intriguing topic related to Picasa 3 on Windows 11: A Comprehensive Guide. Let’s weave interesting information and offer fresh perspectives to the readers.

Picasa 3 on Windows 11: A Comprehensive Guide

Picasa 3 Manual

Introduction

Picasa 3, a popular photo management and editing software, remains a favorite for many users despite its discontinuation in 2016. While Google no longer actively supports the program, its user-friendly interface and powerful features continue to resonate with those seeking a reliable and intuitive photo management solution. This article explores the intricacies of using Picasa 3 on Windows 11, providing insights into its functionality, advantages, and potential limitations.

Understanding Picasa 3: A Photo Management Powerhouse

Picasa 3 is a comprehensive photo management software that offers a wide range of features, including:

  • Photo Importing and Organizing: Picasa 3 efficiently imports photos from various sources, including cameras, memory cards, and hard drives. It automatically organizes photos by date, location, and facial recognition, making it easy to find specific images.
  • Photo Editing and Enhancement: The software provides a plethora of editing tools for enhancing images. These include basic adjustments like cropping, resizing, and rotating, as well as more advanced features like red-eye removal, color correction, and special effects.
  • Photo Sharing and Collaboration: Picasa 3 facilitates easy photo sharing with friends and family through email, social media platforms, and online albums. Users can create shared albums, allowing others to view, comment, and even edit photos collaboratively.
  • Photo Printing and Creating Albums: The software allows users to print photos directly from the application or create professional-looking photo albums with customizable layouts and themes.

Navigating Picasa 3 on Windows 11: A Smooth Transition

Despite its discontinuation, Picasa 3 remains compatible with Windows 11. However, due to the lack of official support, users may encounter some challenges. These include:

  • Compatibility Issues: While Picasa 3 generally works well on Windows 11, some features may exhibit minor glitches or require workarounds.
  • Security Concerns: As Google no longer provides updates, using Picasa 3 on Windows 11 might raise security concerns due to potential vulnerabilities.
  • Limited Functionality: Some features may not function as expected or may be entirely unavailable due to the lack of support.

Harnessing the Power of Picasa 3 on Windows 11: Tips and Tricks

To maximize the benefits of using Picasa 3 on Windows 11, consider these tips:

  • Back Up Your Photos: Before installing or using Picasa 3, back up all your photos to an external drive or cloud storage service to ensure data security.
  • Update Your Drivers: Ensure that your graphics drivers are up-to-date to avoid compatibility issues and improve performance.
  • Use Alternative Photo Editing Tools: For advanced editing needs, consider using other photo editing software alongside Picasa 3.
  • Explore Online Resources: Numerous online communities and forums dedicated to Picasa 3 users can provide valuable tips, workarounds, and troubleshooting advice.

Frequently Asked Questions (FAQs) about Picasa 3 on Windows 11

Q: Is Picasa 3 still available for download?

A: No, Picasa 3 is no longer available for download from Google’s official website. However, users can find older versions of the software through third-party websites.

Q: Is it safe to use Picasa 3 on Windows 11?

A: While Picasa 3 generally works well on Windows 11, there are security concerns due to the lack of official support and updates. Users should be cautious about potential vulnerabilities and consider using alternative photo management software for critical data.

Q: Can I still access my Picasa Web Albums?

A: Google discontinued Picasa Web Albums in 2016. Users can access their photos through Google Photos, which migrated Picasa Web Albums data.

Q: What are some good alternatives to Picasa 3?

A: Several excellent photo management and editing alternatives exist, including Adobe Lightroom, Luminar AI, and DxO PhotoLab.

Conclusion: A Legacy of Simplicity and Efficiency

Picasa 3 remains a valuable tool for photo management and editing, offering a user-friendly interface and comprehensive features. Despite its discontinuation, it continues to function on Windows 11, providing a nostalgic and efficient solution for many users. However, it is crucial to acknowledge the lack of official support and potential security concerns. By understanding the limitations and adopting appropriate precautions, users can continue to leverage the power of Picasa 3 on Windows 11 while exploring alternative solutions for future photo management needs.

Download Picasa for Windows 11 โฌ‡๏ธ Install Picasa App on Windows 11 for Free Picasa 3 Download - Latest (2022) For Windows/Android/Mac Picasa 3 Features. - YouTube
How to Recover Old Picasa Photos on a Windows Computer [Easy Method] How to Download Picasa for Windows 10, 11 & XP? - YouTube Picasa fรผr Windows 11, 10, 7, 8/8.1 (64 Bit/32 Bit) herunterladen
Picasa - ุชู†ุฒูŠู„ Picasa latest version - Get best Windows software

Closure

Thus, we hope this article has provided valuable insights into Picasa 3 on Windows 11: A Comprehensive Guide. We hope you find this article informative and beneficial. See you in our next article!

Navigating The New Landscape: Exploring Windows 11’s Enhanced Features And Settings

Navigating the New Landscape: Exploring Windows 11’s Enhanced Features and Settings

Introduction

With great pleasure, we will explore the intriguing topic related to Navigating the New Landscape: Exploring Windows 11’s Enhanced Features and Settings. Let’s weave interesting information and offer fresh perspectives to the readers.

Hereโ€™s What Windows 11โ€™s Settings App Looks Like

Windows 11, Microsoft’s latest operating system, introduces a host of new features and refined settings designed to enhance user experience, boost productivity, and elevate the overall computing experience. This article delves into the key aspects of Windows 11, providing a comprehensive overview of its new functionalities and the settings that empower users to customize their computing environment.

Visual Transformation: A Refined and Modern Interface

Windows 11 presents a visually refreshed interface that emphasizes simplicity and elegance. The Start menu, a central hub for accessing applications and settings, has been redesigned to prioritize pinned apps and frequently used programs. The taskbar, now centered by default, offers a streamlined layout, allowing users to quickly access open applications and system tray icons.

Enhanced Task Management: Multitasking Made Easier

Windows 11 introduces several enhancements to improve multitasking efficiency. Snap layouts, a feature that allows users to arrange windows in pre-defined layouts, facilitates efficient screen management. Snap Groups, a further development, enables users to save specific window configurations and instantly recall them when needed, streamlining workflow and reducing time spent manually arranging windows.

Focus Modes and Notifications: Prioritizing Productivity

Windows 11 introduces Focus Modes, a feature designed to minimize distractions and promote productivity. Users can activate specific Focus Modes, such as "Work" or "Gaming," which suppress notifications and alerts from irrelevant applications, allowing for dedicated focus on the task at hand.

Enhanced Security: Protecting Your Digital Assets

Security remains a paramount concern in the digital age, and Windows 11 incorporates several enhancements to strengthen user protection. Windows Hello, a biometric authentication system, utilizes facial recognition or fingerprint scanning for secure login, replacing traditional passwords. Windows Defender, Microsoft’s built-in antivirus software, has been further fortified, providing comprehensive protection against malware and online threats.

Improved Gaming Experience: A Gamer’s Paradise

Windows 11 offers a suite of features designed to enhance the gaming experience. Auto HDR (High Dynamic Range), a technology that expands the color range of games, delivers a more immersive and visually stunning experience. DirectStorage, a technology that allows games to directly access storage devices, reduces loading times and enhances responsiveness.

Accessibility Features: Empowering All Users

Windows 11 prioritizes inclusivity by introducing and improving accessibility features. Narrator, a screen reader that provides audio feedback for visually impaired users, has been enhanced with improved voice recognition and natural language processing capabilities. Magnifier, a tool that enlarges the screen, offers a range of magnification options and customizable settings, catering to diverse visual needs.

Settings Exploration: Customization at Your Fingertips

Windows 11 offers a comprehensive set of settings that allow users to tailor their operating system to their specific needs and preferences.

Personalization:

  • Themes: Users can choose from a variety of pre-designed themes or create custom themes, adjusting colors, accents, and visual styles to match their aesthetic preferences.
  • Wallpaper: Windows 11 offers a curated collection of wallpapers, allowing users to personalize their desktop with visually appealing backgrounds.
  • Sounds: Users can customize system sounds, selecting from pre-defined sound schemes or uploading their own audio files.

System Settings:

  • Power Options: Users can fine-tune power settings, adjusting power plans to optimize battery life, performance, or a balance between the two.
  • Storage Management: Windows 11 provides tools for managing storage space, identifying and removing unnecessary files, and optimizing disk usage.
  • Network Settings: Users can configure network settings, connecting to Wi-Fi networks, managing VPN connections, and customizing network sharing options.

Privacy and Security:

  • Privacy Settings: Windows 11 offers granular control over privacy settings, allowing users to manage permissions for applications accessing location data, camera, microphone, and other sensitive information.
  • Windows Security: Users can access Windows Security settings to manage antivirus protection, firewall configurations, and other security features.

Frequently Asked Questions (FAQs)

Q: What are the minimum system requirements for Windows 11?

A: Windows 11 requires a 1 GHz or faster processor with two or more cores, 4 GB of RAM, 64 GB of storage, a compatible graphics card, and a display with a resolution of at least 1366 x 768 pixels.

Q: Can I upgrade to Windows 11 from Windows 10?

A: Yes, Windows 11 can be upgraded from Windows 10, but compatibility requirements must be met. Users can check for compatibility using the PC Health Check app.

Q: Is Windows 11 free?

A: Windows 11 is not free. However, users with a valid license for Windows 10 can upgrade to Windows 11 free of charge.

Q: What are the key differences between Windows 10 and Windows 11?

A: Windows 11 features a redesigned Start menu, a centered taskbar, improved multitasking features, enhanced security measures, and a suite of new gaming features.

Q: How can I customize the Start menu in Windows 11?

A: The Start menu can be customized by pinning frequently used applications, creating folders for organizing apps, and adjusting the size and layout of the menu.

Q: Can I disable the centered taskbar in Windows 11?

A: While the taskbar is centered by default, users can change the alignment to the left using settings.

Q: How do I use Snap layouts and Snap Groups in Windows 11?

A: Snap layouts can be accessed by hovering over the maximize button of a window. Snap Groups can be saved by dragging and dropping windows into a desired configuration and selecting "Save Layout."

Q: How do I enable Focus Modes in Windows 11?

A: Focus Modes can be accessed through the Settings app, under "System" and then "Focus." Users can choose from pre-defined Focus Modes or create custom modes.

Q: How do I manage my privacy settings in Windows 11?

A: Privacy settings can be accessed through the Settings app, under "Privacy and security." Users can manage permissions for individual applications and adjust various privacy-related settings.

Tips for Optimizing Windows 11

  • Regularly update Windows 11: Updates deliver security patches, performance improvements, and new features.
  • Disable unnecessary startup programs: Reduce startup times and improve system performance by disabling unnecessary programs from launching at startup.
  • Optimize storage space: Regularly clean up temporary files, uninstall unused applications, and use storage management tools to optimize disk usage.
  • Adjust power settings: Fine-tune power settings to balance performance and battery life according to individual needs.
  • Customize the taskbar and Start menu: Pin frequently used applications and create folders for easy access to programs.

Conclusion

Windows 11 represents a significant evolution of the Windows operating system, introducing a host of new features, refined settings, and a visually refreshed interface. From improved multitasking capabilities and enhanced security measures to a more engaging gaming experience and a greater emphasis on accessibility, Windows 11 empowers users with a comprehensive set of tools and functionalities designed to elevate their computing experience. By exploring and customizing the diverse features and settings offered by Windows 11, users can unlock the full potential of their operating system and tailor it to their individual needs and preferences.

Windows 11 Landscape Scenery 4K #1300h Wallpaper PC Desktop Hands on with redesigned Settings app on Windows 11 10 settings to get you started with Windows 11  Popular Science
Microsoft Unveils The New Windows 11 Packed With New Amazing Features - Riset Windows 11 new features - glopstrange Exploring The Features Of Windows 11: A Deep Dive
Windows 11 What S New Top Features Of Windows 11 Windows 11 2021 - Photos List of All Windows 11 Editions: Mixed Reality Enters the Stage

Closure

Thus, we hope this article has provided valuable insights into Navigating the New Landscape: Exploring Windows 11’s Enhanced Features and Settings. We thank you for taking the time to read this article. See you in our next article!