Understanding The Importance Of PC Health Check In Windows 10 32-bit

Understanding the Importance of PC Health Check in Windows 10 32-bit

Introduction

With great pleasure, we will explore the intriguing topic related to Understanding the Importance of PC Health Check in Windows 10 32-bit. Let’s weave interesting information and offer fresh perspectives to the readers.

Understanding the Importance of PC Health Check in Windows 10 32-bit

Windows 10: Health Check for Your PC - YouTube

While the 32-bit version of Windows 10 is no longer actively supported by Microsoft, it remains a viable operating system for older computers. However, maintaining optimal performance and ensuring system stability requires regular attention to PC health. This article delves into the critical aspects of PC health check in Windows 10 32-bit, highlighting its importance and outlining key strategies for maintaining a healthy and efficient system.

The Significance of PC Health Check in Windows 10 32-bit

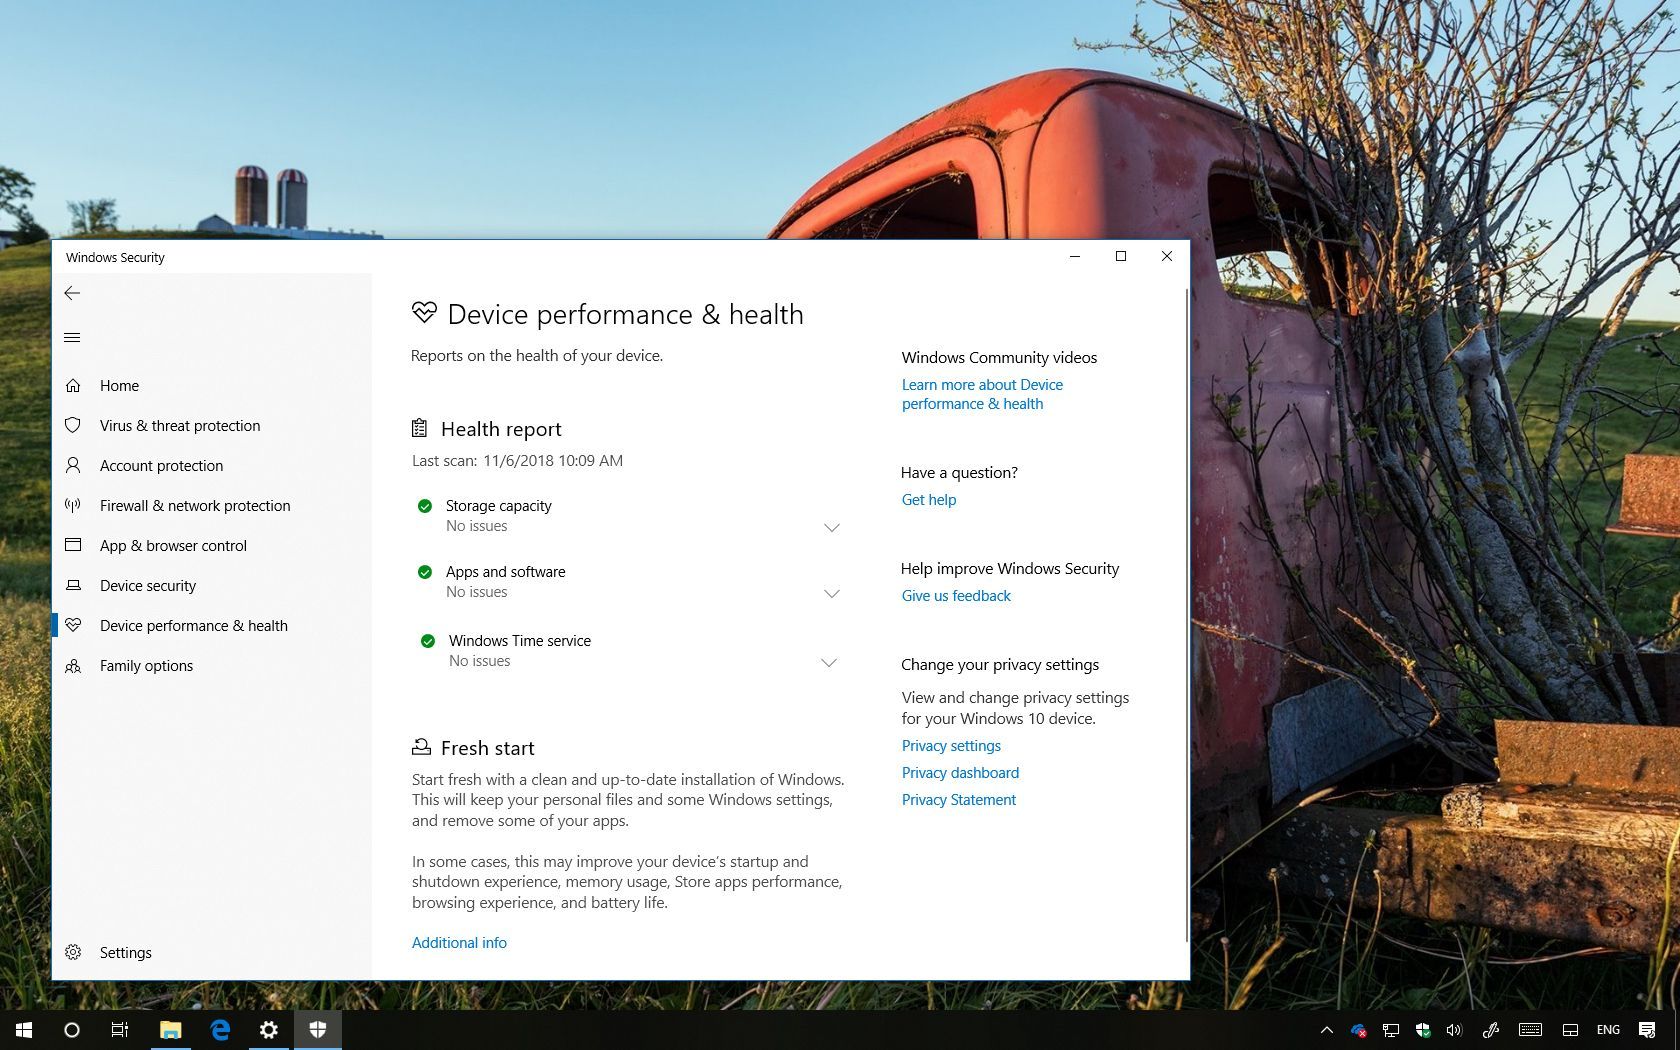
PC health check plays a vital role in ensuring the smooth functioning of a Windows 10 32-bit system. It involves a comprehensive assessment of various system components, identifying potential issues and vulnerabilities, and recommending solutions to enhance performance and security.

Here’s why PC health check is crucial for Windows 10 32-bit users:

  • Performance Optimization: Regularly checking the system’s health helps identify performance bottlenecks, such as excessive background processes, fragmented hard drives, or outdated drivers. Addressing these issues can significantly improve system responsiveness and overall speed.
  • Security Enhancement: A healthy system is a secure system. PC health check helps identify potential security vulnerabilities, such as outdated antivirus software, missing security patches, or compromised user accounts. Addressing these vulnerabilities strengthens the system’s defenses against malware and other cyber threats.
  • Preventing Data Loss: By identifying and resolving potential hardware failures, PC health check helps prevent data loss. It can detect issues with hard drives, RAM, or other critical components, allowing users to take proactive steps to safeguard their valuable data.
  • Prolonging System Lifespan: By addressing performance issues and ensuring proper system maintenance, PC health check can help extend the lifespan of a Windows 10 32-bit system. It can identify and resolve issues that could lead to premature system failure.

Key Components of PC Health Check

A comprehensive PC health check in Windows 10 32-bit involves assessing various aspects of the system. These include:

1. Hardware Assessment:

  • Hard Drive Health: Checking for errors, fragmentation, and available space.
  • RAM Performance: Assessing memory usage, errors, and overall health.
  • CPU Temperature: Monitoring CPU temperature to identify potential overheating issues.
  • Peripheral Connectivity: Ensuring proper functioning of devices like printers, scanners, and external drives.

2. Software Evaluation:

  • Operating System Updates: Checking for and installing the latest Windows updates to enhance security and performance.
  • Driver Updates: Updating device drivers to ensure compatibility and optimal performance.
  • Antivirus Protection: Ensuring active and up-to-date antivirus software for malware protection.
  • Disk Cleanup: Removing unnecessary files to free up disk space and improve system performance.
  • Registry Optimization: Cleaning up the registry to remove invalid entries and improve system stability.

3. System Performance Analysis:

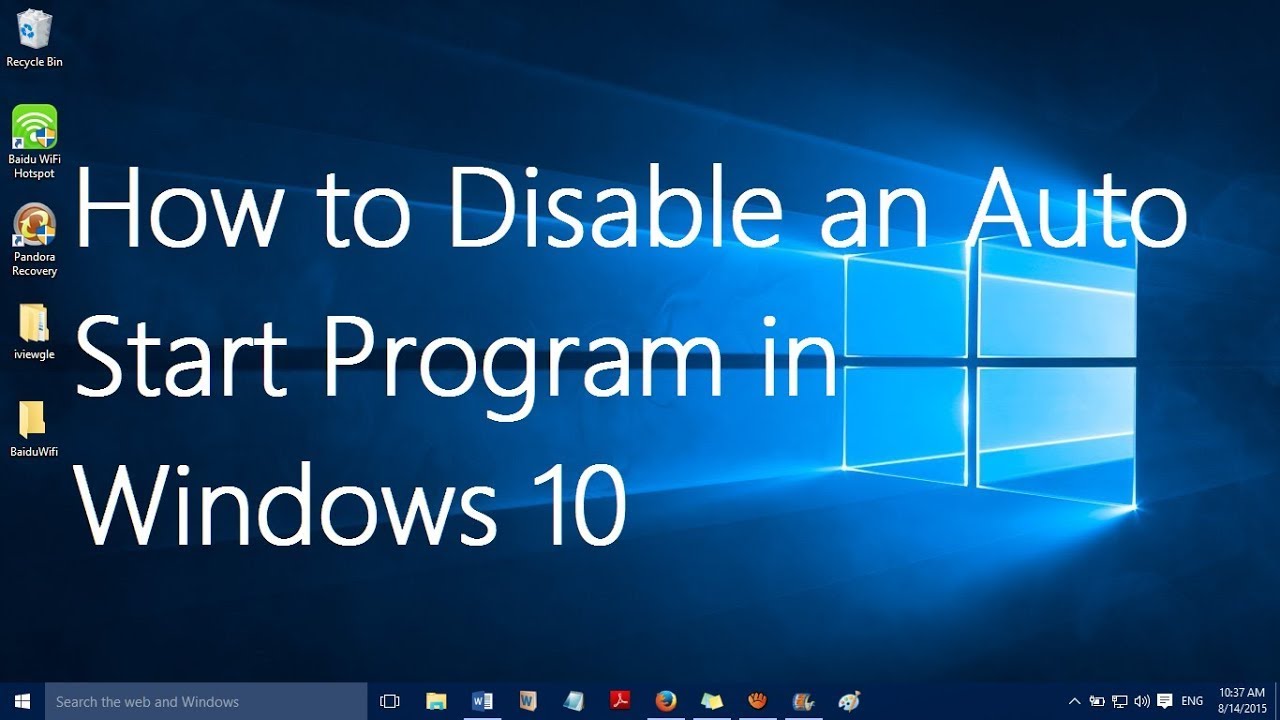
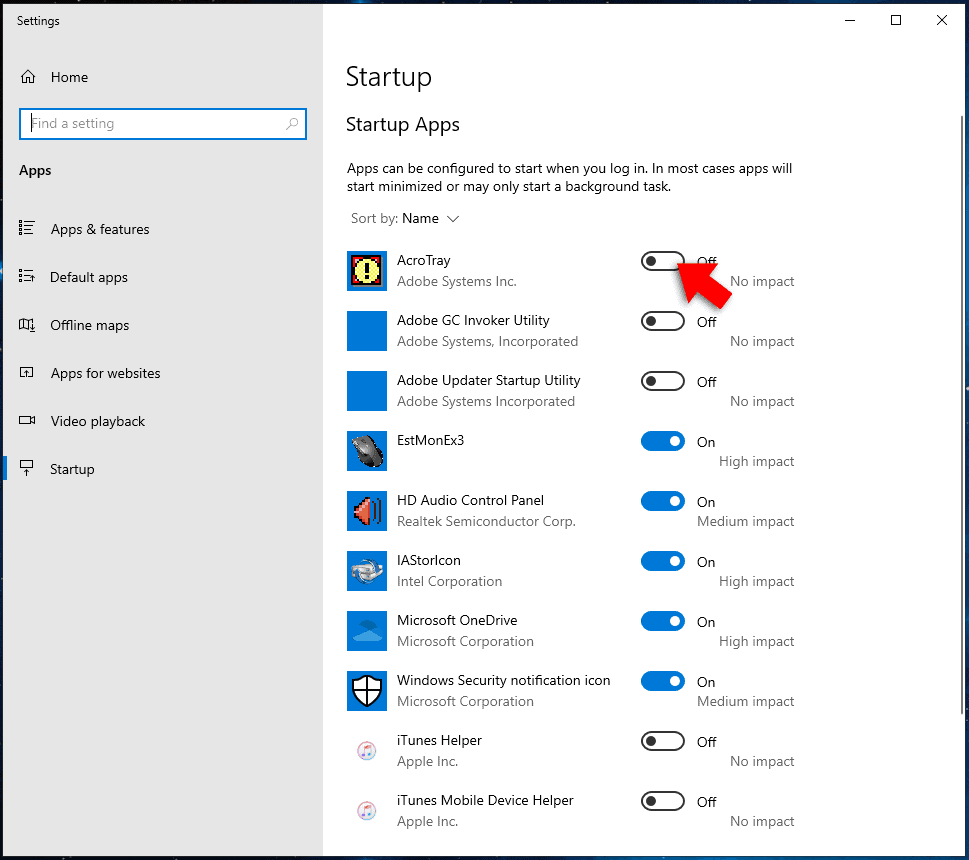
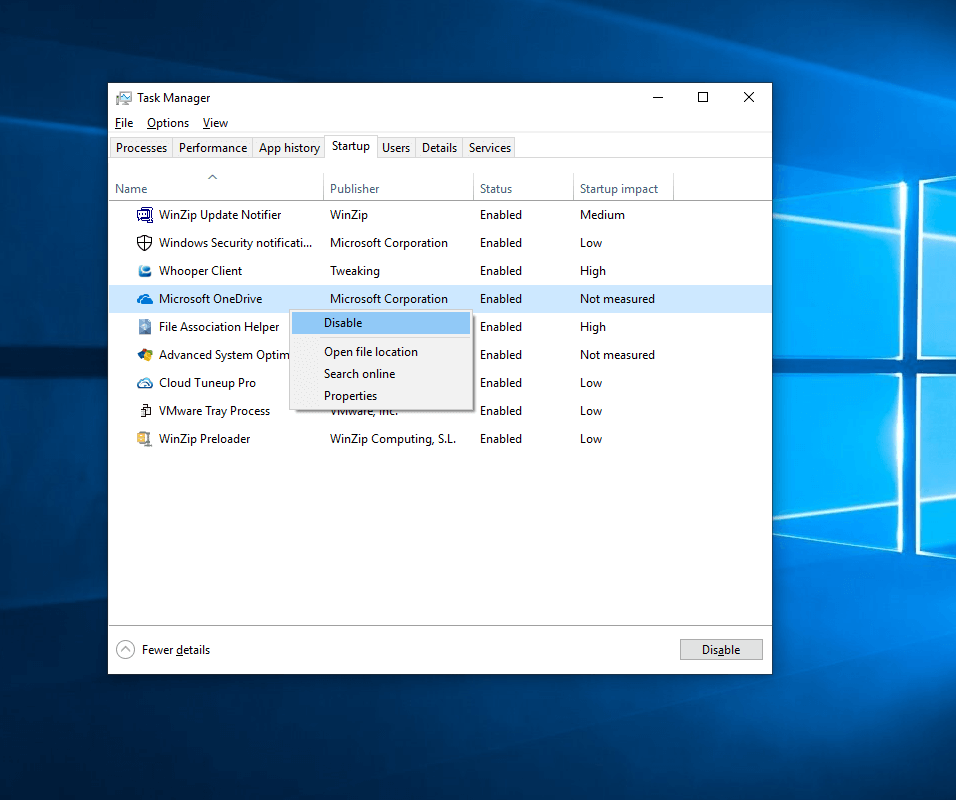
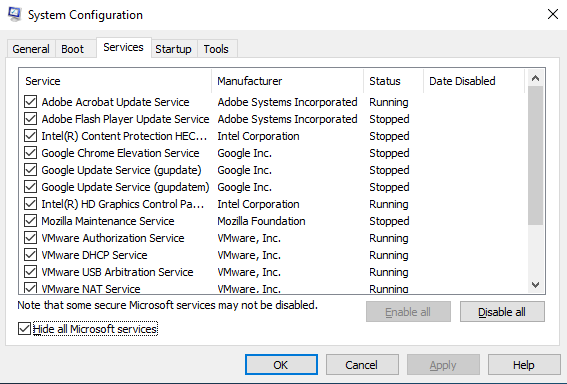
  • Startup Processes: Identifying and disabling unnecessary programs that launch at startup to improve boot time and system responsiveness.
  • Background Processes: Monitoring and managing resource-intensive background processes to optimize system performance.
  • Resource Utilization: Analyzing CPU, RAM, and hard drive usage to identify potential bottlenecks.

Performing PC Health Check in Windows 10 32-bit

While Windows 10 32-bit lacks a dedicated built-in PC health check tool, several methods can be employed to assess system health and performance.

1. Using Windows Built-in Tools:

  • Task Manager: Provides real-time information on CPU, memory, and disk usage, allowing users to identify resource-intensive processes and potentially problematic programs.
  • System Information: Offers detailed information about the system’s hardware and software configuration, allowing users to check for outdated drivers or misconfigured settings.
  • Disk Cleanup: Helps remove temporary files, system files, and other unnecessary data to free up disk space and improve performance.
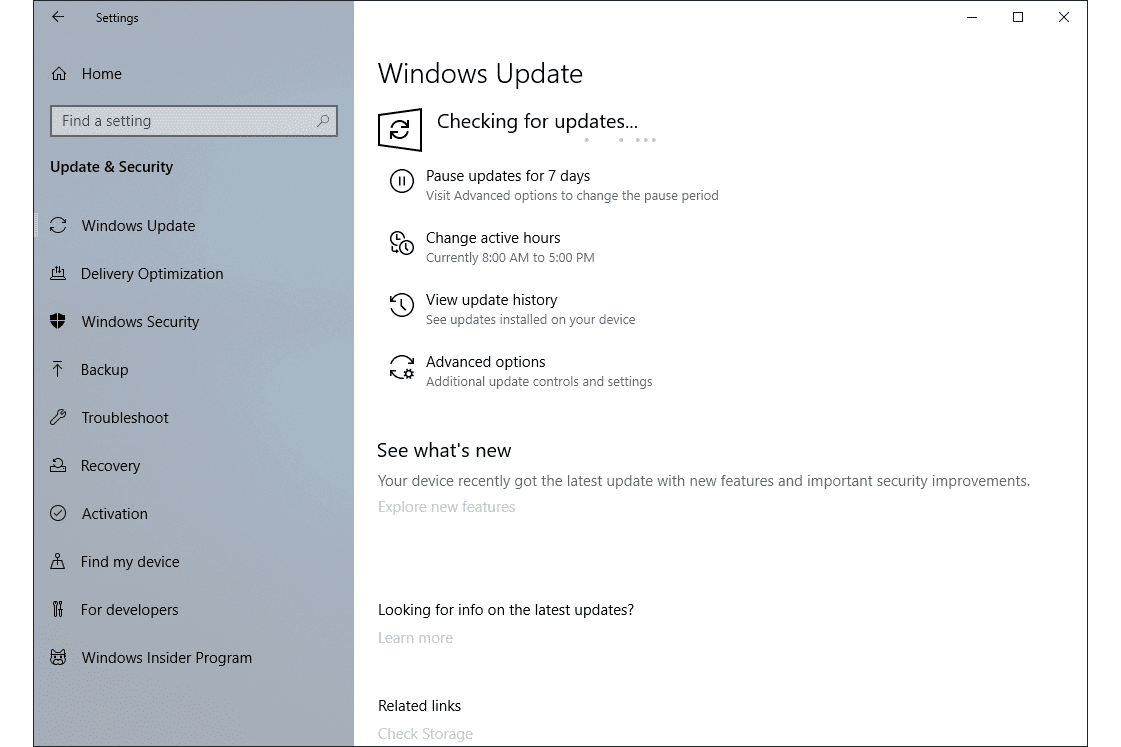
  • Windows Update: Regularly checking for and installing the latest Windows updates ensures security patches and performance enhancements.

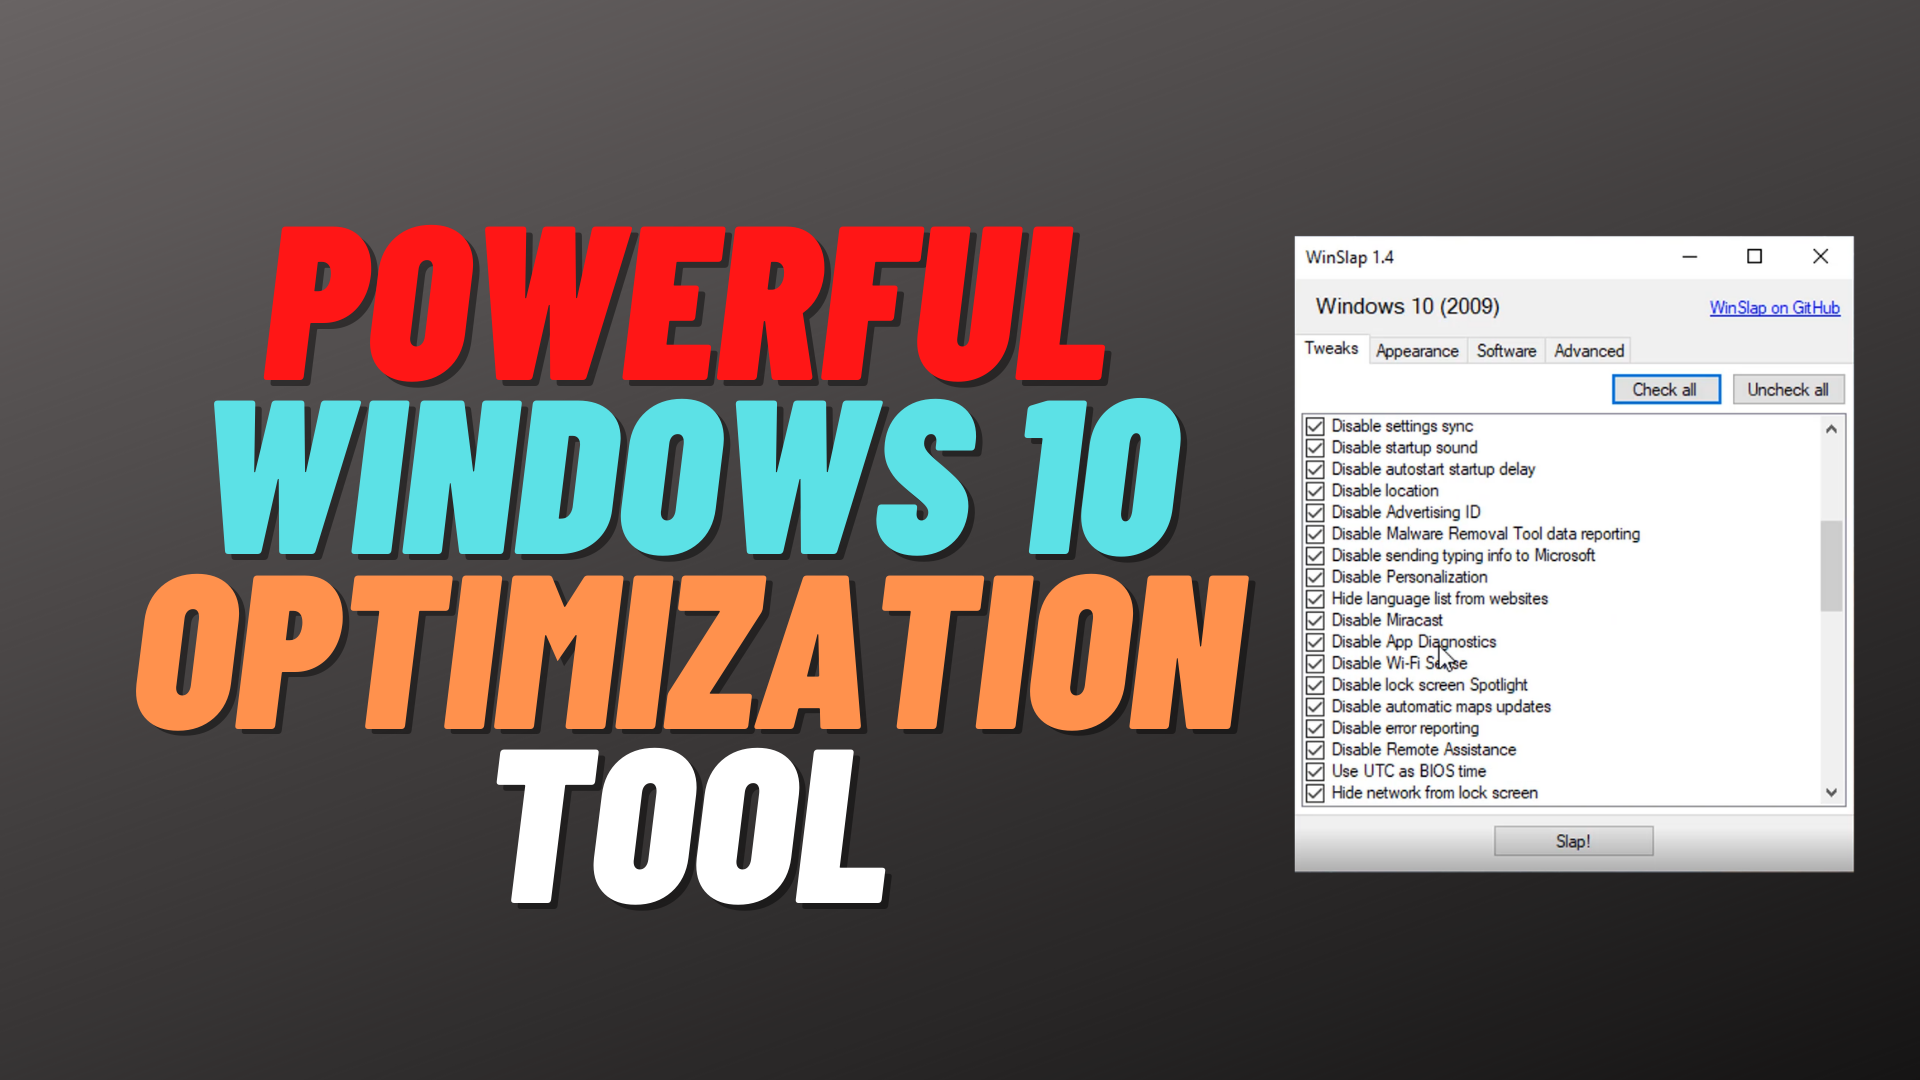
2. Utilizing Third-Party Tools:

  • CCleaner: A popular tool that cleans the registry, removes temporary files, and optimizes system performance.
  • Advanced SystemCare: Offers a comprehensive suite of tools for system optimization, including registry cleaning, driver updates, and performance monitoring.
  • Malwarebytes: Provides real-time protection against malware and offers a comprehensive system scan to identify and remove threats.
  • Speccy: A free tool that provides detailed information about the system’s hardware, including CPU, RAM, and hard drive specifications.

3. Manual System Checks:

  • Checking for Hardware Errors: Running hardware diagnostics tools provided by the manufacturer or using third-party tools like Memtest86+ for RAM testing.
  • Monitoring System Temperature: Using tools like HWMonitor to track CPU and GPU temperatures to identify potential overheating issues.
  • Checking for Drive Errors: Using the built-in "chkdsk" command to check for errors on hard drives and repair them.

Frequently Asked Questions (FAQs)

1. Is PC health check necessary for Windows 10 32-bit?

While Windows 10 32-bit is no longer actively supported, regular PC health check remains essential for maintaining system performance, security, and stability. Addressing potential issues proactively can help extend the system’s lifespan and prevent data loss.

2. How often should I perform a PC health check?

It is recommended to perform a comprehensive PC health check at least once a month. However, more frequent checks may be necessary depending on the system’s usage and the presence of performance or security issues.

3. Can I perform PC health check myself?

Yes, you can perform most aspects of PC health check yourself using built-in Windows tools and third-party applications. However, for complex hardware issues, professional assistance may be required.

4. What are the benefits of using third-party tools for PC health check?

Third-party tools often offer more comprehensive features and automated solutions for system optimization, security, and performance enhancement. They can also provide detailed insights into system health and offer personalized recommendations.

5. Is it safe to use third-party tools for PC health check?

While many reputable third-party tools are available, it is important to download them from trusted sources and read user reviews before using them. Always be cautious about granting excessive permissions to third-party applications.

6. Can PC health check fix all system problems?

While PC health check can address many common system issues, it may not be able to resolve all problems. For complex hardware failures or software conflicts, professional assistance may be required.

Tips for Maintaining PC Health in Windows 10 32-bit

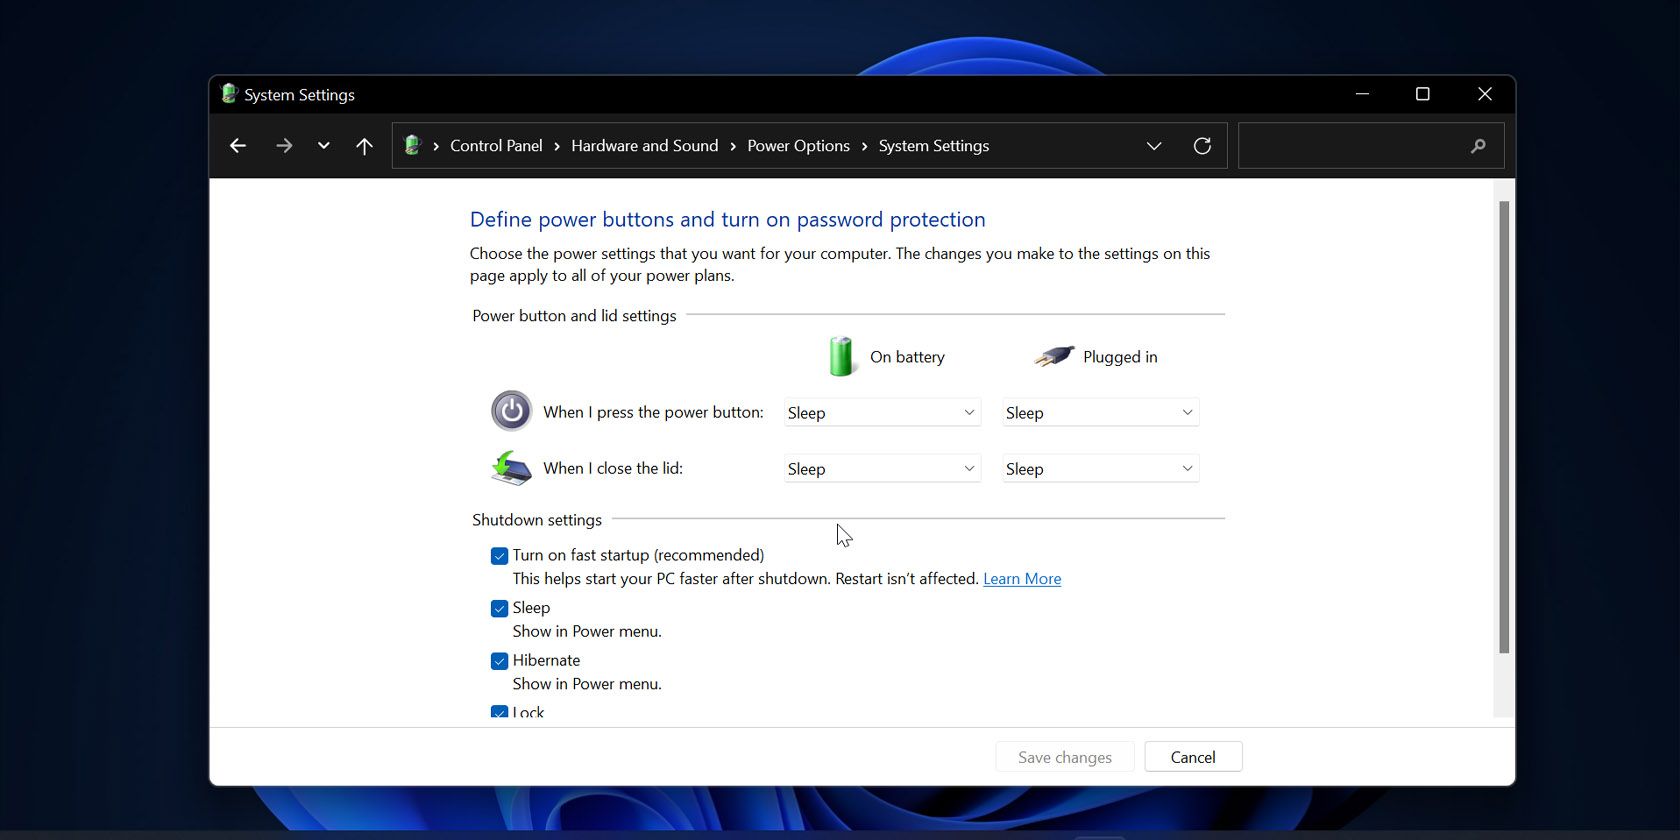
1. Keep the System Updated: Regularly install the latest Windows updates, driver updates, and security patches to ensure system stability, performance, and security.

2. Run Antivirus Software: Install and maintain an active and up-to-date antivirus software to protect the system from malware and other cyber threats.

3. Perform Regular Disk Cleanup: Regularly remove temporary files, system files, and other unnecessary data to free up disk space and improve system performance.

4. Optimize Startup Processes: Disable unnecessary programs that launch at startup to improve boot time and system responsiveness.

5. Manage Background Processes: Monitor and manage resource-intensive background processes to optimize system performance.

6. Monitor System Temperature: Use tools like HWMonitor to track CPU and GPU temperatures to identify potential overheating issues.

7. Check for Hardware Errors: Regularly run hardware diagnostics tools provided by the manufacturer or use third-party tools like Memtest86+ for RAM testing.

8. Back Up Important Data: Regularly back up important data to an external hard drive or cloud storage service to protect against data loss.

9. Avoid Installing Unnecessary Software: Only install software that is necessary and from trusted sources to minimize the risk of malware and performance issues.

10. Regularly Clean the System: Physically clean the system, including the keyboard, mouse, and internal components, to prevent dust buildup and ensure optimal performance.

Conclusion

Maintaining PC health in Windows 10 32-bit is crucial for ensuring optimal performance, security, and system stability. By utilizing built-in Windows tools, third-party applications, and implementing proactive maintenance practices, users can extend the lifespan of their systems, prevent data loss, and enjoy a smooth and efficient computing experience. Remember that while technology evolves, the fundamental principles of PC health check remain relevant, ensuring a healthy and reliable computing environment for all users.

Windows pc health check windows 10 - ktkda How to health check windows 10 for best performance The Windows PC Health Check App Explained
Microsoft began to push the PC Health Check tool to Windows 10 users How to download pc health check app in windows 10 - productver How to check your device health on Windows 10 - Pureinfotech
How to Check the Health of Your Windows 10 PC (And Keep It in Shape)  LaptrinhX How To Check Your PC Memory's Health - Windows 10 - YouTube

Closure

Thus, we hope this article has provided valuable insights into Understanding the Importance of PC Health Check in Windows 10 32-bit. We appreciate your attention to our article. See you in our next article!

Understanding Programs That Launch With Windows 10: A Comprehensive Guide

Understanding Programs that Launch with Windows 10: A Comprehensive Guide

Introduction

With enthusiasm, let’s navigate through the intriguing topic related to Understanding Programs that Launch with Windows 10: A Comprehensive Guide. Let’s weave interesting information and offer fresh perspectives to the readers.

Understanding Programs that Launch with Windows 10: A Comprehensive Guide

WINDOWS 10 - Getting Started

Windows 10, like its predecessors, provides a robust environment for users to launch applications and perform various tasks. A crucial aspect of this functionality is the ability to automatically launch programs when the operating system starts. These programs, often referred to as "startup programs," are essential for a smooth user experience, as they provide crucial background services and functionalities. However, understanding their role, managing their presence, and recognizing their potential impact on system performance is essential for any Windows 10 user.

What are Programs that Launch with Windows 10?

Programs that launch with Windows 10 are applications or processes that automatically start when the operating system boots up. They can be system-critical components like antivirus software, cloud synchronization services, or essential drivers, or user-installed programs like instant messaging applications or productivity tools. These programs are often designed to run in the background, providing continuous services or preparing the system for user interaction.

How do Programs Launch with Windows 10?

The mechanism behind program launches at startup involves a combination of registry entries and system configurations. These programs are typically registered within the Windows Registry, a hierarchical database that stores system settings and configurations. The registry contains specific keys and values that dictate which programs should start automatically.

Additionally, startup folders play a crucial role. These folders, located in the user’s profile directory (e.g., C:UsersAppDataRoamingMicrosoftWindowsStart MenuProgramsStartup), contain shortcut files that direct the system to launch specific programs at startup.

The Benefits of Programs that Launch with Windows 10

The advantages of programs launching at startup are numerous:

  • Improved User Experience: Programs that launch at startup can provide essential services, such as antivirus protection, cloud synchronization, or network connectivity, before the user even interacts with the system. This ensures a seamless and secure experience from the moment the computer boots up.
  • Enhanced Productivity: Certain applications, such as instant messaging tools or productivity software, may benefit from starting automatically, allowing users to access them immediately without having to manually launch them.
  • Background Tasks: Programs that launch at startup can perform crucial background tasks, such as updating system files, downloading data, or synchronizing information, without interrupting the user’s workflow.

The Potential Drawbacks of Programs that Launch with Windows 10

While beneficial, programs that launch at startup can also have negative consequences:

  • Slower Startup Times: Excessive programs launching at startup can significantly increase the time it takes for Windows 10 to boot up, potentially hindering user productivity.
  • Increased Resource Consumption: These programs consume system resources, such as CPU power, memory, and disk space, potentially impacting the overall system performance.
  • Security Risks: Malicious programs or potentially unwanted programs (PUPs) can be configured to launch at startup, posing a security risk to the system.

Managing Programs that Launch with Windows 10

Managing programs that launch with Windows 10 is crucial for maintaining optimal system performance and security. Here are several methods to achieve this:

  • Task Manager: The Task Manager, accessible by pressing Ctrl+Shift+Esc, provides a comprehensive view of running programs. The "Startup" tab lists all programs configured to launch at startup. Users can disable programs from launching automatically by right-clicking them and selecting "Disable."
  • System Configuration: The System Configuration utility (msconfig.exe) allows users to control the programs that launch at startup. Users can access this utility by searching for "msconfig" in the Windows search bar. Within the "Startup" tab, users can disable programs by unchecking the corresponding boxes.
  • Registry Editor: Advanced users can directly modify the registry to control startup programs. However, this requires caution as improper modifications can cause system instability.
  • Third-Party Tools: Numerous third-party utilities, such as Autoruns, provide detailed insights into programs that launch at startup and offer tools for managing them.

FAQs about Programs that Launch with Windows 10

Q: How can I identify which programs are slowing down my system startup?

A: Use the Task Manager’s "Startup" tab to view the impact of each program on system startup. Programs with a high "Startup Impact" score contribute significantly to startup time.

Q: Are there any essential programs that should always launch at startup?

A: System-critical programs, such as antivirus software, drivers, and essential system services, are often necessary for a smooth user experience and should generally remain enabled.

Q: Can I disable programs from launching at startup without affecting their functionality?

A: Disabling programs from launching at startup may affect their functionality, especially if they rely on background processes or continuous services. It’s recommended to research the program’s purpose before disabling it.

Q: How can I prevent potentially unwanted programs (PUPs) from launching at startup?

A: Regularly scan your system for malware and PUPs using reputable antivirus software. Additionally, be cautious when installing new programs, paying attention to any optional installations or bundled software.

Tips for Managing Programs that Launch with Windows 10

  • Regularly Review Startup Programs: Regularly review the programs launching at startup and disable any unnecessary or suspicious applications.
  • Prioritize Essential Programs: Identify and prioritize essential programs that require automatic startup, ensuring they remain enabled while managing the rest.
  • Use Third-Party Tools: Consider using third-party tools to gain further insights into startup programs and manage them effectively.
  • Be Cautious with Installations: Pay attention to program installations and opt out of unnecessary or potentially unwanted programs.

Conclusion

Programs that launch with Windows 10 are an integral part of the operating system, providing a seamless user experience and essential background services. However, managing their presence is crucial to ensure optimal system performance, security, and user productivity. By understanding their role, benefits, and potential drawbacks, users can effectively manage these programs, ensuring a smooth and efficient Windows 10 experience.

What is new in Windows 10 Features Comprehensive of Windows 10 editions with features comparison - AugmaStudio Microsoft Windows 10 Comprehensive - STANZATEXTBOOKS
Windows 10 Start Menu - Surprising Facts Open Programs and Features in Windows 10 [The Fastest Way] How to Open Programs and Features in Windows 10  Control Panel
Startup Programs in Windows 10 New Perspectives Microsoft Windows 10: Comprehensive eBook - AlleText

Closure

Thus, we hope this article has provided valuable insights into Understanding Programs that Launch with Windows 10: A Comprehensive Guide. We appreciate your attention to our article. See you in our next article!

Ensuring A Smooth Windows 10 Experience: The Importance Of PC Health Check

Ensuring a Smooth Windows 10 Experience: The Importance of PC Health Check

Introduction

With great pleasure, we will explore the intriguing topic related to Ensuring a Smooth Windows 10 Experience: The Importance of PC Health Check. Let’s weave interesting information and offer fresh perspectives to the readers.

Ensuring a Smooth Windows 10 Experience: The Importance of PC Health Check

How to Check the Health of Your Windows 10 PC (And Keep It in Shape)  LaptrinhX

In the ever-evolving landscape of technology, maintaining a smooth and efficient computing experience is paramount. For Windows 10 users, Microsoft has provided a valuable tool – PC Health Check – designed to assess system compatibility and prepare for potential upgrades. This article delves into the significance of PC Health Check, its functionality, and how it can contribute to a seamless Windows 10 journey.

Understanding PC Health Check: A Gateway to Compatibility

PC Health Check is a free application developed by Microsoft to evaluate whether a user’s computer meets the minimum system requirements for upgrading to a newer Windows version, primarily Windows 11. The tool scans various hardware components, including processor, memory, storage space, and graphics card, to determine if the device is compatible with the targeted operating system.

Key Features and Functionality:

PC Health Check offers a comprehensive assessment of system health, providing users with valuable insights into their computer’s capabilities. Its primary features include:

  • System Requirements Check: The tool verifies if the computer meets the minimum hardware specifications for the desired Windows version. It checks for compatible processor, RAM, storage space, and graphics card, ensuring a smooth transition to the new operating system.
  • Compatibility Assessment: PC Health Check analyzes the installed drivers and software to identify potential compatibility issues with the new Windows version. This proactive approach helps users address any potential conflicts before upgrading.
  • Upgrade Readiness Report: The tool generates a detailed report outlining the system’s compatibility status, highlighting any areas requiring attention. This report serves as a valuable guide for users, allowing them to take necessary steps to ensure a successful upgrade.
  • Troubleshooting Assistance: In case of compatibility issues, PC Health Check provides troubleshooting tips and guidance, directing users to relevant resources for addressing specific problems. This support feature empowers users to resolve potential obstacles and ensure a seamless upgrade experience.

Benefits of Utilizing PC Health Check:

Implementing PC Health Check before upgrading to a new Windows version offers numerous benefits, including:

  • Pre-emptive Troubleshooting: By identifying potential compatibility issues before upgrading, PC Health Check allows users to address them proactively. This minimizes the risk of encountering problems after the upgrade, ensuring a smoother transition.
  • Informed Decision Making: The tool provides users with a clear understanding of their computer’s capabilities and whether it meets the requirements for the new Windows version. This empowers them to make informed decisions regarding upgrading, ensuring they are prepared for the transition.
  • Optimized Performance: By addressing compatibility issues beforehand, PC Health Check helps users optimize their system’s performance for the new Windows version. This ensures a smoother and more efficient user experience.
  • Reduced Upgrade Risks: PC Health Check minimizes the risk of encountering errors or performance issues during the upgrade process. This contributes to a more seamless and less stressful transition to the new operating system.

Download and Installation:

PC Health Check is readily available for download from the official Microsoft website. The download process is straightforward and user-friendly, requiring only a few simple steps:

  1. Visit the Microsoft Website: Navigate to the official Microsoft website and search for "PC Health Check."
  2. Download the Application: Locate the download link for PC Health Check and click on it to initiate the download.
  3. Run the Installer: Once the download is complete, run the installer file to begin the installation process.
  4. Accept Terms and Conditions: Review and accept the terms and conditions before proceeding with the installation.
  5. Complete Installation: Follow the on-screen instructions to complete the installation process.

Running PC Health Check:

After successful installation, running PC Health Check is a simple and intuitive process:

  1. Open the Application: Locate the PC Health Check application in the Start menu or search bar.
  2. Accept Terms and Conditions: Review and accept the terms and conditions before proceeding with the scan.
  3. Initiate the Scan: Click on the "Check Now" button to initiate the system scan.
  4. Review the Report: Once the scan is complete, review the generated report, which outlines the system’s compatibility status and highlights any areas requiring attention.

FAQs about PC Health Check:

Q1: Is PC Health Check compatible with all Windows versions?

A: PC Health Check is primarily designed for Windows 10 users and is not compatible with older versions of Windows.

Q2: Can I use PC Health Check to upgrade to Windows 11?

A: PC Health Check assesses system compatibility for upgrading to Windows 11, but it does not facilitate the actual upgrade process.

Q3: What happens if my computer fails the compatibility check?

A: If your computer fails the compatibility check, PC Health Check will provide detailed information about the specific requirements that are not met. It will also offer troubleshooting tips and guidance for addressing potential issues.

Q4: Can I still upgrade to Windows 11 if my computer fails the compatibility check?

A: While upgrading to Windows 11 is technically possible even if your computer fails the compatibility check, it is not recommended. Doing so may result in performance issues, instability, and potential compatibility problems.

Q5: Does PC Health Check collect personal data?

A: PC Health Check collects basic system information, such as processor model, RAM capacity, and storage space, to assess compatibility. This data is not used for any other purpose and is not shared with third parties.

Tips for Optimizing PC Health Check:

  • Run PC Health Check with Administrator Privileges: This ensures that the tool has access to all necessary system information for a comprehensive scan.
  • Close Other Applications: Close any unnecessary applications or programs before running PC Health Check to minimize potential conflicts and ensure accurate results.
  • Update Device Drivers: Ensure that all device drivers are up-to-date before running PC Health Check. Outdated drivers can cause compatibility issues and affect the scan results.
  • Check for System Updates: Install any available system updates before running PC Health Check. Updates often include compatibility improvements and may address potential issues.
  • Review the Report Thoroughly: Carefully review the generated report and pay attention to any areas requiring attention. This will help you identify potential problems and take necessary steps to ensure a smooth upgrade experience.

Conclusion:

PC Health Check is an invaluable tool for Windows 10 users who are considering upgrading to a newer version of Windows, particularly Windows 11. By providing a comprehensive assessment of system compatibility and identifying potential issues before upgrading, PC Health Check empowers users to make informed decisions, optimize system performance, and minimize upgrade risks. Utilizing this tool ensures a smooth and efficient transition to a new operating system, allowing users to enjoy the benefits of a modern and powerful computing experience.

How to check your device health on Windows 10 • Pureinfotech How to health check windows 10 for best performance How to change time and language formats in Windows 10 - gHacks Tech News
Windows 10 Users to Get PC Health Check App With New Features - Techsprout News Download pc health check app for windows 10 - insiderfad The Windows PC Health Check App Explained
How to download pc health check app in windows 10 - productver Windows Pc Health Check Setup

Closure

Thus, we hope this article has provided valuable insights into Ensuring a Smooth Windows 10 Experience: The Importance of PC Health Check. We hope you find this article informative and beneficial. See you in our next article!

The Enigma Of Un-Extensible C Drives In Windows 10: A Comprehensive Guide

The Enigma of Un-Extensible C Drives in Windows 10: A Comprehensive Guide

Introduction

In this auspicious occasion, we are delighted to delve into the intriguing topic related to The Enigma of Un-Extensible C Drives in Windows 10: A Comprehensive Guide. Let’s weave interesting information and offer fresh perspectives to the readers.

The Enigma of Un-Extensible C Drives in Windows 10: A Comprehensive Guide

How To Extend C Drive Space On Windows 10 Complete Guide  techwiser

The ability to expand the C drive in Windows 10 is often a sought-after feature, especially when facing storage limitations. However, users frequently encounter situations where this seemingly straightforward task becomes impossible. This article delves into the intricacies of why extending the C drive may be restricted in Windows 10, offering a comprehensive understanding of the underlying factors and potential solutions.

Understanding the C Drive and Its Limitations

The C drive, typically the primary partition on a hard disk drive (HDD) or solid-state drive (SSD), houses the operating system (OS) files and essential system applications. Its size is crucial for smooth and efficient system performance. Insufficient space on the C drive can lead to slow system boot times, application crashes, and overall system instability.

The Challenge of Extending the C Drive

While the need to expand the C drive is common, the process itself is not always straightforward. Several factors can impede the ability to extend the C drive in Windows 10, including:

  • Disk Space Allocation: The most common obstacle is the lack of contiguous unallocated space adjacent to the C drive. Windows Disk Management, the built-in tool for managing partitions, requires contiguous unallocated space to extend a partition. If the unallocated space is fragmented or located on a different disk, extending the C drive becomes impossible.
  • File System Compatibility: Windows Disk Management is limited in its ability to extend partitions across different file systems. If the C drive is formatted with NTFS, but the unallocated space is formatted with FAT32, extending the C drive will not be possible using this method.
  • System Reserved Partition: The System Reserved Partition (SRP), a small partition usually located before the C drive, cannot be directly extended. This partition houses critical boot files and cannot be modified without risking system instability.
  • Third-Party Partitioning Tools: While third-party partitioning software offers greater flexibility, they can sometimes introduce complications. Improper use can lead to data loss or system corruption, requiring advanced recovery techniques.
  • Legacy BIOS vs. UEFI: The type of BIOS used by the system can also influence the ability to extend the C drive. Legacy BIOS systems often have limitations in managing partitions compared to UEFI systems, which offer greater flexibility.

Troubleshooting the Un-Extensible C Drive

When encountering difficulties extending the C drive, a methodical approach to troubleshooting is essential:

  • Check for Unallocated Space: Utilize Windows Disk Management to visualize the disk layout. Verify if there is sufficient unallocated space adjacent to the C drive. If not, consider deleting other partitions or moving files to free up space.
  • Verify File System Compatibility: Ensure the file system of the unallocated space matches the C drive. If not, consider converting the unallocated space to NTFS using the command prompt or a partitioning tool.
  • Examine the System Reserved Partition: The SRP is typically small and cannot be extended. However, if it is unusually large, consider using advanced partitioning tools to adjust its size, but proceed with caution.
  • Consult Third-Party Partitioning Tools: If the limitations of Windows Disk Management prevent extending the C drive, explore third-party tools like EaseUS Partition Master or AOMEI Partition Assistant. These tools offer greater flexibility and advanced features.
  • Consider Data Backup: Before making any significant changes to disk partitions, ensure a complete data backup. This precaution safeguards against data loss in case of unexpected errors.

Alternative Solutions for Expanding Storage

If extending the C drive proves impossible, consider these alternative solutions:

  • External Hard Drive: Use an external hard drive for storing files, freeing up space on the C drive. This is a simple and cost-effective solution, though it requires carrying the external drive.
  • Cloud Storage: Utilize cloud storage services like Google Drive, Dropbox, or OneDrive to store files online. This offers accessibility from multiple devices but requires a stable internet connection.
  • Network Attached Storage (NAS): Invest in a NAS device to create a centralized storage solution for your network. This provides ample storage space and file sharing capabilities.
  • Additional Internal Drive: Install a second internal hard drive or SSD to expand storage capacity. This requires physical installation and may necessitate partitioning the new drive for optimal usage.

FAQs Regarding Extending the C Drive

Q: Can I extend the C drive without losing data?

A: While extending the C drive typically does not involve data loss, it is always recommended to back up your data before proceeding. Unexpected errors during the process can lead to data corruption or loss.

Q: Is it safe to use third-party partitioning tools?

A: Third-party tools can offer greater flexibility, but using them incorrectly can lead to data loss or system corruption. Choose reputable tools with a positive track record and proceed with caution.

Q: Can I extend the C drive if it is encrypted?

A: Extending an encrypted C drive can be complex and may require specific steps. Consult the documentation of your encryption software or seek professional assistance.

Q: Can I extend the C drive if it is on a GPT disk?

A: GPT disks generally offer more flexibility in managing partitions compared to MBR disks. You can typically extend the C drive on a GPT disk using Windows Disk Management or third-party tools.

Tips for Effective C Drive Management

  • Regularly Clean Up Disk Space: Delete unnecessary files, empty the Recycle Bin, and uninstall unused programs to free up space on the C drive.
  • Disable System Restore Points: System Restore points consume significant disk space. Consider disabling or limiting the number of restore points to save space.
  • Optimize Windows Updates: Configure Windows Update settings to download updates only when connected to a Wi-Fi network and choose a specific time for installation. This reduces the impact of updates on C drive space.
  • Consider Using a SSD: SSDs offer faster boot times and application loading, reducing the need for a large C drive.
  • Monitor Disk Space Regularly: Use the Disk Management tool or third-party monitoring software to keep track of available disk space and proactively manage it.

Conclusion

Extending the C drive in Windows 10 can be challenging due to various factors, including disk space allocation, file system compatibility, and system limitations. Troubleshooting the issue requires a systematic approach, involving identifying the underlying cause and exploring potential solutions. While Windows Disk Management offers basic functionality, third-party partitioning tools provide greater flexibility. However, using such tools demands caution and awareness of potential risks. If extending the C drive proves impossible, alternative solutions like external hard drives, cloud storage, or additional internal drives offer viable options for expanding storage capacity. Ultimately, effective C drive management involves a combination of proactive space optimization, regular monitoring, and informed decision-making to ensure optimal system performance and data integrity.

How to Extend C Drive in Windows 10/11 without any Software - YouTube Step-by-Step Instructions To Extend C: Drive on Windows 10 - DZone Methods to Extend C Drive in Windows 11/10  Stellar
How to Extend C Drive in Windows 10 Easily 2 Methods to Extend C Drive in Windows 10[2024] How To Extend C Drive Windows 10
Extend C Drive Windows 10  Extend C Drive In HP Laptop Windows 11  AOMEI Partition Assistant How to Extend C Drive Windows 10 Without Losing Data [100% Working] - YouTube

Closure

Thus, we hope this article has provided valuable insights into The Enigma of Un-Extensible C Drives in Windows 10: A Comprehensive Guide. We hope you find this article informative and beneficial. See you in our next article!

Accelerating Windows 11: Unveiling The Power Of Fast Startup

Accelerating Windows 11: Unveiling the Power of Fast Startup

Introduction

With enthusiasm, let’s navigate through the intriguing topic related to Accelerating Windows 11: Unveiling the Power of Fast Startup. Let’s weave interesting information and offer fresh perspectives to the readers.

Accelerating Windows 11: Unveiling the Power of Fast Startup

How to Enable Fast Startup on Windows 11

In the realm of modern computing, time is a precious commodity. The swiftness with which a device boots up significantly impacts user experience and productivity. Windows 11, Microsoft’s latest operating system, introduces a range of enhancements aimed at minimizing boot times, offering a seamless and efficient user journey. This article delves into the intricacies of Windows 11’s boot optimization features, exploring their impact and providing insights into maximizing their potential.

Understanding the Essence of Fast Boot

Before embarking on a detailed exploration of Windows 11’s boot acceleration features, it is essential to grasp the fundamental concept of fast boot. Unlike traditional boot processes that involve a complete system restart, fast boot leverages a hybrid approach, combining elements of a cold boot (a complete power cycle) with a warm boot (a restart without a full power cycle).

When a system employs fast boot, Windows 11 does not completely shut down. Instead, it enters a state of hibernation, preserving the current session’s data and application states in memory. Upon restarting, Windows 11 quickly restores this saved information, bypassing the lengthy process of loading the operating system from scratch. This significantly reduces the time required to reach the desktop, enhancing user convenience and productivity.

Unveiling Windows 11’s Boot Optimization Arsenal

Windows 11 equips users with a multifaceted arsenal of tools and settings designed to expedite the boot process. These tools work in tandem to minimize delays, ensuring a swift and seamless transition into the operating system.

1. Fast Startup: The Cornerstone of Rapid Boot Times

Fast startup, often referred to as "Hybrid Shutdown," is the cornerstone of Windows 11’s boot acceleration strategy. This feature is enabled by default, automatically activating upon system installation. When enabled, fast startup ensures that upon restarting, Windows 11 does not perform a full system shutdown. Instead, it enters a hibernation state, preserving the current session’s data and application states in memory. This allows for a significantly faster boot time as Windows 11 merely needs to restore the saved data rather than loading the entire operating system from scratch.

2. Disk Optimization: Maximizing Storage Performance

The speed at which data can be accessed from a storage device plays a crucial role in overall boot performance. Windows 11 incorporates various tools and settings aimed at optimizing disk performance, ensuring swift data retrieval during the boot process.

  • Disk Defragmentation: Disk defragmentation is a process that rearranges fragmented data on a hard drive, bringing related data segments closer together. This improves data access speeds, resulting in faster boot times. While less critical for solid-state drives (SSDs) due to their inherent speed, defragmentation can still benefit traditional hard drives.
  • Disk Cleanup: Accumulated temporary files, system logs, and other unnecessary data can hinder disk performance. Windows 11’s Disk Cleanup tool allows users to remove these files, freeing up valuable disk space and potentially improving boot times.
  • Storage Sense: Storage Sense is an automated tool that periodically cleans up temporary files, downloads, and other unnecessary data. This helps to ensure that the storage drive remains free of clutter, improving disk performance and potentially contributing to faster boot times.

3. Boot Configuration: Tailoring Boot Settings for Optimal Performance

Windows 11 provides a range of boot configuration settings that allow users to fine-tune the boot process for optimal performance. These settings offer granular control over various aspects of the boot sequence, enabling users to tailor the boot process to their specific needs and hardware configurations.

  • Boot Options: The "Advanced Startup Options" menu in Windows 11 provides access to a range of boot configuration settings, including the ability to disable or enable specific startup items, adjust the boot order, and configure the boot loader. These settings allow users to prioritize specific devices or services during the boot process, potentially improving boot times.
  • Startup Apps: Applications that launch automatically at startup can significantly impact boot times. Windows 11 allows users to manage startup apps, enabling them to disable unnecessary applications from launching at startup. This helps to reduce the overall load on the system, potentially resulting in faster boot times.

4. Hardware Optimization: Leveraging Hardware Capabilities for Faster Boot Times

The hardware components within a system play a significant role in boot performance. Windows 11 is designed to leverage the capabilities of modern hardware to maximize boot speeds.

  • SSD Usage: Solid-state drives (SSDs) offer significantly faster data access speeds compared to traditional hard drives. Windows 11 takes advantage of SSDs by using features like "Fast Startup" and "Trim," which optimize SSD performance and reduce boot times.
  • RAM Optimization: The amount of RAM available significantly impacts boot performance. Windows 11 efficiently manages RAM, ensuring that critical system files and processes are loaded quickly, contributing to a faster boot experience.

5. Software Optimization: Minimizing Software Interference

Software installed on a system can impact boot times. Windows 11 incorporates features that help to minimize software interference and ensure a swift boot process.

  • Automatic Updates: Windows 11 automatically downloads and installs updates in the background. This helps to ensure that the system is always running the latest version of the operating system, potentially improving boot times.
  • Antivirus Optimization: Antivirus software can sometimes slow down the boot process. Windows 11 includes a built-in antivirus program, Windows Defender, which is optimized for minimal impact on system performance.

The Importance of Fast Boot: A Productivity Booster

The benefits of a fast boot experience extend beyond mere convenience. A swift boot process significantly impacts productivity and user satisfaction.

  • Enhanced User Experience: A quick boot time translates into a seamless and enjoyable user experience. Users can access their applications and data faster, reducing frustration and maximizing productivity.
  • Improved Workflows: A fast boot process enables users to quickly transition between tasks, maximizing efficiency and productivity. This is particularly beneficial for users who frequently reboot their systems or switch between different applications.
  • Reduced Energy Consumption: By minimizing the time spent in the boot process, fast boot can contribute to reduced energy consumption, leading to lower energy bills and a more eco-friendly computing experience.

FAQs: Addressing Common Questions about Fast Boot

1. Is Fast Startup Always Enabled in Windows 11?

Yes, Fast Startup is enabled by default in Windows 11. However, users can disable it if they prefer a complete system shutdown.

2. Does Disabling Fast Startup Impact Boot Time?

Yes, disabling Fast Startup will result in longer boot times as the system will perform a complete shutdown and load the operating system from scratch.

3. Can I Use Fast Startup with a Traditional Hard Drive?

Yes, Fast Startup can be used with traditional hard drives, but the performance benefits may be less pronounced compared to SSDs.

4. Does Fast Startup Affect Battery Life?

Fast Startup can have a minimal impact on battery life, as it uses a small amount of power to maintain the system in a hibernation state.

5. How Can I Troubleshoot Fast Startup Issues?

If you are experiencing issues with Fast Startup, you can try disabling it and then re-enabling it. You can also check for system updates and ensure that your drivers are up to date.

Tips for Maximizing Boot Performance

  • Disable Unnecessary Startup Items: Identify and disable unnecessary applications that launch automatically at startup.
  • Optimize Disk Space: Regularly clean up your disk by removing temporary files, system logs, and other unnecessary data.
  • Defragment Hard Drives: Defragment your hard drive to improve data access speeds.
  • Keep Drivers Updated: Ensure that your device drivers are up to date to optimize hardware performance.
  • Use a Solid-State Drive: Consider upgrading to an SSD for significantly faster boot times.

Conclusion: A Smoother, Faster Computing Experience

Windows 11’s fast boot features are a testament to Microsoft’s commitment to enhancing user experience and productivity. By minimizing boot times and optimizing system performance, these features contribute to a smoother, faster, and more enjoyable computing experience. Understanding the intricacies of these features and implementing the recommended tips can significantly enhance the overall performance of your Windows 11 system, enabling you to make the most of your computing time.

How to Enable Fast Startup on Windows 11 Fast Startup on Windows 11 - Get solutions here How to Enable / Disable "Fast Startup" in Windows 11/10  Fast Startup not Showing - YouTube
How to enable or disable fast startup on Windows 11  Windows Central How to Enable or Turn On Fast Startup on Windows 11 [Tutorial] - YouTube نحوه روشن یا خاموش کردن Fast Startup در ویندوز 11 » خبر و ترفند روز
How to Enable Fast Startup On Windows 11 How to Turn On or Turn Off Fast Startup in Windows 11

Closure

Thus, we hope this article has provided valuable insights into Accelerating Windows 11: Unveiling the Power of Fast Startup. We hope you find this article informative and beneficial. See you in our next article!

Understanding And Adjusting Overscan In Windows 10

Understanding and Adjusting Overscan in Windows 10

Introduction

With enthusiasm, let’s navigate through the intriguing topic related to Understanding and Adjusting Overscan in Windows 10. Let’s weave interesting information and offer fresh perspectives to the readers.

Understanding and Adjusting Overscan in Windows 10

Overscaling Or Overscan in Windows 10 and Windows 11 [Fixed]

Overscan, a common phenomenon in television and monitor displays, refers to the display of content beyond the intended viewing area. This occurs when the signal received by the display extends beyond the actual screen boundaries, resulting in a portion of the image being cut off or hidden. While overscan was historically used to mask imperfections in the display technology, it can cause issues in modern digital environments, particularly when using high-resolution displays or working with sensitive graphical applications. This article will delve into the nuances of overscan in Windows 10, exploring its impact, methods of adjustment, and the benefits of achieving a precise display experience.

Overscan: A Historical Context and Modern Implications

Before the advent of digital displays, analog television signals were prone to imperfections and distortions. Overscan was implemented as a solution to mask these imperfections, effectively cropping the signal to ensure a visually appealing experience. The displayed image was intentionally extended beyond the physical screen boundaries, hiding any potential artifacts or inconsistencies at the edges.

However, in today’s digital landscape, the prevalence of high-resolution displays and precise graphics necessitates a more accurate display experience. Overscan can cause several issues in this context:

  • Content Cut-Off: Overscan can result in the loss of critical information at the edges of the screen, including text, buttons, or important visual elements. This can be particularly problematic in applications that rely on precise positioning and display, such as video editing software, gaming, and web design.
  • Incorrect Aspect Ratio: Overscan can distort the intended aspect ratio of the displayed content, leading to an elongated or compressed image. This can affect the visual fidelity of movies, games, and other media.
  • User Interface Issues: Overscan can obscure elements of the user interface, including menus, toolbars, and scroll bars, making it difficult to navigate and interact with applications.

Identifying and Addressing Overscan in Windows 10

Identifying overscan in Windows 10 is crucial for achieving a seamless and accurate display experience. The first step involves recognizing the visual cues of overscan:

  • Missing Content: If you notice that parts of the image are missing at the edges of the screen, particularly text or important visual elements, it could be an indication of overscan.
  • Distorted Aspect Ratio: If the image appears elongated or compressed, it might be due to overscan altering the intended aspect ratio.
  • Obscured UI Elements: If you find that menus, toolbars, or scroll bars are partially or completely hidden, overscan could be the culprit.

Once overscan is identified, the next step is to adjust the display settings to correct it. Windows 10 offers several methods to address overscan:

1. Using the Display Settings:

  • Navigate to Display Settings: Access the Display settings by right-clicking on the desktop and selecting "Display settings" or by searching for "Display settings" in the Windows search bar.
  • Adjust Display Scale: The "Scale and layout" section within the Display settings allows you to adjust the display scaling. Increasing the scaling percentage can compensate for overscan by shrinking the displayed content, making more of it visible.
  • Adjust Display Resolution: The "Resolution" section allows you to choose a different display resolution. In some cases, selecting a lower resolution might reduce overscan by effectively cropping the image.

2. Using the Monitor’s On-Screen Display (OSD):

  • Access the OSD: Most monitors have an OSD menu accessible through buttons on the monitor itself. This menu typically provides options to adjust various display settings, including overscan.
  • Adjust Overscan Settings: Look for options related to "overscan," "aspect ratio," or "picture size" within the OSD menu. Adjusting these settings can help correct overscan and restore the intended display area.

3. Using Third-Party Software:

  • Dedicated Display Tools: Several third-party software applications specialize in display management and can help adjust overscan. These tools often offer more granular control over display settings than the built-in Windows options.
  • Custom Resolutions: Some display tools allow you to create custom display resolutions, which can be useful for fine-tuning the display area and addressing overscan issues.

The Importance of Overscan Adjustment: Benefits and Applications

Correcting overscan in Windows 10 offers several benefits, improving the overall user experience and enhancing the functionality of various applications:

  • Accurate Content Display: Eliminating overscan ensures that all the intended content is visible, preventing the loss of important information, buttons, or text. This is crucial for tasks requiring precise display, such as video editing, web design, and gaming.
  • Preserving Aspect Ratio: Adjusting overscan restores the intended aspect ratio of the displayed content, maintaining the visual fidelity of movies, games, and other media. This enhances the overall viewing experience and avoids distortion.
  • Enhanced User Interface: Removing overscan reveals all the elements of the user interface, including menus, toolbars, and scroll bars. This improves usability and navigability, making it easier to interact with applications.
  • Improved Aesthetics: Correcting overscan creates a cleaner and more aesthetically pleasing display experience, as the content is displayed within its intended boundaries.

Frequently Asked Questions (FAQs)

Q: How can I tell if my monitor has overscan?

A: Look for missing content at the edges of the screen, distorted aspect ratio, or obscured user interface elements.

Q: What if adjusting the display settings doesn’t fix overscan?

A: Check the monitor’s OSD menu for overscan adjustment options. If these are unavailable, consider using third-party software or consulting the monitor’s manual for specific instructions.

Q: Can I adjust overscan for each individual application?

A: While Windows 10 does not offer application-specific overscan adjustments, some third-party software might provide this functionality.

Q: Will adjusting overscan affect the performance of my computer?

A: Adjusting overscan settings typically does not impact computer performance significantly. However, if you experience any performance issues, revert to the previous settings.

Tips for Adjusting Overscan in Windows 10

  • Start with the Display Settings: Explore the "Scale and layout" and "Resolution" options within the Display settings before moving to other methods.
  • Experiment with Different Settings: Try adjusting the display scaling, resolution, and monitor’s OSD settings to find the optimal configuration for your specific setup.
  • Consider Using Third-Party Software: If the built-in Windows options are insufficient, explore dedicated display tools for more granular control.
  • Consult the Monitor’s Manual: The monitor’s manual might provide specific instructions for adjusting overscan settings.
  • Test the Results: After making any adjustments, carefully check the display area to ensure that the overscan is corrected and the content is displayed as intended.

Conclusion

Overscan, while historically useful for masking display imperfections, can pose challenges in modern digital environments. By understanding the nature of overscan and its impact on the display experience, users can effectively identify and address it in Windows 10. Adjusting display settings, utilizing the monitor’s OSD menu, or employing third-party software can help correct overscan, resulting in a precise and visually accurate display experience. Achieving a correct display area ensures that all content is visible, aspect ratios are preserved, user interfaces are accessible, and overall aesthetics are enhanced, ultimately leading to a more enjoyable and efficient computing experience.

How to Fix Overscan in Windows 10 — Quick 10 Solutions - TechCommuters Cómo arreglar Overscan en Windows 10 para ajustar a la pantalla - Recurso WordPress Overscaling Or Overscan in Windows 10 and Windows 11 [Fixed]
Fix: Overscan in Windows 10 When Connect TV via HDMI Cable Fix: Overscan in Windows 10 When Connect TV via HDMI Cable How To Fix Overscan In Windows 10 To Fit To Screen  deskgeek
How to Fix Overscan in Windows 10 Overscaling Or Overscan in Windows 10 and Windows 11 [Fixed]

Closure

Thus, we hope this article has provided valuable insights into Understanding and Adjusting Overscan in Windows 10. We hope you find this article informative and beneficial. See you in our next article!

Pinning Applications To The Windows 11 Desktop: A Guide To Enhanced Productivity And Organization

Pinning Applications to the Windows 11 Desktop: A Guide to Enhanced Productivity and Organization

Introduction

In this auspicious occasion, we are delighted to delve into the intriguing topic related to Pinning Applications to the Windows 11 Desktop: A Guide to Enhanced Productivity and Organization. Let’s weave interesting information and offer fresh perspectives to the readers.

Pinning Applications to the Windows 11 Desktop: A Guide to Enhanced Productivity and Organization

Pin Apps and Folders to Desktop Windows 11 - YouTube

In the dynamic landscape of modern computing, users are constantly seeking ways to streamline their workflow and enhance their productivity. Windows 11, with its intuitive design and powerful features, offers a range of tools to achieve this goal. One such tool, often overlooked but highly effective, is the ability to pin applications directly to the desktop. This seemingly simple action can significantly impact how users interact with their computer, providing a personalized and efficient environment.

Understanding the Benefits of Pinning Applications

Pinning applications to the desktop offers a multitude of advantages, each contributing to a more streamlined and user-friendly experience:

  • Instant Accessibility: Pinned applications are readily available at a glance, eliminating the need to navigate through menus or search for them in the Start menu. This saves valuable time and minimizes interruptions, allowing users to focus on their tasks.
  • Improved Organization: Pinned applications create a visual hierarchy on the desktop, organizing frequently used tools and resources. This promotes a sense of order and clarity, reducing clutter and simplifying navigation.
  • Personalized Workspace: Users can customize their desktop by pinning their preferred applications, creating a personalized workspace tailored to their specific needs and workflows. This allows for a more efficient and intuitive experience, reflecting individual preferences.
  • Enhanced Efficiency: By eliminating the need to search for applications, pinning reduces the time spent navigating the system. This translates to increased efficiency, allowing users to complete tasks faster and with less effort.
  • Improved Focus: A clutter-free desktop with readily accessible applications fosters a sense of focus and minimizes distractions. This enables users to concentrate on their work without being overwhelmed by multiple open windows or searching for specific tools.

Methods for Pinning Applications to the Desktop

Windows 11 offers several ways to pin applications to the desktop, each catering to different preferences and workflows:

  • From the Start Menu: This is the most straightforward method. Locate the desired application in the Start menu, right-click on its icon, and select "Pin to taskbar." The application will appear as a pinned icon in the taskbar, providing quick access.
  • From the Taskbar: If an application is already open, right-click on its icon in the taskbar and select "Pin to taskbar." This will pin the application directly to the taskbar, ensuring its immediate availability.
  • From the File Explorer: Navigate to the application’s installation folder in File Explorer. Right-click on the executable file (usually with the .exe extension) and select "Pin to taskbar." This method is particularly useful for applications not listed in the Start menu.
  • From the Desktop: If the application has a shortcut file on the desktop, right-click on the shortcut and select "Pin to taskbar." This method is convenient for frequently used applications that already have desktop shortcuts.

Unpinning Applications from the Desktop

To remove an application from the taskbar, simply right-click on its pinned icon and select "Unpin from taskbar." This will remove the application from the taskbar, returning it to the Start menu or its original location.

Beyond the Taskbar: Exploring Additional Pinning Options

While pinning to the taskbar is the most common method, Windows 11 offers further customization options:

  • Pinning to the Start Menu: Right-click on an application’s icon in the Start menu and select "Pin to Start." This will add the application to the "Pinned" section of the Start menu, making it easily accessible.
  • Creating Desktop Shortcuts: Right-click on an application’s icon in the Start menu, select "More," and then "Open file location." This will open the application’s installation folder. Right-click within the folder and select "New" > "Shortcut." In the "Type the location of the item" field, paste the path to the application’s executable file. Click "Next," give the shortcut a name, and then click "Finish." This will create a shortcut on the desktop, providing a direct path to the application.

FAQs: Pinning Applications to the Desktop

Q: Can I pin multiple instances of the same application?

A: No, you can only pin one instance of an application to the taskbar at a time. However, you can open multiple windows of the same application separately.

Q: Will pinned applications remain pinned after a system restart?

A: Yes, pinned applications will persist even after restarting your computer.

Q: Can I customize the appearance of pinned application icons?

A: While you cannot directly change the icon itself, you can customize the taskbar by selecting different themes and color schemes.

Q: Can I pin folders or files to the taskbar?

A: No, you can only pin applications to the taskbar. However, you can create desktop shortcuts for folders or files and then pin those shortcuts to the taskbar.

Tips: Maximizing the Benefits of Pinning Applications

  • Pin frequently used applications: Focus on pinning applications you use regularly, ensuring they are readily available.
  • Organize pinned applications logically: Group similar applications together on the taskbar to enhance visual clarity and ease of navigation.
  • Regularly review pinned applications: Remove applications you no longer use to maintain a streamlined and efficient workspace.
  • Consider using application launchers: For users who prefer a more comprehensive approach to application management, consider using third-party application launchers that offer advanced features like custom icons, keyboard shortcuts, and search functionality.

Conclusion: Embracing the Power of Pinning

Pinning applications to the desktop is a simple yet powerful tool that can significantly enhance user experience in Windows 11. By providing instant accessibility, improved organization, and a personalized workspace, pinning empowers users to work more efficiently, focus on their tasks, and navigate their computer with ease. While seemingly insignificant, the act of pinning applications reflects a fundamental principle of good design: prioritizing user needs and optimizing for a seamless and productive experience.

How To Pin Windows 11 Apps To Desktop - Image to u A Guide to Pinning Apps to the Taskbar on Windows 11 - Geek Rewind How to Pin Apps To Taskbar in Windows 11 - YouTube
How to Pin Any Application to the Taskbar in Windows 11 Windows 11 to support desktop Widgets pinning - Pureinfotech How to Pin Any Application to the Taskbar in Windows 11
How To Pin Apps From The Windows 11 Start Menu To The Taskbar  digisrun How to Add, Remove and Rearrange Apps to Pinned section of Start Menu in Windows 11 - YouTube

Closure

Thus, we hope this article has provided valuable insights into Pinning Applications to the Windows 11 Desktop: A Guide to Enhanced Productivity and Organization. We thank you for taking the time to read this article. See you in our next article!

Windows 11: A Comprehensive Look At Its Advantages

Windows 11: A Comprehensive Look at Its Advantages

Introduction

With enthusiasm, let’s navigate through the intriguing topic related to Windows 11: A Comprehensive Look at Its Advantages. Let’s weave interesting information and offer fresh perspectives to the readers.

Windows 11: A Comprehensive Look at Its Advantages

Advantages Of Windows 11 - Digital Global Times

Windows 11, the latest iteration of Microsoft’s operating system, arrived in 2021, promising a more streamlined, user-friendly, and visually appealing experience. While the transition from Windows 10 was met with mixed reactions, the new operating system offers several compelling advantages that enhance productivity, security, and overall user experience.

Enhanced User Interface and Design

One of the most noticeable improvements in Windows 11 is its redesigned user interface. The new Start menu, centered on the screen, offers a cleaner and more modern aesthetic. The taskbar, now positioned at the bottom of the screen, provides quick access to frequently used applications and files. The overall visual design is sleeker and more refined, with rounded corners and a minimalist approach that enhances clarity and focus.

Improved Performance and Responsiveness

Windows 11 boasts significant performance enhancements, particularly in areas like boot time, application loading, and overall system responsiveness. The operating system leverages the latest hardware capabilities, including support for PCIe 4.0 and NVMe drives, to deliver faster data access and improved application performance. This results in a smoother and more efficient user experience, particularly for demanding tasks such as video editing or gaming.

Enhanced Gaming Experience

For gamers, Windows 11 offers several improvements that enhance the overall gaming experience. The operating system incorporates DirectStorage technology, which enables games to load assets directly from storage devices, bypassing the CPU and significantly reducing loading times. Auto HDR (High Dynamic Range) technology expands the color range, delivering richer and more vibrant visuals. The integration of Xbox Cloud Gaming allows users to stream games directly from the cloud, providing access to a wider library of titles without the need for powerful hardware.

Enhanced Security Features

Security is paramount in any operating system, and Windows 11 reinforces its commitment to protecting user data and devices. The operating system introduces new security features, including Windows Hello for biometrics-based authentication, Microsoft Defender for comprehensive threat protection, and Secure Boot to prevent unauthorized software from loading at startup. These features provide an additional layer of protection against malware, ransomware, and other cyber threats.

Improved Integration with Microsoft Ecosystem

Windows 11 seamlessly integrates with other Microsoft services and devices. The operating system leverages the power of cloud-based services like OneDrive, Microsoft 365, and Microsoft Teams, enabling users to access their files, applications, and communications across multiple devices. The integration with Xbox Live allows gamers to connect with friends and compete in online games. This comprehensive ecosystem enhances productivity, collaboration, and entertainment experiences.

Focus on Accessibility

Windows 11 places a strong emphasis on accessibility, ensuring the operating system is usable for everyone. The operating system includes a wide range of accessibility features, such as screen readers, high-contrast themes, and keyboard shortcuts, making it easier for users with disabilities to navigate and interact with the system. This commitment to accessibility fosters inclusivity and ensures that everyone can benefit from the latest technology.

Enhanced Virtualization Capabilities

Windows 11 significantly enhances virtualization capabilities, enabling users to run multiple operating systems simultaneously. The operating system includes support for Windows Subsystem for Android, allowing users to run Android apps directly on their Windows PCs. This feature expands the versatility of Windows 11, offering users access to a wider range of applications and functionalities.

FAQs on Windows 11

Q: What are the minimum system requirements for Windows 11?

A: Windows 11 requires a processor with at least two cores running at 1 GHz or faster, 4GB of RAM, 64GB of storage space, and a compatible graphics card. Additionally, the system must be equipped with a TPM 2.0 module and support UEFI Secure Boot.

Q: Is Windows 11 compatible with my existing hardware?

A: The compatibility of Windows 11 with existing hardware depends on several factors, including the processor, RAM, storage, and TPM module. Microsoft provides a PC Health Check app that can assess the compatibility of your device.

Q: Can I upgrade to Windows 11 for free?

A: The free upgrade offer for Windows 11 expired in October 2022. Users who did not upgrade during the free period must purchase a license to use Windows 11.

Q: How do I install Windows 11 on my computer?

A: You can install Windows 11 using a USB drive or by downloading the installation files directly from Microsoft’s website. The installation process is straightforward and involves following on-screen instructions.

Q: What are the key differences between Windows 10 and Windows 11?

A: Windows 11 features a redesigned user interface, improved performance, enhanced security features, and better integration with Microsoft services. It also includes support for new features like Windows Subsystem for Android and DirectStorage.

Tips for Using Windows 11

  • Customize your Start menu: The new Start menu offers several customization options, allowing you to personalize the layout and pinned applications.
  • Explore the new Widgets feature: The Widgets panel provides quick access to news, weather, and other relevant information.
  • Utilize the Snap Layouts feature: The Snap Layouts feature allows you to arrange multiple windows side-by-side, maximizing screen space and productivity.
  • Enable Windows Hello for convenient login: Windows Hello uses biometrics, such as facial recognition or fingerprint scanning, to provide a secure and convenient login experience.
  • Use the built-in screen recorder: Windows 11 includes a built-in screen recorder, allowing you to capture video of your screen activity.

Conclusion

Windows 11 is a significant step forward for Microsoft’s operating system, offering a range of improvements that enhance user experience, productivity, and security. The redesigned user interface, enhanced performance, improved gaming features, and robust security measures make Windows 11 a compelling choice for both personal and professional use. While the operating system may require a hardware upgrade for optimal performance, the benefits it offers justify the investment for users seeking a modern, efficient, and secure computing experience.

Meet Windows 11: Features, Look, Benefits More Microsoft, 44% OFF What are the big advantages of Windows 11?  Discover the new features Understanding The Benefits Of Windows 11 Workstation Pro, 48% OFF
Windows 11 sneak peek: New UI, start menu, and much more A First Look At Windows 11 Windows 11 Preview  First Look and Impression  New Desktop Features and More - YouTube
Windows 11 Look And Feel WINDOWS 11 Looks, Feel and Features - YouTube

Closure

Thus, we hope this article has provided valuable insights into Windows 11: A Comprehensive Look at Its Advantages. We thank you for taking the time to read this article. See you in our next article!

Optimizing Windows 10 Startup: A Comprehensive Guide To Auto-Launching Applications

Optimizing Windows 10 Startup: A Comprehensive Guide to Auto-Launching Applications

Introduction

In this auspicious occasion, we are delighted to delve into the intriguing topic related to Optimizing Windows 10 Startup: A Comprehensive Guide to Auto-Launching Applications. Let’s weave interesting information and offer fresh perspectives to the readers.

Optimizing Windows 10 Startup: A Comprehensive Guide to Auto-Launching Applications

How To Auto Launch Apps on Startup Windows 10 - YouTube

Windows 10, like any operating system, relies on a complex interplay of processes and services to function effectively. One of the key aspects of this system is the startup process, which dictates the applications and services that load automatically when the computer boots up. Understanding and managing this process can significantly impact the overall performance and responsiveness of your Windows 10 machine.

The Importance of Efficient Startup Management

A cluttered startup environment, filled with unnecessary programs and services, can lead to a sluggish and frustrating user experience. When a large number of applications and services attempt to launch simultaneously at startup, they compete for system resources, causing delays and potentially impacting the overall performance of the operating system. This can manifest as a prolonged boot time, slow application loading times, and even system instability.

Understanding the Startup Process

Windows 10 utilizes a hierarchical system to manage the startup process. This involves several key components:

  1. Startup Programs: These are applications that are configured to launch automatically when Windows 10 boots up. They can be installed by software developers or manually configured by the user.
  2. Startup Services: These are background processes that perform essential system functions. They are managed by the Windows Service Control Manager and are crucial for the proper operation of the operating system.
  3. Startup Scripts: These are small programs that run automatically when Windows 10 starts. They can be used to perform various tasks, such as configuring network connections or launching other applications.
  4. Startup Folder: This is a dedicated location within the user profile where applications can be placed to launch automatically at startup.

Managing Startup Applications and Services

Windows 10 provides several tools and methods to manage the startup process effectively:

  • Task Manager: The Task Manager offers a comprehensive view of running processes and services. It allows users to identify and disable programs that are unnecessarily launching at startup. To access the Startup tab in Task Manager, press Ctrl+Shift+Esc, navigate to the Startup tab, and disable any unwanted programs.
  • System Configuration (msconfig): This tool provides a more advanced interface for managing startup items, including startup programs, services, and boot options. To access System Configuration, type "msconfig" in the search bar and select the "System Configuration" option.
  • Startup Apps Settings: Windows 10 also provides a dedicated section in the Settings app to manage startup applications. Navigate to Settings > Apps > Startup to access this feature.
  • Third-Party Tools: Numerous third-party utilities are available that offer more advanced features for managing the startup process. These tools can provide detailed analysis of startup items, automate the process of disabling unnecessary programs, and even optimize the overall system performance.

Tips for Optimizing Startup Performance

  • Identify Unnecessary Programs: Before disabling any programs, it’s crucial to identify those that are not essential for your daily tasks. Avoid disabling system-critical programs or services, as this can lead to system instability.
  • Disable Unwanted Services: Carefully review the list of services in the System Configuration tool and disable any that are not essential for your system’s operation.
  • Use Startup Apps Settings: The Startup Apps settings in the Windows 10 Settings app offer a user-friendly interface for managing startup programs.
  • Consider Third-Party Tools: If you need more advanced features for managing the startup process, consider using a reputable third-party tool.
  • Regularly Monitor Startup: It’s essential to periodically review the list of startup items and disable any new programs that have been added without your consent.

Frequently Asked Questions

Q: How do I know if my computer is starting slowly due to a cluttered startup environment?

A: Several signs can indicate a slow startup process, including:

  • Prolonged boot time: The computer takes an unusually long time to boot up.
  • Slow application loading times: Applications take longer than usual to load and open.
  • System instability: The computer experiences frequent crashes, freezes, or other performance issues.

Q: Is it safe to disable startup programs or services?

A: It’s generally safe to disable startup programs and services that you don’t need, but it’s crucial to exercise caution. Avoid disabling system-critical programs or services, as this can lead to system instability.

Q: What are some common startup programs that can be safely disabled?

A: Some common startup programs that can be safely disabled include:

  • Software update programs: These programs often check for updates in the background, which can slow down the startup process.
  • Cloud storage synchronization programs: These programs continuously synchronize files with cloud services, which can consume system resources.
  • Antivirus software: Some antivirus programs launch at startup to scan for malware, which can slow down the boot process.

Q: Can I disable all startup programs and services?

A: It’s not recommended to disable all startup programs and services, as this can prevent Windows 10 from functioning properly. Some services are essential for the operating system’s operation and cannot be disabled without causing system instability.

Conclusion

Managing the startup process is crucial for maintaining a smooth and responsive Windows 10 experience. By understanding the different components of the startup process, identifying and disabling unnecessary programs and services, and utilizing the tools and tips provided, users can significantly improve the overall performance and responsiveness of their computers. Regularly monitoring the startup environment and making adjustments as needed ensures a consistently optimal user experience.

7 Settings You Should Optimize After Installing Windows 10 - Make Tech Easier How to Optimize Windows 10 for Best Performance (2022) How to Optimize Windows 10 for Best Performance
How to launch apps automatically during startup on Windows 10  Windows Central The 10 Best Ways to Optimize Windows 10 Optimizing Windows 10
Auto Start Programs Windows 10 - YouTube Lists 14 How To Change Startup Programs Windows 10 2022: Best Guide - Rezence

Closure

Thus, we hope this article has provided valuable insights into Optimizing Windows 10 Startup: A Comprehensive Guide to Auto-Launching Applications. We thank you for taking the time to read this article. See you in our next article!

Troubleshooting Windows 11’s Wireless Sharing Feature: A Comprehensive Guide

Troubleshooting Windows 11’s Wireless Sharing Feature: A Comprehensive Guide

Introduction

With enthusiasm, let’s navigate through the intriguing topic related to Troubleshooting Windows 11’s Wireless Sharing Feature: A Comprehensive Guide. Let’s weave interesting information and offer fresh perspectives to the readers.

Troubleshooting Windows 11’s Wireless Sharing Feature: A Comprehensive Guide

How to Fix Windows 11 Wifi Problems?

Windows 11 introduced a streamlined approach to file sharing, leveraging Bluetooth and Wi-Fi to enable seamless transfers between compatible devices. This feature, often referred to as "Near Share," simplifies the process of sharing documents, photos, videos, and other files, eliminating the need for cumbersome cable connections or cloud-based services. However, like any technology, it can encounter issues that prevent it from functioning as intended. This article delves into the potential causes behind these issues and offers a comprehensive guide to troubleshooting and resolving them.

Understanding the Importance of Wireless Sharing

The ability to effortlessly share files between devices has become an integral part of our digital lives. Whether collaborating on projects, transferring photos to a friend’s phone, or sharing documents for work, a reliable and efficient sharing mechanism is essential. Windows 11’s wireless sharing feature aims to address this need by offering a simple and intuitive solution, eliminating the limitations and complexities of traditional methods.

Common Reasons for Wireless Sharing Issues in Windows 11

Several factors can contribute to the malfunctioning of Windows 11’s wireless sharing functionality. These can be categorized as follows:

1. Connectivity and Network Issues:

  • Bluetooth and Wi-Fi Connectivity: Wireless sharing relies heavily on a stable and functional Bluetooth or Wi-Fi connection between the sending and receiving devices. Any disruptions or inconsistencies in these connections can hinder the sharing process. This can include issues like weak signal strength, interference from other devices, or Bluetooth pairing problems.
  • Network Restrictions: Firewalls or network security settings can sometimes block the necessary communication channels required for wireless sharing. This could involve blocking specific ports or protocols used by the feature.
  • Network Compatibility: Wireless sharing relies on the presence of specific protocols and technologies on both the sending and receiving devices. If these are incompatible or outdated, the feature might not work as intended.

2. Device-Specific Issues:

  • Hardware Compatibility: While Windows 11’s wireless sharing feature is designed to work with a wide range of devices, certain hardware configurations might not be fully compatible. This could involve limitations with specific Bluetooth adapters or Wi-Fi chips.
  • Operating System Updates: Outdated or incomplete operating system updates on either the sending or receiving device can disrupt the functionality of wireless sharing. These updates often include patches and improvements that ensure compatibility and optimal performance.
  • Device Settings: Incorrectly configured settings on either device can interfere with wireless sharing. This might include disabling Bluetooth or Wi-Fi, restricting file sharing permissions, or activating privacy settings that block communication between devices.

3. Software and Application Conflicts:

  • Antivirus Software: Some antivirus programs might interfere with the communication protocols used for wireless sharing, blocking or limiting the necessary data transfer.
  • Third-Party Applications: Certain applications, particularly those related to file sharing or network management, can conflict with Windows 11’s wireless sharing functionality, causing it to malfunction or become unavailable.

Troubleshooting Steps for Resolving Wireless Sharing Issues

Addressing issues with Windows 11’s wireless sharing feature requires a systematic approach. The following steps provide a comprehensive guide to identifying and resolving the underlying causes:

1. Verify Connectivity and Network Settings:

  • Bluetooth Connection: Ensure both devices are paired and have a stable Bluetooth connection. Check the Bluetooth settings on both devices, ensuring Bluetooth is enabled and the devices are discoverable.
  • Wi-Fi Connection: Confirm that both devices are connected to the same Wi-Fi network and have a strong signal strength. Check for any network connectivity issues by attempting to browse the internet on both devices.
  • Network Firewall and Security Settings: Temporarily disable firewalls and network security settings on both devices to see if this resolves the issue. If so, you can then identify the specific setting causing the problem and adjust it accordingly.

2. Check Device Compatibility and Updates:

  • Hardware Compatibility: Ensure that both devices meet the minimum system requirements for Windows 11’s wireless sharing feature. This typically involves checking the Bluetooth and Wi-Fi capabilities of the devices.
  • Operating System Updates: Update both devices to the latest version of Windows 11. This ensures compatibility and addresses potential bugs that might be causing the issue.
  • Device Drivers: Update the Bluetooth and Wi-Fi drivers on both devices. Outdated or corrupted drivers can lead to connectivity issues and hinder wireless sharing functionality.

3. Review Device Settings and Permissions:

  • Sharing Settings: Ensure that file sharing is enabled on both devices and that the necessary permissions are granted. Check the settings for "Near Share" or "Nearby Sharing" on both devices and ensure they are activated.
  • Privacy Settings: Review the privacy settings on both devices, particularly those related to Bluetooth and Wi-Fi. Ensure that the necessary permissions are granted for wireless sharing.
  • Data Transfer Limits: Check if there are any data transfer limits or restrictions set on either device that might be preventing the sharing process.

4. Identify and Resolve Software Conflicts:

  • Antivirus Software: Temporarily disable antivirus software on both devices to see if this resolves the issue. If so, you can then configure the antivirus settings to allow communication for wireless sharing.
  • Third-Party Applications: Identify any applications that might be interfering with wireless sharing. Temporarily disable these applications and see if the issue is resolved. If so, you can either uninstall the conflicting application or adjust its settings to avoid interference.

5. Additional Troubleshooting Tips:

  • Restart Devices: Restarting both devices can often resolve temporary glitches and refresh the system, potentially resolving wireless sharing issues.
  • Clear Bluetooth Cache: Clearing the Bluetooth cache on both devices can sometimes resolve connection problems and improve compatibility.
  • Reset Network Settings: Resetting the network settings on both devices can help resolve any network configuration errors that might be hindering wireless sharing.
  • Check Device Manager: Check the Device Manager on both devices for any errors or warnings related to Bluetooth or Wi-Fi adapters.
  • Run Windows Troubleshooter: Windows 11 includes a built-in troubleshooter for network connections. Running this tool can help diagnose and resolve common network issues that might be affecting wireless sharing.

Frequently Asked Questions (FAQs)

Q: Why is my device not showing up in the "Nearby Sharing" list?

A: This can be due to several factors:

  • Bluetooth and Wi-Fi Connectivity: Ensure both devices have a stable connection and are within range of each other.
  • Device Discoverability: Make sure both devices are set to "discoverable" in their Bluetooth or Wi-Fi settings.
  • Sharing Settings: Verify that both devices have "Nearby Sharing" enabled and are set to share with everyone or with specific contacts.
  • Device Compatibility: Ensure both devices are compatible with the "Nearby Sharing" feature.

Q: My antivirus software is blocking wireless sharing. How can I resolve this?

A:

  • Configure Antivirus Settings: Check your antivirus software’s settings and add an exception for the "Nearby Sharing" feature or the specific files you want to share.
  • Temporarily Disable Antivirus: Temporarily disable your antivirus software to see if it resolves the issue. If so, configure your antivirus settings to allow wireless sharing.

Q: I’m unable to share files with certain devices. What could be the reason?

A:

  • Device Compatibility: Ensure that the receiving device is compatible with Windows 11’s wireless sharing feature.
  • Sharing Settings: Check the sharing settings on both devices to ensure they are set to share with everyone or with specific contacts.
  • File Type Compatibility: Verify that the file type you are trying to share is supported by the receiving device.

Q: I’m getting an error message when trying to share files. What should I do?

A:

  • Check the Error Message: Carefully review the error message for specific information about the problem. This might provide clues about the cause of the issue.
  • Troubleshooting Steps: Follow the troubleshooting steps outlined in this article, focusing on the specific error message or symptom you are experiencing.

Conclusion

Windows 11’s wireless sharing feature offers a convenient and efficient way to share files between compatible devices. However, like any technology, it can encounter issues that hinder its functionality. By understanding the potential causes of these issues and following the troubleshooting steps outlined in this article, users can effectively diagnose and resolve problems, restoring seamless file sharing capabilities.

Windows 11: Fix any WiFi problem (easy way) - YouTube How to Fix WiFi not working in Windows 11 (Solved with 18 easy ways) How To Fix Wifi Not Working On Windows 11  Fix All WiFi Issues - YouTube
How to Fix WiFi not working in Windows 11 (Solved with 18 easy ways) Fix WiFi Problem in Windows 11  How to Fix Wifi Connection on Laptop Windows 11  wifi not Windows Troubleshooter Windows 11
Top 8 Ways to Fix Wi-Fi Not Working on Windows 11 Fix Wifi Problems in Windows 11  How to Fix Wifi Connection on Laptop Windows 11 - Solved 2021

Closure

Thus, we hope this article has provided valuable insights into Troubleshooting Windows 11’s Wireless Sharing Feature: A Comprehensive Guide. We appreciate your attention to our article. See you in our next article!