Seamless Sharing: Exploring The Capabilities Of Windows 10’s Built-in File Transfer Feature

Seamless Sharing: Exploring the Capabilities of Windows 10’s Built-in File Transfer Feature

Introduction

In this auspicious occasion, we are delighted to delve into the intriguing topic related to Seamless Sharing: Exploring the Capabilities of Windows 10’s Built-in File Transfer Feature. Let’s weave interesting information and offer fresh perspectives to the readers.

Seamless Sharing: Exploring the Capabilities of Windows 10’s Built-in File Transfer Feature

Seamless File Sharing: Google Nearby Share for Windows

In the digital age, sharing files between devices has become an indispensable aspect of our daily lives. Whether it’s collaborating on projects, exchanging photos, or simply transferring documents, the need for efficient and reliable file transfer solutions is paramount. Windows 10, Microsoft’s latest operating system, offers a convenient and secure method for transferring files between devices: Nearby Sharing.

This feature, integrated directly into Windows 10, enables users to share files wirelessly with other nearby devices running Windows 10 or Android. It leverages Bluetooth technology, ensuring a secure and private connection between devices. Unlike traditional file-sharing methods that rely on cloud storage or external drives, Nearby Sharing allows for direct peer-to-peer transfers, minimizing reliance on internet connectivity and enhancing data privacy.

Understanding the Mechanics of Nearby Sharing

At its core, Nearby Sharing relies on a combination of Bluetooth and Wi-Fi Direct technology. When a user initiates a file transfer using Nearby Sharing, their device broadcasts a signal via Bluetooth. If another nearby device with Nearby Sharing enabled is within range, it receives the signal and establishes a secure connection. This connection allows for the seamless transfer of files between the two devices.

Benefits of Utilizing Nearby Sharing

1. Simplicity and Convenience: Nearby Sharing streamlines the file transfer process. Users can easily select files and share them with other devices without complex setup procedures or the need for external applications. This ease of use makes it a highly accessible option for both novice and experienced users.

2. Secure and Private Transfers: The utilization of Bluetooth technology ensures secure and private data transmission. Files are transferred directly between devices, eliminating the need for third-party cloud services or external drives, thus mitigating the risk of unauthorized access or data breaches.

3. Enhanced Collaboration: Nearby Sharing facilitates seamless collaboration between individuals working on shared projects. Teams can quickly and easily exchange files, ideas, and feedback, promoting efficient workflows and accelerating project completion.

4. Versatile File Transfer: Nearby Sharing supports a wide range of file types, including documents, images, videos, and even entire folders. This versatility makes it a suitable option for various file transfer needs, from sharing personal photos with friends to collaborating on professional projects.

5. Cross-Platform Compatibility: While primarily designed for Windows 10 devices, Nearby Sharing also offers compatibility with Android devices, expanding its reach and allowing users to seamlessly share files across different operating systems.

Exploring the Functionality of Nearby Sharing

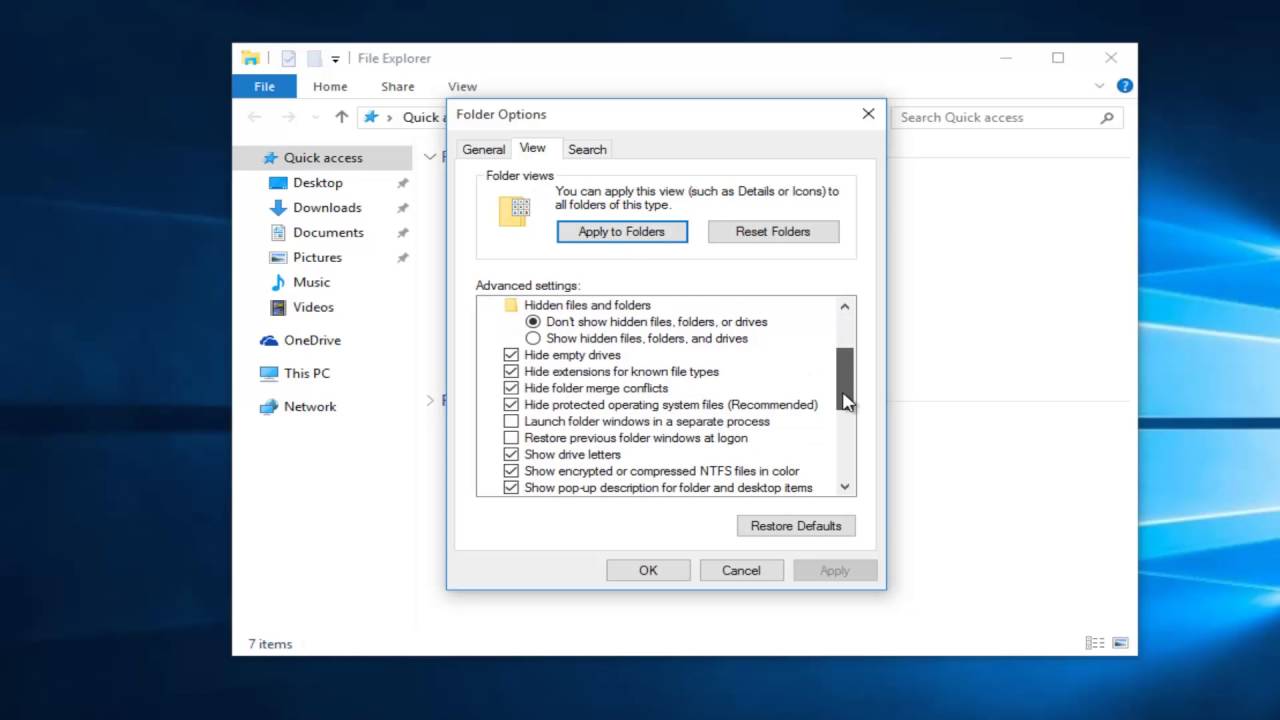
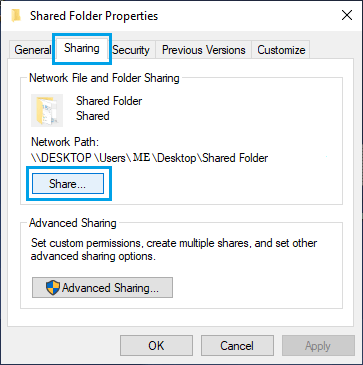
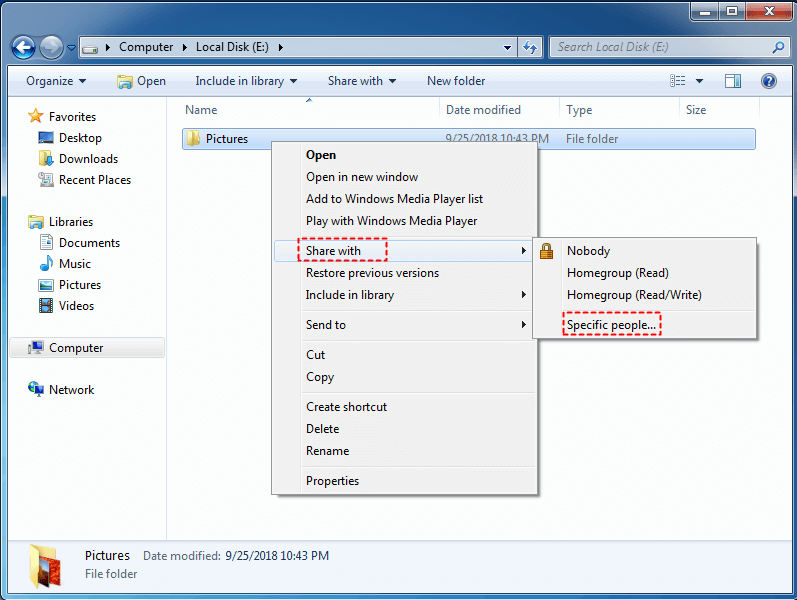
To utilize Nearby Sharing, users must ensure that the feature is enabled on their Windows 10 device. This can be done through the Settings app, navigating to the "System" section and selecting "Shared experiences." Once enabled, users can initiate a file transfer by right-clicking on the desired file or folder and selecting "Share" from the context menu. A list of nearby devices with Nearby Sharing enabled will appear, allowing users to choose the recipient for the file transfer.

Addressing Common Concerns and FAQs

1. Is Nearby Sharing Secure?

Yes, Nearby Sharing utilizes Bluetooth technology for secure and private data transmission. The connection between devices is encrypted, preventing unauthorized access to the transferred files.

2. What is the Range of Nearby Sharing?

The range of Nearby Sharing is limited by the Bluetooth signal strength and can vary depending on environmental factors. Typically, it allows for file transfers within a range of approximately 30 feet.

3. Can I Share Large Files Using Nearby Sharing?

While there is no official file size limit, the practical limit is determined by the available storage space on both the sending and receiving devices. Additionally, the transfer speed can be affected by factors such as Bluetooth signal strength and the size of the file being transferred.

4. Can I Use Nearby Sharing with Other Devices?

While Nearby Sharing is primarily designed for Windows 10 and Android devices, it may be possible to use it with other devices that support Bluetooth technology. However, compatibility may vary depending on the specific device and its operating system.

5. How Can I Troubleshoot Nearby Sharing Issues?

If you encounter issues with Nearby Sharing, ensure that both devices have Bluetooth enabled and are within range. Verify that Nearby Sharing is enabled on both devices and check if any firewall settings are blocking the connection.

Tips for Optimizing Nearby Sharing

1. Ensure Bluetooth is Enabled: Before attempting to use Nearby Sharing, ensure that Bluetooth is enabled on both devices.

2. Keep Devices Close: The range of Nearby Sharing is limited by Bluetooth signal strength. Keep the devices close together for optimal performance.

3. Check Firewall Settings: Firewall settings can sometimes interfere with Nearby Sharing. Ensure that the firewall is not blocking the connection between devices.

4. Restart Devices: If Nearby Sharing is not working as expected, restarting both devices can resolve temporary issues.

5. Update Operating Systems: Regularly update your operating system to ensure compatibility with the latest version of Nearby Sharing and to receive bug fixes and performance enhancements.

Conclusion: Embracing the Future of File Sharing

Nearby Sharing represents a significant advancement in file transfer technology, offering a simple, secure, and convenient method for sharing files between devices. Its ease of use, robust security features, and cross-platform compatibility make it an ideal solution for individuals and teams alike. As technology continues to evolve, Nearby Sharing is poised to become an increasingly vital component of our digital lives, facilitating seamless collaboration and information exchange in a secure and efficient manner.

Nearby Share is Finally Available on Windows, Allowing for a Seamless File Sharing Experience Transfer Files to Other PCs with Nearby Sharing in Windows 10 1803 How To Enable File Sharing In Windows 10 - YouTube
How To Show Fewer Or More Details In File Transfer Dialog Box In Windows 10 - Device Management Blog Seamless Android File Transfer on Windows PC [7 Methods] How to Share Files With Others in Windows 10 - Techbout
Guide on How to Set Up File Sharing over a Network on Windows 10 How to transfer files to new computer windows 10 - psadoweather

Closure

Thus, we hope this article has provided valuable insights into Seamless Sharing: Exploring the Capabilities of Windows 10’s Built-in File Transfer Feature. We appreciate your attention to our article. See you in our next article!

Restoring Memories: A Comprehensive Guide To Photo Repair Apps And Programs In Windows 10

Restoring Memories: A Comprehensive Guide to Photo Repair Apps and Programs in Windows 10

Introduction

With great pleasure, we will explore the intriguing topic related to Restoring Memories: A Comprehensive Guide to Photo Repair Apps and Programs in Windows 10. Let’s weave interesting information and offer fresh perspectives to the readers.

Restoring Memories: A Comprehensive Guide to Photo Repair Apps and Programs in Windows 10

How to Repair Apps and Programs in Windows 11 or 10?  Gear Up Windows

Digital photographs, cherished snapshots of life’s precious moments, are often susceptible to damage. Whether it’s a blurry image, a faded color, or a distorted perspective, imperfections can detract from the beauty and significance of these digital memories. Thankfully, a variety of photo repair apps and programs are available for Windows 10 users, offering powerful tools to restore damaged images and enhance their visual appeal. This comprehensive guide explores the diverse landscape of photo repair software, delving into their functionalities, benefits, and considerations for choosing the right tool for specific needs.

Understanding the Scope of Photo Repair

Photo repair applications encompass a range of capabilities, addressing various common image issues:

  • Sharpening and Noise Reduction: Blurry or grainy photos can be revitalized by sharpening tools that enhance edges and details, while noise reduction algorithms minimize unwanted graininess, improving clarity and overall image quality.

  • Color Correction and Enhancement: Faded colors, poor lighting, and color casts can be corrected and enhanced to restore the original vibrancy and natural tones of the image.

  • Red-Eye Removal: The dreaded red-eye effect, a common issue with flash photography, can be effectively removed using specialized tools, restoring a natural eye color.

  • Object Removal and Cloning: Unwanted elements in the background or foreground can be seamlessly removed or cloned, creating a cleaner and more aesthetically pleasing image.

  • Perspective Correction: Distorted perspectives, often found in wide-angle shots, can be corrected to straighten lines and create a more balanced composition.

  • Cropping and Resizing: Adjusting the dimensions and composition of images is essential for optimizing their display and printing.

Exploring Key Players in the Photo Repair Landscape

The Windows 10 ecosystem offers a diverse selection of photo repair apps and programs, ranging from free, basic tools to advanced, professional-grade software. Here are some prominent players:

Free Photo Repair Options:

  • Windows Photo Viewer: This built-in Windows 10 application provides basic editing features, including cropping, resizing, and red-eye removal. While limited in its capabilities, it offers a convenient starting point for simple repairs.

  • Paint.NET: A free, open-source image editor, Paint.NET provides a wider range of editing tools, including layers, effects, and basic photo repair functions. It’s an excellent choice for users seeking more control and flexibility without the cost of paid software.

Paid Photo Repair Options:

  • Adobe Photoshop: The industry standard for professional image editing, Photoshop offers an unparalleled suite of tools for photo repair, including advanced retouching, color correction, and object removal. While demanding a steep learning curve, its power and versatility make it the ultimate choice for demanding users.

  • GIMP: A free, open-source alternative to Photoshop, GIMP provides comparable functionality with a user interface that can be more challenging to navigate. However, its robust features and affordability make it a compelling option for users seeking a powerful, free alternative.

  • ACDSee Photo Studio: This comprehensive photo editing software offers a user-friendly interface and a wide range of tools for photo repair, including noise reduction, sharpening, and color correction. Its intuitive design and comprehensive features make it a popular choice for both beginners and experienced users.

  • Luminar AI: This innovative photo editor utilizes artificial intelligence to automate complex photo enhancements, including sky replacement, object removal, and color grading. Its intuitive AI-powered features make it an excellent choice for users seeking a streamlined and efficient photo repair workflow.

Choosing the Right Photo Repair Tool

The ideal photo repair tool depends on individual needs and skill level. Consider the following factors when making your selection:

  • Level of Expertise: Beginners may prefer user-friendly apps with intuitive interfaces and guided workflows, while experienced users may opt for advanced software with greater control and customization options.

  • Specific Repair Needs: If the primary focus is on basic edits like cropping and red-eye removal, a free app like Windows Photo Viewer or Paint.NET may suffice. However, for complex repairs like object removal or color correction, a more powerful tool like Photoshop or GIMP is recommended.

  • Budget: Free options like Paint.NET and GIMP offer impressive capabilities without any cost, while paid software like Photoshop and ACDSee Photo Studio offer a wider range of features and professional-grade results.

  • User Interface: A user-friendly interface with clear menus and intuitive controls is essential for a seamless and enjoyable editing experience.

Beyond Repair: Enhancing Your Photos

Beyond basic repair, photo editing software can enhance your images in numerous ways:

  • Creative Filters and Effects: Add artistic flair to your photos with a wide range of filters and effects, including vintage, black and white, and artistic styles.

  • Adding Text and Graphics: Create personalized photo collages, add captions and titles, or incorporate graphic elements to enhance the visual impact of your images.

  • Creating Photo Projects: Utilize photo editing software to create personalized photo books, calendars, or other creative projects.

FAQs on Photo Repair Apps and Programs in Windows 10

Q: Are photo repair apps and programs safe for my computer?

A: Reputable software developers prioritize security and user privacy. Always download software from trusted sources like official websites or reputable app stores to minimize the risk of malware or security vulnerabilities.

Q: Can I use photo repair software on mobile devices?

A: Yes, many photo repair apps are available for both Android and iOS devices, offering convenient editing on the go.

Q: What are the best photo repair apps for beginners?

A: For beginners, user-friendly apps like Adobe Photoshop Express, Snapseed, and Fotor offer intuitive interfaces and a range of basic photo repair features.

Q: Can I recover damaged photos with photo repair software?

A: Photo repair software can address visual imperfections, but it cannot recover completely corrupted or lost files. For data recovery, specialized data recovery software is required.

Tips for Effective Photo Repair

  • Start with a Backup: Always create a backup of your original photos before making any edits. This ensures you have a pristine copy in case of accidental changes.

  • Work Non-Destructively: Most photo editing software allows for non-destructive editing, meaning changes are applied as layers or adjustments without permanently altering the original image.

  • Use Layers: Layers provide a flexible and organized way to apply edits, allowing you to adjust or remove individual changes without affecting the entire image.

  • Experiment with Settings: Don’t be afraid to experiment with different settings and tools to find the optimal results for your specific photos.

Conclusion

Photo repair apps and programs empower Windows 10 users to restore damaged images, enhance their visual appeal, and preserve cherished memories. Whether you seek basic fixes or advanced editing capabilities, the diverse landscape of photo repair software offers a solution for every need. By understanding the functionalities, benefits, and considerations involved in choosing the right tool, users can unlock the full potential of their digital photos, ensuring their enduring beauty and significance for generations to come.

How to Repair Apps and Programs in Windows 10 & 11 Windows 10 Photo App How To Repair Apps & Programs In Windows 10
Cómo restablecer y reparar aplicaciones en Windows 10 ~ kirukiru.es How To Repair Apps and Programs in Windows 10 How to Repair Apps and Programs in Windows 11 or 10?  Gear Up Windows
How to use System Restore on Windows 10  Windows Central How to Repair Apps/Programs Common Problems Windows 10 - MiniTool

Closure

Thus, we hope this article has provided valuable insights into Restoring Memories: A Comprehensive Guide to Photo Repair Apps and Programs in Windows 10. We hope you find this article informative and beneficial. See you in our next article!

Navigating The Modern Landscape: A Comprehensive Guide To Windows 11

Navigating the Modern Landscape: A Comprehensive Guide to Windows 11

Introduction

In this auspicious occasion, we are delighted to delve into the intriguing topic related to Navigating the Modern Landscape: A Comprehensive Guide to Windows 11. Let’s weave interesting information and offer fresh perspectives to the readers.

Windows 11 Landscape Scenery [1920x1080] : r/wallpaper

Windows 11, the latest iteration of Microsoft’s operating system, represents a significant evolution in the way we interact with our computers. While building upon the foundations laid by its predecessor, Windows 11 introduces a refined user interface, enhanced security features, and a suite of new functionalities designed to elevate the user experience. This article aims to provide a comprehensive overview of Windows 11, exploring its key features, benefits, and considerations for users.

A Visual Transformation: The New Look of Windows

One of the most striking aspects of Windows 11 is its redesigned user interface. Gone are the sharp edges and flat design elements of previous versions, replaced by a more rounded, softer aesthetic. The Start menu has been completely overhauled, featuring a centered layout and a focus on pinned applications and recommended content. The taskbar, too, has undergone a transformation, with icons now neatly arranged at the bottom of the screen, offering a cleaner and more intuitive experience.

Beyond Aesthetics: Enhanced Functionality

Windows 11 goes beyond visual enhancements, offering a range of improvements designed to streamline workflows and enhance productivity.

  • Snap Layouts and Virtual Desktops: Windows 11 introduces innovative tools for multi-tasking. Snap Layouts allow users to quickly arrange windows in predefined layouts, maximizing screen real estate and facilitating efficient task switching. Virtual Desktops provide a way to create multiple desktop environments, enabling users to organize different projects or workspaces.

  • Improved Gaming Experience: Windows 11 is optimized for gaming, with features like DirectStorage enabling faster loading times and Auto HDR enhancing visual fidelity. The Xbox app, seamlessly integrated into the operating system, offers a unified platform for accessing games and connecting with the Xbox community.

  • Enhanced Security: Windows 11 prioritizes security, incorporating features like Windows Hello for biometric authentication and Microsoft Defender for comprehensive threat protection. The operating system also benefits from a robust security architecture designed to mitigate potential vulnerabilities.

Beyond the Surface: Exploring the Deeper Features

Windows 11 offers a suite of features designed to enhance the user experience beyond the core functionalities.

  • Widgets: Windows 11 introduces widgets, providing quick access to relevant information and applications. These dynamic panels display personalized content, such as weather updates, news headlines, and calendar appointments, offering a convenient way to stay informed and organized.

  • Focus Modes and Do Not Disturb: Windows 11 incorporates features designed to enhance focus and productivity. Focus Modes allow users to create customized environments that minimize distractions, while Do Not Disturb mode silences notifications and alerts, enabling uninterrupted concentration.

  • Microsoft Store Enhancements: The Microsoft Store, the platform for accessing applications and games, has been significantly revamped in Windows 11. The redesigned interface offers improved navigation, curated recommendations, and a broader selection of applications, making it easier for users to discover and download the software they need.

Navigating the Transition: Considerations for Users

While Windows 11 offers a compelling suite of features and improvements, it’s important to consider certain aspects before making the switch.

  • System Requirements: Windows 11 has specific system requirements, including a minimum processor speed, RAM capacity, and storage space. Users should ensure their current hardware meets these specifications before attempting to upgrade.

  • Compatibility: Not all applications and devices are fully compatible with Windows 11. Before upgrading, it’s essential to check the compatibility status of critical software and peripherals.

  • Upgrade Process: The upgrade process from Windows 10 to Windows 11 can vary depending on factors like hardware configuration and internet speed. Users should ensure a stable internet connection and back up important data before initiating the upgrade.

Frequently Asked Questions

Q: What are the minimum system requirements for Windows 11?

A: Windows 11 requires a processor with at least 1 GHz or faster with 2 or more cores, 4 GB RAM, 64 GB storage, and a compatible graphics card.

Q: Is Windows 11 free to upgrade from Windows 10?

A: Microsoft offered a free upgrade to Windows 11 for eligible Windows 10 users within the first year of its release. However, this offer has expired, and users may need to purchase a license for Windows 11.

Q: What are the differences between Windows 10 and Windows 11?

A: Windows 11 features a redesigned user interface, enhanced security features, improved gaming capabilities, and new functionalities like Snap Layouts, Virtual Desktops, and Widgets.

Q: Is Windows 11 compatible with my current hardware and software?

A: Windows 11 compatibility depends on the specific hardware and software configuration. Users can check the Windows 11 compatibility checker tool on Microsoft’s website to determine if their system meets the requirements.

Tips for Using Windows 11 Effectively

  • Explore the New Features: Take time to familiarize yourself with the new features, such as Snap Layouts, Virtual Desktops, and Widgets, to enhance your workflow and productivity.

  • Customize Your Interface: Windows 11 allows for customization of the Start menu, taskbar, and other aspects of the user interface. Experiment with different settings to personalize your experience.

  • Utilize Focus Modes and Do Not Disturb: Leverage Focus Modes and Do Not Disturb to minimize distractions and create a focused work environment.

  • Optimize for Gaming: If you’re a gamer, take advantage of features like Auto HDR and DirectStorage to enhance your gaming experience.

Conclusion

Windows 11 represents a significant advancement in the Windows operating system, offering a refined user interface, enhanced security features, and a suite of innovative functionalities designed to elevate the user experience. While the transition to Windows 11 might require some adjustments and considerations, the benefits it offers, from improved productivity to enhanced security, make it a compelling option for users seeking a modern and efficient computing experience. By understanding the features, benefits, and considerations associated with Windows 11, users can make informed decisions and navigate the modern landscape of computing with ease.

Windows 11 Landscape Wallpaper PPT - Navigating the CRM Landscape_ A Comprehensive Guide to Microsoft Dynamics and Salesforce Navigating the Modern HR Landscape: A Reflective Exploration
The New Media Landscape  Essential Tips To Navigate In 2020 Navigating the EV Landscape: Comprehensive Guide (2024) Navigating the Fivem Server Landscape: A Comprehensive Guide
Managing Risks in Digital Transformation: Navigate the modern landscape of digital threats with PPT - Navigating the Landscape_ A Comprehensive Guide to Small Business Loans for Entrepreneurs

Closure

Thus, we hope this article has provided valuable insights into Navigating the Modern Landscape: A Comprehensive Guide to Windows 11. We thank you for taking the time to read this article. See you in our next article!

Onmyoji Arena: A Comprehensive Guide To Downloading And Playing On Windows 10

Onmyoji Arena: A Comprehensive Guide to Downloading and Playing on Windows 10

Introduction

In this auspicious occasion, we are delighted to delve into the intriguing topic related to Onmyoji Arena: A Comprehensive Guide to Downloading and Playing on Windows 10. Let’s weave interesting information and offer fresh perspectives to the readers.

Onmyoji Arena: A Comprehensive Guide to Downloading and Playing on Windows 10

Play Onmyoji Arena on PC ️‍�� comfortably. LDPlayer guide. - YouTube

Onmyoji Arena, a captivating MOBA (Multiplayer Online Battle Arena) game set in the enchanting world of Onmyoji, has captivated players worldwide with its unique blend of strategic gameplay, captivating lore, and stunning visuals. While the game is primarily associated with mobile platforms, it is also available for Windows 10 users, offering a seamless and immersive gaming experience on a larger screen. This comprehensive guide will delve into the process of downloading and installing Onmyoji Arena on Windows 10, providing insights into its gameplay, key features, and helpful tips to enhance your gaming experience.

Understanding Onmyoji Arena

Onmyoji Arena is a fast-paced and strategic MOBA where players compete in 5v5 battles, aiming to destroy the opponent’s base. Each player controls a powerful Shikigami, a creature summoned by Onmyoji, a master of the arcane arts. These Shikigami possess unique abilities and playstyles, allowing players to choose the one that best suits their strategy and preferences.

Downloading Onmyoji Arena on Windows 10

The official Onmyoji Arena client is not directly available on the Microsoft Store. However, players can access the game through an emulator like BlueStacks, a popular Android emulator that allows users to play mobile games on their Windows PCs. Here’s a step-by-step guide:

  1. Download and Install BlueStacks: Visit the official BlueStacks website and download the installer for your Windows 10 system. Follow the on-screen instructions to complete the installation process.
  2. Access the Google Play Store: Once BlueStacks is installed, launch it and sign in to your Google account. This will allow you to access the Google Play Store, where you can download Onmyoji Arena.
  3. Download Onmyoji Arena: Search for "Onmyoji Arena" in the Google Play Store, and click "Install." The game will be downloaded and installed within BlueStacks.
  4. Launch Onmyoji Arena: Once the installation is complete, you can launch Onmyoji Arena from the BlueStacks home screen or the app drawer.

Key Features of Onmyoji Arena

  • Diverse Shikigami Roster: The game boasts an extensive roster of Shikigami, each with unique abilities, strengths, and weaknesses. Players can choose from various classes, including tanks, mages, assassins, and supports, allowing for diverse team compositions.
  • Strategic Gameplay: Onmyoji Arena emphasizes strategic decision-making. Players must consider lane positioning, team coordination, and resource management to gain an advantage over their opponents.
  • Engaging Lore: The game is deeply rooted in the rich lore of Onmyoji, a Japanese folklore tradition. Players can explore the captivating stories and characters that shape the world of Onmyoji Arena.
  • Stunning Visuals: Onmyoji Arena features beautiful graphics and animations, bringing the world of Onmyoji to life. The game’s art style is a blend of traditional Japanese aesthetics and modern design elements.
  • Regular Updates: The developers constantly update Onmyoji Arena with new content, including Shikigami, skins, events, and game modes, keeping the gameplay fresh and exciting.

Tips for Enhancing Your Onmyoji Arena Experience

  • Choose the Right Shikigami: Experiment with different Shikigami to find those that best suit your playstyle. Consider factors like ability sets, strengths, and weaknesses.
  • Learn the Basics of MOBA Gameplay: Familiarize yourself with the core mechanics of MOBAs, such as lane pushing, last hitting, and ganking, to improve your strategy and decision-making.
  • Practice in Training Mode: Use the training mode to experiment with different Shikigami and practice your skills without the pressure of competitive play.
  • Join a Team or Guild: Teaming up with other players allows for better coordination, communication, and strategic planning.
  • Stay Updated: Keep an eye on the game’s official website and social media channels for the latest news, updates, and events.

Frequently Asked Questions

Q: What are the minimum system requirements for running Onmyoji Arena on Windows 10?

A: The minimum system requirements for running Onmyoji Arena on Windows 10 through BlueStacks are:

  • Operating System: Windows 7 or later
  • Processor: Intel or AMD processor with at least 2 cores
  • RAM: 2GB RAM
  • Storage: 4GB free disk space
  • Graphics: DirectX 11 compatible graphics card

Q: Is it possible to play Onmyoji Arena on Windows 10 without an emulator?

A: Currently, there is no official Onmyoji Arena client available for Windows 10 outside of emulators like BlueStacks.

Q: Can I use a controller to play Onmyoji Arena on Windows 10?

A: Yes, you can use a controller to play Onmyoji Arena on Windows 10 through BlueStacks. BlueStacks supports various controllers, and you can configure the controls in the settings menu.

Q: Is Onmyoji Arena free to play?

A: Yes, Onmyoji Arena is a free-to-play game. However, it offers in-game purchases for cosmetic items and other enhancements.

Q: How do I connect with other players in Onmyoji Arena?

A: You can connect with other players through the in-game chat system, join guilds, or participate in community events.

Conclusion

Onmyoji Arena offers a captivating and engaging MOBA experience for Windows 10 users. By utilizing an emulator like BlueStacks, players can seamlessly access the game and enjoy its diverse roster of Shikigami, strategic gameplay, and stunning visuals. Whether you’re a seasoned MOBA veteran or a newcomer to the genre, Onmyoji Arena presents a unique and rewarding gaming experience that will keep you entertained for hours on end.

Onmyoji Arena for PC - Free Download: Windows 7,8,10 Edition Download Onmyoji Arena for PC - EmulatorPC Onmyoji Arena For PC (Free Download)  GamesHunters
How to Play Onmyoji Arena on PC with BlueStacks How to Play Onmyoji Arena on PC with BlueStacks Download Onmyoji Arena for PC - EmulatorPC
Stream Onmyoji Arena for PC: A Guide to Install and Play on Windows 10/8/7 by Persteabmo Download Onmyoji Arena For PC Windows and Mac APK 3.7.0 - Free Strategy Games for Android

Closure

Thus, we hope this article has provided valuable insights into Onmyoji Arena: A Comprehensive Guide to Downloading and Playing on Windows 10. We thank you for taking the time to read this article. See you in our next article!

The Absence Of Hyper-V In Windows 10: Understanding The Implications

The Absence of Hyper-V in Windows 10: Understanding the Implications

Introduction

With enthusiasm, let’s navigate through the intriguing topic related to The Absence of Hyper-V in Windows 10: Understanding the Implications. Let’s weave interesting information and offer fresh perspectives to the readers.

The Absence of Hyper-V in Windows 10: Understanding the Implications

How to Disable Hyper V in Windows 10 - YouTube

The presence or absence of Hyper-V, Microsoft’s powerful virtualization platform, can significantly impact the capabilities and functionality of a Windows 10 system. While Hyper-V offers robust features for running virtual machines and testing software, its absence might be attributed to various factors, each with its own set of implications. This article delves into the reasons behind the unavailability of Hyper-V in certain Windows 10 installations, explores the potential consequences, and provides insights into navigating this scenario.

Understanding Hyper-V: A Virtualization Powerhouse

Hyper-V is a type of virtualization technology that allows users to create and manage virtual machines (VMs) within a host operating system. These VMs essentially act as separate computers, each running its own operating system and applications, all within the confines of the host system. This capability provides a multitude of benefits:

  • Software Testing and Development: Hyper-V allows developers to test software in isolated environments, reducing the risk of conflicts with the host system or affecting other applications. This enables them to create and debug applications in a controlled setting, ensuring stability and compatibility.
  • Server Consolidation: By running multiple virtual servers on a single physical machine, Hyper-V optimizes resource utilization and reduces the need for physical hardware. This leads to lower energy consumption, reduced space requirements, and simplified server management.
  • Disaster Recovery: Hyper-V allows for the creation of virtual machine backups, enabling rapid recovery in case of hardware failure or data loss. This ensures business continuity and minimizes downtime.
  • Security Enhancements: Hyper-V can isolate applications and processes within virtual machines, improving security by preventing malicious software from affecting the host system. This isolation also allows for controlled access and resource allocation, enhancing overall system security.

Reasons for the Absence of Hyper-V

The unavailability of Hyper-V in a Windows 10 installation can stem from several factors:

  • Hardware Requirements: Hyper-V demands specific hardware configurations to function effectively. Processors must support virtualization technology, and the system needs sufficient RAM and storage capacity to handle the demands of running multiple virtual machines. If the system does not meet these minimum requirements, Hyper-V will not be available.
  • Operating System Edition: Certain Windows 10 editions, such as Home and Starter, do not include Hyper-V. These editions are typically designed for home users and prioritize a streamlined experience over advanced features like virtualization. To enable Hyper-V, users might need to upgrade to a professional edition of Windows 10.
  • System Configuration: Certain system configurations, such as the presence of other virtualization software like VMware or VirtualBox, might prevent Hyper-V from being installed. These conflicts often arise due to resource contention or incompatibility between the virtualization platforms.
  • System Security Restrictions: In certain environments, especially those governed by strict security policies, Hyper-V might be disabled to prevent unauthorized virtualization activities. This restriction aims to maintain system integrity and prevent potential security breaches.

Consequences of Missing Hyper-V

The absence of Hyper-V can significantly limit the capabilities of a Windows 10 system, particularly for users who rely on its virtualization features. The consequences can vary depending on the specific use case and individual needs:

  • Inability to Run Virtual Machines: Without Hyper-V, users cannot create and manage virtual machines, hindering their ability to test software, consolidate servers, or implement disaster recovery solutions.
  • Limited Development Capabilities: Developers may face difficulties in testing and debugging applications in isolated environments, potentially leading to compatibility issues or delayed development cycles.
  • Compromised Security: The lack of Hyper-V’s isolation capabilities can expose the system to security vulnerabilities, as malicious software might be able to access and compromise the host system.
  • Reduced System Flexibility: The absence of Hyper-V limits the system’s flexibility and ability to adapt to changing demands, hindering its potential for resource optimization and efficient workload management.

Navigating the Absence of Hyper-V

While Hyper-V might not be available in all Windows 10 installations, alternative solutions can address the need for virtualization:

  • Upgrade to a Professional Edition: If the system meets the hardware requirements, upgrading to a professional edition of Windows 10 can unlock Hyper-V functionality.
  • Utilize Third-Party Virtualization Software: Popular options like VMware Workstation and Oracle VirtualBox provide comprehensive virtualization capabilities and can be used as alternatives to Hyper-V.
  • Consider Cloud-Based Solutions: Cloud platforms offer virtualization services, allowing users to run virtual machines without requiring local hardware or software. These solutions offer scalability and flexibility, but might require a subscription or pay-as-you-go model.

FAQs: Addressing Common Queries

Q: Can I install Hyper-V on a Windows 10 Home Edition?

A: No, Hyper-V is not available in Windows 10 Home Edition. You will need to upgrade to a professional edition like Windows 10 Pro or Enterprise to enable Hyper-V functionality.

Q: What are the hardware requirements for Hyper-V?

A: Hyper-V requires a processor with virtualization technology support, at least 4GB of RAM, and sufficient storage space for the virtual machines and related files.

Q: Can I use Hyper-V and other virtualization software simultaneously?

A: It is generally not recommended to run Hyper-V alongside other virtualization software like VMware or VirtualBox. This can lead to resource conflicts and instability.

Q: What are the security implications of using Hyper-V?

A: Hyper-V can enhance system security by isolating applications and processes within virtual machines. However, proper configuration and security practices are crucial to mitigate potential risks associated with virtualization.

Tips: Optimizing System Performance and Security

  • Ensure Adequate Hardware: Before installing Hyper-V, verify that the system meets the minimum hardware requirements to ensure optimal performance.
  • Allocate Sufficient Resources: Assign sufficient RAM and storage space to virtual machines to prevent performance degradation and ensure smooth operation.
  • Implement Security Best Practices: Configure Hyper-V with robust security settings, including strong passwords, access control mechanisms, and regular security updates.
  • Monitor System Performance: Regularly monitor the system’s performance to identify potential bottlenecks or resource contention issues that might affect virtual machine operation.

Conclusion: Embracing Virtualization Capabilities

The absence of Hyper-V in certain Windows 10 installations can be a limitation, but it does not necessarily preclude the use of virtualization technologies. By understanding the underlying reasons for its unavailability and exploring alternative solutions, users can still leverage the benefits of virtualization, whether through third-party software, cloud services, or by upgrading to a suitable Windows 10 edition. Ultimately, the decision to utilize virtualization depends on individual needs and priorities, but the benefits it offers can significantly enhance system functionality, security, and flexibility.

How to disable hyper v windows 10 How to Disable or Turn off Hyper-V in Windows 10 - Four Options Что такое hyper v в windows 10
Hyper V Windows 10 disable hyperv in win 10 home - Microsoft Community How to Disable Hyper-V in Windows 10? - EroFound
How do i disable Hyper-V on Windows 10 Home - Page 2 - Windows 10 Forums Что такое hyper v в windows 10

Closure

Thus, we hope this article has provided valuable insights into The Absence of Hyper-V in Windows 10: Understanding the Implications. We hope you find this article informative and beneficial. See you in our next article!

Accessing Microsoft Word On Windows 11: A Comprehensive Guide

Accessing Microsoft Word on Windows 11: A Comprehensive Guide

Introduction

With enthusiasm, let’s navigate through the intriguing topic related to Accessing Microsoft Word on Windows 11: A Comprehensive Guide. Let’s weave interesting information and offer fresh perspectives to the readers.

Accessing Microsoft Word on Windows 11: A Comprehensive Guide

Word for Windows 11: How to Download It For Free

Microsoft Word, the ubiquitous word processing software, remains a cornerstone of productivity for individuals and organizations alike. Its seamless integration with Windows 11 ensures a smooth and efficient user experience. This guide delves into the various methods for accessing Microsoft Word on Windows 11, highlighting the benefits and considerations associated with each approach.

1. Microsoft 365 Subscription:

The most comprehensive and feature-rich method is through a Microsoft 365 subscription. This subscription service grants access to the latest version of Word, along with other Microsoft Office applications such as Excel, PowerPoint, and Outlook.

Benefits:

  • Always Up-to-Date: Subscribers receive automatic updates, ensuring access to the latest features and bug fixes.
  • Cloud Integration: Documents are seamlessly stored and synchronized across multiple devices via OneDrive, enabling collaboration and access from anywhere.
  • Premium Features: Microsoft 365 unlocks advanced features like co-authoring, real-time collaboration, and advanced document formatting options.

Considerations:

  • Recurring Cost: A subscription requires ongoing payments, making it a long-term commitment.
  • Internet Connection: Cloud-based features necessitate a stable internet connection for optimal functionality.

2. Standalone Purchase:

Alternatively, users can purchase a standalone license for Microsoft Word, providing access to the software without a subscription.

Benefits:

  • One-time Payment: A single purchase grants perpetual access to the software, eliminating recurring costs.
  • Offline Access: Documents can be accessed and edited without an internet connection.

Considerations:

  • Limited Updates: Standalone versions receive limited updates, potentially lagging behind the latest features and security patches.
  • No Cloud Integration: Documents are stored locally and require manual synchronization across devices.

3. Free Alternatives:

While Microsoft Word is the industry standard, several free alternatives offer comparable functionality. These include:

  • Google Docs: A web-based word processor with cloud storage and collaboration features.
  • LibreOffice: A free and open-source office suite compatible with Microsoft Office formats.
  • WPS Office: A comprehensive office suite with a free version offering basic word processing capabilities.

Benefits:

  • No Cost: Free alternatives provide access to word processing capabilities without any financial commitment.
  • Accessibility: These tools are readily available online or through downloadable software.

Considerations:

  • Limited Functionality: Free versions may lack advanced features found in Microsoft Word.
  • Compatibility Issues: Compatibility with Microsoft Word formats might vary depending on the specific alternative.

4. Microsoft Store:

Windows 11 users can also access Microsoft Word through the Microsoft Store. This method provides a convenient way to download and install the software directly from the operating system.

Benefits:

  • Ease of Access: The Microsoft Store offers a centralized platform for downloading and managing applications.
  • Automatic Updates: The store automatically updates installed applications, ensuring access to the latest version.

Considerations:

  • Limited Functionality: The Microsoft Store version may not offer all the features available through a Microsoft 365 subscription.
  • Availability: The availability of specific Word versions within the Microsoft Store may vary.

Choosing the Right Approach:

The ideal method for accessing Microsoft Word depends on individual needs and preferences. Factors to consider include:

  • Budget: A subscription model offers ongoing access to the latest features, while a standalone purchase provides a one-time investment.
  • Functionality: Advanced features like co-authoring and cloud storage are primarily available through Microsoft 365.
  • Internet Access: Cloud-based services require a stable internet connection for optimal performance.
  • Compatibility: Free alternatives may have compatibility limitations with Microsoft Word formats.

FAQs

Q: Can I access Microsoft Word without a subscription?

A: Yes, you can purchase a standalone license for Microsoft Word, providing access without a subscription. Additionally, free alternatives like Google Docs and LibreOffice offer comparable functionality.

Q: Does Microsoft Word work on Windows 11?

A: Yes, Microsoft Word is fully compatible with Windows 11. You can access it through a Microsoft 365 subscription, a standalone purchase, or the Microsoft Store.

Q: What are the benefits of using Microsoft Word on Windows 11?

A: Microsoft Word offers a robust set of features for document creation, editing, and formatting. Its integration with Windows 11 ensures a seamless user experience, while the availability of cloud-based services enhances collaboration and accessibility.

Q: How do I install Microsoft Word on Windows 11?

A: You can install Microsoft Word through a Microsoft 365 subscription, a standalone purchase, or by downloading it from the Microsoft Store.

Q: Is Microsoft Word free?

A: While Microsoft Word is not entirely free, there are free alternatives available such as Google Docs and LibreOffice. You can also access a free trial of Microsoft 365 to experience the software before committing to a subscription.

Tips

  • Explore free alternatives: Before committing to a subscription, consider evaluating free options like Google Docs and LibreOffice.
  • Utilize cloud storage: Microsoft 365 integrates seamlessly with OneDrive, offering secure and convenient cloud storage for documents.
  • Explore advanced features: Take advantage of features like co-authoring, real-time collaboration, and advanced formatting options to enhance your productivity.
  • Optimize for accessibility: Microsoft Word offers accessibility features to ensure documents are accessible to users with disabilities.
  • Stay up-to-date: Ensure your Word version is updated to access the latest features and security enhancements.

Conclusion

Accessing Microsoft Word on Windows 11 offers a range of options, each with its own benefits and considerations. Whether choosing a subscription, standalone purchase, free alternative, or utilizing the Microsoft Store, the key is to select the approach that best aligns with individual needs and budget. By understanding the various methods and their respective advantages, users can ensure a seamless and productive experience with the world’s most popular word processing software.

Windows 11 Microsoft Office gets a swanky redesign — here are the new features – SHOP WITH THE Como entrar a Word en computadora Windows 11 - YouTube Windows 11 Word
Microsoft Word Windows 11 How to Edit Author Name in Microsoft Word on Windows 11 Systems Windows 11 Word
Microsoft Office gets a Fluent design makeover on Windows 11 and 10 How to Set MS Office Word, Excel and PowerPoint as Default in Windows 11 - YouTube

Closure

Thus, we hope this article has provided valuable insights into Accessing Microsoft Word on Windows 11: A Comprehensive Guide. We appreciate your attention to our article. See you in our next article!

Navigating The World Of Trading: A Comprehensive Guide To NinjaTrader 8 On Windows 10

Navigating the World of Trading: A Comprehensive Guide to NinjaTrader 8 on Windows 10

Introduction

With great pleasure, we will explore the intriguing topic related to Navigating the World of Trading: A Comprehensive Guide to NinjaTrader 8 on Windows 10. Let’s weave interesting information and offer fresh perspectives to the readers.

How to Use NinjaTrader 8 - Complete Beginner's Tutorial / Guide for Traders - YouTube

NinjaTrader 8, a powerful and versatile trading platform, has become a staple for traders of all levels. Its robust features, customizable interface, and extensive charting capabilities make it a valuable tool for navigating the complex world of financial markets. This comprehensive guide delves into the intricacies of installing and utilizing NinjaTrader 8 on Windows 10, equipping you with the knowledge necessary to harness its full potential.

Understanding NinjaTrader 8’s Significance

NinjaTrader 8 stands out as a preferred platform for both novice and seasoned traders due to its unique blend of features:

  • Advanced Charting Capabilities: NinjaTrader 8 boasts an extensive array of charting tools, enabling traders to visualize market trends, identify patterns, and execute trades based on technical analysis.
  • Real-Time Data Access: The platform provides real-time market data from various sources, ensuring traders have access to the most up-to-date information for informed decision-making.
  • Customizable Interface: NinjaTrader 8’s highly customizable interface allows traders to tailor the platform to their specific needs and preferences, maximizing efficiency and user experience.
  • Automated Trading: The platform supports automated trading strategies, enabling traders to execute trades based on pre-defined rules and algorithms, potentially reducing emotional bias and enhancing profitability.
  • Backtesting and Strategy Development: NinjaTrader 8 facilitates the development and backtesting of trading strategies, allowing traders to evaluate the performance of their ideas before deploying them in live markets.

The Download and Installation Process

Downloading and installing NinjaTrader 8 on Windows 10 is a straightforward process:

  1. Visit the NinjaTrader Website: Begin by navigating to the official NinjaTrader website (https://ninjatrader.com/).
  2. Download the Installation File: Locate the download section and select the appropriate version for Windows 10.
  3. Run the Installer: Once the download is complete, double-click the installer file to initiate the installation process.
  4. Follow the On-Screen Instructions: Carefully follow the instructions provided by the installer, selecting your desired installation options and accepting the terms and conditions.
  5. Launch NinjaTrader 8: After the installation is complete, locate the NinjaTrader 8 icon on your desktop or in your Start menu and launch the platform.

Configuring and Customizing Your Trading Environment

Upon launching NinjaTrader 8, you’ll be greeted with a customizable interface that allows you to personalize your trading environment:

  • Market Watch: The Market Watch window displays real-time quotes and price data for various instruments, providing a comprehensive overview of the market.
  • Charting Tools: NinjaTrader 8 offers a plethora of charting tools, including various chart types, indicators, and drawing tools, allowing you to analyze market trends and identify trading opportunities.
  • Trading Panel: The trading panel provides a centralized location for placing orders, managing your positions, and monitoring your trading activity.
  • Strategy Analyzer: This tool allows you to backtest and analyze your trading strategies, evaluating their performance and identifying areas for improvement.

Essential Tips for Maximizing Your NinjaTrader 8 Experience

To fully leverage the power of NinjaTrader 8, consider the following tips:

  • Familiarize Yourself with the Platform: Take the time to explore the platform’s features and functionalities, experimenting with different settings and configurations to find what works best for you.
  • Utilize the Help Resources: NinjaTrader offers comprehensive documentation, tutorials, and support resources to assist you in navigating the platform and maximizing its potential.
  • Develop a Trading Plan: A well-defined trading plan outlining your goals, risk tolerance, and trading strategies will provide a framework for navigating the market and making informed decisions.
  • Start with a Demo Account: Before venturing into live trading, practice your strategies and familiarize yourself with the platform’s features using a demo account. This allows you to gain experience without risking real capital.

Frequently Asked Questions

Q: What are the system requirements for running NinjaTrader 8 on Windows 10?

A: NinjaTrader 8 requires a modern computer with a 64-bit operating system, a minimum of 4 GB of RAM, and a dedicated graphics card.

Q: Is NinjaTrader 8 compatible with all brokers?

A: NinjaTrader 8 integrates with a wide range of brokers, but it’s essential to verify compatibility with your chosen broker before proceeding.

Q: Can I use NinjaTrader 8 for both manual and automated trading?

A: Yes, NinjaTrader 8 supports both manual and automated trading. You can execute trades manually or develop and implement automated trading strategies using the platform’s built-in tools.

Q: What are the costs associated with using NinjaTrader 8?

A: NinjaTrader 8 offers a free version with limited features and a paid version with full functionality. The cost of the paid version varies depending on the selected features and subscription plan.

Conclusion

NinjaTrader 8 empowers traders of all levels with the tools necessary to navigate the dynamic world of financial markets. Its advanced features, customizable interface, and comprehensive support resources make it an invaluable platform for developing and executing trading strategies. By following the steps outlined in this guide and taking advantage of the provided tips, you can unlock the full potential of NinjaTrader 8 and enhance your trading journey.

NinjaTrader 8 - Advanced Trade Management Overview - YouTube Beginners Guide on using NinjaTrader 8 charts effectively? - YouTube Sample moving average trading strategy using NinjaTrader 8 - YouTube
Introducing NinjaTrader 8: Newly Redesigned with 500+ Enhancements! - YouTube NinjaTrader 8 Review – Everything You Need to Know Ninjatrader 8 Trading Platform - Comprehensive Review - YouTube
Introduction to Ninjatrader 8 - Part 1 NinjaTrader 8 - Trade Controls Overview - YouTube

Closure

Thus, we hope this article has provided valuable insights into Navigating the World of Trading: A Comprehensive Guide to NinjaTrader 8 on Windows 10. We thank you for taking the time to read this article. See you in our next article!

A Comprehensive Guide To Microsoft Outlook For Windows 10: A Powerful Email And Productivity Tool

A Comprehensive Guide to Microsoft Outlook for Windows 10: A Powerful Email and Productivity Tool

Introduction

With enthusiasm, let’s navigate through the intriguing topic related to A Comprehensive Guide to Microsoft Outlook for Windows 10: A Powerful Email and Productivity Tool. Let’s weave interesting information and offer fresh perspectives to the readers.

A Comprehensive Guide to Microsoft Outlook for Windows 10: A Powerful Email and Productivity Tool

A Basic Guide to Microsoft Outlook

Microsoft Outlook, a mainstay in the world of email and productivity, is a comprehensive application designed to streamline communication, manage schedules, and enhance overall workflow. While often associated with Microsoft Office suites, Outlook can be downloaded and utilized independently on Windows 10, offering a robust solution for individuals and businesses alike. This article provides a detailed exploration of Outlook’s features, benefits, and how to access it for free on your Windows 10 device.

Understanding Outlook’s Core Functionality

At its core, Outlook is an email client, offering a user-friendly interface for managing emails, contacts, and calendars. Beyond basic email functions, Outlook provides advanced features that empower users to:

  • Organize and Prioritize Emails: Outlook’s intuitive interface allows users to categorize emails into folders, prioritize messages with flags, and utilize search functions to quickly locate specific emails.
  • Manage Contacts and Relationships: Outlook enables the creation and organization of contact lists, including personal and professional information, facilitating efficient communication and relationship management.
  • Schedule Meetings and Events: The integrated calendar feature allows users to schedule appointments, meetings, and reminders, ensuring timely engagement and efficient time management.
  • Collaborate Effectively: Outlook’s shared calendar feature facilitates team collaboration, enabling members to view and manage shared schedules, fostering seamless coordination and communication.
  • Utilize Powerful Tools: Outlook offers a suite of tools, including task management, note-taking, and integration with other Microsoft applications, enhancing productivity and streamlining workflows.

Benefits of Utilizing Outlook on Windows 10

The integration of Outlook into the Windows 10 ecosystem provides numerous advantages, enhancing user experience and productivity:

  • Seamless Integration: Outlook seamlessly integrates with other Windows 10 applications, such as Microsoft Word, Excel, and PowerPoint, facilitating seamless data sharing and workflow optimization.
  • Enhanced Security: Microsoft’s commitment to security ensures that Outlook on Windows 10 is equipped with robust measures to protect user data and prevent unauthorized access.
  • Regular Updates and Support: As part of the Windows 10 ecosystem, Outlook receives regular updates and support from Microsoft, ensuring compatibility, performance optimization, and the latest security patches.
  • Accessibility and User Friendliness: Outlook’s user-friendly interface and familiar Windows design make it accessible for users of all skill levels, promoting efficient and intuitive navigation.

Downloading and Installing Outlook on Windows 10

While Outlook is often associated with paid Microsoft Office suites, it can be accessed for free on Windows 10 through the following methods:

  • Microsoft 365 Subscription: A Microsoft 365 subscription provides access to the full suite of Microsoft Office applications, including Outlook, along with cloud storage and other benefits.
  • Outlook.com Account: Creating a free Outlook.com account grants access to the web-based version of Outlook, allowing users to manage emails and calendars through a web browser.
  • Outlook Mobile App: The free Outlook mobile app for Android and iOS devices allows users to access their emails, calendars, and contacts on their smartphones and tablets.

FAQs Regarding Outlook for Windows 10

Q: What are the system requirements for running Outlook on Windows 10?

A: Outlook for Windows 10 typically requires a system with at least 1 GB of RAM, 3 GB of available hard disk space, and a screen resolution of 1024 x 768 pixels. However, for optimal performance, it is recommended to have a more powerful system with at least 4 GB of RAM and a faster processor.

Q: Is Outlook for Windows 10 compatible with other email providers?

A: Yes, Outlook supports various email providers, including Gmail, Yahoo Mail, and iCloud. You can easily configure your accounts within Outlook to access and manage your emails from different providers.

Q: Can I use Outlook offline?

A: Yes, Outlook allows for offline access to your emails and calendar. When connected to the internet, Outlook automatically syncs your data, ensuring that your information is up-to-date.

Q: How do I customize Outlook’s interface?

A: Outlook offers various customization options, allowing you to personalize the interface to suit your preferences. You can customize the appearance, themes, fonts, and other settings to create a personalized experience.

Q: Is there a way to recover deleted emails in Outlook?

A: Yes, Outlook has a built-in "Deleted Items" folder where deleted emails are temporarily stored. You can restore deleted emails from this folder within a certain time frame.

Tips for Maximizing Outlook’s Functionality

  • Utilize Rules and Filters: Create rules and filters to automatically organize and prioritize your emails, reducing clutter and improving efficiency.
  • Leverage Calendar Reminders: Set reminders for important appointments and deadlines, ensuring that you stay on track and avoid missing critical events.
  • Take Advantage of Task Management: Use Outlook’s task management feature to create and track to-do lists, improving productivity and keeping you organized.
  • Integrate with Other Applications: Utilize Outlook’s integration with other Microsoft applications, such as Word, Excel, and PowerPoint, to streamline workflows and enhance collaboration.
  • Explore Add-ins and Extensions: Expand Outlook’s functionality by exploring add-ins and extensions that provide additional features and customizations.

Conclusion

Microsoft Outlook for Windows 10 is a powerful and versatile application that offers a comprehensive solution for email management, communication, and productivity. Its seamless integration with the Windows 10 ecosystem, robust features, and availability through free options make it an ideal choice for individuals and businesses seeking to streamline their workflows and enhance their overall efficiency. Whether you are managing personal emails, coordinating with colleagues, or simply seeking a reliable and user-friendly email client, Outlook for Windows 10 provides a robust and comprehensive solution to meet your needs.

Staff User Guides - Office: Microsoft Outlook  CCGOnline Beginner's Guide to Microsoft Outlook - QuadExcel.com Learn Microsoft Outlook  Complete Microsoft Outlook Guide - SilkCourses.com
Microsoft Outlook For Windows 10 DOWNLOAD [PDF] MICROSOFT OUTLOOK 2022: Complete Beginner to Expert Guide That Teaches Everything How to add email to outlook windows 10 - deskvse
Outlook for Beginners: Comprehensive Guide  SOFTFLIX Blog Best Windows 10 Email Clients and Apps to Use

Closure

Thus, we hope this article has provided valuable insights into A Comprehensive Guide to Microsoft Outlook for Windows 10: A Powerful Email and Productivity Tool. We hope you find this article informative and beneficial. See you in our next article!

Rejuvenating Your Laptop: Reinstalling Windows 10 Without A Disk

Rejuvenating Your Laptop: Reinstalling Windows 10 Without a Disk

Introduction

With enthusiasm, let’s navigate through the intriguing topic related to Rejuvenating Your Laptop: Reinstalling Windows 10 Without a Disk. Let’s weave interesting information and offer fresh perspectives to the readers.

Rejuvenating Your Laptop: Reinstalling Windows 10 Without a Disk

How to Reinstall Windows 10 Without its CD or USB: A 100% Working Way

The operating system is the bedrock of any computer, dictating how software functions and how users interact with their device. Over time, Windows 10, like any operating system, can accumulate software conflicts, system errors, and performance issues. This can lead to sluggishness, crashes, and a frustrating user experience. Reinstalling Windows 10 can be the solution, providing a fresh start and restoring your laptop to its optimal performance.

While the traditional method of reinstalling Windows 10 involves using a physical installation disk, this is no longer the only option. Modern laptops, equipped with the necessary hardware and firmware, offer a convenient alternative: reinstalling Windows 10 without a physical disk. This process, often referred to as a "clean install," can be accomplished using a recovery partition or a bootable USB drive, both readily accessible through Microsoft’s official website.

Why Reinstall Windows 10?

Reinstalling Windows 10 offers numerous benefits, making it a worthwhile endeavor for users experiencing various issues:

  • Enhanced Performance: A clean install removes unnecessary files, outdated drivers, and accumulated clutter, freeing up disk space and improving overall system performance.
  • Resolution of Software Conflicts: Reinstallation resolves conflicts between different software programs, ensuring smoother operation and preventing crashes.
  • Elimination of Viruses and Malware: A clean install effectively removes any lingering malware or viruses, safeguarding your system from future threats.
  • Troubleshooting System Errors: Many system errors can be resolved by reinstalling Windows 10, restoring the operating system to a stable and functional state.
  • Preparation for Upgrades: Before upgrading to a newer version of Windows, it’s recommended to perform a clean install to ensure compatibility and avoid potential issues.
  • Factory Reset: In cases where the operating system has become severely corrupted, reinstalling Windows 10 can effectively restore the laptop to its factory settings.

Methods for Reinstalling Windows 10 Without a Disk

Two primary methods allow users to reinstall Windows 10 without a physical disk:

1. Using the Recovery Partition:

Many modern laptops come equipped with a dedicated recovery partition. This partition contains a compressed copy of the original operating system, allowing users to restore their laptop to its factory settings.

  • Accessing the Recovery Partition: The process of accessing the recovery partition varies depending on the laptop manufacturer. It typically involves pressing a specific key combination during startup, such as F11, F12, or Esc, followed by selecting the "Recovery" or "Restore" option.
  • Reinstallation Process: The recovery partition will guide you through the reinstallation process, providing options for keeping or deleting personal files.

2. Creating a Bootable USB Drive:

If your laptop lacks a recovery partition or you wish to install a specific version of Windows 10, creating a bootable USB drive is the preferred method.

  • Downloading the Windows 10 Installation Media: Visit the official Microsoft website and download the Windows 10 installation media creation tool. This tool will create a bootable USB drive containing the necessary files for a clean install.
  • Preparing the USB Drive: The installation media creation tool will guide you through the process of formatting a USB drive and transferring the necessary files. Ensure the USB drive has sufficient storage capacity (at least 8GB).
  • Booting from the USB Drive: During startup, access the BIOS settings (usually by pressing F2 or Del) and adjust the boot order to prioritize the USB drive.

Steps for Reinstalling Windows 10 Using a Bootable USB Drive:

  1. Backup Your Data: Before proceeding, back up all important data to an external drive or cloud storage service. Reinstalling Windows 10 will erase all data on the system drive.
  2. Connect the USB Drive: Connect the bootable USB drive to the laptop.
  3. Boot from the USB Drive: Restart the laptop and access the BIOS settings to prioritize the USB drive as the boot device.
  4. Install Windows 10: Follow the on-screen instructions to install Windows 10. Choose the custom install option to ensure a clean install.
  5. Format the System Drive: Select the system drive (usually labeled as "C:") and format it using the NTFS file system. This will erase all data on the drive.
  6. Install Windows 10: The installation process will proceed, and you will be prompted to create a user account and configure basic settings.
  7. Install Drivers: After the installation is complete, install the necessary drivers for your laptop’s hardware components. These drivers can be downloaded from the manufacturer’s website.

FAQs about Reinstalling Windows 10 Without a Disk

Q: Will I lose my data during the reinstallation process?

A: Yes, reinstalling Windows 10 will erase all data on the system drive. It is crucial to back up all important data before proceeding.

Q: Do I need a product key to reinstall Windows 10?

A: If you are reinstalling the same version of Windows 10 that was originally installed on your laptop, you do not need a product key. The product key is embedded in the BIOS. However, if you are upgrading to a different version of Windows 10, you will need a new product key.

Q: What if I encounter errors during the reinstallation process?

A: If you encounter errors, consult the official Microsoft documentation or contact their support team for assistance.

Q: Can I reinstall Windows 10 on a different laptop?

A: No, the Windows 10 installation media is tied to the specific hardware of your laptop. You cannot use the same installation media to reinstall Windows 10 on a different laptop.

Tips for Reinstalling Windows 10 Without a Disk

  • Research Your Laptop’s Recovery Options: Familiarize yourself with your laptop’s recovery options before attempting a reinstallation.
  • Back Up Your Data: Before proceeding, back up all important data to an external drive or cloud storage service.
  • Download the Correct Installation Media: Ensure you are downloading the correct version of Windows 10 installation media for your laptop.
  • Check for Driver Updates: After the reinstallation, check for driver updates for your laptop’s hardware components.
  • Use a Reliable USB Drive: Ensure the USB drive you use for creating the bootable media is reliable and has sufficient storage capacity.
  • Consult Microsoft’s Documentation: If you encounter any issues, consult the official Microsoft documentation for troubleshooting tips.

Conclusion

Reinstalling Windows 10 without a disk is a straightforward process that can revitalize your laptop, improving performance, resolving software conflicts, and ensuring a secure and stable operating environment. By understanding the available methods and following the provided steps, users can effectively restore their laptops to a pristine state, enjoying a renewed user experience. Remember to back up all important data before proceeding and consult official documentation or support channels if you encounter any difficulties.

3 Ways to Reinstall Windows 10 without Losing Data - Chrunos How to Reinstall Windows 10 without CD How to Reinstall Windows 10 without CD/USB Easily (3 Skills) (2022)
How to reinstall Windows 10 on your Surface Laptop or Surface Laptop 2  Windows Central How to Reinstall Windows 10 without CD/USB Easily (3 Skills) [MiniTool Tips] How to Reinstall Windows 10 on PC with Recovery
How to Reinstall Windows 10 Without its CD or USB: A 100% Working Way How to Reinstall Windows 10 without CD - GeeksforGeeks

Closure

Thus, we hope this article has provided valuable insights into Rejuvenating Your Laptop: Reinstalling Windows 10 Without a Disk. We hope you find this article informative and beneficial. See you in our next article!

Reclaiming Your Search Experience: Removing Bing From Windows 11 Search

Reclaiming Your Search Experience: Removing Bing from Windows 11 Search

Introduction

With great pleasure, we will explore the intriguing topic related to Reclaiming Your Search Experience: Removing Bing from Windows 11 Search. Let’s weave interesting information and offer fresh perspectives to the readers.

How to Remove BING Search from Windows 11 & Edge  Remove BING Icon - Win Big Sports

Windows 11, while a visually appealing operating system, has integrated Bing, Microsoft’s search engine, into its search bar. This integration, while intended to offer seamless access to online information, can be perceived as intrusive by users who prefer alternative search engines or simply desire greater control over their search experience.

This article explores the reasons why some users choose to remove Bing from the Windows 11 search bar, delves into the methods for achieving this, and addresses common concerns and questions surrounding this process.

Understanding the Need for Change

The presence of Bing within the Windows 11 search bar can be perceived as a limitation for several reasons:

  • Search Engine Preference: Many users have established preferences for other search engines, such as Google, DuckDuckGo, or Ecosia, which they find more efficient, privacy-focused, or aligned with their values.
  • Privacy Concerns: Bing’s integration may raise concerns about data privacy, as user search queries are inherently tied to the Microsoft ecosystem.
  • Personalized Search Results: Bing’s integration can lead to personalized search results that may not be universally desired.
  • Search Experience Control: Users may prefer the flexibility and control offered by dedicated search engines, allowing them to customize their search settings and preferences.

Methods for Removing Bing from Windows 11 Search

Several methods exist to remove Bing from the Windows 11 search bar, each with its own advantages and considerations:

1. Utilizing Third-Party Search Tools:

This approach involves installing a third-party search tool that replaces the default Windows search functionality. Popular options include:

  • Everything: A fast and efficient file search tool that allows users to quickly find files and folders on their computer.
  • Listary: A powerful search tool that offers advanced features like fuzzy matching and file type filtering.
  • SearchEverything: A comprehensive search tool that indexes files, folders, and even the content of documents.

These tools provide a more localized search experience, focusing on files and folders within the user’s computer rather than online information.

2. Configuring Windows Search Settings:

Windows 11 offers built-in settings to customize the search experience, allowing users to prioritize specific search sources:

  • Disable Web Search: This setting removes Bing from the search results, prioritizing local files and folders.
  • Customize Search Index: Users can choose specific locations and file types to be included in the search index, allowing them to tailor the search scope.

While these settings provide a degree of control, they do not completely remove Bing from the search experience.

3. Modifying Registry Settings:

For advanced users, modifying registry settings can provide a more comprehensive solution. This approach requires careful execution to avoid system instability:

  • Disable Bing Search Service: This involves disabling the service responsible for handling Bing search requests.
  • Modify Search Bar Behavior: Advanced registry edits can alter the default search behavior, redirecting queries to other search engines.

This method is not recommended for novice users, as improper registry modifications can lead to system errors.

4. Utilizing Dedicated Search Bar Replacements:

Some third-party software specifically designed to replace the Windows 11 search bar with custom search options are available:

  • StartAllBack: A popular tool that allows users to customize the Start menu and taskbar, including the search bar.
  • Search and Start Menu Tweaker: This tool provides a range of options for modifying the search bar behavior and integrating alternative search engines.

These tools offer greater control over the search experience, allowing users to choose their preferred search engine and customize the search bar’s appearance.

Addressing Common Concerns and Questions

1. Does Removing Bing Affect System Performance?

Removing Bing from the search bar generally has a minimal impact on system performance. However, depending on the method chosen, some users may experience slight performance changes.

2. Can I Still Access Bing After Removing It from the Search Bar?

Yes, users can still access Bing through their web browser or by manually entering the Bing URL in the address bar.

3. Is It Safe to Modify Registry Settings?

Modifying registry settings should be approached with caution. Back up the registry before making any changes, and only modify settings if you are familiar with the registry and its implications.

4. What Are the Best Practices for Removing Bing?

  • Backup Data: Before making any changes, back up important files and settings.
  • Research Thoroughly: Understand the method you are using and its potential consequences.
  • Proceed with Caution: Make changes gradually and test the system after each step.

Conclusion

Removing Bing from the Windows 11 search bar allows users to reclaim control over their search experience, prioritizing their preferred search engines, enhancing privacy, and customizing search behavior.

The choice of method depends on individual preferences and technical proficiency. Regardless of the approach, users should prioritize safety, back up their data, and proceed with caution when making changes to their system settings. By understanding the options and implementing the appropriate methods, users can tailor their Windows 11 search experience to suit their needs and preferences.

Remove Bing From Microsoft Edge Windows 11 - Image to u How to Remove Bing Search from Windows 11 - Technipages Cómo quitar Bing Search de Windows 11 y 10 - Moyens I/O
How to remove Edge and Bing Search on Windows 11 – digistart How To Remove Bing Search Results From Windows 11 With Group Policy - Vrogue How To Get Rid Of Bing Search On Windows 11 - Image to u
Remove Bing From Search Bar Windows 11 - Image to u Say goodbye to ‘Bing Search’ on Windows 11 and 10; remove it this way  How-to

Closure

Thus, we hope this article has provided valuable insights into Reclaiming Your Search Experience: Removing Bing from Windows 11 Search. We hope you find this article informative and beneficial. See you in our next article!