Understanding And Addressing Computer Overheating: A Comprehensive Guide

Understanding and Addressing Computer Overheating: A Comprehensive Guide

Introduction

With great pleasure, we will explore the intriguing topic related to Understanding and Addressing Computer Overheating: A Comprehensive Guide. Let’s weave interesting information and offer fresh perspectives to the readers.

Understanding and Addressing Computer Overheating: A Comprehensive Guide

Computer Overheating - Electronic Repairing

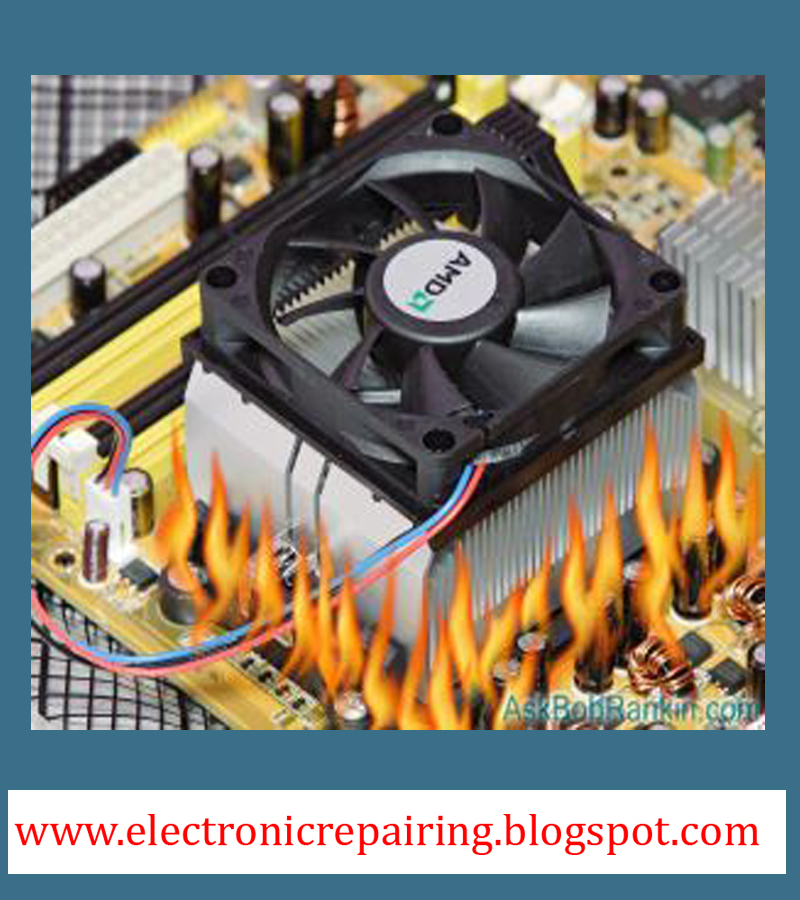
Computer overheating is a common issue that can lead to a variety of problems, including performance degradation, system instability, and even hardware damage. This article provides a comprehensive guide to understanding the causes of overheating, identifying potential symptoms, and implementing effective solutions.

Causes of Computer Overheating

Overheating in computers arises from a fundamental principle: the components generate heat during operation. When this heat exceeds the cooling capacity of the system, temperatures rise, potentially causing damage. The primary causes of overheating include:

1. Insufficient Cooling:

  • Inadequate Airflow: Poorly designed or dusty computer cases can restrict airflow, hindering the dissipation of heat.
  • Faulty or Insufficient Fans: Fans are crucial for circulating air and expelling heat. Malfunctioning or underpowered fans can lead to insufficient cooling.
  • Overclocking: Increasing the clock speed of components can generate more heat, exceeding the cooling capacity.
  • Dust Accumulation: Dust acts as an insulator, trapping heat and hindering airflow.

2. Component Issues:

  • Faulty Heat Sinks and Thermal Paste: Heat sinks and thermal paste are responsible for transferring heat away from components. Malfunctioning or dried-out thermal paste can lead to overheating.
  • Overheating Components: Individual components like the CPU, GPU, or RAM can overheat due to faulty design or increased workload.

3. Environmental Factors:

  • High Ambient Temperatures: Operating a computer in a hot environment can significantly increase internal temperatures.
  • Lack of Ventilation: Insufficient ventilation in the room can lead to trapped heat, affecting the computer’s internal temperature.

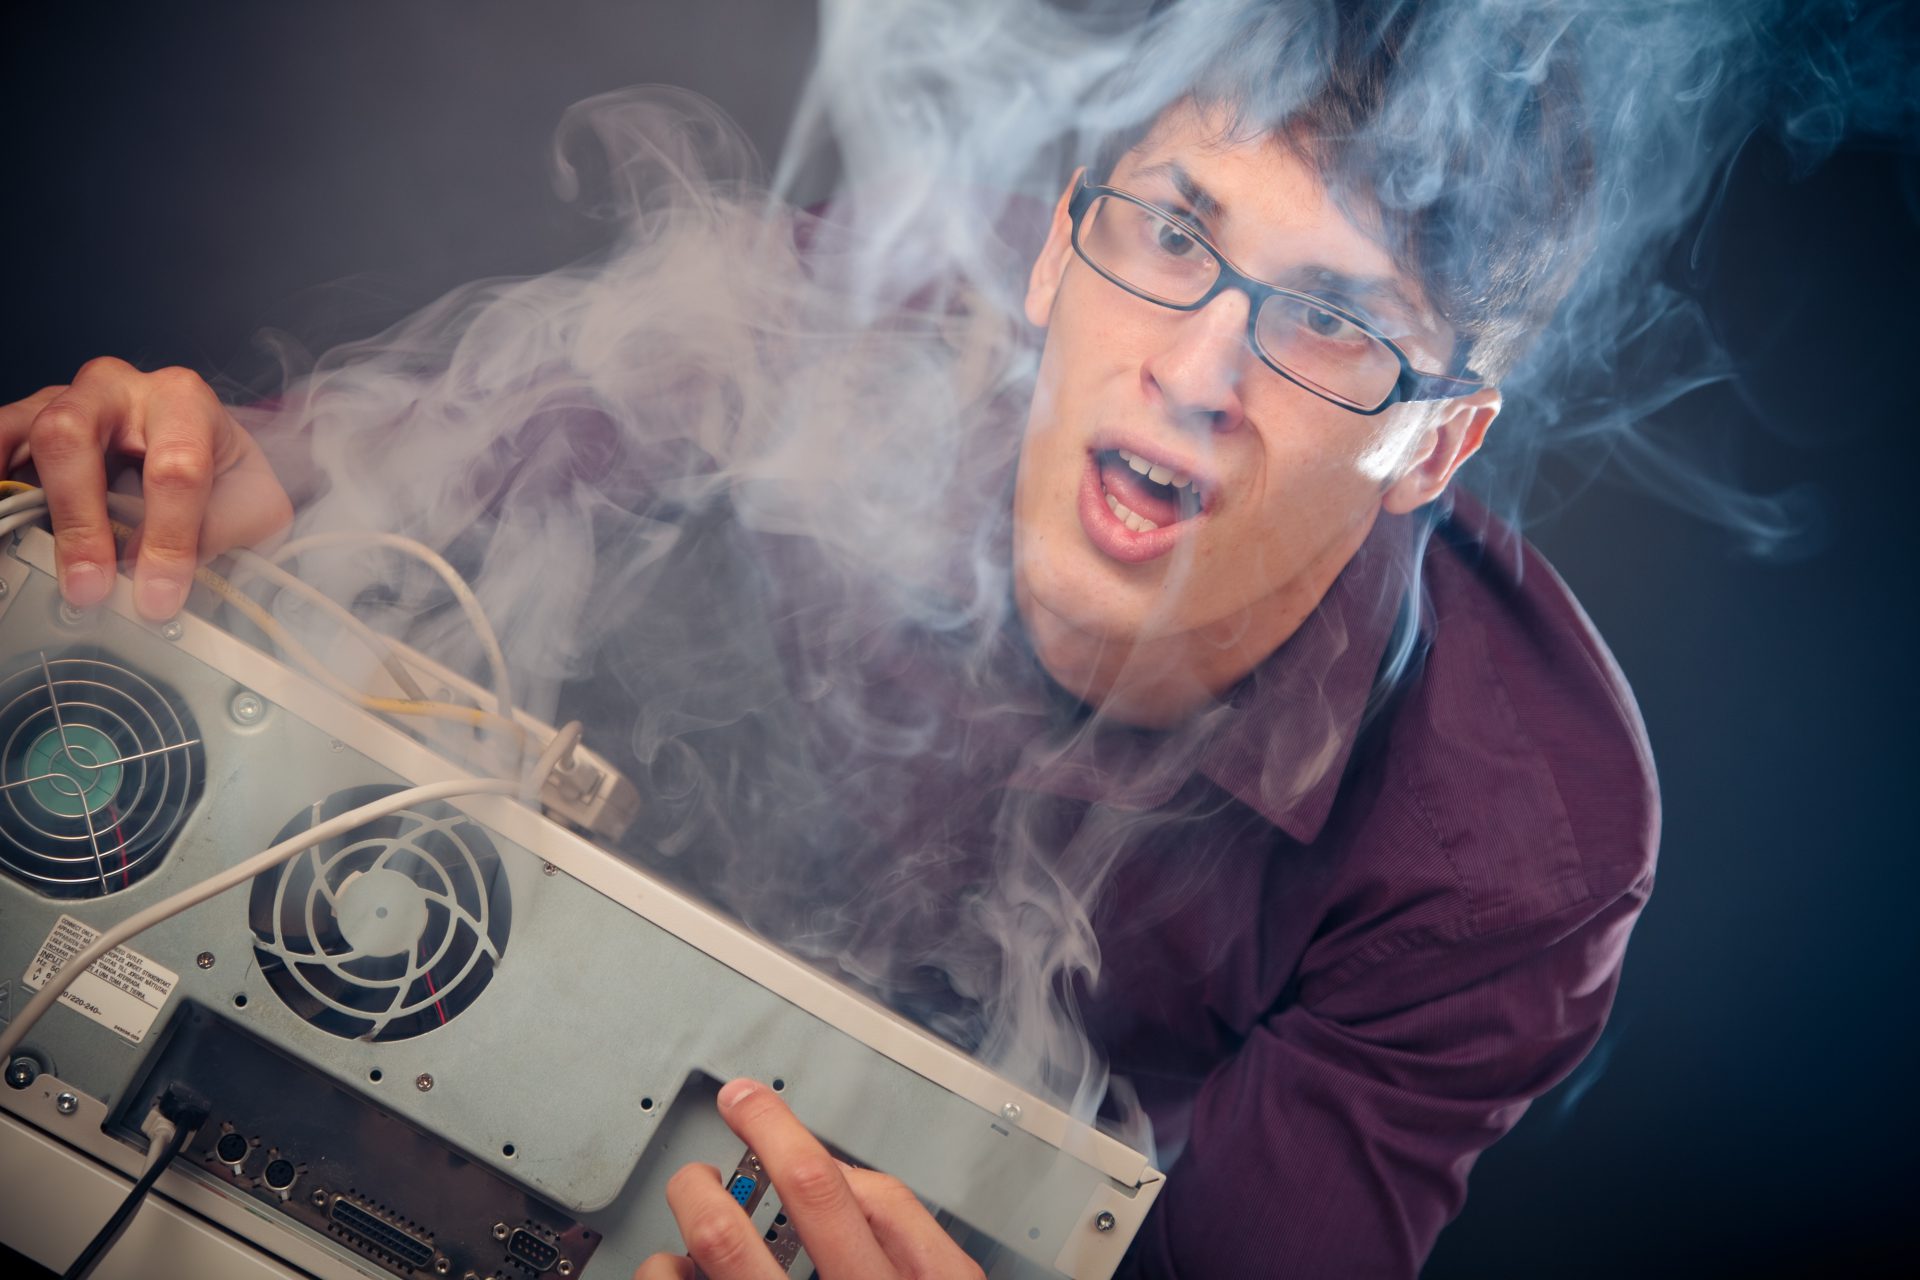
Identifying the Symptoms of Overheating

Recognizing the signs of overheating is crucial for timely intervention and preventing potential damage. Common symptoms include:

  • System Slowdown and Performance Degradation: Overheating can cause components to throttle performance to prevent further damage, resulting in sluggish operation.
  • Frequent Crashes and Blue Screens of Death: Overheating can lead to system instability, causing crashes and error messages.
  • Unusual Noises: Fans may spin faster or make unusual noises as they struggle to cope with increased heat.
  • Warm or Hot Components: The CPU, GPU, or other components might feel unusually warm or hot to the touch.
  • Strange Odors: Overheating components can emit a burning smell.

Addressing Overheating Issues: A Step-by-Step Guide

1. Assess the Situation:

  • Monitor Temperatures: Use monitoring software like HWMonitor or CPU-Z to check the temperatures of critical components.
  • Identify the Source: Determine which component is overheating to focus your troubleshooting efforts.

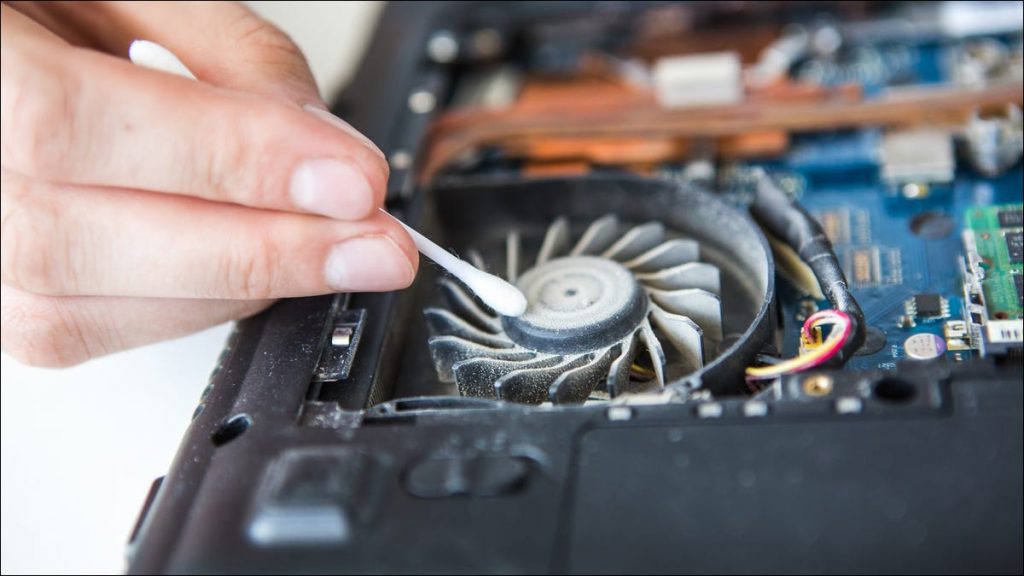
2. Basic Troubleshooting:

  • Clean Dust: Regularly clean the inside of the computer case, removing dust from fans, heat sinks, and other components.
  • Check Fan Function: Ensure all fans are spinning correctly and are not blocked by dust or debris.
  • Re-apply Thermal Paste: If thermal paste is old or dried out, re-apply a fresh layer to the CPU and GPU heat sinks.

3. Advanced Troubleshooting:

  • Re-seat Components: Gently re-seat the CPU, GPU, and RAM modules to ensure proper contact and heat dissipation.
  • Upgrade Cooling: Consider upgrading to a more powerful CPU cooler or installing additional case fans for better airflow.
  • Reduce Overclocking: If overclocking is enabled, reduce the clock speed to reduce heat generation.
  • Improve Ventilation: Ensure adequate ventilation in the room where the computer is located.

4. Seek Professional Help:

  • Contact Manufacturer: If the issue persists, contact the manufacturer of the affected component for support.
  • Consult a Technician: For complex or persistent issues, consider consulting a qualified computer technician.

FAQs on Computer Overheating

1. What temperature is too high for my computer components?

The ideal operating temperature for components varies depending on the specific model and manufacturer specifications. Generally, CPU temperatures should remain below 80ยฐC, while GPU temperatures should stay below 85ยฐC.

2. Can overheating damage my computer?

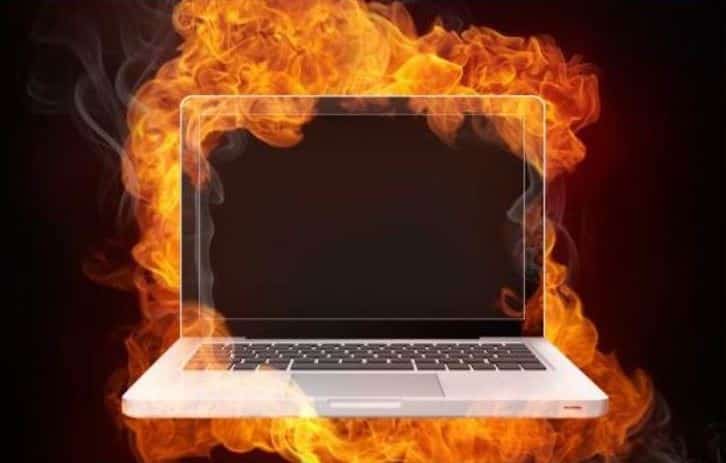
Yes, prolonged overheating can lead to permanent damage to components, including the CPU, GPU, and motherboard.

3. How often should I clean my computer?

It’s recommended to clean your computer’s interior every 3-6 months, depending on the environment and usage.

4. What are the best ways to prevent overheating?

Regular cleaning, ensuring adequate ventilation, and avoiding overclocking are crucial for preventing overheating.

Tips for Preventing Computer Overheating

  • Regular Cleaning: Maintain a dust-free environment inside the computer case.
  • Adequate Ventilation: Ensure proper airflow within the computer case and in the surrounding area.
  • Avoid Overclocking: Avoid pushing components beyond their recommended operating limits.
  • Monitor Temperatures: Regularly check component temperatures to identify potential issues early.
  • Use Quality Components: Choose components with good cooling solutions and reliable performance.

Conclusion

Computer overheating is a significant issue that can impact performance, stability, and even hardware longevity. By understanding the causes, identifying symptoms, and implementing appropriate solutions, users can prevent overheating and ensure optimal computer operation. Regular maintenance, proper ventilation, and responsible component usage are key to maintaining a cool and healthy computer system.

Computer Overheating: Everything You Need to Know - OneSupport Taming the Inferno: A Comprehensive Guide to Resolving Overheating Issues in Your Computer how to solve computer overheating problem
Decoding Laptop Overheating: A Comprehensive Guide to Ensure Optimal Performance How To Diagnose An Overheating Laptop - PCMechanic Computer Repair Davenport, FL PPT - How to solve computer overheating problems? Read/Comment PowerPoint Presentation - ID
How To Stop Your PC Overheating And What Causes It! - YouTube Mastering Laptop Overheating: A Comprehensive Guide

Closure

Thus, we hope this article has provided valuable insights into Understanding and Addressing Computer Overheating: A Comprehensive Guide. We hope you find this article informative and beneficial. See you in our next article!

Reinstalling Windows 10 Without A Disk: A Comprehensive Guide

Reinstalling Windows 10 Without a Disk: A Comprehensive Guide

Introduction

In this auspicious occasion, we are delighted to delve into the intriguing topic related to Reinstalling Windows 10 Without a Disk: A Comprehensive Guide. Let’s weave interesting information and offer fresh perspectives to the readers.

Reinstalling Windows 10 Without a Disk: A Comprehensive Guide

Reinstall Fresh Windows 10 Without Using Any USB / DVD Disk - Complete Guide - ISORIVER

Reinstalling Windows 10 without a physical disk is a common scenario for many users. Whether you’re dealing with a sluggish system, persistent errors, or simply want a fresh start, the process can be surprisingly straightforward. This guide provides a comprehensive overview of the methods available, addressing the key aspects and considerations involved in performing a clean installation.

Understanding the Need for a Reinstall

Before embarking on a Windows 10 reinstall, it is essential to understand the underlying reasons for pursuing this course of action. A clean installation can be a valuable solution in several situations:

  • Performance Issues: Over time, your system can accumulate unnecessary files, temporary data, and software remnants that contribute to slowdowns. A reinstall effectively removes these accumulated burdens, restoring optimal performance.
  • Software Conflicts: Persistent software conflicts can lead to instability and errors. A fresh installation provides a clean slate, eliminating potential conflicts and allowing for a smoother operation.
  • Malware Removal: If your system has been compromised by malware, a reinstall can be a crucial step in eradicating the infection and restoring security.
  • System Upgrades: When upgrading to a new version of Windows or hardware, a reinstall ensures a seamless transition and avoids potential compatibility issues.
  • Troubleshooting: In some cases, a reinstall can be a necessary step in troubleshooting persistent problems that cannot be resolved through other means.

The Methods for Reinstalling Windows 10 Without a Disk

There are several methods for reinstalling Windows 10 without relying on a physical disk. Each approach has its own advantages and considerations:

1. Using the Windows 10 Installation Media Creator:

This method is the most straightforward and widely recommended for creating bootable media. The Windows 10 Installation Media Creator is a free tool provided by Microsoft that allows you to download an ISO file and create a bootable USB drive. This USB drive can then be used to boot your computer and initiate the installation process.

Steps:

  • Download the Tool: Visit the Microsoft website and download the Windows 10 Installation Media Creator tool.
  • Select the Edition: Choose the desired edition of Windows 10 (Home, Pro, etc.) and language.
  • Create Bootable Media: Select "USB flash drive" as the media type and insert a USB drive with sufficient storage space.
  • Boot from USB: Once the process is complete, restart your computer and boot from the USB drive.

2. Using a Recovery Drive:

Windows 10 allows you to create a recovery drive that contains a system image and essential recovery tools. This drive can be used to restore your system to its factory settings or perform a clean installation of Windows 10.

Steps:

  • Create a Recovery Drive: Access the "Create a recovery drive" option within Windows settings.
  • Select a USB drive: Connect a USB drive with sufficient storage space and choose it as the destination for the recovery drive.
  • Boot from Recovery Drive: After creating the recovery drive, restart your computer and boot from it.

3. Utilizing the "Reset This PC" Feature:

Windows 10 offers a built-in "Reset This PC" feature that allows you to refresh or reinstall your operating system without the need for external media.

Steps:

  • Access Reset This PC: Go to "Settings" > "Update & Security" > "Recovery."
  • Select Reset PC: Choose "Reset this PC" and select the desired option: "Keep my files" or "Remove everything."
  • Follow the instructions: The process will guide you through the remaining steps, including downloading necessary files and restarting your computer.

4. Using a System Image:

If you have previously created a system image backup, you can use it to restore your entire system, including all your files and settings. This method is particularly useful for recovering from major system failures or data loss.

Steps:

  • Access System Image Backup: Go to "Settings" > "Update & Security" > "Recovery."
  • Select "Recover from a system image": Follow the on-screen instructions to locate and restore your system image.

5. Using a Windows 10 ISO File:

You can download a Windows 10 ISO file from Microsoft’s website and create a bootable USB drive using third-party tools like Rufus or Universal USB Installer. This method is similar to using the Windows 10 Installation Media Creator but provides more flexibility in choosing the ISO file.

Steps:

  • Download Windows 10 ISO: Obtain the desired Windows 10 ISO file from Microsoft’s website.
  • Use a Bootable USB Creator: Use a tool like Rufus or Universal USB Installer to create a bootable USB drive from the ISO file.
  • Boot from USB: Restart your computer and boot from the USB drive to initiate the installation process.

Key Considerations for Reinstalling Windows 10

Before proceeding with a reinstall, it is crucial to consider several important aspects:

  • Backup Your Data: Always back up your important data before reinstalling Windows 10. This includes files, documents, photos, and any other critical information. You can use external hard drives, cloud storage services, or other backup methods.
  • Product Key: You will need your Windows 10 product key to activate the operating system after the reinstall. If you have lost your product key, you can try recovering it from your computer or contacting Microsoft support.
  • Software Drivers: After reinstalling Windows 10, you may need to reinstall drivers for your hardware components, such as graphics cards, network adapters, and printers. You can download these drivers from the manufacturer’s website.
  • Software Applications: You will need to reinstall any software applications you wish to use after the reinstall. Ensure you have the installation files or access to download them.
  • System Partition: During the installation process, you will be prompted to select a partition for installing Windows 10. It is recommended to choose the largest partition available to ensure sufficient space for the operating system and your files.
  • Boot Order: Ensure that your computer is set to boot from the USB drive or recovery drive before proceeding with the installation process.

Frequently Asked Questions (FAQs)

1. Can I reinstall Windows 10 without losing my data?

While you can choose the "Keep my files" option during a reinstall, it is not guaranteed that all your data will be preserved. It is always recommended to back up your data before proceeding with a reinstall.

2. Will I need to pay for Windows 10 after reinstalling it?

No, you should not need to pay for Windows 10 after reinstalling it, as long as you have a valid product key and are reinstalling the same edition of Windows 10 that you originally purchased.

3. What happens to my installed programs after reinstalling Windows 10?

All installed programs will be removed during a clean installation of Windows 10. You will need to reinstall them after the process is complete.

4. Will I lose my personal settings after reinstalling Windows 10?

Yes, all your personal settings, including desktop customizations, browser settings, and account preferences, will be reset during a clean installation.

5. What if I don’t have a Windows 10 product key?

If you do not have a Windows 10 product key, you may be able to use a digital license associated with your Microsoft account. Alternatively, you can purchase a new product key from Microsoft or a third-party retailer.

6. Can I reinstall Windows 10 without a USB drive?

While using a USB drive is the most common method, you can also use other bootable media, such as a DVD or a network share.

7. What if I encounter errors during the installation process?

If you encounter errors during the installation process, consult Microsoft’s support website or seek assistance from a qualified technician.

Tips for a Smooth Reinstallation

  • Perform a backup: Back up all your important data before proceeding with the reinstall.
  • Check your product key: Ensure you have access to your Windows 10 product key.
  • Download necessary drivers: Gather the drivers for your hardware components before starting the installation.
  • Prepare installation media: Create a bootable USB drive or other installation media.
  • Set boot order: Configure your computer to boot from the installation media.
  • Choose the correct partition: Select the appropriate partition for installing Windows 10.
  • Follow the on-screen instructions: Carefully follow the prompts during the installation process.
  • Install drivers and software: After the installation, install necessary drivers and software applications.

Conclusion

Reinstalling Windows 10 without a physical disk can be a valuable solution for resolving various system issues and achieving optimal performance. By understanding the available methods, key considerations, and best practices, you can confidently perform a clean installation and restore your system to a fresh and efficient state. Remember to back up your data, gather necessary drivers and software, and follow the on-screen instructions carefully for a smooth and successful reinstall.

How to Reinstall Windows 10 without CD - GeeksforGeeks How to reinstall Windows 10, without cd or usb - YouTube Reinstall Windows 10 Without an Installation Disc or USB - YouTube
Reinstall Fresh Windows 10 Without Using Any USB / DVD Disk - Complete Guide - ISORIVER How to Easily Reinstall Windows 10 without CD or USB Drive - YouTube How to Reinstall Windows 10 without CD/USB Easily? - GeeksforGeeks
How to Reinstall Windows 10 without CD - GeeksforGeeks Reinstall Windows 10. Step-by-step tutorial. โ€” How To Fix Guide

Closure

Thus, we hope this article has provided valuable insights into Reinstalling Windows 10 Without a Disk: A Comprehensive Guide. We hope you find this article informative and beneficial. See you in our next article!

Navigating The World Of Free Windows 10: A Comprehensive Guide

Navigating the World of Free Windows 10: A Comprehensive Guide

Introduction

With great pleasure, we will explore the intriguing topic related to Navigating the World of Free Windows 10: A Comprehensive Guide. Let’s weave interesting information and offer fresh perspectives to the readers.

Navigate the World with Windows 10 Maps for Phone - Windows Experience BlogWindows Experience Blog

The allure of a free operating system is undeniable, and Windows 10, despite its widespread use, is no exception. However, the landscape of "free" Windows 10 downloads can be complex, often riddled with misinformation and potential security risks. This article aims to provide a comprehensive guide to navigating the world of free Windows 10 downloads, addressing its nuances, highlighting potential pitfalls, and offering practical advice for a safe and successful experience.

The Reality of Free Windows 10:

It is crucial to understand that obtaining a legitimate copy of Windows 10 without any cost is not a straightforward process. Microsoft, the developer of Windows, offers various avenues to acquire the operating system, but these typically involve payment. However, certain scenarios allow for free access to Windows 10, including:

  • Upgrade from an older version: Users with genuine copies of Windows 7 or Windows 8.1 can upgrade to Windows 10 for free. This offer, while not always readily advertised, remains active, allowing users to enjoy the latest features and functionalities without incurring additional costs.
  • Specific hardware: Some new computers come pre-installed with Windows 10. In these cases, the operating system is bundled with the hardware purchase, effectively providing free access.
  • Academic programs: Educational institutions may offer free licenses of Windows 10 for students and faculty. This route provides access to the operating system for educational purposes, often with additional benefits like discounted software packages.

The Dangers of Free Downloads:

The internet is teeming with websites offering "free" Windows 10 downloads. While some may be legitimate, many are unreliable, posing significant risks to users. These risks can include:

  • Malware and viruses: Downloading Windows 10 from untrusted sources can expose users to malware, viruses, and other harmful software. These malicious programs can compromise system security, steal personal data, and damage hardware.
  • Unlicensed software: Downloading and using unlicensed software is illegal and can lead to legal consequences. Additionally, unlicensed copies may lack essential security updates and support, leaving users vulnerable to exploits.
  • Compromised files: Downloaded files may contain modifications or malicious code that can compromise system security or introduce vulnerabilities.
  • Fake activation keys: Some websites offer "free" activation keys, promising to unlock the full features of Windows 10. These keys are often illegitimate, potentially exposing users to malware or rendering the operating system unusable.

Navigating the Free Download Landscape:

While the allure of a free download is tempting, it is crucial to prioritize security and legality. Here are some key points to consider:

  • Verify the source: Only download Windows 10 from reputable sources like Microsoft’s official website or authorized retailers. Avoid downloading from unknown websites or third-party platforms.
  • Check for digital signatures: Legitimate Windows 10 installations will be digitally signed by Microsoft, ensuring the software’s authenticity. Look for these signatures before downloading any files.
  • Read user reviews and feedback: Before downloading from any source, research user reviews and feedback to gauge its legitimacy and potential risks.
  • Use a reliable antivirus: Install and maintain a robust antivirus software on your computer to protect against malware and viruses, especially when downloading from unfamiliar sources.

FAQs Regarding Free Windows 10 Downloads:

Q: Is it legal to download Windows 10 for free?

A: While the legality of downloading free Windows 10 depends on the source and method, it is generally advisable to obtain a legitimate copy through authorized channels. Downloading from untrusted sources or using pirated copies can lead to legal consequences and security risks.

Q: How can I upgrade to Windows 10 for free?

A: Users with genuine copies of Windows 7 or Windows 8.1 can upgrade to Windows 10 for free. This option may require specific system requirements and might not be readily advertised. However, searching for official Microsoft resources can provide guidance on the upgrade process.

Q: What are the risks of downloading Windows 10 from unofficial sources?

A: Downloading from unofficial sources exposes users to various risks, including malware infections, compromised files, unlicensed software, and fake activation keys. These risks can compromise system security, steal personal data, and damage hardware.

Q: What are the benefits of using a legitimate copy of Windows 10?

A: Legitimate copies of Windows 10 offer several benefits, including:

  • Security updates: Regular security updates are crucial for protecting against vulnerabilities and malware. Legitimate copies receive these updates automatically, ensuring a secure system.
  • Support: Users with legitimate copies have access to technical support from Microsoft, providing assistance with troubleshooting and resolving issues.
  • Legal compliance: Using a legitimate copy ensures compliance with software licensing agreements and avoids legal consequences.

Tips for Obtaining Windows 10 Legally and Securely:

  • Utilize the free upgrade option: If eligible, take advantage of the free upgrade option from Windows 7 or Windows 8.1.
  • Purchase a new computer with Windows 10 pre-installed: This option provides a legitimate copy of Windows 10 bundled with the hardware purchase.
  • Explore academic programs: Educational institutions often offer free licenses of Windows 10 for students and faculty.
  • Consider a subscription service: Microsoft offers subscription services like Microsoft 365, which includes access to Windows 10 and other software.

Conclusion:

Navigating the world of free Windows 10 downloads requires caution and a thorough understanding of the potential risks and benefits. While the allure of free software is tempting, prioritizing security and legality is paramount. By adhering to the guidelines outlined in this article, users can ensure a safe and successful experience, enjoying the features and functionalities of Windows 10 without compromising their system’s security or legal standing. Remember, a legitimate copy of Windows 10 provides peace of mind, security, and access to valuable support services, ultimately leading to a more reliable and enjoyable computing experience.

How to Get Windows 10 for Free [Full Guide in 2024] - EaseUS Navigating The World: A Comprehensive Guide To Map Functionality And Assistance - Best Map How Is the World Adjusting To Windows 10?  Movie TV Tech Geeks News
Microsoft Continues Free Windows 10 Upgrades How to Navigate in Windows 10 - Windows 10 User Interface Overview - YouTube Microsoft is still offering free Windows 10 upgrades - TechSpot
Windows 10 Training Course - FREE - Paperpicks Leading Content Syndication and Distribution Platform Sponsored - Summer Promotion: Get Windows 10 totally for Free! Never Miss Out! - CNX Software

Closure

Thus, we hope this article has provided valuable insights into Navigating the World of Free Windows 10: A Comprehensive Guide. We appreciate your attention to our article. See you in our next article!

Rejuvenating Your Windows 10: A Guide To Maintaining Data While Refreshing Your System

Rejuvenating Your Windows 10: A Guide to Maintaining Data While Refreshing Your System

Introduction

With enthusiasm, let’s navigate through the intriguing topic related to Rejuvenating Your Windows 10: A Guide to Maintaining Data While Refreshing Your System. Let’s weave interesting information and offer fresh perspectives to the readers.

Rejuvenating Your Windows 10: A Guide to Maintaining Data While Refreshing Your System

Repair and Recovery - Windows 10 Troubleshooting Guide

Windows 10, like any software, can experience performance degradation over time due to accumulated files, outdated drivers, or even malicious software. A clean installation can often revitalize the operating system, restoring its speed and efficiency. However, the prospect of reinstalling Windows can be daunting, particularly for users concerned about losing valuable data. This comprehensive guide explores the process of reinstalling Windows 10 while preserving your precious files and applications.

Understanding the Need for a Clean Installation

A clean installation of Windows 10 involves formatting the hard drive, effectively wiping the existing operating system and all its associated files. This approach offers several advantages:

  • Enhanced Performance: A fresh installation eliminates accumulated temporary files, outdated drivers, and potentially harmful software, leading to smoother operation and faster boot times.
  • Resolution of System Errors: Persistent system errors, often caused by corrupted files or conflicting software, can be resolved through a clean installation.
  • Malware Removal: Malware can be deeply embedded in the system, making it difficult to remove through conventional methods. A clean installation effectively eliminates the threat.
  • Troubleshooting Complex Issues: In situations where troubleshooting fails to resolve persistent issues, a clean installation can often provide a definitive solution.

Methods for Reinstalling Windows 10 While Preserving Data

While a clean installation erases everything on the hard drive, there are methods to safeguard your valuable data:

1. Using a Backup:

  • Importance of Regular Backups: The most reliable method to protect your data is to create regular backups. Backups can be stored on external hard drives, cloud storage services, or network drives.
  • Backup Options: Windows 10 offers built-in backup tools, including File History and System Image Backup. Third-party backup software provides more comprehensive solutions with advanced features.
  • Restoring from Backup: After reinstalling Windows 10, you can restore your backed-up data to its original location.

2. Utilizing the "Keep My Files" Option:

  • Windows 10 Installation Process: When reinstalling Windows 10, the setup process presents an option to "keep my files." Selecting this option preserves your personal files, such as documents, photos, and music, while removing applications and settings.
  • Limitations: This method does not retain installed applications or system settings. It is suitable for users who primarily want to refresh the system while retaining their personal data.

3. Using a Third-Party Data Transfer Tool:

  • Specialized Software: Several third-party data transfer tools are available, designed to move data from the old installation to the new one without requiring a full backup.
  • Advantages: These tools offer a convenient and often faster method for transferring data, potentially saving time and effort compared to manual backup and restoration.

Essential Considerations Before Reinstalling Windows 10:

  • Backup Verification: Ensure your backup is complete and functional by attempting to restore a small amount of data.
  • Software Licenses: Check the licenses for your software applications, as some may require re-activation after a clean installation.
  • Drivers: Download and save the latest drivers for your hardware devices before reinstalling Windows 10.
  • System Requirements: Verify that your computer meets the minimum system requirements for Windows 10.
  • Time Commitment: Allow ample time for the entire process, including backing up data, installing Windows 10, and restoring data.

Step-by-Step Guide to Reinstalling Windows 10 While Preserving Data:

  1. Create a Backup: Utilize the Windows 10 backup tools or a third-party backup solution to create a comprehensive backup of your data.
  2. Download Windows 10 Installation Media: Download the Windows 10 installation media from Microsoft’s website. You can create a bootable USB drive or DVD.
  3. Boot from Installation Media: Restart your computer and boot from the installation media.
  4. Choose Installation Options: Select "Custom: Install Windows only (advanced)" to perform a clean installation.
  5. Format the Hard Drive: Format the drive where Windows 10 is installed, ensuring all data is erased.
  6. Install Windows 10: Follow the on-screen instructions to install Windows 10.
  7. Install Drivers: Install the necessary drivers for your hardware devices.
  8. Restore Data: Restore your backed-up data to its original location.
  9. Reinstall Applications: Reinstall any applications that were not included in the "keep my files" option.

Frequently Asked Questions (FAQs):

Q: Can I reinstall Windows 10 without losing my data?

A: Yes, you can reinstall Windows 10 while preserving your data by creating a backup or utilizing the "keep my files" option during the installation process.

Q: What is the best way to back up my data before reinstalling Windows 10?

A: The best method depends on your needs and preferences. Windows 10 offers built-in backup tools, and third-party software provides more comprehensive solutions. External hard drives, cloud storage, and network drives are suitable storage options for backups.

Q: Will reinstalling Windows 10 affect my software licenses?

A: Some software licenses may require re-activation after a clean installation. It is advisable to check the license terms for your software applications.

Q: What if I forget to back up my data before reinstalling Windows 10?

A: If you have not created a backup, data recovery software can potentially recover lost files. However, the success rate depends on factors such as the type of data loss and the condition of the hard drive.

Q: Can I use a third-party data transfer tool instead of backing up my data?

A: While third-party data transfer tools can be convenient, they may not be as reliable as a full backup. Consider using a backup solution for critical data and using a data transfer tool for less essential files.

Tips for Reinstalling Windows 10 While Preserving Data:

  • Plan Ahead: Allocate sufficient time for the entire process and ensure you have all the necessary resources, including a backup drive, installation media, and drivers.
  • Test Your Backup: Before proceeding with the clean installation, test your backup by restoring a small amount of data to ensure it is functional.
  • Consider a System Image Backup: System image backups create a complete snapshot of your system, including the operating system, applications, and settings.
  • Utilize Cloud Storage: Cloud storage services offer a convenient and secure option for storing backups.
  • Document Your Software Licenses: Keep track of your software licenses to facilitate re-activation after the installation.

Conclusion:

Reinstalling Windows 10 can be a valuable process for rejuvenating your system and resolving performance issues. By taking the necessary precautions to protect your data, you can confidently refresh your operating system without sacrificing your precious files and applications. Remember to create regular backups, utilize the "keep my files" option, or consider using a third-party data transfer tool. With careful planning and execution, you can seamlessly reinstall Windows 10 while preserving your valuable data.

"Windows Is Back": Microsoft Planing To Rejuvenate Windows 10 With New Graphic Interface By End HOW TO RESET WINDOWS 10 GUIDE! - YouTube Fix There Was A Problem Refreshing Your Pc In Windows 10 - ZOHAL
How to Clean Install Windows 10 22H2 (the 2022 Update) from USB? - MiniTool [FIX] "There Was A Problem Refreshing Your PC'' In Windows 10 [FIX] "There Was A Problem Refreshing Your PC'' In Windows 10
[FIX] "There Was A Problem Refreshing Your PC'' In Windows 10 [FIX] "There Was A Problem Refreshing Your PC'' In Windows 10

Closure

Thus, we hope this article has provided valuable insights into Rejuvenating Your Windows 10: A Guide to Maintaining Data While Refreshing Your System. We thank you for taking the time to read this article. See you in our next article!

Unveiling The Innovations Of Windows 11: A Comprehensive Exploration

Unveiling the Innovations of Windows 11: A Comprehensive Exploration

Introduction

In this auspicious occasion, we are delighted to delve into the intriguing topic related to Unveiling the Innovations of Windows 11: A Comprehensive Exploration. Let’s weave interesting information and offer fresh perspectives to the readers.

Unveiling the Innovations of Windows 11: A Comprehensive Exploration

Unveiling the Pinnacle of Innovation: Windows 11โ€™s โ€˜Moment 4โ€™ Update

Windows 11, the latest iteration of Microsoft’s flagship operating system, arrived in 2021 with a promise of enhanced user experience, improved performance, and a fresh visual aesthetic. While the initial release introduced several notable features, Microsoft has continued to refine and expand Windows 11’s capabilities through regular updates. This exploration delves into the key innovations that have shaped Windows 11, highlighting their significance and benefits for users.

A Modernized Interface: Embracing Simplicity and Efficiency

One of the most prominent changes in Windows 11 is its redesigned user interface. The new aesthetic prioritizes simplicity and clarity, adopting a minimalist approach with rounded corners, a centered taskbar, and a streamlined Start Menu. This shift aims to create a more intuitive and visually appealing experience, making it easier for users to navigate and find the information they need.

Enhanced Multitasking: Streamlining Productivity

Windows 11 introduces several features designed to improve multitasking capabilities and enhance user productivity. Snap Layouts, for instance, allow users to easily arrange windows in pre-defined configurations, optimizing screen real estate for efficient workflow. Snap Groups, a further refinement, saves these configurations, allowing users to quickly switch between different applications and layouts with a single click.

Focus on Security and Privacy: Protecting User Data

Security and privacy are paramount in the digital age, and Windows 11 incorporates several enhancements in these areas. Windows Hello, a biometric authentication system, provides a more secure and convenient way to log in using facial recognition or fingerprint scanning. Microsoft Defender, the built-in antivirus software, has been strengthened with advanced threat detection capabilities, offering robust protection against malware and other cyber threats.

Gaming Enhancements: Unleashing the Power of Windows

Windows 11 is a haven for gamers, with several features tailored to enhance gaming experiences. Auto HDR (High Dynamic Range) automatically improves the visual quality of games by expanding the color range, creating richer and more immersive visuals. DirectStorage, a new technology, allows games to load faster by bypassing the CPU and directly accessing the storage device, reducing loading times and enhancing responsiveness.

The Power of the Cloud: Seamless Integration and Collaboration

Windows 11 seamlessly integrates with cloud services, leveraging the power of online storage and collaboration tools. OneDrive, Microsoft’s cloud storage platform, provides users with a centralized location to access their files from any device. Microsoft Teams, a popular communication and collaboration platform, is deeply integrated into Windows 11, enabling users to easily connect with colleagues and collaborate on projects.

Beyond the Fundamentals: Exploring the Depth of Windows 11

The innovations in Windows 11 extend beyond the core features mentioned above. The operating system boasts several other notable enhancements, including:

  • Improved Performance: Windows 11 leverages advancements in hardware and software to deliver improved performance, resulting in faster boot times, smoother application launches, and a more responsive user experience.
  • Enhanced Accessibility: Windows 11 incorporates features designed to improve accessibility for users with disabilities. These include text-to-speech options, high contrast themes, and customizable keyboard shortcuts.
  • Windows Subsystem for Android: This groundbreaking feature allows users to run Android applications directly on their Windows 11 devices, opening up a vast library of mobile apps to the Windows ecosystem.

Frequently Asked Questions about Windows 11:

Q: Is Windows 11 compatible with my current PC?

A: Windows 11 has specific hardware requirements. To check compatibility, visit Microsoft’s official website and use the PC Health Check tool.

Q: Will Windows 11 affect the performance of my PC?

A: Windows 11 is designed to optimize performance, but older PCs might experience slight performance differences compared to newer systems.

Q: What are the key benefits of upgrading to Windows 11?

A: Windows 11 offers a modern user interface, enhanced multitasking features, improved security and privacy, gaming enhancements, and seamless cloud integration.

Q: Is Windows 11 free to upgrade?

A: If your existing Windows 10 device meets the minimum requirements, you can upgrade to Windows 11 for free.

Tips for Optimizing Windows 11:

  • Regularly update your system: Keep your Windows 11 installation up-to-date with the latest security patches and feature updates.
  • Customize your settings: Explore the settings menu to personalize your experience and adjust features according to your preferences.
  • Use cloud storage: Leverage OneDrive to store and access files from any device, freeing up local storage space.
  • Optimize your PC’s performance: Utilize tools like Disk Cleanup and Task Manager to manage system resources and improve performance.

Conclusion: A Continuous Journey of Innovation

Windows 11 represents a significant evolution in the Windows operating system, offering a modern, efficient, and secure platform for users of all types. With its focus on user experience, productivity, and security, Windows 11 empowers individuals and businesses to accomplish more. As Microsoft continues to refine and enhance Windows 11, users can expect a future filled with even more innovative features and functionalities, solidifying its position as the leading operating system for the modern digital world.

Unveiling Innovations and Capabilities of Windows 11  by Joel Espirito Santo  Dec, 2023  Medium Windows 11: Best features and new innovations - win10licensekey Windows 11: Unveiling The Exciting New Features
Microsoft Build 2023: Unveiling AI Innovations in Windows 11, Microsoft 365, and More Windows 11 - A Comprehensive Review Of Features And Innovations  ByteVarsity What the New Windows 11 Operating System Means for Businesses
Windows 11 The Operating System Which We Need - Riset Mastering Windows 11 Unveiling 20 Features, Tips & Tricks - IKMZIKI.COM

Closure

Thus, we hope this article has provided valuable insights into Unveiling the Innovations of Windows 11: A Comprehensive Exploration. We hope you find this article informative and beneficial. See you in our next article!

Navigating The Landscape Of Windows 10 Licensing: A Comprehensive Guide

Navigating the Landscape of Windows 10 Licensing: A Comprehensive Guide

Introduction

In this auspicious occasion, we are delighted to delve into the intriguing topic related to Navigating the Landscape of Windows 10 Licensing: A Comprehensive Guide. Let’s weave interesting information and offer fresh perspectives to the readers.

Windows 10 Licensing Guide And Upgrade Paths - www.vrogue.co

The Windows operating system, a cornerstone of modern computing, necessitates a valid license for legal and optimal functionality. This guide delves into the nuances of obtaining a Windows 10 license, providing a comprehensive understanding of the various options available, their implications, and the benefits of a legitimate license.

Understanding the Need for a Windows 10 License

A Windows 10 license is not merely a formality; it serves as a legal agreement between the user and Microsoft, granting permission to use the operating system. It unlocks a range of benefits, including:

  • Legality: Using Windows 10 without a valid license constitutes copyright infringement, potentially leading to legal repercussions.
  • Security: A licensed copy of Windows 10 receives regular updates and security patches, safeguarding the system from vulnerabilities and malicious threats.
  • Functionality: Full access to all features and functionalities of Windows 10, including updates, is only granted with a valid license.
  • Support: Users with licensed copies of Windows 10 can access Microsoft’s technical support, ensuring prompt assistance in resolving any issues.

Exploring the Avenues of Obtaining a Windows 10 License

The path to obtaining a Windows 10 license presents various options, each catering to specific needs and preferences:

1. Purchasing a New Device with Windows 10 Pre-installed:

This is the most common and often the simplest route. Many new computers and laptops come pre-installed with Windows 10, accompanied by a digital license tied to the device’s hardware. This license is typically included in the overall price of the device.

2. Purchasing a Standalone Windows 10 License:

Standalone licenses are available for purchase online or from authorized retailers. These licenses can be used to install Windows 10 on a new or existing device. They come in two main forms:

  • Full Version: This grants the right to install Windows 10 on a single device.
  • Upgrade Version: This requires an existing version of Windows (Windows 7 or 8.1) to be installed on the device and allows upgrading to Windows 10.

3. Obtaining a Windows 10 License Through a Microsoft Account:

Microsoft offers a digital license tied to a user’s Microsoft account. This can be acquired through various means, including:

  • Purchasing a digital license from the Microsoft Store: This allows users to download and install Windows 10 on their device.
  • Upgrading from a previous version of Windows using a Microsoft account: Users with eligible Windows versions can upgrade to Windows 10 through their Microsoft account.

4. Utilizing a Volume License Agreement:

Large organizations often utilize Volume License Agreements (VLAs) from Microsoft. These agreements provide discounted pricing for multiple licenses, tailored to specific business needs.

5. Utilizing an OEM License:

Original Equipment Manufacturers (OEMs) like Dell, HP, and Lenovo often bundle Windows 10 licenses with their devices. These licenses are typically tied to the specific device and cannot be transferred.

Navigating the Licensing Landscape: Key Considerations

Choosing the right Windows 10 license involves understanding various factors:

  • Device Compatibility: Ensure that the chosen license is compatible with the device’s hardware specifications.
  • Type of License: Determine whether a full version or an upgrade version is required based on the existing operating system.
  • Digital vs. Physical License: Digital licenses are stored online, while physical licenses come with a product key.
  • Pricing: Compare prices from different vendors and consider discounts or promotions.
  • Future Upgrades: Consider the need for future upgrades to newer versions of Windows.

Frequently Asked Questions (FAQs) Regarding Windows 10 Licensing

1. What is the difference between a full version and an upgrade version of Windows 10?

  • Full Version: This grants the right to install Windows 10 on a new device without requiring a previous version of Windows.
  • Upgrade Version: This requires an existing version of Windows (Windows 7 or 8.1) to be installed on the device and allows upgrading to Windows 10.

2. Can I transfer my Windows 10 license to a new device?

  • It depends on the type of license. Digital licenses tied to a Microsoft account can typically be transferred to a new device. However, licenses tied to specific hardware, like OEM licenses, cannot be transferred.

3. Is it legal to use Windows 10 without a license?

  • No, using Windows 10 without a valid license is illegal and constitutes copyright infringement.

4. What happens if I don’t activate my Windows 10 license?

  • Unactivated Windows 10 will have limited functionality. You may not receive updates, security patches, or access all features.

5. What are the benefits of using a legitimate Windows 10 license?

  • Legality, security, full functionality, and access to Microsoft support.

6. How can I activate my Windows 10 license?

  • Activation is typically automatic during the installation process. If not, you can activate manually using the provided product key.

7. How do I know if my Windows 10 license is genuine?

  • Check the "About" section in the Windows settings. A genuine license should be indicated there.

8. What are the options if I lose my Windows 10 product key?

  • If the license is tied to your Microsoft account, you can usually retrieve it from your account settings. If it is a physical license, you may need to contact Microsoft support for assistance.

Tips for Ensuring a Secure and Legitimate Windows 10 License

  • Purchase from authorized retailers: Avoid purchasing licenses from untrusted sources.
  • Verify product keys: Ensure that the product key provided is valid and not already in use.
  • Keep licenses tied to your Microsoft account: This facilitates easier management and transferability.
  • Regularly update Windows 10: This ensures security and optimal performance.
  • Back up your license key: In case of hardware failure, having a backup of your license key can save you from potential issues.

Conclusion

Obtaining a legitimate Windows 10 license is crucial for legal compliance, system security, and full functionality. Understanding the various licensing options available and their implications empowers users to make informed decisions. By following the tips outlined in this guide, individuals and organizations can ensure a secure and licensed Windows 10 experience, maximizing the benefits of this powerful operating system.

Windows 10 licensing guide and upgrade paths spiceworks Windows 10 Licensing Guide And Upgrade Paths - www.vrogue.co Windows 10 Licensing Guide And Upgrade Paths - www.vrogue.co
MS Windows 10 licensing guide  PPT A Helpful Flowchart and Explanation of Windows 10 Licensing - Kraft Kennedy Windows 10 Licensing Guide And Upgrade Paths - www.vrogue.co
PPT - Navigating the Windows 10 Experience: A Comprehensive Guide to Licenses and Upgr Windows 10 Licensing Guide And Upgrade Paths - www.vrogue.co

Closure

Thus, we hope this article has provided valuable insights into Navigating the Landscape of Windows 10 Licensing: A Comprehensive Guide. We appreciate your attention to our article. See you in our next article!

A Comprehensive Guide To QBittorrent On 32-bit Windows 10

A Comprehensive Guide to qBittorrent on 32-bit Windows 10

Introduction

With great pleasure, we will explore the intriguing topic related to A Comprehensive Guide to qBittorrent on 32-bit Windows 10. Let’s weave interesting information and offer fresh perspectives to the readers.

A Comprehensive Guide to qBittorrent on 32-bit Windows 10

qBittorrent (32-bit) Download (2024 Latest)

qBittorrent, a free and open-source BitTorrent client, has gained significant popularity for its user-friendly interface, robust feature set, and commitment to privacy. While it is compatible with both 32-bit and 64-bit operating systems, this guide focuses on the specific nuances of utilizing qBittorrent on 32-bit Windows 10.

Understanding qBittorrent’s Advantages

qBittorrent offers a compelling alternative to other torrent clients, particularly on older systems with limited resources. Its lightweight design and efficient resource utilization make it an ideal choice for 32-bit Windows 10 machines, ensuring smooth operation without overwhelming the system.

Key Features of qBittorrent:

  • User-Friendly Interface: qBittorrent’s intuitive interface is designed for ease of use, even for novice users. Its straightforward layout allows for effortless navigation and management of torrents.
  • Cross-Platform Compatibility: qBittorrent is available for various operating systems, including Windows, macOS, Linux, and FreeBSD, offering seamless integration across different environments.
  • Open-Source and Privacy-Focused: qBittorrent’s open-source nature fosters transparency and security. Its commitment to privacy ensures user data is not collected or shared with third parties.
  • Comprehensive Torrent Management: qBittorrent provides a wide range of features for managing torrents, including scheduling, speed limits, and torrent prioritization, allowing for optimal download control.
  • Built-in Search Engine: qBittorrent includes a built-in search engine, eliminating the need for external search tools, simplifying the torrent discovery process.
  • Advanced Features: qBittorrent offers advanced features like RSS feeds, remote control, and UPnP/NAT-PMP port forwarding, enhancing functionality and convenience.

Downloading and Installing qBittorrent on 32-bit Windows 10

  1. Download the Installer: Visit the official qBittorrent website (https://www.qbittorrent.org/) and navigate to the download section. Select the 32-bit installer for Windows.
  2. Run the Installer: Double-click the downloaded installer file to initiate the installation process. Follow the on-screen instructions, choosing your preferred installation location and settings.
  3. Launch qBittorrent: Once the installation is complete, locate the qBittorrent icon on your desktop or in the Start menu and launch the application.

Configuring qBittorrent for Optimal Performance

  • Download Location: Choose a suitable download location with ample storage space and ensure it is accessible to qBittorrent.
  • Connection Settings: Configure the maximum upload and download speeds to balance your internet connection and prioritize other activities.
  • Advanced Settings: Explore the advanced settings menu to fine-tune qBittorrent’s behavior, such as enabling or disabling specific features, adjusting connection limits, and customizing the interface.

FAQs

  • Q: Is qBittorrent safe to use?
    • A: Yes, qBittorrent is a safe and secure torrent client. Its open-source nature allows for community scrutiny and ensures transparency. It does not collect or share user data with third parties.
  • Q: Can I use qBittorrent on a 32-bit Windows 10 machine?
    • A: Yes, qBittorrent is fully compatible with 32-bit Windows 10. Its lightweight design ensures smooth operation on systems with limited resources.
  • Q: What are the system requirements for qBittorrent?
    • A: qBittorrent has minimal system requirements. A 32-bit Windows 10 operating system, a modern web browser, and a stable internet connection are sufficient.
  • Q: How do I add torrents to qBittorrent?
    • A: You can add torrents to qBittorrent by either dragging and dropping the torrent file onto the application window or using the "Add Torrent" option in the file menu.
  • Q: How do I manage downloads in qBittorrent?
    • A: qBittorrent offers various tools for managing downloads. You can pause, resume, prioritize, and remove torrents, as well as adjust download and upload speeds.

Tips for Optimizing qBittorrent Performance

  • Use a VPN: Employing a VPN can enhance privacy and security while using qBittorrent, particularly for downloading copyrighted content.
  • Enable UPnP/NAT-PMP: Enabling these features can simplify port forwarding, improving connection speeds and torrent performance.
  • Minimize Background Processes: Close unnecessary applications and processes to free up system resources, improving qBittorrent’s efficiency.
  • Keep qBittorrent Updated: Regularly updating qBittorrent ensures you have the latest features and security patches, enhancing performance and stability.

Conclusion

qBittorrent provides a reliable and user-friendly torrent client solution for 32-bit Windows 10 users. Its lightweight design, comprehensive feature set, and commitment to privacy make it an excellent choice for managing torrent downloads on older systems. By understanding the key features, configuration options, and best practices, users can optimize qBittorrent’s performance and enjoy a seamless torrenting experience.

๋‹ค์šด๋กœ๋“œ qBittorrent Windows 10 (32/64 bit) ํ•œ๊ตญ์–ด qBittorrent (32-bit) Download (2024 Latest) How To Install qBittorrent in Windows 10 - YouTube
qBittorrent Free Download for Windows 10, 11, 7 (32 / 64-bit) Qbittorrent windows - acakit Qbittorrent for windows 10 - ersap
Download qBittorrent 32-bit 4.1.5 for Windows - Filehippo.com [Guide] Torrent Setup with OpenVPN + Qbittorrent on Windows 10 : r/FastestVPN

Closure

Thus, we hope this article has provided valuable insights into A Comprehensive Guide to qBittorrent on 32-bit Windows 10. We hope you find this article informative and beneficial. See you in our next article!

The Missing Link: Troubleshooting Bluetooth Driver Issues On Windows 10

The Missing Link: Troubleshooting Bluetooth Driver Issues on Windows 10

Introduction

With enthusiasm, let’s navigate through the intriguing topic related to The Missing Link: Troubleshooting Bluetooth Driver Issues on Windows 10. Let’s weave interesting information and offer fresh perspectives to the readers.

The Missing Link: Troubleshooting Bluetooth Driver Issues on Windows 10

Fix: Generic Bluetooth Driver Missing Error in Windows 10

Bluetooth technology has become an integral part of modern computing, enabling seamless wireless communication between devices. From connecting headphones and speakers to transferring files and controlling peripherals, Bluetooth plays a crucial role in enhancing user experience. However, encountering a missing or malfunctioning Bluetooth driver on Windows 10 can significantly hinder these functionalities, leaving users frustrated and disconnected.

This article aims to provide a comprehensive understanding of the causes, symptoms, and troubleshooting methods for Bluetooth driver issues on Windows 10. We will explore various approaches, ranging from simple driver updates to advanced hardware checks, to help users regain control of their Bluetooth connectivity.

Understanding the Importance of Bluetooth Drivers

Drivers act as the bridge between your operating system and hardware components. In the context of Bluetooth, the driver is responsible for interpreting commands from Windows 10 and translating them into instructions that the Bluetooth hardware can understand. Conversely, it also translates data received from the Bluetooth hardware into a format that Windows 10 can interpret.

A missing or outdated Bluetooth driver can lead to a range of issues, including:

  • Inability to detect Bluetooth devices: The system may fail to recognize any Bluetooth devices within range.
  • Intermittent connectivity: Devices may connect sporadically, experiencing frequent disconnections.
  • Slow data transfer speeds: File transfers may take significantly longer than expected.
  • Audio glitches: Bluetooth headphones or speakers may produce distorted sound or experience dropouts.
  • General instability: The Bluetooth functionality may become erratic, causing unexpected behavior.

Identifying the Root Cause

Before diving into troubleshooting steps, it’s essential to pinpoint the underlying cause of the Bluetooth driver issue. Here are some common scenarios:

  • Outdated or corrupted driver: Drivers can become outdated or corrupted due to software updates, hardware changes, or system instability.
  • Hardware malfunction: The Bluetooth hardware itself might be faulty, preventing proper communication with the operating system.
  • Conflicting software: Other programs or services might interfere with the Bluetooth driver’s operation.
  • Windows update issues: Recent Windows updates can sometimes introduce bugs or incompatibilities that affect Bluetooth functionality.

Troubleshooting Steps: A Comprehensive Guide

Now, let’s delve into the practical steps you can take to address Bluetooth driver issues on Windows 10:

1. Update the Bluetooth Driver:

  • Using Device Manager:
    • Open the Device Manager (right-click the Start button and select "Device Manager").
    • Expand the "Bluetooth" category.
    • Right-click on the Bluetooth device and select "Update driver."
    • Choose "Search automatically for updated driver software."
  • Manufacturer’s Website:
    • Visit the website of your computer manufacturer or the Bluetooth adapter manufacturer.
    • Download the latest driver specifically designed for your hardware and Windows 10 version.
    • Install the downloaded driver following the provided instructions.

2. Reinstall the Bluetooth Driver:

  • Using Device Manager:
    • Open the Device Manager.
    • Expand the "Bluetooth" category.
    • Right-click on the Bluetooth device and select "Uninstall device."
    • Restart your computer.
    • Windows will automatically attempt to reinstall the driver.
  • Manually Reinstalling:
    • Download the latest driver from the manufacturer’s website.
    • Locate the downloaded driver file.
    • Right-click on the file and select "Install."

3. Check for Hardware Issues:

  • Inspect the Bluetooth hardware: Ensure the Bluetooth adapter is properly connected to your computer.
  • Test the Bluetooth device: Try connecting a different Bluetooth device to rule out any problems with the device itself.
  • Run a hardware diagnostics test: If you suspect a hardware malfunction, run a diagnostics test for your Bluetooth adapter. You can often find these tests on the manufacturer’s website or through the Windows 10 settings.

4. Resolve Software Conflicts:

  • Disable conflicting software: Temporarily disable any recently installed programs or services that might interfere with Bluetooth functionality.
  • Check for driver conflicts: Use the Device Manager to identify any driver conflicts that might be affecting the Bluetooth driver.
  • Run a clean boot: Perform a clean boot to start Windows 10 with a minimal set of drivers and programs, helping isolate any software conflicts.

5. Update Windows 10:

  • Check for updates: Go to "Settings" > "Update & Security" > "Windows Update" and check for available updates.
  • Install the latest updates: Download and install any pending updates to ensure you have the latest bug fixes and driver improvements.

6. Reset the Bluetooth Adapter:

  • Open the Command Prompt: Press the Windows key + R, type "cmd," and press Enter.
  • Run the following command: netsh winsock reset
  • Restart your computer: This command resets the Windows Sockets (Winsock) settings, which can sometimes resolve Bluetooth issues.

7. Perform a System Restore:

  • Open System Restore: Search for "System Restore" in the Windows search bar.
  • Choose a restore point: Select a restore point from before the Bluetooth issues began.
  • Follow the on-screen instructions: Complete the system restore process. This will revert your system to an earlier state, potentially resolving the driver issue.

8. Contact Support:

  • Manufacturer’s Support: If you’ve exhausted all other options, contact the manufacturer of your computer or Bluetooth adapter for further assistance.
  • Microsoft Support: Reach out to Microsoft Support for troubleshooting guidance specific to Windows 10.

FAQs: Addressing Common Questions

Q: What if the Bluetooth driver is not listed in Device Manager?

A: If the Bluetooth driver is missing from Device Manager, it might indicate a more severe hardware issue or a driver installation problem. You can try reinstalling the driver manually, checking the BIOS settings for Bluetooth enablement, or contacting the manufacturer for support.

Q: How can I determine if the Bluetooth adapter is faulty?

A: To determine if the Bluetooth adapter is faulty, try connecting a different Bluetooth device, check for physical damage to the adapter, run a hardware diagnostics test, or consult with a technician for a hardware inspection.

Q: What are the best practices for maintaining Bluetooth driver stability?

A: To maintain Bluetooth driver stability, keep your drivers updated, avoid installing unnecessary software, ensure your system is free of malware, and regularly perform system maintenance tasks.

Tips for Preventing Future Issues

  • Keep drivers updated: Regularly check for driver updates from the manufacturer’s website or through Windows Update.
  • Use reputable software: Download drivers and software only from trusted sources to avoid installing malware or corrupted files.
  • Monitor system stability: Pay attention to any system instability or errors that might indicate driver issues.
  • Back up your system: Regularly create system restore points or backups to ensure you can revert to a previous state in case of driver problems.

Conclusion

Bluetooth driver issues can be frustrating, but by understanding the underlying causes and implementing the troubleshooting steps outlined in this article, you can effectively resolve these problems and restore your Bluetooth connectivity. Remember to follow a systematic approach, starting with simple solutions and progressively moving towards more advanced techniques.

By taking proactive measures like keeping your drivers updated and monitoring system stability, you can minimize the likelihood of encountering Bluetooth driver issues in the future. Should you encounter persistent problems, seeking professional assistance from the manufacturer or Microsoft support is recommended.

How to Fix Bluetooth Missing from Device Manager in Windows 10 Fix Bluetooth Missing From Windows 10 - ON OFF Button Not Showing? - YouTube Fix Windows 10 Bluetooth Missing Issue. Quickly & Easily! - Driver Easy
How To Fix Missing Generic Bluetooth Driver Error On Windows 10 Windows 10 Bluetooth Missing? Here are the Easy Fixes Bluetooth missing from device manager windows 10 - YouTube
Fix Windows 10 Bluetooth Missing Issue. Quickly & Easily! - Driver Easy How to Turn on/off Bluetooth, Fix Bluetooth missing Windows 10 - WindowsClassroom

Closure

Thus, we hope this article has provided valuable insights into The Missing Link: Troubleshooting Bluetooth Driver Issues on Windows 10. We hope you find this article informative and beneficial. See you in our next article!

Bridging The Gap: Exploring The Android Ecosystem On Windows 11

Bridging the Gap: Exploring the Android Ecosystem on Windows 11

Introduction

With enthusiasm, let’s navigate through the intriguing topic related to Bridging the Gap: Exploring the Android Ecosystem on Windows 11. Let’s weave interesting information and offer fresh perspectives to the readers.

Bridging the Gap: Exploring the Android Ecosystem on Windows 11

Windows 11 + Android  Everything to Know about the New Microsoft Ecosystem - YouTube

The landscape of computing is constantly evolving, and with it, the need for seamless integration across platforms. Windows 11, the latest iteration of Microsoft’s operating system, seeks to bridge the gap between its traditional desktop environment and the vast world of Android applications. This is achieved through a novel feature: the ability to run Android apps directly on Windows 11 devices. This functionality, while not a direct "Play Store" integration in the traditional sense, opens up a world of possibilities for Windows users, allowing them to access a vast library of mobile applications within their familiar desktop environment.

Understanding the Mechanism

The key to running Android apps on Windows 11 lies in the integration of the Android subsystem. This subsystem, powered by the Amazon Appstore, provides a virtualized environment where Android apps can run without needing a separate Android device. This integration allows users to download and install Android apps directly from the Amazon Appstore, which is accessible through the Microsoft Store.

Benefits and Opportunities

The ability to run Android apps on Windows 11 presents a multitude of benefits for users:

  • Expanded App Ecosystem: Windows users gain access to a vast library of Android apps, including popular social media platforms, productivity tools, gaming applications, and more. This significantly expands the functionality and versatility of the Windows 11 platform.
  • Cross-Platform Compatibility: Users can seamlessly access the same apps and services across their Android devices and Windows 11 computers, enhancing productivity and convenience.
  • Mobile-First Experience: Many Android apps are designed for touchscreens and mobile environments, offering a unique and intuitive experience on Windows 11 devices.
  • Enhanced Productivity: Android apps can complement existing Windows applications, offering specialized tools and functionalities that may not be readily available on the desktop.
  • Gaming on the Go: Android gaming apps, known for their accessibility and casual nature, can be enjoyed on a larger screen with improved visuals and control.

Considerations and Limitations

While the integration of Android apps on Windows 11 offers significant advantages, it is crucial to acknowledge certain limitations and considerations:

  • Limited App Availability: Not all Android apps are available through the Amazon Appstore, and the selection may vary compared to the Google Play Store.
  • Performance Variations: The performance of Android apps on Windows 11 can vary depending on the app’s complexity and the user’s hardware specifications.
  • Compatibility Issues: Some Android apps may not be fully compatible with the Windows 11 environment, leading to unexpected behavior or crashes.
  • Security Concerns: As with any software, it is crucial to download apps from trusted sources and maintain a secure system to mitigate potential security risks.

FAQs

Q: How do I install Android apps on Windows 11?

A: You can install Android apps on Windows 11 through the Amazon Appstore, which is accessible via the Microsoft Store. Once installed, you can browse and download apps from the Amazon Appstore just like you would with other Windows applications.

Q: Do I need a separate Android device to use Android apps on Windows 11?

A: No, you do not need a separate Android device. The Android subsystem on Windows 11 provides a virtualized environment that allows Android apps to run directly on your Windows 11 computer.

Q: Are all Android apps available through the Amazon Appstore?

A: Not all Android apps are available through the Amazon Appstore. The selection may vary compared to the Google Play Store.

Q: Can I sideload Android apps on Windows 11?

A: While sideloading Android apps is possible, it is not recommended due to potential security risks. It is advisable to use the Amazon Appstore for a more secure and reliable app installation experience.

Q: What are the minimum system requirements for running Android apps on Windows 11?

A: To run Android apps on Windows 11, your device must meet the minimum system requirements for Windows 11 and have an Intel or AMD processor.

Tips

  • Check for Compatibility: Before installing an Android app, check its compatibility with Windows 11. This can be done by reading the app description in the Amazon Appstore.
  • Update Your System: Ensure that your Windows 11 system is up-to-date with the latest updates and drivers to ensure optimal performance and compatibility.
  • Use Trusted Sources: Download Android apps only from reputable sources like the Amazon Appstore to minimize security risks.
  • Monitor App Performance: Keep an eye on the performance of Android apps on your Windows 11 device. If you encounter any issues, consider troubleshooting or contacting the app developer for support.

Conclusion

The integration of Android apps on Windows 11 represents a significant step towards a more unified and versatile computing experience. By offering access to a vast library of mobile applications, Windows 11 enhances its functionality and provides users with greater flexibility and choice. While there are limitations and considerations to keep in mind, the ability to run Android apps on Windows 11 opens up a world of possibilities for users, expanding the capabilities of their devices and bridging the gap between mobile and desktop computing. As this feature continues to evolve, we can expect to see further improvements and enhancements, solidifying its role in shaping the future of Windows 11.

PPT - Towards a Trustworthy Android Ecosystem PowerPoint Presentation, free download - ID:6641422 Android apps on Windows: Creating an ecosystem without borders  Computerworld An Overview of The Android Ecosystem
The Ultimate Android & Windows Ecosystem is Here  Any android phone - YouTube Google wants to fix the Android ecosystem, and that includes working with Windows - SoyaCincau Make best Ecosystem For Android & Windows  Apple like Ecosystem in Android & Windows 2022 - YouTube
Android Windows Ecosystem �� - YouTube Using Android in the Microsoft ecosystem  Windows Central

Closure

Thus, we hope this article has provided valuable insights into Bridging the Gap: Exploring the Android Ecosystem on Windows 11. We appreciate your attention to our article. See you in our next article!

Navigating Windows 11 With Ease: The Power Of Taskbar Customization

Navigating Windows 11 with Ease: The Power of Taskbar Customization

Introduction

With enthusiasm, let’s navigate through the intriguing topic related to Navigating Windows 11 with Ease: The Power of Taskbar Customization. Let’s weave interesting information and offer fresh perspectives to the readers.

Taskbar Customization Windows 11

The Windows taskbar, a familiar element in every version of the operating system, has evolved significantly in Windows 11. It serves as a central hub for accessing frequently used applications, managing open windows, and interacting with system functions. Within this dynamic environment, the ability to pin applications to the taskbar stands out as a powerful tool for enhancing productivity and simplifying user experience.

Understanding the Importance of Taskbar Pinning

Pinning applications to the taskbar in Windows 11 offers a multitude of benefits, transforming the way users interact with their system. By strategically organizing frequently accessed programs, users can streamline their workflow and navigate the operating system with greater efficiency.

Key Advantages of Pinning Applications:

  • Rapid Access: Pinned applications appear directly on the taskbar, providing immediate access with a single click. This eliminates the need to search through menus or the Start menu, saving valuable time and effort.
  • Enhanced Workflow: By grouping related applications on the taskbar, users can seamlessly switch between tasks without navigating multiple windows. This fosters a more focused and efficient work environment.
  • Personalized Organization: The ability to customize the taskbar by pinning specific applications allows users to tailor their workspace to individual preferences and workflows.
  • Improved Navigation: Pinning applications provides a visual representation of frequently used programs, offering a clear and intuitive way to navigate the system.

Pinning Applications: A Step-by-Step Guide

The process of pinning applications to the taskbar in Windows 11 is straightforward and intuitive:

  1. Locate the Application: Open the application you wish to pin.
  2. Right-Click the Icon: Right-click the application’s icon in the taskbar.
  3. Select "Pin to taskbar": A context menu will appear. Choose the option "Pin to taskbar."

The application’s icon will now be permanently displayed on the taskbar, ready for quick access.

Unpinning Applications: A Simple Process

To remove an application from the taskbar, follow these steps:

  1. Right-Click the Icon: Right-click the icon of the application you wish to unpin.
  2. Select "Unpin from taskbar": A context menu will appear. Choose the option "Unpin from taskbar."

The application’s icon will be removed from the taskbar.

Beyond Basic Pinning: Additional Customization Options

Windows 11 offers further customization options for the taskbar, allowing users to personalize their workspace beyond simply pinning applications:

  • Taskbar Alignment: Users can choose to position the taskbar at the top, bottom, left, or right of the screen.
  • Taskbar Size: The taskbar can be adjusted in size to fit individual preferences and screen resolutions.
  • Taskbar Icons: Users can customize the appearance of icons on the taskbar by adjusting their size and spacing.

FAQs: Addressing Common Questions

Q: Can I pin folders to the taskbar?
A: No, Windows 11 does not currently allow for pinning folders directly to the taskbar.

Q: Can I pin websites to the taskbar?
A: Yes, you can pin websites to the taskbar using Microsoft Edge. Open the website you wish to pin in Edge, right-click the tab, and select "Pin to taskbar."

Q: Can I rearrange the order of pinned applications on the taskbar?
A: Yes, you can rearrange pinned applications by dragging and dropping their icons to the desired position.

Q: Can I pin multiple instances of the same application to the taskbar?
A: No, you can only pin one instance of an application to the taskbar at a time.

Q: Can I pin applications to the taskbar from the Start menu?
A: Yes, you can pin applications to the taskbar from the Start menu. Right-click the application’s tile, and select "Pin to taskbar."

Tips for Effective Taskbar Management

  • Prioritize Frequently Used Applications: Pin only the applications you use most frequently to avoid clutter on the taskbar.
  • Group Related Applications: Consider grouping related applications together on the taskbar for improved workflow and navigation.
  • Experiment with Different Configurations: Explore different taskbar configurations to find the setup that best suits your individual needs and preferences.
  • Utilize the Taskbar Search: If you’re unsure where an application is located, use the taskbar search to quickly find and launch it.

Conclusion: A Powerful Tool for Productivity

Pinning applications to the taskbar in Windows 11 is a simple yet powerful tool that can significantly enhance user experience and productivity. By strategically organizing frequently used programs, users can streamline their workflow, navigate the operating system with ease, and personalize their workspace to meet individual needs. The flexibility and customization options offered by Windows 11 empower users to take control of their digital environment and work more efficiently.

Taskbar Customization Windows 11 Windows 11 Taskbar Customization Tutorial How To Customize Windows 11 Taskbar Step By Step Guide HTMD Blog
How to customize Windows 11 Taskbar area - YouTube How To Customize Windows 11 Taskbar - YouTube Windows 11 Taskbar Customization Guide โ€” Tech How
Windows 11 Taskbar Customization (Tutorial) - YouTube How to Customize Windows 11 Taskbar?  Edit taskbar in Windows 11

Closure

Thus, we hope this article has provided valuable insights into Navigating Windows 11 with Ease: The Power of Taskbar Customization. We thank you for taking the time to read this article. See you in our next article!