Troubleshooting Audio Issues With HDMI On Windows 11: A Comprehensive Guide

Troubleshooting Audio Issues with HDMI on Windows 11: A Comprehensive Guide

Introduction

In this auspicious occasion, we are delighted to delve into the intriguing topic related to Troubleshooting Audio Issues with HDMI on Windows 11: A Comprehensive Guide. Let’s weave interesting information and offer fresh perspectives to the readers.

Troubleshooting Audio Issues with HDMI on Windows 11: A Comprehensive Guide

11 Easy Ways to Fix HDMI Audio Not Working in Windows 11 - Guiding Tech

The inability to hear audio through an HDMI connection on a Windows 11 system can be a frustrating experience, hindering the enjoyment of multimedia content and disrupting productivity. This issue can stem from a variety of factors, ranging from simple configuration errors to more complex hardware malfunctions. This comprehensive guide aims to equip users with the knowledge and tools to effectively diagnose and resolve this common audio problem.

Understanding the Issue

Before delving into troubleshooting steps, it is crucial to understand the underlying causes of HDMI audio failure on Windows 11. Here are some common culprits:

  • Incorrect Audio Output Device Selection: Windows may be configured to output sound to a different device, such as built-in speakers or a Bluetooth headset, instead of the HDMI connection.
  • Outdated or Incompatible Drivers: Outdated or incompatible audio drivers can lead to audio problems with HDMI, particularly if the driver is not specifically designed for the connected display device.
  • HDMI Cable Issues: A faulty or damaged HDMI cable can prevent audio transmission, even if the connection appears to be established.
  • Device Compatibility: Some displays may not support audio transmission over HDMI, while others might require specific settings adjustments to enable sound output.
  • System-Level Audio Configuration Errors: Windows system settings, such as the volume mixer or audio settings, can inadvertently mute or disable HDMI audio output.
  • Hardware Malfunctions: In rare cases, a faulty motherboard audio chip, graphics card, or HDMI port can lead to audio issues.

Troubleshooting Steps

Addressing the lack of HDMI audio in Windows 11 requires a systematic approach, starting with the simplest solutions and progressing to more complex methods. Here is a detailed breakdown of troubleshooting steps:

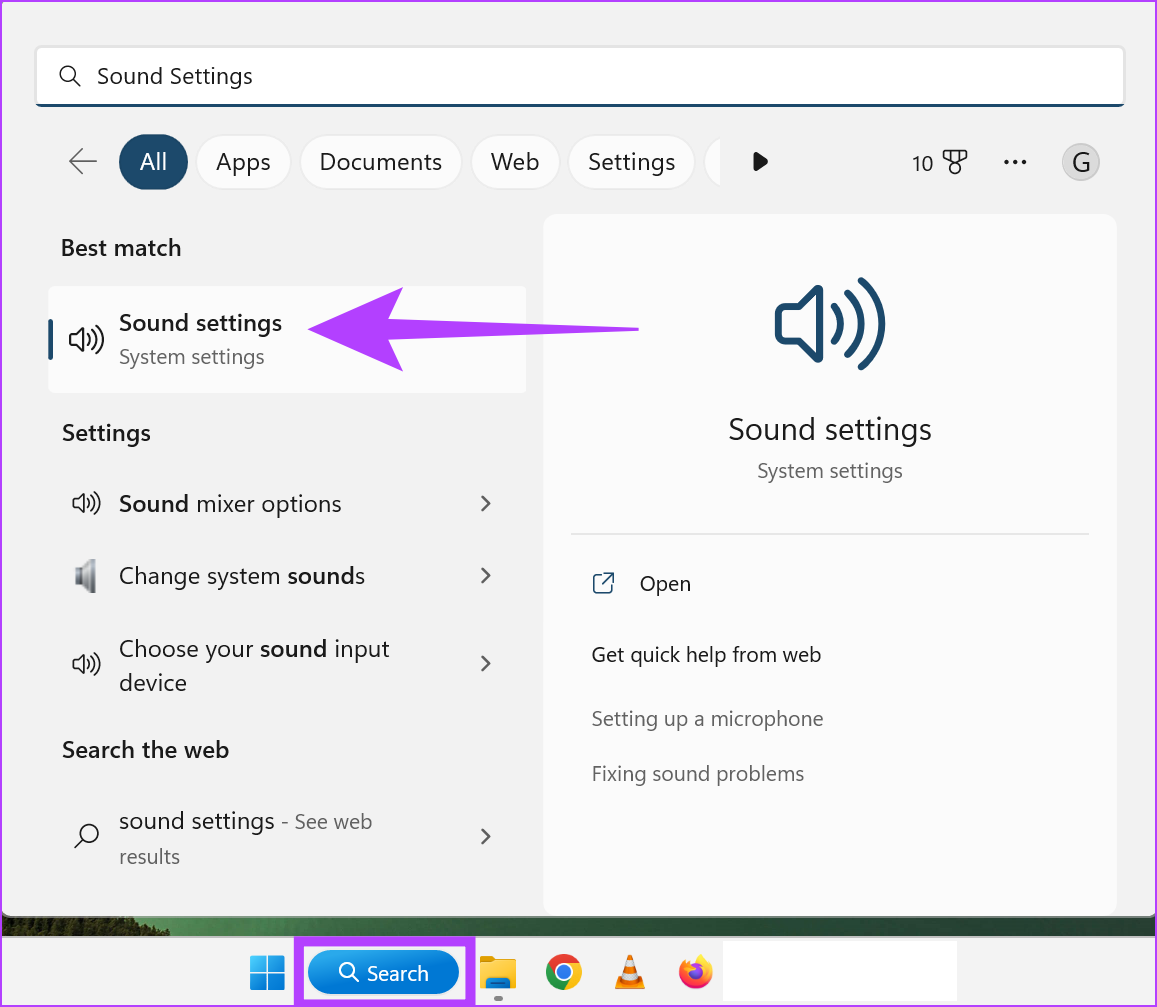
1. Verify Audio Output Device Selection:

  • Open Sound Settings: Access the sound settings by searching for "Sound" in the Windows search bar or navigating to "Settings" > "System" > "Sound."
  • Check Output Device: In the "Sound" settings, locate the "Choose your output device" section and ensure that the HDMI audio output device is selected. If it is not listed, try restarting your computer or disconnecting and reconnecting the HDMI cable.
  • Test Audio: Play a sound or video to confirm that audio is now outputting through the HDMI connection.

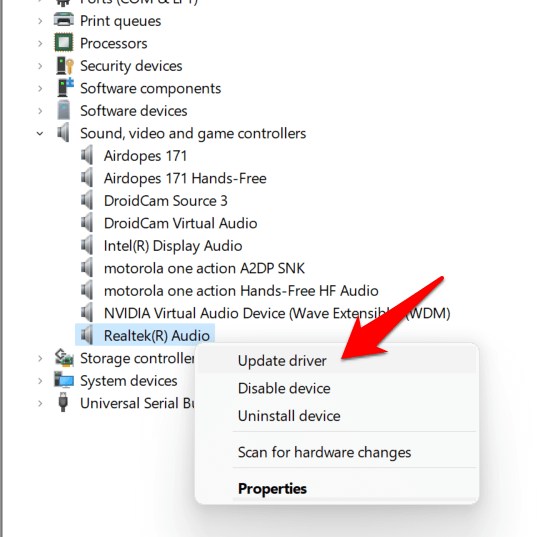
2. Update Audio Drivers:

  • Device Manager: Open "Device Manager" by searching for it in the Windows search bar.
  • Locate Audio Drivers: Expand the "Sound, video and game controllers" category.
  • Update Driver: Right-click on the audio device and select "Update driver." Choose the option to search automatically for updated drivers.
  • Install Driver: If a driver update is available, follow the on-screen instructions to install it.
  • Restart Computer: After installing the updated driver, restart your computer to ensure the changes take effect.

3. Check HDMI Cable:

  • Inspect Cable: Visually inspect the HDMI cable for any signs of damage, such as bent pins, frayed wires, or cracks.
  • Try a Different Cable: If the cable appears damaged or you suspect it is faulty, try using a different HDMI cable known to work with other devices.
  • Connect Directly: If possible, connect the display device directly to the computer, bypassing any intermediary devices or adapters.

4. Configure Display Settings:

  • Display Settings: Open "Display Settings" by searching for it in the Windows search bar or navigating to "Settings" > "System" > "Display."
  • Check Audio Output: Look for any audio-related settings within the display settings, such as "Sound" or "Audio Output." Ensure that the HDMI audio output is enabled and configured correctly.
  • Adjust Display Resolution: Sometimes, changing the display resolution can resolve audio issues. Try adjusting the resolution to a different setting and see if it resolves the problem.

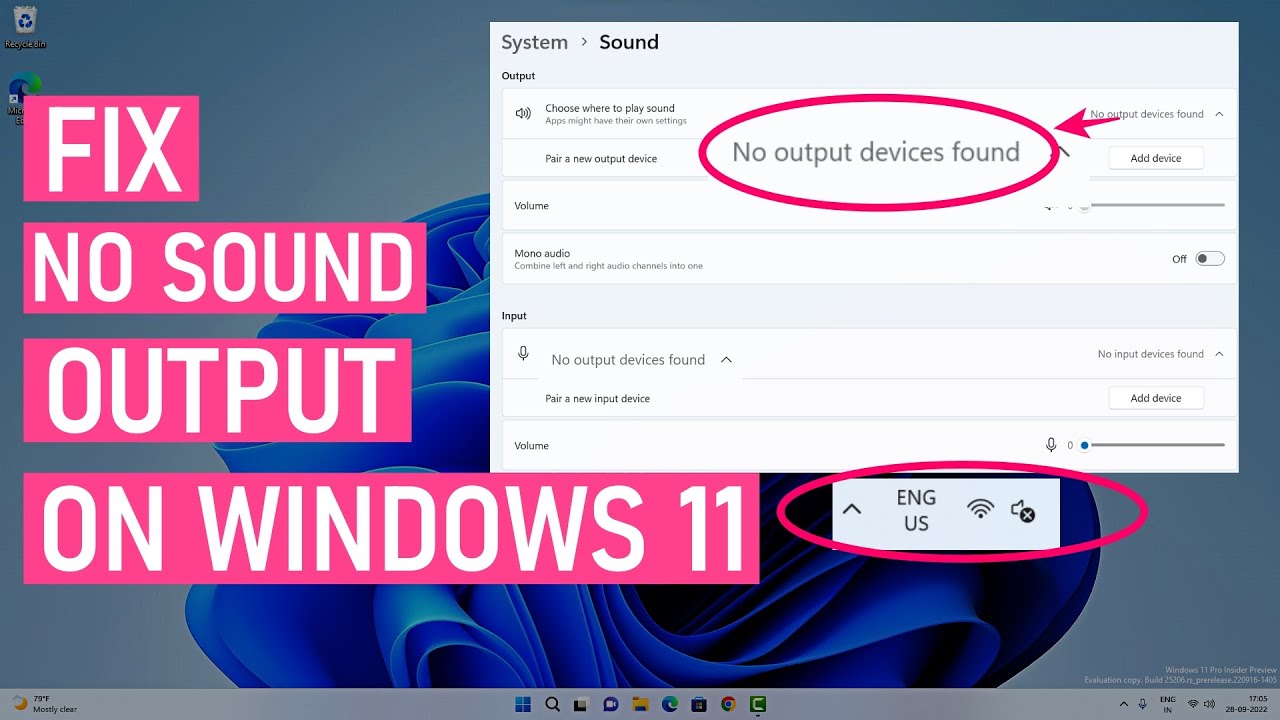
5. Troubleshoot System Audio Settings:

  • Volume Mixer: Open the volume mixer by clicking on the speaker icon in the taskbar. Ensure that the volume slider for the HDMI audio output device is not muted and is set to an appropriate level.
  • Audio Settings: Go to "Sound Settings" and navigate to the "Advanced" tab. Verify that the HDMI output device is selected as the default communication device and that the "Disable all sound effects" option is unchecked.
  • System Sounds: Check the "System sounds" settings in the "Sound Settings" window and ensure that the appropriate sounds are enabled for the HDMI output device.

6. Reset Audio Settings:

  • Reset Audio Devices: Open "Sound Settings" and navigate to the "Advanced" tab. Select "Reset Audio Devices" to restore default settings.
  • Restart Computer: After resetting the audio settings, restart your computer to ensure the changes take effect.

7. Run Audio Troubleshooter:

  • Windows Troubleshooter: Open "Settings" > "System" > "Troubleshoot" and select "Other troubleshooters." Run the "Playing Audio" troubleshooter to automatically diagnose and fix any audio problems.
  • Manufacturer Troubleshooter: Some display manufacturers provide dedicated troubleshooting tools or utilities for their devices. Consult the manufacturer’s website or documentation for specific instructions.

8. Reinstall Audio Drivers:

  • Device Manager: Open "Device Manager" and expand the "Sound, video and game controllers" category.
  • Uninstall Driver: Right-click on the audio device and select "Uninstall device."
  • Restart Computer: After uninstalling the driver, restart your computer.
  • Reinstall Driver: Upon restarting, Windows will automatically reinstall the driver. If not, manually install the driver from the manufacturer’s website or a trusted source.

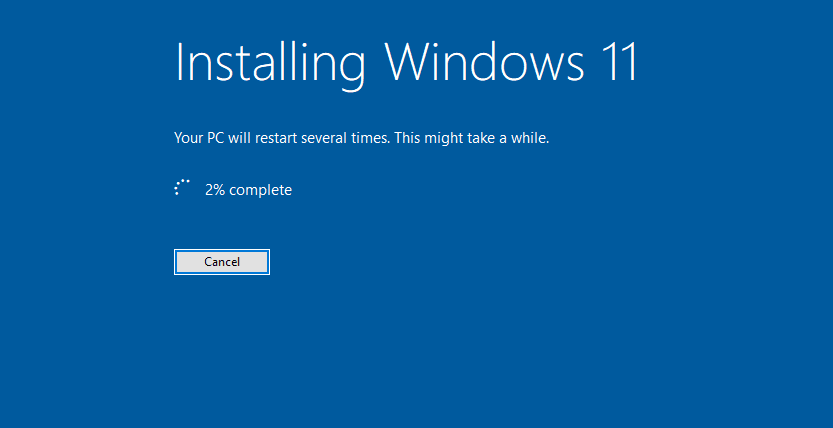
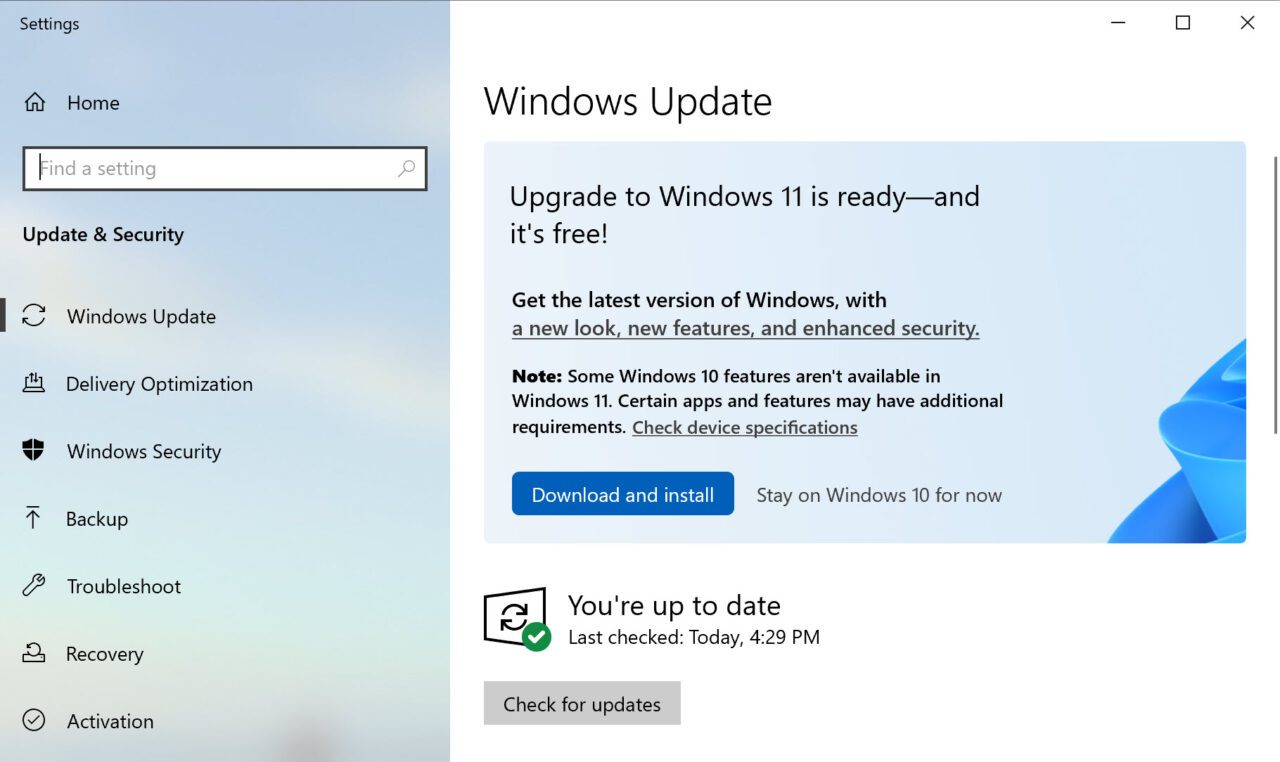
9. Check for Windows Updates:

  • Windows Update: Open "Settings" > "Windows Update" and check for available updates. Install any pending updates, as they may include audio driver updates or system improvements that resolve audio issues.

10. Seek Professional Help:

If none of the above troubleshooting steps resolve the issue, it is likely that there is a hardware malfunction. Contact the computer manufacturer, display manufacturer, or a qualified technician for further assistance.

FAQs

Q: Why is there no sound on my HDMI connection, but the display works fine?

A: This could be due to several factors, including incorrect audio output device selection, outdated or incompatible drivers, or a faulty HDMI cable. Refer to the troubleshooting steps provided above to diagnose and resolve the issue.

Q: My HDMI cable is working for video, but not for audio. What should I do?

A: Try using a different HDMI cable known to work with other devices. If the issue persists, the problem may lie with the display device or the computer’s audio output.

Q: My display does not have audio output capabilities. Can I still get sound through HDMI?

A: Most displays with HDMI ports support audio transmission. However, some older or budget-friendly models may not include built-in speakers or audio output functionality. In such cases, you may need to use an external audio device or connect to a different display that supports audio.

Q: I have tried all the troubleshooting steps, but the problem persists. What can I do?

A: If the issue remains unresolved after attempting all the troubleshooting steps, it is recommended to seek professional help from a qualified technician or contact the computer manufacturer or display manufacturer for support.

Tips

  • Use a High-Quality HDMI Cable: Ensure that the HDMI cable is of good quality and supports audio transmission.
  • Check for Display Settings: Some displays have specific settings for enabling or disabling audio output through HDMI. Consult the display’s user manual for instructions.
  • Update System BIOS: Updating the computer’s BIOS may resolve audio issues related to hardware compatibility.
  • Run a Hardware Diagnostic Test: If you suspect a hardware malfunction, run a hardware diagnostic test to pinpoint the faulty component.
  • Backup Important Data: Before making any significant changes to your system, back up your important data to prevent data loss in case of unexpected issues.

Conclusion

Resolving HDMI audio issues on Windows 11 can be a challenging but achievable task. By understanding the potential causes and following the troubleshooting steps outlined in this guide, users can effectively diagnose and address the problem, restoring audio functionality and enhancing their multimedia experience. Remember to start with the simplest solutions and progress to more complex methods, keeping in mind that seeking professional assistance may be necessary in some cases. With a systematic approach and a bit of patience, users can regain their audio output through HDMI and enjoy a seamless multimedia experience on their Windows 11 system.

11 Easy Ways to Fix HDMI Audio Not Working in Windows 11 - Guiding Tech How to fix your HDMI display and sound problems in Windows 11  HP Computers  @HPSupport HDMI No Sound in Windows 11 When Connect to TV - No HDMI Audio Device Detected FIX [2024] - YouTube
Troubleshooting Audio Problems in Windows 11  Dell US How To Fix No Sound Output Problems On Windows 11  Fix All Audio Issues How To Fix Windows 11 Audio Not Working - Tech Advisor
⚠️ Sound Problem in Windows 11 ️ FIX - YouTube 5+ Ways to Fix the Audio Issues in Windows 11 – DigitBin

Closure

Thus, we hope this article has provided valuable insights into Troubleshooting Audio Issues with HDMI on Windows 11: A Comprehensive Guide. We thank you for taking the time to read this article. See you in our next article!

Navigating The Windows 11 Installation Process: A Comprehensive Guide

Navigating the Windows 11 Installation Process: A Comprehensive Guide

Introduction

With enthusiasm, let’s navigate through the intriguing topic related to Navigating the Windows 11 Installation Process: A Comprehensive Guide. Let’s weave interesting information and offer fresh perspectives to the readers.

Windows 11 installation process - Step by Step  How to install Windows 11  Windows 11

The transition to Windows 11 presents both excitement and potential challenges. While Microsoft has streamlined the installation process, users may encounter roadblocks or require assistance in navigating the complexities involved. This comprehensive guide aims to equip individuals with the necessary knowledge and practical steps to successfully install Windows 11, ensuring a smooth and seamless experience.

Understanding the Prerequisites

Before embarking on the installation journey, it is crucial to ensure your system meets the minimum hardware requirements. These specifications are designed to guarantee optimal performance and compatibility with the new operating system.

System Requirements:

  • Processor: 1 gigahertz (GHz) or faster with 2 or more cores
  • RAM: 4 gigabytes (GB)
  • Storage: 64 GB or larger storage device
  • Graphics Card: Compatible with DirectX 12 or later, with a WDDM 2.x driver
  • Display: High definition (720p) display, 9 inches or larger
  • Internet Connection: Required for initial setup and some features

Preparing for Installation

  1. Backup Your Data: Prioritize safeguarding your valuable data by creating a comprehensive backup. This can be achieved through external hard drives, cloud storage services, or specialized backup software.

  2. Check Compatibility: Verify that your existing hardware and software are compatible with Windows 11. Microsoft offers a dedicated tool for this purpose, readily available on their website.

  3. Create a Bootable USB Drive: Obtain a USB drive with at least 8 GB of storage capacity. This drive will serve as the installation medium, containing the necessary files to install Windows 11. Microsoft provides a straightforward tool to create this bootable drive.

Installing Windows 11

  1. Boot from USB Drive: Connect the bootable USB drive to your computer and restart it. Access the boot menu by pressing the appropriate key (often F12 or Esc), and select the USB drive as the boot device.

  2. Follow On-Screen Instructions: The Windows 11 setup process is guided by a series of clear instructions. Follow these prompts attentively, selecting the desired language, region, and keyboard layout.

  3. Choose Installation Type: You will be presented with two options: "Upgrade" and "Custom." If you wish to keep existing files and settings, select "Upgrade." For a clean installation, choose "Custom."

  4. Partition Hard Drive: For a custom installation, you will need to partition your hard drive. This involves dividing the drive into separate sections, allocating space for Windows 11 and other data.

  5. Install Windows 11: Once you have chosen your installation type and partitioned your drive, the installation process will commence. This may take some time, depending on your system’s specifications.

  6. Activate Windows: Upon completion, you will be prompted to activate Windows 11. This can be done using a product key, if available, or by selecting "I don’t have a product key" to activate later.

Post-Installation Steps

  1. Install Drivers: After installing Windows 11, it is crucial to install the latest drivers for your hardware components. These drivers ensure optimal functionality and performance.

  2. Update Windows: Regularly update your Windows 11 installation to benefit from the latest security patches, performance enhancements, and feature updates.

  3. Customize Settings: Personalize your Windows 11 experience by adjusting settings related to themes, wallpapers, notifications, and other preferences.

Troubleshooting Common Installation Issues

  • Error Messages: If you encounter error messages during the installation process, refer to Microsoft’s official documentation or seek assistance from their support channels.

  • Compatibility Issues: If you face compatibility issues with existing software or hardware, consult the manufacturer’s website for updated drivers or software versions.

  • Boot Problems: If you experience boot problems after installation, try booting into safe mode or using the Windows Recovery Environment to troubleshoot.

Frequently Asked Questions

Q: Can I upgrade from Windows 10 to Windows 11?

A: Yes, a free upgrade path is available for compatible Windows 10 devices. However, the system must meet the minimum hardware requirements to qualify for the upgrade.

Q: What happens to my data during the installation process?

A: An upgrade installation retains your existing files and settings, while a custom installation requires a fresh start, erasing all data.

Q: Can I install Windows 11 on a virtual machine?

A: Yes, Windows 11 can be installed on virtual machines like VMware or VirtualBox. However, performance may be affected depending on the virtual machine’s resources.

Q: Is it necessary to have a Microsoft account to install Windows 11?

A: A Microsoft account is recommended for seamless integration of features like OneDrive and Microsoft Store. However, you can choose to install Windows 11 without one, though some features may be limited.

Tips for a Smooth Installation

  • Disconnect Unnecessary Devices: Disconnect external devices such as printers, scanners, and USB drives that are not essential for the installation process.

  • Disable Antivirus Software: Temporarily disable your antivirus software during the installation to prevent potential conflicts.

  • Check for Updates: Ensure your Windows 10 installation is up-to-date before attempting to upgrade to Windows 11.

  • Use a Wired Connection: A wired internet connection is recommended for a stable and reliable installation experience.

Conclusion

Installing Windows 11 can be a rewarding experience, offering a modern and enhanced operating system. By following the outlined steps and addressing potential challenges, users can successfully navigate the installation process and enjoy the benefits of this new platform. Remember to prioritize data backup, ensure system compatibility, and seek assistance from official resources when needed. With careful planning and execution, the transition to Windows 11 can be smooth and seamless.

Windows 11 Installation Guideline and First Look - YouTube How to install Windows 11 on your PC How to Download and Install Windows 11 Right Now (Leaked Build)
Windows 11 Complete Installation Step By Step Youtube - Vrogue The Ultimate Guide to Installing Windows 11  Petri Detailed Guide How To Install Windows 11 On Your Pc Or Laptop  itechguides
The Ultimate Guide to Installing Windows 11  Petri The Ultimate Guide to Installing Windows 11  Petri

Closure

Thus, we hope this article has provided valuable insights into Navigating the Windows 11 Installation Process: A Comprehensive Guide. We appreciate your attention to our article. See you in our next article!

A Comprehensive Guide To PC Health Check For Windows 10: Ensuring Optimal System Performance

A Comprehensive Guide to PC Health Check for Windows 10: Ensuring Optimal System Performance

Introduction

In this auspicious occasion, we are delighted to delve into the intriguing topic related to A Comprehensive Guide to PC Health Check for Windows 10: Ensuring Optimal System Performance. Let’s weave interesting information and offer fresh perspectives to the readers.

A Comprehensive Guide to PC Health Check for Windows 10: Ensuring Optimal System Performance

How to health check windows 10 for best performance

In the realm of operating systems, Windows 10 has become a ubiquitous presence. Its versatility and robust features cater to a wide range of users, from casual home users to demanding professionals. However, maintaining the optimal performance of a Windows 10 system requires a proactive approach. This is where the PC Health Check app emerges as a valuable tool, providing users with essential insights into their system’s health and potential areas for improvement.

Understanding PC Health Check:

PC Health Check is a free diagnostic tool developed by Microsoft, specifically designed for Windows 10 users. It acts as a comprehensive system analysis utility, offering users a detailed assessment of their computer’s hardware and software components. The app utilizes a range of checks to identify potential issues, including:

  • Storage Space: The app analyzes available storage space on the system drive, flagging potential issues related to low storage capacity.
  • System Updates: PC Health Check verifies the latest Windows updates are installed, ensuring the system is operating on the most secure and efficient version.
  • Driver Updates: The app checks for outdated or missing drivers, which can impact system performance and stability.
  • Hardware Compatibility: PC Health Check assesses the compatibility of hardware components with the Windows 10 operating system, highlighting potential issues that could arise from incompatible devices.
  • System Security: The app evaluates the system’s security posture, checking for potential vulnerabilities and recommending necessary security measures.

The Importance of PC Health Check:

PC Health Check plays a crucial role in ensuring optimal system performance and stability. By providing users with detailed insights into their computer’s health, the app empowers them to take proactive steps to address potential issues before they escalate into significant problems. This proactive approach can:

  • Improve System Performance: Identifying and resolving issues like outdated drivers or low storage space can significantly enhance system performance, leading to faster boot times, smoother application execution, and overall responsiveness.
  • Enhance System Security: PC Health Check helps identify and address potential security vulnerabilities, reducing the risk of malware infections and data breaches.
  • Extend System Lifespan: By proactively addressing potential issues, PC Health Check helps maintain the system’s health and longevity, extending its useful lifespan.
  • Simplify Troubleshooting: The app provides users with detailed information and recommendations, simplifying the troubleshooting process for potential system issues.

Downloading and Installing PC Health Check:

Downloading and installing PC Health Check is a straightforward process. Users can obtain the app directly from the Microsoft website or through the Microsoft Store. The installation process is simple and requires minimal user intervention. Once installed, the app is readily accessible from the Start menu.

Utilizing PC Health Check Effectively:

To maximize the benefits of PC Health Check, users should follow a few best practices:

  • Regularly Run the App: It is recommended to run PC Health Check on a regular basis, ideally once a month, to ensure a comprehensive assessment of the system’s health.
  • Address Identified Issues: Once the app identifies potential issues, users should take the necessary steps to address them promptly. This might involve updating drivers, clearing storage space, or installing security patches.
  • Monitor System Performance: After addressing identified issues, it is essential to monitor the system’s performance to ensure the improvements are reflected in practice.
  • Stay Informed: Keep abreast of updates and new features released for PC Health Check. These updates often include enhanced functionalities and improved analysis capabilities.

FAQs Regarding PC Health Check:

1. Is PC Health Check compatible with all Windows 10 versions?

PC Health Check is compatible with most Windows 10 versions, including Home, Pro, and Enterprise editions. However, older versions of Windows 10 might not support the app’s full functionality.

2. Does PC Health Check require administrative privileges to run?

Yes, PC Health Check requires administrative privileges to access and analyze system files and settings. Users must run the app with administrator permissions to obtain accurate results.

3. Can PC Health Check identify and fix hardware issues?

While PC Health Check can identify potential hardware compatibility issues, it cannot directly fix hardware problems. Users might need to consult a technician for hardware-related repairs.

4. Does PC Health Check collect user data?

PC Health Check does collect limited system information, such as hardware specifications and software versions, to perform its analysis. This data is not shared with third parties and is used solely for enhancing system health.

5. Is PC Health Check a replacement for antivirus software?

No, PC Health Check is not a replacement for antivirus software. It primarily focuses on system health and performance, while antivirus software protects against malware and other security threats.

Tips for Optimizing System Performance with PC Health Check:

  • Prioritize Storage Space Management: Regularly clean up temporary files, uninstall unused applications, and consider using external storage for large files to free up disk space.
  • Keep Drivers Up-to-Date: Regularly check for driver updates for all hardware components, including graphics cards, network adapters, and peripherals.
  • Enable Automatic Updates: Configure Windows Update to automatically install critical updates, ensuring the system is always operating on the latest security patches.
  • Run Disk Cleanup Regularly: Use the built-in Disk Cleanup tool to remove unnecessary files and folders, freeing up valuable disk space.
  • Monitor System Resources: Regularly check CPU usage, memory consumption, and disk activity to identify potential bottlenecks and optimize system performance.

Conclusion:

PC Health Check is a valuable tool for Windows 10 users seeking to optimize system performance and ensure optimal stability. By providing users with detailed insights into their system’s health, the app empowers them to take proactive steps to address potential issues before they escalate into significant problems. By utilizing PC Health Check effectively and adhering to best practices for system maintenance, users can enjoy a smoother, more secure, and efficient Windows 10 experience.

Windows 10: Health Check for Your PC - YouTube How to check your device health on Windows 10 • Pureinfotech How to Check Your Computer Performance on Windows 10: 4 Steps
Microsoft began to push the PC Health Check tool to Windows 10 users How to download pc health check app in windows 10 - productver Pc Health Check Tool To Know Windows 10 Can Be Upgraded To Windows 11  Images and Photos finder
Microsoft pc health check windows 10 - jasdrive PC Health Check Download (2024 Latest)

Closure

Thus, we hope this article has provided valuable insights into A Comprehensive Guide to PC Health Check for Windows 10: Ensuring Optimal System Performance. We appreciate your attention to our article. See you in our next article!

Managing User Accounts In Windows 10: A Comprehensive Guide To Removing Accounts

Managing User Accounts in Windows 10: A Comprehensive Guide to Removing Accounts

Introduction

In this auspicious occasion, we are delighted to delve into the intriguing topic related to Managing User Accounts in Windows 10: A Comprehensive Guide to Removing Accounts. Let’s weave interesting information and offer fresh perspectives to the readers.

Managing User Accounts in Windows 10: A Comprehensive Guide to Removing Accounts

How to manage user account settings on Windows 10  Windows Central

Windows 10, like any operating system, relies on user accounts to manage access and control over system resources. These accounts provide a framework for individualizing settings, storing personal data, and ensuring security. However, situations may arise where it becomes necessary to remove a user account from a Windows 10 device. This could be due to a change in ownership, a desire to enhance system security, or simply the need to declutter the user list.

This article offers a detailed guide on removing user accounts from Windows 10, addressing the various methods and considerations involved.

Understanding the Types of User Accounts

Before delving into the removal process, it is crucial to understand the different types of user accounts in Windows 10:

  • Administrator Account: This account holds the highest level of privileges, allowing complete control over the system. It can install software, make system-wide changes, and manage other user accounts.
  • Standard Account: This account has limited privileges, designed for everyday use. It can access and modify personal files, install some software, and use most features, but cannot make system-level changes.
  • Child Account: This account is specifically designed for children, offering parental controls and restrictions on access to certain applications and websites.

Methods for Removing User Accounts in Windows 10

There are two primary methods for removing user accounts from Windows 10:

  1. Using Settings: This method is straightforward and accessible through the Windows settings interface. It is the preferred method for removing most user accounts.

  2. Using Control Panel: This method offers more granular control and is suitable for more complex scenarios, such as removing accounts with specific permissions or limitations.

Removing User Accounts Using Settings

  1. Open Settings: Access the Windows Settings app by pressing the Windows key + I on your keyboard.

  2. Navigate to Accounts: In the Settings window, click on "Accounts."

  3. Select "Family & other users": In the Accounts settings, click on "Family & other users."

  4. Locate the account to remove: Find the user account you wish to remove from the list.

  5. Remove the account: Click on the account name, and then select "Remove" from the options that appear.

  6. Confirm removal: A confirmation prompt will appear. Review the information and click "Delete account and data" to proceed.

Important Considerations:

  • Data Deletion: Removing a user account will permanently delete all data associated with that account, including files, folders, and settings.
  • Administrator Privileges: Removing an administrator account requires the user performing the removal to have administrator privileges.

Removing User Accounts Using Control Panel

  1. Open Control Panel: Search for "Control Panel" in the Windows search bar and click on the result.

  2. Navigate to User Accounts: In the Control Panel, navigate to "User Accounts."

  3. Select "Manage another account": Click on "Manage another account" to access the list of user accounts.

  4. Locate the account to remove: Find the user account you wish to remove.

  5. Remove the account: Click on the account name, and then click on "Delete the account."

  6. Confirm removal: A confirmation prompt will appear. Review the information and click "Delete the account" to proceed.

Important Considerations:

  • Account Permissions: If the account to be removed has specific permissions or limitations, the Control Panel method offers more control over the removal process.
  • Advanced Options: The Control Panel method allows for the removal of accounts with specific permissions or limitations, such as accounts with restricted access or accounts that are part of a specific group.

Addressing Specific Scenarios

Removing the Current User Account:

  • Log in with a different administrator account: If possible, log in to the device using a different administrator account. This will allow you to remove the current user account without needing to log out.
  • Use a recovery drive: If you do not have another administrator account, you can use a recovery drive to access the system and remove the account.

Removing an Administrator Account:

  • Ensure another administrator account exists: Before removing the administrator account, ensure that at least one other administrator account is present on the device. This is essential to maintain administrative control over the system.
  • Use the Control Panel: The Control Panel method offers more granular control over removing administrator accounts, allowing you to specify the actions to be taken with the associated data.

Removing a Child Account:

  • Parental consent: Removing a child account typically requires parental consent or the use of the parent’s account.
  • Child account restrictions: Child accounts may have specific restrictions and limitations that need to be considered before removal.

Removing a Guest Account:

  • Guest account limitations: Guest accounts have very limited privileges and cannot make permanent changes to the system. Removing a guest account is generally straightforward.
  • Data removal: Removing a guest account will delete any data associated with that account.

FAQs about Removing User Accounts in Windows 10

Q: What happens to the data associated with the removed account?

A: All data associated with the removed account, including files, folders, and settings, will be permanently deleted. It is recommended to back up any important data before removing the account.

Q: Can I recover data from a removed account?

A: While it is difficult, it is not impossible to recover data from a removed account. Data recovery software can be used to attempt recovery, but success is not guaranteed.

Q: Can I remove a user account without logging out?

A: You can remove a user account without logging out if you are using a different administrator account. However, if you are trying to remove the current user account, you will need to log out or use a recovery drive.

Q: What if I accidentally remove the only administrator account?

A: If you accidentally remove the only administrator account, you will need to use a recovery drive or a system reset to regain administrative access.

Q: Can I remove a user account that is currently logged in?

A: You cannot remove a user account that is currently logged in. You will need to log out of the account or use a different administrator account to remove it.

Tips for Removing User Accounts in Windows 10

  • Back up important data: Before removing any user account, back up any important data associated with that account to prevent accidental loss.
  • Use a different administrator account: If possible, use a different administrator account to remove the account you want to delete.
  • Review permissions and limitations: Before removing an account, carefully review its permissions and limitations to ensure that you understand the implications of removal.
  • Consider using a recovery drive: A recovery drive can be used to access the system and remove a user account even if you cannot log in.
  • Contact Microsoft support: If you encounter any difficulties or have specific concerns, contact Microsoft support for assistance.

Conclusion

Removing user accounts from Windows 10 is a routine operation that can be carried out effectively using either the Settings app or the Control Panel. Understanding the different types of accounts, their associated data, and the implications of removal is crucial. By following the outlined steps and considerations, users can confidently manage user accounts on their Windows 10 devices, ensuring a secure and efficient user experience.

Top 5 Methods to Remove User Accounts in Windows 10 Top 5 Methods to Remove User Accounts in Windows 10 Delete User Account in Windows 10 Windows 10 Tutorials
How to Manage User Accounts in Windows 10 - YouTube How to Delete User Accounts in Windows 10: 5 Steps (with Pictures) How to add and remove a new user account in Windows 10 - Tech Junkie
How to add and manage user accounts in Windows 10 [Tip]  dotTech Top 6 Options to Delete a User Account in Windows 10

Closure

Thus, we hope this article has provided valuable insights into Managing User Accounts in Windows 10: A Comprehensive Guide to Removing Accounts. We hope you find this article informative and beneficial. See you in our next article!

Optimizing Windows 10: A Comprehensive Guide To PC Cleaning Tools And Techniques

Optimizing Windows 10: A Comprehensive Guide to PC Cleaning Tools and Techniques

Introduction

In this auspicious occasion, we are delighted to delve into the intriguing topic related to Optimizing Windows 10: A Comprehensive Guide to PC Cleaning Tools and Techniques. Let’s weave interesting information and offer fresh perspectives to the readers.

Optimizing Windows 10: A Comprehensive Guide to PC Cleaning Tools and Techniques

10 Best PC Cleaner Software For Windows 10 (2022) - Clean My PC

Windows 10, a powerful and versatile operating system, can accumulate clutter over time. This clutter, encompassing temporary files, browser history, outdated software, and system registry entries, can significantly impact performance, leading to slow startup times, sluggish application loading, and even system instability. To address these issues, PC cleaning tools and techniques offer a valuable solution, helping to optimize system performance and enhance user experience.

Understanding the Need for PC Optimization

As Windows 10 operates, it generates various files and data, some necessary for functionality, while others become obsolete or redundant. These unnecessary files, known as "junk files," accumulate over time, consuming valuable disk space and slowing down the system.

Types of PC Cleaning Tools

PC cleaning tools for Windows 10 can be broadly categorized into two main types:

1. System Cleaners: These tools focus on removing temporary files, browser cache, and other unnecessary data. They often include features like disk cleanup, registry cleaning, and duplicate file detection. Popular system cleaners include CCleaner, Advanced SystemCare, and IObit Advanced SystemCare.

2. Optimization Tools: These tools go beyond removing clutter by addressing performance issues. They can optimize system settings, manage startup programs, defragment hard drives, and even monitor system health. Examples include Auslogics BoostSpeed, Wise Care 365, and Ashampoo WinOptimizer.

Benefits of Using PC Cleaning Tools

Employing PC cleaning tools offers several benefits for Windows 10 users:

  • Improved System Performance: Removing unnecessary files and optimizing system settings can significantly enhance system speed, reducing startup times and application loading delays.
  • Increased Disk Space: Cleaning up junk files and removing duplicate files frees up valuable disk space, allowing for more storage capacity for important files and applications.
  • Enhanced System Stability: Removing outdated or corrupted files and cleaning the registry can contribute to a more stable system, reducing crashes and errors.
  • Improved Security: Some PC cleaning tools offer features like malware detection and removal, helping to protect the system from threats.

Choosing the Right PC Cleaning Tool

Selecting the right PC cleaning tool is crucial for achieving optimal results. Consider the following factors:

  • Features: Identify the specific features you require, whether it’s simple disk cleanup, advanced registry cleaning, or performance optimization.
  • Ease of Use: Choose a tool with a user-friendly interface that is intuitive and easy to navigate.
  • Reputation: Research the reputation of the tool and its developer, ensuring its reliability and effectiveness.
  • Cost: PC cleaning tools range in price from free to paid options. Determine the best value for your needs and budget.

Manual PC Cleaning Techniques

While PC cleaning tools offer convenience and automation, manual techniques can also be effective for maintaining a clean and optimized system:

  • Disk Cleanup: Windows 10 includes a built-in Disk Cleanup tool (accessible through the "This PC" window). This tool allows you to remove temporary files, system files, and other unnecessary data.
  • Deleting Temporary Files: Temporary files are stored in various locations, including the "Temp" folder, browser cache, and download history. Manually deleting these files can free up significant disk space.
  • Removing Unnecessary Programs: Uninstall programs you no longer use to reclaim disk space and reduce system resource consumption.
  • Managing Startup Programs: Unnecessary programs that launch at startup can slow down system boot times. Use the "Task Manager" (accessible by pressing Ctrl+Shift+Esc) to disable unnecessary startup programs.

FAQs on PC Cleaning Tools

1. Are PC cleaning tools necessary?

While not strictly necessary, PC cleaning tools can significantly improve system performance and stability, especially for older or heavily used computers.

2. Can PC cleaning tools harm my computer?

Reputable PC cleaning tools are generally safe to use. However, using unreliable or poorly designed tools can potentially damage your system. Choose tools from trusted developers and proceed with caution.

3. Do I need to use a paid PC cleaning tool?

Many free PC cleaning tools offer adequate functionality. However, paid tools often provide more advanced features and support. Choose the option that best fits your needs and budget.

4. How often should I clean my PC?

The frequency of PC cleaning depends on your usage habits. For average users, cleaning once a month or every few months is generally sufficient. However, if you notice performance issues, consider cleaning more frequently.

5. Can PC cleaning tools improve my internet speed?

While PC cleaning tools can optimize system performance, they do not directly impact internet speed. Internet speed is primarily determined by your internet service provider and network infrastructure.

Tips for Effective PC Cleaning

  • Regularly Clean: Establish a routine for cleaning your PC, whether it’s weekly, monthly, or quarterly.
  • Backup Important Data: Before running any cleaning tool, back up your important data to prevent accidental loss.
  • Choose Reputable Tools: Opt for PC cleaning tools from trusted developers with a good reputation.
  • Use Caution: Proceed cautiously when using cleaning tools, especially when cleaning the registry.
  • Monitor Performance: Track system performance after cleaning to determine the tool’s effectiveness.

Conclusion

PC cleaning tools and techniques play a vital role in maintaining a healthy and efficient Windows 10 system. By removing unnecessary files, optimizing system settings, and addressing performance issues, these tools contribute to a smoother and more enjoyable user experience. Selecting the right tool and employing responsible cleaning practices can significantly enhance the overall performance and longevity of your Windows 10 computer.

Cleaning Tools In Computer And Their Uses Best windows optimization tool windows 10 - learningbermo Best windows optimization tool windows 10 - aeamela
Optimizing Windows 10 Optimize Your PC with Free Windows Cleanup Tool - YouTube Clean Up Windows 10 and Make Your PC Faster - YouTube
All pc optimizer for windows 10 - fecolreference 25 Best Methods To Optimize Windows 10 Performance

Closure

Thus, we hope this article has provided valuable insights into Optimizing Windows 10: A Comprehensive Guide to PC Cleaning Tools and Techniques. We hope you find this article informative and beneficial. See you in our next article!

Panorama Kvm 10.1 3 Qcow2 Download Windows 10

panorama kvm 10.1 3 qcow2 download windows 10

Introduction

With enthusiasm, let’s navigate through the intriguing topic related to panorama kvm 10.1 3 qcow2 download windows 10. Let’s weave interesting information and offer fresh perspectives to the readers.

Setting Up a Secure and Efficient Network with Panorama KVM 10.1.3: A Comprehensive Guide

Deploying a Panorama KVM image to use with EVE-NG

In the realm of network security and management, the Panorama platform from Palo Alto Networks has become a cornerstone for organizations of all sizes. Its centralized management capabilities, robust security features, and user-friendly interface have made it a popular choice for securing and optimizing network infrastructure. This article delves into the process of setting up a Panorama virtual machine (VM) using the Panorama KVM 10.1.3 qcow2 image for Windows 10, exploring its benefits and providing a detailed walkthrough.

Understanding Panorama KVM 10.1.3 qcow2

Panorama KVM 10.1.3 qcow2 is a pre-configured virtual machine image designed specifically for KVM hypervisors. It offers a streamlined approach to deploying Panorama, eliminating the need for manual configuration and installation. The qcow2 format is a popular choice for virtual machine disk images due to its efficient storage and performance capabilities.

Benefits of Using Panorama KVM 10.1.3 qcow2:

  • Simplified Deployment: The pre-configured image eliminates the need for manual installation and configuration, significantly reducing deployment time.
  • Streamlined Management: Panorama’s centralized management console allows for easy control and configuration of multiple firewalls and other network security devices.
  • Enhanced Security: Panorama provides advanced security features such as intrusion prevention, malware protection, and application control, safeguarding the network from threats.
  • Improved Efficiency: The platform offers granular reporting and analytics, enabling network administrators to optimize performance and identify potential issues.
  • Scalability: Panorama can manage a large number of firewalls, making it suitable for organizations with complex network environments.

Downloading and Preparing the Panorama KVM 10.1.3 qcow2 Image

The first step in deploying Panorama is to download the qcow2 image from the Palo Alto Networks website. Ensure you have a valid license and access to the download portal. Once downloaded, verify the integrity of the image file using a checksum utility.

System Requirements:

  • Hypervisor: KVM (Kernel-based Virtual Machine)
  • Operating System: Windows 10 (64-bit)
  • Processor: Intel or AMD processor with virtualization support
  • Memory: Minimum of 4 GB RAM (8 GB recommended)
  • Storage: Minimum of 50 GB disk space (100 GB recommended)

Setting Up the Panorama VM on KVM

With the Panorama qcow2 image downloaded and the system requirements met, you can proceed with creating the virtual machine. This process involves configuring the KVM hypervisor and importing the qcow2 image.

Steps:

  1. Install and Configure KVM: Install and configure the KVM hypervisor on your host machine. This involves enabling virtualization in the BIOS and installing the necessary KVM packages.
  2. Create a Virtual Machine: Use the KVM management tools (such as virt-manager) to create a new virtual machine. Specify the required resources (CPU, RAM, storage) and select the downloaded qcow2 image as the disk source.
  3. Network Configuration: Configure the virtual machine’s network settings. This typically involves creating a virtual network interface and assigning a static IP address.
  4. Start the VM: Power on the virtual machine. The Panorama installation process will begin automatically.

Accessing and Configuring Panorama

Once the virtual machine boots up, you can access the Panorama management console through a web browser. The default URL is https://<Panorama_IP_address>. The initial login credentials are provided in the Panorama documentation.

Initial Configuration:

  • Configure Network Settings: Set up the Panorama device’s network interfaces and IP addresses.
  • Create Security Policies: Define security policies to control network traffic and enforce access rules.
  • Manage Firewalls: Add and configure firewalls under Panorama’s management.
  • Deploy Security Profiles: Implement security profiles for specific applications and protocols.
  • Monitor and Analyze: Utilize Panorama’s reporting and analytics features to gain insights into network activity and security posture.

FAQs

Q: What are the minimum system requirements for running Panorama KVM 10.1.3?

A: The minimum system requirements include a KVM hypervisor, Windows 10 (64-bit), 4 GB RAM, and 50 GB disk space. It is recommended to allocate more resources for optimal performance.

Q: Can I use the Panorama KVM 10.1.3 qcow2 image with other hypervisors?

A: The qcow2 image is specifically designed for KVM hypervisors. Using it with other hypervisors may result in compatibility issues.

Q: How do I obtain a valid Panorama license?

A: Contact Palo Alto Networks for licensing information and purchase options.

Q: What are the security implications of using a pre-configured Panorama image?

A: The pre-configured image is developed and tested by Palo Alto Networks, ensuring security and reliability. However, it is still essential to maintain good security practices and regularly update the system.

Tips for Successful Deployment

  • Back Up Your Data: Before making any changes to the Panorama configuration, create a backup of the system.
  • Test Thoroughly: Conduct thorough testing of the Panorama configuration and policies before deploying them in production.
  • Monitor Performance: Regularly monitor the performance of the Panorama VM and adjust resources as needed.
  • Stay Updated: Keep the Panorama platform and its components up to date with the latest security patches and updates.

Conclusion

Deploying Panorama KVM 10.1.3 qcow2 on Windows 10 provides a robust and efficient solution for managing and securing network infrastructure. Its pre-configured image simplifies the deployment process, while its centralized management capabilities, advanced security features, and comprehensive reporting tools empower organizations to achieve optimal network performance and security posture. By following the steps outlined in this guide, organizations can effectively leverage Panorama to protect their network assets and ensure business continuity.

KVM环境部署与使用(附导入qcow2镜像及修改qcow2镜像密码)_kvm使用qcow2镜像启动-CSDN博客 KVM环境部署与使用(附导入qcow2镜像及修改qcow2镜像密码)_kvm使用qcow2镜像启动-CSDN博客 Qemu Kvm Create Windows Image qcow2 Tutorial - AKUH.NET
在centos中安装KVM,并导入.qcow2镜像_kvm 导入qcow2-CSDN博客 Deploying a Panorama KVM image to use with EVE-NG 在centos中安装KVM,并导入.qcow2镜像_kvm 导入qcow2-CSDN博客
Cisco SDWAN qcow2-kvm and Eve-NG images Free Download KVM environment deployment and use (with import qcow2 image and modification of qcow2 image

Closure

Thus, we hope this article has provided valuable insights into panorama kvm 10.1 3 qcow2 download windows 10. We thank you for taking the time to read this article. See you in our next article!

Navigating The Windows 11 Command Line: A Comprehensive Guide

Navigating the Windows 11 Command Line: A Comprehensive Guide

Introduction

In this auspicious occasion, we are delighted to delve into the intriguing topic related to Navigating the Windows 11 Command Line: A Comprehensive Guide. Let’s weave interesting information and offer fresh perspectives to the readers.

How to open a Windows 11 Command Prompt as Administrator

The command line, often referred to as the command prompt or terminal, remains a powerful tool for Windows users. It offers a direct interface to the operating system, allowing for advanced tasks beyond the graphical user interface (GUI). While Windows 11 continues to prioritize a visually intuitive experience, understanding the command line remains crucial for users seeking greater control and efficiency. This article delves into the intricacies of the command line in Windows 11, providing a comprehensive guide to its functionalities and potential applications.

Understanding the Command Line:

The command line operates through text-based commands, each representing a specific action. These commands are interpreted by the operating system, which then executes the desired task. This direct interaction provides users with a level of control and flexibility that GUI applications may not offer.

Accessing the Command Line:

In Windows 11, the command line can be accessed through various methods:

  • Search Bar: Typing "cmd" in the search bar and selecting "Command Prompt" will launch the classic command prompt window.
  • Run Dialog: Pressing the Windows key + R and typing "cmd" will also open the command prompt.
  • Windows Terminal: A more modern and versatile alternative, Windows Terminal offers a tabbed interface and supports various command-line shells, including PowerShell and the classic command prompt.

Basic Commands and Concepts:

The command line utilizes a specific syntax for commands. Each command is typically followed by arguments or parameters that modify its behavior. Here are some fundamental commands and concepts:

  • dir (or ls in PowerShell): This command lists the contents of the current directory.
  • cd: This command changes the current directory. For example, cd Documents navigates to the Documents folder.
  • mkdir: Creates a new directory.
  • rmdir: Removes a directory.
  • copy: Copies files or directories.
  • move: Moves files or directories.
  • del: Deletes files.
  • help: Provides information on a specific command.
  • exit: Closes the command prompt window.

PowerShell: A More Powerful Option:

While the classic command prompt remains functional, PowerShell offers a more robust and feature-rich environment. It utilizes a scripting language, allowing for complex automation and tasks beyond the capabilities of the command prompt.

Here are some advantages of PowerShell:

  • Object-Oriented: PowerShell works with objects, providing a more structured and efficient approach to data manipulation.
  • Scripting: It supports scripting, allowing users to create reusable code for automating tasks.
  • Remote Management: PowerShell facilitates remote management of systems, enabling administrators to control multiple computers from a central location.
  • Extensive Modules: A vast collection of modules extends PowerShell’s functionality, providing tools for managing various aspects of the operating system and applications.

Practical Applications of the Command Line:

The command line proves valuable in numerous scenarios:

  • System Administration: Administrators utilize the command line to manage system settings, install software, troubleshoot issues, and perform other critical tasks.
  • Software Development: Developers rely on the command line for building, compiling, and testing software.
  • Automation: Repeating tasks can be automated using scripts, saving time and effort.
  • Troubleshooting: The command line provides a direct interface for diagnosing and resolving system errors.
  • Advanced Customization: Users can fine-tune system settings and customize their Windows experience using command-line tools.

Utilizing the Command Line Effectively:

  • Understanding Syntax: Familiarize yourself with the proper syntax for commands and arguments.
  • Using Help: The help command offers detailed information on specific commands.
  • Exploring Online Resources: Numerous online resources, such as Microsoft documentation and community forums, provide guidance and solutions.
  • Practice: Consistent practice is key to mastering the command line.

FAQs about the Command Line in Windows 11:

  • Q: Is the command line still relevant in Windows 11?
    • A: Yes, the command line remains a powerful tool for advanced users and administrators. It offers a level of control and flexibility that GUI applications may not provide.
  • Q: What are the differences between the command prompt and PowerShell?
    • A: PowerShell is a more advanced and feature-rich command-line shell compared to the classic command prompt. It offers scripting capabilities, object-oriented programming, and extensive modules.
  • Q: Is it safe to use the command line?
    • A: The command line itself is not inherently dangerous. However, incorrect commands or malicious scripts can cause harm. Exercise caution and only use commands from trusted sources.
  • Q: Can I use the command line to access files on a network drive?
    • A: Yes, the command line can access files on network drives using appropriate commands and paths.
  • Q: How do I find the location of a file using the command line?
    • A: You can use the dir command with the /s flag to search for a file within the current directory and its subdirectories.

Tips for Using the Command Line:

  • Start Simple: Begin with basic commands and gradually explore more complex options.
  • Use Tab Completion: Pressing the Tab key can autocomplete commands and file names, saving time and reducing errors.
  • Utilize Copy and Paste: Copy and paste commands from online resources or other applications to avoid typing errors.
  • Create Batch Files: Combine multiple commands into a batch file for automation.
  • Use the help Command: Explore the help command to learn more about specific commands and their arguments.

Conclusion:

The command line in Windows 11 remains a valuable tool for users seeking greater control and efficiency. While the GUI provides a user-friendly interface, the command line offers direct access to the operating system, enabling advanced tasks, automation, and troubleshooting. By understanding its functionalities and utilizing its capabilities effectively, users can unlock a new level of power and customization within their Windows 11 environment.

Terminal Windows 11 How to Open Command Prompt (CMD) in Windows 11? (7 Ways) - MiniTool How to Open Command Prompt (CMD) in Windows 11 - All Things How
Different Ways to Open Command Prompt in Windows 11 Windows 11 Cheat Sheet 8 Ways to Open Command Prompt in Windows 11 – WebNots
3: Create or Download a Shortcut Complete List Of Windows 11 Run Commands  techteds

Closure

Thus, we hope this article has provided valuable insights into Navigating the Windows 11 Command Line: A Comprehensive Guide. We hope you find this article informative and beneficial. See you in our next article!

Understanding Memory Usage In Windows 11: A Comprehensive Guide

Understanding Memory Usage in Windows 11: A Comprehensive Guide

Introduction

In this auspicious occasion, we are delighted to delve into the intriguing topic related to Understanding Memory Usage in Windows 11: A Comprehensive Guide. Let’s weave interesting information and offer fresh perspectives to the readers.

Understanding Memory Usage in Windows 11: A Comprehensive Guide

Does Windows 11 use more RAM than Windows 10?

Windows 11, like any modern operating system, relies heavily on system memory (RAM) to function efficiently. Understanding how much memory your system uses and what factors influence it is crucial for maintaining optimal performance and avoiding system slowdowns. This article provides a comprehensive guide to normal memory usage in Windows 11, covering key aspects, potential causes of high memory usage, and strategies to optimize performance.

What is Memory and Why is it Important?

Memory, also known as RAM (Random Access Memory), is a type of computer hardware that acts as a temporary storage space for the operating system, applications, and data currently in use. Imagine it as a workspace where your computer keeps all the essential files and instructions readily accessible for quick access.

  • Faster Processing: When data is stored in RAM, it can be accessed by the processor much faster than if it were stored on a hard drive or SSD. This translates to faster application loading times, smoother multitasking, and overall better responsiveness.
  • Efficient Multitasking: RAM allows your computer to run multiple applications simultaneously without significant performance degradation. Each application gets its own dedicated space in RAM, enabling them to operate independently.
  • Smooth Operation: When your computer runs out of RAM, it starts using the hard drive as temporary storage, leading to significantly slower performance. This is known as "swapping" and can cause noticeable lag and delays in your system.

Factors Influencing Memory Usage in Windows 11

Memory usage in Windows 11 is influenced by a combination of factors:

  • Operating System: Windows 11 itself requires a certain amount of RAM to function, and this requirement can vary depending on the version and features enabled.
  • Background Processes: Windows 11 runs numerous background processes, such as system updates, antivirus scans, and indexing services, which consume a portion of RAM.
  • Installed Applications: Each application you install requires a certain amount of memory to run. Some applications, especially resource-intensive ones like video editing software or gaming applications, consume a significant amount of RAM.
  • Open Tabs and Windows: Every browser tab, window, and application you have open consumes RAM. The more you have open, the higher your memory usage will be.
  • System Resources: Hardware components like graphics cards and sound cards also utilize a small amount of RAM for their operations.

Normal Memory Usage in Windows 11

There is no single "normal" memory usage value for Windows 11. It varies significantly based on the factors mentioned above and the specific configuration of your system. However, a good rule of thumb is that your memory usage should generally stay below 80% of your total RAM capacity. If your memory usage consistently hovers around 90% or higher, it can lead to performance issues.

How to Monitor Memory Usage

Windows 11 provides several ways to monitor your system’s memory usage:

  • Task Manager: The Task Manager is a built-in tool that provides detailed information about your system’s performance, including memory usage. You can access it by pressing Ctrl+Shift+Esc.
  • Resource Monitor: The Resource Monitor is a more advanced tool that provides even more detailed information about your system’s performance, including memory usage and how different processes are using memory. You can access it by searching for "Resource Monitor" in the Start menu.
  • Performance Monitor: The Performance Monitor is a powerful tool that allows you to monitor various system metrics, including memory usage, over time. You can access it by searching for "Performance Monitor" in the Start menu.

Troubleshooting High Memory Usage

If you notice consistently high memory usage in Windows 11, follow these steps to troubleshoot the issue:

  1. Identify Resource-Intensive Processes: Use the Task Manager or Resource Monitor to identify which processes are consuming the most memory. This will help you determine if the high memory usage is due to a specific application or a system process.
  2. Close Unnecessary Applications: Close any applications you are not actively using. This will free up RAM and improve your system’s performance.
  3. Disable Unnecessary Startup Programs: Many applications automatically start when you boot your computer, consuming valuable RAM. Use the Task Manager’s Startup tab to disable unnecessary programs from starting automatically.
  4. Run a System Scan: Run a full system scan using your antivirus software to rule out any malware or viruses that might be consuming excessive resources.
  5. Check for System Updates: Ensure that your system is up-to-date with the latest Windows updates, as they often include performance improvements and bug fixes.
  6. Consider Upgrading RAM: If your system’s RAM capacity is insufficient to handle your workload, consider upgrading to a higher capacity RAM module.

Tips for Optimizing Memory Usage

  • Limit Browser Tabs: Keep the number of open browser tabs to a minimum, as each tab consumes a small amount of memory.
  • Use Memory-Efficient Applications: Opt for applications known for their low memory footprint, especially when multitasking.
  • Disable Unnecessary Visual Effects: Windows 11 offers various visual effects that can enhance the user experience but also consume additional resources. Consider disabling unnecessary visual effects to free up memory.
  • Regularly Clean Up Your System: Regularly clean up temporary files, unused applications, and outdated data to free up disk space and improve overall system performance.
  • Monitor System Health: Regularly monitor your system’s health and performance using the tools mentioned above to identify potential memory-related issues early on.

FAQs on Memory Usage in Windows 11

Q: How much RAM do I need for Windows 11?

A: Microsoft recommends at least 4GB of RAM for Windows 11, but 8GB is generally considered the minimum for a smooth and responsive experience. For more demanding tasks like gaming or video editing, 16GB or more is recommended.

Q: What is "Page File" and how does it affect memory usage?

A: The Page File is a temporary file stored on your hard drive that acts as an extension of RAM. When your system runs out of RAM, it uses the Page File to store data temporarily, which can slow down performance.

Q: Why is my memory usage high even when I’m not using many applications?

A: This could be due to background processes, system services, or even a memory leak in a running application. Use the Task Manager or Resource Monitor to identify the culprit and take appropriate action.

Q: How can I prevent my system from using too much RAM?

A: You can prevent excessive RAM usage by closing unnecessary applications, disabling unnecessary startup programs, and optimizing system settings. Regularly monitoring your system’s memory usage and taking proactive steps to address potential issues can help maintain optimal performance.

Conclusion

Understanding memory usage in Windows 11 is essential for maintaining optimal system performance. By monitoring your system’s memory usage, identifying resource-intensive processes, and implementing best practices for memory optimization, you can ensure a smooth and responsive computing experience. Remember that the amount of RAM needed varies depending on your usage patterns and system configuration. By following the tips and guidelines provided in this article, you can effectively manage your system’s memory usage and maximize its performance.

High Memory Usage in Windows 11: 5 Solutions How To Reduce Ram Usage Windows 11 Alpha Computer - vrogue.co How to Fix Windows 11 High Memory Usage? Here Are Easy Fixes - MiniTool
Windows 11 Ram Usage FIX Windows 11 High Memory Usage  RAM Usage In Windows 11 [Tutorial] - YouTube How Do I Fix High Memory Usage Windows 11?
You can run Windows 11 on just 200MB of RAM – but should you? • The Register High Memory Usage Windows 11 - YouTube

Closure

Thus, we hope this article has provided valuable insights into Understanding Memory Usage in Windows 11: A Comprehensive Guide. We thank you for taking the time to read this article. See you in our next article!

Oracle VirtualBox: A Powerful Tool For Windows 10 Users

Oracle VirtualBox: A Powerful Tool for Windows 10 Users

Introduction

In this auspicious occasion, we are delighted to delve into the intriguing topic related to Oracle VirtualBox: A Powerful Tool for Windows 10 Users. Let’s weave interesting information and offer fresh perspectives to the readers.

Oracle VirtualBox: A Powerful Tool for Windows 10 Users

How to download and install oracle vm virtualbox on windows 10 - YouTube

Oracle VirtualBox is a widely recognized and free open-source virtualization software that enables users to run different operating systems simultaneously on a single computer. This capability proves invaluable for various scenarios, including software testing, development, education, and general system exploration. This article explores the core features, benefits, and practical applications of Oracle VirtualBox on Windows 10, providing a comprehensive guide for users seeking to unlock its potential.

Understanding Virtualization and its Role in Modern Computing

Virtualization, at its core, involves the creation of virtual environments that mimic the behavior of physical hardware. These virtual environments can host operating systems, applications, and data, all within a confined space on the host machine. This technology offers significant advantages:

  • Resource Optimization: Virtualization allows users to maximize hardware utilization by running multiple operating systems on a single machine, eliminating the need for separate physical computers.
  • Isolation and Security: Virtual environments provide a secure sandbox, preventing potential conflicts and malware infections from affecting the host operating system.
  • Flexibility and Scalability: Virtualization facilitates easy deployment and scaling of applications and environments, enabling rapid adaptation to changing needs.
  • Testing and Development: Virtual environments serve as safe testing grounds for new software, operating systems, or configurations without risking the stability of the host system.

The Advantages of Oracle VirtualBox for Windows 10

Oracle VirtualBox distinguishes itself as a leading virtualization solution due to its robust features and user-friendly interface. Here are some key benefits it offers:

  • Cross-Platform Compatibility: VirtualBox seamlessly integrates with various operating systems, including Windows, macOS, Linux, and Solaris, allowing users to run diverse virtual machines on their Windows 10 host.
  • Ease of Use: VirtualBox boasts a straightforward interface, making it accessible to both novice and experienced users. The intuitive design simplifies the creation, management, and operation of virtual machines.
  • Rich Feature Set: Oracle VirtualBox provides a comprehensive set of features, including support for multiple virtual CPUs, RAM allocation, shared folders, and network configurations, allowing users to tailor virtual environments to their specific needs.
  • Free and Open-Source: VirtualBox is available free of charge, making it an attractive option for individuals and organizations seeking cost-effective virtualization solutions. Its open-source nature fosters community contributions, ensuring ongoing development and improvement.
  • Active Community Support: VirtualBox benefits from a vibrant community of users and developers who contribute to forums, documentation, and tutorials, providing a wealth of resources for troubleshooting and learning.

Practical Applications of Oracle VirtualBox on Windows 10

Oracle VirtualBox’s versatility extends across diverse applications, making it an invaluable tool for various users:

  • Software Development and Testing: Developers can utilize VirtualBox to create isolated environments for testing applications in different operating systems and configurations, ensuring compatibility and stability.
  • Educational Purposes: Students and educators can leverage VirtualBox to explore different operating systems, experiment with software, and learn about computer architecture and network configurations in a safe and controlled environment.
  • System Administration and Troubleshooting: System administrators can use VirtualBox to test and deploy new software updates or configurations in a virtual environment before applying them to the production system, minimizing potential disruptions.
  • Security Research and Analysis: Security professionals can utilize VirtualBox to create isolated environments for analyzing malware, testing security tools, and experimenting with different security configurations.
  • Running Legacy Applications: VirtualBox allows users to run older applications that may not be compatible with the latest operating systems. This is especially useful for businesses that rely on legacy software or individuals who need to access older documents or programs.

Setting Up and Using Oracle VirtualBox on Windows 10

Installing and configuring VirtualBox on Windows 10 is a straightforward process:

  1. Download and Install: Download the VirtualBox installer from the official Oracle website and follow the on-screen instructions to complete the installation.
  2. Create a Virtual Machine: Launch VirtualBox and click on the "New" button to create a new virtual machine. Choose the desired operating system, allocate sufficient RAM, and create a virtual hard disk.
  3. Install the Guest Operating System: Insert the installation media (ISO image or DVD) for the guest operating system and configure the virtual machine to boot from it. Follow the on-screen prompts to install the guest operating system.
  4. Configure Network Settings: Adjust the network settings to allow communication between the virtual machine and the host operating system. You can choose from different network modes, including bridged, NAT, and host-only.
  5. Install Guest Additions: Install the VirtualBox Guest Additions software within the virtual machine to enhance performance and integration with the host operating system. This includes features like seamless mouse integration and shared folders.

FAQs about Oracle VirtualBox on Windows 10

1. Is Oracle VirtualBox safe to use?

Oracle VirtualBox is a reputable and widely used virtualization software. However, as with any software, it is crucial to download it from the official Oracle website to avoid potential malware or security vulnerabilities.

2. How much RAM do I need for VirtualBox?

The required RAM depends on the operating system and applications running within the virtual machine. Generally, allocating at least 2 GB of RAM is recommended for a basic virtual machine. For more demanding workloads, allocate more RAM accordingly.

3. Can I run Windows 10 inside VirtualBox?

Yes, you can run Windows 10 as a guest operating system within VirtualBox on a Windows 10 host. This allows you to test Windows 10 updates or run Windows-specific applications within a controlled environment.

4. What are the best practices for using VirtualBox?

  • Allocate sufficient resources: Ensure your host system has enough RAM and CPU power to run the virtual machine smoothly.
  • Keep VirtualBox updated: Regularly update VirtualBox to benefit from the latest features and security patches.
  • Use a separate virtual hard disk: Create a dedicated virtual hard disk for each virtual machine to avoid data conflicts and improve performance.
  • Back up your virtual machines: Regularly back up your virtual machines to protect against data loss.

Tips for Optimizing Oracle VirtualBox on Windows 10

  • Enable Hardware Virtualization: Ensure that hardware virtualization is enabled in your BIOS settings to improve performance.
  • Adjust the Video Memory: Increase the video memory allocated to the virtual machine for smoother graphics rendering.
  • Use a Shared Folder: Configure a shared folder to easily transfer files between the host and guest operating systems.
  • Optimize Network Settings: Experiment with different network modes to find the best configuration for your specific needs.
  • Consider a VirtualBox Extension Pack: Install the VirtualBox Extension Pack for additional features, such as USB support and remote desktop access.

Conclusion

Oracle VirtualBox empowers Windows 10 users with a versatile and powerful virtualization solution, offering a wide range of benefits, from software development and testing to system administration and education. Its ease of use, comprehensive feature set, and active community support make it an ideal choice for individuals and organizations seeking to unlock the potential of virtualization. By understanding its capabilities and utilizing best practices, users can leverage VirtualBox to enhance their productivity, security, and flexibility in a modern computing landscape.

Oracle vm virtualbox for windows 10 - sharpfad Oracle VirtualBox  Examples and Usage of Oracle VirtualBox Download Oracle VM VirtualBox 6.1.14
Tutorial How to Install Windows 10 64 bit on Oracle VM VirtualBox - YouTube Download Oracle VM VirtualBox 6.1.14 Oracle vm virtualbox tutorial windows 10 - asewa
How to download Oracle virtualbox and install on Windows 10 32bit - YouTube Oracle virtualbox download for windows 10 - nashvillesno

Closure

Thus, we hope this article has provided valuable insights into Oracle VirtualBox: A Powerful Tool for Windows 10 Users. We appreciate your attention to our article. See you in our next article!

A Comprehensive Guide To The Windows 11 Download Assistant

A Comprehensive Guide to the Windows 11 Download Assistant

Introduction

With great pleasure, we will explore the intriguing topic related to A Comprehensive Guide to the Windows 11 Download Assistant. Let’s weave interesting information and offer fresh perspectives to the readers.

A Comprehensive Guide to the Windows 11 Download Assistant

Windows 11 download assistant - locedsuccess

The Windows 11 Download Assistant is a powerful tool designed to streamline the process of upgrading to Windows 11. It simplifies the upgrade experience, offering a user-friendly interface and a comprehensive set of features that ensure a smooth transition. This article provides a detailed analysis of the Windows 11 Download Assistant, exploring its functionality, benefits, and how it can be effectively utilized.

Understanding the Windows 11 Download Assistant

The Windows 11 Download Assistant is a dedicated application that enables users to download and install Windows 11 on their compatible devices. It acts as a bridge between the existing operating system and the latest version, guiding users through the entire upgrade process. This tool is designed to be intuitive and user-friendly, simplifying the often complex task of upgrading to a new operating system.

Key Features of the Download Assistant

The Windows 11 Download Assistant offers a range of features that contribute to a seamless and efficient upgrade experience:

  • Automatic System Check: The tool performs a comprehensive system check to determine compatibility with Windows 11. This ensures that users only proceed with the upgrade if their device meets the minimum requirements, minimizing potential issues during installation.
  • Download and Installation Management: The Assistant handles the download and installation of Windows 11, automating the process and eliminating the need for manual intervention. This streamlines the upgrade, reducing user effort and potential errors.
  • Data Preservation: The Download Assistant prioritizes data preservation during the upgrade. It ensures that user files, settings, and applications are transferred to the new operating system, minimizing data loss and ensuring a smooth transition.
  • Progress Tracking and Notifications: The Assistant provides real-time progress updates during the download and installation process, keeping users informed about the status of the upgrade. It also delivers notifications, ensuring users are aware of any crucial steps or updates.

Benefits of Utilizing the Download Assistant

The Windows 11 Download Assistant offers numerous benefits for users considering an upgrade:

  • Simplified Upgrade Process: The Assistant streamlines the upgrade process, minimizing manual steps and user effort. This makes the transition to Windows 11 more accessible, even for users with limited technical expertise.
  • Enhanced Compatibility Check: The built-in compatibility check ensures that users only proceed with the upgrade if their device meets the minimum requirements. This reduces the risk of encountering compatibility issues or performance problems after the upgrade.
  • Data Security and Preservation: The Assistant prioritizes data security and preservation, ensuring that user files, settings, and applications are transferred safely to the new operating system. This minimizes data loss and ensures a smooth transition.
  • Technical Support and Guidance: The Download Assistant provides comprehensive support and guidance throughout the upgrade process. It offers troubleshooting tips, answers common questions, and provides clear instructions, ensuring a smooth and successful upgrade experience.

FAQs about the Windows 11 Download Assistant

Q: What are the minimum system requirements for Windows 11?

A: To ensure optimal performance and compatibility, Windows 11 requires a device with the following minimum specifications:

  • Processor: 1 gigahertz (GHz) or faster with 2 or more cores
  • RAM: 4 gigabytes (GB)
  • Storage: 64 GB or larger storage drive
  • System Firmware: UEFI, Secure Boot capable
  • Graphics Card: Compatible with DirectX 12 or later with WDDM 2.0 driver
  • Display: High Definition (720p) display with a minimum resolution of 9 inches diagonally

Q: Can I upgrade my device to Windows 11 using the Download Assistant if it doesn’t meet the minimum requirements?

A: No, the Download Assistant will only proceed with the upgrade if your device meets the minimum system requirements. Attempting to upgrade an incompatible device may result in performance issues, instability, or even data loss.

Q: What happens to my existing files and applications during the upgrade?

A: The Download Assistant is designed to preserve your existing data during the upgrade. It will transfer your files, settings, and applications to the new operating system, ensuring a seamless transition.

Q: Can I use the Download Assistant to install Windows 11 on a new device?

A: The Download Assistant is specifically designed for upgrading existing devices to Windows 11. To install Windows 11 on a new device, you will need to use a different method, such as a USB installation media or a clean install from a bootable drive.

Q: What happens if the upgrade process fails?

A: If the upgrade process fails, you can attempt to troubleshoot the issue using the resources provided by Microsoft. You can also contact Microsoft support for assistance. In most cases, the upgrade can be successfully completed by resolving the underlying issue.

Tips for Utilizing the Windows 11 Download Assistant

  • Ensure Your Device Meets System Requirements: Before proceeding with the upgrade, verify that your device meets the minimum system requirements for Windows 11. This will ensure a smooth and successful upgrade experience.
  • Back Up Your Data: Always create a backup of your important files and data before starting the upgrade process. This will provide a safety net in case of unexpected issues or data loss.
  • Connect to a Stable Internet Connection: The upgrade process requires a stable internet connection to download and install Windows 11. Ensure you have a reliable connection throughout the upgrade process.
  • Follow On-Screen Instructions: Pay close attention to the on-screen instructions provided by the Download Assistant. These instructions will guide you through each step of the upgrade process, ensuring a smooth transition.
  • Allow Sufficient Time: The upgrade process can take some time, depending on the size of your hard drive and the speed of your internet connection. Allow sufficient time for the upgrade to complete without interruptions.

Conclusion

The Windows 11 Download Assistant is an essential tool for users looking to upgrade their devices to the latest version of Windows. It streamlines the upgrade process, ensuring a smooth and efficient transition while prioritizing data preservation and compatibility. By understanding the features, benefits, and best practices associated with the Download Assistant, users can confidently navigate the upgrade process and enjoy the full potential of Windows 11.

How to Download and Use Windows 11 Installation Assistant to Install Windows 11?  Gear up Download Windows 11 Installation & Update Assistant Windows 11 download assistant - westdd
How to Upgrade to Windows 11 With Installation Assistant Download windows 11 assistant - rewamgmt Download windows 11 assistant - lasopaanywhere
Windows 11 download assistant - locedsuccess Windows 11 update assistant download - everdax

Closure

Thus, we hope this article has provided valuable insights into A Comprehensive Guide to the Windows 11 Download Assistant. We thank you for taking the time to read this article. See you in our next article!