Empowering Windows 11 Administration: A Guide To Installing RSAT With PowerShell
Empowering Windows 11 Administration: A Guide to Installing RSAT with PowerShell
Related Articles: Empowering Windows 11 Administration: A Guide to Installing RSAT with PowerShell
Introduction
With great pleasure, we will explore the intriguing topic related to Empowering Windows 11 Administration: A Guide to Installing RSAT with PowerShell. Let’s weave interesting information and offer fresh perspectives to the readers.
Table of Content
Empowering Windows 11 Administration: A Guide to Installing RSAT with PowerShell
Windows 11’s robust feature set includes the ability to manage other Windows systems within a network. To unlock this functionality, administrators require the Remote Server Administration Tools (RSAT). These tools provide a comprehensive suite of management utilities, enabling control over various aspects of remote Windows machines, from user accounts and group policies to server roles and features.
While the traditional method of installing RSAT involves navigating through Windows features, PowerShell offers a streamlined and efficient approach. This article explores the power of PowerShell in installing RSAT on Windows 11, providing a detailed guide for administrators seeking to manage remote systems effectively.
Understanding the Power of PowerShell for RSAT Installation
PowerShell, a powerful scripting language for automating tasks, offers several advantages over manual installation methods:
- Automation: PowerShell scripts enable the automated installation of RSAT, eliminating the need for manual steps across multiple machines. This saves significant time and effort, especially in large network environments.
- Centralized Management: Scripts can be centrally stored and executed, ensuring consistent and standardized installation across the entire network. This eliminates potential inconsistencies arising from manual installations.
- Error Handling: PowerShell scripts can be equipped with robust error handling mechanisms, ensuring that installation processes are completed successfully. This reduces the risk of errors and facilitates troubleshooting.
- Flexibility: PowerShell scripts can be customized to meet specific installation requirements, allowing for fine-grained control over the installation process.
PowerShell Commands for Installing RSAT
The following PowerShell commands are used to install RSAT on Windows 11. These commands can be executed directly in a PowerShell console or incorporated into a script for automated installations.
1. Enabling Feature Installation
Before installing RSAT, ensure that the "Windows Features" functionality is enabled. This is done by running the following command:
Enable-WindowsOptionalFeature -Online -FeatureName RSAT-ToolsThis command instructs Windows to enable the RSAT features, which are categorized as optional features.
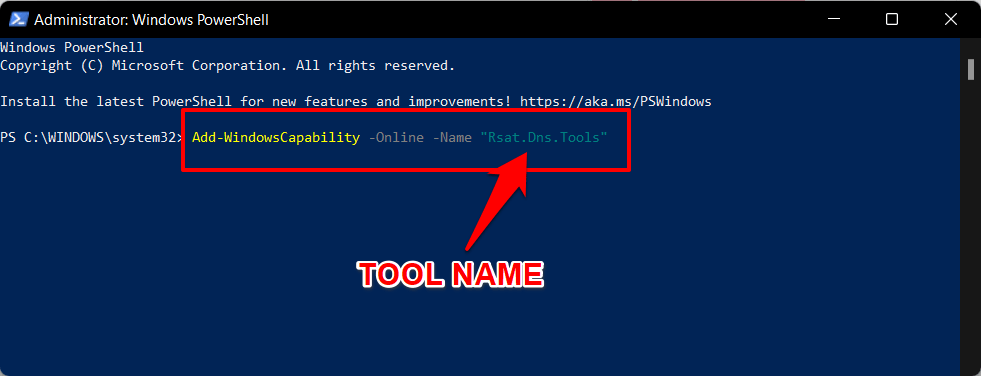
2. Installing Specific RSAT Components
RSAT is comprised of various tools grouped into different feature categories. To install specific tools, use the following command structure:
Enable-WindowsOptionalFeature -Online -FeatureName <FeatureName>Replace <FeatureName> with the specific RSAT feature name. For example, to install the Active Directory Domain Services tools, use the following command:
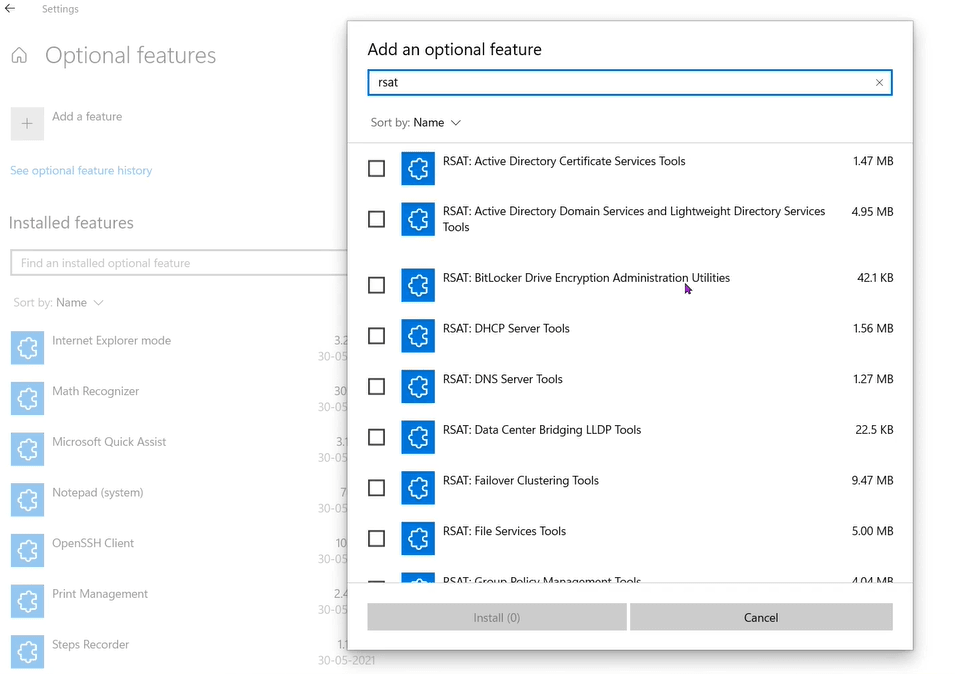
Enable-WindowsOptionalFeature -Online -FeatureName RSAT-AD-ToolsHere are some commonly used RSAT features and their corresponding names:
- Active Directory Domain Services Tools: RSAT-AD-Tools
- Active Directory Lightweight Directory Services Tools: RSAT-ADLDS-Tools
- DNS Server Tools: RSAT-DNS-Tools
- Group Policy Management Tools: RSAT-GroupPolicy-Tools
- Hyper-V Tools: RSAT-Hyper-V-Tools
- Print Server Tools: RSAT-PrintServer-Tools
- Remote Desktop Services Tools: RSAT-RDS-Tools
- Windows Server Update Services Tools: RSAT-WSUS-Tools
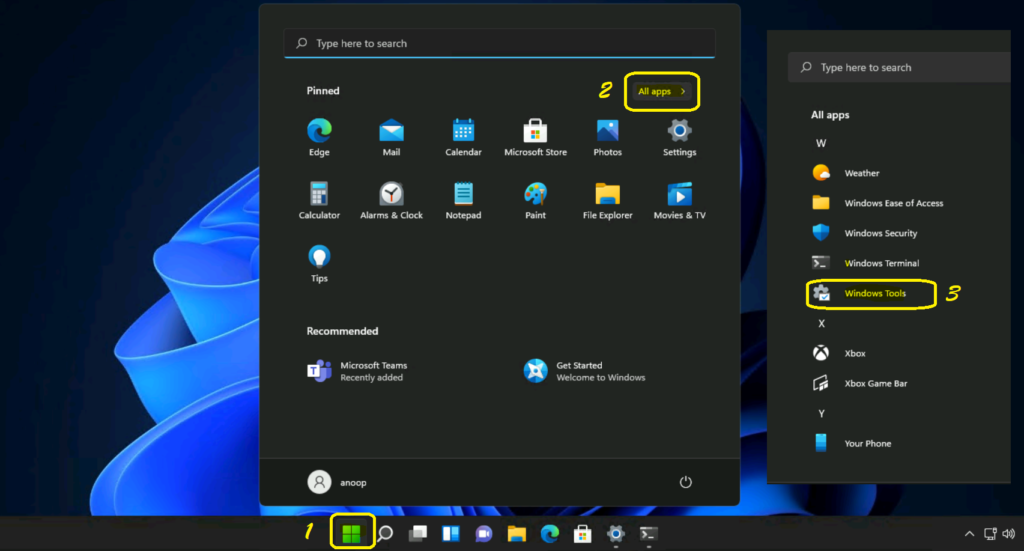
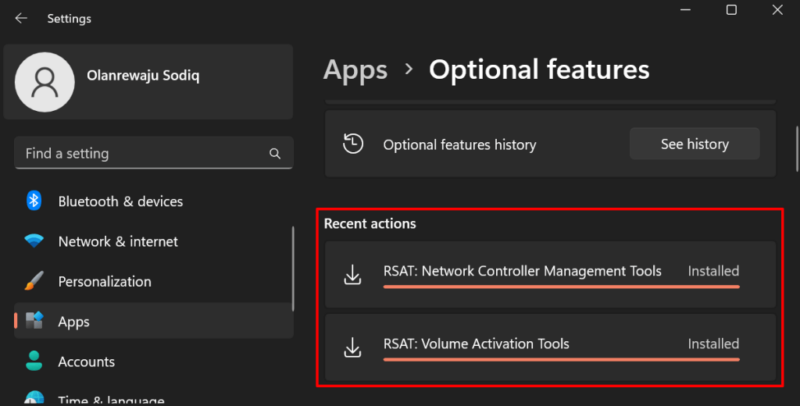
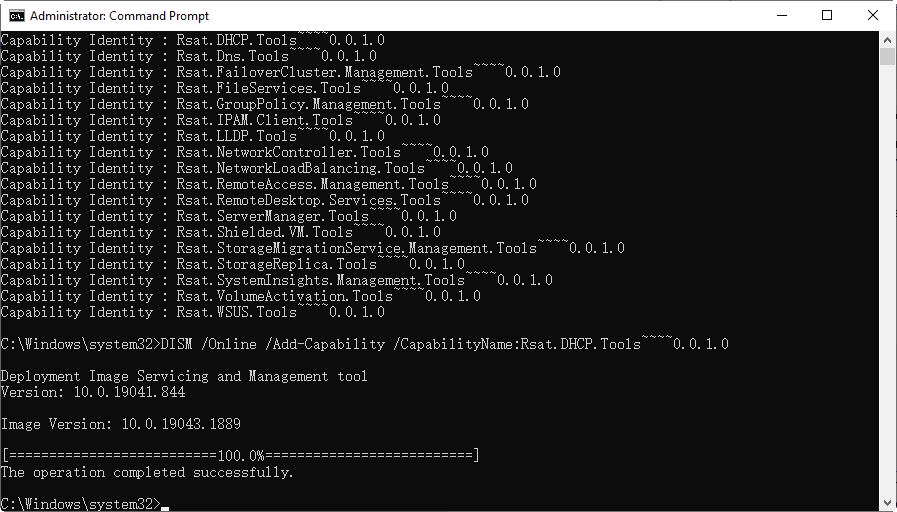
3. Verifying Installation
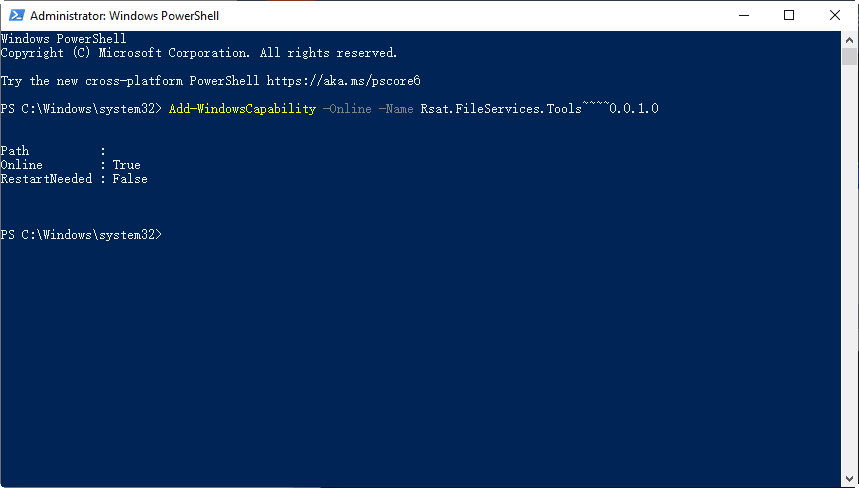
After executing the installation commands, verify the installation by checking the "Windows Features" control panel. Alternatively, use the following PowerShell command to list all enabled features:
Get-WindowsOptionalFeature -OnlineThis command will display a list of all enabled features, including the installed RSAT components.
Important Considerations
- Administrative Privileges: Executing PowerShell commands for RSAT installation requires administrator privileges. Ensure you are running PowerShell as an administrator.
- Network Connectivity: If managing remote servers, ensure proper network connectivity between the machine installing RSAT and the target servers.
- Feature Availability: Not all RSAT features are available in every version of Windows 11. Refer to the official Microsoft documentation for specific feature availability.
- Reboot Requirement: Installing RSAT may require a system reboot. The installation process will prompt you if a reboot is necessary.
FAQs
Q: What are the benefits of installing RSAT using PowerShell?
A: PowerShell offers several advantages over manual installation methods, including:
- Automation: Scripting enables efficient installation across multiple machines.
- Centralized Management: Scripts can be stored and executed centrally, ensuring consistency.
- Error Handling: Scripts can include error handling mechanisms, reducing installation failures.
- Flexibility: Scripts can be customized to meet specific installation requirements.
Q: Can I install specific RSAT features instead of the entire suite?
A: Yes, PowerShell allows you to install individual RSAT features using the Enable-WindowsOptionalFeature command with the specific feature name.
Q: What if I encounter errors during installation?
A: Review the error message for clues. Check for sufficient administrative privileges, network connectivity, and correct feature names. If necessary, consult the official Microsoft documentation or online resources for troubleshooting guidance.
Q: Are there any pre-requisites for installing RSAT?
A: The primary prerequisite is a Windows 11 operating system. Depending on the specific RSAT features being installed, additional pre-requisites may be required. Refer to the official Microsoft documentation for detailed requirements.
Tips
- Create a Script: For repeated installations or large-scale deployments, create a PowerShell script to automate the process.
- Utilize Error Handling: Incorporate error handling mechanisms in your script to prevent unexpected failures and facilitate troubleshooting.
- Document Your Script: Clearly document the purpose and steps involved in your script to ensure maintainability and understanding.
- Test Thoroughly: Before deploying your script in a production environment, thoroughly test it in a controlled environment to ensure it functions as expected.
Conclusion
PowerShell provides a powerful and efficient method for installing RSAT on Windows 11. By leveraging the automation capabilities of PowerShell, administrators can streamline RSAT installations, ensure consistency across their network, and reduce the potential for errors. Understanding the key commands and incorporating best practices can significantly enhance the management of remote systems within a Windows 11 environment.

![Install RSAT on Windows 11 [3 Different Ways]](https://cdn.windowsreport.com/wp-content/uploads/2021/10/install-rsat-windows-11.jpg)

Closure
Thus, we hope this article has provided valuable insights into Empowering Windows 11 Administration: A Guide to Installing RSAT with PowerShell. We thank you for taking the time to read this article. See you in our next article!


![How to Check RAM on Windows 11 [Step by Step Guide]](https://10scopes.com/wp-content/uploads/2021/12/windows-11-ram.jpg)
![How to Increase RAM in Windows 11 [ No Real RAM Installation Required ] Speed Up Windows 11](https://i.ytimg.com/vi/LLZAc_Izt88/maxresdefault.jpg)

![How to Check RAM on Windows 11 [Step by Step Guide]](https://10scopes.com/wp-content/uploads/2021/12/check-ram-on-windows-11.jpg)
![How To Fix High RAM/Memory Usage on Windows 11 [Complete Guide] - YouTube](https://i.ytimg.com/vi/rnAOFqBKXwM/maxresdefault.jpg)


![How To Install Windows 11 ISO [Developer Preview]: 3 Working Methods!](https://i0.wp.com/en.mohamedovic.com/wp-content/uploads/2021/06/Install-Windows-11-Guide.jpg)