Refreshing Your Windows 11 Experience: A Guide To Reinstallation Without Data Loss

Refreshing Your Windows 11 Experience: A Guide to Reinstallation Without Data Loss

Introduction

With enthusiasm, let’s navigate through the intriguing topic related to Refreshing Your Windows 11 Experience: A Guide to Reinstallation Without Data Loss. Let’s weave interesting information and offer fresh perspectives to the readers.

Refreshing Your Windows 11 Experience: A Guide to Reinstallation Without Data Loss

How to Reinstall Windows 11 Without Losing Data or Files - [2024] - YouTube

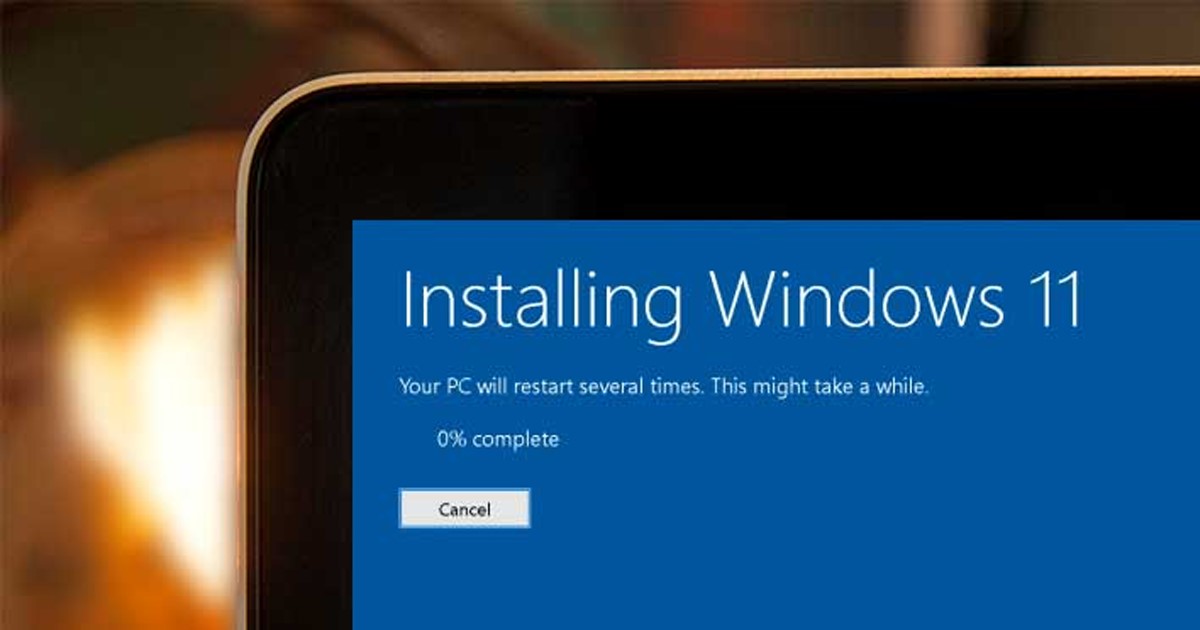
Windows 11, like any operating system, can accumulate unwanted files, outdated software, and system errors over time, leading to performance issues, sluggish response times, and even system instability. A clean installation, however, can revitalize your system, restoring it to a pristine state without the burden of accumulated clutter.

The prospect of reinstalling Windows 11 often evokes fear of data loss, prompting users to shy away from this potentially beneficial process. However, with careful planning and the right tools, reinstalling Windows 11 can be accomplished without losing precious data, ensuring a smooth transition to a fresh, optimized system.

Understanding the Need for Reinstallation

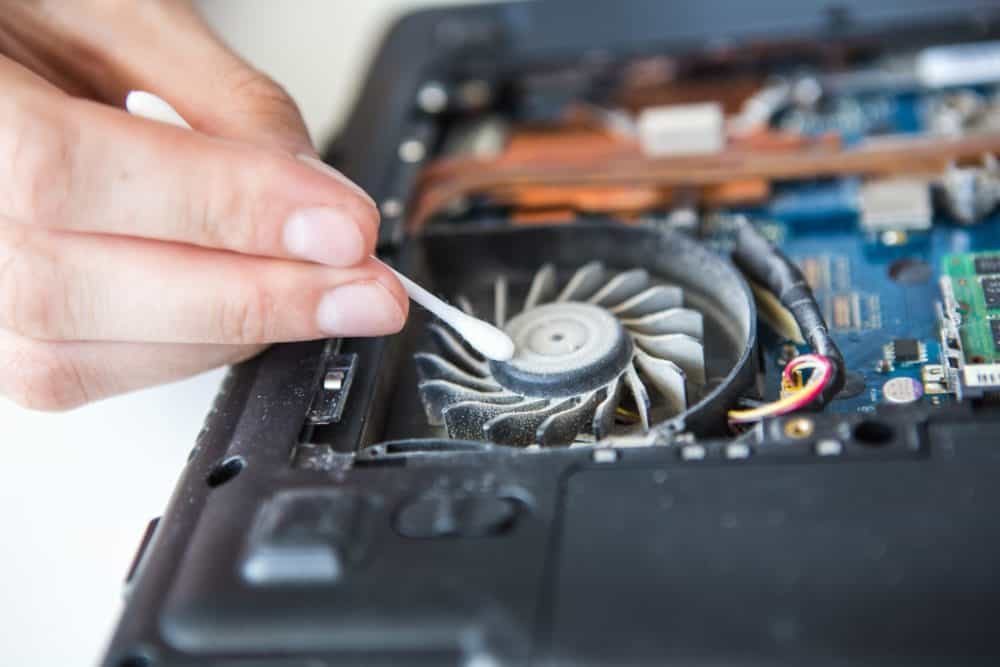
While a simple restart might address minor glitches, a complete reinstallation is often the most effective solution for more persistent issues. These issues can range from:

  • Performance Degradation: Over time, your system can accumulate unnecessary files, temporary data, and outdated software, leading to slower performance and increased startup times.
  • System Errors and Bugs: Errors can arise from corrupted files, outdated drivers, or even malware infections, causing crashes, freezes, and general instability.
  • Malware and Virus Infections: A clean installation can effectively remove malware and viruses, ensuring a secure computing environment.
  • Software Conflicts: Conflicting software installations can lead to unpredictable behavior and system crashes. A fresh installation provides a clean slate, eliminating potential conflicts.
  • Upgrading to a New Version: When upgrading to a newer version of Windows, a clean installation often ensures a smoother transition and optimal performance.

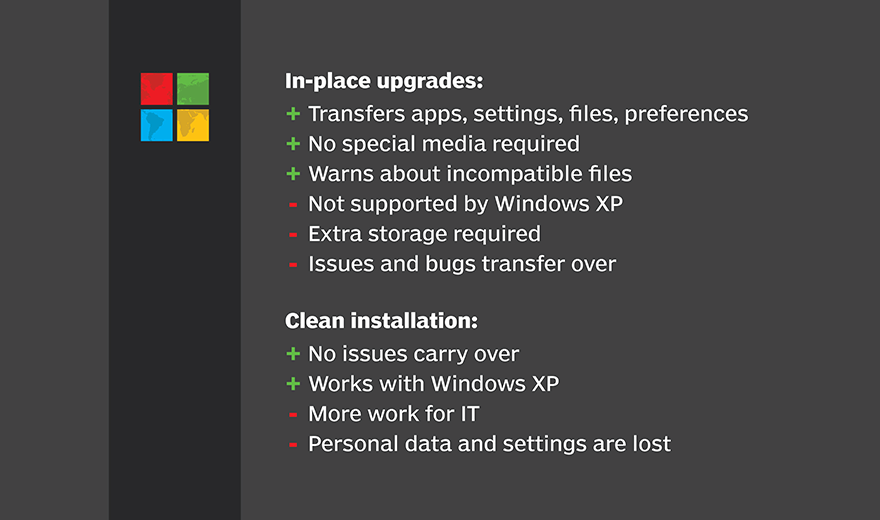
The Benefits of a Clean Installation

Reinstalling Windows 11 without data loss offers significant advantages:

  • Enhanced Performance: A clean system operates more efficiently, experiencing faster boot times, smoother application launches, and overall improved responsiveness.
  • Increased Stability: A fresh installation eliminates potential conflicts and errors, resulting in a more stable and reliable system.
  • Improved Security: A clean installation removes any lingering malware or viruses, enhancing system security.
  • Optimized Storage Space: A fresh installation removes unnecessary files and temporary data, freeing up valuable storage space.
  • Reduced System Clutter: A clean installation removes unnecessary software and customizations, streamlining your system and simplifying its operation.

Methods for Reinstalling Windows 11 Without Data Loss

There are two primary methods for reinstalling Windows 11 without losing data:

1. Using the "Reset This PC" Feature:

  • Built-in Functionality: Windows 11 offers a built-in "Reset This PC" feature that allows you to refresh your system without losing data.
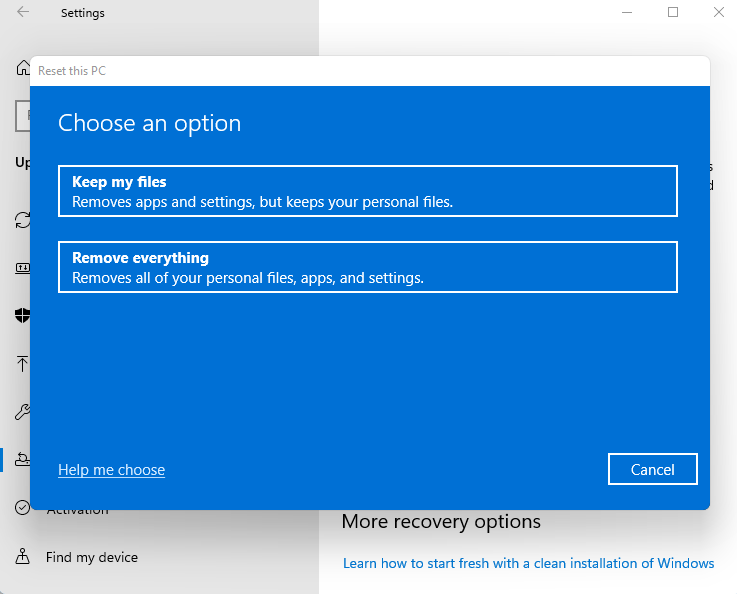
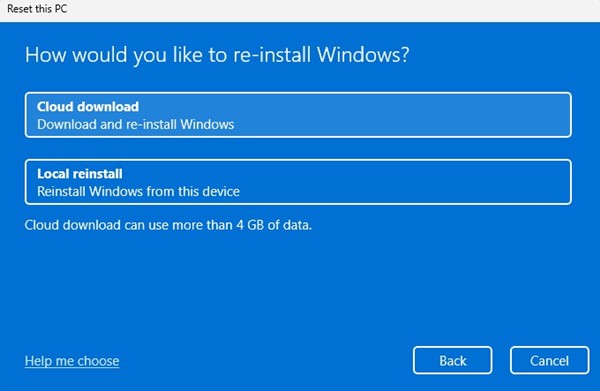
  • Two Options: The "Reset This PC" feature provides two options:
    • Keep My Files: This option preserves your personal files, apps, and settings while reinstalling Windows 11.
    • Remove Everything: This option performs a complete system reset, removing all files and applications.
  • Accessibility: The "Reset This PC" feature is easily accessible through the Settings app.
  • Simple and Efficient: This method is relatively straightforward and requires minimal technical knowledge.

2. Performing a Clean Install with Data Backup:

  • Manual Installation: This method involves manually reinstalling Windows 11 from a bootable USB drive or DVD.
  • Data Backup: Before proceeding with the clean installation, it is crucial to back up your data to an external drive or cloud storage service.
  • Advanced Control: This method allows for greater control over the installation process, enabling you to choose specific settings and features.
  • Technical Expertise: Performing a clean install requires a basic understanding of computer hardware and operating systems.

Step-by-Step Guide to Reinstalling Windows 11 Without Data Loss

Using the "Reset This PC" Feature:

  1. Open Settings: Press the Windows key + I to open the Settings app.
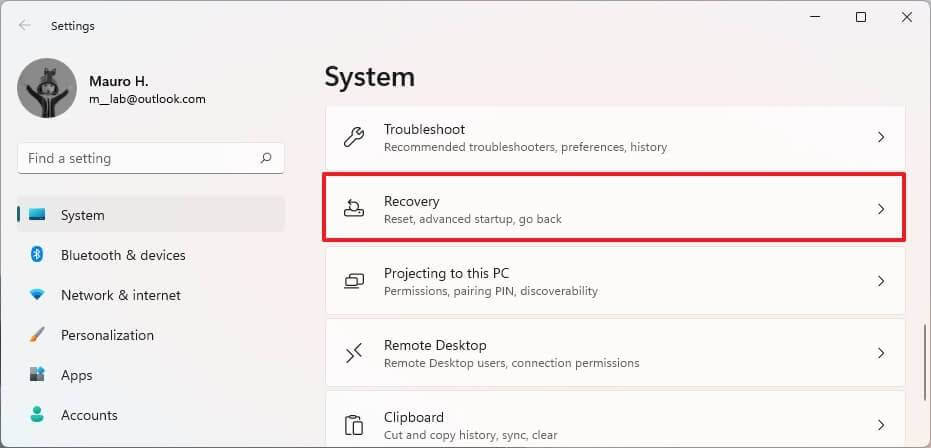
  2. Navigate to Recovery: Click on "System" and then select "Recovery."
  3. Choose "Reset This PC": Under the "Recovery options" section, click on "Reset this PC."
  4. Select "Keep My Files": Choose the "Keep my files" option to preserve your personal data.
  5. Confirm the Reset: Follow the on-screen instructions to confirm the reset process.
  6. Wait for the Reinstallation: The reinstallation process may take some time.
  7. Restart Your Computer: Once the reinstallation is complete, your computer will restart.

Performing a Clean Install with Data Backup:

  1. Back Up Your Data: Before proceeding, back up all your important data to an external hard drive or cloud storage service.
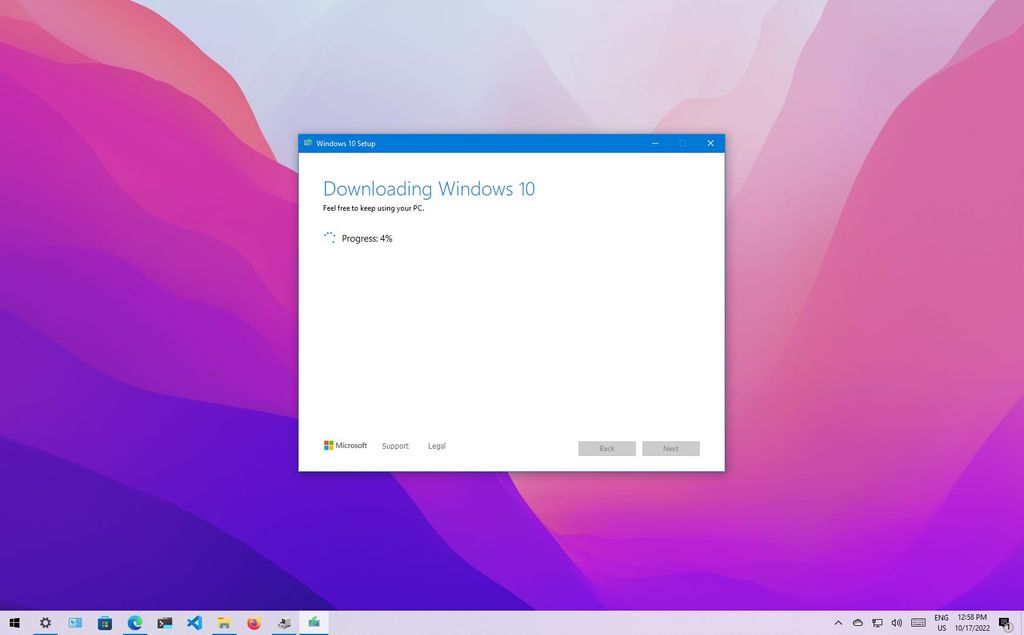
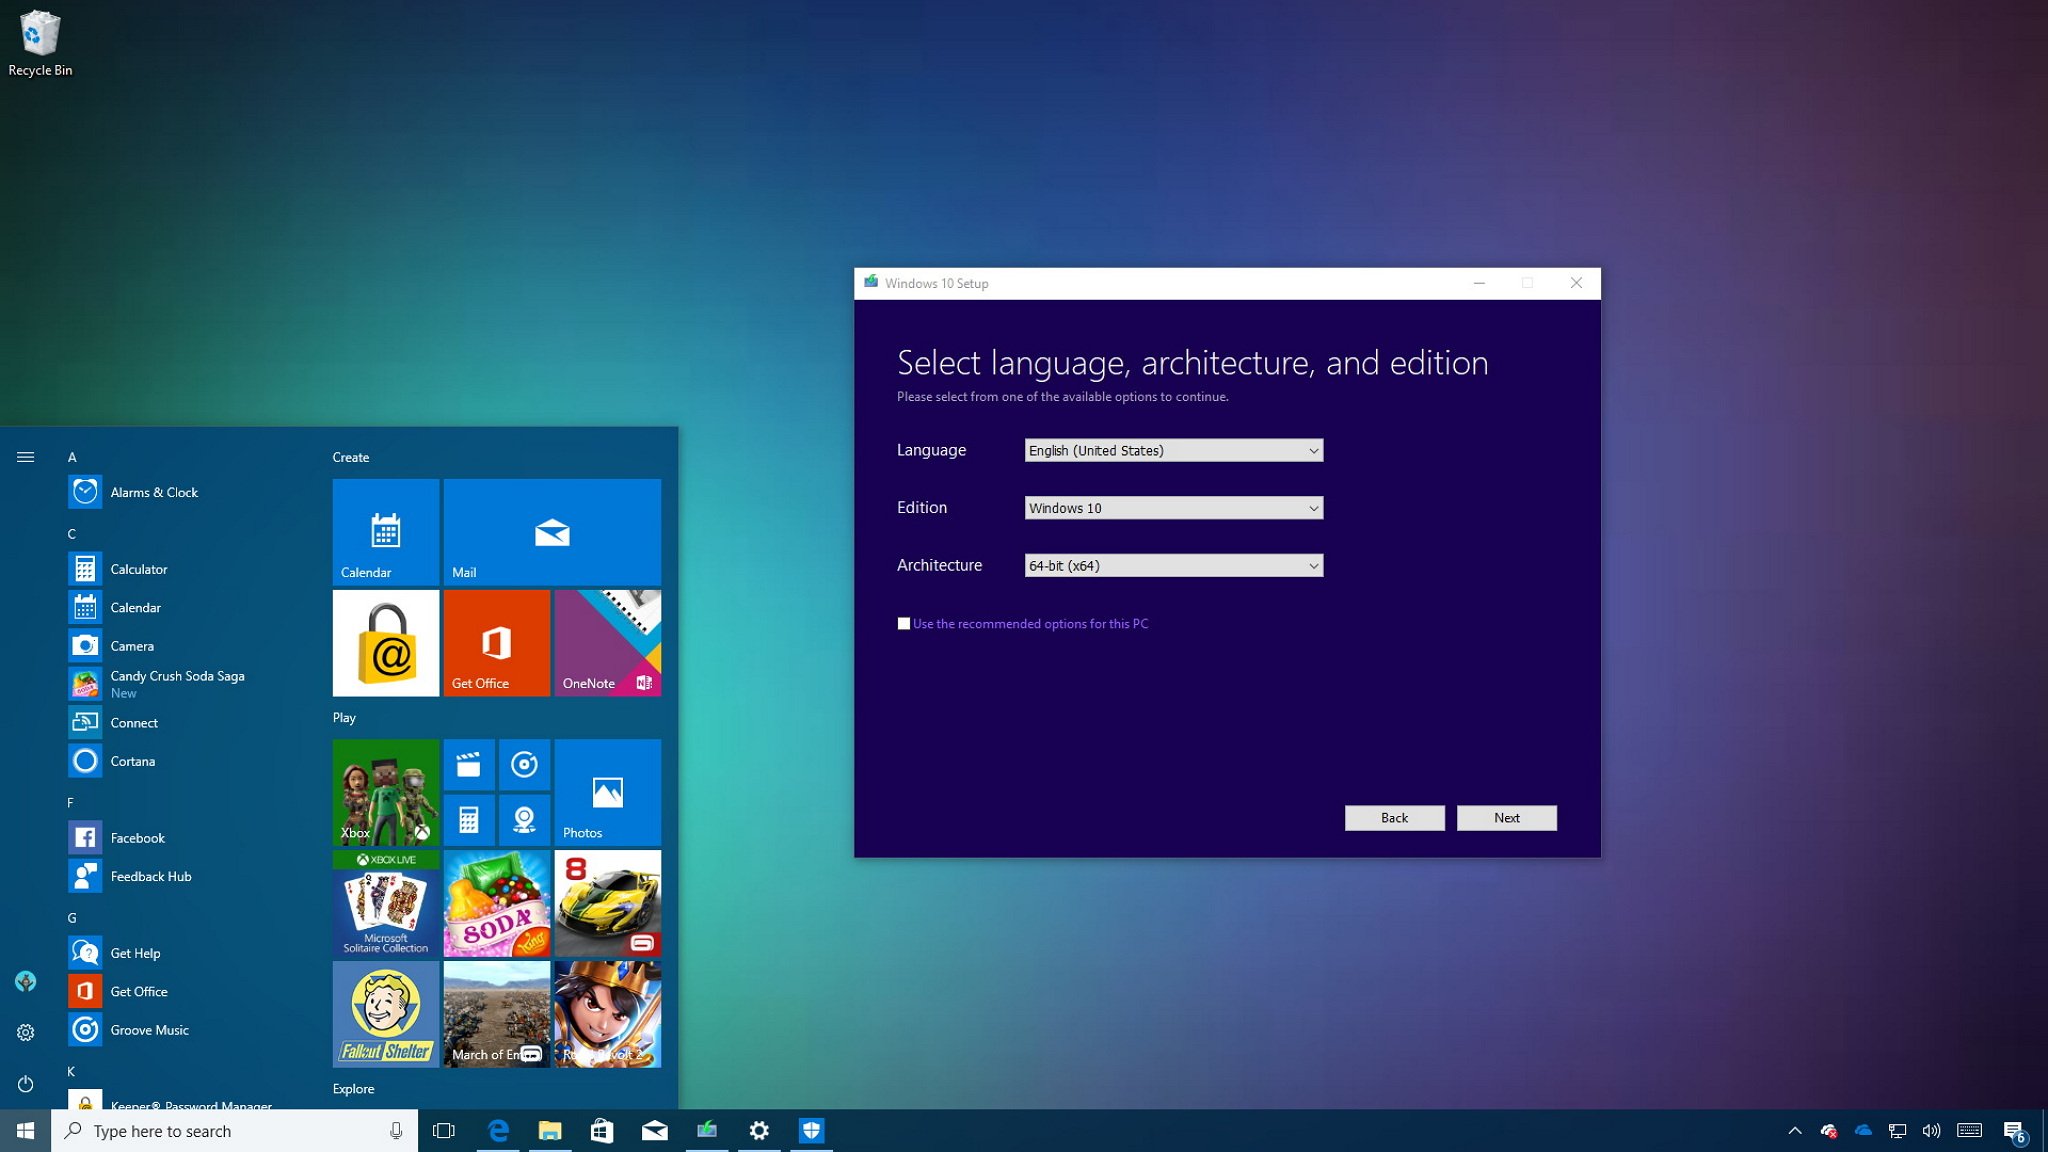
  2. Create a Bootable USB Drive: Download the Windows 11 installation media from Microsoft’s website and create a bootable USB drive.
  3. Boot from USB Drive: Change your computer’s boot order in the BIOS settings to boot from the USB drive.
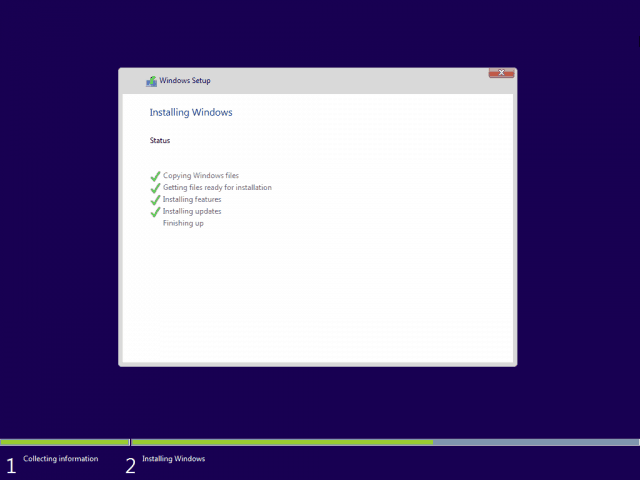
  4. Start the Installation: Follow the on-screen instructions to install Windows 11.
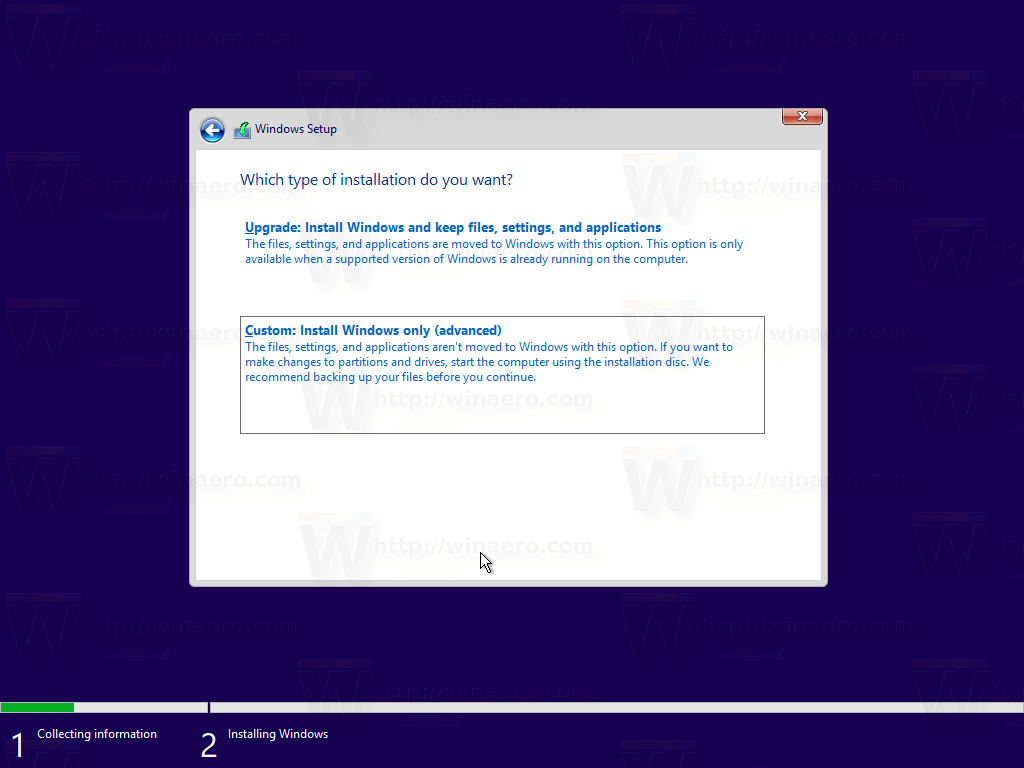
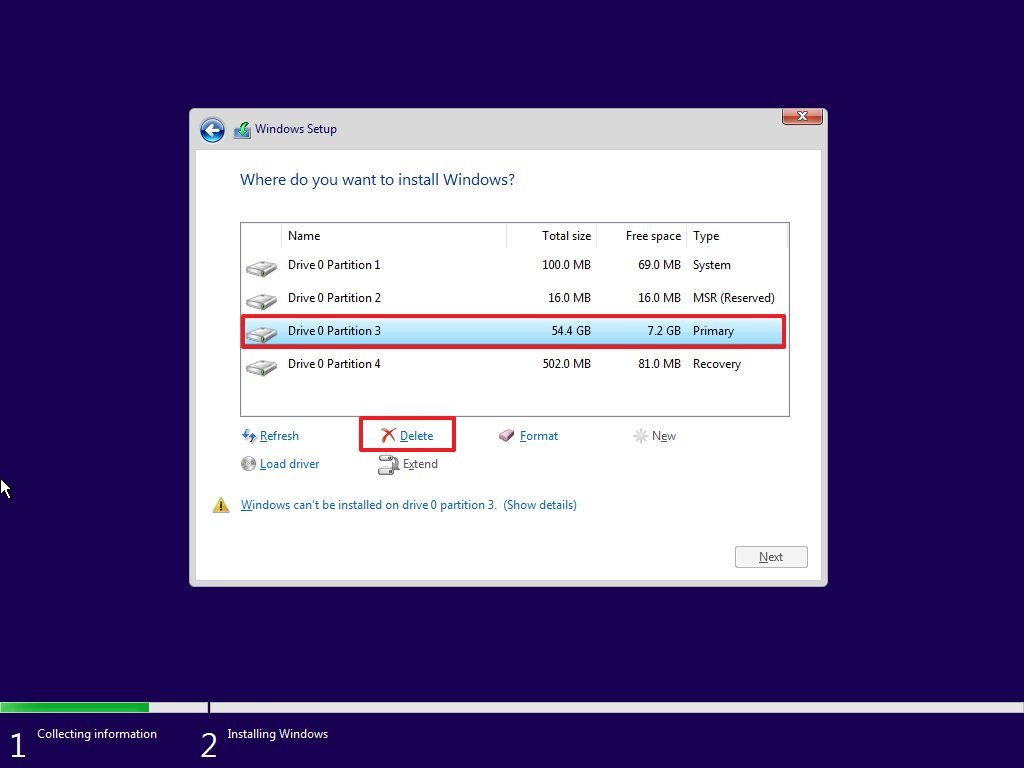
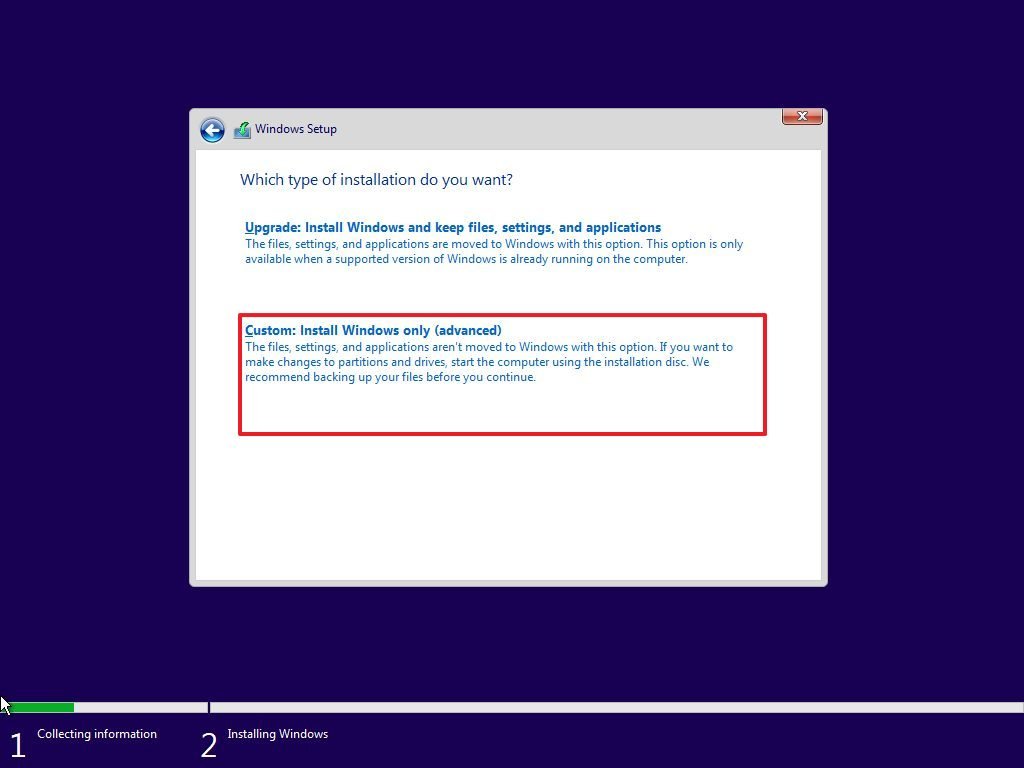
  5. Choose Custom Installation: Select the "Custom" installation option to install Windows 11 on a specific partition.
  6. Format the System Drive: Format the system drive where Windows 11 is to be installed.
  7. Complete the Installation: Follow the remaining installation steps to complete the process.
  8. Restore Your Data: After the installation is complete, restore your data from the backup.

FAQs on Reinstalling Windows 11 Without Data Loss

1. Is it safe to reinstall Windows 11 without losing data?

  • Yes, it is safe to reinstall Windows 11 without losing data if you use the "Keep My Files" option in the "Reset This PC" feature or if you back up your data before performing a clean install.

2. What happens to my applications after reinstalling Windows 11?

  • Using the "Reset This PC" feature with the "Keep My Files" option will preserve your installed applications. However, if you perform a clean install, you will need to reinstall all applications after the process is complete.

3. Will reinstalling Windows 11 affect my drivers?

  • Reinstalling Windows 11 will generally reinstall the necessary drivers for your hardware. However, you may need to update or reinstall specific drivers manually after the process is complete.

4. How long does it take to reinstall Windows 11?

  • The reinstallation time can vary depending on the method used and the speed of your computer. Generally, it can take anywhere from 30 minutes to a few hours.

5. What if I encounter errors during the reinstallation process?

  • If you encounter errors during the reinstallation process, it is best to consult Microsoft’s support website or contact a qualified technician for assistance.

Tips for Reinstalling Windows 11 Without Data Loss

  • Back up Your Data: Always back up your important data before performing a reinstallation.
  • Use a Reliable Backup Method: Choose a reliable backup method, such as an external hard drive or a cloud storage service.
  • Verify Your Backup: After creating a backup, verify that the data is intact and accessible.
  • Check System Requirements: Ensure that your computer meets the minimum system requirements for Windows 11 before proceeding with the reinstallation.
  • Download the Latest Installation Media: Use the latest version of the Windows 11 installation media to ensure compatibility and stability.
  • Read the Instructions Carefully: Follow the on-screen instructions carefully during the reinstallation process.
  • Be Patient: The reinstallation process can take some time, so be patient and allow it to complete without interruption.

Conclusion

Reinstalling Windows 11 without losing data is a powerful tool for revitalizing your system and resolving performance issues. By understanding the process, backing up your data, and following the provided steps, you can enjoy a clean, optimized Windows 11 experience without sacrificing your precious data.

Remember, a clean system is a more efficient, stable, and secure system. Embrace the opportunity to refresh your Windows 11 experience and unlock its full potential.

How to Reinstall Windows 11 Without Losing Data and Apps How to Reinstall Windows 11 without losing data How to Reinstall Windows 11 Without Losing Data
Reinstall Windows 11 Without Losing Apps How to Reinstall Windows 11 Without Losing Data  Reinstall Windows 11 Without an Installation Reset Windows 11 Without Losing Apps
How to Reinstall Windows 11 Without Losing Data and Apps How to Fresh Reinstall Windows 10/11 without Losing Data FREE

Closure

Thus, we hope this article has provided valuable insights into Refreshing Your Windows 11 Experience: A Guide to Reinstallation Without Data Loss. We thank you for taking the time to read this article. See you in our next article!

Navigating The Digital Landscape: The Benefits Of A Clean Windows 10 Installation

Navigating the Digital Landscape: The Benefits of a Clean Windows 10 Installation

Introduction

With enthusiasm, let’s navigate through the intriguing topic related to Navigating the Digital Landscape: The Benefits of a Clean Windows 10 Installation. Let’s weave interesting information and offer fresh perspectives to the readers.

How to do a clean installation of Windows 10  Windows Central

The modern operating system landscape is often cluttered with pre-installed applications, known as bloatware, which can hinder performance, consume storage space, and potentially compromise security. This phenomenon is particularly prevalent in Windows 10, where Microsoft and third-party vendors frequently bundle software into the system. However, a clean Windows 10 installation, devoid of unnecessary software, offers a streamlined, efficient, and secure user experience.

The Bloatware Conundrum: A Deeper Dive

Bloatware, often perceived as unwanted baggage, serves various purposes. From a manufacturer’s perspective, it provides an opportunity to monetize through bundled software subscriptions or trial versions. For software developers, it represents a chance to introduce their applications to a wider audience. However, for the end user, the consequences can be detrimental.

  • Performance Degradation: Bloatware consumes system resources, including CPU cycles, RAM, and hard drive space. This can lead to sluggish performance, slow boot times, and overall system instability.
  • Storage Consumption: Bloatware applications, along with their associated files and data, occupy valuable storage space. This can limit the user’s ability to install desired applications, store files, and utilize the full potential of their hard drive.
  • Security Risks: Bloatware can pose security risks, especially if it originates from untrusted sources. It can contain vulnerabilities that malicious actors can exploit, compromising user data and privacy.
  • User Experience: Bloatware can clutter the system with unnecessary icons, notifications, and pop-up windows, creating a distracting and frustrating user experience.

The Advantages of a Clean Windows 10 Installation

A clean Windows 10 installation, free from bloatware, offers a host of benefits:

  • Enhanced Performance: By eliminating unnecessary software, a clean installation allows the system to operate more efficiently, resulting in faster boot times, quicker application launches, and overall smoother performance.
  • Increased Storage Space: With bloatware removed, users gain valuable storage space that can be used for personal files, applications, or other data. This can be particularly beneficial for users with limited storage capacity.
  • Improved Security: A clean installation reduces the potential security risks associated with bloatware. By removing unnecessary applications, users minimize the attack surface, enhancing their overall security posture.
  • Uncluttered User Experience: A clean installation provides a streamlined and organized user experience, free from distractions and unnecessary clutter. This allows users to focus on their tasks without being bombarded by pop-ups or unwanted notifications.
  • Greater Control: By removing bloatware, users gain greater control over their system. They can choose to install only the applications they need and want, creating a personalized and customized environment.

Methods for Achieving a Clean Windows 10 Installation

There are several methods for achieving a clean Windows 10 installation:

  • Clean Install: This involves formatting the hard drive and installing Windows 10 from scratch. This is the most comprehensive and effective method for removing all pre-installed software and ensuring a truly clean installation.
  • Custom Install: During the Windows 10 installation process, users can choose a custom install option. This allows them to select the specific partitions and drives where Windows will be installed, giving them greater control over the installation process.
  • Selective Removal: Users can manually uninstall unwanted software after installing Windows 10. This is a less comprehensive method but allows for targeted removal of specific applications.
  • Third-Party Tools: Several third-party tools are available to help users remove bloatware. These tools can automate the process of identifying and removing unwanted applications, making it easier for users to clean up their system.

FAQs: Addressing Common Queries

Q: What are the risks associated with removing pre-installed software?

A: Removing pre-installed software, especially system-critical applications, can potentially compromise the stability and functionality of Windows 10. It is crucial to understand the purpose and importance of each application before attempting to remove it.

Q: How do I identify bloatware?

A: Bloatware typically includes applications that are not essential for the basic functionality of Windows 10. These applications might be games, trial versions of software, or promotional apps bundled by the manufacturer. Look for applications that you haven’t installed yourself or that you don’t use regularly.

Q: Is it safe to remove pre-installed software?

A: Removing pre-installed software is generally safe as long as you understand the purpose and importance of each application. However, it is always advisable to back up your system before attempting any major changes.

Q: What happens if I remove a system-critical application?

A: Removing system-critical applications can lead to system instability, errors, and even data loss. It is crucial to avoid removing any applications that are essential for the proper functioning of Windows 10.

Q: How do I avoid bloatware in the future?

A: To avoid bloatware in the future, consider purchasing a clean version of Windows 10 or choosing a manufacturer that offers a bloatware-free experience. You can also be more cautious during the installation process, carefully selecting the applications you want to install.

Tips for Managing Bloatware

  • Research Before Installing: Before installing any software, research its purpose and reputation. Be wary of applications that seem unnecessary or unfamiliar.
  • Use a Clean Install: For a truly bloatware-free experience, consider performing a clean install of Windows 10. This will ensure that no unwanted software is present on your system.
  • Uninstall Unnecessary Software: After installing Windows 10, take the time to uninstall any applications that you don’t need or use.
  • Disable Unnecessary Services: Some pre-installed software might run services in the background, consuming system resources. You can disable these services through the Task Manager or the System Configuration utility.
  • Use a Third-Party Tool: If you are unsure about which applications to remove or how to disable services, consider using a third-party tool specifically designed to manage bloatware.

Conclusion

Navigating the digital landscape often involves dealing with unwanted software. A clean Windows 10 installation, free from bloatware, offers a streamlined, efficient, and secure user experience. By removing unnecessary applications, users can enhance performance, increase storage space, improve security, and create a more personalized and customized environment. While removing pre-installed software requires caution and understanding, the benefits of a clean installation outweigh the potential risks, providing users with a more enjoyable and productive computing experience.

How To Clean Install Windows 10 How To Perform A Clean Install Of Windows 10  solveyourtech Ultimate Guide: How to do a clean installation of Windows 10  Windows Central
[Guide] How To Clean Install Windows 10 How To Perform A Clean Install Of Windows 10 - Riset Start Fresh With A Clean Installation Of Windows 10 Windows Windows 10 Installation - Vrogue
How to do a clean installation of Windows 10  Windows Central What is a clean install?

Closure

Thus, we hope this article has provided valuable insights into Navigating the Digital Landscape: The Benefits of a Clean Windows 10 Installation. We appreciate your attention to our article. See you in our next article!

A World Of Unplugged Entertainment: Exploring Free Offline Games For Windows 11

A World of Unplugged Entertainment: Exploring Free Offline Games for Windows 11

Introduction

With great pleasure, we will explore the intriguing topic related to A World of Unplugged Entertainment: Exploring Free Offline Games for Windows 11. Let’s weave interesting information and offer fresh perspectives to the readers.

A World of Unplugged Entertainment: Exploring Free Offline Games for Windows 11

Best 20 PC Games for Windows 11 Offline [Free Download]

In an age dominated by online gaming and ever-present internet connectivity, the allure of offline gaming for Windows 11 remains undiminished. The freedom to play without a persistent internet connection offers a unique and rewarding experience, allowing players to immerse themselves in captivating worlds and engaging narratives without the constraints of latency, server issues, or subscription fees.

This exploration delves into the diverse landscape of free offline games for Windows 11, highlighting the benefits, genres, and resources available to players seeking unplugged entertainment.

The Appeal of Offline Gaming

Beyond the absence of internet dependence, offline gaming offers a distinct set of advantages:

  • Uninterrupted Gameplay: Offline gaming eliminates the frustration of lag, server outages, or connection disruptions. Players can enjoy uninterrupted gameplay sessions, immersing themselves fully in the game world without the constant threat of interruptions.
  • Reduced Dependence on Internet: Offline gaming liberates players from the need for a stable internet connection, making it ideal for environments with limited or unreliable internet access.
  • Cost-Effective Entertainment: Many excellent offline games are available for free, providing a cost-effective alternative to subscription-based online games or expensive retail titles.
  • Focus on Gameplay: Offline gaming allows players to focus solely on the game itself, without distractions from social features, chat, or online interactions. This can be particularly appealing to players who prefer a more immersive and focused gaming experience.
  • Offline Multiplayer: While many offline games are single-player experiences, some offer offline multiplayer modes, allowing players to enjoy cooperative or competitive gameplay with friends or family members without requiring an internet connection.

Navigating the World of Free Offline Games

The world of free offline games is vast and diverse, encompassing a wide range of genres and gameplay styles. Here’s a breakdown of prominent categories:

1. Classic and Retro Games:

  • Emulators: Platforms like RetroArch allow players to experience classic games from various consoles, including NES, SNES, Sega Genesis, and PlayStation.
  • Freeware Classics: Numerous classic games are available for free download, offering a nostalgic journey back to the golden age of gaming. Examples include:
    • Doom (1993): A groundbreaking first-person shooter that revolutionized the genre.
    • Wolfenstein 3D (1992): A pioneer in the first-person shooter genre, known for its innovative gameplay and fast-paced action.
    • Quake (1996): A revolutionary multiplayer shooter that introduced fast-paced action and advanced graphics.
    • Duke Nukem 3D (1996): A cult classic known for its over-the-top humor, action-packed gameplay, and memorable characters.

2. Indie Games:

  • Independent developers: Many talented indie developers release their games for free, showcasing innovative gameplay mechanics, unique narratives, and artistic styles. Popular platforms for discovering free indie games include:
    • Itch.io: A platform dedicated to indie games, offering a vast library of free and paid titles.
    • Game Jolt: A platform for showcasing indie games, featuring a wide range of genres and styles.

3. Open-Source Games:

  • Community-driven development: Open-source games are developed and maintained by a community of players and developers, offering a collaborative and evolving gaming experience. Examples include:
    • SuperTuxKart: A kart racing game inspired by Mario Kart.
    • 0 A.D.: A historical real-time strategy game set in the ancient world.
    • Minetest: A voxel-based sandbox game similar to Minecraft.

4. Free-to-Play Games with Offline Modes:

  • Accessibility and Choice: Some free-to-play games offer offline modes, allowing players to experience the core gameplay without needing an internet connection. Examples include:
    • The Elder Scrolls V: Skyrim Special Edition: While primarily an online game, Skyrim offers a robust offline mode, allowing players to explore the vast world of Skyrim at their own pace.
    • Fallout 4: Like Skyrim, Fallout 4 offers a compelling offline mode, enabling players to delve into the post-apocalyptic wasteland without an internet connection.
    • Stardew Valley: A charming farming simulation game with a robust offline mode, allowing players to manage their farm, build relationships, and explore the world at their own pace.

5. Educational Games:

  • Learning through Play: Educational games offer a fun and engaging way to learn new skills, concepts, and knowledge.
    • Kerbal Space Program: This game challenges players to design, build, and launch rockets and spacecraft.
    • Civilization V: A strategy game that allows players to lead civilizations through history, from the Stone Age to the Information Age.

Resources for Finding Free Offline Games

  • Steam: While primarily known for its digital distribution of paid games, Steam also offers a selection of free-to-play titles, many of which include offline modes.
  • GOG.com: GOG.com offers a curated selection of classic and modern games, including a growing library of free titles.
  • Humble Bundle: Humble Bundle often offers bundles of games, including free titles, at discounted prices.

Frequently Asked Questions (FAQs)

  • Q: Are free offline games always of lower quality than paid games?

    • A: The quality of a game is not directly related to its price. Many free offline games offer exceptional gameplay, graphics, and storytelling, rivaling or even surpassing paid titles.
  • Q: Can I play free offline games on Windows 11 without installing additional software?

    • A: Most free offline games require installation, but some browser-based games can be played directly in a web browser.
  • Q: How can I ensure that a free offline game is safe to download?

    • A: Download games only from reputable sources, such as Steam, GOG.com, Humble Bundle, or the developer’s official website. Be cautious of suspicious websites or downloads.
  • Q: What are the system requirements for free offline games?

    • A: System requirements vary depending on the game. Some games are designed for older systems, while others require more powerful hardware. Check the game’s website or store page for detailed system requirements.

Tips for Enjoying Free Offline Games

  • Explore Different Genres: Don’t limit yourself to one genre. Experiment with different game styles to discover new favorites.
  • Read Reviews and Recommendations: Check out reviews and recommendations from other players to get an idea of the game’s quality and gameplay.
  • Consider Your System Specifications: Ensure that your system meets the minimum requirements for the game you want to play.
  • Take Breaks: Gaming can be immersive, so remember to take breaks to avoid eye strain and fatigue.

Conclusion

Free offline games for Windows 11 offer a gateway to a world of captivating entertainment without the need for a persistent internet connection. From classic retro titles to innovative indie games, the options are diverse and rewarding. By exploring the various resources available and following these tips, players can discover a wealth of free offline games, immersing themselves in engaging stories, challenging gameplay, and endless hours of unplugged entertainment.

10 Best Offline Games for Windows 11 10 Best Offline Games For Windows 11  techlatest Top 10 Offline PC Game For Free(with downloading link)
The 10 Best Offline Games For Free - vrogue.co Unplugged Entertainment: 10 Popular Offline Games for Windows and Android  by Aqua Angel  Medium Free Offline Games For Pc  Gameita
9 Best Free Offline Games On PC - [Play These Now 2023] - Get On Stream Unplugged Entertainment: Exploring Slot Games That Don't Require Internet - East is East

Closure

Thus, we hope this article has provided valuable insights into A World of Unplugged Entertainment: Exploring Free Offline Games for Windows 11. We hope you find this article informative and beneficial. See you in our next article!

Understanding Windows 10 Activation: A Comprehensive Guide

Understanding Windows 10 Activation: A Comprehensive Guide

Introduction

In this auspicious occasion, we are delighted to delve into the intriguing topic related to Understanding Windows 10 Activation: A Comprehensive Guide. Let’s weave interesting information and offer fresh perspectives to the readers.

Understanding Windows 10 Activation: A Comprehensive Guide

Windows 10 Activation: A Step-by-Step Guide on How to Activate Windows 10 - CSA

Windows 10 activation is a crucial process that ensures the legitimacy of your operating system and grants you access to all its features. This guide aims to demystify the complexities surrounding Windows 10 activation, providing a comprehensive understanding of its purpose, methods, and potential issues.

The Significance of Windows 10 Activation

Activation is not merely a technical formality. It serves several critical purposes:

  • Legality: Activating Windows 10 ensures that you are using a genuine copy of the operating system, adhering to Microsoft’s licensing terms and conditions.
  • Security: Activation helps safeguard your system against potential vulnerabilities and malware by ensuring that your Windows 10 installation is up-to-date with the latest security patches and updates.
  • Feature Access: Activating Windows 10 unlocks all its features, including personalized settings, cloud storage, and various productivity tools, enhancing your overall user experience.
  • Support: A genuine, activated Windows 10 installation allows you to access Microsoft’s official support channels for troubleshooting and assistance.

Activation Methods: A Detailed Overview

Windows 10 offers several activation methods, each catering to different scenarios and user preferences:

1. Digital License:

  • Mechanism: This is the most common method for modern Windows 10 installations. It is automatically linked to your Microsoft account and your device, allowing for seamless activation upon installation.
  • Benefits: It simplifies the activation process, eliminating the need for product keys. It also enables easy transfer of the license to a new device if required.
  • Limitations: It is tied to your Microsoft account and device, making it less flexible than other methods.

2. Product Key:

  • Mechanism: This traditional method involves entering a 25-character product key during the installation process.
  • Benefits: It offers greater flexibility, allowing you to activate Windows 10 on different devices using the same product key.
  • Limitations: It requires careful storage and management of the product key, as losing it can hinder activation.

3. Volume Licensing:

  • Mechanism: This method is primarily used by organizations and businesses with multiple devices. It involves purchasing a license agreement that grants activation rights for a specific number of devices.
  • Benefits: It provides cost-effective solutions for large-scale deployments and centralized management of licenses.
  • Limitations: It requires specific procedures and may involve additional software for license management.

4. Upgrade from Earlier Versions:

  • Mechanism: This method allows users upgrading from earlier versions of Windows (like Windows 7 or 8.1) to activate Windows 10 using the existing license.
  • Benefits: It offers a convenient way to upgrade without purchasing a new license.
  • Limitations: It may have specific requirements and limitations depending on the previous version and its activation status.

Understanding Activation Errors: Troubleshooting and Solutions

While the activation process is generally straightforward, certain issues can arise:

  • Activation Error Codes: Windows 10 may display specific error codes indicating activation problems. These codes provide valuable clues for identifying the cause and finding a solution.
  • Troubleshooting Steps: A systematic approach to troubleshooting can help resolve activation issues:
    • Verify Internet Connection: A stable internet connection is essential for online activation.
    • Check Activation Status: Use the "Windows Activation" settings to verify the activation status and identify potential errors.
    • Run Activation Troubleshooter: Windows 10 offers a built-in troubleshooter that can diagnose and fix common activation issues.
    • Contact Microsoft Support: If the issue persists, reaching out to Microsoft support can provide further assistance.

FAQs Regarding Windows 10 Activation

1. Can I transfer my Windows 10 activation to another device?

Yes, but the specific method depends on your activation method. If you have a digital license, you can transfer it to a new device after deactivating it from the old one. However, if you have a product key, you may be able to activate it on a new device, depending on the type of product key and its usage terms.

2. What happens if I don’t activate Windows 10?

While you can use Windows 10 without activating it, you will encounter limitations. You may not be able to personalize settings, use certain features, or receive updates. Additionally, you may be subjected to watermarks or reminders to activate.

3. Can I activate Windows 10 offline?

In most cases, online activation is required. However, there might be limited scenarios where offline activation is possible, such as using a product key and activating via phone.

4. How often do I need to activate Windows 10?

Once activated, Windows 10 typically remains activated unless there are significant hardware changes or system reinstalls.

5. What if my Windows 10 activation expires?

Windows 10 activation does not have an expiration date. However, if you are using a volume license, its validity may depend on the terms of your agreement with Microsoft.

Tips for Smooth Windows 10 Activation

  • Ensure a Stable Internet Connection: A reliable internet connection is crucial for online activation.
  • Keep Your Microsoft Account Information Handy: If you are using a digital license, having your Microsoft account credentials readily available can simplify the process.
  • Store Your Product Key Securely: If you are using a product key, ensure it is stored safely and securely, as losing it can complicate activation.
  • Utilize the Windows 10 Troubleshooter: The built-in troubleshooter can help resolve common activation issues.
  • Contact Microsoft Support if Needed: If you encounter persistent activation problems, don’t hesitate to contact Microsoft support for assistance.

Conclusion

Windows 10 activation is a fundamental aspect of ensuring a legitimate, secure, and fully functional operating system. Understanding the various activation methods, troubleshooting steps, and FAQs can help users navigate the activation process smoothly. By following the tips provided, users can ensure a seamless experience and enjoy all the features and benefits that Windows 10 has to offer.

Microsoft Windows 10 - Key Activation Guide - G2A.COM Activating Windows 10 for Free: A Comprehensive Guide - devopszones How to Use KMSpico for Windows 10 Activation  Step-by-Step Guide
Activer Windows 10 Microsoft's official Windows 10 Activation Guide - gHacks Tech News How do I activate Windows 10: A Comprehensive Instruction
How to Activate Windows 10 - Microsoft Support - Tech News Era Windows 10 Activation and Product Key - All You Need to Know

Closure

Thus, we hope this article has provided valuable insights into Understanding Windows 10 Activation: A Comprehensive Guide. We hope you find this article informative and beneficial. See you in our next article!

The Unwelcome Heat: Understanding And Managing Laptop Overheating

The Unwelcome Heat: Understanding and Managing Laptop Overheating

Introduction

With great pleasure, we will explore the intriguing topic related to The Unwelcome Heat: Understanding and Managing Laptop Overheating. Let’s weave interesting information and offer fresh perspectives to the readers.

The Unwelcome Heat: Understanding and Managing Laptop Overheating

Find Out The Causes and Solutions Laptop Overheating

Laptop computers, ubiquitous in our modern world, are marvels of engineering, packed with powerful components within a compact frame. However, this efficiency comes at a cost โ€“ the generation of heat. While some heat is normal during operation, excessive temperatures can lead to performance degradation, component damage, and even premature failure. Understanding the causes, consequences, and management of laptop overheating is crucial for ensuring the longevity and optimal performance of these indispensable devices.

The Science of Heat: A Deeper Dive into Laptop Thermodynamics

Laptops, like all electronic devices, generate heat as a byproduct of their operation. This heat is primarily generated by the central processing unit (CPU), graphics processing unit (GPU), and hard drive, all of which are responsible for intensive computations and data processing. These components, packed closely together within a confined space, can lead to a build-up of heat, particularly when subjected to demanding tasks such as gaming, video editing, or prolonged periods of high-intensity use.

The Impact of Excessive Heat: A Cascade of Negative Effects

Overheating is not merely a nuisance; it poses a serious threat to the health and longevity of a laptop. The consequences can range from minor performance hiccups to catastrophic component failure.

  • Performance Degradation: Excessive heat can cause components to throttle their performance, leading to slowdowns, lag, and stuttering. This occurs as a safety mechanism to prevent further damage, but it significantly compromises the user experience.
  • Component Damage: Prolonged exposure to high temperatures can permanently damage sensitive components like the CPU, GPU, and motherboard. This can lead to complete failure, rendering the laptop unusable.
  • Data Loss: In extreme cases, overheating can lead to hard drive failures, resulting in the loss of valuable data.
  • System Instability: High temperatures can cause system instability, resulting in crashes, freezes, and blue screens of death, disrupting workflow and causing frustration.
  • Reduced Battery Life: Overheating can strain the battery, leading to faster discharge and potentially reducing its lifespan.

Unveiling the Culprits: Common Causes of Laptop Overheating

Understanding the root causes of laptop overheating is essential for effective mitigation. Common culprits include:

  • Dust Accumulation: Dust and debris can clog cooling vents, preventing proper airflow and leading to heat buildup.
  • Faulty Cooling System: Malfunctioning fans, blocked heat sinks, or worn-out thermal paste can impair the cooling system’s effectiveness.
  • Software Issues: Certain programs or processes can consume excessive CPU resources, generating excessive heat.
  • Overclocking: Forcing components to operate beyond their intended speeds can lead to increased heat generation.
  • Ambient Temperature: Operating a laptop in hot environments, such as direct sunlight or poorly ventilated rooms, can exacerbate overheating issues.

Addressing the Problem: A Multifaceted Approach to Cooling Down Your Laptop

Managing laptop overheating requires a multi-pronged approach, encompassing both hardware and software solutions:

Hardware Solutions:

  • Cleaning the Cooling System: Regularly cleaning the cooling vents and fans with compressed air can remove dust and improve airflow.
  • Replacing Thermal Paste: Thermal paste, a heat-conductive material applied between the CPU and heat sink, loses its effectiveness over time. Replacing it with fresh paste can significantly improve heat dissipation.
  • Using a Cooling Pad: Cooling pads provide an external source of cooling, drawing heat away from the laptop and preventing overheating.
  • Elevating the Laptop: Raising the laptop off the surface allows for better airflow underneath, preventing heat buildup.

Software Solutions:

  • Closing Unnecessary Programs: Running fewer programs simultaneously reduces the CPU load and heat generation.
  • Adjusting Power Settings: Optimizing power settings to favor battery life can reduce CPU usage and heat output.
  • Monitoring System Temperatures: Using system monitoring tools can help identify overheating components and take appropriate action.
  • Updating Drivers: Outdated drivers can sometimes contribute to overheating issues. Updating drivers to the latest versions can help improve performance and stability.

Frequently Asked Questions: Addressing Common Concerns

Q: How do I know if my laptop is overheating?

A: Several signs indicate potential overheating. These include:

  • Excessive fan noise: If the fan is running constantly at high speeds, it may be struggling to keep up with the heat.
  • System slowdowns: Lag, stuttering, and general performance degradation can be signs of overheating.
  • Automatic shutdown: The laptop may shut down unexpectedly as a safety mechanism to prevent damage.
  • Hot to the touch: The laptop’s body, especially around the keyboard and touchpad, may feel unusually hot.

Q: What are the long-term effects of laptop overheating?

A: Prolonged overheating can lead to:

  • Reduced lifespan: Components can wear out faster, shortening the overall lifespan of the laptop.
  • Data loss: Hard drive failures caused by overheating can lead to permanent data loss.
  • Increased repair costs: Replacing damaged components can be expensive, potentially exceeding the cost of a new laptop.

Q: Is it safe to use a laptop on my lap?

A: Using a laptop on your lap can block airflow and increase heat buildup. It’s advisable to use a laptop stand or cooling pad to ensure proper ventilation.

Tips for Preventing Laptop Overheating:

  • Avoid using the laptop in hot environments: Keep it away from direct sunlight or poorly ventilated areas.
  • Take breaks from intensive tasks: Allow the laptop to cool down after prolonged periods of heavy use.
  • Clean the cooling system regularly: Dust accumulation can significantly impair cooling efficiency.
  • Monitor system temperatures: Use system monitoring tools to keep track of component temperatures.
  • Consider a cooling pad: Cooling pads can provide an extra layer of protection against overheating.

Conclusion: A Call for Proactive Maintenance and Informed Use

Laptop overheating is a serious issue that can have detrimental consequences for both performance and longevity. By understanding the causes, impact, and management strategies, users can take proactive steps to prevent overheating and ensure the optimal functioning of their valuable devices. Regular cleaning, software optimization, and the use of cooling solutions can significantly mitigate the risk of overheating and extend the life of your laptop. Remember, preventative measures are key to maximizing the performance and longevity of your laptop, allowing you to enjoy its benefits for years to come.

How To Diagnose An Overheating Laptop - PCMechanic Computer Repair Davenport, FL How to Stop Your Laptop from Overheating: A Step-by-Step Guide How to fix laptop overheating - YouTube
How to Fix An Overheating Laptop - YouTube Laptop Overheating Repair and Mac Overheating Repair  Geeks Callout Signs and Dangers of Overheated laptop - TechnologyWire
Tips and Tricks to Solve Laptop Overheating Issues - STAR.LABS I.T Procurement, Maintenance How to Stop Laptop Overheating? Tips and Solutions

Closure

Thus, we hope this article has provided valuable insights into The Unwelcome Heat: Understanding and Managing Laptop Overheating. We appreciate your attention to our article. See you in our next article!

Windows 11: A Comprehensive Exploration Of The Latest Operating System

Windows 11: A Comprehensive Exploration of the Latest Operating System

Introduction

With enthusiasm, let’s navigate through the intriguing topic related to Windows 11: A Comprehensive Exploration of the Latest Operating System. Let’s weave interesting information and offer fresh perspectives to the readers.

Windows 11: A Comprehensive Exploration of the Latest Operating System

Microsoft unveils the New Windows 11 packed with New Amazing Features

Windows 11, the latest iteration of Microsoft’s flagship operating system, represents a significant step forward in the evolution of personal computing. Released in October 2021, it boasts a redesigned interface, enhanced security features, and improved performance, offering users a more intuitive and efficient experience. This article delves into the key aspects of Windows 11, providing a comprehensive overview of its features, benefits, and potential impact on the digital landscape.

A Fresh Look: The Redesigned Interface

Windows 11 presents a visually striking and modern interface, departing from the familiar aesthetic of its predecessors. The most notable change is the centered taskbar, a design choice that aligns with the trend towards symmetry and visual balance in contemporary user interfaces. This shift, while initially unfamiliar to some users, offers advantages in terms of accessibility and navigation.

The Start menu has undergone a complete revamp, adopting a streamlined and minimalist approach. It features a curated list of frequently used applications, alongside a prominent "Recommended" section that dynamically adapts to user activity. This personalized experience aims to simplify the process of finding and launching desired applications.

Enhanced Security and Privacy:

Security remains a paramount concern in the digital age, and Windows 11 addresses this challenge with a robust suite of security features. The operating system incorporates Microsoft’s latest security technologies, including Windows Defender Antivirus, which provides real-time protection against malware and other threats.

Furthermore, Windows 11 integrates a new security feature called "Windows Hello," which leverages facial recognition and fingerprint scanning for enhanced user authentication. This technology offers a secure and convenient alternative to traditional passwords, reducing the risk of unauthorized access.

Performance and Productivity Gains:

Windows 11 is engineered to deliver a seamless and efficient user experience. The operating system leverages advanced hardware capabilities, including support for the latest processors and graphics cards, to ensure optimal performance.

The integration of DirectX 12 Ultimate, the latest version of Microsoft’s graphics API, enables developers to create visually stunning and immersive gaming experiences. This advancement not only enhances the visual fidelity of games but also optimizes their performance, allowing users to enjoy smooth and responsive gameplay.

The Power of Cloud Integration:

Windows 11 seamlessly integrates with Microsoft’s cloud services, offering users a unified and collaborative experience across multiple devices. Microsoft OneDrive, the company’s cloud storage platform, provides a convenient and secure way to access files and documents from anywhere.

Furthermore, Windows 11 supports Microsoft Teams, a powerful collaboration tool that enables users to communicate, share files, and collaborate on projects with colleagues and friends. This integration allows for a more streamlined and productive workflow, enhancing the overall user experience.

Accessibility and Inclusivity:

Windows 11 prioritizes accessibility, incorporating features designed to make the operating system usable for individuals with disabilities. The operating system includes a comprehensive set of accessibility tools, such as screen readers, magnifiers, and keyboard shortcuts, enabling users to interact with the operating system in a way that meets their unique needs.

A Look at the Future: Windows 11 and Beyond

Windows 11 represents a significant step forward in the evolution of personal computing, laying the foundation for future innovations. Microsoft continues to invest in research and development, exploring new technologies and functionalities to enhance the user experience.

The company is actively exploring the potential of artificial intelligence (AI) and machine learning (ML) to further personalize and automate tasks, making the operating system more intelligent and responsive to user needs.

Frequently Asked Questions:

Q: What are the system requirements for Windows 11?

A: Windows 11 requires a compatible processor (Intel Core 8th generation or later, AMD Ryzen 2000 series or later), at least 4 GB of RAM, 64 GB of storage space, and a UEFI-compatible BIOS.

Q: Is Windows 11 a free upgrade?

A: Windows 11 is a free upgrade for eligible devices running Windows 10. However, certain devices may not meet the minimum system requirements for the upgrade.

Q: What are the key differences between Windows 10 and Windows 11?

A: Windows 11 features a redesigned interface, enhanced security features, improved performance, and a greater emphasis on cloud integration. It also incorporates new features like Windows Hello and DirectX 12 Ultimate.

Q: Is Windows 11 compatible with my existing applications?

A: Most applications compatible with Windows 10 will also work on Windows 11. However, some older applications may require updates or compatibility patches.

Q: What are the advantages of using Windows 11?

A: Windows 11 offers a more intuitive and efficient user experience, enhanced security features, improved performance, and seamless cloud integration. It also prioritizes accessibility and inclusivity.

Tips for Using Windows 11:

  • Explore the new Start menu: Familiarize yourself with the redesigned Start menu and take advantage of its personalized features.
  • Utilize Windows Hello: Set up Windows Hello to enhance security and enjoy a more convenient login experience.
  • Customize your desktop: Personalize your desktop with themes, wallpapers, and other customization options.
  • Explore new features: Discover and experiment with the latest features, such as Snap Layouts and Focus sessions.
  • Stay updated: Regularly update Windows 11 to ensure you have the latest security patches and performance improvements.

Conclusion:

Windows 11 represents a significant advancement in the operating system landscape, offering users a more intuitive, secure, and efficient computing experience. Its redesigned interface, enhanced security features, and improved performance make it a compelling choice for individuals and businesses alike. As Microsoft continues to innovate and refine the operating system, Windows 11 is poised to shape the future of personal computing.

Windows 11 Operating System - NetAns We look at the interface of the operating system Windows 11 - TECHOBIG Buy Windows 11: Discover From Beginner to Expert with this Ultimate & Complete Step-by-Step User
Unveiling Windows 11: A Comprehensive Review of Microsoft's Latest Operating System - Fashion's Buy Windows 11 User Guide for Beginners and Seniors: A Complete User Guide with Step-by-Step Buy Windows 11 for Seniors: 2021 Complete User Guide to Master Your Microsoft Windows 11
Windows 11: Everything We Know About Microsoft's Next OS Windows 11 - Perhatikan Windows 11 System Requirements / Explore new features, check

Closure

Thus, we hope this article has provided valuable insights into Windows 11: A Comprehensive Exploration of the Latest Operating System. We hope you find this article informative and beneficial. See you in our next article!

The Power Of Photoshop On Windows 10: A Comprehensive Guide

The Power of Photoshop on Windows 10: A Comprehensive Guide

Introduction

With enthusiasm, let’s navigate through the intriguing topic related to The Power of Photoshop on Windows 10: A Comprehensive Guide. Let’s weave interesting information and offer fresh perspectives to the readers.

The Power of Photoshop on Windows 10: A Comprehensive Guide

Download Photoshop for Windows 10: A Step-by-Step Tutorial

Adobe Photoshop, a cornerstone of digital image editing and manipulation, has long been a staple for professionals and enthusiasts alike. While traditionally associated with macOS, Photoshop’s availability on Windows 10 has made it accessible to a wider audience, empowering users with an unparalleled suite of tools for image creation and enhancement. This article aims to provide a comprehensive guide to understanding and utilizing Photoshop on Windows 10, exploring its benefits, installation process, and key features.

Understanding the Importance of Photoshop on Windows 10

Photoshop’s significance on Windows 10 stems from its unparalleled versatility and capabilities, enabling users to:

  • Edit and Enhance Images: From basic adjustments like cropping and resizing to advanced techniques like retouching, color correction, and object removal, Photoshop provides an array of tools for transforming images into their best possible versions.
  • Create and Design Graphics: Beyond image editing, Photoshop serves as a powerful design tool for creating logos, icons, web graphics, and even complete illustrations, offering a wealth of brushes, shapes, and text tools.
  • Manipulate and Compose Images: Photoshop allows users to combine multiple images, create photo montages, and even build complex scenes through layering, masking, and other advanced techniques.
  • Work with 3D Models: Photoshop’s 3D capabilities enable users to create, edit, and manipulate 3D models, opening up a world of creative possibilities for designers and artists.
  • Utilize a Vast Ecosystem: Photoshop integrates seamlessly with other Adobe products like Illustrator, After Effects, and Premiere Pro, allowing for a streamlined workflow and collaborative possibilities.

Installing Photoshop on Windows 10: A Step-by-Step Guide

  1. Subscription Model: Photoshop is available through a subscription-based model, requiring a monthly or annual payment to access the software. This model provides users with access to the latest updates and features.
  2. Adobe Creative Cloud: The primary method of obtaining Photoshop is through Adobe Creative Cloud, a platform that hosts a suite of creative applications, including Photoshop.
  3. Download and Installation: Visit the Adobe Creative Cloud website and sign up for an account. Choose the plan that includes Photoshop and download the installer. Follow the on-screen instructions to complete the installation process.
  4. Activation: After installation, you will need to activate Photoshop using your Adobe Creative Cloud account credentials.

Navigating the Photoshop Interface: A Primer

Photoshop’s interface, while initially daunting, is designed for efficiency and customization. Key elements include:

  • Menu Bar: Located at the top of the screen, the menu bar provides access to various commands and options.
  • Tool Panel: Situated on the left side of the screen, the tool panel houses a wide range of tools for editing, designing, and manipulating images.
  • Layers Panel: This panel, typically found on the right side, displays all the layers in your image, allowing you to manage their visibility, order, and properties.
  • Properties Panel: The properties panel, adjacent to the layers panel, displays the settings and options for the currently selected tool or layer.
  • Workspace: The central area of the screen is the workspace, where you will manipulate your images and create designs.

Key Features and Capabilities of Photoshop on Windows 10

Photoshop’s power lies in its extensive suite of tools and features, catering to a wide range of needs and skill levels. Some key highlights include:

  • Selection Tools: Photoshop provides a variety of tools for selecting specific areas of an image, allowing you to isolate and manipulate them independently.
  • Layers: The concept of layers is central to Photoshop’s workflow, allowing you to build complex images by stacking multiple layers on top of each other.
  • Brushes and Painting Tools: Photoshop offers a vast library of brushes for painting, drawing, and creating artistic effects, catering to both digital artists and graphic designers.
  • Filters: Photoshop’s extensive collection of filters allows you to apply various effects to images, ranging from basic sharpening and blurring to more advanced artistic styles.
  • Adjustment Layers: These layers allow you to make global adjustments to an image without directly altering its pixels, providing non-destructive editing capabilities.
  • Text Tools: Photoshop offers a range of tools for creating and manipulating text, allowing you to add text to images, design logos, and create typographic layouts.
  • 3D Capabilities: Photoshop’s 3D features allow you to create, edit, and manipulate 3D models, opening up new possibilities for designers and artists.

Utilizing Photoshop Effectively: Tips and Techniques

  • Start with the Basics: Familiarize yourself with the fundamental tools and techniques before venturing into more advanced features.
  • Explore Tutorials: Online tutorials and resources provide valuable insights into specific techniques and workflows.
  • Practice Regularly: Consistent practice is key to mastering Photoshop’s capabilities.
  • Experiment with Different Tools: Don’t be afraid to explore different tools and techniques to discover new creative possibilities.
  • Utilize Keyboard Shortcuts: Learning keyboard shortcuts can significantly speed up your workflow.
  • Save Regularly: Develop a habit of saving your work frequently to avoid losing progress.

FAQs: Addressing Common Questions

  • Is Photoshop compatible with Windows 10? Yes, Photoshop is fully compatible with Windows 10, offering a smooth and reliable experience.
  • Do I need a powerful computer to run Photoshop on Windows 10? While Photoshop can run on a variety of systems, a powerful computer with sufficient RAM and processing power will provide a more optimal performance, especially for complex tasks.
  • Is Photoshop free to use? Photoshop is not free to use. It requires a subscription to Adobe Creative Cloud. However, Adobe offers a free trial for new users.
  • What are the system requirements for running Photoshop on Windows 10? The specific system requirements vary depending on the version of Photoshop. You can find the latest requirements on the Adobe website.
  • Is there a free alternative to Photoshop on Windows 10? There are several free alternatives to Photoshop, such as GIMP and Paint.NET. However, they may not offer the same range of features and capabilities as Photoshop.

Conclusion: Unleashing the Power of Photoshop on Windows 10

Photoshop on Windows 10 empowers users with an unparalleled suite of tools for image editing, design, and manipulation. Its versatility, vast ecosystem, and constant innovation make it an indispensable tool for professionals, enthusiasts, and anyone seeking to enhance their creative capabilities. By understanding the installation process, navigating the interface, and exploring its key features, users can harness the power of Photoshop to bring their creative visions to life.

A Complete Beginner's Guide to Adobe Photoshop Creative Cloud How to open Photoshop in Computer Comprehensive Guide to Working With Video in Photoshop -- Adding Filters and Adjustments - YouTube
How can i use adobe photoshop 5-0 in windows 10 - stufflockq Mastering Image Editing: A Comprehensive Guide on How to Make Photoshop Your Default Image Editor Exploring the Power of Photoshop Generative Fill
How to install adobe photoshop cc 2017 in windows 10 - computersdas The Power Of Photoshop :: Behance

Closure

Thus, we hope this article has provided valuable insights into The Power of Photoshop on Windows 10: A Comprehensive Guide. We thank you for taking the time to read this article. See you in our next article!

The Vibrant Appeal Of Orange Desktop Wallpaper: A Comprehensive Exploration

The Vibrant Appeal of Orange Desktop Wallpaper: A Comprehensive Exploration

Introduction

In this auspicious occasion, we are delighted to delve into the intriguing topic related to The Vibrant Appeal of Orange Desktop Wallpaper: A Comprehensive Exploration. Let’s weave interesting information and offer fresh perspectives to the readers.

The Vibrant Appeal of Orange Desktop Wallpaper: A Comprehensive Exploration

Orange Abstract Desktop Wallpapers - Top Free Orange Abstract Desktop Backgrounds - WallpaperAccess

Orange, a hue often associated with warmth, energy, and creativity, has a unique ability to infuse life into any space. When applied to a desktop background, orange wallpaper can transform the digital landscape, offering a range of benefits that extend beyond aesthetics. This article delves into the multifaceted world of orange desktop wallpaper, exploring its impact on user experience, psychological implications, and practical considerations.

The Psychology of Orange:

Orange, a color situated between red and yellow on the color spectrum, inherits qualities from both. It embodies the passion and energy of red while retaining the optimism and cheerfulness of yellow. This duality makes orange a complex and intriguing color, capable of eliciting a wide range of emotions and responses.

Psychologically, orange is often associated with:

  • Creativity and Inspiration: Its vibrant nature stimulates the imagination, fostering creative thinking and problem-solving.
  • Motivation and Enthusiasm: Its energetic presence can boost morale, increase focus, and promote a sense of drive.
  • Warmth and Comfort: Orange evokes feelings of comfort and security, creating a sense of familiarity and belonging.
  • Confidence and Optimism: It can instill a sense of confidence and optimism, helping users approach tasks with a positive attitude.

Benefits of Orange Desktop Wallpaper:

The psychological associations with orange translate into tangible benefits when applied to desktop wallpaper:

  • Enhanced Productivity: Orange’s stimulating effect can enhance focus and concentration, leading to increased productivity.
  • Improved Mood: Its cheerful and optimistic nature can uplift mood, creating a more positive work environment.
  • Reduced Stress: Orange’s warmth and comfort can alleviate feelings of stress and anxiety, promoting a sense of calm and relaxation.
  • Increased Creativity: Its stimulating effect on the imagination can foster creative thinking, aiding in problem-solving and generating new ideas.
  • Personalization and Expression: Orange allows users to express their individuality and create a personalized digital workspace.

Choosing the Right Orange Wallpaper:

While orange offers a range of benefits, the key to maximizing its impact lies in selecting the right shade and design:

  • Hue and Saturation: Brighter, more saturated oranges can be stimulating and energizing, while muted, pastel oranges are more calming and soothing.
  • Design and Patterns: Abstract patterns, geometric designs, and natural imagery can all be effectively incorporated into orange wallpaper.
  • Personal Preference: Ultimately, the best orange wallpaper is one that appeals to the user’s individual taste and preferences.

Tips for Using Orange Desktop Wallpaper:

  • Balance and Contrast: Avoid overwhelming the screen with excessive orange. Consider incorporating complementary colors like blue or green for balance.
  • Visual Hierarchy: Use orange strategically to highlight important elements on the desktop, such as icons or folders.
  • Experimentation: Try different shades and designs to find the perfect orange wallpaper that complements your workflow and mood.

FAQs about Orange Desktop Wallpaper:

Q: Is orange desktop wallpaper suitable for all users?

A: While orange offers numerous benefits, individual preferences and sensitivities vary. Some users may find bright orange overwhelming, while others may prefer more muted tones.

Q: Can orange desktop wallpaper cause eye strain?

A: Excessive brightness can cause eye strain. Consider using a less saturated orange or adjusting screen brightness settings to minimize potential strain.

Q: How can I incorporate orange desktop wallpaper into my work environment?

A: Orange can be incorporated subtly through accents in other elements, like desk accessories or artwork, to create a cohesive and balanced workspace.

Q: Are there any specific situations where orange desktop wallpaper is particularly beneficial?

A: Orange can be particularly beneficial for individuals working in creative fields, requiring focus and motivation, or those seeking to improve their mood and reduce stress.

Conclusion:

Orange desktop wallpaper offers a unique blend of aesthetic appeal and psychological benefits. Its vibrant nature can enhance productivity, uplift mood, and foster creativity, transforming the digital workspace into a more engaging and personalized environment. By carefully considering the nuances of orange and its impact on user experience, individuals can harness the power of this versatile color to create a desktop that reflects their unique needs and preferences.

Abstract Vibrant Orange Grunge Texture Background 3421333 Vector Art at Vecteezy [100+] Orange Desktop Wallpapers  Wallpapers.com Vibrant Orange Solid Color Background Image  Free Image Generator
Vibrant orange background Royalty Free Vector Image Orange Geometric Wallpapers - Wallpaper Cave Orange background 4k - Stunning and ultra HD images for free
73 Background Abstract Orange Wallpaper Pictures - MyWeb 2560x1440 Orange Wallpapers - Top Free 2560x1440 Orange Backgrounds - WallpaperAccess

Closure

Thus, we hope this article has provided valuable insights into The Vibrant Appeal of Orange Desktop Wallpaper: A Comprehensive Exploration. We thank you for taking the time to read this article. See you in our next article!

The Heat Is On: Understanding And Managing Laptop Overheating

The Heat is On: Understanding and Managing Laptop Overheating

Introduction

With enthusiasm, let’s navigate through the intriguing topic related to The Heat is On: Understanding and Managing Laptop Overheating. Let’s weave interesting information and offer fresh perspectives to the readers.

The Heat is On: Understanding and Managing Laptop Overheating

Understanding & Fixing Laptop Overheating Issues - Jnetics Solutions

Laptops, with their portability and versatility, have become indispensable tools for work, entertainment, and communication. However, their compact design presents a unique challenge: managing heat. When the internal components of a laptop reach excessive temperatures, it can lead to a range of issues, from performance degradation to irreversible hardware damage. This article will delve into the intricacies of laptop overheating, exploring its causes, consequences, and effective solutions.

Understanding the Root of the Problem: Why Laptops Overheat

Laptop overheating is a complex phenomenon, influenced by a multitude of factors. Understanding the underlying causes is crucial for identifying and mitigating the issue:

1. Design Constraints: The compact nature of laptops necessitates a delicate balance between functionality and physical space. This often leads to a tight fit for components, limiting airflow and hindering heat dissipation.

2. Component Heat Generation: Modern processors, GPUs, and other components are designed for high performance, which inevitably generates significant heat. This heat, if not properly managed, can lead to overheating.

3. Software and Usage Patterns: Demanding applications, heavy multitasking, and prolonged gaming sessions can place a considerable strain on the laptop’s components, leading to increased heat generation.

4. Environmental Factors: Ambient temperature, lack of ventilation, and dust accumulation can all contribute to overheating. A hot environment or a dusty laptop can impede heat dissipation.

5. Hardware Malfunctions: Faulty fans, clogged vents, or malfunctioning thermal paste can significantly hinder the cooling process, leading to excessive temperatures.

The Consequences of Excessive Heat: A Cascade of Problems

Overheating is not a mere inconvenience; it can have severe consequences for your laptop’s performance and longevity:

1. Performance Degradation: High temperatures can cause components to throttle their performance to prevent damage. This results in slower processing speeds, reduced graphics performance, and overall sluggish operation.

2. Hardware Damage: Persistent overheating can lead to irreparable damage to components, including the motherboard, processor, and graphics card. This can necessitate costly repairs or even a complete replacement.

3. Data Loss: In extreme cases, overheating can cause data corruption or even system crashes, potentially leading to data loss.

4. Reduced Battery Life: Excessive heat can strain the battery, leading to a decrease in its lifespan and overall capacity.

5. System Instability: Overheating can cause system instability, leading to frequent crashes, freezes, and blue screens of death.

6. Noise and Discomfort: Overheated laptops often produce excessive fan noise, which can be distracting and uncomfortable.

Identifying the Signs: Recognizing Overheating in Your Laptop

Recognizing the early signs of overheating is crucial for taking timely action and preventing further damage. Here are some common indicators:

  • Excessive Fan Noise: A sudden increase in fan speed or a loud, unusual fan noise can indicate overheating.
  • Slow Performance: Noticeable lag, sluggish response times, or reduced graphics performance can be a sign of components throttling due to heat.
  • System Crashes and Freezes: Frequent crashes, freezes, or blue screens of death can be related to overheating.
  • Hot to the Touch: The laptop’s chassis, especially around the keyboard and bottom, feels unusually hot.
  • Warning Messages: Some laptops display on-screen warning messages or error codes indicating overheating.

Taking Action: Addressing Overheating Issues

Once overheating is identified, prompt action is necessary to prevent further damage and restore optimal performance. Here are some strategies to address the issue:

1. Software Optimization:

  • Close Unnecessary Programs: Minimize the number of applications running in the background to reduce CPU and GPU load.
  • Update Drivers: Outdated drivers can cause performance issues and increase heat generation.
  • Adjust Power Settings: Set the laptop to a power-saving mode to reduce performance demands and heat output.
  • Utilize Performance Monitoring Tools: Monitor system temperatures and identify resource-intensive applications.

2. Hardware Solutions:

  • Ensure Proper Ventilation: Place the laptop on a flat surface with adequate airflow. Avoid using it on soft surfaces like blankets or beds.
  • Clean the Vents: Regularly clean the vents and fan blades to remove dust and debris that can hinder airflow.
  • Use a Cooling Pad: A cooling pad with fans can provide additional airflow and help dissipate heat.
  • Repaste the CPU: Over time, the thermal paste between the CPU and heatsink can dry out, reducing its effectiveness. Repaste the CPU with fresh thermal paste to improve heat transfer.
  • Consider a Laptop Stand: A laptop stand can elevate the laptop, improving airflow and reducing overheating.

3. Environmental Considerations:

  • Avoid Extreme Temperatures: Do not use the laptop in extremely hot or cold environments.
  • Limit Direct Sunlight: Avoid exposing the laptop to direct sunlight, which can significantly increase its internal temperature.

Frequently Asked Questions: Addressing Common Concerns

1. Is Overheating a Normal Occurrence?

While some heat generation is normal during operation, excessive heat is not. If your laptop consistently reaches high temperatures, it’s a sign of an underlying issue.

2. How Hot is Too Hot?

The optimal operating temperature for laptops varies depending on the model and components. However, exceeding 85ยฐC (185ยฐF) for extended periods can be detrimental.

3. Can I Overclock My Laptop to Improve Performance?

Overclocking can increase performance but also generates more heat. It’s not recommended for laptops without proper cooling solutions.

4. How Often Should I Clean the Vents?

Regular cleaning is essential. Aim to clean the vents every few months or more frequently if you use your laptop in dusty environments.

5. Can I Use a Hair Dryer to Clean the Vents?

Using a hairdryer can damage internal components due to static electricity and heat. It’s not recommended.

6. How Can I Check My Laptop’s Temperature?

There are various free software tools available that monitor system temperatures. Some laptop manufacturers also provide their own monitoring applications.

7. Can I Use a Laptop in My Bed?

While convenient, using a laptop on soft surfaces like beds can obstruct airflow and lead to overheating. It’s best to use a hard, flat surface.

8. What Should I Do If My Laptop Overheats Despite My Efforts?

If overheating persists despite taking steps to address it, it’s best to consult a qualified technician for diagnosis and repair.

Tips for Preventing Overheating: Proactive Measures

  • Limit Multitasking: Avoid running multiple demanding applications simultaneously.
  • Use High-Quality Cooling Accessories: Invest in a high-quality cooling pad with powerful fans.
  • Avoid Blocking Vents: Ensure the laptop’s vents are not blocked by objects or surfaces.
  • Keep the Laptop Clean: Regularly clean the vents and fan blades to maintain optimal airflow.
  • Monitor System Temperatures: Utilize performance monitoring tools to track system temperatures and identify potential overheating issues.

Conclusion: Maintaining Optimal Laptop Performance

Laptop overheating is a serious issue that can significantly impact performance, longevity, and data integrity. By understanding the causes, recognizing the signs, and implementing appropriate solutions, you can effectively manage heat and ensure your laptop operates smoothly and reliably.

Regular maintenance, software optimization, and responsible usage practices are essential for preventing overheating and maximizing the lifespan of your valuable investment. If overheating persists despite your efforts, seeking professional assistance from a qualified technician is recommended. By taking a proactive approach, you can enjoy the benefits of your laptop without the worry of excessive heat.

Laptop Overheating Repair and Mac Overheating Repair  Geeks Callout How to Fix An Overheating Laptop - YouTube How to Handle Laptop Overheating - TechPP
Reason why your Laptop is Overheating and auto shutdown - How to fix - YouTube Laptop Overheating When Playing Games [SOLVED With Pictures] - PopSmartphone How to Fix an Overheating Laptop from Its Internals - Make Tech Easier
10 Ways to Fix Laptop Overheating While Gaming What Causes Overheating In PCs Or Laptops ~ Online Computer Tech Tips

Closure

Thus, we hope this article has provided valuable insights into The Heat is On: Understanding and Managing Laptop Overheating. We appreciate your attention to our article. See you in our next article!

Optimizing Windows 10 Performance With Q-Reduce Lite: A Comprehensive Guide

Optimizing Windows 10 Performance with Q-Reduce Lite: A Comprehensive Guide

Introduction

With enthusiasm, let’s navigate through the intriguing topic related to Optimizing Windows 10 Performance with Q-Reduce Lite: A Comprehensive Guide. Let’s weave interesting information and offer fresh perspectives to the readers.

Optimizing Windows 10 Performance with Q-Reduce Lite: A Comprehensive Guide

Optimizing Windows 10

Windows 10, while a robust operating system, can sometimes experience performance hiccups, particularly as it ages or when burdened with numerous applications and processes. These performance issues can manifest as slow startup times, lagging applications, and general sluggishness, hindering user productivity. To address these concerns, various optimization tools have emerged, and Q-Reduce Lite stands as a prominent contender for Windows 10 users seeking a streamlined and efficient system experience.

Understanding Q-Reduce Lite: A Performance Enhancement Tool

Q-Reduce Lite is a lightweight, user-friendly software designed to enhance Windows 10 performance by identifying and managing resource-intensive processes and applications. It operates by analyzing system activity, detecting processes that consume excessive resources, and offering options to optimize their behavior. This approach allows users to regain control over their system’s performance without resorting to complex configurations or technical expertise.

Key Features and Functionality

Q-Reduce Lite provides a range of features designed to improve Windows 10 performance, encompassing:

  • Process Management: The core functionality of Q-Reduce Lite lies in its ability to monitor and manage running processes. It identifies resource-hungry processes, allowing users to prioritize essential tasks and terminate unnecessary ones. This granular control over system processes empowers users to optimize resource allocation and prevent performance bottlenecks.

  • Startup Optimization: Q-Reduce Lite analyzes the applications that launch at system startup, identifying those that consume valuable resources unnecessarily. Users can disable or delay the launch of non-essential applications, resulting in faster boot times and reduced resource consumption.

  • System Resource Monitoring: The software provides real-time insights into system resource utilization, including CPU, memory, and disk activity. This comprehensive monitoring allows users to identify potential performance bottlenecks and proactively manage resource allocation.

  • System Optimization Tools: Q-Reduce Lite integrates tools for general system optimization, such as disk cleanup, registry optimization, and defragmentation. These features help ensure a clean and efficient system environment, further enhancing performance.

Benefits of Using Q-Reduce Lite

Utilizing Q-Reduce Lite offers a multitude of benefits for Windows 10 users, including:

  • Improved System Performance: By managing resource-intensive processes and optimizing system settings, Q-Reduce Lite significantly enhances overall system performance, leading to faster boot times, smoother application responsiveness, and reduced lag.

  • Increased Productivity: A faster and more responsive system translates to increased productivity, as users can efficiently execute tasks without encountering performance bottlenecks.

  • Enhanced System Stability: By managing system resources effectively, Q-Reduce Lite can contribute to a more stable system environment, reducing the likelihood of crashes and errors.

  • Extended System Lifespan: By optimizing resource allocation and reducing strain on system components, Q-Reduce Lite can contribute to extending the lifespan of older systems.

  • User-Friendly Interface: Q-Reduce Lite boasts a simple and intuitive interface, making it accessible to users of all technical skill levels. The software’s straightforward design allows users to easily navigate its features and implement desired optimizations.

FAQs Regarding Q-Reduce Lite

Q: Is Q-Reduce Lite compatible with all versions of Windows 10?

A: Q-Reduce Lite is designed specifically for Windows 10 and is compatible with all its major versions, including Home, Pro, and Enterprise editions.

Q: Does Q-Reduce Lite require any specific hardware requirements?

A: Q-Reduce Lite is a lightweight software that does not impose significant demands on system resources. It is compatible with most modern computers and can run smoothly even on systems with limited hardware.

Q: Is Q-Reduce Lite free to use?

A: Q-Reduce Lite is available as a free software, allowing users to experience its benefits without any cost. However, a paid version may offer additional features or advanced functionalities.

Q: Can Q-Reduce Lite compromise system security?

A: Q-Reduce Lite is a reputable and trusted software that does not pose any security threats. It is designed to enhance system performance without compromising security measures.

Q: Does Q-Reduce Lite require any special configuration?

A: Q-Reduce Lite is designed to be user-friendly and does not require any complex configuration. Users can easily install and use the software without needing technical expertise.

Tips for Using Q-Reduce Lite Effectively

  • Regular System Scans: It is recommended to perform regular system scans with Q-Reduce Lite to identify and manage resource-intensive processes and optimize system settings.

  • Prioritize Essential Applications: Users should prioritize essential applications and processes, ensuring they have sufficient resources to operate smoothly.

  • Disable Unnecessary Startup Items: By disabling or delaying the launch of non-essential applications at startup, users can significantly improve boot times and reduce resource consumption.

  • Monitor System Resource Utilization: Regularly monitor system resource utilization to identify potential performance bottlenecks and proactively manage resource allocation.

  • Use Disk Cleanup and Defragmentation Tools: Utilize the built-in disk cleanup and defragmentation tools to ensure a clean and efficient system environment.

Conclusion

Q-Reduce Lite emerges as a valuable tool for Windows 10 users seeking to optimize system performance and enhance productivity. Its ability to manage resource-intensive processes, optimize startup items, and provide comprehensive system monitoring empowers users to regain control over their system’s performance without requiring technical expertise. By leveraging the features of Q-Reduce Lite, users can experience a faster, more responsive, and efficient Windows 10 environment, maximizing productivity and enjoying a smoother computing experience.

How to Optimize Windows 10 for Best Performance 25 Best Methods To Optimize Windows 10 Performance �� How to Optimize Windows 10 Performance ! (Part 1) - YouTube
How to Optimize Windows 10 Performance to Get Ultra-Fast Speed How to Optimize Windows 10 for Best Performance Optimize windows performance - by Technotaught
How to optimize windows 10 for performance (My Way) - YouTube How to Optimize Windows 10 For Better Performance? -Technig

Closure

Thus, we hope this article has provided valuable insights into Optimizing Windows 10 Performance with Q-Reduce Lite: A Comprehensive Guide. We hope you find this article informative and beneficial. See you in our next article!