Unlocking Windows 10’s Powerhouse: Exploring The "Tools" Tab

Unlocking Windows 10’s Powerhouse: Exploring the "Tools" Tab

Introduction

With enthusiasm, let’s navigate through the intriguing topic related to Unlocking Windows 10’s Powerhouse: Exploring the "Tools" Tab. Let’s weave interesting information and offer fresh perspectives to the readers.

Unlocking Windows 10’s Powerhouse: Exploring the "Tools" Tab

How to Create Windows Tools folder shortcut in Windows 10

The Windows 10 operating system is renowned for its user-friendly interface and intuitive design. However, beneath the surface lies a powerful set of tools and settings that empower users to customize their experience and manage their system efficiently. This article explores the "Tools" tab, a hidden gem within Windows 10, unveiling its significance and potential for optimizing your computer’s performance.

Understanding the "Tools" Tab:

The "Tools" tab, often referred to as the "Tools" section or "Tools" area, is not a standalone element within Windows 10. It refers to a collection of tools and settings accessible through various locations within the operating system. These tools are not always grouped together visually, but they share a common purpose: to provide users with the means to manage, troubleshoot, and customize their Windows 10 experience.

Navigating the "Tools" Tab:

The "Tools" tab is not a singular, dedicated location. Instead, it encompasses a range of tools dispersed across different Windows 10 interfaces. To access these tools, users can follow these general steps:

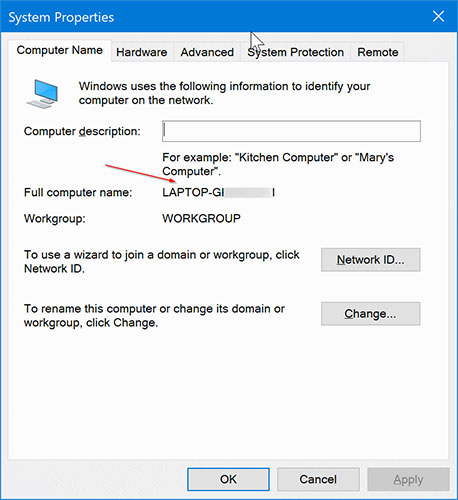
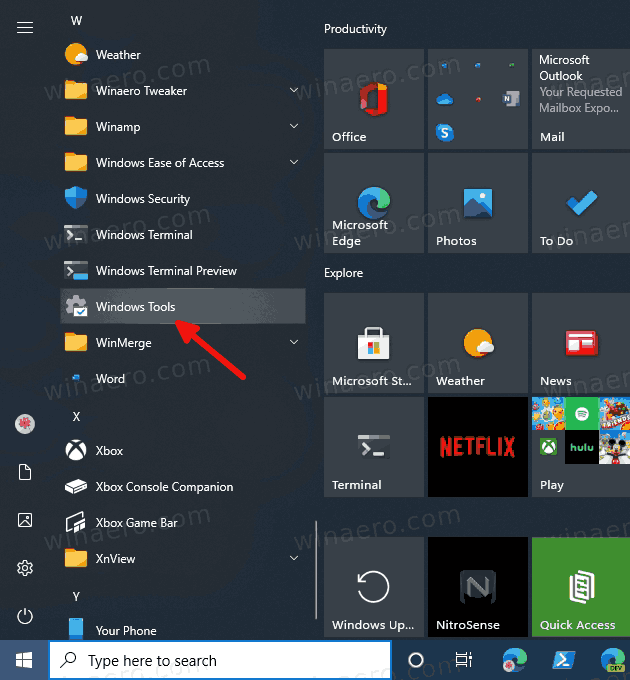
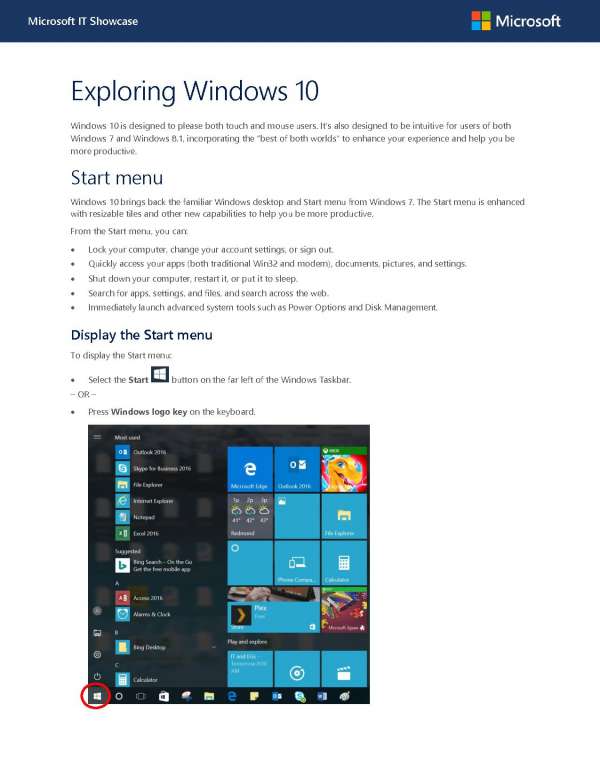
  1. Start Menu: The Start Menu is the primary hub for accessing various Windows 10 tools. By clicking the Windows logo in the taskbar or pressing the Windows key on the keyboard, users can open the Start Menu. Here, they can find folders like "Windows Accessories," "System Tools," or "Administrative Tools," which house a collection of utilities.

  2. Control Panel: The Control Panel is another crucial access point for "Tools." Accessible by searching for "Control Panel" in the Start Menu or using the "Run" dialog box (Windows Key + R), the Control Panel offers a comprehensive range of settings and tools categorized by function.

  3. Settings App: Introduced in Windows 10, the Settings app provides a modern and streamlined interface for configuring various system aspects. By searching for "Settings" in the Start Menu or using the Windows Key + I shortcut, users can access the Settings app, where they can find sections dedicated to managing system settings, privacy, security, and more.

  4. Task Manager: The Task Manager is a powerful tool for monitoring and managing system resources, including running processes, memory usage, and CPU activity. It can be accessed by pressing Ctrl + Shift + Esc or by right-clicking the taskbar and selecting "Task Manager."

The Importance of "Tools":

The "Tools" tab empowers Windows 10 users to:

  • Optimize System Performance: By accessing tools like "Disk Cleanup," "Defragmenter," and "System Configuration," users can remove unnecessary files, optimize disk space, and fine-tune system settings for improved performance.

  • Troubleshoot Issues: Windows 10 provides a range of diagnostic tools, including "System File Checker," "Event Viewer," and "Performance Monitor," which help identify and resolve system errors or performance bottlenecks.

  • Manage Security: Tools like "Windows Defender," "Firewall," and "BitLocker" enable users to protect their system from malware, unauthorized access, and data loss.

  • Customize User Experience: Through tools like "Personalization," "Ease of Access," and "Power Options," users can tailor their Windows 10 experience to their preferences, including customizing the appearance, adjusting accessibility features, and managing power consumption.

  • Access Advanced Features: Tools like "Command Prompt," "Registry Editor," and "Group Policy Editor" provide access to advanced system settings and functionality, allowing users to make significant changes to their system configuration.

Examples of "Tools" and Their Benefits:

  • Disk Cleanup: This tool scans the system for temporary files, system files, and other unnecessary data that can be safely removed, freeing up valuable disk space.

  • System File Checker: This tool scans the system for corrupted or missing system files and attempts to repair them, ensuring the stability and integrity of the operating system.

  • Event Viewer: This tool logs system events, including errors, warnings, and informational messages, providing insights into system behavior and potential issues.

  • Windows Defender: This built-in antivirus software protects the system from malware threats, proactively scanning for and removing malicious files.

  • Power Options: This tool allows users to configure power settings, such as screen brightness, sleep mode, and battery life, optimizing power consumption based on usage patterns.

FAQs about "Tools" in Windows 10:

1. What are the most essential "Tools" for every Windows 10 user?

Essential tools include Disk Cleanup, System File Checker, Windows Defender, and Power Options. These tools address common system maintenance tasks, security threats, and power management needs.

2. Where can I find a complete list of "Tools" available in Windows 10?

A comprehensive list of tools is not readily available in a single location. The Start Menu, Control Panel, and Settings app offer various tools categorized by function. Users can search online for specific tools or consult Windows documentation for a detailed overview.

3. Are all "Tools" in Windows 10 safe to use?

While most tools are safe, some advanced tools like the Registry Editor require caution. Incorrect modifications to system settings can lead to instability or data loss. It is essential to understand the purpose and potential consequences of each tool before using it.

4. How do I troubleshoot issues using "Tools"?

The best approach to troubleshooting depends on the specific issue. Tools like Event Viewer, System File Checker, and Performance Monitor can provide insights into system behavior and potential errors. Users can consult online resources or contact Microsoft support for assistance.

5. Can I customize "Tools" in Windows 10?

Some tools offer customization options. For example, Windows Defender allows users to schedule scans, adjust protection levels, and configure exclusions. Other tools may have limited or no customization options.

Tips for Using "Tools" Effectively:

  • Understand the Purpose: Before using any tool, research its intended function and potential impact on the system.

  • Back Up Data: Before making significant changes to system settings, create a backup of important data to prevent accidental loss.

  • Consult Documentation: Refer to official Windows documentation or online resources for detailed information on using specific tools.

  • Seek Professional Help: If you are unsure about using advanced tools or troubleshooting complex issues, consider seeking professional assistance from a qualified technician.

Conclusion:

The "Tools" tab in Windows 10 offers a hidden treasure trove of utilities that empower users to manage their system efficiently, troubleshoot issues, and customize their experience. By understanding the purpose and functionality of these tools, users can optimize their Windows 10 environment, enhance system performance, and ensure a seamless and secure computing experience. As with any powerful tool, it is crucial to use them responsibly, following best practices and seeking assistance when necessary.

How to Unlock My Windows 10 Laptop – UnBrick.ID Exploring Windows 10 - Intrious An Introduction To Windows 10’s New PowerToys  CIO Africa
How to Lock or Unlock Taskbar in Windows 10 How to Lock or Unlock Taskbar in Windows 10 Unlocking Windows 10's Potential with Command Prompt Shortcuts
Download Unlocker Windows 10 - Download and Install Windows 10 Right Now For Free! - Usama Chan Lock Or Unlock Taskbar In Windows 10

Closure

Thus, we hope this article has provided valuable insights into Unlocking Windows 10’s Powerhouse: Exploring the "Tools" Tab. We appreciate your attention to our article. See you in our next article!

Navigating The Early Tablet Landscape: A Look At PC Magazine’s Reviews From The Turn Of The Millennium

Navigating the Early Tablet Landscape: A Look at PC Magazine’s Reviews from the Turn of the Millennium

Introduction

In this auspicious occasion, we are delighted to delve into the intriguing topic related to Navigating the Early Tablet Landscape: A Look at PC Magazine’s Reviews from the Turn of the Millennium. Let’s weave interesting information and offer fresh perspectives to the readers.

The History of Tablet Computers – An Infographic

The year 2000 marked a pivotal moment in the evolution of computing. The internet was gaining mainstream traction, and the first iterations of tablet computers were beginning to emerge. While these early devices were far from the sleek, powerful machines we know today, they represented a significant shift in how people interacted with technology. PC Magazine, a leading voice in the tech world, played a crucial role in navigating this nascent market, providing insightful reviews that helped shape public perception and guide purchasing decisions.

Early Pioneers: A Look at the Reviewed Devices

PC Magazine’s reviews from 2000 focused on a diverse range of devices, showcasing the nascent state of the tablet market. Notable entries included:

  • The Compaq iPAQ Pocket PC: This device, considered a forerunner to the modern smartphone, offered a compact form factor, touchscreen input, and a suite of productivity applications. PC Magazine praised its intuitive design and "surprisingly capable" performance, acknowledging its potential for mobile professionals.
  • The Handspring Visor: This device, known for its innovative "Springboard" expansion slot, allowed users to customize their experience with a range of add-ons. PC Magazine highlighted its versatility and "impressive" software library, recognizing its appeal for both casual and power users.
  • The Apple Newton MessagePad 2100: While not strictly a tablet in the modern sense, this device offered a unique blend of PDA functionality and handwriting recognition. PC Magazine acknowledged its innovative approach but criticized its high price and limited software ecosystem, highlighting the challenges faced by early tablet pioneers.

Beyond Hardware: Assessing the User Experience

PC Magazine’s reviews went beyond technical specifications, delving into the user experience. They explored the usability of each device, focusing on key aspects like:

  • Operating System: The reviews meticulously examined the operating system’s interface, ease of navigation, and application compatibility. The focus was on understanding how intuitive the user experience was and how well it catered to different needs.
  • Input Methods: The reviews evaluated the effectiveness of different input methods, such as touchscreens, styluses, and keyboards. The focus was on identifying the strengths and weaknesses of each method and assessing their suitability for different tasks.
  • Battery Life: With portable devices, battery life was a crucial factor. The reviews assessed the devices’ battery performance in real-world scenarios, highlighting their endurance and potential limitations.
  • Connectivity: The reviews explored the devices’ connectivity options, including Wi-Fi, Bluetooth, and cellular data. The focus was on evaluating the availability and reliability of these features for accessing the internet and exchanging data.

Beyond the Review: Shaping the Future of Tablets

PC Magazine’s reviews played a vital role in shaping the future of tablet computers. By providing objective assessments of the devices’ strengths and weaknesses, they helped manufacturers understand consumer expectations and refine their product offerings. They also informed potential buyers, enabling them to make informed decisions based on their specific needs and preferences.

The Importance of Independent Reviews in a Nascent Market

In a nascent market like the early tablet landscape, independent reviews like those published by PC Magazine were particularly crucial. They provided a valuable source of information for consumers who were unfamiliar with this new category of devices. By highlighting the strengths and weaknesses of each device, these reviews helped to demystify the technology and empower consumers to make informed purchasing decisions.

FAQs by PC Magazine Tablet Computer Reviews

Q: What were the key features of tablet computers in 2000?

A: Tablet computers in 2000 were characterized by small form factors, touchscreens, and limited processing power. They offered basic productivity features, web browsing capabilities, and some multimedia functionality.

Q: What were the major challenges faced by early tablet computers?

A: Early tablet computers faced challenges such as limited battery life, slow processing speeds, and a lack of robust software ecosystems. The limited availability of compatible applications and the high price point also hindered their widespread adoption.

Q: How did PC Magazine’s reviews influence the development of tablet computers?

A: PC Magazine’s reviews provided valuable feedback to manufacturers, highlighting the features that were most important to consumers and identifying areas for improvement. This feedback helped to guide the development of future tablet computers, leading to devices that were more powerful, user-friendly, and affordable.

Tips by PC Magazine Tablet Computer Reviews

  • Consider your needs: Before purchasing a tablet computer, carefully consider your specific needs and how you intend to use the device. Determine whether you require a device for productivity, entertainment, or a combination of both.
  • Evaluate the operating system: The operating system plays a crucial role in the user experience. Choose a device with an operating system that is intuitive, easy to navigate, and offers a wide range of compatible applications.
  • Assess the input methods: Different tablet computers offer different input methods, such as touchscreens, styluses, and keyboards. Consider which method is most comfortable and efficient for your needs.
  • Check the battery life: Battery life is a crucial factor for portable devices. Choose a tablet with a battery that can last for a full day of use or longer.
  • Compare connectivity options: Evaluate the connectivity options offered by each device, including Wi-Fi, Bluetooth, and cellular data. Choose a device that meets your needs for accessing the internet and exchanging data.

Conclusion by PC Magazine Tablet Computer Reviews

The year 2000 marked the dawn of the tablet computer era. While these early devices were far from perfect, they represented a significant step forward in the evolution of computing. PC Magazine’s reviews played a crucial role in navigating this nascent market, providing insightful assessments that helped to shape public perception and guide purchasing decisions. As technology continues to advance, the role of independent reviews remains essential in helping consumers make informed choices and drive innovation in the ever-evolving world of mobile computing.

The Evolution of the Computer Tablet - LocknCharge Microsoft Invented A Tablet A Decade Before Apple And Totally Blew It The Evolution Of Digital Devices timeline  Timetoast timelines
History of tablet computers First Apple Tablet S History of the tablet - Business Insider
1993: Tablets and eBooks at the Birth of the Web – The Foresight Guide History of tablet computers - YouTube

Closure

Thus, we hope this article has provided valuable insights into Navigating the Early Tablet Landscape: A Look at PC Magazine’s Reviews from the Turn of the Millennium. We hope you find this article informative and beneficial. See you in our next article!

Understanding The Absence Of Local User Groups In Windows 10

Understanding the Absence of Local User Groups in Windows 10

Introduction

In this auspicious occasion, we are delighted to delve into the intriguing topic related to Understanding the Absence of Local User Groups in Windows 10. Let’s weave interesting information and offer fresh perspectives to the readers.

Understanding the Absence of Local User Groups in Windows 10

Local Users and Groups Windows 10 Home - Enjoytechlife

Windows 10, a popular operating system for personal computers, has undergone significant changes compared to its predecessors. One notable shift is the absence of traditional local user groups, a feature that was prominent in earlier Windows versions. This article explores the rationale behind this change, its implications, and how users can manage permissions effectively in a modern Windows environment.

The Evolution of User Management in Windows

In earlier versions of Windows, local user groups served as a central mechanism for managing user permissions and access to system resources. Administrators could create groups, assign users to those groups, and then define specific privileges for each group. This hierarchical structure provided a clear framework for controlling user access to sensitive files, applications, and system settings.

However, with the advent of cloud-based services and the increasing reliance on online accounts, the need for traditional local user groups has diminished. Windows 10 emphasizes a more streamlined approach to user management, focusing on:

  • Microsoft Account Integration: Windows 10 encourages users to utilize Microsoft accounts for login and synchronization. This approach leverages cloud-based authentication and authorization, eliminating the need for local user accounts.
  • Simplified Permission Management: Instead of relying on complex group structures, Windows 10 emphasizes granular permission settings directly applied to individual files, folders, and applications. This approach offers greater flexibility and control over specific access levels.
  • Domain Environments: For organizations that operate within a domain environment, the focus shifts to Active Directory, a centralized directory service that manages user accounts and permissions across the network.

The Benefits of a Streamlined Approach

The shift away from local user groups in Windows 10 offers several advantages:

  • Simplified User Management: Administrators can manage user permissions directly through the operating system’s settings, eliminating the need for complex group structures. This streamlined approach simplifies the process of assigning and modifying access levels.
  • Enhanced Security: By relying on cloud-based authentication and authorization, Microsoft accounts offer stronger security measures against unauthorized access. This approach reduces the risk of local account compromises and strengthens overall system security.
  • Improved Compatibility: The shift towards a unified user management model enhances compatibility with online services and applications. This approach simplifies access and synchronization across different devices and platforms.

Managing Permissions in Windows 10

While local user groups are no longer a primary mechanism for managing permissions, Windows 10 offers various tools and methods to control user access:

  • File and Folder Permissions: Users can set specific permissions for individual files and folders, granting or denying access to specific users or groups. This granular approach allows for precise control over data access.
  • Application Permissions: Windows 10 provides settings to control the permissions granted to individual applications. Users can determine which applications have access to specific resources, such as the camera, microphone, or location data.
  • Family Safety Features: Windows 10 includes features designed to protect children’s online experiences. Parents can set screen time limits, filter inappropriate content, and monitor their children’s online activities.

FAQs

Q: How do I manage user permissions in Windows 10 without local user groups?

A: Windows 10 provides various tools for managing permissions, including:

  • File Explorer: Right-click on a file or folder, select "Properties," and then navigate to the "Security" tab. Here, you can modify permissions for specific users and groups.
  • Settings App: Navigate to "Privacy" and then select "App permissions." This section allows you to control the permissions granted to individual applications.
  • Family Safety Features: Within the "Family" section of the Settings app, you can manage parental controls and set limitations for child accounts.

Q: Can I create new user accounts in Windows 10?

A: Yes, you can create new user accounts in Windows 10. These accounts can be linked to Microsoft accounts or set up as local accounts. The process is straightforward and can be accessed through the "Settings" app.

Q: Can I still use the command prompt to manage permissions?

A: Yes, you can still use command prompt commands like "icacls" to manage permissions. However, the graphical interface provided by Windows 10 offers a more user-friendly approach for most users.

Q: What happens to existing local user accounts in Windows 10?

A: Existing local user accounts remain functional in Windows 10. However, the operating system encourages users to transition to Microsoft accounts for improved security and compatibility.

Tips for Managing Permissions in Windows 10

  • Utilize Granular Permissions: Instead of relying on broad group structures, set specific permissions for each file, folder, or application. This approach provides greater control and minimizes the risk of unintended access.
  • Review App Permissions Regularly: Periodically review the permissions granted to installed applications. Ensure that applications have access only to the resources they require for proper functioning.
  • Enable Family Safety Features: If you have children using Windows 10, enable family safety features to monitor their online activity and protect them from inappropriate content.
  • Use Strong Passwords: Regardless of whether you use a Microsoft account or a local account, always choose strong passwords and enable multi-factor authentication for enhanced security.

Conclusion

The absence of traditional local user groups in Windows 10 reflects a shift towards a more streamlined and secure user management approach. This change emphasizes cloud-based authentication, granular permission settings, and a focus on individual user control. While the absence of local user groups may seem unfamiliar to users accustomed to earlier versions of Windows, the benefits of this approach, including improved security, simplified management, and enhanced compatibility, outweigh the perceived drawbacks. By understanding the rationale behind this change and utilizing the available tools and methods for managing permissions, users can effectively control access to their system resources and enjoy a more secure and user-friendly Windows 10 experience.

2 Ways to Disable or Enable Local Users and Groups in Windows 10  iSumsoft Local users and groups missing windows 10 - pooblocks How to manage local users and groups in Windows 10 using lusrmgr.msc - Digital Citizen
How to Disable Local Users and Groups (lusrmgr.msc) in Windows 10 / 8 / 7  Password Recovery How to manage local users and groups in Windows 10 using lusrmgr.msc - Digital Citizen How to reset all Local Group Policy settings on Windows 10  Windows Central
2 Ways to Disable or Enable Local Users and Groups in Windows 10 How to open Local Users and Groups in Windows 10 [Tip]  dotTech

Closure

Thus, we hope this article has provided valuable insights into Understanding the Absence of Local User Groups in Windows 10. We appreciate your attention to our article. See you in our next article!

The Future Of Windows: Exploring The Potential Of 3D Printing

The Future of Windows: Exploring the Potential of 3D Printing

Introduction

In this auspicious occasion, we are delighted to delve into the intriguing topic related to The Future of Windows: Exploring the Potential of 3D Printing. Let’s weave interesting information and offer fresh perspectives to the readers.

The Future of Windows: Exploring the Potential of 3D Printing

The Future of 3D Printing - 10 Futuristic Applications of 3D Printing - Introduction to 3D

The world of technology is constantly evolving, with innovations emerging across various fields, pushing the boundaries of what is possible. One such area experiencing a surge in interest and development is 3D printing. This technology, once relegated to the realm of science fiction, has become increasingly accessible and versatile, finding applications in diverse industries, from manufacturing to healthcare to even art and design.

While 3D printing has revolutionized the way we create objects, its impact on the software world, specifically the realm of operating systems, is still in its nascent stages. However, the potential for 3D printing to reshape how we interact with and experience operating systems like Windows 10 is immense. This article explores this exciting possibility, delving into the potential benefits, challenges, and implications of integrating 3D printing into the Windows 10 ecosystem.

The Convergence of 3D Printing and Windows 10

At its core, 3D printing is a process of creating three-dimensional objects from digital models by layering materials. The process involves slicing a digital design into thin layers, which are then built up layer by layer by a printer head, creating the final object.

The integration of 3D printing with Windows 10 presents a fascinating opportunity to revolutionize how we interact with our operating systems and the digital world. It opens up possibilities for:

1. Personalized User Interfaces: Imagine an operating system that adapts to your individual needs and preferences. 3D printing could enable the creation of custom hardware components, such as ergonomic keyboards, specialized mice, or even customized VR headsets, that seamlessly integrate with Windows 10. This personalized approach could significantly enhance user experience, making the operating system more intuitive and tailored to individual needs.

2. Interactive and Immersive Experiences: The ability to print physical objects from digital models opens up possibilities for interactive and immersive user experiences. 3D printed prototypes could be used for testing and refining software applications, providing a more tangible and realistic representation of the virtual world. This could be particularly valuable for developers, allowing them to iterate and refine their designs more efficiently.

3. Enhanced Accessibility: 3D printing can be used to create assistive devices and tools for people with disabilities, making Windows 10 more accessible. Customized prosthetics, braille displays, and other assistive technologies could be printed on demand, providing greater independence and inclusion for people with disabilities.

4. Decentralized Manufacturing: 3D printing can facilitate decentralized manufacturing, allowing users to print their own tools, parts, and even devices, empowering them to take control of their technology. This could lead to a more sustainable and less wasteful model of production, reducing reliance on traditional manufacturing processes and their associated environmental impact.

5. New Possibilities for Education and Learning: 3D printing can be used to create tangible learning tools, models, and prototypes, making education more engaging and interactive. Students can learn by building and experimenting with 3D printed models, fostering a deeper understanding of complex concepts.

Challenges and Considerations

While the potential benefits of integrating 3D printing with Windows 10 are significant, there are challenges that need to be addressed.

1. Compatibility and Standardization: Ensuring compatibility between 3D printing hardware and software, specifically Windows 10, is crucial. Standards need to be established for 3D printing file formats, communication protocols, and printer drivers to ensure smooth integration.

2. Security and Privacy: As 3D printing becomes more integrated with operating systems, security and privacy concerns arise. 3D printed devices could potentially be used for malicious purposes, requiring robust security measures to protect users and their data.

3. Material Development and Sustainability: The development of new and sustainable materials for 3D printing is essential for long-term adoption. Research and development are needed to create materials that are durable, biocompatible, and environmentally friendly.

4. Accessibility and Cost: While 3D printing technology is becoming more accessible, cost remains a significant barrier for many users. Affordable and user-friendly 3D printers are needed to make this technology truly accessible to the masses.

5. Regulatory Frameworks: As 3D printing becomes more prevalent, regulatory frameworks need to be developed to address issues related to safety, intellectual property, and environmental impact.

FAQs on Integrating 3D Printing into Windows 10

Q: How would 3D printing affect the user interface of Windows 10?

A: 3D printing could enable the creation of customized hardware components, such as ergonomic keyboards, specialized mice, or even customized VR headsets, that integrate seamlessly with Windows 10. This could lead to a more personalized and intuitive user experience.

Q: What are the potential security concerns related to 3D printing in Windows 10?

A: 3D printed devices could potentially be used for malicious purposes. Robust security measures are needed to protect users and their data, ensuring that 3D printed devices are not compromised.

Q: How can 3D printing be used to improve accessibility in Windows 10?

A: 3D printing can be used to create assistive devices and tools for people with disabilities, such as customized prosthetics, braille displays, and other assistive technologies, making Windows 10 more accessible.

Q: What are the potential environmental impacts of integrating 3D printing into Windows 10?

A: The development of sustainable materials for 3D printing is crucial to minimize environmental impact. Research and development are needed to create materials that are durable, biocompatible, and environmentally friendly.

Q: How can 3D printing be used in education and learning within the Windows 10 environment?

A: 3D printing can be used to create tangible learning tools, models, and prototypes, making education more engaging and interactive. Students can learn by building and experimenting with 3D printed models, fostering a deeper understanding of complex concepts.

Tips for Implementing 3D Printing in Windows 10

1. Explore Open Source Software: Consider using open-source software for 3D printing, as it often provides greater flexibility and customization options.

2. Invest in Training and Education: Ensure that users are adequately trained and educated on the principles and best practices of 3D printing to maximize its potential.

3. Collaborate with Experts: Partner with experts in 3D printing, material science, and design to leverage their knowledge and expertise.

4. Focus on Sustainability: Prioritize the use of sustainable materials and responsible manufacturing practices to minimize the environmental impact of 3D printing.

5. Foster Innovation and Experimentation: Encourage experimentation and innovation to explore the full potential of 3D printing in the Windows 10 environment.

Conclusion

The integration of 3D printing into the Windows 10 ecosystem presents a transformative opportunity, offering a glimpse into a future where technology seamlessly blends with the physical world. While challenges remain, the potential benefits are significant, ranging from personalized user experiences to enhanced accessibility and new possibilities for education and learning. As 3D printing technology continues to evolve and mature, its integration with operating systems like Windows 10 will likely play a pivotal role in shaping the future of computing. The convergence of these two technologies holds the promise of a more personalized, interactive, and innovative digital landscape, unlocking new possibilities for users and developers alike.

What Is the Future of 3D Printing? The Future of 3D Printing - YouTube The Future of 3D Printing Will Blow Your Mind! - YouTube
7 Examples Of The Future of 3D Printing  Built In Schibsted  Future Report: 3d_printing-the-future #futurereport The Future Unfolds: Exploring the Boundless Potential of 3D Printing - promguides.com
Gallery: Science Museum explores the future of 3D printing  Metro UK The Incredible Rise Of 3D Printing In The Future - Labdox Blog

Closure

Thus, we hope this article has provided valuable insights into The Future of Windows: Exploring the Potential of 3D Printing. We hope you find this article informative and beneficial. See you in our next article!

Seamless Connectivity: Exploring Windows 11’s Enhanced File Sharing Capabilities

Seamless Connectivity: Exploring Windows 11’s Enhanced File Sharing Capabilities

Introduction

In this auspicious occasion, we are delighted to delve into the intriguing topic related to Seamless Connectivity: Exploring Windows 11’s Enhanced File Sharing Capabilities. Let’s weave interesting information and offer fresh perspectives to the readers.

Seamless Connectivity: Exploring Windows 11’s Enhanced File Sharing Capabilities

Seamless File Sharing: Google Nearby Share for Windows

Windows 11 introduces a streamlined approach to file sharing with the integration of a powerful new feature: Nearby Sharing. This technology, built upon the foundation of Bluetooth and Wi-Fi, enables users to effortlessly transfer files between Windows devices in close proximity. By eliminating the need for cumbersome cables or cloud-based intermediaries, Nearby Sharing fosters a more direct and efficient method of sharing data.

Understanding the Mechanics of Nearby Sharing

At its core, Nearby Sharing leverages Bluetooth and Wi-Fi to establish a secure, peer-to-peer connection between devices. This connection enables the transfer of files, including documents, images, videos, and even entire folders, without relying on internet access. The process is designed to be intuitive and user-friendly, requiring minimal configuration.

Benefits of Embracing Nearby Sharing

The advantages of utilizing Nearby Sharing extend beyond its simplicity. This feature offers a compelling alternative to traditional file sharing methods, bringing forth several key benefits:

  • Enhanced Speed and Efficiency: Nearby Sharing facilitates rapid file transfers, eliminating the delays associated with cloud-based services or traditional Bluetooth connections. This efficiency is particularly valuable for larger files, enabling users to share content quickly and without interruption.
  • Enhanced Security: By establishing a secure, peer-to-peer connection, Nearby Sharing prioritizes the protection of shared data. This eliminates the vulnerabilities inherent in relying on public networks or cloud-based platforms, ensuring the integrity and confidentiality of transferred information.
  • Simplified Sharing Process: Nearby Sharing simplifies the file transfer process, requiring minimal user intervention. The intuitive interface and user-friendly design make it easy for individuals of all technical backgrounds to share files with ease.
  • No Internet Required: One of the most significant advantages of Nearby Sharing is its independence from internet connectivity. This makes it an ideal solution for environments where internet access is limited or unavailable, such as remote locations or areas with unreliable network coverage.

Navigating the Nearby Sharing Interface

Windows 11’s Nearby Sharing interface is designed for ease of use. Users can initiate file transfers by:

  • Selecting the "Share" option: When viewing a file or folder, users can select the "Share" option from the context menu, which will present the Nearby Sharing interface.
  • Dragging and dropping files: Users can also drag and drop files directly onto the Nearby Sharing interface to initiate a transfer.

Configuring Nearby Sharing Preferences

Windows 11 allows users to customize their Nearby Sharing settings to ensure a secure and personalized experience. Users can:

  • Enable or disable Nearby Sharing: Users can choose whether to enable or disable Nearby Sharing based on their individual needs and security preferences.
  • Select devices to share with: Users can specify which devices they wish to share files with, ensuring that only authorized devices can access their data.
  • Choose sharing method: Users can select whether to share files using Bluetooth or Wi-Fi, depending on the availability and capabilities of their devices.
  • Set a sharing password: For enhanced security, users can set a password that must be entered on the receiving device before file transfers can be completed.

Exploring the Possibilities: Everyday Applications of Nearby Sharing

Nearby Sharing extends its utility beyond basic file transfers, offering a range of practical applications for everyday use:

  • Collaborative Work: Teams can utilize Nearby Sharing to seamlessly exchange documents, presentations, and other project materials, facilitating collaborative work without relying on cloud storage or email attachments.
  • Sharing Photos and Videos: Friends and family can quickly and easily share photos, videos, and other multimedia content without the need for internet connectivity or cloud-based services.
  • Transferring Files Between Devices: Users can transfer files between their personal devices, such as smartphones, laptops, and tablets, without requiring cables or external storage devices.
  • Sharing Large Files: Nearby Sharing’s ability to handle large files makes it an ideal solution for transferring media files, software installations, or other large datasets.

Addressing Common Concerns: FAQs on Nearby Sharing

Q: What is the range of Nearby Sharing?

A: The range of Nearby Sharing is typically limited to approximately 30 feet, depending on factors such as environmental conditions and the devices involved.

Q: How secure is Nearby Sharing?

A: Nearby Sharing utilizes encryption to protect shared files, ensuring that data is transmitted securely between devices. However, it is essential to ensure that only authorized devices are allowed to share files, and to use strong passwords when enabled.

Q: Can I share files with devices running different operating systems?

A: Currently, Nearby Sharing is primarily designed for use between Windows devices. While compatibility with other operating systems is under development, it is not yet fully supported.

Q: Can I use Nearby Sharing over the internet?

A: Nearby Sharing is designed for sharing files between devices in close proximity and does not support file transfers over the internet.

Q: What happens if a file transfer is interrupted?

A: If a file transfer is interrupted, the transfer process will resume automatically when the connection is re-established.

Q: How can I troubleshoot Nearby Sharing issues?

A: If you encounter issues with Nearby Sharing, you can try the following troubleshooting steps:

  • Ensure that Nearby Sharing is enabled on both devices.
  • Verify that the devices are within range of each other.
  • Check for any software updates for Windows and your devices.
  • Restart your devices and try again.

Tips for Optimizing Nearby Sharing

  • Maintain a Strong Bluetooth Signal: Ensure that both devices have a strong Bluetooth signal for optimal performance.
  • Enable Wi-Fi Direct: For faster transfer speeds, consider enabling Wi-Fi Direct on both devices.
  • Use a Password: For enhanced security, set a password for your Nearby Sharing connections.
  • Check Compatibility: Verify that both devices support Nearby Sharing.
  • Keep Devices Updated: Ensure that both devices have the latest software updates to ensure compatibility and security.

Conclusion

Windows 11’s Nearby Sharing feature significantly enhances file sharing capabilities, offering a seamless, secure, and efficient method for transferring data between devices in close proximity. This innovative technology simplifies the sharing process, eliminating the need for cumbersome cables or cloud-based intermediaries. By leveraging Bluetooth and Wi-Fi, Nearby Sharing empowers users to share files quickly and efficiently, while prioritizing data security. As technology continues to evolve, it is anticipated that Nearby Sharing will become increasingly integrated into the fabric of our digital lives, facilitating a more connected and collaborative future.

Enable seamless connectivity: Using SSH on Windows 11 with Putty, Git Bash and WSL2 — Part 2 Windows 11: Turn On Network Discovery and File Sharing Full Guide: Windows 11 File Sharing on Network
Full Guide: Windows 11 File Sharing on Network Full Guide: Windows 11 File Sharing on Network Here's a better look at new Windows 11 File Explorer, Settings app
Windows Subsystem for Android™ Update on Windows 11 Introduces File Sharing and Enhanced Features Network Sharing Settings In Windows 11

Closure

Thus, we hope this article has provided valuable insights into Seamless Connectivity: Exploring Windows 11’s Enhanced File Sharing Capabilities. We thank you for taking the time to read this article. See you in our next article!

R For Windows: A Comprehensive Guide To Installation And Usage

R for Windows: A Comprehensive Guide to Installation and Usage

Introduction

In this auspicious occasion, we are delighted to delve into the intriguing topic related to R for Windows: A Comprehensive Guide to Installation and Usage. Let’s weave interesting information and offer fresh perspectives to the readers.

R for Windows: A Comprehensive Guide to Installation and Usage

Simple Guide for Installing R on Windows 10

R is a powerful open-source programming language and free software environment for statistical computing and graphics. It is widely used in academia, industry, and government for data analysis, visualization, and statistical modeling. This article provides a comprehensive guide to installing and using R on Windows 10.

Understanding R’s Significance

R’s popularity stems from its versatility and powerful capabilities. It offers a vast collection of packages, each designed for specific tasks, allowing users to analyze data from diverse fields, ranging from finance and economics to biology and medicine. R’s strength lies in its ability to:

  • Perform complex statistical analysis: R provides a wide range of statistical functions, including linear and non-linear modeling, hypothesis testing, and time series analysis.
  • Create compelling data visualizations: R excels in producing high-quality graphs and charts, enabling effective communication of insights through visually appealing representations.
  • Develop customized statistical tools: R’s programming language allows users to create their own functions and packages, tailoring the software to their specific needs.
  • Collaborate effectively: R’s open-source nature promotes collaboration, allowing users to share code, packages, and data with others.

Installing R on Windows 10

The installation process for R on Windows 10 is straightforward. Follow these steps:

  1. Download the R installer: Visit the official CRAN (Comprehensive R Archive Network) website (https://cran.r-project.org/). Choose the "Download R for Windows" option.
  2. Select the appropriate installer: Choose the base R installer for your system architecture (32-bit or 64-bit).
  3. Run the installer: Double-click the downloaded installer file to initiate the installation process.
  4. Follow the on-screen instructions: Accept the default settings and click "Next" to complete the installation.

Exploring the R Environment

After installation, R can be accessed through the RGui.exe application, typically found in the "C:Program FilesRR-[version]bin" directory. The RGui provides a console-based interface for entering commands and viewing results.

Managing R Packages

R’s functionality is extended through packages, which are collections of functions, data sets, and documentation. To manage packages, R provides the install.packages() and library() functions:

  • Installing packages: Use the install.packages() function followed by the package name enclosed in quotation marks. For example, install.packages("ggplot2") installs the ggplot2 package for data visualization.
  • Loading packages: Use the library() function followed by the package name to load it into the current R session. For example, library(ggplot2) loads the ggplot2 package.

Writing and Running R Scripts

R scripts are text files containing R code that can be executed together. Scripts can be created using any text editor and saved with the .R extension. To run a script, use the source() function in the R console.

Using RStudio: A Powerful Integrated Development Environment (IDE)

RStudio is a popular IDE that enhances the R experience. It provides a user-friendly interface with features like:

  • Code editor with syntax highlighting and autocompletion
  • Interactive console for executing R commands
  • Environment pane for managing variables and objects
  • Plots pane for displaying graphical outputs
  • Project management tools

To install RStudio, download the appropriate installer from the RStudio website (https://www.rstudio.com/products/rstudio/).

FAQs on R for Windows

Q: What are the system requirements for running R on Windows 10?

A: R is generally compatible with most modern Windows 10 systems. The minimum requirements include:

  • Operating System: Windows 10 (32-bit or 64-bit)
  • Processor: Intel or AMD processor with at least 1 GHz
  • Memory: 2 GB RAM (4 GB recommended)
  • Hard Disk Space: 1 GB (more recommended)

Q: How do I update R on Windows 10?

A: Updating R is as simple as installing a new version. Download the latest installer from CRAN, run it, and follow the on-screen instructions.

Q: How do I troubleshoot R errors?

A: R errors can be frustrating, but there are resources available to help. The R documentation (https://www.rdocumentation.org/) provides detailed explanations of error messages. You can also search for solutions on online forums like Stack Overflow.

Q: Can I use R for machine learning and deep learning?

A: Yes, R is increasingly used for machine learning and deep learning. Numerous packages, such as caret, keras, and tensorflow, provide tools for these tasks.

Tips for Using R Effectively

  • Start with the basics: Familiarize yourself with fundamental R concepts like data types, operators, and control flow.
  • Utilize online resources: Explore online tutorials, courses, and documentation to learn R and its packages.
  • Practice regularly: The best way to learn R is to use it regularly. Work on small projects and gradually tackle more complex tasks.
  • Ask for help: Don’t hesitate to seek help from the R community on forums or through online resources.

Conclusion

R is a powerful and versatile tool for data analysis, visualization, and statistical modeling. Its open-source nature, vast collection of packages, and active community make it an ideal choice for both beginners and experienced users. By following the installation and usage guidelines outlined in this article, users can leverage R’s capabilities to explore and understand data in a comprehensive and insightful manner.

Installing R How to install package in r step by step - elementslalaf How to install R on Windows - DataScience Made Simple
How to install R and RStudio? - Stats and R How to download R and install Rstudio on Windows 10 2021 - YouTube How to download R and install RStudio on Windows 11 - TechDecode Tutorials
Comment installer R Studio sur Windows et Linux ? – StackLima Installing R and Studio

Closure

Thus, we hope this article has provided valuable insights into R for Windows: A Comprehensive Guide to Installation and Usage. We thank you for taking the time to read this article. See you in our next article!

Understanding Windows 11 Pro OEM: A Comprehensive Guide

Understanding Windows 11 Pro OEM: A Comprehensive Guide

Introduction

With enthusiasm, let’s navigate through the intriguing topic related to Understanding Windows 11 Pro OEM: A Comprehensive Guide. Let’s weave interesting information and offer fresh perspectives to the readers.

Understanding Windows 11 Pro OEM: A Comprehensive Guide

Windows 11 Pro Oem

Windows 11 Pro OEM, often referred to simply as "Windows 11 Pro OEM," represents a specific licensing model for Microsoft’s latest operating system. This model is designed for pre-installed operating systems on new computers, typically built by Original Equipment Manufacturers (OEMs) such as Dell, HP, Lenovo, and others. This article aims to provide a comprehensive understanding of Windows 11 Pro OEM, its key features, advantages, and how it differs from other licensing options.

The Essence of OEM Licensing:

OEM licensing differs significantly from retail versions of Windows. It is not sold as a standalone product but bundled with new computers. This means that the license is tied to the specific hardware it is initially installed on, making it non-transferable to other devices.

Key Features of Windows 11 Pro OEM:

Windows 11 Pro OEM offers a range of features designed for professionals and businesses, including:

  • Enhanced Security: Windows 11 Pro features robust security features such as BitLocker Drive Encryption, Windows Hello for biometric authentication, and Windows Defender Antivirus, providing a secure environment for sensitive data.
  • Remote Desktop: This feature allows users to access and control their computer remotely, enhancing productivity and collaboration.
  • Domain Join: Windows 11 Pro supports joining a domain network, enabling centralized management and policy enforcement.
  • Hyper-V: This virtualization technology allows users to run multiple operating systems simultaneously, increasing flexibility and efficiency.
  • Windows Sandbox: A secure environment for running untrusted applications, protecting the main system from potential threats.
  • Microsoft Store for Business: A centralized platform for managing and deploying applications within an organization.

Advantages of Windows 11 Pro OEM:

  • Cost-Effective: Purchasing a new computer with Windows 11 Pro OEM pre-installed is generally more cost-effective than buying a retail version separately.
  • Convenience: The operating system comes pre-configured and ready to use, eliminating the need for separate installation and setup.
  • Guaranteed Compatibility: Windows 11 Pro OEM is specifically designed and tested for compatibility with the hardware it is bundled with, ensuring optimal performance.
  • Support from OEMs: OEMs often provide technical support and warranty services for the pre-installed operating system.

Understanding the Difference from Retail Versions:

While both Windows 11 Pro OEM and retail versions offer the same core features, there are key distinctions:

  • Licensing: OEM licenses are tied to specific hardware, while retail licenses are transferable.
  • Purchase Method: OEM versions are bundled with new computers, while retail versions are purchased separately.
  • Upgrade Path: OEM licenses do not typically allow for upgrades to higher versions, while retail licenses usually do.
  • Support: OEM support is generally provided by the computer manufacturer, while retail versions receive support from Microsoft directly.

FAQs about Windows 11 Pro OEM:

Q: Can I transfer my Windows 11 Pro OEM license to another computer?
A: No. OEM licenses are tied to the specific hardware they are initially installed on and cannot be transferred.

Q: Can I upgrade my Windows 11 Pro OEM to a higher version like Windows 11 Pro Enterprise?
A: Upgrading from OEM licenses is typically not possible.

Q: What happens if my computer motherboard fails and needs replacement?
A: You may need to contact your computer manufacturer to determine if the Windows 11 Pro OEM license can be transferred to the new motherboard.

Q: Can I install Windows 11 Pro OEM on a computer that I built myself?
A: No. OEM licenses are specifically designed for pre-installed operating systems on computers from OEMs.

Tips for Users of Windows 11 Pro OEM:

  • Backup Regularly: Regularly back up your data to ensure protection against data loss.
  • Keep Software Up-to-Date: Install the latest software updates to benefit from security patches and performance enhancements.
  • Use Strong Passwords: Create strong passwords and enable multi-factor authentication for enhanced security.
  • Be Aware of Phishing Attempts: Be cautious of suspicious emails and websites to prevent malware infections.

Conclusion:

Windows 11 Pro OEM offers a cost-effective and convenient option for acquiring Microsoft’s latest operating system when purchasing a new computer. While it provides a robust feature set, it’s important to understand the limitations associated with OEM licensing, particularly regarding transferability and upgrade paths. By carefully considering these factors and following best practices for security and maintenance, users can maximize the benefits of Windows 11 Pro OEM for their professional or business needs.

Microsoft Windows 11 Professional Digital OEM Key – Universal Version – Prime Tech Mart Windows 11 Pro (OEM) Operációs rendszer digitális licence ku Windows 11 Oem
Windows 11 Professional 64 Bit OEM - Showtime Computer Microsoft Windows 11 Pro OEM MICROSOFT WINDOWS 11 PROFESSIONAL OEM - WIN 11 PRO OEM - LICENSE CODE KEY - ORIGINAL NEW
Windows 11 (OEM And Retail) Windows 11 Installation Guides, 49% OFF Windows 11 Professional (OEM) – DiminutiveCoin Official Store

Closure

Thus, we hope this article has provided valuable insights into Understanding Windows 11 Pro OEM: A Comprehensive Guide. We hope you find this article informative and beneficial. See you in our next article!

Understanding And Resolving Low Sound Issues In Windows 11

Understanding and Resolving Low Sound Issues in Windows 11

Introduction

With great pleasure, we will explore the intriguing topic related to Understanding and Resolving Low Sound Issues in Windows 11. Let’s weave interesting information and offer fresh perspectives to the readers.

Understanding and Resolving Low Sound Issues in Windows 11

How to Resolve Audio Sound Problems in Windows 11 - YouTube

Navigating the digital landscape often involves engaging with audio content. Whether it’s listening to music, watching videos, or participating in online meetings, clear and audible sound is crucial for an enjoyable and productive experience. However, users of Windows 11 may encounter situations where the laptop’s sound output is unexpectedly low, leading to frustration and inconvenience. This article explores common causes of this issue and provides a comprehensive guide to troubleshooting and resolving it.

Common Causes of Low Sound in Windows 11:

Several factors can contribute to a low sound output on a Windows 11 laptop. Identifying the root cause is essential for implementing the appropriate solution.

  • System Volume Settings: The most common culprit is simply a low system volume level. Windows 11 provides a master volume control, which can be inadvertently adjusted to a low setting.
  • Muted Speakers or Headphones: Check if the speakers or headphones connected to the laptop are muted. This can happen accidentally or due to a software glitch.
  • Driver Issues: Outdated or corrupted audio drivers can lead to sound problems, including low volume.
  • Sound Effects and Enhancements: Windows 11 offers various sound effects and enhancements, some of which can significantly reduce the overall volume.
  • Hardware Problems: In rare cases, the issue might stem from a hardware problem with the laptop’s speakers, audio jack, or sound card.

Troubleshooting Steps to Resolve Low Sound Issues:

The following steps offer a systematic approach to identifying and resolving the low sound issue in Windows 11:

  1. Check System Volume:

    • Locate the system volume icon in the taskbar.
    • Ensure the volume slider is set to a reasonable level.
    • If the volume icon is muted, click it to unmute the sound.
  2. Verify Speaker/Headphone Settings:

    • Right-click the speaker icon in the taskbar and select "Open Sound settings."
    • In the "Sound" settings window, click on the "Output" tab.
    • Confirm that the correct output device (speakers or headphones) is selected and that it is not muted.
    • Click on the selected device and choose "Properties."
    • Navigate to the "Levels" tab and ensure that all volume sliders are set to an appropriate level.
  3. Update Audio Drivers:

    • Open the "Device Manager" by searching for it in the Start menu.
    • Expand the "Sound, video and game controllers" category.
    • Right-click on the audio driver and select "Update driver."
    • Choose "Search automatically for updated driver software."
    • Follow the on-screen instructions to complete the driver update.
  4. Disable Sound Effects and Enhancements:

    • In the "Sound" settings window, click on the "Output" tab.
    • Click on the selected device and choose "Properties."
    • Navigate to the "Enhancements" tab.
    • Uncheck all boxes related to sound effects and enhancements.
  5. Run Audio Troubleshooter:

    • Open the "Settings" app by pressing Windows key + I.
    • Navigate to "System > Troubleshoot."
    • Click on "Other troubleshooters."
    • Locate and run the "Playing Audio" troubleshooter.
    • Follow the on-screen instructions to resolve any detected issues.
  6. Check Hardware Connections:

    • Ensure that the audio cable (if using external speakers or headphones) is securely connected to the laptop’s audio jack.
    • If using built-in speakers, verify that they are not physically damaged or obstructed.
  7. Consider Hardware Issues:

    • If the above troubleshooting steps fail to resolve the low sound issue, there might be a hardware problem with the laptop’s speakers, audio jack, or sound card.
    • Consider contacting the laptop manufacturer or a qualified technician for further diagnosis and repair.

FAQs:

Q: Why is my laptop sound low only for certain apps?

A: This could be due to individual app volume settings. Check the volume settings within the specific app to ensure they are not set too low.

Q: My laptop sound is low even after updating the drivers. What should I do?

A: If the issue persists after updating drivers, try installing a previous version of the driver. This might resolve compatibility issues.

Q: I’ve tried everything, but the sound is still low. Is there anything else I can do?

A: If all other troubleshooting steps have been exhausted, consider a clean installation of Windows 11. This might resolve underlying software conflicts.

Tips:

  • Use a dedicated external audio device: If the laptop’s built-in speakers are the issue, consider using a separate external speaker system or headphones.
  • Adjust volume settings individually: Different applications might have their own volume settings. Adjust these settings as needed to achieve the desired volume level.
  • Regularly update drivers: Keeping your audio drivers up-to-date is essential for optimal sound performance and can help prevent issues.
  • Check for software conflicts: Certain software applications might interfere with the audio output. Try temporarily disabling or uninstalling any recently installed software to see if it resolves the issue.

Conclusion:

Low sound issues in Windows 11 can be frustrating, but with a systematic approach to troubleshooting, most cases can be resolved. By checking system volume settings, verifying speaker/headphone connections, updating drivers, disabling sound effects, and running the audio troubleshooter, users can effectively address this common problem. If hardware issues are suspected, seeking professional assistance from the laptop manufacturer or a qualified technician is recommended.

How to FIX No Sound Problem in Windows 11  Easy and Quick Tutorial - YouTube How To Fix No Sound Output Problems On Windows 11  Fix All Audio Issues windows sound not working Archives - HACkNOS Blog
How to Fix No Sound Problem in Windows 11 [ Easy ] No Sound in Windows 11 ?? - YouTube Low Audio Windows 11 Windows 11 Sound not Working: Troubleshoot the Problems
Low Audio in Windows 11? Here’s the Fix! Windows 11 - How To Fix No Sound Output Problem — Tech How

Closure

Thus, we hope this article has provided valuable insights into Understanding and Resolving Low Sound Issues in Windows 11. We thank you for taking the time to read this article. See you in our next article!

Restoring Windows 11 Health: A Comprehensive Guide To Data-Preserving Repair

Restoring Windows 11 Health: A Comprehensive Guide to Data-Preserving Repair

Introduction

With great pleasure, we will explore the intriguing topic related to Restoring Windows 11 Health: A Comprehensive Guide to Data-Preserving Repair. Let’s weave interesting information and offer fresh perspectives to the readers.

Restoring Windows 11 Health: A Comprehensive Guide to Data-Preserving Repair

5 essential commands to repair Windows 11 and windows 10

Windows 11, like any operating system, is susceptible to glitches, errors, and performance issues. These can stem from various sources, including corrupted system files, incompatible software, hardware malfunctions, or even malware infections. While a fresh installation might seem like the immediate solution, it often necessitates a complete data wipe, potentially leading to significant data loss. However, there are multiple methods to repair Windows 11 without compromising your valuable data, ensuring a smooth and efficient restoration process.

Understanding the Importance of Data Preservation

The significance of preserving data during a Windows repair cannot be overstated. Data encompasses everything from personal files and documents to crucial work projects, irreplaceable photos and videos, and irreplaceable software installations. Losing this data can be detrimental, causing significant inconvenience, financial loss, or even emotional distress.

Repairing Windows 11: A Multifaceted Approach

Repairing Windows 11 without data loss is achievable through various methods, each catering to different scenarios and levels of system corruption. These methods offer a graduated approach, starting with less intrusive solutions and escalating to more comprehensive repairs when necessary.

1. System File Checker (SFC) and Deployment Image Servicing and Management (DISM): The First Line of Defense

These built-in tools are often the first port of call for addressing system file corruption.

  • System File Checker (SFC): This utility scans and repairs corrupted system files. To initiate an SFC scan, open Command Prompt as administrator and type "sfc /scannow." The process might take some time to complete.
  • Deployment Image Servicing and Management (DISM): DISM is a more comprehensive tool that can repair corrupted system images. To use DISM, open Command Prompt as administrator and execute the command "DISM /Online /Cleanup-Image /RestoreHealth."

2. Startup Repair: Addressing Boot Issues

Startup Repair is a built-in Windows tool designed to automatically diagnose and fix boot problems. It can be accessed during the startup process:

  • Accessing Startup Repair: If Windows fails to boot properly, you’ll typically be presented with an option to access Startup Repair. Alternatively, you can force a restart and continuously press F8 until the Advanced Boot Options menu appears. Select "Repair your computer" and then choose "Startup Repair."

3. System Restore: Reversing System Changes

System Restore is a powerful tool that allows you to revert your system to a previous point in time, effectively undoing any changes made to your system since that point.

  • Using System Restore: To access System Restore, search for "Create a restore point" in the Windows search bar. Select "System Restore" from the results and follow the on-screen instructions to choose a restore point and initiate the process.

4. Refresh Windows: A Clean Slate without Data Loss

Windows Refresh is a more comprehensive repair method that reinstalls Windows without affecting your personal files, settings, and apps.

  • Initiating Windows Refresh: To refresh Windows, go to "Settings" > "System" > "Recovery" and select "Reset this PC" > "Keep my files."

5. Resetting Windows: A Thorough Clean Installation

A Windows reset is the most drastic repair method, reinstalling Windows from scratch. This option removes all your personal files, settings, and apps, effectively restoring your system to its factory state.

  • Choosing a Reset Option: When resetting Windows, you have two options: "Keep my files" and "Remove everything." The former preserves your personal files, while the latter performs a complete wipe.

6. Advanced Recovery Options: For Complex Issues

If the aforementioned methods fail to resolve the issues, you may need to explore advanced recovery options. These options are more complex and require a deeper understanding of Windows recovery processes.

  • Using a Recovery Drive: A recovery drive can be used to boot your computer into a recovery environment, allowing you to perform various repair tasks.
  • Boot from a Windows Installation Media: A bootable USB drive or DVD containing a Windows installation can be used to access advanced repair options.

Frequently Asked Questions (FAQs)

Q: What are the signs that my Windows 11 needs repair?

A: Common signs include:

  • Slow performance and frequent freezes.
  • Unexpected crashes and error messages.
  • Problems with booting or starting applications.
  • Issues with network connectivity.
  • Unusual behavior or appearance of the operating system.

Q: Will repairing Windows 11 delete my personal files?

A: Most repair methods, such as SFC, DISM, Startup Repair, and System Restore, will not delete your personal files. However, a Windows reset with the "Remove everything" option will erase all data.

Q: Can I use a third-party tool to repair Windows 11?

A: While third-party tools exist, it is generally recommended to rely on the built-in Windows repair tools for data safety. Using third-party tools can be risky, as they might not be compatible with your system or could potentially lead to data loss.

Tips for Repairing Windows 11 without Data Loss

  • Back up your data: Always back up your important data before attempting any repair method. This ensures data recovery in case of unforeseen issues.
  • Create a system restore point: Before making any significant changes to your system, create a system restore point. This allows you to revert to a previous state if necessary.
  • Use the appropriate repair method: Choose the repair method that best suits your situation and the severity of the problem.
  • Follow the instructions carefully: Adhere to the instructions provided during the repair process to avoid errors or data loss.
  • Seek professional help if needed: If you are unsure about the repair process or experience difficulties, consider seeking professional assistance from a qualified technician.

Conclusion

Repairing Windows 11 without losing data is achievable through various methods, each offering a different level of repair and complexity. By understanding the importance of data preservation and utilizing the appropriate tools and techniques, you can effectively restore your Windows 11 system to optimal health without compromising your valuable files. Remember to exercise caution, follow instructions meticulously, and consider professional assistance when necessary. With the right approach, you can ensure a smooth and data-safe repair process for your Windows 11 operating system.

How to Backup and Restore Data on Windows 11? - TECHNIG Recovery Settings in Windows 11- Instructions - TeachUcomp, Inc. System Restore In Windows 11 COMPLETE Tutorial - YouTube
Create And Restore A System Restore Point In Windows 11  pckaruma How to Backup and Restore in Windows 11 - TechRechard How To Recover Windows 11 Using A System Image Backup  solveyourtech
How to use System Restore on Windows 11  Windows Central Windows 11 Pc Health Check - YouTube

Closure

Thus, we hope this article has provided valuable insights into Restoring Windows 11 Health: A Comprehensive Guide to Data-Preserving Repair. We thank you for taking the time to read this article. See you in our next article!

Unlinking Your Microsoft Account From Windows 11 Home: A Comprehensive Guide

Unlinking Your Microsoft Account from Windows 11 Home: A Comprehensive Guide

Introduction

In this auspicious occasion, we are delighted to delve into the intriguing topic related to Unlinking Your Microsoft Account from Windows 11 Home: A Comprehensive Guide. Let’s weave interesting information and offer fresh perspectives to the readers.

Unlinking Your Microsoft Account from Windows 11 Home: A Comprehensive Guide

Link or Unlink OneDrive with Microsoft Account in Windows 11 - YouTube

While Microsoft accounts offer numerous advantages, including cloud storage, seamless synchronization, and unified app experiences, there are situations where users may prefer to detach their accounts from their Windows 11 Home installations. This guide provides a detailed explanation of the process, its implications, and the potential benefits associated with this action.

Understanding the Process

Removing a Microsoft account from Windows 11 Home involves effectively disconnecting the operating system from the user’s online Microsoft profile. This action results in the following changes:

  • No longer signing in with a Microsoft account: Users will no longer be able to use their Microsoft account credentials to log in to Windows. Instead, they will need to create a local account.
  • Loss of cloud synchronization: Features like OneDrive cloud storage, Microsoft Edge bookmarks, and settings synchronization will become inactive. Data stored in the cloud will remain accessible through the web interface but will not automatically sync with the local device.
  • Limited app functionality: Certain applications may require a Microsoft account to function fully. This includes apps like Microsoft Store, Xbox Game Pass, and Microsoft Office.
  • Loss of features: Some features reliant on a Microsoft account, such as Windows Hello facial recognition and Cortana voice assistant, will become unavailable.

Reasons for Removing a Microsoft Account

While Microsoft accounts offer convenience, several compelling reasons may motivate users to detach their accounts from their Windows 11 Home installations:

  • Privacy concerns: Some individuals may be uncomfortable with the data collection practices associated with Microsoft accounts. Removing the account can minimize the amount of data shared with Microsoft.
  • Control over device settings: Removing the Microsoft account allows for greater control over device settings, as these are no longer governed by the cloud account.
  • Customization: Users may prefer to personalize their Windows experience without the limitations imposed by a Microsoft account.
  • Multiple users: In a shared computer environment, removing the Microsoft account allows each user to create a local account with independent settings and data.
  • Troubleshooting: In certain troubleshooting scenarios, removing the Microsoft account can help resolve issues related to account synchronization or software conflicts.

Steps to Remove a Microsoft Account from Windows 11 Home

  1. Open Settings: Navigate to the "Settings" app by clicking the Start menu and selecting the gear icon.
  2. Select Accounts: Within the Settings window, click on "Accounts."
  3. Choose Your Account: In the left-hand menu, select "Your info."
  4. Click "Sign out": Locate the "Sign out" button and click on it.
  5. Confirm the Action: Windows will prompt you to confirm your decision. Click "Sign out" again to proceed.
  6. Create a Local Account: After signing out of your Microsoft account, you will be prompted to create a local account. Enter a username, password, and other required information.

Implications and Considerations

Removing a Microsoft account from Windows 11 Home should be a carefully considered decision. While it offers greater control and privacy, it also comes with certain limitations:

  • Loss of cloud services: Users will lose access to cloud-based services like OneDrive, Microsoft Edge synchronization, and app updates.
  • Limited app functionality: Some apps may become unusable or have reduced functionality without a Microsoft account.
  • Data accessibility: While data stored in the cloud remains accessible via the web interface, it will no longer automatically sync with the local device.
  • Potential for data loss: If users have not backed up their data, removing the Microsoft account could lead to data loss.

FAQs Regarding Removing a Microsoft Account

Q: Can I remove my Microsoft account and still use Windows 11 Home?

A: Yes, you can remove your Microsoft account and continue using Windows 11 Home. However, you will need to create a local account to log in.

Q: Will I lose my data if I remove my Microsoft account?

A: Data stored on your local hard drive will remain accessible. However, data stored in the cloud, such as OneDrive files and Microsoft Edge bookmarks, will not automatically sync with the device.

Q: Can I re-add my Microsoft account after removing it?

A: Yes, you can re-add your Microsoft account at any time. However, you may need to re-download and re-install certain apps that require a Microsoft account.

Q: Can I remove my Microsoft account without losing my installed applications?

A: In most cases, removing your Microsoft account will not affect your installed applications. However, certain apps, such as Microsoft Store apps, may require a Microsoft account to function fully.

Q: What happens to my Windows license after removing my Microsoft account?

A: Removing your Microsoft account does not affect your Windows license. The license remains tied to the device, regardless of the account used to log in.

Tips for Removing a Microsoft Account

  • Backup your data: Before removing your Microsoft account, ensure you have backed up all important data stored on your device and in the cloud.
  • Consider alternative storage: If you rely heavily on cloud storage, consider using alternative services like Google Drive or Dropbox.
  • Review app requirements: Check the requirements for your installed applications to determine if they require a Microsoft account to function.
  • Create a local account: Before removing your Microsoft account, create a local account to ensure a smooth transition.

Conclusion

Removing a Microsoft account from Windows 11 Home can be a beneficial choice for users seeking greater control, privacy, or customization. However, it’s crucial to understand the implications and limitations associated with this action. Carefully consider your needs and preferences before making this decision. By following the steps outlined in this guide and understanding the potential consequences, users can effectively remove their Microsoft account from Windows 11 Home while ensuring a smooth transition to a local account environment.

How to unlink microsoft account from computer - kartzoom How to Remove Microsoft Account from Windows 11 [Guide]  Beebom How do I unlink my Microsoft Account from my computer?
Cant Reactivate Windows 11 Pro Digital License After Unlinking Device from Microsoft Account How do I unlink my Microsoft Account from my computer? How do I unlink a Microsoft account from my PC? - Microsoft Community
How to unlink computer from microsoft account - sworldboo Windows 11 - How to Link Microsoft Account to Windows 11  Link Windows 11 to Microsoft Account

Closure

Thus, we hope this article has provided valuable insights into Unlinking Your Microsoft Account from Windows 11 Home: A Comprehensive Guide. We hope you find this article informative and beneficial. See you in our next article!