Navigating The Labyrinth: Resolving Printer Issues After Windows 11 Updates

Navigating the Labyrinth: Resolving Printer Issues After Windows 11 Updates

Introduction

With great pleasure, we will explore the intriguing topic related to Navigating the Labyrinth: Resolving Printer Issues After Windows 11 Updates. Let’s weave interesting information and offer fresh perspectives to the readers.

Windows 11 22H2 users suffer from printing issues

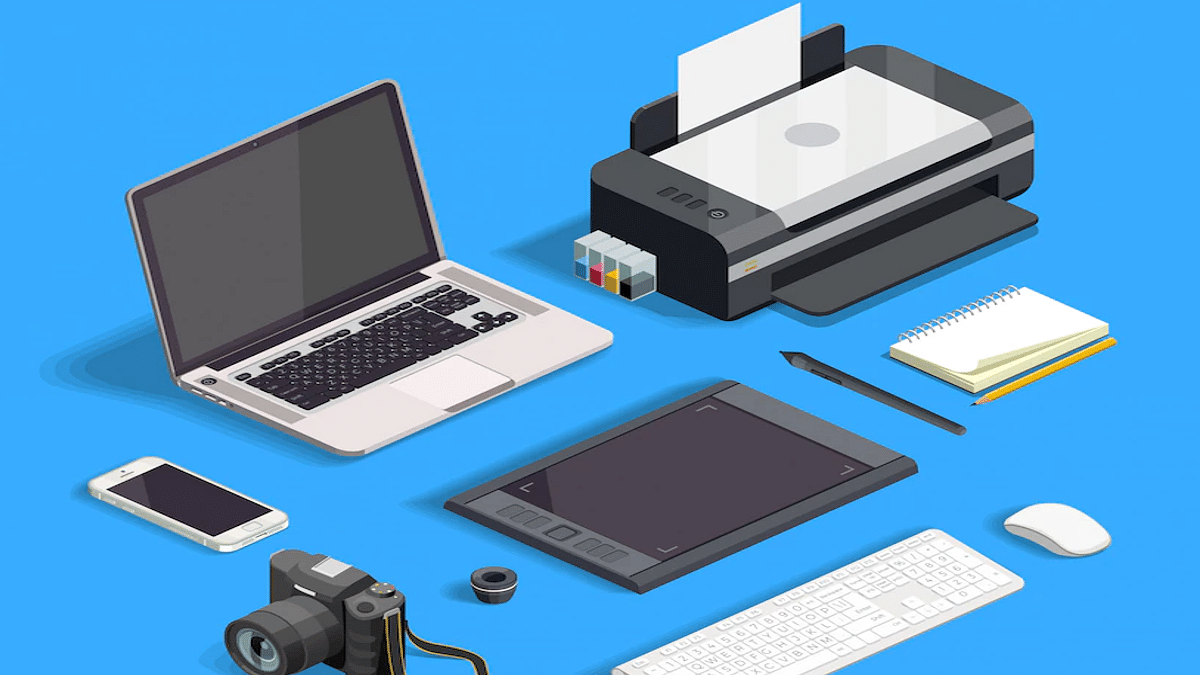
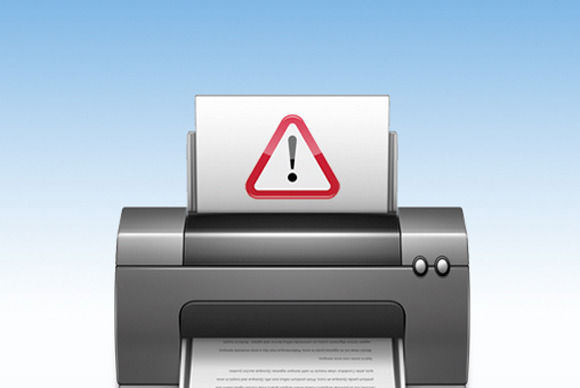
The allure of a fresh, updated operating system is often met with frustration when previously functional devices, like printers, suddenly become incompatible. Windows 11, despite its numerous enhancements, has occasionally presented users with this particular challenge. While the reasons behind printer malfunctions following updates can be diverse, understanding the underlying causes and employing appropriate troubleshooting techniques can effectively restore printing functionality.

Unraveling the Reasons Behind Printer Incompatibility

The root cause of printer issues after a Windows 11 update can often be attributed to one or a combination of the following factors:

  • Outdated or Incompatible Drivers: Windows updates sometimes introduce changes that necessitate updated drivers for peripherals, including printers. If the printer’s driver is not compatible with the new Windows version, communication between the computer and the printer may be disrupted.
  • Conflicting Services: Windows 11 may activate or deactivate specific services during updates. These changes can inadvertently interfere with the printer’s functionality, causing printing errors or preventing the printer from being recognized.
  • Connectivity Issues: Network-connected printers may experience connectivity issues after a Windows update. This could stem from changes in the network configuration, firewall settings, or even a temporary glitch in the network infrastructure.
  • Hardware Conflicts: In rare instances, the update might introduce conflicts between the printer and other hardware components within the system, leading to printing errors or malfunctions.
  • Corrupted Print Spooler: The print spooler, responsible for managing print jobs, can become corrupted due to various reasons, including update-related changes. A corrupted print spooler can hinder printing operations and prevent documents from being sent to the printer.

Troubleshooting Printer Issues: A Step-by-Step Approach

Addressing printer issues after a Windows 11 update requires a systematic and logical approach. The following steps can help pinpoint the problem and provide solutions:

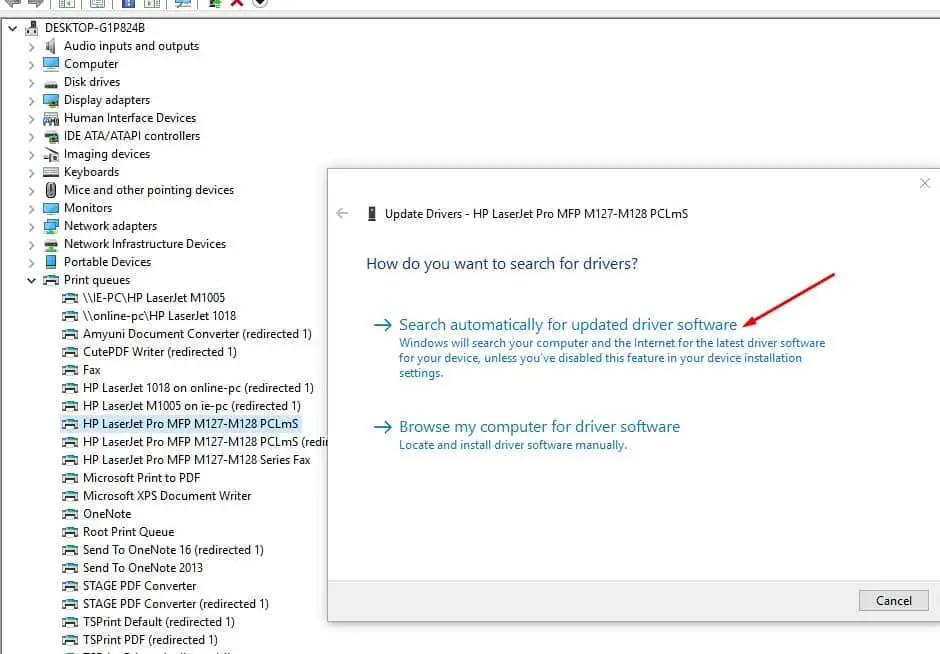
1. Update the Printer Drivers:

  • Identify the Printer Model: Begin by determining the exact model of your printer. This information is typically found on the printer itself or in the user manual.
  • Download the Latest Drivers: Visit the manufacturer’s website and locate the support or downloads section. Search for the latest drivers compatible with Windows 11 and your printer model.
  • Install the New Drivers: Download and install the new drivers following the manufacturer’s instructions. Once installed, restart your computer to ensure the changes take effect.

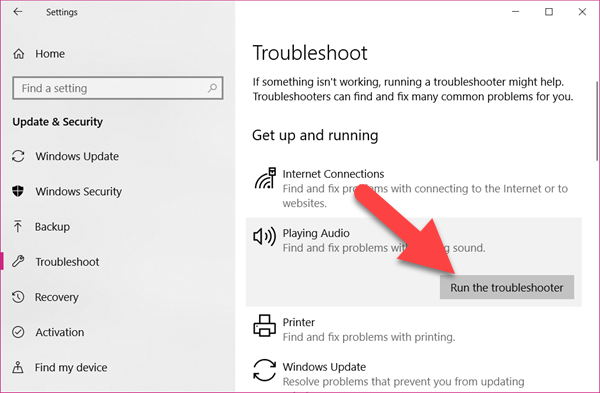
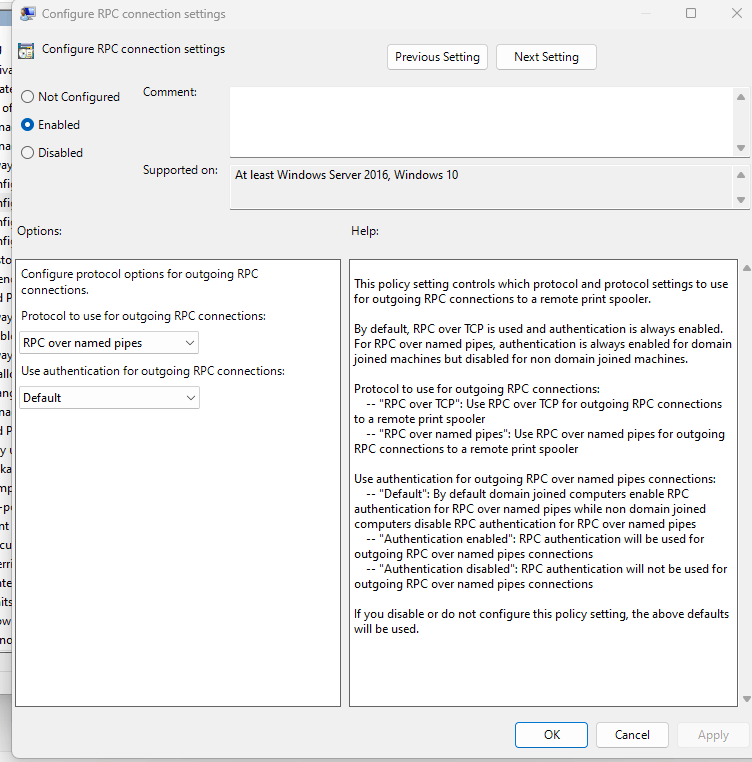
2. Check and Configure Print Spooler:

  • Access Print Spooler Services: Open the "Run" dialog box (Windows key + R), type "services.msc" and press Enter.
  • Locate Print Spooler Service: Scroll down to find the "Print Spooler" service and check its status. If it’s stopped, right-click on the service and select "Start."
  • Reset Print Spooler: To reset the print spooler, open "Run" dialog box, type "cmd" and press Enter. In the command prompt, type "net stop spooler" and press Enter. Then type "net start spooler" and press Enter.

3. Verify Connectivity:

  • Check Network Connection: Ensure your printer is connected to the network and that the network connection is stable.
  • Check Firewall Settings: If your printer is on a network, temporarily disable your firewall to see if it resolves the issue. If it does, consider adding the printer to the firewall’s exceptions list.
  • Check Router Configuration: If the issue persists, examine the router settings to ensure the printer is correctly configured and assigned a valid IP address.

4. Troubleshoot Hardware Conflicts:

  • Disconnect Other Devices: Temporarily disconnect other USB devices or peripherals connected to your computer, leaving only the printer connected. This can help isolate potential hardware conflicts.
  • Update Device Drivers: If the issue persists, update the drivers for other connected devices to ensure they are compatible with Windows 11.

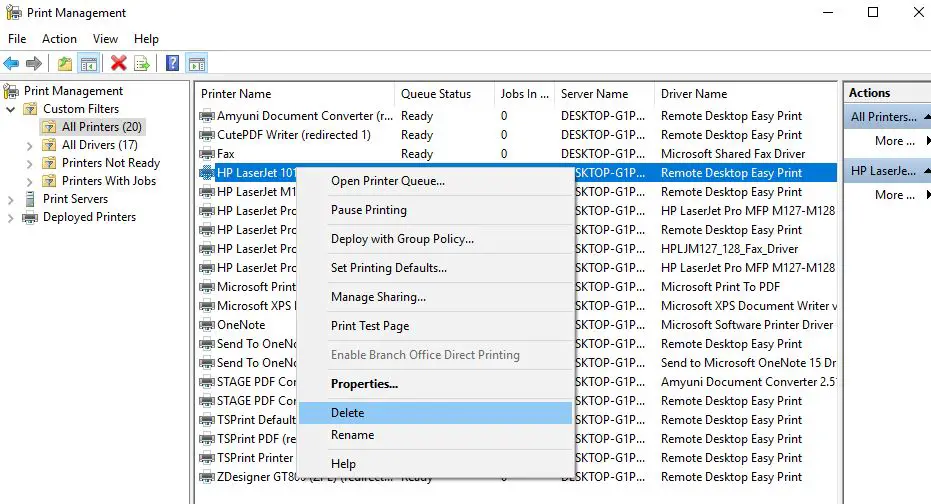
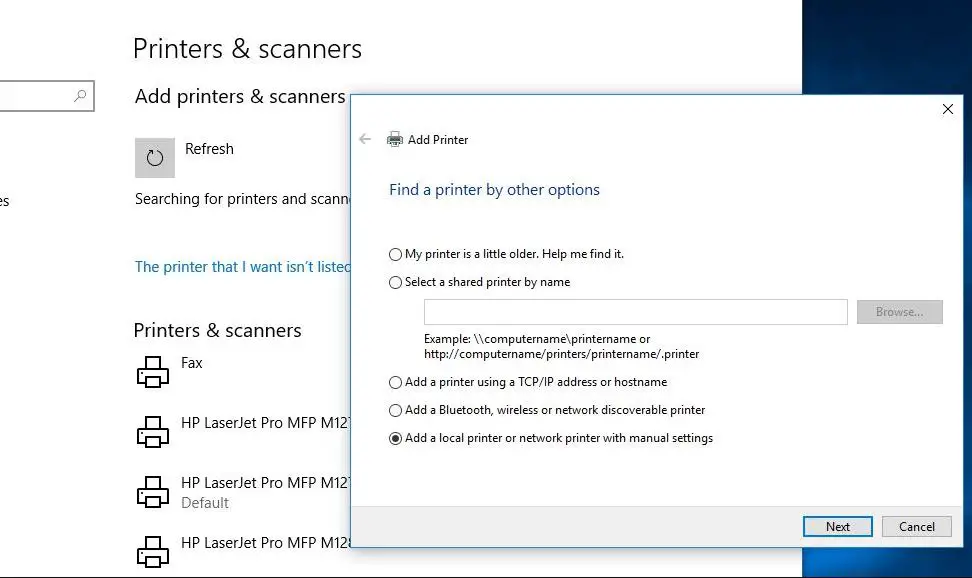
5. Reinstall Printer:

  • Remove the Printer: Open "Settings" > "Bluetooth & devices" > "Printers & scanners." Locate your printer and select "Remove device."
  • Reinstall the Printer: Reconnect your printer to your computer and follow the on-screen instructions to reinstall it. Windows 11 should automatically detect the printer and install the appropriate drivers.

6. Perform a System Restore:

If none of the above solutions work, consider performing a system restore to a point before the update was installed. This will revert your system to a previous state and may resolve the printer issue.

FAQs: Addressing Common Printer Dilemmas

Q: My printer is not showing up in the list of devices after the Windows 11 update. What should I do?

A: This is a common issue after updates. Try restarting your computer and the printer. If the printer still doesn’t appear, check if it is properly connected to your computer or network. If it’s a network printer, make sure the printer’s IP address is correctly configured in your network settings. If the problem persists, consider reinstalling the printer drivers.

Q: I can see my printer, but it’s not printing anything. What could be the issue?

A: Several factors can cause this. First, ensure the printer has enough paper and ink. Next, check the print queue. Open "Settings" > "Bluetooth & devices" > "Printers & scanners." Click on your printer and select "Open queue." If there are any pending print jobs, try canceling them and resending the document. If the issue persists, check the printer’s status lights or error messages for any indications of problems.

Q: My printer was working fine before the update, but now it’s printing blank pages. What’s going on?

A: This could be due to a driver issue or a problem with the printer itself. Try reinstalling the printer drivers and restarting the computer. If the issue persists, check the printer’s settings for any changes in the paper type or print quality. If the problem persists, consider contacting the printer manufacturer for further assistance.

Tips for Preventing Future Printer Issues:

  • Keep Drivers Updated: Regularly check for updates to your printer drivers. This ensures compatibility with the latest operating system versions and helps prevent potential issues.
  • Back Up Your System: Before installing major updates, create a system restore point. This allows you to revert your system to a previous state if any problems arise.
  • Check for Compatibility: Before installing a Windows update, verify that your printer is compatible with the new version. Consult the manufacturer’s website or the Windows update notes for compatibility information.
  • Use a Wired Connection: If possible, consider using a wired connection for your printer instead of a wireless connection. This can improve reliability and reduce the likelihood of connectivity issues.

Conclusion: A Seamless Printing Experience

Resolving printer issues after a Windows 11 update can be a frustrating experience, but with a systematic approach and the right troubleshooting techniques, it is often possible to restore printing functionality. By understanding the potential causes of incompatibility, checking drivers, verifying connectivity, and utilizing other troubleshooting methods, users can overcome these challenges and enjoy a seamless printing experience. Remember, patience and persistence are key to navigating the complexities of technology, and with a little effort, you can regain control of your printer and resume your printing tasks with ease.

Resolving Printer Error 0X8007007e on Windows HP Printers Not Working After Windows 11 Update? Here Are Some Quick Fixes Windows 11 update issues - peresworld
Resolving Printer Connection Problems Resolving Common Printer Problems and Solutions: Your Ultimate Guide - Scanse Fix Printer Problems After Windows 10 Update – UnBrick.ID
Fix Printer Problems After Windows 10 Update – UnBrick.ID Fix Printer Problems After Windows 10 Update – UnBrick.ID

Closure

Thus, we hope this article has provided valuable insights into Navigating the Labyrinth: Resolving Printer Issues After Windows 11 Updates. We appreciate your attention to our article. See you in our next article!

Navigating The Windows 10 Download: A Comprehensive Guide

Navigating the Windows 10 Download: A Comprehensive Guide

Introduction

With enthusiasm, let’s navigate through the intriguing topic related to Navigating the Windows 10 Download: A Comprehensive Guide. Let’s weave interesting information and offer fresh perspectives to the readers.

PPT - A Comprehensive Guide to Downloading Windows 10 for Mac and Windows 11 for PC PowerPoint

The decision to upgrade to Windows 10 is a significant one, demanding careful consideration of system compatibility, software requirements, and data migration. This comprehensive guide aims to provide clarity and guidance throughout the download process, demystifying the intricacies involved and empowering users to make informed choices.

Understanding the Importance of a Clean Installation

While upgrading from a previous Windows version might seem the most straightforward path, a clean installation offers numerous advantages:

  • Enhanced Performance: A fresh installation removes unnecessary files and programs accumulated over time, optimizing system performance and responsiveness.
  • Reduced Errors and Issues: A clean slate eliminates potential conflicts and errors stemming from outdated drivers or leftover software remnants.
  • Enhanced Security: A fresh installation allows for a clean security environment, free from potential vulnerabilities or malware left by previous installations.
  • Personalized Setup: A clean installation enables users to customize their system settings and preferences from the outset, creating a tailored user experience.

Choosing the Right Download Method

There are multiple avenues for acquiring the Windows 10 installation files:

  • Microsoft Website: The official Microsoft website offers the most reliable and secure source for downloading the operating system. Users can choose from various versions based on their specific needs and system requirements.
  • Media Creation Tool: Provided by Microsoft, this tool allows users to create a bootable USB drive or DVD containing the Windows 10 installation files. This method is ideal for performing clean installations or upgrading older systems.
  • ISO Files: Direct download of ISO files containing the Windows 10 installation files is also possible from the Microsoft website. This method provides greater flexibility and control over the installation process.

Essential Prerequisites for Downloading Windows 10

Before embarking on the download journey, ensure that the following prerequisites are met:

  • System Requirements: Verify that the target device meets the minimum system requirements for Windows 10. This includes processor, RAM, storage space, and graphics card specifications.
  • Internet Connection: A stable and reliable internet connection is crucial for downloading the installation files, which can be substantial in size.
  • Backup: It is essential to back up all critical data before proceeding with the download. This ensures data recovery in case of unforeseen issues during the installation process.
  • Product Key: A valid Windows 10 product key is required for activating the operating system after installation.

Step-by-Step Guide to Downloading Windows 10

  1. Choose Your Download Method: Select the preferred download method based on individual needs and system configuration.
  2. Visit the Microsoft Website: Navigate to the official Microsoft website dedicated to Windows 10 downloads.
  3. Select the Desired Version: Choose the appropriate Windows 10 edition based on system requirements and user preferences.
  4. Start the Download: Initiate the download process by clicking the appropriate button or link provided on the website.
  5. Verify the Download: After the download is complete, verify the integrity of the downloaded files by checking their size and checksum.
  6. Create Installation Media: If using the Media Creation Tool, follow the on-screen instructions to create a bootable USB drive or DVD.

FAQs Regarding Windows 10 Downloads

Q: What is the difference between Windows 10 Home and Windows 10 Pro?

A: Windows 10 Home is designed for general home users, while Windows 10 Pro offers additional features tailored for businesses and professionals, including BitLocker encryption, Remote Desktop, and domain join capabilities.

Q: Can I upgrade from Windows 7 or Windows 8.1 to Windows 10 for free?

A: The free upgrade offer for Windows 10 has ended. However, users can purchase a Windows 10 license or upgrade from a previous version at a discounted price.

Q: How much storage space is required for Windows 10?

A: The minimum storage space requirement for Windows 10 is 32GB, although 64GB or more is recommended for optimal performance and software installations.

Q: Will my existing software and drivers work with Windows 10?

A: Most existing software and drivers are compatible with Windows 10. However, it is advisable to check for updates or compatibility information before upgrading.

Tips for a Smooth Windows 10 Download and Installation

  • Check for System Compatibility: Ensure that the target device meets the minimum system requirements before attempting to download or install Windows 10.
  • Back Up Data: Create a complete backup of all important files and data before proceeding with the installation.
  • Disconnect Unnecessary Devices: Disconnect external devices, such as printers and USB drives, to avoid potential conflicts during the installation process.
  • Disable Antivirus Software: Temporarily disable antivirus software to prevent interference with the installation process.
  • Follow On-Screen Instructions: Carefully follow the instructions provided during the download and installation process.

Conclusion

Downloading and installing Windows 10 can be a smooth and rewarding experience with proper planning and preparation. By understanding the different download methods, verifying system compatibility, backing up essential data, and following the outlined steps, users can navigate the process with confidence, unlocking the benefits of this modern operating system. Remember, a clean installation often leads to a more stable and efficient system, ensuring a seamless transition to the world of Windows 10.

Navigating Windows 10: A Comprehensive Guide on How to Get to the Desktop Navigating Windows 10: The Illustrated Guide to Using Windows 10 (Navigating IT) - Wilson, Kevin PPT - A Comprehensive Guide to Installing Windows 10_ Step-by-Step Tutorial PowerPoint
How To Navigate Windows 10 - SSCSD Educational Technology How to Navigate in Windows 10 - Windows 10 User Interface Overview - YouTube Navigating Windows 10.pdf - Navigating Windows 10 1 Know your way around Here are the spots you
PPT - Navigating the Windows 10 Experience: A Comprehensive Guide to Licenses and Upgr VinBoiSoft Blog: 10 Quick Clicks: A PC Guide for Navigating Windows 10

Closure

Thus, we hope this article has provided valuable insights into Navigating the Windows 10 Download: A Comprehensive Guide. We hope you find this article informative and beneficial. See you in our next article!

Navigating The Network: Understanding And Configuring APN Settings On AT&T

Navigating the Network: Understanding and Configuring APN Settings on AT&T

Introduction

With great pleasure, we will explore the intriguing topic related to Navigating the Network: Understanding and Configuring APN Settings on AT&T. Let’s weave interesting information and offer fresh perspectives to the readers.

AT&T APN Settings【 Android  iPhone 】Internet 5G 2024

The ability to connect to the internet through your mobile device is a fundamental aspect of modern life. This connectivity relies on a complex network infrastructure, and a key component within this system is the Access Point Name (APN). APN settings, specific to each mobile carrier, act as a bridge, enabling your device to access the internet through the carrier’s network. For AT&T users, understanding and configuring these settings is crucial for ensuring seamless and reliable internet access.

What are APN Settings?

Imagine the internet as a vast highway, and your mobile device as a vehicle. To navigate this highway, your device needs a specific route, a set of instructions that guide it to the correct destination. APN settings serve as these instructions, providing your device with the necessary information to connect to the internet through AT&T’s network.

These settings contain crucial details, such as:

  • APN Name: This is a unique identifier for the specific internet connection.
  • Username and Password: These credentials are used for authentication on the network.
  • Proxy Server: This server acts as an intermediary, routing traffic between your device and the internet.
  • MMSC and MMS Proxy: These settings are responsible for sending and receiving multimedia messages (MMS).
  • Authentication Type: This specifies the method used to verify your device’s identity on the network.

The Importance of Correct APN Settings

Having the correct APN settings configured on your device is essential for several reasons:

  • Internet Connectivity: Without the correct APN settings, your device will be unable to establish a connection to the internet. This can result in the inability to browse websites, send emails, or use internet-based applications.
  • Data Usage and Billing: Incorrect APN settings can lead to unexpected data usage charges, as your device might attempt to connect to the internet through a different network.
  • MMS Functionality: Incorrect MMSC and MMS proxy settings can hinder your ability to send or receive multimedia messages.
  • Network Performance: Incorrect APN settings can lead to slow internet speeds, dropped connections, and other network performance issues.

How to Configure APN Settings on AT&T

The process of configuring APN settings can vary depending on the type of device you are using. However, the general steps are as follows:

  1. Access Settings: Open the settings app on your device.
  2. Navigate to Network Settings: Look for the "Network" or "Connections" section within the settings.
  3. Find APN Settings: Locate the "Access Point Names" or "APN" option.
  4. Add New APN: If an APN is not already configured, tap on the "Add" or "New APN" button.
  5. Enter APN Details: Enter the necessary APN details as provided by AT&T. This information can be found on their website or by contacting their customer support.
  6. Save Settings: Once you have entered all the required information, save the new APN settings.
  7. Select APN: Choose the newly created APN as your default internet connection.

Troubleshooting Common APN Issues

If you are experiencing issues with your internet connection after configuring APN settings, there are several troubleshooting steps you can take:

  • Verify APN Settings: Double-check that you have entered the correct APN details.
  • Restart Your Device: Sometimes, a simple restart can resolve connectivity issues.
  • Check Network Coverage: Ensure that you are within an area with adequate AT&T network coverage.
  • Contact AT&T Support: If you are still experiencing problems, contact AT&T customer support for assistance.

FAQs on APN Settings

Q: Do I need to configure APN settings if I am using a new AT&T SIM card?

A: In most cases, your device will automatically configure the correct APN settings when you insert a new AT&T SIM card. However, it is always a good practice to verify the settings to ensure they are accurate.

Q: Can I use different APN settings for different purposes, such as browsing the internet and sending MMS messages?

A: Yes, you can create multiple APN profiles on your device, each with different settings for specific purposes. This can be helpful for optimizing your data usage or accessing different network services.

Q: What happens if I delete the existing APN settings on my device?

A: Deleting the existing APN settings will prevent your device from connecting to the internet. You will need to reconfigure the settings to restore internet connectivity.

Q: How often do APN settings need to be updated?

A: APN settings are generally static and do not require frequent updates. However, if you experience connectivity issues or if AT&T announces changes to their network, you may need to update your APN settings.

Tips for APN Settings

  • Backup APN Settings: It is always a good idea to create a backup of your APN settings in case you need to restore them later.
  • Use Reliable Sources: When obtaining APN settings, use official AT&T resources or reputable third-party websites.
  • Contact Support: If you are unsure about the correct APN settings or if you encounter any issues, contact AT&T customer support for assistance.

Conclusion

APN settings play a critical role in enabling your mobile device to connect to the internet through AT&T’s network. By understanding the importance of these settings and following the steps outlined in this article, you can ensure seamless and reliable internet access. Remember to verify the settings, troubleshoot any issues, and consult official resources for accurate and up-to-date information.

What is the best APN Settings for AT&T? Updated APN Settings For AT&T, Verizon, T-Mobile, Sprint ( +4 More) AT&T Wireless Internet (MF279) - View APN Settings - AT&T
AT&T 5G APN Settings  Att internet Settings 2022 - YouTube AT&T APN settings for Android - APN Settings USA ATT APN Settings - Step by Step Setup Guide for Android & iPhone
AT&T APN settings - Latest Settings for Android and iPhone AT&T nighthawk apn settings - Techprojournal

Closure

Thus, we hope this article has provided valuable insights into Navigating the Network: Understanding and Configuring APN Settings on AT&T. We thank you for taking the time to read this article. See you in our next article!

Navigating The Price Landscape Of Original Windows 10 In Bangladesh

Navigating the Price Landscape of Original Windows 10 in Bangladesh

Introduction

In this auspicious occasion, we are delighted to delve into the intriguing topic related to Navigating the Price Landscape of Original Windows 10 in Bangladesh. Let’s weave interesting information and offer fresh perspectives to the readers.

How to check original windows 10 bangla tutorial - YouTube

The operating system is the foundation upon which a computer operates, and Windows 10 has established itself as a dominant force in the global market. In Bangladesh, the cost of acquiring a genuine Windows 10 license is a significant consideration for individuals and businesses alike. This article delves into the price structure of original Windows 10 licenses in Bangladesh, providing a comprehensive understanding of the factors influencing pricing and offering guidance for informed purchasing decisions.

Understanding the Importance of Original Licenses

Using an original Windows 10 license offers numerous benefits:

  • Legality and Security: Genuine licenses ensure compliance with software licensing agreements, mitigating legal risks and potential penalties.
  • Software Updates: Original Windows 10 users receive regular updates, including security patches, bug fixes, and performance enhancements, safeguarding against vulnerabilities and ensuring optimal system performance.
  • Technical Support: Licensed users have access to official Microsoft support channels for troubleshooting and assistance with technical issues.
  • Enhanced Features: Original licenses unlock the full range of features and functionalities offered by Windows 10, including advanced security tools, productivity applications, and multimedia capabilities.

Factors Influencing Windows 10 Pricing in Bangladesh

The price of original Windows 10 licenses in Bangladesh is subject to various factors:

  • License Type: Windows 10 licenses are available in different versions, each tailored to specific user needs. These include:
    • Windows 10 Home: Designed for personal use, offering essential features for everyday computing.
    • Windows 10 Pro: Catering to professionals and businesses, providing advanced features like domain join capabilities and remote desktop access.
    • Windows 10 Enterprise: Tailored for large organizations, offering enhanced security features, management tools, and long-term support options.
  • Retail Channels: Prices can vary depending on the retailer, with authorized distributors, online marketplaces, and local computer stores offering different pricing structures.
  • Promotional Offers: Microsoft and authorized retailers often introduce promotional discounts and special offers, impacting the final price.
  • Currency Fluctuations: Exchange rate fluctuations between the Bangladeshi Taka and the US Dollar can affect the cost of imported software licenses.
  • Market Demand: The demand for specific Windows 10 versions can influence pricing, with higher demand leading to potential price increases.

Navigating the Price Landscape: A Practical Guide

Understanding these factors empowers consumers to make informed decisions when purchasing original Windows 10 licenses in Bangladesh:

  • Research and Compare: Before making a purchase, compare prices from multiple reputable retailers, both online and offline, to identify the best deals.
  • Consider License Type: Choose the license version that best aligns with your specific requirements and usage patterns.
  • Look for Promotions: Keep an eye out for promotional offers and discounts from Microsoft and authorized retailers.
  • Check for Authenticity: Verify the legitimacy of the license key and the retailer to avoid counterfeit products.
  • Seek Professional Advice: Consult with IT professionals or computer specialists for guidance on choosing the appropriate Windows 10 version and navigating the licensing process.

Frequently Asked Questions (FAQs) about Original Windows 10 Licenses in Bangladesh

Q: What is the average price range for an original Windows 10 license in Bangladesh?

A: The price range for original Windows 10 licenses in Bangladesh typically varies from BDT 5,000 to BDT 15,000, depending on the license type, retailer, and promotional offers.

Q: Where can I purchase original Windows 10 licenses in Bangladesh?

A: Original Windows 10 licenses can be purchased from authorized distributors, online marketplaces like Daraz and Bikroy, and local computer stores.

Q: How can I verify the authenticity of a Windows 10 license?

A: Check for the Microsoft hologram sticker on the packaging, verify the license key through Microsoft’s official website, and ensure the retailer is authorized.

Q: Can I transfer a Windows 10 license to a new computer?

A: Yes, you can usually transfer a Windows 10 license to a new computer, but there are specific rules and limitations depending on the license type.

Q: What are the advantages of using an original Windows 10 license?

A: Using an original license ensures legal compliance, grants access to updates and support, unlocks full functionality, and enhances security.

Tips for Purchasing Original Windows 10 Licenses in Bangladesh

  • Prioritize Authorized Retailers: Purchase from authorized distributors or retailers to ensure the authenticity of the license.
  • Read Reviews and Testimonials: Research online reviews and testimonials from previous customers to gauge the reliability of retailers.
  • Compare Prices and Promotions: Utilize price comparison websites and explore promotional offers to find the best deals.
  • Save Proof of Purchase: Keep a copy of the purchase receipt and license key for future reference.

Conclusion

Obtaining an original Windows 10 license in Bangladesh is essential for a secure, functional, and legally compliant computing experience. By understanding the factors influencing pricing, utilizing the tips provided, and being aware of the benefits of genuine licenses, users can make informed decisions and navigate the price landscape effectively. Remember to prioritize authenticity, explore promotional offers, and seek professional advice when necessary to ensure a smooth and rewarding experience with Windows 10.

Bangladesh  Windows Themes Hình nền Bangladesh chất ngầu - Top Những Hình Ảnh Đẹp Bangladesh Village Scenery Painting at PaintingValley.com  Explore collection of Bangladesh
Download Original Windows Nature Landscape Wallpaper  Wallpapers.com Bangladesh Nature, nature of bangladesh HD wallpaper  Pxfuel Download free photo of Bangladesh, landscape, nature, tourism, lake - from needpix.com
Nature Landscape Picture - Free Bangladesh Photos Bangladesz, Dhaka, Miasto, Las

Closure

Thus, we hope this article has provided valuable insights into Navigating the Price Landscape of Original Windows 10 in Bangladesh. We hope you find this article informative and beneficial. See you in our next article!

O Kam Pro For Pc Windows 10 Download

o kam pro for pc windows 10 download

Introduction

In this auspicious occasion, we are delighted to delve into the intriguing topic related to o kam pro for pc windows 10 download. Let’s weave interesting information and offer fresh perspectives to the readers.

It seems you’re requesting information about a software program called "o kam pro" for Windows 10. However, there is no widely known or recognized software with that exact name. It’s possible the name is misspelled or refers to a niche or less popular program.

O-KAM Pro for PC - Free Download: Windows 7,10,11 Edition

To provide you with helpful information, I need more context. Please clarify:

  • Is there a specific software you’re referring to? If so, could you provide the full name or a more detailed description?
  • What is the purpose of this software? Knowing its intended function will help me understand what you’re looking for.
  • Have you tried searching for it online? If so, what results did you find?

Once I have a better understanding of what you’re looking for, I can provide you with relevant information, including:

  • Potential software alternatives that might fulfill the same purpose.
  • Tips for searching for and downloading software safely.
  • Guidance on identifying reliable sources for software downloads.

Please provide me with more information so I can assist you effectively.

O-KAM Pro for PC / Mac / Windows 11,10,8,7 - Free Download - Napkforpc.com O-KAM Pro For Pc : O-KAM Pro Computer Client Download O-KAM Pro for PC - Free Download: Windows 7,10,11 Edition
O-KAM Pro for PC - Free Download: Windows 7,10,11 Edition O-KAM Pro para PC - Descarga gratis [Windows 10,11,7 y Mac OS] - PcMac Español O-KAM Pro PC バージョン : 無料 ダウンロード - Windows 10/11/7/Mac
O-KAM Pro for PC - Free Download: Windows 7,10,11 Edition O-KAM Pro Camera APP And PC Download (Complete Guide)

Closure

Thus, we hope this article has provided valuable insights into o kam pro for pc windows 10 download. We appreciate your attention to our article. See you in our next article!

The End Of Windows 11: A Comprehensive Analysis

The End of Windows 11: A Comprehensive Analysis

Introduction

With great pleasure, we will explore the intriguing topic related to The End of Windows 11: A Comprehensive Analysis. Let’s weave interesting information and offer fresh perspectives to the readers.

The End of Windows 11: A Comprehensive Analysis

Windows 11 End Of Support

The question of when Windows 11 will reach its end-of-life is a topic of ongoing interest for users and industry professionals alike. While Microsoft has not announced a specific sunset date for Windows 11, several factors can provide insight into its potential lifespan and the implications for users.

Understanding Microsoft’s Support Lifecycle:

Microsoft adheres to a structured support lifecycle for its operating systems, encompassing various phases:

  • Mainstream Support: This phase typically lasts for five years from the initial release date and includes full support for the operating system, including security updates, bug fixes, and new features.
  • Extended Support: Following the mainstream support period, Windows 11 will enter an extended support phase lasting for another two years. During this time, Microsoft will primarily focus on providing security updates to address critical vulnerabilities.
  • End of Support: After the extended support phase, Microsoft officially stops releasing all updates, including security patches. This marks the end of support for the operating system, and users are strongly advised to upgrade to a newer version or face significant security risks.

Factors Influencing Windows 11’s Lifespan:

While the standard support lifecycle provides a general timeframe, several factors can influence the actual lifespan of Windows 11:

  • Technological Advancements: Rapid advancements in hardware and software technologies can render older operating systems outdated and less compatible with newer applications and devices. This pressure can motivate Microsoft to introduce newer operating systems with enhanced capabilities, potentially shortening the lifespan of Windows 11.
  • Security Vulnerabilities: As software evolves, new vulnerabilities and security threats emerge. Microsoft needs to ensure that its operating systems remain secure, and if Windows 11 becomes increasingly vulnerable to exploits, it could necessitate an earlier end-of-support date.
  • Market Adoption: The rate of adoption of a new operating system can significantly impact its lifespan. If Windows 11 experiences widespread adoption and becomes the dominant operating system, Microsoft might be more inclined to extend its support to cater to a larger user base. Conversely, low adoption rates could lead to an earlier end-of-life decision.
  • Microsoft’s Strategic Decisions: Ultimately, Microsoft holds the final say on the lifespan of Windows 11. The company’s strategic goals, market dynamics, and competitive landscape will all play a role in determining when it decides to discontinue support for the operating system.

Implications of the End of Support for Windows 11:

The end of support for Windows 11 carries significant implications for users:

  • Security Risks: Without security updates, Windows 11 will become increasingly vulnerable to malware, viruses, and other cyber threats. This can expose users to data breaches, system failures, and financial losses.
  • Compatibility Issues: New applications and hardware may not be compatible with Windows 11 after its end of support. This can limit users’ access to the latest software and technology.
  • Technical Support: Microsoft will no longer provide technical support for Windows 11 after its end of support. Users will need to rely on third-party solutions or upgrade to a newer operating system.

FAQs about the End of Support for Windows 11:

1. When will Windows 11 officially end its support?

Microsoft has not announced a specific end-of-support date for Windows 11. However, based on the standard support lifecycle, it is likely to occur around 2028, seven years after its initial release.

2. What happens to my data after Windows 11 ends support?

Your data will remain on your computer, but it will be at greater risk of security threats without ongoing updates. It is crucial to back up your data regularly to ensure its safety.

3. Can I continue using Windows 11 after its end of support?

Technically, you can continue using Windows 11 after its end of support. However, it is strongly discouraged due to the significant security risks involved.

4. Should I upgrade to a newer operating system before Windows 11 ends support?

It is highly recommended to upgrade to a newer operating system before Windows 11 reaches its end of support to ensure continued security and compatibility.

5. What are my options if I cannot upgrade to a newer operating system?

If upgrading is not feasible, consider using a virtual machine to run a newer operating system alongside Windows 11. This can provide a secure environment for accessing newer applications and technologies.

Tips for Preparing for the End of Support for Windows 11:

  • Back Up Your Data: Regularly back up your important files and data to an external hard drive or cloud storage service.
  • Consider Upgrading: Assess your hardware and software needs and consider upgrading to a newer operating system before Windows 11 ends support.
  • Explore Alternatives: Research alternative operating systems like Linux or Chrome OS that might be compatible with your hardware and software.
  • Stay Informed: Monitor Microsoft’s official announcements and updates regarding the end of support for Windows 11.

Conclusion:

While the exact date for the end of support for Windows 11 remains unknown, it is crucial for users to be aware of the implications and take proactive steps to prepare for the event. By understanding the support lifecycle, considering upgrade options, and implementing appropriate security measures, users can mitigate the risks and ensure a smooth transition to a newer operating system or alternative solutions. Staying informed about Microsoft’s announcements and adopting a proactive approach will be essential in navigating this crucial milestone in the evolution of Windows.

Windows 11: The End of Windows 10 Windows 11: The End of Windows 10  Geek Culture Windows 11: The End of Windows 10  Geek Culture
Windows 11 End Of Support [Confirmed] End of Windows 10 - Next Version Windows 11? - YouTube Windows 11 21H2 reached end of support on October 10, 2023 - Pureinfotech
Why Is Microsoft Releasing Windows 11? — The End Of Windows 10 Windows 11 has a new way to close apps and end processes, here is how to enable it - Neowin

Closure

Thus, we hope this article has provided valuable insights into The End of Windows 11: A Comprehensive Analysis. We appreciate your attention to our article. See you in our next article!

The Silent Symphony: Troubleshooting Audio Issues On Windows 10 Laptops

The Silent Symphony: Troubleshooting Audio Issues on Windows 10 Laptops

Introduction

With enthusiasm, let’s navigate through the intriguing topic related to The Silent Symphony: Troubleshooting Audio Issues on Windows 10 Laptops. Let’s weave interesting information and offer fresh perspectives to the readers.

The Silent Symphony: Troubleshooting Audio Issues on Windows 10 Laptops

How To Fix Sound Problems In Windows 10 The Microsoft Windows11 - Vrogue

A laptop without sound is akin to a symphony without an orchestra – a void where music and communication should be. This silence can be frustrating, hindering productivity, entertainment, and even basic communication. Fortunately, the absence of sound on a Windows 10 laptop is often a solvable issue, stemming from a variety of causes, ranging from simple configuration errors to more complex hardware malfunctions. This article aims to equip users with a comprehensive understanding of the potential causes behind this issue and provide a step-by-step guide to troubleshooting and restoring the harmonious soundscape of their laptops.

Understanding the Silent Symphony: Potential Causes

The lack of sound on a Windows 10 laptop can be attributed to various factors, each requiring a unique approach to resolution. Here’s a breakdown of the most common culprits:

1. Software-Related Issues:

  • Muted System or Application: The most straightforward cause is simply a muted system or application. Accidental clicks or settings adjustments can silence the entire system or specific programs.
  • Incorrect Audio Output Device: Windows 10 may be configured to output sound to a device that is not connected or unavailable. This can occur when multiple audio devices are connected or if a device has been recently disconnected.
  • Outdated or Corrupted Audio Drivers: Drivers are software programs that enable communication between the operating system and hardware components. Outdated or corrupted audio drivers can lead to audio playback issues.
  • Conflicting Audio Software: Multiple audio programs running simultaneously can interfere with each other, causing audio glitches or complete silence.
  • System-Wide Audio Issues: System-wide audio settings, such as the volume mixer or the audio service itself, can be misconfigured or corrupted, preventing sound from being output.

2. Hardware-Related Issues:

  • Damaged or Faulty Speakers/Headphones: Physical damage to the laptop’s built-in speakers or external headphones can render them incapable of producing sound.
  • Faulty Audio Jack: A damaged or loose audio jack can impede the flow of audio signals, causing intermittent sound or complete silence.
  • Hardware Malfunction: A faulty audio card, motherboard, or other hardware components can lead to audio issues.
  • Loose Connections: Loose connections between internal audio components can interrupt the signal path, resulting in no sound.

3. External Factors:

  • External Noise Interference: Strong electromagnetic interference from other devices, such as wireless routers or Bluetooth devices, can disrupt audio signals.
  • Power Management Issues: Windows 10 may be configured to automatically disable audio output to conserve power.

Troubleshooting the Silent Symphony: A Step-by-Step Guide

The following troubleshooting steps are designed to systematically address the potential causes of audio issues, leading to a solution:

1. Basic Checks:

  • Verify System Volume: Ensure that the system volume is not muted. Check the volume slider in the taskbar or the system volume settings.
  • Check Application Volume: Confirm that the volume for the specific application or program is not muted.
  • Check Audio Output Device: Verify that the correct audio output device is selected. Right-click the speaker icon in the taskbar, choose "Playback Devices," and ensure the desired device is selected and enabled.
  • Test with Headphones: Try connecting headphones to the audio jack. If sound is produced through headphones but not through the laptop speakers, the issue may be with the speakers themselves.

2. Software-Related Troubleshooting:

  • Update Audio Drivers: Outdated or corrupted audio drivers can be a common culprit. Check for driver updates through the Device Manager (Right-click "This PC" -> "Manage" -> "Device Manager" -> "Sound, video and game controllers").
  • Reinstall Audio Drivers: If updating drivers doesn’t resolve the issue, try reinstalling the drivers. You can find the latest drivers on the manufacturer’s website.
  • Disable Conflicting Audio Software: Temporarily disable any audio programs or services that may be interfering with the sound output.
  • Run Audio Troubleshooter: Windows 10 includes a built-in troubleshooter that can diagnose and fix common audio problems. Access it by searching "Troubleshoot settings" in the Start menu.
  • Check System Audio Settings: Go to "Settings" -> "System" -> "Sound" and ensure that the correct audio output device is selected and that the system volume is not muted.
  • Reset Windows Audio Service: This can help resolve issues caused by corrupted audio service settings. Open the Run dialog box (Windows key + R), type "services.msc," and press Enter. Find "Windows Audio," right-click it, and select "Restart."

3. Hardware-Related Troubleshooting:

  • Inspect Audio Jack: Examine the audio jack for any visible damage or loose connections. Try cleaning the jack with a cotton swab dipped in alcohol.
  • Check Speakers: If the issue persists, try connecting external speakers to the audio jack. If the external speakers produce sound, the problem lies with the laptop’s built-in speakers.
  • Run Hardware and Devices Troubleshooter: Similar to the audio troubleshooter, Windows 10 has a dedicated troubleshooter for hardware and devices. Access it by searching "Troubleshoot settings" in the Start menu.
  • Consider Professional Repair: If none of the above steps resolve the issue, it may be necessary to seek professional repair. A qualified technician can diagnose and repair hardware malfunctions.

4. External Factors:

  • Minimize Electromagnetic Interference: Move the laptop away from other devices that could be causing electromagnetic interference, such as wireless routers or Bluetooth devices.
  • Check Power Management Settings: Go to "Settings" -> "System" -> "Power & sleep" and ensure that the power management settings are not configured to automatically disable audio output.

FAQs: Addressing Common Queries

Q: What if my laptop has no sound after a Windows update?

A: Windows updates can sometimes cause audio driver conflicts or issues. The recommended solution is to check for updated audio drivers after the update. If the issue persists, try reinstalling the audio drivers or using the Windows Audio Troubleshooter.

Q: My laptop has no sound after connecting headphones. What should I do?

A: This can be due to a faulty audio jack or a conflict between the laptop speakers and headphones. Try cleaning the audio jack, checking the audio output device settings, and ensuring that the headphones are properly connected. If the issue persists, you may need to seek professional repair.

Q: My laptop has no sound when I play videos. How can I fix it?

A: The issue could be related to the video player, the audio settings, or the audio drivers. Ensure that the video player’s volume is not muted and that the correct audio output device is selected. Additionally, check for updated or corrupted audio drivers.

Q: Why is my laptop audio crackling or distorted?

A: Crackling or distorted audio can be caused by outdated or corrupted audio drivers, conflicting audio software, or hardware issues. Try updating or reinstalling the audio drivers, disabling conflicting audio software, and running the Windows Audio Troubleshooter. If the problem persists, consider checking for hardware malfunctions.

Tips for Preventing Audio Issues:

  • Keep Audio Drivers Updated: Regularly update audio drivers to ensure compatibility and optimal performance.
  • Avoid Conflicting Audio Software: Limit the number of audio programs running simultaneously.
  • Check Audio Output Device Regularly: Ensure that the correct audio output device is selected, especially when connecting or disconnecting external audio devices.
  • Protect Audio Jack: Handle the audio jack carefully to prevent damage or loose connections.
  • Maintain Cleanliness: Regularly clean the audio jack and speakers to prevent dust and debris from accumulating and causing issues.

Conclusion: Restoring the Harmony

The absence of sound on a Windows 10 laptop can be a frustrating experience, but it is often a solvable issue. By understanding the potential causes and following the troubleshooting steps outlined in this article, users can effectively diagnose and address the problem, restoring the harmonious soundscape of their laptops. From simple configuration errors to more complex hardware malfunctions, this guide provides a comprehensive roadmap to restoring audio functionality and enjoying the full range of sound on their Windows 10 devices.

How to Fix Audio Sound Problem on Windows 10 [Work 100%] - YouTube How to Fix Audio Issues on Windows 10 in 2021 Fix audio/sound problems on windows 10!! - Howtosolveit - YouTube
How to Fix sound or Audio problems on windows 10  - YouTube How to quickly fix sound problems on Windows 10 - Pureinfotech How to quickly fix sound problems on Windows 10 • Pureinfotech
How to Fix Sound or Audio Problems on Windows 10 How to quickly fix sound problems on Windows 10 - Pureinfotech

Closure

Thus, we hope this article has provided valuable insights into The Silent Symphony: Troubleshooting Audio Issues on Windows 10 Laptops. We hope you find this article informative and beneficial. See you in our next article!