The Complexities Of Download Speed Fluctuations: Understanding The Factors Affecting Your PC’s Download Performance

The Complexities of Download Speed Fluctuations: Understanding the Factors Affecting Your PC’s Download Performance

Introduction

In this auspicious occasion, we are delighted to delve into the intriguing topic related to The Complexities of Download Speed Fluctuations: Understanding the Factors Affecting Your PC’s Download Performance. Let’s weave interesting information and offer fresh perspectives to the readers.

The Complexities of Download Speed Fluctuations: Understanding the Factors Affecting Your PC’s Download Performance

What is a good upload download speed - lasopaaddict

In the digital age, where the internet is an integral part of our lives, download speed is paramount. Whether it’s downloading the latest software update, streaming high-definition movies, or engaging in online gaming, a slow download speed can significantly hinder our digital experience. This article delves into the intricacies of download speed fluctuations, exploring the various factors that can impact your PC’s download performance, and offering insights into how to optimize your internet connection for a smoother digital experience.

Understanding the Dynamics of Download Speed

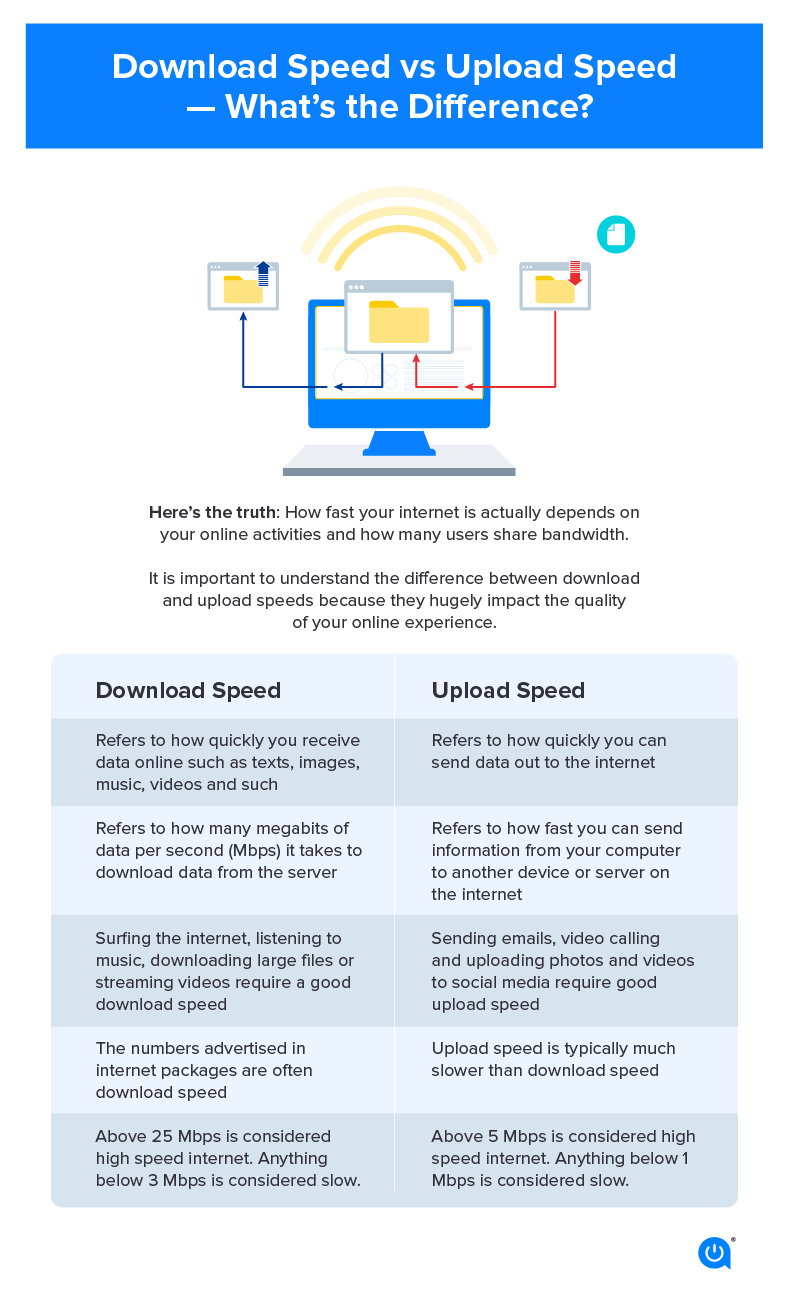
Download speed, measured in megabits per second (Mbps), represents the rate at which data is transferred from a server to your PC. Several factors contribute to the speed you experience, including:

  • Internet Service Provider (ISP): The primary source of your internet connection, your ISP plays a crucial role in determining your maximum download speed. Different ISPs offer varying speeds and service quality, impacting your overall download performance.
  • Network Infrastructure: The physical infrastructure of your internet connection, encompassing cables, routers, and other network devices, can influence download speed. A congested network, outdated equipment, or faulty wiring can lead to bottlenecks and slowdowns.
  • Internet Traffic: The volume of data being transmitted across the internet at any given time affects download speed. During peak hours, when internet usage is high, network congestion can lead to slower download speeds.
  • Website Server Capacity: The server hosting the data you are downloading plays a crucial role. A server with limited capacity or experiencing high traffic can result in slower download speeds.
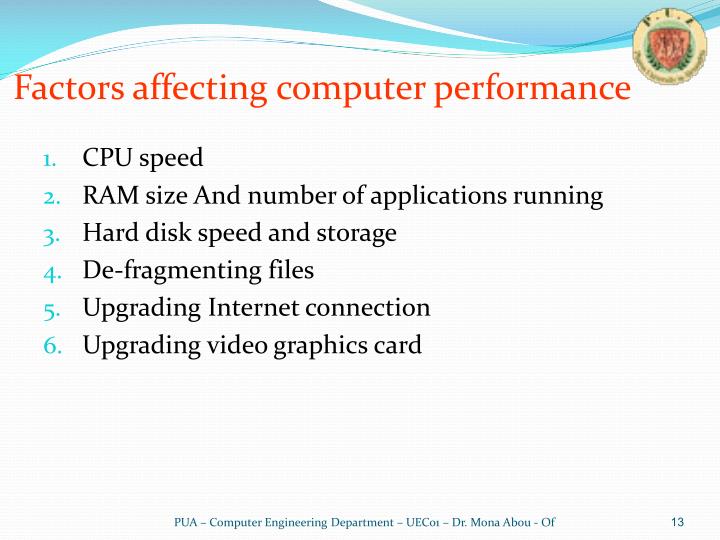
  • Computer Hardware: The processing power and storage capabilities of your PC can also impact download speed. A slower processor or limited RAM can hinder the download process, leading to longer download times.
  • Software and Applications: Certain software and applications running in the background can consume bandwidth, potentially slowing down downloads. Antivirus software, file-sharing programs, and streaming services can all contribute to bandwidth contention.
  • Wireless Connectivity: Wireless connections, while convenient, are inherently less reliable than wired connections. Signal interference, distance from the router, and network congestion can all affect download speed on a wireless network.

Identifying and Addressing Download Speed Issues

When experiencing slow download speeds, it is essential to identify the underlying cause. Here are some troubleshooting steps:

  • Check Your ISP Service: Contact your ISP to verify that your current plan matches the advertised download speed. They can also check for any network outages or maintenance affecting your connection.
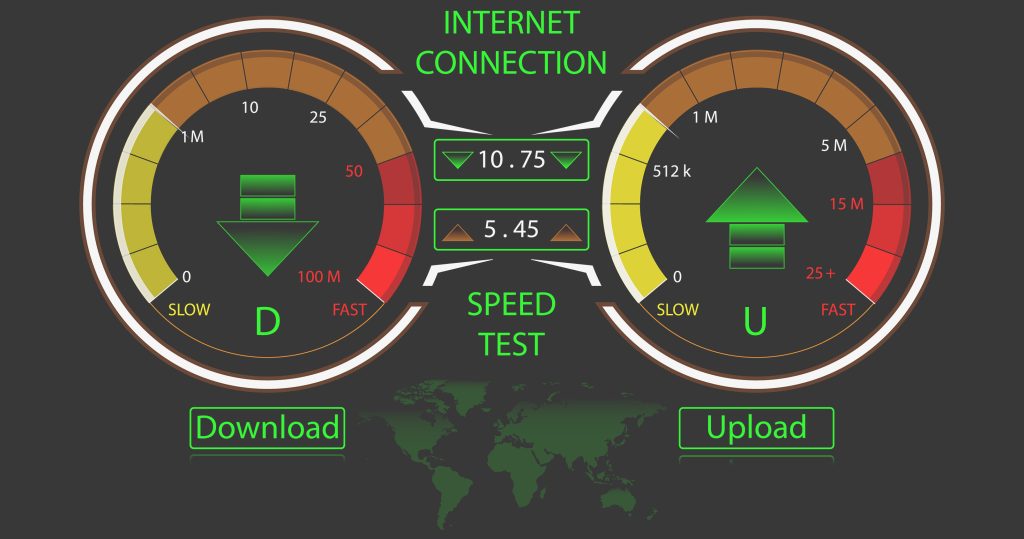
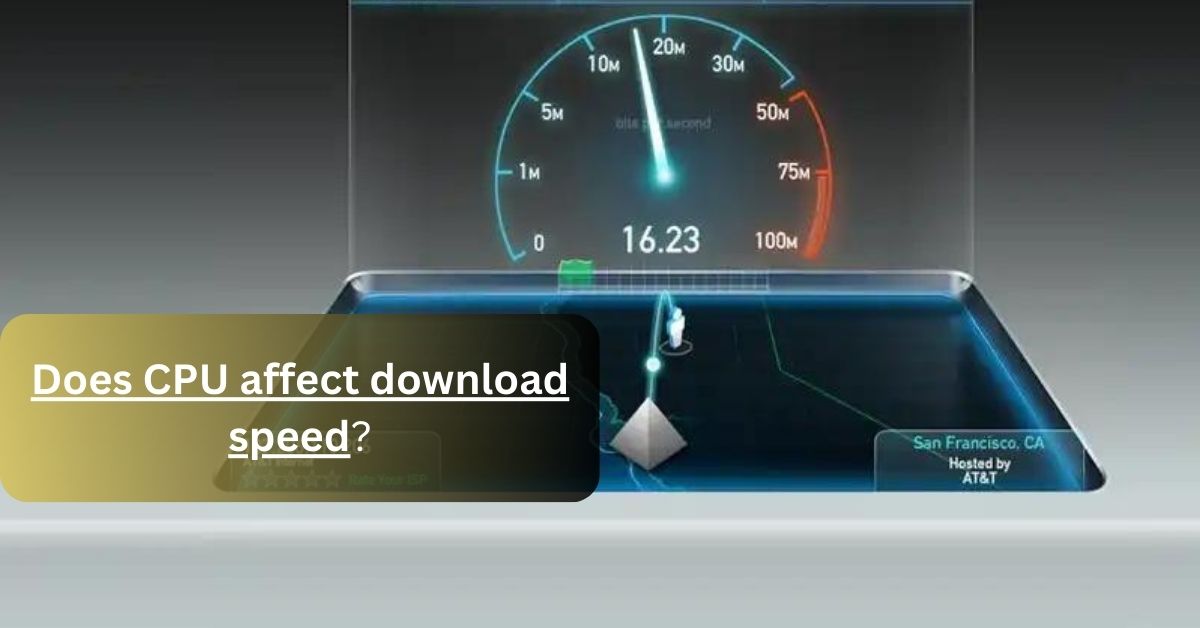
  • Test Your Internet Speed: Utilize online speed tests to measure your actual download speed. This will help you determine if your connection is performing as expected.
  • Optimize Your Network: Ensure your router is properly configured and placed in a central location to minimize signal interference. Consider upgrading to a newer, more powerful router if your current one is outdated.
  • Close Unnecessary Programs: Close any applications or software that are not actively being used, as they can consume bandwidth and slow down downloads.
  • Use a Wired Connection: If possible, switch to a wired connection for a more stable and faster internet connection.
  • Avoid Peak Hours: Try downloading large files during off-peak hours when internet traffic is lighter, leading to faster download speeds.
  • Clear Your Browser Cache: A cluttered browser cache can slow down downloads. Regularly clearing your cache can improve browsing speed and download performance.
  • Update Your Drivers: Ensure your network card drivers are up-to-date. Outdated drivers can lead to compatibility issues and slowdowns.

Optimizing Download Speed for a Smoother Digital Experience

While download speed fluctuations are inevitable, there are ways to optimize your internet connection for a smoother digital experience:

  • Upgrade Your Internet Plan: Consider upgrading to a higher-speed internet plan if your current plan is insufficient for your needs.
  • Use a VPN: A Virtual Private Network (VPN) can encrypt your internet traffic, potentially improving download speed by bypassing network congestion and throttling.
  • Prioritize Bandwidth: Some routers and internet service providers offer features to prioritize bandwidth for specific applications or devices. This can ensure your most important downloads receive priority access to the network.
  • Utilize Download Managers: Download managers are software tools that can manage and optimize downloads. They can prioritize downloads, schedule downloads for off-peak hours, and resume interrupted downloads.
  • Monitor Your Internet Usage: Regularly monitor your internet usage to identify potential bandwidth bottlenecks. This can help you identify applications or devices consuming excessive bandwidth and adjust your usage accordingly.

FAQs: Addressing Common Download Speed Concerns

Q: What is internet throttling, and how does it affect my download speed?

A: Internet throttling occurs when an ISP intentionally slows down your internet connection, often during peak hours or when exceeding a specific data usage limit. This can significantly impact download speed, leading to frustration and a diminished digital experience.

Q: How can I determine if my ISP is throttling my internet connection?

A: It can be challenging to definitively prove throttling, but several indicators can suggest it. If you consistently experience slow download speeds during specific times or after exceeding a data cap, it is worth investigating further. You can run speed tests at different times of day and compare the results. You can also contact your ISP and inquire about their throttling policies.

Q: What can I do to avoid internet throttling?

A: The best way to avoid throttling is to understand your ISP’s policies and usage limits. Consider upgrading to an unlimited data plan or choosing an ISP that does not throttle internet speeds. You can also try using a VPN to encrypt your traffic and potentially bypass throttling mechanisms.

Q: What are the implications of slow download speeds?

A: Slow download speeds can have several negative implications, including:

  • Increased Download Times: Downloading large files, such as software updates or movies, can take significantly longer, impacting your productivity and enjoyment.
  • Streaming Issues: Streaming video and audio can be interrupted or buffer frequently, leading to a frustrating viewing experience.
  • Online Gaming Lag: Slow download speeds can cause lag in online games, making it difficult to compete and enjoy the experience.
  • Reduced Productivity: Slow download speeds can impact productivity, especially when downloading large files or working with cloud-based applications.

Conclusion: Optimizing Your Download Speed for a Seamless Digital Experience

Download speed fluctuations are a common phenomenon, influenced by a multitude of factors. Understanding these factors and implementing appropriate troubleshooting steps can significantly improve your download performance. By optimizing your network, monitoring internet usage, and utilizing tools like download managers and VPNs, you can enhance your digital experience and enjoy faster, more reliable download speeds. Remember, a smooth and efficient internet connection is essential for a fulfilling and productive digital life.

The Difference Between Download And Upload Internet Speeds Understanding What Upload and Download Speeds Are - Phoenix Internet Does CPU Affect Download Speed - Why Your Processor is Key to Fast Internet - Kingston College
Broadband Speed Test Malaysia - On this page you will find a list of isps offering internet Does CPU Affect Download Speed? - Download Speeds Demystified Can a Full Windows Recycling Bin Slow Down Your PC? - Climate Of Our Future
3 main reasons why your internet speed fluctuates wildly - Apps UK �� How to Find the Upload and Download Speed on Your PC: 7 Steps

Closure

Thus, we hope this article has provided valuable insights into The Complexities of Download Speed Fluctuations: Understanding the Factors Affecting Your PC’s Download Performance. We appreciate your attention to our article. See you in our next article!

The Recycle Bin: A Vital Component Of Windows 11

The Recycle Bin: A Vital Component of Windows 11

Introduction

With great pleasure, we will explore the intriguing topic related to The Recycle Bin: A Vital Component of Windows 11. Let’s weave interesting information and offer fresh perspectives to the readers.

The Recycle Bin: A Vital Component of Windows 11

Recycle Bin Windows 11

The Recycle Bin, a familiar icon on Windows desktops for decades, remains an indispensable tool in Windows 11. While it might seem like a simple folder, its function is crucial for managing files and safeguarding against accidental data loss. This article delves into the intricacies of the Recycle Bin in Windows 11, exploring its features, benefits, and best practices for effective file management.

Understanding the Recycle Bin’s Purpose

The Recycle Bin acts as a temporary holding area for deleted files. When a file is deleted, it is not permanently erased from the computer’s storage. Instead, it is moved to the Recycle Bin, offering a safety net for users who might regret their actions. This system allows for the recovery of accidentally deleted files, protecting valuable data from permanent loss.

Exploring the Recycle Bin’s Interface

The Recycle Bin’s interface in Windows 11 is straightforward and user-friendly. It presents a list of all deleted files, categorized by their original location. Users can easily navigate through the list, selecting individual files or entire folders for restoration. The Recycle Bin’s right-click menu offers a range of actions, including:

  • Restore: This option allows users to recover deleted files to their original location.
  • Empty Recycle Bin: This action permanently deletes all files within the Recycle Bin, freeing up disk space.
  • Properties: This option displays information about the Recycle Bin, including its current size and storage capacity.

Key Features and Benefits

The Recycle Bin’s functionality offers several significant benefits for Windows 11 users:

  • Data Recovery: The most prominent benefit is the ability to recover accidentally deleted files. This feature prevents permanent data loss, saving users from potential frustration and inconvenience.
  • Disk Space Management: The Recycle Bin allows for selective deletion of unwanted files, freeing up disk space on the computer. This is particularly helpful when dealing with large files or folders that are no longer needed.
  • Safety Net: The Recycle Bin acts as a safety net for users who may not be confident in their file management skills. It provides a buffer against accidental deletions, ensuring that valuable data remains accessible.
  • Security: The Recycle Bin’s temporary storage of deleted files can be beneficial for security purposes. If a file is deleted accidentally, it remains in the Recycle Bin, making it accessible for recovery in case of data breaches or system malfunctions.

Customization Options

Windows 11 offers several options for customizing the Recycle Bin to suit individual needs:

  • Recycle Bin Size: Users can adjust the maximum size of the Recycle Bin, determining how much disk space it can occupy. This helps balance the need for data recovery with the desire to manage disk space effectively.
  • Empty Recycle Bin on Logoff: This option automatically empties the Recycle Bin when the user logs off, ensuring that deleted files are permanently removed from the system.
  • Bypass Recycle Bin: Advanced users can choose to bypass the Recycle Bin for specific files or folders, deleting them directly from the system without going through the temporary storage stage.

Understanding the Recycle Bin’s Limitations

While the Recycle Bin is a valuable tool, it’s important to understand its limitations:

  • Disk Space: The Recycle Bin requires disk space to store deleted files. If the Recycle Bin becomes full, it will stop accepting new files, potentially leading to data loss.
  • Permanent Deletion: Once the Recycle Bin is emptied, files are permanently deleted and cannot be recovered using standard methods.
  • Security: While the Recycle Bin offers some protection against accidental deletion, it is not a secure storage solution. Sensitive data should be handled with care and disposed of using secure methods.

Best Practices for Effective File Management

To maximize the benefits of the Recycle Bin and ensure effective file management, consider these best practices:

  • Regularly Empty the Recycle Bin: Emptying the Recycle Bin regularly frees up disk space and prevents it from becoming full, potentially leading to data loss.
  • Use the Recycle Bin for Accidental Deletions: The Recycle Bin is intended for accidental deletions. Avoid intentionally deleting files through the Recycle Bin, as it can lead to unnecessary clutter.
  • Backup Important Files: The Recycle Bin is not a replacement for proper data backups. It’s crucial to back up important files regularly to ensure their safekeeping in case of system failure or accidental deletion.
  • Use Secure Deletion Tools: For sensitive data, consider using secure deletion tools that overwrite files multiple times, making them unrecoverable even through advanced data recovery techniques.

FAQs about the Recycle Bin in Windows 11

Q: What happens when the Recycle Bin is full?

A: When the Recycle Bin reaches its maximum size, it will stop accepting new files. Any attempt to delete files will result in an error message indicating that the Recycle Bin is full. To resolve this, you can empty the Recycle Bin or increase its size through the properties settings.

Q: Can I recover deleted files from the Recycle Bin even after emptying it?

A: Once the Recycle Bin is emptied, files are permanently deleted from the system and cannot be recovered using standard methods. However, specialized data recovery software might be able to recover deleted files, though success is not guaranteed.

Q: How can I bypass the Recycle Bin for specific files or folders?

A: You can bypass the Recycle Bin for specific files or folders by using the "Shift + Delete" key combination when deleting them. This will permanently delete the files without moving them to the Recycle Bin.

Q: Is the Recycle Bin secure?

A: The Recycle Bin is not a secure storage solution. While it provides a safety net against accidental deletion, sensitive data should be handled with care and disposed of using secure methods.

Q: What are some alternatives to the Recycle Bin?

A: Some alternatives to the Recycle Bin include cloud storage services that offer version history and file recovery features. These services often provide a more robust solution for data recovery, particularly for sensitive information.

Tips for Utilizing the Recycle Bin Effectively

  • Utilize the Recycle Bin’s Properties: Explore the Recycle Bin’s properties settings to adjust its maximum size and customize its behavior to suit your needs.
  • Empty the Recycle Bin Regularly: Make it a habit to empty the Recycle Bin at least once a week to prevent it from becoming full and potentially blocking file deletions.
  • Use the "Shift + Delete" Shortcut for Permanent Deletion: If you’re certain that you want to permanently delete a file, use the "Shift + Delete" shortcut to bypass the Recycle Bin.
  • Consider Using Secure Deletion Tools: For sensitive data, use secure deletion tools to ensure that files are permanently erased and unrecoverable.

Conclusion

The Recycle Bin remains an essential component of Windows 11, providing a valuable safety net for accidental file deletions. By understanding its features, benefits, and limitations, users can effectively manage files and prevent data loss. Remember to empty the Recycle Bin regularly, utilize its properties settings for customization, and consider using secure deletion tools for sensitive data. With proper knowledge and best practices, the Recycle Bin can be a powerful tool for maintaining data integrity and ensuring a smooth user experience in Windows 11.

How to open Recycle bin in Windows 11 (Easiest ways) How to Hide or Remove Recycle Bin in Windows 11 How to Open Your Recycle Bin On Windows 11 PC (5 Methods)
Recycle Bin Windows 11 How to Open Recycle Bin in Windows 11 How To Hide And Show Recycle Bin In Windows 11 Pc Laptop Techschumz - www.vrogue.co
How to Open Recycle Bin in Windows 11 Change Recycle Bin Settings Windows 11  Recycle Bin Storage Size

Closure

Thus, we hope this article has provided valuable insights into The Recycle Bin: A Vital Component of Windows 11. We hope you find this article informative and beneficial. See you in our next article!

Rejuvenating Your PC: A Comprehensive Guide To Resetting Windows 10

Rejuvenating Your PC: A Comprehensive Guide to Resetting Windows 10

Introduction

With enthusiasm, let’s navigate through the intriguing topic related to Rejuvenating Your PC: A Comprehensive Guide to Resetting Windows 10. Let’s weave interesting information and offer fresh perspectives to the readers.

Rejuvenating Your PC: A Comprehensive Guide to Resetting Windows 10

How to Reset Windows 10 PC [Step by Step Guide]

In the digital age, our personal computers have become indispensable tools for work, entertainment, and communication. Over time, however, these devices can accumulate clutter โ€“ unwanted files, outdated software, and lingering remnants of past installations. This buildup can lead to sluggish performance, system instability, and even security vulnerabilities. A fresh start is often the solution, and for Windows 10 users, this means resetting the operating system.

Resetting Windows 10, often referred to as a "clean install," effectively erases the hard drive and reinstalls the operating system from scratch. This process offers a multitude of benefits, making it a valuable tool for both novice and experienced computer users.

Benefits of Resetting Windows 10

  • Enhanced Performance: A clean install removes unnecessary files, programs, and registry entries, resulting in a faster and more responsive system. This can be particularly noticeable on older machines or those with limited storage space.

  • Improved Stability: Accumulated data and software can lead to system instability, causing crashes and errors. Resetting Windows 10 eliminates these issues, providing a stable and reliable computing experience.

  • Security Enhancement: A fresh installation removes potentially malicious software and vulnerabilities that might have accumulated over time. This significantly reduces the risk of malware infections and data breaches.

  • Troubleshooting Solution: Resetting Windows 10 can resolve various system issues that may be resistant to other troubleshooting methods, such as driver conflicts, software incompatibilities, or corrupted system files.

  • Preparation for Upgrades: Before upgrading to a new version of Windows or installing a major update, it is often recommended to perform a clean install to ensure a smooth transition and avoid potential compatibility issues.

Types of Reset Options

Windows 10 offers two primary reset options:

  • Keep My Files: This option reinstalls Windows 10 while preserving personal files, such as documents, pictures, and music. However, it removes all installed applications and settings, requiring a fresh installation of software.

  • Remove Everything: This option performs a complete wipe of the hard drive, deleting all files, applications, and settings. It effectively returns the system to its factory default state.

Understanding the Process

Resetting Windows 10 is a relatively straightforward process, but it requires careful consideration and preparation:

  • Backup Your Data: Before proceeding with any reset option, it is crucial to back up all important data, including documents, pictures, videos, and other files. This can be achieved through external hard drives, cloud storage services, or USB drives.

  • Choose the Appropriate Reset Option: Carefully assess the desired outcome and select the appropriate reset option โ€“ "Keep My Files" or "Remove Everything."

  • Prepare for Reinstallation: After the reset process, you will need to reinstall all necessary software, including drivers, applications, and operating system updates.

Performing a Reset

  1. Access Settings: Open the "Settings" app by clicking the Windows icon in the taskbar and selecting "Settings."

  2. Navigate to Update & Security: In the Settings app, click "Update & Security."

  3. Select Recovery: On the left-hand side, choose "Recovery."

  4. Choose Reset This PC: Under the "Recovery" section, click "Reset this PC."

  5. Select the Reset Option: Choose either "Keep my files" or "Remove everything," depending on your needs.

  6. Confirm the Reset: Follow the on-screen instructions and confirm the reset operation.

FAQs about Resetting Windows 10

Q: Will resetting Windows 10 affect my personal files?

A: If you choose the "Keep my files" option, your personal files will be preserved. However, if you select "Remove everything," all files will be deleted.

Q: Do I need to back up my data before resetting?

A: It is highly recommended to back up all important data before resetting Windows 10, regardless of the chosen option.

Q: Will resetting Windows 10 remove all my installed programs?

A: Yes, resetting Windows 10 will remove all installed programs, including system applications.

Q: Will resetting Windows 10 affect my hardware drivers?

A: Resetting Windows 10 will remove existing hardware drivers. You will need to reinstall them after the reset process.

Q: How long does it take to reset Windows 10?

A: The duration of the reset process varies depending on factors such as hard drive size, system performance, and the chosen reset option. It can take anywhere from 30 minutes to several hours.

Tips for Resetting Windows 10

  • Use a bootable USB drive: For a more comprehensive reset, consider creating a bootable USB drive with the Windows 10 installation media. This allows you to perform a clean install from scratch.

  • Check for compatibility: Before reinstalling software, verify that it is compatible with the latest version of Windows 10.

  • Install necessary drivers: After the reset, ensure that all essential hardware drivers are installed correctly.

  • Update Windows: After completing the reset, run Windows Update to download and install the latest security patches and updates.

Conclusion

Resetting Windows 10 is a powerful tool for rejuvenating your PC, restoring its performance, and enhancing its security. It is an effective solution for resolving various system issues, preparing for upgrades, and ensuring a clean and stable computing environment. By understanding the process, choosing the appropriate option, and taking necessary precautions, you can successfully reset your Windows 10 system and enjoy a renewed computing experience.

HOW TO RESET WINDOWS 10 GUIDE! - YouTube How to Reset Your PC in Windows 11, 10 & 8 [Walkthrough] How to reset a Windows 10 PC to factory settings  Windows Central
windows 10 reset pc โ€“ reset factory windows 10 โ€“ Brapp How To Reset Windows 10 Step By Step Guide - Vrogue Windows 10 tip: Reset your PC completely  ZDNET
How To Reset Your Windows 10 PC  Make Your PC Like New  Factory Reset Windows 10 - YouTube Factory reset pc windows 10 - designguide

Closure

Thus, we hope this article has provided valuable insights into Rejuvenating Your PC: A Comprehensive Guide to Resetting Windows 10. We thank you for taking the time to read this article. See you in our next article!

Windows 10 Home Single Language: A Comprehensive Guide

Windows 10 Home Single Language: A Comprehensive Guide

Introduction

With great pleasure, we will explore the intriguing topic related to Windows 10 Home Single Language: A Comprehensive Guide. Let’s weave interesting information and offer fresh perspectives to the readers.

Windows 10 Home Single Language: A Comprehensive Guide

Windows 10 Home Single Language is a streamlined version of the popular operating system, designed specifically for users who require a single language interface. This version offers a cost-effective solution for individuals and businesses seeking a user-friendly and efficient operating system without the added complexity of multiple language options.

Understanding the Essence of Windows 10 Home Single Language

At its core, Windows 10 Home Single Language is a tailored version of Windows 10 Home designed to deliver a focused user experience. The core functionalities remain identical to the standard Windows 10 Home edition, but the single language interface simplifies navigation and eliminates potential language-related confusion. This streamlined approach makes it particularly appealing for:

  • Users with limited language proficiency: Individuals who are comfortable with a single language will find the interface intuitive and easy to navigate.
  • Businesses with a monolingual workforce: Companies with employees who primarily use a single language can benefit from the consistency and clarity of a unified interface.
  • Educational institutions: Schools and universities that cater to students with a specific language background can ensure a consistent learning environment.

Key Features and Benefits of Windows 10 Home Single Language

While the single language interface distinguishes this version from the standard Windows 10 Home, it retains all the essential features that users have come to expect:

  • User-friendly interface: Windows 10 Home Single Language offers an intuitive and familiar user interface, making it easy to navigate and access various functionalities.
  • Enhanced security: Built-in security features like Windows Defender and SmartScreen protect users from malware and online threats.
  • Seamless integration: The operating system seamlessly integrates with other Microsoft products and services, enhancing productivity and collaboration.
  • Cost-effective solution: Windows 10 Home Single Language provides a budget-friendly alternative to the standard Windows 10 Home edition, making it an attractive option for individuals and organizations with limited budgets.

The Importance of a Product Key

Like all Windows versions, Windows 10 Home Single Language requires a product key for activation. This unique key serves as a digital license that authorizes the use of the operating system on a specific device. It is crucial for ensuring that the software is legitimate and that users have access to all features and updates.

FAQs Regarding Windows 10 Home Single Language

1. Can I upgrade to a different language version after purchasing Windows 10 Home Single Language?

No, upgrading to a multi-language version after purchasing Windows 10 Home Single Language is not possible. You will need to purchase a separate license for the desired language version.

2. What happens if I need to change the language setting on Windows 10 Home Single Language?

Windows 10 Home Single Language does not support language changes after installation. If you require a different language, you will need to purchase a new license for the corresponding language version.

3. Can I use Windows 10 Home Single Language on multiple devices?

No, Windows 10 Home Single Language is licensed for use on a single device only.

4. How can I obtain a legitimate product key for Windows 10 Home Single Language?

Legitimate product keys for Windows 10 Home Single Language can be obtained through authorized retailers, online marketplaces, or directly from Microsoft.

5. What are the system requirements for Windows 10 Home Single Language?

The system requirements for Windows 10 Home Single Language are similar to those for the standard Windows 10 Home edition. You can find the specific requirements on the Microsoft website.

Tips for Using Windows 10 Home Single Language Effectively

  • Familiarize yourself with the operating system: Take some time to explore the interface and learn the basic functionalities.
  • Install necessary software and drivers: Ensure that you have installed the required drivers for your hardware and any essential software applications.
  • Regularly update your system: Keep your operating system and software up-to-date to ensure optimal performance and security.
  • Back up your data: Regularly back up your important files to prevent data loss in case of system failure.

Conclusion

Windows 10 Home Single Language offers a streamlined and cost-effective solution for users who require a single language operating system. Its user-friendly interface, enhanced security features, and seamless integration with other Microsoft products make it a reliable choice for individuals and businesses alike. By understanding the key features, benefits, and requirements of this version, users can maximize their experience and enjoy the advantages of a focused and efficient operating system.


Closure

Thus, we hope this article has provided valuable insights into Windows 10 Home Single Language: A Comprehensive Guide. We appreciate your attention to our article. See you in our next article!

A New Era Of Email: Exploring The Outlook App On Windows 11

A New Era of Email: Exploring the Outlook App on Windows 11

Introduction

With enthusiasm, let’s navigate through the intriguing topic related to A New Era of Email: Exploring the Outlook App on Windows 11. Let’s weave interesting information and offer fresh perspectives to the readers.

A New Era of Email: Exploring the Outlook App on Windows 11

Microsoft releases new Outlook app for Windows 11 (preview) - Pureinfotech

Microsoft’s Outlook, a mainstay in email management, has undergone a significant transformation with the release of Windows 11. The revamped Outlook app, seamlessly integrated into the operating system, offers a fresh approach to email communication, boasting a sleek interface, enhanced features, and a focus on user productivity. This article delves into the key aspects of the new Outlook app, exploring its design, functionality, and the benefits it offers to users.

A Design Revolution: Modernity Meets Functionality

The first impression of the new Outlook app is one of clean, minimalist design. The interface, adhering to the design language of Windows 11, prioritizes visual clarity and intuitive navigation. The app features a streamlined layout, with a focus on email organization and quick access to key functions. The familiar ribbon menu remains, but it has been redesigned to be less cluttered and more user-friendly. The emphasis on visual appeal is not merely aesthetic; it contributes to a more efficient and enjoyable user experience.

Beyond Email: A Hub for Communication and Collaboration

The new Outlook app transcends the traditional email client, evolving into a comprehensive communication and collaboration hub. It seamlessly integrates with other Microsoft services, including Calendar, Contacts, and Teams, providing a unified platform for managing all aspects of professional communication. Users can easily switch between email, calendar appointments, and team chats, streamlining workflows and enhancing productivity.

Enhanced Features for Streamlined Communication

The new Outlook app is packed with features designed to simplify and enhance email management. Some notable additions include:

  • Focused Inbox: This feature intelligently prioritizes important emails, filtering out less urgent messages and ensuring users focus on what matters most.
  • Quick Actions: The app allows for rapid actions on emails, such as marking them as read, flagging them for follow-up, or deleting them, all with a single click.
  • Search Improvements: The search function has been refined, offering more accurate and efficient results, making it easier to find specific emails or attachments.
  • Enhanced Calendar Integration: The integration with Calendar is more robust than ever, allowing users to view and manage appointments directly within the Outlook app.
  • Improved Accessibility: The app incorporates accessibility features, such as high contrast modes and screen reader compatibility, ensuring inclusivity for all users.

Integration with Other Microsoft Services: A Connected Ecosystem

The new Outlook app’s strength lies in its seamless integration with other Microsoft services. Users can access and manage their files stored in OneDrive directly from within the app, making it easy to share documents and collaborate with others. The integration with Teams allows for effortless communication and collaboration within a unified platform, streamlining workflows and enhancing team productivity.

Benefits of the New Outlook App

The redesigned Outlook app offers numerous benefits to users, including:

  • Improved User Experience: The intuitive interface and streamlined design enhance user experience, making email management less cumbersome and more enjoyable.
  • Increased Productivity: The focus on efficiency, with features like Focused Inbox and Quick Actions, helps users stay organized and manage their email effectively, boosting productivity.
  • Enhanced Collaboration: The integration with other Microsoft services, particularly Teams, facilitates seamless collaboration, making it easier to work together on projects and share information.
  • Security and Reliability: The app leverages the security and reliability of Microsoft’s cloud infrastructure, ensuring user data is protected and accessible.

FAQs: Addressing Common Queries

Q: Is the new Outlook app available for all Windows 11 users?

A: The new Outlook app is pre-installed on all Windows 11 devices.

Q: Can I still access my old Outlook emails and data?

A: Yes, your existing emails and data will be seamlessly migrated to the new Outlook app.

Q: Is the new Outlook app compatible with other email providers?

A: Yes, the new Outlook app supports multiple email providers, including Gmail, Yahoo Mail, and others.

Q: Can I customize the appearance of the new Outlook app?

A: Yes, the app offers customization options, allowing users to adjust the theme, font size, and other settings to their preferences.

Q: What are the system requirements for the new Outlook app?

A: The new Outlook app is compatible with all devices running Windows 11.

Tips for Optimizing the New Outlook App

  • Utilize the Focused Inbox: Enable the Focused Inbox feature to prioritize important emails and filter out less urgent messages.
  • Set up Quick Actions: Customize Quick Actions to streamline email management, such as marking emails as read or deleting them with a single click.
  • Explore Keyboard Shortcuts: Leverage keyboard shortcuts for faster navigation and email management.
  • Integrate with Calendar and Teams: Utilize the seamless integration with Calendar and Teams for improved scheduling and collaboration.
  • Customize the Appearance: Adjust the theme, font size, and other settings to personalize the app to your preferences.

Conclusion: A New Era of Email Management

The new Outlook app on Windows 11 represents a significant advancement in email management, offering a user-friendly interface, enhanced features, and seamless integration with other Microsoft services. It empowers users to manage their emails effectively, collaborate seamlessly, and stay organized, ultimately enhancing productivity and streamlining communication. The app’s focus on visual appeal, intuitive navigation, and a range of features makes it a powerful tool for individuals and teams alike. As Microsoft continues to innovate and improve the Outlook app, it is poised to become an indispensable tool in the modern digital landscape.

Closer look at Windows 11's new Outlook email app with Mica design and more Home windows 11's redesigned Outlook app is now rolling out to extra customers - Tech Post logy Windows 11's redesigned Outlook app is now rolling out to more users
Closer look at Windows 11's new Outlook email app with Mica design and more Windows 11's new Outlook app ready for personal accounts - Pureinfotech How to enable new Outlook app UI on Windows 11 - Pureinfotech
Windows 11s New Outlook App Now Supports Gmail Personal Accounts Images One Outlook app preview releases for Windows 11 - Pureinfotech

Closure

Thus, we hope this article has provided valuable insights into A New Era of Email: Exploring the Outlook App on Windows 11. We appreciate your attention to our article. See you in our next article!

Capturing Your Screen: A Comprehensive Guide To Print Screen In Windows 10

Capturing Your Screen: A Comprehensive Guide to Print Screen in Windows 10

Introduction

In this auspicious occasion, we are delighted to delve into the intriguing topic related to Capturing Your Screen: A Comprehensive Guide to Print Screen in Windows 10. Let’s weave interesting information and offer fresh perspectives to the readers.

Capturing Your Screen: A Comprehensive Guide to Print Screen in Windows 10

How To Capture Screenshot In Windows 10 - Howto Techno

In the digital age, the ability to capture and share visual information is paramount. Whether it’s a troubleshooting guide, a captivating screenshot of a game, or a quick visual note for a colleague, the print screen function in Windows 10 provides a simple and efficient way to achieve this.

This article delves into the intricacies of this fundamental feature, exploring its various functionalities, potential applications, and accompanying tools for enhanced screen capture experiences.

Understanding the Print Screen Function: A Gateway to Visual Information

At its core, the print screen function in Windows 10 acts as a digital camera for your computer screen. It captures the entire desktop, including all open windows, the taskbar, and the notification area, and stores it as an image. This image can then be saved, shared, or used in various applications.

The most common way to utilize the print screen function is through its dedicated shortcut key: Print Screen (PrtScn) or Print Screen SysRq. Pressing this key triggers the capture process, silently storing the image in the clipboard. This image is then ready to be pasted into any application that supports image insertion, such as Microsoft Paint, Word, or even email.

Beyond the Basics: Expanding the Scope of Screen Capture

While the standard print screen function captures the entire screen, Windows 10 offers additional options for capturing specific areas or windows:

1. Alt + Print Screen: This combination captures only the active window, providing a focused image of the current application. This is particularly useful when you want to share a specific window without the clutter of other open programs.

2. Windows Key + Print Screen: This shortcut captures the entire screen and automatically saves it as a PNG file in the Pictures folder under a "Screenshots" subfolder. This eliminates the need to manually paste the image into an application, streamlining the capture process.

3. Snipping Tool: A dedicated tool available in Windows 10, the Snipping Tool offers a more interactive approach to screen capture. It allows users to select specific areas of the screen, choose different capture modes (rectangular, free-form, window, full-screen), and even add annotations to the captured image.

4. Xbox Game Bar: For capturing gameplay moments, the Xbox Game Bar, accessible through the Windows key + G shortcut, provides a dedicated screen capture functionality. This allows users to record videos, take screenshots, and even stream their gameplay live.

Utilizing the Power of Print Screen: Applications and Benefits

The print screen function transcends its basic image capture capabilities, offering a multitude of applications across diverse fields:

1. Documentation and Tutorials: Clear and concise visuals are essential for technical documentation and online tutorials. Print screen enables users to capture specific steps, error messages, or program interfaces, providing visual aids for explaining processes or troubleshooting issues.

2. Communication and Collaboration: Sharing screenshots is a highly effective way to convey information visually. Whether it’s highlighting a specific section of a document, demonstrating a feature in an application, or illustrating a problem, print screen facilitates efficient communication and collaboration.

3. Education and Learning: Visual learning is a powerful tool, and print screen plays a crucial role in enhancing the learning process. Students can capture lecture slides, diagrams, or complex equations, creating their own visual library for future reference.

4. Entertainment and Creativity: From capturing memorable gaming moments to creating memes or digital art, print screen empowers users to express themselves creatively. It allows for the extraction of specific elements from images, facilitating artistic manipulation and personalized content creation.

5. Research and Analysis: Researchers and analysts often rely on visual data to draw insights and support their findings. Print screen allows them to capture data visualizations, graphs, or charts, enabling further analysis and interpretation.

Exploring Common FAQs: Addressing User Concerns

1. What happens to the captured image after pressing Print Screen?

The captured image is stored in the clipboard, a temporary storage area for copied data. This image can then be pasted into any application that supports image insertion.

2. How can I save the captured image?

To save the captured image, you can paste it into an image editing application like Microsoft Paint or a document editor like Microsoft Word. You can then save the image in a desired format (e.g., PNG, JPG). Alternatively, using the Windows key + Print Screen shortcut automatically saves the image as a PNG file in your Pictures folder.

3. Can I edit the captured image?

Yes, you can edit the captured image using various image editing applications. These applications allow you to crop, resize, add annotations, adjust colors, and apply various filters.

4. Is there a limit to the number of screenshots I can take?

No, there is no limit to the number of screenshots you can take. However, each screenshot will replace the previous one in the clipboard.

5. How do I capture a specific area of the screen?

You can use the Snipping Tool to capture specific areas of the screen. This tool allows you to select a rectangular, free-form, or window-based area for capture.

Refining Your Screen Capture Skills: Tips and Techniques

1. Experiment with different capture methods: Explore the various screen capture options available in Windows 10, including Alt + Print Screen, Windows key + Print Screen, and the Snipping Tool, to find the most suitable method for your specific needs.

2. Utilize the Snipping Tool’s features: Take advantage of the Snipping Tool’s ability to delay capture, choose different capture modes, and add annotations to your screenshots.

3. Explore third-party screen capture tools: For advanced features like video recording, scheduling captures, or remote screen capture, consider using third-party screen capture tools.

4. Optimize your screenshots for sharing: Ensure your screenshots are clear, legible, and appropriately sized for easy sharing and viewing.

5. Practice and refine your technique: The more you use the print screen function, the more proficient you will become at capturing information efficiently and effectively.

Conclusion: The Versatility of Print Screen in the Digital Landscape

The print screen function in Windows 10 is a versatile tool that empowers users to capture and share visual information effectively. From documenting technical processes to creating engaging visual content, print screen plays a crucial role in enhancing communication, learning, and creativity in the digital world. By mastering its various functionalities and exploring its diverse applications, users can leverage this simple yet powerful feature to unlock a world of visual possibilities.

Print Screen - How to Capture your Desktop Screen (How to take a Screenshot in Windows) - YouTube How to print screen on windows 10 - ITHelpSupport.com How to Print Screen on Windows 10?
How to Print a Screen in Windows: A Comprehensive Guide - The Explanation Express How To Screenshot on PC (Windows 10) - Quick Guide Printscreen Windows 10
How To Print Screen In Windows How to Print Screen (Screenshot) on Windows 10 - YouTube

Closure

Thus, we hope this article has provided valuable insights into Capturing Your Screen: A Comprehensive Guide to Print Screen in Windows 10. We thank you for taking the time to read this article. See you in our next article!

Enhancing Gaming Performance: A Comprehensive Guide To Optimizing Your PS5 Controller On Windows 11

Enhancing Gaming Performance: A Comprehensive Guide to Optimizing Your PS5 Controller on Windows 11

Introduction

In this auspicious occasion, we are delighted to delve into the intriguing topic related to Enhancing Gaming Performance: A Comprehensive Guide to Optimizing Your PS5 Controller on Windows 11. Let’s weave interesting information and offer fresh perspectives to the readers.

Enhancing Gaming Performance: A Comprehensive Guide to Optimizing Your PS5 Controller on Windows 11

Ultimate Windows 11 Gaming Performance Optimization Guide - Blog - Lienket.vn

The PlayStation 5 DualSense controller, lauded for its innovative haptic feedback and adaptive triggers, has become a popular choice for PC gamers. However, unlocking its full potential on Windows 11 can sometimes require a bit more than just plugging it in. While the term "overclocking" traditionally refers to increasing the processing speed of hardware components, in the context of a PS5 controller, it refers to adjusting its settings to improve responsiveness and performance.

Understanding the Concept of Controller Optimization

The concept of optimizing a PS5 controller for Windows 11 is fundamentally about maximizing its capabilities. This involves tweaking settings related to input latency, response times, and even the controller’s internal communication protocol. While the controller itself doesn’t have a physical clock speed to overclock, the term "overclocking" is used figuratively to emphasize the goal of enhancing its performance beyond default settings.

Benefits of Optimizing Your PS5 Controller

Optimizing your PS5 controller on Windows 11 can yield tangible benefits for your gaming experience:

  • Reduced Input Latency: This translates to a more responsive and immediate feeling of control in-game, crucial for fast-paced action titles and competitive multiplayer scenarios.
  • Improved Accuracy: Precise control is paramount in many genres, and optimized settings can help eliminate subtle delays, leading to more accurate aiming and smoother gameplay.
  • Enhanced Haptic Feedback: By fine-tuning the settings, you can potentially amplify the intensity and precision of the controller’s haptic feedback, immersing yourself deeper into the game world.
  • Personalized Customization: Optimizing allows you to tailor the controller’s behavior to your individual preferences, whether it’s adjusting button sensitivity or tweaking the intensity of the adaptive triggers.

Methods for Optimizing Your PS5 Controller

While the term "overclocking" may be used, the actual process involves various techniques to achieve the desired results. Here’s a breakdown of common approaches:

1. Driver Optimization:

  • Updating Drivers: Ensuring you have the latest drivers for your PS5 controller is crucial for optimal performance. These drivers contain crucial software that enables communication between the controller and your PC. You can typically find the latest drivers on the PlayStation website or through Windows Update.
  • Third-Party Drivers: Some third-party driver solutions, like DS4Windows, offer additional features and customization options. These drivers can provide a wider range of settings to adjust input latency, response times, and even emulate specific controller profiles.

2. Software Configuration:

  • Game Settings: Many games offer in-game controller settings, allowing you to adjust sensitivity, deadzones, and other parameters. Experimenting with these settings can significantly impact your gameplay experience.
  • System Settings: Windows 11 offers a dedicated section for managing game controllers. Within this section, you can configure controller settings like input mode, deadzones, and button mapping.

3. Hardware Considerations:

  • USB Port Selection: Using a USB 3.0 or USB-C port can potentially improve data transfer speeds, leading to lower input latency.
  • Wireless Adapters: If using a wireless connection, ensure your wireless adapter is compatible with the PS5 controller and offers a stable connection with minimal interference.

FAQs: Addressing Common Queries

Q: Is optimizing my PS5 controller safe?

A: Optimizing your PS5 controller through the methods described above is generally safe. However, using unofficial drivers or modifying system files without proper knowledge can potentially lead to issues. Stick to reputable sources and official driver updates whenever possible.

Q: Can I damage my controller by optimizing it?

A: Properly optimizing your controller should not damage it. However, using extreme settings or making drastic modifications without understanding the consequences could potentially lead to unforeseen problems.

Q: What are the potential downsides of optimization?

A: While optimization can improve performance, it’s important to note that it may not always be beneficial for every game or user. Some games may have specific settings that work best with default controller behavior. Excessive optimization could potentially lead to increased input lag or other issues.

Tips for Optimizing Your PS5 Controller:

  • Start with Default Settings: Before making any changes, familiarize yourself with the default controller settings and how they feel in-game. This provides a baseline for comparison.
  • Experiment Gradually: Make small adjustments to your settings and test them in-game to see the impact. Avoid making drastic changes all at once.
  • Prioritize Low Latency: Focus on reducing input latency as this is the most crucial factor for responsiveness.
  • Consider Personal Preferences: Experiment with different settings and find what feels most comfortable and intuitive for your playstyle.
  • Back Up Your Settings: Before making significant changes, consider backing up your current controller settings to revert to them if necessary.

Conclusion: A Personalized Gaming Experience

Optimizing your PS5 controller on Windows 11 is a journey of personalization. It’s about understanding your preferences and finding the settings that enhance your gaming experience. While the term "overclocking" may be used figuratively, the goal is to unlock the full potential of this innovative controller. By following the methods and tips outlined above, you can significantly improve responsiveness, accuracy, and immersion in your favorite games. Remember, the best approach is to experiment, test, and find what works best for you.

PS5 controller on PC: How to use the DualSense in Windows - GamingNewsMag.com Tips to optimize windows 11 for amazing gaming experience How to Optimize Your PS5 Controller and 3D Audio Settings - The Tech Game
How To Optimize Windows 11 For GAMING & Performance In 2021 - Windows 11 Tweaking Guide! 8 Tips to Optimize Your Windows 11 PC for Gaming Performance - Make Tech Easier How to use PS5 controller on PC  Tom's Guide
8 Tips to Optimize Your Windows 11 PC for Gaming Performance - Make Tech Easier Here's how to improve gaming performance on Windows 11

Closure

Thus, we hope this article has provided valuable insights into Enhancing Gaming Performance: A Comprehensive Guide to Optimizing Your PS5 Controller on Windows 11. We appreciate your attention to our article. See you in our next article!

Tailoring The Windows 11 Start Menu: Optimizing User Experience Through Customization

Tailoring the Windows 11 Start Menu: Optimizing User Experience Through Customization

Introduction

With great pleasure, we will explore the intriguing topic related to Tailoring the Windows 11 Start Menu: Optimizing User Experience Through Customization. Let’s weave interesting information and offer fresh perspectives to the readers.

Tailoring the Windows 11 Start Menu: Optimizing User Experience Through Customization

How to customize Windows 11 appearance with these tools

The Windows 11 Start Menu, a central hub for accessing applications and system settings, has undergone a significant redesign. While its modern aesthetic and enhanced functionality are generally well-received, the inclusion of "Recommended" items within the menu has sparked discussions among users. This feature, designed to provide quick access to frequently used applications and files, can sometimes feel intrusive or unnecessary, leading many to seek ways to customize their Start Menu experience.

This article delves into the intricacies of managing the "Recommended" section in the Windows 11 Start Menu, exploring its purpose, potential drawbacks, and methods for tailoring it to individual preferences.

Understanding the Purpose of "Recommended" Items

The "Recommended" section within the Windows 11 Start Menu aims to streamline user workflows by providing personalized suggestions based on usage patterns. This feature leverages Microsoft’s cloud-based data analysis to identify frequently accessed files, recently opened applications, and even relevant content from the Microsoft Store.

The underlying intention is to offer users a more intuitive and efficient way to navigate their digital space. By surfacing relevant items prominently, Microsoft hopes to reduce the time spent searching for specific files or programs, thereby enhancing productivity.

Exploring the Potential Drawbacks of "Recommended" Items

While the "Recommended" section aims to enhance user experience, its implementation has raised concerns among some users.

  • Privacy Concerns: The data collection practices underpinning "Recommended" items have prompted privacy concerns. While Microsoft asserts that user data is anonymized and used solely for personalization, some individuals might prefer a more granular control over the information shared with the company.

  • Cluttered Interface: For users who prioritize a clean and organized Start Menu, the presence of "Recommended" items can contribute to visual clutter. This is particularly relevant for users who have a large number of applications or frequently access a diverse range of files.

  • Lack of Customization: The initial implementation of the "Recommended" section lacked granular controls, leaving some users feeling limited in their ability to customize the Start Menu to their liking.

Tailoring the Start Menu Experience: Options for Customization

Recognizing the user feedback surrounding the "Recommended" section, Microsoft has introduced several options to personalize the Start Menu experience:

  • Disabling "Recommended" Items: Users can disable the "Recommended" section entirely by accessing the Start Menu settings. This option removes the entire section, providing a cleaner Start Menu with a focus on pinned applications and folders.

  • Customizing "Recommended" Content: While disabling the entire section is an option, users can also choose to customize the content within the "Recommended" section. This allows for a more selective approach, enabling users to retain the convenience of suggestions while minimizing unwanted clutter.

  • Managing "Recommended" Content: Users can directly manage the content displayed within the "Recommended" section by right-clicking on individual items and selecting "Remove from Recommended." This allows users to fine-tune the recommendations to their specific needs.

FAQs: Addressing Common Questions About "Recommended" Items

Q: Does disabling "Recommended" items affect the overall functionality of the Start Menu?

A: No, disabling "Recommended" items does not impact the core functionality of the Start Menu. Users can still access all their pinned applications, folders, and system settings.

Q: Can I selectively remove specific "Recommended" items without disabling the entire section?

A: Yes, users can individually remove unwanted items from the "Recommended" section by right-clicking on them and selecting "Remove from Recommended."

Q: Does disabling "Recommended" items impact the privacy settings of my Windows 11 device?

A: Disabling "Recommended" items does not directly alter the privacy settings of your Windows 11 device. However, it might reduce the amount of data collected for personalization purposes.

Q: How do I access the settings for customizing the "Recommended" section?

A: To access the Start Menu settings, right-click on the Start button and select "Settings." From there, navigate to "Personalization" and then "Start." Within the Start settings, you will find options to disable "Recommended" items or customize their content.

Tips for Optimizing the Start Menu Experience

  • Pin Frequently Used Applications: Pinning your most frequently used applications to the Start Menu ensures quick access and reduces the reliance on "Recommended" suggestions.

  • Organize Folders: Create folders within the Start Menu to group related applications or files, making it easier to locate them and reducing clutter.

  • Explore Search Functionality: Utilize the Start Menu search bar to quickly locate applications, files, and settings.

  • Experiment with Customization Options: Explore the various customization options available within the Start Menu settings to find the configuration that best suits your individual needs and preferences.

Conclusion: Towards a Personalized Start Menu Experience

The "Recommended" section within the Windows 11 Start Menu represents a well-intentioned attempt to enhance user experience by offering personalized suggestions. However, the potential drawbacks of privacy concerns, interface clutter, and limited customization options have led some users to seek alternatives.

By understanding the purpose and potential drawbacks of "Recommended" items, users can leverage the available customization options to tailor the Start Menu experience to their specific needs. Whether it involves disabling the entire section, selectively managing its content, or exploring alternative methods of organization, the ultimate goal is to create a Start Menu that is both functional and personalized, ultimately enhancing productivity and user satisfaction.

How to customize the Windows 11 Start menu  Tom's Guide How to Customize Start Menu in Windows 11 - YouTube Customize Windows 11 Start Menu Layout Settings Using Intune HTMD Blog
How to Customize Windows 11 Start Menu Layout โ€” LazyAdmin How to Customize the Start Menu on Windows 11 How To Customize The Windows 11 Start Menu  deskgeek
How to Customize Start Menu in Windows 11 How To Customize Start Menu In Windows 11 - Vrogue

Closure

Thus, we hope this article has provided valuable insights into Tailoring the Windows 11 Start Menu: Optimizing User Experience Through Customization. We appreciate your attention to our article. See you in our next article!

Understanding Password Expiration In Windows 10: A Comprehensive Guide

Understanding Password Expiration in Windows 10: A Comprehensive Guide

Introduction

In this auspicious occasion, we are delighted to delve into the intriguing topic related to Understanding Password Expiration in Windows 10: A Comprehensive Guide. Let’s weave interesting information and offer fresh perspectives to the readers.

Understanding Password Expiration in Windows 10: A Comprehensive Guide

How to Set a Password Expiration Date in Windows 10

In the realm of digital security, password management plays a crucial role. Windows 10, like many operating systems, employs a system of password expiration to encourage users to regularly update their security credentials. This practice, while intended to bolster security, can sometimes be inconvenient for users who prefer a more streamlined experience. This article explores the concept of password expiration in Windows 10, delves into the potential benefits and drawbacks of disabling this feature, and provides guidance on how to make informed decisions regarding password management.

The Rationale Behind Password Expiration

The rationale behind password expiration is rooted in the ever-evolving landscape of cyber threats. Regular password changes are intended to mitigate the risk of compromised accounts, as stolen or leaked passwords can be used to gain unauthorized access to systems. By forcing users to update their passwords periodically, operating systems aim to reduce the window of vulnerability and ensure that even if a password is compromised, the attacker’s access is limited.

The Potential Drawbacks of Password Expiration

While password expiration aims to enhance security, it also presents certain drawbacks. The primary concern is the potential for users to adopt weaker passwords in an effort to remember them for the next cycle. This can actually weaken overall security, as users may resort to easily guessed passwords or repetitive patterns that are easily cracked by attackers.

Furthermore, the constant need to reset passwords can be disruptive and time-consuming for users, especially in environments where multiple accounts require frequent password updates. This can lead to frustration and a reluctance to comply with password policies, potentially undermining their effectiveness.

Understanding the "Password Never Expires" Option

Windows 10 offers a setting that allows users to disable password expiration. This option, often referred to as "Password Never Expires," can be found within the user account settings. While this might seem like a convenient solution, it’s crucial to understand the implications of disabling this feature.

The Risks of Disabling Password Expiration

Disabling password expiration effectively eliminates a crucial security safeguard. If a password is compromised, an attacker could potentially maintain access to the account indefinitely, without the system prompting for a password change. This can have significant consequences, especially if the account has administrative privileges or access to sensitive data.

Balancing Security and Convenience

The decision to disable password expiration requires careful consideration. It’s essential to weigh the potential benefits of convenience against the increased security risks. In situations where users have strong passwords that are not easily guessed and where the account is not critical for sensitive data or administrative access, disabling password expiration might be acceptable. However, in situations involving high-security environments or accounts with privileged access, it’s strongly recommended to maintain the default password expiration policy.

Alternative Approaches to Password Management

Instead of completely disabling password expiration, there are alternative approaches that can enhance security without sacrificing convenience. These include:

  • Strong Password Policies: Implementing strict password policies that enforce the use of complex passwords, including a mix of uppercase and lowercase letters, numbers, and symbols, can significantly strengthen account security.
  • Multi-Factor Authentication (MFA): MFA adds an extra layer of security by requiring users to provide multiple forms of authentication, such as a password and a one-time code sent to their mobile device. This significantly reduces the risk of unauthorized access even if a password is compromised.
  • Password Managers: Password managers are specialized software applications that securely store and manage user passwords. These tools can generate strong, unique passwords for each account and automatically fill in login credentials, eliminating the need for users to remember complex passwords.
  • Regular Password Reviews: Even with strong passwords and MFA in place, it’s essential to conduct regular password reviews. This involves periodically assessing the strength of passwords and updating them if they are deemed weak or compromised.

FAQs Regarding Password Expiration in Windows 10

Q: Is it safe to disable password expiration in Windows 10?

A: Disabling password expiration can be risky, as it removes a crucial security safeguard. It’s only recommended for non-critical accounts with strong passwords and in situations where the risk of compromise is low.

Q: What are the benefits of disabling password expiration?

A: The primary benefit is convenience. Users can avoid the hassle of regularly changing passwords, especially for accounts they use infrequently.

Q: How can I disable password expiration in Windows 10?

A: To disable password expiration, navigate to "Settings" > "Accounts" > "Sign-in options". Under "Password policy", select "Never expire".

Q: What are some best practices for managing passwords in Windows 10?

A: Best practices include using strong, unique passwords for each account, enabling MFA where possible, and using a password manager to store and manage passwords securely.

Tips for Secure Password Management in Windows 10

  • Utilize strong passwords: Ensure your passwords are at least 12 characters long and include a mix of uppercase and lowercase letters, numbers, and symbols.
  • Avoid using personal information: Do not use easily guessed information like birthdays or pet names in your passwords.
  • Enable MFA: Whenever possible, enable multi-factor authentication to add an extra layer of security to your accounts.
  • Use a password manager: Password managers can securely store and manage your passwords, making it easier to create and remember strong, unique credentials.
  • Review passwords regularly: Periodically review your passwords and update them if they are deemed weak or compromised.
  • Be cautious of phishing attempts: Be wary of suspicious emails or websites that ask for your login credentials.

Conclusion

The decision to disable password expiration in Windows 10 requires a careful assessment of security risks and individual needs. While convenience is a factor, prioritizing strong security practices is paramount. By implementing strong passwords, enabling MFA, and using password managers, users can mitigate the risks associated with disabling password expiration and maintain a secure digital environment. Ultimately, the goal is to strike a balance between convenience and security, ensuring that accounts are protected from unauthorized access without compromising user experience.

How to Enable or Disable Password Expiration in Windows 10 - YouTube [How To] Configure Password Expiration In Windows 10 How To Set a Password Expiration Date in Windows 10  Saved passwords, Password safe, Passwords
How to Set Password Expiration Date in Windows 10 How to turn a Password Expiry Date on/off in Windows 10  Microsoft Account or Local Account Windows 10 Password Expiration Notification  Password Recovery
Enable or Disable Password Expiration for Local Accounts in Windows 10  Tutorials [How To] Configure Password Expiration In Windows 10

Closure

Thus, we hope this article has provided valuable insights into Understanding Password Expiration in Windows 10: A Comprehensive Guide. We thank you for taking the time to read this article. See you in our next article!

Near Field Communication (NFC) On Android: A Comprehensive Guide

Near Field Communication (NFC) on Android: A Comprehensive Guide

Introduction

With great pleasure, we will explore the intriguing topic related to Near Field Communication (NFC) on Android: A Comprehensive Guide. Let’s weave interesting information and offer fresh perspectives to the readers.

Near Field Communication (NFC) on Android: A Comprehensive Guide

Nfc Guide Near Field Communication Explained Square - Riset

Near Field Communication (NFC) is a wireless technology that enables short-range communication between devices. This technology has become increasingly ubiquitous in the mobile world, particularly on Android devices, where it empowers a wide array of functionalities, from contactless payments to data sharing and device pairing. This comprehensive guide will explore the intricacies of NFC on Android, elucidating its mechanisms, benefits, and applications, while addressing common inquiries and offering practical tips for utilization.

Understanding the Fundamentals of NFC

At its core, NFC operates on the principle of electromagnetic induction, facilitating communication between devices placed within a few centimeters of each other. This proximity-based nature ensures secure and efficient data transfer, limiting the possibility of unauthorized access or interception.

How NFC Works on Android Devices

Android devices equipped with NFC feature a dedicated chip that acts as a communication hub. This chip operates at a frequency of 13.56 MHz, enabling communication with other NFC-enabled devices, including:

  • NFC Readers: These devices, often found in retail establishments, public transportation systems, and access control systems, can read information stored on an NFC-enabled device.
  • NFC Tags: These passive devices contain pre-programmed data that can be read by NFC-enabled devices. They are widely used for applications like product information, event ticketing, and access control.
  • Other NFC-enabled Devices: Smartphones, tablets, and other devices equipped with NFC can communicate directly with each other, exchanging data or establishing connections.

NFC Applications on Android

The versatility of NFC technology has propelled its adoption across a diverse range of applications on Android devices. Here are some prominent examples:

  • Contactless Payments: NFC is the backbone of contactless payment systems like Google Pay, Samsung Pay, and Apple Pay. By tapping an NFC-enabled device on a compatible terminal, users can make secure and convenient transactions without needing to physically present a card.
  • Data Sharing: NFC allows for quick and effortless transfer of data, such as contact information, photos, and web links, between two NFC-enabled devices. This eliminates the need for cumbersome Bluetooth pairing or data cables.
  • Device Pairing: NFC facilitates seamless pairing between Android devices and other NFC-enabled peripherals, such as Bluetooth speakers, headphones, and smartwatches. This eliminates the need for manual pairing processes and simplifies the connection experience.
  • Access Control: NFC-enabled key cards and badges are increasingly used for building entry, event access, and secure access to restricted areas. This technology provides a secure and convenient alternative to traditional key cards.
  • NFC Tags for Automation: NFC tags can be programmed to trigger specific actions on an Android device when brought into proximity. This enables automation tasks like switching Wi-Fi networks, launching apps, or adjusting device settings.

Benefits of NFC on Android

The integration of NFC on Android devices offers numerous advantages, making it a valuable technology for users and developers alike:

  • Enhanced Convenience: NFC simplifies everyday tasks, enabling contactless payments, seamless device pairing, and effortless data sharing.
  • Improved Security: The close proximity requirement for NFC communication inherently enhances security, reducing the risk of unauthorized access or eavesdropping.
  • Increased Functionality: NFC opens up new possibilities for mobile applications, enabling developers to create innovative solutions for various industries.
  • Cost-Effectiveness: NFC technology is relatively inexpensive to implement, making it accessible for a wide range of devices and applications.
  • Wide Adoption: The widespread adoption of NFC technology across various industries ensures compatibility and ease of use for consumers.

FAQs Regarding NFC on Android

Q1: Is NFC available on all Android devices?

A: Not all Android devices are equipped with NFC. To determine if your device has NFC capabilities, check the device specifications or look for an NFC symbol on the device’s casing.

Q2: How can I activate NFC on my Android device?

A: NFC can typically be activated through the device’s settings menu. Look for a "NFC" or "Wireless & Networks" section, and toggle the NFC switch to the "on" position.

Q3: How secure is NFC technology?

A: NFC technology is generally considered secure due to its proximity-based nature. However, it’s crucial to ensure that your Android device is running the latest security updates and that you only use reputable apps for NFC-related transactions.

Q4: Can NFC be used for file sharing between Android devices?

A: While NFC can be used for data sharing, it’s not typically employed for large file transfers. For larger files, Bluetooth or Wi-Fi Direct are more suitable options.

Q5: What are some common uses of NFC tags?

A: NFC tags can be used for various purposes, including:

  • Product Information: Providing product details, specifications, and reviews.
  • Event Ticketing: Verifying event tickets and providing access to event information.
  • Access Control: Granting access to secure areas or facilities.
  • Automation: Triggering specific actions on an Android device, such as launching apps or adjusting settings.

Tips for Using NFC on Android

  • Ensure NFC is Activated: Before using NFC features, verify that NFC is enabled on your device.
  • Enable NFC Payments: If you intend to use NFC for contactless payments, ensure that your preferred payment app is configured and activated.
  • Utilize NFC Tags: Explore the possibilities of using NFC tags for automation, information retrieval, or access control.
  • Be Aware of Security: Always use reputable apps and services for NFC-related transactions and keep your device updated with the latest security patches.
  • Experiment with NFC Features: Explore the various NFC features available on your Android device and discover new ways to utilize this technology.

Conclusion

NFC technology has revolutionized the way we interact with our Android devices, offering convenience, security, and a plethora of possibilities. From contactless payments and data sharing to device pairing and automation, NFC has become an integral part of the modern mobile experience. By understanding the fundamentals of NFC, exploring its applications, and embracing its benefits, users can leverage this powerful technology to enhance their daily lives and unlock a world of possibilities on their Android devices.

Nfc Guide Near Field Communication Explained Square - Riset NFC Guide: All You Need to Know About Near Field Communication Near Field Communication - NFC Android - Android Beam
Near field communication (NFC) in android Near Field Communication (NFC) Near Field Communication
WHAT IS NFC(NEAR FIELD COMMUNICATION)?  MODES & APPLICATIONS - CuriousPort Nfc Guide All You Need To Know About Near Field Communication - Riset

Closure

Thus, we hope this article has provided valuable insights into Near Field Communication (NFC) on Android: A Comprehensive Guide. We thank you for taking the time to read this article. See you in our next article!