Notepad: A Timeless Tool For Windows 11

Notepad: A Timeless Tool for Windows 11

Introduction

In this auspicious occasion, we are delighted to delve into the intriguing topic related to Notepad: A Timeless Tool for Windows 11. Let’s weave interesting information and offer fresh perspectives to the readers.

Notepad: A Timeless Tool for Windows 11

How To Find And Use The New Notepad In Windows 11

In the ever-evolving landscape of computing, where sophisticated software reigns supreme, a simple, unassuming application continues to hold its own: Notepad. This seemingly basic text editor, a staple of Windows operating systems for decades, remains a valuable tool in Windows 11, offering a range of functionalities for users of all levels.

Notepad’s enduring appeal lies in its simplicity. Unlike its more feature-rich counterparts, it presents a clean, uncluttered interface, free from distractions. This minimalist approach allows users to focus solely on the task at hand: writing and editing plain text. This makes Notepad an ideal choice for a variety of tasks, including:

  • Quick note-taking: Jotting down ideas, reminders, or shopping lists becomes effortless with Notepad’s straightforward interface.
  • Basic text editing: Modifying simple text documents, such as configuration files or code snippets, is easily accomplished within Notepad’s familiar environment.
  • Creating simple web pages: While not a dedicated web development tool, Notepad can be used to create basic HTML documents, offering a hands-on learning experience for beginners.
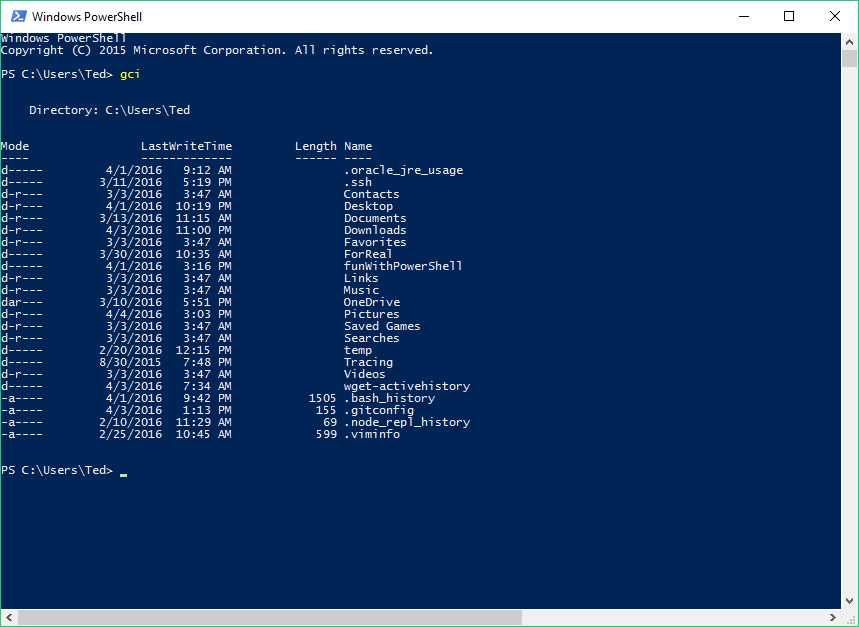
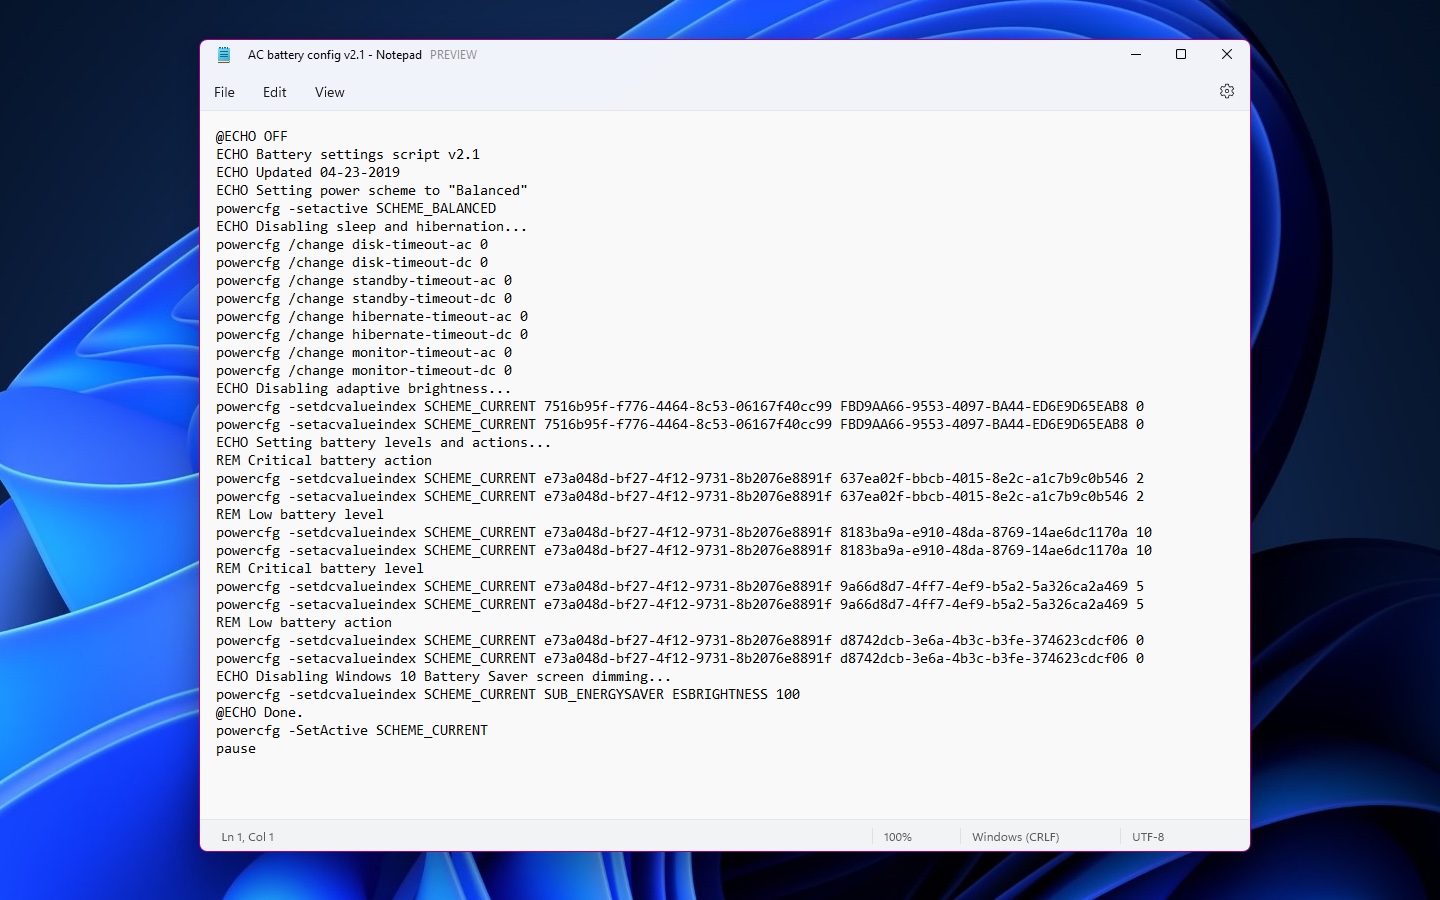
  • Writing scripts: Notepad’s plain text format makes it suitable for writing simple scripts in languages like batch files or VBScript.

Understanding Notepad’s Features

While Notepad’s primary function is to provide a platform for text editing, it offers a range of features that enhance user experience:

  • Basic Text Formatting: Notepad supports basic text formatting options, including font size, font style (bold, italic, underline), and text alignment. While not as extensive as dedicated word processors, these options allow for simple text formatting for basic documents.
  • Find and Replace: This essential feature allows users to quickly locate and replace specific text within a document, saving time and effort.
  • Undo/Redo: Mistakes happen, and Notepad provides the ability to undo recent actions, allowing users to revert to previous states of their document. The redo function complements this, enabling users to reapply undone actions.
  • Line Numbers: This feature is particularly useful for code editors, providing visual cues for navigating through lines of code.
  • Word Wrap: This feature automatically wraps text to the next line when it reaches the end of the current line, improving readability for longer documents.

Beyond the Basics: Notepad’s Hidden Potential

While Notepad’s simplicity is its hallmark, it also possesses a surprising amount of flexibility and power. Here are some lesser-known capabilities:

  • Unicode Support: Notepad supports Unicode encoding, enabling users to work with documents containing characters from various languages and alphabets. This makes it a valuable tool for multilingual users and those working with international text.
  • Clipboard Functionality: Notepad seamlessly integrates with the system clipboard, allowing users to copy and paste text from other applications, including websites and documents.
  • File Association: Notepad can be associated with specific file types, allowing it to open and edit those files by default. This customization option allows users to tailor Notepad to their specific needs.

Notepad in the Modern Era

Despite the rise of more sophisticated text editors and word processors, Notepad continues to hold its place in the modern computing landscape. Its simplicity and ease of use make it an indispensable tool for everyday tasks, while its hidden capabilities offer a surprising level of functionality.

FAQs about Notepad in Windows 11

Q: Is Notepad still relevant in Windows 11?

A: Absolutely. Notepad remains a valuable tool in Windows 11, offering a simple and efficient way to edit plain text for a variety of purposes.

Q: Can Notepad be used for coding?

A: While Notepad is not a dedicated code editor, it can be used for writing simple scripts and code snippets in languages like batch files or VBScript. However, for more complex coding tasks, dedicated code editors with features like syntax highlighting and debugging are recommended.

Q: How can I customize Notepad in Windows 11?

A: Notepad offers limited customization options. Users can change the font, font size, and color theme through the "Format" menu. Additionally, Notepad can be associated with specific file types to open those files by default.

Q: What are some alternatives to Notepad in Windows 11?

A: There are many alternatives to Notepad, ranging from simple text editors like TextEdit (macOS) and gedit (Linux) to more feature-rich word processors like Microsoft Word and Google Docs. The best alternative depends on the specific needs and preferences of the user.

Tips for Using Notepad in Windows 11

  • Utilize Keyboard Shortcuts: Keyboard shortcuts can significantly speed up your workflow. Familiarize yourself with common shortcuts like Ctrl+C (copy), Ctrl+V (paste), and Ctrl+Z (undo).
  • Explore the "Format" Menu: The "Format" menu offers options for basic text formatting, including font size, font style, and text alignment.
  • Use Line Numbers for Code Editing: Enable line numbers in the "View" menu for easier navigation and debugging of code.
  • Experiment with File Associations: Associate Notepad with specific file types to open those files by default, streamlining your workflow.

Conclusion

Notepad is a testament to the enduring power of simplicity. While it may appear basic, it offers a surprising range of functionality and remains a valuable tool in the modern computing landscape. Its ease of use, uncluttered interface, and hidden capabilities make it a powerful tool for everyday tasks, from quick note-taking to basic text editing and even simple scripting. In the ever-evolving world of software, Notepad stands as a reminder that sometimes, the simplest tools can be the most effective.

Microsoft now rolling out highly anticipated Tabbed Notepad to Windows 11 Insiders - Neowin Microsoft rolls out revamped Notepad app to Windows 11 Insiders  Ars Technica New Notepad App in Windows 11 - YouTube
Windows 11: New Notepad App (Download & Install) - YouTube Hands on with Windows 11's redesigned Notepad app with dark mode Hands-On with the Redesigned Notepad for Windows 11 - Thurrott.com
Microsoft Brings Revamped Version of Notepad for Windows 11 Notepad app with Tabs for Windows 11 (Officially Available for Insiders)

Closure

Thus, we hope this article has provided valuable insights into Notepad: A Timeless Tool for Windows 11. We thank you for taking the time to read this article. See you in our next article!

Navigating The World Of Osu! On Windows 10: A Comprehensive Guide

Navigating the World of osu! on Windows 10: A Comprehensive Guide

Introduction

With enthusiasm, let’s navigate through the intriguing topic related to Navigating the World of osu! on Windows 10: A Comprehensive Guide. Let’s weave interesting information and offer fresh perspectives to the readers.

Download and install Osu in Windows 10 2024 tutorial - YouTube

osu!, a popular rhythm game, has captivated players worldwide with its unique blend of music, precision, and competitive gameplay. This guide aims to provide a comprehensive understanding of the process of installing and enjoying osu! on a Windows 10 operating system.

Understanding osu!: A Rhythm Game Revolution

osu! is a rhythm game that challenges players to click, drag, and hold their mouse in sync with the beat of various music tracks. The game utilizes a system of "hit circles" and other interactive elements that appear on the screen, requiring players to respond accurately and rhythmically.

Key Features of osu!

  • Diverse Music Library: osu! boasts a vast library of songs across various genres, allowing players to choose from a wide range of musical experiences.
  • Multiplayer Gameplay: Engage in online battles against other players, testing your skills and climbing the global leaderboards.
  • Customizable Gameplay: Modify the game’s appearance, difficulty, and even create your own custom beatmaps.
  • Community Driven: osu! thrives on its passionate community, creating and sharing new content, fostering a vibrant and supportive environment.

Downloading and Installing osu! on Windows 10

The process of downloading and installing osu! on Windows 10 is straightforward and can be completed in a few simple steps:

  1. Visit the Official Website: Navigate to the official osu! website (https://osu.ppy.sh/).
  2. Download the Installer: Locate the "Download" section and choose the appropriate installer for your Windows 10 operating system.
  3. Run the Installer: Once the download is complete, double-click the installer file to begin the installation process.
  4. Follow the Instructions: The installer will guide you through the necessary steps, including selecting the installation directory and accepting the terms of service.
  5. Launch osu!: After the installation is finished, you can launch the game from the start menu or the desktop shortcut.

Setting Up osu! for Optimal Gameplay

Upon launching osu! for the first time, you will be prompted to create an account. This account allows you to track your progress, participate in online multiplayer, and access various game features.

Customization and Configuration

osu! offers a wide range of customization options to personalize your gaming experience. These include:

  • Skin Selection: Choose from a variety of skins to alter the game’s visual appearance, including the interface, hit objects, and gameplay elements.
  • Input Settings: Configure your mouse sensitivity, button assignments, and other input preferences for optimal control.
  • Graphics Settings: Adjust the game’s resolution, frame rate, and other graphical settings to suit your system’s capabilities.

Exploring the World of osu!

After setting up your account and customizing your preferences, you can begin exploring the vast world of osu!

  • Beatmaps: Explore the extensive library of beatmaps, ranging from classic anime tracks to popular pop songs.
  • Multiplayer Modes: Engage in online matches with other players, compete in ranked and casual modes, and participate in tournaments.
  • Custom Content: Create your own beatmaps using the osu! editor, sharing your creations with the community.

Troubleshooting Common Issues

While the installation and setup process is generally straightforward, you may encounter some common issues:

  • Game Crashes: If osu! crashes frequently, ensure your system meets the minimum system requirements and update your graphics drivers.
  • Lag and Performance Issues: Network connectivity and system resources can impact performance. Optimize your network settings and close unnecessary programs.
  • Installation Errors: If you encounter installation errors, try downloading the installer again, ensuring you have administrator privileges, and temporarily disabling antivirus software.

FAQs about osu! on Windows 10

1. What are the minimum system requirements for osu! on Windows 10?

The minimum system requirements for osu! are:

  • Operating System: Windows 7 or later
  • Processor: Intel Core 2 Duo or AMD equivalent
  • Memory: 2 GB RAM
  • Graphics: Intel HD Graphics 3000 or equivalent
  • Storage: 2 GB available space

2. How do I update osu! on Windows 10?

osu! automatically updates itself when you launch the game. Ensure you have a stable internet connection for the update process to complete successfully.

3. Can I play osu! offline?

You can play osu! offline, but you will not be able to access online features such as multiplayer and leaderboards.

4. How do I create my own beatmaps?

osu! offers a dedicated editor that allows you to create your own beatmaps. The editor provides tools for mapping hit objects, setting difficulty levels, and adding custom effects.

5. How do I find new beatmaps to play?

You can browse the osu! website or use the in-game beatmap browser to discover new beatmaps. You can also search for specific songs or genres to find content that interests you.

Tips for Improving Your osu! Gameplay

  • Practice Regularly: Consistency is key to improving your skills. Set aside dedicated time for practicing and gradually increase the difficulty of beatmaps.
  • Focus on Accuracy: Aim for perfect hits rather than rushing through the beatmap. Accuracy plays a significant role in scoring and improving your overall performance.
  • Analyze Your Mistakes: Pay attention to your mistakes and identify areas for improvement. Analyze your gameplay, identify patterns, and practice those areas specifically.
  • Join a Community: Connect with other osu! players through forums, discord servers, or online communities. Sharing tips, strategies, and experiences can accelerate your learning process.
  • Experiment with Different Skins: Try out different skins to find one that suits your preferences and improves your visual feedback.

Conclusion

osu! is a captivating and rewarding rhythm game that offers a unique and engaging gameplay experience. By following the steps outlined in this guide, you can successfully install and enjoy osu! on your Windows 10 system. Remember to explore the vast library of beatmaps, engage in online multiplayer, and customize the game to suit your preferences. With dedication and practice, you can unlock the full potential of osu! and become a skilled and passionate player within its vibrant community.

How to Install osu! on Windows 10 [Tutorial] - YouTube how to download osu! on windows 10. - YouTube How To Fix Raw Input Osu Windows 10 - Caley Evout1997
osu! Screenshots for Windows - MobyGames Unleashing the Power of Osu! Open Source: A Comprehensive Guide โ€“ PeterElSt How to start playing Osu! (A comprehensive guide) - YouTube
How To Play Osu!: A Comprehensive Guide For Beginners - IHSANPEDIA How To Download Osu for Windows 10 And Up!!!!!!! - YouTube

Closure

Thus, we hope this article has provided valuable insights into Navigating the World of osu! on Windows 10: A Comprehensive Guide. We appreciate your attention to our article. See you in our next article!

Net Framework 4 6 1 Download For Windows 10

net framework 4 6 1 download for windows 10

Introduction

With great pleasure, we will explore the intriguing topic related to net framework 4 6 1 download for windows 10. Let’s weave interesting information and offer fresh perspectives to the readers.

A Comprehensive Guide to .NET Framework 4.6.1 for Windows 10

How To Install Latest .Net Framework 4.6 on Windows 10/8.1/8/7 -OFFLINE 2018 - YouTube

The .NET Framework is a fundamental software development platform for Windows operating systems, offering a robust set of tools and libraries for creating diverse applications. Its significance stems from its ability to enable developers to build a wide range of software, from simple desktop applications to complex web services. .NET Framework 4.6.1, specifically, is a significant release for Windows 10 users, offering enhanced capabilities and improvements over previous versions.

Understanding the Core Functionalities of .NET Framework 4.6.1

At its heart, the .NET Framework 4.6.1 provides a comprehensive environment for application development, encompassing the following key components:

  • Common Language Runtime (CLR): The CLR acts as the execution engine for .NET applications, managing memory, thread management, and security. It ensures that applications run efficiently and securely on the target system.
  • Base Class Library (BCL): The BCL provides a rich collection of pre-built classes and interfaces, offering ready-to-use functionalities for tasks such as file I/O, networking, string manipulation, and data access.
  • Framework Class Library (FCL): Expanding upon the BCL, the FCL offers specialized classes and libraries for specific domains, including Windows Forms (for desktop applications), ASP.NET (for web applications), and WPF (for rich user interfaces).
  • Language Support: The .NET Framework supports multiple programming languages, including C#, VB.NET, F#, and C++. This versatility allows developers to choose the language best suited for their project requirements.

The Advantages of Employing .NET Framework 4.6.1 on Windows 10

.NET Framework 4.6.1 introduces several notable enhancements and benefits for Windows 10 users, making it a valuable asset for both developers and end-users:

  • Improved Performance and Efficiency: The .NET Framework 4.6.1 features performance optimizations that enhance application speed and responsiveness, ensuring a smoother user experience.
  • Enhanced Security: The framework incorporates security enhancements, including improved encryption and authentication mechanisms, to protect applications and sensitive data from malicious threats.
  • Modernized Development Tools: Developers benefit from modern development tools, including Visual Studio 2015, which offer advanced features like code completion, debugging tools, and integrated unit testing.
  • Support for Latest Technologies: .NET Framework 4.6.1 supports the latest web technologies, including HTML5, CSS3, and JavaScript, enabling the creation of modern and engaging web applications.
  • Cross-Platform Compatibility: .NET Framework 4.6.1 provides support for cross-platform development, allowing developers to create applications that run on multiple operating systems, including Windows, macOS, and Linux.

Installing .NET Framework 4.6.1 on Windows 10

Installing .NET Framework 4.6.1 on Windows 10 is a straightforward process:

  1. Check for Existing Versions: Before installing, it’s crucial to verify if any older versions of the .NET Framework are already installed on the system.
  2. Download the Installer: Download the appropriate installer for your system architecture (32-bit or 64-bit) from the official Microsoft website.
  3. Run the Installer: Execute the downloaded installer file. The installation process is automated and should be completed without user intervention.
  4. Verify Installation: After installation, ensure that .NET Framework 4.6.1 is successfully installed by checking the "Programs and Features" section in the Windows Control Panel.

Frequently Asked Questions (FAQs)

Q: Is .NET Framework 4.6.1 compatible with Windows 10?

A: Yes, .NET Framework 4.6.1 is fully compatible with Windows 10. It is designed to work seamlessly with the operating system and provides the necessary components for running .NET applications.

Q: Do I need to install .NET Framework 4.6.1 if I already have an older version?

A: While older versions may still function, it’s recommended to install the latest version, .NET Framework 4.6.1, to benefit from the latest features, security improvements, and performance enhancements.

Q: Can I uninstall .NET Framework 4.6.1 if I no longer need it?

A: Uninstalling .NET Framework 4.6.1 might lead to issues with applications that rely on it. It is generally advisable to keep it installed unless you are certain that none of your applications require it.

Q: What happens if I have multiple versions of the .NET Framework installed?

A: Windows 10 intelligently manages multiple versions of the .NET Framework, ensuring that applications run with the appropriate version.

Tips for Utilizing .NET Framework 4.6.1 Effectively

  • Regular Updates: Keep the .NET Framework updated to the latest version to ensure you have access to the latest security patches and performance improvements.
  • Choose the Right Version: If your application requires specific features or compatibility with older systems, ensure you select the appropriate version of the .NET Framework.
  • Utilize Visual Studio: Visual Studio is the recommended development environment for creating .NET applications, providing a comprehensive set of tools and features for efficient development.

Conclusion

The .NET Framework 4.6.1 is a vital component for Windows 10 users, enabling the development and execution of a wide range of applications. Its enhanced features, improved security, and compatibility with modern technologies make it a valuable asset for developers and end-users alike. By understanding its functionalities and benefits, users can leverage the full potential of this powerful development platform, ensuring a seamless and efficient application experience.

-net framework 4-6-1 download - hoolilux Download Microsoft .NET Framework 4.6.1 Offline Installer Microsoft .NET Framework 4.6.1 Tรฉlรฉcharger et Installer  Windows
NET Framework 4.6 Offline Installer - Versiรณn completa Microsoft net framework 4-6-1 download - onestopvast Microsoft .Net Framework 4 Free Download
Microsoft .Net Framework 4 Free Download -net framework 4-6-1 download windows 10 - faplora

Closure

Thus, we hope this article has provided valuable insights into net framework 4 6 1 download for windows 10. We hope you find this article informative and beneficial. See you in our next article!

Navigating The New Landscape: Exploring Recent Additions To Windows 11

Navigating the New Landscape: Exploring Recent Additions to Windows 11

Introduction

With enthusiasm, let’s navigate through the intriguing topic related to Navigating the New Landscape: Exploring Recent Additions to Windows 11. Let’s weave interesting information and offer fresh perspectives to the readers.

Windows 11 Landscape Wallpaper

Windows 11, the latest iteration of Microsoft’s operating system, has been a subject of much discussion since its release in October 2021. Beyond its visual overhaul and design refinements, the operating system has seen a steady stream of additions and improvements, aiming to enhance user experience and cater to evolving needs. This article delves into some of the most noteworthy programs and features introduced in Windows 11, analyzing their significance and potential benefits for users.

1. Windows Subsystem for Android:

Perhaps the most significant addition, the Windows Subsystem for Android (WSA) bridges the gap between the Windows and Android ecosystems. This feature allows users to run Android apps directly on their Windows 11 machines, expanding the available software library considerably.

Benefits:

  • Enhanced Productivity: Access to a vast repository of Android apps, including productivity tools, social media platforms, and entertainment apps, enhances user productivity and expands the functionality of Windows 11.
  • Cross-Platform Compatibility: Users can seamlessly switch between Windows and Android apps, facilitating a more unified and efficient workflow.
  • Mobile App Integration: The integration of Android apps with Windows 11 allows for smoother integration with mobile devices, creating a more interconnected user experience.

2. Microsoft Teams Integration:

Microsoft Teams, a collaborative communication and productivity platform, has been deeply integrated into Windows 11. This integration aims to streamline communication and collaboration within the operating system.

Benefits:

  • Centralized Communication: Teams is now a central hub for communication, allowing users to access chat, meetings, and file sharing directly from the taskbar.
  • Enhanced Collaboration: The integration facilitates seamless collaboration on documents and projects, fostering a more efficient and productive workflow.
  • Simplified User Experience: The integration minimizes the need for multiple applications, simplifying the user experience and reducing clutter.

3. Focus Assist:

Focus Assist, introduced in Windows 10, has been refined and enhanced in Windows 11. This feature helps users minimize distractions and maintain focus by controlling notifications and alerts.

Benefits:

  • Increased Productivity: By reducing distractions, Focus Assist allows users to concentrate on tasks and improve productivity.
  • Improved Work-Life Balance: By controlling notifications, users can create dedicated work or relaxation time, enhancing work-life balance.
  • Personalized Focus: Users can customize Focus Assist based on their needs, setting specific times or using triggers like active apps or location.

4. Snap Layouts and Snap Groups:

Windows 11 introduces improved multitasking capabilities with Snap Layouts and Snap Groups. These features allow users to arrange windows efficiently and easily switch between different layouts.

Benefits:

  • Enhanced Multitasking: Snap Layouts and Snap Groups allow users to manage multiple windows simultaneously, increasing efficiency and productivity.
  • Improved Screen Management: The ability to create and switch between different layouts optimizes screen space and improves user interface clarity.
  • Streamlined Workflows: Snap Layouts and Snap Groups facilitate smooth transitions between tasks, creating a more streamlined workflow.

5. Widgets:

Windows 11 introduces a dedicated widget panel, offering quick access to information and applications. These widgets provide personalized and dynamic content, enhancing the user experience.

Benefits:

  • Personalized Information: Widgets provide users with tailored information based on their interests and preferences.
  • Increased Efficiency: Quick access to frequently used applications and information through widgets saves time and enhances efficiency.
  • Enhanced User Experience: The dynamic and personalized nature of widgets creates a more engaging and user-friendly interface.

6. Enhanced Security Features:

Windows 11 has been designed with enhanced security features, aiming to protect user data and devices from threats.

Benefits:

  • Improved Protection: Advanced security features like Windows Defender Antivirus and Secure Boot provide robust protection against malware and unauthorized access.
  • Enhanced Privacy: Windows 11 offers improved privacy controls, allowing users to manage their data and control how it is used.
  • Increased Trust: The enhanced security features foster trust in the operating system and provide users with a secure environment for their data.

7. New File Explorer:

Windows 11 features a redesigned File Explorer with a cleaner interface, improved navigation, and enhanced functionality.

Benefits:

  • Enhanced User Experience: The new design offers a cleaner and more intuitive interface, simplifying navigation and file management.
  • Improved Organization: Features like tabs and a new ribbon interface enhance file organization and access.
  • Increased Efficiency: The streamlined design and improved functionality increase efficiency and allow users to manage files more effectively.

8. New Start Menu:

The Start Menu in Windows 11 has undergone a significant revamp, featuring a centered design and improved search functionality.

Benefits:

  • Modern Design: The new Start Menu offers a cleaner and more modern look, aligning with the overall design aesthetic of Windows 11.
  • Enhanced Search: The improved search functionality allows users to quickly find files, applications, and settings.
  • Simplified Access: The centralized design and improved organization provide easier access to frequently used applications and files.

FAQs:

Q: How can I install the Windows Subsystem for Android on my Windows 11 PC?

A: To install the Windows Subsystem for Android, you need to enable the "Virtual Machine Platform" and "Windows Subsystem for Linux" features in Windows Features. You then need to download the Amazon Appstore from the Microsoft Store and follow the instructions to install it.

Q: What are the system requirements for running Android apps on Windows 11?

A: To run Android apps on Windows 11, you need a PC with an Intel or AMD processor that supports virtualization technology, at least 8GB of RAM, and at least 20GB of available storage space.

Q: Can I use my existing Android apps on Windows 11?

A: You can install Android apps from the Amazon Appstore on Windows 11. However, you cannot directly transfer apps from your Android phone to your Windows PC.

Q: Is the Windows Subsystem for Android compatible with all Android apps?

A: The Windows Subsystem for Android is compatible with most Android apps. However, some apps may not be compatible or may not work as expected.

Tips:

  • Use Focus Assist: Set specific times or triggers for Focus Assist to minimize distractions and improve your focus during work or study sessions.
  • Experiment with Snap Layouts: Explore different Snap Layouts to find the most efficient way to manage multiple windows and optimize your screen space.
  • Customize Widgets: Add and remove widgets based on your preferences and interests to create a personalized widget panel that provides relevant information and quick access to your favorite applications.
  • Explore the new File Explorer: Take advantage of the new features in File Explorer, such as tabs and the ribbon interface, to improve file organization and navigation.
  • Utilize the new Start Menu: Explore the improved search functionality and the centralized design of the Start Menu to find applications and files quickly.

Conclusion:

Windows 11 is more than just a visual refresh. It represents a significant evolution in the Windows operating system, incorporating new features and programs that cater to the evolving needs of users. From the introduction of the Windows Subsystem for Android to the enhanced security features, these additions aim to improve user experience, enhance productivity, and solidify Windows 11 as a platform for seamless work, play, and communication. As Microsoft continues to develop and refine Windows 11, we can expect further innovations and improvements in the future, further enhancing the user experience and solidifying its position as a leading operating system.

Windows 11 Landscape Scenery [1920x1080] : r/wallpaper Download Windows 11 Landscape Microsoft 4k Wallpaper - vrogue.co This! 15+ Little Known Truths on Windows 11? Discover the new windows 11 and learn how to
Install Windows 11 On Virtualbox Virtual Machine How To Guide - Riset Navigating the IT Landscape: Exploring the Latest Trends and Innovations Navigating the AI Landscape: Exploring ChatGPT Alternatives
Navigating the New Landscape: Michigan Builders License Renewal 2024 - Blog Navigating the Learning Landscape: Exploring Technologies for Diverse Sectors

Closure

Thus, we hope this article has provided valuable insights into Navigating the New Landscape: Exploring Recent Additions to Windows 11. We thank you for taking the time to read this article. See you in our next article!

Reliving The Arena: A Guide To Downloading And Enjoying Quake III Arena On Windows 10

Reliving the Arena: A Guide to Downloading and Enjoying Quake III Arena on Windows 10

Introduction

In this auspicious occasion, we are delighted to delve into the intriguing topic related to Reliving the Arena: A Guide to Downloading and Enjoying Quake III Arena on Windows 10. Let’s weave interesting information and offer fresh perspectives to the readers.

Reliving the Arena: A Guide to Downloading and Enjoying Quake III Arena on Windows 10

Quake III Arena (1999) - PC Gameplay 4k 2160p / Win 10 - YouTube

Quake III Arena, a seminal first-person shooter (FPS) released in 1999, continues to hold a special place in gaming history. Its lightning-fast gameplay, iconic level design, and revolutionary engine set a new standard for the genre, influencing countless titles that followed. Despite its age, Quake III Arena remains remarkably playable on modern systems, particularly Windows 10. This article provides a comprehensive guide to downloading, installing, and enjoying this classic FPS on contemporary hardware.

Understanding Quake III Arena’s Legacy

Quake III Arena’s significance lies not only in its innovative gameplay but also in its enduring impact on the esports scene. Its fast-paced, skill-based combat, combined with its robust multiplayer features, made it a natural choice for competitive gaming. The game’s iconic maps, like "q3dm6" (commonly known as "The Longest Yard"), became battlegrounds for legendary players, fostering a vibrant community and paving the way for modern esports.

The Benefits of Playing Quake III Arena on Windows 10

While Quake III Arena’s original release predates the widespread adoption of Windows 10, the game’s design and engine have aged remarkably well. Here’s why playing it on a modern system offers a compelling experience:

  • Enhanced Performance: Windows 10’s powerful hardware and advanced operating system capabilities allow for smoother gameplay, higher frame rates, and improved visuals. This translates to a more responsive and immersive experience, especially for competitive play.
  • Accessibility: Modern PCs are generally more powerful than the systems available when Quake III Arena was released. This makes the game more accessible to a wider range of players, eliminating the need for expensive upgrades or specialized hardware.
  • Community and Legacy: Despite its age, Quake III Arena boasts a dedicated and active community. Numerous online servers offer a variety of gameplay modes, ensuring that players can find matches and connect with others who share their passion for the game.
  • Modding and Customization: Quake III Arena’s open-source nature has fostered a vibrant modding community. Players can customize their gameplay experience with new maps, skins, weapons, and even entire game modes, ensuring a constant stream of fresh content.

Downloading and Installing Quake III Arena on Windows 10

Several methods exist for acquiring and installing Quake III Arena on Windows 10. Each method offers its own advantages and considerations:

1. Steam: The most convenient and widely accessible option is purchasing Quake III Arena through Steam, the popular digital distribution platform. This method offers automatic updates, access to the Steam community, and integration with Steam’s networking features.

2. Quake III Arena: Team Arena: This version, available through the official Bethesda website, includes the "Team Arena" expansion pack, which introduces new game modes, weapons, and maps. While it offers additional content, it may require manual updates and lacks Steam integration.

3. Free Download (Legacy Version): The original version of Quake III Arena can be downloaded for free from various websites, including the official id Software website. This option offers a more authentic experience but lacks updates, online multiplayer support, and the content included in "Team Arena."

4. Quake III Arena: Open Source: The game’s source code is available publicly, allowing developers and enthusiasts to modify and distribute their own versions. This option offers maximum customization but requires technical knowledge and may lack official support.

Setting Up and Playing Quake III Arena on Windows 10

Once downloaded and installed, setting up Quake III Arena on Windows 10 is relatively straightforward:

  • Compatibility: Ensure your system meets the minimum requirements for the game. Quake III Arena is generally compatible with most modern systems, but older hardware may require adjustments to settings.
  • Graphics Settings: Adjust the game’s graphics settings to optimize performance and visual quality based on your system’s capabilities. Consider lowering settings for smoother gameplay on less powerful hardware.
  • Controls: Customize the game’s controls to your preference. The default controls are generally well-suited for the game’s fast-paced action, but you may find it beneficial to adjust them to your playing style.
  • Multiplayer: Find and join online servers through the game’s built-in browser or through dedicated third-party websites. Connect with other players, participate in matches, and experience the game’s competitive nature.

Troubleshooting Common Issues

While generally straightforward, downloading and playing Quake III Arena on Windows 10 may present some challenges. Here are some common issues and their solutions:

  • Compatibility Issues: If the game fails to launch or encounters errors, ensure you have the latest compatible drivers for your graphics card and operating system.
  • Network Connectivity: Ensure your internet connection is stable and that any firewalls or antivirus software are not blocking the game’s network access.
  • Game Crashes: Try updating your graphics drivers, lowering the game’s graphics settings, or verifying the game files for corruption.
  • Multiplayer Issues: Check the game’s official forums or websites for information on server issues or connectivity problems.

Frequently Asked Questions (FAQs)

Q: Can I play Quake III Arena online with friends?

A: Yes, Quake III Arena offers robust online multiplayer capabilities. You can connect with friends through dedicated servers, LAN parties, or through online matchmaking services.

Q: Does Quake III Arena support modern resolutions and aspect ratios?

A: Yes, Quake III Arena can be played in modern resolutions and aspect ratios. However, some older maps may not display correctly in widescreen resolutions.

Q: Are there any mods or custom content available for Quake III Arena?

A: Yes, a vast library of mods and custom content is available for Quake III Arena. These modifications can enhance the gameplay experience with new maps, weapons, skins, and even entirely new game modes.

Q: Does Quake III Arena require a specific controller?

A: Quake III Arena is primarily designed for mouse and keyboard controls, but it can also be played with controllers. However, the game’s fast-paced nature may be better suited for precise mouse movements.

Tips for Enjoying Quake III Arena on Windows 10

  • Master the Rocket Launcher: The rocket launcher is a powerful weapon in Quake III Arena, but it requires practice to master its trajectory and timing.
  • Utilize the "Strafe Jump": This technique, commonly used in Quake III Arena, allows players to quickly move around the map and dodge enemy fire.
  • Experiment with Different Maps: Each map in Quake III Arena offers unique gameplay opportunities. Explore different maps and discover the best strategies for each one.
  • Join a Community: Connect with other Quake III Arena players online or through dedicated forums. Sharing tips, strategies, and experiences can significantly enhance your enjoyment of the game.
  • Embrace the Fast-Paced Action: Quake III Arena is a game of quick reflexes and skillful maneuvering. Embrace the fast-paced action and enjoy the thrill of competitive gameplay.

Conclusion

Quake III Arena, despite its age, continues to offer a compelling and engaging gaming experience on modern systems like Windows 10. Its fast-paced gameplay, iconic level design, and enduring legacy make it a worthwhile addition to any gamer’s library. Whether you are a seasoned veteran or a newcomer to the arena, Quake III Arena offers a unique and rewarding experience that transcends time. By following this guide, you can download, install, and enjoy this classic FPS on your Windows 10 system, reliving the golden age of competitive gaming.

Quake 3 arena windows 10 - ballslaneta Quake III: Arena Screenshots for Windows - MobyGames Quake III: Arena Screenshots for Windows - MobyGames
Quake III: Arena Screenshots for Windows - MobyGames Quake III: Arena - Download Quake iii arena downloads - gplasopa
Quake III: Arena PC Download Completo - WiseGamer Quake III: Arena Screenshots for Windows - MobyGames

Closure

Thus, we hope this article has provided valuable insights into Reliving the Arena: A Guide to Downloading and Enjoying Quake III Arena on Windows 10. We thank you for taking the time to read this article. See you in our next article!

Navigating The User Folder Landscape In Windows 11: A Comprehensive Guide

Navigating the User Folder Landscape in Windows 11: A Comprehensive Guide

Introduction

With enthusiasm, let’s navigate through the intriguing topic related to Navigating the User Folder Landscape in Windows 11: A Comprehensive Guide. Let’s weave interesting information and offer fresh perspectives to the readers.

Windows 11 User Folder

Windows 11, like its predecessors, employs a user-centric file organization system. Each user account on the system is assigned a dedicated folder, often referred to as the "user profile folder," which serves as a central repository for their personal data, settings, and applications. This folder, typically found within the "Users" directory on the system drive, is crucial for maintaining user-specific preferences and ensuring a personalized computing experience.

Understanding the User Folder Structure:

The user profile folder is a hierarchical structure, containing various subfolders and files that cater to different aspects of a user’s digital life. These include:

  • Documents: This folder stores user-created documents, such as text files, spreadsheets, presentations, and images.
  • Downloads: This folder is the default destination for downloaded files from the internet.
  • Music: This folder stores music files, including audio tracks, albums, and playlists.
  • Pictures: This folder stores images and photographs.
  • Videos: This folder stores video files, including movies, TV shows, and personal recordings.
  • Desktop: This folder contains shortcuts to frequently used applications and files, as well as any files placed directly on the desktop.
  • AppData: This hidden folder contains application-specific data, settings, and configuration files.
  • LocalAppData: This folder stores temporary data and application cache files.
  • Favorites: This folder stores links to websites and files that users have marked as favorites.
  • Contacts: This folder stores contact information, such as names, phone numbers, and email addresses.

The Importance of User Folder Management:

Renaming the user folder, while seemingly a simple action, can have significant implications. It is often necessary in situations such as:

  • Troubleshooting System Issues: A corrupted or problematic user profile can lead to various system errors. Renaming the folder can help isolate the issue and facilitate troubleshooting.
  • Migrating User Accounts: When transferring user data from one computer to another, renaming the user folder can streamline the process and ensure proper data transfer.
  • Creating Multiple User Accounts: Renaming the user folder allows for the creation of distinct user accounts without conflicts.
  • Customizing User Experience: Renaming the user folder can be a way to personalize the computing environment, particularly for users who prefer a specific naming convention.

Renaming the User Folder in Windows 11:

While the process of renaming a user folder is relatively straightforward, it’s crucial to exercise caution and follow the correct steps to avoid data loss or system instability. Here’s a step-by-step guide:

  1. Log out of the User Account: Before attempting to rename the user folder, ensure that you are logged out of the account associated with the folder. This is essential to prevent data corruption and ensure a smooth renaming process.
  2. Open File Explorer: Navigate to the "Users" folder within the system drive. You can access File Explorer by pressing the Windows key + E or by clicking the File Explorer icon on the taskbar.
  3. Locate the User Folder: Identify the folder representing the user account you wish to rename. The folder name will usually match the user account name.
  4. Rename the Folder: Right-click on the user folder and select "Rename" from the context menu. Enter the desired new name for the folder and press Enter.
  5. Restart the System: After renaming the folder, it’s essential to restart the system to ensure that the changes are applied correctly.

Important Considerations:

  • System Stability: Renaming a user folder can potentially affect system stability. It’s crucial to ensure that all applications and processes associated with the user account are closed before renaming the folder.
  • Data Loss: Renaming a user folder without proper precautions can lead to data loss. It’s advisable to back up important data before proceeding with the renaming process.
  • System Permissions: Renaming a user folder may require administrative privileges. If you encounter any issues, ensure that you are logged in with an administrator account.

FAQs about Renaming the User Folder:

Q: What happens if I rename the user folder while the account is logged in?

A: Renaming a user folder while the account is logged in can lead to data corruption and system instability. It’s crucial to log out of the account before attempting to rename the folder.

Q: Can I rename the user folder to an existing folder name?

A: Renaming the user folder to an existing folder name will likely result in a conflict. It’s advisable to choose a unique name for the renamed folder.

Q: Will renaming the user folder affect my applications and settings?

A: Renaming the user folder will not directly affect your applications and settings. However, it can potentially disrupt the ability of applications to access their data and settings.

Q: What if I accidentally rename the user folder to an incorrect name?

A: If you accidentally rename the user folder to an incorrect name, you can undo the change by right-clicking the folder and selecting "Rename" again. Enter the original folder name and press Enter.

Tips for Renaming User Folders:

  • Back up your data: Before attempting to rename the user folder, back up all important data to an external storage device or cloud service.
  • Check for running processes: Ensure that all applications and processes associated with the user account are closed before renaming the folder.
  • Use a unique name: Choose a unique name for the renamed folder to avoid conflicts.
  • Restart your system: After renaming the folder, restart your system to ensure that the changes are applied correctly.
  • Consider using a system restore point: Before making any major changes to your system, it’s advisable to create a system restore point. This allows you to revert to a previous state if any issues arise.

Conclusion:

Renaming a user folder in Windows 11 can be a necessary step for troubleshooting, migrating user accounts, or customizing the user experience. However, it’s crucial to approach this task with caution and follow the correct procedures to avoid data loss or system instability. By understanding the importance of user folders and adhering to the best practices outlined in this guide, users can navigate the user folder landscape effectively and maintain a stable and personalized computing environment.

Buy Windows 11 User Guide for Beginners: A Comprehensive Guide to Master Windows 11 Operating How to Show or Hide Navigation Pane in Windows 11 File Explorer? 10 Steps to Successfully Change Your User Folder Name in Windows 11: A Comprehensive Guide
Buy Windows 11 User Guide: A Complete Guide to Master the New Windows 11 OS with Tips and Tricks Change User Name Windows 11, Rename User Folder Windows 11 How To Change Your User Folder Name In Windows 11 - vrogue.co
How to Move Default User Folders on Windows 11 How to Change Your User Folder Name in Windows 11

Closure

Thus, we hope this article has provided valuable insights into Navigating the User Folder Landscape in Windows 11: A Comprehensive Guide. We thank you for taking the time to read this article. See you in our next article!

A Comprehensive Guide To Microsoft PowerPoint On Windows 10

A Comprehensive Guide to Microsoft PowerPoint on Windows 10

Introduction

In this auspicious occasion, we are delighted to delve into the intriguing topic related to A Comprehensive Guide to Microsoft PowerPoint on Windows 10. Let’s weave interesting information and offer fresh perspectives to the readers.

A Comprehensive Guide to Microsoft PowerPoint on Windows 10

A Guide to Microsoft Powerpoint and How to Use It

Microsoft PowerPoint, a ubiquitous presentation software, remains a cornerstone of professional communication. Its versatility and user-friendly interface make it ideal for creating visually engaging presentations, reports, and even multimedia content. This article delves into the intricacies of obtaining and utilizing PowerPoint on a Windows 10 operating system, highlighting its significance in today’s digital landscape.

Understanding the Importance of PowerPoint

PowerPoint’s prominence stems from its ability to transform complex information into digestible and impactful visual narratives. Its features allow users to:

  • Organize and Structure Information: Slides provide a logical framework for presenting data, arguments, or ideas in a clear and concise manner.
  • Enhance Visual Appeal: PowerPoint offers a wide array of design elements, including templates, themes, and multimedia capabilities, to create visually stimulating presentations.
  • Engage Audiences: Interactive features like animations, transitions, and video embedding can captivate audiences and enhance information retention.
  • Promote Collaboration: Shared editing and presentation capabilities enable seamless teamwork, facilitating efficient communication and idea exchange.

Obtaining PowerPoint on Windows 10

There are several ways to acquire PowerPoint on Windows 10, each catering to specific needs and preferences:

1. Microsoft 365 Subscription:

  • Benefits: Access to the latest version of PowerPoint, along with other Microsoft Office applications, including Word, Excel, and Outlook. Cloud storage and collaboration features are included.
  • Considerations: Requires a recurring subscription fee.

2. Standalone Purchase:

  • Benefits: One-time purchase of PowerPoint for individual use.
  • Considerations: Users may not have access to the latest features or cloud storage capabilities.

3. Free Trial:

  • Benefits: Allows users to explore PowerPoint’s functionalities without commitment.
  • Considerations: Limited in duration, and may require registration.

4. Educational Versions:

  • Benefits: Available at discounted rates for students and educators.
  • Considerations: Eligibility requirements may apply.

5. Open Source Alternatives:

  • Benefits: Free to use and often offer comparable functionality to PowerPoint.
  • Considerations: May lack the same level of feature integration or user-friendliness as PowerPoint.

Installation and Setup

Once acquired, installing PowerPoint on Windows 10 is typically a straightforward process:

  1. Download: Download the installation file from the Microsoft website or your preferred source.
  2. Run: Double-click the downloaded file to initiate the installation process.
  3. Follow Instructions: Follow the on-screen prompts to complete the installation.
  4. Activate: If required, activate your copy of PowerPoint using a product key or subscription.

Navigating PowerPoint’s Interface

PowerPoint’s interface is designed for intuitive navigation:

  • Ribbon: The topmost bar contains various tabs with groups of commands related to specific tasks, such as "Home," "Insert," "Design," and "Transitions."
  • Slide Pane: The left-hand side displays thumbnails of all slides in the presentation.
  • Slide Area: The main central area where you create and edit slides.
  • Notes Pane: At the bottom, a section for adding speaker notes visible only to the presenter.

Creating a Presentation

  1. Choose a Template: Select a pre-designed template or start with a blank slide.
  2. Add Content: Insert text, images, charts, graphs, videos, and audio into slides.
  3. Format and Design: Customize the appearance of slides using themes, fonts, colors, and animations.
  4. Add Transitions and Animations: Enhance visual flow and engagement with slide transitions and animation effects.
  5. Insert Multimedia: Embed videos, audio files, and interactive elements to enhance presentation impact.
  6. Review and Edit: Proofread content, adjust formatting, and ensure slides flow logically.

Presenting Your Work

  1. Slide Show View: Transition to slide show mode to present your presentation.
  2. Navigation: Use keyboard arrows, mouse clicks, or remote controls to advance slides.
  3. Presenter View: Utilize presenter view to see upcoming slides, speaker notes, and a timer.

PowerPoint’s Versatility: Beyond Presentations

PowerPoint’s functionality extends beyond traditional presentations. It can be used for:

  • Creating Infographics: Visualize data and information in an engaging and easily digestible format.
  • Designing Brochures and Flyers: Create visually appealing marketing materials with professional layouts.
  • Developing Training Materials: Design interactive modules for employee training or educational purposes.
  • Storyboarding: Visualize scenes and sequences for video production or film projects.

FAQs Regarding PowerPoint on Windows 10

1. What are the system requirements for running PowerPoint on Windows 10?

PowerPoint requires a minimum of 1 GB RAM, 3 GB free hard disk space, and a screen resolution of 1024 x 768. However, for optimal performance, it is recommended to have a more powerful system with at least 4 GB RAM and a higher resolution display.

2. Is PowerPoint compatible with other Microsoft Office applications?

Yes, PowerPoint integrates seamlessly with other Microsoft Office applications, allowing for easy data transfer and collaboration.

3. Can I access my PowerPoint presentations from multiple devices?

Yes, by using cloud storage services like OneDrive, you can access and edit your presentations from various devices, including PCs, tablets, and smartphones.

4. What are the best practices for creating effective PowerPoint presentations?

  • Keep slides concise and visually appealing.
  • Use high-quality images and graphics.
  • Limit text on each slide.
  • Use clear and consistent formatting.
  • Practice your presentation beforehand.

5. Are there any free alternatives to PowerPoint?

Yes, there are several free open-source alternatives, such as Google Slides and LibreOffice Impress.

Tips for Optimizing Your PowerPoint Experience

  • Utilize Templates: Start with pre-designed templates to save time and ensure professional aesthetics.
  • Explore Animations and Transitions: Use animations and transitions sparingly and strategically to enhance visual flow without overwhelming the audience.
  • Embrace Multimedia: Incorporate videos, audio clips, and interactive elements to engage audiences and make presentations more memorable.
  • Practice and Rehearse: Practice your presentation beforehand to ensure smooth delivery and confidence.
  • Seek Feedback: Share your presentation with colleagues or friends to gather constructive criticism and improve its effectiveness.

Conclusion

Microsoft PowerPoint remains an indispensable tool for effective communication in today’s digital world. Its versatility, user-friendliness, and extensive features empower individuals and organizations to create compelling presentations, reports, and multimedia content. By understanding the nuances of obtaining, installing, and utilizing PowerPoint on Windows 10, users can unlock its full potential and elevate their communication skills to new heights.

Microsoft PowerPoint for Beginners - Complete Course - YouTube Microsoft Power Point  How to open PowerPoint in Windows 10  How to open PowerPoint  - YouTube How to Record Your Screen with Microsoft PowerPoint in Windows 10 - Dignited
Microsoft PowerPoint - Microsoft Office & Windows 10 - Research guides at Camosun College Library The Ultimate Beginnerโ€™s Guide to Microsoft PowerPoint: From Newbie to Master How To Record Windows 10 Screen Using Microsoft PowerPoint  LaptrinhX
Ppt Windows 10 The Top Features Powerpoint Presentati - vrogue.co MS-PowerPoint Interface and components - Tutorial

Closure

Thus, we hope this article has provided valuable insights into A Comprehensive Guide to Microsoft PowerPoint on Windows 10. We hope you find this article informative and beneficial. See you in our next article!

A Fresh Look Every Day: Exploring Windows 11’s Dynamic Wallpapers

A Fresh Look Every Day: Exploring Windows 11’s Dynamic Wallpapers

Introduction

With great pleasure, we will explore the intriguing topic related to A Fresh Look Every Day: Exploring Windows 11’s Dynamic Wallpapers. Let’s weave interesting information and offer fresh perspectives to the readers.

A Fresh Look Every Day: Exploring Windows 11’s Dynamic Wallpapers

Windows 11 - Dynamic Wallpaper Club

Windows 11, Microsoft’s latest operating system, introduces a captivating feature that breathes life into the desktop experience: dynamic wallpapers. This innovative functionality presents users with a new, visually stunning background image every day, transforming the user interface into a dynamic canvas that reflects the ever-changing world around us.

Understanding the Essence of Dynamic Wallpapers

Dynamic wallpapers are more than just a cosmetic enhancement. They represent a shift in the way users interact with their digital environment. By seamlessly transitioning between a curated selection of images, these wallpapers create a sense of novelty and engagement, fostering a more personalized and visually stimulating desktop experience.

The Mechanics of Dynamic Wallpaper Functionality

Windows 11’s dynamic wallpapers leverage a carefully curated collection of high-quality images that are automatically updated on a daily basis. The selection process involves a combination of factors, including:

  • Time of Day: The wallpaper may change based on the time of day, reflecting the transition from dawn to dusk, or the vibrancy of midday.
  • Seasonal Changes: Images can be tailored to reflect the current season, showcasing the beauty of spring blossoms, the warmth of summer sunsets, the crispness of autumn foliage, or the serenity of winter landscapes.
  • Events and Holidays: Special occasions like holidays or significant events might trigger unique wallpaper themes, adding a touch of festivity or commemoration to the desktop.

Benefits of Embracing Dynamic Wallpapers

The implementation of dynamic wallpapers in Windows 11 offers numerous benefits, enhancing the user experience in various ways:

  • Visual Stimulation and Engagement: The constant flow of fresh imagery keeps the desktop visually engaging, preventing monotony and fostering a sense of discovery.
  • Personalization and Expression: Users can customize their wallpaper preferences, selecting themes and styles that resonate with their individual tastes and interests.
  • Mood Enhancement: The carefully curated images can evoke positive emotions, creating a more enjoyable and inspiring desktop environment.
  • Improved Focus and Productivity: By providing a visually stimulating backdrop, dynamic wallpapers can help users stay focused and engaged with their tasks.
  • Enhanced User Experience: The overall aesthetic appeal of the desktop is elevated, creating a more visually appealing and dynamic interface.

Exploring the Customization Options

Windows 11 empowers users to tailor their dynamic wallpaper experience to their preferences. Users can:

  • Choose Preferred Themes: Select from a range of themes, including nature, cityscapes, abstract art, or even personalized collections.
  • Adjust Wallpaper Update Frequency: Determine how often the wallpaper changes, whether it’s daily, hourly, or based on specific events.
  • Disable Dynamic Wallpapers: If desired, users can disable the feature and revert to a static wallpaper of their choice.

FAQs: Addressing Common Queries

Q: How do I enable dynamic wallpapers in Windows 11?

A: Dynamic wallpapers are enabled by default in Windows 11. However, if you wish to customize the settings or disable the feature, you can navigate to Settings > Personalization > Background and adjust the options accordingly.

Q: Can I choose my own images for dynamic wallpapers?

A: Currently, Windows 11 does not support using custom images for dynamic wallpapers. The feature relies on a curated library of images provided by Microsoft.

Q: What if I don’t like the current dynamic wallpaper?

A: You can easily change the wallpaper by right-clicking on the desktop and selecting "Choose a new background." You can also adjust the wallpaper update frequency to your liking.

Q: Does dynamic wallpaper affect system performance?

A: Dynamic wallpapers are designed to be resource-efficient and have minimal impact on system performance. The image updates are optimized to ensure a smooth user experience.

Tips for Maximizing the Dynamic Wallpaper Experience

  • Explore Different Themes: Experiment with various themes to find the ones that best suit your tastes and interests.
  • Adjust Wallpaper Update Frequency: If you find the daily updates too frequent, consider adjusting the frequency to suit your preferences.
  • Maximize Visual Impact: Ensure your display settings are optimized for high-quality image rendering to fully appreciate the visual beauty of the dynamic wallpapers.

Conclusion: A Dynamic Desktop for a Dynamic World

Windows 11’s dynamic wallpapers represent a significant step forward in the evolution of the desktop experience. By offering a constant stream of visually captivating images, they elevate the user interface, fostering a sense of personalization, engagement, and visual delight. This innovative feature not only enhances the aesthetic appeal of the desktop but also provides a dynamic backdrop that reflects the ever-changing world around us.

Windows 11 - Dynamic Wallpaper Club Windows 11 - Dynamic Wallpaper Club Windows 11 Wallpaper 2 Monitors 2024 - Win 11 Home Upgrade 2024
Windows 11 Bloom - Dynamic Wallpaper Club Windows 11 Abstract - Dynamic Wallpaper Club Windows 11 - Dynamic Wallpaper Club
Steam Workshop::Original 4K, Windows 11 Dynamic Wallpaper (Internet Based) Windows 11 - Dynamic Wallpaper Club

Closure

Thus, we hope this article has provided valuable insights into A Fresh Look Every Day: Exploring Windows 11’s Dynamic Wallpapers. We hope you find this article informative and beneficial. See you in our next article!

Understanding Windows 11: The Key To Unlocking Your Digital Experience

Understanding Windows 11: The Key to Unlocking Your Digital Experience

Introduction

With enthusiasm, let’s navigate through the intriguing topic related to Understanding Windows 11: The Key to Unlocking Your Digital Experience. Let’s weave interesting information and offer fresh perspectives to the readers.

Understanding Windows 11: The Key to Unlocking Your Digital Experience

Unlocking Windows 11: Navigating Pricing Options and Editions  HTML KICK

Windows 11, the latest iteration of Microsoft’s operating system, presents a refined and innovative digital landscape for users. This comprehensive guide delves into the intricate workings of a Windows 11 key, its significance in unlocking the full potential of the operating system, and the various aspects that contribute to a seamless and efficient user experience.

The Significance of a Windows 11 Key

A Windows 11 key serves as a unique digital identifier, acting as a license to activate and use the operating system on a specific device. It is akin to a digital passport, verifying the legitimacy of the software installation and granting access to its full range of features and functionalities.

The Role of Activation

Activation is the process of verifying the authenticity of the Windows 11 installation using a valid key. This process ensures that the user has obtained the software through legitimate means and is entitled to use its features. Activation also enables access to critical updates and security patches, safeguarding the device from vulnerabilities and ensuring optimal performance.

Types of Windows 11 Keys

Windows 11 keys are categorized into different types, each tailored to specific user needs and scenarios:

  • Retail Keys: These keys are typically purchased individually and can be used to activate Windows 11 on a single device. They offer flexibility and are suitable for individual users or small businesses.
  • OEM Keys: These keys are pre-installed on new devices by manufacturers. They are typically tied to the specific hardware configuration of the device and cannot be transferred to another machine.
  • Volume License Keys: Designed for large organizations, these keys allow for the activation of multiple devices with a single license. They often offer cost-effective solutions for businesses with extensive IT infrastructure.
  • Upgrade Keys: These keys are used to upgrade an existing Windows 10 installation to Windows 11. They provide a convenient pathway for users who want to experience the latest features without a complete system reinstallation.

The Benefits of a Genuine Windows 11 Key

Using a legitimate Windows 11 key offers a range of benefits, ensuring a secure and optimized digital experience:

  • Full Feature Access: A genuine key unlocks the full spectrum of Windows 11 features, including advanced security measures, multimedia capabilities, and productivity tools.
  • Software Updates: Regular updates deliver critical security patches, bug fixes, and performance enhancements, ensuring a stable and secure operating environment.
  • Technical Support: Users with genuine keys are entitled to receive technical support from Microsoft, ensuring prompt assistance with any issues encountered.
  • Legal Compliance: Using a genuine key complies with licensing agreements and avoids potential legal repercussions associated with software piracy.

FAQs about Windows 11 Keys

1. Can I use a Windows 11 key on multiple devices?

No, a Windows 11 key is typically tied to a specific device. However, some keys, like volume license keys, may allow for activation on multiple devices within a defined network.

2. What happens if I don’t activate Windows 11?

An unactivated Windows 11 installation will have limited functionality. Certain features, like personalization options and access to updates, may be restricted. The operating system might also display constant reminders to activate the installation.

3. Can I transfer my Windows 11 key to a different computer?

In most cases, a retail Windows 11 key can be transferred to a different computer after deactivating it on the original device. However, OEM keys are typically tied to the specific hardware and cannot be transferred.

4. What if I lose my Windows 11 key?

If you lose your Windows 11 key, you may be able to retrieve it from your Microsoft account or through the product packaging. However, if you cannot locate the key, you may need to purchase a new one.

5. Can I use a Windows 10 key to activate Windows 11?

No, Windows 10 keys are not compatible with Windows 11. You will need a separate Windows 11 key to activate the operating system.

Tips for Managing Your Windows 11 Key

  • Store Your Key Securely: Keep your Windows 11 key in a safe and easily accessible location, such as a password manager or a secure document.
  • Back Up Your Key: Make a backup copy of your key in case of data loss or accidental deletion.
  • Verify Your Key: Before purchasing a key, ensure its authenticity by checking the vendor’s reputation and legitimacy.
  • Avoid Pirated Keys: Using pirated keys is illegal and can expose your device to malware and security risks.
  • Contact Microsoft Support: If you have any issues with your Windows 11 key or activation, contact Microsoft support for assistance.

Conclusion

A Windows 11 key is an essential component of the operating system, unlocking its full potential and ensuring a secure, reliable, and fully functional digital experience. By understanding the different types of keys, their benefits, and proper management practices, users can navigate the world of Windows 11 with confidence and maximize their digital productivity.

Unpick the Potential of Windows 11 Enterprise: Your Guide to Product Key Activation  by How to unlock taskbar on windows 11, Turn-off Taskbar Lock Left, Right, Top, Bottom & Resize The key to unlocking the value of the digital revolution - Med-Tech Innovation
The key characteristics for unlocking digital transformation success. [Tip] How to Unlock and Resize the Taskbar in Windows 11 โ€“ AskVG How To Unlock Taskbar Windows 11 Tutorial - YouTube
Lock Keyboard Windows 11 How to Lock and Unlock Function (Fn) key in Windows 11/10 - YouTube

Closure

Thus, we hope this article has provided valuable insights into Understanding Windows 11: The Key to Unlocking Your Digital Experience. We thank you for taking the time to read this article. See you in our next article!

The Power Of The Command Line: Exploring The PS App For Windows 10

The Power of the Command Line: Exploring the PS App for Windows 10

Introduction

In this auspicious occasion, we are delighted to delve into the intriguing topic related to The Power of the Command Line: Exploring the PS App for Windows 10. Let’s weave interesting information and offer fresh perspectives to the readers.

The Power of the Command Line: Exploring the PS App for Windows 10

How to Check Windows 10 Version in 4 Easy Ways

The Windows 10 operating system offers a diverse array of tools and features to manage and interact with the computer. Among these, the PowerShell application, commonly referred to as the PS app, stands as a powerful and versatile command-line interface that empowers users to automate tasks, manage system settings, and perform advanced operations. This article delves into the intricacies of PowerShell, highlighting its significance, benefits, and applications within the Windows 10 ecosystem.

Understanding the PS App: A Gateway to System Control

PowerShell serves as a scripting language and a command-line shell, providing a robust platform for interacting with the Windows operating system. Unlike the traditional Command Prompt, PowerShell offers a more sophisticated environment with advanced features and capabilities. It leverages the .NET Framework, enabling users to execute commands, manipulate data, and automate complex tasks with greater efficiency.

Key Features and Capabilities of the PS App

  1. Command-Line Interaction: PowerShell allows users to execute commands directly within the console window, providing immediate feedback and control over system operations.

  2. Scripting Language: PowerShell supports a powerful scripting language, enabling users to create and execute automated scripts for repetitive tasks or complex workflows. Scripts can be used to manage user accounts, configure system settings, or automate software deployments.

  3. Object-Oriented Design: PowerShell operates on a foundation of objects, allowing for more structured and efficient data manipulation. Objects represent real-world entities, such as files, processes, and system services, enabling users to interact with them in a more intuitive manner.

  4. Modules and Cmdlets: PowerShell utilizes a modular structure, providing a library of pre-built components known as modules and cmdlets. Modules contain a collection of related cmdlets, which are individual commands designed to perform specific tasks. This modularity allows for easy expansion and customization of PowerShell functionality.

  5. Remote Management: PowerShell enables users to manage and control remote computers, facilitating centralized administration and automation across a network. This capability is particularly valuable for organizations with multiple systems.

Benefits of Using the PS App

  1. Increased Efficiency: PowerShell automates repetitive tasks, saving time and effort for users and administrators.

  2. Enhanced System Control: PowerShell provides a comprehensive platform for managing system settings, user accounts, and software installations, empowering users with greater control over their environment.

  3. Advanced Scripting: The PowerShell scripting language enables users to create sophisticated and customized scripts, automating complex workflows and tailoring solutions to specific needs.

  4. Centralized Management: PowerShell facilitates centralized management of multiple systems, allowing administrators to manage and control remote computers efficiently.

  5. Improved Security: PowerShell offers enhanced security features, including access control mechanisms and the ability to perform actions with elevated privileges, ensuring secure and controlled system operations.

Applications of the PS App in Windows 10

PowerShell finds widespread application in various domains, empowering users and administrators to perform a wide range of tasks:

  1. System Administration: PowerShell is an indispensable tool for system administrators, enabling them to manage user accounts, configure system settings, monitor system health, and automate routine tasks.

  2. Software Deployment: PowerShell can be used to automate software deployments, ensuring consistent and efficient installation across multiple systems.

  3. Data Management: PowerShell can be used to manipulate data, extract information from various sources, and automate data processing tasks.

  4. Network Management: PowerShell provides tools for managing network devices, configuring network settings, and troubleshooting network issues.

  5. Security Management: PowerShell offers capabilities for managing security policies, monitoring security events, and responding to security threats.

FAQs about the PS App for Windows 10

Q: What are the prerequisites for using PowerShell?

A: PowerShell is integrated into Windows 10, so no additional installations are required. However, some advanced modules may require separate installation.

Q: How can I access PowerShell?

A: You can access PowerShell by searching for "PowerShell" in the Windows search bar or by opening the "Windows PowerShell" app from the Start menu.

Q: Is PowerShell suitable for beginners?

A: While PowerShell offers advanced features, it also provides a learning curve. Beginners can start with basic commands and gradually explore more complex functionalities. There are numerous online resources and tutorials available to assist with learning PowerShell.

Q: How can I learn more about PowerShell?

A: Microsoft provides extensive documentation and tutorials on PowerShell, accessible through the official website and online resources. There are also numerous books and online courses dedicated to teaching PowerShell.

Q: Can PowerShell be used to perform malicious actions?

A: Like any powerful tool, PowerShell can be used for malicious purposes. However, Windows 10 implements security measures to mitigate risks associated with PowerShell, and proper usage practices can minimize security vulnerabilities.

Tips for Using the PS App

  1. Start with Basic Commands: Begin by familiarizing yourself with fundamental PowerShell commands and syntax.

  2. Explore Help Documentation: Utilize the Get-Help cmdlet to access detailed information about specific commands and modules.

  3. Utilize Online Resources: Leverage online resources such as Microsoft documentation, community forums, and tutorials to learn and troubleshoot PowerShell.

  4. Practice Regularly: Consistent practice is key to mastering PowerShell. Experiment with different commands and scripts to develop proficiency.

  5. Use Scripts for Automation: Leverage PowerShell scripts to automate repetitive tasks, saving time and effort.

Conclusion

The PS app, or PowerShell, represents a powerful and versatile tool within the Windows 10 ecosystem. Its command-line interface, scripting language, and object-oriented design empower users to manage system settings, automate tasks, and perform advanced operations with greater efficiency. By leveraging the capabilities of PowerShell, users and administrators can enhance system control, improve productivity, and optimize their overall Windows 10 experience.

Playstation App For Windows 10 - Splash Windows Command Line Tutorial - 1 - Introduction to the Command Prompt  command prompt windows Command prompt commands for windows 10 - gameskurt
Windows Command Line Tutorial - 1 - Introduction to the Command Prompt  command prompt windows Introduction to the Windows Command Line with PowerShell  Programming Historian Windows command line - mommyaca
How to use a Command Line switch on Windows 10 Command prompt commands windows 10 list - hopperkurt

Closure

Thus, we hope this article has provided valuable insights into The Power of the Command Line: Exploring the PS App for Windows 10. We thank you for taking the time to read this article. See you in our next article!