The Challenges Of Bypassing Windows 11’s Out-of-Box Experience (OOBE)

The Challenges of Bypassing Windows 11’s Out-of-Box Experience (OOBE)

Introduction

With great pleasure, we will explore the intriguing topic related to The Challenges of Bypassing Windows 11’s Out-of-Box Experience (OOBE). Let’s weave interesting information and offer fresh perspectives to the readers.

The Challenges of Bypassing Windows 11’s Out-of-Box Experience (OOBE)

What's new with the Out-of-box Experience (OOBE) on Windows 11 2022 Update  Windows Central

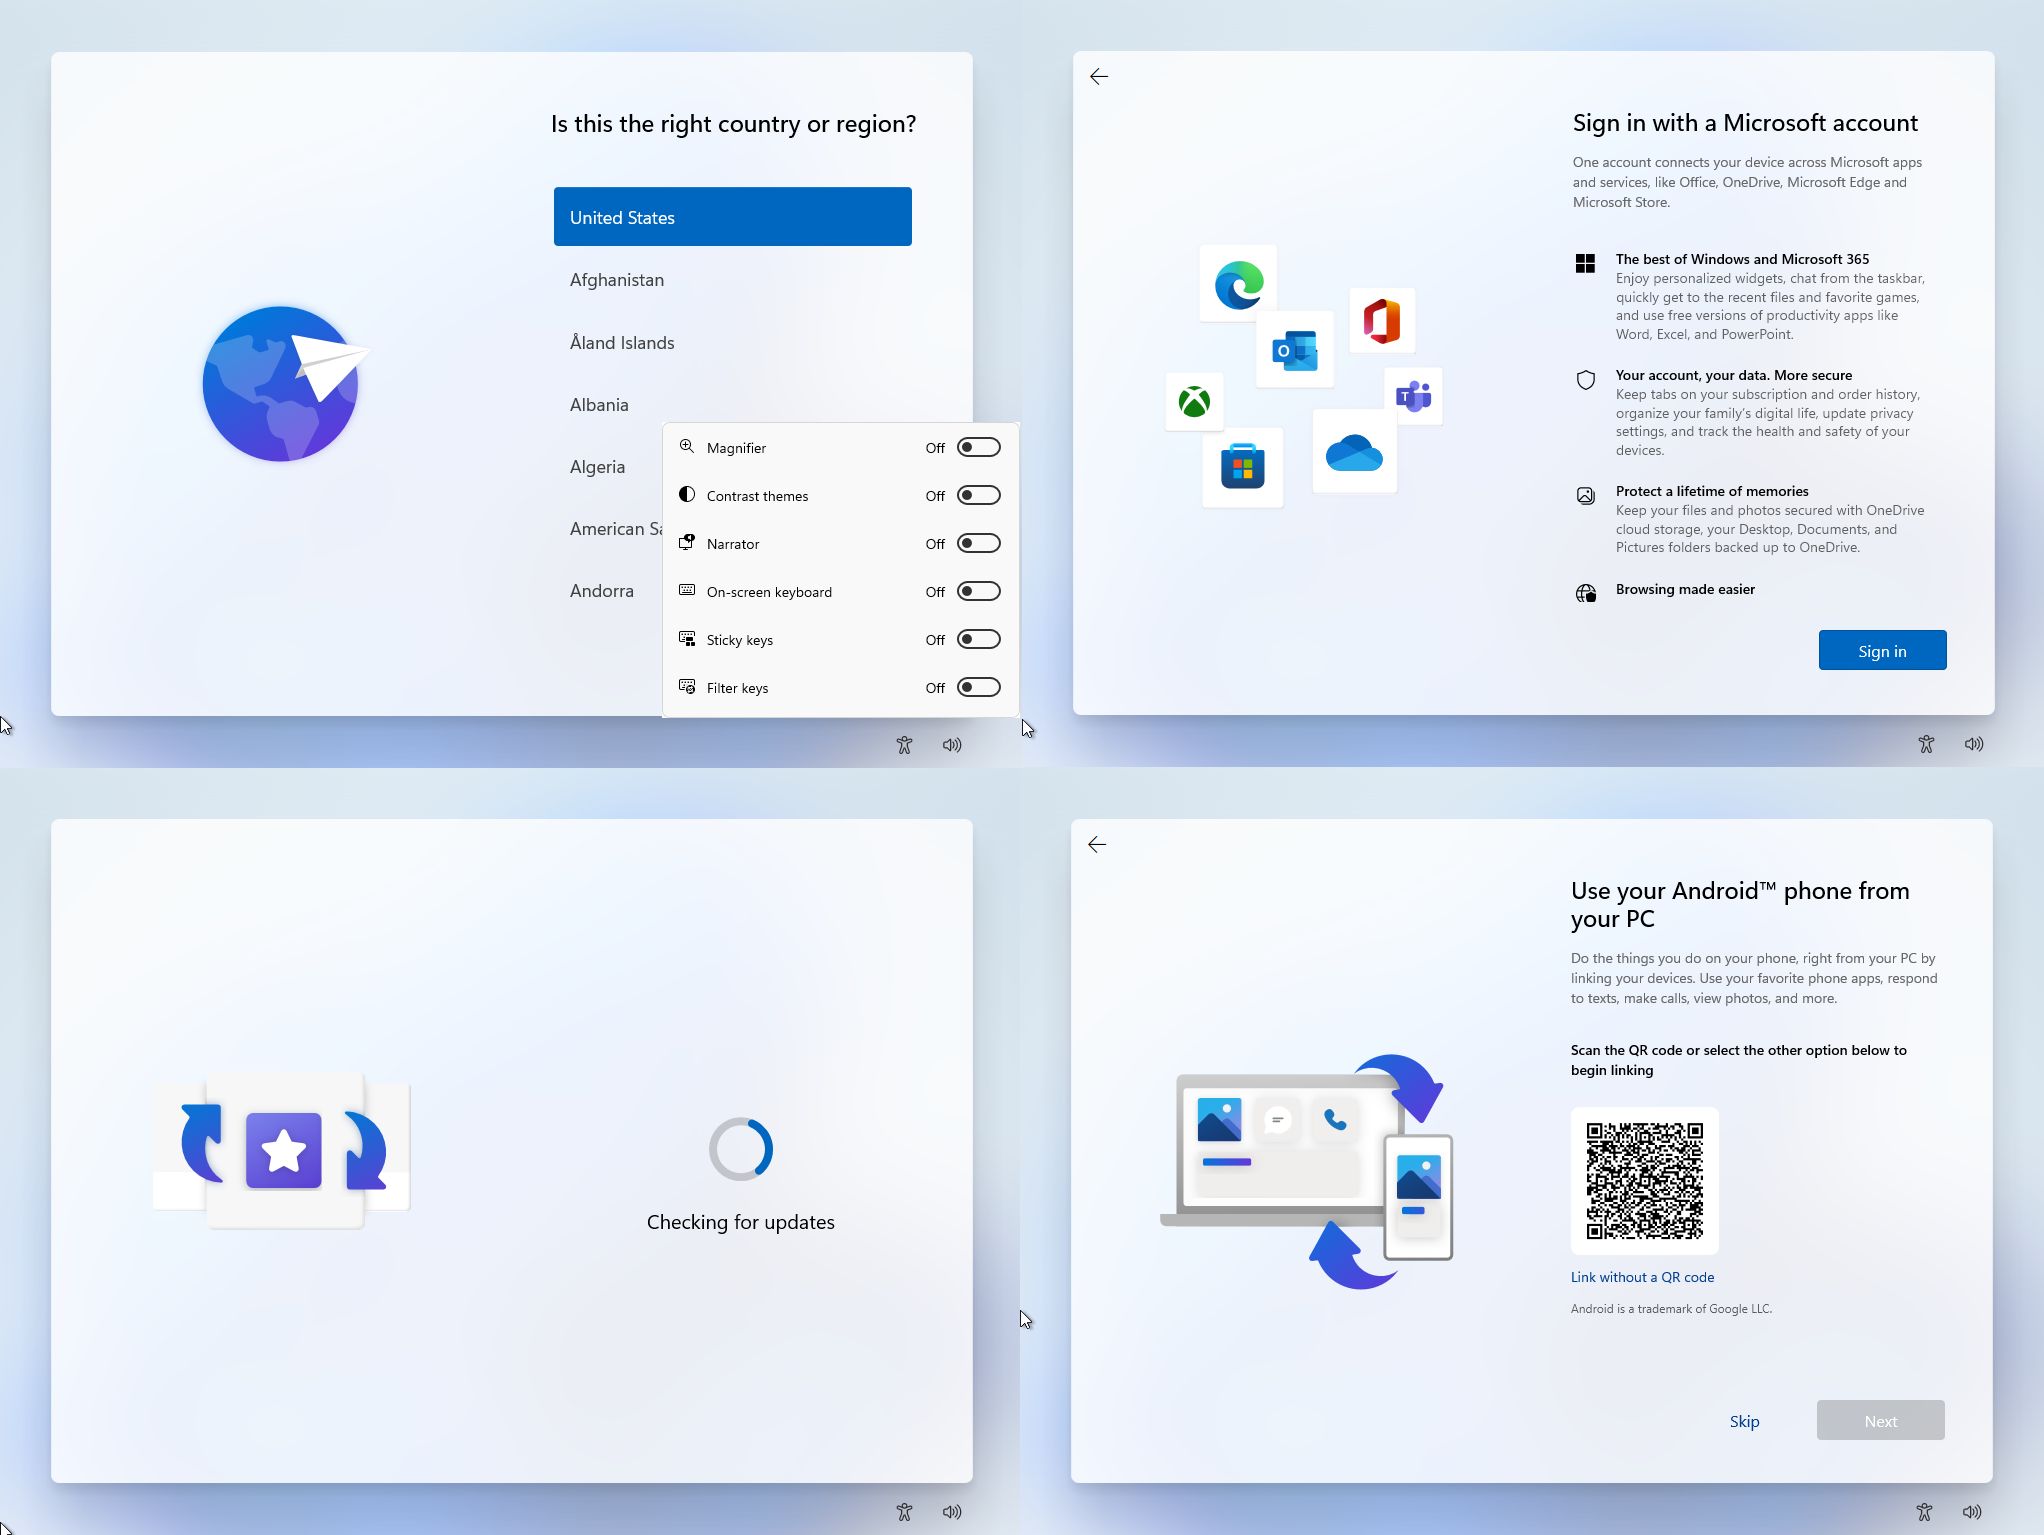
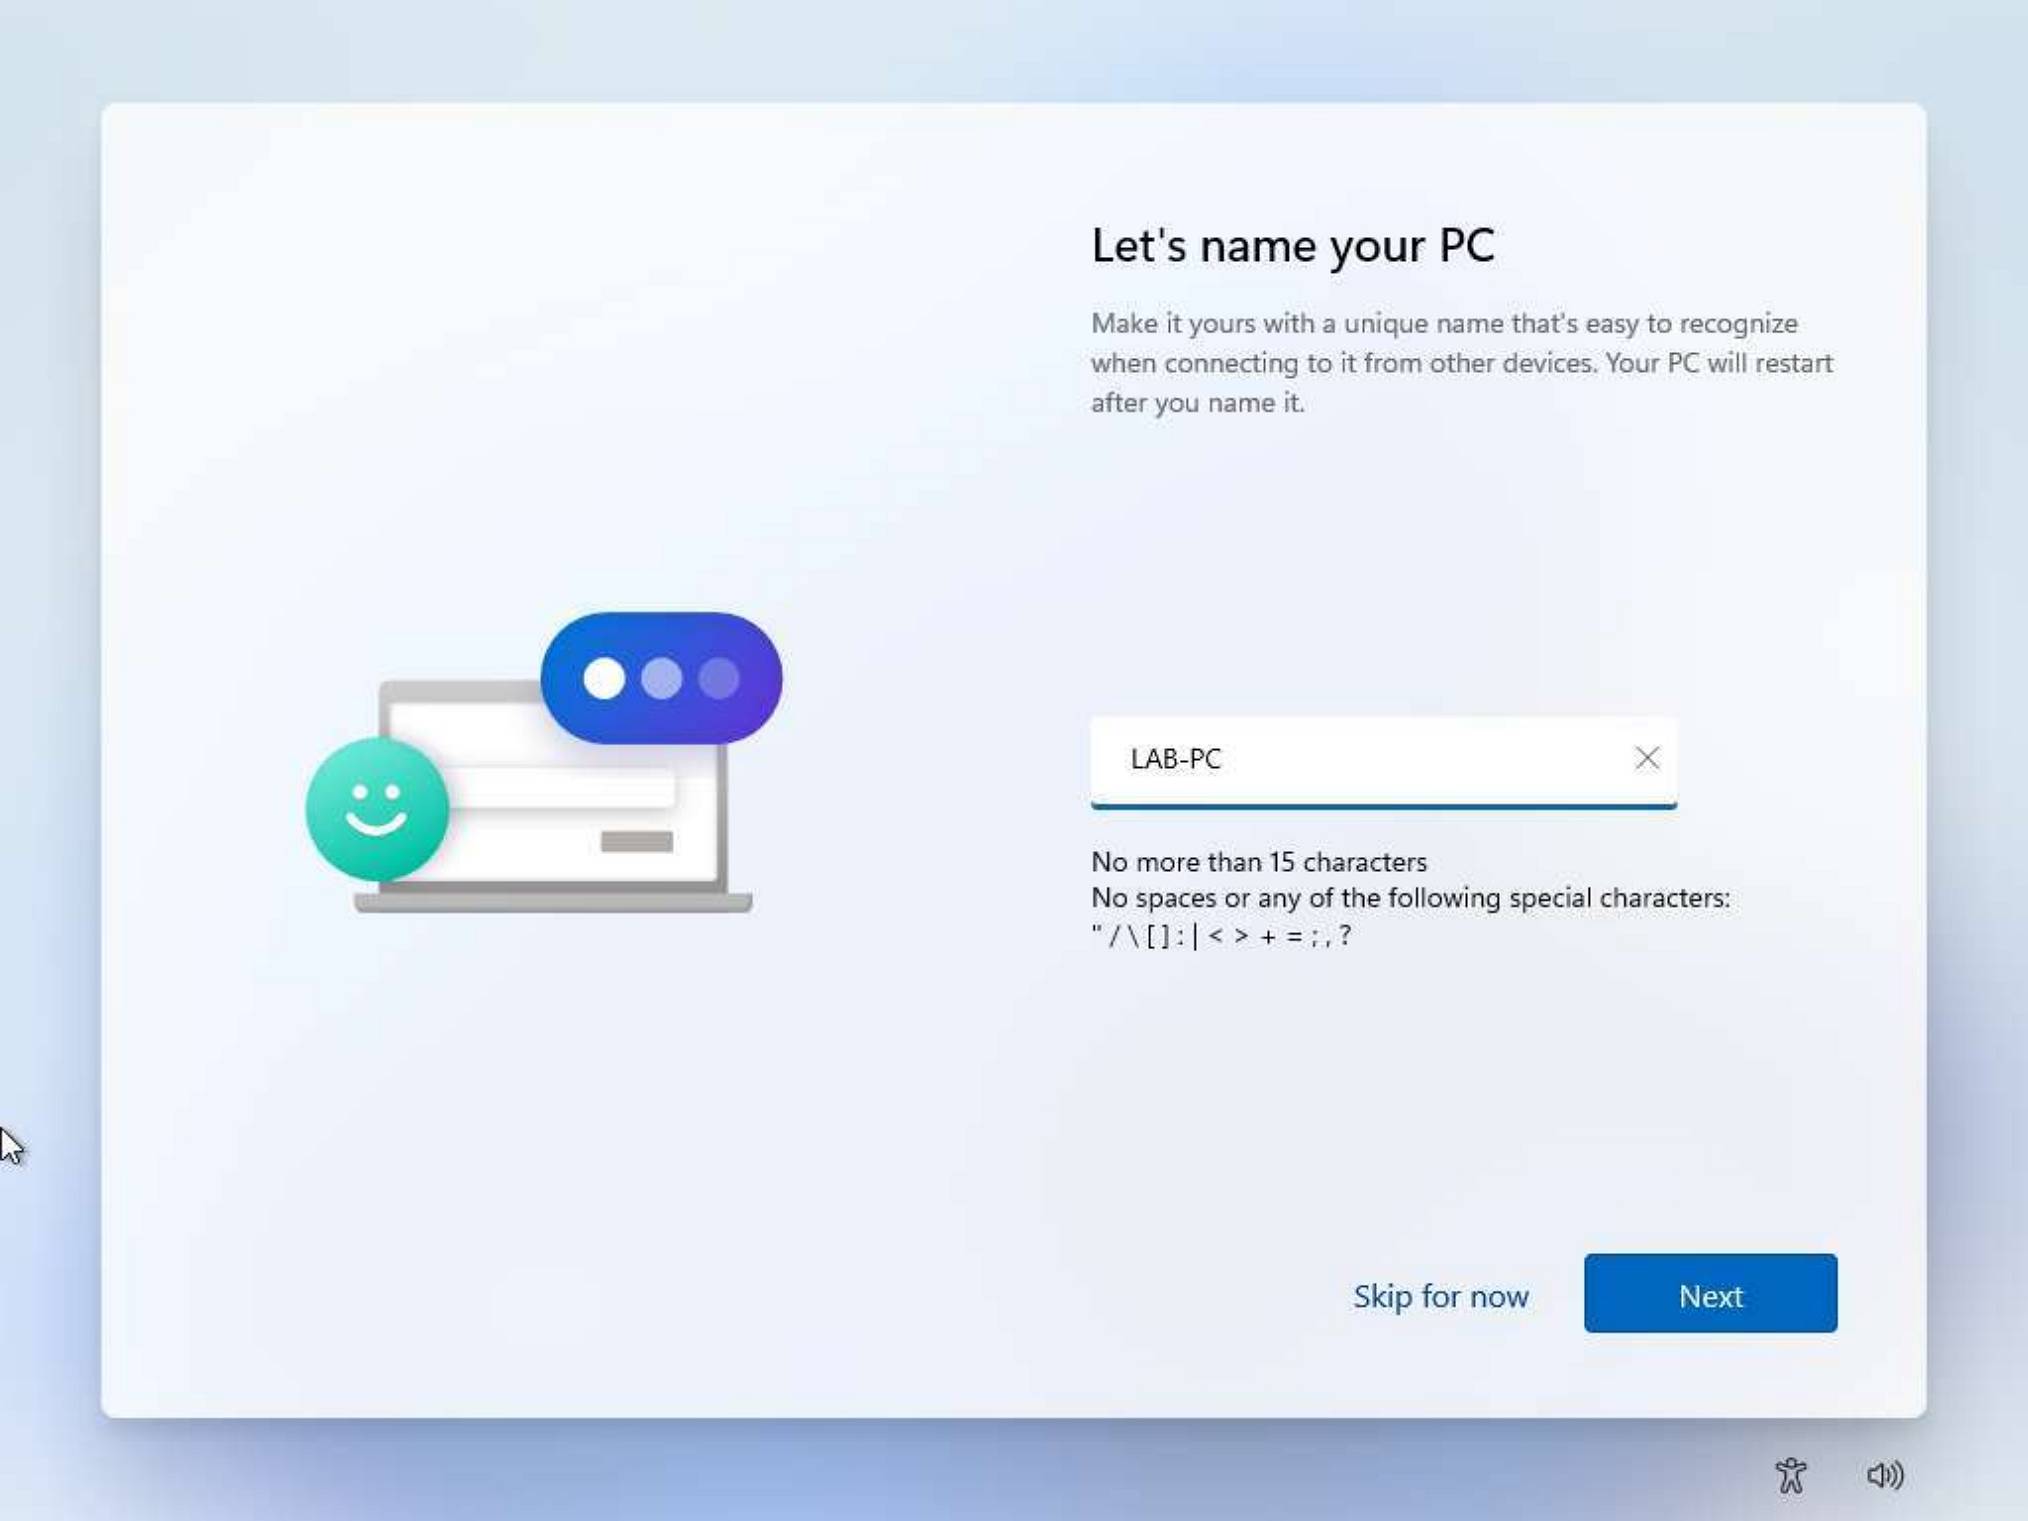
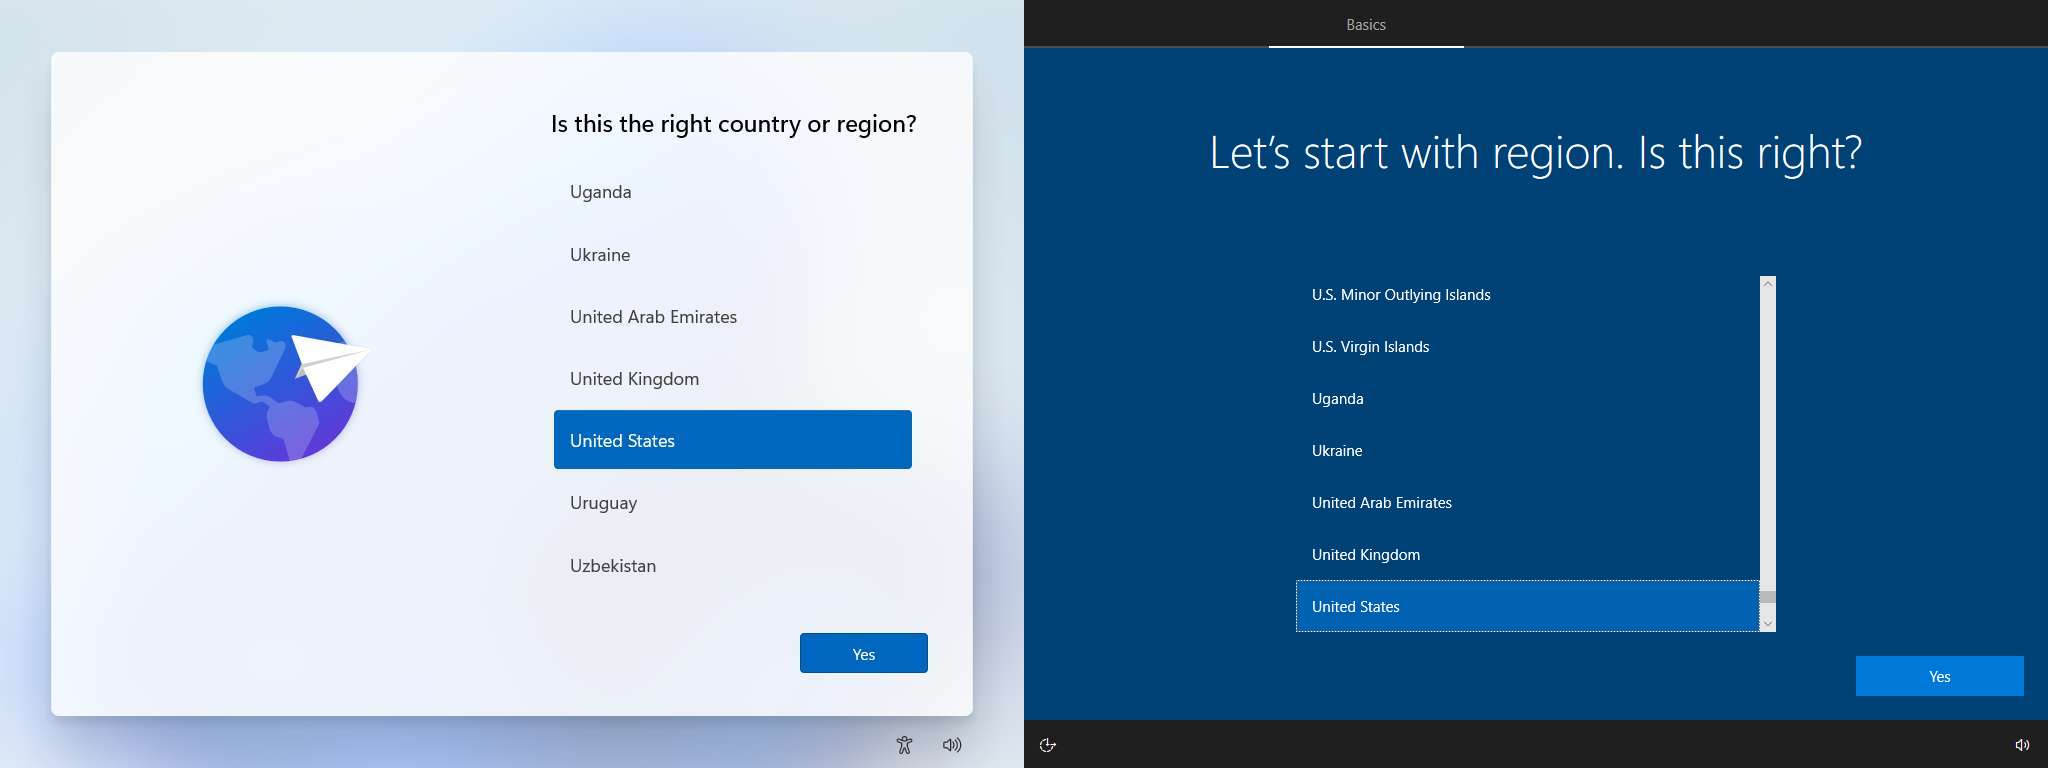
The Out-of-Box Experience (OOBE) is the initial setup process that users encounter when installing a new Windows operating system. While designed to guide users through essential configurations, it can sometimes become a hurdle for specific scenarios. This article explores the complexities of bypassing the OOBE in Windows 11, highlighting the reasons why common methods might fail and offering insights into potential solutions.

Understanding the Importance of OOBE

The OOBE serves a crucial purpose in the Windows installation process. It guides users through essential steps, such as:

  • Account Creation: Setting up a user account with a username and password, essential for accessing the system.
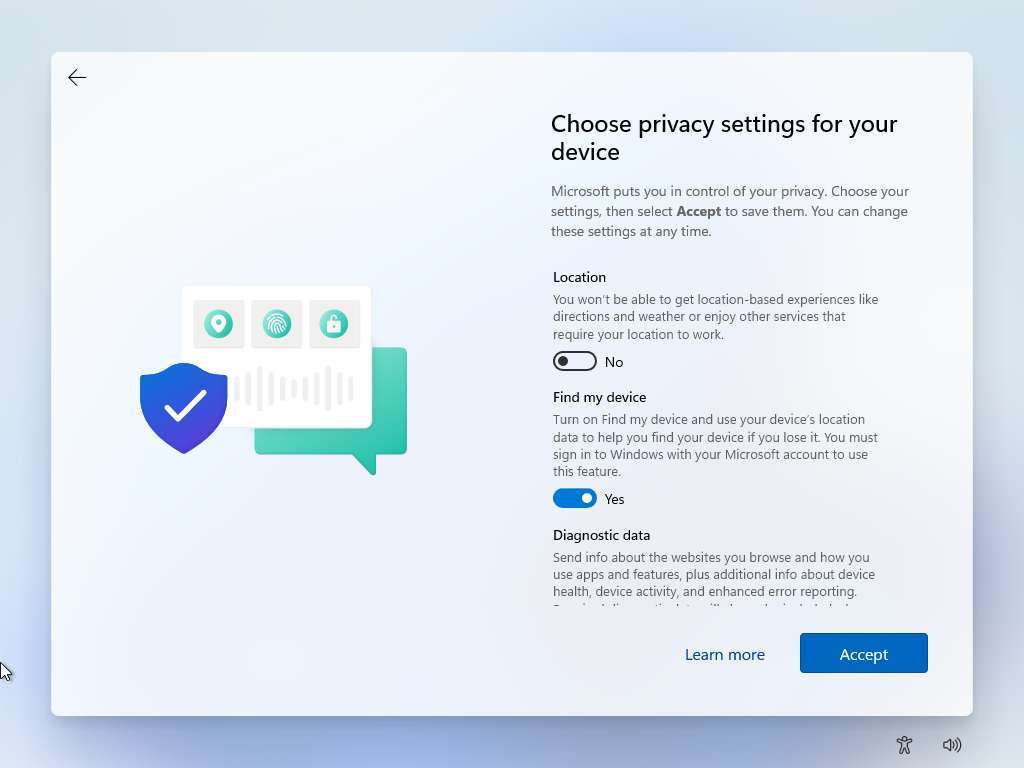
  • Privacy Settings: Allowing users to customize their privacy preferences regarding data collection and usage.
  • Region and Language: Establishing the system’s regional settings, including language, time zone, and currency format.
  • Network Configuration: Connecting to a network and configuring internet access.
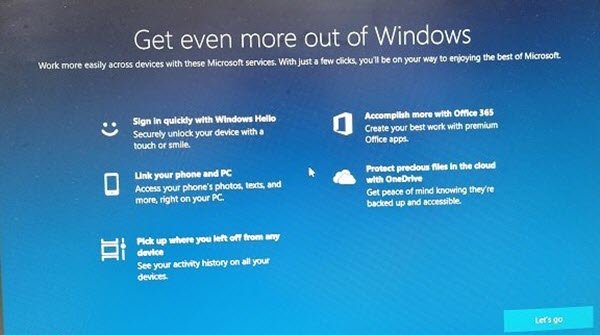
  • Software Updates: Downloading and installing the latest updates to ensure system stability and security.

While these steps are vital for a smooth user experience, situations arise where bypassing the OOBE becomes necessary. For instance, system administrators might need to automate large-scale deployments or technicians might require direct access to a system for troubleshooting without going through the initial setup process.

Common Reasons Why OOBE Bypass Methods Fail in Windows 11

Several factors can contribute to the failure of traditional OOBE bypass techniques in Windows 11. These include:

  • Enhanced Security Measures: Microsoft has significantly strengthened security measures in Windows 11, making it more challenging to circumvent the OOBE.
  • Changes in System Architecture: The introduction of new features and changes in system architecture have altered the way the OOBE functions, impacting established bypass methods.
  • Dynamic Updates: Windows 11 receives regular updates, which can sometimes modify the OOBE process, rendering previously effective bypass techniques obsolete.
  • Hardware Variations: Different hardware configurations can impact the effectiveness of certain bypass methods, as they might rely on specific hardware components or drivers.

Exploring Potential Solutions

While bypassing the OOBE in Windows 11 can be challenging, several approaches can be explored:

  • Using Pre-configured Images: Creating a custom Windows 11 image with pre-configured settings and accounts can eliminate the need for the OOBE entirely.
  • Leveraging Deployment Tools: Using tools like Microsoft Deployment Toolkit (MDT) or System Center Configuration Manager (SCCM) allows administrators to automate the deployment process and bypass the OOBE.
  • Utilizing Command-Line Options: Specific command-line options during the Windows 11 installation process can potentially skip the OOBE, although this approach might require advanced technical knowledge.
  • Employing Third-Party Software: Specialized software tools designed for bypassing the OOBE might be available, although using such tools comes with security risks and might be incompatible with the latest Windows updates.

Understanding the Risks and Considerations

Bypassing the OOBE can have potential drawbacks:

  • Security Concerns: Bypassing the OOBE might compromise security measures, making the system more vulnerable to attacks.
  • System Instability: Improperly bypassing the OOBE can lead to system instability or errors, requiring further troubleshooting.
  • Limited Customization: Bypassing the OOBE might limit the ability to customize certain system settings.
  • Compatibility Issues: Bypassing the OOBE might cause compatibility issues with certain applications or drivers.

Frequently Asked Questions (FAQs)

Q: Is it legal to bypass the OOBE in Windows 11?

A: The legality of bypassing the OOBE depends on the specific context and purpose. Bypassing the OOBE for legitimate reasons, such as system administration or troubleshooting, is generally considered acceptable. However, using bypass methods for unauthorized access or malicious purposes is illegal.

Q: Are there any safe and reliable ways to bypass the OOBE?

A: Using pre-configured images, deployment tools, or command-line options are generally considered safer and more reliable methods for bypassing the OOBE. However, relying on third-party software should be approached with caution due to potential security risks and compatibility issues.

Q: What are the potential consequences of bypassing the OOBE?

A: Bypassing the OOBE can lead to security vulnerabilities, system instability, limited customization options, and compatibility issues. It is crucial to understand the risks and potential consequences before attempting to bypass the OOBE.

Tips for Bypassing the OOBE in Windows 11

  • Thoroughly research the available methods: Before attempting to bypass the OOBE, thoroughly research the different methods and their potential risks.
  • Use reliable and trusted sources: Only utilize tools and resources from reputable sources to minimize security risks.
  • Back up your system: Before making any changes to your system, ensure you have a backup to restore your data in case of any issues.
  • Consult with a technical expert: If you are unsure about the process or have concerns, consult with a qualified technical expert for guidance.

Conclusion

Bypassing the OOBE in Windows 11 can be a complex process, requiring careful consideration and understanding of the potential risks and consequences. While various methods exist, it is crucial to choose approaches that prioritize security, stability, and compatibility. Understanding the reasons why traditional methods might fail and exploring alternative solutions can help navigate this challenge effectively. Ultimately, the decision to bypass the OOBE should be made based on a thorough assessment of the specific situation, the potential benefits, and the potential risks involved.

Windows 11 Out Of Box Experience (OOBE) - YouTube What's new with the out-of-box experience (OOBE) on Windows 11  Windows Central How to bypass internet connection to install Windows 11
What's new with the out-of-box experience (OOBE) on Windows 11  Windows Central HOW TO BYPASS OOBE - Out-of-Box Experience - YouTube What Is Oobe Or Out Of Box Experience In Windows 11 10  thewindowsclub
Quick Test Drive Through Windows 11 Out Of Box Experience, 52% OFF What's new with the out-of-box experience (OOBE) on Windows 11  Windows Central

Closure

Thus, we hope this article has provided valuable insights into The Challenges of Bypassing Windows 11’s Out-of-Box Experience (OOBE). We thank you for taking the time to read this article. See you in our next article!

The Importance Of Antivirus Software On Windows 10 In 2023

The Importance of Antivirus Software on Windows 10 in 2023

Introduction

With enthusiasm, let’s navigate through the intriguing topic related to The Importance of Antivirus Software on Windows 10 in 2023. Let’s weave interesting information and offer fresh perspectives to the readers.

The Importance of Antivirus Software on Windows 10 in 2023

How Does Antivirus Software Works in 2023?

The digital landscape is constantly evolving, with new threats emerging at an alarming rate. While Windows 10 boasts built-in security features, these are often insufficient to protect against the sophisticated and ever-changing malware landscape. Therefore, utilizing robust antivirus software remains crucial for safeguarding your Windows 10 device.

Understanding the Evolving Threat Landscape

The threats to your Windows 10 device are not limited to traditional viruses. Today, the threat landscape encompasses a wide range of malicious actors and techniques, including:

  • Malware: This broad category encompasses various malicious programs designed to infiltrate systems, steal data, disrupt operations, or gain unauthorized access. Malware can manifest as viruses, worms, trojans, ransomware, and more.
  • Phishing: This deceptive tactic involves fraudulent emails or websites designed to trick users into revealing sensitive information like login credentials, credit card details, or personal data.
  • Exploits: These vulnerabilities exploit weaknesses in software or operating systems, allowing attackers to gain unauthorized access to devices.
  • Spyware: This intrusive software secretly monitors user activity, collects personal data, and transmits it to malicious actors.
  • Adware: This software displays unwanted advertisements, often without user consent, and can potentially redirect users to malicious websites.

The Role of Antivirus Software in Defense

Antivirus software acts as a critical defense mechanism against these threats, providing comprehensive protection through various methods:

  • Real-Time Scanning: This feature continuously monitors system activity, detecting and preventing malicious files from accessing your device.
  • Signature-Based Detection: This traditional method identifies malware based on known patterns and signatures.
  • Heuristic Analysis: This advanced technique analyzes suspicious behavior patterns, identifying malware even if it is not yet known to the antivirus database.
  • Cloud-Based Protection: This technology leverages the power of cloud computing to analyze suspicious files and update antivirus definitions in real time, providing faster and more comprehensive protection.
  • Firewall: This security feature acts as a barrier between your device and the external network, blocking unauthorized access attempts.
  • Anti-Phishing: This feature helps identify and block phishing attempts, preventing users from falling victim to deceptive tactics.
  • Anti-Exploit: This feature protects against vulnerabilities in software and operating systems, mitigating the risk of exploitation.
  • Anti-Spyware: This component specifically targets spyware, preventing it from monitoring user activity and collecting sensitive data.
  • Anti-Adware: This feature blocks unwanted advertisements and prevents them from redirecting users to malicious websites.

Beyond Basic Protection: Additional Benefits

While antivirus software provides essential protection against known and emerging threats, it offers additional benefits:

  • Data Protection: Antivirus software helps protect sensitive data from theft, ensuring the privacy and security of personal information.
  • System Stability: By removing malware and preventing infections, antivirus software helps maintain system stability and prevent performance degradation.
  • Enhanced Online Security: Antivirus software enhances online security by protecting against phishing attempts, malicious websites, and other online threats.
  • Peace of Mind: Knowing that your device is protected by a robust antivirus solution provides peace of mind and allows you to focus on your digital tasks without worry.

Choosing the Right Antivirus Software

With a wide variety of antivirus solutions available, selecting the right one can be challenging. Consider the following factors:

  • Features: Assess the features offered by each antivirus solution, ensuring it provides the necessary protection against the threats you are most concerned about.
  • Performance: Choose an antivirus solution that does not significantly impact system performance, ensuring smooth operation and responsiveness.
  • Ease of Use: Opt for a user-friendly interface that is easy to navigate and manage.
  • Reputation: Consider the reputation and reliability of the antivirus vendor, ensuring they have a proven track record of protecting users.
  • Customer Support: Choose a solution with responsive and reliable customer support in case you encounter any issues.

FAQs

Q: Is Windows Defender Sufficient for Protection?

A: While Windows Defender provides a basic level of security, it may not be sufficient to protect against all modern threats. Robust antivirus software offers more comprehensive protection, including advanced features like heuristic analysis, cloud-based protection, and anti-exploit capabilities.

Q: What Happens if I Don’t Use Antivirus Software?

A: Without antivirus protection, your device is vulnerable to malware infections, data theft, system crashes, and other security risks. You may also face financial losses due to identity theft or ransomware attacks.

Q: Can Antivirus Software Slow Down My Computer?

A: Modern antivirus solutions are designed to be lightweight and efficient, minimizing their impact on system performance. However, it is essential to choose a reputable antivirus solution known for its performance optimization.

Q: How Often Should I Update My Antivirus Software?

A: Antivirus software requires regular updates to remain effective. Most antivirus solutions automatically download and install updates in the background, ensuring continuous protection.

Tips for Enhancing Antivirus Protection

  • Keep Your Software Updated: Regularly update your operating system, applications, and antivirus software to patch vulnerabilities and enhance security.
  • Be Cautious of Email Attachments: Avoid opening email attachments from unknown senders, as they may contain malware.
  • Use Strong Passwords: Create complex and unique passwords for each of your online accounts.
  • Be Aware of Phishing Attempts: Be wary of suspicious emails or websites that request sensitive information.
  • Avoid Suspicious Websites: Stay away from websites that look unprofessional or contain excessive pop-up advertisements.
  • Scan Your Device Regularly: Regularly scan your device for malware using your antivirus software.
  • Back Up Your Data: Regularly back up your important data to an external storage device or cloud service.

Conclusion

In the ever-evolving digital landscape, antivirus software remains a critical component of safeguarding your Windows 10 device. By utilizing a robust antivirus solution, you can protect your device from malware, phishing attempts, exploits, spyware, and other threats, ensuring the security and privacy of your personal data. Remember to choose a reputable antivirus solution with comprehensive features, prioritize performance, and maintain regular updates for optimal protection.

How important is antivirus software 2023 Antivirus Market Annual Report  Security.org Protect Your PC with the 20 Best Antivirus Software for 2023
6 Best Free Windows 10 Antivirus Software in (2024) Najväčší TEST antivírusov 2023: Najlepšie antivírusy + AKO vybrať 11 Best Antivirus Protection You Can Install in 2023
What Functions Do Antivirus Programs Perform? The Best Antivirus Software for 2023

Closure

Thus, we hope this article has provided valuable insights into The Importance of Antivirus Software on Windows 10 in 2023. We appreciate your attention to our article. See you in our next article!

A Visual Symphony: Exploring The Official Windows 11 Wallpapers

A Visual Symphony: Exploring the Official Windows 11 Wallpapers

Introduction

With enthusiasm, let’s navigate through the intriguing topic related to A Visual Symphony: Exploring the Official Windows 11 Wallpapers. Let’s weave interesting information and offer fresh perspectives to the readers.

A Visual Symphony: Exploring the Official Windows 11 Wallpapers

New Windows 11 Wallpaper

Windows 11, Microsoft’s latest operating system, is a visual delight, and its official wallpapers play a significant role in creating a cohesive and aesthetically pleasing user experience. These carefully curated images are not mere decorative elements; they embody the spirit of Windows 11, reflecting its design philosophy and fostering a sense of serenity and focus.

A Spectrum of Aesthetics

The official Windows 11 wallpapers are a diverse collection, encompassing a wide range of styles and themes. From abstract gradients and minimalist patterns to breathtaking landscapes and captivating cityscapes, the wallpapers cater to diverse tastes and preferences.

The Significance of Design

The design of the official wallpapers is not arbitrary. Microsoft meticulously selects each image, ensuring it aligns with the core principles of Windows 11:

  • Modernity: The wallpapers embrace contemporary design trends, featuring clean lines, vibrant colors, and a minimalist aesthetic.
  • Clarity: The images prioritize simplicity, offering a visually uncluttered experience that enhances focus and productivity.
  • Versatility: The wallpapers are designed to complement various screen sizes and resolutions, ensuring they look sharp and stunning on any device.
  • Emotional Resonance: The images evoke a sense of calm and inspiration, creating a positive and engaging user experience.

A Deeper Look at the Themes

The official Windows 11 wallpapers can be broadly categorized into several themes:

  • Abstract: These wallpapers feature geometric patterns, gradients, and abstract shapes, creating a modern and minimalist aesthetic. They offer a sense of dynamism and visual interest, while remaining visually calming.
  • Nature: Capturing the beauty of the natural world, these wallpapers showcase landscapes, mountains, oceans, and forests. They provide a sense of tranquility and escape, promoting a sense of peace and serenity.
  • Urban: Featuring iconic cityscapes and architectural marvels, these wallpapers offer a glimpse into the vibrancy and energy of urban life. They are visually stimulating and create a sense of connection to the world around us.
  • Minimalist: These wallpapers prioritize simplicity, featuring solid colors, subtle gradients, or minimal patterns. They offer a clean and uncluttered aesthetic, promoting focus and concentration.

Beyond Aesthetics: The Impact of Wallpapers

The official Windows 11 wallpapers serve a purpose beyond mere decoration. They contribute to:

  • Brand Identity: The wallpapers reinforce the visual identity of Windows 11, conveying a sense of sophistication, modernity, and user-friendliness.
  • User Experience: They create a visually engaging and positive experience, enhancing user satisfaction and engagement with the operating system.
  • Productivity: The minimalist and calming nature of many wallpapers promotes focus and concentration, contributing to a more productive work environment.
  • Personalization: Users have the freedom to choose wallpapers that resonate with their individual preferences, creating a personalized and enjoyable desktop experience.

FAQs About Official Windows 11 Wallpapers

Q: Where can I find the official Windows 11 wallpapers?

A: The official Windows 11 wallpapers are available for download directly from Microsoft’s website. Additionally, they are often included in the Windows 11 installation media.

Q: Can I use the official Windows 11 wallpapers on other devices?

A: Yes, the official Windows 11 wallpapers are compatible with various devices and operating systems. They can be used on desktops, laptops, tablets, and smartphones.

Q: Can I customize the official Windows 11 wallpapers?

A: While the official wallpapers are provided as static images, users can customize them by applying filters, cropping, or adding text using various image editing software.

Q: How often are the official Windows 11 wallpapers updated?

A: Microsoft occasionally updates the collection of official Windows 11 wallpapers, adding new images and themes to keep the experience fresh and engaging.

Tips for Using Official Windows 11 Wallpapers

  • Consider your work environment: Choose wallpapers that complement your work style and promote focus and productivity.
  • Experiment with different themes: Explore the various themes available to find wallpapers that resonate with your personal preferences.
  • Use high-resolution images: Ensure the wallpapers you choose are high-resolution to maintain sharpness and clarity on your screen.
  • Customize your desktop: Combine official Windows 11 wallpapers with other desktop elements like icons, widgets, and themes to create a personalized and visually appealing experience.

Conclusion

The official Windows 11 wallpapers are more than just pretty pictures. They are carefully curated visual elements that embody the design philosophy of Windows 11, promoting a sense of modernity, clarity, and user-friendliness. By offering a diverse collection of images that cater to various tastes and preferences, Microsoft ensures that every user can find a wallpaper that enhances their desktop experience and reflects their individual style. The official Windows 11 wallpapers contribute to a positive and engaging user experience, fostering a sense of serenity, focus, and connection with the world around us.

Here’s What Windows 11’s New Wallpapers Look Like Windows 11 Wallpaper 3840x2400 Download The Official Windows 11 Wallpapers And Give - vrogue.co
2560x1440 Resolution Windows 11 4k Green Glow 1440P Resolution Wallpaper - Wallpapers Den Here Are All Windows 11 Wallpapers Windows 11 Wallpaper In 4k Windows 11 Dark Mode Offic - vrogue.co
Technology Windows 11 4k Ultra Hd Wallpaper By Pawel - vrogue.co Windows 11 Blue Wallpaper

Closure

Thus, we hope this article has provided valuable insights into A Visual Symphony: Exploring the Official Windows 11 Wallpapers. We appreciate your attention to our article. See you in our next article!

Reliving The Golden Age: A Guide To PlayStation 1 Emulation On Windows 11

Reliving the Golden Age: A Guide to PlayStation 1 Emulation on Windows 11

Introduction

With enthusiasm, let’s navigate through the intriguing topic related to Reliving the Golden Age: A Guide to PlayStation 1 Emulation on Windows 11. Let’s weave interesting information and offer fresh perspectives to the readers.

Reliving the Golden Age: A Guide to PlayStation 1 Emulation on Windows 11

RetroBat 12TB PlayStation 1 and 2 Complete Emulation Hard Drive for Windows - RetroMini Store

The PlayStation 1 (PS1), a console that launched in 1994, remains a cherished piece of gaming history. Its library boasts iconic titles like Final Fantasy VII, Metal Gear Solid, and Resident Evil, captivating players with their groundbreaking graphics, innovative gameplay, and unforgettable stories. While the PS1’s hardware is no longer readily available, its legacy lives on through emulation, allowing players to revisit these classics on modern systems.

This article delves into the world of PlayStation 1 emulation on Windows 11, providing a comprehensive guide for enthusiasts seeking to relive the magic of this era. We will explore the available emulators, their features, and essential steps for setup and configuration, ensuring a smooth and enjoyable experience.

Understanding PlayStation 1 Emulation

Emulation involves replicating the functionality of one system on another. In the case of PS1 emulation, software programs called emulators mimic the PS1’s hardware and software, allowing users to run PS1 games on their Windows 11 computers. This technology enables players to access a vast library of PS1 titles without needing to purchase the original console or game discs.

Why Choose PlayStation 1 Emulation?

The appeal of PS1 emulation lies in its accessibility and convenience. It offers numerous benefits for players:

  • Accessibility: Emulation eliminates the need to acquire and maintain outdated hardware, making PS1 games accessible to a wider audience.
  • Convenience: Players can access their entire PS1 library from a single location, eliminating the need for physical copies or multiple consoles.
  • Enhanced Features: Emulators often provide features not available on the original hardware, such as save state functionality, increased resolution, and compatibility with modern controllers.
  • Preservation: Emulation helps preserve these classic games, ensuring their availability for future generations of gamers.

Popular PlayStation 1 Emulators for Windows 11

Several emulators offer excellent PS1 emulation on Windows 11. Here are some of the most popular options:

  • ePSXe: A long-standing and highly regarded emulator, ePSXe boasts excellent compatibility and performance. It features a user-friendly interface and supports a wide range of configuration options.
  • PCSX2: While primarily known for its PlayStation 2 emulation capabilities, PCSX2 also supports PS1 games. It offers advanced features like high-resolution rendering and compatibility with modern controllers.
  • Mednafen: A versatile emulator that supports various systems, including PS1. Mednafen is known for its accuracy and performance, making it a popular choice for experienced users.
  • RetroArch: A multi-system emulator frontend that includes a PS1 core. RetroArch provides a unified interface for managing various emulators and games, simplifying the emulation process.

Setting Up Your PlayStation 1 Emulator on Windows 11

Setting up a PS1 emulator on Windows 11 involves several steps, including downloading the emulator, configuring settings, and obtaining PS1 game files.

  1. Download and Install the Emulator: Choose an emulator from the list above and download the latest version from its official website. Follow the installation instructions provided.
  2. Configure Settings: Once installed, open the emulator and access its settings menu. Configure options like video settings, audio settings, and controller mappings to match your preferences.
  3. Obtain PS1 Game Files: PS1 games are typically distributed in the form of ISO files, which are digital copies of the original game discs. These files can be obtained from various sources, including online retailers or by ripping them from your physical copies.
  4. Load and Play: After obtaining the desired game files, load them into the emulator. The emulator will then launch the game, allowing you to enjoy it on your Windows 11 computer.

Tips for Optimizing Your PlayStation 1 Emulation Experience

To ensure optimal performance and a smooth gaming experience, consider these tips:

  • System Requirements: Ensure your computer meets the minimum system requirements for the chosen emulator.
  • BIOS File: Some emulators require a PS1 BIOS file, which can be obtained from various online sources.
  • Controller Configuration: Configure your controller settings to ensure proper button mapping and responsiveness.
  • Graphics Settings: Adjust graphics settings to balance performance and visual fidelity.
  • Troubleshooting: If you encounter any issues, consult the emulator’s documentation or online forums for troubleshooting tips.

Frequently Asked Questions About PlayStation 1 Emulation on Windows 11

Q: Are PS1 emulators legal to use?

A: The legality of PS1 emulation is a complex issue. While emulators themselves are legal, the legality of obtaining and using game files depends on the source and whether you own the original game.

Q: How do I obtain PS1 game files?

A: You can obtain PS1 game files legally from various sources, including online retailers like PSN, or by ripping them from your physical copies. However, downloading game files from illegal sources is a violation of copyright and may have legal consequences.

Q: What are the best settings for optimal performance?

A: Optimal settings vary depending on your computer’s specifications and the game you are playing. Experiment with different settings to find the best balance between performance and visual fidelity.

Q: Can I use my PS1 controller with the emulator?

A: Most PS1 emulators support the use of PS1 controllers, either through a USB adapter or by using a virtual controller mapping.

Q: What are the benefits of using a specific emulator?

A: Each emulator offers unique features and advantages. Research different emulators to find one that best suits your needs and preferences.

Conclusion

PlayStation 1 emulation on Windows 11 offers a fantastic opportunity to revisit the classic games of the PS1 era. With the right emulator and configuration, players can experience these beloved titles in a modern environment, enjoying enhanced features and convenience. By following the guidelines outlined in this article, enthusiasts can embark on a nostalgic journey through the golden age of gaming, rediscovering the magic of their favorite PS1 titles.

FREE DOWNLOAD PLAYSTATION (PS1, PSX) EMULATOR FOR PC - YouTube Sony PlayStation (1) - Reliving Golden Age - Pixel Refresh PS1 Emulator For PC EPSXe 2021 Easy Setup GUIDE PlayStation ENGLISH Bilibili  atelier-yuwa.ciao.jp
Playstation 1 emulator - architectlena PlayStation Emulation Guide - YouTube 5 meilleurs émulateurs PS1 pour PC en 2024
How to Play Playstation Games on your PC - PS1 Emulator Tutorial - YouTube Download pSX Emulator

Closure

Thus, we hope this article has provided valuable insights into Reliving the Golden Age: A Guide to PlayStation 1 Emulation on Windows 11. We appreciate your attention to our article. See you in our next article!

Navigating The Landscape Of Mustek A3 Scanner Drivers In Windows 11

Navigating the Landscape of Mustek A3 Scanner Drivers in Windows 11

Introduction

With great pleasure, we will explore the intriguing topic related to Navigating the Landscape of Mustek A3 Scanner Drivers in Windows 11. Let’s weave interesting information and offer fresh perspectives to the readers.

Mustek A3 S-series Flatbed Scanner 600s Driver - corpfasr

The world of digital scanning is vast and diverse, with a myriad of devices and software solutions catering to various needs. For those seeking high-resolution scanning capabilities with A3 paper support, Mustek scanners often stand out as a compelling choice. However, ensuring seamless integration with Windows 11 necessitates the installation of appropriate drivers. This article delves into the intricacies of Mustek A3 scanner drivers in Windows 11, providing a comprehensive understanding of their importance, installation, troubleshooting, and potential benefits.

The Significance of Drivers in Scanning

Drivers act as the crucial bridge between hardware and software, enabling communication and functionality. In the context of scanners, drivers translate the raw data captured by the scanner’s hardware into a format understandable by the operating system and applications. Without the correct drivers, a scanner will remain inert, unable to perform its primary function of digitizing physical documents.

Understanding Mustek A3 Scanner Drivers for Windows 11

Mustek, a renowned manufacturer of scanning devices, offers a range of A3 scanners catering to diverse user needs, from home office users to professional environments. These scanners, equipped with advanced features like high-resolution optical scanning, automatic document feeders, and sophisticated image processing capabilities, rely on specialized drivers to function optimally in Windows 11.

Locating and Installing the Correct Drivers

The process of obtaining and installing the appropriate drivers for a Mustek A3 scanner in Windows 11 can be straightforward with a few key steps:

  1. Identify the Scanner Model: The first step involves accurately identifying the specific model of the Mustek A3 scanner. This information is typically found on the scanner’s label or in the accompanying documentation.

  2. Visit the Mustek Website: Navigate to the Mustek website (www.mustek.com) and locate the "Support" or "Downloads" section.

  3. Search for Drivers: Utilize the search functionality on the website to locate drivers specifically designed for the identified scanner model and Windows 11.

  4. Download and Install: Download the driver package and follow the on-screen instructions for installation.

Troubleshooting Common Driver Issues

While the installation process is typically straightforward, occasional challenges may arise. Here are some common issues and their potential solutions:

  • Driver Incompatibility: If the downloaded driver is not compatible with the specific scanner model or Windows 11 version, it might lead to installation errors or malfunctioning. The solution lies in downloading the correct driver package from the Mustek website.

  • Driver Conflicts: Existing drivers for other scanners or peripherals might conflict with the newly installed Mustek driver. Resolving this issue often involves uninstalling conflicting drivers and reinstalling the Mustek driver.

  • Outdated Drivers: Outdated drivers can cause performance issues or compatibility problems. Updating to the latest driver version from the Mustek website can rectify these issues.

  • Missing or Corrupted Drivers: If the driver files are missing or corrupted, the scanner may not function properly. Reinstalling the drivers or using the Windows 11 "Device Manager" to update or reinstall the drivers can resolve this issue.

Benefits of Utilizing the Correct Mustek A3 Scanner Drivers

Installing the correct drivers for a Mustek A3 scanner in Windows 11 unlocks a range of benefits:

  • Enhanced Scanning Performance: Optimized drivers ensure smooth data transfer, resulting in faster scanning speeds and improved image quality.

  • Improved Compatibility: Drivers ensure compatibility with Windows 11 features and applications, enabling seamless integration and functionality.

  • Advanced Features Access: Specific drivers unlock advanced features like automatic document feeding, duplex scanning, and image processing capabilities, enhancing the overall scanning experience.

  • Troubleshooting Assistance: Drivers often include troubleshooting tools and support documentation, simplifying the process of resolving any issues that might arise.

FAQs Regarding Mustek A3 Scanner Drivers in Windows 11

Q: What if I cannot find the correct driver for my Mustek A3 scanner on the Mustek website?

A: In such cases, contacting Mustek’s customer support directly is recommended. They can provide guidance on driver availability and alternative solutions.

Q: Can I use generic scanner drivers instead of specific Mustek drivers?

A: While generic drivers might offer basic functionality, they often lack the advanced features and optimization offered by specific Mustek drivers. It is highly recommended to use the dedicated drivers for optimal performance.

Q: Is there a way to automatically update the drivers for my Mustek A3 scanner?

A: Windows 11’s "Device Manager" provides an option to automatically search for and install driver updates. However, it is still advisable to check the Mustek website for the latest driver versions for optimal performance.

Q: What should I do if my Mustek A3 scanner is not recognized by Windows 11 after installing the drivers?

A: Restarting the computer after driver installation can often resolve this issue. If the problem persists, checking the device manager for any error messages and consulting the Mustek website for troubleshooting guides is recommended.

Tips for Optimal Mustek A3 Scanner Performance in Windows 11

  • Regular Driver Updates: Regularly checking the Mustek website for updated drivers ensures optimal compatibility and performance.

  • Proper Scanner Maintenance: Maintaining the scanner’s cleanliness and ensuring proper connection to the computer contributes to its longevity and performance.

  • Utilizing Recommended Scanning Settings: Utilizing the appropriate scanning settings based on the document type and intended use ensures optimal image quality and file size.

Conclusion

Installing the correct Mustek A3 scanner drivers in Windows 11 is crucial for achieving optimal scanning performance and unlocking the full potential of these advanced devices. By following the outlined steps for locating, installing, and troubleshooting drivers, users can ensure seamless integration and enjoy a smooth and efficient scanning experience. Regular driver updates, proper scanner maintenance, and utilizing recommended scanning settings further contribute to an optimal scanning environment.

Mustek A3 2400s Driver - renewhope Mustek A3 scanner A3F1200NC – Mustek.de Mustek A3 1200s Scanner Driver - sugarrenew
Mustek Driver & Support Mustek A3 1200s Scanner Driver - cleverfriendly Mustek A3 scanner A3F1200NC – Mustek.de
Mustek A3F1200N  A3 Flatbed Scanner Mustek a3 1200 pro driver - selectionpassa

Closure

Thus, we hope this article has provided valuable insights into Navigating the Landscape of Mustek A3 Scanner Drivers in Windows 11. We hope you find this article informative and beneficial. See you in our next article!

Reinstalling Windows 10: A Comprehensive Guide

Reinstalling Windows 10: A Comprehensive Guide

Introduction

In this auspicious occasion, we are delighted to delve into the intriguing topic related to Reinstalling Windows 10: A Comprehensive Guide. Let’s weave interesting information and offer fresh perspectives to the readers.

Reinstalling Windows 10: A Comprehensive Guide

Reinstall Windows 10. Step-by-step tutorial. — How To Fix Guide

Reinstalling Windows 10, often referred to as a "clean install," is a powerful tool for resolving various computer issues, optimizing performance, and ensuring a fresh, uncluttered system. This process involves completely erasing the existing operating system and installing a new copy, effectively restoring your computer to its factory state.

Benefits of Reinstalling Windows 10:

  • Improved Performance: A clean install removes unnecessary files, temporary data, and lingering software remnants, leading to a faster and more responsive system.
  • Troubleshooting Issues: Reinstallation can resolve persistent software errors, system crashes, and performance bottlenecks that may be caused by corrupted files or incompatible programs.
  • Malware Removal: A clean install effectively removes malware, viruses, and other threats that traditional anti-virus software may fail to eliminate.
  • System Optimization: Reinstalling Windows 10 allows you to choose the desired features and settings, customizing the operating system to your specific needs and preferences.
  • Enhanced Security: A fresh installation ensures that your system is free from vulnerabilities and security risks that may have accumulated over time.

Understanding the Process:

Reinstalling Windows 10 is a straightforward process, but it requires careful preparation and understanding of the steps involved. Here’s a breakdown of the key stages:

1. Backup Essential Data:

Before proceeding with the reinstallation, it is crucial to create a complete backup of all important files, including documents, photos, music, and other personal data. This can be achieved through various methods:

  • External Hard Drive: Copying files to an external hard drive provides a reliable and secure backup solution.
  • Cloud Storage: Services like Google Drive, OneDrive, and Dropbox allow for convenient online storage and backup.
  • System Image: Creating a system image captures the entire operating system and all installed applications, allowing for a complete system restoration.

2. Prepare the Installation Media:

You will need a bootable USB drive or DVD containing the Windows 10 installation files. Microsoft provides a tool for creating bootable media from a downloaded ISO image.

3. Boot from Installation Media:

Once the bootable media is ready, you need to change the boot order in your computer’s BIOS settings to prioritize the installation media. This will allow the computer to boot from the USB drive or DVD instead of the hard drive.

4. Follow the Installation Instructions:

The Windows 10 installation process is guided by a series of on-screen prompts. You will be asked to choose your language, keyboard layout, and accept the license terms.

5. Partition the Hard Drive:

During the installation, you may be prompted to choose a partition for installing Windows 10. It is recommended to create a dedicated partition for the operating system, ensuring its separation from other data.

6. Format the Target Partition:

Before installing Windows 10, the target partition needs to be formatted. This process erases all existing data on the partition, so ensure that the backup is complete.

7. Install Windows 10:

Once the partition is formatted, the installation process begins. Windows 10 will copy files, configure settings, and install necessary drivers.

8. Activate Windows 10:

After the installation is complete, you will need to activate Windows 10 using a valid product key.

9. Install Drivers and Software:

After the initial installation, you may need to install drivers for your hardware components and other necessary software.

10. Restore Data:

Finally, restore your backed-up data to the newly installed system.

FAQs:

Q: What is the difference between a clean install and an upgrade?

A: A clean install erases all existing data and installs a fresh copy of Windows 10, while an upgrade installs the new version over the existing operating system. A clean install is recommended for resolving major issues and optimizing performance.

Q: Will I lose my programs and data during a clean install?

A: Yes, a clean install erases all data on the target partition. It is essential to back up all important files before proceeding.

Q: Can I reinstall Windows 10 without a product key?

A: You can install Windows 10 without a product key, but you will not be able to activate it and will have limited functionality.

Q: What if I encounter errors during the installation process?

A: If you encounter errors, try restarting the installation process or consult Microsoft’s support resources for assistance.

Tips:

  • Create a bootable USB drive using the official Microsoft tool.
  • Back up all important data before proceeding with the reinstallation.
  • Ensure that your hardware drivers are compatible with Windows 10.
  • Check for updates and install them after the installation is complete.
  • Consider using a system image for a complete system restoration.

Conclusion:

Reinstalling Windows 10 is a valuable tool for resolving various computer issues, optimizing performance, and ensuring a clean and secure operating system. By following the steps outlined in this guide and taking necessary precautions, you can effectively reinstall Windows 10 and enjoy a revitalized and efficient computing experience. Remember to back up your data, prepare the installation media, and carefully follow the installation instructions for a successful reinstallation.

How To Reinstall Windows 10 Step By Step with Pictures How To Reinstall Windows 10 And Keep Files ~ This Is The Explanation! How To Reinstall Windows 10 Step By Step with Pictures
How to Reinstall Windows 10 from USB: A Step-by-Step Guide - The Knowledge Hub Windows 10 allows you to reinstall the OS and uninstall updates from Troubleshooting options Comprehensive Guide: How to Recover Data after Reinstalling Windows 10?
How to Reinstall Windows 10 and Keep Your Files - Tech Advisor How to reinstall Windows 10 - Explanation Guide

Closure

Thus, we hope this article has provided valuable insights into Reinstalling Windows 10: A Comprehensive Guide. We thank you for taking the time to read this article. See you in our next article!

Troubleshooting Uninstallation Issues In Windows 10: A Comprehensive Guide

Troubleshooting Uninstallation Issues in Windows 10: A Comprehensive Guide

Introduction

With great pleasure, we will explore the intriguing topic related to Troubleshooting Uninstallation Issues in Windows 10: A Comprehensive Guide. Let’s weave interesting information and offer fresh perspectives to the readers.

Troubleshooting Uninstallation Issues in Windows 10: A Comprehensive Guide

How to access Windows 10 troubleshooting tools step by step  TechTarget

Windows 10, despite its robust functionality, occasionally encounters challenges, particularly when attempting to uninstall applications. This can manifest in various ways, from programs refusing to uninstall entirely to encountering error messages during the process. Understanding the underlying causes and employing effective troubleshooting strategies is crucial to regain control over your system and ensure a smooth user experience.

Understanding the Root Causes of Uninstallation Issues:

The inability to uninstall programs in Windows 10 can stem from diverse sources, each requiring a specific approach. Here are some common culprits:

  • Corrupted Registry Entries: The Windows Registry, a vital database containing system settings and program information, can become corrupted due to faulty software installations, improper uninstallation attempts, or system malfunctions. These corrupted entries can prevent programs from being removed properly.
  • Incomplete Installation: Incomplete or faulty installations can leave behind remnants of the program, hindering the uninstallation process. These fragments might include files, folders, or registry entries that the uninstaller cannot identify or remove.
  • File Permissions Issues: Windows employs a hierarchical permission system to control access to files and folders. If the user account lacks sufficient permissions to modify or delete files associated with the program, uninstallation can fail.
  • Conflicting Processes: Background processes running concurrently with the uninstallation process can interfere, leading to errors or incomplete removal. This can be particularly problematic with applications that rely heavily on system resources.
  • Third-Party Antivirus Interference: Antivirus software, while crucial for system security, can sometimes interfere with program uninstallation, especially if it detects a potentially harmful file or process associated with the application.
  • System File Corruption: System file corruption, often caused by malware or system errors, can disrupt the uninstallation process, rendering it ineffective.

Effective Troubleshooting Strategies:

Addressing uninstallation problems in Windows 10 requires a methodical approach. The following strategies, presented in a logical sequence, offer a comprehensive solution:

1. Restarting the System:

A simple yet often overlooked step, restarting your computer can resolve minor conflicts or temporary issues that might be preventing the uninstallation from completing. This allows the system to refresh its memory and clear any temporary files that could be hindering the process.

2. Running the Uninstaller as Administrator:

Many programs require administrative privileges for complete removal. Running the uninstaller as an administrator grants the necessary permissions to access and modify system files, ensuring a clean uninstallation.

  • To run as administrator: Locate the uninstaller (usually found in the program’s installation folder or within the Start menu), right-click on it, and select "Run as administrator."

3. Utilizing the Programs and Features Panel:

Windows 10 provides a dedicated tool for managing installed programs – the "Programs and Features" panel. This tool offers a centralized location to uninstall applications, often resolving simple uninstallation issues.

  • To access the panel: Navigate to "Settings" > "Apps" > "Apps & features". Select the program you wish to uninstall and click "Uninstall".

4. Employing the "Safe Mode" Option:

Starting your computer in "Safe Mode" disables unnecessary startup programs and drivers, potentially isolating the issue and allowing for a successful uninstallation.

  • To access Safe Mode: Restart your computer and repeatedly press the F8 key during the boot process. Select "Safe Mode" from the boot options menu.

5. Utilizing Third-Party Uninstaller Tools:

Specialized uninstaller tools, such as Revo Uninstaller, IObit Uninstaller, or CCleaner, provide advanced features that can remove stubborn programs and leftover files. These tools often scan for residual files and registry entries, ensuring a thorough uninstallation.

6. Manually Removing Program Files:

If all else fails, manually deleting the program’s files and registry entries can be a last resort. However, this should only be attempted by experienced users, as incorrect deletion can damage your system.

  • To manually remove files: Locate the program’s installation folder (usually found in "C:Program Files" or "C:Program Files (x86)"), and delete all its contents.
  • To manually remove registry entries: Access the Registry Editor by typing "regedit" in the search bar. Navigate to the relevant registry keys associated with the program and delete them. Caution: Proceed with extreme care as incorrect modifications can render your system unusable.

7. System Restore:

If the uninstallation issues are related to system-wide corruption or recent changes, using the "System Restore" feature can revert your system to a previous working state, potentially resolving the problem.

  • To access System Restore: Search for "Create a restore point" in the search bar. Select the desired restore point and follow the on-screen instructions.

8. System File Checker (SFC) Scan:

The "System File Checker" (SFC) tool can scan for and repair corrupted system files, which might be hindering the uninstallation process.

  • To run SFC: Open the Command Prompt as administrator and type "sfc /scannow". Allow the scan to complete.

9. Disk Cleanup:

Running the "Disk Cleanup" tool can help remove temporary files, system files, and other unnecessary data that might be contributing to uninstallation issues.

  • To run Disk Cleanup: Search for "Disk Cleanup" in the search bar. Select the drive you wish to clean and follow the on-screen instructions.

10. Reinstalling Windows:

As a last resort, reinstalling Windows can completely erase your system and provide a fresh start, eliminating any underlying issues that might be causing uninstallation problems.

FAQs Regarding Uninstallation Issues in Windows 10:

Q: Why does my program disappear from the "Programs and Features" list after I uninstall it, but it’s still present on my computer?

A: This indicates an incomplete uninstallation. The program’s entry might have been removed from the list, but residual files and registry entries remain. Use a specialized uninstaller tool to locate and remove these remnants.

Q: I’m encountering an error message during uninstallation. What does it mean, and how can I fix it?

A: Error messages often provide clues about the issue. Look for specific error codes or descriptions to research the cause. Consult online resources or contact the software developer for support.

Q: Is it safe to manually delete program files and registry entries?

A: Manually deleting files and registry entries is risky and should only be attempted by experienced users. Incorrect deletion can lead to system instability or data loss.

Q: Can I prevent uninstallation issues from occurring in the future?

A: Yes, by following these practices:

  • Always download software from trusted sources: This minimizes the risk of installing malware or corrupted programs.
  • Install programs with administrator privileges: This ensures proper file permissions and a complete installation.
  • Run regular system maintenance: Regularly clean up temporary files, scan for malware, and update your system to prevent file corruption.
  • Use specialized uninstaller tools: These tools can help ensure a clean and complete removal of programs.

Conclusion:

Addressing uninstallation issues in Windows 10 can be frustrating, but with a systematic approach and the right troubleshooting strategies, these problems can be resolved. By understanding the underlying causes, employing the appropriate methods, and prioritizing system maintenance, you can ensure a smooth and efficient user experience, free from the hassle of incomplete or failed uninstallation attempts.

How to fix Windows 10 Install or Uninstall Programs issue [Troubleshooting Guide] - EasyPCMod Troubleshooting Uninstallation Issues Full Comprehensive Guide – Palia Support Microsoft Windows 10 Troubleshooting Guide – J.R. Clarke Public Library
How to use the Windows Troubleshooter  Microsoft  Windows 10 - YouTube How to Troubleshoot And Fix Windows 10 Problems - YouTube How to Run a Troubleshooter in Windows 10 to Resolve Problems
13 Troubleshooting Tools to Fix Windows 10  MakeUseOf Troubleshooting Windows 10

Closure

Thus, we hope this article has provided valuable insights into Troubleshooting Uninstallation Issues in Windows 10: A Comprehensive Guide. We hope you find this article informative and beneficial. See you in our next article!

Understanding And Resolving The "Stuck Shutdown" Issue In Windows 10

Understanding and Resolving the "Stuck Shutdown" Issue in Windows 10

Introduction

In this auspicious occasion, we are delighted to delve into the intriguing topic related to Understanding and Resolving the "Stuck Shutdown" Issue in Windows 10. Let’s weave interesting information and offer fresh perspectives to the readers.

Understanding and Resolving the "Stuck Shutdown" Issue in Windows 10

Top 5 easy ways: How to Fix Windows 10 Stuck on Shutting down Screen?

The inability to shut down a Windows 10 computer smoothly can be a frustrating experience. This issue, often characterized by a system that appears to hang or freeze during the shutdown process, can stem from a variety of underlying causes. Understanding these causes and implementing appropriate troubleshooting steps is crucial for restoring proper system functionality.

Common Causes of Shutdown Problems in Windows 10:

  1. Software Conflicts: A common culprit is conflicting software applications. These can include programs that are running in the background, constantly accessing system resources, or attempting to perform actions during the shutdown process. This might involve outdated or incompatible software, or programs that are designed to run continuously.

  2. Driver Issues: Outdated or corrupted device drivers can interfere with the shutdown process. These drivers, which act as intermediaries between the operating system and hardware components, may not be compatible with the current version of Windows 10 or may have become corrupted due to system updates or hardware malfunctions.

  3. System File Corruption: Damaged or corrupted system files, which are essential for the proper operation of Windows 10, can also impede the shutdown process. These files might become corrupted due to malware infections, incomplete software installations, or hardware failures.

  4. Hardware Malfunctions: Issues with hardware components, such as the hard drive, RAM, or motherboard, can contribute to shutdown problems. A malfunctioning hard drive, for instance, might struggle to write data to disk during the shutdown process, resulting in a hang.

  5. Background Processes: A large number of running background processes, such as system updates, antivirus scans, or cloud synchronization services, can consume system resources and delay the shutdown process.

  6. Power Management Settings: Incorrect power management settings, such as a delayed shutdown timer or hibernation settings, can cause the system to appear stuck during the shutdown process.

Troubleshooting Steps to Resolve Shutdown Issues:

  1. Restart the Computer: A simple restart can often resolve temporary issues that might be causing the shutdown problem. This allows the system to clear out any temporary files or processes that might be interfering with the shutdown process.

  2. Check for Updates: Ensure that Windows 10 and all installed drivers are up to date. Updates often include bug fixes and performance improvements that can address shutdown issues.

  3. Run System File Checker: The System File Checker (SFC) tool can scan for and repair corrupted system files. Run this tool by opening the Command Prompt as an administrator and typing "sfc /scannow."

  4. Disable Startup Programs: Temporarily disable startup programs to see if they are interfering with the shutdown process. This can be done by opening Task Manager (Ctrl+Shift+Esc), navigating to the Startup tab, and disabling unnecessary programs.

  5. Check for Malware: Run a full system scan with a reputable antivirus program to rule out malware infections that might be interfering with the shutdown process.

  6. Check Hardware: If software-related troubleshooting steps fail, consider checking hardware components for potential malfunctions. This might involve running diagnostic tests on the hard drive, RAM, or other components.

  7. Perform a Clean Boot: A clean boot starts Windows 10 with a minimal set of drivers and programs, helping to isolate the cause of the shutdown issue. This involves disabling all non-essential startup programs and services. Detailed instructions for performing a clean boot are available on the Microsoft website.

  8. Reset Windows 10: As a last resort, consider resetting Windows 10. This will reinstall the operating system, potentially resolving issues caused by corrupted system files or software conflicts. However, this process will erase all data on the system drive, so it is important to back up important files before proceeding.

FAQs Regarding Shutdown Issues in Windows 10:

  • Q: Why does my computer freeze during shutdown?

    • A: Freezing during shutdown can be caused by a variety of factors, including software conflicts, driver issues, corrupted system files, hardware malfunctions, or background processes that are consuming system resources.
  • Q: What can I do if my computer won’t shut down completely?

    • A: If your computer doesn’t shut down completely, it might be stuck in a state of hibernation or sleep mode. Try pressing and holding the power button for several seconds to force a shutdown. If this doesn’t work, consider restarting the computer or using the troubleshooting steps outlined above.
  • Q: Is it safe to force a shutdown?

    • A: While forcing a shutdown can be necessary in some cases, it’s generally not recommended as it can potentially lead to data loss or system instability. Try other troubleshooting steps first.
  • Q: How do I know if my hard drive is failing?

    • A: Signs of a failing hard drive include slow performance, frequent crashes, error messages, and unusual noises. You can use hard drive diagnostic tools to check for errors and assess the health of the drive.
  • Q: What is a clean boot and how do I perform one?

    • A: A clean boot starts Windows 10 with a minimal set of drivers and programs, helping to isolate the cause of the shutdown issue. Detailed instructions for performing a clean boot are available on the Microsoft website.

Tips for Preventing Shutdown Issues in Windows 10:

  • Keep Windows 10 and Drivers Updated: Regularly update Windows 10 and device drivers to ensure compatibility and resolve potential issues.

  • Run Regular System Scans: Perform regular system scans with antivirus software to prevent malware infections.

  • Monitor Background Processes: Be mindful of background processes that might be consuming system resources. Consider disabling or limiting unnecessary programs.

  • Optimize Power Management Settings: Configure power management settings to ensure proper shutdown behavior.

  • Back Up Important Data: Regularly back up important files to protect against data loss in case of system failure.

Conclusion:

The inability to shut down a Windows 10 computer smoothly can be a frustrating experience. However, understanding the potential causes and implementing appropriate troubleshooting steps can help resolve this issue. By systematically addressing software conflicts, driver issues, system file corruption, hardware malfunctions, and background processes, users can restore proper shutdown functionality and ensure a seamless computing experience. Remember to keep Windows 10 and drivers updated, run regular system scans, monitor background processes, and back up important data to prevent future shutdown issues.

8 Ways to Fix Slow Shutdown Issues in Windows 10 – WebNots 8 Ways to Fix Slow Shutdown Issues in Windows 10 – WebNots Fix Task Host Window Prevents Shut Down In Windows 10  techcult
Fix Windows 10 Shutdown issues - YouTube Windows 10 Stuck in Shutdown? 6 Easy Ways to Fix in 2024! 8 Ways to Fix Slow Shutdown Issues in Windows 10 – WebNots
How to Fix Windows 10 Slow Shutdown Issue - YouTube Windows Update Troubleshooter Stuck on Resolving Problems ��

Closure

Thus, we hope this article has provided valuable insights into Understanding and Resolving the "Stuck Shutdown" Issue in Windows 10. We appreciate your attention to our article. See you in our next article!

Navigating The Landscape Of NVIDIA GeForce GTX 1050 Ti Drivers For Windows 11: A Comprehensive Guide

Navigating the Landscape of NVIDIA GeForce GTX 1050 Ti Drivers for Windows 11: A Comprehensive Guide

Introduction

In this auspicious occasion, we are delighted to delve into the intriguing topic related to Navigating the Landscape of NVIDIA GeForce GTX 1050 Ti Drivers for Windows 11: A Comprehensive Guide. Let’s weave interesting information and offer fresh perspectives to the readers.

Nvidia GeForce GTX 1050 Ti Driver Download Links with Setup Guide

The NVIDIA GeForce GTX 1050 Ti, a popular graphics card known for its performance and affordability, can be a valuable asset for Windows 11 users seeking a smooth and enjoyable gaming experience. However, unlocking its full potential requires the right drivers – software that acts as a bridge between the hardware and the operating system. This guide provides a comprehensive overview of NVIDIA GeForce GTX 1050 Ti drivers in the context of Windows 11, covering their importance, installation, troubleshooting, and optimization tips.

Understanding the Significance of Drivers

Drivers are essential software components that enable communication between the hardware and the operating system. Without them, the GTX 1050 Ti would be unable to function correctly, rendering the graphics card essentially useless. Drivers provide the necessary instructions for Windows 11 to recognize, utilize, and manage the graphics card’s capabilities, allowing it to perform tasks such as rendering visuals, displaying images, and accelerating gaming performance.

The Importance of Up-to-Date Drivers

Maintaining up-to-date drivers is crucial for several reasons:

  • Enhanced Performance: Newer drivers often include optimizations that improve performance, leading to smoother gameplay, higher frame rates, and enhanced visual quality.
  • Bug Fixes and Stability: Drivers are constantly being updated to address known issues, bugs, and vulnerabilities. Installing the latest drivers can resolve problems that may be causing instability or crashes.
  • New Feature Support: New drivers may add support for newly released games, technologies, and features, ensuring compatibility and maximizing the GTX 1050 Ti’s potential.
  • Security: Drivers can include security patches that protect against potential vulnerabilities and malware threats.

Finding and Installing the Right Drivers

The most reliable way to obtain the latest drivers for your NVIDIA GeForce GTX 1050 Ti is through the official NVIDIA website:

  1. Visit the NVIDIA Website: Navigate to the NVIDIA Drivers page (https://www.nvidia.com/Download/index.aspx).
  2. Select Your Graphics Card: Select "GeForce" from the "Product Type" dropdown menu, then choose "GeForce GTX 1050 Ti" from the "Product Series" dropdown menu.
  3. Choose Your Operating System: Select "Windows 11" from the "Operating System" dropdown menu.
  4. Download the Driver: Click the "Search" button to locate the latest driver for your specific graphics card and operating system. Download the appropriate driver package.
  5. Install the Driver: Run the downloaded driver installation file and follow the on-screen instructions.

Troubleshooting Common Driver Issues

While driver updates generally improve system performance, they can sometimes introduce new issues. Here are some common problems and solutions:

  • Driver Installation Errors: If the driver installation fails, try restarting your computer and reinstalling the driver. Ensure you have administrator privileges and temporarily disable any antivirus software.
  • Blue Screen of Death (BSOD): If you encounter a BSOD after installing new drivers, try rolling back to the previous version. Access the Device Manager (right-click on the Start menu and select "Device Manager"), locate the "Display adapters" section, right-click on your GTX 1050 Ti, and select "Properties." Navigate to the "Driver" tab and select "Roll Back Driver."
  • Performance Degradation: If you notice a decrease in performance after a driver update, try reinstalling the driver or rolling back to a previous version. Check for driver conflicts with other software and ensure your system meets the minimum requirements for the game or application you are running.
  • Display Issues: If you experience display problems like flickering, artifacts, or black screens, try updating the driver, rolling back to a previous version, or adjusting the display settings.

Optimizing Performance with Driver Settings

NVIDIA GeForce drivers offer a range of settings that can further enhance performance and personalize your gaming experience.

  • NVIDIA Control Panel: Access the NVIDIA Control Panel by right-clicking on your desktop and selecting "NVIDIA Control Panel."
  • Manage 3D Settings: Within the Control Panel, navigate to "Manage 3D Settings" to customize settings for individual games and applications.
  • Anti-Aliasing: Adjust the anti-aliasing settings to smooth out jagged edges in games. Experiment with different levels to find the best balance between visual quality and performance.
  • Texture Filtering: Adjust the texture filtering settings to improve the sharpness and detail of textures. Higher settings can enhance visual quality but may impact performance.
  • Vertical Sync (VSync): VSync synchronizes the refresh rate of your monitor with the frame rate of the game, reducing screen tearing. However, it can introduce input lag. Experiment with different settings to find the best balance for your needs.
  • Power Management: Adjust the power management settings to optimize performance and energy consumption. Choose "Prefer maximum performance" for optimal gaming performance.

FAQs on NVIDIA GeForce GTX 1050 Ti Drivers for Windows 11

Q: Are there different types of drivers available for the GTX 1050 Ti?

A: Yes, NVIDIA provides different driver types, including:

  • Game Ready Drivers: Optimized for specific games, providing the best possible performance and stability.
  • Studio Drivers: Designed for creative professionals, providing optimized performance for applications like video editing and 3D modeling.
  • Standard Drivers: Offer general stability and performance for everyday use.

Q: How often should I update my drivers?

A: It is recommended to update your drivers regularly, ideally every few weeks or whenever a new driver version is released.

Q: Can I use drivers from older operating systems?

A: Using drivers from older operating systems is not recommended. Drivers are designed for specific operating systems and may not function correctly or be compatible with Windows 11.

Q: What should I do if I encounter a driver issue that I cannot resolve?

A: If you encounter a persistent driver issue, try the following:

  • Consult NVIDIA’s Support Website: The NVIDIA website provides comprehensive troubleshooting guides and support resources.
  • Contact NVIDIA Support: If you are unable to resolve the issue yourself, contact NVIDIA’s customer support for assistance.

Tips for Maximizing Performance

  • Keep Your System Up-to-Date: Ensure your Windows 11 operating system is up-to-date with the latest patches and updates.
  • Monitor System Temperatures: High temperatures can impact performance. Ensure your graphics card and CPU are not overheating.
  • Optimize Game Settings: Adjust in-game settings to balance visual quality and performance.
  • Consider Overclocking: Overclocking can boost performance but requires careful monitoring and understanding of potential risks.

Conclusion

NVIDIA GeForce GTX 1050 Ti drivers are crucial for unlocking the full potential of your graphics card in Windows 11. By understanding the importance of drivers, installing the latest versions, and optimizing settings, you can enhance performance, resolve issues, and enjoy a smoother and more enjoyable gaming experience. Remember to regularly update your drivers, monitor system health, and consult NVIDIA’s resources for assistance when needed.

NVIDIA GeForce GTX 1050 Ti Drivers Download for Windows 10,11  TechPout Nvidia GeForce GTX 1050 Ti Driver Download Links with Setup Guide NVIDIA GeForce GTX 1050 Ti Drivers Download for Windows 10,11  TechPout
NVIDIA GeForce GTX 1050 Ti Drivers Download for Windows 10,11  TechPout NVIDIA GeForce GTX 1050 Ti Drivers Download for Windows 10,11  TechPout NVIDIA GeForce GTX 1050 Ti Drivers Download for Windows 10,11  TechPout
How to Download and Update NVidia GeForce GTX 1050 Ti Drivers? Nvidia GeForce GTX 1050 Ti Driver Download Links With Setup, 42% OFF

Closure

Thus, we hope this article has provided valuable insights into Navigating the Landscape of NVIDIA GeForce GTX 1050 Ti Drivers for Windows 11: A Comprehensive Guide. We hope you find this article informative and beneficial. See you in our next article!

Understanding PC Health At A Glance: A Comprehensive Guide To Windows 10’s Built-in Diagnostic Tool

Understanding PC Health at a Glance: A Comprehensive Guide to Windows 10’s Built-in Diagnostic Tool

Introduction

With great pleasure, we will explore the intriguing topic related to Understanding PC Health at a Glance: A Comprehensive Guide to Windows 10’s Built-in Diagnostic Tool. Let’s weave interesting information and offer fresh perspectives to the readers.

Understanding PC Health at a Glance: A Comprehensive Guide to Windows 10’s Built-in Diagnostic Tool

15 Windows Diagnostics Tools to Check Your PC's Health

Maintaining a healthy PC is crucial for optimal performance, smooth operation, and long-term stability. Windows 10, the latest iteration of Microsoft’s operating system, incorporates a powerful diagnostic tool known as "PC Health at a Glance," providing users with valuable insights into their computer’s health and performance. This article delves into the intricacies of this tool, exploring its functionalities, benefits, and how to leverage it effectively.

The Importance of Proactive PC Health Monitoring

Neglecting PC health can lead to a multitude of issues, including slow performance, system crashes, data loss, and security vulnerabilities. Proactive monitoring allows users to identify and address potential problems before they escalate into significant issues. PC Health at a Glance empowers users with the necessary information to take control of their computer’s well-being, ensuring a seamless and efficient computing experience.

Introducing PC Health at a Glance: A Windows 10 Diagnostic Tool

PC Health at a Glance is a user-friendly diagnostic tool integrated into Windows 10. It provides a comprehensive overview of the computer’s health, encompassing various aspects like storage space, battery life, system updates, and security status. By offering a centralized platform for monitoring essential components, PC Health at a Glance facilitates early detection of potential problems and empowers users to take timely action.

Accessing PC Health at a Glance

Accessing PC Health at a Glance is straightforward:

  1. Click the Start Menu: Navigate to the bottom left corner of your screen and click the Start Menu.
  2. Search for "PC Health Check": In the search bar, type "PC Health Check" and select the relevant option.
  3. Launch the Application: Click on the "PC Health Check" application icon to launch the tool.

Key Features and Functionalities

PC Health at a Glance is equipped with a range of functionalities designed to provide comprehensive insights into your computer’s health. These include:

  • Storage Space Analysis: This feature provides a visual representation of the available storage space on your hard drive, highlighting potential storage bottlenecks and prompting users to manage their files effectively.
  • Battery Health Monitoring: For laptop users, PC Health at a Glance offers valuable insights into battery health, indicating potential issues like decreased battery life or charging problems.
  • System Update Status: The tool displays the status of available system updates, ensuring that your computer is running the latest security patches and performance enhancements.
  • Security Status: PC Health at a Glance provides an overview of your computer’s security status, highlighting potential vulnerabilities and recommending necessary security measures.
  • Performance Monitoring: The tool monitors various performance metrics, including CPU usage, memory usage, and disk activity, allowing users to identify performance bottlenecks and optimize their system settings.

Benefits of Utilizing PC Health at a Glance

Leveraging PC Health at a Glance offers numerous benefits, including:

  • Proactive Problem Detection: The tool provides early warnings of potential issues, enabling users to address them before they escalate into significant problems.
  • Improved System Performance: By identifying and addressing performance bottlenecks, PC Health at a Glance helps optimize system performance, resulting in a smoother and more efficient computing experience.
  • Enhanced Security: The tool provides comprehensive security insights, highlighting potential vulnerabilities and recommending necessary security measures to protect your computer from malicious threats.
  • Increased User Awareness: PC Health at a Glance empowers users with valuable knowledge about their computer’s health, promoting a proactive approach to system maintenance.

FAQs: Addressing Common Questions

Q: Is PC Health at a Glance compatible with all Windows 10 versions?

A: PC Health at a Glance is available on all versions of Windows 10, ensuring that all users have access to this valuable diagnostic tool.

Q: Does PC Health at a Glance require any special configuration?

A: PC Health at a Glance is seamlessly integrated into Windows 10 and does not require any specific configuration. Simply launch the tool to access its functionalities.

Q: Can I use PC Health at a Glance to diagnose specific hardware issues?

A: While PC Health at a Glance provides a comprehensive overview of system health, it is not a dedicated hardware diagnostic tool. For specific hardware issues, consider utilizing specialized diagnostic software or contacting a qualified technician.

Q: Is PC Health at a Glance a replacement for antivirus software?

A: No, PC Health at a Glance is not a replacement for antivirus software. It provides an overview of security status, but it does not offer real-time protection against malware.

Tips for Utilizing PC Health at a Glance Effectively

To maximize the benefits of PC Health at a Glance, consider these tips:

  • Run Regular Scans: Regularly run PC Health at a Glance to monitor your system’s health and identify potential issues early on.
  • Address Issues Promptly: When PC Health at a Glance identifies a potential problem, address it promptly to prevent further issues from developing.
  • Utilize Recommended Actions: The tool often provides specific recommendations for addressing identified issues. Follow these recommendations for optimal results.
  • Stay Informed: Keep abreast of updates and new features for PC Health at a Glance to leverage the latest functionalities and improvements.
  • Combine with Other Diagnostic Tools: While PC Health at a Glance is a valuable tool, consider using it in conjunction with other diagnostic software for a more comprehensive approach to system maintenance.

Conclusion: Empowering Users to Maintain Optimal PC Health

PC Health at a Glance is a valuable tool integrated into Windows 10, empowering users to maintain optimal PC health and performance. By providing a centralized platform for monitoring essential system components, the tool facilitates early detection of potential problems, enabling users to take proactive action and ensure a smooth and efficient computing experience. By leveraging the features and functionalities of PC Health at a Glance, users can enjoy a healthier and more reliable PC, maximizing productivity and minimizing potential issues.

How to use the PC Health Check app - Microsoft Support  Check in app, Health check, App Pc Health At A Glance the pc health at a glance screen is shown in this screenshot from windows 10
Pc Health At A Glance Pc Health At A Glance How to Check the Health of Your Windows 10 PC (And Keep It in Shape)  LaptrinhX
10 Best Computer Diagnostic Tool For Windows 10 11  techviral Windows 10 update KB5005463 is installing the PC Health Check app automatically again - YouTube

Closure

Thus, we hope this article has provided valuable insights into Understanding PC Health at a Glance: A Comprehensive Guide to Windows 10’s Built-in Diagnostic Tool. We appreciate your attention to our article. See you in our next article!