Connecting Your Windows 11 PC And Laptop: A Comprehensive Guide
Connecting Your Windows 11 PC and Laptop: A Comprehensive Guide
Related Articles: Connecting Your Windows 11 PC and Laptop: A Comprehensive Guide
Introduction
With enthusiasm, let’s navigate through the intriguing topic related to Connecting Your Windows 11 PC and Laptop: A Comprehensive Guide. Let’s weave interesting information and offer fresh perspectives to the readers.
Table of Content
Connecting Your Windows 11 PC and Laptop: A Comprehensive Guide

The modern digital landscape often demands seamless integration between devices. For Windows 11 users, the ability to connect a PC and laptop effectively opens up a world of possibilities, enabling effortless file sharing, synchronized workspaces, and enhanced productivity. This guide will delve into the various methods for establishing a robust connection between your Windows 11 PC and laptop, providing a detailed understanding of each approach and its respective advantages.
Understanding Connection Methods
Connecting your Windows 11 PC and laptop involves establishing a communication channel between the two devices. This can be achieved through several methods, each with its unique characteristics and suitability for different scenarios.
1. Wired Connection: The Foundation of Stability
A wired connection, facilitated by an Ethernet cable, provides the most stable and reliable communication between your PC and laptop. The inherent physical link eliminates the potential for interference and ensures consistent data transfer speeds.
Advantages:
- High Bandwidth: Ethernet cables offer significantly higher bandwidth compared to wireless connections, ensuring faster file transfers and smooth streaming.
- Reliability: The physical connection eliminates the risk of signal interference or drops, guaranteeing a stable connection.
- Security: Wired connections are inherently more secure than wireless networks, reducing the risk of unauthorized access.
Disadvantages:
- Limited Mobility: Wired connections restrict the movement of your laptop, as it needs to be physically connected to the PC.
- Cable Management: Managing cables can be cumbersome, especially in cluttered workspaces.
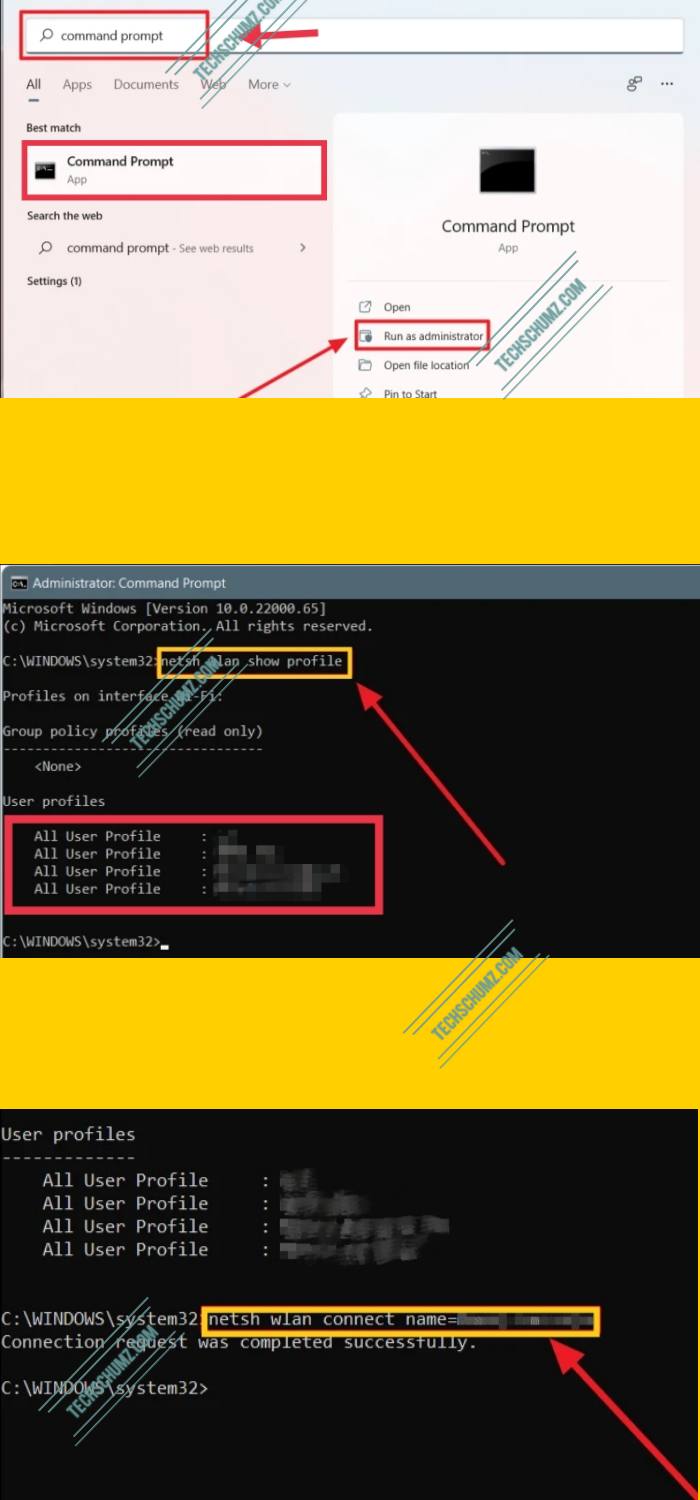
2. Wireless Connection: The Convenience of Freedom
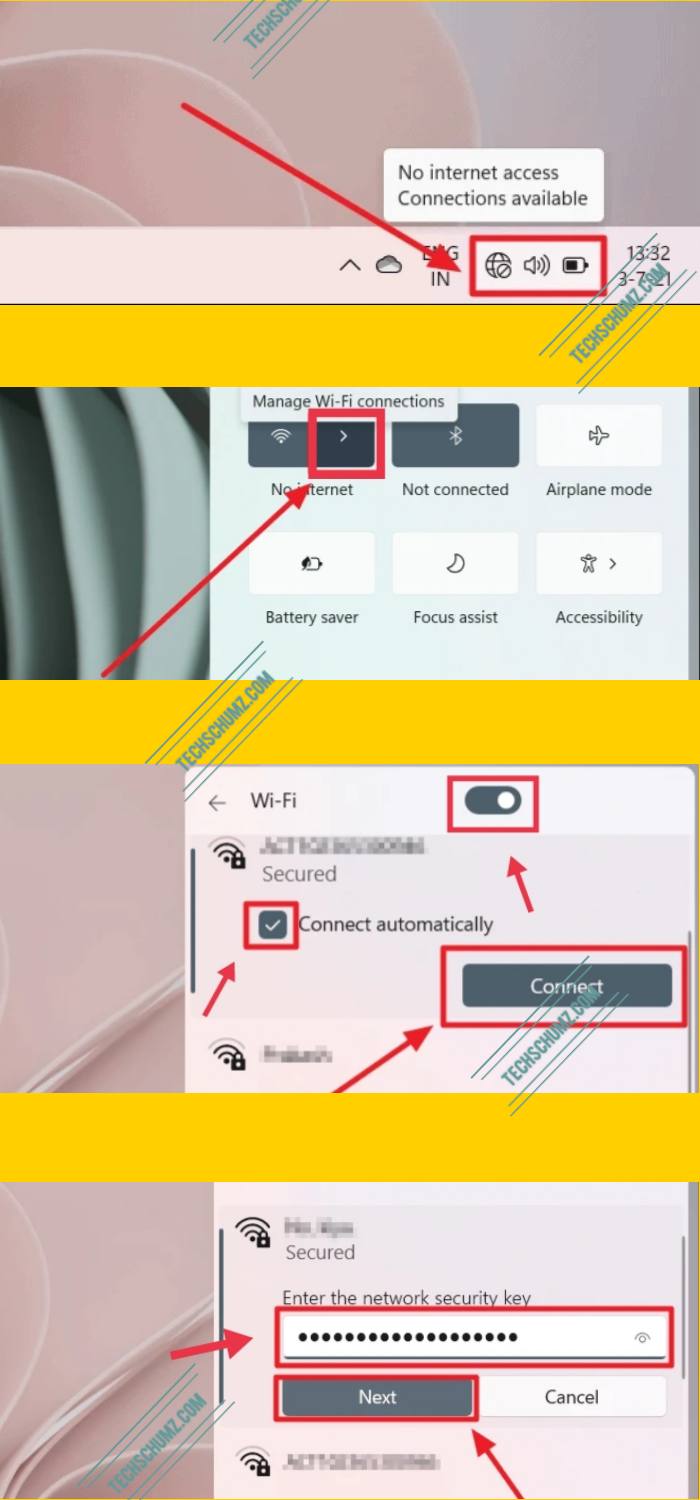
Wireless connections, facilitated by Wi-Fi networks, offer the convenience of mobility and flexibility. Modern routers provide robust and fast Wi-Fi signals, allowing both your PC and laptop to connect seamlessly without physical cables.
Advantages:
- Mobility: Wireless connections enable you to move your laptop freely within the range of the Wi-Fi network.
- Ease of Setup: Setting up a wireless connection is generally simpler than establishing a wired connection.
- Multiple Device Support: Wi-Fi networks can accommodate multiple devices simultaneously, allowing you to connect other devices like smartphones or tablets.
Disadvantages:
- Potential for Interference: Wireless signals can be affected by various factors, such as walls, other electronic devices, and network congestion, leading to slower speeds or connection drops.
- Security Concerns: Wireless networks are susceptible to security breaches if not properly secured.
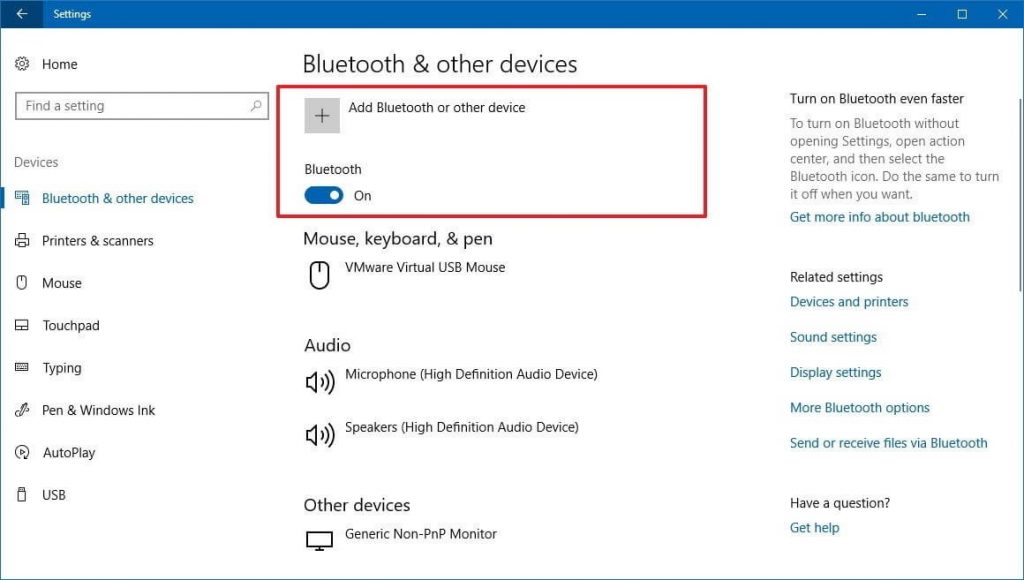
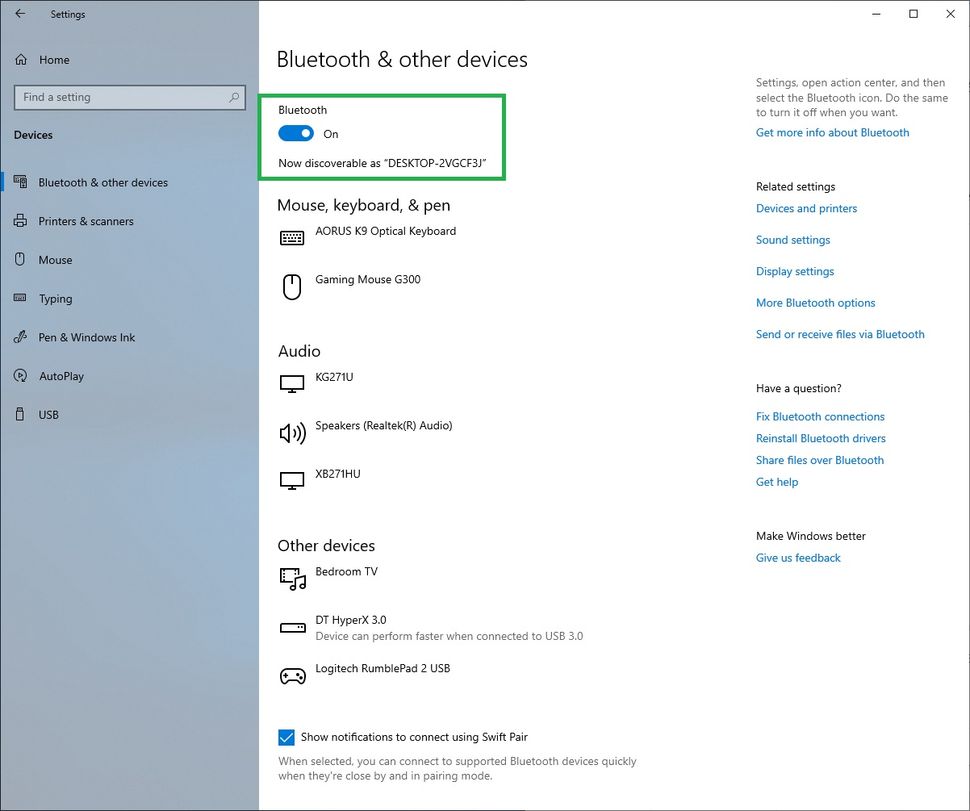
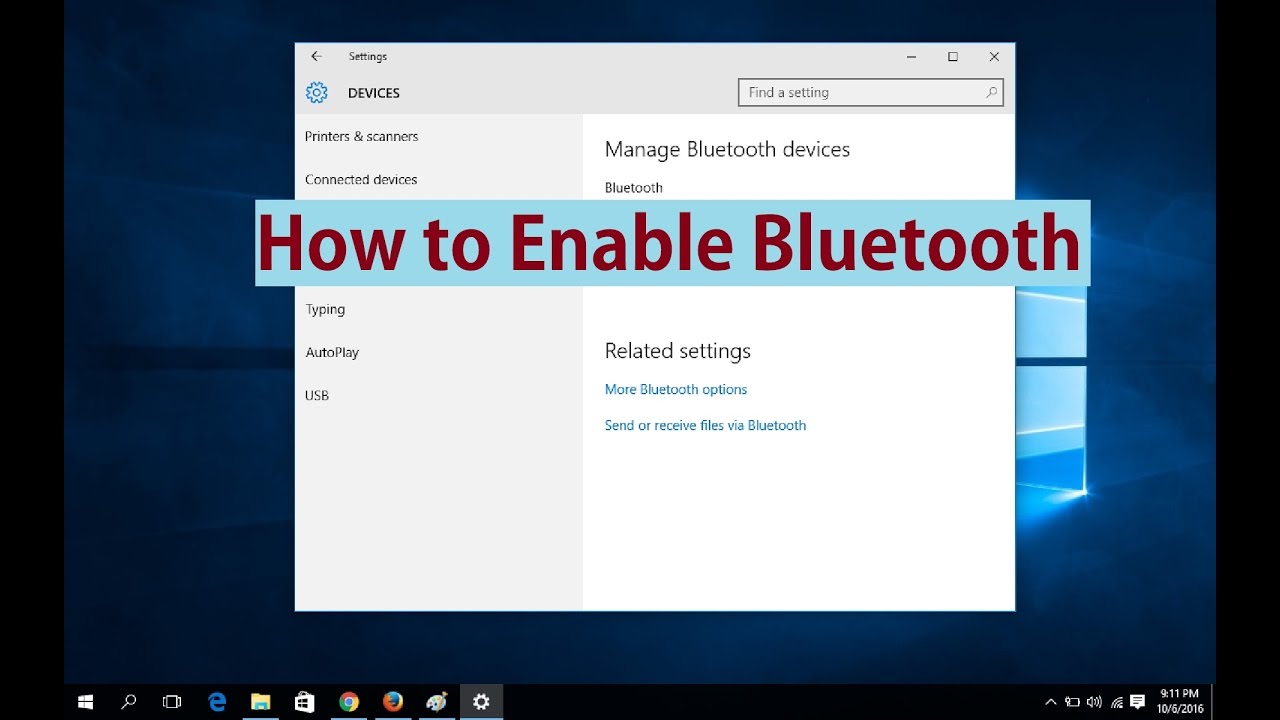
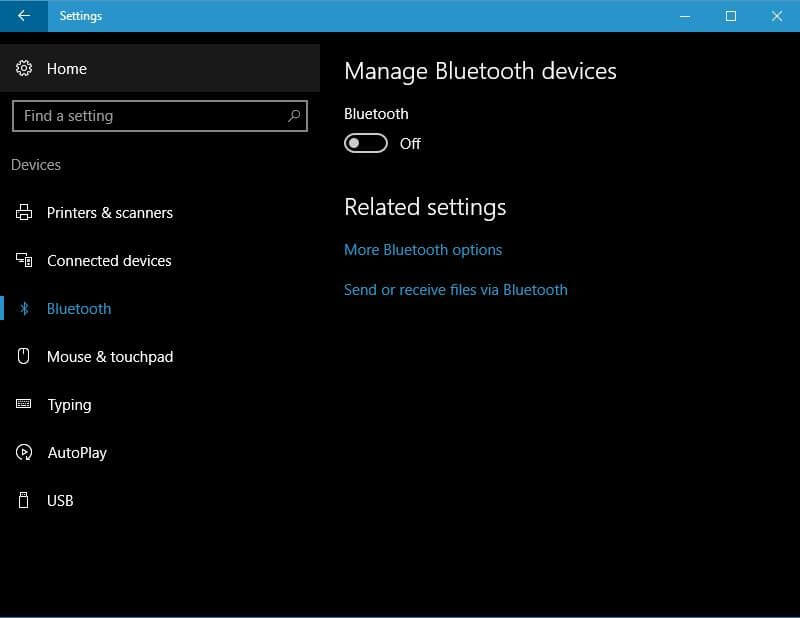
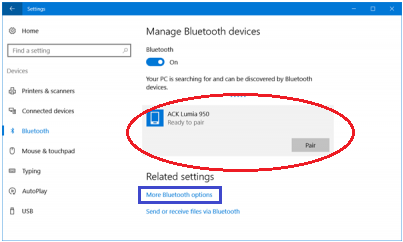
3. Bluetooth: The Bridge for Peripheral Sharing
Bluetooth technology offers a convenient way to connect devices wirelessly, primarily for sharing peripherals like mice, keyboards, and printers. While not ideal for large file transfers, Bluetooth proves useful for quick and easy data exchange.
Advantages:
- Short-Range Connectivity: Bluetooth offers a convenient way to connect devices within close proximity.
- Low Power Consumption: Bluetooth technology is energy-efficient, making it suitable for devices like wireless mice and keyboards.
- Device Pairing: Bluetooth allows easy pairing between devices, simplifying the connection process.
Disadvantages:
- Limited Range: Bluetooth has a shorter range compared to Wi-Fi, limiting its usability for longer distances.
- Lower Bandwidth: Bluetooth offers lower bandwidth compared to Wi-Fi, making it unsuitable for large file transfers or high-bandwidth applications.
4. Remote Desktop: Accessing Your PC from Anywhere
Remote desktop software, such as Microsoft Remote Desktop, allows you to access and control your PC from your laptop remotely. This functionality is particularly beneficial for accessing files, running applications, or managing your PC from another location.
Advantages:
- Remote Access: Remote desktop allows you to control your PC from any location with an internet connection.
- Access to Resources: It enables you to access files, applications, and resources stored on your PC remotely.
- Multitasking: Remote desktop can be used alongside your laptop’s local applications, allowing you to work on multiple tasks simultaneously.
Disadvantages:
- Internet Connection Dependency: Remote desktop functionality relies on a stable internet connection for smooth operation.
- Performance Limitations: Performance can be affected by network latency and bandwidth limitations, impacting responsiveness.
Beyond Connection: Exploring Collaboration Tools
While establishing a connection between your PC and laptop is crucial, leveraging additional tools can significantly enhance your workflow and collaboration capabilities.
1. Cloud Storage: Your Digital Hub
Cloud storage services like OneDrive, Google Drive, and Dropbox offer a convenient way to synchronize files between your PC and laptop. This ensures that your documents, images, and other data are always accessible from both devices, eliminating the need for manual transfers.
Advantages:
- Synchronization: Files stored in cloud storage are automatically synchronized across all connected devices.
- Accessibility: Access your files from any device with an internet connection.
- Collaboration: Cloud storage platforms often offer features for collaborative document editing and sharing.
Disadvantages:
- Internet Dependency: Cloud storage requires a stable internet connection for synchronization and access.
- Security Concerns: Data stored in the cloud is susceptible to security breaches if not properly protected.
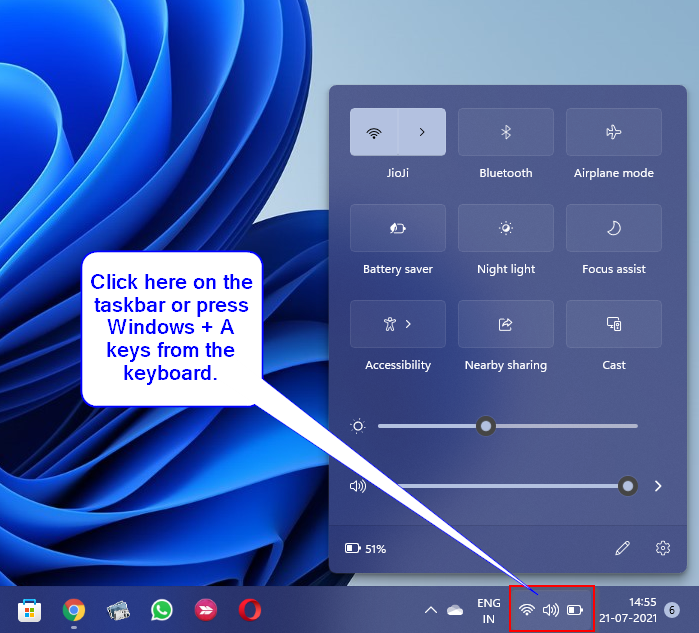
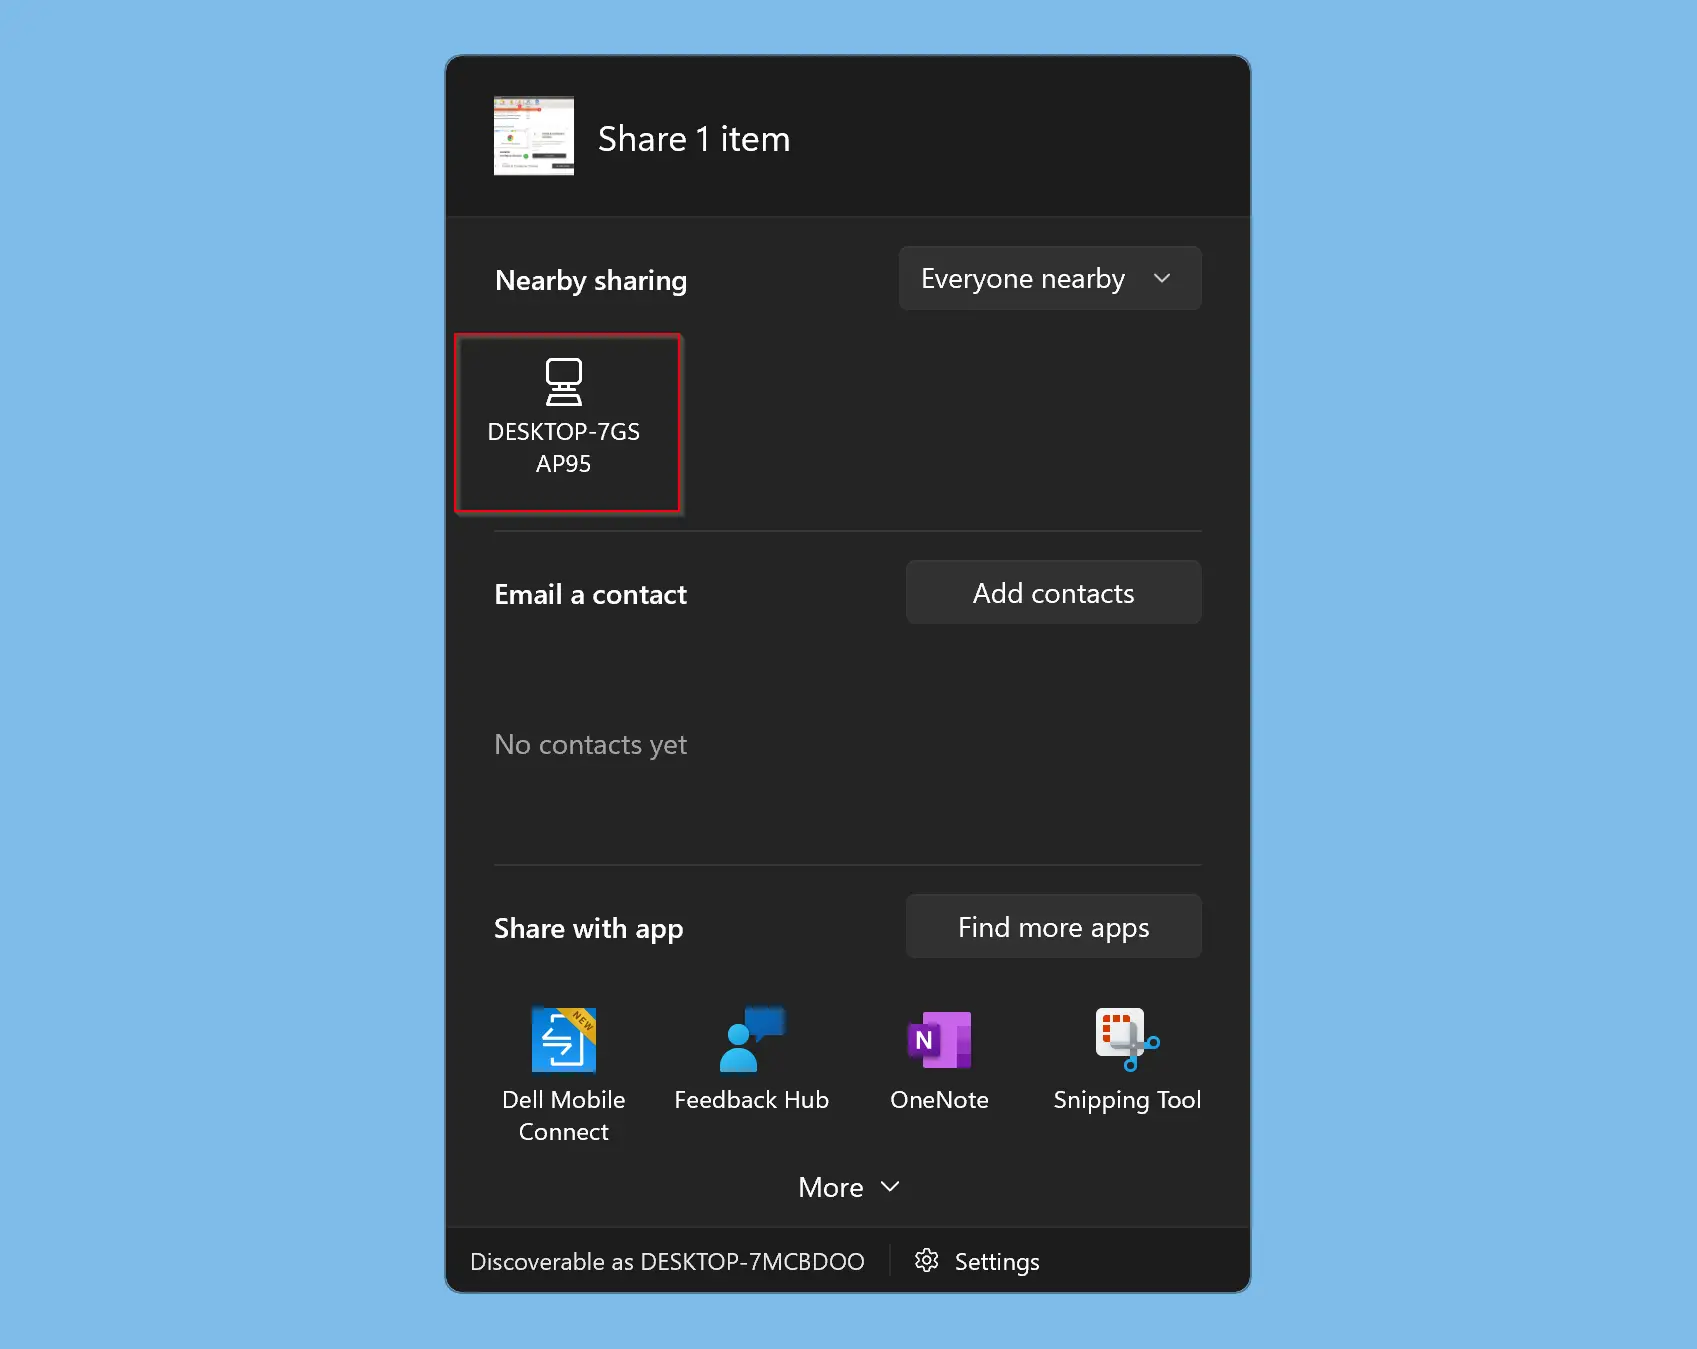
2. File Sharing: Quick and Easy Transfer
File sharing options like Windows’ built-in "Share" feature or third-party applications like AirDrop (for Apple devices) allow you to quickly transfer files between your PC and laptop. This is a convenient method for sharing large files or transferring files without using cloud storage.
Advantages:
- Speed: File sharing options often offer faster transfer speeds compared to cloud storage.
- Direct Transfer: Files are transferred directly between devices without relying on internet connections.
- Privacy: File sharing allows you to control who has access to your files.
Disadvantages:
- Limited Reach: File sharing options typically work within a local network or between compatible devices.
- Potential for Errors: File transfers can be interrupted or corrupted if there are network issues.
3. Virtualization: Running Multiple Operating Systems
Virtualization software, such as VMware Workstation or Oracle VirtualBox, allows you to run a virtual machine on your PC, effectively creating a separate operating system environment. This enables you to run a different operating system, such as Linux, on your PC while simultaneously using Windows 11 on your laptop.
Advantages:
- Multiple Operating Systems: Virtualization allows you to run multiple operating systems simultaneously.
- Testing and Development: It provides a safe and isolated environment for testing applications or developing software.
- Resource Management: Virtual machines can be allocated specific resources, ensuring optimal performance for each operating system.
Disadvantages:
- Resource Intensive: Virtualization requires significant system resources, potentially impacting performance.
- Complexity: Setting up and managing virtual machines can be complex for beginners.
FAQs
Q: How do I connect my PC and laptop wirelessly?
A: To connect your PC and laptop wirelessly, ensure both devices are connected to the same Wi-Fi network. If you haven’t already, set up a Wi-Fi network using your router. Once both devices are connected, they can communicate with each other wirelessly.
Q: Can I access my PC files from my laptop using a wired connection?
A: Yes, you can access files stored on your PC from your laptop using a wired connection. Connect both devices using an Ethernet cable and ensure file sharing is enabled on your PC. You can then access the shared folders on your PC from your laptop.
Q: What are the best cloud storage options for syncing files between my PC and laptop?
A: Popular cloud storage options for file synchronization include OneDrive (integrated with Windows 11), Google Drive, Dropbox, and iCloud Drive (for Apple devices). Choose the option that best suits your needs and preferences.
Q: How do I use remote desktop to access my PC from my laptop?
A: To use remote desktop, install Microsoft Remote Desktop on both your PC and laptop. On your PC, enable remote access in the system settings. Then, connect to your PC from your laptop using the Remote Desktop app, entering the PC’s name or IP address.
Q: What are the benefits of connecting my PC and laptop?
A: Connecting your PC and laptop offers numerous benefits, including:
- Seamless File Sharing: Easily transfer files between devices.
- Synchronized Workspaces: Access documents and applications from both devices.
- Enhanced Productivity: Work on multiple tasks simultaneously across devices.
- Remote Access: Control your PC from anywhere with an internet connection.
- Collaboration: Share files and collaborate on projects with ease.
Tips
- Optimize Network Performance: Ensure your Wi-Fi network is strong and free from interference. Use a wired connection for critical tasks or large file transfers.
- Secure Your Connections: Enable strong passwords and security protocols for your Wi-Fi network and cloud storage accounts.
- Explore Collaboration Tools: Utilize cloud storage, file sharing options, and remote desktop software to enhance your workflow.
- Back Up Your Data: Regularly back up important files to prevent data loss in case of hardware failure or accidental deletion.
- Stay Updated: Regularly update your operating system and software to ensure optimal performance and security.
Conclusion
Connecting your Windows 11 PC and laptop opens up a world of possibilities for seamless file sharing, synchronized workspaces, and enhanced productivity. By understanding the various connection methods, exploring collaboration tools, and implementing best practices, you can effectively harness the power of interconnected devices to streamline your workflow and unlock new levels of efficiency. The choice of connection method and tools depends on your specific needs and preferences, allowing you to customize your setup for optimal functionality and convenience.


/cdn.vox-cdn.com/uploads/chorus_image/image/69784509/windows11main.0.jpg)
Closure
Thus, we hope this article has provided valuable insights into Connecting Your Windows 11 PC and Laptop: A Comprehensive Guide. We thank you for taking the time to read this article. See you in our next article!


![How to Fix: No Sound After Windows 10/11 Update - Sound Missing 2024 [Solved] - YouTube](https://i.ytimg.com/vi/tvjynf0zMG8/maxresdefault.jpg)


![How to Fix Windows 10 Audio Sound Problems [3 Solutions] - YouTube](https://i.ytimg.com/vi/rtPf5igHNn8/maxresdefault.jpg)

:max_bytes(150000):strip_icc()/Addbluetooth-28829cf9d400427dab372c0a2a92e95e.jpg)


![No Audio Output Device Is Installed in Windows 10 Fix [Working] - YouTube](https://i.ytimg.com/vi/AyxN6qURKdA/maxresdefault.jpg)


:max_bytes(150000):strip_icc()/0011_customize-windows-11-5196410-619a7567f6cd4dfc89a7c1783dc36250.jpg)

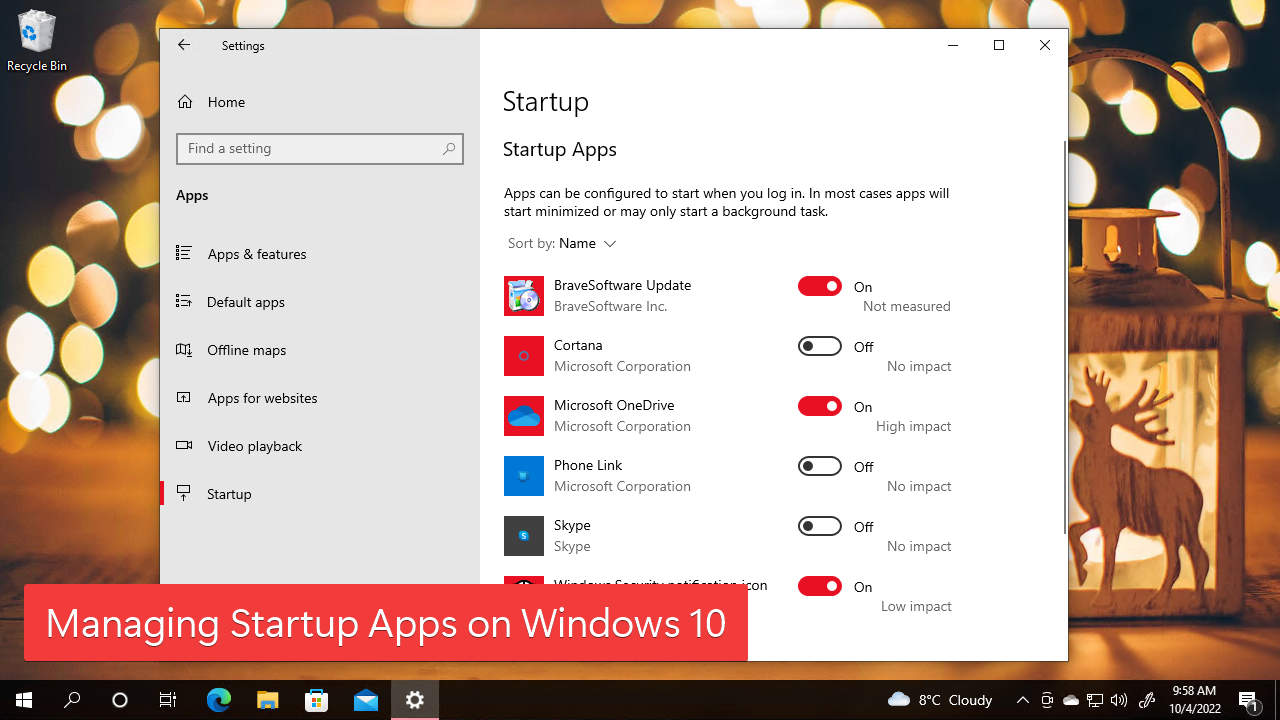
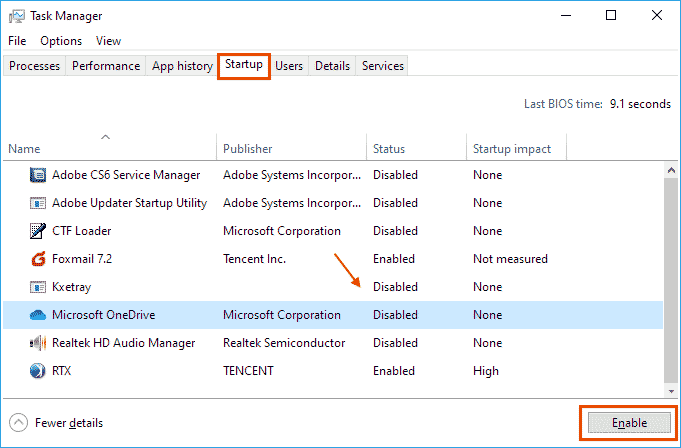
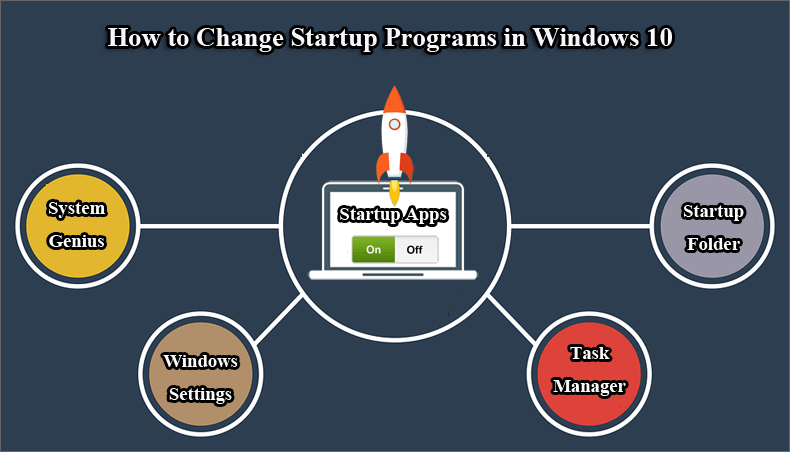
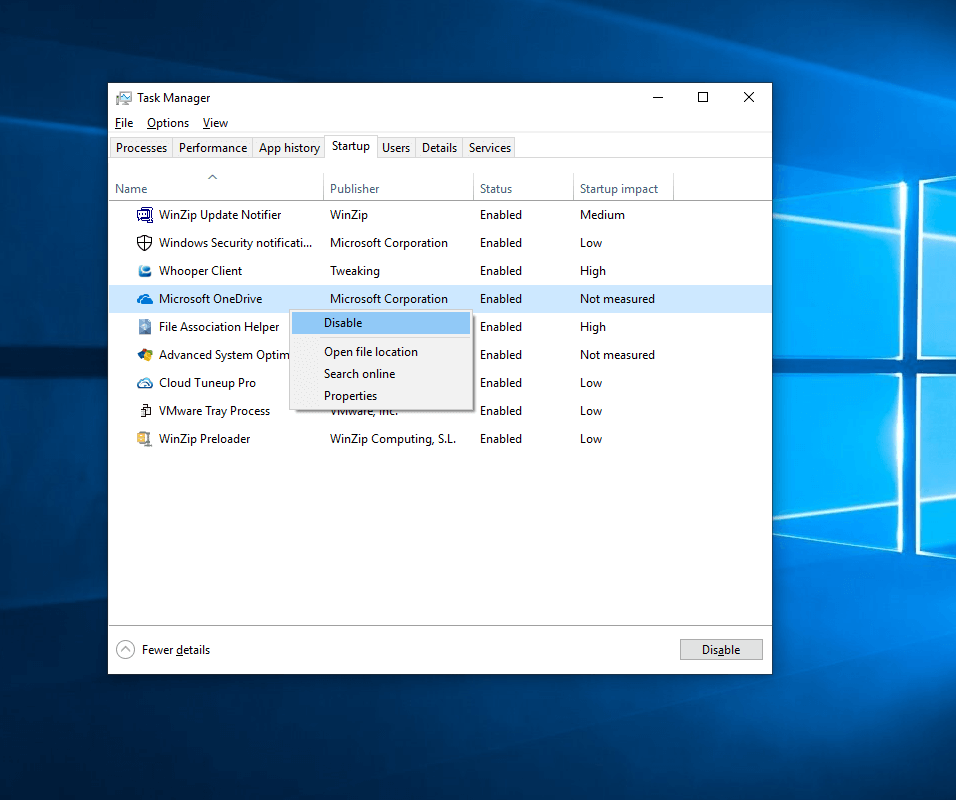
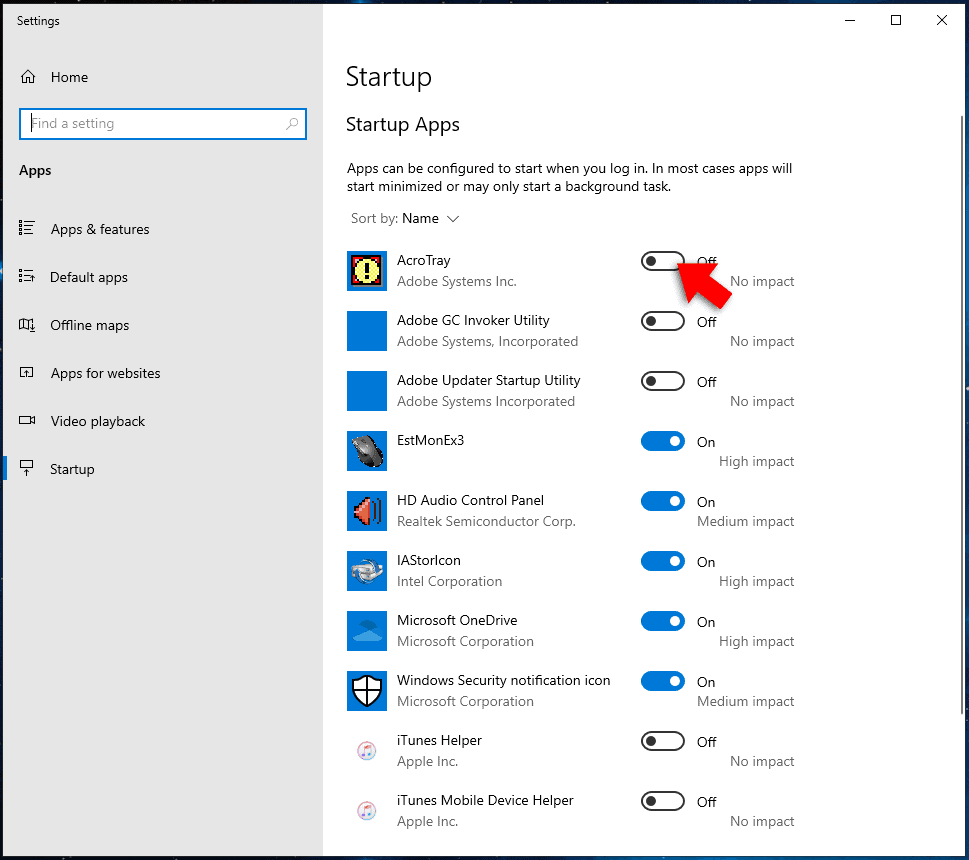
![How to Manage Startup Programs in Windows 10 [Tutorial]](https://consumingtech.com/wp-content/uploads/2017/07/Startup-status-enabled-1024x597.png)