Unveiling The Power Of PhotoImpression 6: A Comprehensive Guide To Windows 11 Image Enhancement

Unveiling the Power of PhotoImpression 6: A Comprehensive Guide to Windows 11 Image Enhancement

Introduction

In this auspicious occasion, we are delighted to delve into the intriguing topic related to Unveiling the Power of PhotoImpression 6: A Comprehensive Guide to Windows 11 Image Enhancement. Let’s weave interesting information and offer fresh perspectives to the readers.

Unveiling the Power of PhotoImpression 6: A Comprehensive Guide to Windows 11 Image Enhancement

TÉLÉCHARGER GRATUITEMENT ARCSOFT PHOTOIMPRESSION 6

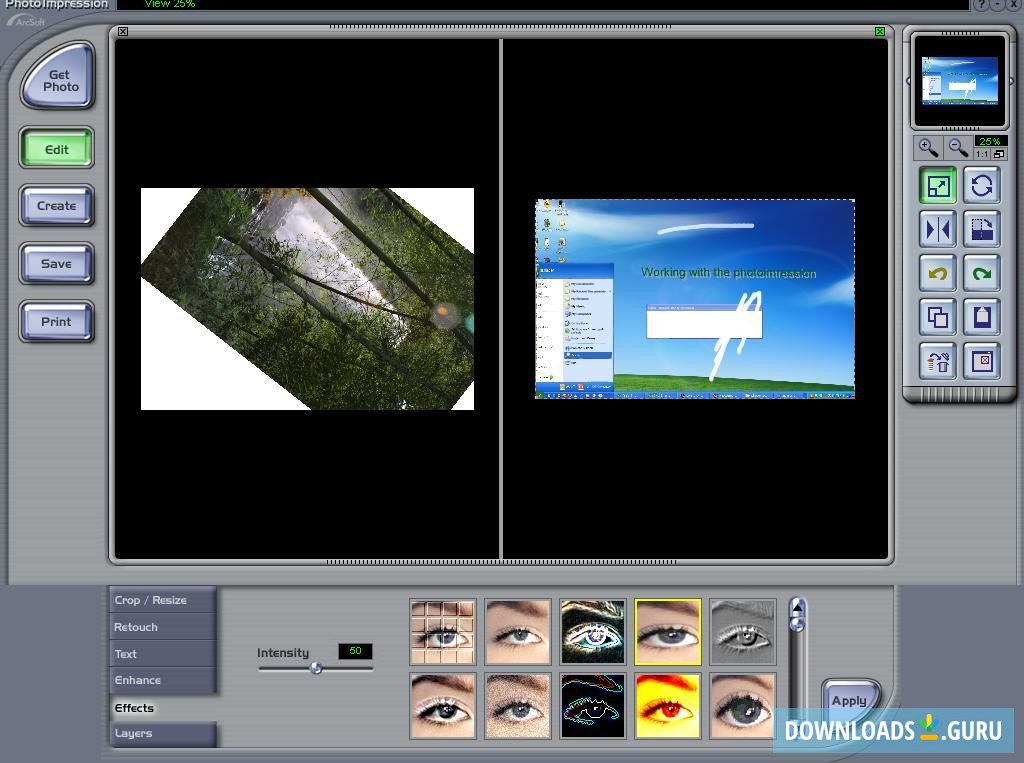
PhotoImpression 6, a powerful image editing software specifically designed for Windows 11, offers a robust set of tools to elevate your photography skills. This comprehensive guide delves into the key features, benefits, and functionalities of PhotoImpression 6, providing a clear understanding of how it can transform your digital images.

Understanding the Fundamentals

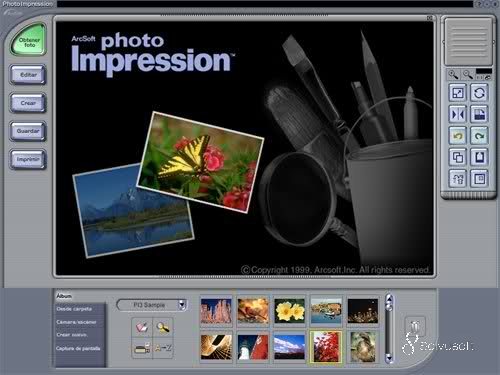
PhotoImpression 6 is a user-friendly software that empowers users of all skill levels to enhance their images with precision and creativity. It seamlessly integrates with Windows 11, providing a familiar and intuitive interface that facilitates effortless navigation and workflow.

Key Features and Functionalities

PhotoImpression 6 boasts a comprehensive suite of features, each designed to address specific image manipulation needs. Some of the most notable features include:

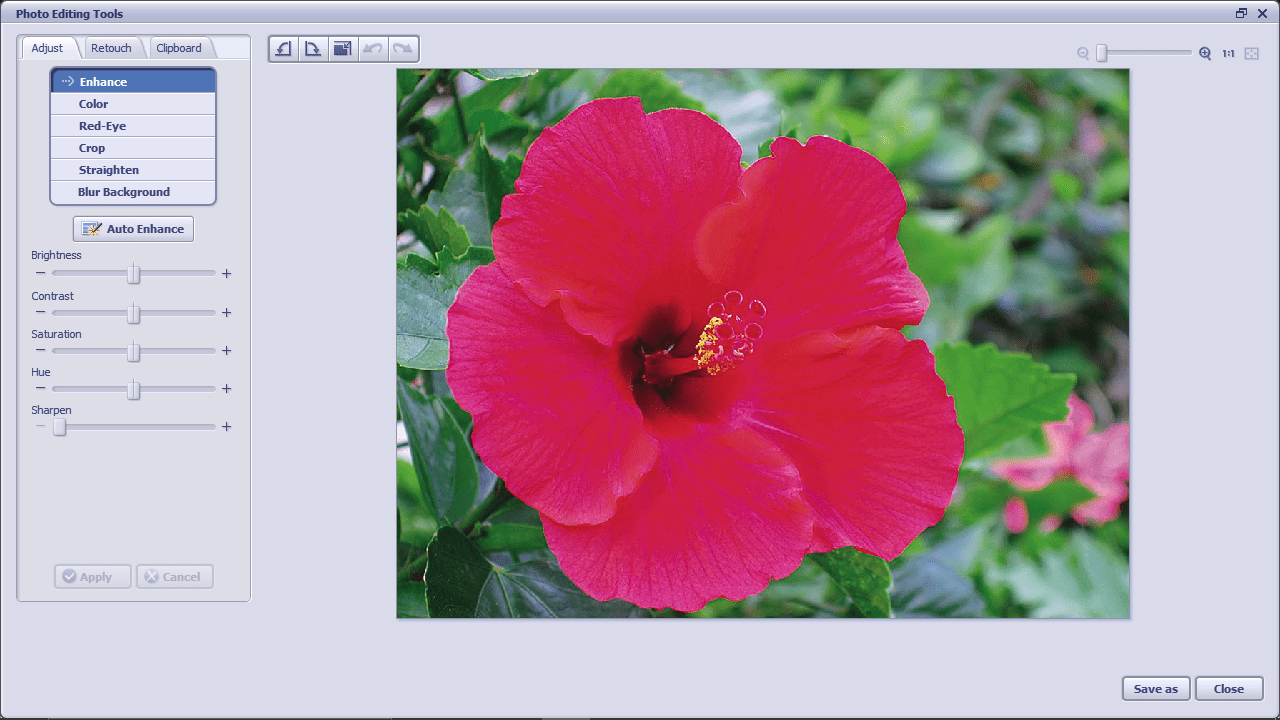
  • Advanced Image Editing: The software offers a wide range of tools for basic and advanced editing. From adjusting brightness and contrast to applying sophisticated filters and effects, PhotoImpression 6 provides the flexibility to fine-tune every aspect of your images.

  • Smart Selection and Masking: Precisely isolate and modify specific areas of your images with the advanced selection and masking tools. This allows for targeted adjustments, creating professional-looking results.

  • Layer-Based Editing: PhotoImpression 6 supports layer-based editing, enabling users to create complex compositions and apply effects non-destructively. This allows for easy adjustments and experimentation without permanently altering the original image.

  • Powerful Filters and Effects: A diverse library of filters and effects is at your disposal, ranging from classic black and white conversions to artistic stylizations and creative distortions. Experiment with these tools to add a unique touch to your images.

  • Batch Processing: PhotoImpression 6 allows for efficient batch processing, enabling users to apply the same edits to multiple images simultaneously. This saves time and ensures consistent results across a collection of photographs.

  • Integration with Windows 11: The software seamlessly integrates with Windows 11, offering a familiar and intuitive user interface. This facilitates easy navigation and a smooth workflow, making it accessible to users of all skill levels.

Benefits of Using PhotoImpression 6

The benefits of utilizing PhotoImpression 6 extend beyond basic image editing, offering a range of advantages for photographers, designers, and everyday users alike:

  • Enhanced Creativity: The software empowers users to unleash their creativity by providing a diverse array of tools for image manipulation and artistic expression.

  • Professional-Quality Results: PhotoImpression 6 equips users with the tools to produce high-quality images that meet professional standards.

  • Increased Productivity: The software’s intuitive interface and efficient workflow enhance productivity, enabling users to complete tasks quickly and efficiently.

  • Improved Image Quality: PhotoImpression 6 offers tools to enhance image quality, reducing noise, sharpening details, and correcting color imbalances.

  • Versatility and Flexibility: The software caters to a wide range of needs, from basic adjustments to advanced creative manipulations, making it suitable for various applications.

FAQs about PhotoImpression 6

Q: Is PhotoImpression 6 compatible with other operating systems besides Windows 11?

A: PhotoImpression 6 is specifically designed for Windows 11 and is not compatible with other operating systems.

Q: What are the system requirements for running PhotoImpression 6?

A: PhotoImpression 6 requires a minimum of 4 GB of RAM and a 1 GHz processor. It is recommended to have a dedicated graphics card for optimal performance.

Q: Can I use PhotoImpression 6 to edit RAW images?

A: Yes, PhotoImpression 6 supports RAW image editing, allowing users to process images directly from their cameras.

Q: Does PhotoImpression 6 offer support for video editing?

A: No, PhotoImpression 6 is solely focused on image editing and does not include video editing capabilities.

Q: How do I get started with PhotoImpression 6?

A: You can purchase PhotoImpression 6 directly from the developer’s website or through authorized retailers. After installation, the software provides a comprehensive tutorial to guide you through the basic functionalities.

Tips for Using PhotoImpression 6

  • Explore the Tools: Familiarize yourself with all the tools and features offered by PhotoImpression 6. Experiment with different settings and techniques to discover the full potential of the software.

  • Utilize Layer-Based Editing: Take advantage of layer-based editing to create complex compositions and apply non-destructive effects. This allows for greater flexibility and control over your edits.

  • Utilize the Undo Feature: Don’t be afraid to experiment and make mistakes. PhotoImpression 6’s undo feature allows you to revert any changes you make.

  • Save Regularly: Save your work frequently to avoid losing any progress. You can also create backups of your projects to ensure data security.

  • Seek Inspiration: Explore online resources and tutorials to learn new techniques and gain inspiration for your image editing projects.

Conclusion

PhotoImpression 6 is a powerful image editing software that empowers users to elevate their photography skills and create stunning visuals. Its user-friendly interface, comprehensive features, and seamless integration with Windows 11 make it an ideal choice for photographers, designers, and anyone seeking to enhance their images. By leveraging the tools and techniques offered by PhotoImpression 6, users can transform their digital images into works of art, showcasing their creativity and achieving professional-quality results.

Download ArcSoft PhotoImpression for Windows 11/10/8/7 (Latest version 2021) - Downloads Guru I Like Warez Blog: DESCARGAR PHOTOIMPRESSION 6 Arcsoft PhotoImpression - Download Arcsoft PhotoImpression 6.5.9.110, 3.0 for Windows
PhotoImpressionとは何ですか?(ArcSoftより) ArcSoft PhotoImpression - Download ASCII.jp:BHA、写真やビデオの管理/編集が行なえるソフト『PhotoImpression 6 PREMIUM』を発売
ArcSoft PhotoImpression 6.0 Download - PhotoImpression.exe Microsoft Introduces the Next Generation of Windows: Windows 11  CodeGuru

Closure

Thus, we hope this article has provided valuable insights into Unveiling the Power of PhotoImpression 6: A Comprehensive Guide to Windows 11 Image Enhancement. We thank you for taking the time to read this article. See you in our next article!

A Comprehensive Guide To Using R On Windows 10 Laptops

A Comprehensive Guide to Using R on Windows 10 Laptops

Introduction

With great pleasure, we will explore the intriguing topic related to A Comprehensive Guide to Using R on Windows 10 Laptops. Let’s weave interesting information and offer fresh perspectives to the readers.

A Comprehensive Guide to Using R on Windows 10 Laptops

Simple Guide for Installing R on Windows 10

R, a powerful and versatile programming language and free software environment, has become indispensable for data analysis, statistical computing, and visualization. Its wide range of packages, robust functionalities, and active community have solidified its position as a leading tool for researchers, data scientists, and statisticians. This article delves into the intricacies of using R on Windows 10 laptops, providing a comprehensive guide for both beginners and experienced users.

Understanding R: A Foundation for Data Analysis

R’s strength lies in its ability to handle complex data analysis tasks with ease. It offers a comprehensive suite of statistical methods, including:

  • Linear and Non-Linear Regression: Modeling relationships between variables and predicting future outcomes.
  • Hypothesis Testing: Evaluating statistical hypotheses and drawing conclusions from data.
  • Classification and Clustering: Categorizing data points and identifying groups within datasets.
  • Time Series Analysis: Analyzing data collected over time and identifying patterns and trends.
  • Data Visualization: Creating informative and visually appealing graphs and charts to communicate insights.

Setting Up R on Windows 10: A Step-by-Step Guide

Installing and configuring R on a Windows 10 laptop is straightforward. Here’s a detailed guide:

  1. Download R: Visit the official CRAN (Comprehensive R Archive Network) website (https://cran.r-project.org/) and download the latest version of R for Windows. Choose the appropriate installer based on your system’s architecture (32-bit or 64-bit).

  2. Install R: Run the downloaded installer file and follow the on-screen instructions. By default, R will be installed in the "C:Program FilesRR-x.x.x" directory (where "x.x.x" represents the version number).

  3. Install RStudio (Optional): While R provides a basic command-line interface, RStudio offers a more user-friendly integrated development environment (IDE). Download and install RStudio from its official website (https://www.rstudio.com/).

  4. Verify Installation: Open R or RStudio and run the command version(). This should display the installed version of R, confirming successful installation.

R Packages: Expanding Functionality and Capabilities

R’s true power lies in its extensive collection of packages, which provide specialized tools for various data analysis tasks. These packages are readily available through the CRAN repository and can be installed using the install.packages() function.

  • Popular Packages:
    • tidyverse: A collection of packages for data manipulation, transformation, and visualization, including dplyr, tidyr, ggplot2, and readr.
    • caret: Provides tools for machine learning model training, tuning, and evaluation.
    • glmnet: Implements penalized regression models like lasso and ridge regression.
    • randomForest: Enables the creation and analysis of random forest models.
    • stringr: Facilitates string manipulation and text processing tasks.

Working with R: A Practical Guide

Once R is installed and packages are loaded, you can start working with data. R uses a scripting language, allowing you to write code to perform specific tasks. Here are some essential concepts:

  • Data Structures: R supports various data structures, including vectors, matrices, data frames, and lists.
  • Functions: R provides numerous built-in functions for data manipulation, statistical analysis, and visualization.
  • Packages: Packages extend R’s capabilities by providing specialized functions and tools.
  • Scripting: Write code to automate tasks, analyze data, and generate reports.

Data Analysis with R: Illustrative Examples

To illustrate R’s capabilities, let’s consider a simple example of analyzing a dataset containing information about student grades.

# Load the necessary package
library(tidyverse)

# Read the data from a CSV file
student_grades <- read.csv("student_grades.csv")

# Calculate the average grade for each student
average_grades <- student_grades %>%
  group_by(student_id) %>%
  summarize(average_grade = mean(grade))

# Visualize the average grades using a boxplot
ggplot(average_grades, aes(x = "", y = average_grade)) +
  geom_boxplot() +
  labs(title = "Distribution of Average Student Grades", y = "Average Grade")

This code snippet demonstrates how to load data, calculate descriptive statistics, and create a visualization using R.

Troubleshooting and Common Issues

While R is generally user-friendly, users may encounter occasional issues. Here are some common problems and their solutions:

  • Package Installation Errors: Ensure that you have a stable internet connection and that the package you are trying to install is compatible with your R version.
  • Function Errors: Check the function’s syntax, arguments, and dependencies. Refer to the documentation for the function or package.
  • Data Import Errors: Ensure that the data file is in a supported format and that the file path is correct.
  • Memory Issues: If your data is large, consider using packages like data.table or dplyr for efficient data handling.

FAQs About R on Windows 10 Laptops

Q1: What are the minimum system requirements for running R on Windows 10?

R has minimal system requirements. A modern laptop with a reasonable amount of RAM (at least 4 GB) and a recent version of Windows 10 should suffice.

Q2: Can I use R on a Windows 10 laptop without installing RStudio?

Yes, you can use R without RStudio. R provides a basic command-line interface, but RStudio offers a more comprehensive and user-friendly environment.

Q3: Is it possible to use R for machine learning?

Yes, R is widely used for machine learning. Packages like caret, glmnet, and randomForest provide tools for model training, tuning, and evaluation.

Q4: How can I share my R code and results with others?

You can share your code by creating R scripts and sharing them as text files. To share results, you can export them as tables, charts, or reports using R’s built-in functions or packages like rmarkdown.

Q5: Where can I find resources and tutorials for learning R?

Numerous online resources are available for learning R. The official R website (https://www.r-project.org/) provides documentation, tutorials, and examples. Other popular resources include DataCamp, Coursera, and edX.

Tips for Efficiently Using R on Windows 10 Laptops

  • Use RStudio: RStudio provides a more user-friendly and efficient environment for working with R.
  • Organize Your Projects: Create separate folders for different projects to keep your code and data organized.
  • Use Version Control: Utilize Git or similar version control systems to track changes in your code and collaborate with others.
  • Document Your Code: Add comments to your code to explain its purpose and functionality.
  • Explore Packages: Regularly explore new packages to expand your R skills and capabilities.

Conclusion

R is a powerful and versatile tool for data analysis, statistical computing, and visualization. Using R on a Windows 10 laptop provides a flexible and efficient environment for tackling complex data analysis tasks. By understanding the core concepts of R, exploring its extensive package ecosystem, and leveraging available resources, users can harness the full potential of this powerful language to gain valuable insights from data.

Installing R on Windows10 - YouTube R for Windows - Windows 10 Download Simple Guide for Installing R on Windows 10
Getting setup with R and RStudio (Windows) - YouTube install-r-on-windows-10-step-2 - Manjaro dot site install-r-on-windows-10-step-5 - Manjaro dot site
How to Install R in Windows 10 in Easy Mode  Manjaro.site How to Enable or Disable Run Command (Win+R) Box on Windows 10 - YouTube

Closure

Thus, we hope this article has provided valuable insights into A Comprehensive Guide to Using R on Windows 10 Laptops. We appreciate your attention to our article. See you in our next article!

Understanding The Red Border On A Mac Screen: A Comprehensive Guide

Understanding the Red Border on a Mac Screen: A Comprehensive Guide

Introduction

In this auspicious occasion, we are delighted to delve into the intriguing topic related to Understanding the Red Border on a Mac Screen: A Comprehensive Guide. Let’s weave interesting information and offer fresh perspectives to the readers.

Understanding the Red Border on a Mac Screen: A Comprehensive Guide

Which Display Is Current Display in the Driver  GAOMON Q&A

The appearance of a red border around a Mac screen can be a disconcerting experience for any user. This unexpected visual anomaly, while seemingly innocuous, often signifies underlying hardware or software issues. This guide aims to provide a comprehensive understanding of the red border phenomenon, its potential causes, and effective troubleshooting steps.

Understanding the Red Border:

The red border, typically a thin line encompassing the entire screen, is not a standard feature of macOS. Its appearance is almost always indicative of a malfunctioning component within the Mac’s hardware or software.

Common Causes of the Red Border:

Several factors can contribute to the red border issue:

1. Display Connector Issues:

  • Loose Connection: The most common cause is a loose connection between the display cable and the Mac’s motherboard. The cable, responsible for transmitting visual data, can become dislodged due to physical movement or wear and tear.
  • Damaged Cable: A damaged display cable can also lead to the red border. This damage could be due to excessive bending, improper handling, or even liquid spills.
  • Faulty Display Port: A malfunctioning display port on the motherboard can also cause the red border. This issue could be due to manufacturing defects or excessive heat exposure.

2. Graphics Card Problems:

  • Overheating: An overheating graphics card can cause display anomalies like the red border. This is often accompanied by other symptoms like screen flickering or distortion.
  • Driver Issues: Outdated or corrupted graphics card drivers can lead to display problems, including the red border.

3. Software Glitches:

  • Operating System Errors: Rarely, a software bug in macOS can cause the red border. This is usually a temporary issue that can be resolved by restarting the Mac or updating the operating system.
  • Third-Party Software Conflicts: Certain third-party applications, especially those dealing with graphics or display settings, can conflict with macOS and cause the red border.

4. External Display Issues:

  • Compatibility Problems: If using an external display, the red border could be a sign of incompatibility between the Mac and the external monitor.
  • Faulty External Display: A faulty external display itself can also cause the red border when connected to the Mac.

Troubleshooting Steps:

1. Basic Checks:

  • Restart your Mac: A simple restart can often resolve temporary software glitches.
  • Check for loose connections: Ensure all cables, including the power cable, are securely connected to the Mac and the display.
  • Try a different display: If using an external display, connect the Mac to a different monitor to rule out an external display issue.

2. Software Troubleshooting:

  • Update macOS: Ensure your Mac is running the latest version of macOS.
  • Update graphics drivers: Download and install the latest graphics drivers for your Mac from the manufacturer’s website.
  • Safe Mode Boot: Boot your Mac in Safe Mode to temporarily disable third-party software and identify potential conflicts.
  • Reinstall macOS: If software issues persist, consider reinstalling macOS, which can resolve underlying software problems.

3. Hardware Troubleshooting:

  • Check for physical damage: Examine the display cable for any visible damage or signs of wear.
  • Reseat the display cable: Disconnect and reconnect the display cable to the Mac and the monitor.
  • Check for overheating: If the graphics card is overheating, consider using a cooling pad or adjusting fan settings.
  • Run hardware diagnostics: Use Apple’s built-in hardware diagnostics tool to check for hardware issues.

4. Professional Assistance:

If the red border persists despite troubleshooting efforts, it is recommended to seek professional assistance from an Apple Authorized Service Provider or a qualified technician.

Frequently Asked Questions (FAQs):

Q1. Can a red border indicate a serious hardware failure?

A: Yes, the red border can be a symptom of a serious hardware failure, especially if it persists despite troubleshooting.

Q2. Is it possible to fix the red border without professional help?

A: In some cases, basic troubleshooting steps like restarting the Mac, checking connections, and updating drivers can resolve the issue. However, if the problem persists, professional assistance is often necessary.

Q3. What is the potential cost of fixing the red border?

A: The cost of fixing the red border can vary depending on the underlying cause. Simple solutions like replacing a damaged cable may be inexpensive, while more complex repairs like replacing the graphics card can be costly.

Tips for Preventing the Red Border:

  • Handle cables with care: Avoid bending or twisting display cables excessively.
  • Keep your Mac clean: Dust and debris can accumulate on the Mac’s internal components, leading to overheating and potential hardware issues.
  • Regularly update macOS and drivers: Keeping your software up-to-date can prevent compatibility issues and resolve potential bugs.
  • Use a cooling pad: If your Mac tends to overheat, using a cooling pad can help regulate temperature and prevent hardware problems.

Conclusion:

The red border on a Mac screen is a visual indication of underlying hardware or software issues. By understanding the potential causes and implementing appropriate troubleshooting steps, users can often resolve the problem. However, if the issue persists, professional assistance is recommended to diagnose and repair the underlying cause. By taking proactive steps to maintain the Mac’s hardware and software, users can minimize the risk of encountering this troublesome display anomaly.

mac-screen-border – QuickTrials What is this thin red border around my screen? : r/MiyooMini PPT - A Comprehensive Guide to Apple MacBook Screen Replacement PowerPoint Presentation - ID
How To Add a Border In An Apple Pages Document - YouTube 5 Ways to Share Your Mac's Screen 테두리  Mac 필모라 가이드
Filmora for Mac Guide - Border How to Fix Gray Square Border on MacBook Display

Closure

Thus, we hope this article has provided valuable insights into Understanding the Red Border on a Mac Screen: A Comprehensive Guide. We hope you find this article informative and beneficial. See you in our next article!

Transferring Software To A New Computer: A Comprehensive Guide

Transferring Software to a New Computer: A Comprehensive Guide

Introduction

With enthusiasm, let’s navigate through the intriguing topic related to Transferring Software to a New Computer: A Comprehensive Guide. Let’s weave interesting information and offer fresh perspectives to the readers.

Transferring Software to a New Computer: A Comprehensive Guide

Transferring Office 365 to a New Computer: A Step-by-Step Guide  Appico

The transition to a new computer can be exciting, but it also presents a practical challenge: moving your software from the old system to the new. This process, often referred to as "software migration," involves transferring applications, settings, and data to ensure a seamless continuation of your digital workflow. This comprehensive guide will explore the various aspects of software transfer, providing insights into methods, considerations, and potential pitfalls.

Understanding the Importance of Software Migration

Transferring software to a new computer is crucial for several reasons:

  • Preserving Data and Settings: Your applications often hold critical data, configurations, and personalized settings. Moving them ensures continuity, preventing the loss of valuable information and restoring your familiar working environment.
  • Maintaining Productivity: A smooth software migration minimizes downtime, allowing you to resume your tasks quickly on the new system. This is especially important for professionals who rely on specific software for their daily operations.
  • Security and Compatibility: Migrating software helps maintain data security by transferring it to a potentially more secure system. Additionally, it ensures compatibility with the new computer’s operating system and hardware.

Methods for Transferring Software

Several methods can be employed to transfer software to a new computer, each with its own advantages and limitations:

1. Direct Transfer (Using Backup Software)

This method involves creating a backup of your entire computer, including software, settings, and data. This backup can then be restored onto the new computer.

  • Benefits: Simple and straightforward, often a one-click process.
  • Limitations: Can be time-consuming, especially for large hard drives. Requires dedicated backup software and sufficient storage space.

2. Transferring Individual Applications

This method involves transferring applications one by one, typically by downloading the latest versions from the software vendor’s website or using installation media.

  • Benefits: More control over what is transferred, allowing for selective migration. Can be useful for updating applications to newer versions.
  • Limitations: Requires individual installations for each application, potentially time-consuming. May necessitate reinstalling individual applications and reconfiguring settings.

3. Using Cloud-Based Services

Several cloud services offer solutions for transferring applications and data. These services typically store your data in the cloud and allow you to access it from any device.

  • Benefits: Convenient and efficient, especially for large files. Accessible from multiple devices.
  • Limitations: Requires an internet connection for data transfer. May involve subscription fees for certain services.

4. Using Migration Tools

Specialized migration tools are designed to streamline the transfer process. These tools often automate the transfer of applications, settings, and data.

  • Benefits: Simplify the migration process, saving time and effort. Can transfer a wide range of data types.
  • Limitations: May require specific software compatibility. Some tools may be more expensive than others.

Considerations for Successful Software Migration

Several factors need to be considered before embarking on the software migration process:

  • Software Compatibility: Ensure that the software you wish to transfer is compatible with the new computer’s operating system and hardware.
  • Data Backup: Always create a backup of your data before transferring it to the new computer. This serves as a safety net in case of unforeseen issues.
  • Licensing: Verify the licensing terms for your software. Some licenses may restrict the number of devices on which the software can be installed.
  • Security: Take necessary precautions to protect your data during the transfer process. Use secure connections and reputable software.
  • Internet Connectivity: If using cloud-based services or downloading software, ensure a stable internet connection.

Potential Challenges and Solutions

During software migration, you might encounter certain challenges:

  • Missing Drivers: The new computer may require specific drivers for your software to function properly. Ensure that the necessary drivers are available for download.
  • Conflicting Software: Sometimes, different software applications can conflict with each other. Troubleshooting may be necessary to resolve these conflicts.
  • Data Transfer Errors: Data transfer errors can occur during the migration process. Regularly check the progress and troubleshoot any issues.

FAQs about Software Migration

1. Do I need to reinstall all my software on the new computer?

Not necessarily. Depending on the method you choose, you may be able to transfer existing installations or use cloud-based services to access your software.

2. How do I transfer my email accounts to the new computer?

Most email clients allow you to import your settings and emails from a previous installation. Alternatively, you can access your email through a web browser.

3. What happens to my saved games and documents?

These files can be transferred using various methods, including backup software, cloud services, or simply copying them to an external drive.

4. Can I transfer my operating system to the new computer?

Yes, you can transfer your operating system using a cloning tool. However, this process is more complex and may require advanced technical skills.

5. What if I forget to transfer some software?

You can always reinstall the missing software from the original installation media or download it from the vendor’s website.

Tips for Software Migration

  • Plan Ahead: Before starting the migration process, create a checklist of all the software you need to transfer.
  • Prioritize: Focus on transferring the most essential applications first, then move on to less critical software.
  • Test Thoroughly: After transferring software, test each application to ensure it functions correctly on the new computer.
  • Seek Professional Help: If you encounter difficulties or are unsure about any step, consider seeking professional assistance from a qualified technician.

Conclusion

Software migration is an essential step when transitioning to a new computer. By understanding the various methods, considerations, and potential challenges, you can ensure a smooth and efficient transfer process. Remember to prioritize data backup, software compatibility, and thorough testing to minimize downtime and maintain productivity. With careful planning and execution, you can seamlessly transfer your software and continue your digital workflow on your new computer.

Transfer Programs To New Computer How To Transfer Programs And Files To New Computer  Venzero Transferring Programs from an Old Computer to a New One: A Comprehensive Guide - The Enlightened How Do I Transfer Software To A New Computer : How To Transfer Your Data From Your Old Pc To
Transferring Installed Programs from One Computer to Another - EaseUS [Guidance] Transferring Installed Programs From One Computer to Another Windows 11 How to Transfer Apps & Programs from One Computer to Another - IT System Admin
Pc to pc file sharing software - pilotrat Transferring Files and Programs to a New Computer: An Essential Guide - The Enlightened Mindset

Closure

Thus, we hope this article has provided valuable insights into Transferring Software to a New Computer: A Comprehensive Guide. We hope you find this article informative and beneficial. See you in our next article!

A Comprehensive Guide To A New PC With Windows 11: Navigating The Modern Computing Landscape

A Comprehensive Guide to a New PC with Windows 11: Navigating the Modern Computing Landscape

Introduction

With enthusiasm, let’s navigate through the intriguing topic related to A Comprehensive Guide to a New PC with Windows 11: Navigating the Modern Computing Landscape. Let’s weave interesting information and offer fresh perspectives to the readers.

A Comprehensive Guide to a New PC with Windows 11: Navigating the Modern Computing Landscape

Buy Windows 11 User Guide for Beginners: A Comprehensive Guide to Master Windows 11 Operating

The world of computing is constantly evolving, with new technologies and advancements emerging regularly. For individuals and businesses alike, the decision to invest in a new PC often arises, driven by the need for enhanced performance, improved features, and access to the latest software. Windows 11, the latest operating system from Microsoft, presents a compelling reason to consider a new PC. This guide will provide a comprehensive overview of the benefits and considerations associated with a new PC running Windows 11, offering insights into its capabilities and potential impact on your digital experience.

Understanding the Advantages of a New PC with Windows 11

A new PC with Windows 11 offers a multitude of advantages, encompassing performance, security, and user experience. Here’s a breakdown of key features and benefits:

1. Enhanced Performance and Efficiency:

  • Hardware Advancements: Modern PCs equipped with Windows 11 leverage the latest hardware advancements, including powerful processors, ample RAM, and high-speed storage. This translates to faster boot times, smoother multitasking, and seamless application performance.
  • Optimized Software: Windows 11 is designed to work in harmony with new hardware, ensuring optimal efficiency and resource utilization. The operating system utilizes advanced power management features to extend battery life and minimize energy consumption.
  • DirectX 12 Ultimate: Windows 11 supports DirectX 12 Ultimate, enabling immersive gaming experiences with advanced graphics capabilities and real-time ray tracing. This technology enhances visual fidelity and realism, delivering a more immersive and visually stunning gaming experience.

2. Enhanced Security and Privacy:

  • Windows Defender: Windows 11 incorporates Windows Defender, a robust built-in antivirus and antimalware solution that provides real-time protection against threats. Its advanced threat detection capabilities keep your PC secure from malware, ransomware, and other online dangers.
  • Hardware-Level Security: Windows 11 leverages hardware-level security features like Secure Boot and Virtualization-Based Security (VBS) to protect your data and privacy. These features ensure that only trusted software can run on your PC, reducing the risk of malicious attacks.
  • Privacy Controls: Windows 11 provides comprehensive privacy controls, allowing users to manage their data and online activity. You can choose what information apps can access, control your location data, and customize your privacy settings to align with your preferences.

3. Modern User Interface and Features:

  • Intuitive Design: Windows 11 features a sleek and modern user interface with rounded corners, redesigned icons, and a simplified Start Menu. This intuitive design makes navigating the operating system easier and more visually appealing.
  • Improved Taskbar: The taskbar has been redesigned with a centralized location for the Start Menu, making it more accessible. It also supports a new feature called "Snap Layouts," allowing users to easily arrange windows and maximize screen space.
  • Focus Modes: Windows 11 offers Focus Modes, which allow you to prioritize specific tasks by minimizing distractions. You can customize Focus Modes to suit your needs, such as blocking notifications or silencing apps during work or study sessions.

4. Seamless Integration and Connectivity:

  • Windows Subsystem for Android: Windows 11 allows you to run Android apps directly on your PC. This enables seamless integration with your mobile ecosystem and expands the range of applications available on your computer.
  • Microsoft Teams Integration: Microsoft Teams is deeply integrated into Windows 11, providing a centralized platform for communication, collaboration, and file sharing. The integration enhances productivity and simplifies teamwork across devices.
  • Universal Windows Platform (UWP): Windows 11 utilizes the Universal Windows Platform (UWP), enabling apps to run seamlessly across different devices, including PCs, tablets, and smartphones. This promotes a consistent and familiar user experience across your digital ecosystem.

Understanding the Considerations for a New PC with Windows 11

While a new PC with Windows 11 offers numerous benefits, there are also important considerations to keep in mind before making a purchase:

1. Hardware Requirements:

  • Processor: Windows 11 requires a 1 gigahertz (GHz) or faster processor with at least two cores.
  • RAM: The minimum RAM requirement is 4 GB, but 8 GB or more is recommended for optimal performance, especially if you plan to run demanding applications.
  • Storage: A minimum of 64 GB of storage space is required, but a larger capacity is recommended for storing applications, files, and data.
  • Graphics Card: A compatible graphics card is necessary for supporting DirectX 12 and utilizing advanced graphics features.

2. Compatibility and Upgrades:

  • Application Compatibility: While Windows 11 is designed to be compatible with most existing applications, some older software may not be fully supported. It’s important to check the compatibility of your essential programs before upgrading.
  • Driver Updates: Ensure that your hardware drivers are up to date to guarantee optimal performance and compatibility with Windows 11.
  • Software Updates: Windows 11 requires regular updates to ensure security and stability. It’s essential to enable automatic updates to receive the latest features and security patches.

3. Cost and Budget:

  • Price Range: The cost of a new PC with Windows 11 can vary significantly depending on the hardware specifications, brand, and features. Consider your budget and prioritize the features that are most important to you.
  • Upgrade Options: If you’re on a tighter budget, consider upgrading your existing PC to Windows 11. However, ensure your hardware meets the minimum system requirements.

FAQs about a New PC with Windows 11

Q: Can I upgrade my existing PC to Windows 11?

A: You can upgrade your existing PC to Windows 11 if it meets the minimum system requirements. However, it’s important to check for compatibility with your existing applications and hardware drivers.

Q: What are the main differences between Windows 10 and Windows 11?

A: Windows 11 features a redesigned user interface, improved security features, enhanced performance, and new features like the Windows Subsystem for Android. It also offers improved multitasking capabilities, a more intuitive Start Menu, and a focus on user privacy.

Q: What are the key features of Windows 11?

A: Windows 11 offers a range of key features, including a redesigned user interface, enhanced security, improved performance, integration with Microsoft Teams, the Windows Subsystem for Android, and advanced gaming capabilities with DirectX 12 Ultimate.

Q: Is Windows 11 compatible with my existing software and hardware?

A: Windows 11 is designed to be compatible with most existing software and hardware. However, it’s essential to check for compatibility with your specific applications and drivers before upgrading.

Tips for Choosing a New PC with Windows 11

1. Define Your Needs: Determine your primary use cases for the PC, such as gaming, productivity, creative work, or general browsing. This will help you prioritize the necessary hardware specifications.

2. Research and Compare: Explore different PC manufacturers and models, comparing their specifications, features, and price points. Consider factors like processor speed, RAM capacity, storage space, and graphics card capabilities.

3. Consider Future-Proofing: Opt for a PC with sufficient RAM, storage, and processing power to ensure it remains capable of handling future software updates and demanding applications.

4. Read Reviews and Seek Recommendations: Consult online reviews and seek recommendations from tech experts or friends who have experience with different PC models.

5. Budget Wisely: Establish a budget and stick to it. Don’t overspend on features you don’t need or prioritize features that are most important to your usage patterns.

Conclusion

A new PC with Windows 11 offers a compelling combination of performance, security, and user experience enhancements. By carefully considering your needs, budget, and compatibility requirements, you can make an informed decision that aligns with your computing needs and preferences. With its modern interface, advanced features, and comprehensive security measures, Windows 11 is poised to elevate your digital experience and empower you to achieve more.

Windows 11 Ultimate Guide – Leaf Publishing Buy Windows 11 User Guide: A Complete Guide to Master the New Windows 11 OS with Tips and Tricks Buy WINDOWS 11 PRO USER GUIDE: A Comprehensive User Guide for Beginners and Seniors to Master
Buy Windows 11: Discover From Beginner to Expert with this Ultimate & Complete Step-by-Step User Windows 11 The Essentials Magazine: Your Essential Guide to Microsoft's New Windows 11 Operating Exploring Windows 11: The Illustrated, Practical Guide to Using Microsoft Windows » GFxtra
Buy WINDOWS 11 COMPLETE GUIDE: Taking You from Windows 11 Novice to Professional In 33 Chapters Windows 11 Fundamentals: 2021 Edition: The Step-by-step Guide to Using Microsoft Windows by

Closure

Thus, we hope this article has provided valuable insights into A Comprehensive Guide to a New PC with Windows 11: Navigating the Modern Computing Landscape. We thank you for taking the time to read this article. See you in our next article!

Seamlessly Connecting Worlds: Exploring Windows 10 To Android Phone File Sharing

Seamlessly Connecting Worlds: Exploring Windows 10 to Android Phone File Sharing

Introduction

With great pleasure, we will explore the intriguing topic related to Seamlessly Connecting Worlds: Exploring Windows 10 to Android Phone File Sharing. Let’s weave interesting information and offer fresh perspectives to the readers.

Seamlessly Connecting Worlds: Exploring Windows 10 to Android Phone File Sharing

How to Connect Windows 10 and Android Using Microsoft's 'Your Phone' App - YouTube

The digital landscape is increasingly interconnected, with users demanding effortless transitions between devices. Windows 10, a popular operating system for personal computers, and Android, the dominant mobile platform, have recognized this need. This has led to the development of innovative solutions that enable seamless file sharing between these two ecosystems.

Understanding the Power of Nearby Sharing:

Nearby Sharing, a feature introduced by Microsoft in Windows 10, empowers users to transfer files between compatible devices with remarkable ease. This functionality relies on Bluetooth technology and Wi-Fi Direct for establishing a secure, direct connection, circumventing the need for cloud storage or complex configurations.

How Nearby Sharing Works:

  1. Enabling Nearby Sharing: Both the Windows 10 computer and the Android phone must have Nearby Sharing enabled. This can typically be found in the settings menu under "Connected devices" or "Bluetooth & other devices."

  2. Device Visibility: Ensure both devices are discoverable. This usually involves making the device visible to other nearby devices.

  3. Initiating File Transfer: On the Windows 10 computer, select the file or folder to be shared. The system will automatically detect compatible nearby devices and present a list of options for transfer.

  4. Accepting the Transfer: On the Android phone, a notification appears requesting permission to receive the file. Accepting the transfer initiates the file transfer process.

Benefits of Utilizing Nearby Sharing:

  • Speed and Efficiency: Nearby Sharing leverages direct connections, eliminating the time delays associated with cloud storage uploads and downloads. This makes it an ideal solution for transferring large files quickly.

  • Simplified Process: The user experience is incredibly intuitive. No complex configurations, account creation, or third-party applications are required.

  • Security and Privacy: Data transfers occur directly between devices, reducing the risk of data interception or unauthorized access.

  • Versatility: Nearby Sharing accommodates a wide range of file types, including documents, images, videos, and even entire folders.

Beyond File Transfer:

While file transfer is the primary function of Nearby Sharing, its capabilities extend beyond this. The feature can also be used for:

  • Sharing Web Links: Conveniently share web links between devices without the need for copying and pasting.

  • Sharing App Installations: Transfer app installation files to other devices, simplifying the installation process.

  • Sharing Screenshots and Other Content: Quickly share screenshots, images, and other content captured on the Windows 10 computer with the Android phone.

Addressing Common Concerns:

Q: What are the limitations of Nearby Sharing?

A: While Nearby Sharing offers a compelling solution for file transfer, it does have limitations. Firstly, it requires both devices to be within Bluetooth range, typically around 30 feet. Secondly, the feature currently lacks support for transferring files between multiple devices simultaneously.

Q: Is Nearby Sharing secure?

A: Nearby Sharing utilizes Bluetooth and Wi-Fi Direct, which are generally considered secure communication protocols. However, it’s crucial to ensure that both devices are connected to a trusted network and that the receiving device is authorized to receive the file.

Q: What if my Android phone doesn’t support Nearby Sharing?

A: If your Android phone doesn’t have built-in Nearby Sharing, you can explore alternative solutions like cloud storage services (e.g., Google Drive, Dropbox) or file transfer applications (e.g., SHAREit, Xender).

Q: What are some tips for utilizing Nearby Sharing effectively?

A:

  • Ensure Bluetooth is Enabled: Both devices must have Bluetooth enabled for Nearby Sharing to function correctly.

  • Verify Device Visibility: Ensure both devices are discoverable to each other.

  • Check for Updates: Keep both your Windows 10 computer and Android phone updated to the latest software versions for optimal performance and compatibility.

  • Utilize File Transfer Applications: For transferring files between devices that don’t support Nearby Sharing, explore file transfer applications that offer cross-platform compatibility.

Conclusion:

Nearby Sharing represents a significant advancement in the realm of device connectivity, offering a seamless and efficient way to transfer files between Windows 10 computers and Android phones. This feature empowers users to navigate the digital landscape with greater ease and flexibility, promoting productivity and enhancing the overall user experience. As technology continues to evolve, we can anticipate further advancements in file sharing solutions, fostering a more interconnected and seamless digital world.

How to Share Files Between Android and Windows on Your Network - Make Tech Easier Pc To Android Phone File Transfer: Best Method in 2024 File Transfer Between Windows And Android
How To Connect Windows 10 And Android Using Microsoft's 'Your Phone' App File sharing app for pc to android - sippag How to Share Files Between Your Android Phone & Windows PC with Bluetooth - Techlicious
How to Perform Android File Transfer to Windows 10 PC? How to Connect Windows 10 and Android smartphone Using Microsoft's Phone Link app

Closure

Thus, we hope this article has provided valuable insights into Seamlessly Connecting Worlds: Exploring Windows 10 to Android Phone File Sharing. We hope you find this article informative and beneficial. See you in our next article!

Navigating The Cost Of Windows 11 Pro In India: A Comprehensive Guide

Navigating the Cost of Windows 11 Pro in India: A Comprehensive Guide

Introduction

With enthusiasm, let’s navigate through the intriguing topic related to Navigating the Cost of Windows 11 Pro in India: A Comprehensive Guide. Let’s weave interesting information and offer fresh perspectives to the readers.

Windows 11 Cost In India - IMAGESEE

Windows 11 Pro, Microsoft’s latest operating system, offers a robust suite of features tailored for businesses and power users. However, understanding its pricing structure in India can be complex. This article provides a comprehensive overview of the various factors influencing the cost of Windows 11 Pro, aiming to equip readers with the knowledge needed to make informed purchasing decisions.

Understanding the Pricing Landscape:

The cost of Windows 11 Pro in India is not fixed and can vary significantly depending on several factors:

  • Retail Channels: Prices can differ across various retailers, including online marketplaces like Amazon and Flipkart, as well as physical stores.
  • License Type: Microsoft offers different types of licenses, including Full Packaged Product (FPP), which is a one-time purchase for a single computer, and OEM (Original Equipment Manufacturer) licenses bundled with new computers.
  • Volume Licensing: Businesses with multiple computers can purchase volume licenses, which often offer discounted rates.
  • Promotions and Discounts: Seasonal sales, special offers, and promotional periods can significantly impact pricing.
  • Currency Fluctuations: The exchange rate between the Indian Rupee and the US Dollar can influence the cost of Windows 11 Pro, as pricing is often determined in US dollars.

Key Factors Affecting Pricing:

  • Features and Functionality: Windows 11 Pro boasts advanced features like BitLocker encryption, remote desktop access, and domain join capabilities, justifying its higher price compared to the Home edition.
  • Target Audience: Windows 11 Pro is designed for businesses and power users, who are willing to pay a premium for its advanced features and security enhancements.
  • Market Demand: The popularity and demand for Windows 11 Pro in India play a significant role in determining its price.
  • Competition: The presence of alternative operating systems, such as Linux and macOS, can influence pricing strategies.

Estimating the Cost:

As of October 2023, the estimated cost of a Windows 11 Pro Full Packaged Product (FPP) license in India ranges from INR 7,000 to INR 10,000. However, it is crucial to check with multiple retailers for the most up-to-date prices.

Exploring Alternative Purchasing Options:

  • Upgrade from Windows 10: If you already own a Windows 10 PC, you may be eligible for a discounted upgrade to Windows 11 Pro.
  • Pre-built PCs: Consider purchasing a pre-built PC that comes bundled with a Windows 11 Pro license. This often offers a more cost-effective solution.
  • Subscription Services: Microsoft offers subscription-based services like Microsoft 365, which include access to Windows 11 Pro and other productivity tools.

Frequently Asked Questions (FAQs):

Q: What is the difference between Windows 11 Home and Windows 11 Pro?

A: Windows 11 Pro offers enhanced features and security measures specifically tailored for businesses and power users. These include features like BitLocker encryption, remote desktop access, and domain join capabilities, which are not available in the Home edition.

Q: Can I upgrade from Windows 10 to Windows 11 Pro for free?

A: While Microsoft offered a free upgrade from Windows 10 to Windows 11 for a limited period, this offer has since expired. Currently, you need to purchase a Windows 11 Pro license to upgrade.

Q: Can I use a Windows 11 Pro license on multiple computers?

A: A single Windows 11 Pro license is typically valid for one computer. However, some volume licensing programs may allow for multiple installations.

Q: Are there any alternatives to Windows 11 Pro?

A: Yes, there are alternative operating systems available, such as Linux and macOS. These options offer varying degrees of functionality and compatibility.

Tips for Purchasing Windows 11 Pro:

  • Compare Prices: Research and compare prices across multiple retailers, both online and offline, to find the best deal.
  • Check for Discounts: Look out for promotional offers, seasonal sales, and special discounts that can help you save money.
  • Consider Volume Licensing: If you are a business with multiple computers, explore volume licensing programs to potentially obtain discounted rates.
  • Evaluate Your Needs: Determine whether the advanced features of Windows 11 Pro are essential for your specific requirements.

Conclusion:

The cost of Windows 11 Pro in India is influenced by various factors, including retail channels, license type, and market conditions. By understanding these factors and exploring different purchasing options, users can make informed decisions to acquire the operating system at the most competitive price. Ultimately, the best approach is to carefully assess individual needs and budget constraints before making a purchase.

Windows 11 Pro cost - Buy and download Windows 11 price in india - poosheet Buy Best Price Windows 11 Pro for Business
Cost of windows 11 pro - acaavatar Microsoft Windows 11 Pro at Rs 13500 in Kochi  ID: 24673022762 Cost of windows 11 pro - vsejp
Cost of windows 11 pro - vsejp Windows 11 Pro pricing

Closure

Thus, we hope this article has provided valuable insights into Navigating the Cost of Windows 11 Pro in India: A Comprehensive Guide. We appreciate your attention to our article. See you in our next article!

A Comprehensive Guide To Downloading And Utilizing PuTTY For Windows 10 X64 Systems

A Comprehensive Guide to Downloading and Utilizing PuTTY for Windows 10 x64 Systems

Introduction

With great pleasure, we will explore the intriguing topic related to A Comprehensive Guide to Downloading and Utilizing PuTTY for Windows 10 x64 Systems. Let’s weave interesting information and offer fresh perspectives to the readers.

A Comprehensive Guide to Downloading and Utilizing PuTTY for Windows 10 x64 Systems

Downloading and Installing PuTTY on Windows 10 and above - YouTube

Introduction

PuTTY is a widely-used, open-source terminal emulator and SSH client. Its primary function is to facilitate secure connections between a local computer and remote servers, enabling users to manage and interact with these servers. While PuTTY is compatible with various operating systems, this guide focuses on its use within the Windows 10 x64 environment.

Understanding the Importance of PuTTY

In the realm of computer networking, remote access is crucial for administration, maintenance, and various other tasks. PuTTY plays a vital role in this process by offering a secure and reliable way to connect to remote servers. Its significance lies in the following aspects:

  • Secure Connection: PuTTY utilizes the Secure Shell (SSH) protocol, providing a highly secure channel for data transmission, protecting sensitive information from unauthorized access.
  • Remote Server Management: PuTTY allows users to execute commands, manage files, and monitor system activity on remote servers, facilitating efficient administration.
  • Network Troubleshooting: PuTTY can be used to diagnose network connectivity issues and pinpoint problems within the network infrastructure.
  • Accessibility: PuTTY is free and readily available for download, making it accessible to a wide range of users.

Downloading PuTTY for Windows 10 x64

The download process for PuTTY is straightforward and can be completed within a few simple steps:

  1. Navigate to the PuTTY Website: Open your preferred web browser and visit the official PuTTY website at https://www.chiark.greenend.org.uk/~sgtatham/putty/.
  2. Locate the Download Section: The website’s homepage features a prominent "Download" section. Click on this section to proceed.
  3. Select the Appropriate Version: PuTTY offers various versions for different operating systems. For Windows 10 x64 systems, choose the "PuTTY for Windows" option.
  4. Download the Installer: The website will prompt you to download the installer file. Save the file to a location of your choice on your computer.
  5. Run the Installer: Once the download is complete, locate the installer file and double-click it to launch the installation process.
  6. Follow the Installation Instructions: The installer will guide you through the installation steps. Accept the default settings unless you have specific requirements.
  7. Complete the Installation: After the installation is finished, you can launch PuTTY from the Start menu or the desktop shortcut.

Utilizing PuTTY for Remote Access

After successfully installing PuTTY, you can establish connections to remote servers and manage them effectively. Here’s a step-by-step guide:

  1. Launch PuTTY: Open PuTTY by clicking its icon on the Start menu or desktop shortcut.
  2. Enter the Host Name or IP Address: In the "Host Name (or IP address)" field, enter the hostname or IP address of the remote server you wish to connect to.
  3. Select the Connection Type: For SSH connections, ensure that the "Connection type" is set to "SSH".
  4. Configure Additional Settings (Optional): PuTTY offers a wide range of settings for customizing the connection. Explore the various options under the "Session" category to tailor the connection according to your preferences.
  5. Open the Connection: Click the "Open" button to initiate the connection to the remote server.
  6. Enter Credentials: If prompted, enter your username and password for the remote server.
  7. Interact with the Remote Server: Once the connection is established, you can interact with the remote server using the PuTTY terminal. Execute commands, manage files, and perform other administrative tasks.

PuTTY Download Windows 10 x64: Frequently Asked Questions (FAQs)

Q1: Is PuTTY compatible with Windows 10 x64 systems?

A: Yes, PuTTY is fully compatible with Windows 10 x64 systems. The official website provides a dedicated installer for Windows 10 and other Windows versions.

Q2: Is PuTTY a secure way to connect to remote servers?

A: Yes, PuTTY utilizes the SSH protocol, which encrypts all data transmission, ensuring secure and confidential communication.

Q3: Does PuTTY require any specific system requirements?

A: PuTTY has minimal system requirements. It runs smoothly on most modern computers, including those with Windows 10 x64 operating systems.

Q4: Is PuTTY free to use?

A: Yes, PuTTY is an open-source software, completely free to download and use.

Q5: How do I troubleshoot connection issues with PuTTY?

A: If you encounter connection issues, verify that the hostname or IP address is correct, ensure that the remote server is accessible, and check your internet connection.

PuTTY Download Windows 10 x64: Tips for Effective Use

  • Use a Strong Password: Choose a complex and unique password for your remote server accounts to enhance security.
  • Enable SSH Key Authentication: Utilize SSH keys for authentication instead of passwords for increased security and convenience.
  • Regularly Update PuTTY: Keep your PuTTY installation up-to-date to benefit from the latest security patches and bug fixes.
  • Explore Advanced Features: Familiarize yourself with PuTTY’s advanced features, such as port forwarding, X11 forwarding, and terminal customization, to enhance your productivity.
  • Utilize PuTTY’s Documentation: Refer to the official PuTTY documentation for detailed information on its features, configurations, and troubleshooting tips.

Conclusion

PuTTY Download Windows 10 x64 is a valuable tool for anyone who needs to connect to remote servers securely and efficiently. Its user-friendly interface, robust security features, and wide range of functionalities make it an indispensable tool for system administrators, developers, and network professionals. By following the steps outlined in this guide, you can seamlessly download, install, and utilize PuTTY on your Windows 10 x64 system, unlocking the potential of remote access and server management.

How To Install Putty On Windows 10 - Addicted To Tech How to Download and Install PuTTy on Windows? - GeeksforGeeks How to Download and Install PuTTy on Windows? - GeeksforGeeks
How To Install PuTTY on Windows 10 - YouTube Putty for windows 10 download - stashokretro How to Install Putty on Windows 10 - Htop Skills
Putty download windows 10 - woohor Describes how to use PuTTY on Windows. Installation, terminal window, configuring, generating

Closure

Thus, we hope this article has provided valuable insights into A Comprehensive Guide to Downloading and Utilizing PuTTY for Windows 10 x64 Systems. We hope you find this article informative and beneficial. See you in our next article!

P-touch Editor: A Comprehensive Guide To Labeling Solutions For Windows 11

P-touch Editor: A Comprehensive Guide to Labeling Solutions for Windows 11

Introduction

With great pleasure, we will explore the intriguing topic related to P-touch Editor: A Comprehensive Guide to Labeling Solutions for Windows 11. Let’s weave interesting information and offer fresh perspectives to the readers.

P-touch Editor: A Comprehensive Guide to Labeling Solutions for Windows 11

Brother P-touch Editor for Windows Pc & Mac: Free Download (2023)  Pcmacstore.com

In the modern world, labeling is an essential part of organization, identification, and communication. From labeling office supplies and files to creating professional signage and personalized gifts, a reliable labeling software solution is crucial. Brother’s P-touch Editor, a user-friendly and powerful software application, offers an array of features designed to simplify the labeling process for Windows 11 users.

Understanding P-touch Editor

P-touch Editor is a comprehensive labeling software designed to work seamlessly with Brother’s P-touch label printers. It allows users to create professional-looking labels with various fonts, graphics, and special effects. The software offers a user-friendly interface, making it accessible to users with varying levels of technical expertise.

Key Features of P-touch Editor

P-touch Editor boasts a wide range of features that cater to diverse labeling needs:

  • Label Design and Customization: Users can design labels from scratch or utilize pre-designed templates, tailoring them with various font styles, sizes, colors, and effects. The software supports a wide variety of label sizes and formats, ensuring compatibility with various Brother P-touch label printers.

  • Barcode Generation: P-touch Editor enables the creation of various barcodes, including EAN, UPC, Code 39, Code 128, and QR codes. These barcodes can be easily integrated into labels, enhancing organization and efficiency.

  • Graphics and Images: Users can incorporate images and graphics into their labels, adding visual appeal and enhancing communication. The software supports various image formats, allowing for diverse design possibilities.

  • Text Editing and Formatting: P-touch Editor offers robust text editing features, enabling users to format text with different font styles, sizes, colors, and effects. Users can also utilize various alignment options and line spacing to enhance readability.

  • Data Import and Export: P-touch Editor allows for the import of data from various sources, including spreadsheets and databases. This feature streamlines the process of creating multiple labels with consistent information. Users can also export labels in various formats, including PDF and image files.

  • Label Printing: P-touch Editor integrates seamlessly with Brother’s P-touch label printers, ensuring smooth and efficient printing. The software offers various printing settings, allowing users to control label orientation, quantity, and print quality.

Benefits of Using P-touch Editor

P-touch Editor offers numerous benefits to users, contributing to efficient organization, clear communication, and professional presentation:

  • Improved Organization: The software facilitates the creation of clear and concise labels, enhancing organization in various settings, including offices, homes, and workshops.

  • Enhanced Communication: P-touch Editor enables the creation of labels with visually appealing graphics and clear text, facilitating better communication and identification.

  • Professional Presentation: The software’s diverse features allow users to create professional-looking labels for a wide range of applications, including product labeling, file organization, and event signage.

  • Time-Saving Features: P-touch Editor’s user-friendly interface, pre-designed templates, and data import/export features significantly reduce the time required to create and print labels.

  • Increased Efficiency: The software’s barcode generation and label printing capabilities streamline processes, enhancing efficiency in various tasks, such as inventory management and asset tracking.

  • Cost-Effectiveness: P-touch Editor’s comprehensive features and user-friendly interface eliminate the need for expensive professional labeling services.

Downloading and Installing P-touch Editor on Windows 11

Downloading and installing P-touch Editor on Windows 11 is a straightforward process:

  1. Visit Brother’s Website: Navigate to the official Brother website and locate the P-touch Editor download section.

  2. Select the Appropriate Version: Choose the version of P-touch Editor compatible with your Windows 11 operating system.

  3. Download the Software: Download the installation file and save it to your computer.

  4. Run the Installer: Locate the downloaded installation file and double-click it to launch the installation process.

  5. Follow the Instructions: Follow the on-screen instructions to complete the installation process.

  6. Launch P-touch Editor: Once installed, locate the P-touch Editor application and launch it to begin creating labels.

Frequently Asked Questions (FAQs)

Q: What are the system requirements for running P-touch Editor on Windows 11?

A: P-touch Editor typically requires a computer with a minimum of 1 GHz processor, 512 MB of RAM, and 1 GB of free hard disk space. However, specific system requirements may vary depending on the version of P-touch Editor and the features used.

Q: Is P-touch Editor compatible with all Brother P-touch label printers?

A: P-touch Editor is compatible with a wide range of Brother P-touch label printers. However, it’s essential to check the compatibility list on the Brother website to ensure your specific printer model is supported.

Q: Can I use P-touch Editor to create labels for specific industries, such as healthcare or manufacturing?

A: Yes, P-touch Editor offers features and templates suitable for various industries, including healthcare, manufacturing, and education. The software’s flexibility allows users to create customized labels for specific needs.

Q: Is there a free version of P-touch Editor available?

A: A free trial version of P-touch Editor is usually available for download, allowing users to explore its features before purchasing a full license. However, the free trial version may have limitations on certain features or functionality.

Q: How do I update P-touch Editor to the latest version?

A: The latest version of P-touch Editor can typically be downloaded from the Brother website. Users can also check for automatic updates within the software itself.

Tips for Using P-touch Editor Effectively

  • Explore Pre-Designed Templates: Utilize the software’s pre-designed templates to save time and effort, especially for common labeling tasks.

  • Experiment with Fonts and Graphics: Use a variety of fonts, colors, and graphics to create visually appealing and informative labels.

  • Utilize Data Import and Export: Leverage data import and export features to streamline the creation of multiple labels with consistent information.

  • Optimize Label Design for Readability: Ensure the text size, font style, and label orientation are optimized for clear readability.

  • Print Test Labels: Always print a test label before printing a large batch to ensure the design and content are as intended.

Conclusion

P-touch Editor is a powerful and user-friendly labeling software that simplifies the process of creating professional-looking labels for various applications. Its comprehensive features, including label design, barcode generation, graphics integration, and data import/export, cater to diverse labeling needs. By leveraging the software’s capabilities, users can enhance organization, improve communication, and achieve professional presentation in various settings. With its compatibility with Windows 11 and a wide range of Brother P-touch label printers, P-touch Editor is an indispensable tool for individuals and businesses seeking efficient and effective labeling solutions.

P-touch Editor - Label Design Software P-Touch-Editor Creating a new label layout using P Touch Editor - YouTube
P-touch Editor  Brother European Developer Centre  Brother P-touch Editor  Brother How to Create a New Label Design in P-touch Editor - YouTube
P Touch Manual P-touch Editor 6 Label Design software  Brother Singapore

Closure

Thus, we hope this article has provided valuable insights into P-touch Editor: A Comprehensive Guide to Labeling Solutions for Windows 11. We appreciate your attention to our article. See you in our next article!

Transforming Your Windows 10 Desktop: Exploring The Power Of Panoramic Themes

Transforming Your Windows 10 Desktop: Exploring the Power of Panoramic Themes

Introduction

With great pleasure, we will explore the intriguing topic related to Transforming Your Windows 10 Desktop: Exploring the Power of Panoramic Themes. Let’s weave interesting information and offer fresh perspectives to the readers.

Transforming Your Windows 10 Desktop: Exploring the Power of Panoramic Themes

Cityscapes Panoramic theme for Windows 10 (download) - Pureinfotech

The Windows 10 operating system offers a vast array of customization options, allowing users to personalize their desktops to suit their preferences. One notable feature is the ability to apply themes, which alter the visual appearance of the user interface, including the desktop background, colors, and sounds. Among these themes, panoramic themes stand out for their captivating visual appeal, transforming the user experience by immersing users in stunning, expansive landscapes.

Understanding Panoramic Themes

Panoramic themes, as the name suggests, feature images that extend beyond the traditional screen dimensions, creating a sense of depth and immersion. These images typically showcase breathtaking scenery, such as majestic mountains, serene beaches, or vibrant cityscapes. When applied to a Windows 10 desktop, these themes seamlessly extend across multiple monitors, creating a continuous visual experience that feels like a window to another world.

The Benefits of Panoramic Themes

Beyond their aesthetic appeal, panoramic themes offer several practical benefits:

  • Enhanced Productivity: The immersive nature of panoramic themes can help users focus on their tasks by providing a visually stimulating and engaging environment. The expansive views can serve as a source of inspiration, reducing distractions and promoting a sense of calm.
  • Improved Mood: Studies have shown that exposure to natural scenes can have a positive impact on mood and well-being. Panoramic themes, with their depictions of serene landscapes, can contribute to a more relaxed and enjoyable computing experience.
  • Customization Flexibility: Windows 10 offers extensive customization options for panoramic themes. Users can adjust the theme’s colors, sounds, and even the image itself, creating a truly personalized desktop experience.
  • Enhanced Visual Appeal: Panoramic themes add a touch of sophistication and elegance to any Windows 10 desktop. The expansive landscapes create a sense of grandeur and depth, elevating the overall visual experience.

Applying Panoramic Themes in Windows 10

Applying a panoramic theme in Windows 10 is a straightforward process:

  1. Open the Settings app: This can be done by clicking the Start menu and selecting "Settings."
  2. Navigate to Personalization: In the Settings app, select "Personalization."
  3. Choose Themes: Within the Personalization settings, click on "Themes."
  4. Browse and Apply: Explore the available themes, including those featuring panoramic images. Select a theme and click "Apply" to implement it.

Beyond Default Themes

While Windows 10 provides a selection of built-in themes, users can access a wider variety of panoramic themes from third-party sources. Online repositories and websites dedicated to Windows customization offer a vast collection of high-quality panoramic themes, catering to diverse tastes and preferences.

Tips for Choosing and Using Panoramic Themes

  • Consider screen resolution: When selecting a panoramic theme, ensure it is compatible with your screen resolution to avoid distortion or pixelation.
  • Optimize for multiple monitors: If you use multiple monitors, choose a panoramic theme designed to seamlessly span across them, creating a unified visual experience.
  • Experiment with different themes: Explore a variety of panoramic themes to find those that resonate with your personal style and enhance your productivity.
  • Maintain theme consistency: For a cohesive visual experience, consider using a consistent color palette and style across your desktop, including the taskbar, start menu, and other interface elements.

FAQs

Q: Are panoramic themes compatible with all Windows 10 versions?

A: Yes, panoramic themes are compatible with all versions of Windows 10.

Q: Can I use my own images as panoramic themes?

A: Yes, you can create custom panoramic themes using your own images. Several third-party tools and applications allow you to convert images into Windows themes.

Q: Can I adjust the image’s position on my desktop?

A: While some panoramic themes offer options to adjust the image’s position, most themes automatically center the image on the screen.

Q: Are panoramic themes resource-intensive?

A: Panoramic themes are generally not resource-intensive, as they primarily rely on static images. However, if you use multiple monitors with very high resolutions, the theme’s performance might be affected.

Conclusion

Panoramic themes offer a compelling way to personalize your Windows 10 desktop, transforming it into a visually captivating and engaging space. Beyond their aesthetic appeal, these themes can enhance productivity, improve mood, and provide a more immersive computing experience. By exploring the vast array of available themes and customizing them to suit your preferences, you can create a desktop environment that reflects your unique style and enhances your overall productivity and well-being.

Panoramic themes windows 10 - memoryfoz Discover more than 83 panoramic wallpaper windows 10 best - 3tdesign.edu.vn Windows 10 Panoramic Wallpaper (42+ images)
Windows 10 Panoramic Wallpaper - WallpaperSafari Panoramic Desktop Themes Windows 10  Webphotos.org Panoramic Cityscapes PREMIUM 4K Theme for Windows  Free Wallpaper Themes
�� [50+] Windows 10 Panoramic Wallpapers  WallpaperSafari Panoramic Desktop Wallpapers - Top Free Panoramic Desktop Backgrounds - WallpaperAccess

Closure

Thus, we hope this article has provided valuable insights into Transforming Your Windows 10 Desktop: Exploring the Power of Panoramic Themes. We hope you find this article informative and beneficial. See you in our next article!