Accessing Files On External Drives In Windows 10: A Comprehensive Guide
Accessing Files on External Drives in Windows 10: A Comprehensive Guide
Related Articles: Accessing Files on External Drives in Windows 10: A Comprehensive Guide
Introduction
In this auspicious occasion, we are delighted to delve into the intriguing topic related to Accessing Files on External Drives in Windows 10: A Comprehensive Guide. Let’s weave interesting information and offer fresh perspectives to the readers.
Table of Content
Accessing Files on External Drives in Windows 10: A Comprehensive Guide
:max_bytes(150000):strip_icc()/how-to-access-an-external-hard-drive-on-windows-10-51916433-d26be3167244473bb97d03a2b77515d7.jpg)
In the realm of personal computing, external drives have become indispensable tools for data storage, backup, and file sharing. Whether it’s a portable hard drive, a USB flash drive, or a memory card, these devices provide a convenient way to expand storage capacity and manage files beyond the confines of your computer’s internal drive. Windows 10, with its intuitive interface and robust file management features, seamlessly integrates with these external drives, allowing users to effortlessly access and manipulate the data stored within.
This article delves into the intricate process of accessing files on external drives in Windows 10, providing a comprehensive understanding of the various methods, functionalities, and considerations involved.
Understanding Drive Letters and File Systems
Before embarking on the journey of accessing files on external drives, it is crucial to grasp the fundamental concepts of drive letters and file systems.
-
Drive Letters: When you connect an external drive to your Windows 10 computer, the operating system assigns it a unique drive letter. This letter serves as an identifier for the drive, allowing the system to locate and access its contents. Typically, internal drives are assigned letters like "C:" and "D:", while external drives are allocated letters like "E:", "F:", or "G:", depending on the number of drives already connected.
-
File Systems: The file system is a hierarchical structure that organizes files and folders on a drive, enabling efficient storage and retrieval of data. Windows 10 primarily utilizes two file systems: NTFS (New Technology File System) and FAT32 (File Allocation Table 32). NTFS is the default file system for internal drives, offering advanced features like security permissions and larger file size support. FAT32, on the other hand, is commonly used for external drives, particularly older devices, due to its compatibility with various operating systems.
Accessing Files via File Explorer
The most straightforward way to access files on an external drive in Windows 10 is through File Explorer. This built-in application acts as the central hub for navigating and managing files on your computer, including those on external drives.
-
Open File Explorer: You can access File Explorer by clicking its icon in the taskbar or by pressing the Windows key + E.
-
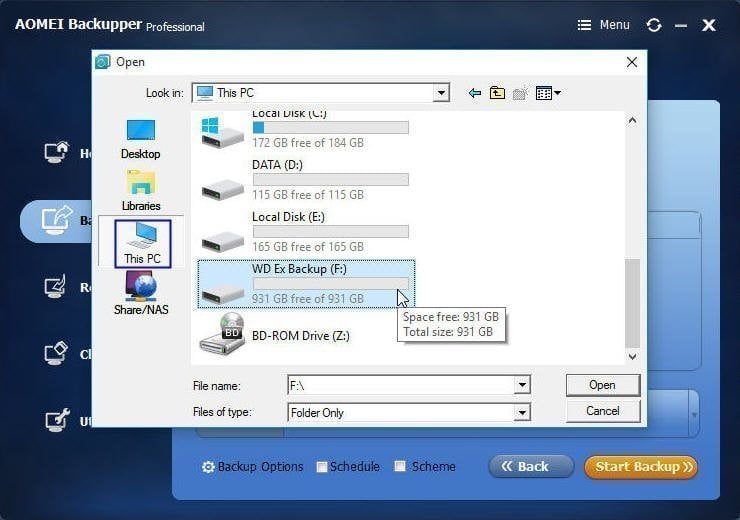
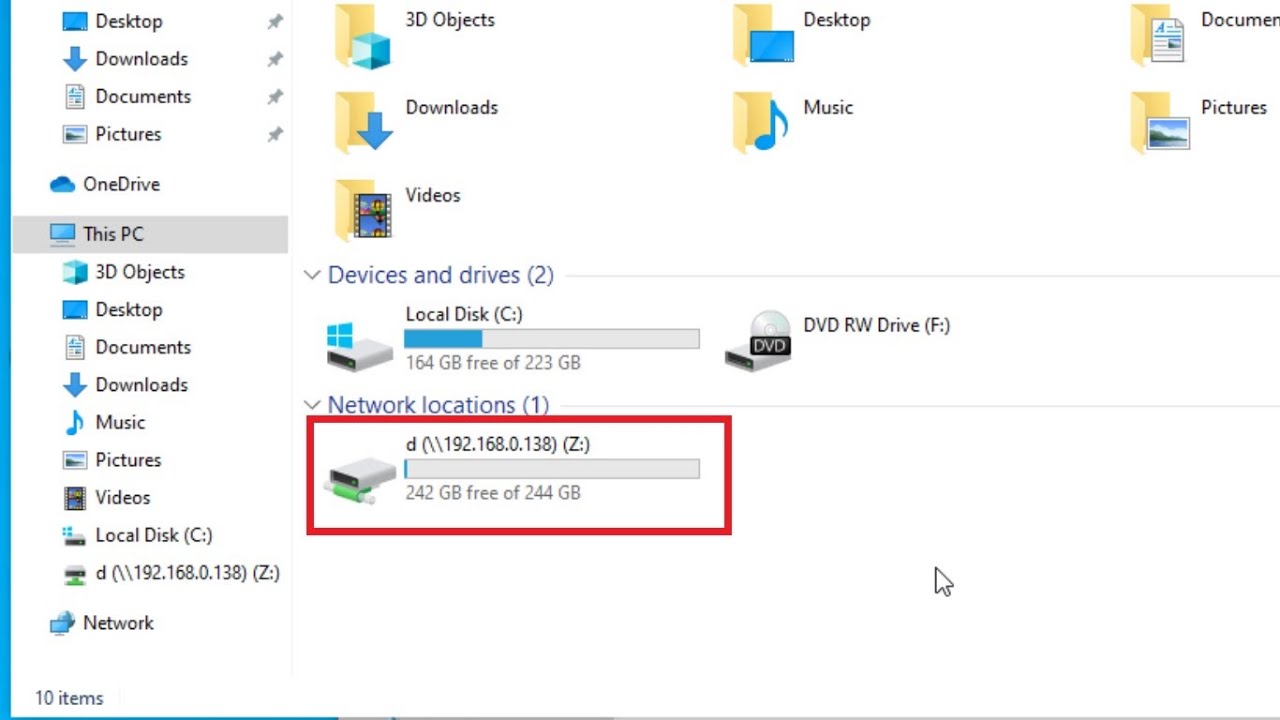
Locate the External Drive: In the left-hand pane of File Explorer, you will find a list of drives connected to your computer. Identify the drive letter assigned to your external drive, which will typically be displayed with its name and icon.
-
Browse and Access Files: Double-click the external drive’s icon to open it. You will then be presented with the contents of the drive, including its folders and files. You can navigate through these folders, open files, copy, move, delete, or perform other file management tasks as needed.
Using the Quick Access Feature
Windows 10’s Quick Access feature provides a convenient way to access frequently used folders and files, including those on external drives.
-
Access Quick Access: Open File Explorer and click the "Quick Access" option in the left-hand pane.
-
Pin External Drive: If your external drive is frequently accessed, you can pin it to Quick Access by right-clicking its icon in File Explorer and selecting "Pin to Quick Access." This will add a shortcut to the drive in the Quick Access section, enabling quick and easy access to its contents.
Accessing Files via the Command Prompt
For advanced users, the Command Prompt provides a powerful text-based interface for interacting with the operating system and managing files.
-
Open Command Prompt: Press the Windows key + R to open the Run dialog box. Type "cmd" and press Enter to open the Command Prompt.
-
Navigate to External Drive: Use the "cd" command to navigate to the directory containing the external drive. For instance, to navigate to the "F:" drive, type "cd F:" and press Enter.
-
Access Files: Once you are in the desired directory, you can use various commands to access and manage files. For example, to list all files in the current directory, type "dir" and press Enter.
Understanding Drive Properties
To gain further insights into an external drive, you can access its properties.
-
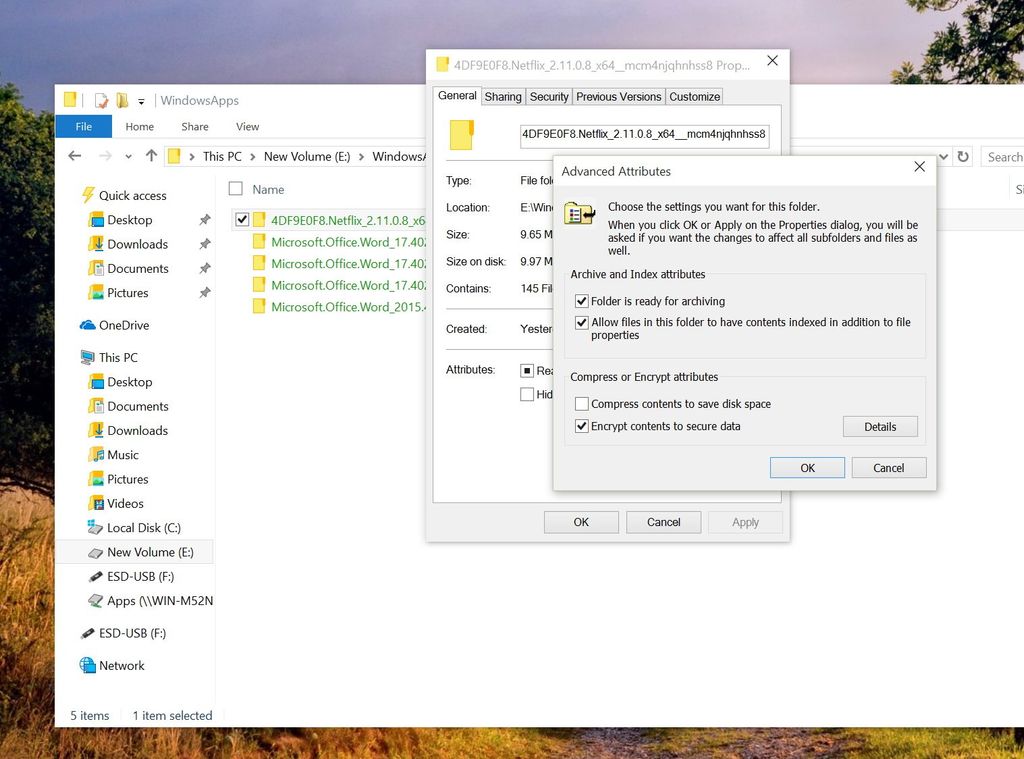
Open Drive Properties: Right-click the external drive’s icon in File Explorer and select "Properties."
-
View Drive Information: The "General" tab displays basic information about the drive, such as its name, file system, and free space.
-
Manage Drive Permissions: The "Security" tab allows you to configure permissions for accessing the drive, controlling who can read, write, or modify its contents.
-
Format Drive: The "Tools" tab provides options for formatting the drive, which essentially erases all its data and allows you to choose a new file system.
Ejecting External Drives Safely
When you are finished using an external drive, it is crucial to eject it safely from your computer to prevent data loss or corruption.
-
Eject via File Explorer: Right-click the external drive’s icon in File Explorer and select "Eject."
-
Eject via System Tray: Look for the external drive’s icon in the system tray, usually located in the bottom right corner of the taskbar. Right-click the icon and select "Eject."
-
Eject via Hardware Safely Remove: Open the "Hardware Safely Remove" option in the system tray, locate the external drive, and click "Eject."
Troubleshooting External Drive Issues
Occasionally, you may encounter issues accessing or using external drives. Here are some common troubleshooting steps:
-
Check Drive Connection: Ensure the external drive is securely connected to your computer. If using a USB connection, try a different USB port or cable.
-
Run Disk Check: Open File Explorer, right-click the external drive’s icon, select "Properties," and go to the "Tools" tab. Click "Check" to run a disk check, which can identify and repair errors on the drive.
-
Update Drivers: Outdated drivers can cause issues with external drives. Update your computer’s drivers by going to Device Manager (right-click the "This PC" icon in File Explorer and select "Manage," then select "Device Manager").
-
Format Drive: If other troubleshooting steps fail, you can try formatting the drive, which will erase all its data but may resolve compatibility or corruption issues. However, ensure you have backed up any important data before formatting.
Frequently Asked Questions
Q: What happens if I disconnect an external drive without ejecting it?
A: Disconnecting an external drive without properly ejecting it can lead to data loss or corruption, as the operating system may still be writing data to the drive. Always ensure you eject the drive safely before disconnecting it.
Q: Can I access files on an external drive from another computer?
A: Yes, you can access files on an external drive from another computer, provided the drive is connected to that computer and the file system is compatible.
Q: What is the difference between NTFS and FAT32?
A: NTFS is a more advanced file system that offers features like security permissions and larger file size support, while FAT32 is simpler and compatible with various operating systems.
Q: How can I increase the storage space on an external drive?
A: You cannot physically increase the storage space of an external drive. However, you can use compression tools or cloud storage services to effectively manage and reduce the amount of data stored on the drive.
Tips for Using External Drives
-
Use a Reliable External Drive: Invest in a high-quality external drive from a reputable brand to ensure data integrity and durability.
-
Back Up Your Data: Regularly back up your important data to an external drive or cloud storage to protect against data loss due to hardware failure or other unforeseen circumstances.
-
Format Drive Regularly: Formatting an external drive regularly can help maintain its performance and prevent errors.
-
Use a Secure Password: If you store sensitive data on an external drive, set a strong password to protect it from unauthorized access.
Conclusion
Accessing files on external drives in Windows 10 is a fundamental aspect of modern computing, enabling users to expand storage capacity, manage files efficiently, and share data seamlessly. By understanding the concepts of drive letters, file systems, and the various access methods, users can navigate and utilize external drives with ease. Remember to always eject drives safely, troubleshoot any issues promptly, and implement best practices for data security and backup. Through proper understanding and utilization, external drives can become invaluable tools for enhancing productivity and data management in the Windows 10 environment.
:max_bytes(150000):strip_icc()/how-to-access-an-external-hard-drive-on-windows-10-51916432-3881c806bd5a499cb6f63c8a80a7e069.jpg)

Closure
Thus, we hope this article has provided valuable insights into Accessing Files on External Drives in Windows 10: A Comprehensive Guide. We thank you for taking the time to read this article. See you in our next article!
Leave a Reply