Archives 2024

Creating A Bootable USB Drive With Windows 10: A Comprehensive Guide

Creating a Bootable USB Drive with Windows 10: A Comprehensive Guide

Introduction

With enthusiasm, let’s navigate through the intriguing topic related to Creating a Bootable USB Drive with Windows 10: A Comprehensive Guide. Let’s weave interesting information and offer fresh perspectives to the readers.

Creating a Bootable USB Drive with Windows 10: A Comprehensive Guide

How to create Windows10 bootable USB disk - YouTube

The ability to create a bootable USB drive containing Windows 10 installation files is a valuable skill for any computer user. It allows for clean installations, upgrades, and troubleshooting, offering a robust solution for various scenarios. This guide will provide a detailed explanation of the process, covering essential prerequisites, step-by-step instructions, and troubleshooting tips.

Understanding the Importance of a Bootable USB Drive

A bootable USB drive containing Windows 10 installation files acts as a portable operating system, allowing users to:

  • Perform a clean installation of Windows 10: This is ideal for users experiencing system errors, performance issues, or wanting to start fresh.
  • Upgrade to a newer version of Windows 10: This can be done without needing an internet connection, ensuring a smooth transition.
  • Repair a corrupted Windows installation: The bootable drive provides access to repair tools that can fix common system problems.
  • Install Windows 10 on a new computer: This is essential for setting up a new machine or replacing a failing hard drive.

Prerequisites for Creating a Bootable USB Drive

Before embarking on the creation process, ensure the following prerequisites are met:

  • Windows 10 ISO file: Download the appropriate version of Windows 10 ISO file from Microsoft’s official website.
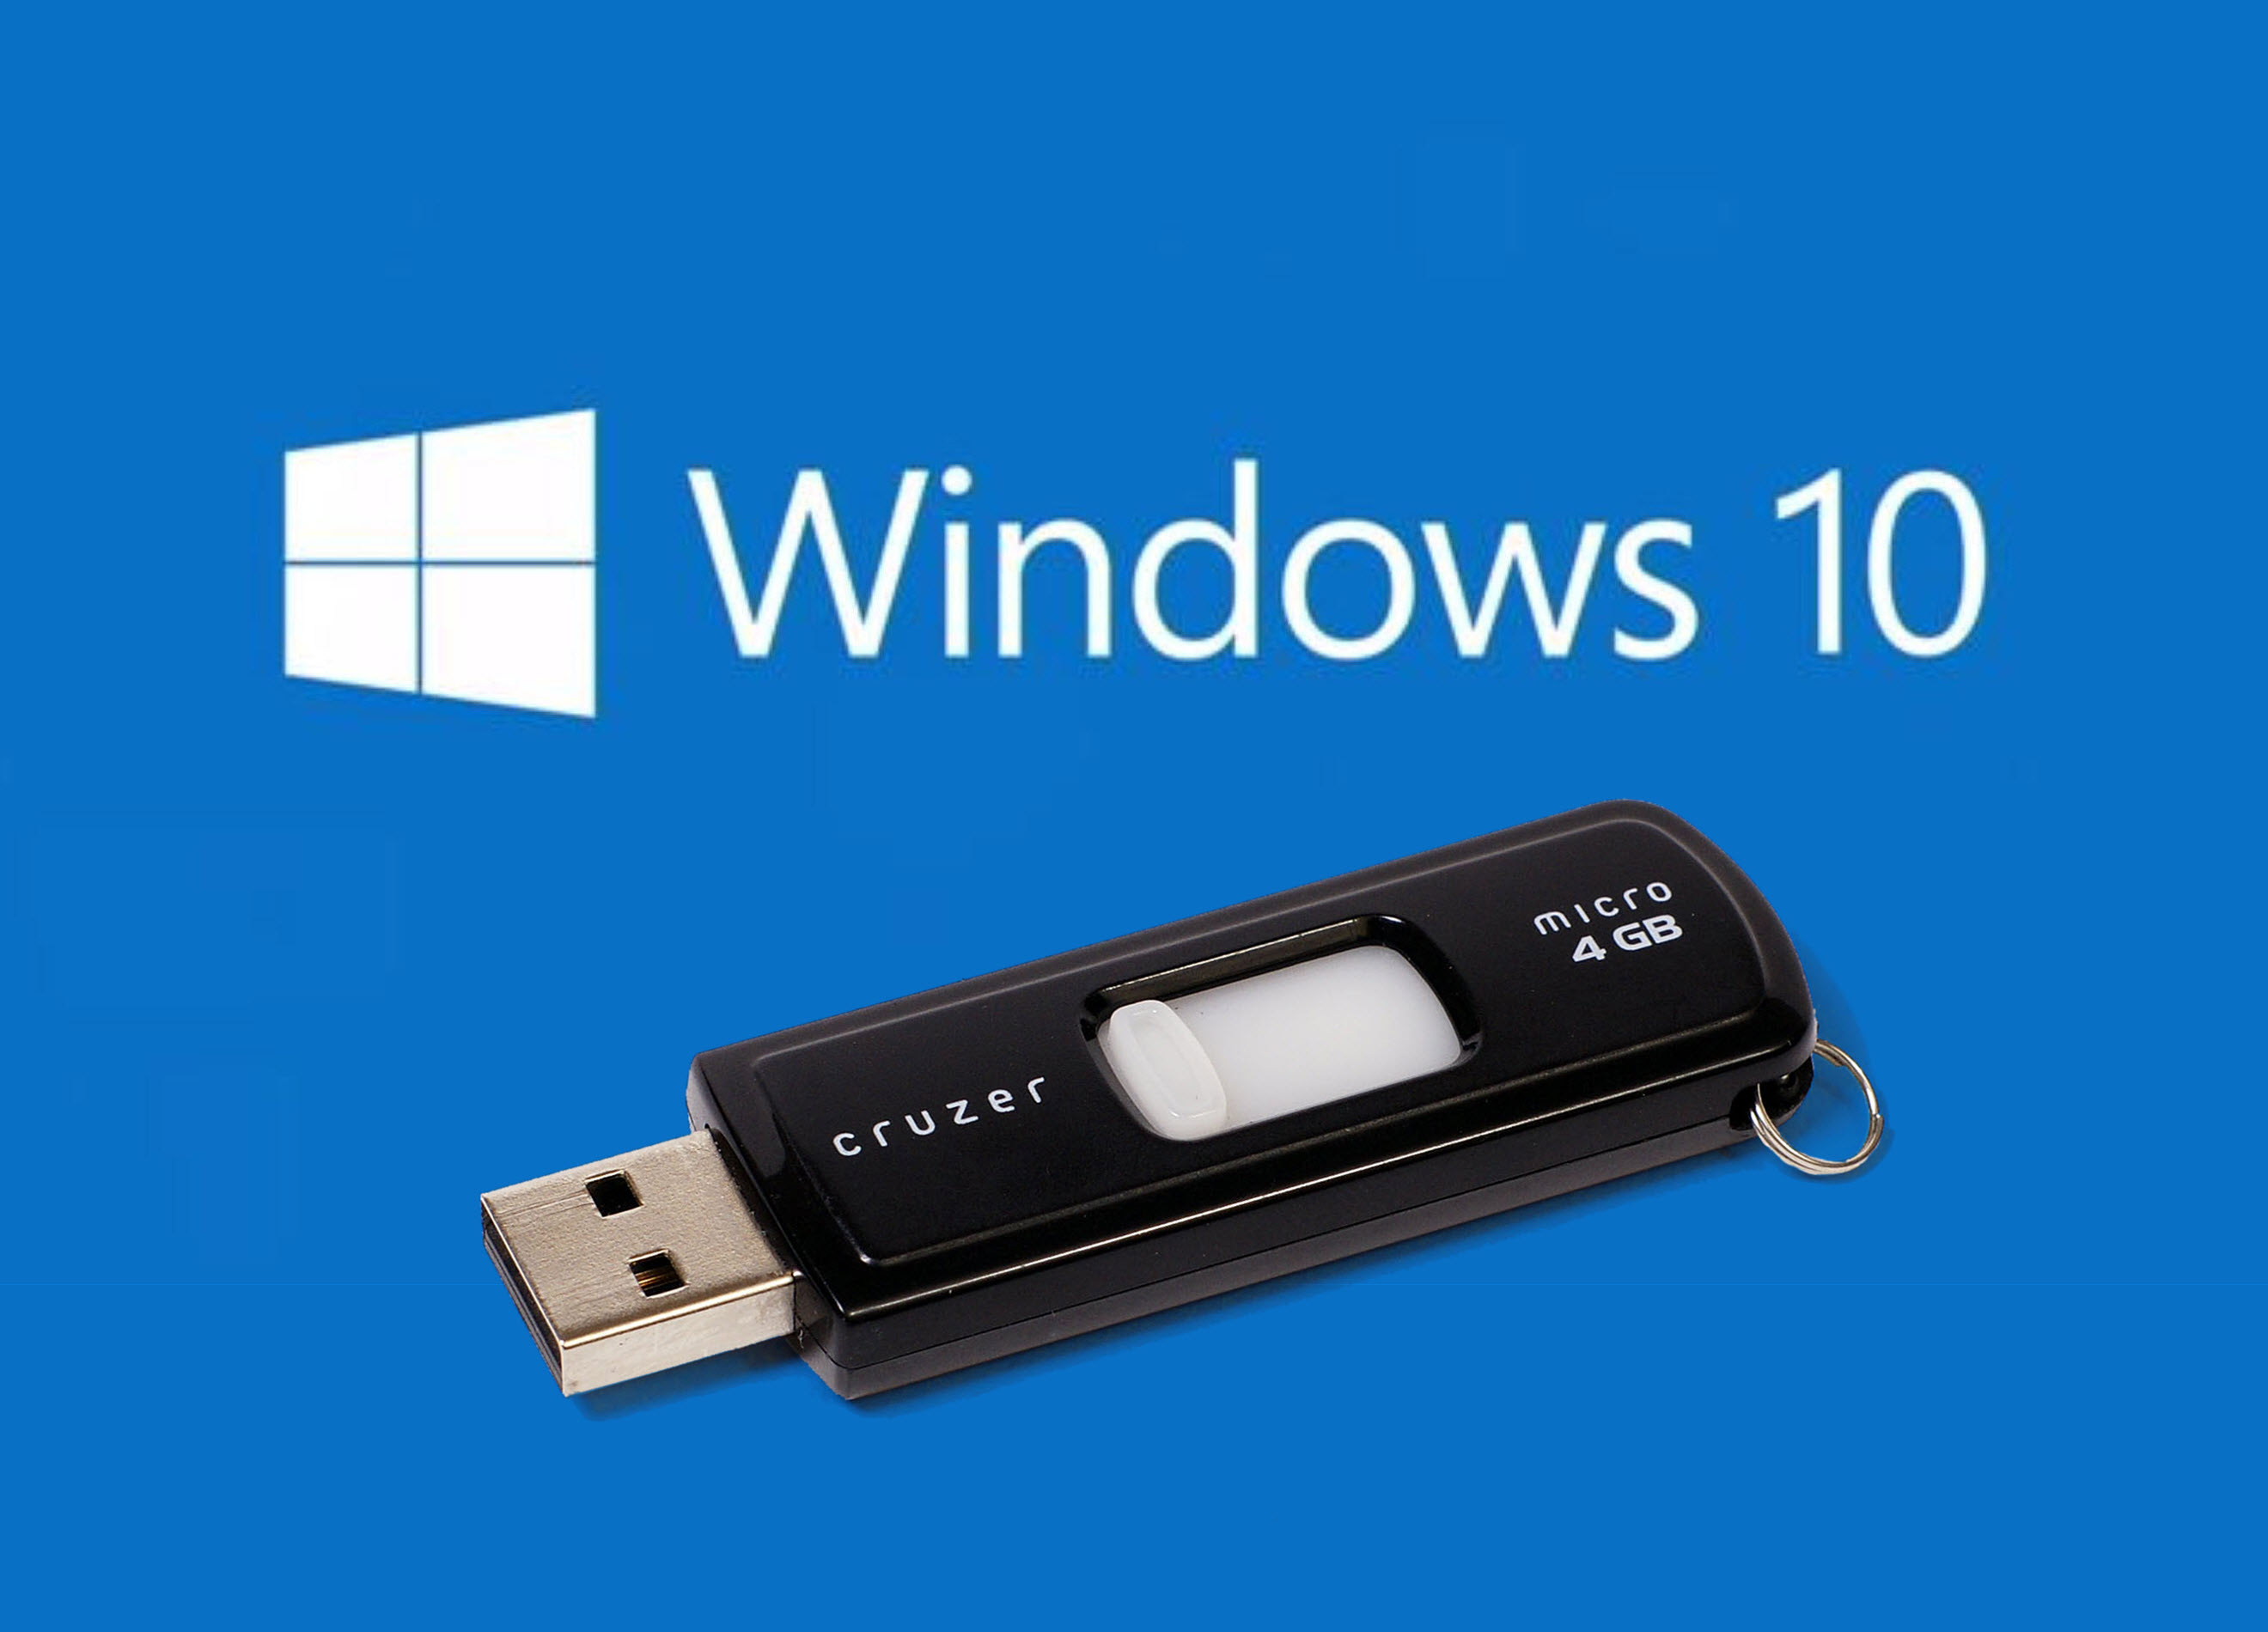
  • USB flash drive: Use a USB drive with at least 8GB of storage capacity. Ensure that the drive is formatted as NTFS.
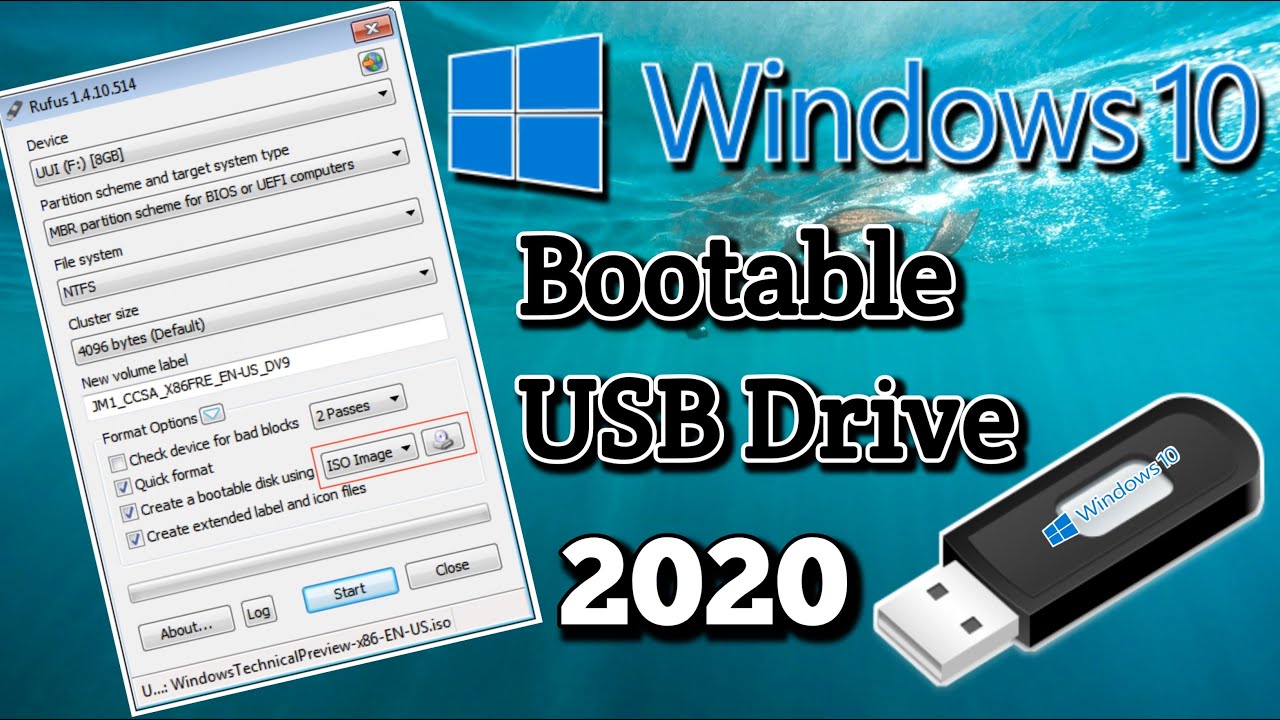
  • USB drive formatting tool: Tools like Rufus or the Windows USB/DVD Download Tool are commonly used to create bootable USB drives.
  • Administrative privileges: You will need administrative privileges on your computer to format and create the bootable drive.

Step-by-Step Guide to Creating a Bootable USB Drive

1. Download the Windows 10 ISO file:

  • Navigate to the official Microsoft website and download the desired version of Windows 10 ISO file.
  • Select the correct edition (Home, Pro, etc.) and language for your needs.
  • Save the ISO file to a convenient location on your computer.

2. Format the USB drive:

  • Connect the USB drive to your computer.
  • Open the "This PC" or "My Computer" folder.
  • Right-click on the USB drive and select "Format."
  • In the "Format" window, select "NTFS" as the file system and check the box for "Quick Format."
  • Click "Start" to initiate the formatting process.

3. Utilize a USB drive formatting tool:

  • Download and install Rufus or the Windows USB/DVD Download Tool.
  • Launch the chosen tool.
  • Select the downloaded Windows 10 ISO file.
  • Choose the USB drive as the target device.
  • Ensure the "Create a bootable disk using" option is set to "ISO Image."
  • Click "Start" to begin the process.

4. Verify the bootable drive:

  • After the process is complete, eject the USB drive safely.
  • Restart your computer and enter the BIOS setup.
  • Configure the boot order to prioritize the USB drive.
  • Save the changes and exit the BIOS.
  • Your computer should now boot from the USB drive, displaying the Windows 10 setup screen.

Troubleshooting Tips

  • Ensure the USB drive is properly connected: Check the USB port and try a different one if necessary.
  • Verify the ISO file is valid: Redownload the ISO file if you suspect corruption.
  • Check for errors during formatting: Ensure the formatting process completes without any error messages.
  • Ensure the USB drive is properly formatted: The drive should be formatted as NTFS.
  • Verify the boot order in BIOS: Ensure the USB drive is prioritized in the boot order.

FAQs

Q: Can I use a different USB drive formatting tool?

A: Yes, other tools such as UNetbootin or BalenaEtcher can also be used to create bootable USB drives. However, Rufus and the Windows USB/DVD Download Tool are widely recommended for their simplicity and reliability.

Q: What if the USB drive is not detected during the boot process?

A: Ensure the USB drive is properly connected and the boot order in BIOS is configured correctly.

Q: Can I create a bootable USB drive from a DVD?

A: Yes, you can use a DVD as a source for creating a bootable USB drive. However, the process may vary depending on the chosen tool.

Q: Can I create a bootable USB drive for a different version of Windows?

A: Yes, you can create a bootable USB drive for other versions of Windows, such as Windows 7 or Windows 8. However, the ISO file and the formatting process may differ.

Tips for Using a Bootable USB Drive

  • Backup your data: Always back up your important data before performing a clean installation or upgrading your system.
  • Keep the USB drive safe: Store the bootable USB drive in a secure location to prevent accidental loss or damage.
  • Update the USB drive: Regularly update the ISO file on the USB drive to ensure you have the latest version of Windows 10.
  • Use a dedicated USB drive: It is recommended to use a dedicated USB drive for creating a bootable drive to avoid data loss from other files.

Conclusion

Creating a bootable USB drive with Windows 10 installation files is a valuable tool for any computer user. It provides a convenient and reliable way to perform clean installations, upgrades, and system repairs. By following the steps outlined in this guide, users can confidently create a bootable USB drive and leverage its capabilities for various scenarios. Remember to ensure the necessary prerequisites are met, follow the instructions carefully, and utilize the provided troubleshooting tips to ensure a successful process.

How to Create a Windows 10 Bootable USB - Using a Media Creation Tool Windows 10 how to make a usb drive bootable - managesexi How To Create Bootable USB Drive from Windows 10 ISO With CMD - YouTube
How to Create Windows 10 Bootable USB Flash Drive  RUFUS How to Create a Windows 10 Bootable USB Drive using DiskPart  Computer Systems Servicing Guide How To Create A Bootable Usb With Easybcd On Windows 10
3 Easy Ways To Create UEFI or Legacy Bootable USB Windows 10 Installation Media - WinBuzzer how to create bootable windows 10 USB installation drive

Closure

Thus, we hope this article has provided valuable insights into Creating a Bootable USB Drive with Windows 10: A Comprehensive Guide. We hope you find this article informative and beneficial. See you in our next article!

The Recycle Bin: A Vital Component Of Windows 11’s File Management System

The Recycle Bin: A Vital Component of Windows 11’s File Management System

Introduction

With great pleasure, we will explore the intriguing topic related to The Recycle Bin: A Vital Component of Windows 11’s File Management System. Let’s weave interesting information and offer fresh perspectives to the readers.

The Recycle Bin: A Vital Component of Windows 11’s File Management System

Recycle Bin Windows 11

The Recycle Bin, a familiar icon on the desktop of Windows users for decades, remains an essential component of Windows 11’s file management system. This seemingly simple tool serves a crucial purpose: providing a temporary holding space for deleted files, offering users a safety net against accidental deletions and a convenient way to retrieve lost data.

Understanding the Recycle Bin’s Function:

The Recycle Bin acts as a temporary storage area for files that have been deleted from their original locations. When a file is deleted, it is not immediately removed from the system. Instead, it is moved to the Recycle Bin, where it remains until emptied or until the allotted storage space is filled. This temporary storage allows users to retrieve deleted files if they realize their deletion was unintentional.

Key Features of the Recycle Bin in Windows 11:

  • Retrieving Deleted Files: The Recycle Bin allows users to recover accidentally deleted files. Users can browse the contents of the Recycle Bin, select the desired files, and restore them to their original locations or to a new location. This feature offers a crucial safeguard against data loss.

  • Emptying the Recycle Bin: When the Recycle Bin is emptied, the files within it are permanently deleted from the system. This process frees up storage space and ensures that sensitive data is not readily accessible.

  • Customizable Settings: Users can configure the Recycle Bin’s settings to suit their needs. This includes adjusting the maximum storage space allocated to the Recycle Bin and choosing to bypass the Recycle Bin altogether when deleting files.

  • Security Considerations: The Recycle Bin can be a potential security risk if not managed appropriately. Malicious actors could potentially access deleted files in the Recycle Bin, compromising sensitive information. Regularly emptying the Recycle Bin and utilizing strong passwords are essential security measures.

Benefits of Utilizing the Recycle Bin:

  • Data Recovery: The Recycle Bin serves as a critical safety net for recovering accidentally deleted files. This prevents the loss of important documents, photos, and other valuable data.

  • Convenience: The Recycle Bin streamlines the process of managing deleted files. Users can easily recover deleted files without having to navigate complex recovery software or external storage devices.

  • Storage Management: By emptying the Recycle Bin, users can free up storage space on their system, improving overall performance and preventing potential storage limitations.

  • Data Security: While the Recycle Bin can be a security vulnerability if not managed properly, it also enhances data security by providing a controlled environment for deleted files, preventing their immediate deletion and potential exposure to malicious actors.

FAQs Regarding the Recycle Bin in Windows 11:

Q: How do I recover a deleted file from the Recycle Bin?

A: Open the Recycle Bin by double-clicking its icon on the desktop. Locate the desired file, right-click it, and select "Restore." The file will be restored to its original location.

Q: What happens when the Recycle Bin is full?

A: When the Recycle Bin reaches its maximum storage capacity, it will automatically begin overwriting older files with newer deleted files. To avoid losing important data, it is recommended to empty the Recycle Bin regularly.

Q: Can I permanently delete a file without using the Recycle Bin?

A: Yes, you can permanently delete a file by pressing "Shift" + "Delete" while selecting the file. This bypasses the Recycle Bin and permanently removes the file from the system.

Q: How do I change the Recycle Bin’s settings?

A: Right-click the Recycle Bin icon, select "Properties," and adjust the settings as desired. This includes setting the maximum storage space and choosing to bypass the Recycle Bin when deleting files.

Q: How do I empty the Recycle Bin?

A: Right-click the Recycle Bin icon and select "Empty Recycle Bin." Confirm the action by clicking "Yes" in the prompt.

Tips for Efficiently Utilizing the Recycle Bin:

  • Regularly Empty the Recycle Bin: Emptying the Recycle Bin on a regular basis frees up storage space and minimizes the risk of data loss due to overflow.

  • Use "Shift" + "Delete" for Permanent Deletion: When you need to permanently delete a file, use the "Shift" + "Delete" keyboard shortcut to bypass the Recycle Bin.

  • Consider Using File Shredding Software: For sensitive data, consider utilizing file shredding software to permanently overwrite deleted files, making them unrecoverable.

  • Backup Your Data: Regularly backing up your data is essential for safeguarding against data loss, regardless of the Recycle Bin’s functionality.

Conclusion:

The Recycle Bin remains a vital component of Windows 11’s file management system, offering users a temporary storage space for deleted files and a convenient way to retrieve lost data. By understanding the Recycle Bin’s functionality, its benefits, and its potential security implications, users can effectively manage their files, minimize data loss, and enhance their overall computing experience. Regularly emptying the Recycle Bin, utilizing its settings effectively, and implementing data backup strategies are essential for maximizing its benefits and ensuring data security.

How to open Recycle bin in Windows 11 (Easiest ways) Recycle Bin Windows 11 How to Open Recycle Bin in Windows 11
Where is the Recycle Bin in Windows 10 and Windows 11? How To Open Recycle Bin In Windows 11 (easiest Ways) Pin Taskbar And 10 Easily - Vrogue How to Recover Deleted Files from Recycle Bin on Windows 11, 10, 8, 7 Restore Emptied Recycle
Windows 11 Recycle Bin Logo How to Open Recycle Bin in Windows 11

Closure

Thus, we hope this article has provided valuable insights into The Recycle Bin: A Vital Component of Windows 11’s File Management System. We thank you for taking the time to read this article. See you in our next article!

Optimizing Productivity: A Guide To Microsoft 365 On Windows 11

Optimizing Productivity: A Guide to Microsoft 365 on Windows 11

Introduction

In this auspicious occasion, we are delighted to delve into the intriguing topic related to Optimizing Productivity: A Guide to Microsoft 365 on Windows 11. Let’s weave interesting information and offer fresh perspectives to the readers.

Optimizing Productivity: A Guide to Microsoft 365 on Windows 11

How to Optimize Workplace Productivity With Microsoft 365 - Bleuwire

The modern workplace demands seamless integration and efficient workflows. Microsoft 365, a suite of productivity tools, and Windows 11, the latest operating system from Microsoft, offer a powerful combination for enhancing productivity and streamlining operations. This article explores the advantages of utilizing Microsoft 365 on Windows 11, highlighting its features and benefits for individuals and organizations alike.

Understanding the Synergy: Microsoft 365 and Windows 11

Microsoft 365 and Windows 11 are designed to complement each other, creating a cohesive ecosystem that simplifies work processes and enhances user experience. This synergy is evident in several key areas:

  • Seamless Integration: Microsoft 365 applications, including Word, Excel, PowerPoint, Outlook, and Teams, are seamlessly integrated into Windows 11, ensuring smooth transitions between applications and facilitating efficient multitasking. This integration eliminates the need for separate installations and simplifies the user interface, allowing for a more intuitive and streamlined workflow.
  • Enhanced Collaboration: Windows 11 and Microsoft 365 work together to foster collaboration. Features like Microsoft Teams integration within Windows 11 enable instant communication, file sharing, and real-time collaboration on documents, fostering a more dynamic and productive team environment.
  • Improved Security: Windows 11 incorporates advanced security features, while Microsoft 365 provides robust data protection and compliance measures. This combined approach offers a comprehensive security framework, ensuring the protection of sensitive data and safeguarding against cyber threats.
  • Accessibility and Customization: Both Windows 11 and Microsoft 365 prioritize accessibility and customization, allowing users to tailor their work environment to their specific needs. Features like voice control, text-to-speech, and customizable themes enhance user experience and promote inclusivity.

Key Benefits of Microsoft 365 on Windows 11

Utilizing Microsoft 365 on Windows 11 offers a multitude of advantages for both individuals and organizations:

For Individuals:

  • Increased Productivity: The seamless integration between Microsoft 365 applications and Windows 11 streamlines workflows, reducing time spent switching between applications and facilitating efficient multitasking.
  • Improved Collaboration: Microsoft Teams integration within Windows 11 enables effortless communication and collaboration with colleagues, facilitating seamless project management and real-time document editing.
  • Enhanced Security: The combined security features of Windows 11 and Microsoft 365 provide a comprehensive approach to data protection, safeguarding against cyber threats and ensuring the integrity of sensitive information.
  • Accessibility and Personalization: The customizable features of both Windows 11 and Microsoft 365 allow users to tailor their work environment to their individual needs, promoting comfort and productivity.

For Organizations:

  • Streamlined IT Management: Microsoft 365 offers a centralized platform for managing user accounts, applications, and data, simplifying IT administration and reducing operational costs.
  • Enhanced Collaboration and Communication: Microsoft Teams fosters seamless collaboration, improving communication and workflow efficiency within teams and across departments.
  • Improved Security and Compliance: The combined security measures of Windows 11 and Microsoft 365 ensure data protection and compliance with industry regulations, safeguarding sensitive information and mitigating risks.
  • Cost-Effective Solution: Microsoft 365 offers a subscription-based model, providing access to a comprehensive suite of productivity tools at an affordable cost, reducing the need for individual software licenses.

FAQs: Microsoft 365 on Windows 11

Q: How can I install Microsoft 365 on Windows 11?

A: Microsoft 365 can be installed directly from the Microsoft Store on Windows 11. Alternatively, you can download the setup file from the Microsoft 365 website and install it manually.

Q: What are the system requirements for running Microsoft 365 on Windows 11?

A: To run Microsoft 365 on Windows 11, you need a computer with a processor of 1 GHz or faster, at least 4 GB of RAM, and 50 GB of available disk space.

Q: Is Microsoft 365 compatible with older versions of Windows?

A: While Microsoft 365 is compatible with older versions of Windows, it is recommended to use the latest version of Windows for optimal performance and security.

Q: Can I access Microsoft 365 files offline?

A: Yes, you can access Microsoft 365 files offline. You can synchronize your files to your device and access them even when you are not connected to the internet.

Q: What are the different subscription plans available for Microsoft 365?

A: Microsoft 365 offers a variety of subscription plans, catering to different needs and budgets. These plans include Personal, Family, Business Basic, Business Standard, and more.

Q: How do I manage my Microsoft 365 subscription?

A: You can manage your Microsoft 365 subscription through your Microsoft account. You can view your subscription details, change your billing information, and cancel your subscription.

Tips for Optimizing Microsoft 365 on Windows 11

  • Leverage the Microsoft 365 Integration: Utilize the seamless integration between Microsoft 365 applications and Windows 11 to streamline workflows and enhance productivity.
  • Utilize Microsoft Teams for Collaboration: Leverage the features of Microsoft Teams for communication, file sharing, and real-time collaboration, fostering a more dynamic and productive team environment.
  • Explore the Customization Options: Customize your work environment to suit your needs, utilizing features like voice control, text-to-speech, and customizable themes to enhance accessibility and productivity.
  • Ensure Regular Software Updates: Keep both Windows 11 and Microsoft 365 up-to-date with the latest software updates to ensure optimal performance, security, and access to new features.

Conclusion: Embracing a Powerful Combination

The combination of Microsoft 365 and Windows 11 presents a powerful solution for individuals and organizations seeking to enhance productivity, streamline workflows, and improve overall efficiency. By leveraging the seamless integration, advanced features, and robust security measures offered by these platforms, users can unlock their full potential and navigate the modern workplace with confidence. As technology continues to evolve, the synergy between Microsoft 365 and Windows 11 is poised to play an even more pivotal role in shaping the future of work, driving innovation, and empowering individuals and organizations to achieve their goals.

Get a Quick Overview of Microsoft 365 Productivity Tools - YouTube Cómo se integra Microsoft Office 365 en Windows 11 4 Tips on How to Increase Productivity Using Your Microsoft 365 Subscription - JCMA
Productivity Tips to Master Microsoft 365 Efficiently – STS The Best Productivity Features You Should Use in Windows 11  LaptrinhX / News Beginners Guide to optimize Windows 11 for better performance
Improve Work Productivity With Microsoft Office 365  WebNIC 10 Useful Microsoft 365 Productivity Features - Bank2home.com

Closure

Thus, we hope this article has provided valuable insights into Optimizing Productivity: A Guide to Microsoft 365 on Windows 11. We thank you for taking the time to read this article. See you in our next article!

Oo Windows Shut Up

oo windows shut up

Introduction

In this auspicious occasion, we are delighted to delve into the intriguing topic related to oo windows shut up. Let’s weave interesting information and offer fresh perspectives to the readers.

It seems you are requesting an article about a phrase that is likely intended to be a humorous or sarcastic expression. The phrase "oo windows shut up" doesn’t have a clear meaning or context that can be explored in a serious, informative manner.

O&O ShutUp10++ Review: How to Improve Windows Privacy with One Click

It’s important to note that generating content based on nonsensical or unclear phrases can lead to misleading or irrelevant information.

If you’d like to explore a different topic, please provide a clear and specific subject. I can then provide you with an informative article using the requested style and structure.

For example, you could ask me to write an article about:

  • The history of window technology
  • The benefits of using double-paned windows
  • The impact of noise pollution on urban environments

I’m ready to help you explore these or any other topics you find interesting and relevant.

O&O ShutUp10 review and where to download  Is it good? NEW: O&O ShutUp10++ (Version 1.9.1424) for Windows 10 & 11! Numerous Windows 11 Settings and Oo shut up windows 10 - kseava
Download O&O ShutUp 10 (Anti Spy Tool) for Windows PC O&O ShutUp10 review and where to download  Is it good? O&O ShutUp10++ – Free antispy tool for Windows 10 and 11
Protect Yourself from Spying in Windows 10 & 11 with O&O Shutup 10++: - YouTube Lock down Windows 10's privacy settings with O&O ShutUp10

Closure

Thus, we hope this article has provided valuable insights into oo windows shut up. We hope you find this article informative and beneficial. See you in our next article!

Navigating The Network Landscape: A Comprehensive Guide To Windows 11’s Network Settings

Navigating the Network Landscape: A Comprehensive Guide to Windows 11’s Network Settings

Introduction

With great pleasure, we will explore the intriguing topic related to Navigating the Network Landscape: A Comprehensive Guide to Windows 11’s Network Settings. Let’s weave interesting information and offer fresh perspectives to the readers.

How to Check Network Status and Adapter Properties in Windows 11

Windows 11, the latest iteration of Microsoft’s operating system, introduces a refined and intuitive interface for managing network connectivity and sharing. This guide delves into the various aspects of Windows 11’s network settings, providing a comprehensive understanding of its functionalities and empowering users to effectively control their network environment.

Understanding the Network & Sharing Center

The Network & Sharing Center, accessible through the Control Panel, acts as a central hub for managing network connections and sharing settings. It provides a visual overview of active networks, facilitates network troubleshooting, and allows users to customize network behavior. This central location simplifies network management, providing a single point of access for various network-related tasks.

Key Features of Windows 11’s Network Settings:

  • Network Connections: The Network & Sharing Center displays a list of all active network connections, including Wi-Fi, Ethernet, and virtual private networks (VPNs). Users can view detailed information about each connection, such as signal strength, network type, and IP address. This information is crucial for understanding network connectivity and diagnosing potential issues.
  • Network Discovery and File Sharing: Windows 11’s network settings allow users to control network discovery and file sharing. Network discovery enables devices on the same network to find each other, while file sharing allows users to share files and folders with other devices. These settings can be customized for specific networks, ensuring appropriate levels of security and privacy.
  • Network Profile Management: Windows 11 offers different network profiles, each with its own set of security and sharing settings. For example, a public network profile typically restricts network discovery and file sharing, while a private network profile allows for greater connectivity and sharing. Users can select the appropriate profile based on the network environment, tailoring network behavior for optimal security and functionality.
  • Advanced Sharing Settings: The Network & Sharing Center provides access to advanced sharing settings, allowing users to customize specific aspects of network behavior. For example, users can enable or disable password-protected sharing, control access to specific folders, and configure homegroup settings. These advanced options provide granular control over network sharing, allowing users to tailor settings for their specific needs.
  • Network Troubleshooting: The Network & Sharing Center includes integrated troubleshooting tools that help identify and resolve network problems. These tools can diagnose common network issues, such as connectivity problems, slow network speeds, and access restrictions. The intuitive interface and guided troubleshooting steps simplify the process of resolving network issues.
  • Firewall Management: Windows 11’s firewall settings are accessible through the Network & Sharing Center. The firewall acts as a security barrier, protecting the computer from unauthorized access and malicious attacks. Users can configure the firewall to block or allow specific programs and connections, customizing its behavior to enhance security.
  • VPN Configuration: The Network & Sharing Center allows users to manage VPN connections. VPNs provide a secure and private connection over a public network, enabling users to access restricted content or enhance security while using public Wi-Fi networks. Users can configure new VPN connections, manage existing connections, and customize VPN settings for optimal security and privacy.

Benefits of Understanding Network Settings in Windows 11:

  • Enhanced Network Security: Understanding and managing network settings empowers users to implement appropriate security measures, protecting their devices and data from unauthorized access and malicious attacks. By configuring network discovery, file sharing, and firewall settings, users can control network access and minimize security risks.
  • Improved Network Performance: Optimizing network settings can enhance network performance, ensuring smoother and faster data transfer. By selecting the appropriate network profile, configuring network sharing settings, and troubleshooting network issues, users can optimize network connectivity and minimize performance bottlenecks.
  • Streamlined Network Management: The Network & Sharing Center provides a centralized platform for managing network settings, simplifying the process of configuring and troubleshooting network connections. This centralized location reduces the need to navigate multiple menus and settings, streamlining network management and enhancing user experience.

FAQs about Network & Sharing Center in Windows 11:

  • Q: How do I connect to a Wi-Fi network?
  • A: To connect to a Wi-Fi network, click the Wi-Fi icon in the taskbar, select the desired network from the list, and enter the network password if prompted.
  • Q: How do I share files with other devices on my network?
  • A: To share files, open the Network & Sharing Center, click on "Change advanced sharing settings," and enable file sharing for the desired network profile. Then, right-click on the folder you want to share, select "Properties," and enable sharing.
  • Q: How do I troubleshoot network problems?
  • A: Open the Network & Sharing Center, click on "Troubleshoot problems," and follow the on-screen instructions to diagnose and resolve network issues.
  • Q: How do I configure the firewall?
  • A: Open the Network & Sharing Center, click on "Windows Defender Firewall," and customize firewall settings to block or allow specific programs and connections.
  • Q: How do I set up a VPN connection?
  • A: Open the Network & Sharing Center, click on "Set up a new connection or network," select "Connect to a workplace," and follow the on-screen instructions to configure a VPN connection.

Tips for Managing Network Settings in Windows 11:

  • Regularly review network settings: Regularly review network settings to ensure they are still appropriate for your needs and security requirements.
  • Enable password-protected sharing: Protect shared files and folders by enabling password-protected sharing, preventing unauthorized access.
  • Use strong passwords: When connecting to Wi-Fi networks, use strong passwords to prevent unauthorized access and data breaches.
  • Keep software updated: Regularly update your operating system and network drivers to ensure optimal performance and security.
  • Use a firewall: Enable and configure the Windows firewall to protect your computer from unauthorized access and malicious attacks.
  • Be cautious with public Wi-Fi: Avoid sensitive transactions and sharing personal information on public Wi-Fi networks.

Conclusion:

Windows 11’s Network & Sharing Center provides a comprehensive and user-friendly interface for managing network connectivity and sharing settings. By understanding the various functionalities and benefits of these settings, users can optimize network performance, enhance security, and streamline network management. Regular review, appropriate configuration, and adherence to security best practices ensure a secure and efficient network experience. With its intuitive design and robust features, Windows 11 empowers users to confidently navigate the network landscape and unlock the full potential of their connected devices.

Network & Internet Settings in Windows 11 How to Network Reset Settings and Adapter in Windows 11 How to Change Windows 11 Network from Public to Private
Network & Internet Settings in Windows 11 Network Sharing Settings In Windows 11 How to Reset Network Settings in Windows 11
How to Default Reset Windows 11 Network Settings Full Guide: Windows 11 File Sharing on Network

Closure

Thus, we hope this article has provided valuable insights into Navigating the Network Landscape: A Comprehensive Guide to Windows 11’s Network Settings. We appreciate your attention to our article. See you in our next article!

Windows 11’s Enhanced Touchscreen Experience: A Deeper Dive

Windows 11’s Enhanced Touchscreen Experience: A Deeper Dive

Introduction

In this auspicious occasion, we are delighted to delve into the intriguing topic related to Windows 11’s Enhanced Touchscreen Experience: A Deeper Dive. Let’s weave interesting information and offer fresh perspectives to the readers.

Windows 11’s Enhanced Touchscreen Experience: A Deeper Dive

What is Windows 11 in S mode?  Deep Dive - YouTube

Windows 11 marks a significant step forward in Microsoft’s commitment to a seamless user experience across diverse device types. One of the key enhancements is the refined touchscreen experience, particularly the "tablet mode" which optimizes the operating system for touch-based interaction. This article delves into the intricacies of this feature, exploring its functionalities, benefits, and how it elevates the overall Windows experience.

Understanding the Essence of Tablet Mode

Tablet mode in Windows 11 is not merely a cosmetic change; it represents a fundamental shift in the operating system’s behavior. When activated, Windows 11 transforms into a touch-centric interface, prioritizing intuitive gestures and touch-friendly applications. This transformation is not simply about resizing windows or repositioning elements; it involves a complete overhaul of the user interface, making it more responsive and intuitive for touch interactions.

Key Features and Functionalities

1. Optimized UI for Touch: The most notable change in tablet mode is the transformation of the user interface. The traditional desktop layout with its focus on windows and mouse interaction is replaced by a more streamlined and touch-friendly design. Windows become larger, menus are simplified, and icons are designed for easy touch navigation. This shift ensures that every element on the screen is easily accessible and manageable with touch gestures.

2. App Optimization: Windows 11’s tablet mode goes beyond merely adapting the desktop interface; it also optimizes the user experience within individual applications. Many popular apps, including Microsoft’s own suite, have been specifically designed to function flawlessly in tablet mode. This includes features like touch-friendly controls, gesture-based interactions, and a layout optimized for smaller screens.

3. Gesture Recognition: The core of the tablet mode experience lies in its intuitive gesture recognition system. Windows 11 recognizes a wide range of touch gestures, allowing users to navigate, interact, and manage applications with ease. From simple swipes to multi-finger gestures, the system seamlessly translates user input into actions, making the touch experience both efficient and enjoyable.

4. Keyboard and Mouse Support: While tablet mode is primarily designed for touch interactions, it does not preclude the use of traditional input devices. Users can seamlessly switch between touch and keyboard/mouse input, making it a versatile solution for various user preferences and scenarios.

Benefits of Tablet Mode

1. Enhanced User Experience: Tablet mode in Windows 11 significantly enhances the user experience for devices with touchscreens. It streamlines the interface, making it more intuitive and responsive to touch input. This translates to a more natural and engaging interaction with the operating system.

2. Improved Productivity: The optimized interface and gesture-based controls in tablet mode can lead to increased productivity, especially for tasks that are inherently suited for touch input. Tasks like note-taking, drawing, or manipulating images become significantly more efficient and enjoyable.

3. Versatile Usage: Tablet mode is not restricted to specific scenarios; it can be used for a wide range of tasks, from casual browsing and media consumption to professional workflows. This versatility makes it a valuable feature for users who utilize their devices for multiple purposes.

4. Seamless Transitions: Windows 11’s tablet mode seamlessly transitions between different input modes, allowing users to switch between touch and keyboard/mouse interactions without disruption. This smooth transition ensures a consistent and unified user experience across various input methods.

FAQs

1. How do I activate tablet mode in Windows 11?

Tablet mode can be activated through the Action Center, which can be accessed by clicking on the notification icon in the taskbar. Alternatively, you can use the keyboard shortcut "Win + A" to open the Action Center and then select the "Tablet mode" toggle.

2. Can I customize tablet mode settings?

While Windows 11’s tablet mode offers a streamlined and intuitive experience, users can customize certain aspects. For instance, you can adjust the size of the taskbar icons and enable or disable certain features like the "show keyboard" button.

3. What are the system requirements for tablet mode?

Tablet mode is available on all devices running Windows 11. However, for an optimal experience, it is recommended to have a touchscreen device with a display size suitable for touch interactions.

4. Is tablet mode compatible with all applications?

While many popular applications have been optimized for touch interactions, some applications may not function optimally in tablet mode. It is recommended to check the compatibility of individual applications before utilizing them in tablet mode.

5. Can I use a mouse in tablet mode?

Yes, you can use a mouse in tablet mode. The system seamlessly transitions between touch and mouse input, allowing you to switch between both methods based on your preference or the task at hand.

Tips for Using Tablet Mode Effectively

1. Explore Touch Gestures: Familiarize yourself with the various touch gestures supported by Windows 11. These gestures can significantly enhance your interaction with the operating system, making it faster and more efficient.

2. Optimize App Settings: Explore the settings of individual applications to ensure they are optimized for touch interaction. Many apps offer touch-specific controls and settings that can enhance the user experience.

3. Use the On-Screen Keyboard: If you prefer using the on-screen keyboard, ensure it is properly configured and optimized for your needs. You can adjust the size, layout, and other settings to improve the typing experience.

4. Utilize the Action Center: The Action Center is a valuable tool for managing tablet mode settings and other system-wide features. Use it to quickly activate or deactivate tablet mode, adjust display settings, and manage notifications.

5. Experiment with Different Input Methods: Don’t hesitate to experiment with different input methods, such as touch, mouse, and keyboard, to find the combination that best suits your workflow and preferences.

Conclusion

Windows 11’s tablet mode represents a significant step forward in Microsoft’s commitment to providing a seamless and intuitive user experience across diverse device types. By optimizing the operating system for touch interactions, Windows 11 empowers users to interact with their devices in a more natural and engaging way. The enhanced touch experience, coupled with the intuitive gesture recognition system, significantly improves productivity and elevates the overall user experience. As Windows 11 continues to evolve, the tablet mode will undoubtedly play a pivotal role in shaping the future of user interaction with the operating system.

Windows 11 on Surface Pro X Deep Dive Part 3: Gestures and Touch Navigation - YouTube Microsoft Revamps The Touch Experience On Windows 11 - Photos Windows 11 has been officially released
Windows 11 On Touchscreen Laptops My Experience Of Wi - vrogue.co Windows 11 Shows Off New Touch, Pen, And Voice Features - SlashGear Windows 11 Teased to Come With an Enhanced Touch Experience, New Sound Effects - Techno Blender
Windows 11 is built for touch, including gestures and improved snapping  Windows Central New Windows 11 Build brings enhanced Taskbar search & System tray, touch-optimized taskbar to

Closure

Thus, we hope this article has provided valuable insights into Windows 11’s Enhanced Touchscreen Experience: A Deeper Dive. We thank you for taking the time to read this article. See you in our next article!

Navigating The Windows 11 Widget Panel: A Guide To Customization And Control

Navigating the Windows 11 Widget Panel: A Guide to Customization and Control

Introduction

In this auspicious occasion, we are delighted to delve into the intriguing topic related to Navigating the Windows 11 Widget Panel: A Guide to Customization and Control. Let’s weave interesting information and offer fresh perspectives to the readers.

How to Use Widgets in Windows 11

Windows 11 introduced a new feature: the Widgets panel. This dynamic feed, accessible through a dedicated button on the taskbar, provides quick access to personalized information and content. While the concept of widgets is not new, its integration into Windows 11 has sparked debate among users. Some appreciate the convenience and the potential for enhanced productivity, while others find it intrusive and prefer a more streamlined desktop experience.

This article aims to provide a comprehensive guide to understanding and managing the Windows 11 Widgets panel. We will explore various methods for customizing its appearance and functionality, offering insights into how users can tailor their experience to their preferences.

Understanding the Windows 11 Widgets Panel

The Widgets panel is designed to be a dynamic, personalized feed that presents information relevant to the user. It draws content from various sources, including:

  • News: Headlines and updates from preferred sources, curated to reflect user interests.
  • Weather: Current conditions and forecasts for the user’s location.
  • Calendar: Upcoming events and reminders.
  • Traffic: Real-time traffic updates, including estimated travel times.
  • Stocks: Price fluctuations and news for selected stocks.
  • Sports: Scores and updates for favorite teams.
  • Social Media: Notifications and updates from preferred platforms.
  • Third-party applications: Widgets from various applications, offering specific functionalities.

The Widgets panel is intended to be a personalized hub, offering information and access to frequently used features in a centralized location.

Customizing the Widgets Panel

Windows 11 provides several options for customizing the Widgets panel, allowing users to tailor its appearance and functionality to their needs:

  • Adding and Removing Widgets: Users can add or remove widgets by clicking the "Add widgets" button at the top of the panel. This allows for selective inclusion of desired widgets, while excluding those deemed unnecessary.
  • Reordering Widgets: The order of widgets can be rearranged by dragging and dropping them into the desired position. This allows for prioritization of frequently accessed widgets.
  • Adjusting Widget Size: Some widgets offer the ability to adjust their size, enabling users to optimize the panel’s layout for their preferences.
  • Setting Widget Preferences: Many widgets offer customizable settings, allowing users to personalize the information displayed. For example, users can select preferred news sources, adjust the displayed weather information, or customize the calendar view.

Managing the Widgets Panel

While the Widgets panel can be a valuable tool for some users, others may find it distracting or unnecessary. Windows 11 offers several options for managing the Widgets panel, ensuring a personalized and efficient desktop experience:

  • Disabling the Widgets Panel: Users can completely disable the Widgets panel by navigating to the "Settings" app, selecting "Personalization," and then "Taskbar." Within the Taskbar settings, users can toggle the "Widgets" option to disable the feature.
  • Hiding the Widgets Button: Instead of completely disabling the Widgets panel, users can choose to simply hide the dedicated button on the taskbar. This allows for access to the Widgets panel when needed, while keeping it out of sight when not in use.
  • Minimizing the Widgets Panel: Users can minimize the Widgets panel by clicking the "Minimize" button at the top of the panel. This allows for a less intrusive experience, reducing the visual impact on the desktop.
  • Setting a Specific Size for the Widgets Panel: Users can customize the size of the Widgets panel by dragging its edges. This allows for a more compact or expanded view, depending on individual preferences.

Frequently Asked Questions (FAQs)

Q: Can I use the Widgets panel without an internet connection?

A: No, the Widgets panel relies on an internet connection to function. It requires access to online data sources to retrieve information and updates.

Q: Can I customize the Widgets panel’s background color or theme?

A: Currently, Windows 11 does not offer the option to customize the Widgets panel’s background color or theme. The panel’s appearance is predetermined and cannot be altered by the user.

Q: Can I add custom widgets from external sources?

A: At this time, Windows 11 does not support the addition of custom widgets from external sources. The available widgets are limited to those provided by Microsoft and its partners.

Q: Can I use the Widgets panel on multiple monitors?

A: The Widgets panel is currently only accessible from the primary monitor. It cannot be displayed or accessed on secondary monitors.

Tips for Optimizing the Widgets Panel Experience

  • Start with a minimal set of widgets: To avoid clutter and distractions, begin by adding only the most essential widgets. Gradually add more widgets as needed.
  • Prioritize frequently used widgets: Arrange the widgets in order of importance, placing those used most often at the top.
  • Customize widget settings: Take advantage of the customizable settings for each widget to tailor the displayed information to your needs.
  • Consider disabling the Widgets panel if you find it distracting: If you prefer a clean and minimalist desktop experience, consider disabling the Widgets panel altogether.

Conclusion

The Windows 11 Widgets panel offers a dynamic and personalized experience, providing quick access to relevant information and features. However, its functionality and appearance may not suit all users. By understanding the various customization and management options, users can tailor their experience to their preferences. Whether embraced as a valuable productivity tool or minimized to reduce distractions, the Widgets panel remains a customizable element of the Windows 11 desktop experience.

How to add and customize Widgets in Windows 11 Windows 11 Widgets Panel Customization— Here’s How To Do It How to Customize Windows 11 Widgets - TechPP
How to work with the Windows 11 Widget panel - The Verge How to Customize Windows 11 Widgets - TechPP A Guide to Using Widgets in Windows 11
How to Use Widgets in Windows 11  PCMag How to Use Desktop Widgets in Windows 11 - Acer Community

Closure

Thus, we hope this article has provided valuable insights into Navigating the Windows 11 Widget Panel: A Guide to Customization and Control. We hope you find this article informative and beneficial. See you in our next article!

Accessing Android Apps On Windows 11: A Comprehensive Guide

Accessing Android Apps on Windows 11: A Comprehensive Guide

Introduction

In this auspicious occasion, we are delighted to delve into the intriguing topic related to Accessing Android Apps on Windows 11: A Comprehensive Guide. Let’s weave interesting information and offer fresh perspectives to the readers.

Accessing Android Apps on Windows 11: A Comprehensive Guide

How to install Android apps on Windows 11 - gHacks Tech News

The integration of Android apps into Windows 11 has revolutionized the way users interact with their computers. While Windows has always been renowned for its robust desktop applications, the ability to seamlessly run Android apps directly on the platform unlocks a world of possibilities. This guide aims to provide a comprehensive understanding of how to access and utilize Android apps on Windows 11, exploring the benefits, methods, and considerations involved.

Understanding the Integration:

Windows 11’s Android app support is powered by the Amazon Appstore. This partnership allows users to access a vast library of Android apps, curated and optimized for the Windows environment. The integration leverages the power of Windows Subsystem for Android (WSA), a virtualized environment that enables Android apps to run smoothly alongside native Windows applications.

Benefits of Running Android Apps on Windows 11:

  1. Expanded Functionality: Windows 11 users gain access to a wider range of applications, including popular mobile games, productivity tools, social media platforms, and more. This expands the functionality of the operating system, offering users more options to suit their needs.

  2. Enhanced User Experience: The familiar Android interface and user experience are seamlessly integrated into the Windows environment. Users can easily navigate apps, utilize touch gestures, and seamlessly switch between Windows and Android apps.

  3. Cross-Platform Compatibility: The ability to run Android apps on Windows 11 promotes seamless integration and communication between different platforms. This allows users to easily share content, manage tasks, and utilize applications across their devices.

  4. Increased Productivity: Android apps often offer specialized features and functionalities that complement existing Windows applications. By leveraging both platforms, users can optimize their workflow and achieve greater productivity.

Methods for Accessing Android Apps:

  1. The Amazon Appstore: The primary method for accessing Android apps on Windows 11 is through the Amazon Appstore. This platform offers a curated selection of apps, optimized for the Windows environment. Users can download and install apps directly from the Appstore, similar to the experience on Android devices.

  2. Sideloading Apps: For advanced users, it is possible to sideload Android apps outside the Amazon Appstore. This method involves manually installing APK files, which are the installation packages for Android apps. Sideloading requires enabling developer options in Windows and may involve additional steps depending on the specific app.

Considerations for Running Android Apps:

  1. Hardware Requirements: The performance of Android apps on Windows 11 depends on the hardware capabilities of the computer. Users should ensure their system meets the minimum requirements for WSA, including sufficient RAM and storage space.

  2. Compatibility: Not all Android apps are compatible with Windows 11. Developers may need to specifically optimize their apps for the Windows environment. Users should check the compatibility information before installing an app.

  3. Security: Sideloading apps from external sources can pose security risks. Users should only download apps from trusted sources and exercise caution when installing apps from unknown developers.

FAQs:

Q: Can I use my existing Google Play account to download apps on Windows 11?

A: Currently, the Amazon Appstore does not support Google Play accounts. Users need to create an Amazon account to access the Appstore and download apps.

Q: Are all Android apps available on the Amazon Appstore?

A: The Amazon Appstore offers a curated selection of apps, but not all Android apps are available. Some developers may choose not to list their apps on the platform.

Q: Can I run Android apps on Windows 11 without the Amazon Appstore?

A: While sideloading apps is possible, it is recommended to use the Amazon Appstore for a more seamless and secure experience. Sideloading may require additional steps and may not be compatible with all apps.

Q: What are the minimum hardware requirements for running Android apps on Windows 11?

A: The minimum requirements for WSA include an Intel or AMD processor with virtualization capabilities, 8GB of RAM, and 20GB of storage space.

Q: How do I enable developer options in Windows 11 for sideloading apps?

A: To enable developer options, go to Settings > System > About, and repeatedly tap on the "Build Number" until the "Developer options" menu appears.

Tips for Optimizing Android Apps on Windows 11:

  1. Update WSA: Regularly update the Windows Subsystem for Android to ensure compatibility and optimal performance.

  2. Manage App Permissions: Review and manage app permissions to control what data apps can access.

  3. Utilize Keyboard Shortcuts: Explore keyboard shortcuts to navigate and control Android apps efficiently.

  4. Enable Mouse Support: Configure mouse support for Android apps to enhance navigation and precision.

Conclusion:

Windows 11’s integration of Android apps offers a significant advancement in the user experience. It expands the functionality of the operating system, provides access to a wider range of applications, and enhances cross-platform compatibility. By understanding the methods, benefits, and considerations involved, users can effectively leverage this feature to enhance their computing experience and access a vast library of Android apps directly on their Windows 11 devices.

How to Install Android Apps on Windows 11 - YouTube Install Android Apps on Windows 11  How to Install And Use Android Application in Windows 11 First Look: Supporting Android Apps on Windows 11 - Windows Subsystem for Android
New! How to install Android Apps on Windows 11 (Official Tutorial) - YouTube How To Install Mobile Apps In Windows 11 , This is the explanation How To Setup And Run Android Apps On Windows 11
How To Get Android Apps On Windows 11  CellularNews How To Install Android Apps On Windows 11  Robots.net

Closure

Thus, we hope this article has provided valuable insights into Accessing Android Apps on Windows 11: A Comprehensive Guide. We hope you find this article informative and beneficial. See you in our next article!

A Comprehensive Guide To OKam Pro For PC Windows 11

A Comprehensive Guide to oKam Pro for PC Windows 11

Introduction

With great pleasure, we will explore the intriguing topic related to A Comprehensive Guide to oKam Pro for PC Windows 11. Let’s weave interesting information and offer fresh perspectives to the readers.

A Comprehensive Guide to oKam Pro for PC Windows 11

O-KAM Pro UYGULAMA INDIRME KURULUM – O-KAM PRO Türkiye

The world of gaming has undergone a significant transformation, with the rise of PC gaming experiencing a resurgence. Players seek immersive experiences, demanding advanced tools and features to enhance their gameplay. Enter oKam Pro, a powerful and versatile application designed specifically for PC Windows 11, which aims to elevate the gaming experience to unprecedented heights.

This article delves into the intricacies of oKam Pro, exploring its functionalities, benefits, and potential impact on PC gaming. Through a detailed analysis, we aim to provide a comprehensive understanding of this innovative tool, empowering users to make informed decisions about its utility.

Understanding the Essence of oKam Pro

oKam Pro is a software solution that acts as a bridge between players and their games, unlocking a range of capabilities that enhance gameplay in numerous ways. It functions as a comprehensive suite of tools, encompassing features that cater to diverse gaming needs, from performance optimization to visual enhancements.

Key Features and Functionalities

oKam Pro stands out due to its diverse set of features, which can be broadly categorized into the following:

  • Performance Enhancement: oKam Pro employs a range of techniques to optimize game performance, leading to smoother gameplay and higher frame rates. This includes CPU and GPU optimization, memory management, and background process prioritization.

  • Visual Enhancement: The software introduces a suite of visual customization tools, allowing players to fine-tune graphics settings, apply visual filters, and enhance textures for a more immersive and visually stunning experience.

  • Gameplay Optimization: oKam Pro offers features designed to improve gameplay mechanics, such as macro creation, input mapping, and in-game overlay functionalities. These features allow for greater control and customization, tailoring the game to individual preferences.

  • System Monitoring and Management: The application provides detailed system monitoring capabilities, enabling users to track performance metrics like CPU usage, GPU temperature, and network activity. This insight empowers players to identify potential bottlenecks and optimize system resources for optimal gaming performance.

Benefits of Utilizing oKam Pro

oKam Pro’s diverse features translate into tangible benefits for PC gamers, elevating their gaming experience in several ways:

  • Enhanced Performance: By optimizing system resources and reducing bottlenecks, oKam Pro allows players to enjoy smoother gameplay with higher frame rates, resulting in a more responsive and enjoyable experience.

  • Immersive Visuals: The visual enhancement features empower players to customize their gaming experience, achieving breathtaking visuals that enhance the immersion and aesthetic appeal of their favorite titles.

  • Personalized Gameplay: The customization options offered by oKam Pro allow players to tailor their gameplay to their preferences, creating a more comfortable and enjoyable experience.

  • Improved Control and Efficiency: The macro creation and input mapping features streamline gameplay, allowing for faster execution of actions and improving overall efficiency.

  • System Optimization and Stability: By providing detailed system monitoring and management tools, oKam Pro empowers users to identify and address potential performance issues, ensuring a stable and optimized gaming environment.

Addressing Potential Concerns

While oKam Pro offers numerous benefits, it is crucial to address potential concerns surrounding its use:

  • System Resource Consumption: The software’s performance enhancement and visual enhancement features might require significant system resources. Users with lower-end systems should carefully consider their hardware capabilities before utilizing oKam Pro.

  • Compatibility Issues: Compatibility issues with specific games or system configurations might arise. Users are advised to consult the oKam Pro documentation or community forums for compatibility information and potential workarounds.

  • Potential for Overuse: The extensive customization options offered by oKam Pro can lead to overuse and unnecessary complexity. Users are encouraged to prioritize functionality and focus on features that genuinely enhance their gaming experience.

FAQs Regarding oKam Pro

Q: Is oKam Pro compatible with all PC games?

A: oKam Pro aims to be compatible with a wide range of PC games, but compatibility can vary depending on specific game engines and system configurations. Users are advised to consult the oKam Pro documentation or community forums for compatibility information.

Q: Does oKam Pro require a powerful PC to function effectively?

A: While oKam Pro can leverage powerful hardware for optimal performance, it is designed to work effectively on a range of systems. However, users with lower-end systems might experience reduced performance or limitations in certain features.

Q: Is oKam Pro free to use?

A: oKam Pro typically offers a free trial period, after which a subscription or purchase might be required to access all features. The pricing model and subscription options can vary depending on the specific version and provider.

Q: Is oKam Pro safe to use?

A: oKam Pro is generally considered safe for use, but users should always download the software from reputable sources and ensure their system is protected with up-to-date antivirus software.

Tips for Utilizing oKam Pro Effectively

  • Start with the Basics: Familiarize yourself with the core functionalities of oKam Pro before exploring more advanced features.

  • Prioritize Performance: Focus on optimizing game performance before delving into visual enhancements.

  • Experiment and Customize: Explore the various customization options and find settings that best suit your preferences and hardware capabilities.

  • Monitor System Resources: Regularly monitor system resource usage to identify potential bottlenecks and adjust settings accordingly.

  • Stay Updated: Ensure you are using the latest version of oKam Pro to benefit from bug fixes and new features.

Conclusion

oKam Pro presents a compelling solution for PC gamers seeking to elevate their gaming experience. Its comprehensive suite of features empowers players to optimize performance, enhance visuals, personalize gameplay, and gain deeper insight into their system. While potential concerns regarding resource consumption and compatibility exist, the benefits offered by oKam Pro outweigh these considerations for many gamers. By understanding its functionalities, benefits, and potential drawbacks, players can make informed decisions about whether oKam Pro aligns with their gaming needs and aspirations. Ultimately, the decision to utilize oKam Pro rests with the individual gamer, who must weigh the potential benefits against their specific gaming goals and system capabilities.

OKAM - Professional NDI motorized FHD camera 1080p Okam for PC / Mac / Windows 11,10,8,7 - Free Download - Napkforpc.com Buy WINDOWS 11 PRO USER GUIDE: A Comprehensive User Guide for Beginners and Seniors to Master
สอนโหลด ติดตั้ง ลงทะเบียน App OKAM PRO แบบง่ายๆ ไม่ต้องใส่ email ให้ยุ่งยาก - YouTube Okam for PC / Mac / Windows 11,10,8,7 - Free Download - Napkforpc.com OKAM Guide part 1: The Basics! - YouTube
[2024] Okam app download for PC / Mac / Windows 11,10,8,7 - Free APK Download [��Updated] ล๊อกจุดหมุน บน App OKAM PRO #กล้องวงจรปิดไร้สาย #กล้องวงจรปิด - YouTube

Closure

Thus, we hope this article has provided valuable insights into A Comprehensive Guide to oKam Pro for PC Windows 11. We hope you find this article informative and beneficial. See you in our next article!

Navigating The Digital Landscape: Understanding Recently Accessed Files In Windows 10

Navigating the Digital Landscape: Understanding Recently Accessed Files in Windows 10

Introduction

With enthusiasm, let’s navigate through the intriguing topic related to Navigating the Digital Landscape: Understanding Recently Accessed Files in Windows 10. Let’s weave interesting information and offer fresh perspectives to the readers.

How To View Recently Accessed Files In Windows 10?

Windows 10, with its user-friendly interface and comprehensive features, offers a plethora of tools to enhance productivity and streamline workflows. Among these features, the "Recently Accessed Files" functionality plays a crucial role in facilitating quick access to frequently used documents, images, and other files.

This feature, prominently displayed in various Windows 10 locations like the File Explorer’s "Quick Access" section, provides a dynamic list of files that have been accessed or modified recently. This seemingly simple feature holds significant value, enabling users to navigate their digital landscape with greater efficiency and ease.

Understanding the Mechanics:

The "Recently Accessed Files" functionality is driven by a dynamic system that tracks file activity, meticulously recording each access or modification. This tracking mechanism operates silently in the background, continuously updating the list of recently accessed files. When a user accesses or modifies a file, Windows 10 logs this activity, ensuring its inclusion in the "Recently Accessed Files" list.

Benefits of Utilizing Recently Accessed Files:

The "Recently Accessed Files" feature offers a multitude of benefits, significantly enhancing user experience and productivity:

  • Rapid Access: The primary advantage lies in its ability to provide quick and effortless access to frequently used files. Instead of navigating through folders and subfolders, users can simply access the "Recently Accessed Files" list, saving valuable time and effort.
  • Enhanced Workflow: For users working with multiple files and projects, the "Recently Accessed Files" feature acts as a digital memory, recalling the most recent files, enabling seamless transitions between tasks. This streamlines workflows, promoting efficient task management and reducing the need to constantly search for files.
  • Improved Organization: The feature can be used as a tool for organization, providing a visual representation of recently accessed files, allowing users to identify patterns in their file usage and make necessary adjustments to their organizational structure.
  • Increased Productivity: By eliminating the need for extensive file searching, the "Recently Accessed Files" feature significantly improves productivity. Users can focus on their core tasks, knowing that their frequently used files are readily available.

Customizing the Functionality:

While the "Recently Accessed Files" feature is highly beneficial, Windows 10 offers customization options to tailor it to individual preferences and needs:

  • Clearing the List: Users can clear the "Recently Accessed Files" list by navigating to the "File Explorer" and selecting "Options" from the "View" tab. Under the "Privacy" tab, users can choose to clear the list. This option is particularly useful for maintaining privacy, especially when sharing a computer with others.
  • Removing Specific Files: Individual files can be removed from the "Recently Accessed Files" list by right-clicking on the file and selecting "Remove from Quick Access." This allows for selective control over the list, ensuring only relevant files are displayed.
  • Disabling the Feature: While not recommended, users can completely disable the "Recently Accessed Files" feature by navigating to the "File Explorer" and selecting "Options" from the "View" tab. Under the "Privacy" tab, users can uncheck the "Show recently used files in Quick Access" option. This disables the feature altogether, but it’s important to note that this will also remove the ability to access recently used files through the "Quick Access" section.

Frequently Asked Questions:

Q: How does Windows 10 determine which files are displayed in the "Recently Accessed Files" list?

A: Windows 10 tracks file access and modification activity, prioritizing files that have been accessed or modified recently. The algorithm prioritizes recent activity, ensuring that the most relevant files are displayed prominently.

Q: Can I control how long files remain in the "Recently Accessed Files" list?

A: Currently, Windows 10 does not offer a direct setting to control the duration of files in the "Recently Accessed Files" list. However, users can manually clear the list or remove specific files, effectively managing the list’s contents.

Q: Is the "Recently Accessed Files" feature secure?

A: While the feature itself is secure, it is important to note that the files listed are accessible to anyone using the computer. Users should be mindful of the files they access, especially when sharing a computer with others.

Q: Can I prevent specific folders from appearing in the "Recently Accessed Files" list?

A: Currently, Windows 10 does not offer a specific setting to exclude specific folders from the "Recently Accessed Files" list. However, users can choose to remove individual files from the list, effectively excluding specific folders.

Tips for Optimizing Recently Accessed Files:

  • Regularly Clear the List: Clearing the "Recently Accessed Files" list periodically helps maintain privacy and ensures that the list reflects the most relevant files.
  • Use the "Pin" Function: Pinning frequently used files to the "Quick Access" section ensures their permanent presence, eliminating the need to rely on the "Recently Accessed Files" list.
  • Organize Your Files: Proper file organization is essential for efficient file access and management. This reduces the reliance on the "Recently Accessed Files" list, enabling quicker file retrieval.

Conclusion:

The "Recently Accessed Files" feature in Windows 10 is a valuable tool that enhances productivity and streamlines workflow. By providing quick access to frequently used files, it saves time and effort, enabling users to focus on their core tasks. While the feature offers various benefits, users should be aware of its implications for privacy and security, ensuring that the list remains relevant and tailored to their individual needs. Understanding the functionality, exploring customization options, and implementing best practices for file organization can maximize the benefits of this powerful feature, empowering users to navigate their digital landscape with greater efficiency and ease.

Quick access now lets you view recent files in windows 10 How to Find Files Quickly in Windows 10 With Star Ratings Add the Recent Items Folder to Windows 10 Quick Access  @Poremsky.com
Recent File List In Windows 1 Windows 10 How To Find And Clear The All Recent Files List  winbuzzer How Do You Find Recently Downloaded Files in Windows 10, 8, 7?
4049_how+to+view+recent+files+in+windows+10+1.jpg How to Control Quick Access and Recent Files in Windows 10

Closure

Thus, we hope this article has provided valuable insights into Navigating the Digital Landscape: Understanding Recently Accessed Files in Windows 10. We appreciate your attention to our article. See you in our next article!