Archives 2024

Windows 11 Home: A Comprehensive Look At The Latest Operating System

Windows 11 Home: A Comprehensive Look at the Latest Operating System

Introduction

With great pleasure, we will explore the intriguing topic related to Windows 11 Home: A Comprehensive Look at the Latest Operating System. Let’s weave interesting information and offer fresh perspectives to the readers.

Windows 11 Home: A Comprehensive Look at the Latest Operating System

Windows 11 Operating System - NetAns

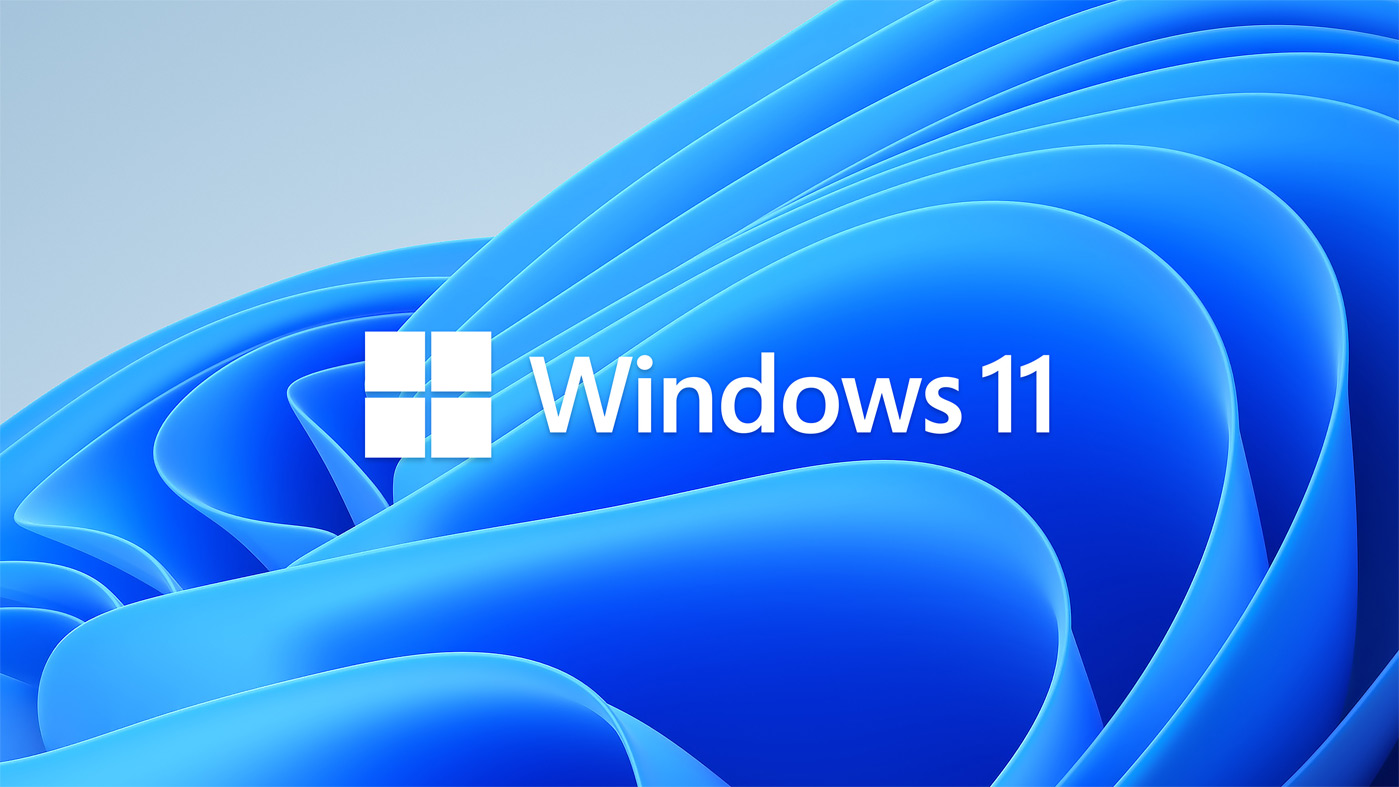
Windows 11 Home, the latest iteration of Microsoft’s flagship operating system, represents a significant evolution in user experience and functionality. Designed for personal computers and offering a streamlined interface with enhanced security features, Windows 11 Home caters to both everyday users and those seeking a more modern and intuitive computing environment. This article provides a comprehensive overview of Windows 11 Home, exploring its key features, benefits, and considerations for potential users.

The Foundation: A Refined and Modern Interface

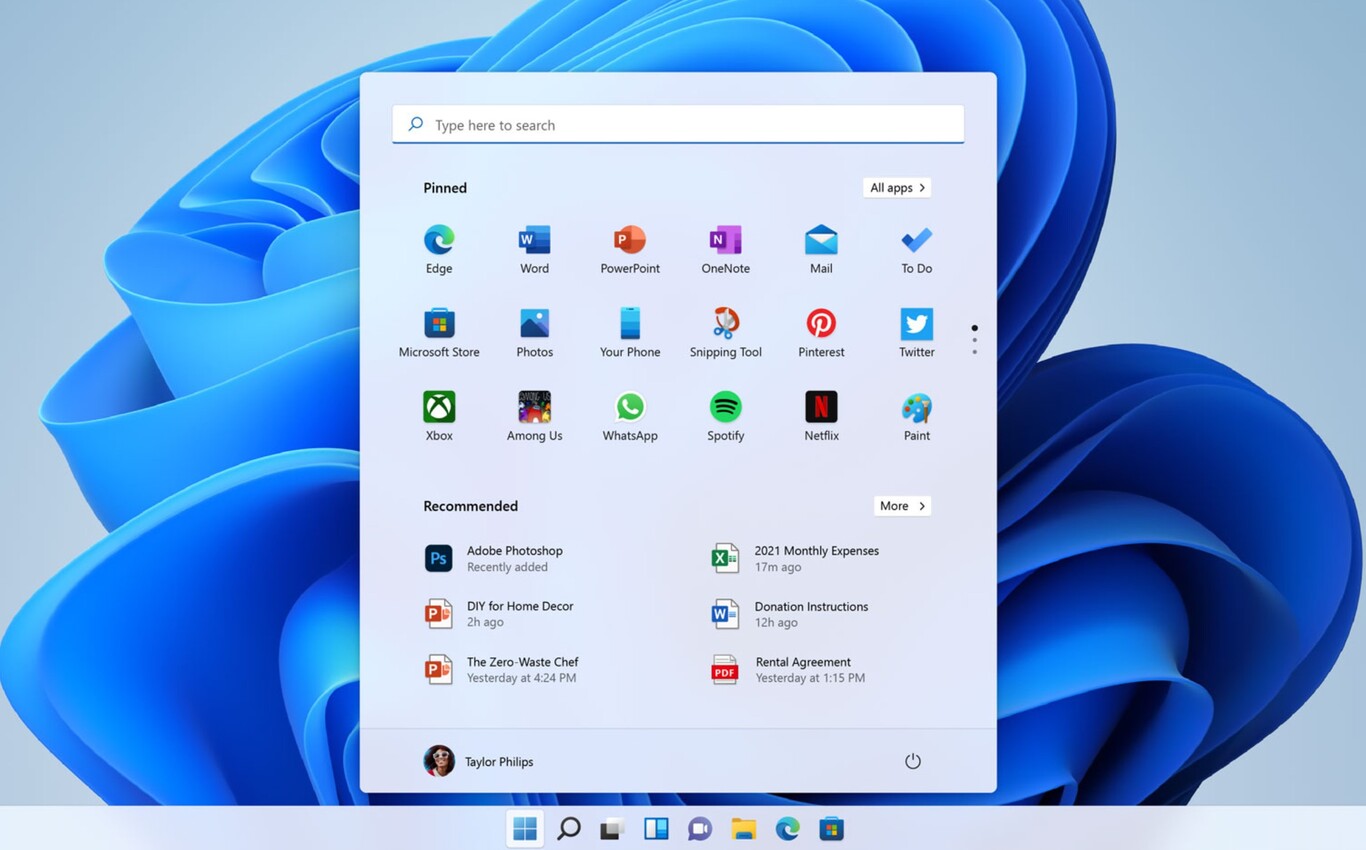
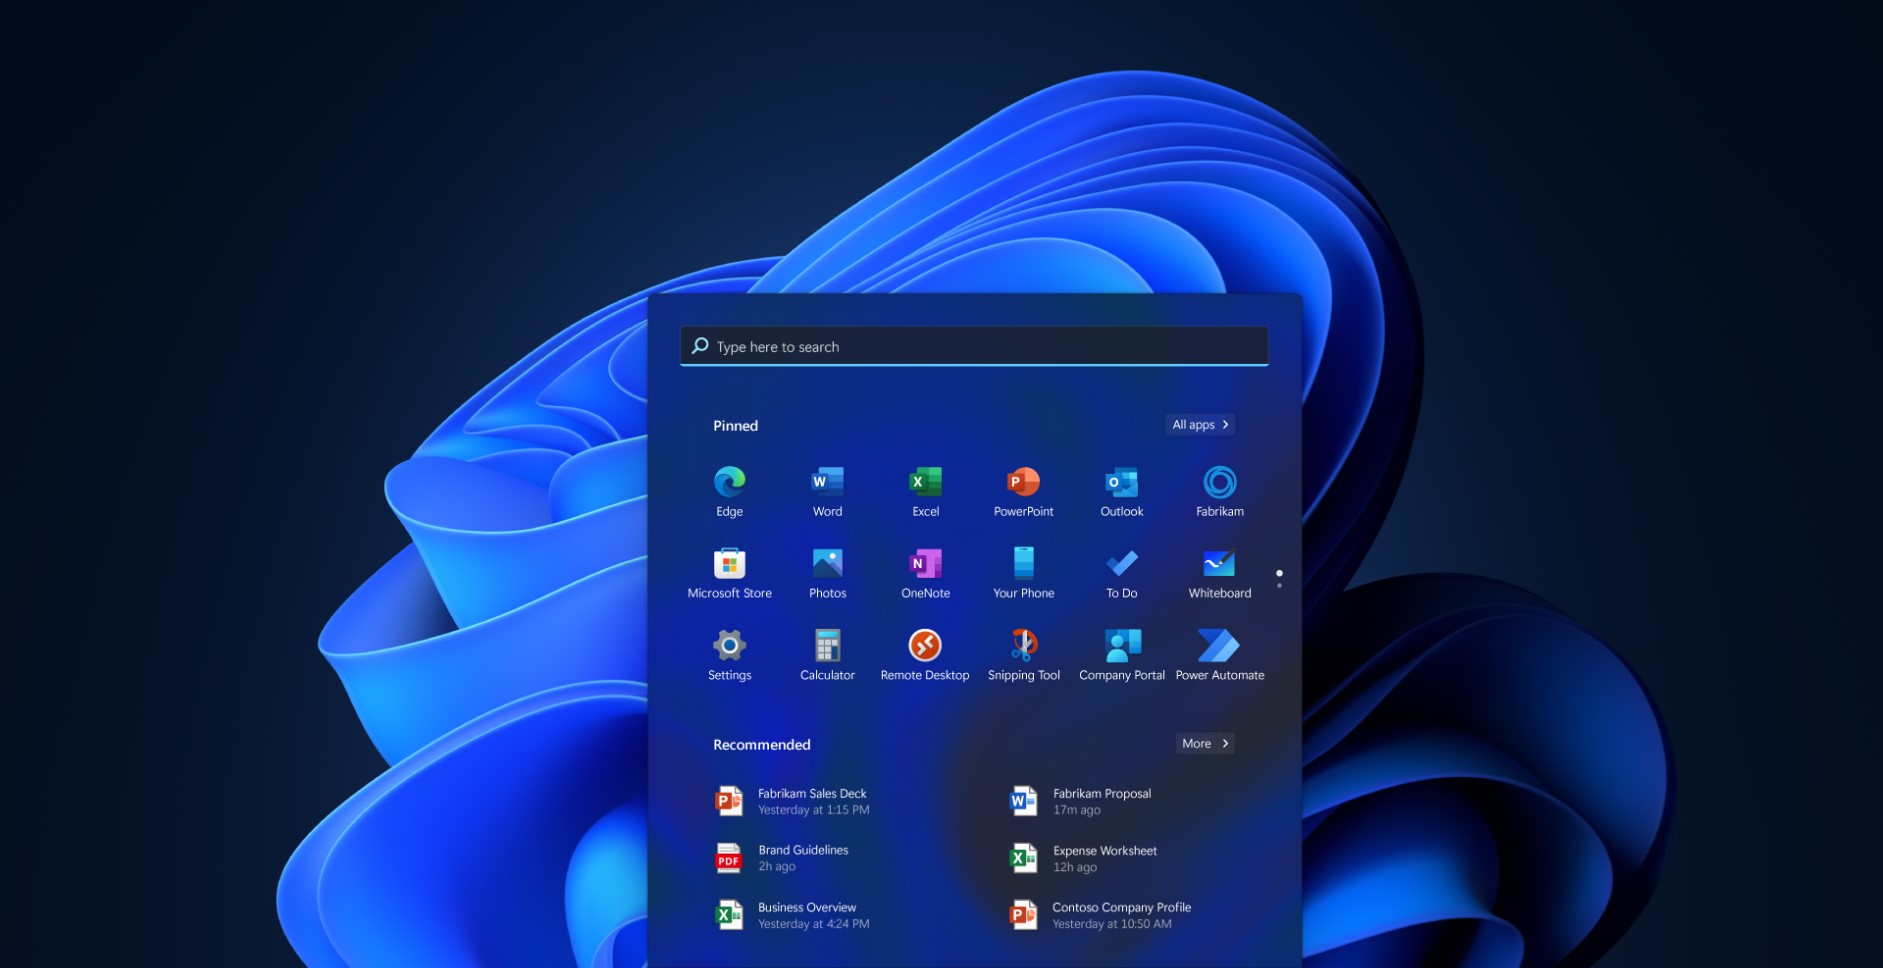
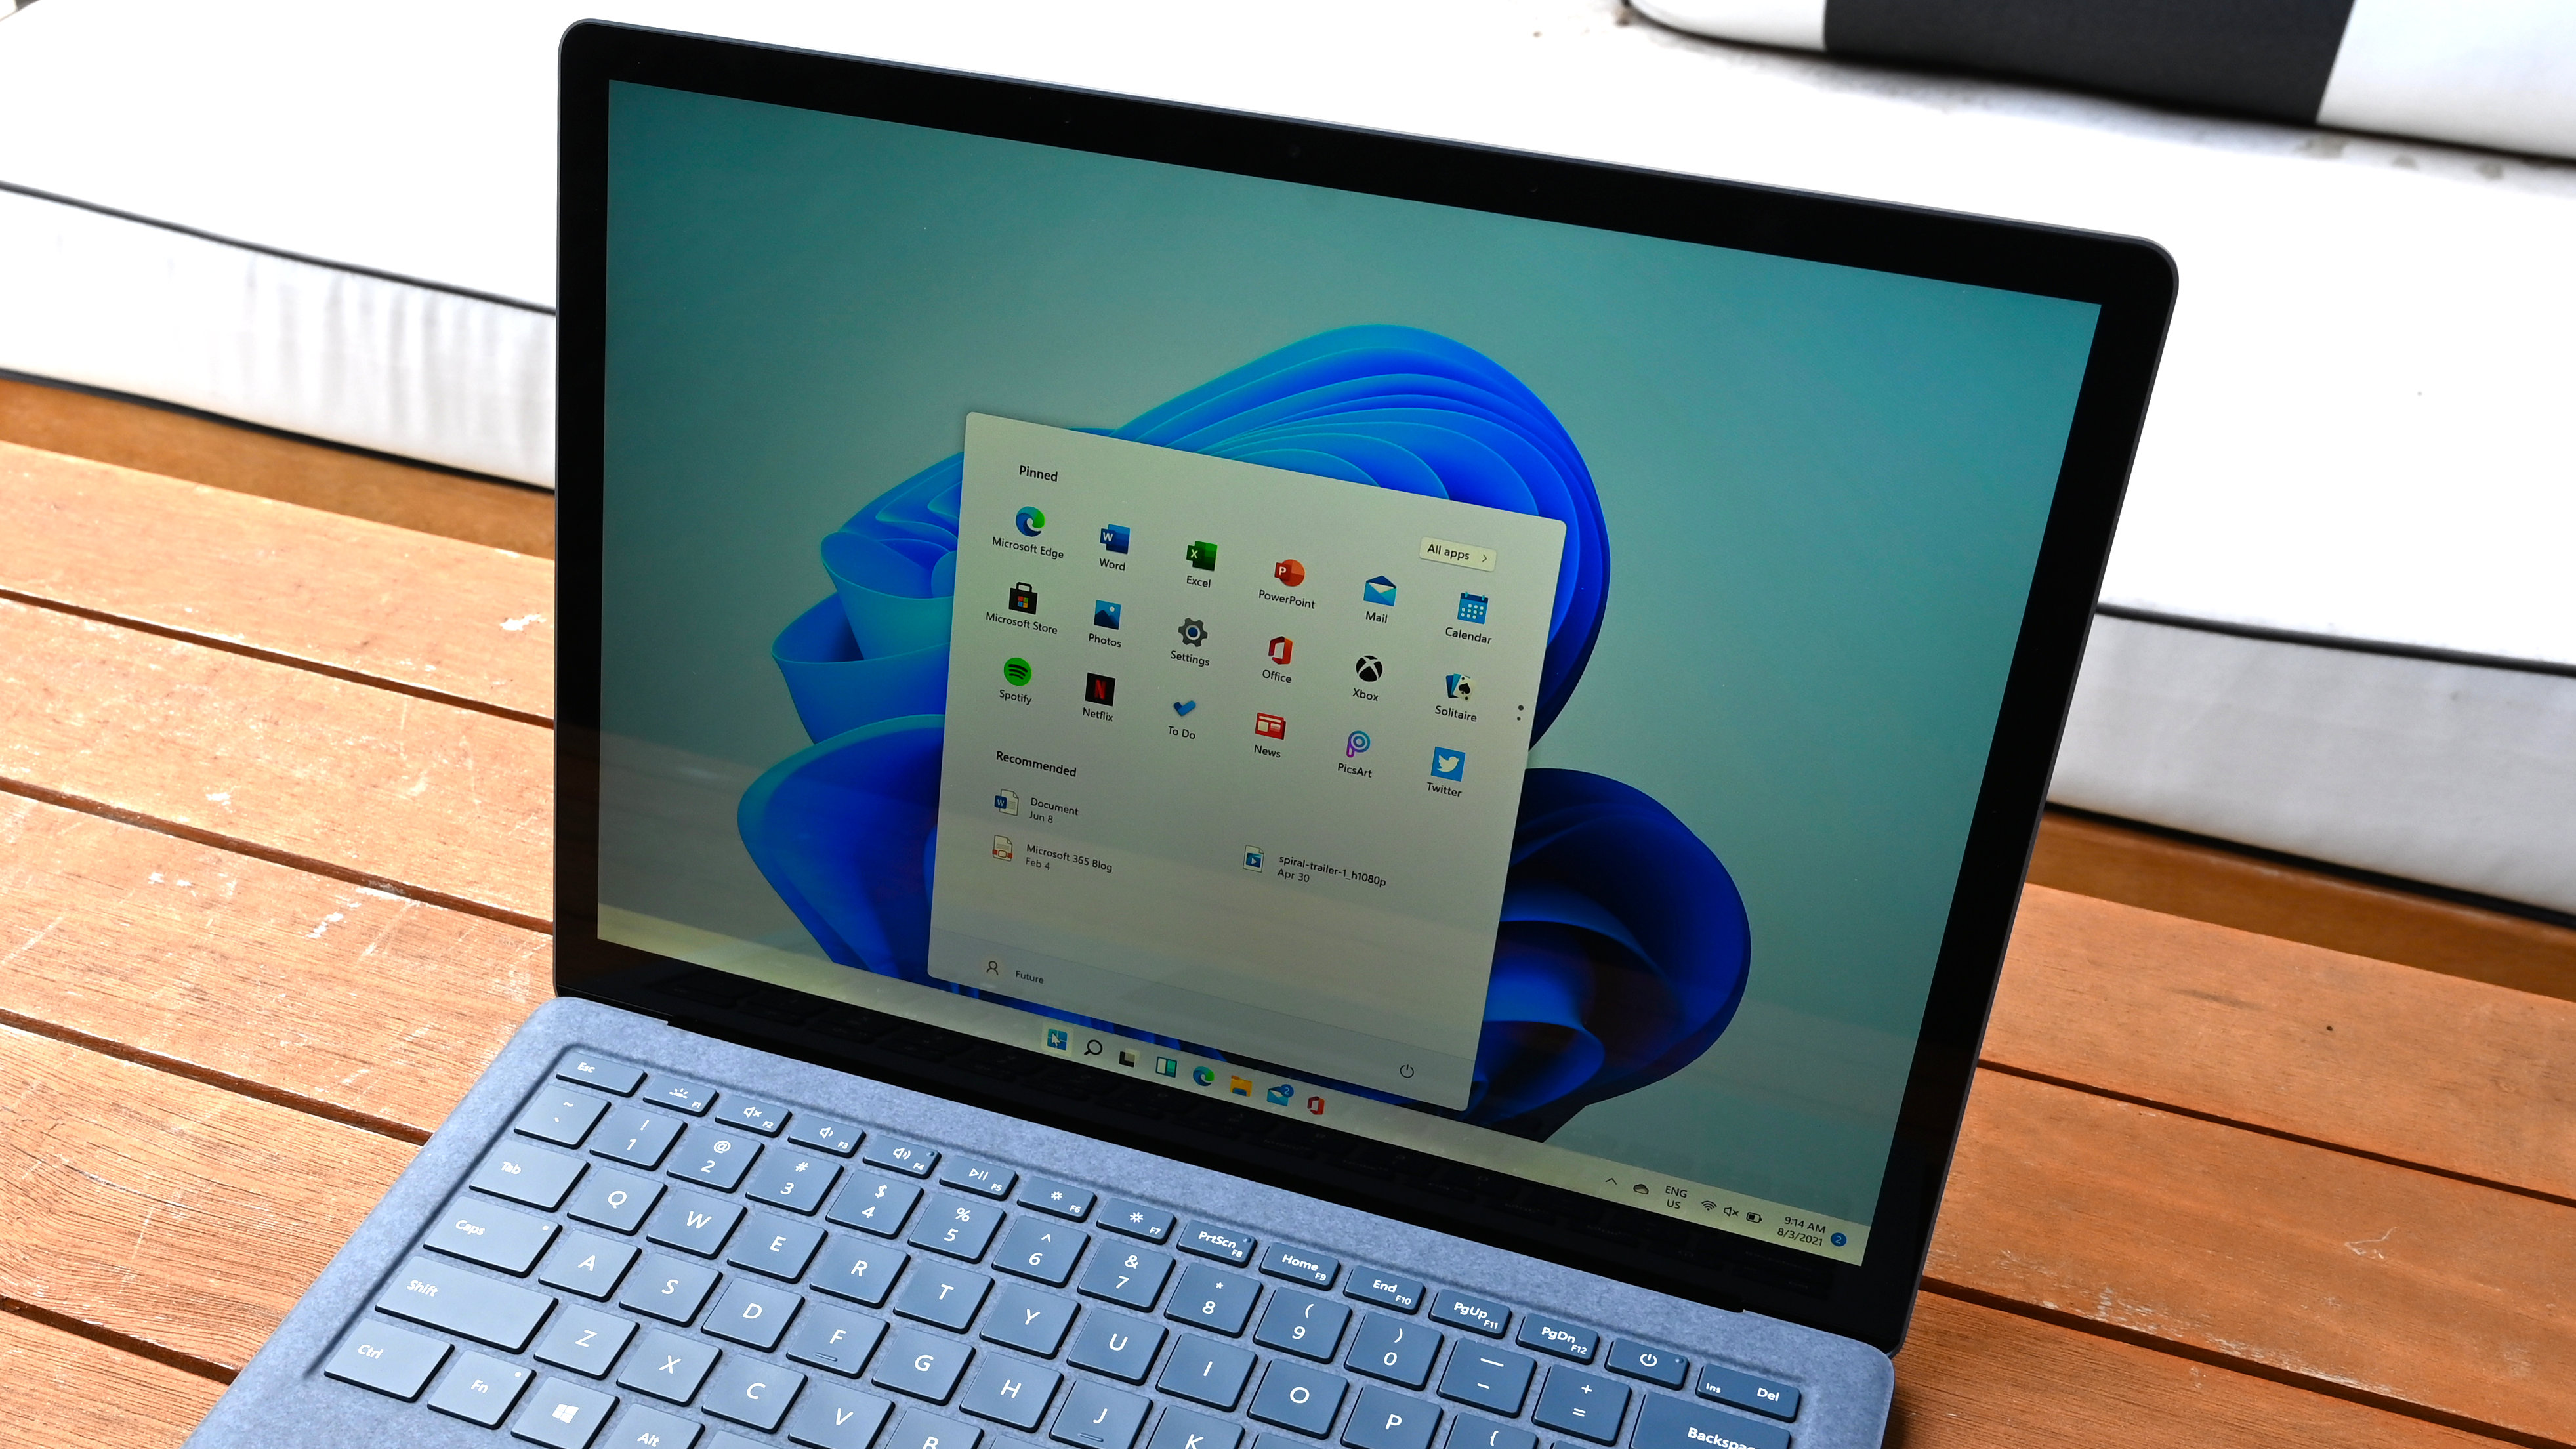
Windows 11 Home boasts a redesigned interface that emphasizes clean lines, a minimalist aesthetic, and a focus on user-friendliness. The Start menu, a cornerstone of Windows, has been revamped, adopting a centered layout and incorporating a dynamic "Recommended" section that learns user preferences and suggests relevant applications and documents. This approach aims to simplify navigation and provide a more personalized experience.

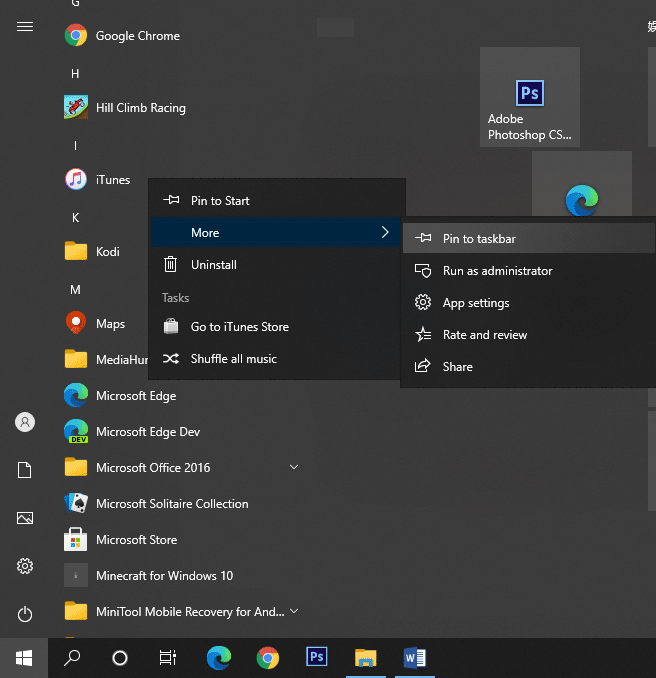
Taskbar: A Gateway to Enhanced Efficiency

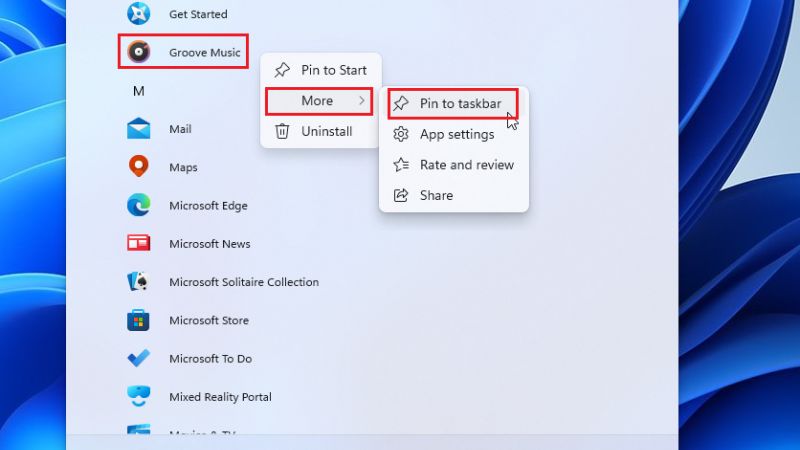
The taskbar, a constant companion in Windows, has undergone a subtle but impactful transformation. It now features a more prominent and visually distinct icon for the Start menu, providing a clear focal point for users. The taskbar also supports a "Snap Layouts" feature, allowing for effortless window arrangement with a single click. This functionality streamlines multitasking, making it easier to manage multiple applications simultaneously.

Widgets: A Personalized Dashboard for Information

Windows 11 Home introduces a dedicated "Widgets" panel, offering a customizable dashboard for quick access to information and essential tools. Users can select from a variety of widgets, including weather updates, news feeds, calendar events, and productivity tools. This feature provides a centralized hub for staying informed and organized, minimizing the need to switch between multiple applications.

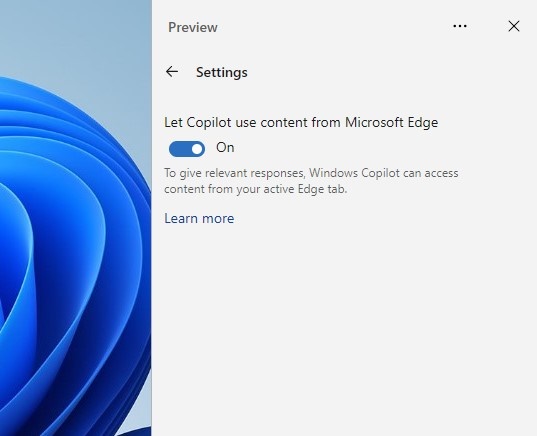
Security: A Multi-Layered Approach to Protection

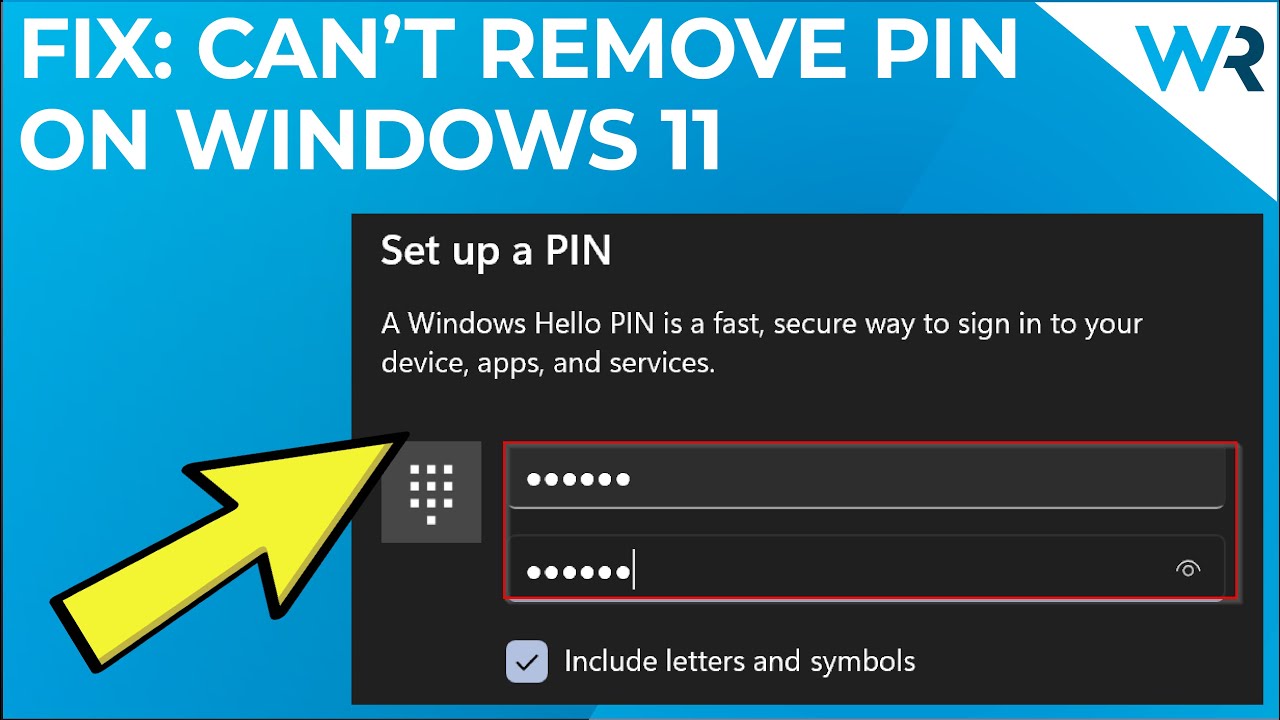
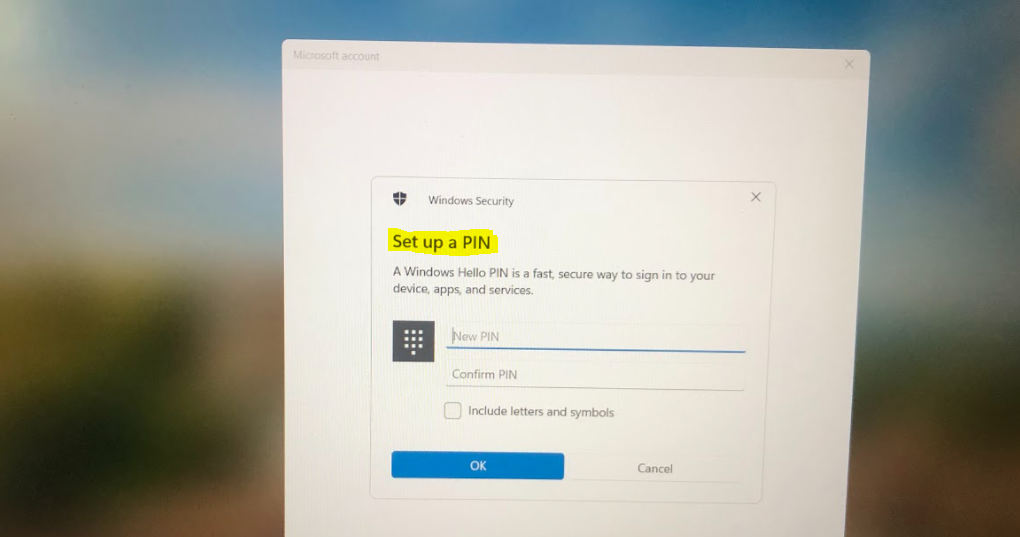
Security remains a paramount concern in the digital landscape, and Windows 11 Home addresses this with a robust, multi-layered approach. The operating system incorporates features like Windows Defender, a built-in antivirus solution that provides real-time protection against malware and other threats. Windows Hello, a biometric authentication system, allows users to unlock their devices using facial recognition or fingerprint scanning, enhancing security and convenience.

Performance: Optimized for Efficiency and Responsiveness

Windows 11 Home is built upon a foundation of efficiency and responsiveness. The operating system leverages the latest hardware advancements, ensuring smooth performance even with demanding applications. Features like "DirectStorage" and "Auto HDR" enhance gaming experiences, while "Windows Sandbox" provides a secure environment for running untrusted applications.

Microsoft Store: A Hub for Applications and Games

The Microsoft Store, a central repository for applications and games, has been redesigned in Windows 11 Home. It features a more intuitive interface, making it easier to discover and download software. The store offers a vast selection of apps, including both free and paid options, catering to a wide range of user needs.

Accessibility: A Focus on Inclusive Design

Windows 11 Home emphasizes accessibility, ensuring that the operating system is usable by people with diverse abilities. Features like "Narrator," a screen reader that vocalizes on-screen content, and "Magnifier," which enlarges portions of the screen, are designed to make the operating system more inclusive.

Benefits of Windows 11 Home

Windows 11 Home offers a compelling set of benefits for users seeking a modern, secure, and efficient computing experience:

  • Modern and Intuitive Interface: The redesigned interface prioritizes user-friendliness and simplicity, providing a more intuitive and engaging experience.
  • Enhanced Security Features: Robust security measures, including Windows Defender and Windows Hello, protect users from cyber threats and ensure data privacy.
  • Streamlined Multitasking: Features like "Snap Layouts" and "Virtual Desktops" facilitate seamless multitasking, enhancing productivity and efficiency.
  • Personalized Experience: Widgets and "Recommended" sections personalize the user experience, tailoring the operating system to individual preferences.
  • Optimized Performance: The operating system leverages the latest hardware advancements, delivering smooth and responsive performance.
  • Accessibility Features: Inclusive design principles ensure that the operating system is usable by people with diverse abilities.

FAQs about Windows 11 Home

Q: What are the minimum system requirements for Windows 11 Home?

A: Windows 11 Home requires a processor with at least two cores running at 1 GHz or faster, 4 GB of RAM, and 64 GB of storage space. The operating system also requires a compatible graphics card and a display with a resolution of at least 1280×720 pixels.

Q: Is Windows 11 Home compatible with my existing hardware?

A: Windows 11 Home is designed to be compatible with a wide range of hardware, but it’s important to check the minimum system requirements to ensure compatibility. You can use the "PC Health Check" app, available from Microsoft, to assess your computer’s readiness for Windows 11 Home.

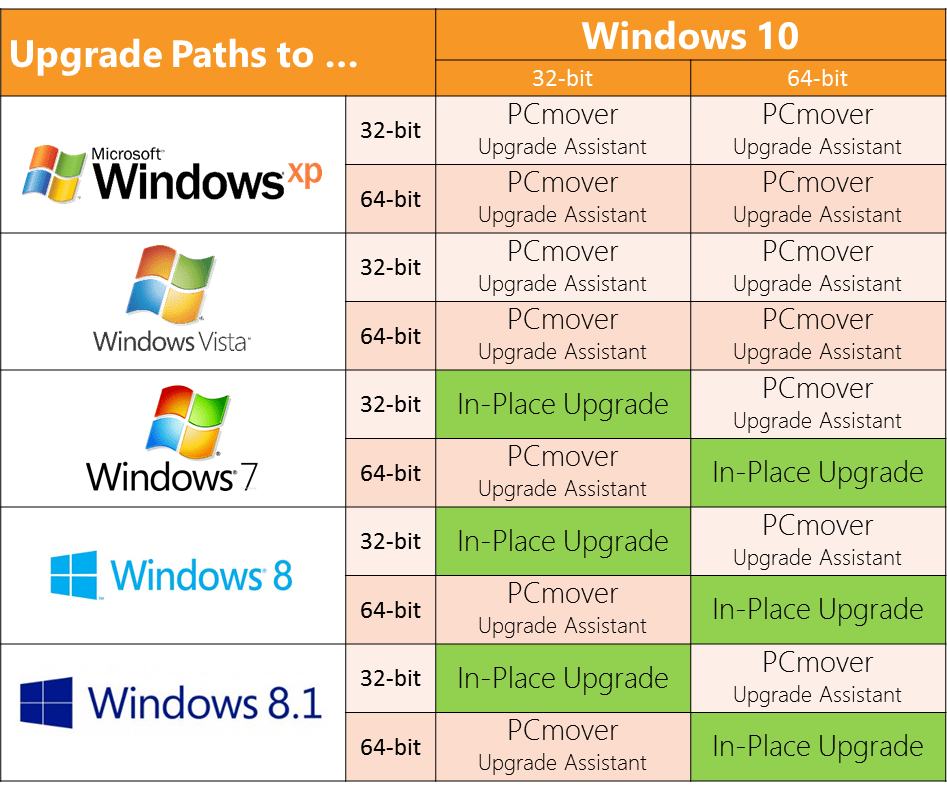
Q: How can I upgrade to Windows 11 Home?

A: If your current computer meets the minimum system requirements, you can upgrade to Windows 11 Home from a compatible version of Windows 10. The upgrade process can be initiated through the "Windows Update" setting in your operating system.

Q: What are the differences between Windows 11 Home and Windows 11 Pro?

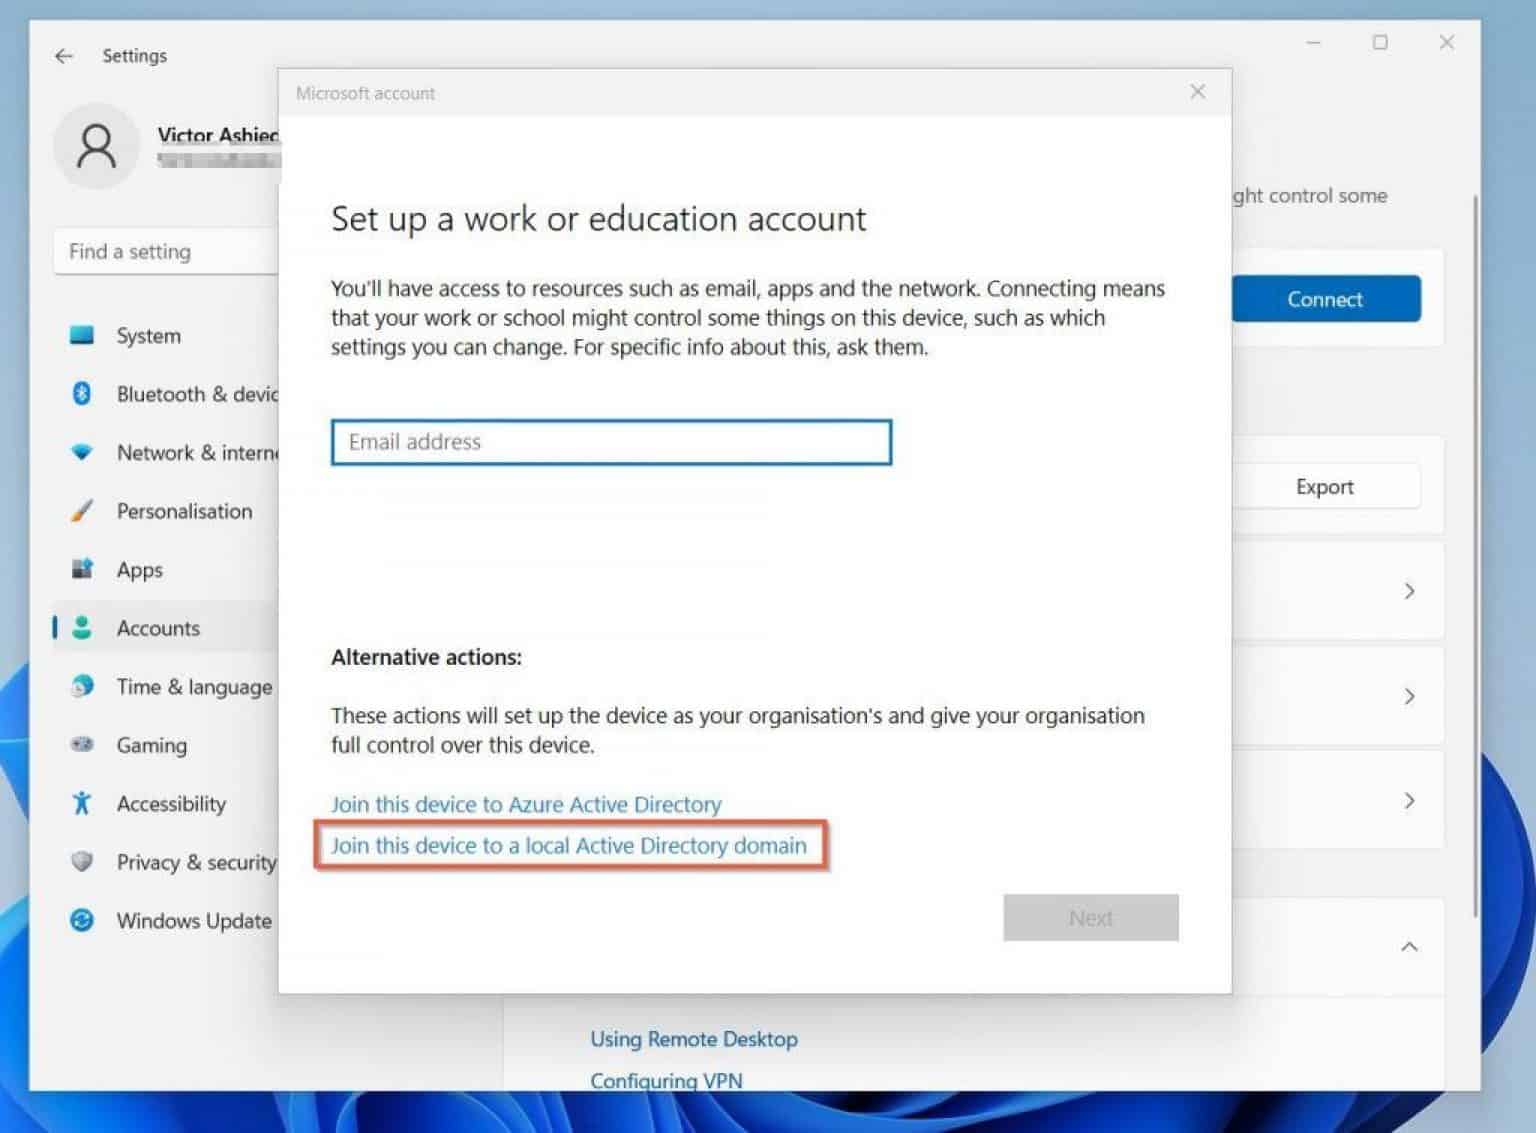
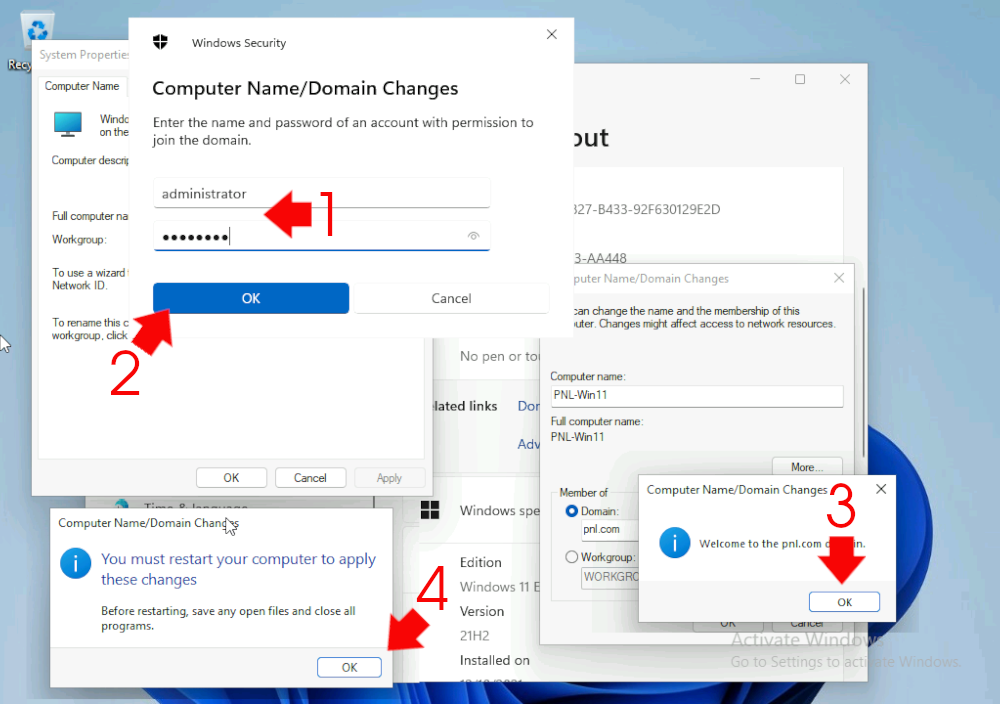
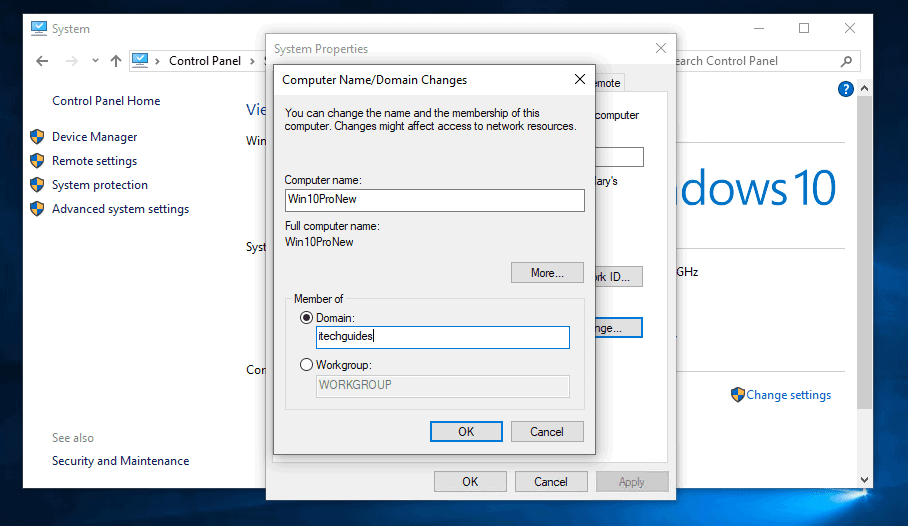
A: Windows 11 Home is designed for personal use, while Windows 11 Pro is geared towards business users. Windows 11 Pro offers additional features like BitLocker encryption, remote desktop access, and domain join capabilities, which are not available in Windows 11 Home.

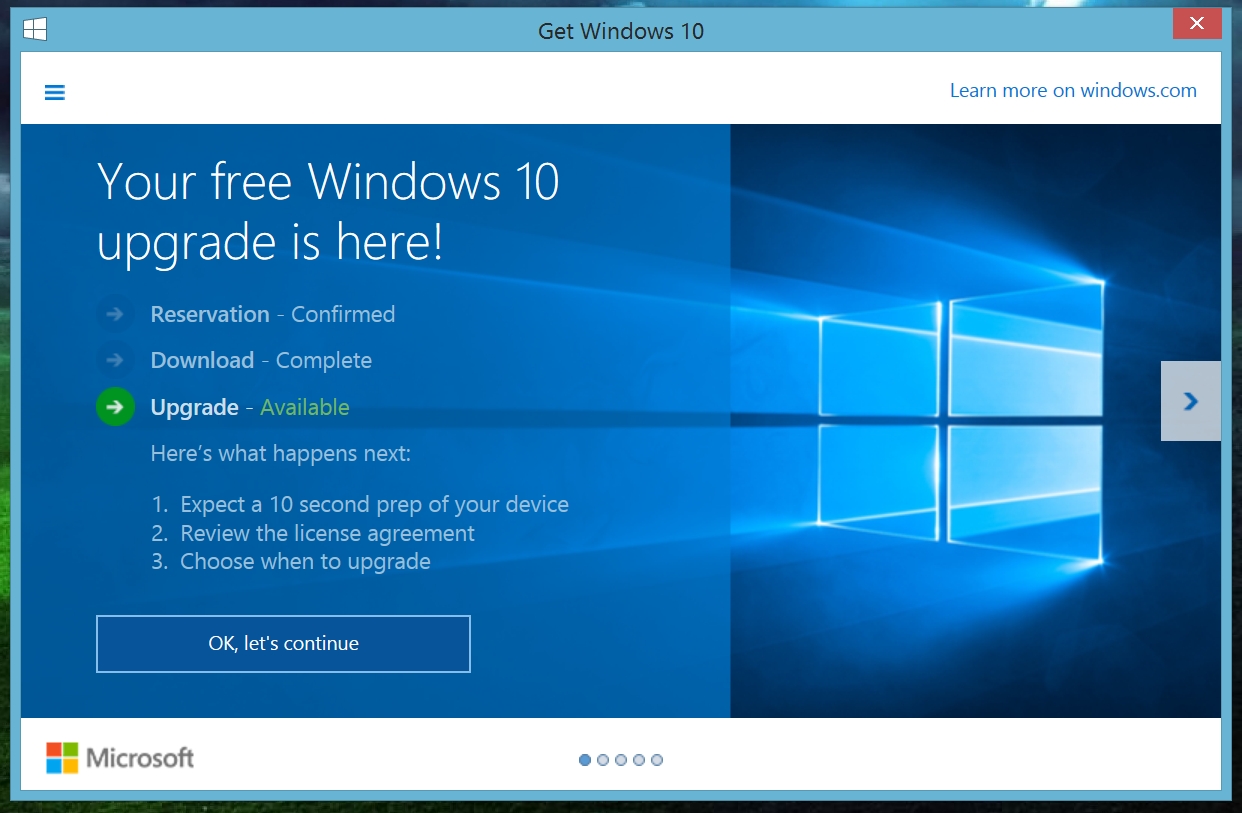
Q: Is Windows 11 Home a free upgrade?

A: While Microsoft offered a free upgrade to Windows 11 Home for users of eligible Windows 10 devices during a limited promotional period, this offer has expired. Currently, Windows 11 Home is a paid operating system that can be purchased through various channels, including the Microsoft Store.

Tips for Using Windows 11 Home

  • Explore the New Interface: Familiarize yourself with the redesigned Start menu, taskbar, and other interface elements to maximize your experience.
  • Customize Widgets: Choose the widgets that are most relevant to your needs and personalize the "Widgets" panel for easy access to information.
  • Take Advantage of Snap Layouts: Utilize the "Snap Layouts" feature to arrange windows efficiently and streamline multitasking.
  • Enable Windows Hello: Enhance security and convenience by setting up Windows Hello for biometric authentication.
  • Explore the Microsoft Store: Discover new applications and games through the redesigned Microsoft Store and expand your digital toolkit.
  • Optimize Performance Settings: Adjust performance settings to match your usage patterns and ensure smooth operation.

Conclusion

Windows 11 Home represents a significant leap forward in the evolution of Windows, offering a modern, user-friendly, and secure computing experience. With its refined interface, enhanced security features, streamlined multitasking capabilities, and personalized features, Windows 11 Home caters to a wide range of users, from everyday consumers to those seeking a more efficient and engaging computing environment. By embracing the latest advancements in technology and user experience, Windows 11 Home aims to empower users with a platform that facilitates productivity, creativity, and a seamless digital journey.

Windows 11: The Ultimate Guide to the Latest Operating System by Microsoft Windows 11: this is the new Microsoft operating system - Techidence Windows 11 Revealed: A Comprehensive Overview of the New OS
Microsoft Windows 11 Operating Systems Windows 11: Everything you need to know about the new operating system • TechBriefly Windows 11 Is Now Official: This Microsoft S New Operating System Has Released Version Of The
Unveiling Windows 11: A Comprehensive Review of Microsoft's Latest Operating System - Fashion's Comprehensive overview of Windows 11 22H2, the first major annual update of the operating system

Closure

Thus, we hope this article has provided valuable insights into Windows 11 Home: A Comprehensive Look at the Latest Operating System. We thank you for taking the time to read this article. See you in our next article!

Navigating The Modern Landscape: A Comprehensive Look At Windows 11 Laptops

Navigating the Modern Landscape: A Comprehensive Look at Windows 11 Laptops

Introduction

In this auspicious occasion, we are delighted to delve into the intriguing topic related to Navigating the Modern Landscape: A Comprehensive Look at Windows 11 Laptops. Let’s weave interesting information and offer fresh perspectives to the readers.

Buy WINDOWS 11 HOME User Manual: A Comprehensive Illustrated Guide to Navigating the New

Windows 11, Microsoft’s latest operating system, has ushered in a new era of computing, particularly for laptops. This update brings a host of changes, both cosmetic and functional, designed to enhance user experience and streamline workflows. This article delves into the intricacies of Windows 11 laptops, exploring their features, benefits, and considerations for potential users.

The Visual Transformation: A Fresh Aesthetic

One of the most immediately noticeable changes in Windows 11 is its visual overhaul. The interface has been streamlined and modernized, emphasizing clean lines, rounded corners, and a lighter color palette. This shift towards a more minimalist aesthetic aims to create a less cluttered and visually appealing experience, facilitating intuitive navigation and focus. The Start menu, a cornerstone of Windows, has undergone a significant redesign, adopting a centered layout with pinned applications and recommended content. This change aims to provide users with quicker access to frequently used programs and discover new applications.

Beyond Aesthetics: Enhanced Functionality

While the visual changes are significant, Windows 11 also introduces substantial functional enhancements. The introduction of "Snap Layouts" offers users a more efficient way to manage multiple windows, allowing for instant arrangement into customizable layouts, optimizing multitasking capabilities. The "Snap Groups" feature takes this a step further, enabling users to save and recall specific window configurations, streamlining repetitive workflows.

Powering Productivity: The Focus on Efficiency

Windows 11 prioritizes productivity, introducing features designed to minimize distractions and maximize efficiency. The "Focus Sessions" feature integrates with the built-in timer to create distraction-free work periods, aiding in time management and concentration. This feature, coupled with the "Do Not Disturb" mode, allows users to customize their workspace to suit their needs, fostering a more focused and productive environment.

The Rise of the Cloud: Seamless Integration and Accessibility

Windows 11 emphasizes cloud integration, offering users seamless access to their files and applications across multiple devices. The "OneDrive" cloud storage service is deeply integrated, providing users with a centralized repository for their data, accessible from any Windows 11 device. This integration allows for seamless file sharing and collaboration, enhancing productivity and simplifying data management.

Security and Privacy: A Core Focus

Security and privacy remain paramount in Windows 11. The operating system incorporates robust security measures, including enhanced threat detection and prevention mechanisms, ensuring a secure environment for users’ data and activities. Windows 11 also offers granular control over privacy settings, allowing users to manage data access and usage by applications, providing greater control over their digital footprint.

Hardware Considerations: The Power Behind the Performance

Windows 11 laptops come in a wide range of configurations, catering to diverse user needs and budgets. From entry-level models for everyday tasks to high-performance machines for demanding applications, the choice depends on individual requirements. Modern Windows 11 laptops typically feature powerful processors, ample RAM, and high-resolution displays, ensuring smooth performance and a visually engaging experience.

The Future of Computing: Windows 11 and Beyond

Windows 11 represents a significant step forward in the evolution of computing. Its focus on user experience, productivity, and security positions it as a powerful platform for the modern user. As technology continues to evolve, Windows 11 will likely be further refined and enhanced, adapting to changing user needs and technological advancements.

FAQs about Windows 11 Laptops

1. What are the minimum system requirements for Windows 11?

Windows 11 requires a 1 GHz or faster processor with at least two cores, 4 GB RAM, 64 GB storage, and a compatible graphics card. It also requires a UEFI firmware with Secure Boot capability.

2. Is Windows 11 compatible with my existing laptop?

Windows 11 compatibility depends on your laptop’s hardware specifications and firmware. Microsoft provides a compatibility checker tool on its website to determine if your laptop meets the minimum requirements.

3. What are the key features of Windows 11?

Windows 11 features a redesigned Start menu, Snap Layouts and Snap Groups for efficient multitasking, Focus Sessions for enhanced productivity, improved cloud integration, and enhanced security measures.

4. How does Windows 11 improve productivity?

Windows 11 features such as Snap Layouts, Snap Groups, Focus Sessions, and Do Not Disturb mode are designed to minimize distractions and optimize workflows, enhancing productivity.

5. Is Windows 11 secure?

Windows 11 incorporates robust security measures, including enhanced threat detection and prevention mechanisms, ensuring a secure environment for users’ data and activities.

6. How can I upgrade to Windows 11?

You can upgrade to Windows 11 from a compatible Windows 10 device through Windows Update. Microsoft provides detailed instructions on its website.

7. What are the differences between Windows 10 and Windows 11?

Windows 11 features a redesigned interface, enhanced multitasking capabilities, improved cloud integration, and a focus on productivity and security. It also introduces new features like Snap Layouts, Snap Groups, Focus Sessions, and Do Not Disturb mode.

8. What are the benefits of using a Windows 11 laptop?

Windows 11 laptops offer a modern user experience, enhanced productivity tools, robust security features, and seamless cloud integration.

9. What are some popular Windows 11 laptops available in the market?

Popular Windows 11 laptops include models from manufacturers like Dell, HP, Lenovo, Acer, and Asus, offering a wide range of configurations and price points.

10. What are the future prospects of Windows 11?

Windows 11 is expected to continue evolving with new features and improvements, adapting to emerging technologies and user needs.

Tips for Using a Windows 11 Laptop

1. Utilize Snap Layouts and Snap Groups: These features allow for efficient window management and multitasking, optimizing productivity.

2. Explore Focus Sessions: This feature helps create distraction-free work periods, promoting concentration and time management.

3. Leverage OneDrive Integration: Take advantage of the seamless cloud storage integration for easy file sharing and collaboration.

4. Customize Privacy Settings: Exercise control over data access and usage by applications, ensuring greater privacy.

5. Keep Your System Updated: Regularly update your Windows 11 laptop to ensure optimal performance, security, and access to the latest features.

6. Explore Windows 11 Features: Familiarize yourself with the new features and functionalities, such as the redesigned Start menu, widgets, and virtual desktops.

7. Optimize Performance: Adjust settings and manage applications to ensure smooth performance and extend battery life.

8. Back Up Your Data: Regularly back up your important files to prevent data loss in case of hardware failure or accidental deletion.

Conclusion

Windows 11 laptops offer a compelling blend of aesthetics, functionality, and performance, catering to diverse user needs. Their intuitive interface, productivity-enhancing features, and robust security measures position them as powerful tools for the modern user. As technology continues to evolve, Windows 11 will undoubtedly play a pivotal role in shaping the future of computing, offering users a seamless and efficient experience across various devices.

How to move the Windows 11 taskbar Modern Landscape Design Front Yard 500, Landscape Photo Wallpaper, Xcode Landscape Launch Screen All About Modern Landscape Design and How to Create the Look
Webinar_20210818_Navigating_the_New_Tech_Landscape - Strategic Treasurer PPT - Navigating the CRM Landscape_ A Comprehensive Guide to Microsoft Dynamics and Salesforce Navigating the Modern HR Landscape: A Reflective Exploration
Navigating the EV Landscape: Comprehensive Guide (2024) Navigating The Digital Landscape: A Comprehensive Look At 4G Coverage In France - Map of China

Closure

Thus, we hope this article has provided valuable insights into Navigating the Modern Landscape: A Comprehensive Look at Windows 11 Laptops. We hope you find this article informative and beneficial. See you in our next article!

Mastering Taskbar Organization: A Comprehensive Guide To Pinning In Windows 10

Mastering Taskbar Organization: A Comprehensive Guide to Pinning in Windows 10

Introduction

In this auspicious occasion, we are delighted to delve into the intriguing topic related to Mastering Taskbar Organization: A Comprehensive Guide to Pinning in Windows 10. Let’s weave interesting information and offer fresh perspectives to the readers.

Mastering Taskbar Organization: A Comprehensive Guide to Pinning in Windows 10

How to Pin a Program to the Windows 10 Taskbar - TipsMake.com

The Windows 10 taskbar, a staple of the operating system, serves as a central hub for launching applications, managing open windows, and accessing system tools. Its efficiency is significantly enhanced through the ability to pin applications, creating a personalized and streamlined workflow. Pinning applications to the taskbar offers numerous benefits, improving user experience and productivity.

The Mechanics of Pinning

Pinning an application to the taskbar in Windows 10 is a simple process:

  1. Locate the Application: Open the application you wish to pin. This could be a program, a folder, or even a website.
  2. Right-Click the Taskbar Icon: Right-click on the application’s icon in the taskbar. A context menu will appear.
  3. Select "Pin to Taskbar": Choose the "Pin to Taskbar" option from the menu. The application’s icon will now permanently reside on the taskbar.

Benefits of Pinning Applications

Pinning applications to the taskbar offers a myriad of advantages, streamlining workflow and enhancing user experience:

  • Rapid Access: Pinned applications are readily available with a single click, eliminating the need to navigate through menus or search for them in the Start menu. This saves time and effort, especially for frequently used applications.
  • Enhanced Organization: Pinned applications create a visually organized structure on the taskbar, providing a clear overview of frequently used programs. This aids in quickly identifying and launching the desired application.
  • Personalized Workspace: Users can tailor the taskbar to their specific needs by pinning applications relevant to their workflow, creating a personalized and efficient workspace.
  • Increased Productivity: By eliminating the time and effort required to locate applications, pinning improves productivity by allowing users to focus on their tasks rather than navigating the operating system.
  • Reduced Clutter: Pinning applications to the taskbar can declutter the Start menu, making it more organized and efficient.

Beyond Applications: Pinning Other Items

While pinning applications is the most common use case, the taskbar offers the ability to pin other items:

  • Folders: Pinning folders allows for quick access to frequently used files and documents.
  • Websites: Pinning websites to the taskbar provides one-click access to your favorite online destinations.
  • System Tools: Pinning system tools, such as the Settings app, File Explorer, or the Task Manager, offers rapid access to essential system functions.

Unpinning Applications: Removing Items from the Taskbar

To remove a pinned item from the taskbar, simply follow these steps:

  1. Right-Click the Icon: Right-click on the pinned item’s icon in the taskbar.
  2. Select "Unpin from Taskbar": Choose the "Unpin from Taskbar" option from the menu. The item will be removed from the taskbar.

Advanced Techniques: Customizing the Taskbar

Windows 10 offers a range of customization options for the taskbar, allowing users to personalize it further:

  • Taskbar Location: The taskbar can be positioned at the top, bottom, left, or right of the screen.
  • Taskbar Size: Users can adjust the taskbar’s height to suit their preferences.
  • Taskbar Icons: The size of icons on the taskbar can be adjusted to optimize visual clarity and space utilization.
  • Taskbar Grouping: Taskbar groups allow multiple windows from the same application to be grouped together, reducing visual clutter.
  • Taskbar Alignment: Icons can be aligned to the left, center, or right of the taskbar, depending on user preference.

Beyond the Basics: Utilizing Taskbar Features

The Windows 10 taskbar offers various features that enhance user experience and productivity:

  • Taskbar Search: The taskbar search bar allows users to quickly search for applications, files, and system settings.
  • Taskbar Notifications: The taskbar displays notifications from applications, allowing users to stay informed without interrupting their workflow.
  • Taskbar Clock: The taskbar displays the current time and date, providing easy access to time-related information.
  • Taskbar System Tray: The system tray, located at the right end of the taskbar, houses icons for system functions and applications, providing quick access to system settings and notifications.

Frequently Asked Questions (FAQs)

Q: Can I pin more than one instance of the same application to the taskbar?

A: No, only one instance of an application can be pinned to the taskbar at a time.

Q: What happens to pinned applications when I upgrade Windows?

A: Pinned applications are generally retained after a Windows upgrade, ensuring continuity in your workspace.

Q: Can I pin applications from a different user account?

A: No, pinned applications are specific to the current user account.

Q: How do I pin a website to the taskbar?

A: To pin a website, open the website in Microsoft Edge, right-click the tab, and select "Pin to taskbar."

Tips for Effective Taskbar Management

  • Prioritize Pinned Applications: Pin only the applications you use most frequently to maintain a clean and organized taskbar.
  • Use Taskbar Groups: Group similar applications together for better organization and easier navigation.
  • Customize Taskbar Appearance: Adjust taskbar settings to suit your preferences and create a visually appealing and functional workspace.
  • Utilize Taskbar Features: Explore the various features of the taskbar, such as search, notifications, and the system tray, to enhance your productivity and workflow.

Conclusion

Pinning applications to the taskbar in Windows 10 is a simple yet powerful technique that significantly enhances user experience and productivity. By providing quick access to frequently used applications, folders, and websites, pinning streamlines workflow and creates a personalized and efficient workspace. Mastering the art of pinning, coupled with exploring the various features of the taskbar, empowers users to navigate Windows 10 with ease and efficiency.

How to Pin to Taskbar on Windows 10 How to Pin a Program or Website to the Windows Taskbar How to Customize Your Windows 10 Taskbar
How To Pin This PC To The Taskbar In Windows 10 How To Pin Folder To Taskbar In Windows 10 - oTechWorld 'Pin to taskbar' and 'Unpin from taskbar' Apps in Windows 10  Tutorials
9 Ways To Pin Shortcuts To The Windows 10 Taskbar Digital Citizen - www.vrogue.co How to pin a document taskbar windows 10 - paglibrary

Closure

Thus, we hope this article has provided valuable insights into Mastering Taskbar Organization: A Comprehensive Guide to Pinning in Windows 10. We thank you for taking the time to read this article. See you in our next article!

Managing Windows 11’s Copilot Feature: A Comprehensive Guide

Managing Windows 11’s Copilot Feature: A Comprehensive Guide

Introduction

In this auspicious occasion, we are delighted to delve into the intriguing topic related to Managing Windows 11’s Copilot Feature: A Comprehensive Guide. Let’s weave interesting information and offer fresh perspectives to the readers.

Managing Windows 11’s Copilot Feature: A Comprehensive Guide

Windows Copilot for Windows 11: A beginner’s guide  iThinkDifferent

Windows 11’s Copilot, a powerful AI-powered assistant, offers a range of benefits for users, streamlining tasks and enhancing productivity. However, there may be situations where users prefer to disable or remove this feature. This guide provides a comprehensive overview of managing Copilot, including its removal, highlighting its significance and offering practical tips for achieving this goal.

Understanding Copilot’s Role in Windows 11

Copilot is integrated deeply within Windows 11, providing context-aware assistance across various applications and system functions. Its capabilities extend to:

  • Personalized Recommendations: Copilot learns user preferences and habits, suggesting relevant files, apps, and settings.
  • Task Automation: It automates repetitive actions, such as scheduling appointments or creating documents.
  • Content Creation: Copilot aids in generating text, code, and images, simplifying creative workflows.
  • Enhanced Search: Copilot refines search results, providing more relevant and accurate information.
  • Accessibility Features: It offers accessibility options, such as text-to-speech and voice control.

Reasons for Removing Copilot

While Copilot offers numerous advantages, specific scenarios might necessitate its removal:

  • Privacy Concerns: Some users might be hesitant about sharing personal data with AI services.
  • Performance Impact: Copilot’s constant background activity can potentially impact system performance.
  • Preference for Traditional Methods: Individuals accustomed to traditional methods might find Copilot intrusive.
  • Limited Functionality: In specific scenarios, Copilot’s functionality might not meet user needs.
  • Troubleshooting Issues: Occasionally, Copilot may experience technical issues requiring its temporary removal.

Methods for Managing Copilot

Windows 11 provides several methods for managing Copilot, ranging from temporary disabling to complete removal:

1. Disabling Copilot Features:

  • System Settings: Accessing "Settings" > "Privacy & Security" > "Copilot" allows users to disable specific Copilot features, such as personalized recommendations or task automation.
  • Individual Applications: Many applications integrate with Copilot, offering options to disable or adjust its behavior within those specific contexts.

2. Removing Copilot Data:

  • Clearing History: Windows 11 allows users to clear Copilot’s usage history, including search queries and interaction data.
  • Deleting Personalization Data: Users can remove data related to personalized recommendations and preferences.

3. Uninstalling Copilot (Advanced)

While not officially supported, advanced users can attempt to remove Copilot by modifying system files. This process is complex and can potentially disrupt system stability. Therefore, it is strongly recommended to consult with experienced technical professionals before attempting this method.

Powershell and Copilot Management

Powershell, a powerful command-line interface, provides advanced scripting capabilities for managing system settings and features. While Windows 11 does not offer a direct Powershell command for removing Copilot, experienced users can leverage Powershell to disable or modify certain aspects of Copilot’s functionality.

Considerations for Removing Copilot

Before removing Copilot, it is crucial to understand its potential impact:

  • Loss of Functionality: Removing Copilot eliminates its benefits, including personalized recommendations, task automation, and content creation assistance.
  • System Stability: Attempting to remove Copilot through unsupported methods might compromise system stability.
  • Reversibility: While removing Copilot is possible, restoring its functionality might require reinstallation or system resets.

FAQs

Q: Is it possible to completely remove Copilot from Windows 11?

A: While Microsoft does not offer an official method for completely removing Copilot, advanced users can attempt to modify system files. However, this approach is complex and potentially risky.

Q: Will removing Copilot affect other Windows 11 features?

A: Removing Copilot might affect features that rely on its functionalities, such as personalized recommendations or task automation.

Q: What happens to my Copilot data after removing it?

A: Removing Copilot might delete associated data, depending on the chosen method. It is recommended to back up any important data before attempting removal.

Q: Can I reinstall Copilot after removing it?

A: Reinstalling Copilot might be possible depending on the removal method. Consult Microsoft documentation or technical support for specific instructions.

Tips for Managing Copilot

  • Start with Disabling: Before attempting removal, consider disabling specific Copilot features to evaluate their impact.
  • Backup Data: Create a system backup before making any significant changes, including removing Copilot.
  • Consult Experts: If unsure about the removal process, seek assistance from experienced technical professionals.
  • Monitor System Stability: After removing Copilot, closely monitor system stability and performance for any issues.

Conclusion

Windows 11’s Copilot offers a range of benefits, but managing its functionality is crucial for optimizing user experience. While complete removal might be complex and potentially risky, users can effectively manage Copilot by disabling specific features or removing associated data. Understanding the potential impact of these actions and seeking expert guidance when necessary ensures a smooth and stable Windows 11 experience.

Enable and Use New Copilot AI Assistant in Windows 11 - YouTube Что такое Windows Copilot в Windows 11 и как он работает You Can Now Try Out Windows Copilot in Windows 11; Here's a First Look!  Beebom
How to Enable Windows Copilot on Windows 11 (Full Guide)  LaptrinhX How to Enable Windows Copilot in Windows 11 23493 How To Enable Copilot Feature On Windows 11 Update - vrogue.co
How To Integrate Windows 11 Copilot With Microsoft Ed - vrogue.co Mastering Windows Copilot: A Comprehensive Guide to Microsoft's AI Companion

Closure

Thus, we hope this article has provided valuable insights into Managing Windows 11’s Copilot Feature: A Comprehensive Guide. We hope you find this article informative and beneficial. See you in our next article!

Pp Windows 11

pp windows 11

Introduction

In this auspicious occasion, we are delighted to delve into the intriguing topic related to pp windows 11. Let’s weave interesting information and offer fresh perspectives to the readers.

It appears you’re asking for an article about "pp Windows 11." However, "pp Windows 11" is not a recognized term or concept within the realm of operating systems or technology. It’s likely a misunderstanding or a typo.

[FREE] Windows 11 Powerpoint Template by DraxasPPT on DeviantArt

If you’re looking for information about Windows 11, I’d be happy to provide you with a comprehensive article. Please clarify your request with the correct term or provide more context, and I’ll be able to assist you further.

Windows 11 : Microsoft dévoile le design de l’explorateur de fichiers, PowerPoint et Word Windows 11 Download Powerpoint - YouTube Windows 11 PowerPoint
PPT - Microsoft Windows 11 Launched Officially You Must Know About It PowerPoint Presentation Windows 11 PowerPoint Template - Prezentr PPT Templates Windows 11 PowerPoint
Fix powerpoint is not opening in windows 11 – Artofit Windows 11 Powerpoint Download

Closure

Thus, we hope this article has provided valuable insights into pp windows 11. We hope you find this article informative and beneficial. See you in our next article!

Network Domain Integration In Windows 11: A Comprehensive Guide

Network Domain Integration in Windows 11: A Comprehensive Guide

Introduction

With enthusiasm, let’s navigate through the intriguing topic related to Network Domain Integration in Windows 11: A Comprehensive Guide. Let’s weave interesting information and offer fresh perspectives to the readers.

Network Domain Integration in Windows 11: A Comprehensive Guide

How To Join Windows 11 To A Domain - Itechguides.com

Windows 11, the latest iteration of Microsoft’s operating system, offers robust network integration capabilities, enabling seamless management and enhanced security within a corporate environment. This article delves into the intricacies of network domains in Windows 11, exploring its benefits, implementation, and critical considerations.

Understanding Network Domains

A network domain refers to a logical grouping of computers and devices within a network, centrally managed by a domain controller. This centralized management framework allows for streamlined administration of user accounts, group policies, security settings, and other critical aspects of the network.

Benefits of Network Domain Integration in Windows 11

Integrating Windows 11 devices into a network domain offers several advantages:

  • Centralized User Management: Domain controllers maintain a central repository of user accounts, simplifying the process of managing user permissions, passwords, and access rights across the network. This ensures consistent security policies and efficient user administration.

  • Streamlined Group Policy Management: Group policies define specific configurations and settings for user accounts, computers, and applications within the domain. These policies can be easily enforced and updated centrally, ensuring uniform standards and compliance across the network.

  • Enhanced Security: Network domains provide robust security mechanisms, including authentication, authorization, and access control. Domain controllers enforce strong password policies and restrict access to sensitive resources, mitigating security threats and safeguarding data.

  • Simplified Network Administration: By managing devices and users from a central location, administrators can efficiently deploy software updates, configure network settings, and troubleshoot issues across the entire domain. This centralized approach significantly reduces administrative overhead and improves overall network management.

  • Improved Collaboration and Resource Sharing: Network domains facilitate seamless file sharing and collaboration among users. By connecting to the domain, users can access shared resources, printers, and other network services, fostering efficient teamwork and productivity.

Implementing Network Domain Integration in Windows 11

Integrating Windows 11 devices into a network domain requires a series of steps:

  1. Domain Controller Setup: A domain controller, typically a Windows Server, must be installed and configured to manage the domain. This involves creating the domain, configuring Active Directory, and defining initial security policies.

  2. Joining the Domain: Windows 11 devices need to be joined to the domain. This process involves specifying the domain name and credentials of a domain administrator, allowing the device to authenticate with the domain controller.

  3. Group Policy Configuration: Once joined, devices inherit group policies from the domain controller. These policies define various settings, including user login scripts, security configurations, and software installations.

  4. User Account Management: Domain administrators can create and manage user accounts, assign permissions, and define group memberships. This centralized user management ensures consistent access control across the network.

  5. Network Resource Sharing: Shared resources, such as printers, folders, and applications, are made available to authorized users within the domain. This facilitates seamless collaboration and resource utilization.

Key Considerations for Network Domain Integration

While network domains offer numerous benefits, it’s crucial to consider these factors:

  • Complexity: Implementing and managing a network domain can be complex, requiring technical expertise and specialized knowledge.

  • Cost: Setting up and maintaining a domain controller, including server hardware and software licensing, can incur significant costs.

  • Security: While network domains enhance security, they also present new security vulnerabilities. Regular security updates and proactive monitoring are essential to mitigate potential threats.

  • Scalability: As the network grows, the domain controller must be able to handle increased workloads and user traffic. Consider scaling infrastructure to accommodate future growth.

Frequently Asked Questions about Network Domain Integration in Windows 11

Q: What are the prerequisites for joining a Windows 11 device to a network domain?

A: The device must have a stable network connection, and a domain controller must be accessible on the network. Additionally, a domain administrator account with appropriate permissions is required.

Q: Can I join a Windows 11 device to multiple domains simultaneously?

A: No, a Windows 11 device can only be joined to a single domain at a time.

Q: How do I troubleshoot issues with network domain integration in Windows 11?

A: Check network connectivity, verify domain controller availability, and review event logs for error messages. Consult Microsoft documentation or seek assistance from a network administrator.

Q: Is it possible to create a domain without a dedicated server?

A: While technically possible, using a non-dedicated server for domain control is not recommended due to potential security risks and performance issues.

Q: What are the security implications of joining a Windows 11 device to a network domain?

A: Joining a domain enhances security by enforcing strong password policies, restricting access to resources, and providing centralized management of security settings. However, proper configuration and regular security updates are crucial to mitigate potential threats.

Tips for Network Domain Integration in Windows 11

  • Plan Thoroughly: Before implementing a network domain, carefully plan the domain structure, user accounts, and security policies.

  • Use Strong Passwords: Encourage users to create strong and unique passwords for their domain accounts.

  • Enable Multi-Factor Authentication: Implement multi-factor authentication for enhanced security and access control.

  • Regularly Update Security Policies: Periodically review and update security policies to address evolving security threats.

  • Monitor Network Activity: Use monitoring tools to track network activity and identify potential security breaches.

Conclusion

Network domain integration offers a powerful solution for managing and securing Windows 11 devices within a corporate environment. By centralizing user management, streamlining group policy deployment, and enhancing security, network domains empower organizations to optimize network administration, improve collaboration, and safeguard sensitive data. While implementing and managing domains require careful planning and technical expertise, the benefits they provide in terms of efficiency, security, and control make them an essential component of modern network infrastructure.

How to Join Windows 11 to a Domain  PeteNetLive How to Join Windows 11 to a Domain  LaptrinhX / News How to Join Windows 11 to a Domain  PeteNetLive
How to Join a Windows 11 PC to a Domain 3 Simple Methods to Join Windows 11 Computer to Domain Join Windows 11 to Domain! - BTNHD
3 Simple Methods to Join Windows 11 Computer to Domain Windows 11 Join Domain

Closure

Thus, we hope this article has provided valuable insights into Network Domain Integration in Windows 11: A Comprehensive Guide. We thank you for taking the time to read this article. See you in our next article!

Troubleshooting "Your PC Did Not Start Correctly" Error In Windows 10

Troubleshooting "Your PC Did Not Start Correctly" Error in Windows 10

Introduction

With great pleasure, we will explore the intriguing topic related to Troubleshooting "Your PC Did Not Start Correctly" Error in Windows 10. Let’s weave interesting information and offer fresh perspectives to the readers.

Troubleshooting "Your PC Did Not Start Correctly" Error in Windows 10

8 Ways to Fix the “Your PC Did Not Start Correctly” Error

The dreaded "Your PC did not start correctly" error message in Windows 10 can be a frustrating experience for any user. This message signifies a critical system failure, preventing the operating system from booting properly. While the cause can range from minor software glitches to hardware malfunctions, understanding the potential culprits and employing appropriate troubleshooting techniques can often resolve the issue.

This article aims to provide a comprehensive guide to diagnosing and resolving this error, covering potential causes, troubleshooting steps, and preventative measures.

Understanding the Error

The "Your PC did not start correctly" error message usually appears with an accompanying blue screen, commonly known as the "Blue Screen of Death" (BSOD). This error indicates that Windows 10 encountered a critical system failure during the boot process, preventing the operating system from loading successfully.

Causes of the Error

The error can stem from various sources, each requiring a different approach for resolution:

  • Hardware Issues: Malfunctioning hardware components, such as RAM, hard drive, motherboard, or even peripherals, can cause system instability and prevent Windows from booting properly.
  • Software Conflicts: Incompatible or corrupted drivers, faulty software installations, or malware infections can disrupt the normal operation of Windows, leading to the error.
  • System File Corruption: Crucial system files essential for Windows operation might become corrupted due to power outages, improper shutdowns, or malware attacks.
  • Boot Sector Issues: The boot sector, responsible for initiating the boot process, can be damaged or corrupted, preventing Windows from loading.
  • Overheating: Excessive heat can lead to system instability and cause the error.
  • BIOS Settings: Incorrect BIOS settings can interfere with the boot process, resulting in the error.

Troubleshooting Steps

1. Basic Troubleshooting:

  • Restart Your Computer: Often, a simple restart can resolve temporary issues causing the error.
  • Check for Loose Connections: Ensure all hardware components are securely connected, particularly RAM modules and hard drives.
  • Disconnect Peripherals: Temporarily disconnect external devices like printers, scanners, and USB drives to rule out potential conflicts.

2. Advanced Troubleshooting:

  • Safe Mode: Boot into Safe Mode, which loads only essential system files, to diagnose potential software conflicts. If Windows boots successfully in Safe Mode, the error is likely caused by a third-party application or driver.
  • System Restore: Use System Restore to revert your computer to a previous state before the error occurred. This can undo recent software changes or driver updates that might be causing the problem.
  • Check for Hardware Errors: Utilize the Windows Memory Diagnostic tool to test your RAM for errors. Run the CHKDSK command to check for hard drive errors.
  • Update Drivers: Ensure all device drivers are up-to-date. Outdated or incompatible drivers can cause system instability.
  • Run a Virus Scan: Scan your system for malware infections, as they can corrupt system files and cause boot errors.
  • Boot from a Recovery Drive: If the error persists, create a Windows recovery drive and boot from it. This allows you to access advanced troubleshooting options, including system repair, data recovery, and reinstalling Windows.

3. Addressing Specific Causes:

  • Hardware Issues: If hardware is suspected, consider replacing the affected component. Consult a computer technician for diagnosis and repair.
  • Software Conflicts: Identify and uninstall recently installed software or drivers. Use the "clean boot" method to start Windows with minimal software running to isolate the problem.
  • System File Corruption: Run the System File Checker (SFC) tool to scan and repair corrupted system files.
  • Boot Sector Issues: Use the Bootrec.exe command in the Windows Recovery Environment to repair the boot sector.

Preventing the Error

  • Regular Maintenance: Regularly perform system scans, update drivers, and clean temporary files to maintain system health.
  • Backup Regularly: Create regular backups of your important data to prevent data loss in case of system failure.
  • Monitor System Temperature: Keep your computer cool by ensuring proper ventilation and avoiding dust buildup.
  • Use a UPS: A Uninterruptible Power Supply (UPS) can protect your computer from power outages and sudden voltage fluctuations, reducing the risk of system file corruption.

FAQs

Q: What are the common signs of a hardware failure causing the error?

A: Common signs include:

  • Repeated blue screens with different error codes.
  • System instability, crashes, and freezes.
  • Unusual noises coming from the computer.
  • Hardware components not being recognized by the system.

Q: How do I boot into Safe Mode?

A: During the boot process, press and hold the F8 key repeatedly. Select "Safe Mode" from the boot options menu.

Q: What is the difference between a system restore and a clean install?

A: A system restore reverts your computer to a previous state, preserving your data. A clean install removes all data and settings, reinstalling Windows from scratch.

Q: What are the risks of reinstalling Windows?

A: Reinstalling Windows can erase all data on your hard drive, so ensure you have a backup before proceeding.

Q: How do I create a Windows recovery drive?

A: Open Settings > Update & Security > Recovery. Click on Create a recovery drive and follow the on-screen instructions.

Tips

  • Keep a record of error messages: Note the specific error codes and messages displayed on the blue screen to help identify the cause.
  • Consult online forums: Search for similar issues and solutions on online forums and communities.
  • Seek professional help: If troubleshooting steps fail, consult a computer technician for professional diagnosis and repair.

Conclusion

The "Your PC did not start correctly" error in Windows 10 can be a significant inconvenience, but understanding the potential causes and employing the appropriate troubleshooting techniques can help resolve the issue. By following the steps outlined in this guide, users can effectively diagnose and repair the problem, restoring their computer to full functionality. Regular system maintenance and preventative measures can further minimize the occurrence of this error, ensuring a smoother and more reliable computing experience.

Your PC did Not Start Correctly Windows 10  Solution to Fix All Startup Problems Windows 10 7 Solutions: Your PC Did Not Start Correctly Error in Windows 10 - MiniTool Solved: Windows 10 Automatic Repair Loop "Your PC Did Not Start Correctly"
Fix: Your PC did not start correctly Windows 10  TroubleShoot Windows Fix: Your PC did not start correctly Windows 10  TroubleShoot Windows 7 Solutions to Fix Your PC Did Not Start Correctly Error in Windows 10
7 Solutions: Your PC Did Not Start Correctly Error in Windows 10 - MiniTool 7 Solutions: Your PC Did Not Start Correctly Error in Windows 10 - MiniTool

Closure

Thus, we hope this article has provided valuable insights into Troubleshooting "Your PC Did Not Start Correctly" Error in Windows 10. We appreciate your attention to our article. See you in our next article!

Troubleshooting Windows 11 Pinning Issues: A Comprehensive Guide

Troubleshooting Windows 11 Pinning Issues: A Comprehensive Guide

Introduction

In this auspicious occasion, we are delighted to delve into the intriguing topic related to Troubleshooting Windows 11 Pinning Issues: A Comprehensive Guide. Let’s weave interesting information and offer fresh perspectives to the readers.

Troubleshooting Windows 11 Pinning Issues: A Comprehensive Guide

Resolving Pin Error 0xD000A002 in Windows 11: A Troubleshooting Guide

The ability to pin applications and files to the taskbar in Windows 11 is a highly valuable feature, offering quick access to frequently used programs and documents. However, there are instances where this functionality might malfunction, leaving users frustrated and unable to efficiently utilize their system. This article delves into the intricacies of pin issues in Windows 11, providing a comprehensive guide to troubleshooting and resolving them.

Understanding the Problem

The phrase "pin windows 11 no funciona" translates to "pin windows 11 not working" in English. This encompasses various scenarios where the taskbar pinning feature fails to operate as intended. Some common manifestations include:

  • Inability to pin applications: Users may find that the "Pin to taskbar" option remains unavailable or grayed out when right-clicking an application icon.
  • Pinned items disappearing: Previously pinned applications or files might vanish from the taskbar without any apparent reason.
  • Pinned items not launching: Clicking on a pinned item may not open the corresponding application or file, resulting in an unresponsive system.

Identifying the Cause

Pinning issues in Windows 11 can stem from various factors, ranging from simple user errors to more complex system inconsistencies. Here are some potential causes:

  • User permissions: Insufficient user permissions can hinder the ability to pin items to the taskbar.
  • Corrupted taskbar data: Damaged or corrupted taskbar configuration files can lead to pinning malfunctions.
  • Software conflicts: Incompatible or outdated software applications can interfere with taskbar functionality.
  • System errors: Underlying system errors or bugs within Windows 11 itself might contribute to pinning problems.
  • Third-party software interference: Certain third-party applications, especially those designed to customize the taskbar, might inadvertently disrupt its normal operation.

Troubleshooting Steps

Addressing pinning issues requires a systematic approach, starting with simple solutions and progressing towards more complex interventions. Here is a step-by-step guide to resolving the problem:

  1. Restart Windows Explorer: Often, a simple restart of Windows Explorer can resolve minor glitches affecting the taskbar. To achieve this, press Ctrl+Shift+Esc to open the Task Manager, locate "Windows Explorer" in the "Processes" tab, right-click it, and select "Restart."

  2. Check User Permissions: Ensure that your user account has the necessary permissions to modify the taskbar. Navigate to Settings > Accounts > Family & other users, and verify that your account has administrative privileges. If not, consult your system administrator for assistance.

  3. Run System File Checker: The System File Checker (SFC) tool can scan and repair corrupted system files, potentially addressing pinning issues caused by file corruption. Open Command Prompt as administrator, type sfc /scannow, and press Enter. Allow the scan to complete, and restart your computer if prompted.

  4. Re-register Taskbar Components: Re-registering the taskbar components can resolve issues arising from incorrect registration entries. Open Command Prompt as administrator, and execute the following commands one by one:

    regsvr32.exe shell32.dll
    regsvr32.exe taskmgr.exe
  5. Disable Third-party Taskbar Customization Software: If you have installed third-party software to customize the taskbar, temporarily disable or uninstall it to see if it resolves the pinning issue.

  6. Perform a Clean Boot: A clean boot starts Windows with minimal software running, isolating the problem to potential software conflicts. To initiate a clean boot, search for "msconfig" in the Start menu, navigate to the "Services" tab, and uncheck all boxes except for "Microsoft services." Similarly, in the "Startup" tab, disable all non-essential startup items.

  7. Create a New User Profile: If the problem persists, consider creating a new user profile. This eliminates potential issues related to your existing user profile’s configuration.

  8. Reset Windows 11: As a last resort, consider resetting Windows 11. This reinstalls the operating system while preserving your personal files. Navigate to Settings > System > Recovery, and select "Reset PC." Choose the "Keep my files" option to retain your data.

FAQs

Q: Why can’t I pin specific applications to the taskbar?

A: This could be due to insufficient user permissions, corrupted taskbar data, software conflicts, or system errors. Follow the troubleshooting steps outlined above to resolve the issue.

Q: Why do my pinned items keep disappearing?

A: This might be caused by corrupted taskbar data, software conflicts, or system errors. Run the System File Checker, re-register taskbar components, or perform a clean boot to resolve the problem.

Q: My pinned items don’t launch when I click on them. What should I do?

A: This could indicate software conflicts or system errors. Disable third-party taskbar customization software, perform a clean boot, or create a new user profile to troubleshoot the issue.

Tips

  • Regularly restart your computer: This helps resolve minor glitches and prevents potential performance issues.
  • Keep your software updated: Ensure that your operating system and applications are up-to-date to minimize compatibility issues.
  • Run a virus scan: Malware infections can disrupt system functionality, including taskbar operation.
  • Monitor system logs: Regularly check system logs for error messages that might indicate the root cause of the pinning issue.

Conclusion

Pinning issues in Windows 11 can be frustrating, but with a systematic approach and a comprehensive understanding of potential causes, most problems can be resolved. By following the troubleshooting steps outlined in this guide, users can regain the convenience and efficiency of pinning applications and files to the taskbar. Remember to keep your system updated, run regular maintenance checks, and be cautious of third-party software that might interfere with system functionality.

Fix: We Were Unable to Set Up Your Pin Error in Windows 11 Fix Windows 11 Can't Remove Windows Hello PIN (Solved) - YouTube How to Fix Pin Error 0xD000A002 in Windows 11?
Can’t remove PIN in Windows 11? Try these methods! How to Pin Any Application to the Taskbar in Windows 11 Fix: PIN not working in Windows 11
How to Reset PIN in Windows 11 [Fix Forgotten PIN Issue 2024] Best Methods To Reset Windows 11 PIN Fix Forgot PIN Issue HTMD Blog

Closure

Thus, we hope this article has provided valuable insights into Troubleshooting Windows 11 Pinning Issues: A Comprehensive Guide. We hope you find this article informative and beneficial. See you in our next article!

Paint 3D: A Comprehensive Guide To Windows 11’s Creative Toolkit

Paint 3D: A Comprehensive Guide to Windows 11’s Creative Toolkit

Introduction

With great pleasure, we will explore the intriguing topic related to Paint 3D: A Comprehensive Guide to Windows 11’s Creative Toolkit. Let’s weave interesting information and offer fresh perspectives to the readers.

Paint 3D: A Comprehensive Guide to Windows 11’s Creative Toolkit

Windows 11 paint 3d - adamnom

Paint 3D is a versatile and user-friendly 3D modeling application integrated into Windows 11. It offers a powerful and intuitive interface for creating, manipulating, and sharing 3D models, making it an ideal tool for both novice and experienced creators. This guide provides a comprehensive overview of Paint 3D, exploring its features, functionalities, and applications.

Understanding the Fundamentals of Paint 3D

Paint 3D is designed to be accessible to a wide range of users, regardless of their prior experience with 3D modeling. Its interface is intuitive and visually appealing, utilizing a familiar layout with familiar tools and functionalities. The application features a 3D canvas that serves as the workspace for creating and manipulating models. Users can interact with the models in real-time, rotating, scaling, and positioning them with ease.

Key Features of Paint 3D

1. 3D Object Creation:

Paint 3D offers various tools for creating 3D objects from scratch. Users can choose from pre-defined shapes like cubes, spheres, cylinders, and cones, or they can utilize the free-form modeling tools to sculpt custom shapes. The application also includes a library of pre-made 3D models that can be imported and modified.

2. Texturing and Painting:

Once a model is created, users can add textures and colors using a variety of tools. Paint 3D offers a range of brushes, patterns, and textures that can be applied to surfaces. Users can also import custom images and use them as textures for their models.

3. 3D Effects and Lighting:

Paint 3D allows users to add depth and realism to their models by applying 3D effects and lighting. The application provides tools for creating shadows, reflections, and other visual effects. Users can also adjust the ambient lighting and add spotlights to their scenes.

4. Remix 3D:

Paint 3D integrates with Remix 3D, a platform that hosts a vast library of user-generated 3D models. Users can access and download models from Remix 3D and incorporate them into their projects. This feature enables collaboration and sharing among the Paint 3D community.

5. Export and Sharing:

Paint 3D allows users to export their creations in various formats, including 3MF, OBJ, and STL. These formats ensure compatibility with other 3D modeling software and 3D printing applications. Users can also share their models directly through social media platforms or by embedding them on websites.

Beyond the Basics: Advanced Features and Applications

While Paint 3D is primarily known for its user-friendly interface and basic 3D modeling capabilities, it also offers a range of advanced features that cater to more experienced users.

1. Advanced Modeling Tools:

Paint 3D includes advanced modeling tools such as the "Duplicator" and "Brush Selector" that allow for more precise and intricate model creation. Users can create complex geometries and intricate details using these tools.

2. 3D Printing Integration:

Paint 3D supports 3D printing, enabling users to bring their digital creations to life. The application allows users to optimize their models for 3D printing, ensuring that they are printable and meet the requirements of specific 3D printers.

3. Augmented Reality (AR) Capabilities:

Paint 3D allows users to create and experience their models in augmented reality. This feature enables users to view their models in the real world, interacting with them in a more immersive way.

4. Collaboration Features:

Paint 3D offers collaboration features that allow multiple users to work on the same model simultaneously. This feature is particularly useful for teams and classrooms, facilitating collaborative design and development.

Applications of Paint 3D

Paint 3D’s versatility and accessibility make it suitable for a wide range of applications, including:

1. Education:

Paint 3D is an excellent tool for teaching students about 3D design and modeling. Its intuitive interface and guided tutorials make it easy for students to learn the fundamentals of 3D creation.

2. Design and Prototyping:

Paint 3D can be used for designing and prototyping products, allowing users to visualize their ideas and iterate on their designs quickly. Its 3D printing capabilities enable users to create physical prototypes of their designs.

3. Entertainment and Gaming:

Paint 3D can be used for creating 3D models for games, animations, and other entertainment projects. Its intuitive tools and ease of use make it an accessible platform for aspiring game developers and animators.

4. Art and Creative Expression:

Paint 3D provides a platform for creative expression, allowing users to explore their artistic talents and create unique 3D art. Its extensive library of textures, effects, and tools offer endless possibilities for artistic exploration.

5. Business and Marketing:

Paint 3D can be used for creating 3D models for marketing materials, product demonstrations, and presentations. Its ability to create engaging and interactive content makes it a valuable tool for businesses looking to enhance their marketing efforts.

FAQs about Paint 3D

1. Is Paint 3D free to use?

Paint 3D is a free application included with Windows 11. Users do not need to purchase a separate license to access and use the application.

2. What are the system requirements for Paint 3D?

Paint 3D runs on Windows 11 and requires a compatible graphics card and sufficient RAM. For optimal performance, it is recommended to have a modern computer with at least 4 GB of RAM and a dedicated graphics card.

3. Can I use Paint 3D to create 3D models for 3D printing?

Yes, Paint 3D supports 3D printing. Users can export their models in STL format, which is compatible with most 3D printers.

4. Can I import and edit models from other 3D modeling software?

Yes, Paint 3D allows users to import models in various formats, including OBJ and 3MF. Users can then edit and modify these imported models within the Paint 3D interface.

5. How do I share my 3D models with others?

Paint 3D allows users to share their models through various methods, including social media platforms, email, and by embedding them on websites. Users can also upload their models to Remix 3D, a platform that hosts a vast library of user-generated 3D models.

Tips for Using Paint 3D Effectively

1. Experiment with Different Tools and Features:

Paint 3D offers a wide range of tools and features. It is essential to experiment with these tools to discover their capabilities and find the ones that best suit your needs.

2. Utilize the Tutorials and Resources:

Paint 3D includes built-in tutorials and online resources that can help users learn the basics and explore advanced features. These resources provide valuable guidance and support for users of all skill levels.

3. Join the Paint 3D Community:

The Paint 3D community is a valuable resource for learning, sharing, and getting inspiration. Users can connect with other creators, share their projects, and receive feedback and support.

4. Practice Regularly:

Like any creative skill, mastering Paint 3D requires practice. Set aside dedicated time to experiment, create, and refine your skills.

5. Explore Remix 3D:

Remix 3D is a valuable resource for finding inspiration and incorporating pre-made models into your projects. Explore the library and discover new ideas and techniques.

Conclusion

Paint 3D is a powerful and accessible 3D modeling application that empowers users to create, manipulate, and share 3D models with ease. Its intuitive interface, versatile features, and extensive resources make it an ideal tool for individuals, educators, and businesses alike. Whether you are a novice or an experienced creator, Paint 3D offers a platform for exploring your creative potential and bringing your 3D ideas to life.

Paint 3d windows 11 - lknmform How to enable Paint 3D in Windows 11 - YouTube Paint 3d windows 11 - kolkeen
Help With Paint In Windows 11: Your Ultimate Paint Guide Paint 3d windows 11 - puzzledun Paint 3d windows 11 - koljunkies
How To Download and Install Paint 3D In Windows 11 [Tutorial] - YouTube Paint 3D in Windows 11: How to Enable & Install it with with Quick Steps

Closure

Thus, we hope this article has provided valuable insights into Paint 3D: A Comprehensive Guide to Windows 11’s Creative Toolkit. We thank you for taking the time to read this article. See you in our next article!

Upgrading To Windows 10: A Comprehensive Guide

Upgrading to Windows 10: A Comprehensive Guide

Introduction

In this auspicious occasion, we are delighted to delve into the intriguing topic related to Upgrading to Windows 10: A Comprehensive Guide. Let’s weave interesting information and offer fresh perspectives to the readers.

Upgrading to Windows 10: A Comprehensive Guide

Upgrade Windows 8.1 to Windows 10 (full guide) - YouTube

The decision to upgrade to Windows 10, the latest iteration of Microsoft’s flagship operating system, is a significant one. It involves weighing the benefits of a modern, feature-rich platform against the potential challenges of transitioning from a previous version. This comprehensive guide aims to provide a clear and informative overview of the upgrade process, its implications, and the factors to consider before making the leap.

Understanding the Upgrade Process

Upgrading to Windows 10 is not merely a simple download and install. It involves a complex series of steps that require careful consideration and preparation. The process can be broadly divided into the following stages:

  1. Compatibility Check: The first step is to determine if your current system meets the minimum hardware requirements for Windows 10. This involves checking the processor, RAM, storage space, and graphics card specifications. Microsoft provides a dedicated tool on its website to assess compatibility.

  2. Backup and Data Transfer: It is crucial to back up all your important data before initiating the upgrade. This includes files, documents, photos, and software. Multiple backup methods are available, including external hard drives, cloud storage services, and system image backups.

  3. Software Compatibility: While Windows 10 offers compatibility with a vast array of software, some older applications may not function properly or require updates. It is advisable to check the compatibility of essential programs before upgrading.

  4. Driver Updates: Updating drivers for your hardware components is essential for optimal performance and stability after upgrading. Manufacturers often provide updated drivers specifically for Windows 10 on their websites.

  5. Upgrade Installation: The actual upgrade process involves downloading the Windows 10 installation files and running the setup wizard. This process can take several hours depending on your system’s speed and the size of the upgrade files.

  6. Post-Upgrade Configuration: Once the upgrade is complete, you will need to personalize settings, configure accounts, and install any necessary software.

Benefits of Upgrading to Windows 10

Upgrading to Windows 10 offers a range of benefits, including:

  • Enhanced Security: Windows 10 boasts improved security features, including Windows Defender Antivirus, SmartScreen, and Windows Hello for biometric authentication. These features help protect your system from malware and unauthorized access.
  • Modern User Interface: The user interface in Windows 10 is modern and intuitive, with a streamlined Start menu, a redesigned Taskbar, and a more visually appealing overall design.
  • Improved Performance: Windows 10 is optimized for modern hardware and offers faster boot times, improved application performance, and a more responsive user experience.
  • Enhanced Features: Windows 10 comes with a suite of new features, including Cortana, Microsoft Edge, Windows Ink, and Xbox Game Bar, enhancing productivity, entertainment, and gaming experiences.
  • Regular Updates: Microsoft regularly releases updates for Windows 10, ensuring that your system remains secure, stable, and up-to-date with the latest features.

Potential Challenges and Considerations

While upgrading to Windows 10 offers numerous benefits, it also presents some potential challenges and considerations:

  • Hardware Requirements: Older systems may not meet the minimum requirements for Windows 10, making an upgrade impossible or resulting in poor performance.
  • Software Compatibility: Some older software may not be compatible with Windows 10, requiring replacements or updates.
  • Data Loss: Although unlikely, there is a small risk of data loss during the upgrade process. Backups are crucial to mitigate this risk.
  • Learning Curve: The new user interface and features in Windows 10 may require some time to adjust to, especially for users familiar with older versions.
  • System Stability: Some users have reported stability issues after upgrading to Windows 10, requiring troubleshooting and potential system resets.

FAQs on Upgrading to Windows 10

1. Can I upgrade to Windows 10 for free?

The free upgrade offer for Windows 10 ended in 2016. However, you can purchase a license for Windows 10 through Microsoft or authorized retailers.

2. What happens to my existing data and programs after upgrading?

Your existing data and programs will be preserved during the upgrade process. However, it is still recommended to create a backup as a precaution.

3. Can I downgrade back to my previous Windows version after upgrading?

Downgrading back to a previous version is possible within a limited timeframe after upgrading. However, this may require reinstalling your programs and transferring your data.

4. What are the minimum hardware requirements for Windows 10?

The minimum hardware requirements for Windows 10 include a 1 GHz processor, 1 GB RAM for 32-bit or 2 GB RAM for 64-bit, 16 GB of storage space, and a DirectX 9 graphics card with WDDM 1.0 driver.

5. Is it safe to upgrade to Windows 10?

Upgrading to Windows 10 is generally safe, provided you follow the recommended steps and create backups of your data. However, it is always advisable to research and understand the potential risks before upgrading.

Tips for Upgrading to Windows 10

  • Check Compatibility: Ensure your system meets the minimum requirements for Windows 10 before upgrading.
  • Back Up Your Data: Create a comprehensive backup of all important data before initiating the upgrade.
  • Update Drivers: Update drivers for your hardware components to ensure optimal performance and stability.
  • Check Software Compatibility: Verify the compatibility of essential software before upgrading.
  • Perform a Clean Install: Consider a clean install of Windows 10 if you encounter significant issues or want a fresh start.
  • Seek Professional Help: If you are unsure about the upgrade process or encounter difficulties, consider seeking help from a qualified technician.

Conclusion

Upgrading to Windows 10 is a significant decision that requires careful consideration. It offers a range of benefits, including enhanced security, a modern user interface, improved performance, and new features. However, potential challenges such as hardware compatibility, software compatibility, and data loss must be acknowledged and addressed. By following the recommended steps, creating backups, and understanding the potential risks, you can ensure a smooth and successful upgrade experience, unlocking the full potential of Windows 10 on your system.

Upgrading to Windows 10 – the Fundamentals – IT Know Howe Computer Services Advantages Of Upgrading To Windows 10 - Techyv.com Upgrade Paths to Windows 10
Upgrading to Windows 10: A Comprehensive Guide to Boost Your PC’s Performance - The Riddle Review Tips for Upgrading to Windows 10  Trusted Tech Team Blog Upgrade Windows 10
The real-world benefits of upgrading to Windows 10  United Imaging Everything You Need to Know Before Installing or Upgrading to Windows 10 - NEXTOFWINDOWS.COM

Closure

Thus, we hope this article has provided valuable insights into Upgrading to Windows 10: A Comprehensive Guide. We thank you for taking the time to read this article. See you in our next article!