Archives 2024

Navigating The User Experience: A Comprehensive Look At Windows 11

Navigating the User Experience: A Comprehensive Look at Windows 11

Introduction

In this auspicious occasion, we are delighted to delve into the intriguing topic related to Navigating the User Experience: A Comprehensive Look at Windows 11. Let’s weave interesting information and offer fresh perspectives to the readers.

Buy Windows 11 User Guide for Beginners: A Comprehensive Guide to Master Windows 11 Operating

Windows 11, the latest iteration of Microsoft’s operating system, has been met with a mixed reception. While some users have embraced its new features and design, others have voiced their concerns, highlighting perceived shortcomings and a sense of disruption. This article aims to provide a balanced and comprehensive perspective on Windows 11, examining its features, addressing common criticisms, and exploring its potential impact on the future of computing.

A New Look and Feel:

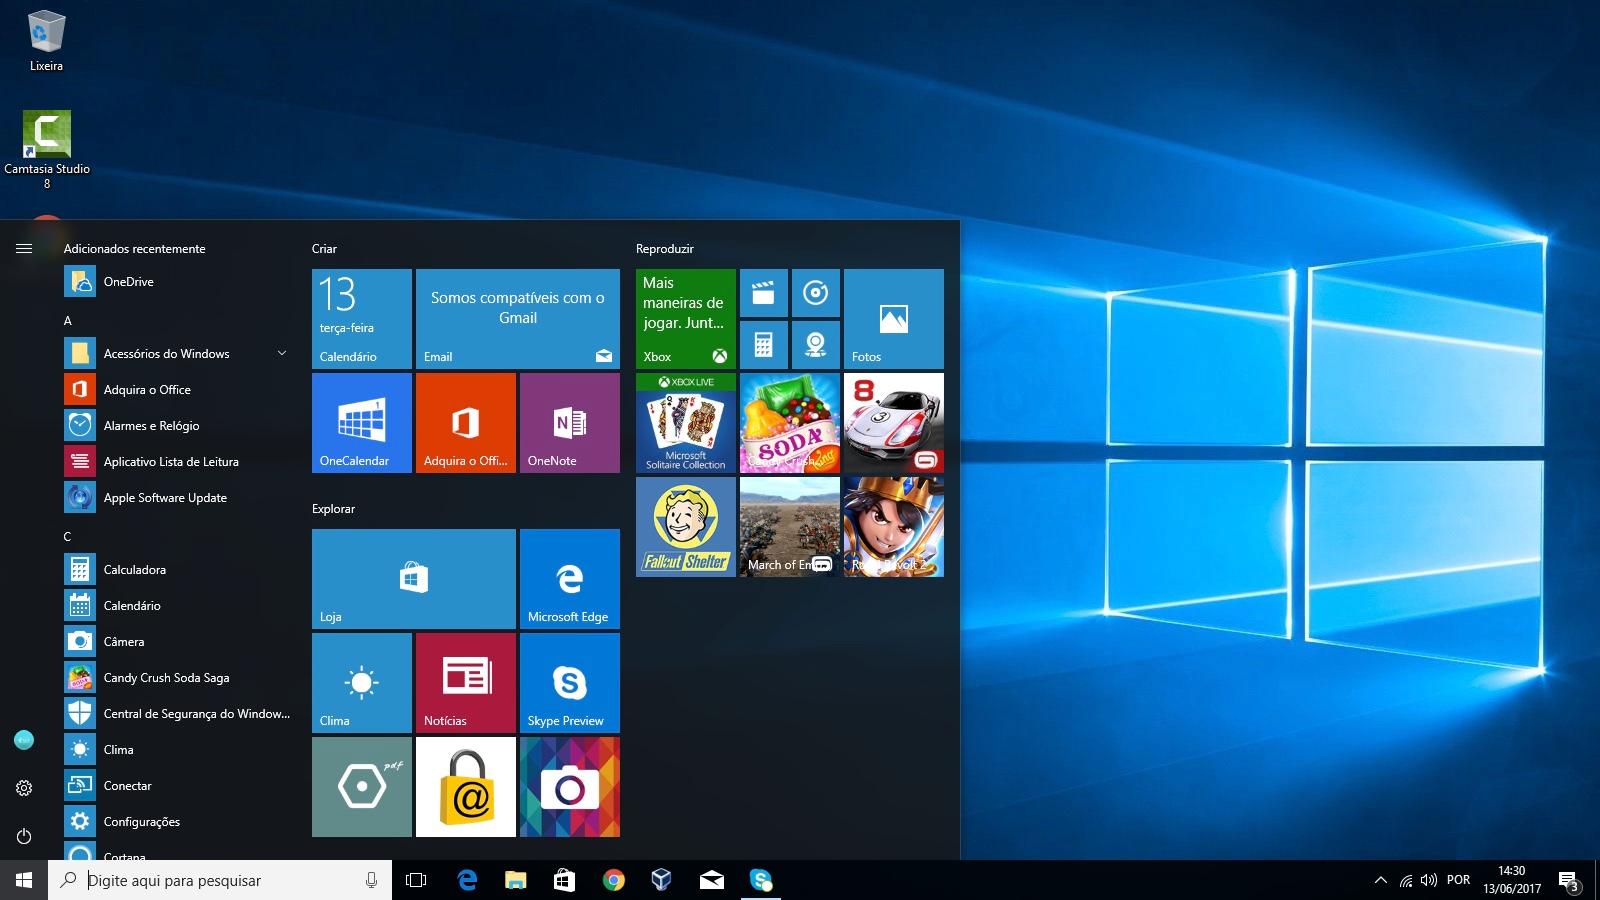
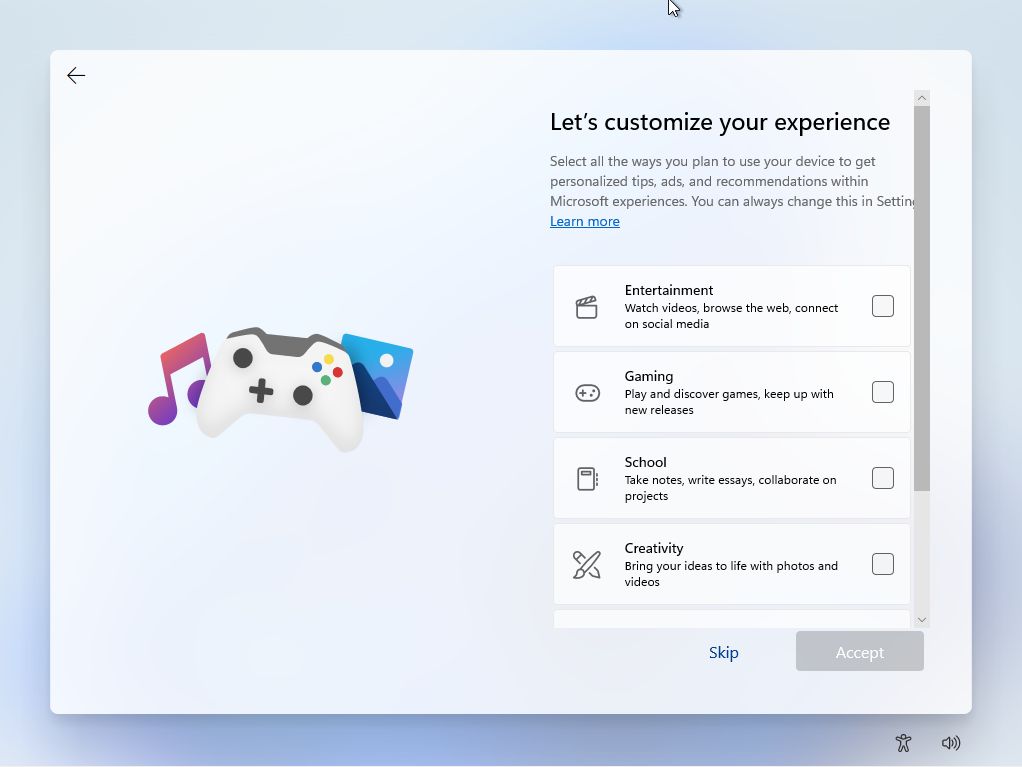
Windows 11 introduces a significant visual overhaul compared to its predecessor. The most prominent change is the redesigned Start Menu, which now features a centered layout and a streamlined approach to accessing applications and files. The interface, overall, emphasizes a clean and minimalist aesthetic, with rounded corners and a focus on visual clarity. This design philosophy extends to other elements, such as the taskbar and system settings, aiming to create a more intuitive and user-friendly experience.

Performance and Functionality:

Windows 11 boasts several performance enhancements. The operating system leverages the latest hardware advancements, including support for the 12th Gen Intel Core processors and AMD Ryzen 6000 series processors. Additionally, Windows 11 integrates with Microsoft’s cloud services, enabling features like cloud storage, seamless device synchronization, and improved security.

Enhanced Security Features:

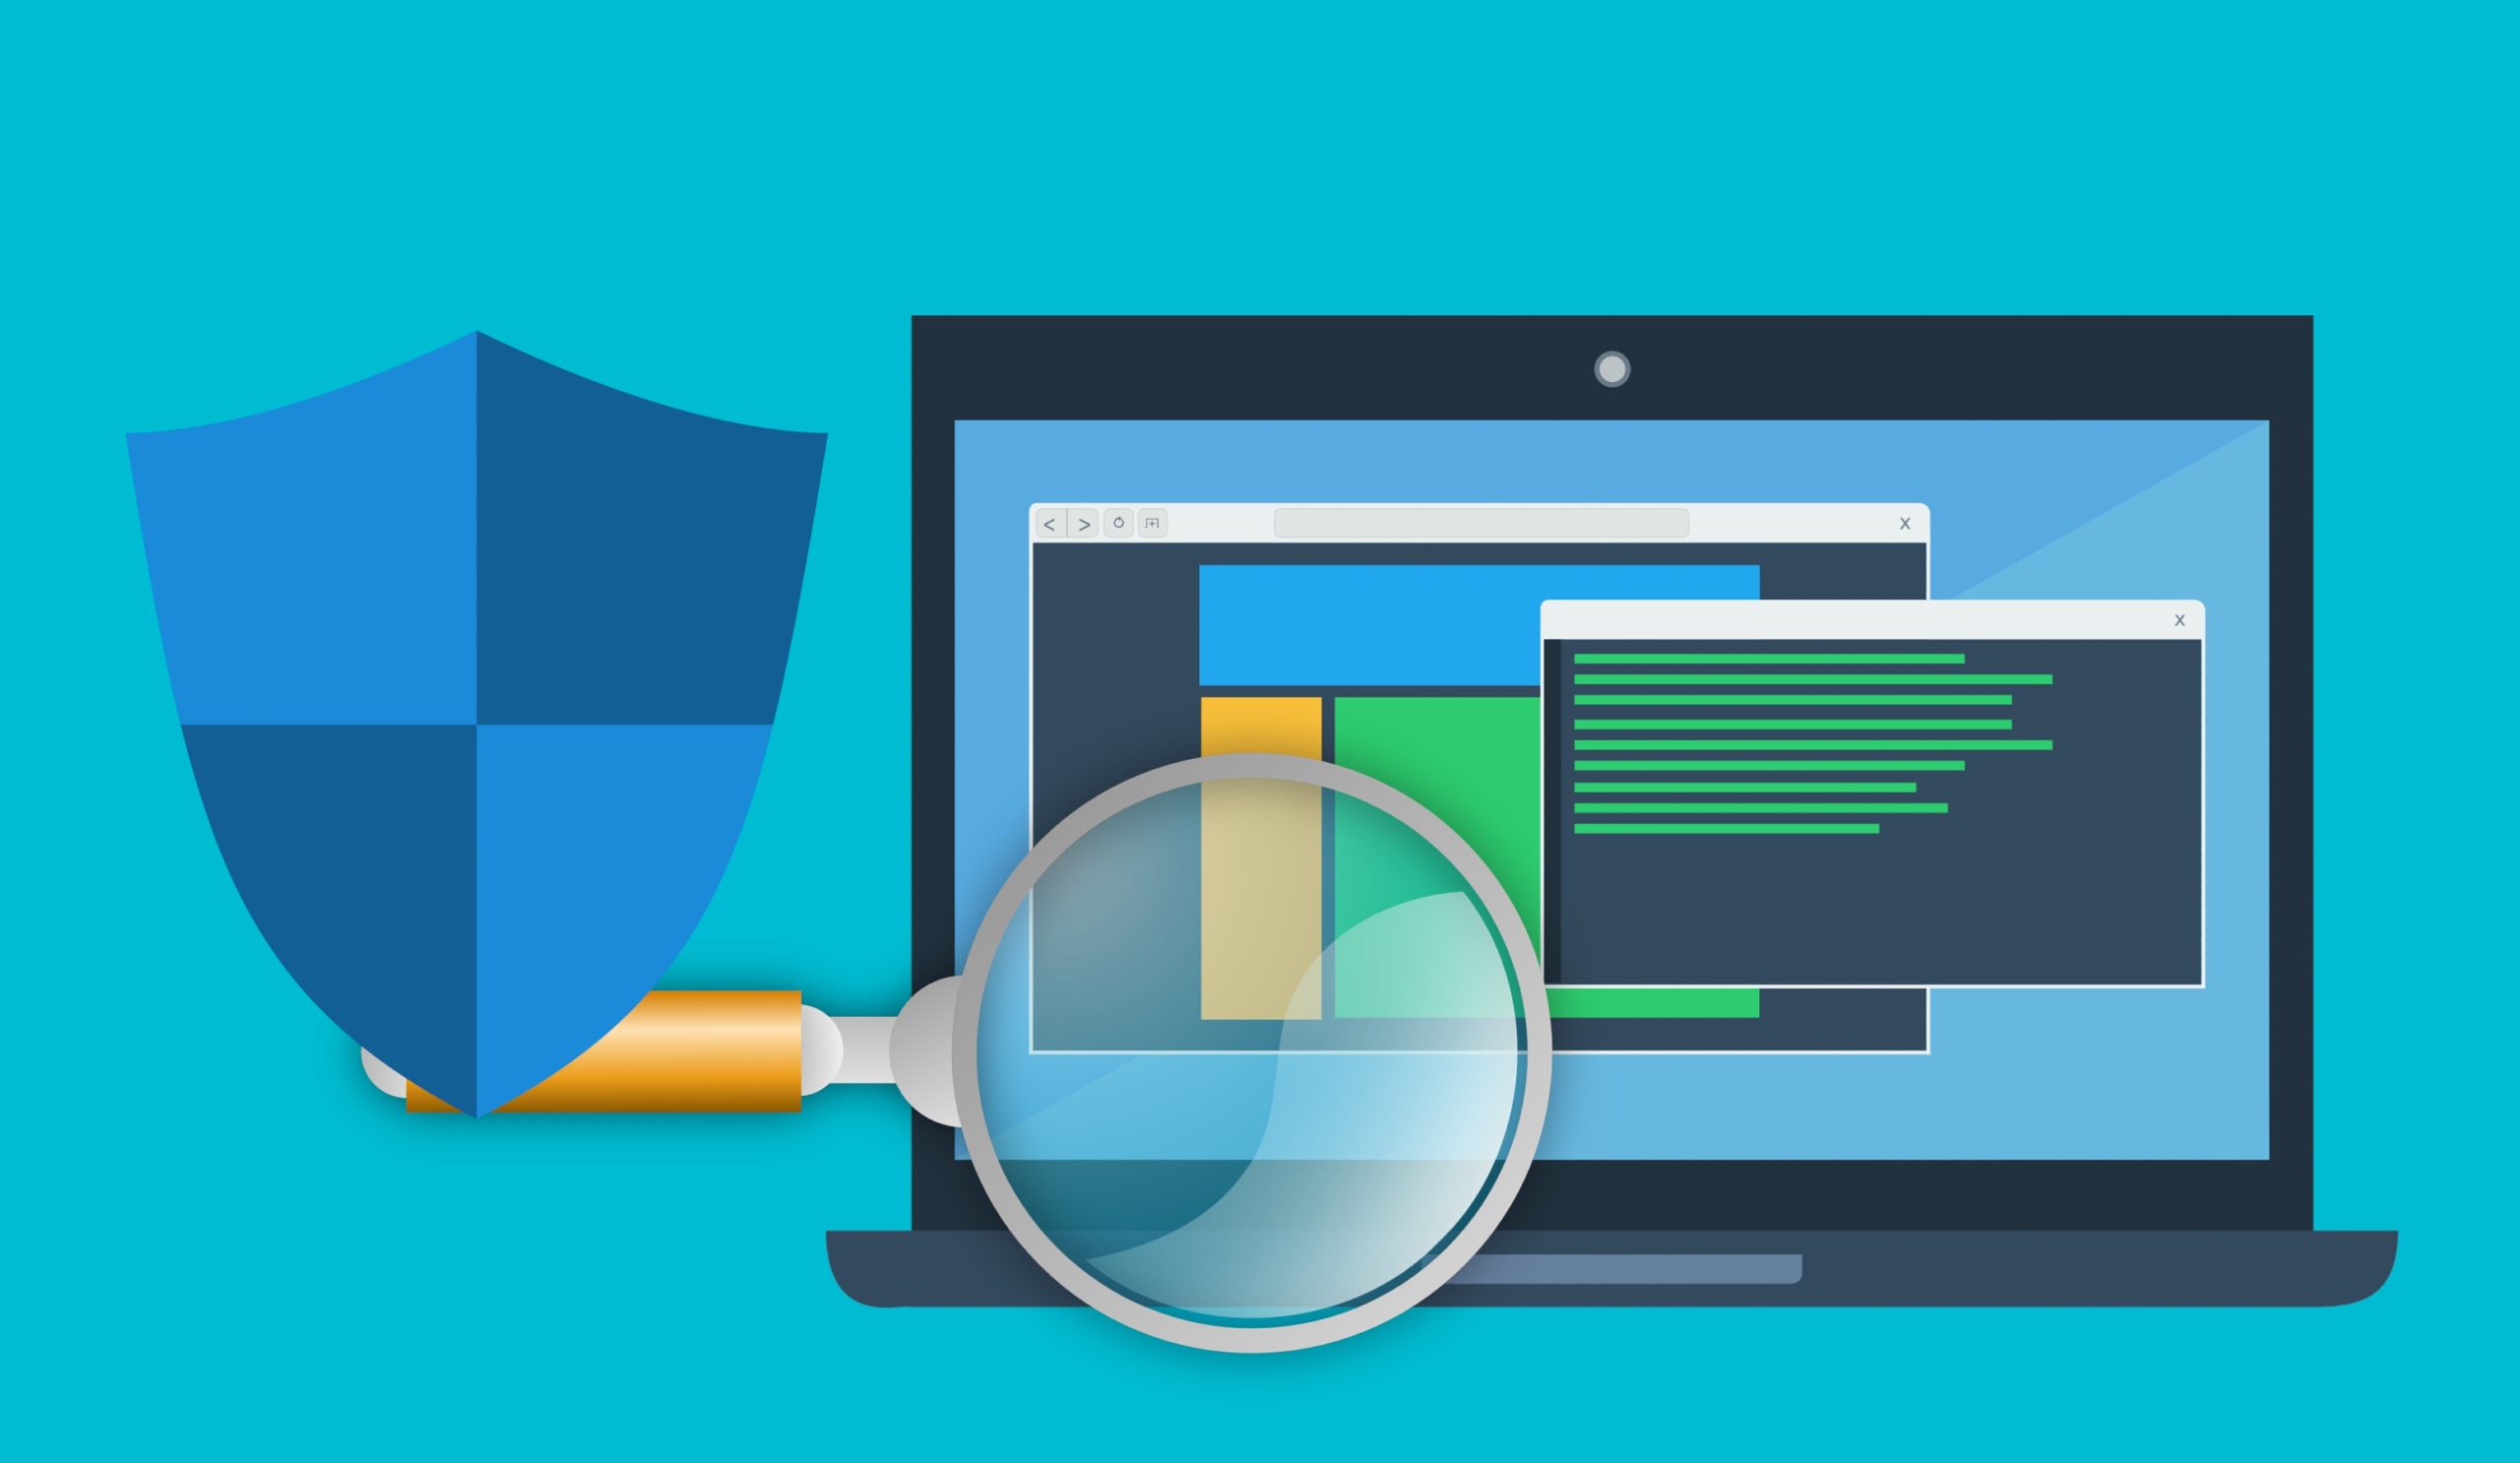
Security remains a top priority in Windows 11. The operating system incorporates advanced security features, including Microsoft Defender, a built-in antivirus solution, and Windows Hello, a biometric authentication system that utilizes facial recognition or fingerprint scanning for secure login. These features aim to protect users from malware and unauthorized access.

Addressing Concerns and Criticism:

While Windows 11 offers a range of improvements, it has also faced criticism. One common complaint is the requirement for specific hardware specifications, which has left some users unable to upgrade. The removal of certain features, such as the ability to drag and drop applications to the taskbar, has also sparked dissatisfaction among users accustomed to the functionality of previous versions.

The Future of Windows:

Windows 11 represents a significant shift in Microsoft’s approach to operating systems. The company aims to create a more unified and integrated ecosystem, leveraging cloud technologies and hardware advancements to enhance user experience. While the transition has encountered some challenges, Windows 11 demonstrates a clear vision for the future of computing, focusing on seamless integration, improved security, and a user-centric design.

FAQs

Q: What are the minimum system requirements for Windows 11?

A: Windows 11 requires a 1 GHz or faster processor with two or more cores, 4GB of RAM, 64GB of storage, a compatible graphics card, and a display with a resolution of 1366 x 768 pixels.

Q: Can I upgrade to Windows 11 from Windows 10?

A: Most Windows 10 users can upgrade to Windows 11 for free. However, the operating system requires specific hardware specifications, and not all devices will be eligible for the upgrade.

Q: Is Windows 11 compatible with my current applications?

A: Most applications compatible with Windows 10 will also work on Windows 11. However, some older applications may require updates or compatibility patches.

Q: What are the benefits of using Windows 11?

A: Windows 11 offers a range of benefits, including a redesigned user interface, improved performance, enhanced security features, and seamless integration with Microsoft’s cloud services.

Tips

Tip 1: Before upgrading to Windows 11, ensure your device meets the minimum system requirements.

Tip 2: Back up your important data before upgrading to avoid data loss.

Tip 3: Familiarize yourself with the new features and interface of Windows 11 to optimize your experience.

Tip 4: Explore the settings and customization options to tailor Windows 11 to your preferences.

Tip 5: Keep your operating system updated to benefit from the latest security patches and performance enhancements.

Conclusion

Windows 11 represents a significant evolution in the Windows operating system, introducing a new design language, improved performance, and enhanced security features. While the transition has faced some challenges, Windows 11 offers a vision for the future of computing, emphasizing user-centric design, cloud integration, and seamless user experience. As the operating system matures, it will be interesting to observe its impact on the computing landscape and its ability to meet the evolving needs of users.

WINDOWS 11 HOME User Guide: A Complete and well-Illustrated Guide to Navigating the New Features Buy WINDOWS 11 HOME User Manual: A Comprehensive Illustrated Guide to Navigating the New Windows 11: A Comprehensive Guide about Features and Updates Perunity - Latest Business Story
Every time Microsoft releases a new version of the Windows operating system, it comes with new Buy WINDOWS 11 PRO USER GUIDE: A Comprehensive User Guide for Beginners and Seniors to Master Buy Windows 11 For Beginners With Pictures: User-Friendly & Comprehensive Guide On How To Master
How to Install Windows 11 Step by Step: Guide with Images How to Fix Windows 11 User Experience - YouTube

Closure

Thus, we hope this article has provided valuable insights into Navigating the User Experience: A Comprehensive Look at Windows 11. We hope you find this article informative and beneficial. See you in our next article!

Mastering The Art Of Disc Burning: A Comprehensive Guide To Nero Burning ROM For Windows 10

Mastering the Art of Disc Burning: A Comprehensive Guide to Nero Burning ROM for Windows 10

Introduction

In this auspicious occasion, we are delighted to delve into the intriguing topic related to Mastering the Art of Disc Burning: A Comprehensive Guide to Nero Burning ROM for Windows 10. Let’s weave interesting information and offer fresh perspectives to the readers.

Mastering the Art of Disc Burning: A Comprehensive Guide to Nero Burning ROM for Windows 10

Nero Burning ROM actualizado - Licencias Eset Premium

In the digital age, where data flows effortlessly through the internet and cloud storage, the physical act of burning data onto a disc might seem antiquated. However, there are still numerous reasons why disc burning remains relevant and valuable, especially for users of Windows 10. For those seeking a reliable and feature-rich solution for creating CDs, DVDs, and Blu-ray discs, Nero Burning ROM stands as a time-tested and highly regarded software application.

This comprehensive guide will delve into the intricacies of downloading and utilizing Nero Burning ROM on Windows 10, exploring its features, benefits, and how to navigate its interface. We will also address common queries and provide practical tips for optimizing your disc burning experience.

Understanding the Importance of Disc Burning in the Modern Era

While cloud storage and online data sharing have become the norm, disc burning remains a vital tool for various scenarios:

  • Data Archiving and Backup: Storing critical data on physical media offers a secure and offline backup solution, safeguarding against data loss due to hardware failures, software malfunctions, or cyberattacks.
  • Creating Audio and Video Collections: Disc burning allows for the creation of personalized music compilations, family video archives, or multimedia presentations for sharing or personal enjoyment.
  • Software Distribution and Installation: Software developers and businesses often utilize discs for distributing software applications, drivers, or updates, ensuring a reliable and efficient delivery method.
  • Offline Data Access: Discs provide a portable and readily accessible method to transport data without internet connectivity, crucial for presentations, research, or travel.
  • Legacy System Compatibility: Some older devices and systems may not have the capability to access data stored on modern storage mediums, making disc burning a vital tool for compatibility.

Downloading and Installing Nero Burning ROM on Windows 10

The process of acquiring and installing Nero Burning ROM is straightforward and user-friendly:

  1. Visit the Nero Website: Navigate to the official Nero website (https://www.nero.com/) using your preferred web browser.
  2. Locate the Download Link: Search for the "Nero Burning ROM" software package and click on the download link.
  3. Choose the Correct Version: Select the appropriate version of Nero Burning ROM compatible with your Windows 10 operating system.
  4. Initiate the Download: Click on the download button, and the installation file will be downloaded to your computer.
  5. Run the Installer: Locate the downloaded installation file and double-click it to launch the setup wizard.
  6. Follow On-Screen Instructions: Follow the prompts provided by the installer, choosing the desired installation directory and accepting the license agreement.
  7. Complete the Installation: Once the installation process is complete, you will have access to Nero Burning ROM on your Windows 10 system.

Exploring the Features and Benefits of Nero Burning ROM

Nero Burning ROM offers a comprehensive suite of features designed to meet the diverse needs of disc burning users:

  • Versatile Disc Creation: Burn various types of discs, including CDs, DVDs, and Blu-ray discs, with support for different formats like audio, video, data, and hybrid discs.
  • Advanced Burning Options: Control disc burning settings, including writing speed, disc format, and data compression, to optimize performance and ensure data integrity.
  • Data Protection and Security: Utilize advanced features like password protection, data encryption, and disc spanning to safeguard sensitive information and prevent unauthorized access.
  • Multimedia Editing and Conversion: Edit and convert audio and video files before burning them onto discs, ensuring compatibility with various devices and platforms.
  • Disc Copying and Backup: Create exact copies of existing discs or back up important files onto blank discs for safekeeping.
  • Disc Labeling and Printing: Design and print custom labels for your discs, enhancing their organization and aesthetics.
  • Disc Image Creation and Management: Create disc images (ISO files) for easy archiving, sharing, or restoring data onto discs.
  • User-Friendly Interface: Navigate the intuitive interface with ease, thanks to a clear layout and straightforward controls.
  • Comprehensive Help and Support: Access extensive online documentation, tutorials, and community forums for assistance with any queries or troubleshooting.

The Nero Burning ROM interface is designed to be user-friendly and efficient. Here’s a breakdown of the key components:

  • Main Menu: Provides access to all core functions, including "New Compilation," "Copy Disc," "Backup," and "Erase Disc."
  • Project Window: Displays the selected project, showing the files or folders to be burned, the disc type, and burning settings.
  • Toolbars: Offer quick access to common functions like adding files, changing burning settings, and starting the burning process.
  • File List: Displays the files and folders selected for burning, allowing for organization and customization.
  • Burning Options: Provides a comprehensive set of settings for controlling the burning process, including writing speed, disc format, and data protection.
  • Progress Bar: Tracks the progress of the burning process, providing real-time updates on the remaining time and estimated completion.

FAQs about Nero Burning ROM on Windows 10

1. Can I use Nero Burning ROM on a free trial basis?

Yes, Nero Burning ROM offers a free trial period for users to explore its features and capabilities before committing to a purchase.

2. What are the system requirements for running Nero Burning ROM on Windows 10?

Nero Burning ROM requires a minimum of a 1.6 GHz processor, 1 GB of RAM, and 1 GB of free hard disk space. For optimal performance, it is recommended to have a faster processor, more RAM, and sufficient free disk space.

3. Is Nero Burning ROM compatible with all Windows 10 versions?

Nero Burning ROM is compatible with most Windows 10 versions, including Home, Pro, and Enterprise editions. However, it’s essential to check the official website for compatibility information regarding specific versions and updates.

4. Does Nero Burning ROM support burning Blu-ray discs?

Yes, Nero Burning ROM supports burning both standard Blu-ray discs and BD-R/RE discs, allowing you to create high-capacity discs for storing large amounts of data or multimedia content.

5. Can I burn data discs with Nero Burning ROM?

Yes, Nero Burning ROM is well-suited for creating data discs, allowing you to store files, folders, and applications on CDs, DVDs, or Blu-ray discs.

6. How can I create a bootable disc using Nero Burning ROM?

Nero Burning ROM allows you to create bootable discs for installing operating systems or other programs. You can create a bootable disc by selecting the appropriate option in the "New Compilation" menu and specifying the ISO image or files needed for the bootable disc.

7. Does Nero Burning ROM offer any data compression features?

Yes, Nero Burning ROM provides data compression options, allowing you to reduce the size of files before burning them onto discs, maximizing storage capacity and minimizing burning time.

8. Can I protect my data on a disc with a password using Nero Burning ROM?

Yes, Nero Burning ROM offers password protection features, allowing you to secure your data on discs with a password, preventing unauthorized access.

9. How can I create a disc image (ISO file) using Nero Burning ROM?

Nero Burning ROM allows you to create disc images (ISO files) of existing discs or data folders. You can use the "Create Image" option in the main menu to create an ISO file of your chosen data.

10. Where can I find help and support for Nero Burning ROM?

Nero provides comprehensive online documentation, tutorials, and community forums for users to access support and assistance. You can also contact Nero’s customer support team for personalized assistance.

Tips for Optimizing Your Disc Burning Experience with Nero Burning ROM

  • Use High-Quality Discs: Employ reputable brands of discs to ensure optimal performance, data integrity, and longevity.
  • Choose the Correct Disc Format: Select the appropriate disc format (CD, DVD, or Blu-ray) based on your storage requirements and the intended use of the disc.
  • Optimize Burning Settings: Experiment with different burning settings, such as writing speed and data compression, to find the best balance between performance and data integrity.
  • Verify Disc Integrity: After burning a disc, use Nero’s built-in verification feature to ensure the data has been written correctly and is accessible.
  • Clean and Maintain Your Disc Drive: Regularly clean your disc drive to prevent dust and debris accumulation, ensuring optimal performance and disc readability.
  • Utilize Disc Labeling and Printing: Create custom labels for your discs to enhance organization, aesthetics, and identification.
  • Back Up Important Data: Before burning a disc, create a backup of your data on your computer or an external storage device, ensuring data security and recovery options.
  • Explore Advanced Features: Utilize Nero Burning ROM’s advanced features, such as data encryption, disc spanning, and multimedia editing, to optimize your burning experience and enhance data security.
  • Stay Updated: Regularly check for updates to Nero Burning ROM, ensuring you have access to the latest features, bug fixes, and security patches.

Conclusion

Nero Burning ROM remains a powerful and versatile tool for disc burning in the digital age, offering a comprehensive set of features and benefits for users of Windows 10. From data archiving and backup to creating multimedia collections and software distribution, Nero Burning ROM empowers users to manage their data effectively, ensuring its security and accessibility. By leveraging its user-friendly interface, advanced options, and comprehensive support resources, users can master the art of disc burning and confidently create high-quality discs for various purposes.

Free Full Version Software and tricks How to Burn Music to Audio CD in 3 Steps  Nero Burning ROM Tutorial - YouTube Nero Burning ROM 2021 Free Download - ALLPCWorld
How To Burn ISO File To CD Or DVD Using Nero 7 Full Process  Burning an ISO File Using Nero Nero Burning ROM - Best-selling burning program How to burn a CD with Nero: in Windows 10
Gameplay24: Nero Burning Rom Nero Burning ROM 10 - YouTube

Closure

Thus, we hope this article has provided valuable insights into Mastering the Art of Disc Burning: A Comprehensive Guide to Nero Burning ROM for Windows 10. We appreciate your attention to our article. See you in our next article!

Understanding The Red Border Phenomenon In Windows 10: A Comprehensive Guide

Understanding the Red Border Phenomenon in Windows 10: A Comprehensive Guide

Introduction

With great pleasure, we will explore the intriguing topic related to Understanding the Red Border Phenomenon in Windows 10: A Comprehensive Guide. Let’s weave interesting information and offer fresh perspectives to the readers.

Understanding the Red Border Phenomenon in Windows 10: A Comprehensive Guide

Red Border Around Screen Windows 10 - Collection  OpenSea

The appearance of a red border around windows in Windows 10 can be a disconcerting experience, often accompanied by concerns about system malfunctions or security breaches. However, this visual anomaly is not necessarily indicative of a serious problem. It can arise from a variety of factors, ranging from simple software glitches to more complex hardware issues. This article aims to provide a comprehensive understanding of the red border phenomenon, outlining its potential causes, troubleshooting steps, and potential resolutions.

The Red Border: A Visual Clue to Underlying Issues

The presence of a red border around a window in Windows 10 is typically a visual cue indicating that the system is attempting to highlight or emphasize that specific window. This behavior can be triggered by various scenarios, including:

1. Active Window Emphasis: Windows 10 employs a visual cue to indicate the currently active window. In some cases, this visual cue might manifest as a red border, particularly when specific themes or settings are enabled.

2. System-Wide Border Settings: Certain system-wide settings, such as those related to accessibility features, might alter the default window border colors, leading to the appearance of red borders.

3. Software-Specific Settings: Specific software applications might have built-in options to modify window borders, potentially resulting in red borders as a user preference or due to a software glitch.

4. Hardware Issues: While less common, hardware issues, such as faulty graphics drivers or display problems, can sometimes manifest as unusual window border behaviors, including the appearance of red borders.

Troubleshooting the Red Border: A Step-by-Step Approach

Addressing the red border phenomenon requires a systematic approach, focusing on identifying and eliminating the potential causes. Here’s a comprehensive troubleshooting guide:

1. Check Active Window Emphasis:

  • Verify the Active Window: Ensure that the window displaying the red border is indeed the currently active window. If not, the red border might be a visual artifact.
  • Explore Theme Settings: Navigate to Settings > Personalization > Themes and examine the active theme. Some themes might incorporate red borders as part of their visual design. Consider switching to a different theme or modifying the current theme settings.
  • Adjust Window Border Settings: Within the same Themes section, explore the Window Color settings. These settings allow you to customize window borders, including colors. Ensure that the desired border color is set correctly.

2. Review System-Wide Settings:

  • Accessibility Features: Explore the Settings > Ease of Access options. Certain accessibility features, such as high contrast mode, might modify window borders, potentially leading to red borders. Disable or adjust these features to see if the red border disappears.
  • System-Wide Color Settings: Navigate to Settings > Personalization > Colors and examine the system-wide color settings. These settings influence the overall color scheme of Windows 10, including window borders. Ensure that the desired color settings are applied.

3. Examine Software-Specific Settings:

  • Application Settings: Open the specific application displaying the red border and review its settings. Many applications offer customization options for window borders, colors, and other visual elements. Ensure that the desired settings are applied.
  • Software Updates: Check for updates to the specific application exhibiting the red border. Software updates often include bug fixes and improvements that might address visual anomalies like red borders.

4. Investigate Hardware Issues:

  • Graphics Driver Updates: Update your graphics drivers to the latest versions. Outdated or faulty drivers can lead to various display issues, including unusual window borders.
  • Display Settings: Explore the Settings > System > Display options. Adjust the display settings, such as resolution and color profile, to ensure that the display is functioning correctly.
  • Hardware Diagnosis: Consider performing a hardware diagnosis to rule out any underlying hardware issues that might be contributing to the red border phenomenon.

FAQs: Addressing Common Concerns

1. Is the red border a sign of a virus or malware infection?

While it’s possible for malware to modify system settings and cause visual anomalies like red borders, it’s not a common occurrence. The red border is more likely due to other factors, such as software glitches or system settings. However, if you suspect a malware infection, perform a full system scan with a reputable antivirus software.

2. Can the red border be permanently removed?

Yes, the red border can usually be removed by addressing the underlying cause. This might involve adjusting system settings, updating software, or resolving hardware issues.

3. What if none of the troubleshooting steps work?

If the red border persists despite following the troubleshooting steps, consider contacting Microsoft support for assistance. They might be able to provide more specific guidance based on your system configuration.

Tips for Preventing Future Red Border Issues

  • Regular System Maintenance: Regularly perform system maintenance tasks, such as cleaning temporary files, updating drivers, and running system scans. This helps maintain system stability and reduces the likelihood of software glitches that might cause visual anomalies.
  • Software Updates: Keep your software applications updated to the latest versions. Software updates often include bug fixes and improvements that can address visual anomalies.
  • Hardware Maintenance: Ensure that your hardware components are functioning correctly. Regularly clean your system and check for any signs of hardware failure.
  • Backup Your Data: Regularly back up your important data. This helps protect your data in case of unforeseen system issues that might require a system reset or reinstall.

Conclusion: A Deeper Understanding of the Red Border Phenomenon

The appearance of a red border around windows in Windows 10 is not necessarily a cause for alarm. It is often a visual cue indicating a specific system state or a minor software glitch. By understanding the potential causes and employing the outlined troubleshooting steps, users can effectively address the red border phenomenon and restore their system’s normal visual appearance. Remember, regular system maintenance, software updates, and hardware checks can help prevent future occurrences of this visual anomaly.

Red Border Around Screen Windows 10  Peatix Why Are there red borders. In the system monitor and desktop settings? : r/ManjaroLinux How To Turn Off Window Border Color In Windows 11 The - vrogue.co
How to Turn Off Window Border Color in Windows 11 [Tutorial] - YouTube The Windows 11 window border is still missing from certain parts of the OS Border Theories โ€“ The New Inquiry
FIX Black Border In Windows 11  Change Resolution - YouTube Avection Fog: A Comprehensive Guide to Understanding and Dealing with this Weather Phenomenon

Closure

Thus, we hope this article has provided valuable insights into Understanding the Red Border Phenomenon in Windows 10: A Comprehensive Guide. We appreciate your attention to our article. See you in our next article!

The Importance Of Antivirus Protection In Windows 10: A Comprehensive Guide

The Importance of Antivirus Protection in Windows 10: A Comprehensive Guide

Introduction

With great pleasure, we will explore the intriguing topic related to The Importance of Antivirus Protection in Windows 10: A Comprehensive Guide. Let’s weave interesting information and offer fresh perspectives to the readers.

The Importance of Antivirus Protection in Windows 10: A Comprehensive Guide

Whatโ€™s the Best Antivirus for Windows 10? (Comprehensive Guide)

Windows 10, despite its robust security features, remains susceptible to various cyber threats. These threats range from malicious software (malware) like viruses, worms, and Trojans to phishing attacks and data breaches. Installing and maintaining a reliable antivirus program is essential for safeguarding your computer and personal information.

Understanding the Need for Antivirus Protection

Modern operating systems like Windows 10 incorporate several built-in security measures, including firewalls and anti-malware components. However, these defenses are not foolproof. Cybercriminals constantly evolve their tactics, developing new and sophisticated methods to bypass existing security protocols.

Antivirus software plays a crucial role in bolstering your system’s defenses. It provides an additional layer of protection by:

  • Detecting and removing malware: Antivirus programs scan your system for suspicious files and programs, identifying and removing known threats. They also utilize advanced heuristics and machine learning algorithms to detect novel malware variants.
  • Blocking malicious websites and downloads: Antivirus software can prevent access to websites known to host malware or phishing schemes. It also monitors downloads for suspicious files, preventing them from entering your system.
  • Protecting your personal information: Antivirus programs can help safeguard sensitive data like passwords, financial information, and personal files from theft or unauthorized access. They often include features like anti-phishing and anti-ransomware capabilities.
  • Real-time protection: Modern antivirus solutions provide real-time protection, constantly monitoring your system for threats and blocking them before they can cause damage.

Choosing the Right Antivirus Solution

The market offers a wide range of antivirus software, each with its own features and pricing. Choosing the right solution depends on your individual needs and budget. Consider these factors when making your selection:

  • Features: Evaluate the features offered by different antivirus programs, such as real-time protection, malware detection and removal, phishing protection, and anti-ransomware capabilities.
  • Performance: Ensure the antivirus software you choose doesn’t significantly impact your system’s performance. Look for programs with minimal resource consumption and efficient scanning algorithms.
  • Ease of use: Select a program with a user-friendly interface, making it easy to manage and configure.
  • Customer support: Consider the availability and quality of customer support offered by the antivirus vendor.
  • Cost: Determine the pricing structure and choose a program that fits your budget.

Maintaining Your Antivirus Protection

Once you have installed an antivirus program, it is crucial to maintain it properly to ensure optimal protection. Here are some essential tips:

  • Regularly update your antivirus software: Antivirus vendors constantly update their software databases with the latest threat information. Ensure you enable automatic updates to keep your protection current.
  • Run regular scans: Schedule regular full system scans to detect any malware that may have evaded real-time detection.
  • Be cautious when browsing the internet: Avoid clicking on suspicious links or downloading files from untrusted sources.
  • Keep your operating system and software updated: Software updates often include security patches that address vulnerabilities exploited by malware.

FAQs

Q: Is Windows Defender sufficient for antivirus protection?

A: Windows Defender, the built-in antivirus solution in Windows 10, offers basic protection against common threats. However, it may not be as comprehensive as third-party antivirus programs, especially in detecting and removing advanced malware.

Q: Can I use multiple antivirus programs simultaneously?

A: Using multiple antivirus programs simultaneously can lead to conflicts and performance issues. It is generally recommended to use only one antivirus program at a time.

Q: How often should I run a full system scan?

A: It is recommended to run a full system scan at least once a month, or more frequently if you suspect your system may be infected.

Q: What should I do if my antivirus program detects a threat?

A: If your antivirus program detects a threat, follow the instructions provided by the program. This may involve quarantining or removing the infected file or program.

Conclusion

Installing and maintaining a reliable antivirus program is essential for safeguarding your Windows 10 computer from cyber threats. By choosing a reputable antivirus solution and following best practices for maintaining your protection, you can significantly reduce the risk of malware infections and protect your personal information. Remember, proactive security measures are crucial for navigating the ever-evolving landscape of cyber threats.

How important is antivirus software Best Free Antivirus for Windows 10: A Comprehensive Guide - The Knowledge Hub Comprehensive Guide to the Best Free Antivirus for Windows 10 - Ehmtic 2014
Importance of Antivirus Software: Protect Computers from Cyber Threat Best Antivirus for Windows 10 - YouTube Does Windows 10 Need Antivirus Protection?
6 Best Free Windows 10 Antivirus Software in (2024) Top 10 Best Antivirus Software For Windows 10 - Techarticle

Closure

Thus, we hope this article has provided valuable insights into The Importance of Antivirus Protection in Windows 10: A Comprehensive Guide. We hope you find this article informative and beneficial. See you in our next article!

Understanding "Qual O Meu Windows 10"

Understanding "Qual o Meu Windows 10"

Introduction

With enthusiasm, let’s navigate through the intriguing topic related to Understanding "Qual o Meu Windows 10". Let’s weave interesting information and offer fresh perspectives to the readers.

Understanding "Qual o Meu Windows 10"

Como descobrir qual รฉ o meu Windows?

"Qual o Meu Windows 10" translates to "What is my Windows 10" in Portuguese. This phrase encapsulates the user’s need to understand their specific Windows 10 configuration, particularly its version, edition, and build number. Knowing these details is crucial for several reasons, ranging from troubleshooting software issues to ensuring compatibility with specific applications and hardware.

The Importance of Knowing Your Windows 10 Version

Determining the Windows 10 version installed on a computer is a foundational step in many computing tasks. It allows users to:

  • Identify System Requirements: Specific applications and games may have minimum system requirements that include a certain Windows 10 version. Knowing your version helps you avoid compatibility issues.
  • Troubleshoot Software Problems: Some software errors are specific to certain Windows 10 versions. Knowing your version can assist in finding relevant troubleshooting guides and solutions.
  • Access Updates: Windows 10 receives regular updates that address bugs, enhance security, and introduce new features. Knowing your version helps you identify the appropriate updates for your system.
  • Ensure Security: Windows 10 releases security patches to address vulnerabilities. Knowing your version ensures that you are receiving the latest security updates.
  • Optimize Performance: Certain Windows 10 versions may have different performance characteristics. Knowing your version allows you to adjust settings and optimize your system for optimal performance.

How to Determine Your Windows 10 Version

Several methods allow you to determine your Windows 10 version:

  • Settings App:

    • Open the Settings app.
    • Click on System.
    • Select About.
    • The Windows specifications section will display your Windows 10 version, edition, and build number.
  • Control Panel:

    • Open the Control Panel.
    • Navigate to System and Security.
    • Click on System.
    • The System window will display your Windows 10 version, edition, and build number.
  • Command Prompt:

    • Open the Command Prompt as an administrator.
    • Type winver and press Enter.
    • A window will display your Windows 10 version, edition, and build number.
  • Third-Party Tools:

    • Various free and paid third-party tools provide detailed system information, including Windows 10 version details.

Understanding the Components of Windows 10 Version Information

  • Version: This indicates the major version of Windows 10, for example, 21H2.
  • Edition: This specifies the specific feature set and functionalities included in the version, such as Home, Pro, Enterprise, or Education.
  • Build Number: This number represents a specific release of the Windows 10 version, indicating the latest updates and bug fixes.

Frequently Asked Questions (FAQs)

Q: Why is it important to know my Windows 10 version?
A: Knowing your Windows 10 version helps you identify system requirements, troubleshoot software issues, access updates, ensure security, and optimize performance.

Q: How can I update my Windows 10 version?
A: Windows 10 automatically checks for updates and installs them in the background. You can manually check for updates by opening the Settings app, navigating to Update & Security, and clicking on Check for updates.

Q: How can I find out which Windows 10 version is the latest?
A: The latest version of Windows 10 is usually available on the official Microsoft website. You can also find information about the latest version in the Windows Update settings.

Q: What are the differences between Windows 10 Home, Pro, and Enterprise editions?
A: Each edition of Windows 10 offers different features and functionalities. Home is designed for everyday users, Pro includes advanced features for businesses and professionals, and Enterprise is designed for large organizations.

Q: Can I downgrade my Windows 10 version?
A: Downgrading to a previous version of Windows 10 may not always be possible, depending on your specific situation. It is recommended to consult Microsoft’s documentation or contact their support team for guidance.

Tips for Understanding Your Windows 10 Version

  • Keep your Windows 10 up to date: Regular updates ensure you have the latest features, security patches, and performance improvements.
  • Back up your data: Before making any significant changes to your system, such as upgrading or downgrading your Windows 10 version, back up your important data to avoid losing it.
  • Consult Microsoft’s documentation: Microsoft’s official documentation provides detailed information about Windows 10 versions, features, and troubleshooting tips.
  • Seek help from a qualified technician: If you are unsure about your Windows 10 version or encounter any problems, seek assistance from a qualified computer technician.

Conclusion

Understanding your Windows 10 version is essential for maintaining a smooth and secure computing experience. By knowing your specific version, edition, and build number, you can optimize system performance, troubleshoot software issues, ensure compatibility, and stay informed about the latest updates and security patches. By taking the time to understand your Windows 10 version, you can enhance your computing experience and ensure that your system is running efficiently and securely.

Como saber qual versรฃo do Windows 10 estou usando? - Meu Windows Windows 10: Qual รฉ a minha versรฃo? Saiba como ver.  i-Tรฉcnico UNDERSTANDING WINDOWS 10 - YouTube
Understanding Windows 10 - YouTube Tudo sobre o Windows 10: As diferenรงas entre o Windows 10 e o Windows 8 COMO SABER A VERSรƒO DO MEU WINDOWS 10 - YouTube
Como saber qual รฉ a versรฃo e a compilaรงรฃo do meu Windows 10 - YouTube Windows 10: 3 formas para ver as especificaรงรตes do seu PC

Closure

Thus, we hope this article has provided valuable insights into Understanding "Qual o Meu Windows 10". We appreciate your attention to our article. See you in our next article!

A Comprehensive Guide To OCaml For Windows

A Comprehensive Guide to OCaml for Windows

Introduction

With great pleasure, we will explore the intriguing topic related to A Comprehensive Guide to OCaml for Windows. Let’s weave interesting information and offer fresh perspectives to the readers.

A Comprehensive Guide to OCaml for Windows

Get Up and Running With OCaml ยท OCaml Tutorials

OCaml, a powerful and versatile programming language, has gained significant traction in various domains, from academia to industry. Its strong static typing, robust type inference, and efficient execution make it an ideal choice for developing reliable and high-performance software. While OCaml’s primary focus historically lay in Unix-based systems, its accessibility on Windows platforms has grown considerably, empowering developers to leverage its strengths across diverse environments.

This guide aims to provide a comprehensive overview of OCaml for Windows, delving into its key features, installation process, essential tools, and practical applications. By exploring these facets, the guide seeks to illuminate the advantages of OCaml for Windows users and equip them with the necessary knowledge to embark on their OCaml programming journey.

Understanding OCaml’s Strengths

OCaml’s appeal stems from its unique combination of features that cater to diverse programming needs:

1. Static Typing: OCaml employs a strong static type system, which means the compiler verifies the type compatibility of variables and expressions at compile time. This rigorous type checking helps catch errors early in the development cycle, leading to more robust and reliable code.

2. Type Inference: One of OCaml’s most powerful features is its advanced type inference mechanism. This allows developers to write code without explicitly specifying the types of variables and functions. The compiler automatically infers the types based on the context, simplifying code writing and enhancing readability.

3. Functional Programming Paradigm: OCaml embraces a functional programming paradigm, emphasizing the use of functions as first-class citizens. This approach promotes code reusability, modularity, and clarity, making it easier to write and maintain complex programs.

4. Imperative Programming Capabilities: While OCaml excels in functional programming, it also provides imperative programming features, allowing developers to work with mutable data structures and side effects when necessary. This flexibility enables OCaml to address a wide range of programming tasks.

5. Efficient Execution: OCaml’s compiler generates highly optimized native code, ensuring efficient execution of programs. This performance advantage is particularly valuable for resource-intensive applications and systems programming.

6. Extensive Libraries: OCaml boasts a rich ecosystem of libraries and tools, covering various domains such as web development, data science, and system programming. These libraries provide pre-built components and functionalities, accelerating development and reducing the need to reinvent the wheel.

Installation and Setup on Windows

Installing OCaml on Windows is a straightforward process, thanks to the availability of pre-built binaries and package managers.

1. Using the Official Installer: The official OCaml website provides a convenient installer for Windows. This installer includes the OCaml compiler, standard library, and essential tools. Download the installer from the official website and follow the on-screen instructions to complete the installation.

2. Employing Package Managers: Several package managers simplify the installation and management of OCaml and its dependencies on Windows. Popular options include:

* **Chocolatey:** This package manager for Windows allows you to install OCaml using the command `choco install ocaml`. 
* **Scoop:** Another package manager for Windows, Scoop offers a similar approach to Chocolatey, enabling you to install OCaml with `scoop install ocaml`. 
* **Opam:** Opam, a package manager specifically designed for OCaml, provides a comprehensive repository of OCaml packages and tools. While Opam is typically associated with Unix-based systems, it can be installed and used on Windows with some configuration.

3. Setting Up the Environment: After installing OCaml, you need to configure your environment to access the compiler and other tools. This typically involves adding the OCaml installation directory to your system’s PATH variable. Refer to your operating system’s documentation for instructions on modifying the PATH variable.

4. Verifying Installation: To ensure successful installation, open a command prompt or terminal and type ocaml followed by the Enter key. If the installation is successful, you should see the OCaml interactive toplevel prompt.

Essential Tools for OCaml Development

Beyond the core OCaml compiler, several tools enhance the development experience and streamline workflows:

1. OCaml IDEs and Editors:

* **Visual Studio Code:** A popular and versatile code editor, Visual Studio Code offers excellent support for OCaml through extensions. 
* **Emacs:** A powerful and customizable editor, Emacs provides extensive OCaml support, including syntax highlighting, code completion, and debugging.
* **Vim:** Another highly customizable editor, Vim also offers OCaml support through plugins and extensions.

2. Build Systems: Build systems automate the process of compiling and linking OCaml projects. Popular options include:

* **Dune:** A modern and efficient build system designed for OCaml, Dune provides a flexible and powerful way to manage projects.
* **OCamlbuild:** A traditional build system for OCaml, OCamlbuild offers a more straightforward approach to project management.

3. Documentation and Resources:

* **OCaml Documentation:** The official OCaml website provides comprehensive documentation, including language reference, tutorials, and API documentation.
* **OCaml Community:** The OCaml community is active and supportive, offering forums, mailing lists, and online resources where developers can ask questions and share knowledge.

Practical Applications of OCaml for Windows

OCaml’s versatility and efficiency make it suitable for a wide range of applications, including:

1. Web Development: OCaml’s functional programming paradigm, strong type system, and efficient execution make it well-suited for web development. Frameworks like OCamlNet and Eliom provide tools for building web applications, APIs, and web services.

2. Data Science and Machine Learning: OCaml’s libraries like Owl and Batteries offer powerful tools for data manipulation, analysis, and machine learning. These libraries provide functionalities for numerical computation, linear algebra, and statistical modeling.

3. System Programming: OCaml’s performance and low-level access capabilities make it suitable for system programming tasks. It can be used to develop operating system components, network protocols, and embedded systems.

4. Financial Modeling and Trading: OCaml’s precision, reliability, and performance make it a preferred choice for financial modeling and high-frequency trading applications.

5. Compiler and Language Development: OCaml’s metaprogramming capabilities and strong type system make it an excellent choice for building compilers and other language tools.

FAQs

1. Is OCaml suitable for beginners?

OCaml’s functional programming paradigm and strong type system may pose a learning curve for beginners accustomed to imperative languages. However, its clear syntax, extensive documentation, and active community provide ample resources for learning and support.

2. Is OCaml suitable for large-scale projects?

Yes, OCaml’s strong type system, modularity, and efficient execution make it well-suited for large-scale projects. Its functional programming approach promotes code reusability and maintainability, facilitating collaboration and reducing complexity.

3. How does OCaml compare to other languages like Python or Java?

OCaml offers advantages in performance, type safety, and functional programming capabilities compared to Python. While Java offers similar features, OCaml generally provides more concise and expressive syntax.

4. What are the limitations of OCaml?

OCaml’s functional programming paradigm may require a shift in thinking for programmers accustomed to imperative languages. Additionally, its smaller community compared to languages like Python or Java might mean fewer readily available libraries and tools for specific domains.

Tips for Effective OCaml Development on Windows

1. Embrace Functional Programming: Leverage OCaml’s functional programming capabilities to write concise, reusable, and modular code.

2. Utilize Type Inference: Take advantage of OCaml’s type inference to simplify code writing and enhance readability.

3. Choose a Suitable IDE or Editor: Select an IDE or editor that provides robust OCaml support, such as Visual Studio Code, Emacs, or Vim.

4. Explore OCaml Libraries: Familiarize yourself with OCaml’s extensive libraries to leverage pre-built components and functionalities.

5. Engage with the Community: Participate in OCaml forums, mailing lists, and online resources to learn from others and seek assistance when needed.

Conclusion

OCaml for Windows offers a powerful and versatile programming environment, empowering developers to build reliable, high-performance software across diverse domains. Its static typing, type inference, functional programming paradigm, and efficient execution make it an excellent choice for a wide range of applications.

By understanding OCaml’s strengths, mastering its installation and setup, and leveraging essential tools, developers can harness its capabilities to create innovative and robust software solutions on Windows platforms. The active OCaml community and comprehensive resources ensure a supportive learning environment for those embarking on their OCaml journey. As OCaml continues to evolve and gain traction, its presence on Windows platforms promises to unlock new possibilities and empower developers to achieve greater heights in software development.

OCaml - Installation and Getting Started on Windows - YouTube Beginner's guide to OCaml beginner's guides. Beginner's guide to OCaml beginner's guides.
TypeRex: OCaml for Windows How to Setup OCaml on Windows with WSL  Tarides Your First Day with OCaml ยท OCaml Tutorials
SOLUTION: Ocaml install guide - Studypool OCaml and 7 Things You Need To Know About It In 2021  Functional Programming  Caml - YouTube

Closure

Thus, we hope this article has provided valuable insights into A Comprehensive Guide to OCaml for Windows. We thank you for taking the time to read this article. See you in our next article!

Navigating The Print Test Page In Windows 11: A Comprehensive Guide

Navigating the Print Test Page in Windows 11: A Comprehensive Guide

Introduction

With great pleasure, we will explore the intriguing topic related to Navigating the Print Test Page in Windows 11: A Comprehensive Guide. Let’s weave interesting information and offer fresh perspectives to the readers.

How To Print A Test Page In Windows 11 From Any Printer

The print test page, a seemingly simple tool often overlooked, plays a crucial role in ensuring the smooth operation of your printer. In the context of Windows 11, this page serves as a diagnostic tool, allowing users to assess the printer’s functionality and identify potential issues. This article delves into the intricacies of the print test page in Windows 11, exploring its significance, utilization, and troubleshooting potential problems.

Understanding the Significance of the Print Test Page

The print test page is more than just a blank sheet with a few lines of text. It acts as a comprehensive diagnostic tool, enabling users to assess various aspects of their printer’s functionality. This includes:

  • Verification of Connectivity: The successful printing of the test page confirms a proper connection between the printer and the computer. It helps identify issues like faulty cables, incorrect network configurations, or driver problems.
  • Assessment of Print Quality: The test page displays various elements like text, graphics, and color patterns. This allows users to gauge the printer’s overall print quality, detecting potential problems like blurry text, faded colors, or misaligned printouts.
  • Evaluation of Hardware Functionality: The test page incorporates specific elements designed to test different aspects of the printer’s hardware. For instance, it might include a pattern of lines to check the alignment of the print head, a grid to assess the paper feeding mechanism, or a color chart to evaluate the ink cartridges.
  • Identification of Paper Jams: A failed print test page can indicate a paper jam within the printer. This allows users to quickly identify and resolve the issue before it affects other print jobs.
  • Troubleshooting Driver Issues: The print test page can help identify issues related to printer drivers. If the test page prints incorrectly, it might suggest a problem with the driver installation or configuration.

Accessing and Printing the Test Page in Windows 11

Printing a test page in Windows 11 is a straightforward process. Users can access this feature through the following steps:

  1. Open the Settings App: Navigate to the "Start" menu and select "Settings".
  2. Access Bluetooth & Devices: In the Settings app, click on "Bluetooth & devices".
  3. Select Printers & Scanners: From the left-hand menu, choose "Printers & scanners".
  4. Locate the Desired Printer: Identify the printer you wish to test from the list of available devices.
  5. Open Printer Properties: Click on the printer’s name and select "Manage".
  6. Access Printer Properties: In the printer properties window, click on the "Printer Properties" button.
  7. Print Test Page: In the "General" tab, locate and click on the "Print Test Page" button.

The printer will then initiate the printing process, delivering the test page to the designated output tray.

Interpreting the Print Test Page: Deciphering the Output

Once the test page is printed, carefully examine it for any anomalies or discrepancies. Here’s a breakdown of common elements and potential issues:

  • Text: The text on the test page should be clear, sharp, and aligned correctly. Any blurriness, fading, or misalignment could indicate problems with the print head, ink cartridges, or driver settings.
  • Graphics: The graphics on the test page, including lines, patterns, and color blocks, should be crisp and well-defined. Distortion, faded colors, or missing elements might suggest issues with the print head alignment, ink cartridges, or printer settings.
  • Color Chart: If the test page includes a color chart, ensure all colors are vibrant and accurately represented. Faint or missing colors could indicate ink cartridge issues or a problem with the printer’s color settings.
  • Paper Feed: The test page should be printed on the correct paper type and size. Any misalignment or uneven printing could point to problems with the paper feeding mechanism.
  • Alignment: The print head alignment is crucial for accurate printing. The test page should display straight lines and consistent patterns, indicating proper alignment. If the lines are crooked or the patterns are misaligned, the print head might need adjustment.

Troubleshooting Common Print Test Page Issues

If the print test page displays anomalies or fails to print successfully, troubleshooting is essential. Here are some common issues and their potential solutions:

  • Connectivity Problems: If the test page doesn’t print, ensure the printer is correctly connected to the computer. Check the cables, network settings, and driver installations.
  • Paper Jams: If the printer jams during the test page printing process, carefully remove the jammed paper. Refer to the printer’s manual for specific instructions on clearing paper jams.
  • Ink Cartridge Issues: If the printed text or graphics appear faded or missing colors, check the ink cartridges. Ensure they are properly installed, have sufficient ink levels, and are not faulty.
  • Print Head Alignment: If the print test page displays misaligned lines or patterns, adjust the print head alignment using the printer’s control panel or software settings.
  • Driver Problems: If the test page prints incorrectly, update or reinstall the printer driver. Ensure the driver is compatible with the printer model and operating system.

FAQs on Print Test Page in Windows 11

Q: What if the print test page prints blank?

A: A blank print test page could indicate a problem with the printer’s ink cartridges, print head, or paper feeding mechanism. Check the ink levels, ensure the print head is properly installed, and inspect the paper path for any obstructions.

Q: What if the print test page is misaligned?

A: Misaligned print test pages suggest a problem with the print head alignment. Use the printer’s control panel or software settings to adjust the print head alignment.

Q: Why is the print test page printing in black and white instead of color?

A: This could be due to incorrect printer settings or a problem with the color ink cartridges. Check the printer settings to ensure color printing is enabled and verify the color ink cartridges are installed and have sufficient ink levels.

Q: How often should I print a test page?

A: It’s recommended to print a test page periodically, especially after replacing ink cartridges or experiencing printing problems. This allows you to proactively identify potential issues before they affect other print jobs.

Tips for Utilizing the Print Test Page Effectively

  • Print a test page regularly: This helps monitor the printer’s performance and identify potential issues early on.
  • Use the test page to troubleshoot printing problems: If you encounter problems with other print jobs, print a test page to assess the printer’s overall functionality.
  • Refer to the printer’s manual: The manual provides detailed instructions on interpreting the test page and troubleshooting common issues.
  • Keep a record of test page results: Documenting the date, time, and any anomalies observed on the test page can be helpful for future troubleshooting.

Conclusion

The print test page, often overlooked, plays a crucial role in maintaining a healthy and functional printing ecosystem. In Windows 11, it serves as a valuable diagnostic tool, allowing users to assess the printer’s connectivity, print quality, hardware functionality, and identify potential issues. By understanding the significance, utilization, and troubleshooting techniques associated with the print test page, users can effectively diagnose and resolve printer problems, ensuring optimal printing performance.

Windows 11 and the test page printout? How To Print A Test Page In Windows 11 From Any Printer Print printer test page in windows 11?
How to Print a Printer Test Page in Windows 11  Printer Test Page The Ultimate Guide to Windows 11 Printer Test Page ยป Print Test Page How to Print a Test Page in Windows 11 without using any tool
How To Print Windows Test Page In Windows 11 - YouTube How To Print A Test Page With Printer in Windows 11 - YouTube

Closure

Thus, we hope this article has provided valuable insights into Navigating the Print Test Page in Windows 11: A Comprehensive Guide. We hope you find this article informative and beneficial. See you in our next article!

Windows 10’s Visual Identity: A Journey Through Official Wallpapers

Windows 10’s Visual Identity: A Journey Through Official Wallpapers

Introduction

In this auspicious occasion, we are delighted to delve into the intriguing topic related to Windows 10’s Visual Identity: A Journey Through Official Wallpapers. Let’s weave interesting information and offer fresh perspectives to the readers.

Windows 10’s Visual Identity: A Journey Through Official Wallpapers

Microsoft Reveals the Official Windows 10 Wallpaper

Windows 10, upon its release in 2015, marked a significant shift in Microsoft’s design philosophy. The operating system’s visual identity, meticulously crafted through its user interface and background imagery, aimed to create a user experience that was both aesthetically pleasing and functionally intuitive. This visual identity is embodied, in part, by the official wallpapers that accompany Windows 10, serving as a visual representation of the operating system’s core values and aesthetic sensibilities.

These wallpapers, often referred to as "hero images," are not merely decorative elements; they are carefully curated to reflect the spirit of Windows 10. They showcase a diverse range of themes, from vibrant landscapes and abstract patterns to minimalist designs and captivating cityscapes. This diversity reflects the broad appeal and adaptability of Windows 10, catering to a wide range of user preferences and aesthetic sensibilities.

A Glimpse into the Design Philosophy

The selection of official wallpapers for Windows 10 is a deliberate process, reflecting a commitment to visual storytelling and user engagement. Each wallpaper serves as a microcosm of the operating system’s design principles, emphasizing key aspects such as:

  • Modernity and Simplicity: Windows 10’s wallpapers often feature clean lines, minimal clutter, and a focus on showcasing the subject matter without distracting elements. This aligns with the operating system’s commitment to a streamlined and user-friendly interface.
  • Dynamic and Evocative Imagery: The wallpapers frequently depict scenes that inspire a sense of movement, exploration, and connection. This resonates with the dynamic nature of Windows 10 and its ability to facilitate a wide range of tasks and experiences.
  • Color Harmony and Visual Appeal: Windows 10 wallpapers are carefully crafted to evoke specific emotions and moods. They employ color palettes and compositions that are visually pleasing and harmonious, enhancing the overall user experience.
  • Cultural Relevance and Inclusivity: The selection of themes and imagery in Windows 10 wallpapers reflects a global perspective, showcasing diverse cultures and landscapes. This commitment to inclusivity is a core value of Windows 10, aiming to resonate with users worldwide.

Beyond Aesthetics: The Practical Benefits

While the aesthetic appeal of Windows 10 wallpapers is undeniable, they also serve practical purposes:

  • Personalization and Expression: Users can choose from a diverse range of official wallpapers, allowing them to personalize their desktops and express their individual styles. This customization option enhances the user experience, making the operating system feel more personal and engaging.
  • Visual Clarity and Focus: The choice of wallpaper can significantly influence a user’s focus and productivity. Subtle backgrounds with minimal distractions can create a calm and focused work environment, while more vibrant and engaging wallpapers might be suitable for creative tasks.
  • Enhanced User Interface: The wallpapers seamlessly integrate with the overall design of Windows 10, enhancing the visual coherence and aesthetic appeal of the user interface. This creates a cohesive and visually pleasing experience for users, contributing to a positive perception of the operating system.

Frequently Asked Questions about Windows 10 Wallpapers

1. Where can I find the official Windows 10 wallpapers?

The official Windows 10 wallpapers are typically included with the operating system, accessible through the "Settings" app under "Personalization" and then "Background." Additionally, they can often be downloaded from Microsoft’s website or through various online resources.

2. Can I change the Windows 10 wallpaper?

Yes, users can easily change the Windows 10 wallpaper by navigating to "Settings" > "Personalization" > "Background" and selecting a different image from the available options or uploading a custom image.

3. Are there different types of Windows 10 wallpapers?

Yes, Windows 10 offers a diverse range of wallpapers, including:

  • Default wallpapers: These are the wallpapers that come pre-installed with Windows 10.
  • Theme-based wallpapers: Microsoft often releases themed wallpaper collections that align with specific events, holidays, or seasons.
  • Dynamic wallpapers: These wallpapers change throughout the day, showcasing different images based on the time of day or weather conditions.
  • User-created wallpapers: Users can create their own wallpapers and use them as their desktop background.

4. Are Windows 10 wallpapers available in different resolutions?

Yes, Windows 10 wallpapers are often available in various resolutions to accommodate different screen sizes and display settings. Users can select the resolution that best suits their needs.

Tips for Using Windows 10 Wallpapers Effectively

  • Consider your personal preferences: Choose wallpapers that resonate with your personal style and aesthetic sensibilities.
  • Think about the purpose of your desktop: Select wallpapers that support the tasks you typically perform on your computer.
  • Experiment with different themes and styles: Don’t be afraid to try out different wallpapers to see what works best for you.
  • Use high-resolution images: Ensure that the wallpapers you use are high-resolution to avoid pixelation and ensure a visually appealing experience.
  • Keep it simple: Avoid using wallpapers that are overly busy or distracting, as they can negatively impact focus and productivity.

Conclusion

The official wallpapers of Windows 10 are not merely decorative elements; they are integral to the operating system’s visual identity and user experience. They reflect Microsoft’s commitment to aesthetic excellence, user engagement, and inclusivity. By thoughtfully curating a diverse range of themes, colors, and imagery, Windows 10 wallpapers create a visually appealing and personalized experience for users, enhancing the overall perception and functionality of the operating system. As Windows 10 continues to evolve, it is likely that the official wallpapers will continue to play a vital role in shaping its visual identity and user experience, reflecting the dynamic and ever-changing nature of the digital landscape.

Microsoft Reveals the Official Windows 10 Wallpaper Microsoft Windows 10 Wallpaper Official - WallpaperSafari Microsoft Reveals the Official Windows 10 Wallpaper
Windows 10 Official Wallpapers - Wallpaper Cave Microsoft Windows 10 Wallpapers Wallpaper Cave Images - vrogue.co HD wallpaper: Windows 10, graphic design  Wallpaper Flare
Windows 10 Hero Wallpaper 1080 - WallpaperSafari Free Download Official Windows Wallpaper For Desktop - vrogue.co

Closure

Thus, we hope this article has provided valuable insights into Windows 10’s Visual Identity: A Journey Through Official Wallpapers. We thank you for taking the time to read this article. See you in our next article!

A Comprehensive Guide To Outlook In 2025: Navigating The Future Of Email And Productivity

A Comprehensive Guide to Outlook in 2025: Navigating the Future of Email and Productivity

Introduction

In this auspicious occasion, we are delighted to delve into the intriguing topic related to A Comprehensive Guide to Outlook in 2025: Navigating the Future of Email and Productivity. Let’s weave interesting information and offer fresh perspectives to the readers.

A Comprehensive Guide to Outlook in 2025: Navigating the Future of Email and Productivity

Outlook Calendar 2025: A Comprehensive Guide To Enhanced Productivity And Collaboration

As we approach the year 2025, the landscape of communication and productivity tools is evolving rapidly. While the exact features of Microsoft Outlook in 2025 remain under wraps, the existing trends and Microsoft’s commitment to innovation provide valuable insights into the potential future of this ubiquitous email client.

Understanding the Evolution of Outlook

Microsoft Outlook has consistently been at the forefront of email management and productivity. Over the years, it has seamlessly integrated with other Microsoft products, offering a unified experience for users. This integration has been a key driver of its success, allowing users to manage their calendar, tasks, contacts, and emails all within a single platform.

Predicting the Future of Outlook

Looking ahead, several key factors suggest the direction Outlook might take in 2025:

  • Enhanced Collaboration and Integration: The increasing demand for seamless collaboration will likely drive further integration with Microsoft Teams and other collaborative platforms. Expect features that streamline communication within teams, facilitate project management, and enable real-time co-authoring of documents directly from within Outlook.
  • AI-Powered Assistance: Artificial intelligence (AI) will likely play a significant role in enhancing Outlook’s capabilities. AI-powered features could include:
    • Smart Email Sorting: Categorizing emails based on importance, sender, and content.
    • Personalized Suggestions: Providing recommendations for scheduling meetings, prioritizing tasks, and responding to emails.
    • Automated Task Management: Creating and assigning tasks based on email content.
    • Improved Search Functionality: Leveraging AI to provide more accurate and relevant search results.
  • Enhanced Security and Privacy: Data security and privacy will remain paramount. Expect robust encryption protocols, advanced phishing detection mechanisms, and granular control over data access.
  • Cross-Platform Compatibility: Microsoft’s commitment to cross-platform compatibility will likely extend to Outlook, ensuring seamless access across various devices, including desktops, laptops, tablets, and smartphones.
  • Focus on User Experience: Outlook will likely prioritize user experience, offering a clean, intuitive interface and a focus on accessibility. Expect customizable themes, personalized layouts, and features that cater to individual preferences.

The Importance of Outlook in 2025

The evolution of Outlook in 2025 will be crucial for businesses and individuals alike. Its enhanced capabilities will empower users to:

  • Increase Productivity: AI-powered features will help users manage their time effectively, prioritize tasks, and automate repetitive actions.
  • Improve Communication: Seamless integration with collaborative platforms will facilitate team communication and project management.
  • Enhance Security: Robust security measures will protect sensitive data and ensure privacy.
  • Stay Organized: Outlook will continue to provide a centralized platform for managing emails, calendar appointments, contacts, and tasks.

FAQs

Q: Will Outlook in 2025 be available for Windows 10?

A: It is highly likely that Outlook in 2025 will be compatible with Windows 10. Microsoft typically supports its software for a reasonable period, and Windows 10 is expected to remain a widely used operating system in 2025. However, it’s always advisable to check Microsoft’s official website for the latest compatibility information.

Q: Will Outlook in 2025 require a subscription?

A: While Microsoft has shifted towards subscription-based models for some of its software, Outlook’s availability in 2025 will depend on Microsoft’s future plans. It’s possible that Outlook might remain available as a standalone product, or it could be included as part of a broader Microsoft 365 suite.

Q: Will Outlook in 2025 be available for other operating systems besides Windows?

A: Microsoft has been expanding its cross-platform compatibility. It’s likely that Outlook in 2025 will be available for macOS, Android, and iOS devices, ensuring accessibility for a wider user base.

Q: Will Outlook in 2025 be compatible with older versions of Windows?

A: Microsoft typically focuses on supporting newer operating systems. While compatibility with older versions of Windows might be available, it’s best to consult Microsoft’s official documentation for the latest information.

Tips for Preparing for Outlook in 2025

  • Stay Updated: Keep your existing version of Outlook updated with the latest patches and updates to ensure optimal performance and security.
  • Explore New Features: Experiment with new features and functionalities introduced in recent Outlook updates to familiarize yourself with the evolving platform.
  • Consider Cloud Storage: Transitioning to cloud-based storage solutions like OneDrive or Microsoft 365 can provide greater flexibility and accessibility.
  • Embrace Collaboration Tools: Familiarize yourself with collaborative platforms like Microsoft Teams to optimize team communication and project management.
  • Focus on Digital Literacy: Enhance your digital literacy by exploring resources on data security, privacy, and best practices for managing online accounts.

Conclusion

The future of Outlook in 2025 promises significant advancements in communication, productivity, and security. By staying informed about the evolving features and embracing new technologies, users can leverage Outlook’s capabilities to enhance their professional and personal lives. Microsoft’s commitment to innovation ensures that Outlook will continue to be a leading email client and productivity platform for years to come.

What is the Future of Email in 2025? We Asked the Experts Outlook Calendar 2025: A Comprehensive Guide To Enhanced Productivity And Collaboration How to Test Drive Microsoft Outlook's Future Look
Microsoft unveils the future of Outlook, and you can try it right now  PCWorld A Comprehensive Guide to Outlook Shortcuts and Tips 3 Real-World Ways To Organize & Automate Your Email Tasks In Outlook
Microsoft Outlook: A Crash Course from Novice to Advanced  Unlock All Features to Streamline Outlook for the future stock illustration. Illustration of development - 232903549

Closure

Thus, we hope this article has provided valuable insights into A Comprehensive Guide to Outlook in 2025: Navigating the Future of Email and Productivity. We appreciate your attention to our article. See you in our next article!

R For Windows 10: A Comprehensive Guide To Statistical Computing And Data Visualization

R for Windows 10: A Comprehensive Guide to Statistical Computing and Data Visualization

Introduction

With enthusiasm, let’s navigate through the intriguing topic related to R for Windows 10: A Comprehensive Guide to Statistical Computing and Data Visualization. Let’s weave interesting information and offer fresh perspectives to the readers.

R for Windows 10: A Comprehensive Guide to Statistical Computing and Data Visualization

R Programming: A Comprehensive Guide to Statistical Computing ยป Let Me Read

R is a free, open-source programming language and software environment widely used for statistical computing, data analysis, and visualization. Its versatility and comprehensive suite of packages make it a powerful tool for researchers, data scientists, and anyone working with data. This guide provides a comprehensive overview of R on Windows 10, highlighting its key features, benefits, and practical applications.

Understanding R: A Foundation for Data Analysis

R’s core strength lies in its statistical capabilities. It offers a vast array of functions for performing complex statistical analyses, including:

  • Descriptive Statistics: Calculating measures like mean, median, standard deviation, and variance.
  • Inferential Statistics: Conducting hypothesis tests, confidence intervals, and regression analysis.
  • Data Manipulation: Cleaning, transforming, and reshaping data using powerful data structures like vectors, matrices, and data frames.
  • Visualization: Creating informative and visually appealing graphs and charts to represent data trends and insights.

Key Features of R for Windows 10

R’s success on Windows 10 stems from its user-friendly interface, extensive package library, and seamless integration with other tools:

  • RStudio: A popular and highly recommended integrated development environment (IDE) for R. It provides a streamlined workspace for writing code, managing projects, and exploring data.
  • CRAN (Comprehensive R Archive Network): A vast repository of over 18,000 packages, offering specialized functions for various domains, including finance, machine learning, bioinformatics, and more.
  • Package Management: R’s package manager simplifies the process of installing, updating, and managing packages, allowing users to access and utilize a wide range of functionalities.
  • Community Support: R boasts a large and active community of users, developers, and enthusiasts, providing extensive resources, forums, and documentation for support and collaboration.

Benefits of Using R on Windows 10

R offers several advantages for users on Windows 10, making it a preferred choice for data analysis and visualization:

  • Free and Open Source: R is freely available for download and use, eliminating the cost barrier often associated with proprietary software. Its open-source nature encourages collaboration and fosters innovation.
  • Powerful Statistical Capabilities: R provides a wide range of statistical functions and packages, enabling users to conduct complex analyses and draw meaningful insights from data.
  • Extensive Visualization Options: R offers diverse visualization libraries, allowing users to create visually appealing and informative graphs, charts, and maps to effectively communicate data insights.
  • Cross-Platform Compatibility: R runs seamlessly on Windows 10, macOS, and Linux, ensuring compatibility across various operating systems.
  • Flexibility and Customization: R’s scripting language provides immense flexibility for customizing analyses, automating tasks, and developing custom functions.

Practical Applications of R on Windows 10

R’s versatility extends to various domains, making it a valuable tool for professionals and researchers across disciplines:

  • Data Science: R is widely used in data science for data mining, machine learning, predictive modeling, and data analysis.
  • Bioinformatics: R plays a crucial role in analyzing biological data, including gene expression, protein interactions, and genomic sequences.
  • Finance: R is used for financial modeling, risk analysis, portfolio optimization, and market research.
  • Marketing: R helps in analyzing customer data, predicting customer behavior, and optimizing marketing campaigns.
  • Academic Research: R is an essential tool for researchers across various fields, enabling statistical analysis, data visualization, and modeling.

FAQs about R for Windows 10

Q1: How do I install R on Windows 10?

A: Installing R on Windows 10 is straightforward. Visit the official CRAN website (https://cran.r-project.org/) and download the appropriate installer for your system. Follow the on-screen instructions to complete the installation.

Q2: What is RStudio, and why should I use it?

A: RStudio is a popular IDE for R, providing a user-friendly environment for coding, managing projects, and visualizing data. It offers features like syntax highlighting, code completion, and interactive plotting, making it an indispensable tool for R users.

Q3: How do I install and use packages in R?

A: You can install packages in R using the install.packages() function. For example, to install the "ggplot2" package, you would use the command install.packages("ggplot2"). Once installed, you can load a package using the library() function, e.g., library(ggplot2).

Q4: Where can I find resources and documentation for R?

A: The official R website (https://www.r-project.org/) provides comprehensive documentation, tutorials, and resources for learning R. Additionally, websites like RDocumentation (https://www.rdocumentation.org/) and Stack Overflow offer extensive Q&A forums and community support.

Q5: Are there any alternative IDEs for R besides RStudio?

A: While RStudio is the most popular IDE, other options include:

  • Visual Studio Code: A versatile code editor with extensions for R support.
  • Rattle: A graphical user interface (GUI) for R, offering a user-friendly interface for data analysis.
  • Jupyter Notebook: A web-based interactive environment for coding, documentation, and visualization.

Tips for Using R on Windows 10

  • Start with the Basics: Begin by learning the fundamental concepts of R, including data types, operators, functions, and control flow.
  • Explore Packages: Experiment with different packages to discover functionalities relevant to your domain.
  • Utilize Online Resources: Leverage online resources like tutorials, documentation, and forums to expand your knowledge and address challenges.
  • Practice Regularly: Consistent practice is key to mastering R. Work on projects, solve problems, and explore new techniques to enhance your skills.
  • Join the Community: Engage with the R community to learn from others, share your experiences, and contribute to the growth of the language.

Conclusion: R – A Powerful Tool for Data Analysis on Windows 10

R stands as a powerful and versatile tool for data analysis, visualization, and statistical computing. Its user-friendly interface, comprehensive package library, and active community make it a popular choice for researchers, data scientists, and anyone working with data on Windows 10. By leveraging its features and resources, users can unlock the potential of data, uncover meaningful insights, and drive informed decision-making.

Data Visualisation Statistical Analysis and Programming in R Data Visualization In R Guide To Data Visualization In R - Vrogue Data visualization using R studio - YouTube
Intro to R R Tutorials - eXtension the beginner's guide to data visualization in r
The R Project for Statistical Computing - Tools - OasisHUB Visualizing Statistics with R: A Comprehensive Guide

Closure

Thus, we hope this article has provided valuable insights into R for Windows 10: A Comprehensive Guide to Statistical Computing and Data Visualization. We appreciate your attention to our article. See you in our next article!