Archives 2024

Navigating Windows 11 Startup Issues: A Comprehensive Guide

Navigating Windows 11 Startup Issues: A Comprehensive Guide

Introduction

In this auspicious occasion, we are delighted to delve into the intriguing topic related to Navigating Windows 11 Startup Issues: A Comprehensive Guide. Let’s weave interesting information and offer fresh perspectives to the readers.

Startup Settings (What It Is and How to Use It)

Windows 11, Microsoft’s latest operating system, boasts numerous enhancements and new features. However, like any software, it can encounter issues during the startup process. These problems, while frustrating, can often be resolved with troubleshooting steps. This article aims to provide a comprehensive guide to understanding and resolving common Windows 11 startup problems, offering practical solutions and insights into the underlying causes.

Understanding Windows 11 Startup Processes

To effectively diagnose and resolve startup issues, it is essential to understand the fundamental processes involved in booting Windows 11. The startup sequence involves a series of steps, beginning with the power-on self-test (POST) by the computer’s BIOS or UEFI firmware, followed by loading the operating system files, and culminating in the user interface appearing on the screen.

Common Windows 11 Startup Problems

Several issues can disrupt this smooth startup process, leading to various symptoms. Some of the most frequent problems include:

  • Black Screen: The computer powers on, but the screen remains black, indicating a failure to display the Windows logo or the desktop.
  • Blue Screen of Death (BSOD): A blue screen with error messages appears, signaling a critical system failure.
  • Endless Boot Loop: The computer restarts repeatedly, failing to progress beyond the initial startup phase.
  • Slow Startup: The computer takes an unusually long time to boot up, indicating potential performance bottlenecks.
  • Error Messages: Specific error messages may appear during startup, providing clues about the underlying problem.

Causes of Windows 11 Startup Problems

These startup issues can stem from various factors:

  • Hardware Malfunctions: Faulty RAM, hard drive, or other hardware components can disrupt the startup process.
  • Software Conflicts: Incompatible or corrupted drivers, applications, or system files can cause conflicts and lead to startup failures.
  • Corrupted System Files: Essential Windows files can become corrupted due to software errors, malware infections, or improper updates.
  • Incorrect Boot Settings: Improperly configured BIOS or UEFI settings can lead to boot failures.
  • Malware Infections: Malicious software can interfere with the startup process, causing unexpected behavior.
  • Overheating: Excessive heat can damage hardware components and lead to system instability, potentially impacting startup.

Troubleshooting Windows 11 Startup Problems

Addressing startup issues requires a systematic approach, starting with simple steps and progressing to more advanced solutions. Here’s a breakdown of troubleshooting methods:

1. Basic Troubleshooting Steps:

  • Restart the Computer: A simple restart can resolve temporary glitches and allow the system to reset itself.
  • Check Hardware Connections: Ensure all hardware components are securely connected, including RAM modules, hard drives, and peripherals.
  • Remove External Devices: Disconnect any external devices, such as USB drives or printers, as they might interfere with startup.
  • Perform a Clean Boot: Start Windows in a minimal state with only essential services and drivers loaded, helping to isolate the source of the problem.
  • Run a System File Checker (SFC) Scan: Use the SFC command to scan for and repair corrupted system files.
  • Update Drivers: Ensure all device drivers are up-to-date, as outdated drivers can cause compatibility issues.
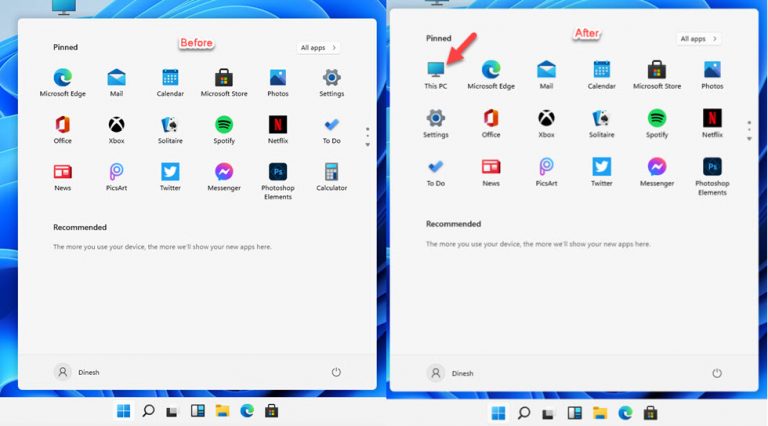
  • Disable Startup Programs: Disable unnecessary startup programs that might be causing conflicts or slowing down the startup process.

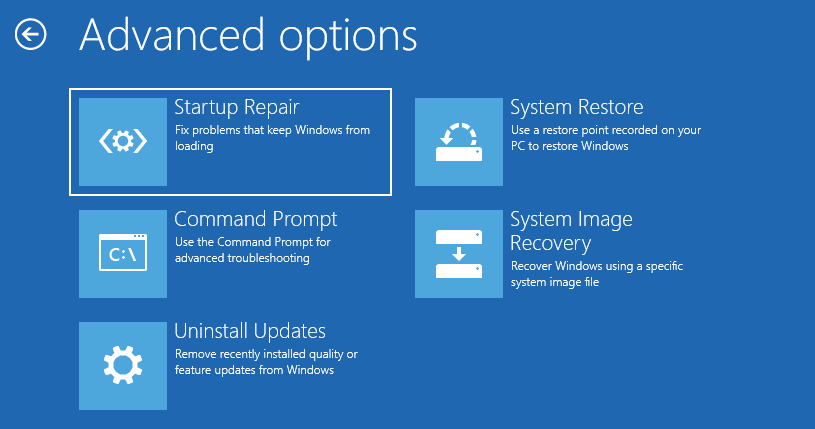
2. Advanced Troubleshooting Techniques:

  • System Restore: Restore the system to a previous point in time when it was working correctly, potentially reverting changes that caused the startup issue.
  • Safe Mode: Boot into Safe Mode, which loads a minimal set of drivers and services, enabling troubleshooting without the interference of potential problem programs.
  • Boot from a Recovery Drive: Create a bootable USB drive or DVD with the Windows 11 recovery environment, allowing you to repair or reset the system.
  • Reinstall Windows: If all other troubleshooting methods fail, a clean reinstall of Windows 11 might be necessary to resolve the issue.

3. Seeking Professional Help:

  • Contact Microsoft Support: Reach out to Microsoft’s support team for technical assistance and guidance.
  • Consult a Computer Technician: If the problem persists, consider consulting a qualified computer technician for hardware diagnosis and repairs.

FAQs about Windows 11 Startup Problems:

Q: What is the Blue Screen of Death (BSOD)?

A: The BSOD is a critical error screen that appears when Windows encounters a fatal system error. It displays error messages and stop codes that can help identify the cause of the problem.

Q: How do I fix a black screen during startup?

A: A black screen can indicate hardware issues, driver conflicts, or corrupted system files. Troubleshooting steps include checking hardware connections, performing a clean boot, updating drivers, and running an SFC scan.

Q: What should I do if my computer is stuck in a boot loop?

A: A boot loop can be caused by corrupted system files, hardware issues, or malware infections. Try restarting the computer, performing a system restore, or booting into Safe Mode for troubleshooting.

Q: Why is my Windows 11 startup slow?

A: Slow startup can result from excessive startup programs, corrupted system files, or hardware performance issues. Disabling unnecessary startup programs, running an SFC scan, and checking hardware health can help improve startup speed.

Q: How can I prevent future startup problems?

A: To minimize startup issues, ensure your system is up-to-date with the latest Windows updates, run regular malware scans, avoid installing suspicious software, and keep your hardware in good working condition.

Tips for Preventing Windows 11 Startup Problems:

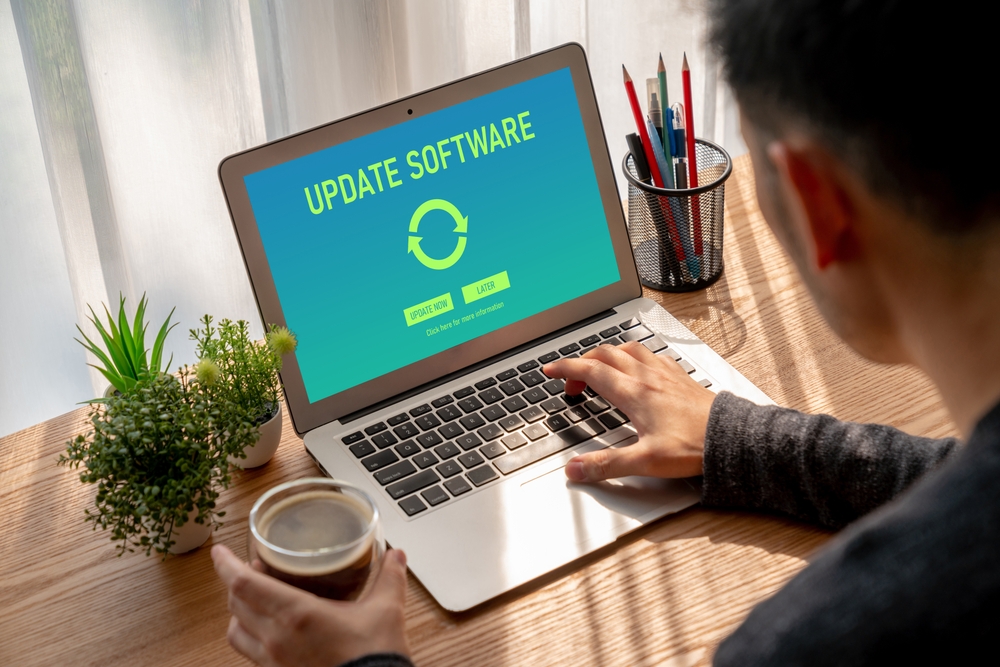
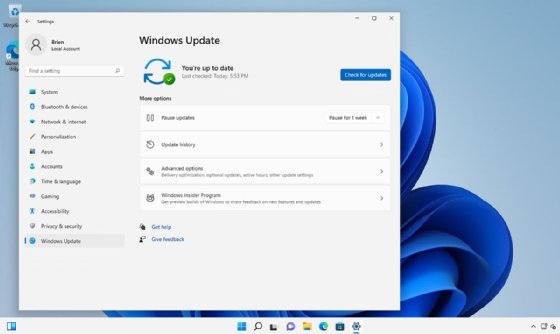
  • Keep Windows Updated: Regularly install the latest Windows updates to receive security patches and bug fixes.
  • Run Regular Malware Scans: Use a reputable antivirus program to scan for and remove malicious software that can disrupt startup.
  • Install Software from Trusted Sources: Download software only from official websites or trusted app stores to avoid installing malware.
  • Maintain Hardware Health: Regularly clean your computer’s internal components to prevent overheating, and ensure all hardware is functioning properly.
  • Backup Your Data: Create regular backups of your important files to protect against data loss in case of system failure.

Conclusion:

Experiencing Windows 11 startup problems can be frustrating, but with a systematic approach to troubleshooting, most issues can be resolved. Understanding the causes of these problems and following the steps outlined in this guide can help you get your system back up and running smoothly. By taking preventative measures and staying proactive in maintaining your system’s health, you can significantly reduce the likelihood of encountering startup issues in the future.

How to FIX Automatic Repair Loop & StartUp Problems in Windows 11 (2023 Guide) - YouTube How to Access Advanced Startup Options (WinRE) on Windows 11? - MiniTool How to Fix Windows 11 Start Menu Not Working, Not Searching, Not Opening Issues - YouTube
Enable or Disable Startup Programs in Windows 11 [Guide 2024] How to Manage Startup Programs on Windows 11 โ€“ WiseCleaner How to Fix Windows 11 Slow Startup (3 Methods) - YouTube
Troubleshooting the most common issues with Windows 11  TechTarget Startup Repair Windows 11  How to Automatic Repair Loop Problems in Windows 11 - YouTube

Closure

Thus, we hope this article has provided valuable insights into Navigating Windows 11 Startup Issues: A Comprehensive Guide. We thank you for taking the time to read this article. See you in our next article!

Migrating Your Digital Life: Transferring Data From An Old PC To A New One

Migrating Your Digital Life: Transferring Data from an Old PC to a New One

Introduction

In this auspicious occasion, we are delighted to delve into the intriguing topic related to Migrating Your Digital Life: Transferring Data from an Old PC to a New One. Let’s weave interesting information and offer fresh perspectives to the readers.

Migrating Your Digital Life: Transferring Data from an Old PC to a New One

Transfer your Data From an Old Computer to a New One - YouTube

The acquisition of a new computer is an exciting event, promising enhanced performance and the latest technology. However, it often presents a challenge: transferring data from the old PC to the new one. This process, known as data migration, involves moving your files, applications, and settings to ensure a seamless transition and minimize disruption to your digital life.

The Importance of Data Migration

Data migration is not merely about moving files from one location to another. It is a crucial step in maximizing the benefits of your new computer. Consider the following:

  • Preserving Your Digital History: Years of accumulated documents, photos, music, and videos hold significant personal and professional value. Migration ensures these memories and valuable information are not lost.
  • Streamlining Your Workflow: Transferring essential applications and settings allows you to resume your work, projects, and hobbies without delay or the need to reconfigure everything.
  • Minimizing Downtime: By transferring your data efficiently, you can avoid the frustration of starting from scratch on your new computer. This saves time and effort, allowing you to quickly adapt to your new environment.
  • Ensuring Data Security: Migration provides an opportunity to back up your data, ensuring its safety in case of hardware failure or other unforeseen circumstances.

Methods for Data Migration

Several methods can be employed for data migration, each with its advantages and considerations.

1. External Storage Devices:

  • USB Drives: These portable devices are widely accessible and offer a straightforward solution for transferring smaller data sets, such as documents and images.
  • External Hard Drives: For larger data volumes, external hard drives provide ample storage capacity and fast transfer speeds.
  • Cloud Storage Services: Services like Google Drive, Dropbox, and OneDrive offer convenient online storage and synchronization capabilities, allowing you to access your data from multiple devices.

2. Network Transfer:

  • Local Network: If both your old and new PCs are connected to the same network, you can utilize file sharing protocols like SMB to transfer data directly.
  • Remote Desktop Software: Programs like TeamViewer or AnyDesk allow you to control your old PC remotely from your new one, enabling you to copy files directly.

3. System Imaging:

  • Backup Software: Dedicated backup software like Acronis True Image or Macrium Reflect can create a complete image of your old PC’s hard drive, including the operating system, applications, and user settings. This image can be restored to your new computer, effectively transferring everything in one go.
  • Operating System Migration Tools: Some operating systems offer built-in tools for migrating user data and settings. For example, Windows 10 provides the "Transfer your files" feature, while macOS offers "Migration Assistant."

4. Specialized Data Migration Software:

  • Third-Party Tools: Various software programs specifically designed for data migration are available. These tools often offer advanced features like selective file transfer, data compression, and scheduling capabilities.

Choosing the Right Method

The most suitable data migration method depends on several factors:

  • Data Volume: For small data sets, USB drives or cloud storage may suffice. Large data volumes necessitate external hard drives or system imaging.
  • Time Constraints: If you need to migrate data quickly, network transfer or specialized migration software might be the best options.
  • Technical Proficiency: Users comfortable with networking and remote access can utilize those methods. For less experienced users, external storage or system imaging might be more convenient.
  • Budget: Cloud storage and some data migration software might incur subscription fees.

Tips for Successful Data Migration

  • Back Up Your Data: Before starting any migration, create a backup of your essential files. This precaution ensures data safety in case of errors or unforeseen issues.
  • Clean Up Your Old PC: Delete unnecessary files and applications to reduce the amount of data that needs to be transferred.
  • Check Compatibility: Ensure that your new computer’s hardware and software are compatible with the files and applications you intend to transfer.
  • Test the Migration: After transferring a portion of your data, test the new system to ensure everything works as expected.
  • Seek Professional Assistance: If you encounter difficulties or prefer a hands-off approach, consider hiring a professional data migration service.

FAQs about Data Migration

Q: What happens to my applications after transferring data?

A: While transferring files, applications themselves may not be automatically migrated. You may need to reinstall them on your new PC. However, some migration methods, like system imaging, can transfer applications along with the operating system.

Q: Can I transfer my operating system to a new computer?

A: Yes, you can transfer your operating system using system imaging or specialized migration tools. However, this is a more complex process and may require advanced technical knowledge.

Q: Is it safe to use cloud storage for data migration?

A: Cloud storage services are generally secure, with data encryption and multiple security measures. However, it’s crucial to choose reputable providers and enable strong passwords and two-factor authentication for added protection.

Q: How long does data migration take?

A: The duration depends on the amount of data, the chosen method, and your internet connection speed. Smaller data sets can be transferred quickly, while large data volumes might take several hours or even days.

Conclusion

Data migration is an essential step in transitioning to a new computer. By carefully planning and choosing the appropriate method, you can ensure a smooth transfer of your digital life. This process allows you to retain your valuable data, applications, and settings, minimizing disruption and maximizing the benefits of your new computer. Remember to back up your data, clean up your old PC, and test the migration process to ensure a successful transition. With careful planning and execution, you can seamlessly move your digital life to your new computer and enjoy the full potential of your technology upgrade.

The best methods for transferring data between computers to ensure an efficient migration How to transfer data from an old PC to a new PC  Windows Central Data Migration - What it is, and how you can to do it faster
Transferring Data to a New Computer  ThriftyFun How to transfer your data from an old PC to a new PC  Windows Central transferring files from old pc to new pc (PT1) - YouTube
How to transfer data from an old PC to a new PC  Windows Central How to transfer data from one PC to another PC with original date and time? - YouTube

Closure

Thus, we hope this article has provided valuable insights into Migrating Your Digital Life: Transferring Data from an Old PC to a New One. We appreciate your attention to our article. See you in our next article!

Navigating The Landscape Of Mustek A3 1200S Scanner Drivers On Windows 10

Navigating the Landscape of Mustek A3 1200S Scanner Drivers on Windows 10

Introduction

With great pleasure, we will explore the intriguing topic related to Navigating the Landscape of Mustek A3 1200S Scanner Drivers on Windows 10. Let’s weave interesting information and offer fresh perspectives to the readers.

Mustek A3 1200s Scanner Driver - cleverfriendly

The Mustek A3 1200S, a high-resolution flatbed scanner renowned for its A3 scanning capabilities, remains a popular choice for various tasks, from document digitization to image archiving. However, effectively utilizing this scanner on a Windows 10 operating system necessitates the correct driver installation. This article aims to provide a comprehensive guide to understanding and navigating the intricacies of Mustek A3 1200S scanner drivers on Windows 10, emphasizing the importance of proper driver selection and installation for optimal scanner functionality.

The Significance of Drivers

Drivers act as the essential bridge between a hardware device, like the Mustek A3 1200S scanner, and the Windows 10 operating system. They provide the software instructions necessary for the computer to communicate with the scanner and translate the scanner’s input into usable data. Without the correct drivers, the scanner will not function properly, and users may encounter issues like:

  • Inability to detect the scanner: The computer may not recognize the scanner’s presence.
  • Scanning errors: Images may be distorted, incomplete, or scanned at incorrect resolutions.
  • Slow scanning speeds: The scanning process may be significantly slower than expected.
  • Software compatibility issues: The scanner may not work with specific applications or programs.

Finding the Right Driver for Your Mustek A3 1200S Scanner

The first step in ensuring optimal performance is identifying the correct driver for your specific scanner model. This process involves careful consideration of various factors:

  • Scanner Model: Confirm the exact model number of your Mustek A3 1200S scanner. While there may be variations within the A3 1200S series, each model might require a specific driver.
  • Operating System Version: Windows 10 comes in various versions, including Home, Pro, and Enterprise, each with its own specific driver requirements.
  • Driver Type: Drivers can be categorized as ‘standard’ or ‘proprietary’. Standard drivers are generally provided by Microsoft and offer basic functionality, while proprietary drivers, developed by the scanner manufacturer (Mustek), often provide enhanced features and performance.

Sources for Mustek A3 1200S Scanner Drivers

Once you have identified the necessary details, you can explore various sources to obtain the appropriate drivers:

  • Mustek Website: The official Mustek website is the primary source for driver downloads. Navigate to their support section and locate the specific driver for your A3 1200S model and Windows 10 version.
  • Device Manager: Windows 10 has a built-in Device Manager that can automatically search for and install drivers. However, it may not always find the most up-to-date or optimal drivers.
  • Third-Party Driver Websites: Websites like DriverPack Solution or DriverEasy offer a vast collection of drivers for various devices, including scanners. However, proceed with caution, as these sources may contain outdated or incompatible drivers.

Installing the Mustek A3 1200S Scanner Driver

Once you have downloaded the driver, the installation process is usually straightforward:

  1. Disconnect the scanner: Before installing the driver, disconnect the scanner from your computer.
  2. Run the installer: Double-click the downloaded driver file and follow the on-screen instructions.
  3. Connect the scanner: Once the driver installation is complete, connect the scanner to your computer.
  4. Test the scanner: Scan a document or image to ensure the scanner is working correctly.

Troubleshooting Common Driver Issues

Despite following these steps, you might encounter issues while installing or using the driver. Here are some common problems and their potential solutions:

  • Driver Compatibility Issues: Ensure the downloaded driver is compatible with your Windows 10 version. If not, search for the appropriate driver on the Mustek website or try a different source.
  • Driver Conflicts: Other installed software or drivers might interfere with the scanner driver. Try temporarily disabling other programs or drivers to isolate the issue.
  • Outdated Drivers: Outdated drivers can lead to performance issues. Update the driver to the latest version available on the Mustek website.
  • Corrupted Drivers: If the driver file is corrupted, re-download it from a trusted source.
  • Hardware Malfunction: If the scanner itself is malfunctioning, it might be necessary to contact Mustek support for assistance.

FAQs: Addressing Common Questions

Q: What if the Mustek website does not have a driver for my specific Windows 10 version?

A: If the official website lacks the desired driver, consider contacting Mustek support directly. They may have alternative solutions or provide guidance on finding compatible drivers.

Q: Can I use a driver from a different Mustek scanner model?

A: While it might be tempting, using a driver from a different model is not recommended. It can lead to unexpected behavior, performance issues, or even damage to your scanner.

Q: What if I have already installed the wrong driver?

A: You can uninstall the incorrect driver using the Windows 10 Device Manager. Navigate to "Devices and Printers," right-click on the scanner, and select "Uninstall device." After uninstalling, install the correct driver from a reliable source.

Tips for Optimal Scanner Performance

  • Regular Driver Updates: Keep your scanner driver updated to the latest version to ensure optimal performance and fix potential bugs.
  • Scanner Maintenance: Regularly clean the scanner glass and platen to prevent dust and debris from affecting scan quality.
  • Proper Connections: Use a high-quality USB cable and ensure it is securely connected to both the scanner and computer.
  • Software Optimization: Use the scanner’s accompanying software to adjust scan settings like resolution, color depth, and file format for optimal results.

Conclusion

Successfully installing and utilizing the Mustek A3 1200S scanner on Windows 10 hinges on choosing the correct driver and following the appropriate installation steps. By understanding the importance of drivers, identifying the right source, and addressing common issues, you can ensure optimal scanner functionality and leverage its capabilities for various tasks. Remember, keeping your driver updated and practicing proper maintenance will contribute to a smooth and efficient scanning experience.

Mustek A3 1200s Scanner Driver - cleverfriendly Mustek A3 1200s Scanner Driver - sugarrenew Mustek A3 1200S Scanner Drivers โ€“ Free Software Download
Mustek ScanExpress A3 USB 1200 Pro Driver v.1.3, v.1.5 download for Windows - deviceinbox.com Mustek A3 1200S (C9A/D2I) Scanner Driver v.1.7 v.3.2 download for Windows - deviceinbox.com Mustek A3 1200HS Scanner Driver v.1.2, v.1.0.0.1 download for Windows - deviceinbox.com
Windows 10 driver for mustek 1200 ub plus scanner - enseomeseo Mustek a3 1200s scanner driver - safashorse

Closure

Thus, we hope this article has provided valuable insights into Navigating the Landscape of Mustek A3 1200S Scanner Drivers on Windows 10. We hope you find this article informative and beneficial. See you in our next article!

Navigating The Digital Landscape: Understanding "Where Is My Computer" In Windows 11

Navigating the Digital Landscape: Understanding "Where is My Computer" in Windows 11

Introduction

With enthusiasm, let’s navigate through the intriguing topic related to Navigating the Digital Landscape: Understanding "Where is My Computer" in Windows 11. Let’s weave interesting information and offer fresh perspectives to the readers.

Navigating The Digital Landscape: Understanding The Power Of IMAP And Unitybox - Best Map

In the intricate world of modern computing, the concept of "where is my computer" has evolved beyond a simple physical location. It encompasses a multifaceted understanding of data accessibility, device management, and network connectivity. Within the context of Windows 11, this question translates into a quest for clarity and control over one’s digital assets and their whereabouts.

Understanding the Digital Landscape

The digital landscape of today is characterized by a complex interplay of devices, networks, and cloud services. Users interact with their computers not only through physical interaction but also through remote access, cloud storage, and online collaboration tools. This interconnectedness necessitates a clear understanding of where data resides and how devices interact within this ecosystem.

Windows 11: A Platform for Digital Organization

Windows 11, Microsoft’s latest operating system, offers a range of features designed to enhance user control over their digital environment. These features address the question of "where is my computer" in various ways, enabling users to:

  • Locate Physical Devices: Windows 11’s "Find My Device" feature allows users to locate their lost or misplaced devices. This is especially useful for laptops, tablets, and smartphones, providing peace of mind and aiding in recovery.
  • Track File Locations: The operating system provides comprehensive file management tools, enabling users to easily track the location of their documents, images, and other files across various storage locations, including local drives, external storage devices, and cloud services.
  • Manage Network Connections: Windows 11 simplifies network management, allowing users to understand their connection status, identify available networks, and control access to specific devices or services.
  • Access Data Remotely: Features like Remote Desktop allow users to access their computer’s desktop and files remotely, regardless of physical location. This empowers users to work from anywhere, access critical information, and manage their devices remotely.

Beyond Physical Location: The Importance of Data Security

The concept of "where is my computer" extends beyond physical location to encompass data security and privacy. Windows 11 offers features like:

  • Enhanced Security Measures: Windows 11 incorporates advanced security features like multi-factor authentication, password management tools, and built-in antivirus protection to safeguard user data and prevent unauthorized access.
  • Data Encryption: Encryption tools allow users to protect sensitive data by converting it into an unreadable format, ensuring that even if a device is lost or stolen, the data remains secure.
  • Privacy Settings: Windows 11 provides detailed privacy settings that allow users to control which data is shared with applications and services, ensuring greater control over personal information.

FAQs: Addressing Common Concerns

Q: How do I locate a lost or stolen Windows 11 device?

A: Windows 11’s "Find My Device" feature allows users to locate their lost or stolen devices. This feature requires a Microsoft account and must be enabled in the device settings. Once enabled, users can access the "Find My Device" website or app to track the device’s location.

Q: How can I track the location of specific files on my Windows 11 computer?

A: Windows 11’s file search functionality allows users to search for files by name, content, or location. Users can also use advanced search operators to refine their searches and locate specific files quickly. Additionally, file explorer provides a clear view of file locations and allows users to navigate through various storage locations.

Q: What are the best practices for securing my data on a Windows 11 computer?

A:

  • Strong Passwords: Use strong and unique passwords for all accounts, including your Microsoft account and any other accounts you use on your computer.
  • Multi-Factor Authentication: Enable multi-factor authentication whenever possible to add an extra layer of security to your accounts.
  • Keep Software Updated: Regularly update your operating system, applications, and drivers to ensure you have the latest security patches.
  • Use Antivirus Software: Install and regularly update a reputable antivirus software to protect your computer from malware and other threats.
  • Be Cautious of Phishing Attempts: Be aware of phishing attempts and avoid clicking on suspicious links or opening attachments from unknown senders.

Tips for Effective Device Management

  • Regular Backups: Regularly back up your important data to an external hard drive or cloud storage service to ensure data recovery in case of device failure or data loss.
  • Organize Files: Organize your files into folders and subfolders to maintain a clear structure and ensure easy access to important documents.
  • Use Cloud Storage: Consider using cloud storage services to store and access your data from multiple devices, enhancing portability and accessibility.
  • Utilize Remote Desktop: Leverage remote desktop features to access and manage your computer remotely, enabling work from anywhere and access to critical information.

Conclusion: Understanding "Where is My Computer" in the Digital Age

The concept of "where is my computer" in Windows 11 transcends physical location, encompassing data security, network connectivity, and remote access. Understanding these aspects empowers users to navigate the digital landscape effectively, manage their devices securely, and access their data from anywhere. Windows 11 provides a comprehensive set of tools and features designed to enhance user control, ensuring a seamless and secure digital experience. By understanding the intricacies of device management and data security, users can harness the full potential of Windows 11 and navigate the digital world with confidence.

Where is My PC in Windows 11 - Where is My Computer in Windows 11 - YouTube Can my PC run Windows 11? Hereโ€™s How To Check!  KnowYourMobile Webinar - How to navigate the new digital landscape  BIMobject
Computer windows 11 - okehidden Navigating the Digital Landscape E-Book Show "My Computer" (This PC) on the Desktop in Windows 11/10
Understanding the Digital Landscape Navigating The Digital Landscape: A Comprehensive Guide To The Best Map And Directions Websites

Closure

Thus, we hope this article has provided valuable insights into Navigating the Digital Landscape: Understanding "Where is My Computer" in Windows 11. We appreciate your attention to our article. See you in our next article!

Navigating Windows 11 With Ease: A Guide To Quick Access Settings

Navigating Windows 11 with Ease: A Guide to Quick Access Settings

Introduction

With great pleasure, we will explore the intriguing topic related to Navigating Windows 11 with Ease: A Guide to Quick Access Settings. Let’s weave interesting information and offer fresh perspectives to the readers.

How to navigate Windows 11 Quick Settings - Westwood Associates

Windows 11 introduces a plethora of features designed to enhance user experience, and among them, the Quick Access Settings stand out as a powerful tool for efficient navigation and customization. This article delves into the intricacies of this feature, exploring its functionality, benefits, and how it empowers users to personalize their Windows 11 experience.

Understanding Quick Access Settings

Quick Access Settings, often referred to as the "Quick Settings" menu, is a convenient hub located within the Windows 11 taskbar. It provides a streamlined interface for toggling frequently used system settings and features, offering a rapid way to control aspects like brightness, volume, Wi-Fi, Bluetooth, and more.

Accessing Quick Access Settings

The Quick Access Settings menu is readily accessible via the following methods:

  • Clicking the Quick Settings icon: The icon, resembling a network of squares, is positioned on the right side of the taskbar. Clicking it reveals the Quick Access Settings panel.
  • Using the keyboard shortcut: Pressing the Windows key + A simultaneously brings up the Quick Access Settings menu.

Exploring the Quick Access Settings Panel

The Quick Access Settings panel presents a visually appealing and user-friendly interface. It displays a series of tiles, each representing a specific system setting or function. These tiles are categorized into groups, making it easy to locate desired options.

  • Top Row: This row typically showcases commonly used settings like Wi-Fi, Bluetooth, Brightness, and Sound.
  • Bottom Row: This row often features settings related to Focus Assist, Night Light, and Battery Saver.
  • Additional Tiles: Depending on the user’s system configuration and installed applications, additional tiles might appear in the panel, offering quick access to features like VPN, Projecting, or specific app controls.

Benefits of Using Quick Access Settings

The Quick Access Settings menu offers a multitude of advantages, streamlining user interaction with Windows 11:

  • Speed and Efficiency: By eliminating the need to navigate through multiple menus, Quick Access Settings significantly reduces the time required to access and modify essential system settings.
  • Customization: Users can tailor the Quick Access Settings panel to their specific needs by pinning frequently used settings to the top row for easy access.
  • Visual Clarity: The panel’s intuitive layout and clear icons make it easy for users to identify and interact with desired settings.
  • System Control: Quick Access Settings provide a centralized hub for managing crucial system functions, empowering users to control their Windows 11 experience.

Frequently Asked Questions

Q: How do I customize the Quick Access Settings panel?

A: You can customize the Quick Access Settings panel by right-clicking the Quick Settings icon on the taskbar and selecting "Edit Quick Settings." This opens a window where you can drag and drop desired settings into the panel or remove existing ones.

Q: Can I add third-party apps to the Quick Access Settings panel?

A: While Windows 11 does not natively support adding third-party apps to the Quick Access Settings panel, some third-party applications might offer integration features that allow you to control them through the panel.

Q: Is there a way to access the Quick Access Settings panel from the keyboard?

A: Yes, you can use the keyboard shortcut Windows key + A to access the Quick Access Settings panel.

Q: What happens if I click on a tile in the Quick Access Settings panel?

A: Clicking on a tile will trigger the corresponding action, such as enabling or disabling Wi-Fi, adjusting brightness, or activating Focus Assist.

Tips for Using Quick Access Settings Effectively

  • Pin Frequently Used Settings: Pin settings you frequently access to the top row of the Quick Access Settings panel for quick access.
  • Explore the Settings Menu: While Quick Access Settings offers a convenient way to access common settings, the Settings app provides a more comprehensive overview of system options.
  • Utilize Keyboard Shortcuts: Learn and use keyboard shortcuts to further streamline your interaction with Quick Access Settings and other system functions.
  • Experiment and Customize: Don’t be afraid to experiment with different settings and customize the Quick Access Settings panel to suit your individual preferences.

Conclusion

The Quick Access Settings in Windows 11 represent a significant step towards a more intuitive and user-friendly operating system. By providing a centralized hub for accessing and managing common system settings, this feature empowers users to personalize their Windows 11 experience and enhance their productivity. Whether you’re a seasoned tech enthusiast or a new Windows user, understanding and leveraging the power of Quick Access Settings can significantly improve your daily interaction with Windows 11.

Windows 11 Quick Settings How to Use Quick Access in Windows 11 - Guiding Tech How to Enable or Disable Quick Access in Windows 11 โ€“ TechCult
Windows 11 Quick Settings  How to Open and Edit it in Windows 11 How to Use Quick Settings in Windows 11 How to use and customize the Windows 11 Quick Settings - Digital Citizen
How To Enable Or Disable Quick Access Feature In Windows 11 How to Open Quick Settings in Windows 11

Closure

Thus, we hope this article has provided valuable insights into Navigating Windows 11 with Ease: A Guide to Quick Access Settings. We thank you for taking the time to read this article. See you in our next article!

Near-Field Communication: A Tutorial Review

Near-Field Communication: A Tutorial Review

Introduction

In this auspicious occasion, we are delighted to delve into the intriguing topic related to Near-Field Communication: A Tutorial Review. Let’s weave interesting information and offer fresh perspectives to the readers.

Near-Field Communication: A Tutorial Review

(PDF) Near-Field Communications: A Tutorial Review

Near-field communication (NFC) is a short-range wireless communication technology that enables two devices to communicate by bringing them within a few centimeters of each other. It has become ubiquitous in modern life, powering a wide range of applications, from contactless payments and data transfer to access control and device pairing. This tutorial review aims to provide a comprehensive understanding of NFC technology, exploring its principles, functionalities, and applications, while highlighting its significance in the evolving technological landscape.

1. Introduction to NFC Technology

NFC technology is built upon the principles of electromagnetic induction, where energy is transferred wirelessly between two devices through a magnetic field. This process is facilitated by two key components:

  • Transmitter: The device transmitting the signal, typically containing a coil that generates a magnetic field.
  • Receiver: The device receiving the signal, containing a coil that picks up the magnetic field and converts it into an electrical signal.

The transfer of data occurs within a very short range, typically less than 10 centimeters. This short-range communication is what distinguishes NFC from other wireless technologies like Wi-Fi or Bluetooth, which can operate over longer distances.

2. NFC Standards and Protocols

NFC technology adheres to a standardized framework to ensure interoperability between devices from different manufacturers. The primary standards governing NFC are:

  • ISO/IEC 14443: This standard defines the communication protocols for passive NFC devices, which are powered by the electromagnetic field generated by the active device.
  • ISO/IEC 18092: This standard defines the communication protocols for active NFC devices, which have their own power source and can initiate communication with passive devices.
  • NFC Forum: This organization promotes the adoption and development of NFC technology, defining specifications and certification programs to ensure compatibility and security.

These standards ensure that NFC-enabled devices can communicate seamlessly, regardless of their manufacturer or operating system.

3. NFC Modes of Operation

NFC technology supports three distinct modes of operation, each tailored to specific applications:

  • Passive Mode: The passive device is powered by the active device and only transmits data when prompted. This mode is commonly used for contactless payments, where the payment terminal acts as the active device and the card or phone acts as the passive device.
  • Active Mode: Both devices have their own power source and can initiate communication. This mode is suitable for data transfer applications between two NFC-enabled devices, such as exchanging contact information or transferring files.
  • Peer-to-Peer (P2P) Mode: This mode allows two active NFC devices to communicate directly with each other. It is used for applications like device pairing, file sharing, and wireless printing.

The choice of mode depends on the specific application and the capabilities of the participating devices.

4. NFC Applications

NFC technology has permeated various aspects of modern life, enabling a wide range of applications:

  • Contactless Payments: NFC-enabled cards and mobile devices have revolutionized payment systems, allowing for quick and secure transactions without the need for physical contact.
  • Data Transfer: NFC allows for the transfer of small amounts of data between devices, such as contact information, website URLs, and digital business cards.
  • Access Control: NFC technology is used for access control systems in various settings, including buildings, offices, and public transport.
  • Device Pairing: NFC simplifies the process of pairing devices, such as connecting a Bluetooth speaker to a smartphone or setting up a wireless headset.
  • Mobile Ticketing: NFC enables contactless ticketing for public transport, eliminating the need for physical tickets and streamlining the boarding process.
  • Near-Field Communication Tag (NFC Tag) Applications: NFC tags are passive devices containing information that can be read by NFC-enabled devices. These tags are used in various applications, including product information, asset tracking, and interactive advertising.

The versatility of NFC technology has led to its widespread adoption in diverse industries, from retail and finance to transportation and healthcare.

5. Advantages of NFC Technology

NFC technology offers several advantages over other wireless communication technologies:

  • Short Range and Security: The short-range nature of NFC communication inherently limits the range of potential eavesdroppers, enhancing security.
  • Low Power Consumption: NFC devices consume minimal power, making them suitable for battery-powered devices.
  • Ease of Use: NFC technology is simple to use, requiring minimal user interaction.
  • Interoperability: NFC standards ensure interoperability between devices from different manufacturers, facilitating seamless communication.
  • Cost-Effectiveness: NFC technology is relatively inexpensive to implement, making it accessible for a wide range of applications.

These advantages have contributed to the rapid adoption of NFC technology across various sectors.

6. Challenges and Limitations of NFC Technology

Despite its numerous advantages, NFC technology also faces certain challenges and limitations:

  • Limited Data Transfer Rate: NFC has a relatively low data transfer rate, making it unsuitable for large file transfers or streaming applications.
  • Short Range: The short communication range limits its applicability in scenarios requiring long-distance communication.
  • Interference: NFC signals can be affected by electromagnetic interference from other devices, potentially causing communication disruptions.
  • Security Concerns: While NFC provides inherent security benefits, vulnerabilities still exist, requiring robust security protocols and implementation.

These challenges are being addressed through ongoing research and development efforts to enhance the capabilities and security of NFC technology.

7. Future Trends in NFC Technology

The future of NFC technology is promising, with ongoing advancements and emerging applications:

  • Integration with Other Technologies: NFC is increasingly being integrated with other technologies, such as Bluetooth and Wi-Fi, to enhance functionality and expand its application scope.
  • Enhanced Security Features: Research is focused on developing more robust security protocols to address potential vulnerabilities and ensure secure data transmission.
  • New Applications: Emerging applications of NFC technology include contactless payments in emerging markets, smart home automation, and healthcare monitoring.

As technology continues to evolve, NFC technology is poised to play an increasingly vital role in shaping the future of wireless communication and mobile technology.

8. Frequently Asked Questions (FAQs) about NFC

Q1: What is the difference between NFC and Bluetooth?

A: NFC is a short-range wireless communication technology that operates within a few centimeters, while Bluetooth is a longer-range technology that can operate over distances of up to 10 meters. NFC is designed for quick and easy communication, while Bluetooth is more suitable for continuous communication and data transfer.

Q2: Is NFC secure?

A: NFC technology is inherently secure due to its short range and limited communication capabilities. However, vulnerabilities exist, and robust security protocols are essential to protect sensitive data.

Q3: How do I enable NFC on my smartphone?

A: The method for enabling NFC on a smartphone varies depending on the device and operating system. Typically, you can find the NFC settings within the device’s wireless or connectivity settings.

Q4: Can I use NFC to transfer large files?

A: NFC is not suitable for transferring large files due to its limited data transfer rate. Other technologies, such as Bluetooth or Wi-Fi, are more appropriate for large file transfers.

Q5: What is the future of NFC technology?

A: NFC technology is expected to continue evolving with advancements in security, integration with other technologies, and new applications in diverse sectors.

9. Tips for Using NFC Technology

  • Ensure your device supports NFC: Check the specifications of your device to confirm NFC compatibility.
  • Enable NFC on your device: Locate and enable the NFC setting within your device’s settings.
  • Bring devices close together: For successful communication, ensure the two NFC-enabled devices are within a few centimeters of each other.
  • Use NFC-enabled apps: Utilize NFC-compatible apps to access various NFC functionalities, such as contactless payments and data transfer.
  • Be mindful of security: Ensure you are using reputable apps and services to protect your data from unauthorized access.

10. Conclusion

Near-field communication (NFC) technology has emerged as a transformative wireless communication technology, enabling a wide range of applications that have revolutionized how we interact with devices and our surroundings. Its short range, low power consumption, and ease of use have made it a ubiquitous technology, powering contactless payments, data transfer, access control, and device pairing. As technology continues to evolve, NFC is poised to play an increasingly vital role in shaping the future of wireless communication and mobile technology, with ongoing advancements in security, integration with other technologies, and the development of new and innovative applications.

(PDF) Near-Field Communications: A Tutorial Review Near field communication - โ€œNear Field Communicationโ€ Near Field Communication (NFC) is a What is Near Field Communication (NFC)?  - YouTube
Near Field Communication NFC, NFC Technology Explained Near-Field Communications: A Tutorial Review  Papers With Code Near Field Communication (NFC)
A Review on the Operating Modes of Near Field Communication Near Field Communication

Closure

Thus, we hope this article has provided valuable insights into Near-Field Communication: A Tutorial Review. We thank you for taking the time to read this article. See you in our next article!

The Art Of Desktop Customization: Removing The Recycle Bin In Windows 11

The Art of Desktop Customization: Removing the Recycle Bin in Windows 11

Introduction

With enthusiasm, let’s navigate through the intriguing topic related to The Art of Desktop Customization: Removing the Recycle Bin in Windows 11. Let’s weave interesting information and offer fresh perspectives to the readers.

The Art of Desktop Customization: Removing the Recycle Bin in Windows 11

How to Remove Recycle Bin from Desktop Windows 11 ((New)) - YouTube

The Windows 11 desktop, with its clean design and modern aesthetics, offers a personalized experience for users. While the Recycle Bin remains a vital component for managing deleted files, its presence on the desktop can sometimes detract from the overall visual appeal, particularly for users who prefer a minimalist approach. This article explores the process of removing the Recycle Bin from the desktop in Windows 11, delving into its rationale, practical considerations, and alternative methods for file management.

Understanding the Purpose of the Recycle Bin

The Recycle Bin serves as a temporary holding area for deleted files. When a file is deleted, it is not permanently removed from the system; instead, it is moved to the Recycle Bin, offering a safety net for accidental deletions. Users can restore files from the Recycle Bin if needed, or permanently erase them from the system by emptying the bin.

Reasons for Removing the Recycle Bin from the Desktop

While the Recycle Bin is essential for file recovery, its presence on the desktop can be perceived as clutter by some users. This perception can be amplified in scenarios where:

  • Minimalist Desktop Aesthetics: Users striving for a clean and uncluttered desktop may find the Recycle Bin icon distracting.
  • Screen Real Estate Optimization: On smaller screens, the Recycle Bin icon can consume valuable space that could be utilized for other icons or windows.
  • Enhanced Visual Focus: By removing the Recycle Bin, users can enhance their visual focus on the desktop, reducing distractions and improving workflow efficiency.

Methods for Removing the Recycle Bin from the Desktop

Removing the Recycle Bin from the desktop in Windows 11 can be achieved through two primary methods:

1. Using the Desktop Context Menu:

  • Right-click on an empty area of the desktop.
  • Select Personalize from the context menu.
  • Navigate to Themes > Desktop Icon Settings.
  • Uncheck the box next to Recycle Bin.
  • Click Apply and OK to save the changes.

2. Using the Settings App:

  • Open the Settings app by pressing Windows key + I.
  • Navigate to Personalization > Themes > Desktop Icon Settings.
  • Uncheck the box next to Recycle Bin.
  • Click Apply and OK to save the changes.

Important Considerations

While removing the Recycle Bin from the desktop offers aesthetic and organizational benefits, it is crucial to consider the following points:

  • File Recovery: By removing the Recycle Bin from the desktop, users may inadvertently empty it without realizing it. This could result in permanent data loss if a file is accidentally deleted and not recovered before emptying the bin.
  • Alternative File Management: Users should explore alternative methods for managing deleted files, such as using the File Explorer to access the Recycle Bin directly or utilizing cloud storage services for backup and recovery purposes.

FAQs Regarding Removing the Recycle Bin

Q: Will removing the Recycle Bin from the desktop permanently delete files?

A: No, removing the Recycle Bin from the desktop only hides the icon. The Recycle Bin remains accessible through the File Explorer, and files within it are not permanently deleted until the bin is emptied.

Q: Can I restore the Recycle Bin to the desktop after removing it?

A: Yes, you can restore the Recycle Bin to the desktop by following the same steps mentioned above, but instead of unchecking the box next to Recycle Bin, you should check it.

Q: Is it safe to remove the Recycle Bin from the desktop?

A: Yes, it is safe to remove the Recycle Bin from the desktop. It only affects the visibility of the icon and does not impact the functionality of the Recycle Bin itself.

Tips for Effective File Management

  • Regularly Empty the Recycle Bin: Emptying the Recycle Bin regularly can free up disk space and improve system performance.
  • Utilize Cloud Storage: Consider using cloud storage services like Google Drive, OneDrive, or Dropbox to backup important files and provide an additional layer of protection against data loss.
  • Enable File History: Windows 11’s File History feature automatically backs up files, making it easier to recover lost data.
  • Use a Third-Party File Recovery Tool: If a file is accidentally deleted and the Recycle Bin has been emptied, a third-party file recovery tool can help retrieve the lost data.

Conclusion

Removing the Recycle Bin from the desktop in Windows 11 is a matter of personal preference and workflow optimization. While it offers aesthetic benefits and enhances desktop focus, users must remain vigilant about file management and consider alternative methods for recovering accidentally deleted files. By understanding the purpose of the Recycle Bin, exploring alternative options, and implementing best practices for file management, users can create a desktop environment that is both visually appealing and functionally efficient.

How to Hide or Remove Recycle Bin in Windows 11 How To Remove Recycle Bin From Windows 11 Desktop - vrogue.co How to Remove Recycle Bin from Desktop on Windows 11 PC or Laptop - YouTube
How to add or remove Recycle Bin to the Windows 11 Taskbar - MSPoweruser Solved How to Remove or Hide Recycle Bin on the Desktop in Windows 11 [Tutorial] - YouTube How to Remove Recycle Bin From Windows 11 Desktop
How To Hide Or Remove Recycle Bin From Desktop On Windows 11 How to Remove Recycle Bin from Desktop on Windows 11/10/8/7

Closure

Thus, we hope this article has provided valuable insights into The Art of Desktop Customization: Removing the Recycle Bin in Windows 11. We thank you for taking the time to read this article. See you in our next article!

Managing User Accounts In Windows 11: Removing Accounts For Security And Efficiency

Managing User Accounts in Windows 11: Removing Accounts for Security and Efficiency

Introduction

With great pleasure, we will explore the intriguing topic related to Managing User Accounts in Windows 11: Removing Accounts for Security and Efficiency. Let’s weave interesting information and offer fresh perspectives to the readers.

Managing User Accounts in Windows 11: Removing Accounts for Security and Efficiency

How to manage user account settings on Windows 11  Windows Central

Windows 11, like its predecessors, offers a robust user account system for managing access to the operating system and its resources. This system allows for multiple accounts with varying levels of privileges, ensuring a secure and personalized experience for each user. However, situations may arise where removing a user account becomes necessary. This could be due to a change in personal circumstances, the need to enhance security, or simply to streamline system management.

Understanding the Importance of Account Removal

Deleting a user account from Windows 11 is not merely a cosmetic change. It carries significant implications for system security and efficiency.

  • Security Enhancement: Removing unused or unnecessary accounts minimizes potential vulnerabilities. A compromised account, even if inactive, can serve as a gateway for malicious actors to gain access to the system. Deleting such accounts effectively removes this potential risk.
  • System Performance: Multiple user accounts can impact system performance, particularly if they contain a large amount of data or active applications. Removing inactive accounts can free up resources and potentially improve system responsiveness.
  • Data Management: Deleting a user account removes associated data, including files, settings, and applications. This can be beneficial when a user leaves the system or when specific data needs to be removed for privacy or security reasons.

Methods for Removing User Accounts in Windows 11

Windows 11 provides multiple avenues for removing user accounts, each tailored to specific scenarios.

1. Using Settings:

  • Navigate to Settings > Accounts > Family & other users.
  • Locate the account you wish to remove.
  • Click on the account name and select Remove.
  • Confirm the removal by following the on-screen prompts.

2. Using Control Panel:

  • Open the Control Panel by searching for it in the Start menu.
  • Go to User Accounts > User Accounts.
  • Click on Manage another account.
  • Select the account you want to remove and click Delete the account.
  • Confirm the deletion by following the on-screen prompts.

3. Using Command Prompt:

  • Open Command Prompt as administrator.
  • Type the following command and press Enter: net user "username" /delete.
  • Replace "username" with the actual username of the account to be deleted.
  • Confirm the deletion by following the on-screen prompts.

4. Removing Local Accounts During Initial Setup:

  • During the initial setup of Windows 11, you can choose to remove local accounts that were created during the installation process.
  • This option is typically available in the Users section of the setup wizard.

Important Considerations Before Removing an Account:

  • Data Backup: Before deleting an account, ensure that all relevant data is backed up. This includes files, settings, and any other important information associated with the account.
  • Account Type: Be aware of the type of account you are removing. Local accounts are specific to the current device, while Microsoft accounts are linked to a user’s email address and can be used across multiple devices.
  • Administrative Privileges: Removing an account with administrative privileges requires a different procedure and may necessitate additional steps to ensure system security.

Frequently Asked Questions (FAQs)

Q: What happens to the data associated with the deleted account?

A: The data associated with the deleted account is typically removed from the system. However, it is advisable to back up any critical data before deleting the account, as recovery may not always be possible.

Q: Can I recover a deleted account?

A: Recovering a deleted account is usually not possible. However, depending on the method of deletion and the configuration of the system, data recovery tools may be able to retrieve some information.

Q: What if I want to remove an account that is currently logged in?

A: You cannot directly delete an account that is currently logged in. You need to log out of the account first, then follow the steps outlined above to remove it.

Q: How do I remove a Microsoft account from Windows 11?

A: Removing a Microsoft account from Windows 11 involves signing out of the account and then deleting it from the system. This process is similar to removing a local account, but requires additional steps to ensure proper synchronization with Microsoft services.

Tips for Managing User Accounts in Windows 11

  • Regularly Review Accounts: Periodically review the user accounts on your system and remove any that are no longer needed.
  • Use Strong Passwords: Ensure that all user accounts, especially those with administrative privileges, use strong and unique passwords.
  • Enable Two-Factor Authentication: Consider enabling two-factor authentication for all user accounts, especially for Microsoft accounts, to enhance security.
  • Use Guest Accounts: For temporary access, use the built-in Guest account instead of creating a new account. This provides limited privileges and ensures that no personal data is stored on the system.
  • Monitor Account Activity: Keep an eye on the activity of all user accounts to identify any suspicious behavior or unauthorized access.

Conclusion

Removing user accounts in Windows 11 is a crucial aspect of system management, contributing to security, efficiency, and data control. By understanding the methods and considerations involved, users can effectively remove accounts, minimizing risks and optimizing system performance. Regular account management practices, combined with the implementation of security best practices, help to create a secure and efficient computing environment.

How to Manage User Account Settings in Windows 11 How to Remove a Microsoft Account from Windows 11 Manage user accounts Windows 11  How to Manage Windows 11 password  Windows 11 Credentials
Manage Your Microsoft Account in Windows 11 โ€“ windows.do How To Remove Microsoft Account From Windows 11 Guide  yorketech How To Remove Other User Accounts From Windows 11 - YouTube
How to Remove User Account from Windows 11 (6 Methods) How To Remove Microsoft Account From Windows 11 Guide  beebom

Closure

Thus, we hope this article has provided valuable insights into Managing User Accounts in Windows 11: Removing Accounts for Security and Efficiency. We hope you find this article informative and beneficial. See you in our next article!

The Power Of Accessibility: Exploring QR Code Generation On Windows 10

The Power of Accessibility: Exploring QR Code Generation on Windows 10

Introduction

With enthusiasm, let’s navigate through the intriguing topic related to The Power of Accessibility: Exploring QR Code Generation on Windows 10. Let’s weave interesting information and offer fresh perspectives to the readers.

The Power of Accessibility: Exploring QR Code Generation on Windows 10

generate qr code in windows 10 - Knowledge Sharing Tech

In today’s digital landscape, the ability to seamlessly bridge the gap between the physical and digital worlds is paramount. QR codes, those ubiquitous square patterns, have emerged as a powerful tool for achieving this seamless transition. Windows 10, with its diverse user base and robust functionality, provides an ideal platform for generating these versatile codes.

Understanding QR Codes: A Gateway to Digital Content

QR codes, or Quick Response codes, are two-dimensional barcodes that store information in a structured format. They can be scanned by smartphones or tablets equipped with a QR code reader, instantly unlocking a world of possibilities. This information can range from website URLs and contact details to product information and even payment links.

The Advantages of QR Code Generation on Windows 10

The availability of QR code generators on Windows 10 empowers users with a multitude of benefits:

  • Enhanced Convenience: QR codes offer a user-friendly way to access information. Users can simply scan a code to open a website, download a file, or access a specific piece of content, eliminating the need for manual data entry.
  • Increased Engagement: QR codes can be integrated into marketing materials, product packaging, and even physical locations, creating interactive experiences that engage users and encourage further exploration.
  • Streamlined Information Sharing: Sharing information becomes effortless with QR codes. Users can quickly create and share codes containing URLs, contact details, or even entire documents, simplifying information exchange.
  • Improved Accessibility: QR codes provide an accessible alternative for individuals with visual impairments or limited digital literacy. Scanning a code can unlock information in a user-friendly format, fostering inclusivity.
  • Personalized Experiences: QR codes can be customized to reflect specific needs. Users can adjust the code’s size, color, and design, creating visually appealing and personalized experiences.

Navigating the Landscape of QR Code Generators on Windows 10

Windows 10 users have access to a variety of QR code generator options, each with its unique features and capabilities. These options range from dedicated standalone applications to online tools and even built-in functionality within certain programs.

  • Standalone Applications: Dedicated QR code generator applications offer comprehensive features and customization options. They often provide advanced functionalities like batch generation, dynamic QR code creation, and integration with other software.
  • Online Tools: Web-based QR code generators offer a convenient and accessible solution. They typically require no installation and can be accessed from any device with an internet connection. Online generators often provide basic functionalities and may offer limited customization options.
  • Built-in Features: Some Windows 10 applications, such as Microsoft Word and Excel, include built-in QR code generation capabilities. This provides a convenient option for users who require quick QR code creation within a specific application.

Choosing the Right QR Code Generator:

Selecting the most suitable QR code generator for your needs depends on several factors:

  • Frequency of Use: For frequent QR code generation, a dedicated standalone application might be the best choice. For occasional use, an online tool or built-in functionality may suffice.
  • Customization Requirements: If you require advanced customization options, such as logo integration or specific design elements, a standalone application or a premium online generator is recommended.
  • Data Security: For sensitive information, consider using a generator that offers encryption or other security measures.
  • Integration Needs: If you need to integrate QR code generation into other software, look for applications that offer API support or plugins.

FAQs about QR Code Generators on Windows 10:

  • Q: Are there any free QR code generators available for Windows 10?
  • A: Yes, there are numerous free QR code generators available for Windows 10. Both standalone applications and online tools offer free versions with basic functionalities.
  • Q: Can I create QR codes for social media accounts on Windows 10?
  • A: Absolutely. Most QR code generators allow you to create codes that link to social media profiles, streamlining user engagement.
  • Q: Can I track the number of scans for my QR codes?
  • A: Some QR code generators offer analytics features that track scan data, providing insights into code usage and effectiveness.
  • Q: What types of data can I store in a QR code?
  • A: QR codes can store various types of data, including URLs, text, contact information, calendar events, and even images.
  • Q: Are there any limitations to the size of QR codes?
  • A: While QR codes can be scaled to different sizes, it’s recommended to maintain a minimum size to ensure readability by scanners.

Tips for Effective QR Code Generation on Windows 10:

  • Use High-Quality Images: When incorporating images into your QR codes, ensure they are high-resolution and optimized for readability.
  • Choose a Clear Background: Select a plain background color that contrasts with the code pattern for improved visibility.
  • Test Your Codes: Always test your generated QR codes using a smartphone or tablet to ensure they function correctly.
  • Promote Your Codes: Clearly indicate the presence of a QR code and encourage users to scan it for additional information or engagement.

Conclusion: Embracing the Power of Accessibility

QR code generation on Windows 10 empowers users to bridge the gap between physical and digital experiences, enhancing accessibility and engagement. By leveraging the diverse range of QR code generator options available, users can create dynamic and interactive experiences, streamlining information sharing and fostering a more connected world. As technology continues to evolve, QR codes will undoubtedly remain a powerful tool for unlocking the possibilities of digital content and creating seamless user journeys.

Generate Qr Code In Windows 10 Knowledge Sharing Tech - vrogue.co Generate QR Code with PowerShell in Windows 10 Windows 10 accessibility features empower everyone - Dr. Ware Technology Services - Microsoft
How to QR code generate in Windows 10 - YouTube Qr Code Generator Freeware Download Windows QR Code Generator for Windows 10 / 7 / Vista / XP
QR code-based access control Access โ€“ QR Code Generator  DEVelopers HUT

Closure

Thus, we hope this article has provided valuable insights into The Power of Accessibility: Exploring QR Code Generation on Windows 10. We hope you find this article informative and beneficial. See you in our next article!

PC Health: A Comprehensive Guide To Maintaining Optimal Performance

PC Health: A Comprehensive Guide to Maintaining Optimal Performance

Introduction

With enthusiasm, let’s navigate through the intriguing topic related to PC Health: A Comprehensive Guide to Maintaining Optimal Performance. Let’s weave interesting information and offer fresh perspectives to the readers.

PC Health: A Comprehensive Guide to Maintaining Optimal Performance

How to Perform Your Own PC Health Check - NECL

The health of your personal computer (PC) is a crucial factor in determining its longevity, efficiency, and overall user experience. A healthy PC operates smoothly, delivers optimal performance, and remains secure against potential threats. Neglecting PC health can lead to a host of issues, including slow performance, system crashes, data loss, and increased vulnerability to malware. This article provides a comprehensive guide to understanding PC health, its importance, and practical tips for maintaining a healthy system.

Understanding PC Health: A Holistic Approach

PC health encompasses a multifaceted range of factors that contribute to a computer’s overall well-being. These factors include:

1. Hardware Health: This refers to the physical components of your PC, including the motherboard, CPU, RAM, hard drive, graphics card, and other peripherals. Maintaining hardware health involves ensuring these components are functioning optimally, free from wear and tear, and properly connected.

2. Software Health: This encompasses the operating system, installed applications, and system files. A healthy software environment is free from malware, viruses, and unnecessary programs that can slow down performance. Regularly updating software and running security scans are essential for maintaining software health.

3. Data Integrity: This refers to the health and security of your data stored on your PC. Ensuring data integrity involves regular backups, secure storage practices, and the implementation of data protection measures to prevent data loss or corruption.

4. System Optimization: This involves configuring your PC settings to maximize performance and efficiency. Regularly optimizing your system can improve boot times, reduce system resource consumption, and enhance overall responsiveness.

Benefits of Maintaining a Healthy PC

A healthy PC offers numerous benefits, including:

1. Enhanced Performance: A well-maintained PC operates smoothly, with faster boot times, quicker application loading, and improved responsiveness. This translates to a more enjoyable and productive computing experience.

2. Increased Stability: A healthy PC is less prone to crashes, freezes, and system errors. This provides a more reliable and predictable computing environment.

3. Enhanced Security: A healthy PC is better equipped to resist malware, viruses, and other security threats. Regular security updates and software maintenance play a crucial role in safeguarding your data and system integrity.

4. Extended Lifespan: By proactively maintaining your PC, you can extend its lifespan and delay the need for expensive upgrades or replacements.

5. Improved User Experience: A healthy PC provides a seamless and enjoyable user experience, free from performance bottlenecks, crashes, and security concerns.

FAQs: Addressing Common Concerns

1. How often should I perform PC maintenance?

It is recommended to perform regular PC maintenance tasks at least once a month. This includes running system scans, updating software, cleaning up temporary files, and defragmenting the hard drive.

2. What are some signs of a failing hard drive?

Common signs of a failing hard drive include slow performance, frequent crashes, error messages, unusual noises, and data corruption. If you experience any of these symptoms, it is essential to back up your data immediately and consider replacing the hard drive.

3. How can I protect my PC from malware?

To protect your PC from malware, install a reputable antivirus program, keep your software updated, avoid suspicious websites and downloads, and be cautious about opening email attachments from unknown sources.

4. What is the best way to optimize my PC performance?

Optimizing PC performance involves a combination of steps, including:

  • Closing unnecessary programs: Running too many programs simultaneously can slow down your PC.
  • Disabling unnecessary startup programs: Many programs launch automatically at startup, consuming system resources. Disabling unnecessary programs can improve boot times and performance.
  • Cleaning up temporary files: Temporary files accumulate over time and can consume valuable disk space. Regularly deleting temporary files can free up space and improve performance.
  • Defragmenting the hard drive: Defragmentation reorganizes data on your hard drive, improving access times and performance.

5. What is the best way to back up my data?

There are several methods for backing up your data, including:

  • External hard drive: This is a simple and reliable method for backing up data.
  • Cloud storage: Cloud storage services offer remote data storage and backup options.
  • Networked storage: Networked storage devices provide centralized data storage and backup capabilities for multiple computers.

Tips for Maintaining PC Health

1. Install a reputable antivirus program: Antivirus software protects your PC from malware, viruses, and other threats.

2. Keep your software updated: Regularly updating your operating system and applications ensures you have the latest security patches and bug fixes.

3. Run system scans regularly: Run system scans to identify and remove malware, viruses, and other potential threats.

4. Clean up temporary files and unused programs: Regularly cleaning up temporary files and uninstalling unused programs can free up disk space and improve performance.

5. Defragment your hard drive: Defragmentation reorganizes data on your hard drive, improving access times and performance.

6. Optimize your system settings: Adjust system settings, such as power options, visual effects, and startup programs, to improve performance and energy efficiency.

7. Back up your data regularly: Regular backups ensure that you can recover your data in case of a system failure or data loss.

8. Monitor system performance: Use system monitoring tools to track resource usage, identify potential bottlenecks, and diagnose performance issues.

9. Practice safe browsing habits: Avoid suspicious websites and downloads, and be cautious about opening email attachments from unknown sources.

10. Consider professional maintenance: For complex issues or advanced optimization, consider seeking professional assistance from a qualified technician.

Conclusion

Maintaining PC health is crucial for ensuring optimal performance, security, and longevity. By implementing the tips and practices outlined in this article, you can proactively safeguard your PC, prevent potential issues, and enjoy a smooth and reliable computing experience. Remember that regular maintenance, software updates, and safe browsing habits are essential for keeping your PC healthy and secure. Investing in PC health pays dividends in the form of increased productivity, improved user experience, and a longer lifespan for your computer.

How to maintain and clean your computer for optimal performance - Vital Tech - Medium How to health check windows 10 for best performance Pc Health At A Glance
For PC Best Top 10 Tips to Maintain your computer health How to Maintain Your PC for Optimal Performance - Repair Services  Cell Phone Repair Expert Maintaining Optimal Computer Performance through Regular Preventative Maintenance  PDF
The Windows PC Health Check App Explained How to Maintain Your PC Performance - YouTube

Closure

Thus, we hope this article has provided valuable insights into PC Health: A Comprehensive Guide to Maintaining Optimal Performance. We hope you find this article informative and beneficial. See you in our next article!