Archives 2024

Navigating The Shift: From Pre-Installed Windows 11 To Windows 10

Navigating the Shift: From Pre-Installed Windows 11 to Windows 10

Introduction

With enthusiasm, let’s navigate through the intriguing topic related to Navigating the Shift: From Pre-Installed Windows 11 to Windows 10. Let’s weave interesting information and offer fresh perspectives to the readers.

How to Fix Windows + Shift + S Not Working

The decision to move from Windows 11 to Windows 10, particularly when the former was pre-installed on a device, is a complex one. While Windows 11 boasts new features and a refined visual aesthetic, its compatibility with older hardware and software can be a significant barrier for many users. This article delves into the intricacies of this transition, providing a comprehensive understanding of the considerations, benefits, and potential challenges involved.

Understanding the Motivation for a Shift

The reasons for choosing Windows 10 over Windows 11, despite the latter being pre-installed, are diverse and often specific to individual users. Some key factors driving this decision include:

  • Hardware Compatibility: Windows 11 has stringent system requirements, including support for TPM 2.0 and Secure Boot. Older devices may not meet these specifications, rendering Windows 11 incompatible.
  • Software Compatibility: Certain legacy applications and games may not function optimally or at all on Windows 11. Users reliant on such software might find Windows 10 a more stable environment.
  • User Interface Preferences: Windows 10’s interface, while not as visually striking as Windows 11, might be more familiar and intuitive for some users.
  • Performance Concerns: Some users report experiencing performance issues with Windows 11, particularly on older or less powerful hardware. Windows 10, with its lower resource demands, may offer a smoother experience.
  • Security Considerations: While both operating systems prioritize security, some users might prefer the stability and familiarity of Windows 10’s security features.

The Process of Transitioning from Windows 11 to Windows 10

Transitioning from Windows 11 to Windows 10 involves a few key steps, each requiring careful consideration:

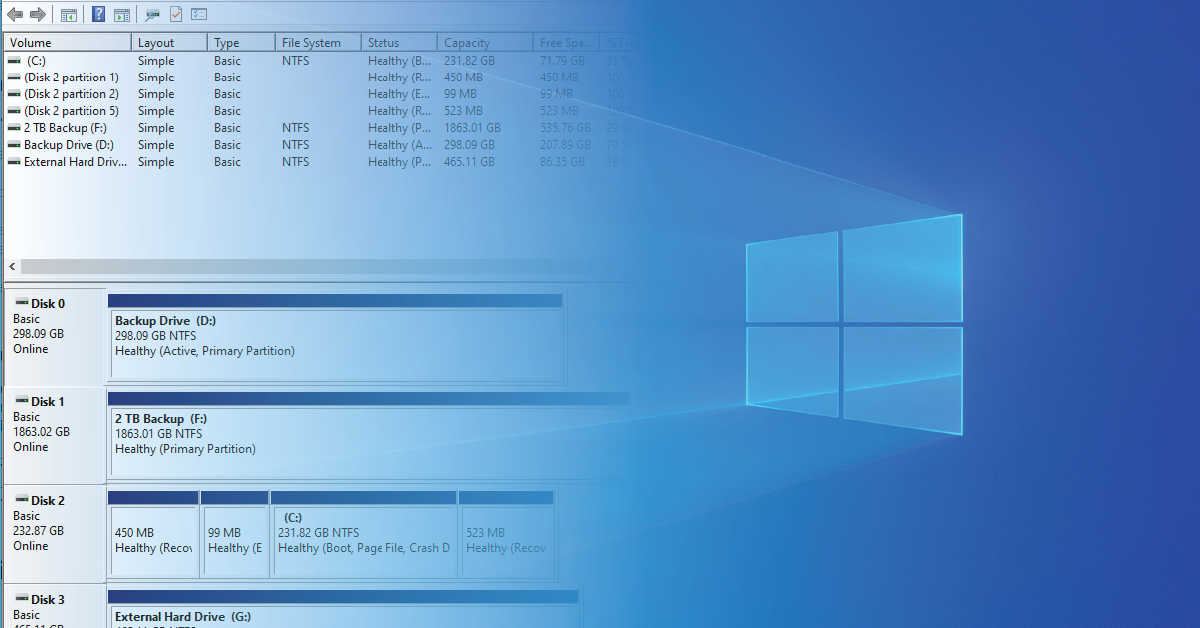
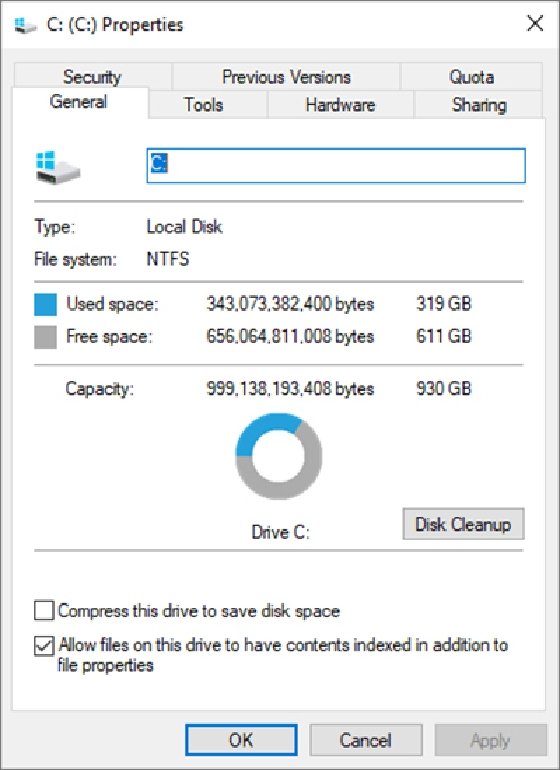
  1. Backup and Data Transfer: Before embarking on the transition, it is imperative to back up all essential data, including files, documents, and settings. This ensures data preservation in case of unforeseen issues during the installation process.
  2. Software Compatibility Check: It is crucial to verify the compatibility of all essential software with Windows 10. This includes applications, drivers, and games.
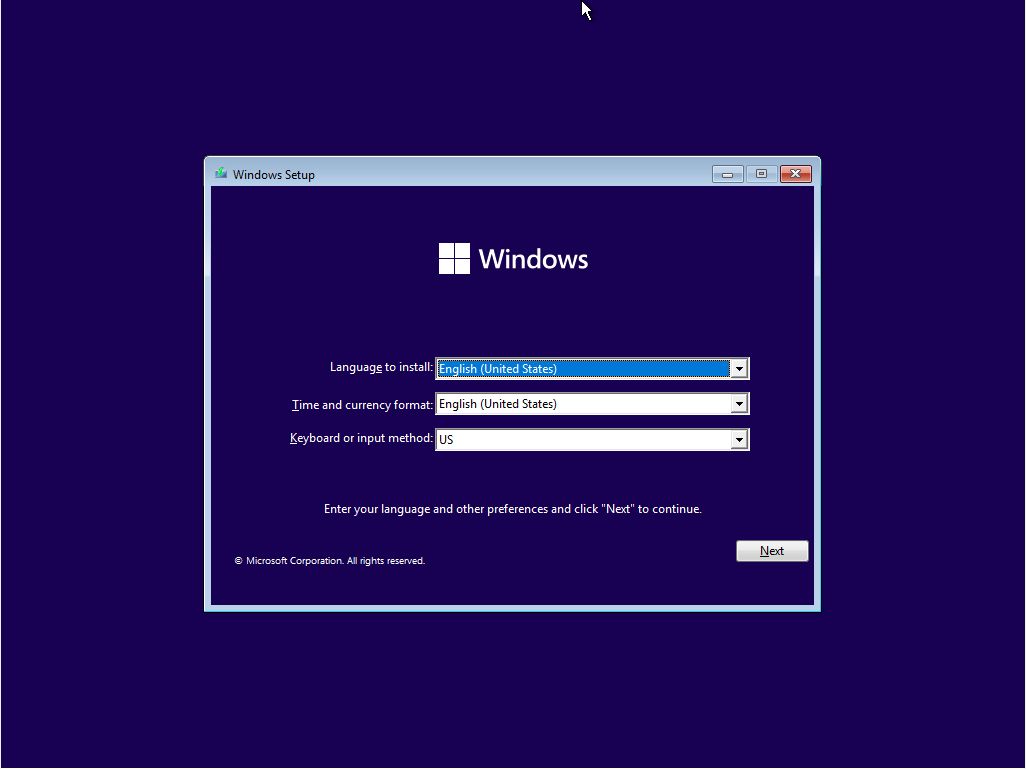
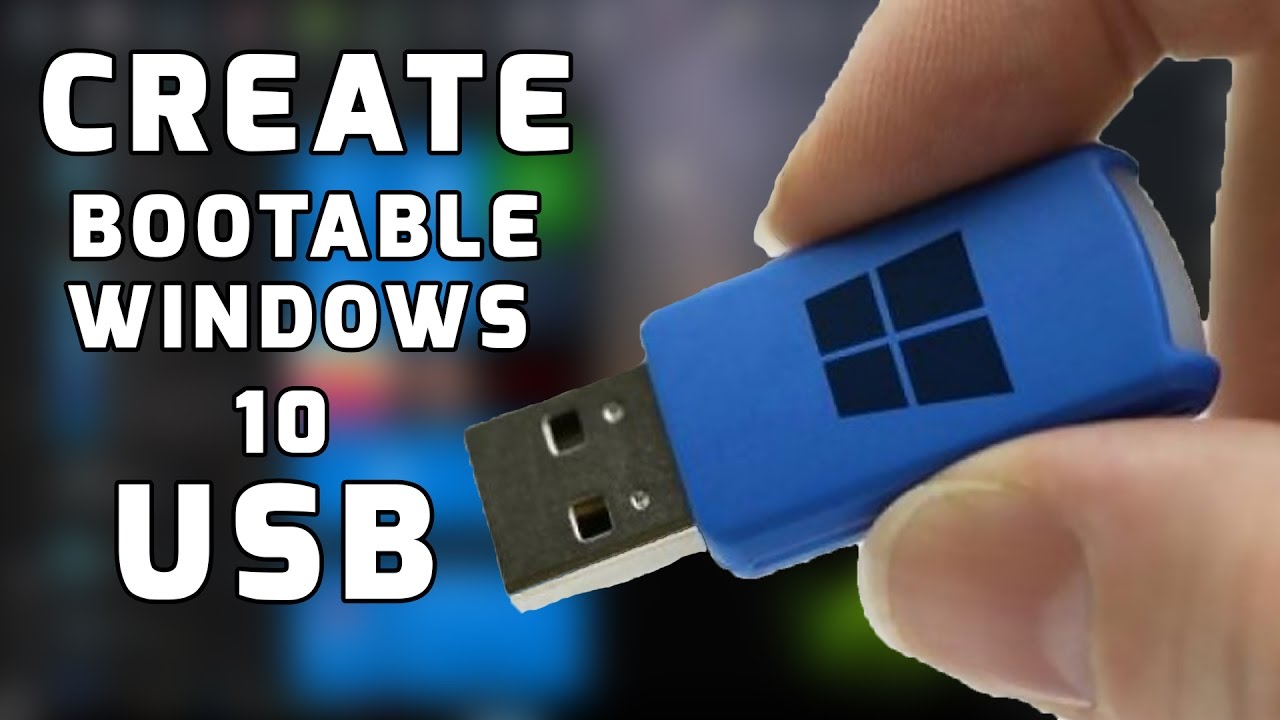
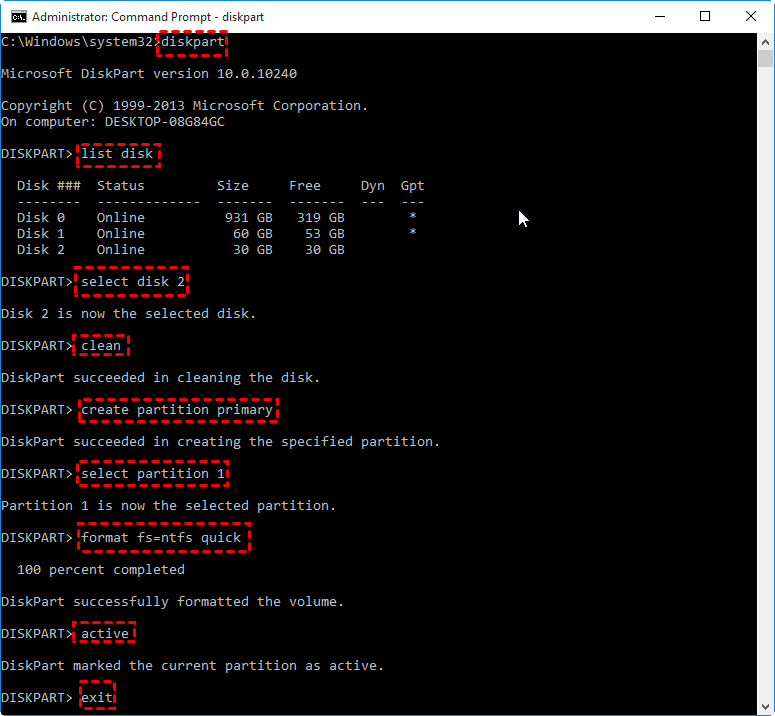
  3. Obtaining a Windows 10 Installation Media: A bootable USB drive or DVD containing the Windows 10 installation files is required. This can be created using the Microsoft Media Creation Tool.
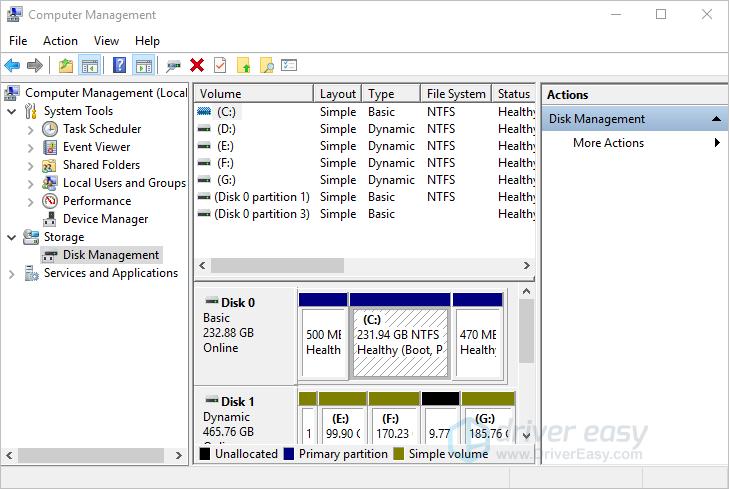
  4. Installation Process: Once the installation media is prepared, the user can proceed with the clean installation of Windows 10. This involves booting from the installation media and following the on-screen instructions.
  5. Driver Installation: After the installation, it is necessary to install the appropriate drivers for hardware components, such as graphics cards, network adapters, and sound cards.
  6. Software Reinstallation: Finally, the user needs to reinstall all essential software applications, ensuring they are compatible with Windows 10.

Potential Challenges and Considerations

The transition from Windows 11 to Windows 10, while feasible, is not without its potential challenges:

  • Driver Compatibility: Finding compatible drivers for all hardware components, especially older devices, might be challenging.
  • Software Compatibility: Some software applications may not be compatible with Windows 10, requiring users to find alternative solutions or updates.
  • Data Loss: While data backup is crucial, there is always a risk of data loss during the installation process. It is essential to follow the instructions carefully and ensure proper backups.
  • System Performance: Depending on the hardware and software configuration, users might experience performance differences between Windows 11 and Windows 10.

Benefits of Transitioning to Windows 10

Despite the challenges, transitioning to Windows 10 can offer several benefits:

  • Improved Compatibility: Windows 10 provides wider compatibility with older hardware and software, ensuring a smoother user experience for those with legacy devices or applications.
  • Enhanced Performance: For users with older or less powerful hardware, Windows 10 might offer a more responsive and efficient experience.
  • Familiar User Interface: Windows 10’s user interface, while undergoing updates, remains familiar to many users, reducing the learning curve compared to Windows 11.
  • Stability and Reliability: Windows 10 has been extensively tested and refined over the years, resulting in a more stable and reliable operating system compared to its newer counterpart.

FAQs Regarding Transitioning from Windows 11 to Windows 10

Q: Can I downgrade from Windows 11 to Windows 10 without losing data?

A: While data loss is possible, it can be minimized by performing a proper backup before the installation process.

Q: Will I be able to use my existing Windows 11 license key for Windows 10?

A: This depends on the specific license type. Contact Microsoft or your device manufacturer for information about license compatibility.

Q: Will my applications and drivers work on Windows 10?

A: This depends on the specific applications and drivers. It is crucial to check compatibility before proceeding with the installation.

Q: Is it possible to dual-boot Windows 11 and Windows 10?

A: Yes, it is possible to install both operating systems on the same device, allowing users to switch between them as needed.

Q: What are the minimum system requirements for Windows 10?

A: The minimum system requirements for Windows 10 are less stringent than Windows 11, allowing for broader hardware compatibility.

Tips for Transitioning from Windows 11 to Windows 10

  • Thorough Backup: Ensure a comprehensive backup of all critical data before starting the installation process.
  • Check Compatibility: Verify the compatibility of all essential software, drivers, and hardware components with Windows 10.
  • Create a Bootable USB Drive: Use the Microsoft Media Creation Tool to create a bootable USB drive containing the Windows 10 installation files.
  • Follow Installation Instructions Carefully: Pay close attention to the on-screen instructions during the installation process.
  • Install Drivers After Installation: Once Windows 10 is installed, install the necessary drivers for all hardware components.
  • Reinstall Software: Reinstall all essential software applications, ensuring they are compatible with Windows 10.

Conclusion

The decision to transition from pre-installed Windows 11 to Windows 10 is a personalized one, driven by individual needs and priorities. While Windows 11 offers new features and a refined visual experience, it can pose compatibility challenges for users with older hardware or software. Windows 10, with its broader compatibility and established stability, remains a viable alternative for those seeking a smoother and more familiar computing experience. Careful planning, thorough backups, and an understanding of the potential challenges are crucial for a successful transition, ensuring a seamless and efficient shift to Windows 10.

Here's how to download and install Windows 11 Turn Windows 11 into Windows 10 - YouTube Shift Key Not Working on Windows 11/10 - (FIXED) - YouTube
How to Boot Windows 11 in Safe Mode [Easy Guide] Fix Win+Shift+S keyboard shortcut is not working in Windows 11/10 - YouTube How to Install Windows 11 Step by Step: Guide with Images
How to install Windows 11 on unsupported hardware - Digital Citizen How to install Windows 11 (update Windows 10 to 11) - Excel at Work

Closure

Thus, we hope this article has provided valuable insights into Navigating the Shift: From Pre-Installed Windows 11 to Windows 10. We thank you for taking the time to read this article. See you in our next article!

Navigating The Windows 10 USB Creation Process: A Comprehensive Guide

Navigating the Windows 10 USB Creation Process: A Comprehensive Guide

Introduction

In this auspicious occasion, we are delighted to delve into the intriguing topic related to Navigating the Windows 10 USB Creation Process: A Comprehensive Guide. Let’s weave interesting information and offer fresh perspectives to the readers.

USB Creation  Pc Help Mate

The creation of a bootable USB drive containing the Windows 10 operating system is a fundamental process for various scenarios. Whether it’s a clean installation, system recovery, or upgrading an existing computer, a properly formatted USB drive serves as the bridge between the operating system and your hardware. This guide delves into the intricacies of this process, providing a detailed breakdown of its steps and addressing common concerns.

Understanding the Purpose and Benefits

A Windows 10 USB drive serves as a portable installation medium. It holds the necessary files to install Windows 10 on a computer, offering a convenient and flexible alternative to traditional installation methods like DVDs. Its significance stems from several key benefits:

  • Flexibility: The USB drive can be used on multiple computers, allowing for easy system installations or upgrades without requiring multiple installation media.
  • Portability: Unlike DVDs, USB drives are compact and easily transportable, making them ideal for carrying the operating system with you.
  • Speed: USB drives offer faster data transfer rates compared to DVDs, resulting in a quicker installation process.
  • Reliability: USB drives are generally more robust than DVDs, making them less prone to damage or scratches.
  • Compatibility: Most modern computers support USB boot, making it a widely applicable method for installing Windows 10.

Step-by-Step Guide to Creating a Bootable USB Drive

The process of creating a bootable Windows 10 USB drive involves several distinct steps, each requiring careful attention to detail:

1. Gather Necessary Materials:

  • USB Drive: Select a USB drive with at least 8GB of storage space. Ensure it is formatted as NTFS.
  • Windows 10 ISO File: Download the Windows 10 ISO file from Microsoft’s official website.
  • Computer: Use a computer running Windows 7, 8, or 10 to create the bootable USB drive.

2. Format the USB Drive:

  • Open File Explorer: Navigate to "This PC" or "My Computer" on your computer.
  • Locate the USB Drive: Identify the USB drive in the list of drives.
  • Right-Click and Format: Right-click on the USB drive and select "Format."
  • Choose NTFS: In the format window, select "NTFS" as the file system and ensure "Quick Format" is checked.
  • Start Formatting: Click "Start" to initiate the formatting process.

3. Download and Run the Windows USB/DVD Download Tool:

  • Download the Tool: Visit Microsoft’s website and search for "Windows USB/DVD Download Tool." Download and install the tool.
  • Launch the Tool: Run the tool and follow the on-screen instructions.
  • Select the ISO File: Browse for the downloaded Windows 10 ISO file and select it.
  • Choose USB Device: Select "USB device" as the destination for the bootable drive.
  • Select the USB Drive: Choose the formatted USB drive from the list of available drives.
  • Begin Creation: Click "Begin copying" to start the process of creating the bootable USB drive.

4. Verify the Bootable Drive:

  • Restart the Computer: After the process completes, restart the computer.
  • Enter BIOS/UEFI: Press the designated key (usually F2, F10, or Del) during the boot process to enter the BIOS/UEFI setup.
  • Boot Order: Navigate to the "Boot Order" or "Boot Priority" settings.
  • Select USB Drive: Ensure the USB drive is listed as the first boot device in the order.
  • Save and Exit: Save the changes and exit the BIOS/UEFI setup.

5. Install Windows 10:

  • Boot from USB: The computer should now boot from the USB drive.
  • Installation Process: Follow the on-screen instructions to install Windows 10 on your computer.

Addressing Common Concerns

1. Errors During the Creation Process:

  • Insufficient Storage Space: Ensure the USB drive has sufficient storage space for the Windows 10 installation files.
  • Incorrect File System: The USB drive must be formatted as NTFS.
  • USB Drive Issues: If the USB drive is faulty, try using a different one.
  • Internet Connectivity: A stable internet connection is crucial for downloading the Windows 10 ISO file.

2. Boot Issues:

  • BIOS/UEFI Settings: Ensure the USB drive is set as the first boot device in the BIOS/UEFI settings.
  • USB Drive Compatibility: Some older computers may not support booting from USB drives.
  • Damaged USB Drive: Check for any physical damage to the USB drive.

3. Installation Errors:

  • Compatibility Issues: Ensure the computer meets the minimum system requirements for Windows 10.
  • Driver Conflicts: If encountering driver issues during installation, try using the latest drivers for your hardware.
  • Corrupted Installation Files: Ensure the Windows 10 ISO file is not corrupted.

FAQs

Q: Can I use a USB drive smaller than 8GB?
A: While theoretically possible, it is strongly discouraged. The Windows 10 installation files require a significant amount of storage space, and a smaller drive might not be sufficient.

Q: Can I create a bootable USB drive from a DVD?
A: No, you cannot directly create a bootable USB drive from a DVD. You need to download the Windows 10 ISO file from Microsoft’s website.

Q: Can I create a bootable USB drive on a Mac?
A: Yes, you can create a bootable USB drive on a Mac using a tool called "Boot Camp Assistant."

Q: What happens to the data on my USB drive after creating a bootable drive?
A: All data on the USB drive will be erased during the formatting process. Back up any important data before proceeding.

Q: Can I use the same USB drive to install Windows 10 on multiple computers?
A: Yes, you can use the same USB drive to install Windows 10 on multiple computers.

Tips for Success

  • Use a Reliable USB Drive: Choose a high-quality USB drive from a reputable brand to ensure reliability.
  • Backup Your Data: Always back up important data before formatting the USB drive.
  • Check System Requirements: Ensure your computer meets the minimum system requirements for Windows 10.
  • Download the Latest Drivers: Download the latest drivers for your hardware before installing Windows 10.
  • Use a Stable Internet Connection: A stable internet connection is crucial for downloading the Windows 10 ISO file.

Conclusion

Creating a bootable Windows 10 USB drive is a fundamental process for various scenarios. By following the detailed steps outlined in this guide, users can create a reliable and portable installation medium for Windows 10. Understanding the purpose, benefits, and potential issues associated with this process empowers users to navigate it effectively and ensure a smooth installation experience.

How to create a Windows 10 bootable USB: It's easier than you think - CNET How to Create Windows 10 bootable USB from ISO [Easy Way] How To Create Bootable Usb In Windows 10 Easy Ways 2021  itechhacks
How To Create Bootable USB Drive from Windows 10 ISO With CMD - YouTube How to Create a Windows 10 Bootable USB - Using a Media Creation Tool How to Create Windows 10 Installation USB?
How to Create Windows 10 Bootable USB Flash Drive - YouTube Create windows 10 bootable usb from iso - rewainfo

Closure

Thus, we hope this article has provided valuable insights into Navigating the Windows 10 USB Creation Process: A Comprehensive Guide. We thank you for taking the time to read this article. See you in our next article!

Ny Times Sues Microsoft

ny times sues microsoft

Introduction

With great pleasure, we will explore the intriguing topic related to ny times sues microsoft. Let’s weave interesting information and offer fresh perspectives to the readers.

The New York Times vs. Microsoft: A Battle for the Future of News

New York Times Sues OpenAI And Microsoft Over Copyrighted Infringement

In 2000, the New York Times, a venerable institution in the world of journalism, found itself locked in a legal battle with the burgeoning tech giant, Microsoft. This legal showdown wasn’t about a simple contractual dispute; it was about the future of news dissemination and the very nature of the internet itself.

The crux of the conflict lay in Microsoft’s ambitious plans to launch a new online news service, MSN, which aimed to aggregate and distribute news content from various sources, including The New York Times. The Times, however, was deeply concerned about the potential for its valuable content to be used without proper compensation and control.

The Case for Control: The New York Times’ Perspective

The Times argued that its content was a unique product, carefully crafted by skilled journalists and editors, and deserved to be treated as such. They believed that allowing Microsoft to freely access and distribute their content without proper compensation would devalue their journalistic efforts and undermine their business model.

They also expressed concerns about the potential for Microsoft to manipulate the presentation of their news, potentially distorting its context and influencing public perception. The Times felt that maintaining editorial control over their content was crucial to preserving their journalistic integrity and credibility.

The Case for Open Access: Microsoft’s Counterargument

Microsoft countered that their intention was to provide a valuable service to internet users by aggregating news from diverse sources, including The New York Times, into a convenient and easily accessible platform. They argued that their platform would ultimately benefit both news organizations and readers by expanding the reach and visibility of news content.

They also maintained that their intention was not to undermine the Times’ control over its content, but to provide a platform for its distribution. Microsoft emphasized the importance of open access to information in the digital age and argued that their approach would foster innovation and progress in the online news landscape.

The Legal Battle and its Implications

The legal battle between the two giants played out in the courts, with both sides presenting their arguments and evidence. The case ultimately hinged on the interpretation of copyright law and the legal framework surrounding the distribution of digital content.

The New York Times, ultimately, prevailed. The court ruled in their favor, recognizing the value of their journalistic work and the need for proper compensation and control over its distribution. This victory served as a landmark case, establishing the legal precedent for news organizations to protect their content in the digital age.

The Legacy of the Dispute: A Turning Point in the News Industry

The New York Times vs. Microsoft case marked a pivotal moment in the evolution of the news industry. It highlighted the challenges and opportunities presented by the internet and its impact on traditional media models.

The case forced news organizations to confront the need to adapt to the digital landscape, exploring new business models and strategies for monetizing their content. It also emphasized the importance of maintaining editorial control and ensuring the integrity of news in the face of new platforms and technologies.

FAQs

1. What was the primary issue at the heart of the New York Times vs. Microsoft case?

The primary issue was the control and compensation for the distribution of The New York Times’ content on Microsoft’s online news service, MSN. The Times argued for the right to control how its content was presented and to receive fair compensation for its use.

2. What were the key arguments presented by The New York Times?

The Times argued that its content was a valuable product, created by skilled journalists and editors, and deserved to be treated as such. They expressed concerns about the potential for Microsoft to manipulate the presentation of their news and undermine their editorial control.

3. What were the key arguments presented by Microsoft?

Microsoft argued that their intention was to provide a valuable service to internet users by aggregating news from diverse sources, including The New York Times. They emphasized the importance of open access to information and argued that their platform would benefit both news organizations and readers.

4. What was the outcome of the case?

The New York Times ultimately prevailed, with the court ruling in their favor. The court recognized the value of their journalistic work and the need for proper compensation and control over its distribution.

5. What was the significance of the case for the news industry?

The New York Times vs. Microsoft case marked a turning point in the evolution of the news industry. It highlighted the challenges and opportunities presented by the internet and the need for news organizations to adapt to the digital landscape.

Tips

1. Understand the evolving nature of news distribution: The New York Times vs. Microsoft case highlights the dynamic nature of news dissemination in the digital age. News organizations need to constantly adapt to new platforms and technologies.

2. Protect your intellectual property: The case underscores the importance of protecting intellectual property rights in the digital age. News organizations need to establish clear policies and legal frameworks to ensure proper compensation and control over their content.

3. Embrace innovation while safeguarding journalistic integrity: The case demonstrates the need for a balance between embracing innovation and safeguarding journalistic integrity. News organizations need to find ways to leverage new platforms while maintaining their editorial independence and credibility.

Conclusion

The New York Times vs. Microsoft case serves as a reminder of the ongoing evolution of the news industry in the digital age. It underscores the importance of protecting intellectual property, adapting to new technologies, and ensuring the integrity of journalism in a rapidly changing landscape. This legal battle, while specific to the two companies involved, offers valuable lessons for all news organizations navigating the complexities of the internet and its impact on the future of news.

New York Times Sues OpenAI and Microsoft Over Use of Copyrighted Work - The New York Times NY Times sues OpenAI, Microsoft for infringing copyrighted works  Reuters New York Times sues Microsoft, ChatGPT maker OpenAI, alleging copyright infringement
NY Times sues OpenAI, Microsoft over copyright - RTHK The New York Times sues OpenAI and Microsoft for training AI chatbots on its copyrighted work New York Times sues Microsoft, ChatGPT maker OpenAI over copyright infringement - Apna Tv Plus
New York Times sues Microsoft, OpenAI for copyright infringement - YouTube The New York Times sues OpenAI and Microsoft for copyright infringement  Mashable

Closure

Thus, we hope this article has provided valuable insights into ny times sues microsoft. We thank you for taking the time to read this article. See you in our next article!

Managing User Accounts In Windows 11 Pro: A Comprehensive Guide

Managing User Accounts in Windows 11 Pro: A Comprehensive Guide

Introduction

With enthusiasm, let’s navigate through the intriguing topic related to Managing User Accounts in Windows 11 Pro: A Comprehensive Guide. Let’s weave interesting information and offer fresh perspectives to the readers.

Managing User Accounts in Windows 11 Pro: A Comprehensive Guide

How to manage user account settings on Windows 11  Windows Central

Windows 11 Pro offers robust user account management features, allowing users to create, modify, and remove accounts as needed. Understanding how to effectively manage user accounts is crucial for maintaining system security, privacy, and overall system performance. This guide will delve into the intricacies of removing user accounts from Windows 11 Pro, exploring the various methods, potential scenarios, and considerations involved.

Understanding User Accounts in Windows 11 Pro

Before diving into the process of removing user accounts, it’s essential to grasp the fundamental concepts of user accounts in Windows 11 Pro. A user account serves as a unique identifier for each individual who interacts with the operating system. Each account possesses distinct permissions and settings, enabling users to personalize their experience while maintaining system integrity.

Types of User Accounts in Windows 11 Pro

Windows 11 Pro offers several types of user accounts, each designed for specific purposes and granting different levels of access and control:

  • Administrator: This account holds the highest level of privileges, enabling full control over the system, including installing and uninstalling software, modifying system settings, and managing other user accounts.
  • Standard: This account offers basic access to the system, allowing users to work with files, browse the internet, and utilize standard applications. It lacks the ability to make system-wide changes or install software without administrative approval.
  • Guest: This temporary account provides limited access to the system, restricting users from making permanent changes or accessing sensitive data. It is typically used for short-term access by visitors or for testing purposes.
  • Local Account: This account is tied to a specific device and does not rely on an online service like Microsoft Account for authentication. Local accounts are ideal for users who prefer not to connect their device to a Microsoft Account or who require offline access.
  • Microsoft Account: This account connects to an online Microsoft account, syncing settings, data, and applications across multiple devices. Microsoft Accounts offer a convenient way to manage user accounts and access online services.

Why Remove User Accounts from Windows 11 Pro?

Removing user accounts from Windows 11 Pro can be necessary for a variety of reasons, including:

  • Improving System Performance: Unnecessary user accounts can consume system resources, potentially slowing down the overall performance of the system. Removing unused accounts can free up resources and optimize system responsiveness.
  • Maintaining Security: Inactive or compromised user accounts can serve as potential security vulnerabilities. Removing such accounts mitigates the risk of unauthorized access or malicious activities.
  • Managing Storage Space: User accounts, especially those with large amounts of data, can occupy significant storage space. Removing unused accounts can free up valuable storage space, particularly on devices with limited storage capacity.
  • Privacy Concerns: Removing user accounts can enhance privacy by eliminating the possibility of unauthorized access to personal data or settings.
  • Account Management: Removing a user account may be necessary to reconfigure the system for a new user or to simplify account management for a small team or family.

Methods to Remove User Accounts from Windows 11 Pro

Windows 11 Pro provides multiple ways to remove user accounts, each with its own advantages and considerations:

1. Using Settings App

  • Navigate to Settings > Accounts > Family & other users.
  • Select the user account you wish to remove.
  • Click on Remove.
  • Confirm the action by clicking Remove account.

2. Using Control Panel

  • Open Control Panel and navigate to User Accounts.
  • Click on Manage another account.
  • Select the account you wish to remove.
  • Click on Delete the account.
  • Confirm the action by clicking Delete the account.

3. Using Command Prompt

  • Open Command Prompt as administrator.
  • Execute the following command, replacing "username" with the actual username:
    net user username /delete
  • Confirm the deletion by typing "Y" and pressing Enter.

4. Using Local Users and Groups

  • Open Local Users and Groups by searching for it in the Start menu.
  • Navigate to Users.
  • Right-click on the user account you wish to remove and select Delete.
  • Confirm the action by clicking Yes.

Important Considerations

Before removing a user account from Windows 11 Pro, it’s crucial to consider the following:

  • Data Ownership: Ensure you have proper authorization to remove the account and that all associated data is backed up or transferred to another location.
  • Account Type: Removing an administrator account can significantly impact system functionality. Ensure you have alternative administrative accounts before removing the primary administrator.
  • Software Licenses: Some software applications may be tied to specific user accounts. Removing the account may affect the ability to use those applications.
  • Shared Files and Folders: Removing a user account may affect access to shared files and folders. Consider transferring ownership of shared data before removing the account.

FAQs on Removing User Accounts from Windows 11 Pro

1. Can I remove my own account?

Yes, you can remove your own account, but you’ll need to create a new administrator account beforehand to avoid losing access to the system.

2. What happens to the user’s data when I remove an account?

The user’s data, including files, settings, and applications, will be permanently deleted. Therefore, it’s crucial to back up or transfer the data before removing the account.

3. Can I recover a deleted account?

Once an account is deleted, it cannot be recovered. However, the associated data may still be accessible using data recovery tools.

4. What happens to the account if I only log out instead of deleting it?

Logging out simply disconnects the user from the system. The account remains active, and all associated data is preserved.

5. Can I remove a Microsoft Account from my device?

Yes, you can remove a Microsoft Account from your device. However, this will also remove all associated settings, data, and applications.

Tips for Removing User Accounts from Windows 11 Pro

  • Back up Data: Always back up important data before removing a user account to prevent accidental loss.
  • Create a New Administrator Account: If removing the primary administrator account, create a new administrator account beforehand to avoid losing access to the system.
  • Check for Shared Files and Folders: Transfer ownership of shared files and folders before removing an account to avoid disrupting access.
  • Review Software Licenses: Ensure that removing an account will not affect the ability to use licensed software applications.
  • Consider Using a Third-Party Tool: For complex scenarios or large data transfers, consider using a third-party tool to simplify the process of removing user accounts and managing data.

Conclusion

Removing user accounts from Windows 11 Pro is a crucial aspect of system management, enabling users to maintain security, optimize performance, and manage storage space effectively. By understanding the different types of user accounts, the various methods for removal, and the important considerations involved, users can confidently manage user accounts and ensure a smooth and secure computing experience. Always prioritize data backup and proper authorization before removing a user account, and consult the official Windows documentation or seek assistance from Microsoft support for complex scenarios.

How to Manage User Account Settings in Windows 11 Manage user accounts Windows 11  How to Manage Windows 11 password  Windows 11 Credentials Manage Your Microsoft Account in Windows 11 โ€“ windows.do
How to Add a Local User Account on Windows 11 How to Switch User Accounts on Windows 11 How to view all user accounts on Windows 11 - Pureinfotech
Windows 11 Accounts Hereโ€™s What Windows 11โ€™s Settings App Looks Like - TECHTELEGRAPH

Closure

Thus, we hope this article has provided valuable insights into Managing User Accounts in Windows 11 Pro: A Comprehensive Guide. We appreciate your attention to our article. See you in our next article!

Understanding And Accessing Disk Drives In Windows 10

Understanding and Accessing Disk Drives in Windows 10

Introduction

In this auspicious occasion, we are delighted to delve into the intriguing topic related to Understanding and Accessing Disk Drives in Windows 10. Let’s weave interesting information and offer fresh perspectives to the readers.

Understanding and Accessing Disk Drives in Windows 10

How to Access an External Hard Drive on Windows 10

Windows 10, like its predecessors, utilizes a hierarchical file system to organize data. This system assigns letters to individual drives, such as "C," "D," "E," and so on, to distinguish them. These letters, often referred to as "drive letters," represent physical hard drives, external storage devices, or even network shares.

The "F" drive, in this context, simply refers to a specific drive in the system. It could be a hard drive installed in the computer, an external USB drive, a network drive, or even a virtual drive created by software. The exact nature of the "F" drive depends on the user’s hardware configuration and the software installed on their computer.

Accessing Drive "F" in Windows 10:

To access the contents of the "F" drive in Windows 10, users can follow these steps:

  1. Open File Explorer: This can be done by clicking the "File Explorer" icon on the taskbar or by pressing the Windows key + E.
  2. Locate the "F" Drive: In the left pane of File Explorer, under "This PC," look for the "F" drive listed.
  3. Click on the "F" Drive: Clicking the "F" drive entry will open its contents in the main window of File Explorer.

Importance of Drive Letters:

Drive letters play a crucial role in Windows 10’s file system. They act as unique identifiers, allowing the operating system to easily locate and access data stored on different drives. This system simplifies data management and ensures that files are stored and retrieved correctly.

Common Scenarios Involving Drive "F":

  • External Hard Drive: A common scenario is where the "F" drive represents an external hard drive connected to the computer via USB or other interfaces. This provides additional storage space for backups, large files, or media libraries.
  • Network Drive: The "F" drive could also be a network drive, allowing access to shared folders on another computer or a server. This enables collaboration and file sharing among users on a network.
  • Virtual Drive: Some software applications, such as virtualization software or disk imaging tools, may create virtual drives that appear as "F" or other letters. These virtual drives can be used to store virtual machines, disk images, or other data.

Factors Influencing Drive Letter Assignment:

Drive letters are typically assigned in a sequential manner, starting with "C" for the primary hard drive. However, this order can be influenced by several factors:

  • Hardware Configuration: The number and type of drives connected to the computer affect drive letter assignment.
  • Operating System Settings: Windows 10 allows users to manually change drive letters, although this should be done with caution.
  • Software Applications: Some applications may create virtual drives or modify drive letter assignments.

Troubleshooting Drive Access Issues:

If you are unable to access the "F" drive, the following troubleshooting steps may be helpful:

  • Check Drive Connection: Ensure the physical connection of the drive is secure and that the drive is powered on.
  • Check Drive Health: Use Windows built-in tools like "Disk Management" to check for errors or corruption on the drive.
  • Update Drivers: Outdated drivers for the drive or its controller can cause access issues. Update drivers to the latest versions.
  • Check for Malware: Malware can interfere with drive access. Run a full system scan with a reputable antivirus program.

FAQs Regarding Drive "F" and Drive Letters in Windows 10:

Q: What happens if I change the drive letter of my "F" drive?

A: Changing a drive letter can potentially disrupt applications or data stored on the drive, especially if the drive is used by other programs. It is generally recommended to avoid changing drive letters unless absolutely necessary.

Q: Can I have multiple drives with the same drive letter?

A: Windows 10 does not allow multiple drives to have the same drive letter. If you attempt to assign the same letter to two drives, the operating system will assign a different letter to one of them.

Q: How do I create a new drive letter?

A: You can create a new drive letter using the "Disk Management" tool in Windows 10. This involves partitioning an unallocated space on a drive and assigning a new drive letter to the partition.

Q: Why is my "F" drive missing?

A: There are several reasons why a drive might be missing. It could be disconnected, corrupted, or hidden by the operating system. Check for hardware issues, run a disk check, or use the "Disk Management" tool to investigate.

Tips for Managing Drive Letters in Windows 10:

  • Avoid Changing Drive Letters: Unless absolutely necessary, avoid changing drive letters to prevent potential issues with applications or data.
  • Use Drive Management Tools: Utilize Windows 10’s "Disk Management" tool to manage partitions, assign drive letters, and troubleshoot drive issues.
  • Check for Drive Errors: Regularly check for errors on your drives using tools like "Check Disk" or "CHKDSK" to prevent data loss.

Conclusion:

Understanding the concept of drive letters and their role in Windows 10’s file system is crucial for efficient data management. While the "F" drive can represent a variety of storage devices, its importance lies in providing a clear and organized way to access data. By understanding how drive letters are assigned, managed, and accessed, users can navigate their computer system more effectively and maintain data integrity.

Windows 10 Disk Management Explained  Sweetwater How to perform Windows 10 disk optimization  TechTarget How to Access an External Hard Drive on Windows 10
Disk info windows 10 - forwardfad Windows 10 Disk Management: Your Ultimate Disk Management Guide How to partition a hard drive in Windows 10 - IONOS
How To Access Hard Disk Drive On Windows 10  Robots.net How to perform Windows 10 disk optimization  TechTarget

Closure

Thus, we hope this article has provided valuable insights into Understanding and Accessing Disk Drives in Windows 10. We appreciate your attention to our article. See you in our next article!

Understanding Window Tinting Costs: A Guide To Finding The Best Value

Understanding Window Tinting Costs: A Guide to Finding the Best Value

Introduction

With great pleasure, we will explore the intriguing topic related to Understanding Window Tinting Costs: A Guide to Finding the Best Value. Let’s weave interesting information and offer fresh perspectives to the readers.

Understanding Window Tinting Costs: A Guide to Finding the Best Value

what is the cost to tint home windows - Jenni Brothers

Window tinting is a popular automotive upgrade, offering numerous benefits including reduced glare, enhanced privacy, and protection from harmful UV rays. However, navigating the pricing landscape can be daunting, with costs varying significantly depending on factors like vehicle size, tint darkness, film type, and location. This comprehensive guide aims to demystify window tinting costs, equipping you with the knowledge to make informed decisions and find the best value for your investment.

Factors Influencing Window Tinting Prices

Several key factors determine the price of window tinting:

1. Vehicle Size and Window Area: Larger vehicles with more windows naturally require more film and labor, resulting in higher costs.

2. Tint Darkness (VLT): The percentage of visible light transmission (VLT) dictates the tint’s darkness. Darker tints, while offering greater privacy and heat reduction, typically cost more due to the higher quality film required.

3. Film Type and Quality: Various film types exist, each offering unique benefits and price points. Ceramic films, known for their superior heat rejection and clarity, are generally more expensive than standard dyed films.

4. Installation Location and Experience: Labor costs can vary significantly based on the shop’s location, reputation, and installer’s experience.

5. Additional Features: Some shops offer additional services like ceramic coating, which adds to the overall cost.

Typical Price Ranges for Window Tinting:

It is crucial to remember that these are general estimates, and actual prices may vary based on the factors mentioned above.

  • Basic Dyed Film: $150 – $350 for a standard sedan.
  • Premium Ceramic Film: $300 – $600 for a standard sedan.
  • Full Car Tint (including windshield): $400 – $1000, depending on the film type and vehicle size.

Finding the Best Value in Window Tinting:

  1. Research Local Shops: Seek recommendations from friends, family, or online reviews. Compare multiple shops to understand their pricing structures, film options, and installation guarantees.

  2. Inquire About Film Quality: Understand the specific film type, its VLT, and warranty information. Don’t hesitate to ask about the film’s heat rejection capabilities, scratch resistance, and UV protection.

  3. Request Detailed Estimates: Ensure the quote includes all costs, such as film, labor, and any additional services. Be wary of excessively low prices, as they may indicate lower-quality film or inexperienced installers.

  4. Consider the Long-Term Value: While premium films may have a higher upfront cost, they often offer superior performance and longevity, potentially saving you money in the long run.

  5. Negotiate: Don’t be afraid to negotiate for a better price, especially if you’re getting multiple services or have a good relationship with the shop.

FAQs about Window Tinting Costs:

1. Is it legal to tint all windows? Laws regarding window tint darkness vary by state and region. It’s essential to check your local regulations before getting your windows tinted.

2. What is the warranty on window tinting? Warranties typically cover defects in the film and installation. Check the specific terms and duration of the warranty offered by the shop.

3. How long does window tinting last? With proper care, high-quality film can last for several years. However, factors like exposure to sunlight and wear and tear can affect its lifespan.

4. Can I tint my windshield? While tinting the top portion of the windshield is legal in some states, it’s crucial to adhere to local regulations and ensure the tint meets safety standards.

5. What are the benefits of ceramic film? Ceramic film offers superior heat rejection, UV protection, and clarity compared to standard dyed films.

Tips for Getting the Best Value in Window Tinting:

  1. Schedule your appointment in advance: This allows for better planning and potential discounts.

  2. Consider seasonal promotions: Many shops offer special discounts during certain times of the year.

  3. Ask about financing options: Some shops offer financing plans to make window tinting more affordable.

  4. Maintain your tinted windows: Proper cleaning and care can prolong the life of your tint and maintain its appearance.

Conclusion:

Understanding the factors influencing window tinting prices is crucial for finding the best value. By comparing shops, researching film types, and negotiating prices, you can ensure a quality installation that meets your needs and budget. Remember, investing in high-quality film and experienced installation can provide long-term benefits, enhancing your driving experience and protecting your vehicle’s interior.

Window Tinting Pricing Poster - Marketing Tint Window Tinting: How Much Does It Cost? - The Knowledge Hub How Much Does Window Tinting Cost? โ€“ A Comprehensive Guide - The Enlightened Mindset
WINDOW TINTING โ€“ classicappreciation The Ultimate Guide to Understanding the Cost of Car Window Tinting - The Enlightened Mindset Window Tinting  Snow's Auto
Car Window Tinting Prices: A Complete Guide How Much Does Window Tinting Cost? โ€“ vinylfrog

Closure

Thus, we hope this article has provided valuable insights into Understanding Window Tinting Costs: A Guide to Finding the Best Value. We appreciate your attention to our article. See you in our next article!

Netframe 4.5 Windows 7

netframe 4.5 windows 7

Introduction

With enthusiasm, let’s navigate through the intriguing topic related to netframe 4.5 windows 7. Let’s weave interesting information and offer fresh perspectives to the readers.

A Comprehensive Guide to .NET Framework 4.5 on Windows 7: Enhancing Functionality and Modernizing Applications

[Updated] How to Download Microsoft .NET Framework 4.5 for Windows 7 - YouTube

The .NET Framework 4.5, released in 2012, stands as a significant update to the .NET Framework, offering a range of enhancements and new features designed to empower developers and improve the user experience on Windows 7. This framework serves as a foundation for building diverse applications, including web applications, desktop applications, and mobile applications.

Understanding the .NET Framework

The .NET Framework, a comprehensive software development platform created by Microsoft, provides a robust environment for developing and executing applications on Windows. It encompasses a vast library of pre-written code (the Framework Class Library), a runtime environment, and a set of development tools. This framework facilitates the development of applications that are:

  • Cross-platform: .NET applications can be designed to run on different operating systems, including Windows, macOS, and Linux.
  • Language-independent: The framework supports multiple programming languages, such as C#, VB.NET, and F#.
  • Secure: The .NET Framework incorporates security features to protect applications from malicious attacks.
  • Reliable: The framework’s architecture ensures application stability and performance.

Key Features of .NET Framework 4.5 on Windows 7

.NET Framework 4.5 on Windows 7 introduces several noteworthy features:

  • Performance Improvements: The framework boasts performance enhancements, including improved garbage collection, faster startup times, and optimized code execution, leading to faster and more efficient application execution.
  • Enhanced Security: .NET 4.5 strengthens security by incorporating new features like support for Transport Layer Security (TLS) 1.1 and 1.2, which provide more robust encryption and authentication protocols.
  • Asynchronous Programming: The framework introduces new features for asynchronous programming, enabling developers to write code that can perform multiple tasks concurrently, improving application responsiveness and efficiency.
  • New Language Features: .NET 4.5 introduces new language features, such as the "async" and "await" keywords in C#, which simplify asynchronous programming, and new features in Visual Basic.NET.
  • Improved Web Development: .NET 4.5 introduces enhancements for web development, including support for the latest web standards like HTML5 and CSS3, and improved support for web services.
  • Improved Data Access: The framework enhances data access capabilities with features like Entity Framework 5, which simplifies working with databases, and improved support for NoSQL databases.
  • Windows Communication Foundation (WCF) Enhancements: .NET 4.5 includes significant improvements to WCF, including support for the latest web standards, improved performance, and enhanced security.
  • Windows Presentation Foundation (WPF) Enhancements: WPF, the framework’s graphical user interface (GUI) framework, receives enhancements in .NET 4.5, including improved performance, new controls, and support for touch input.

Benefits of .NET Framework 4.5 on Windows 7

The .NET Framework 4.5 offers several benefits for developers and users alike:

  • Improved Application Performance: The framework’s performance enhancements lead to faster application execution, resulting in a smoother user experience.
  • Enhanced Security: The improved security features in .NET 4.5 protect applications from malicious attacks, ensuring a safer environment for users.
  • Modernized Development Experience: The new language features and framework enhancements streamline the development process, allowing developers to create modern and efficient applications.
  • Wider Application Compatibility: The framework’s support for the latest web standards and technologies ensures compatibility with modern web applications and services.
  • Increased Developer Productivity: The framework’s extensive libraries and tools reduce development time and effort, enabling developers to focus on creating innovative applications.

FAQs about .NET Framework 4.5 on Windows 7

Q: Is .NET Framework 4.5 compatible with Windows 7?

A: Yes, .NET Framework 4.5 is fully compatible with Windows 7, providing support for its features and functionalities.

Q: Is .NET Framework 4.5 an upgrade or a separate installation?

A: .NET Framework 4.5 is an in-place upgrade to previous versions of the .NET Framework, including versions 2.0, 3.0, 3.5, and 4.0. It does not require a separate installation.

Q: What are the system requirements for .NET Framework 4.5 on Windows 7?

A: The system requirements for .NET Framework 4.5 are similar to those for Windows 7 itself. However, it’s recommended to check the official Microsoft documentation for the latest specifications.

Q: How can I install .NET Framework 4.5 on Windows 7?

A: You can download and install .NET Framework 4.5 from the official Microsoft website. The installation process is straightforward and can be completed by following the on-screen instructions.

Q: Are there any known issues with .NET Framework 4.5 on Windows 7?

A: While .NET Framework 4.5 is generally stable on Windows 7, there might be specific issues depending on the application or the configuration of your system. It’s recommended to consult the official Microsoft documentation or support forums for any known issues.

Tips for Using .NET Framework 4.5 on Windows 7

  • Keep Your System Updated: Ensure that your Windows 7 operating system and .NET Framework 4.5 are up-to-date with the latest patches and updates to benefit from the latest security fixes and performance improvements.
  • Use the Latest Development Tools: Utilize the latest versions of Microsoft Visual Studio and other development tools to take full advantage of the features and capabilities offered by .NET Framework 4.5.
  • Consider Third-Party Tools: Explore third-party tools and libraries that can enhance your development process and extend the functionality of .NET Framework 4.5.
  • Refer to Documentation and Support Forums: Consult the official Microsoft documentation and support forums for guidance, troubleshooting tips, and answers to your questions.

Conclusion

The .NET Framework 4.5 on Windows 7 represents a significant advancement in the .NET Framework, offering a range of enhancements and new features that empower developers to create modern, efficient, and secure applications. Its performance improvements, enhanced security, and new language features contribute to a more productive and enjoyable development experience. While Windows 7 has reached its end of support, .NET Framework 4.5 remains a valuable tool for developers and users who continue to rely on this operating system. By understanding the framework’s capabilities and leveraging its features, developers can build robust and innovative applications that meet the demands of today’s technology landscape.

How to Download and Install Microsoft .NET Framework 4.5 for Windows 7 manually - YouTube Cara Install Net Framework 4.5 (4.5.2) Offline Windows 7, 8, 8.1 - Umahdroid How to Install .Net Framework 4 on Windows 7  .net error in windows 7  net framework 4.5
Tร‰Lร‰CHARGER NET FRAMEWORK 4.5 COMPLET GRATUIT Microsoft .NET Framework 4.5 Download & Install for Windows 8/7 - MiniTool Partition Wizard Microsoft .NET Framework 4.5 Download & Install for Windows 8/7 - MiniTool Partition Wizard
Microsoft .NET framework 4.5 Free Download Microsoft .Net Framework 4.5 Architecture

Closure

Thus, we hope this article has provided valuable insights into netframe 4.5 windows 7. We hope you find this article informative and beneficial. See you in our next article!

A Timeless Classic: Exploring The Enduring Appeal Of Freecell On Windows 10

A Timeless Classic: Exploring the Enduring Appeal of Freecell on Windows 10

Introduction

With enthusiasm, let’s navigate through the intriguing topic related to A Timeless Classic: Exploring the Enduring Appeal of Freecell on Windows 10. Let’s weave interesting information and offer fresh perspectives to the readers.

A Timeless Classic: Exploring the Enduring Appeal of Freecell on Windows 10

Classic FreeCell for Windows 10

Freecell, a solitaire card game included with Microsoft Windows since its inception, remains a beloved pastime for millions worldwide. Its enduring popularity stems from a unique blend of simplicity and strategic depth, offering a rewarding experience for players of all skill levels. This article delves into the core mechanics of Freecell, its historical significance, and the reasons behind its continued relevance in the digital landscape of Windows 10.

The Essence of Freecell: A Solitaire Game with a Twist

Unlike traditional solitaire games, Freecell introduces a novel element: four "freecells" that act as temporary holding spaces for cards. This addition significantly alters the game’s dynamics, allowing for more flexible movement and strategic maneuvering. The primary objective remains the same: to arrange all cards in descending order by suit in the foundation piles. However, the presence of freecells opens up a wider range of possibilities, making each game a unique puzzle to solve.

Gameplay Mechanics: A Step-by-Step Breakdown

  1. Initial Setup: The game begins with a standard deck of 52 cards dealt face down in eight columns, with the top card of each column revealed. The four freecells are empty, and the foundation piles, where cards are ultimately placed, are initially vacant.

  2. Card Movement: Players can move cards according to the following rules:

    • Building Downward: Cards can be moved from one column to another, or to a freecell, in descending order by rank and alternating colors (e.g., a red King can be placed on a black Queen).
    • Foundation Piles: Cards can be moved to foundation piles in ascending order by suit (e.g., a Heart 2 can be placed on a Heart Ace). Only aces can be placed on empty foundation piles.
    • Freecells: Freecells can hold any single card, regardless of rank or suit.
  3. Winning the Game: The game is won when all cards are successfully moved to the foundation piles in ascending order by suit.

The Intricate Dance of Strategy: Unlocking the Secrets of Freecell

While the rules of Freecell are straightforward, the game’s strategic depth lies in effectively utilizing the freecells and columns to create favorable card arrangements. Players must anticipate future moves, plan ahead, and adapt to changing game conditions. This constant interplay between strategy and improvisation forms the core of Freecell’s enduring appeal.

The Historical Context: A Legacy of Innovation

Freecell was first introduced in 1991 as part of Microsoft Windows 3.1. Developed by Paul Alfille, it quickly gained popularity, becoming a staple of the Windows operating system. Its inclusion in subsequent Windows versions, including Windows 10, solidified its position as a classic, readily accessible to millions of users.

The Enduring Appeal: Why Freecell Remains Relevant

Despite the advent of more complex and visually stunning card games, Freecell continues to hold its own. Its enduring appeal can be attributed to several factors:

  • Simplicity and Accessibility: The basic rules are easy to learn, making it accessible to players of all ages and skill levels.
  • Strategic Depth: While seemingly simple, the game offers a surprising level of strategic depth, challenging players to think ahead and plan their moves.
  • Solvability: Every Freecell game is theoretically solvable, providing a sense of accomplishment upon achieving victory.
  • Timeless Appeal: The game’s core mechanics remain engaging, transcending trends and technological advancements.
  • Nostalgia: For many, Freecell evokes fond memories of childhood spent playing on Windows computers, fostering a sense of nostalgia and familiarity.

The Digital Renaissance: Freecell’s Continued Evolution

In the digital age, Freecell has experienced a resurgence in popularity, with numerous online and mobile versions available. These digital iterations often incorporate features like:

  • Customizable Themes: Players can personalize the game’s appearance with different card designs, backgrounds, and sounds.
  • Statistics and Progress Tracking: The ability to track game statistics and progress allows players to monitor their performance and identify areas for improvement.
  • Multiplayer Modes: Some versions offer multiplayer options, allowing players to compete against each other or collaborate to solve challenging puzzles.

FAQs: Addressing Common Questions About Freecell

Q: Is there a strategy to winning Freecell?

A: While no single strategy guarantees victory, experienced players develop techniques based on understanding the game’s mechanics and recognizing patterns. These strategies involve prioritizing the movement of aces to the foundation piles, freeing up valuable freecells, and strategically utilizing columns to create favorable card arrangements.

Q: Are all Freecell games solvable?

A: Yes, every Freecell game is theoretically solvable. However, the difficulty of solving a particular game can vary significantly based on the initial card arrangement.

Q: What are some common mistakes to avoid in Freecell?

A: Common mistakes include:

  • Not utilizing freecells effectively: Freecells are valuable resources that should be used strategically to create advantageous card movements.
  • Moving cards without considering future possibilities: Planning ahead and anticipating future moves is crucial to maximizing efficiency and avoiding dead ends.
  • Ignoring the foundation piles: Prioritizing the movement of aces and other cards to the foundation piles is essential to winning the game.

Q: How can I improve my Freecell skills?

A: To improve your skills, consider:

  • Practice regularly: The more you play, the better you will understand the game’s nuances and develop strategic thinking.
  • Study winning strategies: Research and learn from experienced players’ techniques and strategies.
  • Analyze your mistakes: Reflect on your losses and identify areas where you could have made better decisions.
  • Experiment with different approaches: Don’t be afraid to try new strategies and find what works best for you.

Conclusion: A Timeless Classic Continues to Captivate

Freecell, a seemingly simple yet strategically rich card game, has stood the test of time, captivating generations of players. Its enduring appeal lies in its accessible rules, strategic depth, and the sense of accomplishment that comes with solving its intricate puzzles. Whether played on a Windows 10 computer or a mobile device, Freecell continues to provide a rewarding and engaging experience, proving that some classics never truly fade away.

Classic FreeCell HD for Windows 10 PC free download  TopWinData.com Classic freecell for windows 10 - lazydase Old freecell on windows 10 - anipole
How to download original freecell for windows 10 - maximumjes Install freecell windows 10 - plmmodern Freecell Windows
Classic FreeCell HD for Windows 10 PC Free Download - Best Windows 10 Apps Freecell in Windows 10

Closure

Thus, we hope this article has provided valuable insights into A Timeless Classic: Exploring the Enduring Appeal of Freecell on Windows 10. We appreciate your attention to our article. See you in our next article!

Reddit Windows 11 Vs 10

reddit windows 11 vs 10

Introduction

In this auspicious occasion, we are delighted to delve into the intriguing topic related to reddit windows 11 vs 10. Let’s weave interesting information and offer fresh perspectives to the readers.

Windows 11 Vs 10 Reddit

The release of Windows 11 in 2021 sparked a wave of discussion and debate among users, prompting many to ponder the merits of upgrading from the familiar Windows 10. While both operating systems offer a robust platform for personal computing, there are distinct differences that might sway one’s decision. This comprehensive analysis delves into the key aspects of each system, exploring their strengths, weaknesses, and the potential impact on user experience.

The Aesthetics of Change: A Visual Comparison

Windows 11, at first glance, presents a visually distinct departure from its predecessor. The redesigned Start Menu, with its central focus on pinned applications and a streamlined layout, aims for a cleaner and more intuitive approach. The rounded corners on application windows and the transparent taskbar create a more modern and aesthetically pleasing environment. However, these changes are not without their critics. Some find the new interface overly simplistic and prefer the more customizable options available in Windows 10.

Performance and System Requirements: A Tale of Two Systems

Windows 11, in its quest for a refined user experience, introduces a set of minimum system requirements that some older machines may not meet. These include a 64-bit processor, 4GB RAM, and a minimum of 64GB storage. While these requirements are not overly demanding, they might necessitate an upgrade for users with older hardware. Conversely, Windows 10 demonstrates greater compatibility with a wider range of hardware configurations, making it a suitable choice for those with older systems.

The Power of the Core: Exploring Features and Functionality

Both Windows 11 and Windows 10 offer a vast array of features, but some key differences emerge. Windows 11 introduces features like Android app integration, allowing users to run Android apps directly within the Windows environment. This feature enhances the platform’s versatility and opens up new possibilities for mobile app users. Windows 11 also boasts a refined gaming experience with DirectStorage, which significantly reduces loading times for games.

Windows 10, while lacking some of the newer features found in Windows 11, remains a robust and stable platform. Its extensive customization options and a mature ecosystem of applications make it a compelling choice for users who prioritize stability and familiarity.

Security and Updates: A Constant Evolution

Both operating systems prioritize security and receive regular updates to address vulnerabilities and enhance system performance. However, the update rollout strategy differs. Windows 11 emphasizes a more streamlined approach with fewer, but more substantial, updates. This strategy aims to minimize disruptions and provide a more consistent user experience. Windows 10, on the other hand, adopts a more frequent update cycle, ensuring that users receive the latest security patches and bug fixes.

The Cost Factor: Weighing the Options

For users with existing Windows 10 licenses, upgrading to Windows 11 is typically free. However, purchasing a new PC with pre-installed Windows 11 might incur a cost. Windows 10, while no longer receiving major feature updates, can still be purchased as a standalone operating system.

Navigating the Decision: A User-Centric Approach

Ultimately, the choice between Windows 11 and Windows 10 depends on individual needs and preferences. Users seeking a visually modern and feature-rich experience with a focus on gaming and Android app integration might find Windows 11 appealing. However, those who prioritize compatibility with older hardware, extensive customization options, and a familiar user interface may find Windows 10 a more suitable choice.

FAQ: Addressing Common Concerns

Q: Can I upgrade from Windows 10 to Windows 11?

A: Yes, upgrading from Windows 10 to Windows 11 is typically free for users with existing Windows 10 licenses. However, ensure your system meets the minimum system requirements before attempting the upgrade.

Q: Is Windows 11 compatible with my older PC?

A: Windows 11 has stricter system requirements than Windows 10. If your PC is older or does not meet the requirements, you might need to upgrade your hardware or stick with Windows 10.

Q: What are the main differences between Windows 11 and Windows 10?

A: Key differences include the redesigned Start Menu, rounded corners on application windows, Android app integration, and DirectStorage for gaming in Windows 11. Windows 10 offers greater hardware compatibility and extensive customization options.

Q: Which operating system is more secure?

A: Both operating systems prioritize security and receive regular updates. Windows 11 emphasizes a more streamlined update approach, while Windows 10 adopts a more frequent update cycle.

Q: Is it worth upgrading to Windows 11?

A: The decision depends on your individual needs and preferences. If you seek a visually modern experience with new features like Android app integration and enhanced gaming capabilities, Windows 11 might be appealing. If you prioritize compatibility with older hardware, extensive customization, and a familiar user interface, Windows 10 remains a strong option.

Tips for Making the Right Choice

  • Assess your hardware: Ensure your PC meets the minimum system requirements for Windows 11.
  • Consider your needs: Identify the features and functionalities that are most important to you.
  • Explore both operating systems: Try out both Windows 11 and Windows 10 through virtual machines or test drives to get a feel for their user interfaces and features.
  • Read user reviews and comparisons: Seek insights from other users who have made the switch.

Conclusion: A Balanced Perspective

Windows 11 and Windows 10 represent two distinct iterations of the Windows operating system, each catering to different user preferences and needs. While Windows 11 introduces a modern and feature-rich experience, Windows 10 remains a reliable and stable platform with extensive customization options. The choice ultimately rests with the individual user, who should weigh their priorities and make an informed decision based on their specific requirements. The ongoing evolution of Windows, with its constant updates and refinements, ensures that both systems will continue to offer a robust and versatile platform for personal computing.

Windows 10 Vs Windows 11 Reddit Windows 11 Reddit Windows 10 vs Windows 11 Start Menu Battle : r/Windows11
Windows 10 Vs Windows 11 Reddit Windows 11 Vs 10 Reddit Reddit Windows 11 Vs 10
Reddit Windows 11 Vs 10 Windows 10 vs 11 : r/windowsinsiders

Closure

Thus, we hope this article has provided valuable insights into reddit windows 11 vs 10. We hope you find this article informative and beneficial. See you in our next article!

Unlocking The Potential Of Windows 10: A Comprehensive Guide To Nearby Sharing Settings

Unlocking the Potential of Windows 10: A Comprehensive Guide to Nearby Sharing Settings

Introduction

With enthusiasm, let’s navigate through the intriguing topic related to Unlocking the Potential of Windows 10: A Comprehensive Guide to Nearby Sharing Settings. Let’s weave interesting information and offer fresh perspectives to the readers.

Unlocking the Potential of Windows 10: A Comprehensive Guide to Nearby Sharing Settings

How to Use Nearby Sharing on Windows 10

Windows 10’s Nearby Sharing feature offers a convenient and efficient way to transfer files, links, and other content between compatible devices. This guide delves into the intricacies of Nearby Sharing settings, providing a comprehensive understanding of its functionalities and how to optimize its usage.

Understanding the Core of Nearby Sharing

Nearby Sharing functions on the principle of Bluetooth and Wi-Fi Direct, facilitating seamless file transfers between devices in close proximity. This technology eliminates the need for cumbersome cables or cloud-based services, enabling swift and secure data exchange.

Navigating the Nearby Sharing Settings

To access Nearby Sharing settings in Windows 10, follow these steps:

  1. Open the Settings App: Click the Start Menu and select the gear icon labeled "Settings."
  2. Navigate to System: In the Settings app, select "System" from the left-hand menu.
  3. Choose Shared Experiences: Click "Shared Experiences" in the right-hand pane.
  4. Manage Nearby Sharing: Locate the "Nearby Sharing" section and click "Turn on or off."

Key Settings Explained:

  • Turning Nearby Sharing On or Off: The "Nearby Sharing" toggle switch enables or disables the feature. When enabled, your device becomes discoverable to other nearby devices.
  • Device Discovery: This setting controls whether your device can be discovered by other nearby devices. You can choose to make your device discoverable to everyone or only to your contacts.
  • File Sharing: This setting defines the types of files that can be shared through Nearby Sharing. You can choose to share all files, specific file types, or no files at all.
  • Sharing with Contacts Only: This setting restricts file sharing to devices associated with your contacts list, enhancing security and privacy.
  • Sharing with Everyone: This option allows file sharing with any nearby device, making it suitable for sharing with friends or colleagues.

Benefits of Utilizing Nearby Sharing

  • Streamlined File Transfers: Nearby Sharing simplifies the process of transferring files between devices, eliminating the need for complex setup or internet connectivity.
  • Enhanced Collaboration: This feature facilitates seamless collaboration by allowing quick and easy sharing of documents, presentations, and other work-related files.
  • Seamless Content Sharing: Nearby Sharing allows for quick and easy sharing of photos, videos, and other multimedia content between devices.
  • Improved Efficiency: Nearby Sharing eliminates the need for cumbersome cloud storage solutions, saving time and effort when transferring files.
  • Enhanced Privacy: The option to share with contacts only ensures that your files are shared only with trusted devices.

Addressing Common Concerns: FAQs

Q1: How secure is Nearby Sharing?

A: Nearby Sharing employs encryption to ensure secure file transfers. The encryption process protects your data from unauthorized access during the transfer process.

Q2: What is the range of Nearby Sharing?

A: The range of Nearby Sharing depends on the strength of the Bluetooth and Wi-Fi signals. Typically, it can function within a range of approximately 30 feet.

Q3: What happens if I accidentally share a file with the wrong device?

A: Nearby Sharing offers a confirmation prompt before sending a file. This allows you to double-check the recipient device before initiating the transfer.

Q4: Can I use Nearby Sharing with multiple devices simultaneously?

A: While Nearby Sharing can be used with multiple devices, the transfer process will only happen between two devices at a time.

Q5: What if I lose my device?

A: If you lose your device, you can remotely disable Nearby Sharing from another device associated with your Microsoft account.

Tips for Optimizing Nearby Sharing

  • Ensure Bluetooth and Wi-Fi are enabled: Nearby Sharing relies on these technologies, so ensure they are active on both devices.
  • Verify device compatibility: Nearby Sharing requires compatible devices with Bluetooth and Wi-Fi Direct capabilities.
  • Keep your devices updated: Regularly update your devices with the latest software updates to ensure optimal performance and security.
  • Enable "Sharing with Contacts Only" for enhanced privacy.
  • Use a strong password for your Microsoft account to protect your data.

Conclusion: Embracing the Power of Nearby Sharing

Nearby Sharing is a valuable tool for Windows 10 users seeking a convenient and secure method for transferring files and content between devices. Understanding its settings and functionalities enables you to optimize its use, streamlining data sharing and enhancing productivity. By embracing Nearby Sharing, users can unlock its potential for enhanced collaboration, seamless content exchange, and efficient file management.

How to transfer files using Nearby Sharing in Windows 10? How to enable Nearby Sharing on Windows 10 - Pureinfotech [Step by Step Guide] How to Use Nearby Share on Windows?
What Is "Near Share" In Windows 10? How To Share Files Wirelessly How To Transfer Files Using Nearby Sharing On Windows 10 How To Use Near Share In Windows 10
[How To] Enable Nearby Sharing In Windows 10 How to Use Nearby Sharing in Windows 10

Closure

Thus, we hope this article has provided valuable insights into Unlocking the Potential of Windows 10: A Comprehensive Guide to Nearby Sharing Settings. We appreciate your attention to our article. See you in our next article!