Archives May 2024

P-touch Editor: A Comprehensive Guide To Label Design And Printing On Windows 10

P-touch Editor: A Comprehensive Guide to Label Design and Printing on Windows 10

Introduction

In this auspicious occasion, we are delighted to delve into the intriguing topic related to P-touch Editor: A Comprehensive Guide to Label Design and Printing on Windows 10. Let’s weave interesting information and offer fresh perspectives to the readers.

P-touch Editor: A Comprehensive Guide to Label Design and Printing on Windows 10

Creating a new label layout using P Touch Editor - YouTube

The P-touch Editor software is a powerful tool designed for creating and printing labels using Brother P-touch label printers. This software, compatible with Windows 10, empowers users to design professional-looking labels for various applications, from office organization and product labeling to personal projects and crafting.

Understanding P-touch Editor and Its Importance

The P-touch Editor software serves as the central hub for all label creation and printing tasks using Brother P-touch printers. Its intuitive interface and comprehensive features make it accessible to both novice and experienced users. The software’s importance lies in its ability to:

  • Design Professional Labels: Users can create labels with various text styles, fonts, sizes, and colors, incorporating graphics, barcodes, and QR codes.
  • Utilize Pre-designed Templates: The software offers numerous pre-designed templates for various applications, including name badges, file folders, and product labels.
  • Customize Label Content: Users can easily add text, images, and other elements to personalize labels according to their specific needs.
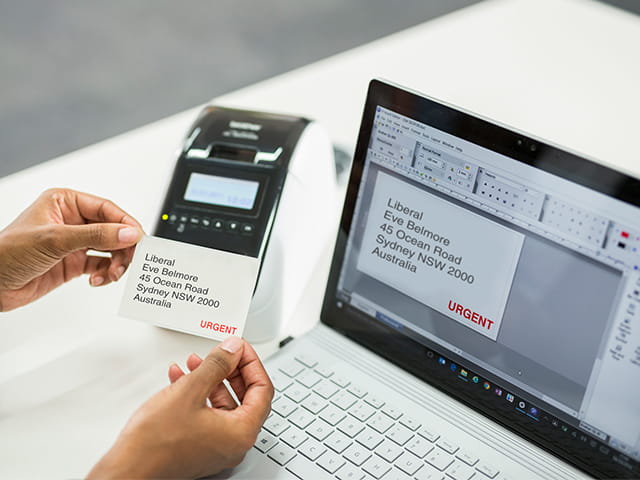
  • Print Labels Efficiently: The software seamlessly integrates with Brother P-touch printers, enabling users to print labels directly from the software.
  • Manage Label Templates and Data: Users can save and manage their label designs for future use, making it convenient to create consistent labels.

Downloading and Installing P-touch Editor on Windows 10

Downloading and installing P-touch Editor on Windows 10 is a straightforward process. The software can be obtained directly from the Brother website. Here’s a step-by-step guide:

  1. Visit the Brother Website: Navigate to the official Brother website (www.brother.com).
  2. Locate the Support Section: Look for the "Support" or "Downloads" section on the website.
  3. Search for Your P-touch Printer Model: Enter your P-touch printer model number in the search bar.
  4. Select "Software and Drivers": Choose the "Software and Drivers" category from the results.
  5. Download the P-touch Editor Software: Locate the P-touch Editor software for Windows 10 and click the download button.
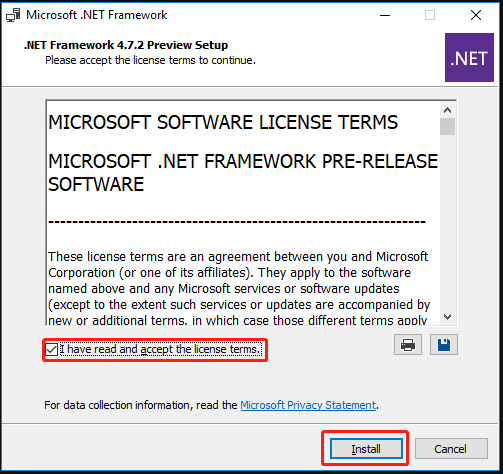
  6. Run the Installation File: Once the download is complete, run the installation file and follow the on-screen instructions.

Key Features of P-touch Editor for Windows 10

P-touch Editor is equipped with an array of features designed to enhance the label creation and printing experience. Some of the key features include:

  • Text Editing: Users can customize text with various fonts, sizes, styles, and colors, including bold, italics, and underline options.
  • Image Insertion: Images can be imported from various sources, such as computer files, scanned images, and online repositories, and incorporated into labels.
  • Barcode and QR Code Generation: The software allows users to create barcodes and QR codes for various applications, including product tracking and website links.
  • Symbol Library: A vast library of symbols, including arrows, shapes, and icons, is available for use in label designs.
  • Template Gallery: The software includes a wide range of pre-designed templates for different label types, saving users time and effort.
  • Label Preview: Users can preview their label designs before printing, ensuring accuracy and desired results.
  • Print Settings: The software offers various print settings, including label size, print orientation, and print quality, allowing users to optimize label printing for specific needs.

Using P-touch Editor Effectively: Tips and Tricks

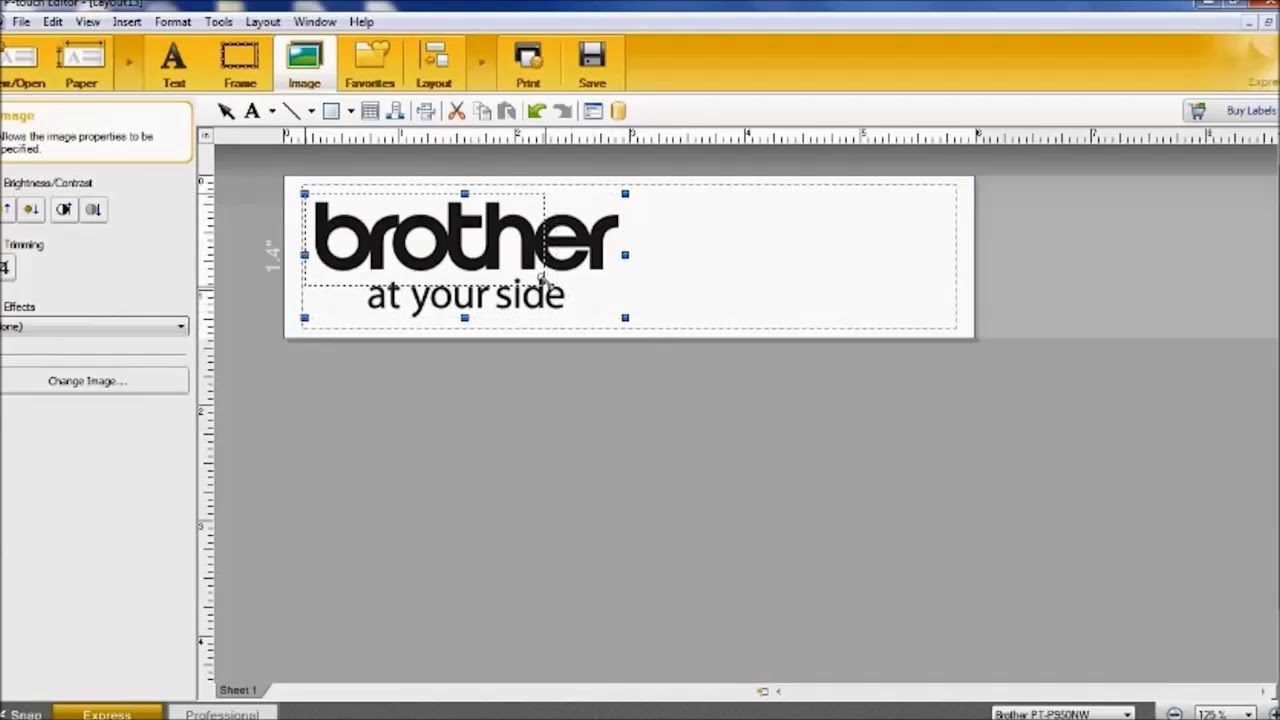
  • Explore the Interface: Spend time familiarizing yourself with the software’s interface, understanding the location of different tools and features.
  • Utilize Templates: Take advantage of the pre-designed templates to jumpstart your label creation process.
  • Experiment with Fonts and Styles: Explore different fonts, sizes, and styles to create visually appealing labels.
  • Use Images Strategically: Images can enhance label designs, but use them judiciously to avoid overcrowding the label.
  • Preview Before Printing: Always preview your labels before printing to ensure accuracy and desired results.
  • Save Your Designs: Save your label designs for future use, streamlining the creation process for recurring labels.

FAQs About P-touch Editor Download and Use

Q: What are the system requirements for P-touch Editor on Windows 10?

A: The system requirements for P-touch Editor vary depending on the specific software version. However, generally, it requires a Windows 10 operating system, a minimum of 1GB of RAM, and a minimum of 1GB of free hard disk space.

Q: Is P-touch Editor free to download and use?

A: P-touch Editor is typically free to download and use, but some advanced features or templates may require a paid license.

Q: Can I use P-touch Editor with any Brother P-touch printer?

A: P-touch Editor is compatible with most Brother P-touch label printers. However, it’s essential to check the compatibility information on the Brother website for your specific printer model.

Q: How do I update P-touch Editor?

A: Updates for P-touch Editor are typically available through the Brother website. Visit the "Support" or "Downloads" section for your printer model and check for available updates.

Q: What types of labels can I create with P-touch Editor?

A: P-touch Editor allows you to create a wide range of labels, including name badges, file folders, product labels, shipping labels, and personalized labels for various purposes.

Q: Can I create labels with barcodes and QR codes?

A: Yes, P-touch Editor allows you to create barcodes and QR codes for various applications, such as product tracking and website links.

Conclusion

P-touch Editor is an invaluable tool for users who need to create and print labels using Brother P-touch label printers. Its intuitive interface, comprehensive features, and compatibility with Windows 10 make it a versatile and user-friendly software solution. Whether for office organization, personal projects, or crafting, P-touch Editor empowers users to design and print professional-looking labels that meet their specific needs. By understanding its features, tips, and FAQs, users can maximize the software’s potential and create labels that enhance efficiency and organization.

How do I create a label using a template? (P-touch Editor 5.x for Windows)  Brother P-touch Editor - Label Design Software P-touch Editor  Brother
P-touch Editor by Brother Industries, LTD. - App Info Create Labels Using P-touch Editor (Windows)  PT‑D410  PT‑D460BT Create Labels Using P-touch Editor (Windows)  PT‑D610BT
P-Touch-Editor How do I create a label using a template? (P-touch Editor 5.x for Windows)  Brother

Closure

Thus, we hope this article has provided valuable insights into P-touch Editor: A Comprehensive Guide to Label Design and Printing on Windows 10. We appreciate your attention to our article. See you in our next article!

Navigating The Cost Of Windows 11 In India: A Comprehensive Guide

Navigating the Cost of Windows 11 in India: A Comprehensive Guide

Introduction

In this auspicious occasion, we are delighted to delve into the intriguing topic related to Navigating the Cost of Windows 11 in India: A Comprehensive Guide. Let’s weave interesting information and offer fresh perspectives to the readers.

Windows 11 Cost In India - IMAGESEE

The release of Windows 11 brought a wave of excitement and anticipation, particularly in India, a market with a rapidly growing technology sector. However, one crucial aspect that often accompanies new software releases is the question of cost. This article aims to provide a comprehensive overview of the pricing landscape for Windows 11 in India, exploring its various purchase options, potential costs, and factors influencing the final price.

Understanding the Pricing Structure

Windows 11, like its predecessors, is available through a variety of avenues, each with its own pricing structure. The primary options include:

  • New PC Purchase: This is the most common route for obtaining Windows 11. When purchasing a new computer, the operating system is typically pre-installed, with its cost factored into the overall price of the device. The price of the computer, therefore, includes the cost of Windows 11. This approach offers convenience and ensures compatibility.

  • Standalone License: Users can also purchase a standalone Windows 11 license, which allows them to install the operating system on a new or existing computer. This option offers flexibility, as it allows users to choose the specific version of Windows 11 that best suits their needs. However, it requires a separate purchase and may not be suitable for all users.

  • Upgrade from Previous Versions: Microsoft offers upgrade paths for users who already have a valid license for Windows 7, 8, or 10. This option typically involves a discounted price compared to a standalone license, making it an attractive choice for users seeking to upgrade their existing system.

Factors Influencing Price

The price of Windows 11 in India can vary depending on several factors:

  • Version: Windows 11 is available in different editions, including Home, Pro, and Enterprise. The Home edition is typically the most affordable, while Pro and Enterprise editions offer advanced features and are priced accordingly.

  • Retailer: Different retailers and online marketplaces may offer varying prices for Windows 11 licenses. Comparing prices across multiple vendors is recommended to find the best deal.

  • Promotional Offers: Microsoft and its authorized retailers often run promotional offers and discounts, which can significantly impact the final price. Staying updated on such offers can help users save money.

  • Currency Fluctuations: The fluctuating exchange rate between the Indian Rupee and the US Dollar can also influence the price of Windows 11, as the software is priced in US Dollars.

Price Range for Different Versions

The following table provides an estimated price range for different Windows 11 versions in India, based on current market trends:

Version Estimated Price Range (INR)
Windows 11 Home ₹5,000 – ₹8,000
Windows 11 Pro ₹8,000 – ₹12,000
Windows 11 Enterprise Contact Microsoft for pricing

Frequently Asked Questions

Q: Can I upgrade to Windows 11 for free?

A: While Microsoft offered a free upgrade to Windows 11 for eligible Windows 10 users during the initial rollout, this offer has since expired. Currently, users need to purchase a license to upgrade to Windows 11.

Q: Is it cheaper to buy a new PC with Windows 11 pre-installed?

A: In most cases, purchasing a new PC with Windows 11 pre-installed is a more cost-effective option compared to buying a standalone license and installing it separately. This is because manufacturers often negotiate bulk discounts for pre-installed licenses.

Q: What are the system requirements for Windows 11?

A: Windows 11 has specific hardware requirements, including a 64-bit processor, 4GB RAM, and at least 64GB storage. It’s essential to ensure your computer meets these requirements before upgrading or purchasing a license.

Tips for Saving Money on Windows 11

  • Check for Promotional Offers: Regularly monitor websites of online retailers and Microsoft for special discounts and deals.
  • Compare Prices: Compare prices across different retailers to find the best value.
  • Consider Refurbished PCs: Refurbished PCs often come with Windows 11 pre-installed at a lower price.
  • Explore Educational Discounts: Students and educators may be eligible for discounted Windows 11 licenses.

Conclusion

The cost of Windows 11 in India varies depending on the chosen purchase option, version, and other factors. Users can choose from various options, including pre-installed licenses, standalone licenses, and upgrade paths. Understanding the different pricing structures, comparing prices, and taking advantage of promotional offers can help users find the most cost-effective solution for their needs.

Windows 11 price in india - poosheet Windows 11 Cost In India - IMAGESEE Windows 11 Archives - Page 3 of 4 - UrTalks
Windows 11 Price In India Mastering Windows 11: A Comprehensive Guide to Operating Systems: "Mastering the Essentials: A Windows 11 Price In India
Windows 11 cost - iconhety Buy Windows 11 User Guide for Beginners: A Comprehensive Guide to Master Windows 11 Operating

Closure

Thus, we hope this article has provided valuable insights into Navigating the Cost of Windows 11 in India: A Comprehensive Guide. We thank you for taking the time to read this article. See you in our next article!

Notepad: A Simple Yet Powerful Tool For Windows 10

Notepad: A Simple Yet Powerful Tool for Windows 10

Introduction

In this auspicious occasion, we are delighted to delve into the intriguing topic related to Notepad: A Simple Yet Powerful Tool for Windows 10. Let’s weave interesting information and offer fresh perspectives to the readers.

Notepad: A Simple Yet Powerful Tool for Windows 10

The New and Improved Windows 10 Notepad: Useful Tips and Features

Notepad, the ubiquitous text editor that has been a fixture of Windows operating systems since its inception, continues to be a valuable tool for Windows 10 users. Despite its unassuming appearance, Notepad offers a surprising range of functionalities, making it suitable for a variety of tasks.

Understanding Notepad’s Core Functionality

At its heart, Notepad is a basic text editor. It allows users to create, edit, and save plain text files, devoid of any formatting or special characters. This simplicity is its strength, allowing users to focus solely on the content. The absence of complex features makes Notepad incredibly lightweight, requiring minimal system resources and launching almost instantaneously.

Notepad’s Versatility: Beyond Simple Text Editing

While Notepad’s primary function is text editing, its capabilities extend beyond this basic function. Here are some of the ways Notepad can be utilized:

  • Creating and Editing Configuration Files: Many applications and system processes rely on text-based configuration files. Notepad provides a straightforward means to create, edit, and save these files, enabling users to fine-tune application settings or modify system behavior.
  • Generating Batch Scripts: Batch scripts are sequences of commands executed in sequence. Notepad can be used to create and edit these scripts, allowing users to automate repetitive tasks or perform complex operations.
  • Writing Simple Programs: For beginners venturing into programming, Notepad serves as a rudimentary code editor. It can be used to write and test simple scripts in languages like Python or JavaScript.
  • Taking Notes: Notepad’s simplicity makes it an ideal tool for jotting down quick notes, ideas, or reminders. Its ability to save files in plain text format ensures compatibility across different operating systems and platforms.
  • Debugging Code: When troubleshooting code errors, Notepad can be used to inspect the output of programs or scripts, helping identify and resolve issues.

Notepad’s Advantages in Windows 10

The simplicity and versatility of Notepad make it a valuable tool for Windows 10 users:

  • Accessibility: Notepad is readily available on all Windows 10 installations, requiring no additional downloads or installations.
  • Lightweight and Efficient: Notepad’s minimal footprint ensures it consumes minimal system resources, making it ideal for older or less powerful machines.
  • Cross-Platform Compatibility: Plain text files created in Notepad can be easily shared and opened on other operating systems like macOS or Linux.
  • Basic Functionality: Notepad’s focus on simplicity makes it easy to use, even for novice computer users.
  • Customization Options: While limited, Notepad offers some customization options, including the ability to change font size, color, and other settings.

Addressing Common Questions about Notepad in Windows 10

Q1: How do I open Notepad in Windows 10?

A: Notepad can be accessed by searching for "Notepad" in the Windows search bar or by navigating to the Start Menu > Windows Accessories > Notepad.

Q2: Can I use Notepad to create and edit HTML files?

A: While Notepad can technically create and edit HTML files, it lacks features like syntax highlighting and code completion, making it less suitable for web development. Dedicated HTML editors offer more advanced functionality.

Q3: Can I use Notepad to edit images or other non-text files?

A: Notepad is specifically designed for text editing. Attempting to edit non-text files can result in data corruption or file damage.

Q4: How do I save a file in Notepad?

A: To save a file, go to File > Save As and choose a location and filename for the file. The default file extension for Notepad files is ".txt".

Q5: How do I print a file from Notepad?

A: Go to File > Print to access printing options.

Tips for Using Notepad Effectively in Windows 10

  • Utilize Keyboard Shortcuts: Shortcuts like Ctrl + N (New), Ctrl + O (Open), Ctrl + S (Save), and Ctrl + Z (Undo) can significantly speed up your workflow.
  • Customize Notepad’s Settings: Adjust font size, color, and other settings to enhance readability and personal preference.
  • Explore Notepad’s Features: Experiment with features like Word Wrap, Find and Replace, and Go To Line to discover how they can enhance your editing experience.
  • Use Notepad for Specific Tasks: Consider using Notepad for creating configuration files, writing simple scripts, taking quick notes, or debugging code.

Conclusion

Notepad, despite its seemingly basic nature, remains a valuable tool for Windows 10 users. Its simplicity, versatility, and accessibility make it a convenient option for a variety of tasks. Whether creating configuration files, writing simple scripts, taking notes, or exploring the world of programming, Notepad provides a solid foundation for text editing in Windows 10.

Best notepad for windows 10 - zoomtruth Get Help With Notepad In Windows 10 Notepad+ - Simple Document and Quick Note for PC - Free Download  WindowsDen (Win 10/8/7)
Notepad - simple notes for PC / Mac / Windows 11,10,8,7 - Free Download - Napkforpc.com Get Help With Notepad In Windows 10: Your Ultimate Guide Simple Notepad for PC - How to Install on Windows PC, Mac
Simple notepad for windows - funple Best simple notepad for pc - methodmyte

Closure

Thus, we hope this article has provided valuable insights into Notepad: A Simple Yet Powerful Tool for Windows 10. We thank you for taking the time to read this article. See you in our next article!

Bridging The Gap: A Comprehensive Guide To Windows 10’s Phone Link Feature

Bridging the Gap: A Comprehensive Guide to Windows 10’s Phone Link Feature

Introduction

With great pleasure, we will explore the intriguing topic related to Bridging the Gap: A Comprehensive Guide to Windows 10’s Phone Link Feature. Let’s weave interesting information and offer fresh perspectives to the readers.

How To use Phone Link on Windows 11 and 10 - Tech Advisor

The modern world demands seamless connectivity, and bridging the gap between our mobile devices and personal computers is crucial for enhanced productivity and streamlined workflows. Windows 10, recognizing this need, introduced a powerful feature known as "Your Phone" – a bridge that allows users to access their Android phone’s functionalities directly on their Windows 10 PC. This feature, now simply called "Phone Link," transcends basic synchronization, offering a range of capabilities that enhance the user experience and simplify daily tasks.

Understanding Phone Link’s Capabilities

Phone Link empowers users to seamlessly integrate their Android phone into their Windows 10 environment. This integration manifests in various ways, offering a range of benefits:

  • Messaging Integration: Phone Link enables users to send and receive SMS messages directly from their PC. This eliminates the need to constantly switch between devices, allowing users to manage their communications from a single point.
  • Notification Synchronization: No more missing crucial notifications. Phone Link mirrors notifications from your Android phone onto your PC, ensuring you never miss important messages, calls, or reminders.
  • File Sharing: Easily transfer files between your phone and PC. Phone Link enables drag-and-drop functionality, simplifying the process of sharing photos, documents, and other files between devices.
  • Screen Mirroring: Experience a seamless extension of your phone’s screen on your PC. Phone Link allows you to mirror your phone’s display, enabling you to view and interact with your Android phone’s content directly from your computer.
  • Call Management: Phone Link allows users to answer and make calls directly from their PC, using their phone’s cellular connection. This feature eliminates the need to constantly reach for your phone, streamlining communication and enhancing productivity.

The Power of Integration: A Deeper Look at Phone Link’s Advantages

Phone Link’s significance lies in its ability to seamlessly integrate the functionalities of two distinct devices, enhancing user experience and productivity in several ways:

  • Enhanced Productivity: Phone Link allows users to manage multiple tasks simultaneously, eliminating the need to constantly switch between devices. This streamlined workflow enhances productivity and efficiency, allowing users to focus on their work without distractions.
  • Increased Accessibility: Phone Link makes accessing crucial information and managing tasks easier. Users can readily access their phone’s content, including notifications, messages, and calls, directly from their PC, ensuring a seamless and convenient experience.
  • Enhanced Communication: Phone Link simplifies communication by enabling users to manage calls and messages directly from their PC. This feature eliminates the need to constantly switch between devices, enhancing communication flow and reducing distractions.
  • Improved Workflow: Phone Link enables seamless file sharing between devices, simplifying the process of transferring data and documents. This streamlined workflow enhances productivity and efficiency, allowing users to focus on their work without interruptions.

System Requirements and Compatibility

To utilize Phone Link, ensure your devices meet the following requirements:

  • Windows 10 PC: Phone Link is compatible with Windows 10 version 1803 or later.
  • Android Phone: The phone must be running Android 7.0 or later.
  • Bluetooth Connection: A stable Bluetooth connection between your phone and PC is required to establish a connection.
  • Phone Link App: You need to install the Phone Link app on your Android phone and the Your Phone Companion app on your PC.

Setting Up Phone Link: A Step-by-Step Guide

Setting up Phone Link is a straightforward process:

  1. Install Phone Link App: Download and install the Phone Link app from the Google Play Store on your Android phone.
  2. Install Your Phone Companion: Download and install the Your Phone Companion app from the Microsoft Store on your Windows 10 PC.
  3. Pair Devices: Open both apps and follow the on-screen instructions to pair your phone and PC using Bluetooth.
  4. Grant Permissions: Allow necessary permissions on your phone to enable Phone Link to access your notifications, messages, and other functionalities.
  5. Connect and Explore: Once paired, Phone Link will automatically sync your phone’s data and notifications to your PC. You can now access and manage your phone’s functionalities directly from your computer.

Addressing Common Concerns and FAQs

Q: Is Phone Link Secure?

A: Phone Link utilizes a secure connection to ensure the safety of your data. It uses encryption to protect your information during transmission and storage. However, it is always advisable to be cautious about granting access to sensitive data and to keep your software updated for the latest security patches.

Q: Does Phone Link Drain My Phone Battery?

A: Phone Link’s impact on battery life is minimal. It only consumes a small amount of battery power when actively used. You can manage battery consumption by adjusting the settings within the Phone Link app.

Q: Can I Use Phone Link with Multiple Devices?

A: Phone Link can be used with one Android phone at a time. However, you can switch between different phones by unpairing the current device and pairing a new one.

Q: What Happens If My Phone is Out of Range?

A: Phone Link requires a Bluetooth connection to function. If your phone is out of range, you will lose access to its functionalities on your PC. However, you can still access your phone’s data and notifications once you reconnect within range.

Q: Can I Use Phone Link with an iPhone?

A: Currently, Phone Link is only compatible with Android devices. There is no official support for iPhone devices at this time.

Tips for Optimizing Phone Link Usage

  • Enable Bluetooth Connectivity: Ensure a stable Bluetooth connection between your phone and PC for optimal performance.
  • Grant Necessary Permissions: Allow Phone Link to access your notifications, messages, and other functionalities for a seamless experience.
  • Keep Apps Updated: Regularly update both the Phone Link app on your phone and the Your Phone Companion app on your PC to ensure compatibility and security.
  • Manage Notifications: Customize notification settings within Phone Link to control which notifications are mirrored to your PC.
  • Utilize File Transfer Feature: Leverage Phone Link’s file transfer capability to seamlessly share files between your phone and PC.
  • Explore Screen Mirroring: Utilize the screen mirroring feature to view and interact with your phone’s content directly from your PC.
  • Optimize Battery Usage: Adjust settings within Phone Link to manage battery consumption and ensure a long-lasting experience.

Conclusion

Phone Link represents a significant advancement in device integration, bridging the gap between Android phones and Windows 10 PCs. This powerful feature offers a range of capabilities that enhance productivity, communication, and overall user experience. By leveraging Phone Link, users can seamlessly manage their mobile and desktop environments, streamlining their workflows and unlocking new possibilities for productivity and efficiency. As technology continues to evolve, Phone Link is likely to become an increasingly integral part of the modern computing experience, empowering users to harness the full potential of their devices.

How To use Phone Link on Windows 11 and 10 - Tech Advisor Guide: How to connect your Android phone to your Windows PC with Phone Link - Neowin How to Connect Windows 10 and Android smartphone Using Microsoft's Phone Link app
How To use Phone Link on Windows 11 and 10 - Tech Advisor What is Phone Link Windows App and How does it Work - YouTube Neue Funktion für Microsofts Phone Link-App für Windows aufgetaucht – Tech-Blogs.de
How To Link Your Android or iOS Device To Windows 10?  Connect Phone To Windows 10 - YouTube How To Link Up Your Android Smartphone With Windows 10  technotips

Closure

Thus, we hope this article has provided valuable insights into Bridging the Gap: A Comprehensive Guide to Windows 10’s Phone Link Feature. We hope you find this article informative and beneficial. See you in our next article!

Navigating The Labyrinth Of Windows 10 Pro Repair Apps And Programs: A Comprehensive Guide

Navigating the Labyrinth of Windows 10 Pro Repair Apps and Programs: A Comprehensive Guide

Introduction

With great pleasure, we will explore the intriguing topic related to Navigating the Labyrinth of Windows 10 Pro Repair Apps and Programs: A Comprehensive Guide. Let’s weave interesting information and offer fresh perspectives to the readers.

How To Repair Apps & Programs In Windows 10  Screen Rant

Windows 10 Pro, despite its robust nature, is not immune to the occasional hiccup. Whether it’s a stubborn error message, a sluggish performance, or a system crash, encountering these issues can be frustrating. Fortunately, a diverse array of repair apps and programs exist to help users diagnose and resolve these problems, restoring their Windows 10 Pro experience to its optimal state. This comprehensive guide delves into the world of these tools, providing insights into their functionalities, benefits, and considerations for selection.

Understanding the Need for Repair Tools

Windows 10 Pro, like any complex software system, relies on a delicate balance of components working in harmony. Errors can arise from various sources, including:

  • Software Conflicts: Incompatible or outdated programs can clash with other software or system components, causing malfunctions.
  • Malware Infections: Viruses, trojans, and other malicious software can corrupt system files, compromise security, and disrupt normal operations.
  • Hardware Issues: Faulty or aging hardware components can lead to system instability and crashes.
  • Registry Errors: The Windows Registry, a database containing system settings, can become corrupted, leading to erratic behavior and performance issues.
  • System Updates: While updates aim to enhance security and functionality, they can occasionally introduce bugs or compatibility problems.

Types of Repair Apps and Programs

Repair tools for Windows 10 Pro can be broadly categorized based on their primary functions:

1. System Optimization and Cleaning Tools:

  • Purpose: These applications focus on enhancing system performance by identifying and removing unnecessary files, optimizing system settings, and managing startup programs.
  • Examples: CCleaner, Advanced SystemCare, IObit Smart Defrag, Wise Care 365.

2. Registry Cleaners and Repairers:

  • Purpose: They scan and repair errors in the Windows Registry, addressing issues that can cause system instability and slowdowns.
  • Examples: Reg Organizer, Registry Mechanic, Wise Registry Cleaner, CCleaner.

3. Antivirus and Anti-Malware Programs:

  • Purpose: These tools protect the system from viruses, malware, spyware, and other threats, ensuring data security and system integrity.
  • Examples: Bitdefender, Norton AntiVirus, Kaspersky Anti-Virus, Malwarebytes Premium.

4. System Recovery and Repair Tools:

  • Purpose: Designed to address more severe problems, these tools can restore system files, repair boot issues, and even perform a clean install of Windows 10 Pro.
  • Examples: Windows Recovery Environment (WinRE), System Restore, Startup Repair, Windows 10 Installation Media.

5. Driver Updaters:

  • Purpose: These programs scan the system for outdated or missing drivers and automatically update them to ensure optimal hardware performance.
  • Examples: Driver Booster, Driver Easy, Snappy Driver Installer.

6. Disk Management and Partitioning Tools:

  • Purpose: These applications allow users to manage hard drive space, create partitions, format drives, and perform other disk-related tasks.
  • Examples: EaseUS Partition Master, AOMEI Partition Assistant, MiniTool Partition Wizard.

7. System Performance Monitoring Tools:

  • Purpose: These programs monitor system resources like CPU usage, memory consumption, and disk activity, providing insights into potential performance bottlenecks.
  • Examples: Resource Monitor (built-in Windows tool), Task Manager (built-in Windows tool), HWMonitor.

Choosing the Right Tools for Your Needs

Selecting the appropriate repair apps and programs requires careful consideration of your specific needs and the nature of the issues you’re facing.

Factors to Consider:

  • Severity of the Problem: For minor performance issues, optimization and cleaning tools may suffice. More serious problems, like system crashes or malware infections, may require dedicated recovery and security tools.
  • Technical Expertise: Some tools are user-friendly with intuitive interfaces, while others require a deeper understanding of system configurations and processes.
  • Cost: Many repair tools are available for free, while others require a paid subscription or one-time purchase.
  • Reputation and Reviews: Research the tool’s reputation and read user reviews to assess its effectiveness and reliability.
  • System Compatibility: Ensure that the chosen tool is compatible with your specific version of Windows 10 Pro.

Key Considerations for System Stability and Performance

  • Avoid Over-Optimization: While cleaning and optimizing tools can be helpful, excessive use can negatively impact system performance.
  • Regular Maintenance: Adopt a proactive approach to system maintenance by regularly scanning for malware, updating drivers, and cleaning up temporary files.
  • Backup Regularly: Create regular backups of your important data to prevent data loss in case of system failures.
  • Use Reputable Software: Download and install repair tools only from trusted sources like official websites or reputable app stores.
  • Understand System Processes: Familiarize yourself with basic system processes and common error messages to better understand the issues you encounter.

Frequently Asked Questions (FAQs)

Q: What is the best repair tool for Windows 10 Pro?

A: The "best" tool depends on your specific needs and the issue you’re trying to resolve. There is no single universal solution. It’s best to research and compare different tools based on your requirements.

Q: Are repair tools safe to use?

A: Reputable repair tools from trusted sources are generally safe. However, be cautious of freeware or tools from unknown sources, as they may contain malware or compromise your system security.

Q: Can I use multiple repair tools simultaneously?

A: While using multiple tools might seem beneficial, it’s generally not recommended. Some tools might conflict with each other, leading to unexpected issues.

Q: How often should I use repair tools?

A: There’s no fixed schedule. Use them when needed, such as after a malware infection, after installing new software, or if you notice performance issues.

Q: Can I restore my system to an earlier point in time?

A: Yes, Windows 10 Pro includes a built-in System Restore feature that allows you to revert your system to a previous restore point, effectively undoing recent changes.

Tips for Using Repair Apps and Programs Effectively

  • Read the Documentation: Before using any tool, carefully read the user manual or online documentation to understand its features and functionalities.
  • Run a Full System Scan: Perform a comprehensive scan to identify any potential issues or threats before taking any corrective actions.
  • Back Up Your Data: Always create a backup of your important data before running any repair tool, especially those that modify system files.
  • Restart Your Computer: After running a repair tool, restart your computer to apply the changes and ensure that the tool has effectively resolved the issues.
  • Monitor System Performance: After using a repair tool, closely monitor your system’s performance to ensure that it’s running smoothly and that the issue has been resolved.
  • Update Regularly: Keep your repair tools updated to benefit from the latest bug fixes and security enhancements.

Conclusion

Repair apps and programs for Windows 10 Pro offer valuable assistance in maintaining system stability and performance. By understanding their functionalities, benefits, and limitations, users can choose the right tools to address specific issues and ensure a smooth and efficient computing experience. Remember to adopt a proactive approach to system maintenance, prioritize data backup, and use only reputable and trustworthy software. By taking these precautions, users can minimize the risk of encountering serious system problems and enjoy a seamless and productive Windows 10 Pro experience.

How to Repair Apps/Programs Common Problems Windows 10 - MiniTool How to Repair Apps/Programs Common Problems Windows 10 - MiniTool Windows 10 Photo App
Repair Windows 10 Using Automatic Repair [Tutorial] - YouTube Repair Windows 10 Best Windows repair Tools and Services (Windows 10/11) - EaseUS
verticalnomad.blogg.se - Microsoft software repair tool for windows 10 pro 5 Best Windows 10 Repair Software 2024

Closure

Thus, we hope this article has provided valuable insights into Navigating the Labyrinth of Windows 10 Pro Repair Apps and Programs: A Comprehensive Guide. We hope you find this article informative and beneficial. See you in our next article!

Rejuvenating Your Windows 11: A Data-Preserving Approach

Rejuvenating Your Windows 11: A Data-Preserving Approach

Introduction

With great pleasure, we will explore the intriguing topic related to Rejuvenating Your Windows 11: A Data-Preserving Approach. Let’s weave interesting information and offer fresh perspectives to the readers.

Rejuvenating Your Windows 11: A Data-Preserving Approach

How to Backup and Restore Data on Windows 11? - TECHNIG

Windows 11, Microsoft’s latest operating system, offers a plethora of enhancements and features designed to elevate the user experience. However, like any software, it can encounter issues over time, leading to performance degradation, instability, or even security vulnerabilities. In such scenarios, reinstalling Windows 11 might seem like the only solution, but the prospect of losing valuable data can be daunting. Fortunately, there are methods to refresh your Windows 11 installation while preserving your precious files and settings. This article delves into these techniques, providing a comprehensive guide to rejuvenate your system without sacrificing your data.

Understanding the Need for Reinstallation

Before embarking on the process of reinstalling Windows 11, it is crucial to understand why such a step might be necessary. While Windows 11 is a robust operating system, it can be susceptible to issues stemming from various sources:

  • Software Conflicts: Installing or uninstalling programs can introduce conflicts that disrupt the smooth functioning of Windows 11. These conflicts can manifest as application crashes, system slowdowns, or even system instability.

  • Malware Infection: Malicious software can infiltrate your system, compromising your data, security, and overall performance. Reinstalling Windows 11 can effectively remove these threats and restore your system’s integrity.

  • Corrupted System Files: Over time, essential system files can become corrupted, leading to errors and malfunctions. A fresh installation of Windows 11 ensures that all system files are intact and operating correctly.

  • Performance Degradation: As your system accumulates temporary files, browser cache, and other unnecessary data, its performance can decline. Reinstalling Windows 11 provides a clean slate, boosting your system’s speed and responsiveness.

The Power of a Data-Preserving Reinstall

Reinstalling Windows 11 without losing data is a powerful tool for system rejuvenation. It allows you to address various issues while preserving your valuable files, applications, and personal settings. This approach offers several benefits:

  • Preservation of Critical Data: Your personal documents, photos, videos, and other essential files remain untouched, eliminating the need for time-consuming backups and restoration processes.

  • Enhanced System Performance: Reinstalling Windows 11 removes unnecessary files and outdated software, leading to improved system performance and responsiveness.

  • Resolution of Software Conflicts: A fresh installation eliminates potential conflicts that may have arisen from incompatible programs, ensuring a smoother and more stable operating environment.

  • Enhanced Security: Reinstalling Windows 11 effectively removes any malicious software that may have infected your system, strengthening its security posture.

Methods for Data-Preserving Reinstallation

While the concept of reinstalling Windows 11 without losing data might seem paradoxical, various methods allow you to achieve this objective. Let’s explore the most common and effective approaches:

1. Resetting Windows 11:

Windows 11 includes a built-in "Reset this PC" feature that offers two options:

  • Keep my files: This option reinstalls Windows 11 while preserving your personal files, applications, and settings. It essentially performs a clean installation of Windows 11, removing unnecessary files and outdated software, while retaining your data.

  • Remove everything: This option completely erases all data from your system, effectively performing a clean installation of Windows 11. This option is suitable for situations where you want a completely fresh start.

To access the "Reset this PC" feature:

  • Open Settings by pressing Windows key + I.
  • Navigate to System > Recovery.
  • Click Reset this PC.
  • Choose the desired option: Keep my files or Remove everything.

2. Using a Recovery Drive:

A recovery drive is a bootable USB drive containing a backup of your Windows 11 installation. It allows you to reinstall Windows 11 without needing to download the installation files again. To create a recovery drive:

  • Open Settings by pressing Windows key + I.
  • Navigate to System > Recovery.
  • Click Create a recovery drive.
  • Follow the on-screen instructions to create the recovery drive.

To reinstall Windows 11 using a recovery drive:

  • Connect the recovery drive to your computer.
  • Restart your computer and press the appropriate key (usually F12 or Esc) to access the boot menu.
  • Select the recovery drive from the boot menu.
  • Follow the on-screen instructions to reinstall Windows 11.

3. Performing a Clean Install with Data Backup:

If you prefer a more manual approach, you can perform a clean install of Windows 11 while preserving your data by backing it up beforehand.

  • Backup Your Data: Use a reliable backup solution to create a complete backup of your important files and settings. This can be done using external hard drives, cloud storage services, or specialized backup software.
  • Download Windows 11 Installation Media: Download the Windows 11 installation files from Microsoft’s website.
  • Create a Bootable USB Drive: Use a tool like Rufus or the Media Creation Tool to create a bootable USB drive with the Windows 11 installation files.
  • Boot from USB Drive: Restart your computer and boot from the USB drive.
  • Install Windows 11: Follow the on-screen instructions to install Windows 11.
  • Restore Your Data: After the installation is complete, restore your data from the backup you created earlier.

4. Utilizing Third-Party Tools:

Several third-party tools can assist in reinstalling Windows 11 without data loss. These tools often offer more advanced features and customization options than the built-in Windows 11 tools. Some popular options include:

  • Macrium Reflect: A comprehensive backup and recovery tool that can create images of your entire system, allowing you to restore your system to a previous state.

  • EaseUS Todo Backup: Another powerful backup and recovery tool with features like system cloning and disk management.

  • Acronis True Image: A renowned backup and recovery solution offering data protection, system cloning, and disaster recovery capabilities.

Important Considerations:

  • Data Backup: Regardless of the method you choose, it is crucial to have a reliable backup of your important data before proceeding with the reinstallation process. This serves as a safety net in case of unforeseen issues.

  • System Compatibility: Before reinstalling Windows 11, ensure your system meets the minimum requirements for the operating system.

  • Software Licensing: Reinstalling Windows 11 does not affect your software licenses. You can continue to use the same licenses after the reinstallation.

  • Driver Updates: After reinstalling Windows 11, you might need to update your device drivers to ensure proper functionality.

  • Personalization: You might need to reconfigure your personal settings and preferences after reinstalling Windows 11.

FAQs:

Q: Will I lose all my programs after reinstalling Windows 11?

A: If you choose the "Keep my files" option during the reset process, your installed programs will be preserved. However, you might need to reinstall certain programs that are not compatible with the latest version of Windows 11.

Q: What happens to my personal files during the reinstallation process?

A: Your personal files will be preserved if you choose the "Keep my files" option. These files will be untouched during the reinstallation process.

Q: Can I reinstall Windows 11 without a product key?

A: No, you need a valid Windows 11 product key to activate the operating system after reinstalling it.

Q: Can I reinstall Windows 11 on a different computer?

A: You can only reinstall Windows 11 on the same computer where it was originally activated.

Q: What if my reinstallation fails?

A: If the reinstallation process fails, you can try the process again or use a recovery drive to restore your system to a previous state.

Tips:

  • Create a Recovery Drive: Creating a recovery drive is a good idea, even if you don’t plan to reinstall Windows 11 immediately. It can be helpful in case of system failures or other issues.

  • Backup Your Data Regularly: Make it a habit to back up your important data regularly, regardless of whether you plan to reinstall Windows 11 or not. This ensures that your data is protected from potential data loss.

  • Check System Requirements: Before reinstalling Windows 11, ensure your system meets the minimum requirements for the operating system. This helps avoid compatibility issues.

  • Update Drivers: After reinstalling Windows 11, update your device drivers to ensure proper functionality.

  • Personalize Your Settings: After reinstalling Windows 11, take the time to personalize your settings and preferences to create a comfortable and efficient working environment.

Conclusion:

Reinstalling Windows 11 without losing data is a powerful tool for rejuvenating your system and addressing various issues. It allows you to restore your system’s performance, stability, and security without sacrificing your valuable files and settings. By understanding the various methods and considerations involved, you can confidently embark on this process, ensuring a smooth and data-preserving reinstallation experience. Remember, data backup is crucial, and it is always advisable to consult with a qualified technician if you encounter any difficulties during the process.

Reinstall Windows 11 Without Losing Data Now Possible - Blog Mr Key Shop How to change the look and feel of Windows 11  Windows Central Why Does Home windows 11 Preserve Freezing? Defined - Abdul Ali Tech
Preserve Serene! Microsoft Promises To Reconsider Home Windows 11 Specifications, And Your Clean windows 11 - powerlio Customize Your Windows 11 Desktop « TOP NEW Review
These Are The Best Apps To Customize Your Windows 11 Appearance Customize Your Windows 11 Desktop « TOP NEW Review

Closure

Thus, we hope this article has provided valuable insights into Rejuvenating Your Windows 11: A Data-Preserving Approach. We hope you find this article informative and beneficial. See you in our next article!

Ra Pc Windows 11

ra pc windows 11

Introduction

With enthusiasm, let’s navigate through the intriguing topic related to ra pc windows 11. Let’s weave interesting information and offer fresh perspectives to the readers.

It appears you are asking for an article about "ra pc windows 11" which is not a recognized term or concept in the context of computer technology. It is likely a misunderstanding or a typo.

[THỦ THUẬT] Cách đưa This PC ra Desktop Win 11

If you are looking for information about a specific aspect of Windows 11, please clarify your request. For example, you could ask:

  • "An article about the features of Windows 11"
  • "An article about the performance of Windows 11 on different PCs"
  • "An article about the differences between Windows 11 and Windows 10"

Once you provide a clearer topic, I can help you create a comprehensive and informative article.

Cách đưa ứng dụng ra màn hình máy tính Win 11 - QuanTriMang.com Cách đưa This PC ra Desktop Windows 11, hiển thị My Computer Cách đơn giản để mang "My Computer" ra ngoài Desktop trên Windows 11  Hoàng Hà Mobile
Windows 11 ra mắt: Đơn giản hóa giao diện người dùng, cải thiện Window Công ty Nhật ra mắt PC chạy Windows 11: Màn 5,5 inch, thiết kế siêu nhỏ nhét được vào túi quần [THỦ THUẬT] Cách đưa This PC ra Desktop Win 11
Những điều bạn cần biết trước khi cập nhật lên Windows 11 : Win 11 có gì mới, cấu hình tối thiểu Windows 11 Ra Mắt Chính Thức Trong Tháng 10 Năm Nay

Closure

Thus, we hope this article has provided valuable insights into ra pc windows 11. We thank you for taking the time to read this article. See you in our next article!

Net Framework 4 7 2 Download For Windows 10

net framework 4 7 2 download for windows 10

Introduction

In this auspicious occasion, we are delighted to delve into the intriguing topic related to net framework 4 7 2 download for windows 10. Let’s weave interesting information and offer fresh perspectives to the readers.

A Comprehensive Guide to .NET Framework 4.7.2 for Windows 10

NET Framework 4.7.2 Download & Install for Windows 10/8.1/7 PCs

The .NET Framework, a cornerstone of Microsoft’s development ecosystem, provides a robust foundation for building and running applications on Windows. While newer versions like .NET 5 and .NET 6 have emerged, .NET Framework 4.7.2 remains a vital component for many Windows 10 users, especially those running legacy applications or encountering compatibility issues. This article aims to provide a comprehensive understanding of .NET Framework 4.7.2, its significance, and its role in ensuring smooth operation of applications on Windows 10.

Understanding the .NET Framework

The .NET Framework is a software framework that provides a consistent environment for developing and executing applications. It consists of a common language runtime (CLR), a set of libraries, and a collection of tools that streamline the development process.

The Importance of .NET Framework 4.7.2

While newer versions of .NET have been released, .NET Framework 4.7.2 continues to be relevant for several reasons:

  • Legacy Application Compatibility: Many applications, particularly those developed before the advent of .NET Core, rely on .NET Framework 4.7.2 for functionality. Installing this framework ensures these applications run smoothly on Windows 10.
  • Wide Applicability: .NET Framework 4.7.2 is supported on a wide range of Windows 10 versions, making it a reliable choice for diverse systems.
  • Security Updates: Microsoft continues to provide security updates for .NET Framework 4.7.2, addressing vulnerabilities and ensuring a secure environment for applications.
  • Stability and Performance: .NET Framework 4.7.2 offers a proven track record of stability and performance, making it a dependable choice for critical applications.

Downloading and Installing .NET Framework 4.7.2

Installing .NET Framework 4.7.2 is a straightforward process:

  1. Check for Compatibility: Ensure your Windows 10 version supports .NET Framework 4.7.2. You can find this information on Microsoft’s official website.
  2. Download the Installer: Visit the Microsoft website and download the .NET Framework 4.7.2 offline installer for your specific Windows 10 version (32-bit or 64-bit).
  3. Run the Installer: Execute the downloaded installer file. Follow the on-screen instructions to complete the installation process.

Benefits of Using .NET Framework 4.7.2

Installing .NET Framework 4.7.2 provides several benefits:

  • Improved Application Performance: The framework optimizes application execution, leading to faster loading times and smoother operation.
  • Enhanced Security: .NET Framework 4.7.2 incorporates security enhancements, protecting applications and data from potential threats.
  • Expanded Functionality: The framework provides access to a wide range of libraries and features, empowering developers to build more complex and robust applications.
  • Simplified Development: .NET Framework 4.7.2 offers a comprehensive set of tools and libraries, simplifying the development process and reducing development time.

Troubleshooting Common Issues

While .NET Framework 4.7.2 is generally stable, users might encounter issues during installation or execution. Here are some common problems and their solutions:

  • Installation Errors: Errors during installation can arise due to insufficient disk space, conflicting software, or incomplete downloads. Ensure adequate disk space, temporarily disable antivirus software, and redownload the installer if necessary.
  • Application Compatibility: Applications developed for earlier versions of .NET Framework might not be compatible with .NET Framework 4.7.2. Check for application updates or contact the software developer for support.
  • Security Updates: Ensure you have installed the latest security updates for .NET Framework 4.7.2 to address vulnerabilities and maintain a secure environment.

Frequently Asked Questions (FAQs)

Q: Is .NET Framework 4.7.2 compatible with all versions of Windows 10?

A: .NET Framework 4.7.2 is supported on a wide range of Windows 10 versions, but it’s essential to check for specific compatibility information on Microsoft’s website.

Q: Do I need to install .NET Framework 4.7.2 if I have a newer version of .NET installed?

A: If you have a newer version of .NET installed, you might not need .NET Framework 4.7.2. However, if you’re running legacy applications that require this specific version, installing it is recommended.

Q: Is it safe to download and install .NET Framework 4.7.2 from Microsoft’s website?

A: Yes, it is safe to download and install .NET Framework 4.7.2 from Microsoft’s official website. Ensure you download the installer from a trusted source to avoid malware or unauthorized software.

Q: What are the minimum system requirements for installing .NET Framework 4.7.2?

A: Refer to the official Microsoft documentation for detailed system requirements for .NET Framework 4.7.2. Generally, it requires a minimum processor speed, RAM, and available disk space.

Tips for Using .NET Framework 4.7.2

  • Regular Updates: Keep .NET Framework 4.7.2 updated with the latest security patches and bug fixes to ensure stability and security.
  • Compatibility Check: Before installing .NET Framework 4.7.2, check if your applications are compatible with this version.
  • Troubleshooting Resources: Utilize online forums and Microsoft support resources to address any installation or runtime issues.

Conclusion

.NET Framework 4.7.2 remains a valuable component for Windows 10 users, especially those running legacy applications or needing a stable and secure environment. By understanding its importance, benefits, and installation process, users can ensure their applications function seamlessly on Windows 10. While newer versions of .NET have emerged, .NET Framework 4.7.2 continues to play a vital role in maintaining a robust and reliable software ecosystem for Windows 10.

How to Download .NET Framework 4.7.2 on Windows 7/8/8.1/10 I How to install.NET Framework 4.7.2 How to download NET Framework 4.7.2 offline installer - YouTube Microsoft .Net Framework 4.7.2 released - gHacks Tech News
COMO INSTALAR .NET FRAMEWORK 4.7.2 en WINDOWS 7/8/10 - YouTube NET Framework 4.7.2 Download & Install for Windows 10/8.1/7 PCs - MiniTool Partition Wizard Net framework 4-7 download offline installer - topsupermarket
how to Download .NET Framework 4.7.2 windows 10 - YouTube Microsoft Net Framework 4.7.2 Download - YouTube

Closure

Thus, we hope this article has provided valuable insights into net framework 4 7 2 download for windows 10. We thank you for taking the time to read this article. See you in our next article!

Word 2025: A Glimpse Into The Future Of Document Creation

Word 2025: A Glimpse into the Future of Document Creation

Introduction

With great pleasure, we will explore the intriguing topic related to Word 2025: A Glimpse into the Future of Document Creation. Let’s weave interesting information and offer fresh perspectives to the readers.

Word 2025: A Glimpse into the Future of Document Creation

The Future of Document Creation and Distribution

The landscape of document creation is constantly evolving, driven by technological advancements and shifting user needs. While Microsoft Word 2025 remains shrouded in speculation, it is likely to build upon existing features and introduce new functionalities that streamline workflows, enhance collaboration, and elevate the user experience. This article explores potential features that could define Word 2025, examining their impact on document creation and the broader digital landscape.

Enhanced AI Integration:

Word 2025 is expected to leverage the power of artificial intelligence (AI) more extensively, offering sophisticated features that automate tasks and improve content quality. This includes:

  • Contextual Grammar and Style Suggestions: AI-powered grammar and style checkers will go beyond basic errors, offering context-sensitive suggestions based on document type, audience, and purpose. This will ensure consistency, clarity, and professional tone across all documents.
  • Automated Content Generation: Users can leverage AI to generate content outlines, summaries, and even entire sections of text. This will be particularly beneficial for tasks requiring research, report writing, or content creation in a specific style.
  • Real-time Content Translation: Seamless integration with translation services will enable real-time translation of documents, facilitating communication and collaboration across language barriers. This feature will streamline global communication and break down language barriers.
  • Image and Video Analysis: AI will analyze images and videos within documents, extracting relevant information and generating captions, descriptions, and even summaries. This will enhance accessibility and provide a more comprehensive understanding of visual content.

Collaborative Features:

Word 2025 will likely prioritize seamless collaboration, enabling users to work together on documents in real-time regardless of location. This will be facilitated by:

  • Enhanced Co-authoring Tools: Real-time co-authoring features will be further refined, allowing multiple users to edit and contribute to a single document simultaneously. This will enhance team productivity and streamline collaborative workflows.
  • Improved Version Control: Robust version control systems will track changes, allowing users to revert to previous versions and ensure transparency in collaborative projects. This will prevent data loss and facilitate seamless collaboration.
  • Integrated Communication Tools: Word 2025 could integrate communication tools like instant messaging and video conferencing, facilitating direct communication within the document editing environment. This will streamline collaboration and reduce the need for external communication channels.

Advanced Formatting and Design:

Word 2025 is expected to offer advanced formatting and design tools, providing users with greater control over document aesthetics and visual appeal. These features could include:

  • Dynamic Layout Options: Users will have access to dynamic layouts that adapt automatically to different screen sizes and devices. This will ensure optimal viewing and readability across platforms.
  • Enhanced Object Manipulation: Improved tools for manipulating images, videos, and other objects within documents will allow for more creative and engaging presentations. This will enable users to create visually appealing and informative documents.
  • Interactive Content Features: Word 2025 could incorporate interactive elements like embedded quizzes, polls, and forms, creating engaging and dynamic documents. This will enhance user engagement and provide interactive learning experiences.

Accessibility and Inclusivity:

Word 2025 will prioritize accessibility and inclusivity, making document creation and consumption easier for users with diverse needs. This will be achieved through:

  • Improved Accessibility Features: Built-in accessibility features will be enhanced, ensuring documents are readily accessible to users with visual, auditory, or cognitive impairments. This will promote inclusivity and ensure everyone can access and interact with documents.
  • Enhanced Readability Tools: AI-powered readability tools will analyze text and provide suggestions for improving clarity, conciseness, and overall readability. This will make documents easier to understand and consume for all users.
  • Multilingual Support: Comprehensive multilingual support will ensure that documents can be created and edited in multiple languages, facilitating global communication and collaboration. This will break down language barriers and promote inclusivity in the digital space.

FAQs:

Q: Will Word 2025 be cloud-based?

A: While Microsoft has emphasized cloud-based services in recent years, it is likely that Word 2025 will offer both cloud-based and desktop versions, catering to diverse user preferences and needs.

Q: What about security in Word 2025?

A: Security will remain a top priority, with enhanced encryption protocols and robust authentication measures safeguarding user data and documents.

Q: Will Word 2025 be compatible with older versions?

A: Microsoft typically maintains backward compatibility, ensuring that users can open and edit documents created in previous versions of Word. However, some advanced features might require newer versions for full functionality.

Q: What will be the pricing for Word 2025?

A: Pricing details are not yet available. However, it is likely to follow a similar pricing model to previous versions, offering subscription-based and standalone options.

Tips for Using Word 2025 Effectively:

  • Embrace AI Assistance: Utilize AI-powered features to enhance content quality, streamline tasks, and improve overall efficiency.
  • Prioritize Collaboration: Leverage co-authoring tools and integrated communication features to foster seamless collaboration and teamwork.
  • Experiment with Design: Explore advanced formatting and design options to create visually appealing and engaging documents.
  • Ensure Accessibility: Utilize accessibility features to create inclusive documents that are accessible to all users.

Conclusion:

Word 2025 promises to be a significant leap forward in document creation, leveraging the power of AI, enhancing collaboration, and prioritizing accessibility. By incorporating these innovative features, Word 2025 will empower users to create high-quality, engaging, and accessible documents that meet the evolving demands of the digital landscape. As we move closer to 2025, it will be exciting to see how these advancements shape the future of document creation and communication.

Document creation - past and future Assignment: Create Document with Tables and Images  Computer Applications for Managers How to save a document as a template in Microsoft Word
A Glimpse into the Future Economy after the Pandemic - UPCEA A Glimpse of the Future: AI Will Change Everything   Observer A Glimpse Into The Future
CatBlox on Twitter: "A glimpse into the future" Sustainability  Free Full-Text  Happy and Engaged Workforce in Industry 4.0: A New Concept of

Closure

Thus, we hope this article has provided valuable insights into Word 2025: A Glimpse into the Future of Document Creation. We appreciate your attention to our article. See you in our next article!

Navigating And Accessing Files On The D Drive In Windows 10: A Comprehensive Guide

Navigating and Accessing Files on the D Drive in Windows 10: A Comprehensive Guide

Introduction

With great pleasure, we will explore the intriguing topic related to Navigating and Accessing Files on the D Drive in Windows 10: A Comprehensive Guide. Let’s weave interesting information and offer fresh perspectives to the readers.

如何使用 D 盤 Windows 10? - 今日操作系統

The D drive, along with other lettered drives (such as C, E, F, etc.), represents a storage location within your Windows 10 computer. These drives can be physical hard drives, solid-state drives (SSDs), external storage devices like USB drives, or even network drives. Understanding how to access and manage files on the D drive is crucial for effective file organization and system administration.

Understanding Drive Letters and File Systems

Windows assigns a letter to each storage device connected to your computer. The C drive usually represents the primary hard drive where the operating system is installed. The D drive, and subsequent letters, are allocated to additional storage devices.

Each drive utilizes a file system, which is a hierarchical structure that organizes files and folders. Windows typically uses the NTFS (New Technology File System) for its internal drives, providing advanced features like security permissions, data compression, and journaling. Understanding the file system is crucial for navigating and managing files effectively.

Accessing Files on the D Drive

There are several ways to access files stored on the D drive in Windows 10:

1. Using File Explorer:

  • Open File Explorer: Click the File Explorer icon on the taskbar or press the Windows key + E.
  • Navigate to the D Drive: In the left pane, you will see a list of drives. Click on "This PC" or "Computer" to view the available drives. Locate the D drive and double-click it to access its contents.
  • Browse Folders and Files: Once you’re in the D drive, you can navigate through folders and locate specific files using the navigation pane or the address bar.

2. Using the Search Bar:

  • Open the Search Bar: Click the search bar on the taskbar or press the Windows key + S.
  • Type the File Name: Enter the name of the file you are looking for.
  • Filter by Location: Click the "Show more" button and select "This PC" or "Computer" from the drop-down menu.
  • Select the D Drive: Check the box next to the D drive to limit the search to that specific drive.

3. Using the Run Command:

  • Open the Run Command: Press the Windows key + R.
  • Type the Path: In the "Open" field, type "D:" followed by the path to the file or folder you want to access. For example, to open a folder named "Documents" on the D drive, type "D:Documents" and click "OK."

4. Using Shortcuts:

  • Create a Shortcut: Right-click on the desired file or folder on the D drive and select "Create shortcut."
  • Move the Shortcut: Drag and drop the shortcut to a convenient location, like the desktop or the Quick Access bar in File Explorer.

5. Using Network Drives:

  • Connect to a Network Drive: If the D drive is a network drive, you can access it by clicking "This PC" or "Computer" in File Explorer, selecting "Map network drive," and entering the network path.

Managing Files on the D Drive

Once you have accessed the D drive, you can perform various file management operations, including:

  • Creating Folders: Right-click on an empty space in the D drive window and select "New" > "Folder." Give the folder a name and click "OK."
  • Copying Files: Select the files you want to copy, right-click, and choose "Copy." Then, navigate to the desired destination folder on the D drive and right-click, selecting "Paste."
  • Moving Files: Select the files you want to move, right-click, and choose "Cut." Then, navigate to the desired destination folder on the D drive and right-click, selecting "Paste."
  • Deleting Files: Select the files you want to delete, right-click, and choose "Delete."
  • Renaming Files: Right-click on the file you want to rename, select "Rename," and type the new name.

Benefits of Using the D Drive

  • Increased Storage Capacity: The D drive provides additional storage space beyond the primary hard drive (C drive).
  • File Organization: Separating files onto different drives allows for better organization and easier retrieval.
  • Data Backup and Recovery: The D drive can be used to store backups of important data, ensuring its safety in case of system failure.
  • System Performance Enhancement: By moving large files or programs from the C drive to the D drive, you can potentially improve system performance.

Troubleshooting Common Issues

  • Drive Not Showing: If the D drive is not visible in File Explorer, ensure it is properly connected and powered on. Check the device manager for any errors related to the drive.
  • Access Denied: If you encounter an "Access denied" error, you may not have sufficient permissions to access the drive or its files. Contact the system administrator or change the permissions accordingly.
  • Drive Not Recognized: If the D drive is not recognized by Windows, check the drive’s connection, ensure the driver software is up-to-date, and try troubleshooting using the Device Manager.

FAQs

Q: How do I format the D drive?

A: Formatting a drive erases all data on it. To format the D drive, open Disk Management (right-click "This PC" or "Computer" and select "Manage" > "Disk Management"), right-click the D drive, and select "Format." Choose a file system (typically NTFS) and click "Start."

Q: Can I change the drive letter of the D drive?

A: Yes, you can change the drive letter using Disk Management. Right-click the D drive, select "Change Drive Letter and Paths," and click "Change." Choose a new letter and click "OK."

Q: How do I transfer files from the C drive to the D drive?

A: To transfer files, use the copy or move methods described earlier in the "Managing Files on the D Drive" section.

Q: What happens if I delete the D drive?

A: Deleting a drive erases all data on it and makes it unusable. Ensure you have backed up any important data before deleting a drive.

Tips

  • Regularly Back Up Data: Back up important files and folders to the D drive or external storage to prevent data loss.
  • Use File Explorer’s Search Function: Utilize the search bar to quickly locate files on the D drive.
  • Organize Files into Folders: Create folders to categorize files and improve file management.
  • Monitor Drive Space: Keep track of available space on the D drive to avoid running out of storage.
  • Maintain Drive Health: Regularly check the D drive for errors and perform disk cleanup to optimize its performance.

Conclusion

Understanding how to access and manage files on the D drive is essential for maximizing storage capacity, organizing data, and enhancing overall system performance. By utilizing the methods and tips outlined in this guide, you can effectively navigate the D drive and ensure your files are safely stored and easily accessible. Remember to regularly back up important data, keep your storage devices healthy, and maintain proper file organization to optimize your Windows 10 experience.

How to Fully Use D Drive in Windows 10 - 3 Ways How to Fully Use D Drive in Windows 10 - 3 Ways How to Find D Drive on Windows 10?
4 Methods To Transfer Files From C Drive To D Drive In Windows - Vrogue How to Move Folders from C Drive to D Drive in Windows 11/10/8/7? How to Access an External Hard Drive on Windows 10
How to Create D Drive in Windows 10? D drive not showing in Windows 10  How to access d drive - YouTube

Closure

Thus, we hope this article has provided valuable insights into Navigating and Accessing Files on the D Drive in Windows 10: A Comprehensive Guide. We hope you find this article informative and beneficial. See you in our next article!