Archives May 2024

Understanding Windows 10 Pro OEM Licenses: A Comprehensive Guide

Understanding Windows 10 Pro OEM Licenses: A Comprehensive Guide

Introduction

In this auspicious occasion, we are delighted to delve into the intriguing topic related to Understanding Windows 10 Pro OEM Licenses: A Comprehensive Guide. Let’s weave interesting information and offer fresh perspectives to the readers.

Understanding Windows 10 Pro OEM Licenses: A Comprehensive Guide

Windows 10 Pro OEM Key  The Tech Act

The world of operating system licensing can be complex and confusing. One frequently encountered term is "Windows 10 Pro OEM CD-Key Global-Lifetime." This phrase often appears in online marketplaces, raising questions about its legitimacy and value proposition. This article aims to provide a comprehensive understanding of this type of license, exploring its characteristics, benefits, and potential drawbacks.

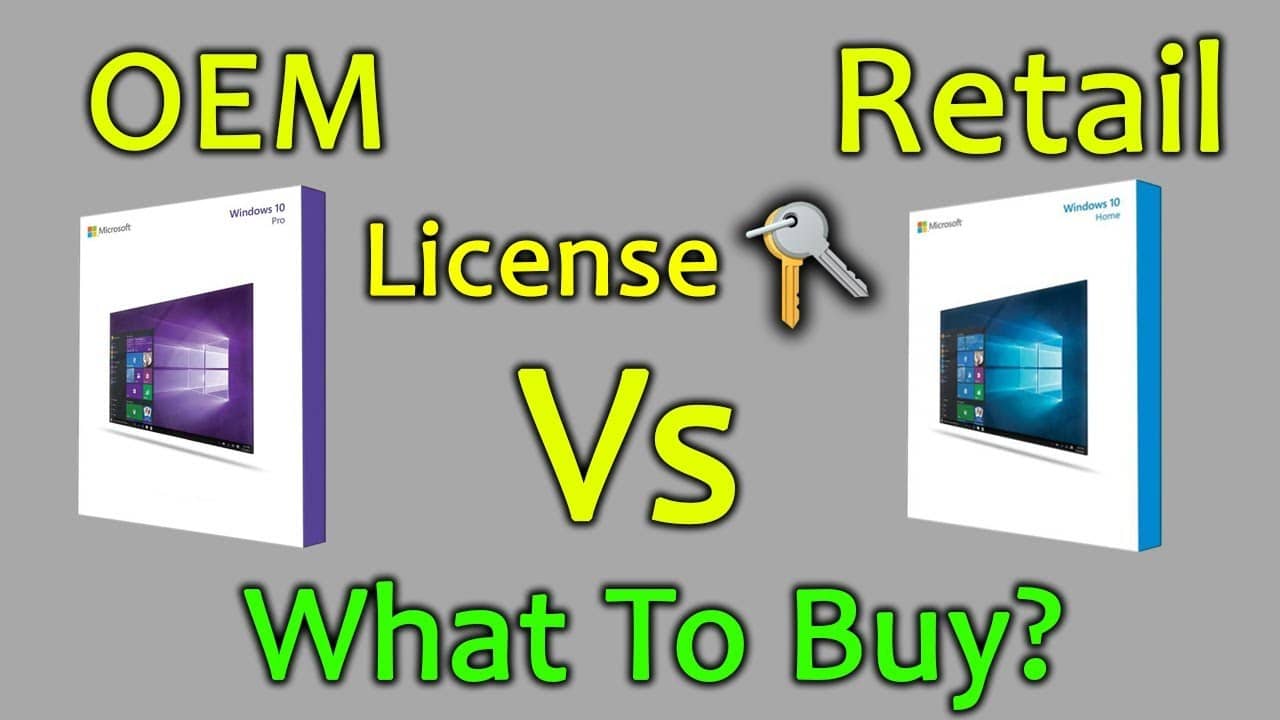
OEM Licenses: A Foundation of Understanding

OEM stands for "Original Equipment Manufacturer," and an OEM license is tied to a specific piece of hardware. This means that the license is typically bundled with a new computer, laptop, or tablet, and is not intended for separate purchase. The license is generally non-transferable, meaning it cannot be moved to a different device.

Windows 10 Pro: Features and Advantages

Windows 10 Pro is a robust operating system designed for both home and business users. It offers a range of advanced features compared to the standard Windows 10 Home edition, including:

  • Enhanced Security: Windows 10 Pro incorporates features like BitLocker Drive Encryption, which helps protect sensitive data. It also offers advanced domain join capabilities, enabling seamless integration into corporate networks.
  • Remote Desktop Access: This feature allows users to connect to their computers remotely, enabling work from anywhere with an internet connection.
  • Hyper-V Virtualization: Windows 10 Pro allows users to run multiple operating systems simultaneously, facilitating testing and development environments.
  • Group Policy Management: This feature empowers administrators to configure and manage user settings and system policies across multiple devices.

The Concept of "Global-Lifetime"

The term "Global-Lifetime" is often used to describe a type of OEM license that is not geographically restricted. This implies that the license can be activated and used anywhere in the world, regardless of the country of origin of the hardware. However, it’s important to note that the term "Global-Lifetime" is not an official Microsoft designation and should be approached with caution.

Potential Benefits and Concerns

While the idea of a "Global-Lifetime" OEM license may seem attractive, it’s essential to understand its potential benefits and drawbacks:

Potential Benefits:

  • Flexibility: A truly global license offers flexibility in terms of location and device usage.
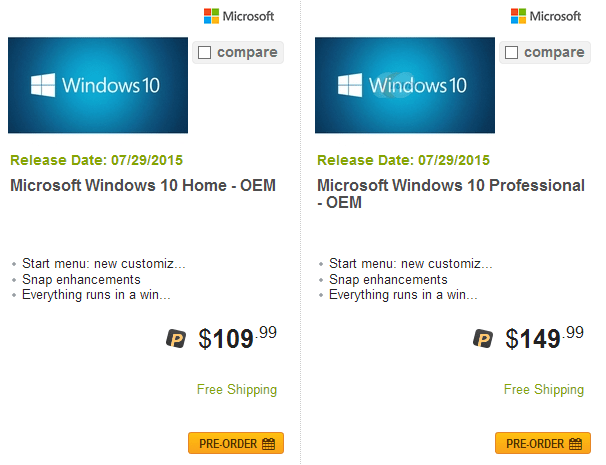
  • Cost-Effectiveness: OEM licenses are generally less expensive than retail versions, potentially making them a more affordable option.

Potential Concerns:

  • Legitimacy: The use of the term "Global-Lifetime" in online marketplaces can be misleading. It’s crucial to verify the source and legitimacy of the license.
  • Support: OEM licenses may not offer the same level of support as retail versions, as the responsibility often lies with the hardware manufacturer.
  • Updates: The availability of future updates and upgrades might be limited or subject to the hardware manufacturer’s policies.
  • Transferability: The non-transferable nature of OEM licenses means that the license cannot be moved to a different device.

Understanding the Risks of Unverified Licenses

Purchasing an unverified OEM license from an unknown source can pose significant risks:

  • Fraud: The license may be counterfeit or stolen, leading to potential legal issues and loss of investment.
  • Malware: Downloaded files containing the license key could contain malware, compromising your computer’s security.
  • Functionality Issues: The license may not activate properly or may not provide access to all features of Windows 10 Pro.

Tips for Safe and Reliable Licensing

To ensure a safe and reliable Windows 10 Pro licensing experience, consider these tips:

  • Purchase from Reputable Sources: Buy licenses only from authorized retailers or Microsoft directly.
  • Verify License Authenticity: Check for official Microsoft documentation and verify the license key through Microsoft’s website.
  • Understand Licensing Terms: Carefully read and understand the license agreement before purchasing.
  • Consider Alternative Options: Explore retail versions of Windows 10 Pro for greater flexibility and support.

FAQs

Q: Is it legal to purchase a "Global-Lifetime" Windows 10 Pro OEM license?

A: The legality of such licenses depends on the source and the specific terms of the license agreement. It is advisable to purchase licenses only from reputable sources and to carefully review the terms and conditions.

Q: Are "Global-Lifetime" OEM licenses guaranteed to work?

A: The functionality of such licenses is not guaranteed, and their validity can be subject to change. It’s important to understand that Microsoft does not officially endorse or support the use of "Global-Lifetime" OEM licenses.

Q: What are the risks associated with using an unverified OEM license?

A: The risks include potential fraud, malware infection, and functionality issues. It’s crucial to verify the source and authenticity of any license before purchasing.

Conclusion

While the concept of a "Global-Lifetime" Windows 10 Pro OEM license may appear appealing, it’s crucial to approach it with caution. The term itself is not an official Microsoft designation, and the legality and functionality of such licenses can be questionable. Always prioritize purchasing from reputable sources, verifying the authenticity of the license, and understanding the associated risks. For a more reliable and secure experience, consider exploring retail versions of Windows 10 Pro or obtaining licenses directly from Microsoft.

Microsoft Windows 10 Pro OEM System builder License Key Microsoft Windows 10 Pro OEM Key  Get your Cheap License CD Key โ€“ RoyalCDKeys Windows 10 Pro OEM Key  Buy on Kinguin
Windows 10 Pro Oem Microsoft windows 10 pro oem license  How to buy a windows 10 Pro OEM license?. 2019-05-07 Windows 10 Pro Oem Digital License - Licenศ›ฤƒ Blog
Windows 10 pro digital license - ftras Windows 10 Pro OEM licenses for businesses

Closure

Thus, we hope this article has provided valuable insights into Understanding Windows 10 Pro OEM Licenses: A Comprehensive Guide. We thank you for taking the time to read this article. See you in our next article!

Seamless File Sharing On Windows 11: Exploring The Options

Seamless File Sharing on Windows 11: Exploring the Options

Introduction

With great pleasure, we will explore the intriguing topic related to Seamless File Sharing on Windows 11: Exploring the Options. Let’s weave interesting information and offer fresh perspectives to the readers.

Seamless File Sharing on Windows 11: Exploring the Options

Windows 11: Turn On Network Discovery and File Sharing

Windows 11, with its refined interface and enhanced features, presents a more streamlined experience for users. One area that has seen significant improvement is file sharing. While traditional methods like email attachments and external drives remain viable, Windows 11 introduces several modern solutions that prioritize ease and efficiency.

This article delves into the various methods of file sharing available on Windows 11, highlighting their strengths and limitations. Understanding these options empowers users to choose the most suitable method for their specific needs, fostering a seamless and secure file transfer process.

The Rise of Cloud-Based Sharing:

The advent of cloud storage services has revolutionized file sharing. Platforms like OneDrive, Google Drive, and Dropbox offer a convenient and accessible way to share files across various devices. These services allow users to upload files to a centralized cloud storage space, generate shareable links, and control access permissions.

Advantages:

  • Accessibility: Files can be accessed from any device with an internet connection.
  • Ease of Use: Sharing files involves simply generating a link and sharing it with the intended recipient.
  • Collaboration: Cloud platforms facilitate real-time collaboration on documents and projects.
  • Version Control: Changes made to files are automatically tracked and versions can be restored if needed.

Disadvantages:

  • Internet Dependency: Access to files is contingent on a stable internet connection.
  • Storage Limits: Free cloud storage plans often have limited capacity.
  • Security Concerns: Data stored on cloud servers is vulnerable to potential breaches.

Exploring Local Network Sharing:

For users who prefer to share files within a local network, Windows 11 offers a robust built-in feature known as "Network Sharing." This feature allows users to share files and folders directly with other devices on the same network, eliminating the need for external drives or cloud services.

Advantages:

  • Speed: File transfers within a local network are significantly faster than cloud-based sharing.
  • Offline Access: Files are accessible even without an internet connection.
  • Security: Sharing within a controlled network environment offers greater security.

Disadvantages:

  • Network Setup: Configuring network sharing requires a basic understanding of network settings.
  • Limited Reach: Files can only be shared with devices on the same network.
  • Security Risks: Vulnerabilities in network security can expose shared files to unauthorized access.

Utilizing the Power of Near Field Communication (NFC):

Windows 11, with its support for NFC, enables users to share files wirelessly by simply tapping two NFC-enabled devices together. This method is particularly useful for transferring small files, such as images or contact information, between compatible devices.

Advantages:

  • Simplicity: Sharing files involves a simple tap between devices.
  • Speed: Transfers are typically fast and efficient.
  • No Internet Required: NFC sharing does not rely on an internet connection.

Disadvantages:

  • Limited Range: NFC has a short range, typically requiring physical proximity between devices.
  • Device Compatibility: Both devices must be NFC-enabled.
  • File Size Limitations: NFC is best suited for sharing small files.

The Versatility of Bluetooth:

Bluetooth technology, a ubiquitous wireless communication standard, offers another option for file sharing on Windows 11. Users can pair their devices via Bluetooth and transfer files between them, facilitating a wireless transfer process.

Advantages:

  • Versatility: Bluetooth can be used to connect a wide range of devices, including smartphones, headphones, and printers.
  • Convenience: It eliminates the need for cables or physical proximity.
  • File Size Flexibility: Bluetooth can transfer files of varying sizes.

Disadvantages:

  • Slower Speeds: Bluetooth transfers are generally slower than other methods.
  • Pairing Complexity: Initial pairing can be cumbersome.
  • Security Concerns: Bluetooth can be vulnerable to security breaches if not properly configured.

Understanding the Importance of File Sharing:

File sharing is an integral aspect of modern computing. It enables individuals and businesses to collaborate on projects, share information, and exchange data seamlessly. The ability to transfer files effortlessly across devices, networks, and platforms is crucial for productivity, communication, and overall efficiency.

Windows 11, with its diverse range of file sharing options, empowers users to choose the most suitable method for their specific needs. Whether it’s cloud-based storage, local network sharing, or wireless technologies like NFC and Bluetooth, Windows 11 provides a robust and versatile ecosystem for sharing files seamlessly.

Frequently Asked Questions:

Q: What are the safest ways to share files on Windows 11?

A: The safest methods for file sharing on Windows 11 include:

  • Cloud storage services: Using reputable cloud platforms with robust security measures.
  • Local network sharing: Ensuring the network is secured with a strong password and firewall.
  • Encrypted file transfers: Utilizing tools that encrypt files before transmission.

Q: How can I share files with someone who doesn’t have a Windows 11 device?

A: You can share files with users on different operating systems using:

  • Cloud storage services: Most cloud platforms offer compatibility across various devices and operating systems.
  • Email attachments: Sending files as attachments to emails is a universal method.
  • External drives: Transferring files to a USB drive or other external storage device.

Q: What are the limitations of sharing files via Bluetooth?

A: Bluetooth sharing has limitations, including:

  • Slower speeds: Transfers can be significantly slower compared to other methods.
  • Pairing complexity: The initial pairing process can be cumbersome.
  • Security concerns: Bluetooth can be vulnerable to security breaches if not properly configured.

Q: How can I improve the security of my shared files on Windows 11?

A: You can enhance the security of your shared files by:

  • Setting strong passwords for your accounts: This applies to cloud storage services, local network sharing, and Bluetooth connections.
  • Enabling file encryption: Encrypting files before sharing them can protect their contents from unauthorized access.
  • Using a firewall: A firewall helps to prevent unauthorized access to your network and shared files.

Tips for Seamless File Sharing on Windows 11:

  • Choose the right method: Consider the size of the file, the speed of the transfer, and the security requirements before selecting a sharing method.
  • Utilize cloud storage: Cloud platforms offer convenience, accessibility, and collaboration features.
  • Configure network sharing: If you prefer local network sharing, ensure your network is properly set up and secured.
  • Explore NFC and Bluetooth: These wireless technologies offer quick and convenient file transfers for compatible devices.
  • Prioritize security: Employ strong passwords, encryption, and firewalls to safeguard your shared files.

Conclusion:

Windows 11 presents a diverse range of file sharing options, each with its own strengths and limitations. Understanding these methods empowers users to choose the most appropriate approach for their specific needs. From cloud-based storage to local network sharing and wireless technologies like NFC and Bluetooth, Windows 11 offers a versatile ecosystem for seamless and efficient file transfer. By prioritizing security and employing best practices, users can ensure their shared files are protected and accessible as needed.

Full Guide: Windows 11 File Sharing on Network How to share files on Windows 11 - Pureinfotech How to Turn on Network Discovery and File Sharing in Windows 11 - MiniTool
Windows 11: Turn On Network Discovery and File Sharing How to share files on Windows 11 - Pureinfotech Full Guide: Windows 11 File Sharing on Network
Easy Share the folder with everyone on Windows 11? Full Guide: Windows 11 File Sharing on Network

Closure

Thus, we hope this article has provided valuable insights into Seamless File Sharing on Windows 11: Exploring the Options. We hope you find this article informative and beneficial. See you in our next article!

Photo Story 3.1 For Windows 10

photo story 3.1 for windows 10

Related Articles: photo story 3.1 for windows 10

Introduction

With great pleasure, we will explore the intriguing topic related to photo story 3.1 for windows 10. Let’s weave interesting information and offer fresh perspectives to the readers.

Photo Story 3.1 for Windows 10: A Comprehensive Guide

Pobierz Microsoft Photo Story 3.01 dla Windows - Filehippo.com

Photo Story 3.1, a Microsoft program designed for creating slideshows and digital stories, has been a popular tool for Windows users for many years. Though officially discontinued in 2006, its legacy continues to resonate among those seeking a user-friendly and effective method for transforming photographs into engaging narratives. This article delves into the intricacies of Photo Story 3.1 for Windows 10, exploring its features, advantages, and continued relevance in the digital age.

Understanding the Basics: A Photo Story Journey

Photo Story 3.1 is a straightforward yet powerful application that empowers users to create visually captivating slideshows with a narrative flow. The program’s core functionality revolves around importing images, arranging them in a desired sequence, adding text, transitions, and background music, culminating in a multimedia story that can be shared with friends, family, or a broader audience.

Key Features: Unveiling the Tools of Storytelling

Photo Story 3.1 boasts a range of features that contribute to its enduring popularity:

  • Image Import and Arrangement: The program supports importing images from various sources, including digital cameras, scanners, and local storage. Users can effortlessly arrange these images in a desired order, forming the foundation of their story.

  • Text and Captions: Photo Story 3.1 allows for the addition of text overlays to individual images, enabling users to provide context, descriptions, or dialogue. The program offers various font styles, sizes, and colors, facilitating customization and visual appeal.

  • Transitions and Effects: Transitions between images add dynamism and visual interest to the slideshow. Photo Story 3.1 provides a selection of pre-designed transitions, ranging from subtle fades to more dramatic wipes, allowing users to tailor the visual flow to their narrative.

  • Music and Sound: Integrating music and sound effects enriches the emotional impact of the slideshow. Photo Story 3.1 allows users to add background music from their personal libraries or utilize pre-installed sound effects.

  • Output Options: Once the story is complete, Photo Story 3.1 offers various output formats, including Windows Media Video (WMV) and executable files. These options enable users to share their creations on various platforms, including online video hosting sites, social media, and personal computers.

Benefits of Photo Story 3.1: A Legacy of Simplicity and Creativity

Despite its age, Photo Story 3.1 remains a valuable tool due to its inherent simplicity and effectiveness:

  • User-Friendly Interface: The program’s intuitive interface makes it accessible to users of all skill levels, regardless of prior experience with slideshow creation software.

  • Ease of Use: The straightforward workflow and clear instructions guide users through the process of creating engaging slideshows.

  • Creative Freedom: Photo Story 3.1 provides sufficient creative control to allow users to personalize their stories, from choosing images and transitions to adding text and music.

  • Versatility: The program can be used for various purposes, including personal projects, family memories, educational presentations, and business marketing materials.

  • Accessibility: Photo Story 3.1 is available for free download, making it an accessible tool for anyone seeking a simple and effective way to create slideshows.

FAQs: Addressing Common Queries

Q: How do I download and install Photo Story 3.1 on Windows 10?

A: Photo Story 3.1 is no longer officially supported by Microsoft. However, various websites offer the program for download. Ensure you download from a reputable source to avoid potential security risks. Installation involves running the downloaded executable file and following the on-screen instructions.

Q: Can I use Photo Story 3.1 with modern image formats like JPEG and PNG?

A: Yes, Photo Story 3.1 supports common image formats like JPEG, PNG, and GIF.

Q: Is there a way to add more transitions or effects to Photo Story 3.1?

A: While Photo Story 3.1 offers a selection of pre-designed transitions and effects, there are no official means to add more. However, third-party applications or websites might offer additional options.

Q: Can I export my Photo Story 3.1 projects in different resolutions or video formats?

A: The program offers limited control over output resolution and video formats. However, you can adjust the video quality settings within the export options.

Q: Are there any alternatives to Photo Story 3.1 for Windows 10?

A: Yes, several alternatives are available, both free and paid. Some popular options include:

  • Windows Movie Maker: A free video editing software included with older versions of Windows.

  • Adobe Premiere Elements: A user-friendly video editing software designed for beginners.

  • iMovie: A free video editing software available for macOS and iOS devices.

  • Animoto: A cloud-based video creation platform offering various templates and features.

Tips for Creating Effective Photo Stories:

  • Choose Relevant Images: Select images that tell a compelling story and are visually appealing.

  • Organize Your Images: Arrange images in a logical order that guides the viewer through the narrative.

  • Use Text Sparingly: Avoid cluttering images with excessive text. Focus on concise captions and descriptions.

  • Select Appropriate Transitions: Choose transitions that complement the flow of the story and enhance visual interest.

  • Add Music and Sound Effects: Integrate music and sound effects that enhance the emotional impact and create a cohesive atmosphere.

  • Share Your Creation: Share your completed photo story with friends, family, or a wider audience through various platforms.

Conclusion: A Legacy of Storytelling Continues

Photo Story 3.1, despite its discontinuation, continues to hold a place in the hearts of many users. Its simplicity, user-friendliness, and creative potential make it a valuable tool for individuals seeking to transform photographs into engaging narratives. While newer software offers advanced features and capabilities, Photo Story 3.1 remains a testament to the enduring power of storytelling through visual media. Its legacy continues to inspire users to explore the art of storytelling, preserving memories and sharing experiences in a compelling and impactful way.

Photo story 3 for windows Photo Story 3 for Windows - QuanTriMang.com Photo Story 3 For Windows Download
How to download and install Photo Story on Windows 10 Photo Story 3 for Windows  Other Multimedia Software How to Download and Install Photo Story 3 for Windows - YouTube
Microsoft Photo Story 3.1 Download (Free) - PhotoStory3.exe 21st Century Teaching & Learning: Photo Story 3 for Windows

Closure

Thus, we hope this article has provided valuable insights into photo story 3.1 for windows 10. We hope you find this article informative and beneficial. See you in our next article!

Navigating The Digital Landscape: A Comprehensive Guide To Online Quantum Computing

Navigating the Digital Landscape: A Comprehensive Guide to Online Quantum Computing

Introduction

With enthusiasm, let’s navigate through the intriguing topic related to Navigating the Digital Landscape: A Comprehensive Guide to Online Quantum Computing. Let’s weave interesting information and offer fresh perspectives to the readers.

Basic Guide to Quantum Computing and Superposition  by Mark Rethana  Medium

Quantum computing, a burgeoning field with the potential to revolutionize scientific research and technological innovation, is gradually transitioning from the realm of theoretical exploration to practical application. One of the most accessible avenues for individuals and organizations to engage with this transformative technology is through online quantum computing platforms. These platforms, such as Q-Reduce Lite, offer a gateway to the world of quantum algorithms and provide a hands-on experience with the principles of quantum mechanics.

Understanding the Basics of Quantum Computing

At its core, quantum computing leverages the principles of quantum mechanics to perform computations in a fundamentally different way than classical computers. Classical computers utilize bits, which can represent either a 0 or a 1. Quantum computers, on the other hand, employ qubits, which can exist in a superposition of states, representing both 0 and 1 simultaneously. This superposition property allows quantum computers to explore multiple possibilities concurrently, leading to significant speedups for certain types of problems.

The Role of Online Platforms in Quantum Computing Education

Online platforms like Q-Reduce Lite play a crucial role in democratizing access to quantum computing knowledge and fostering its widespread adoption. They provide a user-friendly environment for individuals with varying levels of technical expertise to learn about quantum mechanics, explore quantum algorithms, and experiment with real-world applications. These platforms offer several key advantages:

  • Accessibility: Online platforms eliminate geographical barriers and make quantum computing accessible to anyone with an internet connection.
  • Cost-Effectiveness: They provide a cost-effective alternative to expensive and specialized hardware required for traditional quantum computing.
  • Interactive Learning: Online platforms often incorporate interactive tutorials, simulations, and coding exercises, enhancing the learning experience and promoting hands-on engagement.
  • Community Building: Many platforms foster online communities where users can collaborate, share knowledge, and learn from each other.

Q-Reduce Lite: A Comprehensive Overview

Q-Reduce Lite, a prominent online platform, exemplifies the benefits of this approach. It offers a range of features designed to cater to both beginners and experienced users seeking to delve into the world of quantum computing.

Key Features of Q-Reduce Lite:

  • Intuitive Interface: Q-Reduce Lite features a user-friendly interface, making it accessible even to those without prior experience in quantum computing.
  • Interactive Tutorials: The platform provides comprehensive tutorials that guide users through the fundamentals of quantum mechanics, quantum algorithms, and quantum programming.
  • Simulations: Q-Reduce Lite offers interactive simulations that allow users to visualize the behavior of quantum systems and experiment with different quantum operations.
  • Coding Exercises: Users can practice their quantum programming skills through a variety of coding exercises, progressively increasing in complexity.
  • Community Support: Q-Reduce Lite fosters a vibrant online community where users can engage in discussions, seek help, and share their knowledge.

Benefits of Using Q-Reduce Lite:

  • Enhanced Understanding: The platform’s interactive learning resources and simulations provide a deeper understanding of quantum mechanics and its applications.
  • Practical Skills Development: Users can develop practical skills in quantum programming and algorithm design through coding exercises and simulations.
  • Real-World Applications: Q-Reduce Lite showcases the potential of quantum computing in addressing real-world problems in fields like medicine, finance, and materials science.
  • Career Advancement: Proficiency in quantum computing is becoming increasingly valuable in various industries, making Q-Reduce Lite a valuable tool for career development.

FAQs

1. What is the target audience for Q-Reduce Lite?

Q-Reduce Lite caters to a wide audience, including students, researchers, developers, and anyone interested in learning about quantum computing. It offers resources for beginners as well as more advanced users seeking to deepen their understanding.

2. Does Q-Reduce Lite require any prior knowledge of quantum computing?

No, Q-Reduce Lite is designed to be accessible to individuals with no prior knowledge of quantum computing. The platform provides comprehensive tutorials that introduce the fundamental concepts in a clear and concise manner.

3. Is Q-Reduce Lite free to use?

Q-Reduce Lite offers a free tier with access to basic features and tutorials. Advanced features and more comprehensive resources may be available through a paid subscription.

4. What programming languages are supported by Q-Reduce Lite?

Q-Reduce Lite supports popular programming languages used in quantum computing, including Python and Qiskit.

5. How can I get started with Q-Reduce Lite?

To begin using Q-Reduce Lite, simply visit the platform’s website and create an account. The platform provides detailed instructions and tutorials to guide you through the initial setup and exploration.

Tips for Maximizing the Use of Q-Reduce Lite:

  • Start with the Basics: Begin with the platform’s introductory tutorials to gain a solid foundation in quantum computing.
  • Experiment with Simulations: Utilize the interactive simulations to visualize quantum phenomena and experiment with different quantum operations.
  • Practice Coding: Engage in the provided coding exercises to develop practical skills in quantum programming.
  • Join the Community: Participate in online discussions and forums to learn from others and share your knowledge.
  • Explore Real-World Applications: Explore the platform’s examples of quantum computing applications in various fields.

Conclusion

Q-Reduce Lite stands as a valuable resource for individuals seeking to explore the exciting world of quantum computing. Its user-friendly interface, comprehensive tutorials, interactive simulations, and vibrant online community make it an ideal platform for learning, experimenting, and building skills in this transformative field. As quantum computing continues to evolve, platforms like Q-Reduce Lite will play a pivotal role in fostering its widespread adoption and empowering individuals to harness its potential for innovation and progress.

A Guide To Quantum Computing Complete Guide to Quantum Computing - BLOCKGENI Exploring Quantum Computing: Principles and Applications - NCUIndia
Quantum Computing, A Comprehensive Guide - Give You Insights Quantum computing, digital transformation, programming languages, and more: ZDNet's research Quantum Computing and Its Applications  Technology Research Insights
Quantum Computing + Colocation + Interconnection = Transformation - Interconnections - The Understanding the Quantum Computing Landscape Today โ€“ Buy, Rent, or Wait - DataScienceCentral.com

Closure

Thus, we hope this article has provided valuable insights into Navigating the Digital Landscape: A Comprehensive Guide to Online Quantum Computing. We hope you find this article informative and beneficial. See you in our next article!

Navigating Windows 10 Updates: A Comprehensive Guide

Navigating Windows 10 Updates: A Comprehensive Guide

Introduction

With great pleasure, we will explore the intriguing topic related to Navigating Windows 10 Updates: A Comprehensive Guide. Let’s weave interesting information and offer fresh perspectives to the readers.

Navigating the Windows 10 Upgrade: A Comprehensive Guide - Fashion Magazine

Windows 10, like any operating system, requires regular updates to ensure optimal performance, security, and compatibility. These updates are delivered through the Windows Update service, accessible through the Settings app. Understanding the intricacies of this process and the various parameters involved can significantly enhance your Windows 10 experience.

Understanding the Update Process:

Windows 10 updates are delivered in two primary forms:

  • Feature updates: These are major releases that introduce significant new features, improvements, and design changes. They are typically released twice a year, in the spring and fall.
  • Quality updates: These updates focus on addressing security vulnerabilities, bug fixes, and performance enhancements. They are released more frequently, often monthly.

The Windows Update service automatically checks for and installs these updates, ensuring your system remains up-to-date. However, users have a degree of control over the update process through various parameters within the Settings app.

Exploring the Parameters:

The Settings app offers a comprehensive range of parameters to manage Windows 10 updates:

1. Update Settings:

  • Active hours: This setting allows users to define a period during which updates will not be installed. This is particularly useful for individuals who rely on their computers during specific hours and want to avoid interruptions.
  • Metered connections: This setting restricts updates over metered internet connections, such as mobile hotspots, to avoid excessive data usage.
  • Delivery Optimization: This feature allows Windows to download updates from other computers on the network, potentially speeding up the update process. Users can choose between downloading updates from other PCs on the local network or from computers worldwide.
  • Advanced options: This section allows users to choose whether to receive updates for all devices on the network, select the time when updates are downloaded, and define the size of the download bandwidth used for updates.

2. Advanced Options:

  • Pause updates: This setting allows users to temporarily pause updates for up to 35 days. This can be useful for situations where immediate updates are not desired, for example, during a major software deployment or before a significant event.
  • Choose how updates are delivered: Users can opt to receive updates directly from Microsoft or from other PCs on the network.
  • Update history: This section provides detailed information about previously installed updates, including their size, date, and installation status.

3. Windows Insider Program:

  • Join the Windows Insider Program: This program allows users to test pre-release versions of Windows 10, providing early access to new features and improvements. However, it is important to note that Insider builds may be unstable and may contain bugs.

Benefits of Keeping Windows 10 Updated:

  • Enhanced security: Updates often include security patches that address vulnerabilities in the operating system, protecting against malware and other threats.
  • Improved performance: Updates can optimize system performance, addressing bugs and improving resource utilization.
  • New features and functionality: Feature updates introduce new capabilities, user interface enhancements, and improved compatibility with the latest hardware and software.
  • Bug fixes and stability: Quality updates address bugs and issues reported by users, enhancing the overall stability and reliability of the operating system.
  • Compatibility with new software and hardware: Updates ensure compatibility with the latest software and hardware, providing a smooth user experience.

Addressing Common Concerns:

1. Update size and download time: Feature updates can be large, requiring significant download time and bandwidth. This can be mitigated by using Delivery Optimization to download updates from other PCs on the network.

2. System downtime during updates: Updates require system restarts, which can be disruptive, particularly for users who rely on their computers for work or other critical tasks. Using Active hours can minimize disruptions by preventing updates from installing during crucial periods.

3. Potential for update issues: While updates are generally safe and beneficial, there is always a small chance of encountering issues, such as compatibility problems or unexpected errors. It is important to back up important data before installing updates.

Tips for Managing Windows 10 Updates:

  • Schedule updates: Utilize the Active hours feature to schedule updates during non-critical periods.
  • Optimize download speed: Enable Delivery Optimization to download updates from other PCs on the network, potentially reducing download time.
  • Monitor update history: Regularly check the Update history to stay informed about installed updates and potential issues.
  • Back up data: Before installing updates, it is always a good practice to back up important data to prevent data loss in case of unforeseen issues.
  • Consider joining the Windows Insider Program: For users who want to test new features and improvements, joining the Windows Insider Program can be an excellent way to stay ahead of the curve.

Conclusion:

Managing Windows 10 updates effectively is crucial for maintaining a secure, stable, and up-to-date system. By understanding the various parameters available within the Settings app and utilizing the tips provided, users can optimize the update process, minimize disruptions, and ensure a smooth and enjoyable Windows 10 experience.

The complete guide to Windows 10 updates - Digital Citizen How To Update Windows 10: From Download To Installation How to manage Windows 10 updates to prevent them from ruining your life  PCWorld
How to view available microsoft updates for windows 10 - gashacker How to Update Apps in Windows 10 (Complete Guide) How to Change Windows Update Settings
How to Update Your Windows 10 Computer : HelloTech How Windows Update Wisdom: Navigating Updates in Windows 10

Closure

Thus, we hope this article has provided valuable insights into Navigating Windows 10 Updates: A Comprehensive Guide. We thank you for taking the time to read this article. See you in our next article!

A Comprehensive Guide To PC Magazine’s Best Desktop Computers

A Comprehensive Guide to PC Magazine’s Best Desktop Computers

Introduction

In this auspicious occasion, we are delighted to delve into the intriguing topic related to A Comprehensive Guide to PC Magazine’s Best Desktop Computers. Let’s weave interesting information and offer fresh perspectives to the readers.

A Comprehensive Guide to PC Magazine’s Best Desktop Computers

Maximum PC Magazine Subscription Discount  Savvy PC - DiscountMags.com

PC Magazine, a renowned authority in the technology world, annually publishes its esteemed "Best Desktop Computers" list. This list serves as a valuable resource for discerning consumers seeking the most reliable, powerful, and feature-rich desktop computers available. It is a culmination of rigorous testing, analysis, and evaluation by PC Magazine’s expert team, ensuring the inclusion of only the highest-quality machines.

Understanding the Importance of PC Magazine’s Best Desktop Computer List

Navigating the vast and ever-evolving landscape of desktop computers can be daunting. The sheer volume of options, coupled with the rapid advancements in technology, can make it challenging for consumers to make informed decisions. PC Magazine’s "Best Desktop Computers" list acts as a trusted guide, simplifying this process by curating a selection of exceptional machines.

The list’s significance lies in its objective and comprehensive approach. PC Magazine’s team meticulously tests each computer, evaluating its performance across a range of metrics, including:

  • Overall Performance: This encompasses the computer’s processing power, memory, and storage capabilities, ensuring it can handle demanding tasks with ease.
  • Graphics Performance: For gamers and creative professionals, the graphics card’s capabilities are crucial. PC Magazine assesses the computer’s ability to deliver smooth and visually stunning graphics.
  • Connectivity and Features: The list considers the availability of essential ports, connectivity options, and additional features like built-in webcams or fingerprint readers.
  • Design and Build Quality: PC Magazine evaluates the computer’s aesthetics, build materials, and overall durability.
  • User Experience: The ease of use, operating system, and overall user-friendliness are crucial factors in determining a computer’s suitability.

By considering all these factors, PC Magazine provides a well-rounded assessment of each desktop computer, enabling consumers to make informed decisions based on their individual needs and preferences.

Exploring the Benefits of Choosing a PC Magazine Best Desktop Computer

Choosing a computer from PC Magazine’s "Best Desktop Computers" list offers numerous benefits:

  • Guaranteed Quality: The list features only the most reliable and well-built machines, ensuring a high level of quality and performance.
  • Expert Validation: PC Magazine’s rigorous testing and analysis process ensures that each computer on the list meets the highest standards of excellence.
  • Informed Decision-Making: The list provides a comprehensive overview of each computer’s features, performance, and strengths, enabling informed decision-making.
  • Peace of Mind: Choosing a PC Magazine-recommended computer offers peace of mind knowing that you are investing in a reliable and high-performing machine.
  • Value for Money: The list often includes computers that offer exceptional value for their price, ensuring that you get the most out of your investment.

Navigating the PC Magazine Best Desktop Computers List

To ensure you find the perfect desktop computer for your needs, it is essential to understand the various categories and factors considered by PC Magazine when compiling the list.

Categories:

  • Best Overall: This category highlights the most well-rounded and versatile desktop computers, suitable for a wide range of users.
  • Best for Gaming: This category focuses on computers specifically designed for gaming, boasting powerful graphics cards and high refresh rate displays.
  • Best for Work: These computers are optimized for productivity and multitasking, featuring powerful processors and ample memory.
  • Best for Budget: This category features affordable yet capable computers, ideal for users on a tight budget.
  • Best for Students: This category highlights computers designed for students, offering a balance of performance and affordability.

Factors to Consider:

  • Budget: Determine your budget and choose a computer within your price range.
  • Purpose: Consider your intended use for the computer. Are you a gamer, a creative professional, or a casual user?
  • Performance Requirements: Determine the level of processing power, memory, and storage you need.
  • Features: Identify the features that are essential for you, such as specific ports, connectivity options, or built-in peripherals.
  • Design and Aesthetics: Consider the design and build quality of the computer, as it will be a prominent part of your workspace.

Frequently Asked Questions (FAQs) about PC Magazine’s Best Desktop Computers

Q: How often does PC Magazine update its "Best Desktop Computers" list?

A: PC Magazine regularly updates its list, typically several times a year, to reflect the latest advancements in technology and the availability of new models.

Q: Are all the computers on the list available for purchase?

A: While PC Magazine aims to include computers that are readily available, availability may vary depending on location and retailer.

Q: Can I trust the reviews and ratings on PC Magazine’s website?

A: PC Magazine’s reviews and ratings are based on rigorous testing and analysis by its expert team, ensuring that they are accurate and reliable.

Q: What if the computer I choose is no longer available?

A: PC Magazine’s list is a starting point for your research. If the specific model you are interested in is no longer available, you can explore other options on the list or consult additional reviews and comparisons.

Tips for Choosing the Best Desktop Computer for Your Needs

  • Read reviews and comparisons: Consult multiple sources, including PC Magazine’s reviews, to gain a comprehensive understanding of each computer’s strengths and weaknesses.
  • Consider your specific needs: Think about your intended use for the computer and prioritize features accordingly.
  • Compare prices and specifications: Don’t just focus on price; compare the specifications and features of different models to ensure you are getting the best value for your money.
  • Check for warranties and support: Ensure that the computer comes with a comprehensive warranty and reliable customer support.
  • Don’t be afraid to ask for help: If you are unsure about which computer to choose, consult with a knowledgeable salesperson or technology expert.

Conclusion

PC Magazine’s "Best Desktop Computers" list is an invaluable resource for anyone seeking a high-quality and reliable desktop computer. By carefully considering the factors discussed above and utilizing the list as a guide, consumers can confidently choose a machine that meets their specific needs and enhances their computing experience. Remember, investing in a quality desktop computer is an investment in productivity, creativity, and enjoyment.

Computers PC magazines PDF download online Maximum PC Magazine - 2023-05-23 Maximum PC Magazine  Savvy PC - DiscountMags.com
Computers PC magazines PDF download online The Ultimate PC Building Handbook Magazine (Digital) - DiscountMags.com Maximum PC Magazine - July 2018 Back Issue
Maximum PC  Computer magazines, Computer internet, Computer learning Best Desktop Computers for 2023 - CyberGuy

Closure

Thus, we hope this article has provided valuable insights into A Comprehensive Guide to PC Magazine’s Best Desktop Computers. We thank you for taking the time to read this article. See you in our next article!

Stripping Down Windows 11: A Comprehensive Guide To Removing Unwanted Software

Stripping Down Windows 11: A Comprehensive Guide to Removing Unwanted Software

Introduction

In this auspicious occasion, we are delighted to delve into the intriguing topic related to Stripping Down Windows 11: A Comprehensive Guide to Removing Unwanted Software. Let’s weave interesting information and offer fresh perspectives to the readers.

Stripping Down Windows 11: A Comprehensive Guide to Removing Unwanted Software

Windows (How to removing unwanted software)Simple Step - YouTube

Windows 11, like its predecessors, comes pre-loaded with a suite of applications, some of which might be considered unnecessary or even unwanted by users. These applications, often referred to as "bloatware," can consume valuable storage space, slow down system performance, and even pose potential security risks. This article provides a comprehensive guide to removing unwanted software from your Windows 11 installation, focusing on methods to create a clean and optimized system experience.

Understanding Bloatware and its Impact

Bloatware refers to pre-installed software applications that are not considered essential for the basic functioning of the operating system. These applications can range from trial versions of software, advertising tools, and third-party utilities to games and productivity apps. While some might be useful, others are often considered intrusive, resource-intensive, or simply unnecessary for the average user.

The presence of bloatware can have several detrimental effects on a Windows 11 installation:

  • Storage Consumption: Bloatware applications occupy valuable disk space, potentially reducing the available storage for essential files, applications, and system updates.
  • Performance Degradation: Bloatware can run in the background, consuming system resources like RAM and CPU, leading to slower performance and increased boot times.
  • Security Risks: Some bloatware applications might contain vulnerabilities or be bundled with malicious software, posing security risks to the user’s system.
  • User Frustration: The presence of unwanted applications can be frustrating for users, especially those who prefer a clean and streamlined system experience.

Methods for Removing Bloatware from Windows 11

There are several methods to remove bloatware from Windows 11, each with its own advantages and limitations. These methods can be broadly categorized as:

1. Using the "Apps & Features" Settings:

  • Direct Uninstall: The "Apps & Features" settings in Windows 11 allow users to directly uninstall unwanted applications. This is the simplest and most straightforward method for removing individual applications.
  • Limitations: This method might not be effective for removing system-level applications or those deeply integrated into the operating system.

2. Utilizing Third-Party Software:

  • Dedicated Bloatware Removal Tools: Several third-party software applications are specifically designed to identify and remove bloatware. These tools often offer advanced features like automatic detection, batch uninstallation, and system optimization.
  • Advantages: These tools can provide a more comprehensive and efficient solution for removing bloatware, especially for users unfamiliar with manual methods.
  • Limitations: Third-party tools might require user permissions and could potentially introduce vulnerabilities or conflicts with the operating system.

3. Modifying the Windows 11 ISO Image:

  • Pre-Installation Removal: This method involves modifying the Windows 11 ISO image before installation, removing bloatware applications and other unwanted components. This ensures a clean installation without the need for manual removal after installation.
  • Advantages: Offers a clean and optimized installation from the outset, eliminating the need for post-installation removal processes.
  • Limitations: Requires technical expertise and knowledge of ISO image manipulation techniques.

Modifying the Windows 11 ISO Image: A Detailed Walkthrough

Modifying the Windows 11 ISO image before installation is a powerful method for removing bloatware and creating a clean, optimized system. This process involves several steps:

1. Downloading and Extracting the Windows 11 ISO:

  • Download the official Windows 11 ISO image from Microsoft’s website.
  • Use a suitable tool like 7-Zip or WinRAR to extract the contents of the ISO image to a temporary folder.

2. Identifying Bloatware Applications:

  • Examine the extracted files and folders to identify bloatware applications. This might require some research to determine which applications are considered unwanted.
  • Common bloatware applications include:
    • Candy Crush Saga
    • Microsoft Solitaire Collection
    • Skype
    • Microsoft Edge
    • Office 365 Trial
    • Windows Defender Antivirus (if you prefer an alternative)
    • OneDrive (if you don’t use cloud storage)
  • Use online resources and forums to find lists of common bloatware applications in Windows 11.

3. Removing Bloatware Files and Folders:

  • Delete the folders and files associated with the identified bloatware applications. Be cautious and ensure you are removing the correct files to avoid accidentally deleting essential system components.
  • Use a file explorer to navigate to the relevant folders and delete the unwanted files and folders.

4. Creating a New ISO Image:

  • Use a tool like Rufus or ISO Workshop to create a new ISO image from the modified files and folders.
  • Configure the tool to create a bootable ISO image that can be used to install Windows 11.

5. Installing Windows 11 from the Modified ISO:

  • Use the newly created ISO image to install Windows 11 on your system.
  • The installation process will proceed as usual, but the system will be free from the removed bloatware applications.

Frequently Asked Questions (FAQs)

1. Is removing bloatware safe?

Removing bloatware is generally safe as long as you are careful and avoid deleting essential system files. It is recommended to research the applications you are removing and ensure they are not critical for system functionality.

2. Can I remove bloatware after installing Windows 11?

Yes, you can remove bloatware after installing Windows 11 using the "Apps & Features" settings or dedicated third-party software. However, modifying the ISO image before installation provides a cleaner and more efficient solution.

3. What if I accidentally delete a necessary system file?

Deleting essential system files can lead to system instability or even prevent Windows 11 from booting. It is crucial to be cautious and double-check the files you are removing. If you suspect you have deleted a necessary file, you might need to reinstall Windows 11.

4. Will removing bloatware affect my warranty?

Removing bloatware generally does not affect your warranty. However, it is always advisable to consult your manufacturer’s warranty policy for specific details.

5. Are there any risks associated with modifying the ISO image?

Modifying the ISO image can be risky if not done correctly. It is essential to use reliable tools and follow the steps carefully to avoid corrupting the ISO image or introducing vulnerabilities.

Tips for Removing Bloatware

  • Research before removing: Before removing any application, ensure you understand its purpose and whether it is essential for system functionality.
  • Backup your data: It is always advisable to back up your important data before making any significant changes to your system.
  • Use reputable tools: When using third-party software, choose reputable and well-reviewed tools to minimize the risk of introducing malware or vulnerabilities.
  • Start with a clean installation: If you are unsure about removing bloatware, consider performing a clean installation of Windows 11 to start with a fresh and clean system.

Conclusion

Removing bloatware from your Windows 11 installation can significantly improve your system performance, storage space, and overall user experience. While there are several methods to achieve this, modifying the Windows 11 ISO image before installation offers a comprehensive and efficient solution. By following the steps outlined in this article and exercising caution, you can create a clean and optimized Windows 11 environment free from unwanted software. Remember to research, back up your data, and use reliable tools to ensure a safe and successful removal process.

Strip Down and Optimize Windows 11 for Kiosks Digital Signage and Special Purpose Systems How to Remove the Unwanted Software from Your Computer? - IMC Grupo This stripped-down Windows 11 version runs on less than 2GB of RAM (and doesn't require TPM
Different Ways to Shut Down Windows 11 Systems - Tutorial How to Fix Windows Security Potentially Unwanted App Found in Windows 11 - YouTube How to Strip down windows operating system - YouTube
Different Ways to Shut Down Windows 11 Systems - Tutorial Remove Update and Shutdown Option from Windows 11 Power Menu

Closure

Thus, we hope this article has provided valuable insights into Stripping Down Windows 11: A Comprehensive Guide to Removing Unwanted Software. We hope you find this article informative and beneficial. See you in our next article!

Troubleshooting A Non-Booting Windows 10 System: A Comprehensive Guide

Troubleshooting a Non-Booting Windows 10 System: A Comprehensive Guide

Introduction

With great pleasure, we will explore the intriguing topic related to Troubleshooting a Non-Booting Windows 10 System: A Comprehensive Guide. Let’s weave interesting information and offer fresh perspectives to the readers.

Troubleshooting a Non-Booting Windows 10 System: A Comprehensive Guide

Windows 10 Not Booting After Update? Here is the Quick Fix

A computer that fails to boot into Windows 10 presents a frustrating and potentially concerning scenario for any user. This guide aims to provide a comprehensive understanding of the potential causes behind this issue and offers a systematic approach to troubleshooting and resolving it.

Understanding the Boot Process

Before delving into troubleshooting, it is crucial to grasp the fundamental steps involved in the boot process:

  1. Power On Self Test (POST): When the computer is powered on, the BIOS (Basic Input/Output System) performs a self-test to ensure essential hardware components are functioning correctly.
  2. Boot Device Selection: The BIOS then identifies the boot device (usually a hard drive or SSD) from which the operating system should be loaded.
  3. Operating System Loading: The operating system files are loaded from the selected device into memory.
  4. System Initialization: Windows 10 initializes services, drivers, and other components necessary for the system to function.
  5. Login Screen: The user is presented with the login screen, allowing them to access their account.

Common Causes of a Non-Booting Windows 10 System

A variety of factors can disrupt the boot process, preventing Windows 10 from starting successfully. These include:

1. Hardware Malfunctions:

  • Hard Drive Failure: This is a common culprit, as a failing hard drive can corrupt the operating system files or render the device inaccessible. Symptoms may include clicking noises, slow performance, or error messages during boot.
  • RAM Issues: Faulty RAM can lead to system instability and prevent Windows from loading properly.
  • Motherboard Failure: A malfunctioning motherboard can disrupt communication between various components, causing a system crash.
  • Loose Connections: Improperly connected cables or components can interrupt power flow or data transfer, leading to boot failures.

2. Software Issues:

  • Corrupted Operating System Files: Damaged or missing system files can prevent Windows from starting correctly. This can occur due to power outages, improper shutdowns, or malware infections.
  • Incorrect Boot Configuration: Improperly configured BIOS settings or boot order can prevent the system from finding and loading the operating system.
  • Driver Conflicts: Incompatible or outdated drivers can cause system instability and prevent Windows from booting.
  • Malware Infections: Viruses or other malware can damage system files or interfere with the boot process.

3. Other Potential Causes:

  • Overheating: Excessive heat can damage components and lead to system instability.
  • Dust Accumulation: Dust can clog fans and vents, hindering airflow and causing overheating.
  • Power Supply Problems: A faulty power supply can fail to provide adequate power, leading to boot failures.

Troubleshooting Strategies

1. Identifying the Problem:

  • Observe the Boot Process: Pay close attention to the initial boot sequence. Any error messages, beeps, or unusual behavior can provide valuable clues.
  • Check for Visual Indicators: Look for flashing lights or error codes on the motherboard or peripherals. These indicators often provide information about specific hardware failures.
  • Monitor Temperature: Use monitoring software or BIOS utilities to check system temperatures. Overheating can be a significant cause of boot failures.

2. Basic Troubleshooting Steps:

  • Restart the Computer: A simple restart can sometimes resolve temporary issues.
  • Check Connections: Ensure all cables are securely connected and that no components are loose.
  • Remove External Devices: Disconnect all external devices, including USB drives, printers, and external hard drives.
  • Run a Hardware Diagnostic: Use a diagnostic utility to test the hard drive, RAM, and other components.
  • Update BIOS: Ensure the BIOS is up to date to address any compatibility issues or bug fixes.

3. Advanced Troubleshooting:

  • Boot into Safe Mode: Safe Mode loads Windows with minimal drivers and services, allowing you to troubleshoot issues. You can access Safe Mode by pressing F8 during startup or by using the System Configuration utility.
  • Perform a System Restore: System Restore can revert your system to a previous working state, potentially resolving issues caused by software updates or changes.
  • Run a Startup Repair: Startup Repair attempts to fix problems that prevent Windows from starting correctly.
  • Reinstall Windows 10: If all else fails, reinstalling Windows 10 can address corrupted system files or other software issues.

4. Data Recovery:

If the hard drive is suspected to be failing, data recovery should be prioritized. Consult a professional data recovery service to attempt to retrieve important files.

5. Prevention and Maintenance:

  • Regularly Back Up Data: Regular backups are essential to protect your data in case of system failures.
  • Keep Software Updated: Install the latest Windows updates and software patches to address vulnerabilities and improve stability.
  • Monitor System Health: Use system monitoring tools to track temperatures, disk space, and other critical metrics.
  • Clean and Maintain Hardware: Regularly clean your computer’s interior to prevent dust accumulation and ensure proper airflow.

FAQs (Frequently Asked Questions)

Q: What does a "blue screen of death" indicate?

A: A blue screen of death (BSOD) signifies a critical system error that prevents Windows from operating. The error message displayed on the blue screen provides clues about the cause of the problem.

Q: What should I do if my computer beeps repeatedly during startup?

A: Beeping codes are often used by the BIOS to indicate specific hardware failures. Consult your motherboard’s manual to decipher the meaning of the beeps.

Q: Can I fix a corrupted hard drive?

A: In some cases, corrupted sectors on a hard drive can be repaired using specialized software. However, if the damage is extensive, the drive may need to be replaced.

Q: Is it safe to reinstall Windows 10?

A: Reinstalling Windows 10 is generally safe, but it will erase all data on the system drive. Ensure you have a backup of important files before proceeding.

Tips for Preventing Boot Failures:

  • Regularly back up your data.
  • Keep your operating system and software up to date.
  • Monitor system temperatures and performance.
  • Clean your computer regularly to prevent dust accumulation.
  • Be cautious about downloading files from untrusted sources.
  • Use a reputable antivirus program.

Conclusion

While a non-booting Windows 10 system can be a frustrating experience, it is often resolvable with careful troubleshooting and a systematic approach. By understanding the potential causes, utilizing the appropriate tools and techniques, and implementing preventative measures, users can minimize the likelihood of encountering such issues and ensure the smooth operation of their computer systems.

How To Fix A No Bootable Device Error On Windows 10  helpdeskgeek Windows 10 Won't Boot? 12 Fixes to Get Your PC Running Again How to Fix Windows 10 Startup Problems (4 Ways) - YouTube
How to access Windows 10 troubleshooting tools step by step  TechTarget How to Fix Windows 10 Startup Problems!  Windows 10 not Booting Up Black Screen! (2021) Windows 10 Not Booting Up FIX [Tutorial] - YouTube
Windows 10 Won't Boot? Fix it with Startup Repair and BootRec Commands How to fix Windows 10 not booting? - Icon Remover

Closure

Thus, we hope this article has provided valuable insights into Troubleshooting a Non-Booting Windows 10 System: A Comprehensive Guide. We thank you for taking the time to read this article. See you in our next article!

A Comprehensive Guide To NinjaTrader 8 On Windows 11: Empowering Traders In The Modern Era

A Comprehensive Guide to NinjaTrader 8 on Windows 11: Empowering Traders in the Modern Era

Introduction

With great pleasure, we will explore the intriguing topic related to A Comprehensive Guide to NinjaTrader 8 on Windows 11: Empowering Traders in the Modern Era. Let’s weave interesting information and offer fresh perspectives to the readers.

A Comprehensive Guide to NinjaTrader 8 on Windows 11: Empowering Traders in the Modern Era

How to Use NinjaTrader 8 - Complete Beginner's Tutorial / Guide for Traders - YouTube

NinjaTrader 8, a leading platform for advanced traders, seamlessly integrates with Windows 11, offering a robust and user-friendly environment for executing strategies, analyzing market data, and managing trading activities. This comprehensive guide provides an in-depth exploration of NinjaTrader 8 on Windows 11, highlighting its capabilities and benefits for traders of all levels.

Understanding NinjaTrader 8: A Powerful Trading Ecosystem

NinjaTrader 8 is not merely a trading platform; it is a comprehensive ecosystem designed to empower traders with the tools and resources necessary for success. Its key features include:

  • Advanced Charting and Analysis: NinjaTrader 8 provides an array of customizable chart types, drawing tools, and indicators, enabling traders to visualize market movements, identify patterns, and develop trading strategies.
  • Automated Trading: The platform supports automated trading strategies through its Strategy Wizard and Strategy Analyzer, allowing traders to execute trades based on pre-defined rules and algorithms.
  • Market Data Access: NinjaTrader 8 offers real-time market data from various sources, including exchanges and brokers, ensuring traders have access to the latest information for informed decision-making.
  • Backtesting and Optimization: The platform facilitates backtesting of trading strategies against historical data, enabling traders to assess performance, identify areas for improvement, and optimize strategies.
  • Order Management and Execution: NinjaTrader 8 provides a user-friendly order management system for placing, modifying, and canceling orders with various order types and execution algorithms.
  • Community and Support: NinjaTrader 8 boasts a vibrant community of traders, developers, and educators, offering a wealth of resources, support, and knowledge sharing opportunities.

Windows 11: A Modern Operating System for Enhanced Trading

Windows 11, the latest iteration of Microsoft’s operating system, provides a modern and secure environment for running demanding applications like NinjaTrader 8. Its key features relevant to trading include:

  • Performance and Stability: Windows 11 is optimized for performance and stability, ensuring smooth operation and minimal interruptions during active trading sessions.
  • Security and Privacy: Windows 11 incorporates advanced security features to protect user data and trading activities from unauthorized access and cyber threats.
  • Integration with Trading Devices: Windows 11 seamlessly integrates with various trading devices, such as multi-monitors, touchscreens, and specialized trading hardware, enhancing the trading experience.
  • Modern User Interface: Windows 11 features a modern and intuitive user interface, making it easy to navigate and utilize the full functionality of NinjaTrader 8.

The Synergy of NinjaTrader 8 and Windows 11

The combination of NinjaTrader 8 and Windows 11 creates a powerful and efficient trading environment. By leveraging the strengths of both platforms, traders can benefit from:

  • Enhanced Performance and Stability: Windows 11’s optimized performance and stability ensure NinjaTrader 8 runs smoothly, minimizing latency and maximizing trading efficiency.
  • Secure Trading Environment: Windows 11’s advanced security features protect sensitive trading data and activities from unauthorized access and cyber threats.
  • Seamless Integration with Trading Devices: Windows 11’s integration with various trading devices enhances the overall trading experience, allowing traders to customize their setup for optimal efficiency.
  • Modern User Interface: The modern and intuitive user interface of Windows 11 makes it easy to navigate and utilize the full functionality of NinjaTrader 8, enhancing user experience and productivity.

Downloading and Installing NinjaTrader 8 on Windows 11

Downloading and installing NinjaTrader 8 on Windows 11 is a straightforward process. Here’s a step-by-step guide:

  1. Visit the NinjaTrader Website: Navigate to the official NinjaTrader website (https://www.ninjatrader.com).
  2. Download the Installer: Locate the download section and select the appropriate installer for Windows 11.
  3. Run the Installer: Once the download is complete, run the installer and follow the on-screen instructions.
  4. Choose Installation Options: Select the desired installation options, including the installation directory and any additional features.
  5. Complete the Installation: The installer will complete the installation process, and you will be ready to launch NinjaTrader 8.

Configuring NinjaTrader 8 for Optimal Trading

Once NinjaTrader 8 is installed, it’s crucial to configure it for optimal trading. This involves:

  • Setting Up Account and Brokerage: Connect your brokerage account to NinjaTrader 8 and configure the necessary settings for order execution and data feed.
  • Customizing Charts and Indicators: Choose the desired chart types, indicators, and drawing tools to suit your trading style and analysis needs.
  • Developing and Testing Trading Strategies: Utilize the Strategy Wizard and Strategy Analyzer to develop, test, and optimize your trading strategies.
  • Setting Up Alerts and Notifications: Configure alerts and notifications to stay informed about market movements and trading opportunities.

Frequently Asked Questions (FAQs) about NinjaTrader 8 on Windows 11

Q: What are the system requirements for running NinjaTrader 8 on Windows 11?

A: NinjaTrader 8 requires a modern computer with sufficient processing power, memory, and storage space. The specific requirements can be found on the NinjaTrader website.

Q: Is NinjaTrader 8 compatible with all Windows 11 versions?

A: NinjaTrader 8 is compatible with all supported versions of Windows 11. However, it’s always advisable to check for the latest compatibility information on the NinjaTrader website.

Q: Can I use NinjaTrader 8 with multiple monitors on Windows 11?

A: Yes, NinjaTrader 8 supports multi-monitor setups on Windows 11, allowing traders to customize their workspace for optimal efficiency.

Q: Does NinjaTrader 8 require any specific hardware on Windows 11?

A: While NinjaTrader 8 can run on standard computer hardware, specialized trading devices, such as high-performance monitors and touchscreens, can enhance the trading experience.

Q: Is there a free trial version of NinjaTrader 8 available?

A: Yes, NinjaTrader 8 offers a free trial version, allowing traders to explore the platform’s features and functionality before committing to a subscription.

Tips for Optimizing NinjaTrader 8 on Windows 11

  • Regularly Update Windows 11: Keeping Windows 11 up-to-date ensures optimal performance and security, enhancing the overall trading experience.
  • Optimize System Resources: Close unnecessary applications and processes to free up system resources for NinjaTrader 8 to operate efficiently.
  • Use a Dedicated Trading Computer: Consider using a dedicated computer for trading, minimizing distractions and ensuring optimal performance.
  • Customize the User Interface: Tailor the user interface of NinjaTrader 8 to your specific needs and preferences for enhanced productivity.
  • Stay Updated on the Latest Features: Regularly check for updates and new features in NinjaTrader 8 to leverage the latest tools and improvements.

Conclusion: A Powerful Platform for Modern Trading

NinjaTrader 8, running on Windows 11, provides a powerful and user-friendly platform for traders of all levels. Its advanced features, comprehensive tools, and seamless integration with Windows 11 empower traders to analyze markets, develop strategies, execute trades, and manage their trading activities efficiently and effectively. By leveraging the strengths of both platforms, traders can unlock new possibilities and achieve their trading goals in the modern era.

NinjaTrader 8 Beginner's Tutorial for Traders - How to Set up a Chart - YouTube Ninjatrader 8 Trading Platform - Comprehensive Review - YouTube Introduction to Ninjatrader 8 - Part 1
Beginners Guide on using NinjaTrader 8 charts effectively? - YouTube NinjaTrader 8 Video Instruction Guide for Beginners Unlock trading success with this Ninja Trader 8 Chart SetupNOW! - YouTube
Introducing NinjaTrader 8: Newly Redesigned with 500+ Enhancements! - YouTube NinjaTrader 8 - Advanced Trade Management Overview - YouTube

Closure

Thus, we hope this article has provided valuable insights into A Comprehensive Guide to NinjaTrader 8 on Windows 11: Empowering Traders in the Modern Era. We hope you find this article informative and beneficial. See you in our next article!

Troubleshooting Windows 11 Startup Errors: A Comprehensive Guide

Troubleshooting Windows 11 Startup Errors: A Comprehensive Guide

Introduction

With great pleasure, we will explore the intriguing topic related to Troubleshooting Windows 11 Startup Errors: A Comprehensive Guide. Let’s weave interesting information and offer fresh perspectives to the readers.

Troubleshooting Windows 11 Startup Errors: A Comprehensive Guide

Fix Common Startup Problems In Windows 11 [Tutorial] - YouTube

Encountering the dreaded "Your PC did not start correctly" error message in Windows 11 can be frustrating. This message signals a problem preventing the operating system from booting properly, leaving users unable to access their files or applications. While the message itself provides little insight, understanding the potential causes and troubleshooting steps can help resolve the issue.

This article delves into the complexities of Windows 11 startup errors, providing a comprehensive guide for users to diagnose and address the problem. It outlines potential causes, explores various troubleshooting methods, and offers practical tips for preventing future occurrences.

Understanding the Causes

The "Your PC did not start correctly" error can stem from various factors, each requiring a specific approach to resolution. Here are some common culprits:

  • Hardware Issues:
    • Faulty RAM: Damaged or incompatible RAM modules can disrupt the boot process.
    • Failing Hard Drive: A failing hard drive can lead to data corruption and prevent the operating system from loading.
    • Loose Connections: Improperly connected cables, particularly those related to the motherboard, can interrupt data flow.
    • Overheating Components: Excessive heat can damage hardware and interfere with the boot process.
  • Software Issues:
    • Corrupted System Files: Damaged or missing system files can prevent Windows 11 from starting properly.
    • Conflicting Drivers: Incompatible or outdated drivers can cause conflicts and disrupt the boot process.
    • Malware Infections: Malicious software can compromise system files and interfere with the boot process.
    • Recent Software Updates: Newly installed programs or updates can sometimes introduce bugs that affect system stability.

Troubleshooting Steps

Once the potential causes are understood, troubleshooting becomes more focused. Here’s a step-by-step approach to resolving Windows 11 startup errors:

1. Basic Checks:

  • Power Cycle: Turn off the computer completely, unplug it from the power outlet, and wait for a few minutes. Then, plug it back in and attempt to boot.
  • Check Connections: Ensure all cables, including power, monitor, and peripherals, are securely connected.
  • Remove External Devices: Disconnect any external devices, such as USB drives, printers, and external hard drives.
  • Check for Overheating: If the computer feels unusually hot, allow it to cool down before attempting to boot again.

2. Advanced Troubleshooting:

  • Safe Mode: Booting into Safe Mode disables unnecessary startup programs and drivers, isolating the problem. To enter Safe Mode, restart the computer and repeatedly press the F8 key during the boot process.
  • System Restore: Revert the system to a previous point in time when it was working correctly. This can resolve software-related issues but will delete any changes made since the restore point.
  • Startup Repair: Windows 11’s built-in repair tool can automatically detect and fix common startup problems. Access it by restarting the computer and pressing the Shift key while selecting "Restart."
  • Command Prompt: Use the Command Prompt to troubleshoot specific issues, such as corrupt system files or driver conflicts.

3. Hardware Diagnosis:

  • RAM Test: Run a memory diagnostic tool to identify and isolate faulty RAM modules.
  • Hard Drive Check: Use the built-in hard drive diagnostic tool or a third-party software to check for errors and potential failures.
  • BIOS Update: Ensure the BIOS is up-to-date, as outdated BIOS can cause compatibility issues.

4. Software Solutions:

  • Driver Updates: Update all device drivers, especially those related to the motherboard, graphics card, and storage devices.
  • Malware Scan: Run a full system scan with a reputable antivirus program to eliminate any malicious software.
  • Clean Boot: Start Windows 11 with only essential services and drivers enabled. This helps isolate the problematic software.
  • Reinstall Windows: As a last resort, reinstalling Windows 11 can resolve severe software issues, but it will require backing up data beforehand.

Tips for Prevention

Preventing Windows 11 startup errors requires proactive measures:

  • Regular Maintenance: Perform regular system maintenance tasks, including defragmenting the hard drive, clearing temporary files, and running disk cleanup.
  • Software Updates: Keep Windows 11 and all software applications updated with the latest patches and security fixes.
  • Driver Updates: Ensure all device drivers are up-to-date and compatible with the current system configuration.
  • Virus Protection: Install and maintain a reputable antivirus program to protect against malware infections.
  • Hardware Monitoring: Regularly monitor system temperatures and hardware performance to detect potential issues early.

FAQs

Q: What if the "Your PC did not start correctly" error persists?

A: If the above troubleshooting steps fail, consider seeking professional assistance from a qualified technician. They can diagnose the issue more thoroughly and provide tailored solutions.

Q: Can I recover my data if the hard drive is failing?

A: Data recovery from a failing hard drive is possible but requires specialized tools and expertise. Consult a data recovery professional for assistance.

Q: Is reinstalling Windows 11 always necessary?

A: Reinstalling Windows 11 is a last resort. It should only be considered if other troubleshooting methods fail to resolve the issue.

Conclusion

Resolving "Your PC did not start correctly" errors in Windows 11 can be challenging but is achievable with systematic troubleshooting. By understanding the potential causes, applying the appropriate steps, and implementing preventative measures, users can minimize the impact of these errors and maintain a stable and functional system. Remember, if the issue persists, seeking professional assistance is recommended to ensure a comprehensive diagnosis and effective resolution.

Windows 11 Errors Bugs And Issues A Full List Pc Guide - Riset Windows 11 Startup Repair Not Working? 4 BEST FIX [2021] How to FIX Automatic Repair Loop & StartUp Problems in Windows 11 (2023 Guide) - YouTube
Fix Common Startup Problems In Windows 11 - [2024 Tutorial] - YouTube How to Fix Windows 10/11 Startup Problems using Command Prompt (Complete Tutorial)  4 Ways to Windows 11 Startup Repair Not Working? 4 BEST FIX [2021]
Startup Repair Windows 11  How to Automatic Repair Loop Problems in Windows 11 - ViDoe *STARTUP REPAIR WINDOWS 11  HOW TO FIX AUTOMATIC REPAIR LOOP PROBLEMS IN WINDOWS 11 [2022

Closure

Thus, we hope this article has provided valuable insights into Troubleshooting Windows 11 Startup Errors: A Comprehensive Guide. We thank you for taking the time to read this article. See you in our next article!