Archives May 2024

Navigating The Digital Landscape: Exploring The Possibilities Of PhonePe On Windows 11

Navigating the Digital Landscape: Exploring the Possibilities of PhonePe on Windows 11

Introduction

With enthusiasm, let’s navigate through the intriguing topic related to Navigating the Digital Landscape: Exploring the Possibilities of PhonePe on Windows 11. Let’s weave interesting information and offer fresh perspectives to the readers.

10 Top & Upcoming UPI Apps To Send & Receive Money In 2024 - Decentro

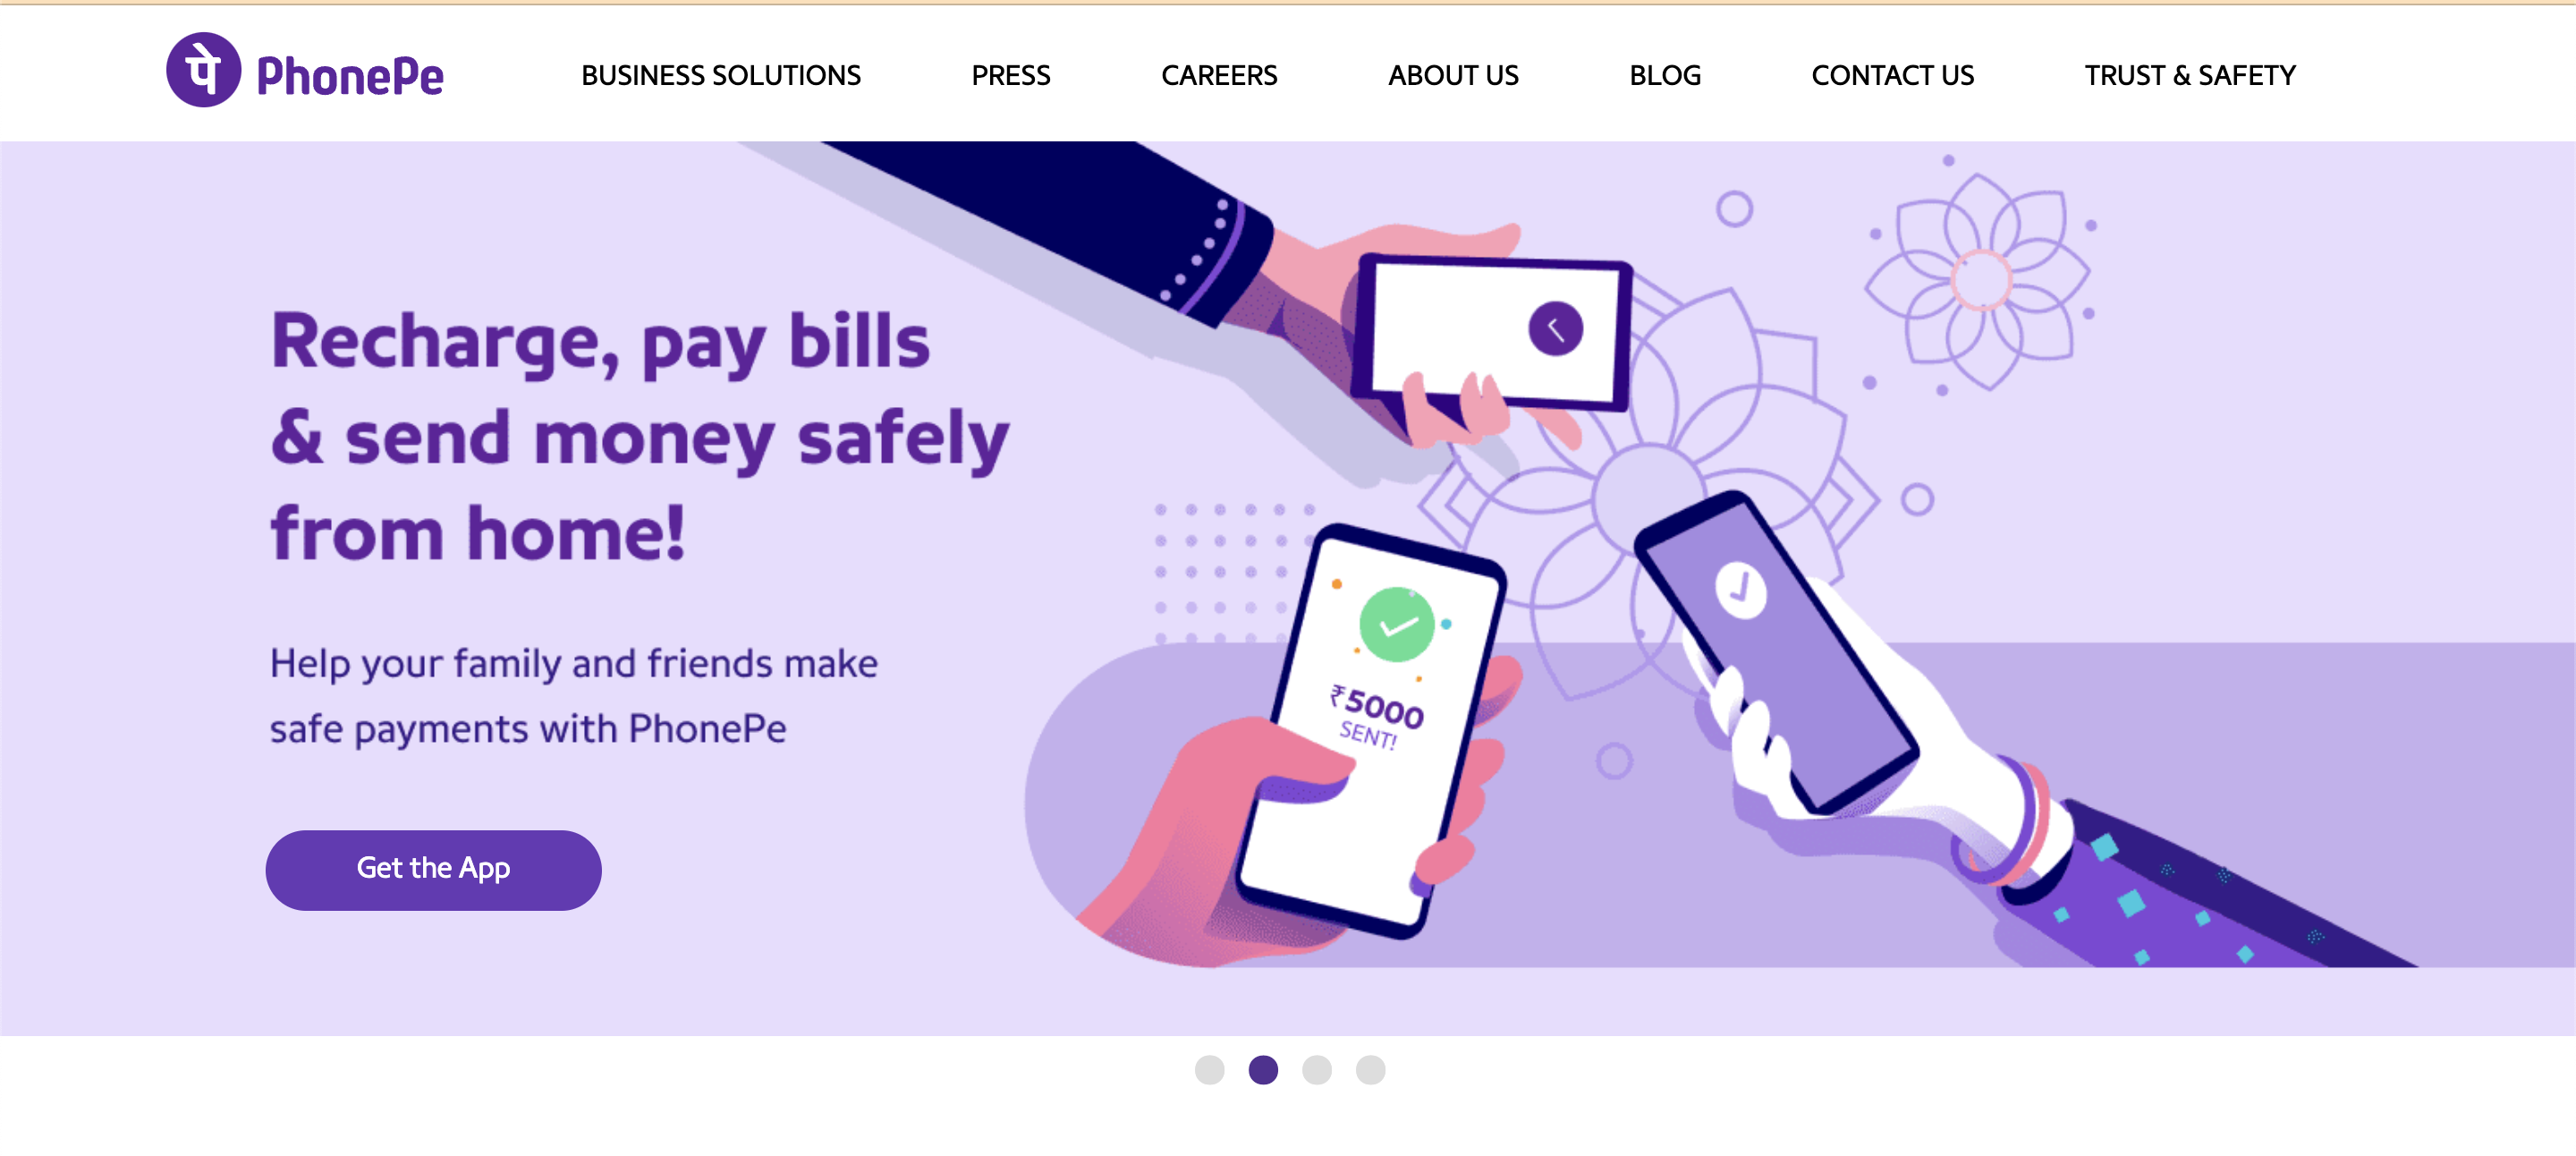
The digital landscape is constantly evolving, with new technologies and platforms emerging to simplify everyday tasks and enhance our experiences. Among these advancements, mobile payment applications have revolutionized how individuals manage their finances, offering convenience, security, and accessibility. One such application, PhonePe, has gained immense popularity in India and beyond, providing a comprehensive suite of financial services. While primarily designed for mobile devices, the question arises: can PhonePe be accessed on a Windows 11 PC?

Understanding the Landscape: PhonePe and Windows 11

PhonePe, developed by Flipkart, is a mobile application that enables users to perform various financial transactions, including:

  • Money transfers: Sending and receiving money to individuals and businesses.
  • Bill payments: Settling utility bills, recharges, and subscriptions.
  • Recharge and payments: Topping up mobile and DTH connections.
  • Financial services: Accessing loans, insurance, and investment products.
  • Shopping: Making online purchases at various merchants.

Windows 11, the latest operating system from Microsoft, offers a user-friendly interface and advanced features for personal and professional use. However, PhonePe, being a mobile application, is primarily designed for smartphones and tablets.

The Challenge of Compatibility: Bridging the Gap

The challenge lies in bridging the gap between a mobile application and a desktop operating system. PhonePe, designed for touch-based interactions on smaller screens, lacks a dedicated desktop version for Windows 11. While there are methods to run Android applications on Windows 11, these methods are often complex and may not provide a seamless user experience.

Alternative Approaches: Exploring Options

For users seeking to access PhonePe’s features on their Windows 11 PC, several alternative approaches can be explored:

  • Web browser: PhonePe offers a web-based platform accessible through any internet browser. While functionality may differ from the mobile app, users can perform essential tasks like bill payments, money transfers, and recharges.
  • Android emulators: Third-party software like BlueStacks or NoxPlayer allows users to run Android applications on their Windows 11 PC. This approach can provide a more familiar PhonePe experience, but it requires additional software and may impact system performance.
  • Mobile device connectivity: Users can connect their smartphones to their Windows 11 PC via USB or Bluetooth and use PhonePe on their mobile device while viewing the screen on the larger PC monitor. This approach provides the full PhonePe experience but requires the physical presence of the mobile device.

Navigating the Alternatives: Considerations and Trade-offs

Each alternative approach presents its own advantages and disadvantages:

  • Web browser: Offers simplicity and accessibility but may lack the full feature set of the mobile app.
  • Android emulators: Provides a closer mobile app experience but requires additional software and may impact system performance.
  • Mobile device connectivity: Offers the full PhonePe experience but requires the physical presence of the mobile device.

The optimal approach depends on individual needs and preferences. Users seeking a simple and accessible solution may prefer the web browser, while those prioritizing a comprehensive mobile app experience may consider Android emulators.

Exploring Beyond the Obvious: Additional Considerations

Beyond the technical aspects, users should consider the following factors when exploring PhonePe access on Windows 11:

  • Security and privacy: Utilizing third-party software like emulators raises concerns regarding data security and privacy. Users should carefully research and select reputable software from trusted sources.
  • System resources: Running Android emulators can consume significant system resources, potentially impacting the performance of other applications. Users should ensure their PC meets the minimum system requirements for the chosen emulator.
  • User experience: The user experience on a desktop may differ from the mobile app due to the larger screen size and keyboard input. Users should consider their comfort level with navigating the interface on a larger display.

Frequently Asked Questions

Q: Is there a dedicated PhonePe app for Windows 11?
A: No, PhonePe does not currently offer a dedicated desktop application for Windows 11.

Q: Can I use PhonePe on my Windows 11 PC without a mobile device?
A: While PhonePe is primarily designed for mobile devices, users can access certain features through the web browser or by using Android emulators. However, these options may not provide the full mobile app experience.

Q: Are Android emulators safe for my PC?
A: Android emulators can be safe if downloaded from reputable sources. However, users should be cautious about potential security risks associated with third-party software.

Q: What are the system requirements for running PhonePe on an emulator?
A: The system requirements for running Android emulators vary depending on the chosen software. Users should consult the emulator’s documentation for specific requirements.

Tips for Using PhonePe on Windows 11

  • Choose a reputable emulator: Select a trusted emulator from a well-known developer.
  • Ensure your PC meets system requirements: Verify that your PC meets the minimum system requirements for the chosen emulator.
  • Prioritize security: Install antivirus software and keep your PC updated to protect against potential threats.
  • Consider alternative options: If using an emulator proves challenging, explore the web browser or mobile device connectivity options.

Conclusion

While PhonePe does not offer a dedicated desktop version for Windows 11, users can access its features through alternative approaches like web browsers, Android emulators, or mobile device connectivity. Choosing the appropriate approach depends on individual needs and preferences, considering factors like functionality, security, system resources, and user experience. By understanding the options and trade-offs involved, users can navigate the digital landscape and leverage PhonePe’s features on their Windows 11 PC to simplify their financial management and enhance their digital experience.

PhonePe: Transforming India's Digital Payments Landscape For A Cashless Future  The Navigating The Digital Landscape: A Comprehensive Guide To The Best Map And Directions Websites Navigating the Digital Landscape  SBC Media Partners
Navigating The Digital Landscape: A Comprehensive Guide To Effective Digital Marketing Services Exploring the Digital Payment Landscape in India: PhonePe and Its Key Competitors - Jumbo Realty Navigating Digital Landscape: Chatbots & AI/ML Essentials 2023 - Ciente
Navigating the Digital Landscape: Premium Photo  The Art of Seamlessly Navigating the Digital Landscape Exploring UIUX Experience

Closure

Thus, we hope this article has provided valuable insights into Navigating the Digital Landscape: Exploring the Possibilities of PhonePe on Windows 11. We thank you for taking the time to read this article. See you in our next article!

Navigating The Posiflex PP-6900 Driver Landscape In Windows 10: A Comprehensive Guide

Navigating the Posiflex PP-6900 Driver Landscape in Windows 10: A Comprehensive Guide

Introduction

With enthusiasm, let’s navigate through the intriguing topic related to Navigating the Posiflex PP-6900 Driver Landscape in Windows 10: A Comprehensive Guide. Let’s weave interesting information and offer fresh perspectives to the readers.

POSIFLEX PP-6900 SERIES USER MANUAL Pdf Download  ManualsLib

The Posiflex PP-6900, a robust and versatile point-of-sale (POS) system, has earned its place in various industries due to its reliability and adaptability. However, ensuring seamless operation of this system within the Windows 10 environment hinges on the correct installation and management of its drivers. This guide aims to illuminate the intricacies of Posiflex PP-6900 drivers in Windows 10, providing a comprehensive understanding of their significance, installation process, potential issues, and troubleshooting methods.

Understanding the Essence of Drivers

Drivers are software programs that act as translators, enabling the operating system (Windows 10 in this case) to communicate with hardware devices, like the Posiflex PP-6900. Without the appropriate drivers, the operating system cannot recognize the POS system, rendering it unusable.

The Importance of Drivers for the Posiflex PP-6900

The Posiflex PP-6900 incorporates a range of components, each requiring specific drivers for proper functionality:

  • Touchscreen: The touchscreen’s responsiveness and accuracy depend on the correct driver installation.
  • Printer: The driver ensures seamless printing of receipts, invoices, and other documents.
  • Cash Drawer: The driver allows the cash drawer to open automatically upon transaction completion.
  • Magnetic Stripe Reader: The driver enables the POS system to read and process data from magnetic stripe cards.
  • Barcode Scanner: The driver facilitates the efficient scanning of barcodes for inventory management and transaction processing.

Installing Posiflex PP-6900 Drivers in Windows 10

The installation process for Posiflex PP-6900 drivers in Windows 10 typically involves the following steps:

  1. Obtain the Driver Package: Download the latest driver package from the official Posiflex website or the provided CD.
  2. Extract the Files: Unzip the downloaded package to a designated folder on your computer.
  3. Run the Installation Program: Locate and execute the setup file within the extracted folder.
  4. Follow the On-Screen Instructions: The installation wizard will guide you through the process.
  5. Restart the System: After the installation is complete, restart your computer to ensure the drivers are properly loaded.

Common Challenges and Troubleshooting

While the installation process is generally straightforward, certain challenges might arise:

  • Driver Incompatibility: Ensure the downloaded driver package is compatible with your specific Windows 10 version (32-bit or 64-bit).
  • Driver Conflicts: If other software or drivers are interfering with the Posiflex PP-6900 drivers, try disabling or uninstalling them temporarily.
  • Device Manager Errors: The Device Manager might display error messages related to the Posiflex PP-6900 components. Right-click the device, select "Update Driver," and choose "Search automatically for updated driver software."
  • Missing Drivers: If certain drivers are missing, download them individually from the Posiflex website.
  • Corrupted Drivers: Reinstall the drivers or try a different driver package if the current ones are corrupted.

FAQs

Q: What if the drivers are not available on the Posiflex website?

A: Contact Posiflex technical support for assistance. They can provide alternative driver sources or troubleshoot the issue.

Q: How do I know if the drivers are installed correctly?

A: Check the Device Manager in Windows 10. All Posiflex PP-6900 components should be listed without any error messages.

Q: Can I use generic drivers for the Posiflex PP-6900?

A: Using generic drivers might not guarantee optimal performance or full functionality. It is recommended to use the official Posiflex drivers.

Q: What happens if I don’t install the drivers?

A: The Posiflex PP-6900 will not function properly. The operating system will not recognize the hardware components, and you will not be able to utilize the POS system effectively.

Tips for Optimal Driver Management

  • Regular Updates: Keep your drivers updated to ensure compatibility with the latest software and operating system versions.
  • Backup Drivers: Create a backup of the installed drivers to facilitate reinstallation if necessary.
  • Driver Compatibility Checker: Use a driver compatibility checker to verify the suitability of drivers before installation.
  • Manufacturer Support: Contact Posiflex technical support for assistance with driver-related issues.

Conclusion

The Posiflex PP-6900 driver landscape in Windows 10 requires careful navigation to ensure seamless operation. By understanding the importance of drivers, following the installation steps, and addressing potential challenges proactively, users can maximize the functionality and performance of their POS system. Consistent driver management through regular updates, backups, and manufacturer support is crucial for maintaining a reliable and efficient POS environment.

User manual Posiflex PP-6900 (English - 8 pages) POSIFLEX PP-6900 USER MANUAL Pdf Download  ManualsLib Manual Posiflex PP-6900 (8 páginas)
Posiflex pp 6900 настройка lan Manual Posiflex PP-6900 (8 páginas) User manual Posiflex PP-6900 (English - 8 pages)
POSIFLEX PP-6900 SERIES USER MANUAL Pdf Download  ManualsLib User manual Posiflex PP-6900 (English - 8 pages)

Closure

Thus, we hope this article has provided valuable insights into Navigating the Posiflex PP-6900 Driver Landscape in Windows 10: A Comprehensive Guide. We hope you find this article informative and beneficial. See you in our next article!

Navigating The Challenges Of Installing R On Windows 10

Navigating the Challenges of Installing R on Windows 10

Introduction

With enthusiasm, let’s navigate through the intriguing topic related to Navigating the Challenges of Installing R on Windows 10. Let’s weave interesting information and offer fresh perspectives to the readers.

Simple Guide for Installing R on Windows 10

R, a powerful open-source programming language and free software environment for statistical computing and graphics, has become indispensable for data scientists, statisticians, and researchers across various disciplines. Its versatility and comprehensive libraries make it a highly sought-after tool for data analysis, visualization, and modeling. However, installing R on Windows 10 can sometimes present unexpected hurdles, leaving users frustrated and unable to access the vast potential of this valuable software.

This article aims to demystify the common challenges encountered during the R installation process on Windows 10, providing a comprehensive guide to troubleshoot and overcome these obstacles.

Understanding the Importance of R

Before delving into the intricacies of installation issues, it is crucial to acknowledge the profound impact of R on various fields. Its open-source nature fosters collaboration and knowledge sharing, while its extensive package library empowers users to tackle complex data analysis tasks with ease. R’s capabilities extend across diverse domains:

  • Data Analysis and Visualization: R’s statistical capabilities allow for comprehensive data exploration, analysis, and visualization, enabling users to extract meaningful insights from raw data.
  • Machine Learning and Predictive Modeling: The language provides a robust platform for building and evaluating machine learning models, predicting future trends, and automating decision-making processes.
  • Bioinformatics and Genomics: R’s libraries are extensively used in bioinformatics for analyzing genomic data, identifying gene expression patterns, and exploring complex biological systems.
  • Finance and Economics: Financial analysts and economists rely on R for analyzing market trends, building financial models, and forecasting economic indicators.
  • Social Sciences and Psychology: Researchers in social sciences and psychology use R to analyze survey data, conduct statistical tests, and visualize patterns in human behavior.

These are just a few examples of how R is transforming various fields. Its ability to handle complex data, perform sophisticated statistical analysis, and generate insightful visualizations makes it an invaluable tool for professionals across numerous disciplines.

Common Challenges Encountered During R Installation on Windows 10

While the installation process for R on Windows 10 is generally straightforward, certain issues can arise, hindering the user’s ability to access the software. These challenges can stem from various factors, including:

  • Incompatible System Requirements: R has specific system requirements, including operating system version, RAM, and processor capabilities. If these requirements are not met, the installation process might fail.
  • Conflicting Software or Antivirus Interference: Existing software on the system, particularly antivirus programs, might interfere with the installation process, blocking or disrupting the installation files.
  • Incomplete or Corrupted Downloads: Downloading the R installer from unreliable sources or experiencing network connectivity issues can lead to incomplete or corrupted downloads, resulting in installation errors.
  • Administrative Privileges: Installing R requires administrative privileges on the system. Insufficient permissions can lead to installation failures or limitations.
  • Missing or Incorrect Dependencies: R relies on certain system dependencies, such as libraries and components, to function correctly. Missing or outdated dependencies can cause installation problems.

Troubleshooting Tips for R Installation Issues on Windows 10

Addressing R installation issues on Windows 10 requires a systematic approach, focusing on identifying and resolving the root cause. Here are some troubleshooting tips to guide the process:

  • Verify System Requirements: Ensure that your Windows 10 system meets the minimum requirements for installing R. Refer to the official R website for detailed system specifications.
  • Download from a Reliable Source: Download the R installer from the official CRAN (Comprehensive R Archive Network) website to avoid corrupted or incomplete downloads.
  • Disable Antivirus Software: Temporarily disable your antivirus software during the installation process. Antivirus programs might mistakenly flag the R installer as a threat, interfering with the installation.
  • Run as Administrator: Right-click the R installer and select "Run as administrator" to ensure that the installation process has the necessary permissions.
  • Check for Missing Dependencies: If the installation fails due to missing dependencies, refer to the R documentation or online resources for information on installing the required libraries and components.
  • Reinstall R: If all other troubleshooting steps fail, consider reinstalling R after completely uninstalling the previous version.
  • Seek Community Support: If you encounter persistent issues, consult the R community forums or seek help from experienced R users.

FAQs: Addressing Common R Installation Concerns

Q: What are the minimum system requirements for installing R on Windows 10?

A: The minimum system requirements for R vary depending on the version and intended use. However, generally, a 64-bit Windows 10 operating system with at least 4GB of RAM and a dual-core processor is recommended.

Q: Why is my antivirus software blocking the R installation?

A: Antivirus software might flag the R installer as a potential threat due to its nature as a compiled executable file. Temporarily disabling the antivirus software during the installation process can resolve this issue.

Q: What are the common errors encountered during R installation on Windows 10?

A: Some common errors include "Error 1722" (installation failed), "Error 1316" (installation package is invalid), and "Error 1935" (installation package is corrupt). These errors often indicate missing dependencies, corrupted files, or insufficient permissions.

Q: How do I install R packages on Windows 10?

A: R packages can be installed using the install.packages() function in the R console. This function downloads and installs the package from CRAN or other repositories.

Q: Where can I find help and resources for troubleshooting R installation issues?

A: The official R website, CRAN documentation, and various online forums dedicated to R programming provide comprehensive resources for troubleshooting installation issues.

Conclusion: Embracing the Power of R on Windows 10

Successfully installing R on Windows 10 unlocks a world of possibilities for data analysis, visualization, and modeling. By understanding the common challenges, applying effective troubleshooting techniques, and utilizing available resources, users can overcome installation obstacles and harness the immense power of R. As a versatile and powerful tool, R empowers individuals and organizations to extract valuable insights from data, make informed decisions, and drive innovation across various fields.

Installing R on Windows10 - YouTube Simple Guide for Installing R on Windows 10 Simple Guide for Installing R on Windows 10
install-r-on-windows-10-step-2 - Manjaro dot site Installing R Simple Guide for Installing R on Windows 10
How to Install R on Windows 10 - YouTube How to Install R in Windows 10 in Easy Mode  Manjaro.site

Closure

Thus, we hope this article has provided valuable insights into Navigating the Challenges of Installing R on Windows 10. We thank you for taking the time to read this article. See you in our next article!

Navigating The Legacy: Exploring Microsoft Word 2007 On Windows 10

Navigating the Legacy: Exploring Microsoft Word 2007 on Windows 10

Introduction

With great pleasure, we will explore the intriguing topic related to Navigating the Legacy: Exploring Microsoft Word 2007 on Windows 10. Let’s weave interesting information and offer fresh perspectives to the readers.

Exploring Microsoft Office Word 2007 Ch3  Technology  Software

While the landscape of word processing has evolved dramatically since its release in 2007, Microsoft Word 2007 remains a relevant tool for many users, particularly those seeking a familiar and stable platform. This article delves into the nuances of using Word 2007 on a Windows 10 operating system, addressing its compatibility, potential challenges, and why it may still hold value in certain scenarios.

Understanding the Compatibility Landscape

The primary obstacle in utilizing Word 2007 on Windows 10 lies in its age. Microsoft has discontinued support for this version, meaning no new security updates or bug fixes are provided. This raises concerns about potential vulnerabilities and compatibility issues with newer operating systems.

However, Word 2007 is still capable of running on Windows 10 through the use of compatibility modes. This feature allows older programs to function on newer operating systems by emulating the environment they were originally designed for. While compatibility mode mitigates some potential issues, it is crucial to understand that performance may be affected, and some features may not function as intended.

The Case for Word 2007

Despite its age, Word 2007 remains a viable option for specific user groups. Its intuitive interface and familiar tools resonate with those accustomed to its layout and functionality. Additionally, its minimalist design may appeal to users seeking a less resource-intensive word processor.

Here are some potential scenarios where Word 2007 might be preferred:

  • Legacy Document Compatibility: Users who primarily work with documents created in Word 2007 may find it advantageous to maintain the same version for seamless file compatibility.
  • Limited System Resources: Individuals with older computers or limited RAM might find Word 2007’s lower resource demands a better fit.
  • Simplicity and Familiarity: Users who prefer a straightforward interface and are comfortable with the classic Word 2007 layout may find it a more intuitive option.

Potential Challenges and Considerations

While Word 2007 can function on Windows 10, users should be aware of potential challenges and limitations:

  • Security Risks: The lack of security updates for Word 2007 exposes it to vulnerabilities. It is strongly recommended to exercise caution when opening documents from unknown sources and to keep antivirus software up-to-date.
  • Compatibility Issues: While compatibility mode helps, some features might not function correctly, and compatibility with newer file formats may be limited.
  • Limited Functionality: Word 2007 lacks certain features introduced in later versions, such as advanced collaboration tools, real-time co-authoring, and cloud integration.

FAQs about Word 2007 on Windows 10

Q: Is it legal to download Word 2007 for free?

A: Downloading Word 2007 for free from unauthorized sources is illegal and may expose your system to malware. If you require Word 2007, it is recommended to purchase a legitimate license from Microsoft or explore alternative word processing options.

Q: Can I install Word 2007 on Windows 10 without a product key?

A: While you can install Word 2007 without a product key, it will be in a trial mode with limited functionality. To unlock all features, a valid product key is required.

Q: How do I ensure compatibility with Word 2007 documents on Windows 10?

A: Ensure that you have the latest updates for your operating system and utilize the compatibility mode feature for Word 2007. It is also advisable to save documents in a compatible format, such as .doc or .rtf, for optimal compatibility.

Tips for Utilizing Word 2007 on Windows 10

  • Keep Antivirus Software Up-to-Date: Regularly update your antivirus software to mitigate security risks.
  • Be Cautious with Document Sources: Avoid opening documents from unknown sources to minimize the risk of malware.
  • Explore Alternative Word Processors: If you require advanced features or are concerned about security, consider exploring newer word processing options such as Microsoft Word 365, LibreOffice, or Google Docs.

Conclusion

While Word 2007 may not be the ideal choice for everyone, it can still serve as a viable option for specific users. Its compatibility with Windows 10, familiar interface, and minimalist design make it a suitable tool for those seeking a stable and straightforward word processing experience. However, it is crucial to be aware of its limitations, security risks, and the availability of more modern and feature-rich alternatives. Ultimately, the decision of whether to use Word 2007 on Windows 10 depends on individual needs and priorities.

Word 2007 Lesson 12 - Adding Navigation Tools to a Document - YouTube PPT - Microsoft Office 2007- Illustrated Introductory, Windows Edition PowerPoint Presentation Word 2007 windows 10 - tronicose
Word 2007 windows 10 - tronicose Word 2007 windows 10 - osecricket Curso de Microsoft Office 2007. A interface do Word 2007! Aula: 01 de 44 - YouTube
Скачать Word 2007 бесплатно для Windows 10 Introduction to microsoft word 2007

Closure

Thus, we hope this article has provided valuable insights into Navigating the Legacy: Exploring Microsoft Word 2007 on Windows 10. We thank you for taking the time to read this article. See you in our next article!

Navigating Windows 10’s Troubles: A Guide To Repair Apps And Programs

Navigating Windows 10’s Troubles: A Guide to Repair Apps and Programs

Introduction

With great pleasure, we will explore the intriguing topic related to Navigating Windows 10’s Troubles: A Guide to Repair Apps and Programs. Let’s weave interesting information and offer fresh perspectives to the readers.

How To Repair Apps & Programs In Windows 10

Windows 10, while a powerful operating system, is not immune to the occasional hiccup. From frustrating error messages to sluggish performance, encountering issues with your Windows 10 system can be a significant inconvenience. Fortunately, a diverse range of repair apps and programs exist to diagnose and rectify these problems, ensuring a smooth and efficient user experience. This article delves into the world of Windows 10 repair tools, outlining their functionalities, benefits, and considerations for optimal use.

Understanding the Need for Repair Tools:

Windows 10, like any complex software, can be affected by various factors leading to malfunctions. These include:

  • Corrupted System Files: Essential files crucial for Windows’ operation can become damaged, causing instability and errors.
  • Registry Errors: The Windows Registry, a database storing system settings, can accumulate invalid entries, hindering proper functionality.
  • Malware Infections: Viruses and other malicious software can compromise system security and performance.
  • Software Conflicts: Incompatible programs or outdated drivers can create conflicts, leading to crashes or errors.
  • Hardware Issues: Malfunctioning hardware components can also trigger system instability.

Types of Repair Apps and Programs:

Repair tools for Windows 10 can be categorized into several groups, each addressing specific issues:

1. System File Checkers:

  • System File Checker (SFC): A built-in Windows tool that scans for and repairs corrupted system files. It utilizes a database of protected system files to identify and replace corrupted ones.
  • Deployment Image Servicing and Management (DISM): A command-line tool for repairing the Windows image, addressing issues that SFC might not resolve. It can repair corrupted Windows components and ensure proper system functionality.

2. Registry Cleaners:

  • CCleaner: A popular tool for cleaning and optimizing the Windows Registry, removing invalid entries and improving system performance.
  • Wise Registry Cleaner: Another widely used registry cleaner that scans for and removes unnecessary or corrupted entries, potentially improving system stability.
  • Registry Reviver: A comprehensive tool that not only cleans the registry but also offers system optimization features.

3. Malware Removal Tools:

  • Windows Defender: Microsoft’s built-in antivirus software, providing real-time protection against malware threats.
  • Malwarebytes: A popular third-party antivirus solution known for its comprehensive malware detection and removal capabilities.
  • HitmanPro: A powerful tool specializing in removing stubborn malware infections that might evade traditional antivirus software.

4. System Optimization Tools:

  • Advanced SystemCare: A comprehensive tool that combines system cleaning, optimization, and security features to enhance performance.
  • IObit Smart Defrag: A disk defragmentation tool that reorganizes fragmented files, improving system speed and responsiveness.
  • Glary Utilities: A suite of tools offering various system maintenance features, including disk cleanup, registry optimization, and privacy protection.

5. Driver Updaters:

  • Driver Booster: Automatically scans for and updates outdated or missing drivers, ensuring optimal hardware performance and stability.
  • Snappy Driver Installer: A free tool that allows users to download and install the latest drivers for their hardware components.
  • DriverPack Solution: A comprehensive driver package that includes drivers for a wide range of hardware components, simplifying the driver update process.

Benefits of Repair Apps and Programs:

  • Improved System Stability: Repairing corrupted files, cleaning the registry, and removing malware can significantly enhance system stability and reduce crashes.
  • Enhanced Performance: Optimizing the registry, defragmenting the hard drive, and updating drivers can lead to faster boot times, quicker application loading, and overall improved system responsiveness.
  • Reduced Errors and Blue Screens: Repairing system files and addressing registry issues can minimize error messages and dreaded blue screens of death.
  • Enhanced Security: Removing malware and keeping your system up-to-date with the latest security patches helps protect your data and privacy.
  • Proactive Maintenance: Regular use of repair tools allows for proactive maintenance, preventing potential issues before they arise.

Considerations for Choosing Repair Apps and Programs:

  • Legitimacy and Reputation: Choose tools from reputable developers with a proven track record and positive user reviews.
  • Functionality and Features: Select tools that cater to your specific needs, whether it’s registry cleaning, malware removal, or driver updates.
  • System Requirements: Ensure the chosen tool is compatible with your Windows 10 version and system specifications.
  • User Interface and Ease of Use: Opt for tools with intuitive interfaces and straightforward instructions, making them easy to use for both beginners and advanced users.
  • Cost: Consider the cost of the tool, whether it’s free or requires a paid subscription.

FAQs by Repair Apps and Programs in Windows 10:

1. Is it necessary to use repair apps and programs?

While Windows 10 has built-in tools for system maintenance, utilizing dedicated repair apps and programs can offer more comprehensive and advanced features, potentially leading to a more stable and efficient system.

2. Can repair apps and programs damage my system?

Using reputable and well-maintained tools is crucial. Avoid using untrusted or poorly-rated software, as it could potentially harm your system.

3. How often should I use repair apps and programs?

Regularly running a system scan and cleanup with a repair tool can be beneficial, especially after installing new software, downloading files from untrusted sources, or experiencing system slowdowns.

4. Can repair apps and programs affect my privacy?

Some tools might collect user data or share information with third parties. Choose tools with transparent privacy policies and avoid those with questionable practices.

5. Are repair apps and programs a substitute for professional support?

Repair tools can address many common issues, but for complex or persistent problems, seeking professional help from a qualified technician might be necessary.

Tips by Repair Apps and Programs in Windows 10:

  • Regularly Update Windows: Keeping your operating system up-to-date with the latest patches and security updates is crucial for system stability and security.
  • Scan for Malware Regularly: Run a full system scan with your antivirus software at least once a week to detect and remove any potential threats.
  • Clean Up Your Disk: Regularly clean up your hard drive by deleting temporary files, unused programs, and unnecessary files.
  • Optimize Your Registry: Consider using a registry cleaner to remove invalid entries and improve system performance.
  • Update Your Drivers: Regularly check for and update your device drivers to ensure optimal hardware functionality and compatibility.

Conclusion by Repair Apps and Programs in Windows 10:

Repair apps and programs are invaluable tools for maintaining a healthy and efficient Windows 10 system. By addressing common issues, optimizing performance, and ensuring security, these tools empower users to troubleshoot and resolve problems effectively. Choosing the right tools based on your needs, utilizing them responsibly, and practicing good digital hygiene can significantly enhance your Windows 10 experience. Remember to always prioritize reputable software, maintain a proactive approach to system maintenance, and seek professional help when needed.

How To Repair Apps and Programs in Windows 10 How to Repair Apps/Programs Common Problems Windows 10 - MiniTool Top 6 Ways to Repair Windows 10 Without Losing Data (Free) - EaseUS
Windows 10 Apps Not Opening Here S How To Reset And Repair  winbuzzer 7 Repair Tools to Solve Windows 10 Problems Automatically  Geekflare How to Repair Apps/Programs Common Problems Windows 10 - MiniTool
How to Fix Default Apps & Program Missing on Windows 10 - YouTube How to Repair Apps and Programs in Windows 10 & 11

Closure

Thus, we hope this article has provided valuable insights into Navigating Windows 10’s Troubles: A Guide to Repair Apps and Programs. We hope you find this article informative and beneficial. See you in our next article!

Windows 11: A Deeper Dive Into New Features And Enhancements

Windows 11: A Deeper Dive into New Features and Enhancements

Introduction

With great pleasure, we will explore the intriguing topic related to Windows 11: A Deeper Dive into New Features and Enhancements. Let’s weave interesting information and offer fresh perspectives to the readers.

Windows 11: A Deeper Dive into New Features and Enhancements

Exploring The Features Of Windows 11: A Deep Dive

Microsoft’s Windows 11, released in October 2021, marked a significant evolution in the operating system’s history. Beyond a refreshed aesthetic, it introduced a range of new features and improvements aimed at enhancing user experience, productivity, and security. This article delves into the key advancements in Windows 11, exploring their functionalities and potential benefits for users.

1. Enhanced User Interface and Design:

Windows 11 boasts a refined visual language, characterized by rounded corners, a centered taskbar, and a streamlined Start menu. These design elements contribute to a modern and visually appealing user interface. The Start menu, now centrally positioned, offers a more intuitive experience, seamlessly integrating with the search bar and providing quick access to frequently used applications.

Benefits:

  • Improved Aesthetics: The redesigned interface enhances the overall visual appeal of the operating system, creating a more modern and refined user experience.
  • Enhanced Usability: The centralized taskbar and streamlined Start menu promote intuitive navigation, making it easier for users to find the applications and settings they need.
  • Increased Efficiency: The refined design fosters a more streamlined workflow, allowing users to accomplish tasks with greater ease.

2. Windows Widgets:

Windows 11 introduces a dedicated Widgets section, providing users with quick access to personalized information and content. This feature offers a dynamic feed of relevant news, weather updates, calendar events, and other information tailored to the user’s preferences.

Benefits:

  • Personalized Content: Widgets offer a customized feed of information based on the user’s interests and preferences, ensuring they receive relevant and timely updates.
  • Time-Saving Convenience: Widgets provide quick access to information without requiring users to navigate through multiple applications or websites.
  • Enhanced Productivity: By presenting relevant information at a glance, Widgets can help users stay organized and focused on their tasks.

3. Enhanced Multitasking Capabilities:

Windows 11 introduces several features designed to improve multitasking efficiency. The Snap Layouts feature allows users to quickly arrange windows in predefined layouts, maximizing screen space and streamlining workflow. Snap Groups enable users to save and restore window arrangements for specific tasks, facilitating seamless transitions between projects.

Benefits:

  • Improved Productivity: Snap Layouts and Snap Groups streamline multitasking, enabling users to manage multiple applications and tasks efficiently.
  • Enhanced Organization: The ability to save and restore window arrangements simplifies the management of multiple projects and tasks, fostering a more organized workflow.
  • Increased Focus: By minimizing distractions and maximizing screen space, multitasking enhancements promote a more focused and productive work environment.

4. Enhanced Gaming Experience:

Windows 11 introduces several features that enhance the gaming experience. Auto HDR (High Dynamic Range) technology automatically enhances the visual quality of games, delivering richer colors and contrast. DirectStorage enables faster loading times and smoother gameplay, particularly on high-performance systems.

Benefits:

  • Immersive Visual Experience: Auto HDR enhances the visual fidelity of games, creating a more immersive and engaging gaming experience.
  • Improved Performance: DirectStorage optimizes game loading times and performance, enabling smoother gameplay and reduced lag.
  • Enhanced Gaming Ecosystem: Windows 11 offers a dedicated Xbox app for accessing games and features from the Xbox ecosystem, further enhancing the gaming experience.

5. Enhanced Security and Privacy:

Windows 11 incorporates several security and privacy enhancements to protect user data and systems. Windows Hello, a biometric authentication system, offers secure login using facial recognition or fingerprint scanning. Microsoft Defender, the built-in antivirus solution, has been enhanced with advanced threat detection and protection capabilities.

Benefits:

  • Enhanced Security: Windows Hello provides a more secure and convenient login method, reducing the risk of unauthorized access.
  • Advanced Threat Protection: Microsoft Defender offers robust protection against malware and other threats, safeguarding user data and systems.
  • Privacy Control: Windows 11 provides granular control over privacy settings, enabling users to manage the data they share with applications and services.

6. Improved Performance and Efficiency:

Windows 11 incorporates several improvements aimed at enhancing system performance and efficiency. These include optimizations for storage management, memory utilization, and application responsiveness.

Benefits:

  • Faster Boot Times: Optimized system startup routines contribute to faster boot times, reducing the time users spend waiting for their devices to become operational.
  • Improved Application Performance: Enhanced memory management and application optimization contribute to smoother and more responsive application performance.
  • Efficient Resource Utilization: Improved resource utilization ensures that system resources are allocated effectively, maximizing overall performance and efficiency.

7. Enhanced Accessibility Features:

Windows 11 introduces new accessibility features to enhance the user experience for individuals with disabilities. These include improvements to the Narrator screen reader, the Magnifier tool for visual impairments, and the Windows on-screen keyboard.

Benefits:

  • Inclusive User Experience: Enhanced accessibility features make Windows 11 more accessible to individuals with disabilities, fostering a more inclusive user experience.
  • Improved Usability: Accessibility enhancements improve the usability of the operating system for users with diverse needs and abilities.
  • Enhanced Productivity: By enabling individuals with disabilities to interact with the operating system more effectively, accessibility features contribute to increased productivity.

FAQs about New Features and Improvements in Windows 11:

Q: What are the key changes in the Windows 11 interface?

A: The most prominent changes are a centered taskbar, a redesigned Start menu, and rounded corners for windows. These elements contribute to a more modern and visually appealing interface.

Q: How do Windows Widgets work?

A: Windows Widgets provide a personalized feed of relevant information, including news, weather updates, calendar events, and more. Users can customize the widgets they see based on their interests and preferences.

Q: What are the benefits of Snap Layouts and Snap Groups?

A: Snap Layouts and Snap Groups enhance multitasking by allowing users to quickly arrange windows in predefined layouts and save those arrangements for specific tasks. This improves productivity and workflow efficiency.

Q: Does Windows 11 offer any improvements for gamers?

A: Yes, Windows 11 introduces Auto HDR, which automatically enhances the visual quality of games, and DirectStorage, which enables faster loading times and smoother gameplay.

Q: How does Windows 11 improve security and privacy?

A: Windows 11 offers enhanced security features like Windows Hello for biometric authentication and a more robust Microsoft Defender for advanced threat protection. It also provides granular control over privacy settings.

Q: What are the performance improvements in Windows 11?

A: Windows 11 incorporates optimizations for storage management, memory utilization, and application responsiveness, leading to faster boot times, improved application performance, and more efficient resource utilization.

Q: How does Windows 11 enhance accessibility for users with disabilities?

A: Windows 11 includes improvements to the Narrator screen reader, the Magnifier tool, and the on-screen keyboard, making the operating system more accessible to individuals with diverse needs and abilities.

Tips for Utilizing New Features and Improvements in Windows 11:

  • Explore the Redesigned Start Menu: Familiarize yourself with the new Start menu layout and its integration with the search bar for quick access to applications and settings.
  • Customize Your Widgets: Explore the available widgets and personalize your feed based on your interests and preferences for a more relevant and useful experience.
  • Experiment with Snap Layouts and Snap Groups: Utilize these features to streamline your workflow and manage multiple applications efficiently.
  • Enable Auto HDR and DirectStorage: Enhance your gaming experience by enabling these features to improve visual quality and performance.
  • Configure Privacy Settings: Review and customize your privacy settings to manage the data you share with applications and services.

Conclusion:

Windows 11 represents a significant evolution in the Windows operating system, introducing a range of new features and improvements designed to enhance user experience, productivity, security, and accessibility. From a refined user interface and enhanced multitasking capabilities to improved gaming performance and advanced security features, Windows 11 offers a comprehensive suite of advancements that cater to diverse user needs and preferences. By embracing these new features and enhancements, users can unlock a more efficient, engaging, and secure computing experience.

10 settings to get you started with Windows 11  Popular Science Windows 11 Deep Dive: Walking Through The New OS - YouTube Exploring The Features Of Windows 11: A Deep Dive
Windows 11's 2023 update: A deep dive into AI-centric enhancements Windows 11 deep dive: Checking out the Widgets pane Windows 11 Deep-Dive: Die Neuerungen im Überblick - WindowsUnited
Windows 11 deep dive: Checking out the new Photos app Windows 11 deep dive: Checking out the new Paint app

Closure

Thus, we hope this article has provided valuable insights into Windows 11: A Deeper Dive into New Features and Enhancements. We appreciate your attention to our article. See you in our next article!

The Future Of Productivity: Exploring The Potential Of Office 2025

The Future of Productivity: Exploring the Potential of Office 2025

Introduction

With enthusiasm, let’s navigate through the intriguing topic related to The Future of Productivity: Exploring the Potential of Office 2025. Let’s weave interesting information and offer fresh perspectives to the readers.

The Future of Productivity: Exploring the Potential of Office 2025

The rise in automation and what it means for the future  World Economic Forum

The year 2025 is on the horizon, and with it comes a new wave of technological advancements poised to revolutionize the way we work. While Microsoft has not officially announced an "Office 2025" suite, the rapid evolution of software and the ever-increasing demands of the modern workforce suggest a future where productivity tools are more intelligent, collaborative, and adaptable than ever before.

This article delves into the potential features and functionalities that could be incorporated into a hypothetical "Office 2025," exploring the implications for users and the broader landscape of productivity software.

The Evolution of Office Suites

Microsoft Office, a mainstay in the world of productivity software, has consistently adapted to changing user needs and technological breakthroughs. From the early days of WordPerfect and Lotus 1-2-3 to the ubiquitous integration of cloud services and mobile applications, Office has undergone a significant transformation.

The future of Office, in its hypothetical "2025" iteration, is likely to be characterized by:

  • Advanced Artificial Intelligence (AI): AI will play a central role in enhancing user experience and productivity. Imagine AI-powered assistants that anticipate user needs, automate repetitive tasks, and provide real-time insights from vast datasets. These assistants could help with everything from drafting emails and presentations to analyzing financial reports and generating creative content.
  • Enhanced Collaboration and Communication: The modern workplace is increasingly collaborative, and Office 2025 will likely reflect this trend. Expect seamless integration with communication platforms, real-time co-authoring capabilities, and intuitive tools for collaborative brainstorming and project management.
  • Immersive User Experiences: Virtual and augmented reality (VR/AR) technologies are poised to transform how we interact with software. Office 2025 could offer immersive experiences, allowing users to visualize data in 3D, collaborate in virtual spaces, and engage with content in a more engaging and intuitive way.
  • Cross-Platform Compatibility: The lines between desktop, mobile, and web applications are blurring. Office 2025 will likely offer a consistent experience across all devices, ensuring seamless access to documents and tools regardless of location or device.
  • Personalized and Adaptive Interfaces: User interfaces will become more personalized and adaptive, learning from user preferences and habits to offer a tailored experience. This could involve intelligent recommendations, context-aware features, and dynamic layouts that adjust to individual needs.

Potential Benefits of a Hypothetical Office 2025

A hypothetical "Office 2025" suite, incorporating these advancements, could offer numerous benefits to individuals and organizations alike:

  • Increased Productivity: AI-powered assistants, automation tools, and streamlined workflows can significantly boost productivity, freeing up time for more strategic tasks.
  • Enhanced Creativity and Innovation: Immersive experiences, AI-powered content generation, and collaborative tools can foster creativity and innovation, allowing users to explore new ideas and solutions more effectively.
  • Improved Collaboration and Communication: Seamless communication and collaboration tools can break down silos and foster a more connected and productive work environment.
  • Greater Accessibility and Inclusivity: Cross-platform compatibility and adaptive interfaces ensure accessibility for a wider range of users, promoting inclusivity and empowering individuals with diverse needs.
  • Data-Driven Insights and Decision-Making: AI-powered analytics can provide valuable insights from data, enabling users to make informed decisions and optimize workflows.

FAQs

Q: Will there be a physical "Office 2025" ISO download?

A: The future of software distribution is likely to move away from traditional ISO downloads. Office 2025, if released, may be primarily cloud-based, accessible through subscription services and web applications.

Q: What are the potential security concerns with AI-powered features in Office 2025?

A: Security is paramount in the age of AI. Microsoft will likely prioritize robust security measures to protect user data and prevent malicious use of AI functionalities. This may involve encryption, access controls, and regular security updates.

Q: Will Office 2025 be compatible with older versions of Office?

A: While Microsoft strives for backward compatibility, there may be limitations in compatibility with older versions. It is crucial to stay informed about system requirements and update policies to ensure a smooth transition.

Tips for Embracing the Future of Productivity

  • Stay Informed: Keep abreast of the latest advancements in productivity software and emerging technologies.
  • Embrace Cloud Solutions: Consider transitioning to cloud-based productivity solutions for greater accessibility and collaboration.
  • Explore AI-Powered Tools: Experiment with AI-powered tools and assistants to enhance efficiency and workflow.
  • Invest in Training and Development: Stay updated on the latest features and functionalities by investing in training programs and resources.

Conclusion

While Microsoft has not officially announced "Office 2025," the future of productivity software is likely to be shaped by advancements in AI, collaboration, and user experience. A hypothetical "Office 2025" suite could usher in a new era of efficiency, creativity, and collaboration, empowering individuals and organizations to achieve their full potential. As technology continues to evolve, it is crucial to remain adaptable and embrace the opportunities that lie ahead in the ever-changing landscape of productivity.

PPT - Leading With The Future Of Productivity PowerPoint Presentation, free download - ID:4938605 Future shocks: 17 technology predictions for 2025  World Economic Forum The future of productivity  Visual.ly
PPT - The future of productivity PowerPoint Presentation, free download - ID:6255307 THE FUTURE OF PRODUCTIVITY The Future of Productivity The Future of Work: Effectiveness and Productivity – SHP
The Future of Workplace Productivity  Twinview The True Secret to Increasing Your Productivity

Closure

Thus, we hope this article has provided valuable insights into The Future of Productivity: Exploring the Potential of Office 2025. We appreciate your attention to our article. See you in our next article!

The Power Of Parallel Viewing: Maximizing Efficiency And Productivity With Split-Screen Functionality

The Power of Parallel Viewing: Maximizing Efficiency and Productivity with Split-Screen Functionality

Introduction

With enthusiasm, let’s navigate through the intriguing topic related to The Power of Parallel Viewing: Maximizing Efficiency and Productivity with Split-Screen Functionality. Let’s weave interesting information and offer fresh perspectives to the readers.

The Power of Parallel Viewing: Maximizing Efficiency and Productivity with Split-Screen Functionality

Maximize Productivity: The Advantages of Split Screen Usage - ImageRocket

In the contemporary digital landscape, where information flows relentlessly and tasks demand constant attention, the ability to efficiently manage multiple windows simultaneously is paramount. This is where the concept of "open two windows side by side" – or, more accurately, split-screen functionality – emerges as a powerful tool for enhancing productivity and streamlining workflows. This article will delve into the multifaceted benefits of this technique, exploring its applications across diverse platforms and highlighting its significance in modern work environments.

Understanding Split-Screen Functionality: A Visual Symphony

Split-screen, at its core, is a user interface (UI) feature that allows users to divide their screen real estate into multiple, distinct viewing areas. This enables the simultaneous display of multiple applications, documents, or web pages within a single window, fostering a seamless and efficient multitasking experience.

The implementation of split-screen functionality varies across different operating systems and applications. Some platforms offer dedicated keyboard shortcuts or mouse gestures for initiating split-screen mode, while others rely on visual cues and drag-and-drop interactions. Regardless of the specific method, the fundamental principle remains consistent: users gain the ability to view and interact with multiple digital spaces within a unified visual framework.

The Advantages of Parallel Viewing: A Multifaceted Approach

The benefits of utilizing split-screen functionality extend far beyond mere visual aesthetics. By enabling parallel viewing, this technique unlocks a range of advantages that directly contribute to increased productivity, enhanced collaboration, and a more efficient overall user experience.

1. Boosting Productivity and Efficiency:

  • Simultaneous Task Management: Split-screen allows users to seamlessly switch between tasks without the need to constantly minimize and maximize windows. This eliminates the time-consuming process of switching between applications, fostering a more focused and efficient workflow.
  • Comparative Analysis: By displaying two related documents or web pages side by side, users can readily compare and contrast information, facilitating informed decision-making and analysis. This is particularly beneficial in fields such as research, financial analysis, and creative endeavors.
  • Reference Material Accessibility: Having reference materials readily available alongside the primary task at hand eliminates the need to constantly search for information, streamlining the workflow and reducing cognitive overload.

2. Enhancing Collaboration and Communication:

  • Real-time Collaboration: Split-screen enables seamless collaboration by allowing team members to simultaneously view and edit documents, presentations, or code. This fosters real-time communication and ensures everyone is working from the same source, eliminating potential discrepancies and misunderstandings.
  • Shared Viewing Experiences: Split-screen functionality facilitates shared viewing experiences, allowing users to collaborate on presentations, watch videos together, or engage in remote brainstorming sessions. This fosters a more interactive and engaging environment, promoting team cohesion and effective communication.

3. Optimizing User Experience:

  • Reduced Cognitive Load: By eliminating the need to constantly switch between windows, split-screen minimizes cognitive overload and allows users to focus on the task at hand without distractions. This leads to increased mental clarity and improved performance.
  • Enhanced Contextual Awareness: Having multiple sources of information readily available in split-screen mode provides users with a comprehensive contextual awareness, facilitating better decision-making and a deeper understanding of the information being presented.
  • Increased Accessibility: For users with visual impairments or cognitive disabilities, split-screen can enhance accessibility by providing a more intuitive and manageable viewing experience. This allows users to customize their screen layout according to their specific needs and preferences.

Applications Across Diverse Platforms: A Universal Tool

The versatility of split-screen functionality extends across a wide range of platforms and applications, making it a valuable tool for individuals and organizations alike.

1. Operating Systems:

  • Windows: Windows operating systems offer a dedicated "Snap" feature that enables users to easily arrange windows side by side. This feature allows users to resize and position windows precisely, providing a highly customizable split-screen experience.
  • macOS: macOS utilizes a similar functionality called "Split View," allowing users to effortlessly divide their screen into two halves and arrange windows accordingly. This feature seamlessly integrates with the macOS ecosystem, offering a user-friendly and intuitive split-screen experience.
  • Linux: Many Linux distributions offer built-in support for split-screen functionality, often through dedicated keyboard shortcuts or graphical user interface (GUI) tools. The specific implementation may vary depending on the chosen distribution and desktop environment.

2. Web Browsers:

  • Google Chrome: Chrome offers a built-in "Picture-in-Picture" mode that allows users to display a video window on top of other browser tabs. While not a true split-screen feature, it provides a similar functionality for viewing video content alongside other web pages.
  • Mozilla Firefox: Firefox offers a variety of extensions that provide split-screen capabilities. These extensions allow users to customize the screen layout and easily switch between multiple tabs, enhancing their browsing experience.
  • Microsoft Edge: Edge, like Chrome, offers a "Picture-in-Picture" mode, allowing users to view videos while simultaneously interacting with other web pages. This feature provides a convenient way to consume video content without disrupting other browsing activities.

3. Productivity and Collaboration Tools:

  • Microsoft Office Suite: Microsoft Word, Excel, and PowerPoint all offer split-screen functionality, allowing users to compare and contrast different documents or sections within the same application. This feature is particularly useful for tasks involving editing, analysis, and presentation creation.
  • Google Workspace: Google Docs, Sheets, and Slides also provide split-screen capabilities, enabling users to work on multiple documents simultaneously and seamlessly share their work with others in real-time. This feature enhances collaboration and promotes efficient document management.
  • Code Editors and IDEs: Many popular code editors and integrated development environments (IDEs) offer split-screen functionality, allowing developers to view and edit multiple code files simultaneously. This feature streamlines the coding process and enhances productivity by providing a comprehensive view of the project structure.

Mastering the Art of Split-Screen: Tips and Techniques

While split-screen functionality is inherently user-friendly, there are specific techniques and best practices that can further optimize its effectiveness and enhance productivity.

1. Optimize Screen Layout:

  • Vertical vs. Horizontal: The choice between vertical and horizontal split-screen layouts depends on the specific task at hand. Vertical layouts are ideal for comparing text-based documents or code files, while horizontal layouts are better suited for viewing video content alongside other applications.
  • Proportional Sizing: Adjusting the size and proportions of each split-screen window allows for optimal viewing and interaction. Consider the nature of the content being displayed and prioritize the window that requires the most focus.
  • Window Management Tools: Utilize third-party window management tools to streamline the process of creating and managing split-screen layouts. These tools often offer advanced features such as hotkeys, custom layouts, and automatic window arrangement.

2. Utilize Keyboard Shortcuts and Mouse Gestures:

  • Keyboard Shortcuts: Familiarize yourself with the keyboard shortcuts for activating and managing split-screen functionality. This will streamline the process of creating and adjusting split-screen layouts, maximizing efficiency and minimizing distractions.
  • Mouse Gestures: If your operating system or application supports mouse gestures, utilize them to quickly switch between windows, resize split-screen panes, or activate specific features. This will further enhance your workflow and reduce the reliance on keyboard shortcuts.

3. Mindful Application Selection:

  • Task Compatibility: Not all tasks are equally suited for split-screen functionality. Prioritize tasks that involve comparing information, referencing materials, or simultaneous editing of multiple documents or files.
  • Cognitive Load: Be mindful of the potential cognitive load associated with using split-screen. Avoid overloading your screen with too many windows or overly complex information, as this can lead to distraction and decreased productivity.
  • Focus and Prioritization: Clearly define the primary task and ensure that the split-screen arrangement facilitates its efficient completion. Minimize distractions by limiting the number of windows displayed and prioritizing the most relevant information.

Frequently Asked Questions: Addressing Common Concerns

1. What are the limitations of split-screen functionality?

While split-screen functionality offers numerous benefits, it also comes with certain limitations. The most notable limitation is the reduced screen real estate for each individual window. This can pose a challenge when working with applications that require a large amount of screen space, such as graphic design software or video editing tools. Additionally, the use of split-screen can lead to visual clutter and cognitive overload if not implemented thoughtfully.

2. Is split-screen functionality suitable for all tasks?

Split-screen functionality is not universally applicable to all tasks. Some tasks, such as reading long documents or engaging in highly focused creative work, may be better suited for a single-window environment. The suitability of split-screen depends on the specific task requirements and individual preferences.

3. How can I prevent visual clutter when using split-screen?

To minimize visual clutter, prioritize the most relevant windows and limit the number of applications being displayed simultaneously. Use clear window titles and consistent color schemes to enhance visual organization. Consider utilizing a dark mode theme for reduced eye strain and improved focus.

4. What are some alternative approaches to multitasking?

Alternatives to split-screen functionality include using virtual desktops, tabbed browsing, and task management applications. Virtual desktops allow users to create separate workspaces for different tasks, while tabbed browsing provides a more organized way to manage multiple web pages. Task management applications offer tools for prioritizing tasks, setting reminders, and tracking progress.

Conclusion: Embracing the Power of Parallel Viewing

Split-screen functionality has emerged as a vital tool for enhancing productivity, streamlining workflows, and fostering collaboration in the modern digital age. By enabling users to view and interact with multiple applications simultaneously, this technique unlocks a range of benefits that directly contribute to a more efficient and engaging user experience.

While split-screen functionality offers numerous advantages, it is important to utilize it strategically and mindfully. By optimizing screen layout, utilizing keyboard shortcuts and mouse gestures, and selecting tasks that are well-suited for parallel viewing, users can harness the full potential of this powerful tool and achieve greater productivity and efficiency. As the digital landscape continues to evolve, split-screen functionality is poised to play an increasingly significant role in shaping the way we work, collaborate, and interact with information.

Increase your productivity using Split Screen Ultimate - YouTube How To Use Split Screen In Windows 11  midargus How to Use a Split Screen to Increase Productivity in the Classroom  Techie teacher, Teacher
How to Use a Split Screen to Increase Productivity in the Classroom  The Techie Teacher® How to enable ‘split screen tabs’ on Microsoft Edge to enhance productivity  Technology News Split-screen setup for enhanced productivity on Craiyon
How to Use a Split Screen to Increase Productivity in the Classroom  Classroom tech, Teaching How to Use a Split Screen to Increase Productivity in the classroom using Chromebooks, laptops

Closure

Thus, we hope this article has provided valuable insights into The Power of Parallel Viewing: Maximizing Efficiency and Productivity with Split-Screen Functionality. We hope you find this article informative and beneficial. See you in our next article!

Unraveling The Mystery Of "Page Fault In Nonpaged Area" In Windows 10

Unraveling the Mystery of "Page Fault in Nonpaged Area" in Windows 10

Introduction

In this auspicious occasion, we are delighted to delve into the intriguing topic related to Unraveling the Mystery of "Page Fault in Nonpaged Area" in Windows 10. Let’s weave interesting information and offer fresh perspectives to the readers.

Unraveling the Mystery of "Page Fault in Nonpaged Area" in Windows 10

Fix the Page_Fault_In_Nonpaged_Area Error in Windows 10 - EaseUS

The infamous "Page Fault in Nonpaged Area" error, often accompanied by a blue screen of death (BSOD), can be a daunting experience for Windows 10 users. This error signifies a critical system failure, interrupting normal operation and potentially causing data loss. Understanding the root cause of this error is crucial for effective troubleshooting and preventing its recurrence. This article delves into the intricate workings of memory management in Windows 10, providing a comprehensive explanation of the "Page Fault in Nonpaged Area" error and its implications.

The Foundation: Memory Management in Windows 10

Windows 10 employs a sophisticated memory management system to optimize resource utilization. The system divides the computer’s physical memory into units called "pages," typically 4 kilobytes each. These pages are then mapped into virtual memory, an abstract representation of the computer’s memory space. Virtual memory allows programs to access more memory than physically available by utilizing hard disk space as an extension.

Two Distinct Realms: Paged and Nonpaged Memory

Within this virtual memory framework, Windows 10 designates two distinct areas:

  • Paged Memory: This area holds the majority of the operating system’s code and data, including user applications. The content of paged memory can be swapped between physical RAM and the hard drive, allowing for efficient resource allocation.
  • Nonpaged Memory: This area houses critical system components that must always reside in physical RAM for immediate access. This includes the kernel, device drivers, and essential system structures. These components are considered "nonpageable" because their removal from physical memory would result in system instability or crashes.

The Page Fault: A Signal of Trouble

A "page fault" occurs when the processor attempts to access a memory location that is not currently present in physical RAM. In the context of paged memory, this is a normal occurrence, as the operating system manages the swapping of pages between RAM and the hard drive. However, a "page fault in nonpaged area" indicates a serious issue, as it implies that the processor is trying to access a critical system component that should always be present in physical RAM.

Common Culprits Behind the "Page Fault in Nonpaged Area" Error

Several factors can contribute to this error, including:

  • Faulty Hardware: Defective RAM modules, failing hard drives, or malfunctioning motherboard components can cause memory access issues, leading to page faults.
  • Driver Conflicts or Errors: Incompatible or outdated device drivers can interfere with the system’s memory management, resulting in page faults.
  • Corrupted System Files: Damaged or corrupted system files, particularly those related to memory management, can disrupt the smooth operation of the system, leading to page faults.
  • Software Conflicts: Incompatible or malfunctioning software applications can interfere with system resources and trigger page faults.
  • Virus or Malware Infection: Malicious software can corrupt system files, modify memory settings, or introduce memory leaks, causing page faults.
  • Overheating: Excessive heat can damage hardware components, including RAM, leading to memory errors and page faults.
  • Insufficient Memory: Running resource-intensive applications or having too many programs open simultaneously can overwhelm the system’s available memory, resulting in page faults.

Navigating the Blue Screen of Death: Troubleshooting Strategies

When confronted with the "Page Fault in Nonpaged Area" error, a systematic approach to troubleshooting is essential:

  1. Restart Your Computer: A simple restart can sometimes resolve temporary glitches and clear out any memory conflicts.

  2. Check for Hardware Errors: Run a memory test using tools like Windows Memory Diagnostic or third-party software. Ensure that all hardware components are properly connected and functioning correctly.

  3. Update Device Drivers: Install the latest drivers for all hardware components, particularly graphics cards, network adapters, and storage devices.

  4. Scan for Malware: Use a reputable antivirus program to scan your system for malware that could be interfering with memory management.

  5. Check for Software Conflicts: Identify recently installed software or applications that might be causing issues and temporarily disable them.

  6. Run System File Checker: Execute the System File Checker (SFC) tool to repair any corrupted or missing system files.

  7. Check Event Viewer: Examine the Event Viewer logs for error messages related to memory management or hardware failures.

  8. Perform a Clean Boot: Start your computer in a clean boot state to isolate the problem by disabling unnecessary startup programs and services.

  9. Reinstall Windows: If all else fails, consider reinstalling Windows 10 to eliminate potential software conflicts and system corruption.

Beyond the Troubleshooting: Prevention Strategies

While troubleshooting is essential for resolving immediate issues, implementing preventive measures can significantly reduce the likelihood of encountering the "Page Fault in Nonpaged Area" error:

  • Regularly Update Windows: Keep your Windows 10 installation updated with the latest security patches and system enhancements.

  • Maintain System Health: Regularly scan for malware, optimize disk space, and defragment your hard drive to ensure system stability.

  • Monitor Hardware Temperatures: Use system monitoring tools to track hardware temperatures and ensure that components are not overheating.

  • Allocate Sufficient Memory: Ensure that your system has enough RAM to handle the applications and programs you use regularly.

  • Avoid Overloading Your System: Limit the number of programs running simultaneously to avoid overwhelming system resources.

FAQs: Addressing Common Concerns

Q: What does "nonpaged area" refer to?

A: "Nonpaged area" refers to a section of memory that is essential for the operating system to function correctly and cannot be swapped out to the hard drive. This area contains critical system components like the kernel, device drivers, and system structures.

Q: Why is a page fault in the nonpaged area so critical?

A: A page fault in the nonpaged area indicates a failure to access a critical system component that must always be present in physical RAM. This can lead to system instability, crashes, or data loss.

Q: Can I fix a page fault in the nonpaged area myself?

A: While some troubleshooting steps can be attempted, it’s crucial to identify the root cause of the error. In some cases, professional assistance may be required to diagnose and resolve complex hardware or software issues.

Q: Is a page fault in the nonpaged area always caused by hardware failure?

A: No, while hardware issues are a common culprit, software conflicts, corrupted system files, and malware infections can also trigger this error.

Q: What should I do if I encounter a page fault in the nonpaged area?

A: Immediately restart your computer and attempt to troubleshoot the issue. If the problem persists, consult the troubleshooting steps outlined in this article or seek professional assistance.

Tips for Avoiding Future Errors:

  • Regularly back up your data: This will minimize data loss in the event of a system crash or hardware failure.
  • Monitor system health: Use system monitoring tools to track hardware temperatures and resource utilization.
  • Keep your software updated: Install the latest updates and patches for your operating system and applications.
  • Avoid downloading software from untrusted sources: This can introduce malware or viruses that can compromise your system.

Conclusion: A Deeper Understanding for a Smoother Experience

The "Page Fault in Nonpaged Area" error, while intimidating, is a symptom of underlying system issues. By understanding the intricacies of memory management in Windows 10 and the potential causes of this error, users can effectively troubleshoot and prevent its recurrence. By implementing preventive measures and adhering to best practices, users can minimize the risk of encountering this error and ensure a smooth and reliable computing experience. Remember, a proactive approach to system maintenance and troubleshooting is crucial for a stable and productive Windows 10 environment.

How to Fix 'Page Fault in Nonpaged Area' BSOD Error in Windows 10/11  Beebom Fix: Page Fault in Nonpaged Area on Windows 10 How to Fix the 'PAGE FAULT IN NONPAGED AREA' Error in Windows 10?  Stellar (2023)
How to Fix 'Page Fault In Nonpaged Area' In Windows 10 - PC Guide How to fix "Page Fault in Nonpaged Area" BSOD Error on Windows 10 - SuperTechman (Solved) PAGE_FAULT_IN_NONPAGED_AREA Blue Screen in Windows 10 - YouTube
Solved: Page Fault In Nonpaged area windows 10 Boot loop (STOP 0x00000050) How To Fix The ‘Page Fault in Non-Paged Area’ BSOD in Windows 10? - GeeksforGeeks

Closure

Thus, we hope this article has provided valuable insights into Unraveling the Mystery of "Page Fault in Nonpaged Area" in Windows 10. We hope you find this article informative and beneficial. See you in our next article!

Reinstalling Windows 10: A Comprehensive Guide To Refreshing Your PC

Reinstalling Windows 10: A Comprehensive Guide to Refreshing Your PC

Introduction

In this auspicious occasion, we are delighted to delve into the intriguing topic related to Reinstalling Windows 10: A Comprehensive Guide to Refreshing Your PC. Let’s weave interesting information and offer fresh perspectives to the readers.

Reinstalling Windows 10: A Comprehensive Guide to Refreshing Your PC

Reinstall Windows 10. Step-by-step tutorial. — How To Fix Guide

Reinstalling Windows 10, often referred to as a "clean install," is a powerful tool for resolving various issues and optimizing your computer’s performance. This process involves erasing your hard drive and installing a fresh copy of Windows 10, leaving your system clean and free of accumulated software and data clutter. While the process may seem daunting, it’s relatively straightforward and can significantly improve your computer’s speed, stability, and security.

Why Reinstall Windows 10?

There are several compelling reasons why reinstalling Windows 10 can be beneficial:

  • Resolving Software Conflicts and Errors: Over time, your system can accumulate software conflicts, corrupted files, and registry errors. Reinstalling Windows 10 eliminates these issues, providing a clean slate for your software to run smoothly.
  • Boosting Performance: A fresh install of Windows 10 can significantly enhance your computer’s performance, especially if it’s been running slowly or experiencing frequent crashes. By removing unnecessary files and programs, your system can operate more efficiently.
  • Addressing Malware and Virus Infections: If your computer has been infected with malware or viruses, a clean install is often the most effective way to remove them completely.
  • Preparing for Hardware Upgrades: Before installing new hardware components, it’s often recommended to reinstall Windows 10 to ensure optimal compatibility and avoid potential driver conflicts.
  • Troubleshooting Hardware Issues: If you’re experiencing hardware-related problems, a clean install can help isolate the issue by ruling out software conflicts.
  • Selling or Donating Your Computer: Before selling or donating your computer, reinstalling Windows 10 will erase all personal data and ensure that the recipient receives a clean and usable system.

The Reinstallation Process: A Step-by-Step Guide

Reinstalling Windows 10 involves several steps, each requiring careful attention:

  1. Backup Your Data: Before proceeding, it’s crucial to back up all your important files and data. This includes documents, photos, videos, and any other data you wish to retain. You can use external hard drives, cloud storage services, or USB drives for this purpose.
  2. Create a Bootable USB Drive: You’ll need a bootable USB drive containing the Windows 10 installation files. Microsoft provides a tool called the "Media Creation Tool" to create this drive easily.
  3. Boot from the USB Drive: Once the USB drive is created, restart your computer and enter the BIOS settings. Configure your computer to boot from the USB drive.
  4. Start the Installation: The Windows 10 setup process will begin automatically. Follow the on-screen instructions, selecting the appropriate language, region, and keyboard layout.
  5. Choose Installation Options: You’ll be presented with two options: "Upgrade" and "Custom: Install Windows only (advanced)." Choose "Custom" to perform a clean install.
  6. Format Your Hard Drive: Select the hard drive where you want to install Windows 10 and format it. This will erase all existing data on the drive, so ensure you have backed up all your files.
  7. Install Windows 10: The installation process will take some time. Your computer will reboot several times during this phase.
  8. Set Up Your Account: Once the installation is complete, you’ll be prompted to create a user account and configure your settings.
  9. Install Drivers: After setting up your account, you’ll need to install the necessary drivers for your hardware components. These drivers can be downloaded from the manufacturer’s website or obtained from the Windows Update service.
  10. Install Your Programs: Finally, you can install the programs and applications you need.

FAQs about Reinstalling Windows 10

Q: Will I lose all my data during the reinstallation process?

A: Yes, reinstalling Windows 10 will erase all data on the hard drive where you install it. Therefore, backing up your data before proceeding is essential.

Q: What happens to my programs and files after reinstalling Windows 10?

A: All programs and files will be removed during the reinstallation process. You’ll need to reinstall your programs and restore your files from your backup.

Q: Do I need a product key to reinstall Windows 10?

A: If you’re reinstalling Windows 10 on the same computer, you don’t need a product key. The operating system will automatically activate itself using the digital license associated with your hardware.

Q: Can I reinstall Windows 10 without losing my personal files?

A: While a clean install erases all data, you can use the "Keep personal files and apps" option during the installation process to preserve your files and programs. However, this option may not be as effective as a clean install in resolving system issues.

Q: What if I forget my password after reinstalling Windows 10?

A: If you forget your password, you’ll need to reset it using a Microsoft account or a local administrator account. You may need to use a password recovery tool or contact Microsoft support for assistance.

Tips for Reinstalling Windows 10

  • Always backup your data before reinstalling Windows 10.
  • Use a reliable and reputable source for your Windows 10 installation files.
  • Ensure your computer meets the minimum system requirements for Windows 10.
  • Download the latest drivers for your hardware components before starting the installation.
  • Be patient; the reinstallation process can take several hours.
  • If you encounter any issues, consult Microsoft’s official documentation or seek technical support.

Conclusion

Reinstalling Windows 10 is a powerful tool for resolving system issues, optimizing performance, and ensuring a clean and secure computing environment. While it requires careful planning and execution, the benefits of a fresh install can significantly improve your computer’s overall functionality and user experience. By following the steps outlined in this guide and considering the provided FAQs and tips, you can successfully reinstall Windows 10 and enjoy a revitalized and efficient computing experience.

How To Reinstall Windows 10 Step By Step with Pictures Windows 10 allows you to reinstall the OS and uninstall updates from Troubleshooting options How to use Reset this PC to easily reinstall Windows 10
Windows 10 System Restore, Refresh, Reset, Fresh Start & Reinstall guide Reinstall Windows 10 using Refresh Windows Tool from Microsoft How to refresh your Windows 10 PC with a clean installation - Pureinfotech
How To Reinstall Windows 10 Step By Step with Pictures Refresh Windows 10  Tutorials

Closure

Thus, we hope this article has provided valuable insights into Reinstalling Windows 10: A Comprehensive Guide to Refreshing Your PC. We appreciate your attention to our article. See you in our next article!