Archives May 2024

Understanding Windows 10 Updates: A Comprehensive Guide

Understanding Windows 10 Updates: A Comprehensive Guide

Introduction

With enthusiasm, let’s navigate through the intriguing topic related to Understanding Windows 10 Updates: A Comprehensive Guide. Let’s weave interesting information and offer fresh perspectives to the readers.

Understanding Windows 10 Updates: A Comprehensive Guide

Understanding Microsoft Updates for Windows 10 #008 - YouTube

Windows 10, Microsoft’s flagship operating system, is designed to be a living, evolving platform. This evolution is driven by regular updates, which are essential for maintaining the security, stability, and functionality of your system. These updates, released by Microsoft, are designed to address vulnerabilities, enhance performance, and introduce new features, ensuring that your Windows 10 experience remains up-to-date and optimized.

Types of Windows 10 Updates

Windows 10 updates are categorized into two main types:

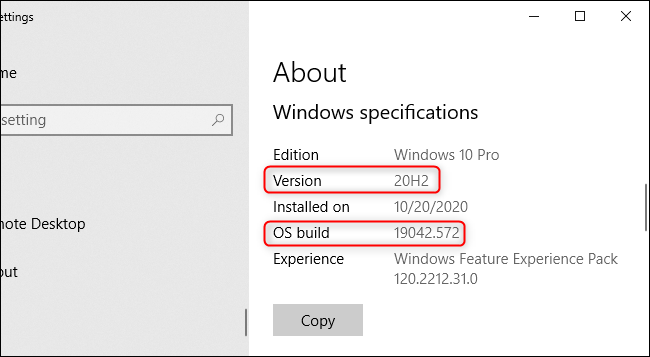
  • Feature Updates: These are major updates that introduce significant new features, enhancements, and design changes. They are typically released twice a year and often have a specific version number, such as Windows 10 version 20H2 or Windows 10 version 21H1.
  • Quality Updates: These updates focus on security improvements, bug fixes, and performance enhancements. They are released on a more frequent basis, usually on the second Tuesday of each month. These updates are often referred to as "patch Tuesday" updates.

Why are Windows 10 Updates Important?

Regularly updating your Windows 10 system offers a multitude of benefits:

  • Enhanced Security: Updates patch vulnerabilities and security holes that could be exploited by malicious actors. This helps protect your system and your personal data from threats like malware and ransomware.
  • Improved Performance: Updates often optimize system performance, addressing issues that might cause slowdowns or crashes. This leads to a smoother and more efficient user experience.
  • New Features and Functionality: Feature updates introduce new features and functionalities, expanding the capabilities of your Windows 10 system and offering new ways to interact with your device.
  • Compatibility and Stability: Updates ensure that your system remains compatible with the latest software and hardware, ensuring stability and preventing compatibility issues.

How Windows 10 Updates Work

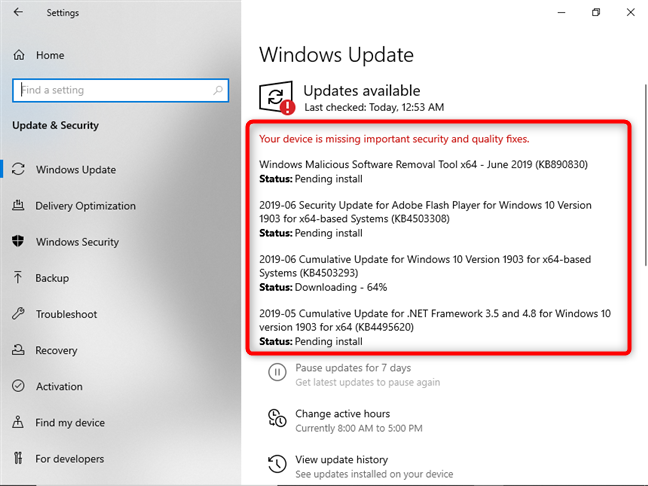
Windows 10 updates are delivered through Windows Update, a built-in service that automatically checks for and downloads updates. You can also manually check for updates by navigating to the Windows Update settings.

The update process typically involves the following steps:

  1. Checking for Updates: Windows Update checks for available updates and downloads them in the background.
  2. Installation: Once the download is complete, the update is installed on your system.
  3. Restart: In most cases, a system restart is required to complete the update installation.

Managing Windows 10 Updates

While automatic updates are generally recommended, you have some control over how they are managed:

  • Update Schedule: You can choose when updates are installed, opting for specific times or days to minimize disruption to your workflow.
  • Update Delivery Optimization: This feature allows you to download updates from other nearby PCs on your network, potentially speeding up the process.
  • Metered Connections: You can configure Windows Update to use less bandwidth on metered connections, such as mobile hotspots, to avoid excessive data usage.
  • Pause Updates: If you need to temporarily postpone updates, you can pause updates for up to 35 days.

Troubleshooting Windows 10 Update Issues

While Windows 10 updates are generally seamless, you may encounter issues during the update process. Common issues include:

  • Slow Download Speeds: This can be caused by network congestion or limited bandwidth.
  • Installation Errors: These errors can occur due to corrupted files, insufficient disk space, or compatibility issues.
  • System Instability: Some updates might cause temporary system instability or unexpected behavior.

To troubleshoot update issues, you can try the following:

  • Restart your computer: This often resolves temporary glitches.
  • Run the Windows Update troubleshooter: This tool can diagnose and fix common update problems.
  • Check your network connection: Ensure a stable and reliable internet connection.
  • Free up disk space: Ensure sufficient disk space is available for the update.
  • Temporarily disable antivirus software: Some antivirus software can interfere with updates.
  • Contact Microsoft support: If the issue persists, contact Microsoft support for assistance.

Frequently Asked Questions (FAQs)

Q: Is it safe to install Windows 10 updates?

A: Yes, Windows 10 updates are generally safe and are designed to enhance the security and stability of your system. Microsoft rigorously tests updates before releasing them to the public.

Q: Do I need to install every update?

A: While it’s generally recommended to install all updates, you can choose to defer some updates, especially feature updates, if you need to maintain a specific configuration or avoid potential disruptions. However, it’s crucial to install security updates promptly to protect your system from vulnerabilities.

Q: What if I have a slow internet connection?

A: You can configure Windows Update to use less bandwidth on metered connections or choose to download updates at specific times when your internet connection is less congested.

Q: Can I roll back to a previous version of Windows 10?

A: Yes, you can roll back to a previous version of Windows 10 within a certain timeframe after a feature update. However, this option is not always available, and you might lose data or settings during the rollback process.

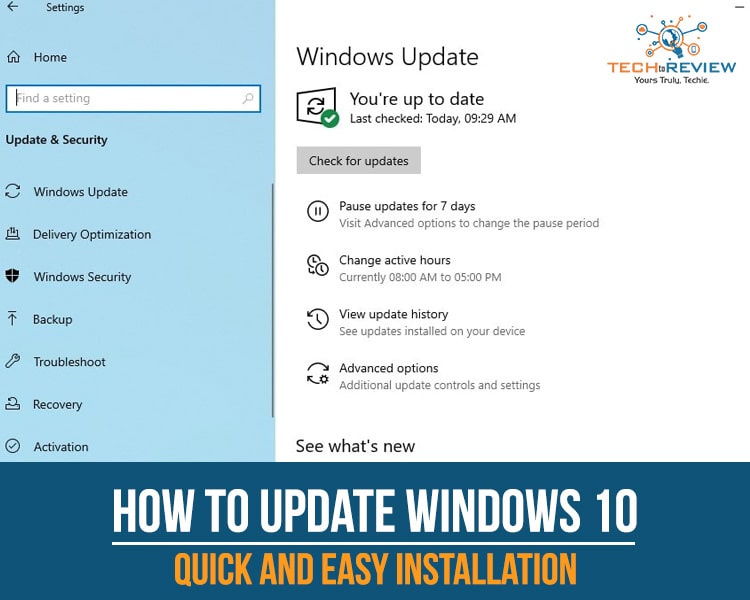
Q: How do I know if my Windows 10 is up-to-date?

A: You can check for updates by navigating to the Windows Update settings (Settings > Update & Security > Windows Update). If no updates are available, your system is up-to-date.

Tips for Managing Windows 10 Updates

  • Schedule updates during off-peak hours: This minimizes disruption to your workflow and ensures that updates are installed when you are less likely to be using your computer.
  • Back up your data regularly: This helps protect your data in case of unexpected issues during the update process.
  • Check for compatibility issues: Before installing a major update, research potential compatibility issues with your hardware and software.
  • Stay informed about updates: Stay informed about the latest updates and their potential impact on your system by checking Microsoft’s official website or trusted technology news sources.

Conclusion

Windows 10 updates are essential for maintaining a secure, stable, and efficient computing experience. By understanding the different types of updates, their importance, and how to manage them effectively, you can ensure that your Windows 10 system remains up-to-date and optimized for optimal performance. Regular updates are crucial for protecting your data, enhancing system functionality, and enjoying the latest features that Microsoft offers.

The complete guide to Windows 10 updates - Digital Citizen Ultimate Outsider: Understanding Windows 10 Upgrade System Settings Read This to Understand Windows 10 Update Names and Numbers
How To Update Windows 10: From Download To Installation Understanding And Managing Windows 10 Updates - Debug Story Windows 10 Update Methods: 5 Ways to Update Windows 10
Read This to Understand Windows 10 Update Names and Numbers How to Update Your Windows 10 Computer : HelloTech How

Closure

Thus, we hope this article has provided valuable insights into Understanding Windows 10 Updates: A Comprehensive Guide. We hope you find this article informative and beneficial. See you in our next article!

P In Windows 11

p in windows 11

Introduction

With great pleasure, we will explore the intriguing topic related to p in windows 11. Let’s weave interesting information and offer fresh perspectives to the readers.

It seems you’re asking about the "PowerShell" command line interface in Windows 11. While it’s not directly referred to as "p," it’s often used in conjunction with the letter "p" when referring to commands like "powershell" or "pwsh." Let’s delve into the world of PowerShell in Windows 11, exploring its capabilities, benefits, and how it empowers users to interact with their operating system on a deeper level.

Windows 11でPINを設定する方法と削除する方法

PowerShell: The Command Line Interface for Windows 11

PowerShell, the command-line interface for Windows 11, offers a powerful and flexible way to manage, automate, and configure various aspects of the operating system. Unlike the traditional Command Prompt, PowerShell utilizes a scripting language that enables complex tasks, system administration, and automation.

PowerShell: Beyond the Basics

  • Object-Oriented Approach: PowerShell handles data as objects, providing a structured and consistent way to interact with system components. This object-oriented approach allows for more efficient data manipulation and processing.
  • Scripting Capabilities: PowerShell scripts enable users to automate repetitive tasks, streamline workflows, and manage system configurations efficiently. These scripts can be saved and reused, saving time and effort.
  • Remote Management: PowerShell facilitates remote administration, allowing users to manage multiple computers from a central location. This capability is crucial for large networks and enterprise environments.
  • Modules and Cmdlets: PowerShell utilizes modules, which are collections of cmdlets (commands). These cmdlets provide a comprehensive set of tools for managing various system aspects, from user accounts to network settings.

PowerShell: The Power of Automation

One of the key advantages of PowerShell is its ability to automate tasks. This automation can be applied to diverse scenarios:

  • System Configuration: Configure network settings, update security policies, and manage user accounts automatically.
  • Software Deployment: Install and configure applications across multiple devices, streamlining software rollout.
  • Data Management: Process and manipulate data from various sources, including databases and text files.
  • Reporting and Monitoring: Generate system reports, track performance metrics, and monitor system health.

PowerShell: A Gateway to Advanced System Management

For system administrators, developers, and power users, PowerShell offers unparalleled control and flexibility. It empowers users to:

  • Troubleshoot System Issues: Diagnose and resolve system problems by examining logs, analyzing processes, and manipulating system settings.
  • Optimize System Performance: Fine-tune system settings, manage resources, and optimize performance for specific workloads.
  • Customize Windows Environment: Modify system behavior, personalize user interfaces, and tailor the operating system to specific requirements.
  • Develop Custom Solutions: Build custom tools and scripts to address specific needs and integrate with existing systems.

PowerShell in Windows 11: Integration and Enhancements

Windows 11 further integrates PowerShell, making it even more accessible and powerful:

  • Improved User Experience: Windows 11 provides a streamlined interface for accessing PowerShell, with enhanced features like tab completion and syntax highlighting.
  • Enhanced Scripting Capabilities: Windows 11 introduces new cmdlets and modules, expanding PowerShell’s functionality and providing support for the latest technologies.
  • Integration with Windows Features: PowerShell seamlessly integrates with various Windows features, including the Task Scheduler, Group Policy, and Active Directory.

PowerShell: A Vital Tool for Windows 11 Users

Whether you’re a seasoned administrator or a curious user, PowerShell provides a valuable tool for interacting with Windows 11. Its versatility, automation capabilities, and integration with system features make it an essential resource for managing, configuring, and customizing your Windows environment.

Frequently Asked Questions about PowerShell in Windows 11

Q1: How do I access PowerShell in Windows 11?

A: You can access PowerShell in Windows 11 in several ways:

  • Search Bar: Type "powershell" in the Windows search bar and select the "Windows PowerShell" application.
  • Start Menu: Click the "Start" button, then type "powershell" and select the "Windows PowerShell" application.
  • Run Command: Press the "Windows key + R" to open the "Run" dialog box, type "powershell," and press "Enter."
  • Taskbar: Right-click the taskbar, select "Taskbar settings," and enable the "Show taskbar icons for open apps" option. Then, right-click the PowerShell icon in the taskbar and select "Pin to taskbar."

Q2: What are the basic PowerShell commands?

A: Some basic PowerShell commands include:

  • Get-ChildItem: Lists files and folders in a directory.
  • Get-Process: Lists running processes on the system.
  • Get-Service: Lists available services on the system.
  • Set-Location: Changes the current directory.
  • New-Item: Creates a new file or folder.
  • Remove-Item: Deletes a file or folder.
  • Stop-Process: Stops a running process.
  • Restart-Service: Restarts a service.

Q3: How can I learn more about PowerShell?

A: There are many resources available to learn more about PowerShell:

  • Microsoft Docs: Visit the official Microsoft documentation for comprehensive information on PowerShell, including tutorials, examples, and reference materials.
  • PowerShell Gallery: Explore the PowerShell Gallery, a repository of PowerShell modules, scripts, and resources.
  • Online Courses and Tutorials: Numerous online platforms offer courses and tutorials on PowerShell, covering various aspects from basic commands to advanced scripting.

Q4: Is PowerShell safe to use?

A: PowerShell is a powerful tool, and like any tool, it can be used for both good and potentially harmful purposes. However, it’s important to use PowerShell responsibly and avoid running untrusted scripts. Always verify the source of scripts before executing them, and exercise caution when working with sensitive system settings.

Tips for Using PowerShell in Windows 11

  • Start with Simple Commands: Begin by exploring basic commands like Get-ChildItem and Get-Process to understand the syntax and functionality of PowerShell.
  • Use Tab Completion: PowerShell offers tab completion, which suggests commands and parameters as you type, saving time and reducing errors.
  • Explore Modules and Cmdlets: Discover the wealth of modules and cmdlets available for PowerShell, expanding your capabilities and addressing specific needs.
  • Utilize Help Files: Use the Get-Help cmdlet to access detailed documentation and examples for specific commands and modules.
  • Experiment with Scripts: Create simple scripts to automate repetitive tasks and gradually explore more complex scripting scenarios.

Conclusion: PowerShell – A Powerful Tool for Windows 11 Users

PowerShell provides a robust and versatile command-line interface for Windows 11, empowering users to manage, automate, and configure their operating system effectively. Its object-oriented approach, scripting capabilities, and integration with system features make it a valuable tool for administrators, developers, and power users alike. By embracing PowerShell, users can unlock the full potential of Windows 11, streamlining workflows, optimizing system performance, and customizing their environment to meet specific needs.

How to Change PIN in Windows 11?  Gear up Windows 11 & 10 Cambiar pin en Windows 11  Modificar PIN en el sistema operativo Windows 11  Cambiar el PIN How to disable pin in Windows 11 and enable password - ArhamTechMind
Cómo crear un PIN para iniciar sesión en Windows 11 - Gearrice Español Can’t remove PIN in Windows 11? Try these methods! How to Change Your PIN in Windows 11 - Instructions - TeachUcomp, Inc.
How To Set PIN On Windows 11  Windows 11 Me PIN Kaise Lagaye - YouTube Pin Apps and Folders to Desktop Windows 11 - YouTube

Closure

Thus, we hope this article has provided valuable insights into p in windows 11. We hope you find this article informative and beneficial. See you in our next article!

Navigating The Network Landscape: A Comprehensive Guide To Windows 11 Pro’s Network And Sharing Center

Navigating the Network Landscape: A Comprehensive Guide to Windows 11 Pro’s Network and Sharing Center

Introduction

With great pleasure, we will explore the intriguing topic related to Navigating the Network Landscape: A Comprehensive Guide to Windows 11 Pro’s Network and Sharing Center. Let’s weave interesting information and offer fresh perspectives to the readers.

Windows 11 Network Sharing Center

Windows 11 Pro, the latest iteration of Microsoft’s flagship operating system, offers a refined and powerful user experience, particularly when it comes to managing network connections and sharing resources. The Network and Sharing Center, a central hub for all network-related activities, empowers users to seamlessly connect to the internet, manage shared folders, and control network security settings. This article delves into the intricacies of this essential tool, providing a comprehensive understanding of its functionalities, benefits, and how it can enhance the overall network experience for Windows 11 Pro users.

Understanding the Network and Sharing Center

The Network and Sharing Center acts as a one-stop solution for all network-related tasks, offering a graphical interface to visualize and control various aspects of your network environment. It consolidates information about your network connections, provides access to essential settings, and enables you to troubleshoot network issues effectively.

Key Features and Functionality

1. Network Connections Overview:

  • The Network and Sharing Center displays a clear overview of all active network connections, including wired Ethernet, Wi-Fi, and virtual private networks (VPNs).
  • This visual representation provides information about connection status, network type, and signal strength, allowing users to quickly assess the health of their network connections.

2. Network Sharing Settings:

  • The Network and Sharing Center allows users to configure network sharing settings, enabling or disabling file and printer sharing, and controlling access to specific folders and devices.
  • Users can customize sharing settings based on their specific needs, ensuring secure and controlled access to shared resources.

3. Network Security Management:

  • The Network and Sharing Center provides a centralized platform for managing network security settings, including firewall configuration, network discovery, and password protection for shared folders.
  • Users can adjust security levels to suit their environment, balancing security with ease of access to shared resources.

4. Network Troubleshooting Tools:

  • The Network and Sharing Center integrates with various troubleshooting tools, helping users identify and resolve common network issues.
  • These tools offer diagnostic information, suggesting potential solutions and guiding users through the troubleshooting process.

5. Network Discovery and Connection Management:

  • The Network and Sharing Center facilitates network discovery, enabling users to find other devices on their network and connect to them seamlessly.
  • This feature simplifies sharing resources, connecting to printers, and collaborating with other users on the same network.

6. VPN Connection Management:

  • For users who require enhanced security or access to restricted networks, the Network and Sharing Center allows for the management of VPN connections.
  • Users can create, configure, and connect to VPNs, ensuring secure and private internet access.

7. Wireless Network Management:

  • The Network and Sharing Center provides comprehensive control over wireless network settings, allowing users to manage Wi-Fi profiles, connect to different networks, and configure network security options.
  • Users can optimize their wireless network experience, ensuring stable and secure connections.

Benefits of the Network and Sharing Center

1. Centralized Network Management:

  • The Network and Sharing Center consolidates all network-related functionalities into a single location, simplifying network management and eliminating the need to navigate multiple settings menus.

2. Enhanced Network Visibility and Control:

  • The Network and Sharing Center provides a comprehensive overview of network connections and settings, empowering users to understand the network environment and make informed decisions.

3. Simplified Network Sharing:

  • The Network and Sharing Center simplifies the process of sharing resources, allowing users to easily enable and configure file and printer sharing, and control access to specific folders and devices.

4. Improved Network Security:

  • The Network and Sharing Center provides a centralized platform for managing network security settings, including firewall configuration, network discovery, and password protection, enhancing network security and protecting sensitive data.

5. Efficient Network Troubleshooting:

  • The Network and Sharing Center integrates with troubleshooting tools, providing diagnostic information and suggesting potential solutions, helping users quickly identify and resolve network issues.

6. Streamlined VPN Management:

  • The Network and Sharing Center simplifies the process of managing VPN connections, allowing users to easily create, configure, and connect to VPNs, ensuring secure and private internet access.

7. Comprehensive Wireless Network Control:

  • The Network and Sharing Center provides comprehensive control over wireless network settings, allowing users to manage Wi-Fi profiles, connect to different networks, and configure network security options, optimizing the wireless network experience.

FAQs about Network and Sharing Center in Windows 11 Pro

Q1: How do I access the Network and Sharing Center in Windows 11 Pro?

A1: To access the Network and Sharing Center, follow these steps:

  • Open the Start menu and search for "Network and Sharing Center".
  • Click on the Network and Sharing Center icon to open the application.

Q2: How do I change network sharing settings in Windows 11 Pro?

A2: To change network sharing settings, follow these steps:

  • Open the Network and Sharing Center.
  • Click on the link Change advanced sharing settings.
  • Select the Private or Public network profile you want to modify.
  • Adjust the sharing settings according to your requirements.

Q3: How do I troubleshoot network connection issues in Windows 11 Pro?

A3: The Network and Sharing Center provides various troubleshooting tools:

  • Network troubleshooter: This tool automatically diagnoses and attempts to fix common network connection issues.
  • Network diagnostics: This feature provides detailed information about network connections, including signal strength, network speed, and potential issues.
  • Network adapter settings: This section allows you to configure network adapter settings, including IP address, DNS server, and other parameters.

Q4: How do I configure a VPN connection in Windows 11 Pro?

A4: To configure a VPN connection, follow these steps:

  • Open the Network and Sharing Center.
  • Click on Set up a new connection or network.
  • Select Connect to a workplace.
  • Choose VPN and enter the necessary connection details, including VPN server address and credentials.

Q5: How do I manage wireless network settings in Windows 11 Pro?

A5: To manage wireless network settings, follow these steps:

  • Open the Network and Sharing Center.
  • Click on Manage wireless networks.
  • Select the wireless network you want to manage.
  • You can view connection details, edit network settings, or remove the network profile.

Tips for Using the Network and Sharing Center

1. Regularly Check Network Status:

  • Periodically review the Network and Sharing Center to monitor network connection status, signal strength, and potential issues.

2. Configure Sharing Settings Based on Needs:

  • Adjust network sharing settings based on your environment and security requirements, ensuring secure and controlled access to shared resources.

3. Utilize Troubleshooting Tools:

  • Leverage the built-in troubleshooting tools to diagnose and resolve network connection issues effectively.

4. Secure Wireless Networks:

  • Enable strong password protection and encryption for wireless networks to prevent unauthorized access.

5. Keep Network Drivers Updated:

  • Ensure your network drivers are up-to-date to maintain optimal performance and compatibility.

Conclusion

The Network and Sharing Center in Windows 11 Pro is an indispensable tool for managing network connections, sharing resources, and ensuring a secure and reliable network environment. Its comprehensive functionalities, user-friendly interface, and integration with troubleshooting tools empower users to efficiently manage their network connections, optimize network performance, and resolve common network issues. By effectively utilizing the Network and Sharing Center, Windows 11 Pro users can confidently navigate the network landscape, ensuring seamless connectivity, secure data sharing, and a smooth user experience.

Windows 11 Network And Sharing Center Network Sharing Settings In Windows 11 Full Guide: Windows 11 File Sharing on Network
Windows 11 Network Sharing Center Network And Sharing Center Windows 11 Windows 11 Network Sharing Center
Windows 11 Network Sharing Center Network And Sharing Center Windows 11

Closure

Thus, we hope this article has provided valuable insights into Navigating the Network Landscape: A Comprehensive Guide to Windows 11 Pro’s Network and Sharing Center. We appreciate your attention to our article. See you in our next article!

Streamlining Office 365 Deployment: A Comprehensive Guide To Tools And Techniques

Streamlining Office 365 Deployment: A Comprehensive Guide to Tools and Techniques

Introduction

With enthusiasm, let’s navigate through the intriguing topic related to Streamlining Office 365 Deployment: A Comprehensive Guide to Tools and Techniques. Let’s weave interesting information and offer fresh perspectives to the readers.

Streamlining Office 365 Deployment: A Comprehensive Guide to Tools and Techniques

Streamline Your Office 365 Deployment with Valto

The transition to a cloud-based productivity suite like Microsoft Office 365 presents organizations with a plethora of benefits, including enhanced collaboration, increased accessibility, and reduced IT infrastructure costs. However, successfully deploying Office 365 requires careful planning, execution, and the utilization of appropriate tools. This article delves into the realm of Office 365 deployment tools, providing a comprehensive understanding of their functionalities, benefits, and best practices.

Understanding the Deployment Landscape

Office 365 deployment encompasses a range of tasks, from user account provisioning and license management to application configuration and data migration. This multifaceted process can be daunting, especially for organizations with large user bases or complex IT environments. Deployment tools streamline these tasks, automating processes, minimizing manual errors, and accelerating the overall deployment timeline.

Types of Office 365 Deployment Tools

The Office 365 deployment landscape offers a variety of tools, each catering to specific needs and functionalities. Broadly, these tools can be categorized into:

1. Microsoft-Provided Tools:

  • Microsoft 365 Admin Center: This centralized management console serves as the primary interface for managing Office 365 tenants. It offers functionalities for user management, license assignments, service configuration, and reporting.
  • Microsoft 365 Deployment Toolkit: This free toolkit provides a collection of scripts and templates for automating common deployment tasks, such as user provisioning, license management, and application configuration.
  • Azure Active Directory (Azure AD) Connect: This tool synchronizes user identities and passwords between on-premises Active Directory and Azure AD, enabling seamless single sign-on for Office 365.

2. Third-Party Deployment Tools:

  • Deployment Automation Tools: These tools automate complex deployment processes, such as user provisioning, application installation, and data migration. They often integrate with Microsoft 365 APIs for seamless interaction.
  • Data Migration Tools: These tools facilitate the transfer of data from on-premises systems to Office 365, including email, calendar, contacts, and files. They offer features like data mapping, filtering, and conflict resolution.
  • Security and Compliance Tools: These tools enhance security and compliance for Office 365 deployments, including data loss prevention, user authentication, and access control.

Benefits of Using Deployment Tools

Utilizing Office 365 deployment tools offers significant advantages for organizations, including:

  • Reduced Deployment Time: Automation streamlines repetitive tasks, accelerating the deployment process and minimizing manual effort.
  • Improved Accuracy and Consistency: Automated processes minimize human error, ensuring consistent and accurate user provisioning, application configuration, and data migration.
  • Enhanced Scalability: Deployment tools handle large user bases and complex IT environments efficiently, facilitating smooth rollouts across the organization.
  • Centralized Management: Tools provide a single point of control for managing Office 365 deployments, simplifying administration and reducing complexity.
  • Cost Savings: Automation reduces labor costs associated with manual deployment tasks, while streamlined processes optimize resource utilization.

Key Considerations for Tool Selection

Choosing the right deployment tool requires careful consideration of factors such as:

  • Organization Size and Complexity: The tool should be scalable to handle the organization’s user base and IT infrastructure complexity.
  • Deployment Scope: Consider the specific deployment tasks, such as user provisioning, application configuration, and data migration.
  • Budget and Resources: Evaluate the cost of the tool, including licensing fees and support services.
  • Technical Expertise: Ensure the organization has the technical expertise to implement and manage the chosen tool.
  • Integration with Existing Systems: The tool should integrate seamlessly with existing on-premises systems and applications.

Best Practices for Office 365 Deployment

  • Plan Thoroughly: Define clear deployment objectives, scope, timeline, and resources.
  • Pilot Testing: Conduct pilot deployments with a small group of users to identify and address potential issues before full rollout.
  • User Training: Provide comprehensive training to users on the new Office 365 applications and functionalities.
  • Regular Monitoring: Continuously monitor the deployment process and address any issues or challenges promptly.
  • Data Backup and Recovery: Implement robust data backup and recovery procedures to safeguard against data loss.

Frequently Asked Questions (FAQs)

Q1: What are the key challenges associated with Office 365 deployment?

A: Common challenges include:

  • User adoption: Encouraging users to embrace new applications and workflows.
  • Data migration: Ensuring accurate and timely transfer of data from on-premises systems.
  • Security and compliance: Implementing robust security measures and adhering to regulatory requirements.
  • Integration with existing systems: Ensuring seamless integration with on-premises applications and infrastructure.
  • Training and support: Providing adequate training and support to users and IT staff.

Q2: What are the best practices for managing Office 365 licenses?

A: Effective license management involves:

  • Regular license audits: Identifying unused or underutilized licenses to optimize costs.
  • Automated license assignment: Utilizing tools to automatically assign licenses based on user roles and responsibilities.
  • License provisioning and deprovisioning: Ensuring licenses are assigned and removed promptly based on user changes.
  • License reporting: Monitoring license usage and identifying potential issues or inefficiencies.

Q3: How can I ensure a smooth transition to Office 365?

A: A smooth transition involves:

  • Planning and preparation: Defining clear deployment objectives, scope, timeline, and resources.
  • Pilot testing: Conducting pilot deployments with a small group of users to identify and address potential issues.
  • Communication and training: Keeping users informed about the transition and providing comprehensive training.
  • Support and monitoring: Providing ongoing support to users and monitoring the deployment process.

Q4: What are the benefits of using a third-party deployment tool?

A: Third-party tools offer:

  • Specialized functionalities: Tailored solutions for specific deployment tasks, such as data migration or user provisioning.
  • Integration with existing systems: Seamless integration with on-premises applications and infrastructure.
  • Advanced automation capabilities: Streamlining complex deployment processes and minimizing manual effort.
  • Expert support: Access to specialized support and expertise from the tool vendor.

Q5: What are the key considerations for choosing a deployment tool?

A: Key considerations include:

  • Organization size and complexity: The tool should be scalable to handle the organization’s user base and IT infrastructure complexity.
  • Deployment scope: Consider the specific deployment tasks, such as user provisioning, application configuration, and data migration.
  • Budget and resources: Evaluate the cost of the tool, including licensing fees and support services.
  • Technical expertise: Ensure the organization has the technical expertise to implement and manage the chosen tool.
  • Integration with existing systems: The tool should integrate seamlessly with existing on-premises systems and applications.

Tips for Successful Office 365 Deployment

  • Start Small: Begin with a pilot deployment to test and refine the process before full rollout.
  • Embrace Automation: Leverage tools to automate repetitive tasks and minimize manual effort.
  • Prioritize User Training: Provide comprehensive training to users on the new Office 365 applications and functionalities.
  • Monitor and Iterate: Continuously monitor the deployment process and address any issues or challenges promptly.
  • Seek Expert Guidance: Engage with Microsoft partners or consultants for specialized expertise and support.

Conclusion

Office 365 deployment tools play a crucial role in ensuring a successful transition to the cloud. By automating processes, reducing manual effort, and providing centralized management, these tools empower organizations to streamline deployments, optimize resource utilization, and maximize the benefits of Office 365. With careful planning, the right tool selection, and adherence to best practices, organizations can confidently navigate the Office 365 deployment journey and unlock the full potential of this transformative productivity suite.

Using Office Deployment Tool For Office 365 with config.office.com - YouTube Choose how to deploy Office 365 ProPlus - Office Support Office 365 Deployment Diagram
Office 365 Deployment Guide Office 365 Deployment Tool For Mac Ggoogle - rapwestern Deploying Office 365 with Office Deployment Tool (ODT) - Tech Blog, News, How To's and More.
Office 365 Deployment Tool - Office Choices Office Deployment Tool Guide Trusted Tech Team

Closure

Thus, we hope this article has provided valuable insights into Streamlining Office 365 Deployment: A Comprehensive Guide to Tools and Techniques. We appreciate your attention to our article. See you in our next article!

Resolving The "No Audio Devices Installed" Issue In Windows 10: A Comprehensive Guide

Resolving the "No Audio Devices Installed" Issue in Windows 10: A Comprehensive Guide

Introduction

With great pleasure, we will explore the intriguing topic related to Resolving the "No Audio Devices Installed" Issue in Windows 10: A Comprehensive Guide. Let’s weave interesting information and offer fresh perspectives to the readers.

Resolving the "No Audio Devices Installed" Issue in Windows 10: A Comprehensive Guide

How To Fix No Audio Device Installed Problem In Windows 10 - YouTube

The absence of sound on a Windows 10 computer can be frustrating, especially when the error message "No audio devices installed" appears. This issue can stem from various factors, ranging from driver problems to hardware malfunctions. This comprehensive guide provides a step-by-step approach to troubleshooting and resolving this common audio issue.

Understanding the Problem

The "No Audio Devices Installed" error message indicates that Windows 10 cannot detect any audio hardware connected to your computer. This could be due to:

  • Driver Issues: The audio drivers, which act as intermediaries between your hardware and the operating system, might be outdated, corrupted, or incompatible.
  • Hardware Malfunction: The audio hardware itself, such as the sound card or speakers, might be faulty or not properly connected.
  • System Configuration Errors: Incorrect system settings or conflicts with other software can hinder audio output.
  • Windows Updates: Recent Windows updates might have inadvertently disrupted audio functionality.

Troubleshooting Steps

The following troubleshooting steps are designed to systematically address the potential causes of the "No Audio Devices Installed" error:

1. Restart Your Computer and Peripherals:

  • The first step is to restart your computer and any connected audio devices, such as speakers or headphones. This simple action can often resolve temporary glitches.

2. Check Physical Connections:

  • Ensure that all audio cables are securely connected to the appropriate ports on both your computer and audio devices.
  • Verify that the volume knob on your speakers or headphones is turned up.
  • If using external speakers, check if they are powered on and the power switch is in the correct position.

3. Update Audio Drivers:

  • Device Manager:
    • Open the "Device Manager" by searching for it in the Windows search bar.
    • Expand the "Sound, video and game controllers" category.
    • Right-click on the audio device and select "Update driver."
    • Choose "Search automatically for updated driver software" and follow the on-screen instructions.
  • Manufacturer Website:
    • Visit the website of your computer manufacturer or the audio hardware manufacturer.
    • Search for the latest drivers for your specific model and download them.
    • Follow the installation instructions provided by the manufacturer.

4. Roll Back or Reinstall Audio Drivers:

  • If updating drivers doesn’t resolve the issue, consider rolling back to a previous version.
  • Right-click on the audio device in Device Manager, select "Properties," and navigate to the "Driver" tab.
  • Click "Roll Back Driver" if available.
  • If rolling back isn’t possible, you can uninstall the driver and reboot your computer. Windows will automatically reinstall the driver on startup.

5. Troubleshoot Audio Playback:

  • Open the "Settings" app by pressing Windows key + I.
  • Select "System," then "Sound."
  • Click "Troubleshoot sound problems" and follow the on-screen instructions.
  • This tool will attempt to identify and fix any audio-related issues.

6. Run the Windows Audio Troubleshooter:

  • Open the "Settings" app.
  • Select "Update & Security," then "Troubleshoot."
  • Click on "Additional troubleshooters" and select "Playing Audio."
  • Run the troubleshooter and follow the on-screen instructions.

7. Check System Services:

  • Open the "Run" dialog box by pressing Windows key + R.
  • Type "services.msc" and press Enter.
  • Locate the "Windows Audio" service in the list.
  • Right-click on it and select "Properties."
  • Ensure that the "Startup type" is set to "Automatic" and the service is "Running."
  • If the service is stopped, click "Start."

8. Disable Exclusive Mode:

  • Some applications can take exclusive control of the audio output, preventing other applications from playing sound.
  • Open the "Settings" app.
  • Select "System," then "Sound."
  • Click on "Sound control panel" under "Related settings."
  • Go to the "Playback" tab and select your default audio device.
  • Right-click on it and choose "Properties."
  • Navigate to the "Advanced" tab and uncheck the box next to "Allow applications to take exclusive control of this device."

9. Check for Software Conflicts:

  • Certain software applications can interfere with audio playback.
  • Try temporarily disabling any recently installed software or applications that might be causing conflicts.
  • If you suspect a specific program, try running your computer in Safe Mode to see if the issue persists.

10. Run a System Restore:

  • If none of the above steps resolve the issue, you can try restoring your system to a previous point in time when audio was working correctly.
  • Open the "Start" menu and search for "Create a restore point."
  • Select "Create a restore point" and follow the on-screen instructions.
  • Choose a restore point before the audio issue occurred and proceed with the restoration process.

11. Check for Hardware Malfunctions:

  • If the issue persists after trying all the software-related solutions, it might be a hardware problem.
  • Sound Card: Try testing your audio output using a different sound card or audio device. If the issue is resolved, it indicates a problem with your current sound card.
  • Speakers/Headphones: Test your speakers or headphones with another device to rule out a hardware issue with the audio device itself.

12. Contact Support:

  • If you have exhausted all troubleshooting steps and the problem persists, contact your computer manufacturer’s support team or a qualified technician for further assistance.

FAQs

Q: What are the common causes of the "No Audio Devices Installed" error?

A: The error can be caused by outdated or corrupted drivers, hardware malfunctions, system configuration errors, or recent Windows updates.

Q: How do I update audio drivers in Windows 10?

A: You can update drivers through Device Manager or by downloading the latest drivers from the manufacturer’s website.

Q: Why might rolling back audio drivers resolve the issue?

A: Rolling back drivers can revert to a previous version that was working correctly, addressing compatibility issues or driver conflicts.

Q: Can I use a different audio output device to troubleshoot the problem?

A: Yes, trying a different sound card, speakers, or headphones can help isolate whether the issue lies with the hardware or software.

Q: What should I do if none of the troubleshooting steps work?

A: If all other solutions fail, contact your computer manufacturer’s support team or a qualified technician for further assistance.

Tips

  • Keep your audio drivers up to date by enabling automatic driver updates in Windows Update settings.
  • Regularly check for and install the latest Windows updates to ensure compatibility and fix potential bugs.
  • Avoid installing unnecessary software or applications that might interfere with audio functionality.
  • If you encounter audio issues after installing new software, try uninstalling the software to see if it resolves the problem.

Conclusion

Resolving the "No Audio Devices Installed" error in Windows 10 requires a systematic approach to troubleshooting. By following the steps outlined in this guide, you can identify and address the underlying cause of the issue. Remember to check for driver updates, hardware connections, and system configurations. If the issue persists, contact your computer manufacturer’s support team or a qualified technician for further assistance. By addressing this error, you can restore your computer’s audio functionality and enjoy a seamless multimedia experience.

How To Fix 'No Audio Device is Installed' in Windows 10 - WinErrorFixer.Com No Audio Output Device Is Installed In Windows 10- FIX (Working -2020) No Audio Output Device Is Installed In Windows 10- FIX (Working -2020)
No Audio Output Device Is Installed On Windows 10 PC (Best 10 Fixes) FIXED] No Audio Output Device is Installed in Windows 10 How to Fix No Audio Output Device Is Installed In Windows 10 PC
How to Fix No Audio Output Device is Installed Issue in Windows PC How To Fix Windows 10 No Audio Devices Installed After Windows Update - TeckLyfe

Closure

Thus, we hope this article has provided valuable insights into Resolving the "No Audio Devices Installed" Issue in Windows 10: A Comprehensive Guide. We appreciate your attention to our article. See you in our next article!

Troubleshooting Wireless Sharing Issues In Windows 10: A Comprehensive Guide

Troubleshooting Wireless Sharing Issues in Windows 10: A Comprehensive Guide

Introduction

With great pleasure, we will explore the intriguing topic related to Troubleshooting Wireless Sharing Issues in Windows 10: A Comprehensive Guide. Let’s weave interesting information and offer fresh perspectives to the readers.

Troubleshooting Wireless Sharing Issues in Windows 10: A Comprehensive Guide

Ultimate Windows 10 Wifi Troubleshooting Guide  onlinetechtips

Windows 10’s wireless sharing capabilities, known as "Near Share," offer a convenient way to transfer files between devices. However, users occasionally encounter difficulties with this functionality. This article provides a comprehensive guide to understanding the common causes of Near Share malfunctions and offers solutions to restore its seamless operation.

Understanding Near Share and its Importance

Near Share leverages Bluetooth and Wi-Fi to establish a secure, direct connection between compatible devices. It eliminates the need for cloud storage services or physical cables, streamlining file transfers for everyday tasks like sharing photos, documents, and videos.

Common Reasons for Near Share Malfunctions

Several factors can hinder Near Share’s functionality, ranging from simple configuration issues to more complex technical problems. Some of the most frequent causes include:

1. Bluetooth and Wi-Fi Connectivity:

  • Bluetooth Disabled or Unavailable: Near Share relies on Bluetooth for initial device discovery. If Bluetooth is disabled or unavailable on either device, the sharing process will fail.
  • Wi-Fi Connectivity Issues: While Near Share utilizes Bluetooth for initial connection, it relies on Wi-Fi Direct for actual file transfer. Poor Wi-Fi signal strength or network connectivity problems can disrupt the sharing process.
  • Bluetooth and Wi-Fi Interference: External factors like other devices emitting radio waves can interfere with Bluetooth and Wi-Fi signals, hindering Near Share’s performance.

2. Device Compatibility:

  • Operating System Version: Near Share requires compatible versions of Windows 10. Older versions might not support the feature.
  • Device Compatibility: Not all devices are compatible with Near Share. Certain hardware configurations or driver issues can prevent proper functionality.

3. Software and Configuration Issues:

  • Near Share Feature Disabled: The Near Share feature might be disabled in Windows settings.
  • Incorrect Settings: Incorrectly configured privacy settings or sharing permissions can prevent Near Share from working.
  • Outdated Drivers: Outdated Bluetooth or Wi-Fi drivers can cause compatibility issues and hinder Near Share’s functionality.
  • Software Conflicts: Certain applications or software conflicts can interfere with Near Share’s operation.

4. Network Security:

  • Firewall Blockage: Firewalls, either system-level or software-based, can block Near Share’s communication attempts.
  • Antivirus Interference: Antivirus software might mistakenly identify Near Share as a security threat and block its operation.

Troubleshooting Steps

Addressing Near Share issues requires a systematic approach. Here’s a breakdown of troubleshooting steps:

1. Basic Checks:

  • Verify Bluetooth and Wi-Fi: Ensure both devices have Bluetooth enabled and are connected to a Wi-Fi network.
  • Check Device Compatibility: Verify that both devices meet the minimum system requirements for Near Share.
  • Restart Devices: Restarting both devices can resolve temporary software glitches.

2. Software and Configuration:

  • Enable Near Share: Navigate to Windows Settings > System > Shared Experiences and ensure Near Share is enabled.
  • Check Privacy Settings: In Windows Settings > Privacy > Bluetooth & Other Devices, ensure the "Allow devices to find this PC" option is selected.
  • Update Drivers: Update Bluetooth and Wi-Fi drivers to the latest versions.
  • Disable Antivirus and Firewall: Temporarily disable antivirus and firewall software to check if they interfere with Near Share.

3. Network Connectivity:

  • Improve Wi-Fi Signal: Ensure both devices are within range of a strong Wi-Fi signal.
  • Restart Router: Restarting the router can resolve network connectivity issues.
  • Check for Network Interference: Identify and eliminate potential sources of radio wave interference.

4. Advanced Troubleshooting:

  • Run Network Troubleshooter: Windows’ built-in network troubleshooter can identify and resolve common connectivity issues.
  • Check for Software Conflicts: Identify and temporarily disable any software that might be interfering with Near Share.
  • Reset Network Settings: Resetting network settings to their default values can resolve configuration issues.
  • Consult Device Manufacturer: Contact the device manufacturer for specific troubleshooting steps and potential driver updates.

Frequently Asked Questions (FAQs)

Q: Why is Near Share not showing up on my device?

A: Near Share might not be visible due to several reasons:

  • Bluetooth disabled: Ensure Bluetooth is enabled on both devices.
  • Incompatible devices: Verify that both devices are compatible with Near Share.
  • Incorrect settings: Check privacy settings and ensure the "Allow devices to find this PC" option is enabled.

Q: My device is connected to Wi-Fi, but Near Share still doesn’t work. What should I do?

A: Wi-Fi connectivity issues can hinder Near Share. Consider:

  • Wi-Fi signal strength: Ensure both devices are within range of a strong Wi-Fi signal.
  • Network interference: Identify and eliminate potential sources of radio wave interference.
  • Restart router: Restarting the router can resolve network connectivity issues.

Q: Why does Near Share keep disconnecting?

A: Disconnections can occur due to:

  • Bluetooth range: Ensure both devices are within Bluetooth range.
  • Battery life: Low battery levels can affect Bluetooth connectivity.
  • Network issues: Intermittent Wi-Fi connectivity can cause disconnections.

Tips for Enhancing Near Share Performance

  • Ensure devices are within range: Maintain close proximity between devices for optimal Bluetooth and Wi-Fi signal strength.
  • Reduce network interference: Avoid using Near Share in areas with high levels of radio wave interference.
  • Keep devices updated: Ensure both devices have the latest operating system updates and driver versions.
  • Check for software conflicts: Identify and disable any applications that might interfere with Near Share’s operation.

Conclusion

Near Share’s convenience makes it a valuable feature for efficient file sharing. By understanding the common causes of Near Share malfunctions and following the troubleshooting steps outlined in this guide, users can effectively address these issues and restore the seamless operation of this wireless sharing functionality.

Ultimate Guide to Fix WiFi Issues on Windows 10 - TechPP Ultimate Guide to Fix WiFi Issues on Windows 10 - TechPP Ultimate Guide to Fix WiFi Issues on Windows 10 - TechPP
How To Fix WiFi Not Working In Windows 10 : Dr PC Center How to Fix WiFi Problems on Windows 10  How To Fix WiFi Connection Problems in Windows 10 - YouTube Fix Windows 10 WiFi Problems [3 Solutions]
Common WiFi Errors On Windows 10 And Ways To Fix Them How To Fix WiFi Connection Problems in Windows 10 Easily  Guiding Tech - YouTube

Closure

Thus, we hope this article has provided valuable insights into Troubleshooting Wireless Sharing Issues in Windows 10: A Comprehensive Guide. We appreciate your attention to our article. See you in our next article!

Net Framework 3 5 1 Windows 10 Download

net framework 3 5 1 windows 10 download

Introduction

With enthusiasm, let’s navigate through the intriguing topic related to net framework 3 5 1 windows 10 download. Let’s weave interesting information and offer fresh perspectives to the readers.

The Enduring Relevance of .NET Framework 3.5.1 on Windows 10

How to Download & Install .Net Framework 3.5 On Windows 10 - YouTube

While the software landscape is constantly evolving, certain technologies remain crucial for legacy applications and specific functionalities. .NET Framework 3.5.1, despite its age, continues to play a vital role for many Windows 10 users, providing access to a vast library of tools and features essential for various software applications. This article delves into the significance of .NET Framework 3.5.1 on Windows 10, exploring its functionalities, installation process, and the reasons behind its continued relevance.

Understanding the Significance of .NET Framework 3.5.1

.NET Framework 3.5.1 is a powerful software development framework developed by Microsoft. It provides a comprehensive set of tools and libraries for building a wide range of applications, including web applications, desktop applications, and mobile applications. The framework’s strength lies in its ability to simplify the development process, allowing developers to focus on the core logic of their applications while relying on the framework for common tasks like data access, user interface design, and network communication.

For Windows 10 users, .NET Framework 3.5.1 is often required to run older applications that were developed using this framework. These applications may include essential business tools, legacy software, or even games that rely on specific functionalities provided by .NET Framework 3.5.1. While newer applications may utilize later versions of the framework, many users find themselves needing to install .NET Framework 3.5.1 to ensure compatibility with their existing software.

The Importance of .NET Framework 3.5.1 for Windows 10

The continued relevance of .NET Framework 3.5.1 on Windows 10 stems from several factors:

1. Compatibility with Legacy Applications: Many older applications were built using .NET Framework 3.5.1, and these applications may not be compatible with newer versions of the framework. Installing .NET Framework 3.5.1 ensures that these applications can run smoothly on Windows 10.

2. Specialized Features: .NET Framework 3.5.1 offers a unique set of features that may not be available in later versions. These features might be crucial for specific applications, making the older framework indispensable for certain tasks.

3. Security Updates: Microsoft continues to release security updates for .NET Framework 3.5.1, ensuring that it remains secure and protected against vulnerabilities. These updates are critical for maintaining the integrity of applications that rely on this framework.

4. Developer Community Support: Despite its age, .NET Framework 3.5.1 still enjoys a vibrant developer community. This community provides ongoing support, documentation, and resources for developers working with this framework, ensuring its continued relevance.

Installing .NET Framework 3.5.1 on Windows 10

Installing .NET Framework 3.5.1 on Windows 10 is relatively straightforward. You can utilize the following methods:

1. Using Windows Features:

  • Navigate to the Control Panel.
  • Select Programs and Features.
  • Click on Turn Windows features on or off.
  • Check the box next to .NET Framework 3.5 (includes .NET 2.0 and 3.0).
  • Click OK.

Windows will then download and install .NET Framework 3.5.1 from Windows Update. This is the recommended method, as it ensures you obtain the latest version and security updates.

2. Using an Offline Installer:

If you do not have an internet connection or prefer an offline installation, you can download the .NET Framework 3.5.1 offline installer from Microsoft’s website. This installer contains all the necessary files for a complete installation.

3. Using a USB Drive:

You can also create a bootable USB drive with the .NET Framework 3.5.1 installer. This allows you to install the framework on multiple computers without requiring an internet connection.

Troubleshooting Common Issues with .NET Framework 3.5.1 Installation

While installing .NET Framework 3.5.1 is generally straightforward, you might encounter certain issues. Here are some common problems and their solutions:

1. Error Message "Windows couldn’t find the necessary files…"

This error indicates that Windows is unable to download the required files from Windows Update. You can resolve this by:

  • Checking your internet connection.
  • Ensuring that Windows Update is properly configured.
  • Trying to install .NET Framework 3.5.1 again.

2. Error Message "The feature you are trying to use is on a network resource that is unavailable…"

This error suggests that the installation files are not accessible. You can resolve this by:

  • Checking your internet connection.
  • Ensuring that the network resource is available.
  • Trying to install .NET Framework 3.5.1 again.

3. Error Message "Error 0x800F0906"

This error code often indicates a problem with the Windows Update service. You can resolve this by:

  • Running the Windows Update troubleshooter.
  • Resetting the Windows Update components.
  • Trying to install .NET Framework 3.5.1 again.

Frequently Asked Questions (FAQs)

1. Is .NET Framework 3.5.1 still supported by Microsoft?

Yes, Microsoft continues to provide security updates for .NET Framework 3.5.1. However, new features or enhancements are unlikely to be added.

2. Can I install .NET Framework 3.5.1 on Windows 11?

While .NET Framework 3.5.1 is not officially supported on Windows 11, you can still install it manually. However, Microsoft recommends using the latest version of .NET Framework available for Windows 11.

3. What are the system requirements for .NET Framework 3.5.1?

The system requirements for .NET Framework 3.5.1 are relatively modest. It requires a minimum of 1 GB of RAM and 3 GB of hard disk space. It is compatible with most Windows 10 versions.

4. Is .NET Framework 3.5.1 compatible with other frameworks?

Yes, .NET Framework 3.5.1 is compatible with other versions of .NET Framework, including .NET Framework 4.0 and later. However, you may need to install specific versions for different applications.

5. Can I uninstall .NET Framework 3.5.1 if I no longer need it?

Yes, you can uninstall .NET Framework 3.5.1 using the Windows Features dialog box. However, uninstalling it may cause issues with applications that rely on this framework.

Tips for Using .NET Framework 3.5.1

1. Keep It Updated: Regularly update .NET Framework 3.5.1 to ensure that you have the latest security patches and bug fixes.

2. Test Applications: After installing or updating .NET Framework 3.5.1, test your applications to ensure that they are working correctly.

3. Consult Documentation: If you encounter any issues, consult the official Microsoft documentation for .NET Framework 3.5.1.

4. Seek Community Support: If you cannot find a solution to your problem, seek assistance from the .NET Framework 3.5.1 developer community.

5. Consider Alternatives: If you are developing new applications, consider using a newer version of .NET Framework or a different development platform.

Conclusion

.NET Framework 3.5.1 remains a vital component for many Windows 10 users, enabling compatibility with legacy applications and providing access to specialized features. While newer versions of the framework offer advancements, .NET Framework 3.5.1 continues to play a significant role in maintaining the functionality of existing software. Understanding the importance of this framework, its installation process, and potential troubleshooting steps is essential for ensuring a smooth user experience on Windows 10. As the software landscape evolves, it is important to acknowledge the enduring contributions of legacy technologies like .NET Framework 3.5.1 and their continued relevance in specific contexts.

how to install net framework 3.5 on windows 10,8.1,7 / How To Enable / Install .NET Framework 3. How to Install .NET Framework 3.5 on Windows 10 Net Framework 3.5 for Windows 10 - Download & Install Guide
Cara Install .NET Framework 3.5 di Windows 10 ~ ProFastCV How To Download Net Framework 3 5 For Windows 1011 Offline - Vrogue Netframe 3 5 For Windows 10
How To Install .Net Framework 3.5 On Windows 10 [TUTORIAL] - YouTube How to Download and Install .net framework 3.5 on windows 10

Closure

Thus, we hope this article has provided valuable insights into net framework 3 5 1 windows 10 download. We hope you find this article informative and beneficial. See you in our next article!

A Comprehensive Guide To Obtaining Windows 10: Exploring Legitimate Options And Considerations

A Comprehensive Guide to Obtaining Windows 10: Exploring Legitimate Options and Considerations

Introduction

With enthusiasm, let’s navigate through the intriguing topic related to A Comprehensive Guide to Obtaining Windows 10: Exploring Legitimate Options and Considerations. Let’s weave interesting information and offer fresh perspectives to the readers.

A Comprehensive Guide to Obtaining Windows 10: Exploring Legitimate Options and Considerations

PPT - DOWNLOAD Windows 10 A Comprehensive Beginner s Guide to Learn Windows 10 Step by Step

The Windows operating system has long been a cornerstone of personal computing, and Windows 10, released in 2015, represents a significant evolution in the platform. While many users have upgraded from previous versions, others may be seeking to install Windows 10 for the first time. This comprehensive guide aims to provide clarity on the various methods for obtaining Windows 10, emphasizing legitimate and safe approaches.

Understanding the Legitimate Acquisition of Windows 10

It is crucial to understand that obtaining Windows 10 without proper licensing is illegal. Microsoft offers several legitimate avenues for acquiring the operating system, and utilizing these methods ensures you are using the software ethically and with access to crucial support and updates.

1. Purchasing a Full Version of Windows 10:

The most common and recommended method is to purchase a full version of Windows 10 from Microsoft or an authorized reseller. This option grants you a perpetual license, meaning you can use the software indefinitely on a single device.

  • Key Features:

    • Full access to all Windows 10 features and updates.
    • Perpetual license allowing ongoing use.
    • Enhanced security and support from Microsoft.
  • Considerations:

    • Requires a financial investment.
    • May be subject to regional pricing variations.

2. Upgrading from a Previous Version of Windows:

If you have a valid license for a previous version of Windows (Windows 7, 8, or 8.1), Microsoft offers a free upgrade path to Windows 10. This option is typically available through the Windows Update mechanism.

  • Key Features:

    • Free upgrade for existing Windows users.
    • Access to all Windows 10 features and updates.
    • Seamless transition for familiar users.
  • Considerations:

    • Requires a valid license for a previous Windows version.
    • Upgrade path may be limited in time.

3. Windows 10 in S Mode:

Windows 10 in S Mode is a streamlined version of the operating system designed for simplicity and security. It is primarily intended for entry-level devices and offers a limited application ecosystem, primarily relying on the Microsoft Store.

  • Key Features:

    • Streamlined user experience with a focus on security.
    • Limited application availability, primarily through the Microsoft Store.
    • Often included with budget-friendly devices.
  • Considerations:

    • Restricted application availability.
    • Limited customization options.
    • May not be suitable for users with specific software requirements.

4. Windows 10 Education:

Windows 10 Education is specifically designed for educational institutions and offers features tailored for students and educators.

  • Key Features:

    • Designed for educational environments.
    • Offers features like classroom management tools.
    • Typically available through institutional licensing agreements.
  • Considerations:

    • Primarily intended for educational institutions.
    • May require specific licensing agreements.

5. Windows 10 Pro for Workstations:

Windows 10 Pro for Workstations is a specialized version of Windows 10 designed for high-performance workstations, supporting advanced hardware features and enhanced stability.

  • Key Features:

    • Optimized for high-performance computing.
    • Supports advanced hardware features like persistent memory.
    • Designed for demanding applications and workflows.
  • Considerations:

    • Requires specific hardware configurations.
    • May be more expensive than standard Windows 10 versions.

6. Windows 10 Enterprise:

Windows 10 Enterprise is the most comprehensive version of Windows 10, offering advanced security features, management tools, and deployment options for businesses and large organizations.

  • Key Features:

    • Comprehensive security and management features.
    • Designed for enterprise-level deployments.
    • Often requires volume licensing agreements.
  • Considerations:

    • Primarily intended for large organizations.
    • May require specific licensing agreements.

Understanding the Importance of Legitimate Windows 10 Acquisition

Using a legitimate copy of Windows 10 provides several crucial benefits:

  • Security: Using a genuine copy of Windows 10 ensures access to the latest security updates, protecting your system from malware and vulnerabilities.
  • Updates: You receive regular updates, including bug fixes, performance enhancements, and new features.
  • Support: Microsoft offers technical support for genuine Windows 10 users, providing assistance with troubleshooting and resolving issues.
  • Legal Compliance: Using a licensed copy ensures you are adhering to software licensing agreements and avoiding potential legal repercussions.

Avoiding Illegal Acquisition Methods

It is crucial to avoid illegal methods of obtaining Windows 10. These methods often involve:

  • Downloading pirated versions: Pirated versions are often infected with malware and may not receive security updates.
  • Using cracked software: Cracked software may be unstable and prone to security risks.
  • Sharing licenses: Sharing licenses is illegal and can result in penalties for both parties involved.

FAQs Regarding Windows 10 Acquisition

1. Can I use a Windows 10 product key from a previous computer on a new one?

  • While you can technically use a product key from a previous computer, Microsoft’s terms of service generally prohibit transferring licenses between devices. It is advisable to purchase a new license for your new computer.

2. Is it safe to download Windows 10 from a third-party website?

  • It is highly discouraged to download Windows 10 from third-party websites. These downloads may be infected with malware or contain illegal copies of the software.

3. How can I check if my copy of Windows 10 is genuine?

  • You can check the authenticity of your Windows 10 installation by going to Settings > System > About. Look for the "Windows Specifications" section. If the installation is genuine, it will display a digital product key and information about your license.

4. How can I upgrade from a previous version of Windows to Windows 10?

  • If you have a valid license for a previous version of Windows, you can usually upgrade to Windows 10 through the Windows Update mechanism. This process is typically free and straightforward.

5. Can I downgrade from Windows 10 to a previous version of Windows?

  • Downgrading from Windows 10 to a previous version is possible, but it may require specific steps and may not be possible in all cases. It’s recommended to consult Microsoft’s support resources for guidance.

Tips for Obtaining Windows 10 Legitimately

  • Purchase from authorized retailers: Ensure you purchase Windows 10 from reputable retailers like Microsoft’s official website or authorized resellers.
  • Verify product keys: Always verify the authenticity of product keys before purchasing.
  • Check for official downloads: Download Windows 10 only from official sources like Microsoft’s website.
  • Keep your system updated: Regularly update Windows 10 to receive the latest security patches and bug fixes.
  • Use legitimate software: Avoid using pirated or cracked software, as it poses significant security risks.

Conclusion

Obtaining Windows 10 legitimately is essential for ensuring a secure, reliable, and legally compliant computing experience. By following the guidelines outlined in this guide, users can confidently acquire and utilize Windows 10 while benefiting from the latest features, updates, and support from Microsoft. Remember, choosing the right method for your specific needs and adhering to legal practices will ensure a smooth and secure journey with the Windows 10 operating system.

The ultimate guide to obtaining and installing Windows 10 - Electronic Products Exploring Tech: Exploring Windows 10 May 2019 Edition : The Illustrated, Practical Guide to Exploring Windows 10 - Intrious
Exploring Windows 10 - Intrious Windows 10 Quick Guide PPT - A Comprehensive Guide to Installing Windows 10_ Step-by-Step Tutorial PowerPoint
How to upgrade from pirated Windows to legitimate Windows 10  PCWorld Complete Guide to Obtaining and Activating Windows 10 Pro Product Key - VISADA.ME

Closure

Thus, we hope this article has provided valuable insights into A Comprehensive Guide to Obtaining Windows 10: Exploring Legitimate Options and Considerations. We thank you for taking the time to read this article. See you in our next article!

Eliminating The Yellow Border In Windows 10: A Comprehensive Guide

Eliminating the Yellow Border in Windows 10: A Comprehensive Guide

Introduction

With great pleasure, we will explore the intriguing topic related to Eliminating the Yellow Border in Windows 10: A Comprehensive Guide. Let’s weave interesting information and offer fresh perspectives to the readers.

Eliminating the Yellow Border in Windows 10: A Comprehensive Guide

How do I get rid of this yellow border around my displays whenever I snip an image (using WIN

The appearance of a yellow border around windows in Windows 10 can be a frustrating and visually unappealing issue. This anomaly, often associated with specific software or system settings, can detract from the overall aesthetic of your desktop and potentially hinder your workflow. This article provides a comprehensive guide to understanding the causes of this issue and offers effective solutions to eliminate the yellow border, restoring the intended visual experience of your Windows 10 environment.

Understanding the Causes of the Yellow Border

The yellow border appearing around windows in Windows 10 is not a standard feature of the operating system. Its occurrence is typically attributed to one or more of the following factors:

  • Third-Party Software: Certain applications, especially those dealing with image editing, graphic design, or video production, might employ a feature that introduces a yellow border to highlight specific areas or elements within a window. This is often a temporary effect within the application’s context and may not persist outside of it.
  • System-Level Settings: Some users might inadvertently change system-level settings related to window borders, leading to the appearance of a yellow border. This could be due to modifications in themes, color schemes, or accessibility options.
  • Hardware Issues: In rare cases, hardware malfunctions, particularly with display drivers or graphics cards, can contribute to the appearance of the yellow border. This is often accompanied by other visual anomalies on the screen.
  • Corrupted System Files: Damaged or corrupted system files, potentially due to incomplete updates or malware infections, can also lead to unexpected visual behavior, including the yellow border issue.

Troubleshooting and Solutions

Addressing the yellow border issue requires a systematic approach, focusing on identifying the root cause and implementing appropriate solutions. The following steps provide a comprehensive guide to troubleshooting and resolving this visual anomaly:

1. Identifying the Source:

  • Software Compatibility: Check if the yellow border appears exclusively when a specific application is running. If so, the issue might lie within the application’s settings or a compatibility conflict.
  • Recent Changes: Reflect on any recent changes to your system, including software installations, theme modifications, or updates. Identifying the specific change might help pinpoint the cause.
  • Accessibility Settings: Examine your accessibility settings, particularly those related to high contrast or color inversions. These settings could unintentionally introduce a yellow border.

2. Resolving Software Conflicts:

  • Application Settings: Within the application causing the yellow border, explore its settings and look for options related to borders, highlighting, or visual effects. Adjust these settings to remove the unwanted border.
  • Compatibility Mode: If the application is older or incompatible with your current Windows version, try running it in compatibility mode. This might resolve any visual conflicts.
  • Reinstall Application: If the yellow border persists despite adjustments in settings, consider reinstalling the application. This ensures a fresh installation and potentially eliminates any corrupted files.

3. Restoring System Settings:

  • Default Theme: Reset your system theme to the default settings. This eliminates any custom modifications that might be contributing to the issue.
  • Color Scheme: Adjust your color scheme, particularly the window border color, to ensure it matches your desired appearance.
  • Accessibility Settings: Review your accessibility settings and disable any options that might be affecting the window borders.

4. Updating Drivers and System Files:

  • Graphics Driver Updates: Ensure your graphics card drivers are up-to-date. Outdated drivers can cause visual anomalies and compatibility issues.
  • Windows Updates: Install the latest Windows updates to address potential system file corruption or bug fixes related to visual rendering.
  • System File Checker: Run the System File Checker (SFC) utility to scan for and repair any corrupted system files that might be contributing to the yellow border.

5. Advanced Solutions:

  • Clean Boot: Perform a clean boot to temporarily disable all non-essential programs and services. This helps isolate the cause of the yellow border if it is related to a specific third-party application.
  • System Restore: If the issue arose after a recent system change, consider restoring your system to an earlier point in time. This reverts your system settings and files to a previous state, potentially resolving the yellow border.

FAQs: Addressing Common Concerns

1. Is the yellow border a virus or malware infection?

While malware infections can sometimes cause visual anomalies, the yellow border is not typically a direct symptom of a virus. It is more likely related to software compatibility, system settings, or hardware issues.

2. Can I permanently remove the yellow border without affecting other system settings?

Yes, in most cases, the yellow border can be removed without affecting other system settings. The key is to identify the source of the issue and implement the appropriate solution, whether it’s adjusting application settings, restoring system defaults, or updating drivers.

3. What if the yellow border persists despite trying all these solutions?

If the yellow border persists despite trying all the solutions mentioned above, it is recommended to seek further assistance from a technical expert or consult the Microsoft support website for additional troubleshooting steps.

Tips for Preventing the Yellow Border

  • Regular System Maintenance: Regularly update your system, drivers, and software to ensure optimal performance and minimize the risk of compatibility issues.
  • Careful Software Installations: Be cautious when installing new software, especially those that deal with graphics or visual effects. Read user reviews and check for compatibility information before installing.
  • Backup Your System: Regularly back up your system to ensure that you can restore it to a previous state if any unexpected issues arise.

Conclusion

The yellow border issue in Windows 10, while visually unappealing, is often resolvable through careful troubleshooting and systematic solutions. By understanding the potential causes and implementing the appropriate steps, users can effectively eliminate the yellow border and restore the intended visual experience of their Windows 10 environment.

Cài đặt quyền cho ứng dụng PRISM hoặc cài đặt bổ sung trong Facebook có thể được yêu cầu để phát How to remove the thick borders/ border lines on windows 10?!? - Microsoft Community How To Change Color Of Title Bars In Windows 10 - vrogue.co
How to remove Yellow Boarder Capture Indicator from Windows.Graphics.Capture-ing (for desktop How To Remove Accent Color Along Windows Borders In W - vrogue.co How to remove the thick borders/ border lines on windows 10?!? - Microsoft Community
Ist there any way to completely remove window borders? (Windows 10) : r/OLED_Gaming Windows 10 window border lines missing - EASY FIX!

Closure

Thus, we hope this article has provided valuable insights into Eliminating the Yellow Border in Windows 10: A Comprehensive Guide. We hope you find this article informative and beneficial. See you in our next article!

The Future Of Productivity: Exploring The Potential Of Microsoft Office 2025

The Future of Productivity: Exploring the Potential of Microsoft Office 2025

Introduction

In this auspicious occasion, we are delighted to delve into the intriguing topic related to The Future of Productivity: Exploring the Potential of Microsoft Office 2025. Let’s weave interesting information and offer fresh perspectives to the readers.

The Future of Productivity: Exploring the Potential of Microsoft Office 2025

The Future According To Microsoft - Productivity Future Vision (2020) - YouTube

The world of technology is constantly evolving, and the software we use to navigate our digital lives is no exception. While Microsoft Office has long been a staple for productivity, the future of this suite is a topic of much speculation. While a specific release date for "Office 2025" hasn’t been officially announced, it is safe to assume that Microsoft will continue to innovate and offer new versions of its popular software in the coming years.

This article explores the potential features and advancements that could be included in a hypothetical "Office 2025" release, focusing on how these changes might enhance productivity and cater to the needs of users in a rapidly evolving technological landscape.

Beyond the Basics: A Look at Potential Features

While the exact features of a future Office release are yet to be revealed, we can speculate on potential advancements based on current trends and Microsoft’s previous innovations. Here are some key areas that could see significant changes:

1. Enhanced Collaboration and Cloud Integration:

  • Real-Time Co-Authoring: Collaborative document editing is already a feature in current Office versions, but "Office 2025" could see a significant improvement in real-time co-authoring capabilities. Imagine seamless, lag-free collaboration on documents, spreadsheets, and presentations, regardless of location or device. This could involve enhanced version control, conflict resolution, and communication tools within the platform.
  • Deep Cloud Integration: Microsoft’s cloud services, particularly OneDrive and Microsoft Teams, are likely to be further integrated into Office. This could lead to features like automatic document syncing, cloud-based storage, and the ability to access and edit files from any device, fostering a truly mobile and collaborative work environment.

2. Artificial Intelligence (AI) Integration:

  • AI-Powered Automation: AI could play a significant role in automating repetitive tasks within Office applications. This might include features like automatic data entry, content generation, and even personalized recommendations based on user habits and preferences.
  • Intelligent Assistant: A virtual assistant integrated into Office could help users with tasks like scheduling, reminders, and even composing emails or documents based on user input. This could significantly streamline workflow and reduce the time spent on mundane tasks.
  • Enhanced Accessibility: AI could be used to improve accessibility for users with disabilities. This could involve features like text-to-speech, speech-to-text, and real-time translation, making Office more inclusive for a wider range of users.

3. Immersive Experiences and Visual Enhancements:

  • Augmented Reality (AR) and Virtual Reality (VR) Integration: While still in its early stages, AR and VR could potentially be integrated into Office to create more immersive and engaging experiences. Imagine collaborating on projects in a virtual meeting space or using AR to visualize data in a more interactive way.
  • Enhanced Visual Design: Office applications could see a significant visual overhaul, with updated user interfaces, intuitive navigation, and a more modern aesthetic. This could contribute to a more pleasant and efficient user experience.

4. Security and Privacy:

  • Advanced Security Measures: With the increasing threat of cyberattacks, future versions of Office will likely incorporate advanced security features to protect user data and prevent unauthorized access. This could include enhanced encryption, multi-factor authentication, and real-time threat detection.
  • Privacy Controls: Users will likely have more granular control over their data and privacy settings. This could involve options to control data sharing, track usage patterns, and manage permissions for third-party applications.

5. Cross-Platform Compatibility:

  • Seamless Integration Across Devices: Office will likely continue to prioritize cross-platform compatibility, ensuring that users can access and edit documents seamlessly across Windows, macOS, iOS, and Android devices. This will be crucial for maintaining a consistent user experience and maximizing productivity in a multi-device world.

Addressing Potential Concerns

While these potential advancements offer exciting possibilities for the future of Office, it’s essential to address some potential concerns:

1. Accessibility and Cost:

  • Free Download Availability: The availability of a "free download" for "Office 2025" remains uncertain. Microsoft’s current subscription model for Office 365 has proven successful, and it’s possible that future versions will continue to follow this model, offering different tiers of access with varying features and pricing.
  • Accessibility for All: It is essential to ensure that any future version of Office remains accessible to users with varying technical abilities and financial resources. This could involve offering tiered subscription options, free versions with basic features, or programs to support low-income users.

2. Data Privacy and Security:

  • Data Security and Privacy Concerns: As AI and cloud integration become more prevalent, it’s crucial to address concerns about data privacy and security. Microsoft will need to implement robust measures to protect user data and ensure transparency in data collection and usage.
  • Transparency and Control: Users need to have clear and concise information about how their data is being used and have the ability to control their privacy settings. This will build trust and ensure that users feel confident using Office products.

3. User Experience and Adaptation:

  • User Interface Changes: Significant changes to the user interface, especially the introduction of new features like AR/VR, could pose a learning curve for users. Microsoft will need to provide comprehensive training materials and support to ensure a smooth transition for existing users.
  • Adapting to New Technologies: The rapid pace of technological change can be challenging for users. Microsoft needs to provide clear and accessible resources to help users understand and adapt to new features and functionalities.

FAQs: Addressing Common Questions

1. Will "Office 2025" be a free download?

The availability of a "free download" for "Office 2025" remains uncertain. Microsoft’s current subscription model for Office 365 has proven successful, and it’s possible that future versions will continue to follow this model.

2. What are the key benefits of using "Office 2025"?

"Office 2025" could offer a number of benefits, including:

  • Enhanced Productivity: AI-powered automation, intelligent assistants, and improved collaboration tools could significantly streamline workflows and increase productivity.
  • Improved User Experience: Updated interfaces, intuitive navigation, and immersive experiences could make using Office more enjoyable and efficient.
  • Increased Security and Privacy: Advanced security measures and granular privacy controls could provide users with greater peace of mind about their data.

3. How will "Office 2025" integrate with other Microsoft products?

"Office 2025" is likely to be deeply integrated with other Microsoft products like OneDrive, Teams, and Azure. This could lead to a more seamless and interconnected user experience across different platforms.

4. What are the potential challenges of "Office 2025"?

Potential challenges include:

  • Accessibility and Cost: Ensuring that "Office 2025" remains accessible to all users, regardless of their financial resources or technical abilities.
  • Data Privacy and Security: Protecting user data and ensuring transparency in data collection and usage.
  • User Experience and Adaptation: Providing adequate training and support to help users adapt to new features and functionalities.

Tips for Adapting to Future Office Versions:

  • Stay Informed: Keep up-to-date on the latest developments in Microsoft Office by reading industry publications, attending webinars, and following official Microsoft channels.
  • Embrace Cloud Integration: Familiarize yourself with cloud-based services like OneDrive and Teams, as these are likely to play a significant role in future Office versions.
  • Experiment with New Features: Don’t be afraid to explore new features and functionalities as they become available. This will help you adapt to changes and maximize the benefits of future Office versions.

Conclusion

While "Office 2025" remains a hypothetical concept, it is clear that Microsoft will continue to evolve its Office suite to meet the evolving needs of its users. The potential for advancements in collaboration, AI integration, immersive experiences, and security could significantly transform how we work, learn, and create. By embracing these innovations and addressing potential challenges, Microsoft can ensure that Office continues to be a powerful and essential tool for productivity in the years to come.

Microsoft Office 365 - The Future of Productivity Microsoft Great Plans: 2025 End of Life [Alternative Options, Pros and Cons of Dynamics 365 Microsoft And The Future Of Productivity
Microsoft And The Future Of Productivity Microsoft And The Future Of Productivity Watch Microsoft Office Productivity Future Vision
New Microsoft Future of Productivity Video 10 ways Microsoft Office could improve your productivity - Collab365

Closure

Thus, we hope this article has provided valuable insights into The Future of Productivity: Exploring the Potential of Microsoft Office 2025. We thank you for taking the time to read this article. See you in our next article!