Archives May 2024

The Silent PC: Troubleshooting Audio Issues In Windows 10

The Silent PC: Troubleshooting Audio Issues in Windows 10

Introduction

With great pleasure, we will explore the intriguing topic related to The Silent PC: Troubleshooting Audio Issues in Windows 10. Let’s weave interesting information and offer fresh perspectives to the readers.

The Silent PC: Troubleshooting Audio Issues in Windows 10

How To Fix Audio Sound Problem in Windows 10 [2 Methods] - YouTube

A silent PC can be frustrating, especially when you rely on sound for work, entertainment, or communication. This lack of audio can stem from a variety of causes, ranging from simple software glitches to more complex hardware problems. This article aims to provide a comprehensive guide to troubleshooting audio issues in Windows 10, empowering users to identify and resolve the problem efficiently.

Understanding the Problem

Before delving into troubleshooting steps, it is crucial to understand the nature of the audio issue. This involves identifying the specific symptoms, which can help pinpoint the potential cause.

  • Complete Absence of Sound: The most common scenario is a complete lack of any audio output from the PC, regardless of the application or source. This indicates a problem with the system’s audio drivers, settings, or hardware.
  • Distorted or Crackling Sound: This suggests a potential issue with the audio driver, speaker configuration, or even the speakers themselves.
  • Sound Only in Certain Applications: If sound works in some programs but not others, it may indicate a problem with the specific application’s audio settings or compatibility.
  • No Sound from Headphones or External Speakers: This may be due to a faulty connection, incorrect input selection, or a problem with the external device itself.

Common Causes and Solutions

The following sections explore common causes of audio issues in Windows 10 and provide step-by-step solutions to address them.

1. Software Issues

  • Driver Problems: Outdated, corrupted, or incompatible audio drivers are a frequent culprit. To resolve this:
    • Update Drivers: Navigate to Device Manager (right-click on the Start menu and select "Device Manager"). Expand "Sound, video and game controllers," right-click on the audio device, and select "Update driver."
    • Reinstall Drivers: If updating doesn’t work, uninstall the current driver and reinstall the latest version from the manufacturer’s website.
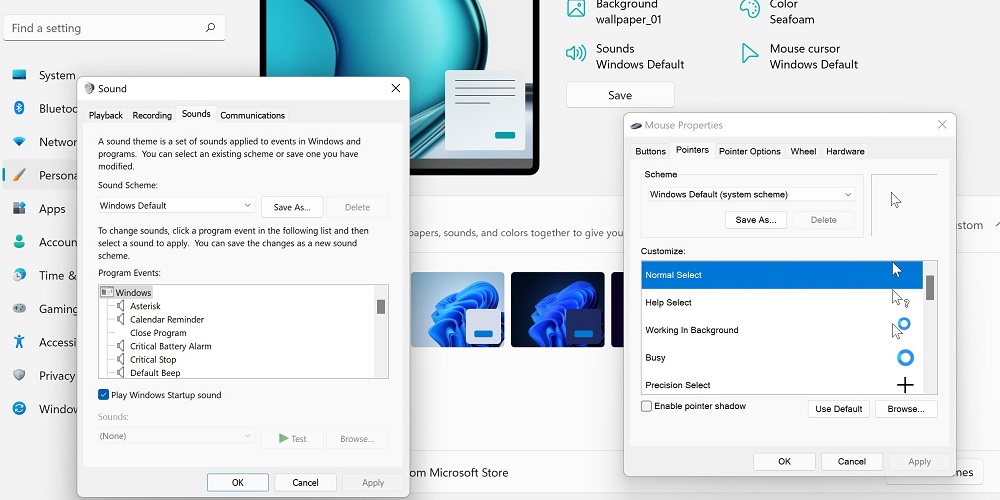
  • Audio Settings: Incorrect or conflicting audio settings can also cause problems. To check and adjust:
    • Sound Control Panel: Open the Control Panel, select "Sound," and ensure the correct output device is selected and enabled.
    • Application Settings: Some applications have specific audio settings that may need adjustment. Check the application’s settings menu for audio options.
  • System-Wide Mute: A simple but often overlooked issue is a system-wide mute setting. Check the volume icon in the taskbar and ensure the volume is not muted.

2. Hardware Issues

  • Faulty Speakers or Headphones: Check if the speakers or headphones are properly connected and functioning. Try connecting them to another device to confirm their functionality.
  • Loose Connections: Ensure all connections, including the audio cable and the speaker/headphone jack, are secure.
  • Damaged Audio Jack: If the audio jack is damaged, it may need to be replaced.
  • Internal Sound Card Failure: In rare cases, the internal sound card might be faulty. If other troubleshooting steps fail, consider replacing the sound card.

3. System-Level Issues

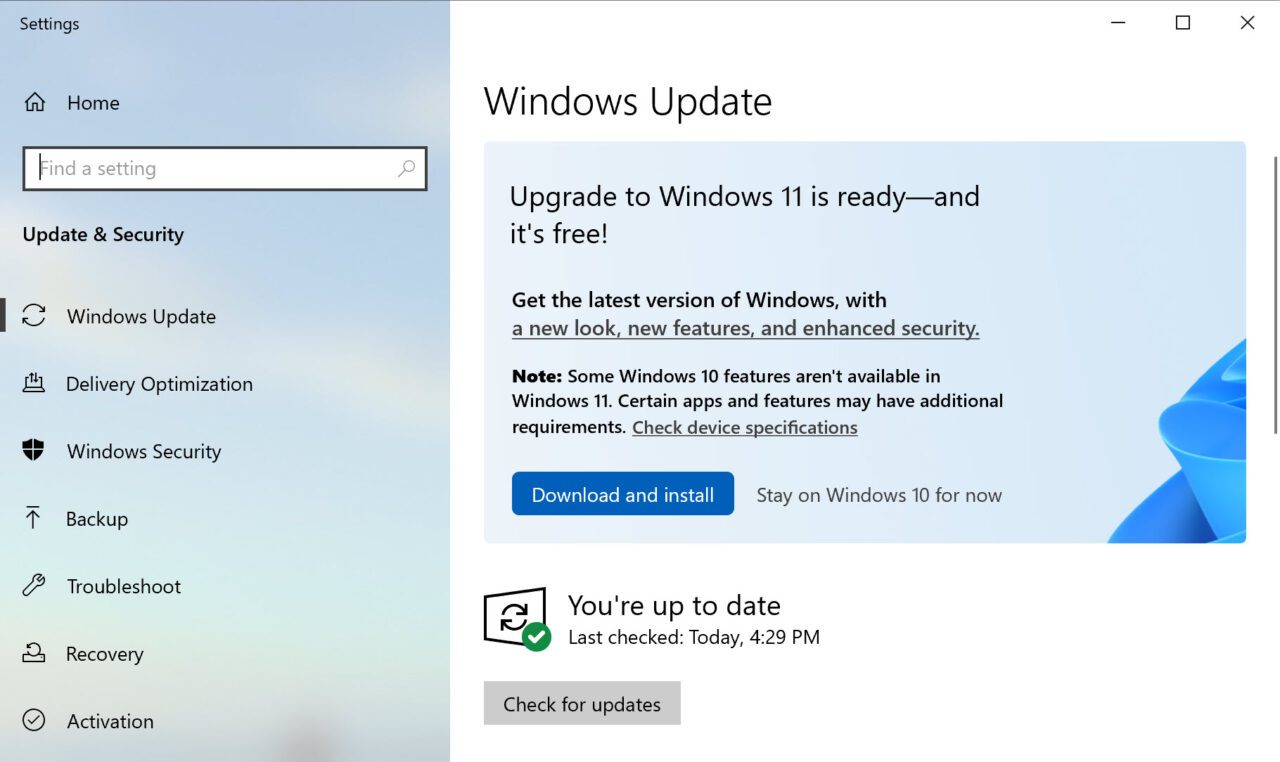
  • Windows Updates: Recent Windows updates can sometimes cause audio problems. Check for available updates and install them. If the issue started after a recent update, consider rolling back to a previous version.
  • Virus or Malware: Malware infections can interfere with audio functionality. Run a full system scan with a reputable antivirus program.
  • System File Corruption: Corrupted system files can also affect audio. Run a System File Checker scan (SFC scan) to repair corrupted files.

4. Specific Scenarios

  • No Sound After Connecting Headphones: If you connect headphones and no sound comes through, check the audio settings to ensure the correct output device is selected.
  • Sound Only Through One Speaker: This may indicate a problem with the speaker configuration or a faulty speaker. Check the speaker settings and ensure all speakers are connected and enabled.
  • Sound Cutting Out Intermittently: This could be due to a driver issue, a faulty connection, or even background processes consuming system resources. Check the device manager, connections, and running applications.

FAQs

Q: What if I have tried all the troubleshooting steps, and there is still no sound?

A: If all other solutions have failed, it may be necessary to seek professional assistance. A technician can diagnose the problem more thoroughly and potentially repair or replace faulty components.

Q: How can I prevent audio issues in the future?

A: Regularly updating audio drivers, maintaining a clean system, and avoiding installing untrusted software can help prevent future audio problems.

Q: What are some general tips for maintaining audio functionality?

A: Regularly check for driver updates, avoid overloading the system with unnecessary programs, and ensure all connections are secure.

Tips

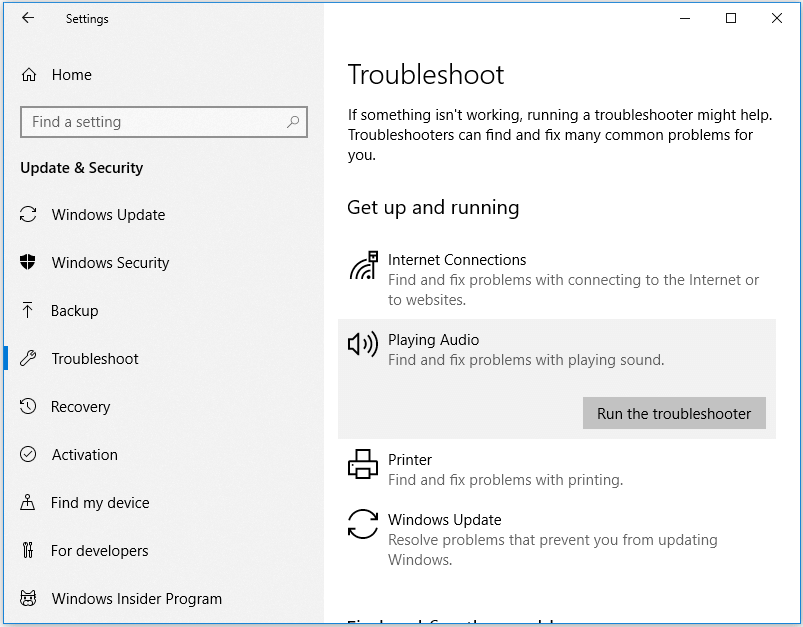
  • Use a Diagnostic Tool: Windows includes a built-in audio troubleshooter. To access it, search for "Troubleshoot sound problems" in the Start menu.
  • Check for System Errors: Look for any error messages related to audio in the Event Viewer (search for "Event Viewer" in the Start menu).
  • Disable Audio Enhancements: Some audio enhancements can cause problems. Disable them in the Sound Control Panel.
  • Update BIOS: An outdated BIOS can sometimes cause audio issues. Check your motherboard manufacturer’s website for the latest BIOS update.

Conclusion

Audio issues in Windows 10 can be frustrating, but with a systematic approach to troubleshooting, most problems can be resolved. By understanding the nature of the issue, checking driver settings, verifying connections, and performing system-level checks, users can often restore audio functionality to their PC. In cases where troubleshooting fails, professional assistance may be required. However, with the knowledge and tools provided in this guide, users can confidently tackle audio issues and enjoy a fully functional sound experience on their Windows 10 PC.

How to Fix Sound or Audio Problems on Windows 10  Audio Problems Solved - YouTube How To Fix Sound Problem Windows 10 - YouTube How to quickly fix sound problems on Windows 10 - Pureinfotech
How to Fix sound or Audio problems on windows 10  - YouTube How To Fix Windows 10 Sound Problem - Windows 10 Audio Problems Fix - YouTube 5 Tips to Fix Sound Problems in Windows 10 - MiniTool
How to quickly fix sound problems on Windows 10 - Pureinfotech How to quickly fix sound problems on Windows 10 โ€ข Pureinfotech

Closure

Thus, we hope this article has provided valuable insights into The Silent PC: Troubleshooting Audio Issues in Windows 10. We hope you find this article informative and beneficial. See you in our next article!

Navigating The Landscape Of Windows 11: Common Challenges And Solutions

Navigating the Landscape of Windows 11: Common Challenges and Solutions

Introduction

In this auspicious occasion, we are delighted to delve into the intriguing topic related to Navigating the Landscape of Windows 11: Common Challenges and Solutions. Let’s weave interesting information and offer fresh perspectives to the readers.

How to Fix 3 Most Common Issues on Windows 11  Slashdigit

Windows 11, Microsoft’s latest operating system, has garnered significant attention since its release. While it boasts numerous improvements and modern features, it has also encountered a fair share of challenges, ranging from compatibility issues to performance hiccups. This article delves into the prevalent problems encountered by users and offers practical solutions to mitigate them.

1. Hardware Compatibility Issues:

One of the most prominent hurdles for Windows 11 users is the stringent hardware requirements. Microsoft implemented a strict set of minimum specifications, leaving some users with older systems unable to upgrade. This incompatibility can manifest in various ways, including:

  • TPM 2.0 Requirement: The Trusted Platform Module (TPM) 2.0 is a security chip that plays a crucial role in protecting sensitive data. Older systems might lack this chip, preventing them from running Windows 11.
  • Processor Compatibility: Windows 11 requires a compatible processor from Intel, AMD, or Qualcomm, with specific generations and models meeting the criteria. Older processors might not meet these requirements.
  • RAM and Storage: Windows 11 demands a minimum of 4GB RAM and 64GB storage space. Systems with less RAM or storage capacity might struggle to run the operating system efficiently.

Solutions:

  • Check System Compatibility: Before attempting to upgrade, use the Windows 11 PC Health Check app to determine if your system meets the minimum requirements.
  • Upgrade to Compatible Hardware: If your system fails the compatibility check, consider upgrading to a newer computer that meets the specifications.
  • Utilize a Virtual Machine: For testing purposes or running older software, consider using a virtual machine with a supported operating system.
  • Explore Alternatives: If upgrading hardware is not feasible, consider alternatives like Linux distributions, which are generally less demanding on system resources.

2. Performance Degradation:

While Windows 11 boasts improved performance in certain areas, some users have reported encountering performance degradation compared to previous versions. This can manifest as:

  • Slow Boot Times: The initial startup process might take longer than expected, especially on older systems.
  • Laggy Applications: Certain applications might run slower or experience lag, impacting user experience.
  • High CPU Usage: Windows 11 might consume more CPU resources than previous versions, leading to system slowdown.

Solutions:

  • Optimize Startup Applications: Disable unnecessary applications from launching at startup to reduce system load.
  • Disable Visual Effects: Turn off visual effects like animations and transparency to improve performance, especially on systems with limited resources.
  • Update Drivers: Ensure all drivers, particularly graphics and network drivers, are up-to-date to optimize performance.
  • Run Disk Cleanup: Regularly clean up temporary files and unnecessary data to free up disk space and improve performance.
  • Check for System Updates: Microsoft regularly releases updates that address performance issues. Ensure your system is running the latest version.

3. Compatibility Issues with Applications and Drivers:

Windows 11’s new architecture and features can lead to compatibility issues with certain applications and drivers. This can result in:

  • Application Errors: Some applications might not function correctly or might crash altogether.
  • Driver Conflicts: Older drivers might not be compatible with Windows 11, leading to system instability or device malfunction.

Solutions:

  • Check for Application Updates: Developers often release updates to address compatibility issues. Ensure you’re using the latest version of the application.
  • Seek Driver Updates: Visit the manufacturer’s website to download the latest drivers compatible with Windows 11.
  • Use Compatibility Mode: For older applications, try running them in compatibility mode to ensure compatibility with Windows 11.
  • Consider Alternatives: If an application is incompatible and no solution is available, consider finding an alternative application with similar functionality.

4. Privacy Concerns:

Windows 11 has been criticized for its increased data collection practices. Some users have expressed concerns about the operating system’s ability to track their activity and share their data with Microsoft.

Solutions:

  • Review Privacy Settings: Carefully review and adjust privacy settings within Windows 11 to control what data is collected and shared.
  • Disable Unnecessary Features: Consider disabling features that collect unnecessary data, such as location tracking or voice recognition.
  • Use a VPN: A Virtual Private Network (VPN) can encrypt your internet traffic and protect your data from unauthorized access.
  • Consider Third-Party Anti-Spyware Software: Utilize third-party anti-spyware software to monitor and block potential data collection attempts.

5. User Interface Changes:

Windows 11 introduces a significant overhaul of the user interface, with a new Start Menu, Taskbar, and overall design. While some users appreciate the visual changes, others find them jarring and less intuitive.

Solutions:

  • Utilize Customizations: Windows 11 offers customization options to personalize the user interface, such as changing themes, colors, and Start Menu layout.
  • Explore Third-Party Apps: Consider using third-party apps to enhance the user interface, such as Start Menu replacements or taskbar customizations.
  • Get Familiar with the New Features: Take time to familiarize yourself with the new features and interface changes to adapt to the updated design.

6. Security Vulnerabilities:

Like any software, Windows 11 is susceptible to security vulnerabilities. These vulnerabilities can be exploited by malicious actors to gain unauthorized access to your system.

Solutions:

  • Keep System Updated: Microsoft regularly releases security updates to address vulnerabilities. Ensure your system is running the latest version.
  • Use Strong Passwords: Set strong and unique passwords for your accounts to prevent unauthorized access.
  • Enable Two-Factor Authentication: Implement two-factor authentication for your accounts to add an extra layer of security.
  • Install Anti-Virus Software: Utilize reputable antivirus software to protect your system from malware and other threats.
  • Be Cautious of Suspicious Links and Attachments: Avoid clicking on suspicious links or opening attachments from unknown sources, as they could contain malware.

FAQs about Windows 11:

Q: Is Windows 11 free to upgrade?

A: For users with compatible systems, upgrading to Windows 11 is free. However, it is important to note that this is a one-time upgrade offer.

Q: Can I downgrade from Windows 11 to Windows 10?

A: While downgrading from Windows 11 to Windows 10 is possible within a limited time frame after upgrading, it is not a simple process and might require reinstalling Windows 10 from scratch.

Q: What are the minimum system requirements for Windows 11?

A: The minimum system requirements for Windows 11 include:

  • Processor: 1 gigahertz (GHz) or faster with 2 or more cores on a compatible 64-bit processor or System on a Chip (SoC).
  • RAM: 4 GB of RAM.
  • Storage: 64 GB or larger storage device.
  • System Firmware: UEFI, Secure Boot capable.
  • TPM: Trusted Platform Module (TPM) version 2.0.
  • Graphics Card: Compatible with DirectX 12 or later with WDDM 2.x driver.
  • Display: HD display (720p) or higher, 9 inches or greater in diagonal size.
  • Internet Connection: Internet connection required for some features.

Q: How do I check if my computer is compatible with Windows 11?

A: Microsoft provides a PC Health Check app that you can download and run to determine if your system meets the minimum requirements for Windows 11.

Q: Can I install Windows 11 on a virtual machine?

A: Yes, you can install Windows 11 on a virtual machine, provided the virtual machine meets the minimum system requirements. This can be a useful way to test Windows 11 without affecting your primary operating system.

Q: What are some of the new features in Windows 11?

A: Windows 11 introduces numerous new features, including:

  • A redesigned Start menu with a focus on pinned apps and recent files.
  • A centered taskbar with a new design and functionality.
  • A new Widgets panel that provides quick access to information and news.
  • Improved multitasking features with Snap Layouts and virtual desktops.
  • A redesigned Microsoft Store with a focus on Android apps.
  • Enhanced security features with TPM 2.0 and Windows Hello.

Tips for Windows 11 Users:

  • Keep your system updated: Microsoft regularly releases updates to address bugs, security vulnerabilities, and improve performance. Ensure your system is running the latest version.
  • Optimize startup applications: Disable unnecessary applications from launching at startup to reduce system load.
  • Clean up your disk: Regularly delete temporary files and unnecessary data to free up disk space and improve performance.
  • Review privacy settings: Carefully review and adjust privacy settings to control what data is collected and shared.
  • Use a strong password: Set a strong and unique password for your accounts to prevent unauthorized access.
  • Install antivirus software: Utilize reputable antivirus software to protect your system from malware and other threats.
  • Be cautious of suspicious links and attachments: Avoid clicking on suspicious links or opening attachments from unknown sources.

Conclusion:

Windows 11 offers a compelling upgrade for users with compatible systems, bringing a host of new features and improvements. However, it is essential to be aware of the potential challenges that users might encounter, such as hardware compatibility issues, performance degradation, and compatibility problems with applications and drivers. By understanding these challenges and implementing the solutions outlined in this article, users can navigate the Windows 11 landscape effectively and enjoy the benefits of the latest operating system.

11 Common Windows 11 Problems With Easy Solutions 11 Common Windows 11 Problems With Easy Solutions - vrogue.co Windows 11 23H2: Three Common Issues and Solutions - BDRSuite
5 Biggest Windows 11 Common Issues and Fixes 11 Common Windows 11 Problems With Easy Solutions - vrogue.co Most common Windows 11 problems and how to fix them  EPX
List of All Windows 11 Editions: Mixed Reality Enters the Stage PPT - Troubleshooting Windows 11 Common Issues_ Fix annoying bugs and crashes with our step-by

Closure

Thus, we hope this article has provided valuable insights into Navigating the Landscape of Windows 11: Common Challenges and Solutions. We thank you for taking the time to read this article. See you in our next article!

Navigating OneDrive Settings In Windows 10: A Comprehensive Guide To Customization And Control

Navigating OneDrive Settings in Windows 10: A Comprehensive Guide to Customization and Control

Introduction

With great pleasure, we will explore the intriguing topic related to Navigating OneDrive Settings in Windows 10: A Comprehensive Guide to Customization and Control. Let’s weave interesting information and offer fresh perspectives to the readers.

How to Use OneDrive in Windows 10

OneDrive, Microsoft’s cloud storage service, is deeply integrated into Windows 10. While its presence offers seamless file syncing and access across devices, users may find it beneficial to fine-tune its settings to align with their specific needs and preferences. This article provides a detailed exploration of OneDrive settings within Windows 10, outlining how to adjust its behavior for optimal functionality and data management.

Understanding OneDrive’s Role in Windows 10

OneDrive acts as a bridge between your local computer and the cloud, offering a convenient way to store, access, and share files across multiple devices. It seamlessly integrates with various Windows 10 features, such as:

  • File Explorer: OneDrive files appear alongside your local folders, providing easy access to both.
  • Automatic File Syncing: Changes made to files stored in OneDrive folders are automatically synced across all your linked devices.
  • Version History: OneDrive keeps track of previous versions of your files, enabling you to revert to earlier states if needed.
  • Sharing and Collaboration: Sharing OneDrive files with others is simple, facilitating collaborative work and project management.

Accessing OneDrive Settings

To adjust OneDrive settings, follow these steps:

  1. Click the OneDrive cloud icon in the system tray (bottom right corner of the taskbar).
  2. Select "More" from the menu that appears.
  3. Choose "Settings" from the subsequent menu.

The OneDrive settings window will then open, presenting various options to customize the service’s behavior.

Key OneDrive Settings and Their Implications

The OneDrive settings window is divided into several tabs, each dedicated to a specific aspect of the service.

1. Account

  • Manage Storage: This tab displays your current storage usage and allows you to purchase additional storage space if needed.
  • Sign Out: This option lets you disconnect your OneDrive account from your Windows 10 device.

2. Backup

  • Backup your PC: This feature allows you to automatically back up your desktop, documents, and pictures folders to OneDrive. This is particularly useful for safeguarding critical data in case of hardware failure or accidental data loss.
  • Choose folders to back up: You can select specific folders to include in the backup process, giving you granular control over which data is synced to the cloud.
  • Pause backup: This option temporarily suspends the backup process, allowing you to manage your storage space or prioritize other tasks.

3. Settings

  • Files On-Demand: This feature allows you to access all your OneDrive files without needing to download them to your device. This saves storage space, particularly on devices with limited storage capacity.
  • Placeholders: With Files On-Demand, placeholders are created for files not currently downloaded. These appear as icons with a cloud overlay, indicating that the file is available online but not locally. Clicking on a placeholder file triggers its download.
  • Always keep these files on this device: This option ensures that specific files are always downloaded and available locally, even when Files On-Demand is enabled.
  • Show OneDrive in File Explorer: This option controls whether OneDrive folders are displayed within File Explorer, allowing you to access your cloud storage seamlessly alongside your local files.
  • Start OneDrive automatically when I sign in to Windows: This setting ensures that OneDrive launches automatically upon logging into Windows 10, ensuring continuous syncing and access to your files.

4. Network

  • Limit bandwidth: This option allows you to control how much bandwidth OneDrive uses for syncing and downloading files. This is particularly useful for users with limited internet bandwidth or who want to prioritize other online activities.
  • Metered connections: This setting allows you to restrict OneDrive’s activity on metered connections (e.g., mobile hotspots) to conserve data usage.

5. General

  • Show OneDrive icon in the notification area: This option controls whether the OneDrive cloud icon is displayed in the system tray, providing quick access to the service.
  • Show notifications: This setting allows you to receive notifications about OneDrive activities, such as completed uploads, sync errors, and file sharing updates.
  • Open the OneDrive website: This option opens the OneDrive web interface in your default browser, providing access to your files and settings online.

Turning Off OneDrive’s Automatic Syncing

While OneDrive offers numerous benefits, there may be situations where disabling its automatic syncing is desirable. This might be due to:

  • Limited Storage Space: Disabling OneDrive syncing can help free up local storage space, particularly on devices with limited capacity.
  • Privacy Concerns: Some users may prefer to keep their files exclusively on their local device, minimizing the amount of data stored in the cloud.
  • Performance Issues: In certain scenarios, OneDrive syncing might contribute to performance issues, especially on older or resource-constrained devices.

To disable OneDrive’s automatic syncing, follow these steps:

  1. Open the OneDrive settings window as described earlier.
  2. Select the "Account" tab.
  3. Click "Unlink this PC".
  4. Confirm your decision when prompted.

This will disconnect OneDrive from your Windows 10 device, stopping automatic file syncing and removing OneDrive folders from File Explorer.

Important Considerations When Disabling OneDrive

  • Data Loss: Disabling OneDrive syncing will remove local copies of files stored in OneDrive folders. It’s crucial to back up any essential data before proceeding.
  • File Availability: Files stored solely on OneDrive will no longer be accessible offline unless downloaded manually.
  • Collaborative Work: Disabling OneDrive syncing will disrupt collaborative work involving files stored in OneDrive folders.

FAQs

Q: Can I selectively disable syncing for specific folders?

A: While you cannot disable syncing for individual folders, you can choose specific folders to back up using the "Backup" tab in OneDrive settings.

Q: What happens to my files if I disable OneDrive?

A: Your files remain stored on OneDrive servers. However, they will no longer be synced to your local device, and you will only be able to access them online.

Q: Can I re-enable OneDrive syncing after disabling it?

A: Yes, you can re-enable OneDrive syncing by signing back into your account through the OneDrive settings window. Your files will then be synced back to your device.

Q: How can I free up storage space if OneDrive is taking up too much space?

A: You can manage your storage space by deleting unwanted files, using Files On-Demand to access files online without downloading them, or purchasing additional storage space.

Tips

  • Utilize Files On-Demand: Enable Files On-Demand to conserve local storage space while maintaining access to all your OneDrive files.
  • Optimize Bandwidth Usage: Adjust OneDrive’s bandwidth settings to prioritize other online activities or conserve data on metered connections.
  • Manage Notifications: Customize notification settings to receive updates only for specific events or to disable them entirely.
  • Regularly Review Storage Usage: Monitor your storage usage to avoid exceeding your storage limit and ensure smooth file syncing.

Conclusion

OneDrive provides a convenient and powerful way to manage files and access them across multiple devices. However, its integration with Windows 10 requires careful consideration and adjustment to suit individual needs and preferences. By understanding the various settings and options available within OneDrive, users can optimize its functionality, control data storage, and ensure a seamless and efficient file management experience.

Re-enable OneDrive in Windows 10 [Complete Guide 2024] How to Change OneDrive Sync Settings on Windows 10 How to Setup OneDrive on Windows 10
Access OneDrive Files in Windows 10  CustomGuide Setup OneDrive On Windows 10 [Tutorial] - YouTube How to Configure and Set-Up OneDrive in Windows 10 - YouTube
How To Get Help In Windows 10 One Drive Setup โ€“ Lates Windows 10 Update How to set up OneDrive on Windows 10 - OnMSFT.com

Closure

Thus, we hope this article has provided valuable insights into Navigating OneDrive Settings in Windows 10: A Comprehensive Guide to Customization and Control. We thank you for taking the time to read this article. See you in our next article!

Safeguarding Your Digital Fortress: A Comprehensive Guide To Ransomware Protection Software For Windows 10

Safeguarding Your Digital Fortress: A Comprehensive Guide to Ransomware Protection Software for Windows 10

Introduction

With great pleasure, we will explore the intriguing topic related to Safeguarding Your Digital Fortress: A Comprehensive Guide to Ransomware Protection Software for Windows 10. Let’s weave interesting information and offer fresh perspectives to the readers.

Safeguarding Your Digital Fortress: A Comprehensive Guide to Ransomware Protection Software for Windows 10

Ransomware: How to Protection from Ransomware In Windows 10  Windows 10  [January 2020] - YouTube

In the digital landscape, where information is currency and vulnerabilities abound, ransomware attacks pose a significant threat. These malicious programs can encrypt critical data, rendering it inaccessible until a ransom is paid. For Windows 10 users, this threat is particularly relevant, as the operating system’s widespread use makes it a prime target. Fortunately, a robust arsenal of ransomware protection software exists, providing a shield against these cyberattacks.

Understanding the Threat: The Nature of Ransomware

Ransomware operates by infiltrating a system, typically through phishing emails, malicious downloads, or vulnerabilities in software. Once inside, it encrypts files, rendering them unusable. The attacker then demands payment, often in cryptocurrency, to provide the decryption key. This process can paralyze businesses, disrupt personal lives, and cause significant financial damage.

The Importance of Proactive Defense: Why Ransomware Protection Software is Crucial

While traditional antivirus software can detect and remove some ransomware variants, a dedicated ransomware protection solution offers a multi-layered approach to defense. This comprehensive approach can significantly reduce the risk of a successful attack and mitigate the consequences if an attack does occur.

Key Features of Effective Ransomware Protection Software

  • Real-time File Monitoring: This feature constantly scans files for suspicious activity, identifying and stopping ransomware attempts before they encrypt data.
  • Behavior Analysis: By analyzing file behavior, the software can detect anomalies that indicate potential ransomware activity, even if the malware is unknown.
  • Rollback Technology: In the event of an attack, this feature allows users to restore files to a previous state, effectively reversing the encryption process.
  • Data Backup and Recovery: Regularly backing up data is crucial. This allows users to restore files from a clean backup if ransomware encrypts their primary data.
  • Network Protection: This feature monitors network traffic for suspicious activity, blocking potential ransomware attacks at the network level.
  • Security Awareness Training: Educating users about the risks of ransomware and best practices for avoiding attacks can significantly reduce vulnerability.

Navigating the Landscape: A Guide to Choosing the Right Software

Choosing the right ransomware protection software depends on individual needs and risk profiles. Factors to consider include:

  • Ease of Use: The software should be user-friendly, with clear instructions and intuitive interface.
  • Comprehensive Protection: It should offer a combination of features, including real-time monitoring, behavior analysis, rollback technology, and data backup.
  • Compatibility: The software should be compatible with Windows 10 and other essential applications.
  • Performance: The software should not significantly impact system performance.
  • Cost: The price should be reasonable and commensurate with the level of protection offered.
  • Customer Support: Reliable customer support is crucial for troubleshooting issues and receiving assistance.

Frequently Asked Questions about Ransomware Protection Software

Q1: What are the most common types of ransomware attacks?

A1: Common types include:

  • Crypto-ransomware: This type encrypts files, demanding payment for decryption.
  • Locker ransomware: It locks the user out of their device, demanding payment for access.
  • Scareware: This type uses deceptive tactics to trick users into paying for fake security solutions.

Q2: How can I protect myself from ransomware attacks?

A2: In addition to using ransomware protection software, follow these best practices:

  • Keep your operating system and software updated: Updates often include security patches that address vulnerabilities.
  • Be cautious of suspicious emails and attachments: Do not open attachments from unknown senders.
  • Use strong passwords and enable two-factor authentication: This makes it harder for attackers to gain access to your accounts.
  • Back up your data regularly: Store backups on external drives or cloud storage services.

Q3: What should I do if my computer is infected with ransomware?

A3:

  • Disconnect from the internet: This prevents the ransomware from spreading.
  • Do not pay the ransom: Paying the ransom does not guarantee decryption and may encourage further attacks.
  • Contact your IT administrator or security specialist: They can assist in recovering data and removing the ransomware.
  • Report the attack to the authorities: This helps law enforcement agencies track down the attackers.

Tips for Enhancing Ransomware Protection

  • Implement a strong password policy: Use complex passwords and avoid reusing them across different accounts.
  • Train employees on security best practices: This includes identifying phishing emails, avoiding suspicious downloads, and reporting any suspicious activity.
  • Regularly review security logs: This can help identify suspicious activity and potential vulnerabilities.
  • Use a firewall: This helps protect your computer from unauthorized access.

Conclusion

Ransomware protection software is an essential tool for safeguarding digital assets on Windows 10. By implementing a comprehensive approach that includes real-time monitoring, behavior analysis, rollback technology, and data backup, users can significantly reduce the risk of a successful attack. Combining this technology with best practices for cybersecurity can further strengthen defenses, ensuring a safer and more secure digital experience.

Windows 10 Your Guide To Ransomware - vrogue.co Top 10 Tips to Prevent Ransomware: Safeguarding Your Digital Fortress - TechBullion Ransomware Threats and Mitigation: Safeguarding Your Digital Fortress
Safeguarding Your Digital Fortress: A Comprehensive Guide on Internet Security How to Enable Ransomware Protection in Windows 10 - Tech Advisor Complete Guide To Ransomware Protection In Microsoft
How To Enable Ransomware Protection In Windows 10 Complete Guide To Ransomware Protection On Windows 10 - vrogue.co

Closure

Thus, we hope this article has provided valuable insights into Safeguarding Your Digital Fortress: A Comprehensive Guide to Ransomware Protection Software for Windows 10. We thank you for taking the time to read this article. See you in our next article!

Navigating The Landscape Of Windows 13: A Comprehensive Guide To Programs And Features Settings

Navigating the Landscape of Windows 13: A Comprehensive Guide to Programs and Features Settings

Introduction

In this auspicious occasion, we are delighted to delve into the intriguing topic related to Navigating the Landscape of Windows 13: A Comprehensive Guide to Programs and Features Settings. Let’s weave interesting information and offer fresh perspectives to the readers.

Windows 13 Concept - YouTube

While the release of Windows 13 remains speculative, the hypothetical "Programs and Features" settings within it would likely mirror the functionality found in previous Windows iterations, albeit with potential refinements and additions. This comprehensive guide delves into the essential aspects of this crucial control panel, exploring its structure, features, and the critical role it plays in managing your Windows experience.

Understanding the Foundation: The Importance of Programs and Features Settings

Within the Windows operating system, the "Programs and Features" settings act as a central hub for managing applications installed on your computer. This section grants users a comprehensive view of their software landscape, enabling them to:

  • Install and Uninstall Applications: The primary function of this setting is to facilitate the installation and removal of programs. Users can add new software to their system or remove existing programs that are no longer needed, freeing up disk space and streamlining system performance.
  • Repair Corrupted Programs: In cases where a program malfunctions due to corrupted files, the "Programs and Features" settings offer a repair option. This allows users to attempt to fix the program without needing to uninstall and reinstall it entirely.
  • Control Program Updates: Windows 13 might offer more granular control over program updates through this setting. Users could potentially choose to defer updates, schedule updates at specific times, or opt out of updates for specific applications.
  • Manage Default Programs: This setting allows users to determine which programs open specific file types. For example, users can choose their preferred web browser, email client, or media player for specific file formats.
  • View Installed Program Details: The "Programs and Features" settings provide detailed information about each installed application, including the installation date, version number, and publisher. This data can be helpful for troubleshooting, identifying potential conflicts, or understanding the software’s history on the system.

Exploring the Landscape: A Detailed Look at the Settings

The "Programs and Features" settings in Windows 13 are likely to be organized in a user-friendly manner, making it easy to navigate and manage installed software. Here’s a breakdown of the potential sections and their functionalities:

1. Installed Programs:

  • List of Installed Programs: This section provides a comprehensive list of all installed applications on the computer. The list might be sortable by name, installation date, size, or other relevant criteria.
  • Program Details: Selecting a specific program from the list reveals detailed information about it, such as the version number, publisher, installation date, and file size.
  • Uninstall, Repair, or Change: The "Programs and Features" settings offer buttons for uninstalling, repairing, or changing the program’s configuration.

2. Windows Features:

  • Optional Features: This section allows users to add or remove optional Windows features, such as .NET Framework, Windows Media Player, or Windows Fax and Scan. These features might be required for specific programs or functionalities.
  • Turn Windows Features On or Off: Users can toggle the availability of various Windows features through this section. For example, they can enable or disable features like Hyper-V, Windows Subsystem for Linux, or Windows Sandbox.
  • Feature Details: Similar to the "Installed Programs" section, users can view detailed information about each optional Windows feature.

3. Default Programs:

  • Set Default Programs by File Type: This section allows users to choose their preferred programs for specific file types. For example, users can select their preferred web browser to open web pages, their preferred email client to open email attachments, or their preferred media player to play audio or video files.
  • Set Default Programs by Protocol: Users can also specify default programs for specific protocols, such as HTTP or FTP. This ensures that the desired program is used when opening links or connecting to servers using these protocols.
  • Manage Default Apps: This section provides a central location for managing default apps across the system, offering an overview of the programs associated with specific actions, such as web browsing, email, and media playback.

4. Updates:

  • Control Program Updates: This section might allow users to manage the update behavior of installed programs. Users could potentially choose to defer updates, schedule updates at specific times, or opt out of updates for specific applications.
  • Update History: This section might provide a history of program updates, including the date and version of the updates applied.
  • Update Settings: Users might have the ability to configure automatic update settings, such as the frequency of updates and the time of day when updates are performed.

5. Advanced Settings:

  • System Restore Points: This section might allow users to create and manage system restore points. These points serve as snapshots of the system’s configuration, enabling users to revert to a previous state if a problem arises.
  • Performance Options: Users might be able to adjust system performance settings, such as the amount of memory allocated to programs or the level of visual effects displayed on the screen.
  • Other System Settings: This section might provide access to additional advanced system settings, such as the ability to manage environmental variables, configure the system’s clock, or adjust power settings.

Beyond the Interface: The Benefits of Effective Management

The "Programs and Features" settings are not merely a collection of options; they are the foundation for a stable, efficient, and secure Windows experience. Effective management of this control panel offers numerous benefits:

  • Enhanced System Performance: Removing unnecessary programs and features can free up valuable disk space and system resources, leading to improved performance and faster boot times.
  • Reduced Security Risks: Outdated or vulnerable software can pose security risks. Regularly reviewing and updating installed programs helps to mitigate these risks by ensuring that all software is up-to-date with the latest security patches.
  • Improved User Experience: By choosing appropriate default programs and managing program updates effectively, users can tailor their Windows experience to their specific needs and preferences, leading to a more intuitive and enjoyable workflow.
  • Troubleshooting and Recovery: The "Programs and Features" settings provide valuable tools for troubleshooting problems related to installed programs. Users can repair corrupted programs, reset default programs, or uninstall problematic software to resolve issues and restore system stability.
  • Customization and Personalization: Through these settings, users can personalize their Windows environment by adding or removing features, changing default programs, and adjusting system settings to match their individual preferences.

Frequently Asked Questions (FAQs): Demystifying Common Concerns

Q: What are the consequences of uninstalling a program?

A: Uninstalling a program removes its files, settings, and registry entries from your system. This frees up disk space and removes the program from your list of installed applications. However, it is essential to ensure that the program is not critical to the functionality of other applications or Windows itself.

Q: Can I reinstall a program after uninstalling it?

A: Yes, you can generally reinstall a program after uninstalling it. The installation process will typically restore the program’s files, settings, and registry entries to their original state. However, if you have deleted the installation files, you may need to download them again from the program’s website.

Q: How do I repair a corrupted program?

A: The "Programs and Features" settings usually offer a repair option for corrupted programs. Selecting this option attempts to repair the program’s files without requiring a full uninstall and reinstall. If the repair fails, you may need to uninstall and reinstall the program.

Q: Can I change the default program for a specific file type?

A: Yes, you can change the default program for a specific file type using the "Default Programs" section of the "Programs and Features" settings. This allows you to choose your preferred program for opening specific types of files, such as web pages, email attachments, or media files.

Q: What are Windows features, and why should I manage them?

A: Windows features are optional components that can be added or removed from your system. These features might be required for specific programs or functionalities, but they can also consume valuable disk space and system resources. Managing Windows features allows you to optimize your system by installing only the features you need.

Q: How do I create a system restore point?

A: System restore points are snapshots of your system’s configuration, allowing you to revert to a previous state if a problem arises. The "Programs and Features" settings might offer an option to create and manage system restore points.

Tips for Effective Program and Feature Management:

  • Regularly Review Installed Programs: Periodically review your list of installed programs to identify any software that you no longer use. Uninstalling these programs can free up disk space and improve system performance.
  • Keep Software Updated: Ensure that all your programs are up-to-date with the latest security patches and bug fixes. This helps to mitigate security risks and improve program stability.
  • Use Default Programs Wisely: Carefully choose your default programs for specific file types and protocols. This ensures that the desired programs are used when opening files or accessing online resources.
  • Create System Restore Points Regularly: Before making significant changes to your system, such as installing a new program or updating drivers, create a system restore point. This allows you to revert to a previous state if something goes wrong.
  • Understand the Impact of Feature Management: Before adding or removing Windows features, ensure that you understand the potential impact on your system. Some features might be required for specific programs or functionalities.

Conclusion: A Foundation for a Seamless Windows Experience

The "Programs and Features" settings in Windows 13, while seemingly simple, are a powerful tool for managing your software landscape, customizing your system, and ensuring a smooth and secure Windows experience. By understanding the capabilities of this control panel and utilizing its features effectively, users can optimize their system performance, enhance their security posture, and personalize their Windows environment to meet their specific needs and preferences. Effective management of these settings is not just a technical necessity; it is a key ingredient for a seamless, efficient, and enjoyable Windows experience.

Windows 13 - YouTube Windows 13.1 - First-Look Concept - YouTube New Windows 13.1 Concept - YouTube
Ways to Open Windows Programs and Features Programs And Features Windows 13 concepts - YouTube
Windows programs and features command Windows 13 - YouTube

Closure

Thus, we hope this article has provided valuable insights into Navigating the Landscape of Windows 13: A Comprehensive Guide to Programs and Features Settings. We thank you for taking the time to read this article. See you in our next article!

Unveiling The Benefits Of Professional Window Tinting: A Comprehensive Guide To Finding The Best Deals

Unveiling the Benefits of Professional Window Tinting: A Comprehensive Guide to Finding the Best Deals

Introduction

With enthusiasm, let’s navigate through the intriguing topic related to Unveiling the Benefits of Professional Window Tinting: A Comprehensive Guide to Finding the Best Deals. Let’s weave interesting information and offer fresh perspectives to the readers.

Unveiling the Benefits of Professional Window Tinting: A Comprehensive Guide to Finding the Best Deals

The Benefits of Window Tinting for Your Home or Business A Comprehensive Guide.

Window tinting has become an increasingly popular automotive and home modification, offering a multitude of advantages ranging from enhanced privacy and aesthetics to improved energy efficiency and protection from harmful UV rays. While the benefits are undeniable, the cost of professional window tinting can sometimes be a deterrent. Fortunately, numerous opportunities exist to acquire attractive discounts and promotions, allowing individuals to enjoy the advantages of professionally installed window tint without breaking the bank.

Understanding the Value of Professional Window Tinting

Before delving into the intricacies of finding the best deals, it is essential to comprehend the inherent value proposition of professional window tinting. Unlike DIY solutions, professional installation guarantees a flawless finish, ensuring optimal performance and longevity.

Benefits of Professional Window Tinting:

  • Enhanced Privacy: Tinted windows provide a barrier against unwanted prying eyes, offering a sense of seclusion and security, especially in residential settings.
  • UV Protection: Window tint acts as a shield against harmful ultraviolet (UV) radiation, safeguarding occupants from sunburns, skin damage, and fading of interior furnishings.
  • Reduced Glare: By filtering out excessive sunlight, window tint significantly reduces glare, enhancing visibility and comfort, particularly while driving.
  • Improved Energy Efficiency: Tinted windows help regulate interior temperatures by blocking out solar heat gain, reducing reliance on air conditioning and lowering energy consumption.
  • Enhanced Aesthetics: Window tint can add a touch of sophistication and style to vehicles and homes, complementing their overall design and enhancing curb appeal.
  • Increased Security: Tinted windows act as a deterrent against potential break-ins, making it more difficult for intruders to gain access.
  • Protection from Fading: Window tint helps prevent fading of carpets, furniture, and other interior materials caused by prolonged exposure to sunlight.

Navigating the World of Window Tinting Coupons and Discounts

Now that the value of professional window tinting is established, let’s explore the strategies for finding the most attractive deals and promotions.

1. Online Resources:

  • Deal Aggregator Websites: Websites like Groupon, LivingSocial, and Yelp often feature deals and coupons for local window tinting services.
  • Manufacturer Websites: Certain window tinting film manufacturers offer promotional discounts and rebates for their products, which can be applied at participating installers.
  • Local Business Directories: Websites like Yellow Pages and Google Maps often list local window tinting businesses and may provide information about ongoing promotions.
  • Social Media Platforms: Businesses frequently advertise special offers and discounts on social media platforms like Facebook, Instagram, and Twitter.

2. Local Businesses:

  • Direct Contact: Contacting local window tinting businesses directly is a straightforward way to inquire about current promotions or negotiate discounts.
  • Loyalty Programs: Many businesses offer loyalty programs with rewards and discounts for repeat customers.
  • Referral Programs: Some window tinting businesses offer discounts or referral bonuses for recommending their services to friends and family.
  • Seasonal Promotions: Businesses often run seasonal promotions or discounts during specific periods, such as holidays or slow seasons.

3. Tips for Maximizing Savings:

  • Timing is Key: Searching for deals during off-peak seasons or weekdays can often lead to better discounts.
  • Package Deals: Consider inquiring about package deals that bundle multiple services, such as window tinting and other automotive upgrades, to potentially save money.
  • Negotiate: Don’t be afraid to negotiate with businesses, especially if you are considering a larger project or have multiple vehicles to be tinted.
  • Check for Financing Options: Some businesses offer financing options, allowing customers to spread the cost of window tinting over time.
  • Compare Quotes: Obtain quotes from multiple businesses before making a decision to ensure you are getting the best price and service.

FAQs: Addressing Common Concerns

Q: Are there any specific types of window tinting that are more likely to have discounts?

A: While discounts can be found across the board, some businesses may offer more attractive deals on specific types of window tint, such as basic tints or those with particular features. It is recommended to inquire about available promotions for specific tint types.

Q: How can I be sure that a coupon or discount is legitimate?

A: Verify the authenticity of any coupon or discount by checking the website or social media page of the business offering it. Additionally, confirm the terms and conditions of the offer, including any limitations or restrictions.

Q: What are the typical costs associated with professional window tinting?

A: The cost of professional window tinting varies depending on factors such as the size of the vehicle or home, the type of tint film used, and the complexity of the installation. It is advisable to obtain quotes from multiple businesses to compare pricing.

Q: What should I look for in a reputable window tinting business?

A: Choose a business with a proven track record, positive customer reviews, and a commitment to using high-quality materials and professional installation techniques.

Conclusion: Making Informed Decisions

Finding attractive deals and promotions for professional window tinting is achievable through diligent research and strategic planning. By leveraging online resources, local business connections, and savvy negotiation tactics, individuals can enjoy the numerous benefits of professionally installed window tint without compromising their budget. Remember to prioritize quality and customer service when selecting a window tinting business, ensuring a positive and rewarding experience.

Unveiling The 11 Amazing Window Tinting Benefits You Never Knew  Flawless Car Guide - Flawless The Benefits of Car Window Tinting Infographic This infographic shows some of the benefits of Window Tinting benefits, options you need to know - Hurricaneauto
Unveiling The 11 Amazing Window Tinting Benefits You Never Knew  Flawless Car Guide - Flawless Unveiling The 11 Amazing Window Tinting Benefits You Never Knew  Flawless Car Guide - Flawless Unveiling The 11 Amazing Window Tinting Benefits You Never Knew  Flawless Car Guide - Flawless
Benefits of Professional Window Tinting Professional Car Window Tinting - A Comprehensive Guide

Closure

Thus, we hope this article has provided valuable insights into Unveiling the Benefits of Professional Window Tinting: A Comprehensive Guide to Finding the Best Deals. We appreciate your attention to our article. See you in our next article!

Near Field Communication: A Technological Revolution In Our Pockets

Near Field Communication: A Technological Revolution in Our Pockets

Introduction

In this auspicious occasion, we are delighted to delve into the intriguing topic related to Near Field Communication: A Technological Revolution in Our Pockets. Let’s weave interesting information and offer fresh perspectives to the readers.

Near Field Communication: A Technological Revolution in Our Pockets

Near Field Communication (NFC)

Near field communication (NFC) technology has quietly become an integral part of our daily lives. This wireless communication protocol, operating over short distances, has revolutionized how we interact with devices and services, making it possible to transfer data, make payments, and access information seamlessly. Its widespread adoption across various industries, from mobile payments to transportation and healthcare, highlights its transformative potential. This article delves into the intricacies of NFC technology, exploring its applications, benefits, and future prospects.

Understanding the Fundamentals of NFC

NFC, at its core, is a short-range wireless communication technology that allows two devices to exchange data when they are within a few centimeters of each other. This communication occurs through electromagnetic fields, eliminating the need for line-of-sight visibility. NFC operates on the 13.56 MHz radio frequency band, enabling data transfer rates ranging from 106 kbit/s to 424 kbit/s.

NFC: A Closer Look at the Technology

The foundation of NFC lies in the principles of electromagnetic induction. When two NFC-enabled devices are brought close together, one device acts as a transmitter, generating a magnetic field. This field induces an electric current in the receiving device, enabling the transfer of data.

Two Modes of Operation

NFC operates in two distinct modes:

  • Passive Mode: In this mode, one device acts as a passive tag, drawing power from the electromagnetic field generated by the other device, which acts as an active reader. This mode is commonly used in applications like contactless payment cards and RFID tags.
  • Active Mode: Both devices actively transmit and receive data, allowing for peer-to-peer communication. This mode is employed in applications like NFC-enabled mobile payments and data sharing between devices.

The Benefits of NFC Technology

NFC’s versatility and convenience have made it a preferred choice for a wide range of applications. Its key benefits include:

  • Simplicity: NFC communication is inherently user-friendly, requiring minimal setup and interaction. Users can simply tap their NFC-enabled devices together to initiate data transfer or complete transactions.
  • Security: NFC transactions are typically secure, utilizing encryption protocols to protect sensitive data during transmission. This enhanced security is crucial for sensitive applications like mobile payments and data sharing.
  • Versatility: NFC technology is highly adaptable, supporting various applications across diverse industries. From contactless payments and data transfer to access control and mobile ticketing, NFC’s versatility makes it a valuable tool for businesses and consumers alike.
  • Energy Efficiency: NFC communication consumes minimal power, making it suitable for battery-powered devices. This energy efficiency is particularly advantageous for mobile devices and wearables.

Exploring the Applications of NFC

NFC technology has made its mark across various industries, revolutionizing how we interact with our surroundings and manage our daily activities. Here are some prominent examples:

1. Contactless Payments:

NFC has become synonymous with contactless payments. Smartphones, smartwatches, and even payment cards equipped with NFC chips allow users to make secure and convenient payments by simply tapping their devices at NFC-enabled terminals. This technology has transformed the retail landscape, providing a faster and more secure alternative to traditional payment methods.

2. Mobile Ticketing:

NFC technology has revolutionized the way we access and manage transportation tickets. Mobile ticketing applications utilize NFC to store and display tickets on smartphones, eliminating the need for physical tickets. Users can simply tap their phones at NFC readers to validate their tickets and gain access to public transportation.

3. Data Sharing and File Transfer:

NFC facilitates seamless data sharing between devices. Users can easily exchange contact information, photos, videos, and other files by simply tapping their NFC-enabled devices together. This feature eliminates the need for cumbersome Bluetooth pairing or data cables, streamlining the file transfer process.

4. Access Control and Security:

NFC technology plays a crucial role in enhancing security and access control systems. NFC-enabled keycards or mobile devices can be used to grant access to buildings, offices, and other restricted areas. This technology eliminates the need for traditional keys or physical access cards, providing a more secure and convenient way to manage access control.

5. Healthcare and Medical Applications:

NFC is increasingly being integrated into healthcare applications, enabling secure and efficient data exchange between patients and healthcare providers. For instance, NFC-enabled medical devices can transmit patient data, such as vital signs and medication records, to healthcare professionals, facilitating better patient care and remote monitoring.

6. NFC in the Automotive Industry:

NFC technology is being adopted in the automotive industry for various applications. Car keyless entry systems utilize NFC to unlock and start vehicles, while NFC-enabled infotainment systems allow drivers to connect their smartphones to their car’s entertainment systems.

7. NFC in the Retail Industry:

NFC technology is transforming the retail experience by enabling contactless payments, inventory management, and customer engagement. NFC-enabled point-of-sale terminals allow customers to make quick and secure payments, while NFC tags can be used to track inventory and provide customers with product information.

8. NFC in the IoT (Internet of Things):

NFC is a key enabling technology for the Internet of Things (IoT), facilitating communication and data exchange between various connected devices. For example, NFC tags can be used to identify and track objects in the supply chain, while NFC-enabled smart home devices can interact with each other seamlessly.

FAQs on NFC Technology

1. What are the security concerns associated with NFC technology?

While NFC transactions are generally secure, potential security risks include:

  • Data Breaches: If an NFC-enabled device is compromised, sensitive data stored on the device could be accessed by unauthorized individuals.
  • Man-in-the-Middle Attacks: Attackers can intercept communication between two NFC devices, potentially stealing data or altering transactions.

2. How can I protect myself from NFC security risks?

To mitigate security risks associated with NFC technology, consider these measures:

  • Use Strong Passwords: Set strong passwords for your NFC-enabled devices and payment accounts.
  • Enable Device Security Features: Utilize device security features such as PIN codes, biometrics, and screen locks to protect your device from unauthorized access.
  • Keep Software Updated: Ensure that your device’s operating system and NFC-related apps are updated to the latest versions, which typically include security patches.
  • Be Aware of Your Surroundings: Be mindful of your surroundings when using NFC-enabled devices, particularly in crowded or unfamiliar areas.

3. What are the limitations of NFC technology?

Despite its numerous benefits, NFC technology has certain limitations:

  • Short Range: NFC communication is restricted to short distances, typically a few centimeters.
  • Limited Data Transfer Speed: NFC data transfer speeds are relatively slow compared to other wireless technologies like Bluetooth or Wi-Fi.
  • Device Compatibility: Not all devices are equipped with NFC capabilities, limiting its applicability in certain scenarios.

4. How is NFC different from Bluetooth or Wi-Fi?

NFC, Bluetooth, and Wi-Fi are all wireless communication technologies, but they differ in their operating principles, range, and applications:

  • NFC: Short-range, operates on electromagnetic induction, primarily used for contactless payments, data sharing, and access control.
  • Bluetooth: Medium-range, uses radio waves, primarily used for wireless audio streaming, data transfer, and device connectivity.
  • Wi-Fi: Long-range, uses radio waves, primarily used for internet access, data transfer, and device connectivity.

5. What is the future of NFC technology?

NFC technology is expected to continue evolving and expanding its reach in various industries. Some key trends include:

  • Integration with Other Technologies: NFC is likely to be integrated with other technologies, such as Bluetooth and Wi-Fi, to enhance functionality and expand its applications.
  • Increased Security Measures: Advancements in encryption and security protocols will further enhance the security of NFC transactions.
  • New Applications: NFC technology is expected to find new applications in areas like smart cities, industrial automation, and wearable technology.

Tips for Using NFC Technology

  • Ensure Device Compatibility: Before using NFC, verify that both your device and the receiving device are NFC-enabled.
  • Enable NFC Functionality: Activate NFC functionality on your device by going to the settings menu and enabling NFC.
  • Keep Devices Close Together: For successful NFC communication, ensure that the two devices are within a few centimeters of each other.
  • Be Mindful of Security: Use strong passwords and enable device security features to protect your data.
  • Keep Software Updated: Regularly update your device’s operating system and NFC-related apps to ensure optimal performance and security.

Conclusion

Near field communication technology has emerged as a transformative force, revolutionizing the way we interact with devices, services, and our surroundings. Its versatility, convenience, and security have made it an integral part of our daily lives, enabling contactless payments, mobile ticketing, data sharing, and access control. As NFC technology continues to evolve and integrate with other technologies, its impact on various industries is expected to grow, shaping the future of communication and interaction. From simplifying everyday transactions to enhancing security and enabling new applications, NFC’s potential is vast and promising, making it a technology poised to play a significant role in the future.

What Is NFC? Explaining Near-Field Communication Technology What is NFC? - GeeksforGeeks Near Field Communication
Near Field Communication NFC, NFC Technology Explained near field communication What Is Near Field Communication Applications - CXJRFIDFactory
How it Works: NFC (near field communication) What Is NFC? Explaining Near-Field Communication Technology

Closure

Thus, we hope this article has provided valuable insights into Near Field Communication: A Technological Revolution in Our Pockets. We appreciate your attention to our article. See you in our next article!

Navigating The Installation Process: A Comprehensive Guide To Installing Windows 11

Navigating the Installation Process: A Comprehensive Guide to Installing Windows 11

Introduction

In this auspicious occasion, we are delighted to delve into the intriguing topic related to Navigating the Installation Process: A Comprehensive Guide to Installing Windows 11. Let’s weave interesting information and offer fresh perspectives to the readers.

Windows 11 installation process - Step by Step  How to install Windows 11  Windows 11

The release of Windows 11 marked a significant milestone in the evolution of Microsoft’s operating system. This latest version boasts a refined user interface, enhanced security features, and a focus on improved performance. However, the installation process, while not overly complex, requires a methodical approach and attention to detail. This comprehensive guide will provide a step-by-step walkthrough, addressing common challenges and offering valuable tips for a smooth installation experience.

Understanding the Prerequisites

Before embarking on the installation process, it is crucial to ensure your system meets the minimum requirements. Windows 11 demands a certain level of hardware capability to function optimally. These requirements include:

  • Processor: 1 gigahertz (GHz) or faster with 2 or more cores.
  • RAM: 4 gigabytes (GB) of RAM.
  • Storage: 64 GB or larger storage device.
  • System Firmware: UEFI, Secure Boot capable.
  • Graphics Card: Compatible with DirectX 12 or later, with WDDM 2.x driver.
  • Display: High Definition (720p) display that is at least 9 inches diagonally.
  • Internet connection: Required for some features and to complete the installation.

Methods of Installation

There are two primary methods for installing Windows 11:

  • Clean Installation: This method involves erasing the entire hard drive and installing Windows 11 from scratch. This approach is ideal for users seeking a fresh start, eliminating any existing software or system issues.
  • Upgrade Installation: This method allows you to upgrade your existing Windows 10 installation to Windows 11. This option preserves your personal files, applications, and settings, simplifying the transition.

Preparing for Installation

Irrespective of the chosen method, several steps must be taken to prepare for the installation:

  • Backup: Before proceeding with the installation, create a comprehensive backup of your data. This includes personal files, applications, and important system settings. Backups can be stored on external hard drives, cloud storage services, or other secure locations.
  • Check Compatibility: Verify that all your essential hardware components, including peripherals, are compatible with Windows 11. Consult the manufacturer’s website or the Windows Compatibility Checker tool for detailed information.
  • Disable Antivirus Software: Temporarily disable your antivirus software to avoid conflicts during the installation process. It is recommended to re-enable the software once the installation is complete.
  • Disconnect External Devices: Disconnect any unnecessary external devices, such as printers, scanners, and external hard drives, to minimize potential conflicts.

Installing Windows 11 via Clean Installation

  1. Create a Bootable USB Drive: Download the Windows 11 ISO file from Microsoft’s official website. Use a tool like Rufus or the Windows USB/DVD Download Tool to create a bootable USB drive containing the installation files.
  2. Boot from USB Drive: Restart your computer and access the BIOS settings. Configure the boot order to prioritize the USB drive.
  3. Install Windows 11: Follow the on-screen instructions to initiate the installation process. Select the desired language, time zone, and keyboard layout.
  4. Format the Hard Drive: Choose the option to format the entire hard drive to ensure a clean installation. This will erase all data, so ensure you have a backup.
  5. Install Windows 11: The installation process will commence, requiring several minutes to complete.
  6. Configure Settings: Once the installation is finished, you will be prompted to set up your user account, configure language settings, and connect to the internet.

Installing Windows 11 via Upgrade Installation

  1. Check for Updates: Ensure your Windows 10 system is up-to-date by checking for updates through the Windows Update settings.
  2. Download Windows 11: Access the Windows 11 installation assistant from Microsoft’s official website. The tool will automatically check your system’s compatibility and initiate the download process.
  3. Install Windows 11: Follow the on-screen instructions to complete the upgrade installation. The process will take some time depending on your system’s configuration and the size of your data.
  4. Restart: Once the upgrade is complete, your computer will restart, and you will be greeted with the Windows 11 desktop.

Troubleshooting Common Installation Issues

Despite following the instructions meticulously, installation issues can arise. Some common challenges and their potential solutions are listed below:

  • Compatibility Errors: If your system does not meet the minimum requirements, you may encounter compatibility errors. Ensure your hardware meets the specified criteria.
  • Installation Failure: If the installation process fails unexpectedly, try restarting the computer and retrying the installation. You can also consult Microsoft’s support website for detailed troubleshooting steps.
  • Driver Issues: After installing Windows 11, you may encounter driver issues with specific hardware components. Visit the manufacturer’s website to download and install the latest drivers.
  • Boot Errors: If your computer fails to boot after the installation, try booting into safe mode and running a system repair tool.

Frequently Asked Questions (FAQs)

Q: Can I install Windows 11 on a virtual machine?
A: Yes, you can install Windows 11 on a virtual machine, such as VMware or VirtualBox. However, ensure the virtual machine’s settings meet the minimum requirements.

Q: What happens to my data during an upgrade installation?
A: An upgrade installation preserves your personal files, applications, and settings. However, it is still recommended to have a backup in case of unforeseen issues.

Q: Can I downgrade from Windows 11 to Windows 10?
A: Yes, you can downgrade to Windows 10 within a certain timeframe after installing Windows 11. However, this may involve data loss and requires specific steps.

Q: Is Windows 11 free?
A: Windows 11 is free for eligible devices that are running Windows 10. However, new devices may require a purchase.

Tips for a Smooth Installation

  • Ensure sufficient disk space: Ensure you have enough free space on your hard drive to accommodate the Windows 11 installation files and any additional applications.
  • Disable unnecessary startup programs: Close any unnecessary programs and applications before initiating the installation to optimize system performance.
  • Use a wired internet connection: If possible, use a wired internet connection for a more stable and reliable connection during the installation process.
  • Consider a clean installation: For a fresh start and to avoid potential conflicts, a clean installation is often recommended.

Conclusion

Installing Windows 11, while a seemingly complex process, can be achieved successfully with careful planning and execution. This comprehensive guide provided a step-by-step walkthrough, addressing common challenges and offering valuable tips for a smooth installation experience. Remember to back up your data, check compatibility, and follow the instructions meticulously. By adhering to these steps, you can confidently install Windows 11 and enjoy its enhanced features and performance.

How to install Windows 11 on your PC Windows 11 Installation Guideline and First Look - YouTube Install Windows 11 Without Losing Apps
The Ultimate Guide to Installing Windows 11  Petri The Ultimate Guide to Installing Windows 11  Petri Windows 11 Complete Installation Step By Step Youtube - Vrogue
Windows 11 Installation How to Install Windows 11 Step by Step: Guide with Images

Closure

Thus, we hope this article has provided valuable insights into Navigating the Installation Process: A Comprehensive Guide to Installing Windows 11. We hope you find this article informative and beneficial. See you in our next article!

The Allure Of Lightweight Gaming: Exploring PC Games Under 200 MB

The Allure of Lightweight Gaming: Exploring PC Games Under 200 MB

Introduction

With enthusiasm, let’s navigate through the intriguing topic related to The Allure of Lightweight Gaming: Exploring PC Games Under 200 MB. Let’s weave interesting information and offer fresh perspectives to the readers.

The Allure of Lightweight Gaming: Exploring PC Games Under 200 MB

Top 14 best lightweight PC games for low-spec machines!  AppTuts

In the era of sprawling open-world games boasting multi-gigabyte file sizes, a different breed of gaming experience thrives in the realm of compact, downloadable titles. These "lightweight" games, often clocking in under 200 MB, offer a unique blend of accessibility, nostalgic charm, and surprisingly deep gameplay, defying the notion that size dictates quality.

A World of Accessibility:

The most prominent appeal of these diminutive games lies in their accessibility. With minimal storage requirements, they can be downloaded and enjoyed on a wide range of PCs, regardless of hardware limitations. This opens the door to gaming for individuals with older machines or limited storage space, providing a gateway to a diverse world of entertainment without the need for costly upgrades.

A Blast from the Past:

Many games under 200 MB are nostalgic throwbacks to the golden age of gaming, drawing inspiration from classic genres like arcade, platformers, and puzzle games. This resurgence of retro aesthetics and mechanics offers a refreshing change from the current trend of hyper-realistic graphics and complex storylines. It evokes a sense of familiarity and comfort, reminding gamers of the joy of simpler, yet captivating gameplay.

Beyond the Byte Count: A Deeper Dive into Gameplay:

While size may be a defining characteristic, it doesn’t limit the depth of gameplay these games offer. From fast-paced arcade shooters demanding lightning-fast reflexes to intricate puzzle games requiring strategic thinking, the variety in genre and gameplay mechanics is vast.

Examples of Popular Genres:

  • Arcade Classics: Games like "Space Invaders" and "Pac-Man" remain timeless for their addictive gameplay loops and simple yet engaging mechanics. These titles offer a quick burst of fun, perfect for short gaming sessions.

  • Platformers: The genre, exemplified by games like "Super Mario Bros." and "Sonic the Hedgehog," relies on precise platforming, exploration, and challenging levels. These games often feature vibrant visuals and memorable soundtracks.

  • Puzzle Games: Games like "Tetris" and "Minesweeper" require strategic thinking and problem-solving skills. Their simple rules and addictive nature make them ideal for casual gaming.

  • Roguelikes: These games, often featuring procedurally generated levels and permadeath, offer a unique challenge and replayability. "NetHack" and "ADOM" are prime examples of this genre.

The Importance of Indie Development:

The realm of lightweight games is often dominated by independent developers. These creators, unburdened by large budgets and complex pipelines, are free to experiment with innovative ideas and unique gameplay mechanics. This fosters creativity and innovation, resulting in diverse and often surprising gaming experiences.

Benefits of PC Games Under 200 MB:

  • Low System Requirements: These games can be enjoyed on a wide range of PCs, making them accessible to a broader audience.

  • Quick Downloads: Downloading a game under 200 MB is a matter of minutes, allowing for immediate gameplay.

  • Nostalgia and Retro Appeal: Many of these games evoke a sense of nostalgia and remind gamers of the golden age of gaming.

  • Variety of Genres: From arcade classics to intricate puzzles, the genre diversity is vast, catering to diverse gaming preferences.

  • Indie Innovation: Independent developers often experiment with unique mechanics and fresh ideas, leading to diverse and engaging experiences.

Frequently Asked Questions:

Q: Where can I find these games?

A: Numerous websites and platforms offer free downloads of games under 200 MB. Some popular options include:

  • IndieDB: A database dedicated to independent game development, featuring a wide selection of free and low-cost games.

  • Itch.io: A platform for indie game creators, offering a vast library of downloadable games, including many under 200 MB.

  • FreeGamePick: A website that curates a selection of free games, often featuring smaller, downloadable titles.

Q: Are these games safe to download?

A: As with any online download, exercising caution is essential. Download games from reputable sources and scan downloaded files with antivirus software to ensure safety.

Q: Can I play these games online?

A: Many games under 200 MB offer multiplayer modes, allowing for online play with friends. Some games even feature dedicated servers for online communities.

Tips for Enjoying PC Games Under 200 MB:

  • Explore Different Genres: Venture beyond your comfort zone and try games from unfamiliar genres. You might discover a new favorite.

  • Seek Out Indie Developers: Support independent creators by exploring their unique and innovative game designs.

  • Join Online Communities: Connect with other players online to share tips, strategies, and experiences.

  • Embrace the Nostalgia: These games offer a nostalgic journey back to the golden age of gaming.

Conclusion:

While the gaming landscape is increasingly dominated by massive open-world experiences, PC games under 200 MB offer a refreshing alternative. These lightweight games provide a gateway to gaming for those with limited resources, evoke a sense of nostalgia, and showcase the creativity and innovation of indie developers. Their accessibility, diverse genres, and captivating gameplay make them a valuable addition to any gaming library, proving that size doesn’t always dictate quality.

Top 10 PC Games Under 200MB (2021)  Low End PC Highly compressed  Part 1 - YouTube Top 5 Gaming Top 10 Best games for Low-End PC Below 200 mb ( 2021)
Top 5 PC games that are under 200 MB in size top 5 best offline fps games under 200 mb - YouTube Top 5 PC games that are under 200 MB in size
Top 5 PC games that are under 200 MB in size Best pc games under 200 MB - Tech Warrior X

Closure

Thus, we hope this article has provided valuable insights into The Allure of Lightweight Gaming: Exploring PC Games Under 200 MB. We thank you for taking the time to read this article. See you in our next article!

R For Windows 10: A Comprehensive Guide To Statistical Computing And Data Visualization

R for Windows 10: A Comprehensive Guide to Statistical Computing and Data Visualization

Introduction

With great pleasure, we will explore the intriguing topic related to R for Windows 10: A Comprehensive Guide to Statistical Computing and Data Visualization. Let’s weave interesting information and offer fresh perspectives to the readers.

R for Windows 10: A Comprehensive Guide to Statistical Computing and Data Visualization

R Programming: A Comprehensive Guide to Statistical Computing ยป Let Me Read

R, a free and open-source programming language and software environment, has become a cornerstone for statistical computing and data visualization. Its versatility and rich ecosystem of packages have made it a powerful tool for researchers, analysts, and data scientists across various disciplines. This guide provides a comprehensive overview of R on Windows 10, exploring its installation, key features, and benefits, along with practical tips for beginners and experienced users alike.

Understanding R: A Statistical Powerhouse

R’s core strength lies in its extensive capabilities for statistical analysis and data manipulation. It offers a wide range of functions and packages for:

  • Data Exploration and Manipulation: R excels in importing, cleaning, and transforming data from various sources, including spreadsheets, databases, and web APIs.
  • Statistical Modeling: From simple linear regressions to complex machine learning algorithms, R provides a robust framework for building statistical models and analyzing data patterns.
  • Data Visualization: R boasts powerful visualization tools, enabling users to create informative and aesthetically pleasing charts, graphs, and plots, effectively communicating insights from data.
  • Reproducibility and Collaboration: R promotes reproducible research by enabling users to document their analysis steps and share their code with colleagues, fostering collaboration and transparency.

Installing R on Windows 10: A Step-by-Step Guide

The installation process for R on Windows 10 is straightforward and user-friendly. Follow these steps:

  1. Download the R Installer: Visit the official Comprehensive R Archive Network (CRAN) website (https://cran.r-project.org/) and navigate to the "Download R for Windows" section.
  2. Choose the Installer: Select the appropriate installer based on your system architecture (32-bit or 64-bit).
  3. Run the Installer: Double-click the downloaded installer file and follow the on-screen instructions.
  4. Confirm Installation: Once the installation is complete, verify that R is installed by opening the R console from the start menu.

RStudio: A Powerful Integrated Development Environment (IDE)

While R itself provides a console for code execution, RStudio offers a more comprehensive and user-friendly integrated development environment (IDE). It enhances the R experience by providing:

  • Code Editor: RStudio’s code editor offers syntax highlighting, code completion, and debugging tools, making code writing and editing efficient.
  • Interactive Console: The interactive console allows users to execute code, view results, and experiment with different commands.
  • Workspace Management: RStudio helps manage and organize projects, scripts, and data files, ensuring a structured workflow.
  • Visualizations and Plots: RStudio seamlessly integrates with R’s plotting capabilities, displaying charts and graphs directly within the IDE.

Essential R Packages: Expanding Functionality

R’s true power lies in its extensive package library, which provides specialized functions and tools for a wide range of applications. Some key packages for beginners include:

  • tidyverse: A collection of packages designed for data manipulation, transformation, and visualization, offering a consistent and intuitive syntax for data wrangling.
  • ggplot2: A powerful and flexible graphics package for creating high-quality visualizations with customizable aesthetics.
  • dplyr: A package for data manipulation, providing functions for filtering, selecting, and summarizing data.
  • stringr: A package for working with strings, offering functions for manipulating and extracting information from text data.

Benefits of Using R in Windows 10

  • Free and Open Source: R is completely free to use and distribute, making it accessible to all users, regardless of budget constraints.
  • Large Community and Support: R has a vast and active community of users and developers, providing ample resources, tutorials, and support forums for learning and problem-solving.
  • Extensive Package Library: R’s extensive package library offers solutions for a wide array of tasks, from statistical analysis to machine learning and data visualization.
  • Reproducible Research: R promotes reproducible research by encouraging users to document their analysis steps and share their code, fostering transparency and collaboration.
  • Industry-Standard Tool: R is widely used in academia, industry, and government, making it a valuable skill for data professionals.

FAQs about R on Windows 10

Q: What are the system requirements for running R on Windows 10?

A: R has minimal system requirements and can run on most Windows 10 machines. However, for optimal performance, it is recommended to have at least 4GB of RAM and a modern processor.

Q: How do I install packages in R?

A: To install a package, use the install.packages() function in the R console. For example, to install the tidyverse package, type: install.packages("tidyverse").

Q: How do I update R and its packages?

A: To update R, download and install the latest version from the CRAN website. To update packages, use the update.packages() function in the R console.

Q: How do I get help with R?

A: There are numerous resources available for learning R, including online tutorials, documentation, and community forums. The official R website (https://www.r-project.org/) provides comprehensive documentation and resources.

Q: Can I use R for machine learning?

A: Yes, R has several packages dedicated to machine learning, including caret, randomForest, and xgboost, which provide algorithms for classification, regression, and clustering.

Tips for Using R on Windows 10

  • Start with Tutorials: Begin by exploring beginner-friendly tutorials and online courses to get a grasp of R’s syntax and fundamentals.
  • Practice Regularly: Consistent practice is key to mastering R. Work on small projects and challenges to build your skills.
  • Explore Packages: Discover and experiment with different R packages to expand your toolset and find solutions for specific tasks.
  • Join the Community: Engage with the R community online through forums, meetups, and conferences to learn from others and seek support.
  • Document Your Work: Keep track of your code and analysis steps by using comments and creating documentation, ensuring reproducibility and clarity.

Conclusion

R on Windows 10 empowers users with a powerful and versatile tool for statistical computing, data visualization, and analysis. Its free and open-source nature, extensive package library, and active community make it an ideal choice for researchers, analysts, and data scientists across various domains. By mastering R, users can unlock the potential of data to gain insights, make informed decisions, and drive innovation in their respective fields.

Data Visualisation Statistical Analysis and Programming in R Data Visualization In R Guide To Data Visualization In R - Vrogue Data visualization using R studio - YouTube
Intro to R R Tutorials - eXtension the beginner's guide to data visualization in r
The R Project for Statistical Computing - Tools - OasisHUB Visualizing Statistics with R: A Comprehensive Guide

Closure

Thus, we hope this article has provided valuable insights into R for Windows 10: A Comprehensive Guide to Statistical Computing and Data Visualization. We appreciate your attention to our article. See you in our next article!