Archives April 2024

Unlocking The Potential Of Windows 10 Pro: A Comprehensive Guide To Product Keys

Unlocking the Potential of Windows 10 Pro: A Comprehensive Guide to Product Keys

Introduction

With great pleasure, we will explore the intriguing topic related to Unlocking the Potential of Windows 10 Pro: A Comprehensive Guide to Product Keys. Let’s weave interesting information and offer fresh perspectives to the readers.

Unlocking the Potential of Windows 10 Pro: A Comprehensive Guide to Product Keys

Unlocking the Power of Windows 10 Pro: Your Ultimate Guide to Windows 10 Pro Product Keys  by

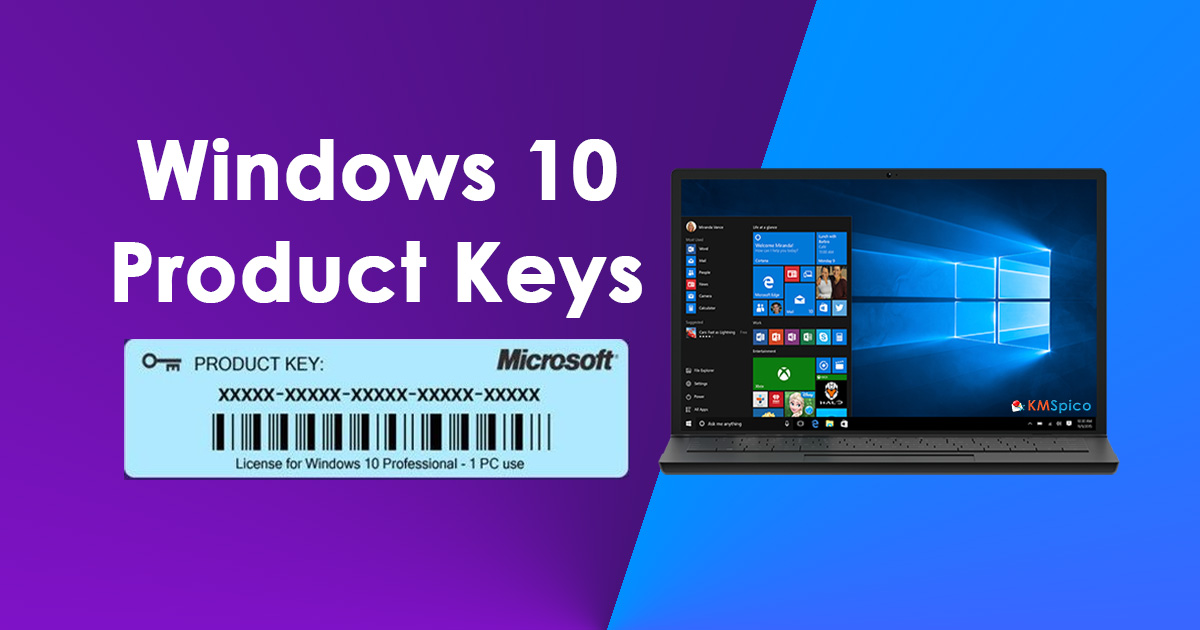
Windows 10 Pro, Microsoft’s flagship operating system, offers a robust suite of features designed to enhance productivity, security, and overall user experience. However, to fully unlock its potential, a valid product key is essential. This guide delves into the intricacies of Windows 10 Pro product keys, exploring their significance, acquisition methods, and the benefits they provide.

Understanding the Importance of a Product Key:

A product key is a unique, alphanumeric code that acts as a digital fingerprint, authenticating the installation of Windows 10 Pro. This code verifies that the software is legitimate, granting users access to all features, updates, and technical support.

Benefits of a Genuine Product Key:

  • Full Functionality: A valid product key unlocks all features of Windows 10 Pro, including advanced security measures like BitLocker encryption, remote desktop access, and the ability to join a domain.
  • Security and Stability: Genuine installations are protected from malware and unauthorized access, ensuring a stable and secure computing environment.
  • Official Updates: Regular updates, including security patches and performance enhancements, are only available to users with a genuine product key, keeping the system up-to-date and protected.
  • Technical Support: Microsoft provides comprehensive technical support to users with genuine installations, ensuring prompt assistance with any issues or inquiries.
  • Legal Compliance: Using a genuine product key ensures compliance with software licensing agreements, avoiding legal repercussions and potential fines.

Methods for Obtaining a Windows 10 Pro Product Key:

  1. Retail Purchase: Windows 10 Pro can be purchased as a standalone product key from authorized retailers, either online or in physical stores. These keys are typically packaged with a physical media (DVD or USB drive) or a digital download code.
  2. Pre-installed on New Devices: Many new computers and laptops come pre-installed with Windows 10 Pro, which includes a product key embedded in the device’s BIOS.
  3. Upgrade from Previous Versions: Users with existing Windows installations (Windows 7, 8, or 8.1) can upgrade to Windows 10 Pro by purchasing an upgrade license. This license typically includes a new product key for the upgraded version.
  4. Volume Licensing Agreements: Businesses and organizations with multiple devices can purchase volume licenses for Windows 10 Pro, providing a cost-effective solution for large deployments.

Navigating the Landscape of Product Keys:

  • OEM Keys: These keys are tied to specific devices and cannot be transferred to other machines. They are typically pre-installed by the manufacturer.
  • Retail Keys: These keys are standalone and can be used on any compatible device. They offer greater flexibility compared to OEM keys.
  • Digital Licenses: Introduced with Windows 10, digital licenses are linked to your Microsoft account and allow you to activate Windows 10 Pro on multiple devices without requiring a physical key.

Understanding Product Key Activation:

Once you have a valid product key, you need to activate Windows 10 Pro. This process verifies the authenticity of your key and unlocks the full functionality of the operating system. Activation can be performed online using an internet connection or by phone if online activation is not possible.

Common FAQs Regarding Windows 10 Pro Product Keys:

1. Can I use the same product key on multiple devices?

No, a single product key can only be used on one device at a time. However, you can transfer the key to a new device after deactivating it from the original one.

2. What happens if I lose my product key?

If you lose your product key, you can try to retrieve it from your Microsoft account or the original purchase receipt. If these options fail, you may need to purchase a new product key.

3. Is it legal to download Windows 10 Pro without a product key?

No, downloading Windows 10 Pro without a valid product key is illegal. Using an unlicensed copy can lead to legal consequences and security risks.

4. Can I upgrade from Windows 10 Home to Windows 10 Pro without a new product key?

No, upgrading from Windows 10 Home to Windows 10 Pro requires a separate product key specifically for the Pro version.

5. What are the differences between Windows 10 Home and Windows 10 Pro?

Windows 10 Pro offers advanced features like BitLocker encryption, remote desktop access, and the ability to join a domain, making it suitable for businesses and power users. Windows 10 Home provides a more streamlined experience for general home users.

Tips for Managing Windows 10 Pro Product Keys:

  • Store your product key securely: Keep a record of your product key in a safe and accessible location.
  • Use a digital license: Consider using a digital license for easier activation and management across multiple devices.
  • Back up your system regularly: Regular backups can help recover your product key in case of data loss.
  • Stay informed about updates: Keep your Windows 10 installation updated with the latest security patches and features.
  • Contact Microsoft support: If you encounter any issues with your product key, seek assistance from Microsoft support.

Conclusion:

A genuine Windows 10 Pro product key is essential for unlocking the full potential of this powerful operating system. It ensures legal compliance, access to all features, security updates, and technical support. Understanding the different types of product keys, activation processes, and common FAQs empowers users to make informed decisions and maximize their Windows 10 Pro experience. By obtaining a valid product key and adhering to best practices, users can enjoy a secure, stable, and feature-rich computing environment.

How to Get Windows 10 Pro Product Key  How To Activate Windows 10 - YouTube Windows 10 Pro N Product Key 64 Bit 2023 – Get Latest Windows 10 Update Accurate And Free Windows Keys For Windows 10 And 11
Windows 10 Pro Product Key Free 2023 [64 Bit] – Techjustify Windows 10 Pro Product Key 64 Bit  Windows 10 Pro License Key & Activation key Free Windows 10 Pro Keys & Win 10 Home Product Keys - Windows10KeySale.com - YouTube
Windows 10 Product Key for Free  Digital Keys [Updated] Windows 10 Pro Product Key 32/64 Bit (All Versions) 2020

Closure

Thus, we hope this article has provided valuable insights into Unlocking the Potential of Windows 10 Pro: A Comprehensive Guide to Product Keys. We hope you find this article informative and beneficial. See you in our next article!

Managing User Accounts On Windows 11: Removing Accounts For Enhanced Security And Control

Managing User Accounts on Windows 11: Removing Accounts for Enhanced Security and Control

Introduction

With enthusiasm, let’s navigate through the intriguing topic related to Managing User Accounts on Windows 11: Removing Accounts for Enhanced Security and Control. Let’s weave interesting information and offer fresh perspectives to the readers.

Managing User Accounts on Windows 11: Removing Accounts for Enhanced Security and Control

How to manage user account settings on Windows 11  Windows Central

Windows 11, with its emphasis on user-centricity, allows for the creation and management of multiple user accounts. This feature provides a structured way to organize access to the operating system and its resources, enhancing security and privacy. However, situations may arise where it becomes necessary to remove a user account from a Windows 11 laptop. This could be due to a variety of reasons, such as:

  • Account inactivity: An account that is no longer actively used may be a security vulnerability. Removing it helps eliminate potential access points for malicious actors.
  • Account compromise: If an account has been compromised, removing it is crucial to mitigate the risk of unauthorized access to sensitive data.
  • Transferring ownership: When transferring ownership of a laptop, it is essential to remove any personal accounts to ensure the new owner has full control.
  • Account cleanup: Removing unnecessary accounts can streamline system performance and reduce clutter in the user interface.

Understanding the Types of User Accounts

Before delving into the process of removing an account, it is essential to understand the different types of user accounts in Windows 11:

  • Administrator Account: This account has full control over the operating system and its settings. It can install software, make system-wide changes, and manage other user accounts.
  • Standard Account: This account has limited privileges and cannot make system-wide changes. It is ideal for everyday users who do not require administrative rights.
  • Guest Account: This account provides temporary access to the computer with limited privileges and does not save any data. It is suitable for occasional users who need access to the computer without compromising security.

Steps to Remove a User Account

The process of removing a user account in Windows 11 is straightforward and can be completed through the "Settings" app:

  1. Access Settings: Open the "Settings" app by clicking the "Start" button and selecting the "Settings" icon (gear symbol).
  2. Navigate to Accounts: In the "Settings" window, click on the "Accounts" option.
  3. Select "Family & other users": Within the "Accounts" section, click on "Family & other users."
  4. Choose the account to remove: Locate the account you want to remove and click on it.
  5. Remove the account: Click the "Remove" button next to the account name.
  6. Confirm removal: Windows 11 will prompt you to confirm the removal. Click "Delete account and data" to finalize the process.

Important Considerations

  • Administrator privileges: To remove a user account, you must be logged in as an administrator.
  • Data loss: Removing an account will permanently delete all associated data, including files, settings, and applications. It is advisable to back up any essential data before removing the account.
  • Active accounts: You cannot remove an account that is currently logged in. Log out of the account before attempting to remove it.
  • System accounts: Certain system accounts cannot be removed. These accounts are essential for the functioning of the operating system and are usually hidden from view.

FAQs about Removing User Accounts in Windows 11

Q1. Can I remove my own account?

A: No, you cannot remove your own account while logged in. You need to log out and log in as a different administrator account to remove your account.

Q2. What happens to the data associated with the removed account?

A: All data associated with the removed account, including files, settings, and applications, will be permanently deleted. It is essential to back up any crucial data before removing the account.

Q3. Can I recover a deleted account?

A: Once an account is removed, it cannot be recovered. The data associated with the account is permanently deleted.

Q4. What if I remove the only administrator account?

A: Removing the only administrator account will render the computer inaccessible. You will need to create a new administrator account or use a recovery drive to regain access.

Q5. Can I remove a user account without deleting its data?

A: No, removing a user account will always delete all associated data. However, you can manually back up the data before removing the account to preserve it.

Tips for Managing User Accounts in Windows 11

  • Regularly review user accounts: Periodically review the user accounts on your laptop to identify any inactive or compromised accounts.
  • Use strong passwords: Encourage all users to create strong passwords and change them regularly.
  • Enable two-factor authentication: Implement two-factor authentication for all accounts to enhance security.
  • Keep software up to date: Ensure that all software, including Windows 11, is updated to the latest version to patch security vulnerabilities.
  • Use antivirus software: Install and maintain a reliable antivirus program to protect your laptop from malware.

Conclusion

Removing a user account from a Windows 11 laptop is a crucial task for maintaining security and optimizing system performance. By understanding the different account types, following the removal steps, and considering important factors, users can confidently manage their accounts and ensure a secure and efficient computing experience. Regularly reviewing and managing user accounts is essential for maintaining the integrity and security of your Windows 11 laptop.

How to Manage User Account Settings in Windows 11 Manage user accounts Windows 11  How to Manage Windows 11 password  Windows 11 Credentials How To Remove Microsoft Account From Windows 11 Guide  yorketech
Help With User Account Control In Windows 11 How to remove Microsoft Account from Windows 11 [3 Methods] - DroidWin How To Remove Other User Accounts From Windows 11 - YouTube
How To Remove Microsoft Account From Windows 11 Guide  beebom How to Remove User Account from Windows 11 (6 Methods)

Closure

Thus, we hope this article has provided valuable insights into Managing User Accounts on Windows 11: Removing Accounts for Enhanced Security and Control. We thank you for taking the time to read this article. See you in our next article!

The Enigma Of The Missing 5G Wi-Fi Signal: A Comprehensive Guide To Troubleshooting

The Enigma of the Missing 5G Wi-Fi Signal: A Comprehensive Guide to Troubleshooting

Introduction

With great pleasure, we will explore the intriguing topic related to The Enigma of the Missing 5G Wi-Fi Signal: A Comprehensive Guide to Troubleshooting. Let’s weave interesting information and offer fresh perspectives to the readers.

The Enigma of the Missing 5G Wi-Fi Signal: A Comprehensive Guide to Troubleshooting

Unraveling the Enigma of WiFi 5G: Demystifying the Confusion Between 5G and WiFi 5GHz

The advent of 5G technology has ushered in a new era of wireless connectivity, promising blazing-fast speeds and enhanced reliability. However, the frustration of a missing 5G Wi-Fi signal can be a significant obstacle to enjoying these benefits. This article delves into the common causes behind this issue, providing a comprehensive guide to troubleshooting and resolving it.

Understanding the Fundamentals of 5G Wi-Fi

Before embarking on troubleshooting, it’s essential to grasp the basics of 5G Wi-Fi. 5G Wi-Fi, also known as Wi-Fi 6E, operates on the 6 GHz frequency band, offering several advantages over traditional 2.4 GHz and 5 GHz Wi-Fi:

  • Increased Bandwidth: The 6 GHz band provides significantly more bandwidth, allowing for faster data transfer rates and smoother streaming experiences.
  • Reduced Interference: Operating on a less congested frequency band minimizes interference from other devices, leading to a more stable connection.
  • Lower Latency: 5G Wi-Fi boasts lower latency, crucial for real-time applications like online gaming and video conferencing.

The Missing 5G Wi-Fi Signal: Common Culprits

The absence of a 5G Wi-Fi signal can stem from a variety of factors, each requiring a specific approach to resolution:

1. Compatibility Issues:

  • Device Compatibility: Not all devices support 5G Wi-Fi. Older devices or those lacking the necessary hardware may not be able to detect or connect to 6 GHz networks.
  • Router Compatibility: Ensure your router is capable of broadcasting 5G Wi-Fi. Check the router’s specifications or documentation to confirm its compatibility.

2. Network Settings:

  • Hidden Network: Some routers allow users to hide their Wi-Fi network. If the 5G network is hidden, it won’t be visible to devices attempting to connect.
  • Incorrect SSID: The 5G network might have a different SSID than the 2.4 GHz or 5 GHz network. Verify the SSID in your router settings and ensure it’s correctly entered in your device’s Wi-Fi settings.

3. Physical Limitations:

  • Distance: The 6 GHz frequency band has a shorter range than 2.4 GHz or 5 GHz. Ensure your device is within close proximity to the router.
  • Obstacles: Walls, furniture, and other objects can obstruct the 6 GHz signal. Consider relocating your router or device to minimize interference.

4. Router Configuration:

  • Disabled 5G Network: Check your router settings to ensure the 5G network is enabled. It might be disabled by default or accidentally turned off.
  • Channel Congestion: The 6 GHz band is divided into multiple channels. If the channel selected for your 5G network is congested, it can impact signal strength and visibility.

5. Software and Firmware Issues:

  • Outdated Drivers: Ensure your device’s Wi-Fi drivers are up-to-date. Outdated drivers can cause compatibility issues and prevent the detection of 5G networks.
  • Outdated Router Firmware: Similarly, outdated router firmware can hinder 5G functionality. Update your router’s firmware to the latest version.

Troubleshooting and Resolution Strategies

Once you have identified the potential cause of the missing 5G Wi-Fi signal, you can implement the following troubleshooting steps:

1. Verify Device Compatibility:

  • Check the device’s specifications or user manual to confirm 5G Wi-Fi support.
  • If the device is compatible, ensure the Wi-Fi settings are properly configured to scan for 6 GHz networks.

2. Verify Router Compatibility:

  • Consult the router’s documentation or manufacturer website to confirm 5G Wi-Fi capabilities.
  • If the router supports 5G, ensure it’s enabled in the router’s settings.

3. Check Network Settings:

  • Access your router’s settings and verify that the 5G network is not hidden.
  • Check the SSID of the 5G network and ensure it matches the one displayed in your device’s Wi-Fi settings.

4. Optimize Physical Environment:

  • Relocate your router or device to minimize distance and obstacles obstructing the signal.
  • Consider using a Wi-Fi extender to boost the signal in areas with weak coverage.

5. Update Drivers and Firmware:

  • Download and install the latest Wi-Fi drivers for your device.
  • Update your router’s firmware to the latest version available from the manufacturer’s website.

6. Reset Router Settings:

  • If all else fails, try resetting your router to factory defaults. This will erase all custom settings and potentially resolve any configuration issues.

7. Contact Technical Support:

  • If you’ve exhausted all troubleshooting options, contact your internet service provider or router manufacturer for technical assistance.

FAQs: Addressing Common Concerns

Q: What if my device doesn’t support 5G Wi-Fi?

A: If your device lacks 5G Wi-Fi support, you can still connect to the 2.4 GHz or 5 GHz networks offered by your router. However, you won’t be able to experience the benefits of 5G connectivity. Consider upgrading to a newer device that supports 5G Wi-Fi.

Q: Why is my 5G network so slow?

A: Slow 5G speeds can be caused by various factors, including network congestion, interference, or outdated hardware. Check your router’s settings to ensure the 5G network is using a less congested channel. Also, ensure your device’s Wi-Fi drivers and router firmware are up-to-date.

Q: Can I use 5G Wi-Fi with my older router?

A: Older routers may not support 5G Wi-Fi. Consider upgrading to a newer router that supports 6 GHz connectivity to enjoy the benefits of 5G.

Tips for Optimizing 5G Wi-Fi Performance

  • Minimize Interference: Place your router in an open area, away from other electronic devices that might cause interference.
  • Use a Wired Connection: For tasks requiring high bandwidth and low latency, consider using a wired Ethernet connection for optimal performance.
  • Prioritize Devices: Some routers allow you to prioritize devices on the network, ensuring higher bandwidth for critical applications.
  • Enable QoS (Quality of Service): QoS settings in your router can help prioritize traffic for specific applications, improving performance for demanding tasks.

Conclusion: Embracing the Future of Wireless Connectivity

The absence of a 5G Wi-Fi signal can be a frustrating experience, but by understanding the potential causes and implementing the appropriate troubleshooting steps, you can resolve this issue and unlock the full potential of 5G connectivity. By embracing the advancements in wireless technology, you can enjoy faster speeds, reduced latency, and a more reliable internet experience, transforming your digital world.

WiFi troubleshooting  Brightspeed 5G NR SRS (Sounding Reference Signals) Things That Can Affect Your Wi-Fi Signal  ImOn Communications
5G WiFi: How to know if your smartphone supports this super fast wireless standard - Dignited How is Wi-Fi different from 4G and 5G?  Learning Module  What is Wi-Fi? Online Course 5G WiFi Signal - Openclipart
WiFi Troubleshooting  CenturyLink What Is 5G? Understanding The Next-Gen Wireless System Set To Enable Our Connected Future

Closure

Thus, we hope this article has provided valuable insights into The Enigma of the Missing 5G Wi-Fi Signal: A Comprehensive Guide to Troubleshooting. We appreciate your attention to our article. See you in our next article!

Navigating The Landscape: A Comprehensive Look At Windows 10 Programs And Features

Navigating the Landscape: A Comprehensive Look at Windows 10 Programs and Features

Introduction

With great pleasure, we will explore the intriguing topic related to Navigating the Landscape: A Comprehensive Look at Windows 10 Programs and Features. Let’s weave interesting information and offer fresh perspectives to the readers.

How to Open Programs and Features in Windows 10  Control Panel

Windows 10, released in 2015, has become the dominant operating system for personal computers worldwide. Its success stems from a combination of user-friendly design, robust security features, and a vast ecosystem of applications. This article delves into the key programs and features that define Windows 10, highlighting their significance and benefits.

Core Programs:

1. File Explorer: The cornerstone of file management in Windows 10, File Explorer provides a hierarchical view of the user’s file system. It facilitates searching, organizing, and manipulating files and folders, making it the primary tool for accessing and managing data.

Benefits:

  • Intuitive Navigation: The ribbon interface and navigation pane allow for efficient browsing and access to files and folders.
  • Flexible Organization: Users can create folders, subfolders, and libraries to categorize files logically.
  • Powerful Search: The integrated search function allows users to quickly locate files based on name, content, and other criteria.

2. Microsoft Edge: The default web browser in Windows 10, Microsoft Edge offers a modern and secure browsing experience. It incorporates features like reading view, tab management, and integration with Cortana, the voice-activated digital assistant.

Benefits:

  • Enhanced Security: Edge employs robust security measures to protect users from online threats.
  • Improved Performance: The browser is optimized for speed and responsiveness, ensuring a smooth browsing experience.
  • Cross-Platform Compatibility: Edge is available on multiple devices, enabling seamless browsing across desktops, laptops, and mobile platforms.

3. Windows Store: This platform acts as a central hub for downloading and installing applications, games, and other digital content. The Windows Store offers a curated selection of apps, ensuring a secure and reliable source for software.

Benefits:

  • Centralized App Management: Users can easily browse, download, and update applications from a single location.
  • Secure Downloads: The Windows Store verifies apps before listing them, minimizing the risk of malware.
  • Extensive App Library: The store provides access to a vast library of applications, catering to diverse needs and interests.

4. Windows Defender: A built-in antivirus and anti-malware solution, Windows Defender provides real-time protection against online threats. It regularly scans the system for suspicious activity, ensuring a secure computing environment.

Benefits:

  • Proactive Protection: Windows Defender proactively monitors for potential threats, preventing infections before they occur.
  • Real-time Security: It continuously scans files and applications, offering immediate detection and mitigation of threats.
  • Automatic Updates: Windows Defender updates itself automatically, ensuring access to the latest security definitions.

5. Cortana: Windows 10’s voice-activated digital assistant, Cortana offers a range of functionalities, including voice search, task management, and reminders. It integrates with various applications and services, enhancing productivity and convenience.

Benefits:

  • Hands-Free Control: Users can interact with their computer using voice commands, freeing up their hands for other tasks.
  • Personalized Experience: Cortana learns user preferences and habits, providing tailored recommendations and assistance.
  • Cross-Device Compatibility: Cortana works seamlessly across multiple devices, ensuring a consistent experience.

Key Features:

1. Start Menu: A familiar and intuitive interface, the Start Menu provides access to applications, settings, and system information. Its customizable tiles offer quick access to frequently used programs and files.

Benefits:

  • Simplified Access: The Start Menu provides a central point of entry for navigating the operating system.
  • Customization: Users can personalize the Start Menu by pinning frequently used applications and customizing its appearance.
  • Improved Search: The integrated search function allows for quick and efficient searching within the operating system.

2. Action Center: A notification hub, Action Center consolidates system notifications, updates, and quick actions. Users can easily manage notifications, access system settings, and control various system functions.

Benefits:

  • Centralized Notifications: Action Center provides a single location for receiving and managing system alerts.
  • Quick Access to Settings: Users can quickly access system settings and adjust various system parameters.
  • Enhanced Control: Action Center offers quick actions for controlling system features like Wi-Fi, Bluetooth, and volume.

3. Task View: This feature allows users to manage multiple open windows and applications efficiently. It provides a visual overview of all running tasks, enabling seamless switching between applications.

Benefits:

  • Improved Multitasking: Task View facilitates efficient management of multiple applications, enhancing productivity.
  • Visual Organization: It presents a clear overview of running tasks, simplifying navigation and application switching.
  • Virtual Desktops: Task View supports the creation of virtual desktops, allowing users to organize applications and files logically.

4. Windows Ink: Designed for touch-enabled devices, Windows Ink allows users to interact with the operating system using a stylus. It offers features like handwriting recognition, sketching, and annotation, enhancing creativity and productivity.

Benefits:

  • Natural Interaction: Windows Ink allows for a more intuitive and natural interaction with the operating system.
  • Enhanced Creativity: It enables users to express themselves creatively through drawing, sketching, and note-taking.
  • Improved Productivity: Windows Ink simplifies tasks like taking notes, annotating documents, and signing digital documents.

5. Continuum: A feature specifically designed for hybrid devices, Continuum allows users to seamlessly switch between desktop and tablet modes. It automatically adapts the user interface based on the device orientation and input method.

Benefits:

  • Versatile Usage: Continuum enables users to utilize their hybrid devices in both desktop and tablet modes.
  • Optimized Interface: The user interface adapts automatically based on the device mode, ensuring optimal usability.
  • Seamless Transition: Users can seamlessly switch between modes without interrupting their workflow.

FAQs by Programs and Features:

File Explorer:

  • Q: How do I create a new folder in File Explorer?
    • A: Navigate to the desired location, right-click on the empty space, and select "New" followed by "Folder."
  • Q: Can I customize the File Explorer ribbon?
    • A: Yes, you can customize the ribbon by right-clicking on it and selecting "Customize the Ribbon."
  • Q: How do I search for a specific file within File Explorer?
    • A: Use the search bar located in the top-right corner of File Explorer and enter the file name or keywords.

Microsoft Edge:

  • Q: How do I enable reading view in Microsoft Edge?
    • A: Click on the "Reading View" icon located in the address bar.
  • Q: Can I import bookmarks from other browsers to Microsoft Edge?
    • A: Yes, you can import bookmarks by going to "Settings" > "Import Favorites and Settings."
  • Q: How do I manage tabs in Microsoft Edge?
    • A: Use the tab bar located at the top of the browser window to switch between tabs, close tabs, or create new tabs.

Windows Store:

  • Q: How do I download and install an app from the Windows Store?
    • A: Search for the desired app in the Windows Store, click on the app’s tile, and select "Install."
  • Q: Can I uninstall an app from the Windows Store?
    • A: Yes, you can uninstall an app by navigating to "Settings" > "Apps" > "Apps & features" and selecting the app you want to uninstall.
  • Q: How do I update apps from the Windows Store?
    • A: The Windows Store automatically updates apps in the background. You can check for updates manually by going to "Settings" > "Apps" > "Apps & features" and selecting the app you want to update.

Windows Defender:

  • Q: How do I run a full system scan with Windows Defender?
    • A: Open Windows Defender by searching for it in the Start Menu, select "Virus & threat protection," and click on "Scan options." Then, select "Full scan" and click on "Scan now."
  • Q: Can I customize Windows Defender settings?
    • A: Yes, you can customize settings by navigating to "Settings" > "Update & Security" > "Windows Defender."
  • Q: How do I know if Windows Defender is active and protecting my computer?
    • A: Windows Defender’s status is displayed in the notification area of the taskbar. If the icon is green, it indicates that Windows Defender is active and protecting your computer.

Cortana:

  • Q: How do I activate Cortana?
    • A: Click on the Cortana icon in the taskbar or say "Hey Cortana."
  • Q: Can I customize Cortana settings?
    • A: Yes, you can customize Cortana’s settings by clicking on the Cortana icon in the taskbar and selecting "Settings."
  • Q: How do I use Cortana to set reminders?
    • A: Say "Hey Cortana, remind me to…" followed by the reminder details.

Start Menu:

  • Q: How do I pin an application to the Start Menu?
    • A: Right-click on the application’s icon and select "Pin to Start."
  • Q: Can I customize the Start Menu tiles?
    • A: Yes, you can resize, rearrange, and unpin tiles by right-clicking on them.
  • Q: How do I access system settings from the Start Menu?
    • A: Click on the "Settings" icon located in the lower-left corner of the Start Menu.

Action Center:

  • Q: How do I access the Action Center?
    • A: Click on the Action Center icon located in the taskbar.
  • Q: How do I clear notifications from the Action Center?
    • A: Click on the "Clear all" button located at the top of the Action Center.
  • Q: How do I customize Action Center settings?
    • A: Click on the "Settings" icon located in the Action Center and customize the notifications and quick actions.

Task View:

  • Q: How do I access Task View?
    • A: Click on the "Task View" icon located in the taskbar or use the keyboard shortcut "Alt+Tab."
  • Q: How do I create a new virtual desktop?
    • A: Click on the "New desktop" button located in the Task View window.
  • Q: How do I close a virtual desktop?
    • A: Click on the "X" button located in the top-right corner of the virtual desktop window.

Windows Ink:

  • Q: How do I access Windows Ink Workspace?
    • A: Click on the "Windows Ink Workspace" icon located in the taskbar.
  • Q: How do I use Windows Ink for handwriting recognition?
    • A: Open a text field and use the stylus to write directly into it.
  • Q: How do I use Windows Ink for sketching and drawing?
    • A: Open the "Sketchpad" app in the Windows Ink Workspace and use the stylus to draw and sketch.

Continuum:

  • Q: How do I enable Continuum on my hybrid device?
    • A: Continuum is automatically enabled on hybrid devices. You can adjust Continuum settings by navigating to "Settings" > "System" > "Tablet mode."
  • Q: How do I switch between desktop and tablet modes in Continuum?
    • A: The device automatically switches between modes based on the device orientation and input method. You can manually switch modes by clicking on the "Tablet mode" button in the Action Center.
  • Q: What applications are compatible with Continuum?
    • A: Most modern applications are compatible with Continuum. You can check the application’s description in the Windows Store for compatibility information.

Tips by Programs and Features:

File Explorer:

  • Tip: Use the "Quick Access" section to access frequently used folders and files.
  • Tip: Utilize the "File Explorer" search bar to quickly locate files based on name, content, and other criteria.
  • Tip: Customize the File Explorer ribbon by adding or removing commands based on your usage patterns.

Microsoft Edge:

  • Tip: Use the "Reading View" feature to enhance readability by removing distractions and formatting web pages.
  • Tip: Create and manage multiple profiles in Microsoft Edge to separate browsing data for different users.
  • Tip: Use the "Favorites" feature to save frequently visited websites for quick access.

Windows Store:

  • Tip: Utilize the "Collections" feature to organize apps into categories based on your preferences.
  • Tip: Check the "Reviews" section before downloading an app to get insights from other users.
  • Tip: Enable automatic updates for apps to ensure access to the latest features and security patches.

Windows Defender:

  • Tip: Schedule regular full system scans to ensure comprehensive threat detection.
  • Tip: Enable "Real-time protection" to monitor your computer for suspicious activity in real-time.
  • Tip: Keep Windows Defender updated to access the latest security definitions and threat signatures.

Cortana:

  • Tip: Use voice commands to control your computer, including launching applications, searching the web, and setting reminders.
  • Tip: Customize Cortana’s settings to personalize your experience and control the information it collects.
  • Tip: Utilize Cortana’s integration with other applications and services to enhance your productivity and convenience.

Start Menu:

  • Tip: Pin frequently used applications to the Start Menu for quick access.
  • Tip: Use the Start Menu search function to quickly locate files, applications, and system settings.
  • Tip: Customize the Start Menu tiles by resizing, rearranging, and unpinning them based on your preferences.

Action Center:

  • Tip: Clear notifications regularly to avoid clutter and ensure that important alerts are not overlooked.
  • Tip: Utilize quick actions in the Action Center to control system features like Wi-Fi, Bluetooth, and volume.
  • Tip: Customize Action Center settings to control which notifications are displayed and how they are prioritized.

Task View:

  • Tip: Utilize Task View to manage multiple open windows and applications efficiently.
  • Tip: Create virtual desktops to organize applications and files logically.
  • Tip: Use Task View to quickly switch between applications and navigate between virtual desktops.

Windows Ink:

  • Tip: Use Windows Ink for handwriting recognition to input text directly into text fields.
  • Tip: Utilize the "Sketchpad" app to sketch, draw, and annotate documents.
  • Tip: Explore the various Windows Ink features to enhance your creativity and productivity.

Continuum:

  • Tip: Use Continuum to seamlessly switch between desktop and tablet modes on your hybrid device.
  • Tip: Adjust Continuum settings to optimize the user interface for your preferred mode.
  • Tip: Ensure that your applications are compatible with Continuum to ensure a seamless experience.

Conclusion:

Windows 10 presents a robust and user-friendly operating system, offering a comprehensive suite of programs and features designed to enhance productivity, security, and user experience. From core programs like File Explorer and Microsoft Edge to key features like Start Menu and Task View, Windows 10 provides a versatile platform for various computing needs. Understanding the capabilities of these programs and features empowers users to leverage the full potential of Windows 10, maximizing efficiency and enhancing their overall computing experience.

6 Ways to Access Programs and Features in Windows 10 Free Virtual Landscape Design Software Windows 10, Landscape Curbing Wesley Chapel Fl War Free landscape design software for Windows
Pro landscape home windows 10 - nativecaqwe WINDOWS 10 - Getting Started How to view all program and apps in Windows 10 - YouTube
Free landscape design software for Windows View Recently Installed Apps and Programs in Windows 10

Closure

Thus, we hope this article has provided valuable insights into Navigating the Landscape: A Comprehensive Look at Windows 10 Programs and Features. We appreciate your attention to our article. See you in our next article!

Troubleshooting Windows 11 Reset Issues: A Comprehensive Guide

Troubleshooting Windows 11 Reset Issues: A Comprehensive Guide

Introduction

With enthusiasm, let’s navigate through the intriguing topic related to Troubleshooting Windows 11 Reset Issues: A Comprehensive Guide. Let’s weave interesting information and offer fresh perspectives to the readers.

Troubleshooting Windows 11 Reset Issues: A Comprehensive Guide

How to Reset Windows 11? [Step-by-Step Guide] - MiniTool Partition Wizard

Windows 11’s reset feature, designed to restore your system to its factory settings, can be a valuable tool for resolving various issues, from performance problems to malware infections. However, encountering difficulties with the reset process can be frustrating and leave users feeling lost. This comprehensive guide aims to provide clarity and actionable steps to troubleshoot common issues that prevent a successful Windows 11 reset.

Understanding the Reset Process and its Limitations

Before diving into troubleshooting, it is crucial to understand the nature of the reset process and its limitations. A Windows 11 reset essentially:

  • Deletes all personal files: This includes documents, pictures, music, and any other data stored on the system drive.
  • Removes all installed applications: This includes both pre-installed and user-installed programs.
  • Reinstalls Windows 11: This brings the operating system back to its default state, similar to a fresh installation.

It is important to note that:

  • The reset process does not affect files stored on external drives.
  • The reset process may not remove all traces of malware, especially if it is deeply embedded within the system.
  • Certain hardware components, such as drivers, may require reinstallation after the reset.

Common Reasons for Reset Failure and Troubleshooting Steps

Several factors can impede the Windows 11 reset process. Identifying the root cause is essential for implementing the appropriate troubleshooting steps. Here are some common reasons and their solutions:

1. Insufficient Disk Space:

The reset process requires sufficient free space on the system drive to complete the operation. If there is not enough space, the reset will fail.

Solution:

  • Free up disk space: Delete unnecessary files, uninstall unused applications, and move large files to an external drive.
  • Use a different drive: If possible, choose a different drive for the reset. This may require creating a new partition or using an external drive.

2. Corrupted System Files:

Damaged or corrupted system files can prevent the reset process from functioning correctly.

Solution:

  • Run the System File Checker (SFC): This built-in utility scans for and repairs corrupted system files. Open Command Prompt as administrator and type "sfc /scannow".
  • Use the Deployment Image Servicing and Management (DISM) tool: This tool can repair corrupted system images. Open Command Prompt as administrator and type "DISM /Online /Cleanup-Image /RestoreHealth".
  • Use a bootable USB drive: If the above solutions fail, consider creating a bootable USB drive with the Windows 11 installation media and performing a clean installation.

3. Hardware Failures:

Faulty hard drives, RAM issues, or other hardware problems can also hinder the reset process.

Solution:

  • Run hardware diagnostics: Check for errors in your hard drive and RAM using manufacturer-provided diagnostic tools or third-party software.
  • Replace faulty hardware: If diagnostics indicate a hardware failure, replace the affected component.

4. Third-Party Software Interference:

Certain third-party applications, especially antivirus programs, can interfere with the reset process.

Solution:

  • Temporarily disable antivirus software: Disable your antivirus program before attempting the reset.
  • Uninstall problematic software: Identify and uninstall any software that might be interfering with the reset process.

5. Network Issues:

If the reset process requires downloading files, unstable internet connectivity can lead to failures.

Solution:

  • Ensure stable internet connection: Connect to a reliable Wi-Fi network or use a wired connection.
  • Disable network restrictions: Check for any firewall or network restrictions that might be blocking the reset process.

6. Insufficient User Privileges:

The reset process requires administrator privileges. If the user account does not have sufficient permissions, the reset will fail.

Solution:

  • Log in as administrator: Log in to the computer using an administrator account.
  • Grant administrator privileges: If necessary, grant administrator privileges to the current user account.

7. Boot Mode Issues:

The reset process might fail if the computer is not booting in the correct mode.

Solution:

  • Check boot mode settings: Ensure the computer is booting in UEFI mode, not legacy BIOS mode.
  • Disable Secure Boot: If Secure Boot is enabled, temporarily disable it to see if it resolves the issue.

8. Incompatible Hardware or Drivers:

Certain hardware components or outdated drivers may not be compatible with the reset process.

Solution:

  • Update drivers: Update all drivers to the latest versions.
  • Check hardware compatibility: Ensure all hardware components are compatible with Windows 11.

9. File System Errors:

Errors within the file system can also prevent the reset process from completing successfully.

Solution:

  • Run the Check Disk (chkdsk) utility: This tool checks for and repairs errors in the file system. Open Command Prompt as administrator and type "chkdsk /f /r".
  • Format the drive: If the above solutions fail, consider formatting the system drive. This will erase all data on the drive, so ensure you have a backup before proceeding.

10. System Image Corruption:

If the Windows 11 system image is corrupted, the reset process may fail.

Solution:

  • Use a bootable USB drive: Create a bootable USB drive with the Windows 11 installation media and perform a clean installation.

FAQs on Windows 11 Reset Issues

Q: What happens to my files during a reset?

A: All personal files on the system drive will be deleted during a reset. It is highly recommended to back up your data before proceeding.

Q: Can I reset Windows 11 without losing my files?

A: No, the reset process will always delete all files on the system drive.

Q: What if the reset process gets stuck?

A: If the reset process gets stuck, try restarting the computer. If the problem persists, consider using a bootable USB drive with the Windows 11 installation media to perform a clean installation.

Q: Can I revert back to a previous version of Windows after a reset?

A: No, a reset will permanently install the latest version of Windows 11.

Q: Is there a way to selectively reset Windows 11 without deleting all files?

A: No, the reset process does not allow for selective file deletion.

Tips for Successful Windows 11 Resets

  • Back up your data: Ensure you have a complete backup of all important files before attempting a reset.
  • Check system requirements: Verify that your computer meets the minimum system requirements for Windows 11.
  • Update drivers: Keep all drivers up to date to avoid compatibility issues.
  • Disable unnecessary software: Temporarily disable any third-party software that might interfere with the reset process.
  • Use a reliable internet connection: Ensure a stable internet connection for downloading necessary files during the reset process.

Conclusion

Successfully resetting Windows 11 can be a valuable solution for resolving various system issues. However, encountering difficulties with the reset process can be frustrating. By understanding the common reasons for reset failures and implementing the appropriate troubleshooting steps, users can increase their chances of successfully restoring their system to a clean state. Remember to back up your data and proceed with caution, as the reset process is irreversible.

How To Reset Wsa To Fix Problems On Windows 11 Purein - vrogue.co How to Reset Windows 11? [Step-by-Step Guide] - MiniTool Partition Wizard How to reset your Windows 11 computer
How to Reset Windows 11 PC to Factory Settings Using Command Prompt - YouTube How to run a troubleshooter in Windows 11 - Tomas Arlen How to Reset Windows 11? [Step-by-Step Guide] - MiniTool Partition Wizard
How to reset a Windows 11 PC to factory settings, pc windows 11 - okgo.net Fix Windows 11/10 Reset Not Working: Quick Solutions

Closure

Thus, we hope this article has provided valuable insights into Troubleshooting Windows 11 Reset Issues: A Comprehensive Guide. We hope you find this article informative and beneficial. See you in our next article!

Navigating The Labyrinth: Repair Apps And Programs For Windows 10 Excel

Navigating the Labyrinth: Repair Apps and Programs for Windows 10 Excel

Introduction

In this auspicious occasion, we are delighted to delve into the intriguing topic related to Navigating the Labyrinth: Repair Apps and Programs for Windows 10 Excel. Let’s weave interesting information and offer fresh perspectives to the readers.

How to Repair Apps and Programs in Windows 10 & 11

The world of spreadsheets is a powerful tool for organization, analysis, and data management. Microsoft Excel, a cornerstone of this realm, offers unmatched functionality and flexibility. However, even the most robust software can encounter issues, leading to frustration and productivity loss. This is where repair apps and programs for Windows 10 Excel step in, providing a lifeline for users facing various challenges.

Understanding the Need for Repair Tools

Excel, like any software, is susceptible to glitches and errors. These can manifest in numerous ways, including:

  • Corrupted files: Accidental edits, power outages, or software conflicts can lead to corrupted Excel files, rendering them inaccessible.
  • Performance issues: Slow loading times, unresponsive functions, or frequent crashes can significantly hinder workflow.
  • Add-in conflicts: Incompatible or outdated add-ins can disrupt the smooth operation of Excel.
  • Formula errors: Incorrectly entered formulas or dependencies can lead to inaccurate results.
  • Data inconsistencies: Missing data, duplicate entries, or incorrect formatting can undermine the reliability of spreadsheets.

Repair Apps and Programs: A Spectrum of Solutions

Repair apps and programs for Windows 10 Excel address these issues by offering a range of functionalities:

  • File Recovery: These tools specialize in retrieving data from corrupted Excel files. They employ advanced algorithms to scan the file structure, identify damaged sections, and attempt to reconstruct the original data.
  • Performance Optimization: Programs designed to enhance Excel’s performance can identify and address bottlenecks, such as excessive memory usage or inefficient resource allocation. This can lead to faster loading times and smoother operation.
  • Add-in Management: Tools specifically for managing Excel add-ins allow users to disable or remove conflicting add-ins, preventing them from disrupting the application’s functionality.
  • Formula Auditing: These programs help users identify and correct errors in formulas by providing visual representations of dependencies and potential inconsistencies.
  • Data Validation: Tools for data validation can ensure the accuracy and consistency of data within spreadsheets by identifying and flagging potential errors, such as duplicate entries or incorrect formatting.

A Comprehensive Look at Popular Options

The market offers a diverse range of repair apps and programs for Windows 10 Excel. Here’s a closer look at some prominent options:

1. Microsoft Excel Repair Tool:

  • Function: This built-in tool, accessible through the "File" menu, attempts to repair corrupted Excel files. It analyzes the file structure and tries to recover as much data as possible.
  • Pros: Easy to access, part of the core Excel application.
  • Cons: Limited capabilities, may not be effective for complex corruption issues.

2. Stellar Phoenix Excel Repair:

  • Function: A dedicated repair tool that can recover data from heavily corrupted Excel files. It supports various file formats and offers advanced features like previewing recovered data before saving.
  • Pros: Powerful recovery capabilities, supports multiple file formats.
  • Cons: Paid software, requires a license for full functionality.

3. Recover My Files:

  • Function: A data recovery software that can recover deleted or lost files, including Excel files. It offers advanced scanning options and supports various file systems.
  • Pros: Comprehensive data recovery solution, supports various file types.
  • Cons: Paid software, may not be specifically tailored for Excel repair.

4. EaseUS Data Recovery Wizard:

  • Function: A data recovery program that can recover lost or deleted Excel files. It offers different recovery modes and supports various storage devices.
  • Pros: User-friendly interface, supports various storage devices.
  • Cons: Paid software, may not be specifically designed for Excel repair.

5. Advanced Excel Repair Tool:

  • Function: A specialized tool designed to repair corrupted Excel files. It offers features like previewing recovered data and recovering specific data elements.
  • Pros: Focused on Excel repair, offers preview functionality.
  • Cons: Paid software, may have limited features compared to comprehensive data recovery programs.

6. Excel Repair Toolbox:

  • Function: A collection of tools designed to address various Excel issues, including corruption, performance problems, and add-in conflicts. It offers a user-friendly interface and comprehensive diagnostic capabilities.
  • Pros: Multiple tools in one package, user-friendly interface.
  • Cons: Paid software, may not be suitable for all types of Excel issues.

FAQs: Addressing Common Concerns

Q: Can I repair a corrupted Excel file without using any special software?

A: While there are some basic troubleshooting steps you can try, such as renaming the file or opening it in an older version of Excel, these methods are not guaranteed to work. Dedicated repair software offers a higher chance of success, especially for heavily corrupted files.

Q: Is it safe to use repair software from unknown sources?

A: Always download repair software from reputable sources, such as official websites or trusted app stores. Avoid downloading from unknown websites or untrusted sources, as these may contain malware or viruses that can harm your computer.

Q: Can repair software recover all the data from a corrupted Excel file?

A: The extent of data recovery depends on the severity of the corruption. Some tools can recover most or all of the data, while others may only be able to retrieve a portion of it.

Q: What are the best practices for preventing Excel file corruption?

A: Here are some best practices:

  • Save regularly: Save your work frequently to minimize data loss in case of unexpected issues.
  • Use reliable storage devices: Avoid using unreliable storage devices like external hard drives that are prone to failure.
  • Back up your files: Create regular backups of your important files to ensure you have a copy in case of data loss.
  • Avoid opening files from untrusted sources: Be cautious about opening Excel files received from unknown sources, as they may contain malware or viruses.
  • Keep your software up to date: Regularly update your Excel application and operating system to benefit from security patches and bug fixes.

Tips for Choosing the Right Repair Tool

  • Assess the severity of the issue: If you are dealing with a minor corruption, a basic repair tool may suffice. However, if the file is heavily corrupted, you may need a more powerful tool.
  • Consider your budget: Some repair tools are free, while others require a paid license. Choose a tool that fits your budget and meets your needs.
  • Read reviews and compare features: Research different repair tools and compare their features, capabilities, and user reviews before making a decision.
  • Look for compatibility: Ensure that the repair tool is compatible with your version of Excel and operating system.

Conclusion: Empowering Excel Users

Repair apps and programs for Windows 10 Excel play a crucial role in ensuring data integrity and productivity. By providing tools for file recovery, performance optimization, and error correction, they empower users to overcome various challenges and maintain the smooth operation of their spreadsheets. Choosing the right repair tool, understanding its capabilities, and following best practices can significantly minimize data loss and ensure a seamless Excel experience.

How To Repair Apps & Programs In Windows 10 Repair Apps in windows 10 How to Repair Apps/Programs Common Problems Windows 10 - MiniTool
How to Repair Apps and Programs in Windows 11 or 10?  Gear Up Windows Repair Apps And Programs Repair Apps in windows 10
How to Repair Apps and Programs in Windows 10 & 11 How To Repair Apps and Programs in Windows 10 - YouTube

Closure

Thus, we hope this article has provided valuable insights into Navigating the Labyrinth: Repair Apps and Programs for Windows 10 Excel. We thank you for taking the time to read this article. See you in our next article!

The End Of An Era: Understanding The Windows 10 Support Lifecycle

The End of an Era: Understanding the Windows 10 Support Lifecycle

Introduction

With great pleasure, we will explore the intriguing topic related to The End of an Era: Understanding the Windows 10 Support Lifecycle. Let’s weave interesting information and offer fresh perspectives to the readers.

The End of an Era: Understanding the Windows 10 Support Lifecycle

Windows 10 Support Lifecycle - Image to u

Windows 10, a cornerstone of the modern computing landscape, has served millions of users worldwide. However, like all software, it has a lifespan. Microsoft, the developer of Windows 10, provides a defined support lifecycle for its operating system, outlining the period during which security updates, bug fixes, and technical assistance are offered. This lifecycle helps users understand when their operating system will transition to a state where it is no longer actively maintained.

The official end of support for Windows 10 Home and Pro editions is October 14, 2025. This date marks the cessation of all new features, security updates, and technical assistance from Microsoft. While Windows 10 will continue to function after this date, it will become increasingly vulnerable to security threats and malware, as Microsoft will no longer release patches to address newly discovered vulnerabilities.

Understanding the Importance of Support Lifecycle

The Windows 10 support lifecycle is crucial for several reasons:

  • Security: Security updates are essential for protecting devices from emerging threats. Without regular updates, systems become susceptible to malware, data breaches, and other security risks.
  • Stability and Performance: Updates often include bug fixes and performance enhancements that improve the overall stability and responsiveness of the operating system.
  • Compatibility: New hardware and software releases may require compatibility with the latest operating system updates. Without updates, users may experience issues with newly released applications or devices.
  • Technical Support: Microsoft’s technical support provides assistance with various issues and helps users troubleshoot problems. After the end of support, users will need to rely on alternative resources for assistance.

The Impact of the End of Support

When support for Windows 10 ends, users will experience the following:

  • No More Security Updates: Microsoft will no longer release security updates to address newly discovered vulnerabilities. This will leave devices vulnerable to malware and other security threats.
  • No More Bug Fixes: Microsoft will no longer release bug fixes or performance enhancements. This can lead to stability issues and a decline in performance.
  • No More Technical Support: Microsoft will no longer provide technical support for Windows 10. Users will need to rely on third-party resources or community forums for assistance.
  • Limited Compatibility: New hardware and software releases may not be compatible with Windows 10 after the end of support.

Preparing for the End of Support

It is essential for users to prepare for the end of support for Windows 10. Here are some key steps:

  • Upgrade to Windows 11: Consider upgrading to Windows 11, which is the latest version of Microsoft’s operating system. Windows 11 offers enhanced security features, improved performance, and compatibility with the latest hardware and software.
  • Back Up Your Data: Regularly back up your important data to ensure its safety. This can be done using cloud storage services, external hard drives, or other backup solutions.
  • Consider Alternative Operating Systems: Explore alternative operating systems like Linux or macOS, which offer different features and benefits.
  • Stay Informed: Stay updated on the latest information regarding the end of support for Windows 10. This will help you make informed decisions about your operating system.

FAQs about the End of Support for Windows 10

Q: Will my Windows 10 computer stop working after October 14, 2025?

A: No, your computer will continue to function. However, it will be more vulnerable to security threats and may experience stability issues.

Q: What happens to my data after the end of support?

A: Your data will remain on your device. However, it may be at risk from security threats if your device is not updated with the latest security patches.

Q: Can I still use Windows 10 after the end of support?

A: Yes, you can continue to use Windows 10. However, it is strongly recommended to upgrade to a supported operating system or consider alternative options.

Q: Is it safe to continue using Windows 10 after the end of support?

A: No, it is not recommended to continue using Windows 10 after the end of support. Your device will be vulnerable to security threats and may experience performance issues.

Q: What are the benefits of upgrading to Windows 11?

A: Windows 11 offers enhanced security features, improved performance, and compatibility with the latest hardware and software. It also includes new features and user interface enhancements.

Tips for Managing the End of Support for Windows 10

  • Plan Ahead: Start planning your upgrade or migration strategy well in advance of the end of support.
  • Assess Your Needs: Determine whether upgrading to Windows 11 or exploring alternative operating systems is the best option for your needs.
  • Back Up Your Data: Regularly back up your important data to ensure its safety.
  • Stay Informed: Stay updated on the latest information regarding the end of support for Windows 10.
  • Consider Professional Assistance: If you are unsure about the upgrade process or have complex requirements, consider seeking professional assistance.

Conclusion

The end of support for Windows 10 marks a significant milestone in the evolution of operating systems. While it may seem daunting, it presents an opportunity for users to upgrade to newer, more secure platforms or explore alternative operating systems that better suit their needs. By understanding the importance of the support lifecycle and taking proactive steps to prepare, users can ensure a smooth transition and continue enjoying a secure and reliable computing experience.

Windows 10 Build Support Lifecycle - Image to u Microsoft to support Windows 10 until at least 2025 - gHacks Tech News What Happens When Windows 10 Support Ends?  Windows 10, Windows, Supportive
Windows 10 Support Ende Übersicht - Der grosse Guide - Extended Support erklärt - Windows Windows 10 Build Support Lifecycle - Image to u What Happens When Windows 10 Support Ends?
Windows 10 Build Support Lifecycle - Image to u Don’t Get Caught Off-Guard: Support for Windows 10 1903 Expires Soon

Closure

Thus, we hope this article has provided valuable insights into The End of an Era: Understanding the Windows 10 Support Lifecycle. We hope you find this article informative and beneficial. See you in our next article!

Photoimpression 3.0

photoimpression 3.0

Introduction

With enthusiasm, let’s navigate through the intriguing topic related to photoimpression 3.0. Let’s weave interesting information and offer fresh perspectives to the readers.

The Evolution of Image Understanding: Exploring the Advancements of Photoimpression 3.0

PhotoImpression 3.0 - Macintosh Repository

The field of computer vision has witnessed remarkable progress in recent years, with advancements in artificial intelligence (AI) driving the development of sophisticated image processing techniques. One such innovation, commonly referred to as Photoimpression 3.0, represents a significant leap forward in image understanding, offering a new paradigm for analyzing and interpreting visual data.

Photoimpression 3.0 transcends traditional image recognition by integrating a multifaceted approach that encompasses deep learning, natural language processing (NLP), and knowledge graph technologies. This sophisticated integration empowers systems to not only identify objects within an image but also comprehend their relationships, context, and underlying meaning.

A Deeper Dive into Photoimpression 3.0:

Photoimpression 3.0 operates on the foundation of deep learning algorithms, specifically convolutional neural networks (CNNs). These networks are trained on vast datasets of images and their corresponding labels, enabling them to learn intricate patterns and features within visual data. The learned representations are then used to identify objects, scenes, and even emotions conveyed within an image.

However, Photoimpression 3.0 goes beyond simple object detection. It incorporates NLP techniques to understand the narrative embedded within the image. This is achieved through analyzing the visual elements and their arrangement, associating them with relevant language concepts and generating descriptive captions or summaries.

Furthermore, knowledge graph technology plays a crucial role in enriching the understanding of images. By linking identified objects and concepts to a vast network of interconnected entities, Photoimpression 3.0 can infer relationships, contextualize information, and provide deeper insights into the image’s content.

The Significance of Photoimpression 3.0:

The implications of Photoimpression 3.0 extend far beyond the realm of image analysis. Its capabilities have the potential to revolutionize various industries, empowering them with enhanced efficiency, improved decision-making, and new avenues for innovation.

1. Enhanced Search and Retrieval:

Photoimpression 3.0 can significantly improve image search capabilities by understanding the semantic content of images. This allows users to search for images based on their meaning rather than just visual features, enabling more accurate and relevant results.

2. Content Moderation and Safety:

In online platforms, Photoimpression 3.0 can be utilized to detect and filter inappropriate or harmful content with greater accuracy. By understanding the context and meaning of images, systems can identify offensive material, misinformation, or violations of community guidelines.

3. Medical Diagnosis and Analysis:

The ability to interpret complex medical images, such as X-rays and MRIs, holds immense promise for healthcare. Photoimpression 3.0 can assist in diagnosis by identifying anomalies, detecting patterns, and providing insights that may be missed by human observation.

4. Marketing and Advertising:

Photoimpression 3.0 can revolutionize marketing by enabling targeted advertising based on image content. By understanding the context and emotions conveyed in images, advertisers can tailor their campaigns to specific audiences and increase their effectiveness.

5. Accessibility and Inclusion:

For visually impaired individuals, Photoimpression 3.0 can provide real-time image descriptions, enabling them to access and understand visual information. This technology can bridge the gap between visual and non-visual experiences, fostering greater inclusion.

Frequently Asked Questions (FAQs) about Photoimpression 3.0:

1. What are the limitations of Photoimpression 3.0?

While Photoimpression 3.0 represents a significant advancement, it is not without limitations. The accuracy of the system depends heavily on the quality and diversity of the training data. Bias in the training data can lead to biased outputs, and the system may struggle to interpret images containing unfamiliar objects or concepts.

2. How can I access and utilize Photoimpression 3.0?

Photoimpression 3.0 is not yet widely available as a standalone product. However, its underlying technologies, such as deep learning and NLP, are being integrated into various platforms and services. Users can access these functionalities through APIs, cloud-based services, or specialized software.

3. What are the ethical considerations surrounding Photoimpression 3.0?

As with any powerful technology, Photoimpression 3.0 raises ethical concerns. The potential for misuse, such as creating deepfakes or manipulating images for malicious purposes, necessitates careful consideration of its applications and regulations.

4. How does Photoimpression 3.0 compare to other image analysis technologies?

Photoimpression 3.0 stands out from traditional image recognition techniques by incorporating NLP and knowledge graphs. This allows for a deeper level of understanding, going beyond object detection to grasp the context and meaning embedded within images.

5. What is the future of Photoimpression 3.0?

Photoimpression 3.0 is an evolving technology with continuous advancements. Future developments may include improved accuracy, enhanced understanding of complex scenes, and integration with other AI technologies, further expanding its capabilities.

Tips for Utilizing Photoimpression 3.0 Effectively:

1. Choose the right tool: Select a Photoimpression 3.0-based tool that aligns with your specific needs and requirements, considering factors such as accuracy, speed, and functionality.

2. Provide clear instructions: When using Photoimpression 3.0 for tasks like image captioning or content moderation, provide clear and concise instructions to ensure the system understands your intended outcome.

3. Evaluate the results: It is crucial to critically evaluate the outputs of Photoimpression 3.0, considering its potential limitations and biases. Human oversight remains essential in ensuring the accuracy and appropriateness of the results.

4. Stay updated on advancements: The field of computer vision is rapidly evolving, and new advancements in Photoimpression 3.0 are constantly emerging. Staying informed about the latest developments will help you leverage the technology effectively.

Conclusion:

Photoimpression 3.0 represents a transformative shift in image understanding, empowering systems to interpret visual data with unprecedented depth and accuracy. Its ability to analyze objects, comprehend context, and extract meaning from images opens up a world of possibilities across various industries. As the technology continues to evolve, its impact on our lives will undoubtedly grow, shaping the future of how we interact with and understand the visual world around us.

ArcSoft PhotoImpression 3.0: Recensioner  Tester  Produktinfo  Prisjakt - Fotosidan TÉLÉCHARGER ARCSOFT PHOTOIMPRESSION 3.0 ArcSoft PhotoImpression 3.0: Recensioner  Tester  Produktinfo  Prisjakt - Fotosidan
ArcSoft PhotoImpression 3.0 Download (Free) - PhotoImpression.exe Photoimpression 3 Free Download Full Version ArcSoft PhotoImpression 3.0 Download (Free) - PhotoImpression.exe
Arcsoft Photoimpression 3.0 - renewcharge Photoimpression 3.0 Free Download Full Version

Closure

Thus, we hope this article has provided valuable insights into photoimpression 3.0. We hope you find this article informative and beneficial. See you in our next article!

The Future Of Windows: An Exploration Of The Unreleased Windows 12

The Future of Windows: An Exploration of the Unreleased Windows 12

Introduction

In this auspicious occasion, we are delighted to delve into the intriguing topic related to The Future of Windows: An Exploration of the Unreleased Windows 12. Let’s weave interesting information and offer fresh perspectives to the readers.

The Future of Windows: An Exploration of the Unreleased Windows 12

Artificial Intelligence, New Interface This Is All We Know About The Future Windows 12 - GEARRICE

While Microsoft has not officially announced Windows 12, speculation and anticipation surrounding the next iteration of its flagship operating system are rife. This article will delve into the rumors, potential features, and possible release timeline for Windows 12, examining its potential impact on the tech landscape.

The Road to Windows 12: A Look Back and Forward

Windows 11, released in October 2021, introduced a significant visual overhaul and a focus on user experience. However, the operating system has faced criticisms for its resource-intensive nature and its reliance on the Microsoft Store for app distribution.

With Windows 11 still relatively new, the development cycle for Windows 12 is likely to be longer than the usual three-year gap between releases. However, given the rapid pace of technological advancements, Microsoft is likely already exploring innovative features and functionalities for its next operating system.

Speculation and Potential Features

While concrete details are scarce, rumors and leaks suggest several potential features for Windows 12:

  • Enhanced AI Integration: Windows 12 could see a deeper integration of artificial intelligence, offering features like personalized recommendations, automated task management, and improved accessibility tools.
  • Focus on Cloud Computing: Microsoft might further enhance cloud integration, allowing for seamless file sharing and collaborative work across devices. This could include features like cloud-based desktop environments and improved integration with Microsoft 365 services.
  • Improved Security: With cyber threats becoming increasingly sophisticated, Windows 12 could prioritize enhanced security features, including built-in anti-malware tools and improved data encryption.
  • Refined User Interface: The user interface might undergo further refinements, potentially incorporating a more minimalist design and streamlined navigation.
  • Augmented and Virtual Reality Support: Windows 12 could see enhanced support for augmented and virtual reality applications, potentially leading to a more immersive user experience.
  • Focus on Gaming: With the growing popularity of gaming, Windows 12 might introduce features specifically designed to enhance gaming performance and optimize gameplay.

The Release Timeline: A Matter of Speculation

Given the current development cycle of Windows 11, a release date for Windows 12 is unlikely to be before 2024. However, Microsoft could opt for a staggered release strategy, introducing new features gradually through updates to Windows 11.

The Importance of Windows 12: A New Era of Computing

Windows 12 could mark a significant shift in the computing landscape, potentially influencing:

  • The Future of Work: The focus on cloud computing and AI integration could transform the way people work, enabling remote collaboration and automating repetitive tasks.
  • The Rise of Immersive Technologies: Enhanced support for AR and VR could lead to the widespread adoption of these technologies, revolutionizing entertainment, education, and healthcare.
  • The Evolution of Gaming: Dedicated gaming features could further enhance the gaming experience, attracting a wider audience and driving innovation in the gaming industry.

FAQs Regarding Windows 12

Q: Will Windows 12 be a free upgrade for existing Windows 11 users?

A: It is too early to confirm whether Windows 12 will be a free upgrade. Microsoft’s upgrade policies have varied in the past, and the decision will likely depend on the features and changes introduced in the new operating system.

Q: Will Windows 12 require specific hardware requirements?

A: Microsoft is likely to introduce minimum hardware requirements for Windows 12, potentially requiring newer processors and sufficient RAM to support the new features.

Q: Will Windows 12 be compatible with existing software and hardware?

A: While Microsoft strives for backward compatibility, some existing software and hardware may not be fully supported by Windows 12. Users may need to upgrade their software or hardware to ensure optimal compatibility.

Q: Will Windows 12 support legacy applications?

A: Microsoft generally prioritizes backward compatibility, so Windows 12 is likely to support legacy applications. However, older applications may require updates or compatibility fixes to run smoothly on the new operating system.

Tips for Preparing for Windows 12

  • Keep your system updated: Ensure your computer is running the latest version of Windows 11 to receive the latest updates and security patches.
  • Back up your data: Regularly back up your important data to prevent loss in case of any issues during the transition to Windows 12.
  • Check hardware compatibility: Verify that your computer meets the minimum hardware requirements for Windows 12 before upgrading.
  • Stay informed: Follow technology news and official announcements from Microsoft to stay informed about the latest developments regarding Windows 12.

Conclusion

Windows 12 holds the potential to revolutionize the computing experience, offering a glimpse into a future where AI, cloud computing, and immersive technologies play a central role. While the specific features and release timeline remain shrouded in speculation, the anticipation surrounding Windows 12 highlights its potential impact on the tech landscape. As Microsoft continues to develop this next-generation operating system, it will be interesting to see how it shapes the future of computing.

Windows 12: What we know so far about the future of Windows  Windows Central TEASER FIRST LOOK: Windows 12 (Concept 2) - YouTube Windows 12 concept video shows off drool-worthy design for a dream OS - TECHTELEGRAPH
Adaptive wallpapers could bring the Windows 12 desktop to life Future Windows 12 - YouTube Unveiling the Future: Windows 12 Leaks Uncovered! - YouTube
Future Windows 12 - YouTube Microsoft Windows 12: Everything we know about the future Windows OS

Closure

Thus, we hope this article has provided valuable insights into The Future of Windows: An Exploration of the Unreleased Windows 12. We appreciate your attention to our article. See you in our next article!

Navigating The Notification Area In Windows 11: A Comprehensive Guide

Navigating the Notification Area in Windows 11: A Comprehensive Guide

Introduction

With enthusiasm, let’s navigate through the intriguing topic related to Navigating the Notification Area in Windows 11: A Comprehensive Guide. Let’s weave interesting information and offer fresh perspectives to the readers.

[Detailed Guide] How to Install Windows 11 on Your PC or Laptop

The notification area, often referred to as the system tray, is a vital component of the Windows 11 interface. It serves as a central hub for displaying essential system information, ongoing processes, and quick access to frequently used applications. This area, located at the bottom right corner of the taskbar, provides a concise and visually intuitive way to monitor and interact with various aspects of your computer.

Understanding the Notification Area Icons

The notification area houses a collection of icons, each representing a specific function or application. These icons can be categorized into several groups:

1. System Icons: These icons provide real-time information about essential system functions and status.

  • Network: This icon indicates your network connection status, whether connected via Wi-Fi, Ethernet, or cellular data. It also displays the signal strength and network name.
  • Volume: This icon controls the system’s audio output volume. Clicking on it opens a volume mixer, allowing you to adjust individual application volume levels.
  • Power: This icon represents the power status of your computer, displaying the battery percentage (for laptops) or the current power plan.
  • Clock: This icon displays the current time and date, providing a quick reference. Clicking it opens the calendar, allowing you to view appointments and set reminders.
  • Action Center: This icon serves as a central hub for notifications, displaying alerts from various applications and system events. It allows you to manage and dismiss notifications, as well as access quick actions like Wi-Fi toggling or brightness adjustments.

2. Application Icons: These icons represent running applications that are minimized or background processes.

  • Running Applications: These icons indicate active applications that are minimized or running in the background. Clicking on them brings the corresponding application to the forefront.
  • Hidden Icons: These icons are typically hidden by default to avoid clutter in the notification area. To access them, click on the "show hidden icons" arrow located to the right of the notification area.

3. Custom Icons: These icons represent applications or utilities that have been added to the notification area by the user.

  • Third-Party Applications: Some applications, such as antivirus software or cloud storage services, add their own icons to the notification area to provide quick access to their features or display important information.
  • System Tray Tools: Users can add various system tray tools, such as system monitoring utilities or performance indicators, to the notification area for convenient access.

The Importance of the Notification Area

The notification area plays a crucial role in providing users with a streamlined and efficient computing experience. Its key benefits include:

  • Centralized Information: The notification area serves as a central hub for displaying essential system information, providing users with a quick overview of their computer’s status.
  • Quick Access: It allows users to quickly access and interact with frequently used applications and system functions, saving time and effort.
  • Enhanced Awareness: By displaying notifications and alerts, the notification area keeps users informed about important system events and application activities.
  • Customizability: Users can personalize the notification area by adding or removing icons, customizing their display, and adjusting notification settings.

Frequently Asked Questions

Q: How can I customize the notification area icons?

A: You can customize the notification area icons by right-clicking on the taskbar and selecting "Taskbar settings." From there, you can adjust various settings related to the notification area, such as hiding or showing specific icons, customizing their display, and managing notification settings.

Q: How do I add or remove icons from the notification area?

A: To add an icon to the notification area, you can typically right-click on the application’s icon in the taskbar and select "Pin to taskbar." To remove an icon, right-click on it in the notification area and select "Unpin from taskbar."

Q: What are the hidden icons in the notification area?

A: Hidden icons are icons that are not displayed by default in the notification area to avoid clutter. To access hidden icons, click on the "show hidden icons" arrow located to the right of the notification area.

Q: How do I manage notifications in the notification area?

A: To manage notifications, click on the Action Center icon in the notification area. From there, you can dismiss individual notifications, adjust notification settings for specific applications, and access quick actions.

Tips for Utilizing the Notification Area Effectively

  • Pin Essential Icons: Pin icons for frequently used applications or system functions to the notification area for quick access.
  • Hide Unnecessary Icons: Hide icons for applications or system functions that you rarely use to reduce clutter in the notification area.
  • Customize Notification Settings: Adjust notification settings for specific applications to receive only the most important alerts.
  • Utilize Quick Actions: Take advantage of quick actions in the Action Center to quickly toggle Wi-Fi, adjust brightness, or perform other common tasks.
  • Explore System Tray Tools: Consider adding system tray tools, such as system monitoring utilities or performance indicators, to the notification area for convenient access.

Conclusion

The notification area in Windows 11 serves as a vital tool for users, providing a streamlined and efficient way to monitor and interact with their computer. By understanding the different icons and their functions, users can leverage the notification area to enhance their computing experience, stay informed about system events, and access essential features with ease.

Notification Area Windows 11 How to handle Windows 11 notifications like a Pro - Digital Citizen Notification Settings Of Windows 11 Full Review  Global Vs Individual Application Notifications
Using Notifications and Quick Settings - Windows 11 Beginner - Novus Skills Customize Windows 11 Taskbar Notification Area - Device Management Blog How to Manage Notifications in Windows 11? Here Is the Tutorial
How to configure app notification settings in Windows 11 - Digital Citizen Customize Windows 11 Taskbar Notification Area - Device Management Blog

Closure

Thus, we hope this article has provided valuable insights into Navigating the Notification Area in Windows 11: A Comprehensive Guide. We appreciate your attention to our article. See you in our next article!