Archives April 2024

Navigating The Digital Marketplace: Finding Legitimate Windows 10 Keys

Navigating the Digital Marketplace: Finding Legitimate Windows 10 Keys

Introduction

With enthusiasm, let’s navigate through the intriguing topic related to Navigating the Digital Marketplace: Finding Legitimate Windows 10 Keys. Let’s weave interesting information and offer fresh perspectives to the readers.

How to find your Windows 10 product key or digital license

The digital realm offers a plethora of options for acquiring software, including Windows 10 keys. However, the ease of access also brings challenges, as navigating the landscape of legitimate and potentially fraudulent vendors requires careful consideration. This article explores the complexities of purchasing Windows 10 keys online, focusing on the information shared within the Reddit community, a platform renowned for its user-generated content and diverse perspectives.

Understanding the Importance of Legitimate Keys:

Acquiring a legitimate Windows 10 key is crucial for several reasons:

  • Functionality: A genuine key guarantees access to all features and updates of Windows 10, including security patches and performance enhancements.
  • Security: Using a legitimate key ensures your system is protected from malware and unauthorized access.
  • Legal Compliance: Purchasing a legitimate key adheres to software licensing agreements and avoids potential legal ramifications.
  • Peace of Mind: Knowing your key is genuine provides peace of mind, eliminating the risk of encountering software malfunctions or encountering future activation issues.

Navigating the Online Landscape:

The internet offers a vast array of vendors claiming to sell Windows 10 keys. However, not all vendors operate with the same ethical standards. Here’s a breakdown of the types of vendors commonly encountered:

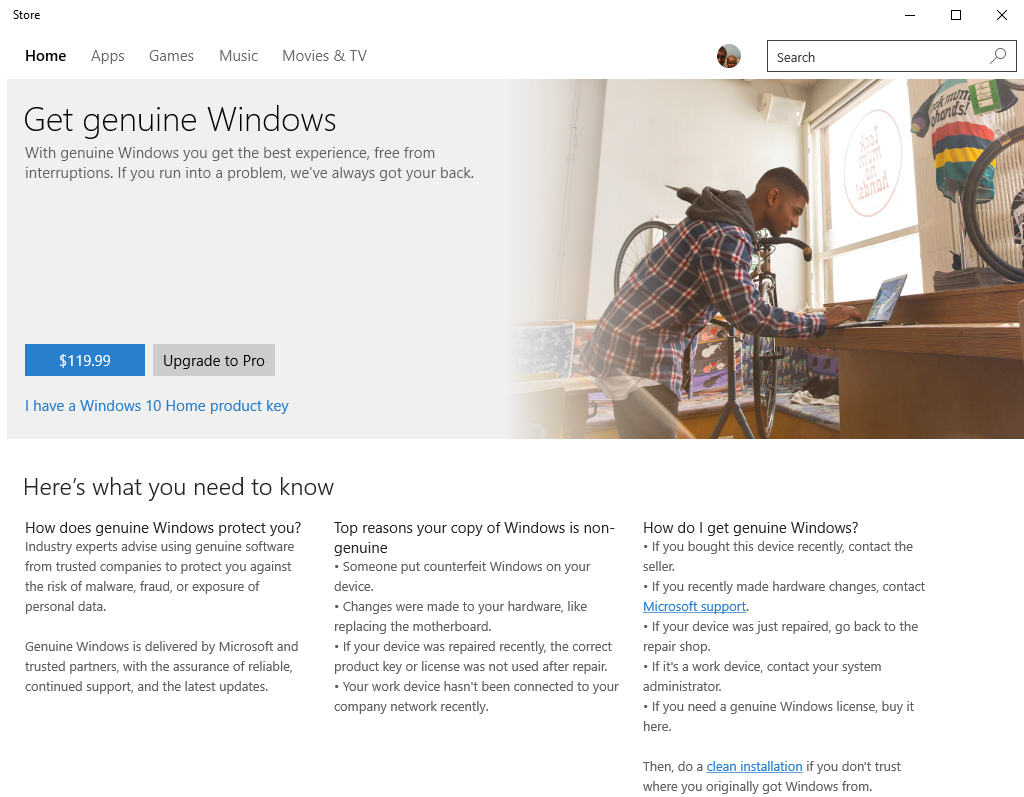
  • Official Microsoft Store: This is the most reliable source for Windows 10 keys. However, the cost may be higher compared to other options.
  • Authorized Resellers: These are businesses officially authorized by Microsoft to sell Windows 10 keys. They offer a level of legitimacy, but prices can vary.
  • Third-Party Websites: These websites offer a wide range of prices, but their legitimacy can be questionable. It is essential to exercise caution and conduct thorough research before making a purchase.
  • Key Resellers: These individuals or groups purchase keys in bulk and resell them at lower prices. While potentially offering attractive deals, the origin and legitimacy of these keys can be uncertain.

Reddit’s Insights: A User-Driven Perspective:

Reddit, with its vast and diverse community, provides a valuable platform for users to share experiences and advice. While Reddit should not be considered a definitive source for legal advice, it offers a unique perspective on the intricacies of purchasing Windows 10 keys:

  • Community Forums: Reddit hosts numerous forums dedicated to software, technology, and purchasing advice. Users often share their experiences with different vendors, highlighting both positive and negative encounters.
  • User Reviews: Reddit users often leave reviews and recommendations for specific vendors, providing insights into their legitimacy, pricing, and customer service.
  • Discussions and Debates: Reddit users actively engage in discussions about the best places to acquire Windows 10 keys, sharing information and cautionary tales.

FAQs: Addressing Common Concerns:

Q: Is it safe to purchase Windows 10 keys from third-party websites?

A: Purchasing from third-party websites carries inherent risks. While some may be legitimate, others may offer stolen or fraudulent keys. It is crucial to conduct thorough research and only purchase from reputable vendors with positive customer reviews.

Q: What are the signs of a fraudulent vendor?

A: Signs of a fraudulent vendor include:

  • Unusually low prices: Prices significantly lower than the official Microsoft Store may indicate a suspicious offer.
  • Lack of customer support: Reputable vendors offer reliable customer support channels.
  • Negative reviews: Online reviews can reveal past customer experiences with a vendor.
  • Suspicious website design: Unprofessional website design or lack of contact information may indicate a fraudulent operation.

Q: What are the risks of using a stolen or fraudulent Windows 10 key?

A: Using a stolen or fraudulent key can lead to:

  • Activation Issues: The key may not activate properly, leaving you unable to use Windows 10.
  • Security Risks: Stolen keys may be associated with malware or other security threats.
  • Legal Consequences: Using an illegitimate key can result in legal action from Microsoft.

Q: How can I ensure I am purchasing a legitimate Windows 10 key?

A: To ensure legitimacy, consider the following:

  • Purchase from reputable sources: Stick to the official Microsoft Store, authorized resellers, or trusted third-party websites with positive reviews.
  • Verify vendor legitimacy: Check for official contact information, customer support options, and website design.
  • Read reviews and user feedback: Consult online reviews and user discussions to gauge the vendor’s reputation.

Tips for Safe and Secure Purchasing:

  • Compare prices: Research prices from multiple vendors to find the best value.
  • Read the terms and conditions: Carefully review the vendor’s terms and conditions before purchasing.
  • Use a secure payment method: Opt for reputable payment processors like PayPal or credit card transactions.
  • Save your purchase information: Keep a record of your purchase details, including the vendor’s name, order number, and key code.
  • Contact customer support if necessary: Don’t hesitate to contact customer support if you encounter issues or have questions.

Conclusion:

Acquiring a legitimate Windows 10 key requires careful consideration and research. While Reddit offers a valuable platform for user-generated information, it is essential to remain cautious and verify information from multiple sources. By following the tips and advice outlined in this article, users can navigate the digital marketplace and secure a legitimate Windows 10 key, ensuring a safe and secure computing experience.

How To Find Windows 10 Product Key  Retail & OEM Digital License Key - YouTube Windows 10 product key digital - batjas Find digital license key windows 10  How To Find Windows 10 Product Key. 2019-04-20
How to retrieve your Windows product key for a legitimate copy Linus tech tips finding legitimate windows 10 pro product keys - arkdsae Linus tech tips finding legitimate windows 10 pro product keys - mevaperu
4 Best Ways Find Windows 10 Product Key  techviral How to check if my Windows Key is Genuine or Legit

Closure

Thus, we hope this article has provided valuable insights into Navigating the Digital Marketplace: Finding Legitimate Windows 10 Keys. We hope you find this article informative and beneficial. See you in our next article!

Managing User Accounts In Windows 11: A Comprehensive Guide To Removing Accounts

Managing User Accounts in Windows 11: A Comprehensive Guide to Removing Accounts

Introduction

With enthusiasm, let’s navigate through the intriguing topic related to Managing User Accounts in Windows 11: A Comprehensive Guide to Removing Accounts. Let’s weave interesting information and offer fresh perspectives to the readers.

Managing User Accounts in Windows 11: A Comprehensive Guide to Removing Accounts

How To Remove Microsoft Account From Windows 11 Guide  yorketech

Windows 11, like its predecessors, allows for multiple user accounts, each offering a personalized experience with distinct settings and files. While this promotes flexibility and security, it is essential to understand how to effectively manage these accounts, including the process of removing them when no longer needed. This guide provides a comprehensive overview of removing user accounts from Windows 11 settings, encompassing its importance, benefits, and practical considerations.

Understanding User Account Removal

Removing a user account from Windows 11 involves permanently deleting the associated profile, settings, and data. This action should be undertaken with caution, as it cannot be reversed. It is critical to ensure that all necessary data has been backed up or transferred before proceeding.

Reasons for Removing User Accounts

There are several compelling reasons for removing a user account from Windows 11:

  • Account Inactivity: If a user account remains inactive for an extended period and is no longer required, removing it can free up disk space and streamline system performance.
  • Account Security: Removing accounts that are no longer in use enhances system security by eliminating potential vulnerabilities associated with dormant profiles.
  • Account Consolidation: In scenarios where multiple user accounts exist for a single individual, removing redundant accounts can simplify system management and improve user experience.
  • Account Transfer: When transitioning to a new device or upgrading to a different operating system, removing user accounts from the previous system can be necessary to avoid data conflicts or compatibility issues.
  • Account Privacy: Removing user accounts can help protect personal data and privacy, especially if the account is linked to a service or platform that is no longer used.

The Process of Removing User Accounts

Removing a user account from Windows 11 is a straightforward process that can be completed through the Settings app:

  1. Access Settings: Open the Settings app by pressing Windows key + I.
  2. Navigate to Accounts: In the Settings app, click on Accounts.
  3. Select Family & Other Users: From the left-hand menu, choose Family & Other Users.
  4. Locate the Account: Identify the user account you wish to remove.
  5. Remove Account: Click on the account and select Remove.
  6. Confirm Removal: Confirm the removal by clicking on Remove account and data.

Important Note: Removing an account will permanently delete all associated data, including files, settings, and applications. It is crucial to back up any essential data before proceeding.

Considerations Before Removing an Account

Before removing a user account, it is essential to consider the following:

  • Account Ownership: Ensure that you have the necessary permissions to remove the account.
  • Data Backup: Back up all critical data associated with the account before removal.
  • Account Dependencies: Verify if any applications or services rely on the account.
  • Administrative Privileges: If the account to be removed has administrative privileges, consider transferring these privileges to another account before proceeding.

Frequently Asked Questions

Q: Can I remove my own account?

A: No, you cannot remove the account you are currently logged into. You must first log into a different account with administrative privileges to remove the current account.

Q: What happens to the files and settings associated with the removed account?

A: All files, settings, and applications associated with the removed account will be permanently deleted.

Q: Can I recover a removed account?

A: Once an account is removed, it cannot be recovered. The data associated with the account is permanently deleted.

Q: Can I transfer files from a removed account to another account?

A: You can transfer files from a removed account to another account by copying them to a shared location or using a file-sharing service.

Q: What if I have forgotten the password to the account I want to remove?

A: If you have forgotten the password, you may need to reset it or contact your system administrator for assistance.

Tips for Managing User Accounts

  • Regularly Review Accounts: Periodically review your user accounts and remove any that are no longer required.
  • Use Strong Passwords: Utilize strong and unique passwords for each account to enhance security.
  • Enable Two-Factor Authentication: Consider enabling two-factor authentication for enhanced account security.
  • Keep Accounts Updated: Regularly update your account information, including passwords and contact details.
  • Limit Account Permissions: Assign appropriate permissions to each account based on its intended use.

Conclusion

Removing user accounts from Windows 11 settings is a crucial aspect of maintaining system security, performance, and privacy. While the process is straightforward, it is essential to proceed with caution and ensure that all necessary data is backed up before proceeding. By understanding the process and associated considerations, users can effectively manage their accounts and optimize their Windows 11 experience.

How To Remove Microsoft Account From Windows 11 Guide  beebom How to Remove a Microsoft Account from Windows 11 How to manage user account settings on Windows 11  Windows Central
How To Remove Other User Accounts From Windows 11 - YouTube Delete User Account Windows 11 How To Remove User Account In Windows  Images and Photos finder How to remove Work or School account in Windows 11/10
How to Completely Delete a Microsoft Account and Remove It from Windows 11 - WinBuzzer How to remove Microsoft Account from Windows 11 [3 Methods] - DroidWin

Closure

Thus, we hope this article has provided valuable insights into Managing User Accounts in Windows 11: A Comprehensive Guide to Removing Accounts. We appreciate your attention to our article. See you in our next article!

Mastering The Transition: A Comprehensive Guide To Office 365 Deployment Lab Kits

Mastering the Transition: A Comprehensive Guide to Office 365 Deployment Lab Kits

Introduction

With enthusiasm, let’s navigate through the intriguing topic related to Mastering the Transition: A Comprehensive Guide to Office 365 Deployment Lab Kits. Let’s weave interesting information and offer fresh perspectives to the readers.

Mastering the Transition: A Comprehensive Guide to Office 365 Deployment Lab Kits

Microsoft 365 - Windows and Office Deployment Lab kit - YouTube

In today’s digitally driven world, organizations are increasingly adopting cloud-based solutions to enhance efficiency, collaboration, and scalability. Microsoft Office 365, a comprehensive suite of productivity applications, has emerged as a frontrunner in this transition, offering a robust platform for communication, collaboration, and data management. However, the successful implementation of Office 365 requires meticulous planning, thorough testing, and a deep understanding of its intricate features and functionalities. This is where Office 365 deployment lab kits come into play, serving as indispensable tools for organizations embarking on their cloud journey.

Understanding the Significance of Deployment Lab Kits

An Office 365 deployment lab kit is a meticulously curated collection of resources designed to simulate a real-world Office 365 environment within a controlled setting. This simulated environment provides a safe space for organizations to test, experiment, and validate their deployment strategies before rolling out Office 365 to their entire user base.

Key Components of an Effective Lab Kit

A comprehensive Office 365 deployment lab kit typically includes the following essential components:

  • Virtual Machines (VMs): These virtual machines act as the foundation of the lab environment, simulating various user roles and workloads within the Office 365 ecosystem. VMs can be configured to represent different user types, such as administrators, end users, and service accounts, enabling realistic testing scenarios.

  • Software and Tools: The kit encompasses essential software and tools necessary for configuring, managing, and testing Office 365 services. This includes Microsoft’s own tools like Azure Active Directory (Azure AD) Connect, Microsoft 365 Admin Center, and PowerShell modules, along with third-party tools for network simulation, performance monitoring, and security analysis.

  • Documentation and Tutorials: Comprehensive documentation, including step-by-step guides, best practices, and troubleshooting tips, is crucial for navigating the complex landscape of Office 365 deployment. These resources empower lab users to understand the intricacies of the platform, configure services effectively, and resolve potential issues encountered during testing.

  • Pre-configured Scenarios: To streamline the testing process, lab kits often include pre-configured scenarios representing common deployment scenarios, such as migrating user accounts from an on-premises Active Directory to Azure AD, implementing hybrid deployments, or testing specific Office 365 services like Exchange Online or SharePoint Online.

  • Support and Community Resources: Access to support channels, online forums, and knowledge bases provides a valuable resource for addressing questions, seeking guidance, and leveraging the collective expertise of the Office 365 community.

Benefits of Utilizing a Deployment Lab Kit

The benefits of utilizing an Office 365 deployment lab kit extend far beyond simply testing the technical aspects of the platform. Here’s a detailed exploration of the key advantages:

  • Reduced Risk and Downtime: The ability to test deployment strategies and configurations in a controlled environment significantly reduces the risk of unforeseen issues during the actual rollout. This minimizes downtime, ensuring a seamless transition for users and minimizing disruption to business operations.

  • Improved Deployment Accuracy and Efficiency: By simulating real-world scenarios, lab kits enable organizations to fine-tune their deployment plans, identify potential bottlenecks, and optimize the configuration of Office 365 services. This results in a smoother, more efficient deployment process.

  • Enhanced User Experience: Thorough testing in a lab environment allows organizations to proactively address user concerns and ensure a positive user experience from day one. This includes testing user access, application performance, and overall usability within the Office 365 environment.

  • Cost Optimization: By identifying potential issues early in the deployment process, lab kits help organizations avoid costly rework and minimize the time and resources required to resolve problems. This translates to significant cost savings and optimized project budgets.

  • Increased Security and Compliance: Lab kits provide a platform for testing security configurations, access controls, and data protection measures. This allows organizations to ensure compliance with relevant industry regulations and mitigate potential security risks associated with Office 365 adoption.

  • Improved Collaboration and Knowledge Sharing: The collaborative nature of lab environments fosters knowledge sharing among team members, enabling them to learn from each other’s experiences and build a collective understanding of Office 365 deployment best practices.

Frequently Asked Questions (FAQs) about Office 365 Deployment Lab Kits

1. What are the different types of Office 365 deployment lab kits available?

Office 365 deployment lab kits come in various forms, tailored to different needs and budgets:

  • Free and Open-Source Kits: These kits are readily available online and often provide a basic foundation for testing Office 365 deployment. They may lack advanced features and comprehensive documentation.
  • Commercial Lab Kits: These kits are offered by vendors specializing in Office 365 deployment and typically include more robust features, pre-configured scenarios, and dedicated support.
  • Custom Lab Kits: Organizations can create their own customized lab kits to meet specific requirements, leveraging their existing infrastructure and expertise.

2. How do I choose the right Office 365 deployment lab kit for my organization?

The selection of a suitable lab kit depends on several factors:

  • Organization Size and Complexity: The size of the organization and the complexity of its IT infrastructure will influence the required features and scalability of the lab kit.
  • Deployment Scope and Objectives: The specific goals of the deployment, such as migrating user accounts, implementing hybrid deployments, or testing specific services, will determine the necessary functionalities.
  • Budget and Resources: The available budget and technical resources will play a crucial role in choosing between free, commercial, or custom lab kits.

3. What are the essential prerequisites for setting up an Office 365 deployment lab kit?

To successfully set up and utilize an Office 365 deployment lab kit, organizations need to consider the following prerequisites:

  • Hardware Requirements: Sufficient hardware resources, including servers, storage, and network infrastructure, are required to support the virtual machines and software components of the lab kit.
  • Software Requirements: The lab kit will require specific software components, including operating systems, hypervisors, and necessary tools for managing and configuring Office 365 services.
  • Technical Expertise: A basic understanding of virtual machine management, network configuration, and Office 365 administration is essential for effectively utilizing the lab kit.

4. How do I get started with using an Office 365 deployment lab kit?

The process of getting started with an Office 365 deployment lab kit typically involves the following steps:

  • Select and Procure a Lab Kit: Choose a suitable lab kit based on your organization’s needs and budget.
  • Set Up the Lab Environment: Install the necessary software, configure virtual machines, and establish network connectivity.
  • Familiarize Yourself with the Kit: Review the documentation, tutorials, and pre-configured scenarios included in the kit.
  • Start Testing and Experimenting: Begin testing your deployment strategies, configurations, and user workflows in the simulated environment.
  • Document Findings and Best Practices: Record your observations, document successful configurations, and identify potential areas for improvement.

5. What are some tips for maximizing the effectiveness of an Office 365 deployment lab kit?

To enhance the effectiveness of your Office 365 deployment lab kit, consider these tips:

  • Involve Key Stakeholders: Include representatives from different departments and teams involved in the Office 365 deployment process to ensure a comprehensive testing approach.
  • Use Real-World Data: Leverage actual user data, application usage patterns, and network configurations to make the lab environment more realistic.
  • Automate Testing Processes: Implement automation tools to streamline repetitive testing tasks, freeing up time for more complex scenarios.
  • Regularly Update the Lab Kit: Keep your lab kit updated with the latest versions of software, tools, and documentation to ensure accurate testing and alignment with the evolving Office 365 landscape.
  • Continuously Improve Deployment Strategies: Use the insights gained from lab testing to refine your deployment plans, optimize configurations, and enhance the overall user experience.

Conclusion

Office 365 deployment lab kits play a critical role in enabling organizations to navigate the complexities of migrating to the cloud and implementing Office 365 effectively. By providing a safe and controlled environment for testing, experimentation, and validation, these kits empower organizations to reduce risks, improve deployment efficiency, enhance user experiences, and optimize costs. As organizations continue to embrace the power of cloud solutions, Office 365 deployment lab kits will remain indispensable tools for ensuring a smooth and successful transition to the future of work.

Windows 11 e Office 365 Deployment Lab Kit - ICT Power A Full Guide to Windows 11 and Office 365 Deployment Lab Kit Modern Desktop Deployment and Management Lab Kit: laboratori pratici per la distribuzione e la
Office 365 Deployment Guide Windows 11 e Office 365 Deployment Lab Kit - ICT Power Windows 11 e Office 365 Deployment Lab Kit - ICT Power
Windows 11 e Office 365 Deployment Lab Kit - ICT Power Office 365 Deployment Step by Step free PDF - KING OF EXCEL

Closure

Thus, we hope this article has provided valuable insights into Mastering the Transition: A Comprehensive Guide to Office 365 Deployment Lab Kits. We thank you for taking the time to read this article. See you in our next article!

The World Of Free PC Games On Windows 11: A Comprehensive Guide

The World of Free PC Games on Windows 11: A Comprehensive Guide

Introduction

With enthusiasm, let’s navigate through the intriguing topic related to The World of Free PC Games on Windows 11: A Comprehensive Guide. Let’s weave interesting information and offer fresh perspectives to the readers.

The World of Free PC Games on Windows 11: A Comprehensive Guide

Best Free Windows 11 Games

Windows 11, Microsoft’s latest operating system, offers a wealth of opportunities for gamers seeking immersive experiences. While many games require purchase, a vast ecosystem of free-to-play titles exists, catering to diverse tastes and preferences. This article aims to delve into the world of free PC games on Windows 11, exploring its significance, benefits, and avenues for discovery.

Understanding the Appeal of Free PC Games

The availability of free PC games on Windows 11 has revolutionized the gaming landscape, offering several advantages:

  • Accessibility: The barrier to entry for gaming is significantly lowered, allowing individuals with limited budgets to experience the thrill of virtual worlds.
  • Variety: Free games cover a wide spectrum of genres, from action-packed shooters and strategy titles to immersive role-playing games and casual experiences.
  • Exploration: Free games provide an opportunity to discover new genres and titles without financial risk. Players can sample different game mechanics, storylines, and artistic styles before committing to paid purchases.
  • Community: Many free games boast vibrant online communities, fostering interaction, collaboration, and competition among players.

Exploring the Landscape of Free PC Games

The realm of free PC games is vast and constantly evolving. Several platforms and sources cater to players seeking engaging experiences:

  • Epic Games Store: Known for its generous weekly free game offerings, Epic Games Store provides access to a diverse collection of titles, including AAA releases and indie gems.
  • Steam: While primarily a platform for paid games, Steam also features a substantial library of free-to-play titles, encompassing various genres and gameplay styles.
  • Microsoft Store: Windows 11 users have direct access to a curated selection of free games through the Microsoft Store, offering a convenient way to discover and download new experiences.
  • Independent Developers: Numerous independent developers release free games directly on their websites or through platforms like itch.io, showcasing creativity and innovative gameplay concepts.

Navigating the World of Free Games

With countless options available, navigating the world of free PC games can seem daunting. Here are some strategies to discover hidden gems and maximize your gaming experience:

  • Genre Exploration: Consider your preferred game genres and explore free titles within those categories. This approach ensures you’ll find games that align with your interests.
  • Community Recommendations: Online forums, gaming websites, and social media platforms often feature discussions and recommendations for free games. Leverage these resources to discover hidden gems.
  • Free Game Roundups: Many websites and publications compile lists of noteworthy free games, offering curated selections based on genre, popularity, or critical acclaim.
  • Trial and Error: Embrace the opportunity to experiment with various free games. Some titles might not resonate with you, but others could become your new favorite.

FAQs: Free PC Games on Windows 11

Q: Are all free PC games safe to download?

A: While reputable platforms like the Epic Games Store, Steam, and the Microsoft Store generally offer safe downloads, exercising caution is always advisable. Research the game developer, read user reviews, and consider using antivirus software to protect your system.

Q: Do free games require internet connectivity?

A: Most free games require an internet connection for gameplay, especially those with online multiplayer features. However, some titles offer offline modes or single-player experiences.

Q: Are free games limited in content or features?

A: While some free games might offer limited content or feature a "freemium" model with in-game purchases, many offer full-fledged experiences comparable to paid titles.

Q: Can I play free games on any computer?

A: The minimum system requirements for free games vary depending on the title. Some games might require powerful hardware, while others can run on older computers.

Tips: Enhancing Your Free PC Gaming Experience

  • Optimize your system: Ensure your computer meets the minimum system requirements for the games you want to play. Consider upgrading your hardware if necessary.
  • Utilize free gaming tools: Explore free software like game launchers, performance optimizers, and recording software to enhance your gaming experience.
  • Join online communities: Connect with other players through forums, Discord servers, or social media groups to share tips, strategies, and build friendships.
  • Embrace the free-to-play model: Understand that free games often rely on in-game purchases to generate revenue. Approach these purchases strategically, focusing on items that enhance your enjoyment without impacting gameplay.

Conclusion

The availability of free PC games on Windows 11 has opened up a world of possibilities for gamers, offering accessible, diverse, and engaging experiences. By leveraging the resources available, exploring different genres, and embracing the spirit of discovery, players can unlock a vast library of free titles and embark on unforgettable gaming journeys. The future of free PC gaming on Windows 11 is bright, promising a continuous stream of innovative titles and captivating experiences for all.

11 games to download and play on Windows 11(free and paid) 10 Best Offline Games for Windows 11 Windows 11 Games , game download for pc windows 11 - thirstymag.com
How to Play Old PC Games on Windows 11?  LaptrinhX 7 Best Racing Games for Windows 11 โ€“ DigitBin Download And Install Windows 7 Games For Windows 11 For Free
Windows 11 Games , game download for pc windows 11 - thirstymag.com Best Free PC Games to Play on Windows - Make Tech Easier

Closure

Thus, we hope this article has provided valuable insights into The World of Free PC Games on Windows 11: A Comprehensive Guide. We hope you find this article informative and beneficial. See you in our next article!

Navigating The Digital Landscape With QR Code Scanners On Windows 11

Navigating the Digital Landscape with QR Code Scanners on Windows 11

Introduction

With enthusiasm, let’s navigate through the intriguing topic related to Navigating the Digital Landscape with QR Code Scanners on Windows 11. Let’s weave interesting information and offer fresh perspectives to the readers.

How to Scan QR Code on Windows Laptops  Windows 11 or 10 - YouTube

In today’s digitally interconnected world, QR codes have become ubiquitous, acting as gateways to a wealth of information and services. These square-shaped barcodes, readily scanned by smartphones, have revolutionized how we interact with the physical world. However, for those primarily using personal computers, accessing the information embedded within these codes often requires an additional step. This is where QR code scanners for Windows 11 come into play, bridging the gap between the digital and physical realms.

The Importance of QR Code Scanners on Windows 11

QR code scanners for Windows 11 empower users to seamlessly access the information encoded within these barcodes directly from their PCs. This functionality extends beyond mere convenience, offering a range of benefits:

  • Enhanced Accessibility: For individuals who rely heavily on their PCs, QR code scanners eliminate the need to switch between devices, streamlining information retrieval. This is particularly beneficial for users who may not have a smartphone readily available or find it challenging to use one.

  • Increased Productivity: In professional settings, QR code scanners can expedite tasks involving data entry or accessing online resources. For instance, scanning a QR code on a product label can automatically populate a spreadsheet with product information, saving time and reducing errors.

  • Security and Privacy: Certain QR codes lead to websites that may not be secure or trustworthy. Utilizing a dedicated QR code scanner on a PC allows users to review the URL before accessing the linked website, promoting a safer browsing experience.

Types of QR Code Scanners for Windows 11

The world of QR code scanners for Windows 11 encompasses a diverse range of options, each catering to specific needs and preferences:

  • Dedicated Applications: Standalone applications specifically designed for QR code scanning offer comprehensive features and customization options. These applications often incorporate advanced functionalities like batch scanning, QR code generation, and integration with other software.

  • Browser Extensions: For those who prefer a more streamlined approach, browser extensions provide a simple and convenient method for scanning QR codes. These extensions seamlessly integrate with popular browsers like Chrome, Firefox, and Edge, allowing users to scan directly from within their web browsing environment.

  • Built-in Windows 11 Features: Windows 11, in its latest iterations, offers native support for QR code scanning. This built-in functionality eliminates the need for third-party applications, offering a seamless and integrated user experience.

Choosing the Right QR Code Scanner for Your Needs

Selecting the ideal QR code scanner for Windows 11 depends on individual requirements and usage patterns. Several factors should be considered:

  • Frequency of Use: If QR code scanning is a frequent activity, a dedicated application with advanced features might be more suitable. For occasional use, a browser extension or the built-in Windows 11 functionality may suffice.

  • Desired Features: Consider features like batch scanning, QR code generation, and integration with other software. Dedicated applications often offer a wider range of functionalities compared to browser extensions or built-in features.

  • Security and Privacy Concerns: Opt for applications from reputable developers with a strong security track record. Ensure the application does not collect unnecessary personal data and prioritizes user privacy.

Using QR Code Scanners on Windows 11

Once a QR code scanner is installed, using it is a straightforward process:

  1. Open the Scanner: Launch the dedicated application, browser extension, or activate the built-in Windows 11 feature.

  2. Point the Camera: Position the camera of your PC or webcam towards the QR code. Ensure the code is well-lit and within the camera’s field of view.

  3. Scan the Code: The scanner will automatically detect and decode the QR code, displaying the embedded information.

  4. Access the Information: The scanned information may be presented as a URL, text, or other data format. Click on the link or interact with the displayed content as needed.

Tips for Effective QR Code Scanning on Windows 11

  • Ensure Proper Lighting: Adequate lighting is crucial for accurate QR code scanning. Ensure the code is well-lit and free from shadows.

  • Maintain a Clear View: Ensure no obstructions block the camera’s view of the QR code.

  • Keep the Code Still: Avoid moving the QR code while the scanner is detecting it.

  • Check for Updates: Regularly update your QR code scanner to ensure compatibility with the latest QR code standards and security patches.

  • Explore Additional Features: Familiarize yourself with the various features offered by your chosen QR code scanner, including batch scanning, QR code generation, and integration with other software.

FAQs about QR Code Scanners on Windows 11

Q: Are QR code scanners on Windows 11 safe?

A: Reputable QR code scanners are generally safe, but it’s important to download them from trusted sources like the Microsoft Store or reputable app stores. Always review the developer’s privacy policy and ensure the application does not collect unnecessary personal data.

Q: Can I generate QR codes on Windows 11?

A: Yes, several dedicated QR code generator applications are available for Windows 11. These applications allow you to create QR codes for various purposes, such as website links, contact information, and social media profiles.

Q: Can I scan multiple QR codes at once?

A: Some QR code scanners for Windows 11 offer batch scanning functionality, enabling you to scan multiple codes simultaneously. This feature is particularly useful for tasks involving data entry or managing large amounts of information.

Q: Is there a built-in QR code scanner in Windows 11?

A: Yes, Windows 11 includes a built-in QR code scanner. You can access it by opening the Camera app and selecting the "QR code" option.

Conclusion

QR code scanners for Windows 11 have become essential tools for navigating the modern digital landscape. By bridging the gap between the physical and digital worlds, these scanners empower users to access a wealth of information and services directly from their PCs. Whether choosing a dedicated application, a browser extension, or leveraging the built-in Windows 11 features, QR code scanners offer a convenient and efficient way to interact with the ever-growing world of QR codes.

How To Scan Qr Code In Laptop Windows 11 And Windows 10 Easy Way - YouTube QR code Scanner for Windows 10, 11  Camera and Image Scan - YouTube How to Scan QR Code in Windows 11? โ€“ WebNots
Scanner un QR Code sur un PC Windows 11 Scan QR Code in Windows and generate one for free - YouTube 4 Ways to Scan QR Codes on a Windows PC - Make Tech Easier
Tipp: Windows Kamera kann QR-Codes scannen unter Windows 11 Windows - TechCommuters

Closure

Thus, we hope this article has provided valuable insights into Navigating the Digital Landscape with QR Code Scanners on Windows 11. We thank you for taking the time to read this article. See you in our next article!

Understanding The Windows 10 Taskbar: A Comprehensive Guide

Understanding the Windows 10 Taskbar: A Comprehensive Guide

Introduction

With great pleasure, we will explore the intriguing topic related to Understanding the Windows 10 Taskbar: A Comprehensive Guide. Let’s weave interesting information and offer fresh perspectives to the readers.

Understanding the Windows 10 Taskbar: A Comprehensive Guide

Windows 10 Taskbar Customization: The Complete Guide  LaptrinhX

The Windows 10 taskbar, a familiar fixture at the bottom of the screen, serves as a central hub for navigation and application management. It is the foundation for user interaction with the operating system, offering quick access to essential features and tools. This article delves into the intricacies of the Windows 10 taskbar, exploring its functionalities, customization options, and significance in enhancing user experience.

The Anatomy of the Taskbar

The Windows 10 taskbar consists of several key elements, each with a distinct purpose:

  • Start Button: This iconic button, located at the leftmost corner, serves as the gateway to the Start menu, a central repository for applications, settings, and system information.
  • Taskbar Icons: These represent currently open applications. Clicking on an icon brings the corresponding application to the forefront.
  • System Tray: Situated at the rightmost corner, this area houses icons for system tools and notifications, including volume control, network connectivity, and time.
  • Search Bar: The taskbar’s search bar allows users to quickly find files, applications, or web content.
  • Taskbar Buttons: These buttons, located on the right side of the taskbar, provide quick access to system features like the Action Center, Cortana, and virtual desktops.

Navigating the Taskbar

The taskbar facilitates seamless navigation within the Windows 10 environment. Here are some fundamental navigation techniques:

  • Switching Between Applications: Clicking on an application icon on the taskbar brings it to the forefront.
  • Minimizing and Maximizing Applications: Clicking the minimize button (a small rectangle) shrinks an application window to the taskbar. Clicking the maximize button (a square) expands the application to fill the entire screen.
  • Closing Applications: Clicking the close button (an ‘X’) in the top-right corner of an application window closes it.
  • Right-Clicking for Contextual Options: Right-clicking on an application icon on the taskbar reveals a context menu with options such as closing the application, pinning it to the taskbar, or opening its properties.

Customization Options

The Windows 10 taskbar offers a wide range of customization options, allowing users to tailor it to their preferences and needs:

  • Taskbar Location: The taskbar can be moved to the top, left, or right side of the screen.
  • Taskbar Size: The taskbar’s height can be adjusted.
  • Taskbar Icon Size: The size of application icons on the taskbar can be modified.
  • Taskbar Grouping: Applications can be grouped together on the taskbar, making it easier to manage multiple open windows.
  • Taskbar Transparency: The taskbar’s transparency level can be adjusted.
  • Taskbar Icons: Users can choose which icons appear in the system tray.

Advanced Features

The Windows 10 taskbar encompasses several advanced features that enhance productivity and user experience:

  • Virtual Desktops: The taskbar allows users to create and manage multiple virtual desktops, providing a more organized and efficient workspace.
  • Task View: Pressing the Alt+Tab keys or clicking the Task View button (a square with four rectangles) reveals a visual overview of all open applications, enabling easy switching between them.
  • Snap Assist: Dragging an application window to the edge of the screen activates Snap Assist, which automatically arranges the window alongside other open applications.
  • Cortana Integration: The taskbar provides access to Cortana, the voice-activated digital assistant, allowing users to perform tasks like setting reminders, searching the web, or controlling smart home devices.
  • Notification Center: The Action Center, accessible through the taskbar, displays system notifications and quick actions.

Importance and Benefits

The Windows 10 taskbar plays a crucial role in user interaction with the operating system, offering numerous benefits:

  • Enhanced Navigation: The taskbar provides a centralized and intuitive interface for accessing applications, system tools, and notifications.
  • Improved Productivity: Features like virtual desktops, Task View, and Snap Assist streamline multitasking and enhance workflow efficiency.
  • Customization and Personalization: The taskbar’s customization options allow users to tailor it to their specific preferences and needs, creating a personalized and comfortable user experience.
  • Seamless Integration: The taskbar integrates seamlessly with other Windows 10 features, including Cortana, the Action Center, and the Start menu, providing a cohesive and user-friendly experience.

FAQs

1. How do I pin an application to the taskbar?

To pin an application to the taskbar, right-click on its icon in the taskbar and select "Pin to taskbar."

2. How do I remove an application from the taskbar?

To remove an application from the taskbar, right-click on its icon and select "Unpin from taskbar."

3. How do I change the taskbar’s location?

To change the taskbar’s location, right-click on an empty area of the taskbar, select "Taskbar settings," and then choose the desired location under "Taskbar alignment."

4. How do I enable or disable taskbar transparency?

To enable or disable taskbar transparency, right-click on an empty area of the taskbar, select "Taskbar settings," and then toggle the "Transparency effects" setting.

5. How do I use virtual desktops?

To create a new virtual desktop, click the "Task View" button on the taskbar and then click the "New desktop" button. To switch between virtual desktops, click on the corresponding desktop icon on the taskbar.

Tips

  • Customize the Taskbar: Experiment with different taskbar settings to create a personalized and efficient workspace.
  • Utilize Virtual Desktops: Use virtual desktops to organize different tasks or projects.
  • Leverage Task View: Take advantage of Task View to quickly switch between open applications.
  • Explore Snap Assist: Use Snap Assist to arrange windows side-by-side for multitasking.
  • Customize the System Tray: Add or remove icons from the system tray to streamline your taskbar.

Conclusion

The Windows 10 taskbar is an indispensable component of the operating system, facilitating seamless navigation, enhancing productivity, and providing a personalized user experience. Its comprehensive functionalities, customization options, and integration with other features make it an essential tool for navigating and interacting with the Windows 10 environment. By understanding and effectively utilizing the taskbar’s features, users can optimize their workflow, enhance their productivity, and enjoy a more efficient and enjoyable computing experience.

Windows 10 Taskbar Overview Tutorial - YouTube How to Customize Windows 10 Taskbar - Complete Guide Windows 10 Taskbar Settings Explained  Customize Windows taskbar  Cs Guide - YouTube
Windows 10 Taskbar Customization: The Complete Guide How to Change Taskbar Color in Windows 10: A Comprehensive Guide - The Explanation Express Move and Resize the Taskbar in Windows 10  CustomGuide
Windows 10 Taskbar Tips And Tricks For Improved Workflow  midargus 15 Tips to Customize Taskbar in Windows 10 โ€“ WebNots

Closure

Thus, we hope this article has provided valuable insights into Understanding the Windows 10 Taskbar: A Comprehensive Guide. We hope you find this article informative and beneficial. See you in our next article!

P-touch Editor Software: Empowering Label Creation On Windows 11

P-touch Editor Software: Empowering Label Creation on Windows 11

Introduction

With great pleasure, we will explore the intriguing topic related to P-touch Editor Software: Empowering Label Creation on Windows 11. Let’s weave interesting information and offer fresh perspectives to the readers.

P-touch Editor Software: Empowering Label Creation on Windows 11

Creating a new label layout using P Touch Editor - YouTube

P-touch Editor software, developed by Brother Industries, is a robust and versatile tool designed to streamline label creation for a wide range of applications. Compatible with Windows 11, the software empowers users to design, print, and manage labels with unparalleled ease and precision. This article delves into the intricacies of P-touch Editor, exploring its features, benefits, and potential applications.

Navigating the Interface: A User-Friendly Approach

P-touch Editor presents a visually intuitive interface, welcoming users of all experience levels. The software’s layout is structured to facilitate a seamless workflow, with dedicated sections for label design, text formatting, image integration, and printing settings. Users can easily navigate through menus and toolbars, accessing a comprehensive array of functions without encountering unnecessary complexity.

Design Freedom: Unleashing Creativity with Diverse Options

At the heart of P-touch Editor lies its powerful design capabilities. The software offers a wide selection of pre-designed templates, catering to various label types, including address labels, barcode labels, name tags, and more. These templates serve as a starting point, enabling users to customize them according to their specific needs.

Beyond pre-designed templates, P-touch Editor grants users complete control over label creation. Users can freely add text, images, and barcodes to their labels, leveraging a diverse set of fonts, colors, and graphic elements. The software supports various image formats, allowing users to incorporate company logos, product images, or other relevant visuals into their labels.

Beyond Aesthetics: Functionality and Efficiency

P-touch Editor extends beyond visual design, incorporating functionalities that enhance label creation efficiency. The software supports various label sizes and formats, ensuring compatibility with a wide range of Brother P-touch label printers. Users can configure print settings, including print quality, label orientation, and number of copies, optimizing the printing process for their specific needs.

Barcode Generation: Streamlining Data Management

For businesses and organizations that rely heavily on barcodes, P-touch Editor provides a comprehensive barcode generation feature. The software supports various barcode types, including Code 39, Code 128, EAN-13, and QR Code, allowing users to create barcodes that meet specific industry standards. Users can easily customize barcode parameters, such as height, width, and text placement, ensuring optimal readability and data accuracy.

Database Integration: Simplifying Label Creation for Large Datasets

P-touch Editor further streamlines label creation by integrating with external databases. Users can import data from Microsoft Excel or other compatible databases, automatically populating label templates with relevant information. This feature proves particularly valuable for organizations that need to create large quantities of labels with consistent data, eliminating the need for manual data entry and reducing the risk of errors.

Benefits of P-touch Editor: A Powerful Tool for Diverse Applications

P-touch Editor offers a compelling suite of benefits, making it an indispensable tool for individuals and organizations across various industries:

  • Enhanced Efficiency: By automating label creation tasks, P-touch Editor significantly reduces the time and effort required for labeling, freeing up resources for other essential activities.
  • Increased Accuracy: The software’s comprehensive features, including database integration and barcode generation, minimize the risk of errors, ensuring label accuracy and data integrity.
  • Improved Branding: P-touch Editor empowers users to create visually appealing and professional labels, strengthening brand identity and enhancing product presentation.
  • Streamlined Operations: The software’s versatility and compatibility with various label printers simplify label creation for diverse applications, streamlining operations and improving overall productivity.

Applications of P-touch Editor: A Wide Range of Possibilities

P-touch Editor finds diverse applications across various industries, including:

  • Retail: Creating product labels with clear pricing, barcodes, and product descriptions.
  • Manufacturing: Generating labels for inventory management, asset tracking, and product identification.
  • Healthcare: Creating patient labels, specimen labels, and medication labels for accurate identification and tracking.
  • Education: Producing labels for school supplies, student materials, and classroom organization.
  • Office Administration: Creating address labels, file labels, and name tags for efficient organization and information management.

FAQs: Addressing Common Questions

Q: Is P-touch Editor compatible with other operating systems besides Windows 11?

A: P-touch Editor is primarily designed for Windows operating systems. However, Brother Industries offers alternative software solutions, such as P-touch Design & Print, for Mac users.

Q: What label printer models are compatible with P-touch Editor?

A: P-touch Editor is compatible with a wide range of Brother P-touch label printers. The software’s compatibility information is available on the Brother website or within the P-touch Editor software itself.

Q: Can I create custom templates in P-touch Editor?

A: Yes, P-touch Editor allows users to create custom templates from scratch. Users can customize label size, layout, and design elements according to their specific requirements.

Q: Does P-touch Editor support the creation of QR codes?

A: Yes, P-touch Editor supports the creation of QR codes. Users can easily generate QR codes and customize their size, shape, and data content.

Q: Can I import images from my computer into P-touch Editor?

A: Yes, P-touch Editor supports the import of various image formats, including JPEG, PNG, and GIF. Users can incorporate images into their label designs to enhance visual appeal and brand recognition.

Tips for Optimizing P-touch Editor Usage

  • Explore the Templates: Utilize the software’s pre-designed templates as a starting point, customizing them to meet specific needs.
  • Leverage Database Integration: For large-scale labeling projects, utilize database integration to automate data entry and minimize errors.
  • Experiment with Design Elements: Explore the software’s diverse font, color, and graphic element options to create visually appealing and informative labels.
  • Utilize the Help Feature: If you encounter any difficulties, refer to the comprehensive help section within the software or consult the Brother website for support.
  • Regularly Update the Software: Keep your P-touch Editor software up-to-date to benefit from new features, performance enhancements, and security updates.

Conclusion: Empowering Label Creation with P-touch Editor

P-touch Editor software for Windows 11 provides a comprehensive and user-friendly solution for creating professional labels for a wide range of applications. Its intuitive interface, powerful design capabilities, and versatile features empower individuals and organizations to streamline label creation, enhance efficiency, and improve overall productivity. By leveraging P-touch Editor’s capabilities, users can unlock new possibilities in labeling, enhancing brand identity, streamlining operations, and achieving optimal results.

Brother P-touch Editor for Windows Pc & Mac: Free Download (2023)  Pcmacstore.com Creating a New Label Layout using P-Touch Editor Software, Templates, Shapes, Lines and more P-touch Editor - Label Design Software
How to Create a New Label Design in P-touch Editor - YouTube Brother P-touch Editor Download - Es erlaubt dem Anwender eine groรŸe Vielfalt professionell Brother P-touch Editor latest version - Get best Windows software
P-touch Editor by Brother Industries, LTD. - App Info P-Touch-Editor

Closure

Thus, we hope this article has provided valuable insights into P-touch Editor Software: Empowering Label Creation on Windows 11. We hope you find this article informative and beneficial. See you in our next article!

Windows 10 Build 9926: A Look Back At A Milestone In Windows Development

Windows 10 Build 9926: A Look Back at a Milestone in Windows Development

Introduction

In this auspicious occasion, we are delighted to delve into the intriguing topic related to Windows 10 Build 9926: A Look Back at a Milestone in Windows Development. Let’s weave interesting information and offer fresh perspectives to the readers.

Windows 10 Build 9926: A Look Back at a Milestone in Windows Development

Windows 10 build 9926: Hands-on with updated UI, Cortana, apps, Settings, MORE! - YouTube

The journey of Windows 10, Microsoft’s flagship operating system, began with the release of early preview builds, offering a glimpse into the future of computing. Among these, Windows 10 build 9926 stands out as a significant milestone, marking a pivotal point in the evolution of the operating system. Released in March 2015, this build introduced a number of notable features and refinements, showcasing the direction Microsoft was taking with Windows 10.

Key Features and Refinements:

  • Start Menu: Build 9926 marked a significant departure from the traditional Start Menu. It introduced a hybrid approach, combining the familiarity of the Start Menu with the live tile functionality of Windows 8. This design aimed to bridge the gap between the two operating systems, providing a user-friendly experience for both existing Windows users and those transitioning from Windows 8.

  • Action Center: This build introduced a dedicated Action Center, replacing the Charms Bar from Windows 8. This centralized hub provided quick access to notifications, system settings, and quick actions. It aimed to simplify user interaction and streamline access to essential functions.

  • Cortana: The digital assistant, Cortana, made its debut in build 9926, providing a voice-controlled interface for tasks such as searching the web, setting reminders, and controlling various system functions. This feature was a clear indication of Microsoft’s commitment to integrating artificial intelligence into the Windows experience.

  • Universal Apps: Build 9926 further solidified the concept of universal apps, applications designed to run seamlessly across various devices, from desktops to tablets and smartphones. This concept aimed to create a unified user experience across different form factors, enhancing the portability and accessibility of applications.

  • Modernized Design: The build incorporated a refined design language, incorporating subtle visual changes and enhancements that aimed to create a more modern and user-friendly experience. The design focused on clean lines, improved iconography, and a more intuitive layout.

Importance and Significance:

Build 9926 served as a critical stepping stone in the development of Windows 10. It showcased Microsoft’s vision for the future of the operating system, demonstrating its commitment to innovation, user-centric design, and integration of new technologies like artificial intelligence.

The build’s release was met with significant interest from the tech community and Windows enthusiasts alike. It provided valuable insights into the direction Microsoft was taking with Windows 10, generating discussions and feedback that ultimately shaped the final release of the operating system.

FAQ:

Q: What was the purpose of releasing Windows 10 build 9926?

A: The release of build 9926 was intended to gather feedback from users and testers, allowing Microsoft to refine and improve the operating system before its official launch. This approach allowed for early identification and resolution of potential issues, ensuring a smoother and more stable final release.

Q: What were the key improvements introduced in build 9926?

A: Build 9926 introduced a number of significant improvements, including a redesigned Start Menu, the introduction of the Action Center, the debut of Cortana, and a refined user interface. These changes aimed to enhance the user experience, streamline interactions, and integrate new technologies.

Q: How did build 9926 contribute to the development of Windows 10?

A: Build 9926 provided valuable feedback and insights into user preferences, allowing Microsoft to refine and improve the operating system. It also helped in identifying and resolving potential issues, ultimately contributing to a more stable and polished final release.

Tips:

  • Explore the new features: Take the time to explore the new features introduced in build 9926, such as the redesigned Start Menu, the Action Center, and Cortana. Familiarize yourself with these features and experiment with their functionalities.

  • Provide feedback: Share your thoughts and feedback with Microsoft, helping them to refine and improve the operating system. This feedback is invaluable in shaping the future of Windows 10.

  • Stay updated: Keep an eye out for new updates and releases, as Microsoft continues to refine and enhance Windows 10. These updates often introduce new features, performance improvements, and security patches.

Conclusion:

Windows 10 build 9926 was a significant milestone in the development of Windows 10, providing a glimpse into the future of the operating system. Its introduction of key features like the redesigned Start Menu, the Action Center, and Cortana, along with its refined design and user interface, showcased Microsoft’s commitment to innovation and user-centric design. This build played a crucial role in shaping the final release of Windows 10, contributing to a more stable, feature-rich, and user-friendly operating system.

Windows 10 Build 9926 - Install and Overview - YouTube Windows 10 Build 9926: Overview - YouTube Windows 10 Preview 2015 (Build 9926) - YouTube
Windows 10 Build 9926 Screenshots First impressions of Windows 10 Technical Preview (Build 9926) on the Surface Pro 3  Windows Windows 10 Build 9926 out NOW -- New features include Cortana, Xbox app, improved Start menu and
Tips for Windows 10 Build 9926 - Microsoft Community Windows 10 Technical Preview Build 9926

Closure

Thus, we hope this article has provided valuable insights into Windows 10 Build 9926: A Look Back at a Milestone in Windows Development. We hope you find this article informative and beneficial. See you in our next article!