Archives March 2024

The Art Of Desktop Customization: Removing The Recycle Bin In Windows 11

The Art of Desktop Customization: Removing the Recycle Bin in Windows 11

Introduction

With enthusiasm, let’s navigate through the intriguing topic related to The Art of Desktop Customization: Removing the Recycle Bin in Windows 11. Let’s weave interesting information and offer fresh perspectives to the readers.

The Art of Desktop Customization: Removing the Recycle Bin in Windows 11

How to Remove Recycle Bin from Desktop Windows 11 ((New)) - YouTube

The Windows 11 desktop, with its clean design and modern aesthetics, offers a personalized experience for users. While the Recycle Bin remains a vital component for managing deleted files, its presence on the desktop can sometimes detract from the overall visual appeal, particularly for users who prefer a minimalist approach. This article explores the process of removing the Recycle Bin from the desktop in Windows 11, delving into its rationale, practical considerations, and alternative methods for file management.

Understanding the Purpose of the Recycle Bin

The Recycle Bin serves as a temporary holding area for deleted files. When a file is deleted, it is not permanently removed from the system; instead, it is moved to the Recycle Bin, offering a safety net for accidental deletions. Users can restore files from the Recycle Bin if needed, or permanently erase them from the system by emptying the bin.

Reasons for Removing the Recycle Bin from the Desktop

While the Recycle Bin is essential for file recovery, its presence on the desktop can be perceived as clutter by some users. This perception can be amplified in scenarios where:

  • Minimalist Desktop Aesthetics: Users striving for a clean and uncluttered desktop may find the Recycle Bin icon distracting.
  • Screen Real Estate Optimization: On smaller screens, the Recycle Bin icon can consume valuable space that could be utilized for other icons or windows.
  • Enhanced Visual Focus: By removing the Recycle Bin, users can enhance their visual focus on the desktop, reducing distractions and improving workflow efficiency.

Methods for Removing the Recycle Bin from the Desktop

Removing the Recycle Bin from the desktop in Windows 11 can be achieved through two primary methods:

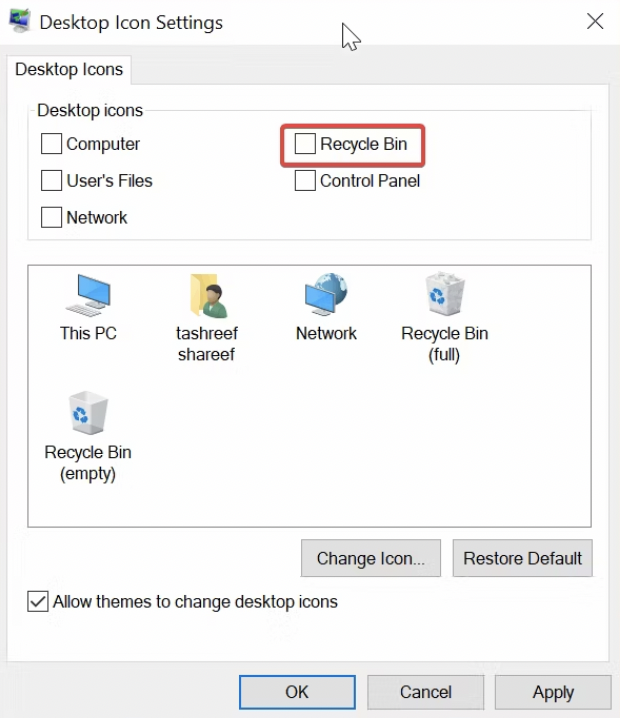
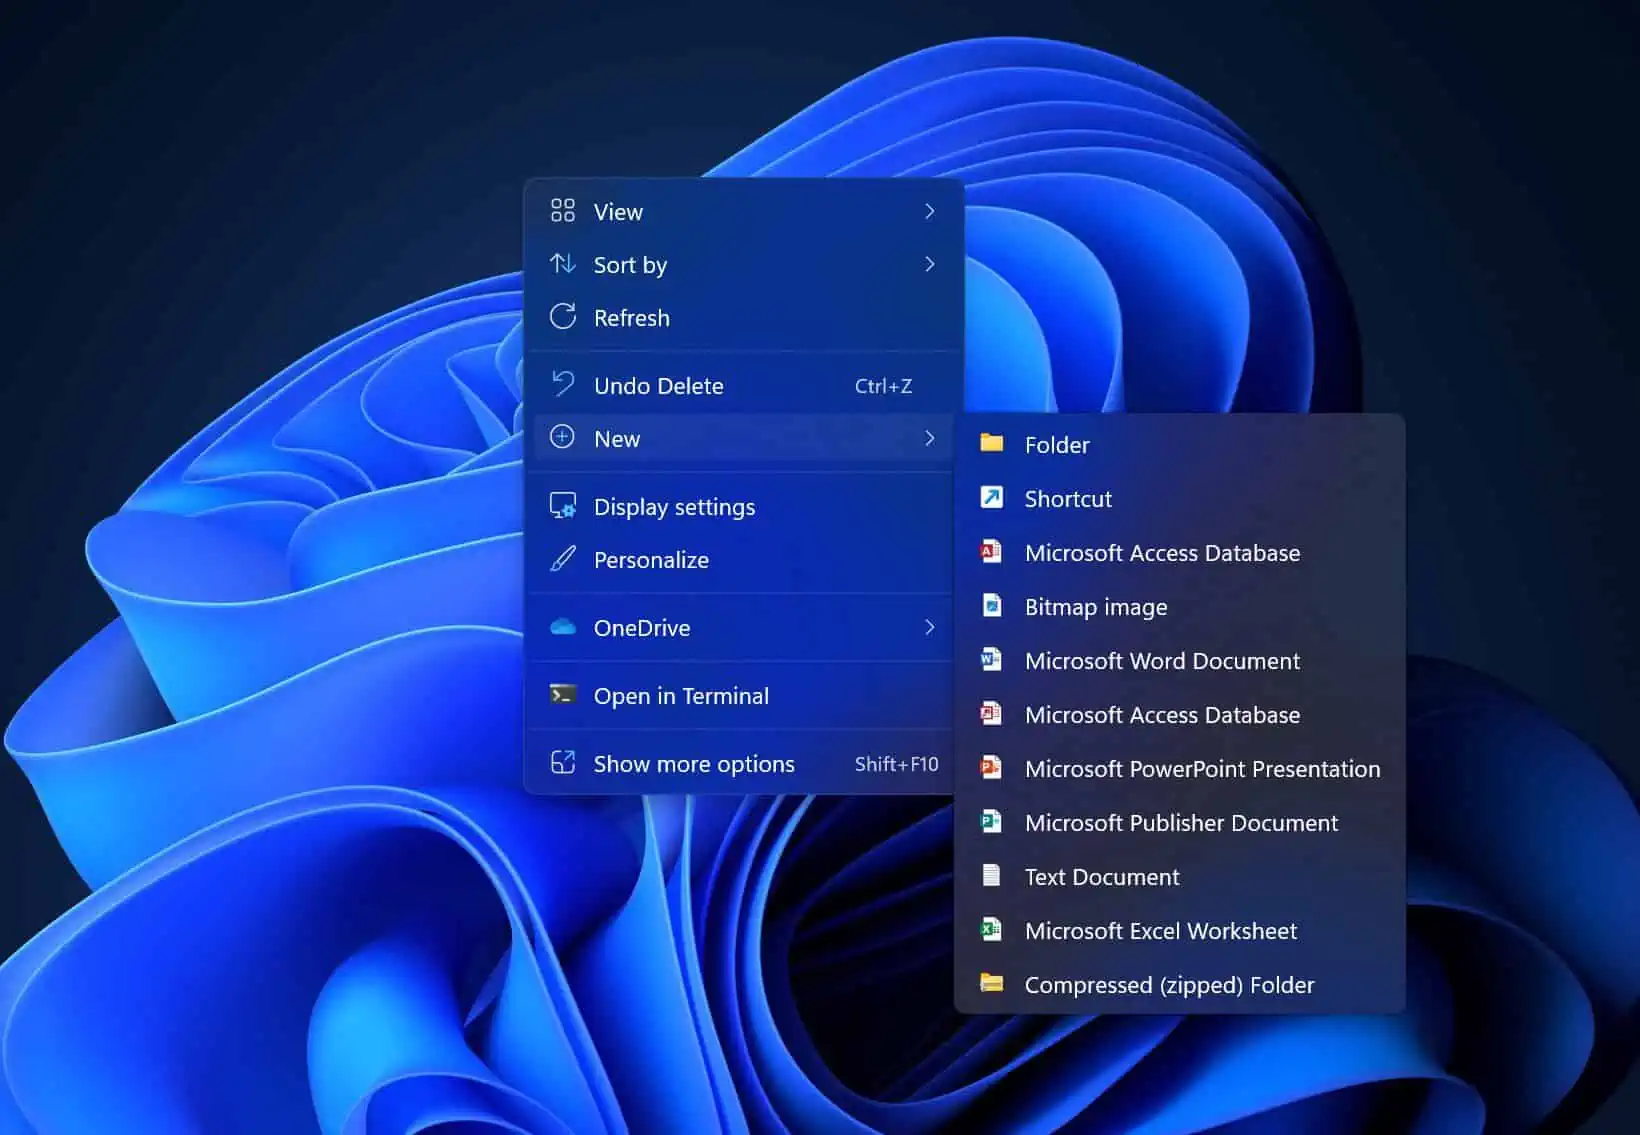
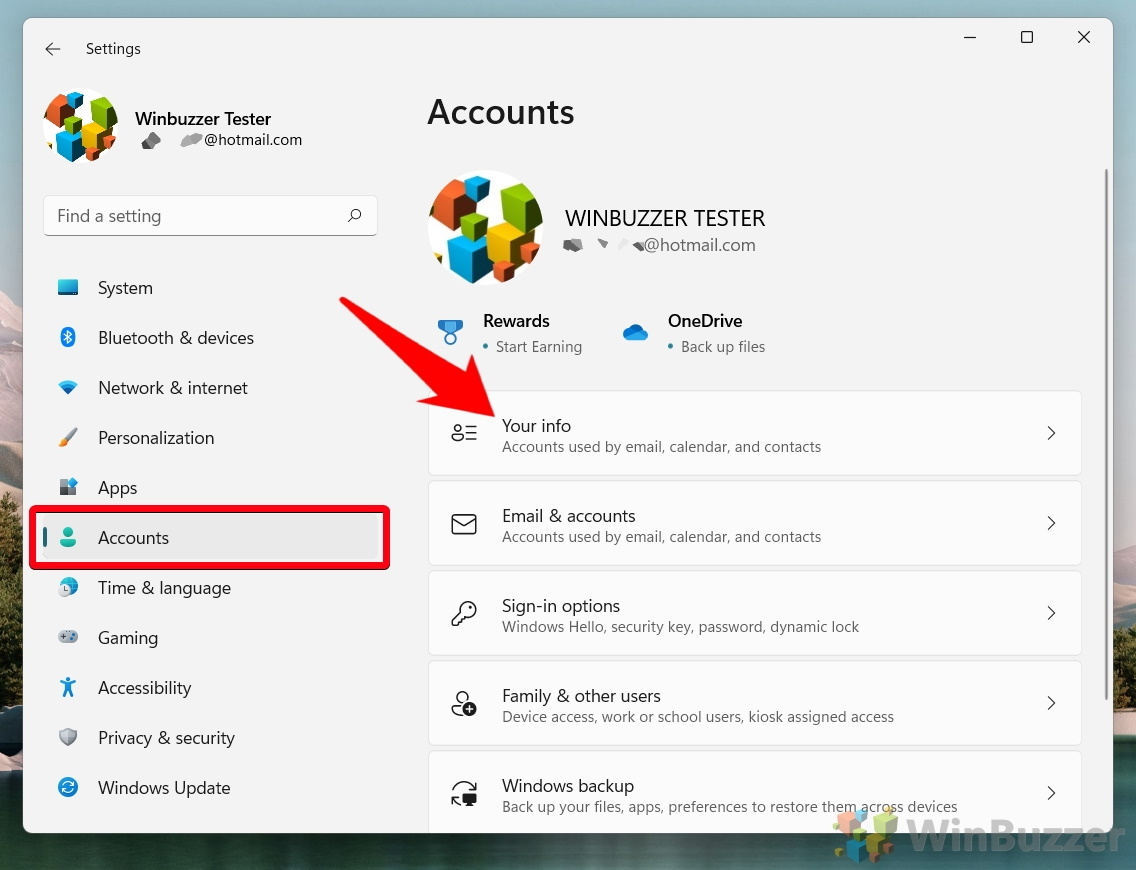
1. Using the Desktop Context Menu:

  • Right-click on an empty area of the desktop.
  • Select Personalize from the context menu.
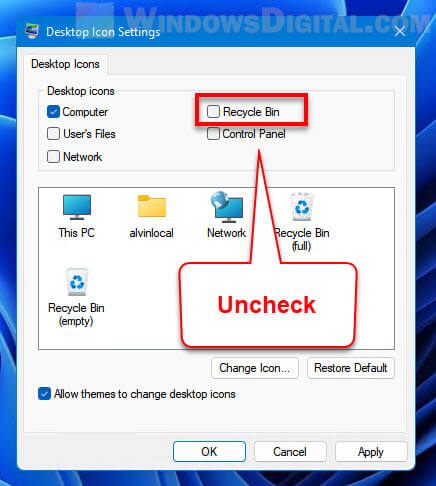
  • Navigate to Themes > Desktop Icon Settings.
  • Uncheck the box next to Recycle Bin.
  • Click Apply and OK to save the changes.

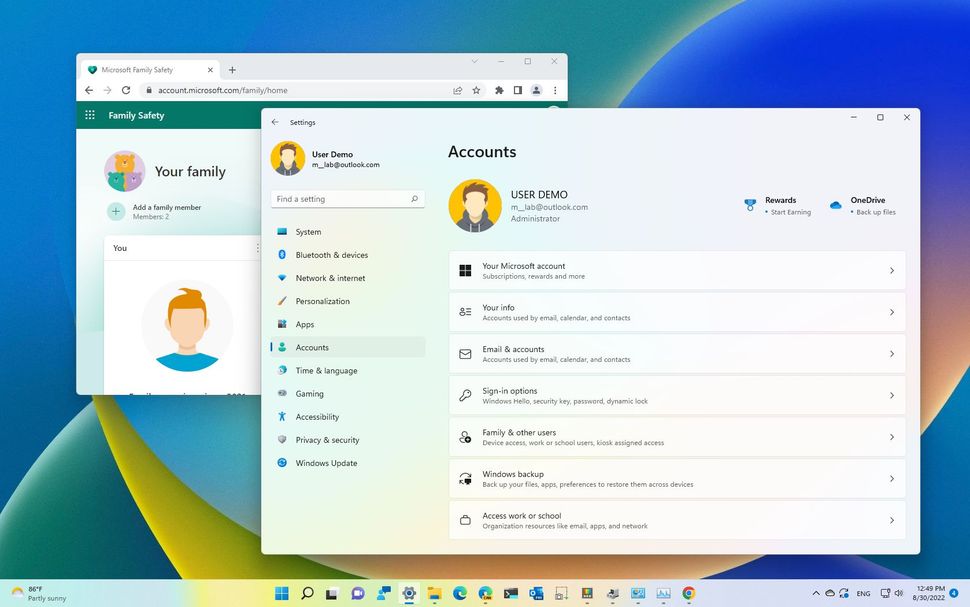
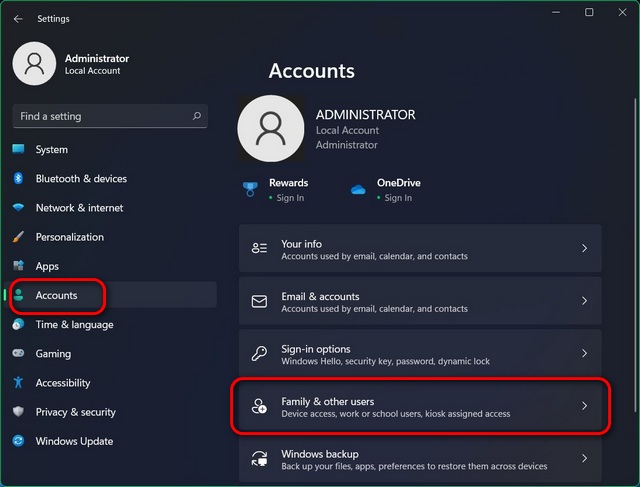
2. Using the Settings App:

  • Open the Settings app by pressing Windows key + I.
  • Navigate to Personalization > Themes > Desktop Icon Settings.
  • Uncheck the box next to Recycle Bin.
  • Click Apply and OK to save the changes.

Important Considerations

While removing the Recycle Bin from the desktop offers aesthetic and organizational benefits, it is crucial to consider the following points:

  • File Recovery: By removing the Recycle Bin from the desktop, users may inadvertently empty it without realizing it. This could result in permanent data loss if a file is accidentally deleted and not recovered before emptying the bin.
  • Alternative File Management: Users should explore alternative methods for managing deleted files, such as using the File Explorer to access the Recycle Bin directly or utilizing cloud storage services for backup and recovery purposes.

FAQs Regarding Removing the Recycle Bin

Q: Will removing the Recycle Bin from the desktop permanently delete files?

A: No, removing the Recycle Bin from the desktop only hides the icon. The Recycle Bin remains accessible through the File Explorer, and files within it are not permanently deleted until the bin is emptied.

Q: Can I restore the Recycle Bin to the desktop after removing it?

A: Yes, you can restore the Recycle Bin to the desktop by following the same steps mentioned above, but instead of unchecking the box next to Recycle Bin, you should check it.

Q: Is it safe to remove the Recycle Bin from the desktop?

A: Yes, it is safe to remove the Recycle Bin from the desktop. It only affects the visibility of the icon and does not impact the functionality of the Recycle Bin itself.

Tips for Effective File Management

  • Regularly Empty the Recycle Bin: Emptying the Recycle Bin regularly can free up disk space and improve system performance.
  • Utilize Cloud Storage: Consider using cloud storage services like Google Drive, OneDrive, or Dropbox to backup important files and provide an additional layer of protection against data loss.
  • Enable File History: Windows 11’s File History feature automatically backs up files, making it easier to recover lost data.
  • Use a Third-Party File Recovery Tool: If a file is accidentally deleted and the Recycle Bin has been emptied, a third-party file recovery tool can help retrieve the lost data.

Conclusion

Removing the Recycle Bin from the desktop in Windows 11 is a matter of personal preference and workflow optimization. While it offers aesthetic benefits and enhances desktop focus, users must remain vigilant about file management and consider alternative methods for recovering accidentally deleted files. By understanding the purpose of the Recycle Bin, exploring alternative options, and implementing best practices for file management, users can create a desktop environment that is both visually appealing and functionally efficient.

How to Hide or Remove Recycle Bin in Windows 11 How To Remove Recycle Bin From Windows 11 Desktop - vrogue.co How to Remove Recycle Bin from Desktop on Windows 11 PC or Laptop - YouTube
How to add or remove Recycle Bin to the Windows 11 Taskbar - MSPoweruser Solved How to Remove or Hide Recycle Bin on the Desktop in Windows 11 [Tutorial] - YouTube How to Remove Recycle Bin From Windows 11 Desktop
How To Hide Or Remove Recycle Bin From Desktop On Windows 11 How to Remove Recycle Bin from Desktop on Windows 11/10/8/7

Closure

Thus, we hope this article has provided valuable insights into The Art of Desktop Customization: Removing the Recycle Bin in Windows 11. We thank you for taking the time to read this article. See you in our next article!

Managing User Accounts In Windows 11: Removing Accounts For Security And Efficiency

Managing User Accounts in Windows 11: Removing Accounts for Security and Efficiency

Introduction

With great pleasure, we will explore the intriguing topic related to Managing User Accounts in Windows 11: Removing Accounts for Security and Efficiency. Let’s weave interesting information and offer fresh perspectives to the readers.

Managing User Accounts in Windows 11: Removing Accounts for Security and Efficiency

How to manage user account settings on Windows 11  Windows Central

Windows 11, like its predecessors, offers a robust user account system for managing access to the operating system and its resources. This system allows for multiple accounts with varying levels of privileges, ensuring a secure and personalized experience for each user. However, situations may arise where removing a user account becomes necessary. This could be due to a change in personal circumstances, the need to enhance security, or simply to streamline system management.

Understanding the Importance of Account Removal

Deleting a user account from Windows 11 is not merely a cosmetic change. It carries significant implications for system security and efficiency.

  • Security Enhancement: Removing unused or unnecessary accounts minimizes potential vulnerabilities. A compromised account, even if inactive, can serve as a gateway for malicious actors to gain access to the system. Deleting such accounts effectively removes this potential risk.
  • System Performance: Multiple user accounts can impact system performance, particularly if they contain a large amount of data or active applications. Removing inactive accounts can free up resources and potentially improve system responsiveness.
  • Data Management: Deleting a user account removes associated data, including files, settings, and applications. This can be beneficial when a user leaves the system or when specific data needs to be removed for privacy or security reasons.

Methods for Removing User Accounts in Windows 11

Windows 11 provides multiple avenues for removing user accounts, each tailored to specific scenarios.

1. Using Settings:

  • Navigate to Settings > Accounts > Family & other users.
  • Locate the account you wish to remove.
  • Click on the account name and select Remove.
  • Confirm the removal by following the on-screen prompts.

2. Using Control Panel:

  • Open the Control Panel by searching for it in the Start menu.
  • Go to User Accounts > User Accounts.
  • Click on Manage another account.
  • Select the account you want to remove and click Delete the account.
  • Confirm the deletion by following the on-screen prompts.

3. Using Command Prompt:

  • Open Command Prompt as administrator.
  • Type the following command and press Enter: net user "username" /delete.
  • Replace "username" with the actual username of the account to be deleted.
  • Confirm the deletion by following the on-screen prompts.

4. Removing Local Accounts During Initial Setup:

  • During the initial setup of Windows 11, you can choose to remove local accounts that were created during the installation process.
  • This option is typically available in the Users section of the setup wizard.

Important Considerations Before Removing an Account:

  • Data Backup: Before deleting an account, ensure that all relevant data is backed up. This includes files, settings, and any other important information associated with the account.
  • Account Type: Be aware of the type of account you are removing. Local accounts are specific to the current device, while Microsoft accounts are linked to a user’s email address and can be used across multiple devices.
  • Administrative Privileges: Removing an account with administrative privileges requires a different procedure and may necessitate additional steps to ensure system security.

Frequently Asked Questions (FAQs)

Q: What happens to the data associated with the deleted account?

A: The data associated with the deleted account is typically removed from the system. However, it is advisable to back up any critical data before deleting the account, as recovery may not always be possible.

Q: Can I recover a deleted account?

A: Recovering a deleted account is usually not possible. However, depending on the method of deletion and the configuration of the system, data recovery tools may be able to retrieve some information.

Q: What if I want to remove an account that is currently logged in?

A: You cannot directly delete an account that is currently logged in. You need to log out of the account first, then follow the steps outlined above to remove it.

Q: How do I remove a Microsoft account from Windows 11?

A: Removing a Microsoft account from Windows 11 involves signing out of the account and then deleting it from the system. This process is similar to removing a local account, but requires additional steps to ensure proper synchronization with Microsoft services.

Tips for Managing User Accounts in Windows 11

  • Regularly Review Accounts: Periodically review the user accounts on your system and remove any that are no longer needed.
  • Use Strong Passwords: Ensure that all user accounts, especially those with administrative privileges, use strong and unique passwords.
  • Enable Two-Factor Authentication: Consider enabling two-factor authentication for all user accounts, especially for Microsoft accounts, to enhance security.
  • Use Guest Accounts: For temporary access, use the built-in Guest account instead of creating a new account. This provides limited privileges and ensures that no personal data is stored on the system.
  • Monitor Account Activity: Keep an eye on the activity of all user accounts to identify any suspicious behavior or unauthorized access.

Conclusion

Removing user accounts in Windows 11 is a crucial aspect of system management, contributing to security, efficiency, and data control. By understanding the methods and considerations involved, users can effectively remove accounts, minimizing risks and optimizing system performance. Regular account management practices, combined with the implementation of security best practices, help to create a secure and efficient computing environment.

How to Manage User Account Settings in Windows 11 How to Remove a Microsoft Account from Windows 11 Manage user accounts Windows 11  How to Manage Windows 11 password  Windows 11 Credentials
Manage Your Microsoft Account in Windows 11 โ€“ windows.do How To Remove Microsoft Account From Windows 11 Guide  yorketech How To Remove Other User Accounts From Windows 11 - YouTube
How to Remove User Account from Windows 11 (6 Methods) How To Remove Microsoft Account From Windows 11 Guide  beebom

Closure

Thus, we hope this article has provided valuable insights into Managing User Accounts in Windows 11: Removing Accounts for Security and Efficiency. We hope you find this article informative and beneficial. See you in our next article!

The Power Of Accessibility: Exploring QR Code Generation On Windows 10

The Power of Accessibility: Exploring QR Code Generation on Windows 10

Introduction

With enthusiasm, let’s navigate through the intriguing topic related to The Power of Accessibility: Exploring QR Code Generation on Windows 10. Let’s weave interesting information and offer fresh perspectives to the readers.

The Power of Accessibility: Exploring QR Code Generation on Windows 10

generate qr code in windows 10 - Knowledge Sharing Tech

In today’s digital landscape, the ability to seamlessly bridge the gap between the physical and digital worlds is paramount. QR codes, those ubiquitous square patterns, have emerged as a powerful tool for achieving this seamless transition. Windows 10, with its diverse user base and robust functionality, provides an ideal platform for generating these versatile codes.

Understanding QR Codes: A Gateway to Digital Content

QR codes, or Quick Response codes, are two-dimensional barcodes that store information in a structured format. They can be scanned by smartphones or tablets equipped with a QR code reader, instantly unlocking a world of possibilities. This information can range from website URLs and contact details to product information and even payment links.

The Advantages of QR Code Generation on Windows 10

The availability of QR code generators on Windows 10 empowers users with a multitude of benefits:

  • Enhanced Convenience: QR codes offer a user-friendly way to access information. Users can simply scan a code to open a website, download a file, or access a specific piece of content, eliminating the need for manual data entry.
  • Increased Engagement: QR codes can be integrated into marketing materials, product packaging, and even physical locations, creating interactive experiences that engage users and encourage further exploration.
  • Streamlined Information Sharing: Sharing information becomes effortless with QR codes. Users can quickly create and share codes containing URLs, contact details, or even entire documents, simplifying information exchange.
  • Improved Accessibility: QR codes provide an accessible alternative for individuals with visual impairments or limited digital literacy. Scanning a code can unlock information in a user-friendly format, fostering inclusivity.
  • Personalized Experiences: QR codes can be customized to reflect specific needs. Users can adjust the code’s size, color, and design, creating visually appealing and personalized experiences.

Navigating the Landscape of QR Code Generators on Windows 10

Windows 10 users have access to a variety of QR code generator options, each with its unique features and capabilities. These options range from dedicated standalone applications to online tools and even built-in functionality within certain programs.

  • Standalone Applications: Dedicated QR code generator applications offer comprehensive features and customization options. They often provide advanced functionalities like batch generation, dynamic QR code creation, and integration with other software.
  • Online Tools: Web-based QR code generators offer a convenient and accessible solution. They typically require no installation and can be accessed from any device with an internet connection. Online generators often provide basic functionalities and may offer limited customization options.
  • Built-in Features: Some Windows 10 applications, such as Microsoft Word and Excel, include built-in QR code generation capabilities. This provides a convenient option for users who require quick QR code creation within a specific application.

Choosing the Right QR Code Generator:

Selecting the most suitable QR code generator for your needs depends on several factors:

  • Frequency of Use: For frequent QR code generation, a dedicated standalone application might be the best choice. For occasional use, an online tool or built-in functionality may suffice.
  • Customization Requirements: If you require advanced customization options, such as logo integration or specific design elements, a standalone application or a premium online generator is recommended.
  • Data Security: For sensitive information, consider using a generator that offers encryption or other security measures.
  • Integration Needs: If you need to integrate QR code generation into other software, look for applications that offer API support or plugins.

FAQs about QR Code Generators on Windows 10:

  • Q: Are there any free QR code generators available for Windows 10?
  • A: Yes, there are numerous free QR code generators available for Windows 10. Both standalone applications and online tools offer free versions with basic functionalities.
  • Q: Can I create QR codes for social media accounts on Windows 10?
  • A: Absolutely. Most QR code generators allow you to create codes that link to social media profiles, streamlining user engagement.
  • Q: Can I track the number of scans for my QR codes?
  • A: Some QR code generators offer analytics features that track scan data, providing insights into code usage and effectiveness.
  • Q: What types of data can I store in a QR code?
  • A: QR codes can store various types of data, including URLs, text, contact information, calendar events, and even images.
  • Q: Are there any limitations to the size of QR codes?
  • A: While QR codes can be scaled to different sizes, it’s recommended to maintain a minimum size to ensure readability by scanners.

Tips for Effective QR Code Generation on Windows 10:

  • Use High-Quality Images: When incorporating images into your QR codes, ensure they are high-resolution and optimized for readability.
  • Choose a Clear Background: Select a plain background color that contrasts with the code pattern for improved visibility.
  • Test Your Codes: Always test your generated QR codes using a smartphone or tablet to ensure they function correctly.
  • Promote Your Codes: Clearly indicate the presence of a QR code and encourage users to scan it for additional information or engagement.

Conclusion: Embracing the Power of Accessibility

QR code generation on Windows 10 empowers users to bridge the gap between physical and digital experiences, enhancing accessibility and engagement. By leveraging the diverse range of QR code generator options available, users can create dynamic and interactive experiences, streamlining information sharing and fostering a more connected world. As technology continues to evolve, QR codes will undoubtedly remain a powerful tool for unlocking the possibilities of digital content and creating seamless user journeys.

Generate Qr Code In Windows 10 Knowledge Sharing Tech - vrogue.co Generate QR Code with PowerShell in Windows 10 Windows 10 accessibility features empower everyone - Dr. Ware Technology Services - Microsoft
How to QR code generate in Windows 10 - YouTube Qr Code Generator Freeware Download Windows QR Code Generator for Windows 10 / 7 / Vista / XP
QR code-based access control Access โ€“ QR Code Generator  DEVelopers HUT

Closure

Thus, we hope this article has provided valuable insights into The Power of Accessibility: Exploring QR Code Generation on Windows 10. We hope you find this article informative and beneficial. See you in our next article!

PC Health: A Comprehensive Guide To Maintaining Optimal Performance

PC Health: A Comprehensive Guide to Maintaining Optimal Performance

Introduction

With enthusiasm, let’s navigate through the intriguing topic related to PC Health: A Comprehensive Guide to Maintaining Optimal Performance. Let’s weave interesting information and offer fresh perspectives to the readers.

PC Health: A Comprehensive Guide to Maintaining Optimal Performance

How to Perform Your Own PC Health Check - NECL

The health of your personal computer (PC) is a crucial factor in determining its longevity, efficiency, and overall user experience. A healthy PC operates smoothly, delivers optimal performance, and remains secure against potential threats. Neglecting PC health can lead to a host of issues, including slow performance, system crashes, data loss, and increased vulnerability to malware. This article provides a comprehensive guide to understanding PC health, its importance, and practical tips for maintaining a healthy system.

Understanding PC Health: A Holistic Approach

PC health encompasses a multifaceted range of factors that contribute to a computer’s overall well-being. These factors include:

1. Hardware Health: This refers to the physical components of your PC, including the motherboard, CPU, RAM, hard drive, graphics card, and other peripherals. Maintaining hardware health involves ensuring these components are functioning optimally, free from wear and tear, and properly connected.

2. Software Health: This encompasses the operating system, installed applications, and system files. A healthy software environment is free from malware, viruses, and unnecessary programs that can slow down performance. Regularly updating software and running security scans are essential for maintaining software health.

3. Data Integrity: This refers to the health and security of your data stored on your PC. Ensuring data integrity involves regular backups, secure storage practices, and the implementation of data protection measures to prevent data loss or corruption.

4. System Optimization: This involves configuring your PC settings to maximize performance and efficiency. Regularly optimizing your system can improve boot times, reduce system resource consumption, and enhance overall responsiveness.

Benefits of Maintaining a Healthy PC

A healthy PC offers numerous benefits, including:

1. Enhanced Performance: A well-maintained PC operates smoothly, with faster boot times, quicker application loading, and improved responsiveness. This translates to a more enjoyable and productive computing experience.

2. Increased Stability: A healthy PC is less prone to crashes, freezes, and system errors. This provides a more reliable and predictable computing environment.

3. Enhanced Security: A healthy PC is better equipped to resist malware, viruses, and other security threats. Regular security updates and software maintenance play a crucial role in safeguarding your data and system integrity.

4. Extended Lifespan: By proactively maintaining your PC, you can extend its lifespan and delay the need for expensive upgrades or replacements.

5. Improved User Experience: A healthy PC provides a seamless and enjoyable user experience, free from performance bottlenecks, crashes, and security concerns.

FAQs: Addressing Common Concerns

1. How often should I perform PC maintenance?

It is recommended to perform regular PC maintenance tasks at least once a month. This includes running system scans, updating software, cleaning up temporary files, and defragmenting the hard drive.

2. What are some signs of a failing hard drive?

Common signs of a failing hard drive include slow performance, frequent crashes, error messages, unusual noises, and data corruption. If you experience any of these symptoms, it is essential to back up your data immediately and consider replacing the hard drive.

3. How can I protect my PC from malware?

To protect your PC from malware, install a reputable antivirus program, keep your software updated, avoid suspicious websites and downloads, and be cautious about opening email attachments from unknown sources.

4. What is the best way to optimize my PC performance?

Optimizing PC performance involves a combination of steps, including:

  • Closing unnecessary programs: Running too many programs simultaneously can slow down your PC.
  • Disabling unnecessary startup programs: Many programs launch automatically at startup, consuming system resources. Disabling unnecessary programs can improve boot times and performance.
  • Cleaning up temporary files: Temporary files accumulate over time and can consume valuable disk space. Regularly deleting temporary files can free up space and improve performance.
  • Defragmenting the hard drive: Defragmentation reorganizes data on your hard drive, improving access times and performance.

5. What is the best way to back up my data?

There are several methods for backing up your data, including:

  • External hard drive: This is a simple and reliable method for backing up data.
  • Cloud storage: Cloud storage services offer remote data storage and backup options.
  • Networked storage: Networked storage devices provide centralized data storage and backup capabilities for multiple computers.

Tips for Maintaining PC Health

1. Install a reputable antivirus program: Antivirus software protects your PC from malware, viruses, and other threats.

2. Keep your software updated: Regularly updating your operating system and applications ensures you have the latest security patches and bug fixes.

3. Run system scans regularly: Run system scans to identify and remove malware, viruses, and other potential threats.

4. Clean up temporary files and unused programs: Regularly cleaning up temporary files and uninstalling unused programs can free up disk space and improve performance.

5. Defragment your hard drive: Defragmentation reorganizes data on your hard drive, improving access times and performance.

6. Optimize your system settings: Adjust system settings, such as power options, visual effects, and startup programs, to improve performance and energy efficiency.

7. Back up your data regularly: Regular backups ensure that you can recover your data in case of a system failure or data loss.

8. Monitor system performance: Use system monitoring tools to track resource usage, identify potential bottlenecks, and diagnose performance issues.

9. Practice safe browsing habits: Avoid suspicious websites and downloads, and be cautious about opening email attachments from unknown sources.

10. Consider professional maintenance: For complex issues or advanced optimization, consider seeking professional assistance from a qualified technician.

Conclusion

Maintaining PC health is crucial for ensuring optimal performance, security, and longevity. By implementing the tips and practices outlined in this article, you can proactively safeguard your PC, prevent potential issues, and enjoy a smooth and reliable computing experience. Remember that regular maintenance, software updates, and safe browsing habits are essential for keeping your PC healthy and secure. Investing in PC health pays dividends in the form of increased productivity, improved user experience, and a longer lifespan for your computer.

How to maintain and clean your computer for optimal performance - Vital Tech - Medium How to health check windows 10 for best performance Pc Health At A Glance
For PC Best Top 10 Tips to Maintain your computer health How to Maintain Your PC for Optimal Performance - Repair Services  Cell Phone Repair Expert Maintaining Optimal Computer Performance through Regular Preventative Maintenance  PDF
The Windows PC Health Check App Explained How to Maintain Your PC Performance - YouTube

Closure

Thus, we hope this article has provided valuable insights into PC Health: A Comprehensive Guide to Maintaining Optimal Performance. We hope you find this article informative and beneficial. See you in our next article!

The Enhanced Multitasking Experience Of Windows 11: Navigating Tabs With Ease

The Enhanced Multitasking Experience of Windows 11: Navigating Tabs with Ease

Introduction

With enthusiasm, let’s navigate through the intriguing topic related to The Enhanced Multitasking Experience of Windows 11: Navigating Tabs with Ease. Let’s weave interesting information and offer fresh perspectives to the readers.

The Enhanced Multitasking Experience of Windows 11: Navigating Tabs with Ease

An In-depth Look At Windows 11 Build 22000.51 [ Easy Guide ]  Yehi Web

Windows 11, the latest iteration of Microsoft’s operating system, introduces a refined user interface and numerous enhancements, including a significant improvement in multitasking capabilities. One of the key features contributing to this enhanced experience is the tabbed interface, which allows users to manage multiple open windows and applications within a single window, streamlining workflows and maximizing screen real estate.

Understanding Tabbed Interfaces in Windows 11

Tabbed interfaces, familiar from web browsers, have become ubiquitous in modern software applications. This concept is implemented in Windows 11 by integrating tabs into the operating system’s core functionality. The integration of tabs allows users to organize and manage multiple open windows within a single application window. This approach offers a number of advantages over the traditional method of opening separate windows for each program.

Benefits of Tabbed Interfaces in Windows 11

1. Increased Efficiency and Productivity:

Tabbed interfaces significantly enhance productivity by minimizing the number of open windows on the screen. This reduces clutter and visual distractions, allowing users to focus on the task at hand. Switching between different applications becomes seamless, as users can easily navigate between tabs instead of minimizing and maximizing multiple windows.

2. Enhanced Organization and Management:

Tabbed interfaces provide a structured and organized way to manage open applications. Users can group related applications under a single tab, making it easy to find and access the desired program. This is especially beneficial for users who work with multiple applications simultaneously.

3. Optimized Screen Space Utilization:

The compact nature of tabs allows for more efficient use of screen space. By consolidating multiple windows into a single window with tabs, users can view more content and information simultaneously. This is particularly advantageous for users with smaller screens or those working on high-resolution displays.

4. Improved Focus and Concentration:

Tabbed interfaces contribute to improved focus by reducing the visual clutter associated with multiple open windows. The simplified view allows users to concentrate on the current task without being distracted by other open programs.

5. Seamless Integration with Other Features:

Windows 11’s tabbed interface integrates seamlessly with other features like Snap Layouts and Virtual Desktops. Users can easily arrange tabs within different Snap Layouts or group them into separate Virtual Desktops, further enhancing their workflow and multitasking capabilities.

Implementing Tabbed Interfaces in Windows 11

Windows 11’s tabbed interface is implemented across a range of applications, including File Explorer, Microsoft Edge, and other compatible programs. Users can easily open tabs within these applications by clicking on the "New Tab" button or dragging a file or folder into an existing tab.

1. File Explorer:

Tabbed File Explorer enables users to manage multiple folders and files within a single window. This eliminates the need to open separate windows for each folder, simplifying file navigation and organization.

2. Microsoft Edge:

Microsoft Edge, Windows 11’s default web browser, leverages tabs extensively. Users can open multiple websites within a single browser window, allowing for quick and easy switching between different web pages.

3. Other Compatible Programs:

Several third-party applications are also adopting tabbed interfaces, including popular productivity tools like Microsoft Office and Adobe Creative Cloud. This trend is likely to continue as more developers recognize the advantages of tabbed interfaces in enhancing user experience and productivity.

FAQs about Tabbed Interfaces in Windows 11

1. How do I open a tab in Windows 11?

To open a tab in a compatible application, click on the "New Tab" button or drag a file or folder into an existing tab.

2. Can I customize the appearance of tabs?

Yes, you can customize the appearance of tabs by adjusting their size, color, and other settings. This can be done through the application’s settings menu.

3. Can I close multiple tabs at once?

Yes, you can close multiple tabs at once by right-clicking on a tab and selecting "Close All Tabs" or by using keyboard shortcuts like Ctrl+W.

4. Are tabbed interfaces available in all Windows 11 applications?

No, tabbed interfaces are not yet implemented in all Windows 11 applications. However, Microsoft is actively working to integrate tabs into more programs in future updates.

5. What are the limitations of tabbed interfaces in Windows 11?

While tabbed interfaces offer significant benefits, they also have some limitations. For example, some applications may not fully support tabbed interfaces, and some users may find the transition from traditional windows to tabs challenging.

Tips for Using Tabbed Interfaces in Windows 11

1. Organize Your Tabs:

Organize tabs by grouping related applications under a single tab. This will help you easily navigate and find the desired application.

2. Utilize Keyboard Shortcuts:

Use keyboard shortcuts like Ctrl+Tab to switch between tabs, Ctrl+Shift+Tab to switch back, and Ctrl+W to close the current tab.

3. Take Advantage of Snap Layouts:

Combine tabbed interfaces with Snap Layouts to arrange multiple tabs in different screen layouts, maximizing screen space and improving efficiency.

4. Experiment with Virtual Desktops:

Group tabs into separate Virtual Desktops to create different workspaces for various tasks. This allows for a more focused and organized workflow.

5. Explore Third-Party Tools:

Consider using third-party tools that enhance tabbed interfaces, providing additional features like tab management, customization options, and integration with other applications.

Conclusion

Tabbed interfaces in Windows 11 represent a significant advancement in multitasking capabilities, offering numerous benefits for users. By streamlining workflows, maximizing screen space, and enhancing organization, tabs contribute to a more efficient and productive user experience. As more applications embrace tabbed interfaces, this feature is poised to become an integral part of the Windows 11 ecosystem, further empowering users to navigate and manage their digital lives with ease.

Windows 11 Has a Killer Multitasking Feature You Need to Try  Digital Trends Windows 11 Snap Layouts: A Powerful Way to Multitask and Optimize your Screen - SmartWindows What's new with multitasking on Windows 11  Windows Central
How to Use Multi-Windows on Windows 11 How to use Windows 11's virtual desktops for enhanced multitasking Using the Snap Layout for Multitasking in Windows 11 - YouTube
How to Change Alt+Tab Settings in Windows 11?  Gear Up Windows How to simplify multitasking with Windows 11  PDQ

Closure

Thus, we hope this article has provided valuable insights into The Enhanced Multitasking Experience of Windows 11: Navigating Tabs with Ease. We appreciate your attention to our article. See you in our next article!

Navigating The Upgrade: A Comprehensive Guide To Windows 11 Home To Pro

Navigating the Upgrade: A Comprehensive Guide to Windows 11 Home to Pro

Introduction

With enthusiasm, let’s navigate through the intriguing topic related to Navigating the Upgrade: A Comprehensive Guide to Windows 11 Home to Pro. Let’s weave interesting information and offer fresh perspectives to the readers.

How to Upgrade Windows 11 HOME to Windows 11 PRO? - YouTube

Windows 11, the latest iteration of Microsoft’s flagship operating system, offers two primary editions: Home and Pro. While both share core functionalities, Windows 11 Pro caters to a more professional user base, presenting a suite of advanced features that enhance productivity and security for businesses and power users. This article delves into the price difference between these two editions, outlining the key features that distinguish them and providing insights into whether the upgrade is worthwhile for your specific needs.

Understanding the Price Gap:

The price difference between Windows 11 Home and Pro is a significant factor to consider. While the exact pricing may fluctuate based on regional variations and promotional offers, Windows 11 Home typically carries a lower price tag compared to its Pro counterpart. This price discrepancy reflects the additional features and functionalities included in the Pro edition, which are designed to address the unique demands of professional environments.

Key Features that Justify the Price Difference:

The price difference between Windows 11 Home and Pro is justified by the inclusion of several powerful features in the Pro edition. These features cater to the needs of professionals and organizations, offering enhanced security, management, and productivity capabilities.

1. Enhanced Security and Management:

  • BitLocker Drive Encryption: Windows 11 Pro incorporates BitLocker, a robust encryption tool that safeguards data on your hard drive, rendering it inaccessible to unauthorized users. This feature is crucial for businesses handling sensitive information and adhering to regulatory compliance standards.

  • Domain Join: Windows 11 Pro allows seamless integration into corporate networks through domain join, enabling centralized management and policy enforcement. This feature facilitates efficient administration of multiple devices within a corporate environment.

  • Group Policy Management: Windows 11 Pro empowers administrators with granular control over user settings and system configurations through Group Policy, ensuring consistent security and compliance across the organization.

  • Windows Sandbox: This feature provides a secure, isolated environment for testing applications and software without affecting the main operating system. This is particularly beneficial for IT professionals and developers who need to evaluate software in a controlled environment.

2. Advanced Productivity and Collaboration:

  • Remote Desktop: Windows 11 Pro enables users to remotely access and control their computer from another device. This is essential for professionals who need to work from different locations or manage multiple computers.

  • Hyper-V: Windows 11 Pro includes Hyper-V, a powerful virtualization tool that allows users to run multiple operating systems simultaneously on a single computer. This is invaluable for software developers, testers, and IT professionals who need to work with different operating systems.

  • Windows Update for Business: This feature provides businesses with greater control over the deployment of Windows updates, allowing them to schedule updates and test them in a controlled environment before rolling them out to all devices.

3. Enhanced Functionality for Businesses:

  • Windows Hello for Business: This feature enables secure authentication using biometric methods like facial recognition or fingerprint scanning, enhancing security and simplifying user login.

  • Assigned Access: Windows 11 Pro allows administrators to lock down devices to specific apps and websites, providing a secure and controlled environment for specific tasks. This is useful for kiosks, shared devices, or situations where restricted access is required.

Weighing the Pros and Cons of Upgrading:

The decision to upgrade from Windows 11 Home to Pro hinges on your specific needs and usage patterns. While the Pro edition offers a compelling set of features for professionals and businesses, it is essential to consider whether these features align with your individual requirements.

Factors to Consider:

  • Professional Use: If you are a professional or business user who requires advanced security, management, and productivity features, Windows 11 Pro is a compelling choice.

  • Budget Constraints: The price difference between Windows 11 Home and Pro is a significant factor to consider. If you are on a tight budget, Windows 11 Home may be sufficient.

  • Feature Requirements: Carefully assess whether the features offered by Windows 11 Pro align with your specific needs. If you do not require features like BitLocker, Domain Join, or Hyper-V, Windows 11 Home might be a more cost-effective option.

Frequently Asked Questions (FAQs):

1. Can I upgrade from Windows 11 Home to Pro without reinstalling the operating system?

Yes, you can upgrade from Windows 11 Home to Pro without reinstalling the operating system. Microsoft provides an in-place upgrade option that preserves your existing files and settings.

2. Can I downgrade from Windows 11 Pro to Home after upgrading?

Downgrading from Windows 11 Pro to Home is not a straightforward process. You might need to perform a clean installation of Windows 11 Home, which will erase all data on your device.

3. Does upgrading to Windows 11 Pro require a new product key?

Yes, upgrading to Windows 11 Pro requires a separate product key. You can purchase a Windows 11 Pro product key from authorized retailers or Microsoft’s online store.

4. Can I use a Windows 11 Home product key to activate Windows 11 Pro?

No, you cannot use a Windows 11 Home product key to activate Windows 11 Pro. You need a separate product key for the Pro edition.

5. Is the upgrade from Windows 11 Home to Pro permanent?

Yes, the upgrade from Windows 11 Home to Pro is permanent. Once you upgrade, you will have access to all Pro features without needing to purchase a separate license.

Tips for Upgrading to Windows 11 Pro:

  • Back up your data: Before upgrading, ensure you have a complete backup of your important files and settings. This will help you recover your data in case of any unforeseen issues.

  • Check system requirements: Verify that your computer meets the minimum system requirements for Windows 11 Pro.

  • Review your feature needs: Carefully evaluate whether the Pro features align with your requirements.

  • Purchase a valid product key: Obtain a genuine Windows 11 Pro product key from a reputable source.

  • Follow the upgrade instructions: Follow the official Microsoft instructions for upgrading from Windows 11 Home to Pro.

Conclusion:

The decision to upgrade from Windows 11 Home to Pro ultimately depends on your individual needs and budget. While Windows 11 Home provides a solid foundation for general users, the Pro edition offers a comprehensive suite of features designed to enhance productivity, security, and management for professionals and businesses. By carefully evaluating your requirements and weighing the pros and cons, you can make an informed decision that aligns with your specific needs and ensures a seamless and efficient computing experience.

How to upgrade Windows 11 Home to Pro - Pureinfotech How to Upgrade Windows 11 Home to Pro Without Reinstalling How to Upgrade Windows 11 Home to Pro
How to upgrade Windows 11 Home to Pro How to upgrade Windows 11 Home to Pro Upgrade Windows 11 Home To Pro Edition - YouTube
Buy WINDOWS 11 COMPLETE GUIDE: Taking You from Windows 11 Novice to Professional In 33 Chapters Buy WINDOWS 11 PRO USER GUIDE: A Comprehensive User Guide for Beginners and Seniors to Master

Closure

Thus, we hope this article has provided valuable insights into Navigating the Upgrade: A Comprehensive Guide to Windows 11 Home to Pro. We thank you for taking the time to read this article. See you in our next article!

QBittorrent: A Comprehensive Guide For Windows 11 Users

qBittorrent: A Comprehensive Guide for Windows 11 Users

Introduction

With great pleasure, we will explore the intriguing topic related to qBittorrent: A Comprehensive Guide for Windows 11 Users. Let’s weave interesting information and offer fresh perspectives to the readers.

qBittorrent: A Comprehensive Guide for Windows 11 Users

how to install qbittorrent on windows 11  how to install the qbittorrent on windows 10 - YouTube

In the digital landscape, where vast amounts of data flow freely, efficient file sharing and download management are paramount. For Windows 11 users seeking a robust, reliable, and user-friendly torrent client, qBittorrent emerges as a compelling choice. This open-source software offers a comprehensive suite of features, prioritizing user privacy and security while delivering exceptional performance. This article delves into the intricacies of qBittorrent, exploring its functionalities, advantages, and how it seamlessly integrates into the Windows 11 environment.

Understanding qBittorrent: A Primer on Torrenting

qBittorrent is a free and open-source BitTorrent client, designed to facilitate the downloading and sharing of files using the BitTorrent protocol. This protocol allows users to download files from multiple sources simultaneously, enhancing download speeds and efficiency. qBittorrent acts as a bridge between the user and the torrent network, enabling them to access and manage torrents effectively.

Key Features of qBittorrent

qBittorrent stands out from other torrent clients due to its comprehensive feature set, catering to diverse user needs. Here are some of its most notable features:

  • User Interface: qBittorrent boasts a clean and intuitive interface, making it easy to navigate even for novice users. The interface is highly customizable, allowing users to tailor it to their preferences.
  • Torrent Search: qBittorrent integrates seamlessly with popular torrent search engines, eliminating the need for external websites. Users can search for torrents directly within the application, streamlining the download process.
  • Download Management: qBittorrent offers advanced download management features, including scheduling, prioritization, and speed limits. Users can control the download process meticulously, ensuring optimal resource utilization.
  • Multiple Connections: qBittorrent supports multiple simultaneous downloads, allowing users to download multiple files concurrently without compromising performance.
  • Bandwidth Control: The software offers granular bandwidth control, enabling users to allocate specific bandwidth for torrent downloads while ensuring other online activities are not impacted.
  • Encryption: qBittorrent supports encryption, ensuring the privacy and security of user data during download and upload activities.
  • RSS Feed Support: qBittorrent integrates with RSS feeds, allowing users to automatically download torrents as soon as they are available, simplifying the process of acquiring new content.
  • Cross-Platform Compatibility: qBittorrent is available for multiple operating systems, including Windows, macOS, Linux, and FreeBSD, ensuring compatibility across diverse platforms.
  • Open Source and Ad-Free: qBittorrent is an open-source software, meaning its source code is publicly available for inspection and modification. This transparency fosters trust and ensures the absence of hidden agendas or malicious functionalities. Furthermore, qBittorrent is completely ad-free, providing a clean and uncluttered user experience.

Benefits of Using qBittorrent

The benefits of using qBittorrent extend beyond its comprehensive feature set, encompassing user experience, security, and performance.

  • User-Friendliness: qBittorrent’s intuitive interface and user-centric design make it accessible to both seasoned torrent users and newcomers. The software’s straightforward navigation and clear instructions eliminate the learning curve associated with other torrent clients.
  • Privacy and Security: qBittorrent prioritizes user privacy and security. Its open-source nature allows for thorough code scrutiny, minimizing the risk of vulnerabilities. Furthermore, the software’s built-in encryption safeguards user data during download and upload activities.
  • Performance and Efficiency: qBittorrent is known for its exceptional performance. Its efficient resource management, multiple connection support, and bandwidth control features optimize download speeds and minimize system impact.
  • No Bloatware or Ads: qBittorrent is free from bloatware and advertisements, ensuring a clean and uncluttered user experience. This minimalist approach enhances performance and prevents distractions.
  • Community Support: As an open-source project, qBittorrent benefits from a vibrant and active community. Users can access extensive documentation, forums, and support channels, providing assistance and troubleshooting solutions.

Integrating qBittorrent into Windows 11

Integrating qBittorrent into Windows 11 is a seamless process. Here are the steps involved:

  1. Download qBittorrent: Visit the official qBittorrent website and download the installer for Windows.
  2. Installation: Run the installer and follow the on-screen instructions to install qBittorrent on your Windows 11 system.
  3. Configuration: Once installed, launch qBittorrent. The software’s intuitive interface allows for easy configuration, including language settings, download location, and bandwidth limits.
  4. Torrent Downloading: To download a torrent file, simply drag and drop it into the qBittorrent window or use the "Add Torrent" button. qBittorrent will automatically start downloading the files.

qBittorrent: FAQs

Q: Is qBittorrent safe to use?

A: qBittorrent is a reputable and secure torrent client. Its open-source nature allows for independent code audits, minimizing the risk of vulnerabilities. The software also incorporates encryption to protect user data during download and upload activities.

Q: Is qBittorrent legal?

A: The legality of torrenting depends on the content being downloaded. Downloading copyrighted material without permission is illegal. However, qBittorrent itself is a legitimate software and does not promote or encourage illegal activities.

Q: How does qBittorrent work?

A: qBittorrent uses the BitTorrent protocol to download files from multiple sources simultaneously. It connects to a network of peers who share parts of the file, allowing users to download it faster and more efficiently.

Q: What are the advantages of using qBittorrent?

A: qBittorrent offers several advantages, including user-friendliness, privacy and security, performance, and no bloatware or ads. It is also open-source, ensuring transparency and community support.

Q: How can I configure qBittorrent for optimal performance?

A: You can configure qBittorrent to prioritize downloads, set bandwidth limits, and optimize settings based on your internet connection and system resources. Consult the software’s documentation for detailed configuration options.

Tips for Using qBittorrent

  • Prioritize Downloads: Use qBittorrent’s prioritization feature to prioritize important downloads, ensuring they complete faster.
  • Set Bandwidth Limits: Configure bandwidth limits to allocate specific bandwidth for torrent downloads while ensuring other online activities are not impacted.
  • Use Encryption: Enable encryption to protect user data during download and upload activities.
  • Schedule Downloads: Schedule downloads to take advantage of off-peak hours when internet speeds are typically higher.
  • Use RSS Feeds: Leverage RSS feeds to automatically download torrents as soon as they are available, simplifying the process of acquiring new content.

Conclusion

qBittorrent emerges as a powerful and versatile torrent client for Windows 11 users. Its comprehensive features, user-friendly interface, and commitment to privacy and security make it a compelling choice for both seasoned torrent users and newcomers. By integrating seamlessly into the Windows 11 environment, qBittorrent empowers users to download and manage torrents efficiently, ensuring a smooth and secure file sharing experience. As an open-source software, qBittorrent fosters a collaborative environment, enabling continuous improvement and innovation. Whether you are downloading software, movies, music, or any other type of content, qBittorrent provides a reliable and efficient solution for your torrenting needs.

10 Best Torrent Clients for Windows 11 Download qBittorrent for Windows 11/10/8/7 (Latest version 2023) - Downloads Guru Qbittorrent windows - acakit
qBittorrent - A Must Read Comprehensive Guide - DotCom Magazine-Influencers And Entrepreneurs Qbittorrent downloads  Best BitTorrent Clients for Windows 11  Windows Mode 10 Best Torrent Clients For Windows 11 in 2024
How to download and install qBittorrent on Windows - YouTube qBittorrent Free Download for Windows 10, 11, 7 (32 / 64-bit)

Closure

Thus, we hope this article has provided valuable insights into qBittorrent: A Comprehensive Guide for Windows 11 Users. We thank you for taking the time to read this article. See you in our next article!

Navigating The Labyrinth: Troubleshooting Connectivity Issues In Windows 11

Navigating the Labyrinth: Troubleshooting Connectivity Issues in Windows 11

Introduction

With enthusiasm, let’s navigate through the intriguing topic related to Navigating the Labyrinth: Troubleshooting Connectivity Issues in Windows 11. Let’s weave interesting information and offer fresh perspectives to the readers.

How to Fix Network Connection Issues in Windows 11

Windows 11, with its sleek interface and enhanced features, has captivated many users. However, the transition to a new operating system often brings its own set of challenges, particularly when it comes to network connectivity. Users may encounter a range of issues, from sluggish internet speeds to complete network outages, hindering their ability to access the digital world. This article delves into the common causes of connectivity problems in Windows 11, offering a comprehensive guide to troubleshooting and resolving these issues.

Understanding the Network Landscape

Before embarking on troubleshooting, it’s crucial to understand the different components involved in a Windows 11 network connection. These components work in concert to establish a stable and reliable connection:

  • Network Interface Card (NIC): This hardware component acts as the bridge between your computer and the network. It translates data from your computer into signals that can be transmitted over the network.
  • Network Drivers: These software programs provide instructions for the NIC, enabling it to communicate effectively with the network.
  • Network Settings: These configurations determine how your computer connects to the network, including the type of connection (Wi-Fi, Ethernet), security settings, and network protocols.
  • Internet Service Provider (ISP): Your ISP provides the internet connection to your home or office.
  • Router: This device acts as a central hub, connecting your computer to the internet and other devices on your local network.

Common Connectivity Issues in Windows 11

While the complexity of network connectivity can make troubleshooting seem daunting, understanding the common issues can provide a starting point. Here are some of the most prevalent problems encountered by Windows 11 users:

  • Slow Internet Speeds: This issue can be caused by factors ranging from network congestion to outdated drivers.
  • Intermittent Network Connectivity: This problem involves frequent disconnections or unstable connections, often attributed to network interference or driver conflicts.
  • Inability to Connect to Wi-Fi: This can occur due to incorrect Wi-Fi passwords, network configuration issues, or problems with the Wi-Fi router.
  • Limited or No Internet Access: This is a serious issue that can stem from various sources, including router problems, ISP outages, or network security settings.
  • Network Adapter Issues: The NIC itself can malfunction, leading to connectivity problems.

Troubleshooting Connectivity Problems in Windows 11

Addressing these issues requires a systematic approach. Here’s a step-by-step guide to troubleshooting network connectivity problems in Windows 11:

1. Basic Checks:

  • Restart your computer and router: This simple step often resolves temporary glitches.
  • Check your internet connection: Ensure your ISP is not experiencing outages.
  • Verify your Wi-Fi password: Double-check that you are entering the correct password.
  • Check for network outages in your area: Use online tools to check for local network outages.

2. Network Settings:

  • Reset your network settings: This removes all network configurations and resets them to default settings.
  • Check your IP address: Ensure your computer has a valid IP address.
  • Disable IPv6: IPv6 is a newer internet protocol that can sometimes cause connectivity issues. Temporarily disabling it can resolve the problem.
  • Check your firewall: Ensure the firewall is not blocking network traffic.

3. Network Drivers:

  • Update your network drivers: Outdated or corrupted drivers can lead to connectivity issues.
  • Rollback your network drivers: If recent driver updates caused problems, roll back to a previous version.
  • Reinstall your network drivers: This can resolve driver conflicts or corruption.

4. Wi-Fi Troubleshooting:

  • Check your Wi-Fi signal strength: Weak signal can cause connectivity problems.
  • Move closer to your router: If the signal is weak, try moving your computer closer to the router.
  • Change your Wi-Fi channel: This can reduce interference from other wireless networks.
  • Reset your Wi-Fi router: This can resolve configuration issues or firmware problems.

5. Advanced Troubleshooting:

  • Run the Network Troubleshooter: Windows 11 includes a built-in troubleshooter that can identify and resolve common network problems.
  • Check for malware: Malware can interfere with network connections.
  • Perform a clean boot: This eliminates third-party software that could be causing conflicts.
  • Contact your ISP: If the problem persists, contact your ISP for support.

FAQs About Connectivity Issues in Windows 11

Q: Why is my internet speed so slow in Windows 11?

A: Slow internet speeds can be caused by factors such as network congestion, outdated drivers, malware, or even background processes consuming bandwidth.

Q: How can I fix intermittent network connectivity in Windows 11?

A: Intermittent connectivity issues can be addressed by checking for driver conflicts, network interference, or router problems.

Q: My computer can’t connect to Wi-Fi in Windows 11. What should I do?

A: Verify your Wi-Fi password, check your network settings, and ensure your router is functioning correctly.

Q: I have limited or no internet access in Windows 11. What are the possible causes?

A: This issue can be caused by router problems, ISP outages, or network security settings.

Q: How can I troubleshoot network adapter issues in Windows 11?

A: Update or reinstall your network drivers, check for hardware malfunctions, and consider replacing the NIC if necessary.

Tips for Preventing Connectivity Issues in Windows 11

  • Keep your drivers updated: Regularly update your network drivers to ensure optimal performance.
  • Use a strong Wi-Fi password: Protect your network from unauthorized access.
  • Check for network interference: Identify and minimize sources of interference, such as cordless phones or microwaves.
  • Run regular security scans: Detect and remove malware that can disrupt network connections.
  • Monitor network usage: Identify and limit applications that consume excessive bandwidth.

Conclusion

Connectivity problems in Windows 11 can be frustrating, but with a systematic approach and the right troubleshooting techniques, these issues can be resolved. By understanding the different components involved in network connectivity, identifying common issues, and implementing the steps outlined in this guide, users can regain control over their internet experience and enjoy the full potential of Windows 11. Remember, patience and persistence are key to successfully navigating the labyrinth of network troubleshooting.

How to Fix Internet Connection Problem Windows 11 - YouTube How to Fix Network Connection Issues on Windows 11/10 How to Fix Windows 11 Internet Connection Problem โ€“ Simple and Effective Method โ€“ howto Go-it
How to Fix Error Please Check Your Network Connection In Windows 11 [Tutorial] - YouTube How to fix network connection issues on Windows 11. - YouTube Six common problems and solutions of Windows 11 โ€“ Tech Guru: How to fix errors
Windows 11 Problems How To Fix The Most Common Issues - vrogue.co How To Turn On Or Off Wi Fi In Windows 11 Quick Ways - ZOHAL

Closure

Thus, we hope this article has provided valuable insights into Navigating the Labyrinth: Troubleshooting Connectivity Issues in Windows 11. We appreciate your attention to our article. See you in our next article!

The Unruly Cursor: A Comprehensive Guide To Erratic Mouse Behavior

The Unruly Cursor: A Comprehensive Guide to Erratic Mouse Behavior

Introduction

With great pleasure, we will explore the intriguing topic related to The Unruly Cursor: A Comprehensive Guide to Erratic Mouse Behavior. Let’s weave interesting information and offer fresh perspectives to the readers.

The Unruly Cursor: A Comprehensive Guide to Erratic Mouse Behavior

Erratic mouse cursor movement Solution [Solved[ - YouTube

A cursor that jumps erratically across the screen can be a frustrating and disruptive experience for any computer user. This seemingly simple issue can stem from a variety of underlying causes, ranging from minor software glitches to hardware malfunctions. Understanding the potential causes and implementing appropriate solutions can restore smooth and efficient computer operation.

Understanding the Problem:

The cursor, a visual representation of the mouse’s position on the screen, relies on a complex interplay of hardware and software components. When the cursor exhibits erratic behavior, it indicates a disruption in this delicate balance. The most common symptoms include:

  • Uncontrolled Movement: The cursor moves randomly and unexpectedly across the screen, often without any user input.
  • Jumping and Skipping: The cursor jumps or skips between different locations on the screen, making accurate selection and navigation difficult.
  • Delayed Response: The cursor responds sluggishly to mouse movements, creating a lag that hinders productivity.
  • Double-Clicking: The cursor registers multiple clicks with a single mouse click, leading to unintended actions and errors.

Potential Causes:

Identifying the root cause of the erratic cursor behavior is crucial for finding an effective solution. The following factors can contribute to this issue:

1. Hardware Malfunctions:

  • Faulty Mouse: A damaged or malfunctioning mouse can lead to inaccurate cursor movement. This could involve issues with the mouse sensor, buttons, or internal wiring.
  • Dirty Mouse Sensor: Dust and debris can accumulate on the optical or laser sensor of a mouse, interfering with its ability to track movement accurately.
  • USB Port Issues: A faulty or loose USB port can disrupt communication between the mouse and the computer, resulting in erratic cursor behavior.
  • Loose Mouse Cable: A frayed or loose cable connecting the mouse to the computer can cause intermittent or unreliable signal transmission.

2. Software Issues:

  • Driver Conflicts: Outdated or incompatible mouse drivers can lead to conflicts with the operating system, causing cursor problems.
  • System Errors: Corrupted system files or software bugs can interfere with the mouse’s functionality.
  • Malware Infection: Malicious software can hijack the mouse’s input and manipulate the cursor.
  • Conflicting Software: Certain software programs can interfere with the mouse’s input or cause conflicts with the operating system.

3. Environmental Factors:

  • Electromagnetic Interference: Strong electromagnetic fields from devices like cell phones or wireless routers can interfere with the mouse’s wireless signal, leading to erratic cursor movement.
  • Surface Issues: Using the mouse on a reflective or uneven surface can disrupt the sensor’s ability to track movement accurately.

Troubleshooting and Solutions:

Addressing the erratic cursor behavior requires a systematic approach. The following steps can help identify and resolve the issue:

1. Check the Mouse:

  • Clean the Mouse Sensor: Gently clean the optical or laser sensor with a soft, dry cloth. Avoid using harsh chemicals or abrasive materials.
  • Test the Mouse on a Different Surface: Try using the mouse on a different surface, such as a clean mousepad or a flat, non-reflective surface.
  • Replace the Batteries: If using a wireless mouse, replace the batteries or recharge the battery.
  • Try a Different Mouse: Connect a different mouse to the computer to see if the issue persists. If the cursor behaves normally with a different mouse, the problem likely lies with the original mouse.

2. Check the Computer:

  • Restart the Computer: Restarting the computer can resolve temporary software glitches or conflicts.
  • Update Mouse Drivers: Ensure that the latest mouse drivers are installed. You can update drivers through the device manager or download them from the manufacturer’s website.
  • Run a System Scan: Scan the computer for malware using a reputable antivirus program.
  • Check for Conflicting Software: Identify and temporarily disable any recently installed software that might be interfering with the mouse’s functionality.

3. Check the Environment:

  • Remove Potential Sources of Interference: Move the computer away from potential sources of electromagnetic interference, such as cell phones or wireless routers.
  • Ensure a Clean Surface: Ensure the surface where the mouse is being used is clean, flat, and non-reflective.

FAQs:

Q: My cursor is jumping around, but I’m using a wired mouse. Could it still be a hardware issue?

A: Yes, even wired mice can experience hardware problems. The cable itself could be damaged, the USB connector could be loose, or the mouse sensor could be malfunctioning.

Q: I’ve tried all the troubleshooting steps, but my cursor is still jumping around. What should I do?

A: If the problem persists, it might be necessary to seek professional assistance from a computer technician. They can perform a more thorough diagnosis and potentially identify and repair hardware issues.

Q: Can I fix a faulty mouse sensor myself?

A: It is not recommended to attempt to repair a faulty mouse sensor yourself. Doing so could damage the mouse further and potentially void the warranty.

Q: What are some preventive measures to avoid erratic cursor behavior?

A: Regularly cleaning the mouse sensor, using a quality mousepad, and keeping the computer free of malware can help prevent cursor problems.

Tips:

  • Use a Quality Mousepad: A smooth, non-reflective mousepad can significantly improve the accuracy of optical or laser mice.
  • Avoid Using the Mouse on Reflective Surfaces: Reflective surfaces can interfere with the sensor’s ability to track movement accurately.
  • Keep the Mouse Clean: Regularly clean the mouse sensor and the surrounding area to prevent dust and debris from interfering with its functionality.
  • Maintain Proper Mouse Ergonomics: Using a comfortable mouse and maintaining proper posture can reduce strain and prevent repetitive stress injuries.

Conclusion:

An erratic cursor can be a frustrating and disruptive experience, but it is usually a solvable problem. By understanding the potential causes and implementing the appropriate troubleshooting steps, users can restore smooth and efficient computer operation. While hardware malfunctions can be a contributing factor, software issues and environmental factors should not be overlooked. Regular maintenance and preventive measures can help minimize the likelihood of encountering cursor problems in the future.

Fixed: strange erratic mouse pointer behavior - moving on its own uncontrollably across the No Cursor movement, Mouse Cursor moves erratically or slowly - YouTube Fix Erratic/Jumping Mouse Cursor Issue on Dell, HP, Lenovo, Asus windows 10 PC  Asus, Lenovo
Your mouse is moving erratically? Top 5 solutions to fix it erratic mouse problem solved - YouTube M220 mouse erratic cursor (1) - YouTube
How to Fix Stuck or Erratic Mouse in Windows 11 - Digitional Erratic Mouse Behaviour : Technical Support

Closure

Thus, we hope this article has provided valuable insights into The Unruly Cursor: A Comprehensive Guide to Erratic Mouse Behavior. We thank you for taking the time to read this article. See you in our next article!

Understanding The Cost Of Professional Window Tinting: A Comprehensive Guide

Understanding the Cost of Professional Window Tinting: A Comprehensive Guide

Introduction

With great pleasure, we will explore the intriguing topic related to Understanding the Cost of Professional Window Tinting: A Comprehensive Guide. Let’s weave interesting information and offer fresh perspectives to the readers.

Understanding the Cost of Professional Window Tinting: A Comprehensive Guide

How Much Does Window Tinting Cost? โ€“ A Comprehensive Guide - The Enlightened Mindset

Window tinting, a process of applying a thin, specialized film to glass surfaces, offers numerous benefits, ranging from enhanced privacy and aesthetics to improved energy efficiency and protection from harmful UV rays. While the decision to invest in window tinting is often driven by these advantages, the cost associated with professional installation is a significant factor to consider. This comprehensive guide explores the factors influencing window tinting prices, provides insights into typical costs, and offers guidance on making informed decisions.

Factors Influencing Window Tinting Prices

Several key elements contribute to the overall cost of professional window tinting. Understanding these factors empowers consumers to make informed choices and ensure a transparent pricing structure.

1. Vehicle Type and Size:

The size and type of vehicle play a crucial role in determining the cost of tinting. Larger vehicles, such as SUVs and trucks, generally require more film and labor, leading to higher prices. Conversely, smaller vehicles like sedans or hatchbacks tend to have lower tinting costs.

2. Number of Windows Tinted:

The number of windows being tinted directly affects the price. Tinting all windows, including the windshield, typically costs more than tinting only the side and rear windows.

3. Film Type and Quality:

Window tint films come in various grades, each offering distinct levels of protection, heat rejection, and aesthetics. Higher-quality films, often featuring advanced technologies like ceramic or nano-ceramic coatings, generally command higher prices due to their superior performance and durability.

4. Tint Percentage or Darkness:

The percentage of light blocked by the tint film, commonly referred to as the VLT (Visible Light Transmission), influences the price. Darker tints, which offer greater privacy and heat reduction, often cost more due to the increased complexity of the installation process.

5. Installation Location and Expertise:

The location and reputation of the window tinting shop can significantly impact the cost. Reputable shops with experienced installers often charge higher prices due to their expertise, quality materials, and commitment to customer satisfaction.

Typical Window Tinting Prices

While exact prices can vary widely depending on the factors mentioned above, a general understanding of typical costs can provide a helpful starting point.

For a standard sedan or hatchback:

  • Basic tint (side and rear windows): $150 – $300
  • Full tint (all windows except windshield): $250 – $500
  • Premium tint (ceramic or nano-ceramic): $350 – $700

For larger vehicles (SUVs, trucks, vans):

  • Basic tint (side and rear windows): $200 – $400
  • Full tint (all windows except windshield): $350 – $700
  • Premium tint (ceramic or nano-ceramic): $450 – $900

Additional Costs

Beyond the base tinting cost, additional charges may apply for specific services or modifications. These can include:

  • Windshield tinting: Prices vary depending on the type of film used and the vehicle model.
  • Removal of existing tint: This can be necessary if replacing old or damaged tint.
  • Special installation requirements: Vehicles with complex window shapes or difficult access may incur additional charges.
  • Extra features: Some shops offer additional services, such as paint protection film or ceramic coating, which can add to the overall cost.

Tips for Getting the Best Value

To ensure you receive the best value for your window tinting investment, consider these tips:

  • Compare multiple quotes: Obtain quotes from several reputable shops to compare prices and services.
  • Inquire about warranties: Reputable shops offer warranties on their work and materials.
  • Ask about film quality: Understand the specifications and benefits of different film types.
  • Consider the shop’s reputation: Research online reviews and seek recommendations from trusted sources.
  • Negotiate prices: Don’t hesitate to discuss pricing with the shop and explore potential discounts or package deals.

Frequently Asked Questions

Q: Is professional window tinting worth the cost?

A: Yes, professional window tinting offers numerous benefits that can justify the investment. These include enhanced privacy, reduced glare, improved energy efficiency, protection from harmful UV rays, and increased vehicle aesthetics.

Q: How long does professional window tinting last?

A: High-quality window tint films, when professionally installed, can last for several years, often with a warranty of 5-10 years.

Q: Can I tint my own windows?

A: While DIY window tinting kits are available, professional installation is highly recommended. Professional installers have the expertise and tools to ensure proper application and optimal results.

Q: Is window tinting legal?

A: Window tinting regulations vary by state and locality. It’s essential to check local laws regarding tint darkness and window coverage.

Conclusion

Professional window tinting offers a range of advantages that can enhance vehicle functionality, aesthetics, and safety. While the cost of professional installation is a factor to consider, understanding the factors influencing pricing and following the tips outlined in this guide can empower consumers to make informed decisions and secure the best value for their investment. By carefully evaluating the benefits, costs, and available options, individuals can choose the window tinting solution that best meets their specific needs and preferences.

How Much Does Window Tinting Cost? โ€“ A Comprehensive Guide - The Enlightened Mindset Home Window Tinting Cost: A Comprehensive Guide - Honest Home Experts what is the cost to tint home windows - Jenni Brothers
Window Tinting: How Much Does It Cost? - The Knowledge Hub The Ultimate Guide to Understanding the Cost of Car Window Tinting - The Enlightened Mindset Professional Car Window Tinting - A Comprehensive Guide
How Much Does Window Tinting Cost? A Comprehensive Guide - The Enlightened Mindset How Much Does Window Tinting Cost? โ€“ vinylfrog

Closure

Thus, we hope this article has provided valuable insights into Understanding the Cost of Professional Window Tinting: A Comprehensive Guide. We thank you for taking the time to read this article. See you in our next article!