Archives March 2024

A Comprehensive Guide To QBittorrent On 32-bit Windows 10

A Comprehensive Guide to qBittorrent on 32-bit Windows 10

Introduction

With great pleasure, we will explore the intriguing topic related to A Comprehensive Guide to qBittorrent on 32-bit Windows 10. Let’s weave interesting information and offer fresh perspectives to the readers.

A Comprehensive Guide to qBittorrent on 32-bit Windows 10

qBittorrent (32-bit) Download (2024 Latest)

qBittorrent, a free and open-source BitTorrent client, has gained significant popularity for its user-friendly interface, robust feature set, and commitment to privacy. While it is compatible with both 32-bit and 64-bit operating systems, this guide focuses on the specific nuances of utilizing qBittorrent on 32-bit Windows 10.

Understanding qBittorrent’s Advantages

qBittorrent offers a compelling alternative to other torrent clients, particularly on older systems with limited resources. Its lightweight design and efficient resource utilization make it an ideal choice for 32-bit Windows 10 machines, ensuring smooth operation without overwhelming the system.

Key Features of qBittorrent:

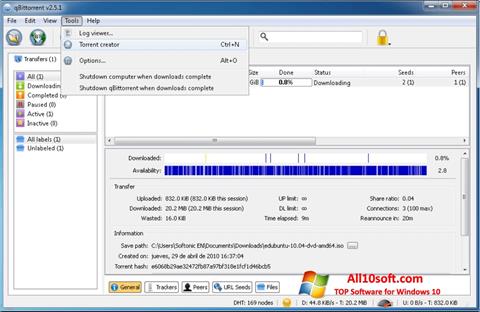
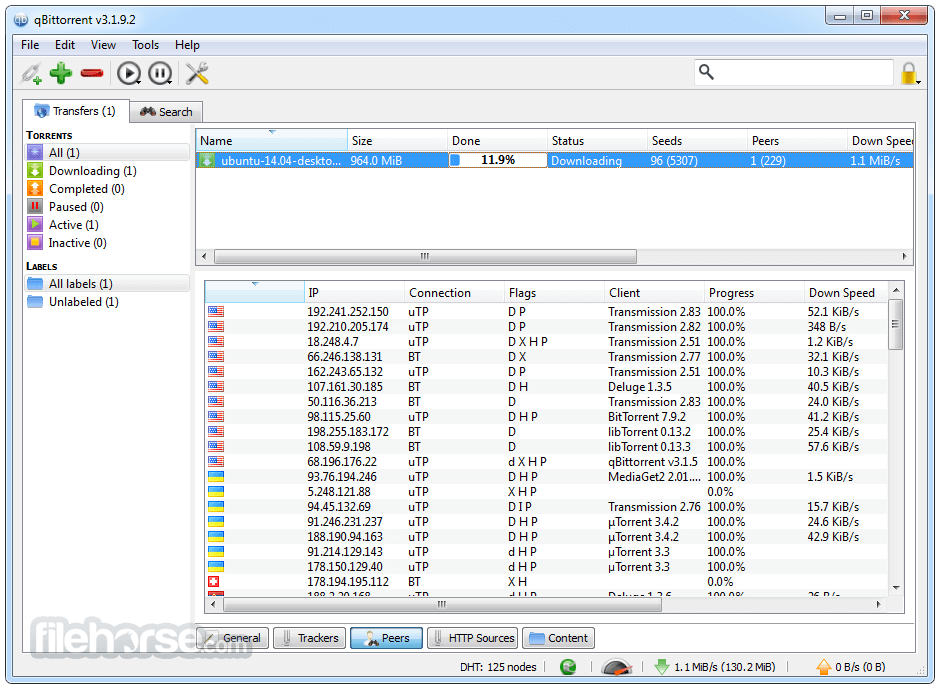
  • User-Friendly Interface: qBittorrent’s intuitive interface is designed for ease of use, even for novice users. Its straightforward layout allows for effortless navigation and management of torrents.
  • Cross-Platform Compatibility: qBittorrent is available for various operating systems, including Windows, macOS, Linux, and FreeBSD, offering seamless integration across different environments.
  • Open-Source and Privacy-Focused: qBittorrent’s open-source nature fosters transparency and security. Its commitment to privacy ensures user data is not collected or shared with third parties.
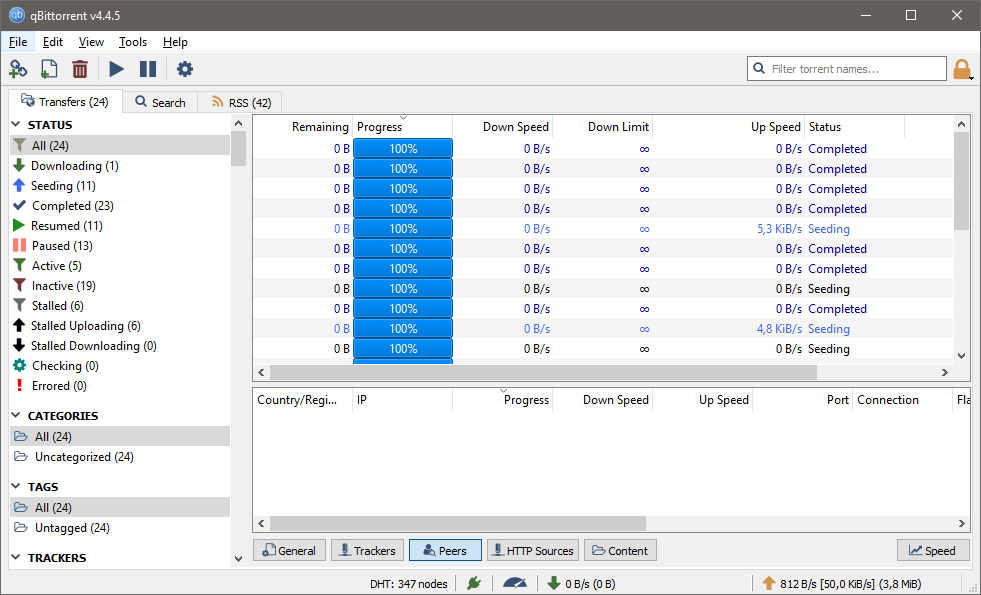
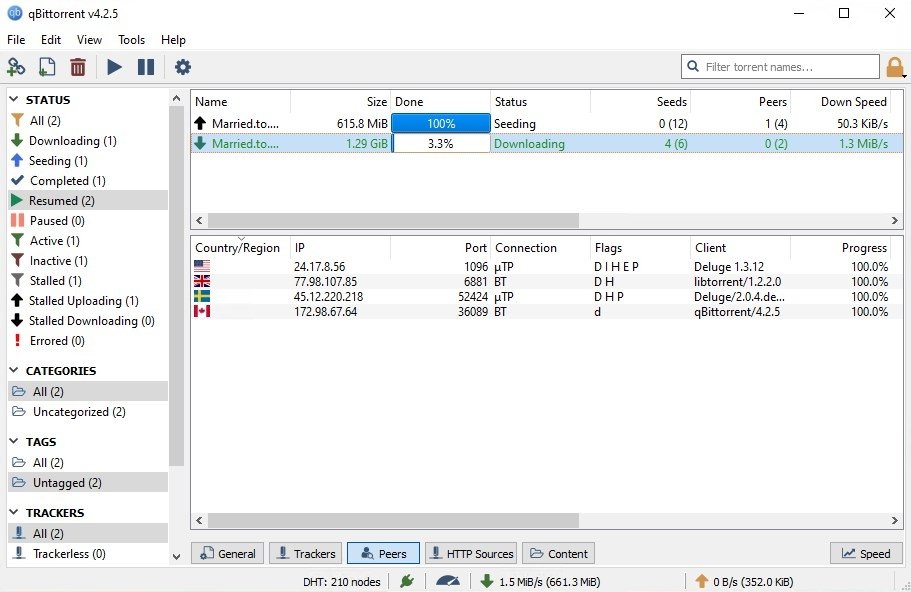
  • Comprehensive Torrent Management: qBittorrent provides a wide range of features for managing torrents, including scheduling, speed limits, and torrent prioritization, allowing for optimal download control.
  • Built-in Search Engine: qBittorrent includes a built-in search engine, eliminating the need for external search tools, simplifying the torrent discovery process.
  • Advanced Features: qBittorrent offers advanced features like RSS feeds, remote control, and UPnP/NAT-PMP port forwarding, enhancing functionality and convenience.

Downloading and Installing qBittorrent on 32-bit Windows 10

  1. Download the Installer: Visit the official qBittorrent website (https://www.qbittorrent.org/) and navigate to the download section. Select the 32-bit installer for Windows.
  2. Run the Installer: Double-click the downloaded installer file to initiate the installation process. Follow the on-screen instructions, choosing your preferred installation location and settings.
  3. Launch qBittorrent: Once the installation is complete, locate the qBittorrent icon on your desktop or in the Start menu and launch the application.

Configuring qBittorrent for Optimal Performance

  • Download Location: Choose a suitable download location with ample storage space and ensure it is accessible to qBittorrent.
  • Connection Settings: Configure the maximum upload and download speeds to balance your internet connection and prioritize other activities.
  • Advanced Settings: Explore the advanced settings menu to fine-tune qBittorrent’s behavior, such as enabling or disabling specific features, adjusting connection limits, and customizing the interface.

FAQs

  • Q: Is qBittorrent safe to use?
    • A: Yes, qBittorrent is a safe and secure torrent client. Its open-source nature allows for community scrutiny and ensures transparency. It does not collect or share user data with third parties.
  • Q: Can I use qBittorrent on a 32-bit Windows 10 machine?
    • A: Yes, qBittorrent is fully compatible with 32-bit Windows 10. Its lightweight design ensures smooth operation on systems with limited resources.
  • Q: What are the system requirements for qBittorrent?
    • A: qBittorrent has minimal system requirements. A 32-bit Windows 10 operating system, a modern web browser, and a stable internet connection are sufficient.
  • Q: How do I add torrents to qBittorrent?
    • A: You can add torrents to qBittorrent by either dragging and dropping the torrent file onto the application window or using the "Add Torrent" option in the file menu.
  • Q: How do I manage downloads in qBittorrent?
    • A: qBittorrent offers various tools for managing downloads. You can pause, resume, prioritize, and remove torrents, as well as adjust download and upload speeds.

Tips for Optimizing qBittorrent Performance

  • Use a VPN: Employing a VPN can enhance privacy and security while using qBittorrent, particularly for downloading copyrighted content.
  • Enable UPnP/NAT-PMP: Enabling these features can simplify port forwarding, improving connection speeds and torrent performance.
  • Minimize Background Processes: Close unnecessary applications and processes to free up system resources, improving qBittorrent’s efficiency.
  • Keep qBittorrent Updated: Regularly updating qBittorrent ensures you have the latest features and security patches, enhancing performance and stability.

Conclusion

qBittorrent provides a reliable and user-friendly torrent client solution for 32-bit Windows 10 users. Its lightweight design, comprehensive feature set, and commitment to privacy make it an excellent choice for managing torrent downloads on older systems. By understanding the key features, configuration options, and best practices, users can optimize qBittorrent’s performance and enjoy a seamless torrenting experience.

다운로드 qBittorrent Windows 10 (32/64 bit) 한국어 qBittorrent (32-bit) Download (2024 Latest) How To Install qBittorrent in Windows 10 - YouTube
qBittorrent Free Download for Windows 10, 11, 7 (32 / 64-bit) Qbittorrent windows - acakit Qbittorrent for windows 10 - ersap
Download qBittorrent 32-bit 4.1.5 for Windows - Filehippo.com [Guide] Torrent Setup with OpenVPN + Qbittorrent on Windows 10 : r/FastestVPN

Closure

Thus, we hope this article has provided valuable insights into A Comprehensive Guide to qBittorrent on 32-bit Windows 10. We hope you find this article informative and beneficial. See you in our next article!

The Missing Link: Troubleshooting Bluetooth Driver Issues On Windows 10

The Missing Link: Troubleshooting Bluetooth Driver Issues on Windows 10

Introduction

With enthusiasm, let’s navigate through the intriguing topic related to The Missing Link: Troubleshooting Bluetooth Driver Issues on Windows 10. Let’s weave interesting information and offer fresh perspectives to the readers.

The Missing Link: Troubleshooting Bluetooth Driver Issues on Windows 10

Fix: Generic Bluetooth Driver Missing Error in Windows 10

Bluetooth technology has become an integral part of modern computing, enabling seamless wireless communication between devices. From connecting headphones and speakers to transferring files and controlling peripherals, Bluetooth plays a crucial role in enhancing user experience. However, encountering a missing or malfunctioning Bluetooth driver on Windows 10 can significantly hinder these functionalities, leaving users frustrated and disconnected.

This article aims to provide a comprehensive understanding of the causes, symptoms, and troubleshooting methods for Bluetooth driver issues on Windows 10. We will explore various approaches, ranging from simple driver updates to advanced hardware checks, to help users regain control of their Bluetooth connectivity.

Understanding the Importance of Bluetooth Drivers

Drivers act as the bridge between your operating system and hardware components. In the context of Bluetooth, the driver is responsible for interpreting commands from Windows 10 and translating them into instructions that the Bluetooth hardware can understand. Conversely, it also translates data received from the Bluetooth hardware into a format that Windows 10 can interpret.

A missing or outdated Bluetooth driver can lead to a range of issues, including:

  • Inability to detect Bluetooth devices: The system may fail to recognize any Bluetooth devices within range.
  • Intermittent connectivity: Devices may connect sporadically, experiencing frequent disconnections.
  • Slow data transfer speeds: File transfers may take significantly longer than expected.
  • Audio glitches: Bluetooth headphones or speakers may produce distorted sound or experience dropouts.
  • General instability: The Bluetooth functionality may become erratic, causing unexpected behavior.

Identifying the Root Cause

Before diving into troubleshooting steps, it’s essential to pinpoint the underlying cause of the Bluetooth driver issue. Here are some common scenarios:

  • Outdated or corrupted driver: Drivers can become outdated or corrupted due to software updates, hardware changes, or system instability.
  • Hardware malfunction: The Bluetooth hardware itself might be faulty, preventing proper communication with the operating system.
  • Conflicting software: Other programs or services might interfere with the Bluetooth driver’s operation.
  • Windows update issues: Recent Windows updates can sometimes introduce bugs or incompatibilities that affect Bluetooth functionality.

Troubleshooting Steps: A Comprehensive Guide

Now, let’s delve into the practical steps you can take to address Bluetooth driver issues on Windows 10:

1. Update the Bluetooth Driver:

  • Using Device Manager:
    • Open the Device Manager (right-click the Start button and select "Device Manager").
    • Expand the "Bluetooth" category.
    • Right-click on the Bluetooth device and select "Update driver."
    • Choose "Search automatically for updated driver software."
  • Manufacturer’s Website:
    • Visit the website of your computer manufacturer or the Bluetooth adapter manufacturer.
    • Download the latest driver specifically designed for your hardware and Windows 10 version.
    • Install the downloaded driver following the provided instructions.

2. Reinstall the Bluetooth Driver:

  • Using Device Manager:
    • Open the Device Manager.
    • Expand the "Bluetooth" category.
    • Right-click on the Bluetooth device and select "Uninstall device."
    • Restart your computer.
    • Windows will automatically attempt to reinstall the driver.
  • Manually Reinstalling:
    • Download the latest driver from the manufacturer’s website.
    • Locate the downloaded driver file.
    • Right-click on the file and select "Install."

3. Check for Hardware Issues:

  • Inspect the Bluetooth hardware: Ensure the Bluetooth adapter is properly connected to your computer.
  • Test the Bluetooth device: Try connecting a different Bluetooth device to rule out any problems with the device itself.
  • Run a hardware diagnostics test: If you suspect a hardware malfunction, run a diagnostics test for your Bluetooth adapter. You can often find these tests on the manufacturer’s website or through the Windows 10 settings.

4. Resolve Software Conflicts:

  • Disable conflicting software: Temporarily disable any recently installed programs or services that might interfere with Bluetooth functionality.
  • Check for driver conflicts: Use the Device Manager to identify any driver conflicts that might be affecting the Bluetooth driver.
  • Run a clean boot: Perform a clean boot to start Windows 10 with a minimal set of drivers and programs, helping isolate any software conflicts.

5. Update Windows 10:

  • Check for updates: Go to "Settings" > "Update & Security" > "Windows Update" and check for available updates.
  • Install the latest updates: Download and install any pending updates to ensure you have the latest bug fixes and driver improvements.

6. Reset the Bluetooth Adapter:

  • Open the Command Prompt: Press the Windows key + R, type "cmd," and press Enter.
  • Run the following command: netsh winsock reset
  • Restart your computer: This command resets the Windows Sockets (Winsock) settings, which can sometimes resolve Bluetooth issues.

7. Perform a System Restore:

  • Open System Restore: Search for "System Restore" in the Windows search bar.
  • Choose a restore point: Select a restore point from before the Bluetooth issues began.
  • Follow the on-screen instructions: Complete the system restore process. This will revert your system to an earlier state, potentially resolving the driver issue.

8. Contact Support:

  • Manufacturer’s Support: If you’ve exhausted all other options, contact the manufacturer of your computer or Bluetooth adapter for further assistance.
  • Microsoft Support: Reach out to Microsoft Support for troubleshooting guidance specific to Windows 10.

FAQs: Addressing Common Questions

Q: What if the Bluetooth driver is not listed in Device Manager?

A: If the Bluetooth driver is missing from Device Manager, it might indicate a more severe hardware issue or a driver installation problem. You can try reinstalling the driver manually, checking the BIOS settings for Bluetooth enablement, or contacting the manufacturer for support.

Q: How can I determine if the Bluetooth adapter is faulty?

A: To determine if the Bluetooth adapter is faulty, try connecting a different Bluetooth device, check for physical damage to the adapter, run a hardware diagnostics test, or consult with a technician for a hardware inspection.

Q: What are the best practices for maintaining Bluetooth driver stability?

A: To maintain Bluetooth driver stability, keep your drivers updated, avoid installing unnecessary software, ensure your system is free of malware, and regularly perform system maintenance tasks.

Tips for Preventing Future Issues

  • Keep drivers updated: Regularly check for driver updates from the manufacturer’s website or through Windows Update.
  • Use reputable software: Download drivers and software only from trusted sources to avoid installing malware or corrupted files.
  • Monitor system stability: Pay attention to any system instability or errors that might indicate driver issues.
  • Back up your system: Regularly create system restore points or backups to ensure you can revert to a previous state in case of driver problems.

Conclusion

Bluetooth driver issues can be frustrating, but by understanding the underlying causes and implementing the troubleshooting steps outlined in this article, you can effectively resolve these problems and restore your Bluetooth connectivity. Remember to follow a systematic approach, starting with simple solutions and progressively moving towards more advanced techniques.

By taking proactive measures like keeping your drivers updated and monitoring system stability, you can minimize the likelihood of encountering Bluetooth driver issues in the future. Should you encounter persistent problems, seeking professional assistance from the manufacturer or Microsoft support is recommended.

How to Fix Bluetooth Missing from Device Manager in Windows 10 Fix Bluetooth Missing From Windows 10 - ON OFF Button Not Showing? - YouTube Fix Windows 10 Bluetooth Missing Issue. Quickly & Easily! - Driver Easy
How To Fix Missing Generic Bluetooth Driver Error On Windows 10 Windows 10 Bluetooth Missing? Here are the Easy Fixes Bluetooth missing from device manager windows 10 - YouTube
Fix Windows 10 Bluetooth Missing Issue. Quickly & Easily! - Driver Easy How to Turn on/off Bluetooth, Fix Bluetooth missing Windows 10 - WindowsClassroom

Closure

Thus, we hope this article has provided valuable insights into The Missing Link: Troubleshooting Bluetooth Driver Issues on Windows 10. We hope you find this article informative and beneficial. See you in our next article!

Bridging The Gap: Exploring The Android Ecosystem On Windows 11

Bridging the Gap: Exploring the Android Ecosystem on Windows 11

Introduction

With enthusiasm, let’s navigate through the intriguing topic related to Bridging the Gap: Exploring the Android Ecosystem on Windows 11. Let’s weave interesting information and offer fresh perspectives to the readers.

Bridging the Gap: Exploring the Android Ecosystem on Windows 11

Windows 11 + Android  Everything to Know about the New Microsoft Ecosystem - YouTube

The landscape of computing is constantly evolving, and with it, the need for seamless integration across platforms. Windows 11, the latest iteration of Microsoft’s operating system, seeks to bridge the gap between its traditional desktop environment and the vast world of Android applications. This is achieved through a novel feature: the ability to run Android apps directly on Windows 11 devices. This functionality, while not a direct "Play Store" integration in the traditional sense, opens up a world of possibilities for Windows users, allowing them to access a vast library of mobile applications within their familiar desktop environment.

Understanding the Mechanism

The key to running Android apps on Windows 11 lies in the integration of the Android subsystem. This subsystem, powered by the Amazon Appstore, provides a virtualized environment where Android apps can run without needing a separate Android device. This integration allows users to download and install Android apps directly from the Amazon Appstore, which is accessible through the Microsoft Store.

Benefits and Opportunities

The ability to run Android apps on Windows 11 presents a multitude of benefits for users:

  • Expanded App Ecosystem: Windows users gain access to a vast library of Android apps, including popular social media platforms, productivity tools, gaming applications, and more. This significantly expands the functionality and versatility of the Windows 11 platform.
  • Cross-Platform Compatibility: Users can seamlessly access the same apps and services across their Android devices and Windows 11 computers, enhancing productivity and convenience.
  • Mobile-First Experience: Many Android apps are designed for touchscreens and mobile environments, offering a unique and intuitive experience on Windows 11 devices.
  • Enhanced Productivity: Android apps can complement existing Windows applications, offering specialized tools and functionalities that may not be readily available on the desktop.
  • Gaming on the Go: Android gaming apps, known for their accessibility and casual nature, can be enjoyed on a larger screen with improved visuals and control.

Considerations and Limitations

While the integration of Android apps on Windows 11 offers significant advantages, it is crucial to acknowledge certain limitations and considerations:

  • Limited App Availability: Not all Android apps are available through the Amazon Appstore, and the selection may vary compared to the Google Play Store.
  • Performance Variations: The performance of Android apps on Windows 11 can vary depending on the app’s complexity and the user’s hardware specifications.
  • Compatibility Issues: Some Android apps may not be fully compatible with the Windows 11 environment, leading to unexpected behavior or crashes.
  • Security Concerns: As with any software, it is crucial to download apps from trusted sources and maintain a secure system to mitigate potential security risks.

FAQs

Q: How do I install Android apps on Windows 11?

A: You can install Android apps on Windows 11 through the Amazon Appstore, which is accessible via the Microsoft Store. Once installed, you can browse and download apps from the Amazon Appstore just like you would with other Windows applications.

Q: Do I need a separate Android device to use Android apps on Windows 11?

A: No, you do not need a separate Android device. The Android subsystem on Windows 11 provides a virtualized environment that allows Android apps to run directly on your Windows 11 computer.

Q: Are all Android apps available through the Amazon Appstore?

A: Not all Android apps are available through the Amazon Appstore. The selection may vary compared to the Google Play Store.

Q: Can I sideload Android apps on Windows 11?

A: While sideloading Android apps is possible, it is not recommended due to potential security risks. It is advisable to use the Amazon Appstore for a more secure and reliable app installation experience.

Q: What are the minimum system requirements for running Android apps on Windows 11?

A: To run Android apps on Windows 11, your device must meet the minimum system requirements for Windows 11 and have an Intel or AMD processor.

Tips

  • Check for Compatibility: Before installing an Android app, check its compatibility with Windows 11. This can be done by reading the app description in the Amazon Appstore.
  • Update Your System: Ensure that your Windows 11 system is up-to-date with the latest updates and drivers to ensure optimal performance and compatibility.
  • Use Trusted Sources: Download Android apps only from reputable sources like the Amazon Appstore to minimize security risks.
  • Monitor App Performance: Keep an eye on the performance of Android apps on your Windows 11 device. If you encounter any issues, consider troubleshooting or contacting the app developer for support.

Conclusion

The integration of Android apps on Windows 11 represents a significant step towards a more unified and versatile computing experience. By offering access to a vast library of mobile applications, Windows 11 enhances its functionality and provides users with greater flexibility and choice. While there are limitations and considerations to keep in mind, the ability to run Android apps on Windows 11 opens up a world of possibilities for users, expanding the capabilities of their devices and bridging the gap between mobile and desktop computing. As this feature continues to evolve, we can expect to see further improvements and enhancements, solidifying its role in shaping the future of Windows 11.

PPT - Towards a Trustworthy Android Ecosystem PowerPoint Presentation, free download - ID:6641422 Android apps on Windows: Creating an ecosystem without borders  Computerworld An Overview of The Android Ecosystem
The Ultimate Android & Windows Ecosystem is Here  Any android phone - YouTube Google wants to fix the Android ecosystem, and that includes working with Windows - SoyaCincau Make best Ecosystem For Android & Windows  Apple like Ecosystem in Android & Windows 2022 - YouTube
Android Windows Ecosystem �� - YouTube Using Android in the Microsoft ecosystem  Windows Central

Closure

Thus, we hope this article has provided valuable insights into Bridging the Gap: Exploring the Android Ecosystem on Windows 11. We appreciate your attention to our article. See you in our next article!

Navigating Windows 11 With Ease: The Power Of Taskbar Customization

Navigating Windows 11 with Ease: The Power of Taskbar Customization

Introduction

With enthusiasm, let’s navigate through the intriguing topic related to Navigating Windows 11 with Ease: The Power of Taskbar Customization. Let’s weave interesting information and offer fresh perspectives to the readers.

Taskbar Customization Windows 11

The Windows taskbar, a familiar element in every version of the operating system, has evolved significantly in Windows 11. It serves as a central hub for accessing frequently used applications, managing open windows, and interacting with system functions. Within this dynamic environment, the ability to pin applications to the taskbar stands out as a powerful tool for enhancing productivity and simplifying user experience.

Understanding the Importance of Taskbar Pinning

Pinning applications to the taskbar in Windows 11 offers a multitude of benefits, transforming the way users interact with their system. By strategically organizing frequently accessed programs, users can streamline their workflow and navigate the operating system with greater efficiency.

Key Advantages of Pinning Applications:

  • Rapid Access: Pinned applications appear directly on the taskbar, providing immediate access with a single click. This eliminates the need to search through menus or the Start menu, saving valuable time and effort.
  • Enhanced Workflow: By grouping related applications on the taskbar, users can seamlessly switch between tasks without navigating multiple windows. This fosters a more focused and efficient work environment.
  • Personalized Organization: The ability to customize the taskbar by pinning specific applications allows users to tailor their workspace to individual preferences and workflows.
  • Improved Navigation: Pinning applications provides a visual representation of frequently used programs, offering a clear and intuitive way to navigate the system.

Pinning Applications: A Step-by-Step Guide

The process of pinning applications to the taskbar in Windows 11 is straightforward and intuitive:

  1. Locate the Application: Open the application you wish to pin.
  2. Right-Click the Icon: Right-click the application’s icon in the taskbar.
  3. Select "Pin to taskbar": A context menu will appear. Choose the option "Pin to taskbar."

The application’s icon will now be permanently displayed on the taskbar, ready for quick access.

Unpinning Applications: A Simple Process

To remove an application from the taskbar, follow these steps:

  1. Right-Click the Icon: Right-click the icon of the application you wish to unpin.
  2. Select "Unpin from taskbar": A context menu will appear. Choose the option "Unpin from taskbar."

The application’s icon will be removed from the taskbar.

Beyond Basic Pinning: Additional Customization Options

Windows 11 offers further customization options for the taskbar, allowing users to personalize their workspace beyond simply pinning applications:

  • Taskbar Alignment: Users can choose to position the taskbar at the top, bottom, left, or right of the screen.
  • Taskbar Size: The taskbar can be adjusted in size to fit individual preferences and screen resolutions.
  • Taskbar Icons: Users can customize the appearance of icons on the taskbar by adjusting their size and spacing.

FAQs: Addressing Common Questions

Q: Can I pin folders to the taskbar?
A: No, Windows 11 does not currently allow for pinning folders directly to the taskbar.

Q: Can I pin websites to the taskbar?
A: Yes, you can pin websites to the taskbar using Microsoft Edge. Open the website you wish to pin in Edge, right-click the tab, and select "Pin to taskbar."

Q: Can I rearrange the order of pinned applications on the taskbar?
A: Yes, you can rearrange pinned applications by dragging and dropping their icons to the desired position.

Q: Can I pin multiple instances of the same application to the taskbar?
A: No, you can only pin one instance of an application to the taskbar at a time.

Q: Can I pin applications to the taskbar from the Start menu?
A: Yes, you can pin applications to the taskbar from the Start menu. Right-click the application’s tile, and select "Pin to taskbar."

Tips for Effective Taskbar Management

  • Prioritize Frequently Used Applications: Pin only the applications you use most frequently to avoid clutter on the taskbar.
  • Group Related Applications: Consider grouping related applications together on the taskbar for improved workflow and navigation.
  • Experiment with Different Configurations: Explore different taskbar configurations to find the setup that best suits your individual needs and preferences.
  • Utilize the Taskbar Search: If you’re unsure where an application is located, use the taskbar search to quickly find and launch it.

Conclusion: A Powerful Tool for Productivity

Pinning applications to the taskbar in Windows 11 is a simple yet powerful tool that can significantly enhance user experience and productivity. By strategically organizing frequently used programs, users can streamline their workflow, navigate the operating system with ease, and personalize their workspace to meet individual needs. The flexibility and customization options offered by Windows 11 empower users to take control of their digital environment and work more efficiently.

Taskbar Customization Windows 11 Windows 11 Taskbar Customization Tutorial How To Customize Windows 11 Taskbar Step By Step Guide HTMD Blog
How to customize Windows 11 Taskbar area - YouTube How To Customize Windows 11 Taskbar - YouTube Windows 11 Taskbar Customization Guide — Tech How
Windows 11 Taskbar Customization (Tutorial) - YouTube How to Customize Windows 11 Taskbar?  Edit taskbar in Windows 11

Closure

Thus, we hope this article has provided valuable insights into Navigating Windows 11 with Ease: The Power of Taskbar Customization. We thank you for taking the time to read this article. See you in our next article!

The Windows 10 Out-of-Box Experience: A First Impression That Matters

The Windows 10 Out-of-Box Experience: A First Impression that Matters

Introduction

With great pleasure, we will explore the intriguing topic related to The Windows 10 Out-of-Box Experience: A First Impression that Matters. Let’s weave interesting information and offer fresh perspectives to the readers.

The Windows 10 Out-of-Box Experience: A First Impression that Matters

Out of Box Experience in Windows 10

The initial encounter with a new operating system, often referred to as the out-of-box experience (OOBE), sets the tone for the user’s entire relationship with the software. In the case of Windows 10, this first impression is crucial, as it aims to introduce users to a powerful and versatile platform while providing a smooth and intuitive onboarding process.

The Windows 10 OOBE is designed to be a user-friendly experience, guiding individuals through the essential setup steps and introducing them to key features and functionalities. This initial setup process goes beyond simply configuring basic settings; it serves as a foundational experience that shapes user perceptions and influences future interactions with the operating system.

The Core Components of the Windows 10 OOBE:

The Windows 10 OOBE comprises several distinct phases, each designed to guide users through specific setup tasks:

  1. Language and Region Selection: This initial step allows users to choose their preferred language and region, ensuring that the operating system displays menus, dialog boxes, and other user interface elements in their native language and adheres to their regional settings.

  2. Keyboard Layout Selection: Users select their preferred keyboard layout, enabling them to comfortably input text and interact with the operating system.

  3. Network Connectivity: The OOBE guides users through connecting to a Wi-Fi network or setting up an Ethernet connection, providing essential internet access for software updates and other online services.

  4. Account Creation: Users can create a new Microsoft account or use an existing one. This account serves as the central point of access for various services, including cloud storage, application synchronization, and personalized settings.

  5. Privacy Settings: Windows 10 emphasizes user privacy and provides clear options for configuring data collection and sharing preferences. Users can choose how much information they are comfortable sharing with Microsoft and third-party applications.

  6. Personalization: The OOBE enables users to customize their Windows 10 experience by choosing themes, wallpapers, and other visual elements. Users can personalize their desktop and start menu to reflect their preferences.

  7. App Installation: Windows 10 pre-installs a selection of essential apps, including Microsoft Edge, Mail, Calendar, and Photos. Users can choose to install additional apps from the Microsoft Store, tailoring the operating system to their specific needs.

The Importance of a Successful OOBE:

A well-designed OOBE is paramount for a positive user experience, as it lays the groundwork for future interactions with Windows 10. Key benefits include:

  • Intuitive Onboarding: The OOBE acts as a user-friendly guide, simplifying the initial setup process and making it accessible to individuals with varying levels of technical expertise.

  • Enhanced User Engagement: A seamless and engaging OOBE encourages users to explore the capabilities of Windows 10, fostering a sense of excitement and anticipation for the user experience.

  • Personalized Experience: The OOBE empowers users to customize their operating system environment, tailoring it to their specific needs and preferences.

  • Increased User Satisfaction: A positive first impression, created through a well-designed OOBE, contributes to user satisfaction and loyalty, encouraging users to adopt and utilize Windows 10 effectively.

FAQs Regarding the Windows 10 Out-of-Box Experience:

Q: Can I skip the OOBE process?

A: While skipping the OOBE is technically possible, it is not recommended. The OOBE guides users through essential setup steps, ensuring proper configuration and optimal performance.

Q: Can I change my language or region settings after the OOBE is complete?

A: Yes, users can modify language and region settings at any time through the Windows Settings app.

Q: Can I choose to not create a Microsoft account?

A: While creating a Microsoft account is recommended for full functionality, users can choose to create a local account, which is specific to the device. However, this option limits access to certain features and services.

Q: What if I encounter an error during the OOBE process?

A: If an error occurs, users can consult Microsoft support resources for troubleshooting assistance. In some cases, restarting the setup process might resolve the issue.

Q: How can I customize the Windows 10 OOBE for my specific needs?

A: Windows 10 offers limited options for customizing the OOBE. However, organizations can use tools like Windows Configuration Designer to create custom OOBE experiences for specific deployment scenarios.

Tips for Optimizing the Windows 10 Out-of-Box Experience:

  • Ensure a Stable Internet Connection: A reliable internet connection is crucial for downloading updates and installing essential apps during the OOBE.

  • Review Privacy Settings: Carefully review and adjust privacy settings according to individual preferences, ensuring that users are comfortable with the level of data collection and sharing.

  • Familiarize Yourself with Key Features: Utilize the OOBE as an opportunity to learn about key features and functionalities, such as the Start menu, Cortana, and the Microsoft Store.

  • Consider Using a Microsoft Account: Creating a Microsoft account provides access to a wide range of services and benefits, including cloud storage, application synchronization, and personalized settings.

  • Customize Your Environment: Take advantage of personalization options to tailor the Windows 10 environment to your specific needs and preferences.

Conclusion:

The Windows 10 out-of-box experience serves as a crucial first impression, shaping user perceptions and influencing future interactions with the operating system. By providing a user-friendly and engaging onboarding process, Windows 10 aims to empower users with the knowledge and confidence to navigate its vast functionalities. A well-designed OOBE is essential for maximizing user satisfaction and fostering a positive relationship with the platform.

Out of Box Experience in Windows 10 Set up Windows 10 Out-of-Box Experience after a Clean Install - MiniTool Set up Windows 10 Out-of-Box Experience after a Clean Install - MiniTool
How to: Complete the Windows 10 Out of Box Experience - Microsoft Community Set Up Windows 10 Again with the Windows Out Of Box Experience (OOBE) - Ask Leo! How to: Complete the Windows 10 Out of Box Experience - Microsoft Community
Set up Windows 10 Out-of-Box Experience after a Clean Install Out of Box Experience in Windows 10

Closure

Thus, we hope this article has provided valuable insights into The Windows 10 Out-of-Box Experience: A First Impression that Matters. We thank you for taking the time to read this article. See you in our next article!

A Comprehensive Guide To Installing And Utilizing R On Windows 11

A Comprehensive Guide to Installing and Utilizing R on Windows 11

Introduction

In this auspicious occasion, we are delighted to delve into the intriguing topic related to A Comprehensive Guide to Installing and Utilizing R on Windows 11. Let’s weave interesting information and offer fresh perspectives to the readers.

A Comprehensive Guide to Installing and Utilizing R on Windows 11

Install R on Windows 11  TestingDocs.com

R, a powerful and versatile programming language and free software environment for statistical computing and graphics, has become an indispensable tool for data scientists, statisticians, and researchers across various disciplines. Its open-source nature, extensive libraries, and comprehensive functionalities make it a highly sought-after platform for data analysis, visualization, and modeling. This article provides a detailed guide on installing and utilizing R on Windows 11, encompassing its significance, benefits, and essential aspects of its usage.

Understanding R’s Significance and Benefits

R’s prominence stems from its ability to handle complex data analysis tasks with unparalleled efficiency and flexibility. It excels in:

  • Statistical Analysis: R offers a wide range of statistical packages for conducting hypothesis testing, regression analysis, time series analysis, and other statistical procedures.
  • Data Visualization: R’s graphical capabilities are highly regarded, allowing users to create compelling and informative data visualizations using packages like ggplot2, lattice, and plotly.
  • Machine Learning: R’s machine learning libraries, such as caret, randomForest, and e1071, provide tools for building predictive models, classifying data, and uncovering hidden patterns.
  • Data Manipulation and Transformation: R’s data manipulation capabilities are unmatched. Packages like dplyr and tidyr enable users to easily clean, filter, transform, and reshape data.
  • Open-Source and Community Support: R’s open-source nature fosters a vibrant and active community of users and developers. This translates to extensive documentation, tutorials, and support forums, making learning and problem-solving easier.

Installing R on Windows 11: A Step-by-Step Guide

  1. Download the R Installer: Navigate to the official CRAN (Comprehensive R Archive Network) website (https://cran.r-project.org/) and select the appropriate download link for Windows.
  2. Run the Installer: Double-click the downloaded installer file (usually an .exe file) to initiate the installation process.
  3. Follow the Installation Instructions: The installer will guide you through the installation process. Accept the default settings unless you have specific requirements.
  4. Choose Installation Location: Select the desired installation directory for R. It is generally recommended to use the default location.
  5. Complete the Installation: Click "Finish" to complete the installation.

Configuring R for Enhanced Usability

  1. Install RStudio: While R provides a command-line interface, RStudio (https://www.rstudio.com/) offers a more user-friendly integrated development environment (IDE). Download and install RStudio, ensuring compatibility with your R version.
  2. Setting Up RStudio: Once installed, open RStudio. You will be presented with the R console, script editor, environment pane, and other helpful tools.
  3. Managing Packages: R’s power lies in its extensive package library. Utilize the "Packages" tab in RStudio to install, update, and manage packages.
  4. Exploring R’s Documentation: R comes with comprehensive documentation. Use the help() function or the ? operator to access documentation for specific functions or packages.

Utilizing R for Data Analysis and Visualization

  1. Loading Data: Import data into R using functions like read.csv(), read.table(), or read.xlsx(), depending on the data format.
  2. Data Exploration: Explore the imported data using functions like summary(), head(), tail(), and str().
  3. Data Manipulation: Clean, transform, and reshape data using packages like dplyr and tidyr.
  4. Statistical Analysis: Apply statistical functions and packages for hypothesis testing, regression analysis, and other statistical procedures.
  5. Data Visualization: Create compelling visualizations using packages like ggplot2, lattice, and plotly.

Understanding R’s Key Components

  • R Console: The R console is the primary interface for interacting with R. It allows you to execute commands and view output.
  • R Scripts: R scripts are text files containing sequences of R commands. You can create and execute scripts in RStudio’s script editor.
  • R Packages: R packages are collections of functions, data sets, and documentation that extend R’s capabilities.
  • R Objects: R objects are data structures that store data in memory. Examples include vectors, matrices, data frames, and lists.

Essential R Functions and Packages for Beginners

  • c(): Creates vectors.
  • seq(): Generates sequences of numbers.
  • rep(): Repeats elements.
  • summary(): Provides summary statistics for data.
  • head() and tail(): Displays the first or last few rows of a data frame.
  • str(): Provides a structured representation of an object.
  • dplyr: A package for data manipulation.
  • ggplot2: A package for creating data visualizations.

FAQs about R on Windows 11

Q: What is the minimum system requirement for R on Windows 11?

A: R is relatively lightweight. A modern computer with at least 4GB of RAM and a recent version of Windows 11 should be sufficient.

Q: How do I update R on Windows 11?

A: To update R, download the latest version from CRAN and run the installer. The installer will automatically update your existing R installation.

Q: How do I uninstall R on Windows 11?

A: You can uninstall R through the Windows Control Panel. Search for "Add or Remove Programs" and select "R" from the list. Click "Uninstall" to remove R from your system.

Q: Is there a specific version of R recommended for Windows 11?

A: R is regularly updated. It is generally recommended to use the latest stable version of R for optimal compatibility and performance.

Q: What are some good resources for learning R?

A: There are numerous resources available for learning R, including:

Tips for Using R on Windows 11

  • Organize Your Projects: Create separate folders for each R project to keep files organized.
  • Use Version Control: Employ version control systems like Git to track changes in your code and collaborate with others.
  • Explore R Packages: Take advantage of R’s extensive package library to extend its capabilities.
  • Contribute to the Community: Share your code, packages, and insights with the R community.
  • Practice Regularly: Consistent practice is key to mastering R and its functionalities.

Conclusion

R’s power and flexibility make it an invaluable tool for data analysis, visualization, and modeling. Its open-source nature, extensive libraries, and vibrant community provide a rich environment for learning, collaboration, and innovation. By following this guide, users can successfully install and utilize R on Windows 11, unlocking its potential to analyze data, uncover insights, and drive informed decision-making.

Install R on Windows 11  TestingDocs.com Install R on Windows 11  TestingDocs.com Windows 11 User Guide A Step By Step Guide To Install And Use The New Images
How to download R and install RStudio on Windows 11 - TechDecode Tutorials Install R on Windows 11  TestingDocs.com Windows 11 installation process - Step by Step  How to install Windows 11  Windows 11
Amazon.co.jp: Windows 11 User Guide: A Step by Step Guide to Install and Use the New Windows 11 Buy Windows 11 User Guide for Beginners: A Comprehensive Guide to Master Windows 11 Operating

Closure

Thus, we hope this article has provided valuable insights into A Comprehensive Guide to Installing and Utilizing R on Windows 11. We hope you find this article informative and beneficial. See you in our next article!

Photoshop 7.0 Free Download For Windows 10 P

photoshop 7.0 free download for windows 10 p

Introduction

With enthusiasm, let’s navigate through the intriguing topic related to photoshop 7.0 free download for windows 10 p. Let’s weave interesting information and offer fresh perspectives to the readers.

A Comprehensive Guide to Photoshop 7.0 on Windows 10

Download adobe photoshop 7-0 free download full version - topsonic

While Adobe Photoshop 7.0 was released in 2002, its legacy persists in the realm of image editing. Despite being a vintage version, it remains a sought-after tool for specific tasks and users. This article aims to provide a comprehensive guide to understanding Photoshop 7.0 and its potential use on Windows 10, addressing its compatibility, advantages, and limitations.

Understanding the Legacy of Photoshop 7.0

Photoshop 7.0 was a significant milestone in the history of image editing. It introduced several groundbreaking features like the "History Brush" and "Vanishing Point" tools, significantly enhancing image manipulation capabilities. The software’s stability and user-friendly interface made it a popular choice for both professionals and hobbyists.

Compatibility with Windows 10

The compatibility of Photoshop 7.0 with Windows 10 presents a unique challenge. While the software itself was designed for older operating systems like Windows XP and earlier, it can be made to work on Windows 10 through specific compatibility solutions. However, this process requires careful consideration and technical knowledge.

The Challenges of Running Photoshop 7.0 on Windows 10

Running Photoshop 7.0 on Windows 10 comes with inherent challenges. The software was designed for older hardware and software configurations, leading to potential compatibility issues. These issues can manifest in various forms:

  • Driver Compatibility: The graphics drivers and other hardware components of modern computers might not be compatible with the software’s requirements.
  • Operating System Compatibility: Windows 10’s architecture and security features might create conflicts with Photoshop 7.0’s design.
  • Performance Issues: The software might exhibit slow performance or even crashes due to the mismatch between its design and the modern operating system’s capabilities.

Solutions for Running Photoshop 7.0 on Windows 10

Despite the challenges, several solutions can help make Photoshop 7.0 functional on Windows 10:

  • Compatibility Mode: Running the software in compatibility mode can often resolve issues by mimicking the environment of older operating systems.
  • Virtual Machines: Virtual machines like VMware or VirtualBox can create a virtual environment with an older operating system, allowing Photoshop 7.0 to run within it.
  • Third-Party Compatibility Tools: Certain third-party tools can bridge the compatibility gap between the software and Windows 10, but these tools might have their own limitations.

Advantages of Using Photoshop 7.0 on Windows 10

Despite the challenges, using Photoshop 7.0 on Windows 10 can offer specific advantages:

  • Simplicity and Stability: The software’s user interface is considered simpler and more intuitive compared to later versions. Its stability is also widely praised.
  • Legacy Support: It can be a valuable tool for working with older file formats or projects created using earlier versions of Photoshop.
  • Learning Resource: For those interested in understanding the evolution of image editing software, Photoshop 7.0 provides a historical perspective.

Disadvantages of Using Photoshop 7.0 on Windows 10

However, using Photoshop 7.0 on Windows 10 also comes with significant disadvantages:

  • Limited Features: The software lacks many features introduced in later versions, including advanced tools for editing images, video, and 3D models.
  • Security Risks: Running older software like Photoshop 7.0 on a modern operating system might expose the system to vulnerabilities.
  • Lack of Support: Adobe no longer provides updates or support for Photoshop 7.0, making it difficult to resolve technical issues.

Alternatives to Photoshop 7.0 on Windows 10

Considering the challenges and limitations, it’s essential to explore alternative image editing software options for Windows 10.

  • Adobe Photoshop CC: The latest version of Photoshop offers a vast range of features, including advanced tools, compatibility with modern hardware and operating systems, and continuous updates.
  • GIMP: This free and open-source image editor provides a powerful alternative to Photoshop, offering a wide range of features and compatibility with various operating systems.
  • Affinity Photo: This professional-grade image editing software offers a user-friendly interface and powerful tools, making it a viable alternative to Photoshop.

FAQs Regarding Photoshop 7.0 on Windows 10

Q: Is it legal to download and use Photoshop 7.0 on Windows 10?

A: The legality of using Photoshop 7.0 on Windows 10 depends on your licensing status. If you have a valid license for the software, you can legally use it on Windows 10. However, downloading or using the software without a valid license is considered illegal.

Q: Can I use Photoshop 7.0 for commercial purposes on Windows 10?

A: Using Photoshop 7.0 for commercial purposes on Windows 10 is legally permissible if you have a valid commercial license. However, the software’s limitations might not meet the requirements of modern commercial projects.

Q: Is it safe to use Photoshop 7.0 on Windows 10?

A: Running older software like Photoshop 7.0 on a modern operating system like Windows 10 can pose security risks. The software might have vulnerabilities that could be exploited by malicious actors.

Q: What are the minimum system requirements for running Photoshop 7.0 on Windows 10?

A: The minimum system requirements for Photoshop 7.0 were designed for older hardware and operating systems. While it might run on modern systems, performance and stability can be significantly impacted.

Tips for Using Photoshop 7.0 on Windows 10

  • Compatibility Mode: Ensure that Photoshop 7.0 is running in compatibility mode for the appropriate operating system.
  • Virtual Machine: Consider using a virtual machine to run Photoshop 7.0 in a controlled environment with an older operating system.
  • Security Measures: Take necessary security precautions when using older software like Photoshop 7.0 on a modern operating system.

Conclusion

While Photoshop 7.0 holds a special place in image editing history, its compatibility with Windows 10 presents significant challenges. The software’s outdated design and lack of support from Adobe make it unsuitable for modern workflows. However, for specific tasks or users seeking a historical perspective, it can still be a valuable tool. Ultimately, the decision to use Photoshop 7.0 on Windows 10 should be based on a thorough understanding of its limitations and the availability of alternative solutions.

Adobe Photoshop 7.0 Free Download For PC [Official] Adobe Photoshop 7.0 Free Download Full Version for PC Download Adobe Photoshop 7.0 for Windows 10, 7 Free
Adobe photoshop 7.0 free download full version online - snomobi Adobe Photoshop 7.0 free download  Computer Software Adobe Photoshop 7.0 free Download for PC Windows 10/8/7/XP
Adobe Photoshop 7.0 Software Download for Windows 7 / 10 / 8 - FileHare Adobe Photoshop 7.0 Free Download for Windows 11, 10, 8, 7

Closure

Thus, we hope this article has provided valuable insights into photoshop 7.0 free download for windows 10 p. We hope you find this article informative and beneficial. See you in our next article!

Accessing External Storage On Windows 10: A Comprehensive Guide To USB Drive Management

Accessing External Storage on Windows 10: A Comprehensive Guide to USB Drive Management

Introduction

With enthusiasm, let’s navigate through the intriguing topic related to Accessing External Storage on Windows 10: A Comprehensive Guide to USB Drive Management. Let’s weave interesting information and offer fresh perspectives to the readers.

Accessing External Storage on Windows 10: A Comprehensive Guide to USB Drive Management

How to Access an External Hard Drive on Windows 10

The ability to connect and utilize external storage devices, particularly USB drives, is an essential aspect of modern computing. Windows 10 provides a user-friendly environment for seamlessly integrating these devices, allowing users to transfer, store, and access data with ease. This article delves into the intricacies of managing USB drives within the Windows 10 operating system, exploring the underlying mechanisms and offering practical guidance for efficient utilization.

Understanding USB Drive Functionality

A USB drive, also known as a flash drive or thumb drive, is a portable storage device that connects to a computer via the Universal Serial Bus (USB) interface. This interface enables bidirectional data transfer, allowing users to write data onto the drive and read data from it.

The functionality of a USB drive relies on a combination of hardware and software components:

  • Hardware: The drive itself consists of a small, non-volatile memory chip housed within a compact casing. This memory chip stores the data, and the casing contains the USB connector that facilitates the physical connection to the computer.
  • Software: The operating system, in this case, Windows 10, provides the necessary drivers and software infrastructure to recognize and interact with the USB drive. These drivers act as a translator, converting the data signals between the drive and the computer’s internal components.

When a USB drive is plugged into a Windows 10 computer, the operating system automatically detects the device and assigns it a drive letter, typically starting from "E" or "F" depending on the existing drives connected to the system. This drive letter becomes the identifier for the USB drive, allowing users to access its contents through the file explorer or other applications.

Accessing USB Drive Contents: A Step-by-Step Guide

Accessing the contents of a USB drive in Windows 10 is a straightforward process:

  1. Connect the USB drive: Insert the drive into an available USB port on the computer.
  2. Wait for detection: Windows 10 will automatically detect the drive and assign it a drive letter. This process may take a few seconds.
  3. Open File Explorer: Click the File Explorer icon on the taskbar or press the Windows key + E.
  4. Locate the drive: In the left pane of File Explorer, you will see the USB drive listed under "This PC" or "Devices and drives." The drive’s name or label, along with its assigned drive letter, will be displayed.
  5. Access the contents: Double-click the USB drive icon to open its contents. You can now view, copy, move, delete, or create files and folders within the drive’s storage space.

Windows 10 provides a set of tools for managing and customizing USB drive behavior:

  • Drive properties: Right-clicking the USB drive icon in File Explorer and selecting "Properties" reveals detailed information about the drive, including its size, file system, and available space.
  • Formatting: The "Format" option within the Properties window allows you to reformat the drive, erasing its contents and choosing a new file system. This is useful for preparing the drive for new data or troubleshooting issues.
  • Drive labels: The "General" tab in the Properties window allows you to change the drive’s label, making it easier to identify in File Explorer.
  • Ejecting the drive: Before physically removing the USB drive, it is crucial to "eject" it safely to prevent data loss or corruption. This can be done by right-clicking the drive icon and selecting "Eject," or by clicking the "Safely Remove Hardware and Eject Media" icon in the system tray and selecting the drive.

Common USB Drive Issues and Troubleshooting

While USB drives are generally reliable, users may encounter occasional issues:

  • Drive not detected: If Windows 10 fails to recognize the USB drive, try plugging it into a different USB port, restarting the computer, or checking for driver updates.
  • Drive inaccessible: If the drive is detected but cannot be accessed, try running a disk scan using the "Check Disk" tool in File Explorer. If the scan detects errors, attempt to repair them.
  • Data corruption: If data on the drive becomes corrupted, try using data recovery software to attempt to recover the lost files. However, data recovery is not always successful, and it is crucial to maintain regular backups of important data.
  • Slow performance: If the drive is experiencing slow read and write speeds, try using a different USB port or checking for compatibility issues with the drive’s specifications.

Optimizing USB Drive Performance

To maximize the performance of USB drives, consider the following:

  • Use a high-quality drive: Invest in a reputable brand and model with fast read and write speeds, especially if you frequently transfer large files.
  • Format with a compatible file system: Windows 10 supports several file systems, but NTFS is generally recommended for USB drives due to its robust features and compatibility.
  • Avoid overloading the drive: Leave some free space on the drive to ensure optimal performance.
  • Minimize unnecessary writes: Limit the number of times you write data to the drive, as this can contribute to wear and tear on the memory chip.
  • Keep the drive clean: Avoid exposing the drive to dust, moisture, or extreme temperatures, as these can damage the hardware.

Security Considerations for USB Drives

USB drives can be susceptible to security risks:

  • Data theft: Unsecured drives can be easily accessed by unauthorized individuals, potentially leading to data breaches.
  • Malware infection: USB drives can be used as vectors for spreading malware, which can infect the computer when the drive is connected.
  • Data loss: Physical damage or accidental deletion can result in permanent data loss.

To mitigate these risks, consider the following:

  • Password protection: Enable password protection on the drive to restrict access to authorized users.
  • Encryption: Encrypt the data on the drive using software tools to protect it from unauthorized access.
  • Antivirus protection: Regularly scan the drive for malware using a reputable antivirus program.
  • Regular backups: Create regular backups of important data on the drive to prevent permanent data loss.

Frequently Asked Questions (FAQs)

1. Why is my USB drive not showing up in Windows 10?

  • Check the connection: Ensure the drive is securely plugged into a functioning USB port.
  • Check the drive’s power: Some drives may require external power, especially if they have a large capacity.
  • Check for hardware issues: Inspect the drive for any visible damage or loose connections.
  • Run a hardware troubleshooter: Windows 10 includes a built-in troubleshooter for hardware issues.
  • Update drivers: Outdated drivers can sometimes cause compatibility problems.
  • Check for disk errors: Run a disk scan to check for errors and attempt to repair them.

2. How do I format a USB drive in Windows 10?

  1. Open File Explorer.
  2. Right-click the USB drive icon.
  3. Select "Format."
  4. Choose a file system (NTFS is recommended for Windows 10).
  5. Choose a cluster size (the default is usually appropriate).
  6. Check the "Quick Format" option if you want to erase the drive quickly.
  7. Click "Start" to begin the formatting process.

3. What is the best file system for a USB drive in Windows 10?

  • NTFS: Offers robust features, security, and compatibility with Windows 10.
  • FAT32: Provides broad compatibility with older operating systems and devices but has limitations on file size and volume size.
  • exFAT: Offers larger file and volume sizes than FAT32 while maintaining compatibility with Windows 10 and other operating systems.

4. How do I recover data from a corrupted USB drive?

  • Use data recovery software: Several reputable data recovery programs are available online.
  • Contact a professional data recovery service: If the data is critical, consider contacting a professional data recovery service.

5. How do I protect my USB drive from malware?

  • Use a reputable antivirus program: Regularly scan the drive for malware.
  • Enable password protection: Prevent unauthorized access to the drive.
  • Avoid connecting the drive to untrusted computers: Limit the number of devices that access the drive.
  • Keep the drive up to date: Ensure the drive’s firmware is up to date.

Tips for Using USB Drives Effectively

  • Label your drives: Assign descriptive labels to your USB drives to easily identify them.
  • Use a separate drive for backups: Create a dedicated USB drive for storing backups of important data.
  • Regularly check drive health: Run a disk scan periodically to ensure the drive is functioning properly.
  • Keep drives organized: Create folders on the drive to organize files and make them easier to find.
  • Eject drives safely: Always eject the drive before physically disconnecting it from the computer.

Conclusion

USB drives remain an indispensable tool for data storage, transfer, and portability. Understanding the functionality, management tools, and potential issues associated with USB drives in Windows 10 empowers users to utilize these devices effectively and securely. By following the guidelines outlined in this article, users can optimize the performance of their USB drives, protect their data, and leverage the full potential of external storage within the Windows 10 environment.

How to Open Disk Management in Windows 10.  DriverFinder - We Make Drivers Work for You Can Not Access USB Drive Windows 10: How to Open USB on Windows 10 and Access Files - EaseUS Now you can optimize USB Storages on Windows 10 computer. Check out the detailed guide on how to
Windows Storage Management and Cleanup - Online Computer Tips How to Manage Disk Storage Space in Windows 10 Device Manager - USB Mass Storage Device - Microsoft Community
How to Check Storage on Windows 10 - 11 Steps - Itechguides.com How to use Windows 10 to see what's using the most disk space

Closure

Thus, we hope this article has provided valuable insights into Accessing External Storage on Windows 10: A Comprehensive Guide to USB Drive Management. We appreciate your attention to our article. See you in our next article!

Netframe 4.5 For Windows 10 64 Bit

netframe 4.5 for windows 10 64 bit

Introduction

In this auspicious occasion, we are delighted to delve into the intriguing topic related to netframe 4.5 for windows 10 64 bit. Let’s weave interesting information and offer fresh perspectives to the readers.

Understanding .NET Framework 4.5 for Windows 10 64-bit

Netframe 4 5 Windows 10

The .NET Framework is a critical software development platform that provides a robust foundation for building and running applications on Windows operating systems. Released in 2012, .NET Framework 4.5 represents a significant advancement, offering enhanced capabilities and compatibility for Windows 10, specifically in its 64-bit architecture. This article aims to provide a comprehensive understanding of .NET Framework 4.5 on Windows 10 64-bit, exploring its key features, benefits, and considerations.

What is .NET Framework?

.NET Framework is a software framework developed by Microsoft. It provides a managed execution environment, a large class library, and a set of tools for developing and running applications. The framework allows developers to create applications that run on Windows, utilizing a consistent programming model across different devices and platforms.

The Significance of .NET Framework 4.5 for Windows 10 64-bit

Windows 10, released in 2015, ushered in a new era of computing. With its 64-bit architecture, Windows 10 leverages greater processing power and memory capacity, enabling more complex and demanding applications. .NET Framework 4.5, with its optimized design and features, plays a crucial role in harnessing this power.

Key Features and Benefits:

  • Enhanced Performance: .NET Framework 4.5 incorporates performance enhancements, including improvements in garbage collection, asynchronous programming, and just-in-time (JIT) compilation. These optimizations result in faster application execution and improved overall responsiveness.

  • Improved Security: The framework includes enhanced security features, such as improved cryptography algorithms and support for the latest security protocols. This ensures that applications built on .NET Framework 4.5 are more secure against potential threats.

  • Support for Modern Technologies: .NET Framework 4.5 embraces modern technologies, including support for Windows Communication Foundation (WCF), Windows Presentation Foundation (WPF), and ASP.NET MVC. These technologies enable developers to create modern, user-friendly, and feature-rich applications.

  • Backward Compatibility: .NET Framework 4.5 maintains backward compatibility with previous versions, ensuring that existing applications built on older frameworks can continue to run without major modifications.

  • Support for 64-bit Architecture: .NET Framework 4.5 is specifically designed to leverage the advantages of 64-bit architecture, allowing applications to access larger amounts of memory and process data more efficiently.

Applications Built with .NET Framework 4.5

A wide range of applications rely on .NET Framework 4.5, including:

  • Desktop Applications: From business productivity tools to entertainment software, .NET Framework 4.5 empowers developers to create robust and engaging desktop applications.

  • Web Applications: .NET Framework 4.5 powers dynamic web applications, offering features like ASP.NET MVC, web services, and database connectivity.

  • Mobile Applications: While .NET Framework 4.5 is primarily designed for Windows, it can also be used to develop mobile applications for Windows Phone and other Windows-based devices.

  • Cloud-based Applications: .NET Framework 4.5 supports cloud-based applications, enabling developers to leverage cloud services and build scalable and resilient applications.

FAQs about .NET Framework 4.5 for Windows 10 64-bit

Q: Is .NET Framework 4.5 necessary for Windows 10 64-bit?

A: While not strictly necessary, .NET Framework 4.5 is essential for running many applications that rely on its features and capabilities. It’s highly recommended to install .NET Framework 4.5 on Windows 10 64-bit for optimal functionality and compatibility.

Q: How do I install .NET Framework 4.5 on Windows 10 64-bit?

A: .NET Framework 4.5 is typically included with Windows 10 64-bit. However, if it’s not already installed, you can download and install it from the Microsoft website.

Q: Can I install multiple versions of .NET Framework on Windows 10 64-bit?

A: Yes, you can install multiple versions of .NET Framework on Windows 10 64-bit. The operating system will automatically select the appropriate version for each application.

Q: Is .NET Framework 4.5 compatible with Windows 10 64-bit?

A: Yes, .NET Framework 4.5 is fully compatible with Windows 10 64-bit. It’s designed to leverage the advantages of 64-bit architecture and provide optimal performance.

Tips for Using .NET Framework 4.5 on Windows 10 64-bit

  • Keep it Updated: Regularly update .NET Framework to the latest version to ensure security patches and performance improvements.

  • Check Application Requirements: Before installing applications, ensure they are compatible with .NET Framework 4.5.

  • Use Visual Studio: Utilize Visual Studio, Microsoft’s integrated development environment (IDE), to develop and deploy applications built on .NET Framework 4.5.

  • Explore Documentation: Refer to the official Microsoft documentation for detailed information on .NET Framework 4.5, including its features, APIs, and best practices.

Conclusion

.NET Framework 4.5 is a crucial component of the Windows 10 64-bit ecosystem. It provides a robust platform for building and running applications, offering enhanced performance, security, and compatibility. By understanding the features and benefits of .NET Framework 4.5, developers and users can leverage its capabilities to create and run modern, efficient, and secure applications on Windows 10. As technology continues to evolve, .NET Framework 4.5 remains a valuable tool for developers and users alike, ensuring a seamless and productive computing experience.

TÉLÉCHARGER NET FRAMEWORK 4.5 COMPLET GRATUIT Microsoft .Net Framework 4.5 Architecture - AAPNA Infotech Microsoft .NET Framework 4.5 Installation — Appspace Core 5.2 documentation
TÉLÉCHARGER NET FRAMEWORK 4.5.1 GRATUITEMENT Microsoft .NET Framework 4.5 Microsoft .NET Framework 4.5
Microsoft .Net Framework 4 Free Download Microsoft .NET Framework 4.5 Installation — Appspace Core v5.5 Documentation

Closure

Thus, we hope this article has provided valuable insights into netframe 4.5 for windows 10 64 bit. We thank you for taking the time to read this article. See you in our next article!

Understanding Windows 10 Activation: A Comprehensive Guide

Understanding Windows 10 Activation: A Comprehensive Guide

Introduction

With great pleasure, we will explore the intriguing topic related to Understanding Windows 10 Activation: A Comprehensive Guide. Let’s weave interesting information and offer fresh perspectives to the readers.

Understanding Windows 10 Activation: A Comprehensive Guide

Windows 10 Activation: A Step-by-Step Guide on How to Activate Windows 10 - CSA

Windows 10 activation is a crucial process that ensures the legitimacy and functionality of your operating system. It verifies that your copy of Windows 10 is genuine and allows you to access all its features, including updates, security enhancements, and personalized settings.

The Importance of Windows 10 Activation

Activating Windows 10 is essential for several reasons:

  • Legality: Using an unactivated copy of Windows 10 is a violation of Microsoft’s licensing agreement and can lead to legal repercussions.
  • Full Functionality: Activation unlocks all the features of Windows 10, including access to the Microsoft Store, personalized settings, and the ability to receive regular updates.
  • Security: Activated Windows 10 receives regular security updates that protect your device from malware and vulnerabilities.
  • Stability: An activated Windows 10 installation is more stable and reliable, ensuring smooth operation and reducing the risk of crashes or errors.

Methods of Windows 10 Activation

There are several ways to activate Windows 10:

  • Product Key: This is the most common method. You obtain a 25-character product key during the purchase of a new device or Windows 10 license. This key is then entered during the activation process.
  • Digital License: If you previously activated Windows 10 on your device, a digital license is associated with your hardware. This license is automatically applied when you reinstall Windows 10 on the same device.
  • Windows 10 Upgrade: If you upgraded from a previous version of Windows, you may have received a free digital license for Windows 10.
  • Volume Licensing: Organizations with multiple devices can purchase volume licenses that allow them to activate Windows 10 on all their computers.

Common Activation Errors and Solutions

During the activation process, you might encounter errors. Here are some common errors and their solutions:

  • "Windows is not activated": This error indicates that your Windows 10 installation is not activated. Try re-entering your product key or checking your digital license.
  • "Activation error 0x803F7001": This error usually occurs when your device is not connected to the internet. Ensure you have a stable internet connection and try activating again.
  • "Activation error 0xC004F074": This error indicates that your product key is invalid or has already been used on another device. Contact Microsoft support for assistance.
  • "Activation error 0x80072F8F": This error usually occurs when there is a problem with your internet connection or the activation servers. Try restarting your device and activating again later.

FAQs about Windows 10 Activation

Q: What happens if I don’t activate Windows 10?

A: An unactivated Windows 10 installation will have limited functionality. You will not be able to personalize settings, access the Microsoft Store, or receive security updates. You will also see a watermark on your desktop reminding you to activate.

Q: Can I activate Windows 10 on multiple devices with the same product key?

A: No, a single product key can only be used to activate one device at a time.

Q: What if I lost my product key?

A: If you have a digital license associated with your device, you can try reinstalling Windows 10 and the license will be automatically applied. If you do not have a digital license, you may need to contact Microsoft support to retrieve your product key.

Q: Can I transfer my Windows 10 license to a new device?

A: You can transfer your Windows 10 license to a new device, but there are limitations. You can only transfer the license once, and you must have a valid product key associated with the license.

Tips for Windows 10 Activation

  • Ensure a stable internet connection: Activation requires an active internet connection.
  • Check your product key: Double-check that you have entered the correct product key.
  • Restart your device: Restarting your device can resolve activation issues.
  • Check your digital license: If you previously activated Windows 10 on your device, a digital license may be associated with your hardware.
  • Contact Microsoft support: If you are unable to activate Windows 10, contact Microsoft support for assistance.

Conclusion

Activating Windows 10 is a simple yet crucial step to ensure the full functionality, security, and stability of your operating system. By following the steps outlined in this guide, you can easily activate your copy of Windows 10 and enjoy all its benefits. Remember, using an unactivated copy of Windows 10 is a violation of Microsoft’s licensing agreement and can lead to legal repercussions. If you encounter any issues during the activation process, refer to the FAQs and tips provided in this guide or contact Microsoft support for assistance.

Microsoft Windows 10 - Key Activation Guide - G2A.COM Activating Windows 10 for Free: A Comprehensive Guide - devopszones How to Use KMSpico for Windows 10 Activation  Step-by-Step Guide
Activer Windows 10 Microsoft's official Windows 10 Activation Guide - gHacks Tech News How do I activate Windows 10: A Comprehensive Instruction
How to Activate Windows 10 - Microsoft Support - Tech News Era Windows 10 Activation and Product Key - All You Need to Know

Closure

Thus, we hope this article has provided valuable insights into Understanding Windows 10 Activation: A Comprehensive Guide. We hope you find this article informative and beneficial. See you in our next article!