Archives March 2024

Navigating The Windows 11 Command Line: A Comprehensive Guide

Navigating the Windows 11 Command Line: A Comprehensive Guide

Introduction

In this auspicious occasion, we are delighted to delve into the intriguing topic related to Navigating the Windows 11 Command Line: A Comprehensive Guide. Let’s weave interesting information and offer fresh perspectives to the readers.

How to open a Windows 11 Command Prompt as Administrator

The command line, often referred to as the command prompt or terminal, remains a powerful tool for Windows users. It offers a direct interface to the operating system, allowing for advanced tasks beyond the graphical user interface (GUI). While Windows 11 continues to prioritize a visually intuitive experience, understanding the command line remains crucial for users seeking greater control and efficiency. This article delves into the intricacies of the command line in Windows 11, providing a comprehensive guide to its functionalities and potential applications.

Understanding the Command Line:

The command line operates through text-based commands, each representing a specific action. These commands are interpreted by the operating system, which then executes the desired task. This direct interaction provides users with a level of control and flexibility that GUI applications may not offer.

Accessing the Command Line:

In Windows 11, the command line can be accessed through various methods:

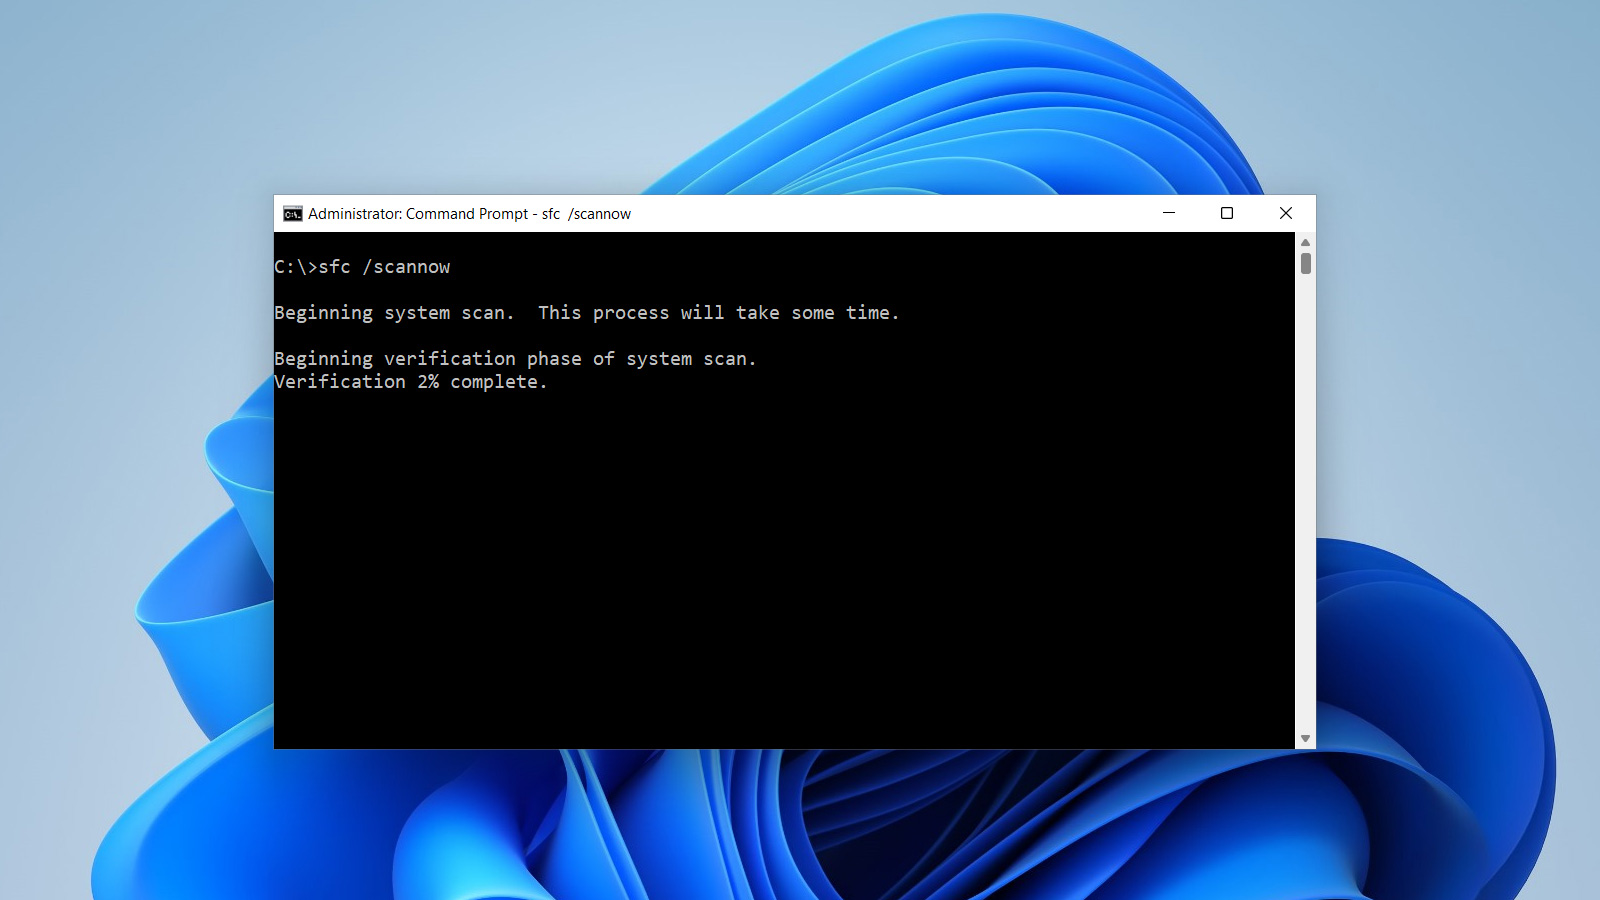
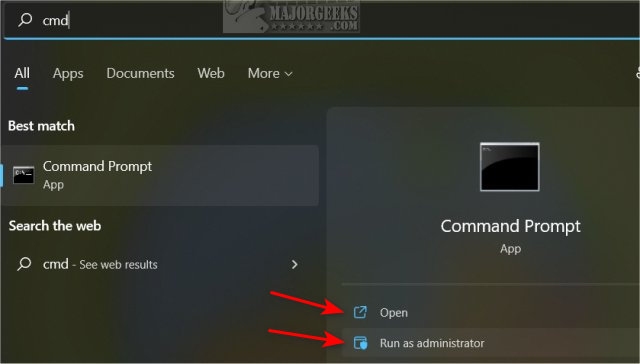
  • Search Bar: Typing "cmd" in the search bar and selecting "Command Prompt" will launch the classic command prompt window.
  • Run Dialog: Pressing the Windows key + R and typing "cmd" will also open the command prompt.
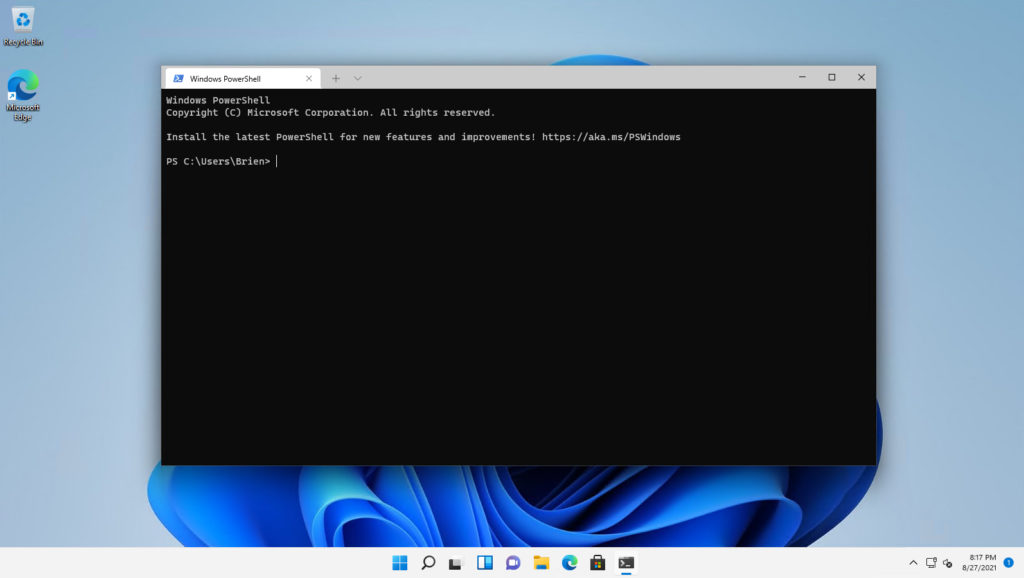
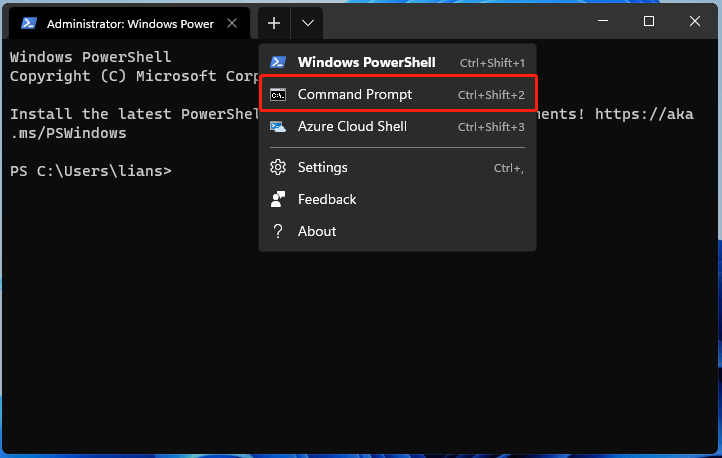
  • Windows Terminal: A more modern and versatile alternative, Windows Terminal offers a tabbed interface and supports various command-line shells, including PowerShell and the classic command prompt.

Basic Commands and Concepts:

The command line utilizes a specific syntax for commands. Each command is typically followed by arguments or parameters that modify its behavior. Here are some fundamental commands and concepts:

  • dir (or ls in PowerShell): This command lists the contents of the current directory.
  • cd: This command changes the current directory. For example, cd Documents navigates to the Documents folder.
  • mkdir: Creates a new directory.
  • rmdir: Removes a directory.
  • copy: Copies files or directories.
  • move: Moves files or directories.
  • del: Deletes files.
  • help: Provides information on a specific command.
  • exit: Closes the command prompt window.

PowerShell: A More Powerful Option:

While the classic command prompt remains functional, PowerShell offers a more robust and feature-rich environment. It utilizes a scripting language, allowing for complex automation and tasks beyond the capabilities of the command prompt.

Here are some advantages of PowerShell:

  • Object-Oriented: PowerShell works with objects, providing a more structured and efficient approach to data manipulation.
  • Scripting: It supports scripting, allowing users to create reusable code for automating tasks.
  • Remote Management: PowerShell facilitates remote management of systems, enabling administrators to control multiple computers from a central location.
  • Extensive Modules: A vast collection of modules extends PowerShell’s functionality, providing tools for managing various aspects of the operating system and applications.

Practical Applications of the Command Line:

The command line proves valuable in numerous scenarios:

  • System Administration: Administrators utilize the command line to manage system settings, install software, troubleshoot issues, and perform other critical tasks.
  • Software Development: Developers rely on the command line for building, compiling, and testing software.
  • Automation: Repeating tasks can be automated using scripts, saving time and effort.
  • Troubleshooting: The command line provides a direct interface for diagnosing and resolving system errors.
  • Advanced Customization: Users can fine-tune system settings and customize their Windows experience using command-line tools.

Utilizing the Command Line Effectively:

  • Understanding Syntax: Familiarize yourself with the proper syntax for commands and arguments.
  • Using Help: The help command offers detailed information on specific commands.
  • Exploring Online Resources: Numerous online resources, such as Microsoft documentation and community forums, provide guidance and solutions.
  • Practice: Consistent practice is key to mastering the command line.

FAQs about the Command Line in Windows 11:

  • Q: Is the command line still relevant in Windows 11?
    • A: Yes, the command line remains a powerful tool for advanced users and administrators. It offers a level of control and flexibility that GUI applications may not provide.
  • Q: What are the differences between the command prompt and PowerShell?
    • A: PowerShell is a more advanced and feature-rich command-line shell compared to the classic command prompt. It offers scripting capabilities, object-oriented programming, and extensive modules.
  • Q: Is it safe to use the command line?
    • A: The command line itself is not inherently dangerous. However, incorrect commands or malicious scripts can cause harm. Exercise caution and only use commands from trusted sources.
  • Q: Can I use the command line to access files on a network drive?
    • A: Yes, the command line can access files on network drives using appropriate commands and paths.
  • Q: How do I find the location of a file using the command line?
    • A: You can use the dir command with the /s flag to search for a file within the current directory and its subdirectories.

Tips for Using the Command Line:

  • Start Simple: Begin with basic commands and gradually explore more complex options.
  • Use Tab Completion: Pressing the Tab key can autocomplete commands and file names, saving time and reducing errors.
  • Utilize Copy and Paste: Copy and paste commands from online resources or other applications to avoid typing errors.
  • Create Batch Files: Combine multiple commands into a batch file for automation.
  • Use the help Command: Explore the help command to learn more about specific commands and their arguments.

Conclusion:

The command line in Windows 11 remains a valuable tool for users seeking greater control and efficiency. While the GUI provides a user-friendly interface, the command line offers direct access to the operating system, enabling advanced tasks, automation, and troubleshooting. By understanding its functionalities and utilizing its capabilities effectively, users can unlock a new level of power and customization within their Windows 11 environment.

Terminal Windows 11 How to Open Command Prompt (CMD) in Windows 11? (7 Ways) - MiniTool How to Open Command Prompt (CMD) in Windows 11 - All Things How
Different Ways to Open Command Prompt in Windows 11 Windows 11 Cheat Sheet 8 Ways to Open Command Prompt in Windows 11 โ€“ WebNots
3: Create or Download a Shortcut Complete List Of Windows 11 Run Commands  techteds

Closure

Thus, we hope this article has provided valuable insights into Navigating the Windows 11 Command Line: A Comprehensive Guide. We hope you find this article informative and beneficial. See you in our next article!

Understanding Memory Usage In Windows 11: A Comprehensive Guide

Understanding Memory Usage in Windows 11: A Comprehensive Guide

Introduction

In this auspicious occasion, we are delighted to delve into the intriguing topic related to Understanding Memory Usage in Windows 11: A Comprehensive Guide. Let’s weave interesting information and offer fresh perspectives to the readers.

Understanding Memory Usage in Windows 11: A Comprehensive Guide

Does Windows 11 use more RAM than Windows 10?

Windows 11, like any modern operating system, relies heavily on system memory (RAM) to function efficiently. Understanding how much memory your system uses and what factors influence it is crucial for maintaining optimal performance and avoiding system slowdowns. This article provides a comprehensive guide to normal memory usage in Windows 11, covering key aspects, potential causes of high memory usage, and strategies to optimize performance.

What is Memory and Why is it Important?

Memory, also known as RAM (Random Access Memory), is a type of computer hardware that acts as a temporary storage space for the operating system, applications, and data currently in use. Imagine it as a workspace where your computer keeps all the essential files and instructions readily accessible for quick access.

  • Faster Processing: When data is stored in RAM, it can be accessed by the processor much faster than if it were stored on a hard drive or SSD. This translates to faster application loading times, smoother multitasking, and overall better responsiveness.
  • Efficient Multitasking: RAM allows your computer to run multiple applications simultaneously without significant performance degradation. Each application gets its own dedicated space in RAM, enabling them to operate independently.
  • Smooth Operation: When your computer runs out of RAM, it starts using the hard drive as temporary storage, leading to significantly slower performance. This is known as "swapping" and can cause noticeable lag and delays in your system.

Factors Influencing Memory Usage in Windows 11

Memory usage in Windows 11 is influenced by a combination of factors:

  • Operating System: Windows 11 itself requires a certain amount of RAM to function, and this requirement can vary depending on the version and features enabled.
  • Background Processes: Windows 11 runs numerous background processes, such as system updates, antivirus scans, and indexing services, which consume a portion of RAM.
  • Installed Applications: Each application you install requires a certain amount of memory to run. Some applications, especially resource-intensive ones like video editing software or gaming applications, consume a significant amount of RAM.
  • Open Tabs and Windows: Every browser tab, window, and application you have open consumes RAM. The more you have open, the higher your memory usage will be.
  • System Resources: Hardware components like graphics cards and sound cards also utilize a small amount of RAM for their operations.

Normal Memory Usage in Windows 11

There is no single "normal" memory usage value for Windows 11. It varies significantly based on the factors mentioned above and the specific configuration of your system. However, a good rule of thumb is that your memory usage should generally stay below 80% of your total RAM capacity. If your memory usage consistently hovers around 90% or higher, it can lead to performance issues.

How to Monitor Memory Usage

Windows 11 provides several ways to monitor your system’s memory usage:

  • Task Manager: The Task Manager is a built-in tool that provides detailed information about your system’s performance, including memory usage. You can access it by pressing Ctrl+Shift+Esc.
  • Resource Monitor: The Resource Monitor is a more advanced tool that provides even more detailed information about your system’s performance, including memory usage and how different processes are using memory. You can access it by searching for "Resource Monitor" in the Start menu.
  • Performance Monitor: The Performance Monitor is a powerful tool that allows you to monitor various system metrics, including memory usage, over time. You can access it by searching for "Performance Monitor" in the Start menu.

Troubleshooting High Memory Usage

If you notice consistently high memory usage in Windows 11, follow these steps to troubleshoot the issue:

  1. Identify Resource-Intensive Processes: Use the Task Manager or Resource Monitor to identify which processes are consuming the most memory. This will help you determine if the high memory usage is due to a specific application or a system process.
  2. Close Unnecessary Applications: Close any applications you are not actively using. This will free up RAM and improve your system’s performance.
  3. Disable Unnecessary Startup Programs: Many applications automatically start when you boot your computer, consuming valuable RAM. Use the Task Manager’s Startup tab to disable unnecessary programs from starting automatically.
  4. Run a System Scan: Run a full system scan using your antivirus software to rule out any malware or viruses that might be consuming excessive resources.
  5. Check for System Updates: Ensure that your system is up-to-date with the latest Windows updates, as they often include performance improvements and bug fixes.
  6. Consider Upgrading RAM: If your system’s RAM capacity is insufficient to handle your workload, consider upgrading to a higher capacity RAM module.

Tips for Optimizing Memory Usage

  • Limit Browser Tabs: Keep the number of open browser tabs to a minimum, as each tab consumes a small amount of memory.
  • Use Memory-Efficient Applications: Opt for applications known for their low memory footprint, especially when multitasking.
  • Disable Unnecessary Visual Effects: Windows 11 offers various visual effects that can enhance the user experience but also consume additional resources. Consider disabling unnecessary visual effects to free up memory.
  • Regularly Clean Up Your System: Regularly clean up temporary files, unused applications, and outdated data to free up disk space and improve overall system performance.
  • Monitor System Health: Regularly monitor your system’s health and performance using the tools mentioned above to identify potential memory-related issues early on.

FAQs on Memory Usage in Windows 11

Q: How much RAM do I need for Windows 11?

A: Microsoft recommends at least 4GB of RAM for Windows 11, but 8GB is generally considered the minimum for a smooth and responsive experience. For more demanding tasks like gaming or video editing, 16GB or more is recommended.

Q: What is "Page File" and how does it affect memory usage?

A: The Page File is a temporary file stored on your hard drive that acts as an extension of RAM. When your system runs out of RAM, it uses the Page File to store data temporarily, which can slow down performance.

Q: Why is my memory usage high even when I’m not using many applications?

A: This could be due to background processes, system services, or even a memory leak in a running application. Use the Task Manager or Resource Monitor to identify the culprit and take appropriate action.

Q: How can I prevent my system from using too much RAM?

A: You can prevent excessive RAM usage by closing unnecessary applications, disabling unnecessary startup programs, and optimizing system settings. Regularly monitoring your system’s memory usage and taking proactive steps to address potential issues can help maintain optimal performance.

Conclusion

Understanding memory usage in Windows 11 is essential for maintaining optimal system performance. By monitoring your system’s memory usage, identifying resource-intensive processes, and implementing best practices for memory optimization, you can ensure a smooth and responsive computing experience. Remember that the amount of RAM needed varies depending on your usage patterns and system configuration. By following the tips and guidelines provided in this article, you can effectively manage your system’s memory usage and maximize its performance.

High Memory Usage in Windows 11: 5 Solutions How To Reduce Ram Usage Windows 11 Alpha Computer - vrogue.co How to Fix Windows 11 High Memory Usage? Here Are Easy Fixes - MiniTool
Windows 11 Ram Usage FIX Windows 11 High Memory Usage  RAM Usage In Windows 11 [Tutorial] - YouTube How Do I Fix High Memory Usage Windows 11?
You can run Windows 11 on just 200MB of RAM โ€“ but should you? โ€ข The Register High Memory Usage Windows 11 - YouTube

Closure

Thus, we hope this article has provided valuable insights into Understanding Memory Usage in Windows 11: A Comprehensive Guide. We thank you for taking the time to read this article. See you in our next article!

Oracle VirtualBox: A Powerful Tool For Windows 10 Users

Oracle VirtualBox: A Powerful Tool for Windows 10 Users

Introduction

In this auspicious occasion, we are delighted to delve into the intriguing topic related to Oracle VirtualBox: A Powerful Tool for Windows 10 Users. Let’s weave interesting information and offer fresh perspectives to the readers.

Oracle VirtualBox: A Powerful Tool for Windows 10 Users

How to download and install oracle vm virtualbox on windows 10 - YouTube

Oracle VirtualBox is a widely recognized and free open-source virtualization software that enables users to run different operating systems simultaneously on a single computer. This capability proves invaluable for various scenarios, including software testing, development, education, and general system exploration. This article explores the core features, benefits, and practical applications of Oracle VirtualBox on Windows 10, providing a comprehensive guide for users seeking to unlock its potential.

Understanding Virtualization and its Role in Modern Computing

Virtualization, at its core, involves the creation of virtual environments that mimic the behavior of physical hardware. These virtual environments can host operating systems, applications, and data, all within a confined space on the host machine. This technology offers significant advantages:

  • Resource Optimization: Virtualization allows users to maximize hardware utilization by running multiple operating systems on a single machine, eliminating the need for separate physical computers.
  • Isolation and Security: Virtual environments provide a secure sandbox, preventing potential conflicts and malware infections from affecting the host operating system.
  • Flexibility and Scalability: Virtualization facilitates easy deployment and scaling of applications and environments, enabling rapid adaptation to changing needs.
  • Testing and Development: Virtual environments serve as safe testing grounds for new software, operating systems, or configurations without risking the stability of the host system.

The Advantages of Oracle VirtualBox for Windows 10

Oracle VirtualBox distinguishes itself as a leading virtualization solution due to its robust features and user-friendly interface. Here are some key benefits it offers:

  • Cross-Platform Compatibility: VirtualBox seamlessly integrates with various operating systems, including Windows, macOS, Linux, and Solaris, allowing users to run diverse virtual machines on their Windows 10 host.
  • Ease of Use: VirtualBox boasts a straightforward interface, making it accessible to both novice and experienced users. The intuitive design simplifies the creation, management, and operation of virtual machines.
  • Rich Feature Set: Oracle VirtualBox provides a comprehensive set of features, including support for multiple virtual CPUs, RAM allocation, shared folders, and network configurations, allowing users to tailor virtual environments to their specific needs.
  • Free and Open-Source: VirtualBox is available free of charge, making it an attractive option for individuals and organizations seeking cost-effective virtualization solutions. Its open-source nature fosters community contributions, ensuring ongoing development and improvement.
  • Active Community Support: VirtualBox benefits from a vibrant community of users and developers who contribute to forums, documentation, and tutorials, providing a wealth of resources for troubleshooting and learning.

Practical Applications of Oracle VirtualBox on Windows 10

Oracle VirtualBox’s versatility extends across diverse applications, making it an invaluable tool for various users:

  • Software Development and Testing: Developers can utilize VirtualBox to create isolated environments for testing applications in different operating systems and configurations, ensuring compatibility and stability.
  • Educational Purposes: Students and educators can leverage VirtualBox to explore different operating systems, experiment with software, and learn about computer architecture and network configurations in a safe and controlled environment.
  • System Administration and Troubleshooting: System administrators can use VirtualBox to test and deploy new software updates or configurations in a virtual environment before applying them to the production system, minimizing potential disruptions.
  • Security Research and Analysis: Security professionals can utilize VirtualBox to create isolated environments for analyzing malware, testing security tools, and experimenting with different security configurations.
  • Running Legacy Applications: VirtualBox allows users to run older applications that may not be compatible with the latest operating systems. This is especially useful for businesses that rely on legacy software or individuals who need to access older documents or programs.

Setting Up and Using Oracle VirtualBox on Windows 10

Installing and configuring VirtualBox on Windows 10 is a straightforward process:

  1. Download and Install: Download the VirtualBox installer from the official Oracle website and follow the on-screen instructions to complete the installation.
  2. Create a Virtual Machine: Launch VirtualBox and click on the "New" button to create a new virtual machine. Choose the desired operating system, allocate sufficient RAM, and create a virtual hard disk.
  3. Install the Guest Operating System: Insert the installation media (ISO image or DVD) for the guest operating system and configure the virtual machine to boot from it. Follow the on-screen prompts to install the guest operating system.
  4. Configure Network Settings: Adjust the network settings to allow communication between the virtual machine and the host operating system. You can choose from different network modes, including bridged, NAT, and host-only.
  5. Install Guest Additions: Install the VirtualBox Guest Additions software within the virtual machine to enhance performance and integration with the host operating system. This includes features like seamless mouse integration and shared folders.

FAQs about Oracle VirtualBox on Windows 10

1. Is Oracle VirtualBox safe to use?

Oracle VirtualBox is a reputable and widely used virtualization software. However, as with any software, it is crucial to download it from the official Oracle website to avoid potential malware or security vulnerabilities.

2. How much RAM do I need for VirtualBox?

The required RAM depends on the operating system and applications running within the virtual machine. Generally, allocating at least 2 GB of RAM is recommended for a basic virtual machine. For more demanding workloads, allocate more RAM accordingly.

3. Can I run Windows 10 inside VirtualBox?

Yes, you can run Windows 10 as a guest operating system within VirtualBox on a Windows 10 host. This allows you to test Windows 10 updates or run Windows-specific applications within a controlled environment.

4. What are the best practices for using VirtualBox?

  • Allocate sufficient resources: Ensure your host system has enough RAM and CPU power to run the virtual machine smoothly.
  • Keep VirtualBox updated: Regularly update VirtualBox to benefit from the latest features and security patches.
  • Use a separate virtual hard disk: Create a dedicated virtual hard disk for each virtual machine to avoid data conflicts and improve performance.
  • Back up your virtual machines: Regularly back up your virtual machines to protect against data loss.

Tips for Optimizing Oracle VirtualBox on Windows 10

  • Enable Hardware Virtualization: Ensure that hardware virtualization is enabled in your BIOS settings to improve performance.
  • Adjust the Video Memory: Increase the video memory allocated to the virtual machine for smoother graphics rendering.
  • Use a Shared Folder: Configure a shared folder to easily transfer files between the host and guest operating systems.
  • Optimize Network Settings: Experiment with different network modes to find the best configuration for your specific needs.
  • Consider a VirtualBox Extension Pack: Install the VirtualBox Extension Pack for additional features, such as USB support and remote desktop access.

Conclusion

Oracle VirtualBox empowers Windows 10 users with a versatile and powerful virtualization solution, offering a wide range of benefits, from software development and testing to system administration and education. Its ease of use, comprehensive feature set, and active community support make it an ideal choice for individuals and organizations seeking to unlock the potential of virtualization. By understanding its capabilities and utilizing best practices, users can leverage VirtualBox to enhance their productivity, security, and flexibility in a modern computing landscape.

Oracle vm virtualbox for windows 10 - sharpfad Oracle VirtualBox  Examples and Usage of Oracle VirtualBox Download Oracle VM VirtualBox 6.1.14
Tutorial How to Install Windows 10 64 bit on Oracle VM VirtualBox - YouTube Download Oracle VM VirtualBox 6.1.14 Oracle vm virtualbox tutorial windows 10 - asewa
How to download Oracle virtualbox and install on Windows 10 32bit - YouTube Oracle virtualbox download for windows 10 - nashvillesno

Closure

Thus, we hope this article has provided valuable insights into Oracle VirtualBox: A Powerful Tool for Windows 10 Users. We appreciate your attention to our article. See you in our next article!

A Comprehensive Guide To The Windows 11 Download Assistant

A Comprehensive Guide to the Windows 11 Download Assistant

Introduction

With great pleasure, we will explore the intriguing topic related to A Comprehensive Guide to the Windows 11 Download Assistant. Let’s weave interesting information and offer fresh perspectives to the readers.

A Comprehensive Guide to the Windows 11 Download Assistant

Windows 11 download assistant - locedsuccess

The Windows 11 Download Assistant is a powerful tool designed to streamline the process of upgrading to Windows 11. It simplifies the upgrade experience, offering a user-friendly interface and a comprehensive set of features that ensure a smooth transition. This article provides a detailed analysis of the Windows 11 Download Assistant, exploring its functionality, benefits, and how it can be effectively utilized.

Understanding the Windows 11 Download Assistant

The Windows 11 Download Assistant is a dedicated application that enables users to download and install Windows 11 on their compatible devices. It acts as a bridge between the existing operating system and the latest version, guiding users through the entire upgrade process. This tool is designed to be intuitive and user-friendly, simplifying the often complex task of upgrading to a new operating system.

Key Features of the Download Assistant

The Windows 11 Download Assistant offers a range of features that contribute to a seamless and efficient upgrade experience:

  • Automatic System Check: The tool performs a comprehensive system check to determine compatibility with Windows 11. This ensures that users only proceed with the upgrade if their device meets the minimum requirements, minimizing potential issues during installation.
  • Download and Installation Management: The Assistant handles the download and installation of Windows 11, automating the process and eliminating the need for manual intervention. This streamlines the upgrade, reducing user effort and potential errors.
  • Data Preservation: The Download Assistant prioritizes data preservation during the upgrade. It ensures that user files, settings, and applications are transferred to the new operating system, minimizing data loss and ensuring a smooth transition.
  • Progress Tracking and Notifications: The Assistant provides real-time progress updates during the download and installation process, keeping users informed about the status of the upgrade. It also delivers notifications, ensuring users are aware of any crucial steps or updates.

Benefits of Utilizing the Download Assistant

The Windows 11 Download Assistant offers numerous benefits for users considering an upgrade:

  • Simplified Upgrade Process: The Assistant streamlines the upgrade process, minimizing manual steps and user effort. This makes the transition to Windows 11 more accessible, even for users with limited technical expertise.
  • Enhanced Compatibility Check: The built-in compatibility check ensures that users only proceed with the upgrade if their device meets the minimum requirements. This reduces the risk of encountering compatibility issues or performance problems after the upgrade.
  • Data Security and Preservation: The Assistant prioritizes data security and preservation, ensuring that user files, settings, and applications are transferred safely to the new operating system. This minimizes data loss and ensures a smooth transition.
  • Technical Support and Guidance: The Download Assistant provides comprehensive support and guidance throughout the upgrade process. It offers troubleshooting tips, answers common questions, and provides clear instructions, ensuring a smooth and successful upgrade experience.

FAQs about the Windows 11 Download Assistant

Q: What are the minimum system requirements for Windows 11?

A: To ensure optimal performance and compatibility, Windows 11 requires a device with the following minimum specifications:

  • Processor: 1 gigahertz (GHz) or faster with 2 or more cores
  • RAM: 4 gigabytes (GB)
  • Storage: 64 GB or larger storage drive
  • System Firmware: UEFI, Secure Boot capable
  • Graphics Card: Compatible with DirectX 12 or later with WDDM 2.0 driver
  • Display: High Definition (720p) display with a minimum resolution of 9 inches diagonally

Q: Can I upgrade my device to Windows 11 using the Download Assistant if it doesn’t meet the minimum requirements?

A: No, the Download Assistant will only proceed with the upgrade if your device meets the minimum system requirements. Attempting to upgrade an incompatible device may result in performance issues, instability, or even data loss.

Q: What happens to my existing files and applications during the upgrade?

A: The Download Assistant is designed to preserve your existing data during the upgrade. It will transfer your files, settings, and applications to the new operating system, ensuring a seamless transition.

Q: Can I use the Download Assistant to install Windows 11 on a new device?

A: The Download Assistant is specifically designed for upgrading existing devices to Windows 11. To install Windows 11 on a new device, you will need to use a different method, such as a USB installation media or a clean install from a bootable drive.

Q: What happens if the upgrade process fails?

A: If the upgrade process fails, you can attempt to troubleshoot the issue using the resources provided by Microsoft. You can also contact Microsoft support for assistance. In most cases, the upgrade can be successfully completed by resolving the underlying issue.

Tips for Utilizing the Windows 11 Download Assistant

  • Ensure Your Device Meets System Requirements: Before proceeding with the upgrade, verify that your device meets the minimum system requirements for Windows 11. This will ensure a smooth and successful upgrade experience.
  • Back Up Your Data: Always create a backup of your important files and data before starting the upgrade process. This will provide a safety net in case of unexpected issues or data loss.
  • Connect to a Stable Internet Connection: The upgrade process requires a stable internet connection to download and install Windows 11. Ensure you have a reliable connection throughout the upgrade process.
  • Follow On-Screen Instructions: Pay close attention to the on-screen instructions provided by the Download Assistant. These instructions will guide you through each step of the upgrade process, ensuring a smooth transition.
  • Allow Sufficient Time: The upgrade process can take some time, depending on the size of your hard drive and the speed of your internet connection. Allow sufficient time for the upgrade to complete without interruptions.

Conclusion

The Windows 11 Download Assistant is an essential tool for users looking to upgrade their devices to the latest version of Windows. It streamlines the upgrade process, ensuring a smooth and efficient transition while prioritizing data preservation and compatibility. By understanding the features, benefits, and best practices associated with the Download Assistant, users can confidently navigate the upgrade process and enjoy the full potential of Windows 11.

How to Download and Use Windows 11 Installation Assistant to Install Windows 11?  Gear up Download Windows 11 Installation & Update Assistant Windows 11 download assistant - westdd
How to Upgrade to Windows 11 With Installation Assistant Download windows 11 assistant - rewamgmt Download windows 11 assistant - lasopaanywhere
Windows 11 download assistant - locedsuccess Windows 11 update assistant download - everdax

Closure

Thus, we hope this article has provided valuable insights into A Comprehensive Guide to the Windows 11 Download Assistant. We thank you for taking the time to read this article. See you in our next article!

Troubleshooting Bluetooth Connectivity Issues In Windows 10

Troubleshooting Bluetooth Connectivity Issues in Windows 10

Introduction

With enthusiasm, let’s navigate through the intriguing topic related to Troubleshooting Bluetooth Connectivity Issues in Windows 10. Let’s weave interesting information and offer fresh perspectives to the readers.

Troubleshooting Bluetooth Connectivity Issues in Windows 10

How to fix Bluetooth connection problems on Windows 10 - YouTube

Wireless connectivity, particularly through Bluetooth, has become an integral part of the modern computing experience. It enables seamless data transfer, device pairing, and even audio streaming, enhancing productivity and entertainment. However, occasional Bluetooth malfunctions can disrupt this convenience, leaving users frustrated and searching for solutions. This article aims to provide a comprehensive guide to troubleshooting common Bluetooth connectivity issues in Windows 10, equipping users with the knowledge to resolve these problems effectively.

Understanding the Problem:

Before delving into troubleshooting steps, it is crucial to understand the nature of the issue. Is the Bluetooth functionality entirely absent, or are specific devices failing to connect? Does the Bluetooth icon appear in the system tray, or is it missing altogether? Identifying the specific symptom can help narrow down the potential causes and guide the troubleshooting process.

Common Causes of Bluetooth Connectivity Issues:

Numerous factors can contribute to Bluetooth connectivity problems in Windows 10. Some of the most common causes include:

  • Driver Issues: Outdated, corrupted, or incompatible Bluetooth drivers can prevent proper device recognition and connection.
  • Hardware Malfunctions: A faulty Bluetooth adapter, either internal or external, can render the functionality unusable.
  • Software Conflicts: Certain software applications might interfere with the Bluetooth service, causing connectivity issues.
  • Power Management Settings: Incorrect power management settings can lead to the Bluetooth adapter being disabled or put into a low-power state, preventing connections.
  • Bluetooth Device Issues: The Bluetooth device itself might be malfunctioning, preventing successful pairing and communication.
  • Network Interference: Other wireless devices operating on the same frequency band can interfere with Bluetooth signals.

Troubleshooting Steps:

1. Restart the Computer and Bluetooth Device:

A simple restart can resolve temporary glitches affecting Bluetooth connectivity. Restart both the computer and the Bluetooth device to ensure they are functioning properly.

2. Update Bluetooth Drivers:

Outdated or corrupted drivers can cause significant connectivity problems. To update the drivers:

  • Device Manager: Open the Device Manager (right-click the Start menu and select "Device Manager"). Expand the "Bluetooth" category and locate the Bluetooth adapter. Right-click on it and select "Update driver." Follow the on-screen instructions.
  • Manufacturer Website: Visit the manufacturer’s website for your computer or Bluetooth adapter and download the latest drivers specifically designed for your device and Windows 10 version.

3. Check for Hardware Malfunctions:

If the Bluetooth adapter is faulty, updating drivers will not resolve the issue. To check for hardware problems:

  • External Bluetooth Adapters: Try connecting a different external Bluetooth adapter to verify if the problem lies with the adapter itself.
  • Internal Bluetooth Adapters: If the issue persists with an internal adapter, consider seeking professional assistance to diagnose and potentially replace the faulty component.

4. Disable Conflicting Software:

Certain software applications can interfere with Bluetooth connectivity. Temporarily disable any recently installed programs or applications suspected of causing conflicts.

5. Adjust Power Management Settings:

Incorrect power management settings can prevent the Bluetooth adapter from functioning correctly. To adjust these settings:

  • Device Manager: Open the Device Manager and expand the "Bluetooth" category. Right-click on the Bluetooth adapter and select "Properties." Navigate to the "Power Management" tab and uncheck the box next to "Allow the computer to turn off this device to save power."

6. Enable Bluetooth Services:

Ensure that the Bluetooth service is running properly. To enable the service:

  • Services: Open the "Services" window (search "services.msc" in the Start menu). Locate the "Bluetooth Support Service" and ensure it is started. If not, right-click on it and select "Start."

7. Reinstall Bluetooth Drivers:

If updating drivers does not resolve the issue, consider reinstalling them.

  • Device Manager: Open the Device Manager and expand the "Bluetooth" category. Right-click on the Bluetooth adapter and select "Uninstall device." Confirm the uninstallation and restart the computer. Windows will automatically reinstall the drivers upon restarting.

8. Reset Bluetooth Settings:

Resetting Bluetooth settings can resolve configuration issues.

  • Settings: Open the "Settings" app (Windows key + I) and navigate to "Devices." Click on "Bluetooth & other devices" and then select "More Bluetooth options."
  • Reset: Click on the "Advanced" tab and select "Reset" to restore Bluetooth settings to their default values.

9. Run the Bluetooth Troubleshooter:

Windows 10 includes a built-in troubleshooter that can diagnose and resolve common Bluetooth connectivity problems.

  • Settings: Open the "Settings" app and navigate to "Update & Security." Click on "Troubleshoot" and then select "Additional troubleshooters."
  • Bluetooth: Locate the "Bluetooth" troubleshooter and click on "Run the troubleshooter." Follow the on-screen instructions.

10. Check for Network Interference:

Other wireless devices operating on the same frequency band can interfere with Bluetooth signals. Try temporarily disabling other wireless devices, such as Wi-Fi routers or cordless phones, to see if the issue is resolved.

11. Update Windows 10:

Outdated Windows 10 versions might contain bugs or compatibility issues that affect Bluetooth functionality. Update Windows 10 to the latest version to ensure compatibility and resolve potential issues.

12. Contact Device Manufacturer:

If all troubleshooting steps fail, consider contacting the manufacturer of your computer or Bluetooth device for support. They might be able to provide specific guidance or assistance tailored to your device.

FAQs:

Q: Why is my Bluetooth icon missing from the system tray?

A: The Bluetooth icon might be missing due to several reasons, including:

  • Disabled Bluetooth: The Bluetooth adapter might be disabled. Check the system tray for a Bluetooth icon with a cross-mark and enable it.
  • Hidden Icon: The Bluetooth icon might be hidden in the system tray. Click on the "Show hidden icons" arrow to reveal all hidden icons.
  • Driver Issues: Outdated or corrupted Bluetooth drivers might prevent the icon from appearing. Update or reinstall the drivers.

Q: How do I pair my Bluetooth device with my computer?

A: To pair a Bluetooth device:

  • Enable Bluetooth: Ensure Bluetooth is enabled on your computer.
  • Put Device in Pairing Mode: Place the Bluetooth device in pairing mode. This typically involves pressing a pairing button or following the device’s instructions.
  • Search for Devices: Open the "Settings" app, navigate to "Devices," and click on "Bluetooth & other devices."
  • Select Device: Select the Bluetooth device from the list of available devices and click on "Connect."

Q: My Bluetooth device keeps disconnecting.

A: Frequent disconnections can occur due to:

  • Battery Issues: Ensure the Bluetooth device has sufficient battery life.
  • Range Limitations: Bluetooth has a limited range. Ensure the device is within range of the computer.
  • Interference: Other wireless devices can interfere with Bluetooth signals. Try moving the devices further apart.
  • Power Management Settings: Incorrect power management settings can cause the Bluetooth adapter to disconnect. Adjust the settings in the Device Manager.

Tips:

  • Use a High-Quality Bluetooth Adapter: Invest in a reputable Bluetooth adapter for better performance and reliability.
  • Keep Devices Updated: Regularly update both your computer and Bluetooth devices with the latest firmware and drivers.
  • Minimize Interference: Keep Bluetooth devices away from other wireless devices to minimize interference.
  • Use a Bluetooth Dongle: If your computer does not have built-in Bluetooth, consider using a USB Bluetooth dongle for added flexibility.

Conclusion:

Troubleshooting Bluetooth connectivity issues in Windows 10 can be a challenging but rewarding process. By systematically addressing potential causes and implementing the appropriate troubleshooting steps, users can restore seamless Bluetooth functionality and enjoy the convenience of wireless connectivity. Remember to update drivers, check for hardware malfunctions, adjust power management settings, and consider seeking professional assistance if necessary. By following these guidelines, users can effectively resolve Bluetooth connectivity problems and maintain a smooth and productive computing experience.

How to Fix Bluetooth Problems in Windows 10 - YouTube How To Fix Bluetooth Connecting Working Issue On Windows 10 How to Fix Bluetooth Problems in Windows 10?  TechLatest
How to fix Bluetooth issues in Windows 10  Windows 10 Bluetooth not working  - YouTube How to Fix Bluetooth Connection Issues in Windows 10? โ€“ WebNots Quick Fix Windows 10 Bluetooth Not Working (5 Simple Methods) - MiniTool
How to fix Bluetooth connection problems on Windows 10 - Pureinfotech How to fix Bluetooth connection problems on Windows 10 โ€ข Pureinfotech

Closure

Thus, we hope this article has provided valuable insights into Troubleshooting Bluetooth Connectivity Issues in Windows 10. We thank you for taking the time to read this article. See you in our next article!

Unleashing The Potential: Optimizing Windows 10 For Gaming Performance

Unleashing the Potential: Optimizing Windows 10 for Gaming Performance

Introduction

With great pleasure, we will explore the intriguing topic related to Unleashing the Potential: Optimizing Windows 10 for Gaming Performance. Let’s weave interesting information and offer fresh perspectives to the readers.

Unleashing the Potential: Optimizing Windows 10 for Gaming Performance

How to Optimize Windows 10 For GAMING & Performance in 2020! (Fortnite) - YouTube

In the realm of gaming, every frame counts. A smooth, responsive gaming experience is not merely a preference; it’s the difference between immersion and frustration. While powerful hardware is essential, neglecting software optimization can significantly hinder performance, leaving even the most robust gaming rigs underperforming.

Windows 10, the dominant operating system for gaming PCs, offers a wealth of tools and settings that can be fine-tuned to enhance performance. By understanding these options and implementing effective strategies, gamers can unlock the full potential of their systems, maximizing frame rates, minimizing lag, and achieving a truly immersive gaming experience.

The Importance of Optimization

Optimizing Windows 10 for gaming is not about squeezing every last drop of performance out of the system. It’s about creating a balanced environment where the operating system efficiently allocates resources, prioritizing gaming processes and minimizing distractions. This results in:

  • Increased Frame Rates: A smoother, more responsive gameplay experience, crucial for competitive gaming and immersive titles.
  • Reduced Input Lag: Faster response times to player inputs, crucial for precision and reaction-based gameplay.
  • Minimized System Stuttering: A smoother, more consistent experience free from jarring frame drops.
  • Improved Game Stability: Reduced chances of crashes and errors, ensuring uninterrupted gameplay sessions.
  • Enhanced Overall Performance: A system that feels snappier and more responsive, not just for gaming, but for general use.

The Optimization Process: A Comprehensive Guide

Optimizing Windows 10 for gaming is a multifaceted process that involves a combination of system settings, software management, and hardware considerations.

1. System Settings and Configuration:

  • Disable Unnecessary Background Processes: Windows 10 runs numerous background processes that consume system resources. Identifying and disabling non-essential processes can free up valuable CPU and RAM for gaming.
  • Manage Startup Programs: Programs that automatically launch at startup can drain system resources. Carefully review and disable unnecessary programs to streamline the boot process.
  • Adjust Visual Effects: Windows 10 offers various visual effects that, while aesthetically pleasing, can impact performance. Disabling or reducing these effects, particularly those related to transparency and animations, can improve frame rates.
  • Prioritize Gaming Processes: Windows 10 allows you to prioritize specific applications, ensuring they receive more system resources. This can be particularly beneficial for demanding games.
  • Power Management Settings: Optimizing power settings can influence performance. For gaming, setting the power plan to "High Performance" or customizing settings to favor performance over power saving can be beneficial.
  • Update Drivers: Outdated or corrupted drivers can cause instability and performance issues. Regularly updating graphics drivers, especially, is crucial for optimal gaming performance.

2. Software Management and Tuning:

  • Windows Update Settings: While Windows updates are essential for security and stability, they can sometimes interfere with gaming. Temporarily disabling automatic updates during gaming sessions can prevent unexpected interruptions.
  • Uninstall Unnecessary Software: Removing unused software can free up disk space and reduce the number of background processes competing for resources.
  • Defragment Hard Drives: Defragmenting hard drives can improve access times and reduce loading times, especially for older hard disk drives.
  • Use a Game Booster: Third-party game booster software can automatically optimize system settings and close unnecessary processes to prioritize gaming performance.
  • Utilize Game Optimization Tools: Many games offer built-in optimization tools that allow players to adjust graphics settings, resolution, and other parameters to find the ideal balance between visual fidelity and performance.
  • Monitor System Resources: Utilize system monitoring tools to observe CPU, RAM, and disk usage during gameplay. This information can help identify bottlenecks and areas for further optimization.

3. Hardware Considerations:

  • Overclocking: Overclocking your CPU and GPU can significantly boost performance, but it requires careful planning, monitoring, and potential system modifications.
  • Upgrade Storage: Switching to a faster SSD or NVMe drive can dramatically reduce loading times and improve overall system responsiveness.
  • Cooling System: Ensure adequate cooling for your CPU and GPU to prevent thermal throttling, which can negatively impact performance.
  • Network Optimization: A stable and fast internet connection is crucial for online gaming. Optimize your network settings and consider using a wired connection for the best performance.

FAQs: Addressing Common Concerns

Q: Is optimizing Windows 10 for gaming necessary?

A: While not mandatory, optimizing Windows 10 can significantly enhance gaming performance, especially for demanding games or systems with limited resources. It allows you to squeeze the most out of your hardware and achieve a smoother, more immersive gaming experience.

Q: Will optimization impact other system functions?

A: Proper optimization focuses on prioritizing gaming processes while maintaining overall system stability. While some settings may affect other applications, the overall impact should be minimal.

Q: Are there any risks associated with optimization?

A: While optimization is generally safe, it’s important to be cautious with certain settings, such as overclocking. Always consult reliable sources and proceed with caution, especially when making significant changes to system settings.

Q: What are the best optimization tools for Windows 10?

A: Several free and paid tools are available, including:

  • Windows 10 built-in tools: Windows 10 offers a range of built-in tools, including Task Manager, Power Options, and Performance Monitor.
  • Third-party game boosters: Software like Razer Cortex, Game Booster, and IObit Game Booster can automate optimization processes and offer additional features.

Tips for Effective Optimization:

  • Start with Basic Settings: Begin by implementing basic optimization techniques, such as disabling unnecessary background processes and adjusting power settings.
  • Monitor Performance: Use system monitoring tools to track CPU, RAM, and GPU usage during gaming. This data can help identify bottlenecks and guide further optimization efforts.
  • Experiment Gradually: Make changes gradually and test the impact on performance. Avoid making drastic changes all at once, as this can lead to instability.
  • Prioritize Performance over Aesthetics: While visual effects can enhance the gaming experience, prioritizing performance, especially for demanding games, can lead to a smoother and more enjoyable gameplay.
  • Keep Drivers Updated: Regularly updating graphics drivers, especially, is crucial for optimal gaming performance.

Conclusion: A More Immersive Gaming Experience

Optimizing Windows 10 for gaming is not a one-time fix, but an ongoing process of fine-tuning and adjustment. By understanding the tools and techniques available, gamers can unlock the full potential of their systems, achieving a smoother, more responsive, and ultimately more immersive gaming experience. Remember, every frame counts, and with careful optimization, you can maximize your gaming performance and truly immerse yourself in the virtual worlds you explore.

How to Optimize Windows 10 for Gaming and Performance - Fix Lag, Stutter and Increase FPS (2021 How to Optimize Windows 10 For GAMING & Performance in 2020! - YouTube How to Optimize Windows 10 for Gaming and Performance
�� How to Optimize Windows 10 For GAMING & Performance The Ulti How to Optimize Windows 10 For GAMING 2022  Unlock PC's Max Potential (FPS Boost + Lower How To Optimize Windows 10 PC For Gaming and Performance! Best Performance Optimization guide
How To Optimize Windows 10 for Gaming (2021) Increase FPS and Performance! - 10s.vn Top 15 Most Powerful Tips To Optimize Windows 10 For Gaming

Closure

Thus, we hope this article has provided valuable insights into Unleashing the Potential: Optimizing Windows 10 for Gaming Performance. We hope you find this article informative and beneficial. See you in our next article!

Understanding Network Bandwidth Management In Windows 10: A Comprehensive Guide

Understanding Network Bandwidth Management in Windows 10: A Comprehensive Guide

Introduction

With enthusiasm, let’s navigate through the intriguing topic related to Understanding Network Bandwidth Management in Windows 10: A Comprehensive Guide. Let’s weave interesting information and offer fresh perspectives to the readers.

Understanding Network Bandwidth Management in Windows 10: A Comprehensive Guide

How to Optimize Your Network Bandwidth: A Comprehensive Guide

Network bandwidth, the rate at which data can be transmitted over a network connection, is a precious resource. In modern homes and offices, multiple devices compete for this bandwidth, leading to potential performance issues. Windows 10, recognizing this challenge, incorporates sophisticated mechanisms for managing bandwidth allocation, ensuring optimal performance for all applications and users. This guide delves into the intricacies of these mechanisms, exploring their functionalities, benefits, and potential drawbacks.

The Essence of Bandwidth Management

Bandwidth management, often referred to as network throttling, involves controlling the rate at which data is transmitted and received over a network connection. This control can be applied to specific applications, devices, or even entire network segments. The primary objective is to prioritize critical applications and services, ensuring smooth operation even when network resources are limited.

Windows 10’s Bandwidth Management Tools

Windows 10 offers a suite of tools for managing bandwidth, each tailored to specific needs:

  • Quality of Service (QoS): This feature allows users to prioritize network traffic based on application type. For instance, video conferencing can be given higher priority than file downloads, ensuring smooth real-time communication. QoS settings can be configured through the Advanced settings of a network adapter’s properties.
  • Network Throttling Policies: Windows 10 enables the creation of specific policies that limit bandwidth usage for individual applications or devices. This can be particularly useful when managing resource-intensive applications like video streaming or online gaming, preventing them from hogging all available bandwidth.
  • Group Policy Objects (GPOs): In enterprise environments, administrators can leverage GPOs to enforce network bandwidth restrictions across an entire network. This enables centralized control over bandwidth usage, ensuring efficient resource allocation and preventing unauthorized bandwidth consumption.
  • Task Scheduler: This feature allows users to schedule bandwidth limitations for specific time periods. For example, a user might choose to throttle bandwidth during peak hours to minimize network congestion.
  • Third-Party Software: Numerous third-party applications offer more advanced bandwidth management features, providing granular control over network traffic and enabling customized prioritization strategies.

Benefits of Network Bandwidth Management

Implementing bandwidth management in Windows 10 offers numerous advantages:

  • Improved Network Performance: By prioritizing critical applications, bandwidth management ensures smoother operation for essential tasks like video conferencing, online gaming, and remote work.
  • Reduced Network Congestion: Limiting bandwidth usage for less critical applications can alleviate network congestion, leading to faster response times and improved overall network performance.
  • Enhanced User Experience: Prioritizing bandwidth for applications and devices based on user needs results in a more consistent and responsive user experience.
  • Optimized Resource Allocation: Bandwidth management ensures that network resources are efficiently allocated, preventing any single application or device from monopolizing bandwidth.
  • Controlled Data Usage: Network throttling policies can be used to limit data usage, particularly relevant for users with limited data plans or those seeking to control costs.

Potential Drawbacks and Considerations

While bandwidth management offers significant benefits, it’s essential to acknowledge potential drawbacks and consider these factors:

  • Performance Trade-offs: Excessive bandwidth throttling can negatively impact the performance of applications, especially those requiring high bandwidth for optimal operation.
  • Complexity: Configuring bandwidth management settings can be complex, requiring a good understanding of network protocols and traffic prioritization.
  • Potential for Interference: Misconfigured bandwidth management settings can inadvertently interfere with network traffic, leading to unexpected performance issues.
  • Impact on Latency: Throttling bandwidth can introduce latency, particularly noticeable in real-time applications like online gaming and video conferencing.

FAQs on Network Bandwidth Management in Windows 10

Q: Can I control bandwidth usage for specific applications in Windows 10?

A: Yes, Windows 10 offers various tools for controlling bandwidth usage for individual applications. Using QoS settings, you can prioritize applications based on their importance, ensuring smoother operation for critical tasks.

Q: Is it possible to limit bandwidth usage for specific devices on my network?

A: Yes, Windows 10 allows you to create network throttling policies that limit bandwidth usage for individual devices. This can be useful for managing resource-intensive devices or preventing unauthorized bandwidth consumption.

Q: Can I schedule bandwidth limitations for specific time periods?

A: Yes, Windows 10’s Task Scheduler allows you to schedule bandwidth limitations for specific time periods. This can be helpful for minimizing network congestion during peak hours or for managing data usage within a limited data plan.

Q: Are there any third-party tools for advanced bandwidth management?

A: Yes, numerous third-party applications offer advanced bandwidth management features, providing granular control over network traffic and enabling customized prioritization strategies.

Tips for Effective Network Bandwidth Management

  • Identify Critical Applications: Determine the applications that require the most bandwidth and prioritize their traffic.
  • Monitor Network Usage: Regularly monitor network usage patterns to identify potential bottlenecks and adjust bandwidth management settings accordingly.
  • Start with Basic Settings: Begin with simple bandwidth management configurations and gradually increase complexity as needed.
  • Test and Evaluate: Thoroughly test any changes to bandwidth management settings to ensure they achieve the desired results without negatively impacting performance.
  • Consider Third-Party Tools: For advanced bandwidth management needs, explore third-party applications that offer more granular control and customization options.

Conclusion

Network bandwidth management in Windows 10 is a powerful tool for optimizing network performance, ensuring smooth operation for critical applications and devices. By understanding the available tools and techniques, users can effectively manage bandwidth, prioritize applications based on their needs, and create a more efficient and reliable network environment. While implementing bandwidth management requires careful consideration and configuration, the benefits in terms of performance, user experience, and resource allocation make it a valuable practice for both individual users and enterprise environments.

5 Bandwidth Management Tools For Windows Windows 10 bandwidth manager - darelomd Managing Bandwidth  Visibility  Connectivity  IT Support
32 Bandwidth Management Principle  Network Bandwidth Management - YouTube Best bandwidth monitors for Windows 10 Network bandwidth monitoring tool for windows - wingsgawer
Top 8 Best Bandwidth Control Software for Windows 10 How to Set Windows Update Bandwidth in Windows 10 - Technastic

Closure

Thus, we hope this article has provided valuable insights into Understanding Network Bandwidth Management in Windows 10: A Comprehensive Guide. We appreciate your attention to our article. See you in our next article!

Unveiling The Powerhouse: A Comprehensive Guide To Windows 10 Programs And Features

Unveiling the Powerhouse: A Comprehensive Guide to Windows 10 Programs and Features

Introduction

With great pleasure, we will explore the intriguing topic related to Unveiling the Powerhouse: A Comprehensive Guide to Windows 10 Programs and Features. Let’s weave interesting information and offer fresh perspectives to the readers.

Unveiling the Powerhouse: A Comprehensive Guide to Windows 10 Programs and Features

"Unveiling the Powerhouse: Microsoft Office" - YouTube

Windows 10, the latest iteration of Microsoft’s iconic operating system, boasts a robust suite of programs and features designed to empower users with an intuitive, secure, and productive computing experience. This guide delves into the key elements of Windows 10, exploring their functionalities, benefits, and how they contribute to a seamless user experience.

Core Programs: The Foundation of Productivity

1. File Explorer: The cornerstone of file management, File Explorer provides a hierarchical view of your computer’s storage. It facilitates easy navigation, file searching, and organization, enabling users to locate and access their files efficiently.

2. Microsoft Edge: Windows 10’s default web browser, Microsoft Edge, offers a modern and secure browsing experience. It features built-in PDF viewing, reading mode, and integration with Cortana, enhancing productivity and user convenience.

3. Windows Store: A central hub for applications, the Windows Store offers a curated selection of software, games, and apps. It provides a secure platform for downloading and installing programs, ensuring compatibility and reliability.

4. Photos: This program offers a user-friendly interface for viewing, editing, and sharing photos. It incorporates basic editing tools, auto-enhancement features, and the ability to create slideshows and albums, facilitating creative expression and digital storytelling.

5. Mail: Windows 10’s integrated email client, Mail, supports multiple email accounts and provides a unified inbox for managing emails from different providers. It offers features like spam filtering, calendar integration, and contact management, streamlining email communication.

6. Calendar: This program allows users to create, manage, and synchronize calendars across multiple devices. It offers features like reminders, event scheduling, and integration with other apps, simplifying personal and professional organization.

7. Groove Music: Windows 10’s built-in music player, Groove Music, offers a seamless experience for listening to music, creating playlists, and accessing online music streaming services. It provides a user-friendly interface and integrates with other multimedia features.

8. Movies & TV: This program provides a platform for watching movies and TV shows purchased or rented from the Microsoft Store. It supports various video formats, offers a personalized watchlist, and integrates with other entertainment services.

9. Notepad: A simple yet versatile text editor, Notepad is ideal for quick note-taking, creating plain text files, and editing code. Its straightforward interface and basic functionalities make it a valuable tool for various tasks.

10. Paint: A classic drawing and image editing program, Paint offers basic tools for creating simple drawings, editing photos, and annotating images. It is a user-friendly tool for basic image manipulation.

Beyond the Basics: Expanding Functionality

1. Cortana: Windows 10’s intelligent personal assistant, Cortana, offers a range of features, including voice search, calendar reminders, and task management. It integrates seamlessly with other Windows 10 programs, providing a personalized and efficient user experience.

2. Windows Defender: A built-in antivirus and anti-malware solution, Windows Defender provides real-time protection against threats, safeguarding your computer from malicious software. It offers automatic updates and scans, ensuring continuous security.

3. Settings App: Replacing the traditional Control Panel, the Settings app offers a modern and intuitive interface for configuring various system settings. It provides a streamlined experience for managing privacy, accessibility, and other system parameters.

4. Action Center: A central hub for notifications and quick actions, Action Center provides a convenient way to manage alerts, access system settings, and control connected devices. It offers a consolidated view of important information and actions.

5. Task Manager: This program provides a detailed overview of running processes, system resource utilization, and network activity. It allows users to monitor system performance, identify resource-intensive applications, and manage processes efficiently.

6. Windows Update: Ensuring that your system remains up-to-date with the latest security patches and features, Windows Update automatically downloads and installs updates, ensuring optimal performance and security.

7. Xbox Game Bar: A dedicated overlay for gamers, Xbox Game Bar provides access to features like screen recording, performance monitoring, and chat, enhancing the gaming experience. It integrates seamlessly with Xbox Live, enabling social interaction and competitive gameplay.

8. Microsoft Store for Business: Designed for businesses, Microsoft Store for Business offers a streamlined platform for deploying and managing apps across multiple devices. It provides centralized control, simplified deployment, and improved security for business applications.

9. Windows Sandbox: A secure environment for testing applications, Windows Sandbox provides a virtualized desktop where users can run untrusted programs without affecting the main operating system. It offers a safe space for experimentation and evaluation.

10. Windows Hello: A biometric authentication system, Windows Hello utilizes facial recognition or fingerprint scanning to provide secure and convenient login access. It enhances security and streamlines the login process.

Enhancing Productivity and Efficiency

1. Snap Assist: This feature allows users to quickly and efficiently arrange windows on the screen, maximizing productivity by enabling multi-tasking and efficient use of screen space.

2. Virtual Desktops: Windows 10 allows users to create multiple virtual desktops, each with its own set of applications and windows. This feature enhances organization and productivity by enabling users to separate workspaces for different tasks.

3. Tablet Mode: Windows 10 seamlessly adapts to different form factors, offering a touch-friendly interface for tablet devices. It optimizes the user experience for touch input, providing a smooth and intuitive interaction.

4. Continuum: This feature allows users to seamlessly switch between desktop and tablet modes, providing a fluid and adaptable experience across different devices. It ensures a consistent user experience regardless of the form factor.

5. OneDrive: Microsoft’s cloud storage service, OneDrive, seamlessly integrates with Windows 10, providing a convenient way to store, sync, and share files across multiple devices. It offers a reliable and secure way to access files anytime, anywhere.

6. Microsoft Office: Windows 10 is seamlessly integrated with the Microsoft Office suite, providing a powerful and comprehensive productivity platform. It offers a range of applications, including Word, Excel, PowerPoint, and Outlook, for document creation, data analysis, presentations, and communication.

7. Windows Ink: This feature leverages the power of digital pens, enabling users to take handwritten notes, draw, and annotate documents directly on the screen. It provides a natural and intuitive way to interact with digital content.

8. Focus Assist: Designed to enhance productivity and minimize distractions, Focus Assist automatically silences notifications and alerts, allowing users to concentrate on their work without interruptions.

9. Night Light: This feature reduces blue light emission from the screen, reducing eye strain and promoting better sleep. It adjusts the screen’s color temperature, creating a more comfortable viewing experience.

10. Windows Search: A powerful search tool, Windows Search allows users to quickly find files, applications, and settings across their computer. It offers a comprehensive search experience, enabling users to access information efficiently.

FAQs: Understanding the Essentials

Q: What are the system requirements for Windows 10?

A: Windows 10 requires a minimum of 1 GHz processor, 1 GB RAM for 32-bit or 2 GB RAM for 64-bit, 16 GB storage space, and a DirectX 9 graphics device with WDDM 1.0 driver.

Q: How can I update Windows 10?

A: Windows Update automatically downloads and installs updates. You can also manually check for updates by going to Settings > Update & Security > Windows Update.

Q: How do I create a system restore point?

A: Go to Settings > Update & Security > Recovery and click on "Create a recovery drive". This will create a backup of your system that can be used to restore your computer to a previous state.

Q: What is the difference between Windows 10 Home and Windows 10 Pro?

A: Windows 10 Home is designed for personal use, while Windows 10 Pro offers additional features for business users, such as BitLocker encryption, domain join, and remote desktop.

Q: How can I personalize my Windows 10 experience?

A: You can customize your desktop background, themes, and colors in Settings > Personalization. You can also adjust system settings like notification settings, power options, and accessibility features.

Tips: Optimizing Your Windows 10 Experience

1. Regularly update your system: Ensure that your Windows 10 installation is up-to-date with the latest security patches and features.

2. Use a strong password: Protect your computer by setting a strong and unique password for your user account.

3. Enable Windows Defender: Ensure that Windows Defender is enabled and running to protect your computer from malware.

4. Use a file backup solution: Regularly back up your important files to a separate location, such as an external hard drive or cloud storage.

5. Keep your system clean: Regularly clean your hard drive by deleting temporary files and unnecessary programs to improve performance.

6. Optimize your power settings: Adjust your power settings to balance performance and energy efficiency based on your usage habits.

7. Customize your taskbar: Add or remove icons from your taskbar to streamline your workflow and access frequently used programs quickly.

8. Use keyboard shortcuts: Learn and utilize keyboard shortcuts to navigate and perform tasks more efficiently.

9. Explore Windows 10 features: Experiment with different features like Cortana, Snap Assist, and virtual desktops to find what works best for you.

10. Seek help from Microsoft support: If you encounter any issues or have questions, contact Microsoft support for assistance.

Conclusion: A Comprehensive and Powerful Platform

Windows 10 stands as a testament to Microsoft’s commitment to delivering a comprehensive and user-friendly operating system. Its rich suite of programs and features caters to a diverse range of users, empowering them with productivity, creativity, and security. From the core programs that form the foundation of productivity to the innovative features that enhance efficiency and personalize the experience, Windows 10 offers a powerful and adaptable platform for both personal and professional use. By understanding its functionalities and leveraging its capabilities, users can unlock the full potential of Windows 10 and elevate their computing experience to new heights.

PPT - Unveiling the Power of Windows 10: A Comprehensive Guide to Enterprise and Home PowerPoint Dashboard V2 : Unveiling the Powerhouse and new Features  Publitio Unveiling the Powerhouse: Aorus Laptops - A Comprehensive Guide - SellLaptopBack.com
How to Open Programs and Features in Windows 10 - WinCope Windows programs and features command Programs and features windows 10
Programs and features windows 10 Open Programs and Features in Windows 10 [The Fastest Way]

Closure

Thus, we hope this article has provided valuable insights into Unveiling the Powerhouse: A Comprehensive Guide to Windows 10 Programs and Features. We appreciate your attention to our article. See you in our next article!

Windows 11 Themes: A Visual Exploration Of Personalization

Windows 11 Themes: A Visual Exploration of Personalization

Introduction

With enthusiasm, let’s navigate through the intriguing topic related to Windows 11 Themes: A Visual Exploration of Personalization. Let’s weave interesting information and offer fresh perspectives to the readers.

Windows 11 Themes: A Visual Exploration of Personalization

How to use Themes to Personalize the Desktop in Windows 11

Windows 11, like its predecessors, offers a range of customization options, allowing users to personalize their desktop experience. Themes, a key element of this customization, provide a cohesive visual identity to the operating system. They encompass various visual aspects, including wallpapers, colors, sounds, and even cursor styles, creating a distinct aesthetic for the user’s workspace.

Understanding Windows 11 Themes

A Windows 11 theme is more than just a wallpaper change. It represents a comprehensive set of visual elements that work in harmony to create a unique look and feel. These elements include:

  • Wallpapers: The most prominent aspect of a theme, wallpapers set the visual tone for the desktop. They can range from abstract designs to vibrant landscapes, and even personal photographs.
  • Colors: Themes define the accent color used throughout the operating system, including in windows, menus, and icons. This color adds a pop of personality and visual distinction.
  • Sounds: Themes can include custom sound schemes for system events like notifications, log-in, and shut down. These sounds contribute to the overall user experience and can be tailored to individual preferences.
  • Cursor Styles: While subtle, cursor styles can also be customized through themes. Users can choose different shapes, sizes, and even animations for their cursor, enhancing the visual appeal of interaction.

Exploring the Official Theme Collection

Windows 11 comes pre-installed with a curated collection of official themes, providing a starting point for users to explore different visual styles. These themes are carefully crafted by Microsoft, ensuring compatibility and a polished look. The official theme collection offers a diverse selection, catering to various tastes and preferences.

Benefits of Using Official Windows 11 Themes

Utilizing official themes offers several advantages:

  • Compatibility: Official themes are designed and tested to work seamlessly with Windows 11, ensuring a stable and reliable experience.
  • Quality: Microsoft meticulously designs and optimizes official themes, guaranteeing a high-quality visual experience.
  • Variety: The official theme collection offers a diverse range of options, allowing users to find themes that align with their personal style.
  • Ease of Use: Applying official themes is effortless, with a user-friendly interface that simplifies the process.
  • System Integration: Official themes integrate seamlessly with the Windows 11 ecosystem, enhancing the overall user experience.

Beyond the Official Collection

While the official theme collection provides a solid foundation, users can further personalize their Windows 11 experience by exploring third-party themes. These themes, often created by independent developers, offer a wider range of styles and options, including unique themes not found in the official collection.

However, it is crucial to exercise caution when using third-party themes. Some themes may not be compatible with Windows 11, leading to system instability or visual glitches. It is recommended to download themes from reputable sources and ensure compatibility before installing them.

FAQs about Windows 11 Themes

Q: Can I create my own theme in Windows 11?

A: While Windows 11 does not offer a built-in theme creation tool, users can customize individual aspects like wallpapers, colors, and sounds. Third-party applications can also be used to create and apply custom themes.

Q: How do I apply a theme in Windows 11?

A: Applying a theme in Windows 11 is a straightforward process. Navigate to Settings > Personalization > Themes and select the desired theme from the available options.

Q: Can I change individual elements within a theme?

A: Yes, users can modify individual elements within a theme, such as the wallpaper, colors, or sounds. These changes can be made within the Settings > Personalization menu.

Q: Are there any limitations to using themes in Windows 11?

A: While themes offer extensive customization options, there are some limitations. For example, some themes may not be compatible with specific hardware or software configurations.

Tips for Choosing and Using Windows 11 Themes

  • Consider your personal style: Select themes that reflect your preferences and create a visually pleasing environment.
  • Experiment with different themes: Explore the official theme collection and third-party options to find themes that best suit your needs.
  • Pay attention to compatibility: Ensure that any third-party themes you download are compatible with your Windows 11 version.
  • Backup your system: Before applying any new theme, it is always advisable to create a system backup to prevent data loss.
  • Keep your themes updated: Regularly check for updates to your themes to ensure compatibility and stability.

Conclusion

Windows 11 themes provide a powerful tool for personalizing the desktop experience. By utilizing the official theme collection, users can create a visually appealing and cohesive workspace. Exploring third-party themes can further expand customization options, allowing users to express their individuality and create a truly unique desktop environment.

Remember to exercise caution when using third-party themes, prioritizing compatibility and security. By following these guidelines, users can effectively leverage the power of Windows 11 themes to personalize their operating system and enhance their overall computing experience.

How to Customize Windows 11 Windows 11 Personalization Themes Windows 11 Personalization Themes
How to use themes in Windows 11 for a more personal desktop experience How to Customize Windows 11 How to Change a Themes' Color Scheme in Windows 11
How To Make Windows 11 Look Minimal!  Customize Windows 11  Make Windows 11 Look Better How to Change Theme in Windows 11?  Gear up Windows 11 & 10

Closure

Thus, we hope this article has provided valuable insights into Windows 11 Themes: A Visual Exploration of Personalization. We thank you for taking the time to read this article. See you in our next article!

Navigating The Digital Landscape: QR Code Scanners For Windows 11 Laptops

Navigating the Digital Landscape: QR Code Scanners for Windows 11 Laptops

Introduction

In this auspicious occasion, we are delighted to delve into the intriguing topic related to Navigating the Digital Landscape: QR Code Scanners for Windows 11 Laptops. Let’s weave interesting information and offer fresh perspectives to the readers.

How to Scan QR Code on Windows Laptops  Windows 11 or 10 - YouTube

In today’s technologically driven world, QR codes have become ubiquitous, serving as gateways to a wealth of digital information. From accessing product details and navigating websites to engaging with interactive content and making secure payments, QR codes have revolutionized how we interact with the physical environment. For Windows 11 laptop users, seamlessly integrating with this technology is crucial, and this is where QR code scanners emerge as essential tools.

Understanding QR Code Scanners

QR code scanners are applications designed to interpret the encoded data within a QR code. These scanners utilize the camera on a Windows 11 laptop to capture an image of the QR code, which is then processed to extract the underlying information. This information can range from simple URLs and contact details to complex data sets and encrypted payment information.

Types of QR Code Scanners for Windows 11 Laptops

The Windows 11 ecosystem offers a variety of QR code scanning solutions, catering to diverse user needs and preferences.

  • Built-in Scanner: Windows 11 incorporates a native QR code scanner, accessible through the camera app. This integrated solution provides a straightforward and convenient method for scanning QR codes, eliminating the need for third-party applications.

  • Dedicated Apps: A plethora of dedicated QR code scanner apps are available on the Microsoft Store. These applications often offer advanced features, such as batch scanning, history management, and integration with other productivity tools.

  • Browser Extensions: Certain web browsers, such as Chrome and Edge, support QR code scanning through extensions. These extensions enable users to scan QR codes directly from their browser, streamlining the process and eliminating the need for separate applications.

Key Benefits of Using QR Code Scanners on Windows 11 Laptops

The integration of QR code scanners with Windows 11 laptops unlocks a multitude of benefits, enhancing efficiency and convenience across various scenarios.

  • Effortless Access to Information: QR codes serve as digital gateways to a wealth of information, ranging from product details and website addresses to contact information and social media profiles. QR code scanners facilitate effortless access to this information, eliminating the need for manual data entry.

  • Enhanced Security and Privacy: QR codes can be used to authenticate transactions and access secure websites, ensuring data integrity and user privacy. QR code scanners play a vital role in enabling secure interactions, safeguarding sensitive information.

  • Streamlined Workflow: QR codes can be used to automate various tasks, such as connecting to Wi-Fi networks, accessing digital tickets, and making payments. QR code scanners streamline these processes, saving time and reducing manual effort.

  • Interactive Content Engagement: QR codes can be used to unlock interactive content, such as augmented reality experiences, 3D models, and multimedia presentations. QR code scanners enable users to engage with this content, enriching their digital experiences.

Factors to Consider When Choosing a QR Code Scanner

Selecting the right QR code scanner for a Windows 11 laptop depends on individual needs and preferences. Here are some key factors to consider:

  • Functionality: Determine the specific features required, such as batch scanning, history management, and integration with other applications.

  • User Interface: Choose a scanner with a user-friendly interface that is intuitive and easy to navigate.

  • Performance: Opt for a scanner that is fast and reliable, ensuring accurate and efficient code recognition.

  • Privacy and Security: Prioritize scanners that prioritize user privacy and data security, implementing robust encryption and authentication mechanisms.

FAQs Regarding QR Code Scanners for Windows 11 Laptops

Q: Is it necessary to download a separate QR code scanner app for Windows 11?

A: No, Windows 11 includes a built-in QR code scanner accessible through the camera app. However, dedicated QR code scanner apps may offer additional features and customization options.

Q: Can I scan QR codes directly from my web browser?

A: Yes, certain web browsers, such as Chrome and Edge, support QR code scanning through extensions. These extensions enable users to scan QR codes directly from their browser, streamlining the process.

Q: Are QR code scanners secure?

A: QR code scanners are generally secure, but it is essential to use reputable apps and websites. Avoid scanning QR codes from unknown sources or suspicious websites.

Q: Can I use my Windows 11 laptop camera to scan QR codes?

A: Yes, the camera on a Windows 11 laptop can be used to scan QR codes using the built-in scanner or dedicated apps.

Q: How do I troubleshoot QR code scanning issues?

A: If you encounter difficulties scanning QR codes, ensure that the camera is properly configured and that the QR code is clearly visible and well-lit. You may also need to update your scanner app or browser extension.

Tips for Using QR Code Scanners Effectively

  • Ensure Clear Visibility: Make sure the QR code is clearly visible and well-lit for optimal scanning accuracy.

  • Maintain Proper Distance: Hold your laptop at an appropriate distance from the QR code to ensure the entire code is captured by the camera.

  • Utilize Dedicated Apps: Consider using dedicated QR code scanner apps for enhanced features and customization options.

  • Stay Informed: Keep your scanner app or browser extension updated to ensure compatibility and security.

  • Be Cautious of Suspicious QR Codes: Avoid scanning QR codes from unknown sources or suspicious websites to prevent potential security risks.

Conclusion

QR code scanners have become an integral part of the digital landscape, enabling Windows 11 laptop users to seamlessly interact with the physical world. By leveraging the power of QR codes, users can access information, engage with interactive content, and automate various tasks with ease. When choosing a QR code scanner, consider functionality, user interface, performance, and security to ensure a seamless and secure experience. As technology continues to evolve, QR code scanners will undoubtedly play an increasingly crucial role in shaping our digital interactions, enhancing efficiency and convenience for Windows 11 laptop users.

How To Scan Qr Code In Laptop Windows 11 And Windows 10 Easy Way - YouTube How to Scan QR Code in Windows 11? โ€“ WebNots Windows 11 Erhรคlt Einen Integrierten QR-Code-Scanner - Futuriq.de
Scanner un QR Code sur un PC Windows 11 Windows 11 - QR-code scanner voor pc  Computerforum PcTuts.be How to Scan QR Code in Windows 11? โ€“ WebNots
Ixl Qr Code Scanner 4 Ways to Scan QR Codes on a Windows PC - Make Tech Easier

Closure

Thus, we hope this article has provided valuable insights into Navigating the Digital Landscape: QR Code Scanners for Windows 11 Laptops. We appreciate your attention to our article. See you in our next article!