Archives March 2024

Navigating The Windows 11 Preview: A Comprehensive Guide

Navigating the Windows 11 Preview: A Comprehensive Guide

Introduction

With great pleasure, we will explore the intriguing topic related to Navigating the Windows 11 Preview: A Comprehensive Guide. Let’s weave interesting information and offer fresh perspectives to the readers.

Buy WINDOWS 11 HOME User Manual: A Comprehensive Illustrated Guide to Navigating the New

Microsoft’s Windows 11 preview program offers users a unique opportunity to experience the latest features and advancements of the operating system before its official release. This program, aimed at early adopters and enthusiasts, allows users to provide valuable feedback and contribute to the development process. Engaging with the preview program necessitates careful consideration and understanding of its intricacies. This article delves into the process of participating in the Windows 11 preview program, highlighting its importance, benefits, and potential challenges.

Understanding the Windows 11 Preview Program:

The Windows 11 preview program is a crucial step in Microsoft’s iterative development cycle. It provides a platform for users to engage with the latest builds of Windows 11, offering insights and feedback that directly influence the final product. This collaborative approach ensures that the operating system evolves based on real-world user experiences, ultimately leading to a more refined and user-friendly release.

Benefits of Participating in the Windows 11 Preview Program:

  1. Early Access: Participants gain early access to the latest features and functionalities of Windows 11, allowing them to explore and experiment with the upcoming operating system before its official release.

  2. Shape the Future: Feedback provided by preview participants plays a vital role in shaping the development of Windows 11. This direct influence on the operating system’s evolution provides a sense of ownership and involvement in the development process.

  3. Stay Ahead of the Curve: Participating in the preview program offers a unique opportunity to stay ahead of the curve in terms of technology and software advancements. Users gain valuable insights into the future of Windows and its evolving capabilities.

  4. Community Engagement: The preview program fosters a vibrant community of early adopters and tech enthusiasts, allowing participants to connect with like-minded individuals and share experiences, feedback, and knowledge.

Considerations for Joining the Windows 11 Preview Program:

  1. Instability: Preview builds are often unstable and may contain bugs or glitches that can impact system performance and functionality. Users should be prepared for potential issues and have a backup plan in case of data loss or system crashes.

  2. Data Loss: Preview builds are not intended for production environments and may not be as reliable as stable releases. It is crucial to back up important data before installing a preview build to minimize the risk of data loss.

  3. Time Commitment: Participating in the preview program requires a certain level of commitment, as users need to regularly update their systems and provide feedback on their experiences.

Joining the Windows 11 Preview Program:

  1. Eligibility: To participate in the preview program, users need to have a compatible device running a supported version of Windows 10.

  2. Registration: The registration process involves joining the Windows Insider Program, where users can choose the desired preview channel (Dev, Beta, or Release Preview) based on their comfort level with instability and the frequency of updates.

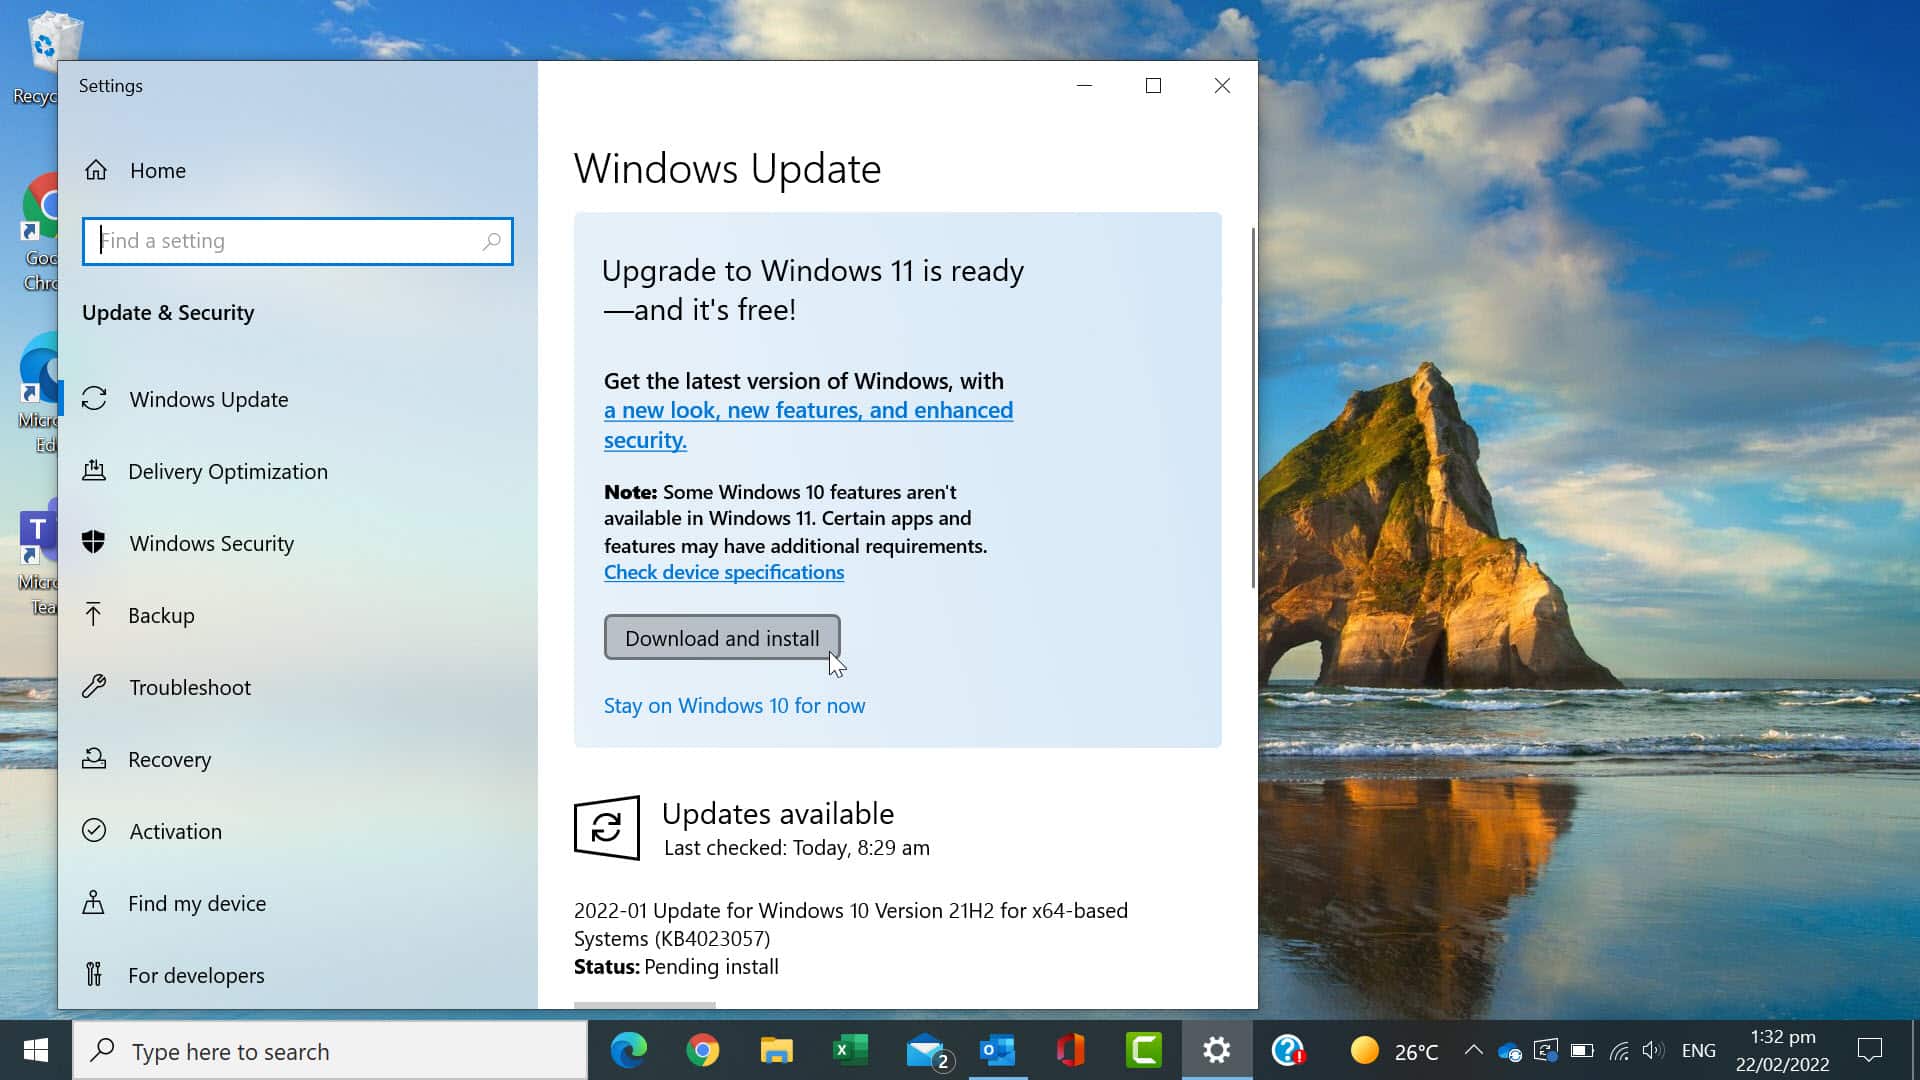
  3. Installation: Once registered, users can download and install the preview build through the Windows Update settings.

Tips for Participating in the Windows 11 Preview Program:

  1. Choose the Right Channel: Carefully consider your comfort level with instability and the frequency of updates before selecting a preview channel. The Dev channel offers the most recent and potentially unstable builds, while the Release Preview channel provides more stable builds closer to the final release.

  2. Back Up Your Data: Prioritize data backup before installing any preview build to protect against potential data loss or system issues.

  3. Report Issues: Actively report any bugs, glitches, or unexpected behavior encountered during the preview program. This feedback is crucial for improving the stability and functionality of Windows 11.

  4. Engage with the Community: Join online forums and communities dedicated to the Windows 11 preview program to share experiences, seek help, and learn from other participants.

Frequently Asked Questions (FAQs) about the Windows 11 Preview Program:

Q: Is it safe to install the Windows 11 preview build on my main computer?

A: While the preview program provides an opportunity to experience the latest features, it is not recommended to install preview builds on your primary computer, especially if it is used for critical tasks or sensitive data. Preview builds are prone to instability and may cause issues that could disrupt your workflow or lead to data loss. It is advisable to install preview builds on a separate test machine or a virtual machine to minimize risk.

Q: What happens to my data when I install a preview build?

A: Installing a preview build does not necessarily erase your existing data. However, it is crucial to back up all important data before installing a preview build as there is a possibility of data loss or corruption due to potential instability.

Q: Can I switch back to the stable version of Windows 10 after installing a preview build?

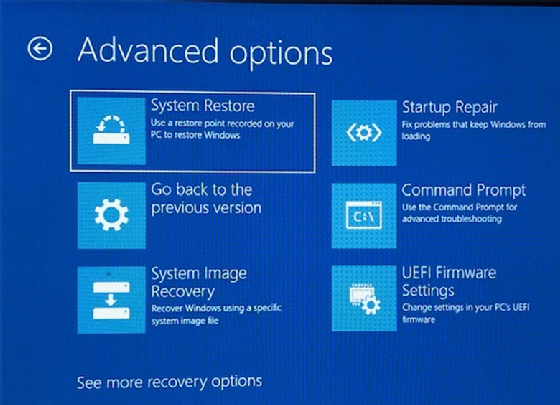
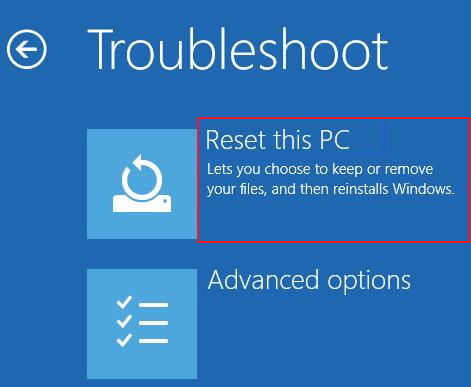
A: Yes, you can switch back to the stable version of Windows 10 by resetting your computer to its factory settings. However, this will erase all data on your computer, so ensure you have a backup before proceeding.

Q: What happens to my preview build when Windows 11 is officially released?

A: When Windows 11 is officially released, preview builds will be superseded by the stable release. You will need to upgrade to the official release to continue using Windows 11.

Conclusion:

Participating in the Windows 11 preview program offers a unique opportunity to engage with the latest operating system advancements and contribute to its development. However, it is crucial to approach the program with caution and awareness of its potential challenges. By carefully considering the benefits and considerations, users can make informed decisions about their involvement in the preview program and leverage its potential to shape the future of Windows 11. The program serves as a valuable bridge between Microsoft and its users, ensuring the evolution of Windows 11 reflects the needs and feedback of its diverse user base.

Windows 11 features in preview: Everything you can try right now Windows 11: A Comprehensive Guide about Features and Updates Perunity - Latest Business Story Windows 11 preview - lynatilaX
How To Download Windows 11 Preview & A Look Into Exciting New Features How To Download Windows 11 Preview & A Look Into Exciting New Features Microsoft Windows 11 Preview - YouTube
Windows 11 preview released: How to try Microsoft's big new OS - SlashGear How to Get the Windows 11 Preview on Your PC โ€“ CTTHANH WORDPRESS

Closure

Thus, we hope this article has provided valuable insights into Navigating the Windows 11 Preview: A Comprehensive Guide. We appreciate your attention to our article. See you in our next article!

A Glimpse Into The Future: Exploring The Previews Of Windows 12

A Glimpse into the Future: Exploring the Previews of Windows 12

Introduction

With great pleasure, we will explore the intriguing topic related to A Glimpse into the Future: Exploring the Previews of Windows 12. Let’s weave interesting information and offer fresh perspectives to the readers.

A Glimpse into the Future: Exploring the Previews of Windows 12

Windows 12 concept video shows off drool-worthy design for a dream OS  Flipboard

The world of technology is constantly evolving, with each iteration promising new advancements and user experiences. Microsoft, a pioneer in the operating system landscape, has long been at the forefront of this evolution. While the official release of Windows 12 remains shrouded in speculation, early previews have begun to emerge, offering a tantalizing peek into the future of computing.

These previews, though still in their nascent stages, provide valuable insights into the direction Microsoft is taking with its next major operating system. They unveil potential features, design philosophies, and technological innovations that could reshape the way we interact with our devices.

Unveiling the Potential of Windows 12: A Comprehensive Analysis

The previews of Windows 12, while not yet representative of the final product, offer a glimpse into the key themes and potential innovations that Microsoft is exploring. Here is a comprehensive analysis of these previews, highlighting their significance and potential impact on the future of computing.

1. A Refined User Interface: A Focus on Simplicity and Efficiency

The early previews suggest a significant shift in the user interface design philosophy. The focus seems to be on streamlining the user experience, prioritizing simplicity and efficiency. This is evident in the redesigned Start Menu, Taskbar, and other core interface elements. The overall aesthetic leans towards a cleaner, more minimalist approach, potentially reflecting a desire to minimize visual clutter and enhance user focus.

2. AI Integration: Enhancing Productivity and Personalization

Artificial intelligence (AI) is poised to play a crucial role in Windows 12. The previews showcase the integration of AI-powered features designed to enhance productivity and personalize the user experience. These features include:

  • Smart Assistant: A more intelligent and context-aware virtual assistant capable of anticipating user needs and providing proactive assistance.
  • Intelligent Search: Enhanced search functionality that leverages AI to deliver more relevant and accurate results, understanding user intent and context.
  • Adaptive Learning: The system learns user preferences and habits, automatically optimizing settings and recommendations for a more personalized experience.

3. Enhanced Security and Privacy: Protecting User Data

Security and privacy remain paramount concerns in the digital age. The previews of Windows 12 indicate a heightened focus on these aspects, incorporating new features and technologies designed to protect user data and enhance overall security:

  • Multi-Factor Authentication: Strengthening account security through the implementation of multi-factor authentication, requiring multiple verification steps for login.
  • Enhanced Privacy Controls: Providing users with greater control over their data, allowing them to choose what information is shared and with whom.
  • Real-Time Threat Detection: Integrating advanced security measures to detect and mitigate potential threats in real time, safeguarding user devices from malicious attacks.

4. Cloud Integration: Seamless Connectivity and Data Synchronization

The previews underscore the growing importance of cloud integration in the modern operating system. Windows 12 is expected to seamlessly integrate with cloud services, enabling users to access and manage their data and applications across multiple devices:

  • Cloud Storage Synchronization: Effortless synchronization of files and settings across devices, ensuring data accessibility and consistency.
  • Cloud-Based Applications: Streamlined access to cloud-based applications, eliminating the need for local installation and providing on-demand availability.
  • Remote Desktop Access: Enhanced capabilities for remote desktop access, allowing users to control their computers from anywhere with an internet connection.

5. Gaming Enhancements: Elevating the Gaming Experience

Gaming continues to be a significant focus for Microsoft, and the previews of Windows 12 hint at enhancements aimed at elevating the gaming experience:

  • DirectX 13: The next generation of DirectX, promising improved graphics performance and visual fidelity, delivering a more immersive gaming experience.
  • Cloud Gaming Integration: Seamless integration with cloud gaming services, offering access to a vast library of games without the need for local installation.
  • Game Mode Optimization: Enhanced system optimization for gaming, prioritizing resources and minimizing distractions for a smoother and more responsive gameplay experience.

6. Accessibility Features: A More Inclusive Operating System

Windows 12 is expected to include advancements in accessibility features, making the operating system more inclusive and accessible to users with diverse needs:

  • Improved Voice Control: Enhanced voice control capabilities, allowing users to interact with the operating system using voice commands.
  • Enhanced Screen Reader Functionality: Improved screen reader functionality, providing a more accurate and comprehensive experience for visually impaired users.
  • Personalized Accessibility Settings: A wider range of customization options for accessibility settings, allowing users to tailor the system to their specific needs.

7. The Future of Windows: A New Era of Computing

The previews of Windows 12 offer a glimpse into the future of computing. They showcase a platform that prioritizes simplicity, efficiency, AI integration, enhanced security, cloud connectivity, and accessibility. These elements, combined with the ongoing advancements in hardware technology, have the potential to revolutionize the way we interact with our devices, paving the way for a new era of computing.

FAQs about Windows 12

1. When will Windows 12 be released?

While Microsoft has not officially announced a release date for Windows 12, speculation suggests it could be sometime in 2024. However, it is important to note that these are unofficial estimates, and the actual release date may differ.

2. Will Windows 12 be a free upgrade?

Microsoft has not yet confirmed whether Windows 12 will be a free upgrade for existing Windows 10 users. Historically, major Windows releases have often been accompanied by upgrade fees, but there is no guarantee that this will be the case with Windows 12.

3. What are the system requirements for Windows 12?

The specific system requirements for Windows 12 are not yet publicly available. However, it is likely that the requirements will be similar to those for Windows 11, with a focus on newer hardware and security features.

4. Will Windows 12 support older hardware?

Microsoft has not explicitly stated whether Windows 12 will support older hardware. Given the increasing emphasis on security and performance, it is possible that the operating system may require more modern hardware to function optimally.

5. What are the key differences between Windows 11 and Windows 12?

While the exact differences between Windows 11 and Windows 12 are still under wraps, the previews suggest a significant shift in design philosophy, with a stronger emphasis on AI integration, cloud connectivity, and enhanced security in Windows 12.

Tips for Windows 12

1. Stay Updated with Official Information: The most reliable source of information about Windows 12 is Microsoft’s official website and communication channels. Avoid relying on rumors or speculation from unofficial sources.

2. Join the Windows Insider Program: The Windows Insider Program provides early access to preview versions of Windows, allowing users to test new features and provide feedback to Microsoft.

3. Backup Your Data: Before installing any preview versions of Windows 12, it is essential to back up your data to prevent any potential data loss.

4. Be Prepared for Bugs and Issues: Preview versions of operating systems are often prone to bugs and issues. Be prepared for potential instability and be patient with the development process.

5. Provide Feedback to Microsoft: If you encounter any bugs or have feedback on the preview versions of Windows 12, share your experiences with Microsoft through the appropriate channels. Your feedback can help shape the development of the final product.

Conclusion

The previews of Windows 12 offer a tantalizing glimpse into the future of computing. While still in their early stages, they reveal a platform that prioritizes simplicity, efficiency, AI integration, enhanced security, cloud connectivity, and accessibility. These innovations, coupled with the ongoing advancements in hardware technology, have the potential to reshape the way we interact with our devices, ushering in a new era of computing.

As development progresses, we can expect to see further refinements, enhancements, and potentially new features emerge. The journey towards the official release of Windows 12 is sure to be filled with anticipation and excitement as we witness the evolution of this iconic operating system.

Feast Your Eyes on a Glimpse into the Future from Microsoft �� Free download Exploring the Windows Update A Glimpse into the Future of [1080x675] for your Microsoft's Special Windows and Surface AI Event: A Glimpse into the Future - CCcamLive Blog - A
The World in 2050: A Glimpse into the Future - YouTube Insider Preview Windows 11 Metaverse - A glimpse into the future - Business of Apps
The Last Human โ€“ An Optimistic Glimpse Into The Far Future A Glimpse Into The Future

Closure

Thus, we hope this article has provided valuable insights into A Glimpse into the Future: Exploring the Previews of Windows 12. We thank you for taking the time to read this article. See you in our next article!

The Elusive Quest For "PhotoImpression 4 Free Download Full Version"

The Elusive Quest for "PhotoImpression 4 Free Download Full Version"

Introduction

With great pleasure, we will explore the intriguing topic related to The Elusive Quest for "PhotoImpression 4 Free Download Full Version". Let’s weave interesting information and offer fresh perspectives to the readers.

The Elusive Quest for "PhotoImpression 4 Free Download Full Version"

Photoimpression 4 Free Full Version - cleverexcel

The search for a free, full version of PhotoImpression 4 often leads users down a winding path, filled with promises of free downloads that ultimately prove elusive. This article aims to shed light on the realities surrounding this software and provide a comprehensive understanding of its history, functionality, and the complexities of obtaining a legal, free version.

Understanding PhotoImpression 4 and its Legacy

PhotoImpression 4, released in the late 1990s, was a popular image editing software developed by Ulead Systems, now known as Corel. It offered a user-friendly interface and a range of features for basic photo editing, including cropping, resizing, color adjustments, and special effects. The software gained considerable popularity for its accessibility and affordability, particularly among home users.

However, like many software programs of its era, PhotoImpression 4 is no longer actively supported by its developers. This means that updates, bug fixes, and security patches are no longer provided, rendering the software potentially vulnerable to security threats and compatibility issues with modern operating systems.

The Challenges of Finding a Free, Full Version

The allure of free software is undeniable, but when it comes to older programs like PhotoImpression 4, the reality is far more complex. The primary reason for the scarcity of legitimate free downloads lies in licensing agreements and copyright protections.

Software developers invest significant resources in creating and distributing their products. They rely on licensing fees and sales to recoup their investments and continue development. Offering a full version of their software for free would undermine their business model and discourage future innovation.

The Risks Associated with Unofficial Downloads

The internet is rife with websites offering "free downloads" of software, including PhotoImpression 4. However, it is crucial to exercise extreme caution when encountering such offers. These downloads often come with hidden dangers, such as:

  • Malware and Viruses: Unofficial download sources are notorious for distributing malicious software disguised as legitimate programs. These threats can compromise your computer’s security, steal personal information, or even render your device unusable.
  • Copyright Infringement: Downloading software without a valid license constitutes copyright infringement, which can result in legal consequences.
  • Unreliable Software: Unofficial downloads may be incomplete, outdated, or corrupted, leading to performance issues, compatibility problems, or even data loss.

Exploring Alternative Options

While finding a completely free and legitimate full version of PhotoImpression 4 is highly unlikely, there are alternative options to consider:

  • Corel Products: Corel, the current owner of Ulead Systems, offers a range of modern image editing software, including Corel PaintShop Pro. These products provide advanced features and compatibility with contemporary operating systems.
  • Free Image Editing Software: Several excellent free image editing programs are available, such as GIMP, Paint.NET, and Adobe Photoshop Express. These programs offer a wide range of features, often comparable to commercial software, without the cost.
  • Virtual Machines: Running older software on modern systems can be challenging. Virtual machines, such as VirtualBox or VMware, allow you to create a virtual environment where you can install and run legacy software, including PhotoImpression 4, without affecting your primary operating system.

Frequently Asked Questions

Q: Is it legal to download a free version of PhotoImpression 4?

A: Downloading PhotoImpression 4 without a valid license is generally considered illegal, as it violates copyright laws.

Q: Where can I find a safe and legitimate download of PhotoImpression 4?

A: Finding a safe and legal download of PhotoImpression 4 is extremely difficult. Official download sources are unlikely, and unofficial downloads pose significant risks.

Q: What are the best alternatives to PhotoImpression 4?

A: Several excellent free and commercial image editing software alternatives are available, such as GIMP, Paint.NET, Corel PaintShop Pro, and Adobe Photoshop Express.

Tips for Avoiding Unofficial Downloads

  • Verify the Source: Always download software from trusted and reputable websites, such as official developer sites or well-known software distribution platforms.
  • Read Reviews: Check user reviews and forums to gauge the legitimacy and safety of download sources.
  • Be Wary of Free Offers: Exercise caution when encountering websites offering free downloads of commercial software.
  • Use Anti-Virus Software: Install and regularly update antivirus software to protect your computer from malware and other threats.

Conclusion

The quest for a free, full version of PhotoImpression 4 is a challenging one. While the allure of free software is tempting, the risks associated with unofficial downloads far outweigh the potential benefits. Exploring alternative options, such as modern image editing software or virtual machines, is a safer and more reliable approach to achieving your image editing needs. By prioritizing safety, legality, and responsible software acquisition, users can ensure a secure and productive digital experience.

Arcsoft photoimpression 4 free download full version - passlwholesale Arcsoft Photoimpression 4 Software - bucketcrack Photoimpression 4 Free Download Chip - usaloadnewdp
Tร‰Lร‰CHARGER ARCSOFT PHOTOIMPRESSION 4 Photoimpression 4 free download full version - lotpowen Free Arcsoft Photoimpression 4 Download - labfasr
Photoimpression 4 Download INSTALL Full Versionl - Collection  OpenSea Nanoguns9 Free Downloads: ArcSoft PhotoImpression 4

Closure

Thus, we hope this article has provided valuable insights into The Elusive Quest for "PhotoImpression 4 Free Download Full Version". We hope you find this article informative and beneficial. See you in our next article!

Troubleshooting Windows 10 Reset Issues: A Comprehensive Guide

Troubleshooting Windows 10 Reset Issues: A Comprehensive Guide

Introduction

In this auspicious occasion, we are delighted to delve into the intriguing topic related to Troubleshooting Windows 10 Reset Issues: A Comprehensive Guide. Let’s weave interesting information and offer fresh perspectives to the readers.

Troubleshooting Windows 10 Reset Issues: A Comprehensive Guide

How to access Windows 10 troubleshooting tools step by step  TechTarget

Windows 10’s reset feature offers a convenient method for resolving various system issues, restoring the operating system to its factory settings, or preparing the device for sale or donation. However, scenarios where the reset process fails can be frustrating and require a methodical approach to diagnosis and resolution. This article provides a comprehensive guide to understanding the reasons behind Windows 10 reset failures and offers a range of troubleshooting steps to rectify the situation.

Understanding the Reset Process:

Before delving into troubleshooting, it’s crucial to understand the fundamental aspects of the Windows 10 reset process. The reset operation aims to remove all user data, applications, and settings, restoring the system to its original state. It offers two primary options:

  • Keep my files: This option preserves personal files, such as documents, pictures, and music, while removing applications and settings.
  • Remove everything: This option completely erases all data from the system, including user files, applications, and settings.

Causes of Reset Failures:

Numerous factors can impede the successful completion of a Windows 10 reset. These include:

  • Hardware Issues: Faulty hard drives, RAM, or other hardware components can disrupt the reset process, rendering it unsuccessful.
  • Software Conflicts: Existing applications or system files can interfere with the reset operation, causing it to fail.
  • Corrupted System Files: Damaged or corrupted system files can prevent the reset from completing successfully.
  • Insufficient Disk Space: Insufficient free space on the hard drive can hinder the reset process, as it requires ample space to complete the operation.
  • Boot Issues: Problems with the boot process, such as a corrupted boot sector, can prevent the reset from initiating.
  • Third-Party Antivirus Software: Antivirus software can sometimes interfere with the reset process, causing it to fail.
  • Incorrect User Permissions: Insufficient user permissions can prevent the reset operation from proceeding.
  • System Reserved Partition Issues: Problems with the system reserved partition, which contains essential boot files, can hinder the reset process.

Troubleshooting Steps:

1. Verify Hardware Functionality:

  • Run a hardware diagnostic test: Utilize the built-in Windows diagnostics or a third-party tool to check for hardware failures.
  • Replace faulty components: If the diagnostics identify a faulty component, replace it with a working alternative.
  • Ensure sufficient power supply: Verify that the power supply unit is functioning correctly and providing adequate power to the system.

2. Troubleshoot Software Conflicts:

  • Temporarily disable antivirus software: Deactivate any third-party antivirus software and attempt the reset again.
  • Uninstall conflicting applications: Identify and uninstall applications that might be interfering with the reset process.
  • Clean boot: Perform a clean boot by starting Windows with a minimal set of drivers and applications to isolate the source of the conflict.

3. Repair Corrupted System Files:

  • Run System File Checker (SFC): This built-in tool scans and repairs corrupted system files.
  • Utilize the DISM tool: The Deployment Image Servicing and Management (DISM) tool can repair corrupted system images.

4. Free Up Disk Space:

  • Delete unnecessary files: Remove temporary files, unused applications, and large files to free up disk space.
  • Move files to external storage: Transfer large files to an external hard drive to free up space on the system drive.

5. Address Boot Issues:

  • Use a bootable USB drive: Create a bootable USB drive with a Windows installation media and attempt the reset from the bootable environment.
  • Repair the boot sector: Utilize a boot repair tool to fix any corrupted boot sectors.
  • Check for BIOS settings: Ensure that the BIOS settings are configured correctly for booting from the hard drive.

6. Verify User Permissions:

  • Log in as administrator: Ensure that you are logged in as an administrator with full system privileges.
  • Check user account settings: Review the user account settings to ensure that the account has the necessary permissions to perform a reset.

7. Troubleshoot System Reserved Partition Issues:

  • Use a bootable USB drive: Create a bootable USB drive with a Windows installation media and attempt to repair the system reserved partition.
  • Utilize a third-party partition manager: Employ a partition manager tool to repair or rebuild the system reserved partition.

8. Consider a Clean Installation:

If the troubleshooting steps fail to resolve the reset issue, consider performing a clean installation of Windows 10. This involves formatting the hard drive and installing a fresh copy of the operating system.

FAQs:

Q: What if the reset process hangs or freezes during the operation?

A: If the reset process hangs or freezes, it could indicate a hardware issue, a software conflict, or a corrupted system file. Attempt to restart the computer and try the reset again. If the issue persists, follow the troubleshooting steps outlined above.

Q: Can I recover my data after a reset with "Remove everything" selected?

A: When you select "Remove everything," all data on the system is erased. Data recovery may be possible with specialized data recovery software, but it is not guaranteed.

Q: Why is my Windows 10 reset taking a long time?

A: The reset process can take a considerable amount of time, especially if you have a large amount of data on the system or if the system is experiencing performance issues. Be patient and allow the process to complete.

Q: Can I reset Windows 10 without a product key?

A: If you have a digital license associated with your Microsoft account, you can reset Windows 10 without a product key. However, if you have a retail product key, you will need to enter it during the reset process.

Tips:

  • Backup your data: Always back up your important data before performing a reset, as it will erase all data from the system.
  • Create a recovery drive: Create a recovery drive with a bootable USB drive containing a Windows installation media, which can be used to repair or reinstall the operating system.
  • Update Windows regularly: Keep your Windows operating system updated to the latest version to ensure optimal performance and security.
  • Monitor system health: Regularly monitor the system’s health for any signs of issues, such as slow performance, error messages, or system crashes.

Conclusion:

Encountering a failed Windows 10 reset can be a frustrating experience. However, by understanding the potential causes and employing the troubleshooting steps outlined above, users can effectively diagnose and resolve the issue. Remember to approach the problem systematically, starting with basic checks and gradually progressing to more advanced solutions. With patience and a methodical approach, most Windows 10 reset failures can be rectified, restoring the system to its optimal state.

HOW TO RESET WINDOWS 10 GUIDE! - YouTube How to Reset PC Windows 10 - Top 5 Best Methods to Fix Problem of Resetting Your PC/Laptops How to Fix Windows 10 Reset This PC Not Working?
There was a problem when resetting your PC (Windows 10) No changes were made - YouTube Fix Windows 10 Restoring Your Previous Version of Windows Stuck or Loop - EaseUS How to access Windows 10 troubleshooting tools step by step  TechTarget
How to Reset Windows 10: 11 Steps (with Pictures) - wikiHow Fixed: โ€œThere was a problem resetting your PCโ€ error on Windows 10

Closure

Thus, we hope this article has provided valuable insights into Troubleshooting Windows 10 Reset Issues: A Comprehensive Guide. We appreciate your attention to our article. See you in our next article!

Navigating The Shift: From Pre-Installed Windows 11 To Windows 10

Navigating the Shift: From Pre-Installed Windows 11 to Windows 10

Introduction

With enthusiasm, let’s navigate through the intriguing topic related to Navigating the Shift: From Pre-Installed Windows 11 to Windows 10. Let’s weave interesting information and offer fresh perspectives to the readers.

How to Fix Windows + Shift + S Not Working

The decision to move from Windows 11 to Windows 10, particularly when the former was pre-installed on a device, is a complex one. While Windows 11 boasts new features and a refined visual aesthetic, its compatibility with older hardware and software can be a significant barrier for many users. This article delves into the intricacies of this transition, providing a comprehensive understanding of the considerations, benefits, and potential challenges involved.

Understanding the Motivation for a Shift

The reasons for choosing Windows 10 over Windows 11, despite the latter being pre-installed, are diverse and often specific to individual users. Some key factors driving this decision include:

  • Hardware Compatibility: Windows 11 has stringent system requirements, including support for TPM 2.0 and Secure Boot. Older devices may not meet these specifications, rendering Windows 11 incompatible.
  • Software Compatibility: Certain legacy applications and games may not function optimally or at all on Windows 11. Users reliant on such software might find Windows 10 a more stable environment.
  • User Interface Preferences: Windows 10’s interface, while not as visually striking as Windows 11, might be more familiar and intuitive for some users.
  • Performance Concerns: Some users report experiencing performance issues with Windows 11, particularly on older or less powerful hardware. Windows 10, with its lower resource demands, may offer a smoother experience.
  • Security Considerations: While both operating systems prioritize security, some users might prefer the stability and familiarity of Windows 10’s security features.

The Process of Transitioning from Windows 11 to Windows 10

Transitioning from Windows 11 to Windows 10 involves a few key steps, each requiring careful consideration:

  1. Backup and Data Transfer: Before embarking on the transition, it is imperative to back up all essential data, including files, documents, and settings. This ensures data preservation in case of unforeseen issues during the installation process.
  2. Software Compatibility Check: It is crucial to verify the compatibility of all essential software with Windows 10. This includes applications, drivers, and games.
  3. Obtaining a Windows 10 Installation Media: A bootable USB drive or DVD containing the Windows 10 installation files is required. This can be created using the Microsoft Media Creation Tool.
  4. Installation Process: Once the installation media is prepared, the user can proceed with the clean installation of Windows 10. This involves booting from the installation media and following the on-screen instructions.
  5. Driver Installation: After the installation, it is necessary to install the appropriate drivers for hardware components, such as graphics cards, network adapters, and sound cards.
  6. Software Reinstallation: Finally, the user needs to reinstall all essential software applications, ensuring they are compatible with Windows 10.

Potential Challenges and Considerations

The transition from Windows 11 to Windows 10, while feasible, is not without its potential challenges:

  • Driver Compatibility: Finding compatible drivers for all hardware components, especially older devices, might be challenging.
  • Software Compatibility: Some software applications may not be compatible with Windows 10, requiring users to find alternative solutions or updates.
  • Data Loss: While data backup is crucial, there is always a risk of data loss during the installation process. It is essential to follow the instructions carefully and ensure proper backups.
  • System Performance: Depending on the hardware and software configuration, users might experience performance differences between Windows 11 and Windows 10.

Benefits of Transitioning to Windows 10

Despite the challenges, transitioning to Windows 10 can offer several benefits:

  • Improved Compatibility: Windows 10 provides wider compatibility with older hardware and software, ensuring a smoother user experience for those with legacy devices or applications.
  • Enhanced Performance: For users with older or less powerful hardware, Windows 10 might offer a more responsive and efficient experience.
  • Familiar User Interface: Windows 10’s user interface, while undergoing updates, remains familiar to many users, reducing the learning curve compared to Windows 11.
  • Stability and Reliability: Windows 10 has been extensively tested and refined over the years, resulting in a more stable and reliable operating system compared to its newer counterpart.

FAQs Regarding Transitioning from Windows 11 to Windows 10

Q: Can I downgrade from Windows 11 to Windows 10 without losing data?

A: While data loss is possible, it can be minimized by performing a proper backup before the installation process.

Q: Will I be able to use my existing Windows 11 license key for Windows 10?

A: This depends on the specific license type. Contact Microsoft or your device manufacturer for information about license compatibility.

Q: Will my applications and drivers work on Windows 10?

A: This depends on the specific applications and drivers. It is crucial to check compatibility before proceeding with the installation.

Q: Is it possible to dual-boot Windows 11 and Windows 10?

A: Yes, it is possible to install both operating systems on the same device, allowing users to switch between them as needed.

Q: What are the minimum system requirements for Windows 10?

A: The minimum system requirements for Windows 10 are less stringent than Windows 11, allowing for broader hardware compatibility.

Tips for Transitioning from Windows 11 to Windows 10

  • Thorough Backup: Ensure a comprehensive backup of all critical data before starting the installation process.
  • Check Compatibility: Verify the compatibility of all essential software, drivers, and hardware components with Windows 10.
  • Create a Bootable USB Drive: Use the Microsoft Media Creation Tool to create a bootable USB drive containing the Windows 10 installation files.
  • Follow Installation Instructions Carefully: Pay close attention to the on-screen instructions during the installation process.
  • Install Drivers After Installation: Once Windows 10 is installed, install the necessary drivers for all hardware components.
  • Reinstall Software: Reinstall all essential software applications, ensuring they are compatible with Windows 10.

Conclusion

The decision to transition from pre-installed Windows 11 to Windows 10 is a personalized one, driven by individual needs and priorities. While Windows 11 offers new features and a refined visual experience, it can pose compatibility challenges for users with older hardware or software. Windows 10, with its broader compatibility and established stability, remains a viable alternative for those seeking a smoother and more familiar computing experience. Careful planning, thorough backups, and an understanding of the potential challenges are crucial for a successful transition, ensuring a seamless and efficient shift to Windows 10.

Here's how to download and install Windows 11 Turn Windows 11 into Windows 10 - YouTube Shift Key Not Working on Windows 11/10 - (FIXED) - YouTube
How to Boot Windows 11 in Safe Mode [Easy Guide] Fix Win+Shift+S keyboard shortcut is not working in Windows 11/10 - YouTube How to Install Windows 11 Step by Step: Guide with Images
How to install Windows 11 on unsupported hardware - Digital Citizen How to install Windows 11 (update Windows 10 to 11) - Excel at Work

Closure

Thus, we hope this article has provided valuable insights into Navigating the Shift: From Pre-Installed Windows 11 to Windows 10. We thank you for taking the time to read this article. See you in our next article!

Navigating The Windows 10 USB Creation Process: A Comprehensive Guide

Navigating the Windows 10 USB Creation Process: A Comprehensive Guide

Introduction

In this auspicious occasion, we are delighted to delve into the intriguing topic related to Navigating the Windows 10 USB Creation Process: A Comprehensive Guide. Let’s weave interesting information and offer fresh perspectives to the readers.

USB Creation  Pc Help Mate

The creation of a bootable USB drive containing the Windows 10 operating system is a fundamental process for various scenarios. Whether it’s a clean installation, system recovery, or upgrading an existing computer, a properly formatted USB drive serves as the bridge between the operating system and your hardware. This guide delves into the intricacies of this process, providing a detailed breakdown of its steps and addressing common concerns.

Understanding the Purpose and Benefits

A Windows 10 USB drive serves as a portable installation medium. It holds the necessary files to install Windows 10 on a computer, offering a convenient and flexible alternative to traditional installation methods like DVDs. Its significance stems from several key benefits:

  • Flexibility: The USB drive can be used on multiple computers, allowing for easy system installations or upgrades without requiring multiple installation media.
  • Portability: Unlike DVDs, USB drives are compact and easily transportable, making them ideal for carrying the operating system with you.
  • Speed: USB drives offer faster data transfer rates compared to DVDs, resulting in a quicker installation process.
  • Reliability: USB drives are generally more robust than DVDs, making them less prone to damage or scratches.
  • Compatibility: Most modern computers support USB boot, making it a widely applicable method for installing Windows 10.

Step-by-Step Guide to Creating a Bootable USB Drive

The process of creating a bootable Windows 10 USB drive involves several distinct steps, each requiring careful attention to detail:

1. Gather Necessary Materials:

  • USB Drive: Select a USB drive with at least 8GB of storage space. Ensure it is formatted as NTFS.
  • Windows 10 ISO File: Download the Windows 10 ISO file from Microsoft’s official website.
  • Computer: Use a computer running Windows 7, 8, or 10 to create the bootable USB drive.

2. Format the USB Drive:

  • Open File Explorer: Navigate to "This PC" or "My Computer" on your computer.
  • Locate the USB Drive: Identify the USB drive in the list of drives.
  • Right-Click and Format: Right-click on the USB drive and select "Format."
  • Choose NTFS: In the format window, select "NTFS" as the file system and ensure "Quick Format" is checked.
  • Start Formatting: Click "Start" to initiate the formatting process.

3. Download and Run the Windows USB/DVD Download Tool:

  • Download the Tool: Visit Microsoft’s website and search for "Windows USB/DVD Download Tool." Download and install the tool.
  • Launch the Tool: Run the tool and follow the on-screen instructions.
  • Select the ISO File: Browse for the downloaded Windows 10 ISO file and select it.
  • Choose USB Device: Select "USB device" as the destination for the bootable drive.
  • Select the USB Drive: Choose the formatted USB drive from the list of available drives.
  • Begin Creation: Click "Begin copying" to start the process of creating the bootable USB drive.

4. Verify the Bootable Drive:

  • Restart the Computer: After the process completes, restart the computer.
  • Enter BIOS/UEFI: Press the designated key (usually F2, F10, or Del) during the boot process to enter the BIOS/UEFI setup.
  • Boot Order: Navigate to the "Boot Order" or "Boot Priority" settings.
  • Select USB Drive: Ensure the USB drive is listed as the first boot device in the order.
  • Save and Exit: Save the changes and exit the BIOS/UEFI setup.

5. Install Windows 10:

  • Boot from USB: The computer should now boot from the USB drive.
  • Installation Process: Follow the on-screen instructions to install Windows 10 on your computer.

Addressing Common Concerns

1. Errors During the Creation Process:

  • Insufficient Storage Space: Ensure the USB drive has sufficient storage space for the Windows 10 installation files.
  • Incorrect File System: The USB drive must be formatted as NTFS.
  • USB Drive Issues: If the USB drive is faulty, try using a different one.
  • Internet Connectivity: A stable internet connection is crucial for downloading the Windows 10 ISO file.

2. Boot Issues:

  • BIOS/UEFI Settings: Ensure the USB drive is set as the first boot device in the BIOS/UEFI settings.
  • USB Drive Compatibility: Some older computers may not support booting from USB drives.
  • Damaged USB Drive: Check for any physical damage to the USB drive.

3. Installation Errors:

  • Compatibility Issues: Ensure the computer meets the minimum system requirements for Windows 10.
  • Driver Conflicts: If encountering driver issues during installation, try using the latest drivers for your hardware.
  • Corrupted Installation Files: Ensure the Windows 10 ISO file is not corrupted.

FAQs

Q: Can I use a USB drive smaller than 8GB?
A: While theoretically possible, it is strongly discouraged. The Windows 10 installation files require a significant amount of storage space, and a smaller drive might not be sufficient.

Q: Can I create a bootable USB drive from a DVD?
A: No, you cannot directly create a bootable USB drive from a DVD. You need to download the Windows 10 ISO file from Microsoft’s website.

Q: Can I create a bootable USB drive on a Mac?
A: Yes, you can create a bootable USB drive on a Mac using a tool called "Boot Camp Assistant."

Q: What happens to the data on my USB drive after creating a bootable drive?
A: All data on the USB drive will be erased during the formatting process. Back up any important data before proceeding.

Q: Can I use the same USB drive to install Windows 10 on multiple computers?
A: Yes, you can use the same USB drive to install Windows 10 on multiple computers.

Tips for Success

  • Use a Reliable USB Drive: Choose a high-quality USB drive from a reputable brand to ensure reliability.
  • Backup Your Data: Always back up important data before formatting the USB drive.
  • Check System Requirements: Ensure your computer meets the minimum system requirements for Windows 10.
  • Download the Latest Drivers: Download the latest drivers for your hardware before installing Windows 10.
  • Use a Stable Internet Connection: A stable internet connection is crucial for downloading the Windows 10 ISO file.

Conclusion

Creating a bootable Windows 10 USB drive is a fundamental process for various scenarios. By following the detailed steps outlined in this guide, users can create a reliable and portable installation medium for Windows 10. Understanding the purpose, benefits, and potential issues associated with this process empowers users to navigate it effectively and ensure a smooth installation experience.

How to create a Windows 10 bootable USB: It's easier than you think - CNET How to Create Windows 10 bootable USB from ISO [Easy Way] How To Create Bootable Usb In Windows 10 Easy Ways 2021  itechhacks
How To Create Bootable USB Drive from Windows 10 ISO With CMD - YouTube How to Create a Windows 10 Bootable USB - Using a Media Creation Tool How to Create Windows 10 Installation USB?
How to Create Windows 10 Bootable USB Flash Drive - YouTube Create windows 10 bootable usb from iso - rewainfo

Closure

Thus, we hope this article has provided valuable insights into Navigating the Windows 10 USB Creation Process: A Comprehensive Guide. We thank you for taking the time to read this article. See you in our next article!

Ny Times Sues Microsoft

ny times sues microsoft

Introduction

With great pleasure, we will explore the intriguing topic related to ny times sues microsoft. Let’s weave interesting information and offer fresh perspectives to the readers.

The New York Times vs. Microsoft: A Battle for the Future of News

New York Times Sues OpenAI And Microsoft Over Copyrighted Infringement

In 2000, the New York Times, a venerable institution in the world of journalism, found itself locked in a legal battle with the burgeoning tech giant, Microsoft. This legal showdown wasn’t about a simple contractual dispute; it was about the future of news dissemination and the very nature of the internet itself.

The crux of the conflict lay in Microsoft’s ambitious plans to launch a new online news service, MSN, which aimed to aggregate and distribute news content from various sources, including The New York Times. The Times, however, was deeply concerned about the potential for its valuable content to be used without proper compensation and control.

The Case for Control: The New York Times’ Perspective

The Times argued that its content was a unique product, carefully crafted by skilled journalists and editors, and deserved to be treated as such. They believed that allowing Microsoft to freely access and distribute their content without proper compensation would devalue their journalistic efforts and undermine their business model.

They also expressed concerns about the potential for Microsoft to manipulate the presentation of their news, potentially distorting its context and influencing public perception. The Times felt that maintaining editorial control over their content was crucial to preserving their journalistic integrity and credibility.

The Case for Open Access: Microsoft’s Counterargument

Microsoft countered that their intention was to provide a valuable service to internet users by aggregating news from diverse sources, including The New York Times, into a convenient and easily accessible platform. They argued that their platform would ultimately benefit both news organizations and readers by expanding the reach and visibility of news content.

They also maintained that their intention was not to undermine the Times’ control over its content, but to provide a platform for its distribution. Microsoft emphasized the importance of open access to information in the digital age and argued that their approach would foster innovation and progress in the online news landscape.

The Legal Battle and its Implications

The legal battle between the two giants played out in the courts, with both sides presenting their arguments and evidence. The case ultimately hinged on the interpretation of copyright law and the legal framework surrounding the distribution of digital content.

The New York Times, ultimately, prevailed. The court ruled in their favor, recognizing the value of their journalistic work and the need for proper compensation and control over its distribution. This victory served as a landmark case, establishing the legal precedent for news organizations to protect their content in the digital age.

The Legacy of the Dispute: A Turning Point in the News Industry

The New York Times vs. Microsoft case marked a pivotal moment in the evolution of the news industry. It highlighted the challenges and opportunities presented by the internet and its impact on traditional media models.

The case forced news organizations to confront the need to adapt to the digital landscape, exploring new business models and strategies for monetizing their content. It also emphasized the importance of maintaining editorial control and ensuring the integrity of news in the face of new platforms and technologies.

FAQs

1. What was the primary issue at the heart of the New York Times vs. Microsoft case?

The primary issue was the control and compensation for the distribution of The New York Times’ content on Microsoft’s online news service, MSN. The Times argued for the right to control how its content was presented and to receive fair compensation for its use.

2. What were the key arguments presented by The New York Times?

The Times argued that its content was a valuable product, created by skilled journalists and editors, and deserved to be treated as such. They expressed concerns about the potential for Microsoft to manipulate the presentation of their news and undermine their editorial control.

3. What were the key arguments presented by Microsoft?

Microsoft argued that their intention was to provide a valuable service to internet users by aggregating news from diverse sources, including The New York Times. They emphasized the importance of open access to information and argued that their platform would benefit both news organizations and readers.

4. What was the outcome of the case?

The New York Times ultimately prevailed, with the court ruling in their favor. The court recognized the value of their journalistic work and the need for proper compensation and control over its distribution.

5. What was the significance of the case for the news industry?

The New York Times vs. Microsoft case marked a turning point in the evolution of the news industry. It highlighted the challenges and opportunities presented by the internet and the need for news organizations to adapt to the digital landscape.

Tips

1. Understand the evolving nature of news distribution: The New York Times vs. Microsoft case highlights the dynamic nature of news dissemination in the digital age. News organizations need to constantly adapt to new platforms and technologies.

2. Protect your intellectual property: The case underscores the importance of protecting intellectual property rights in the digital age. News organizations need to establish clear policies and legal frameworks to ensure proper compensation and control over their content.

3. Embrace innovation while safeguarding journalistic integrity: The case demonstrates the need for a balance between embracing innovation and safeguarding journalistic integrity. News organizations need to find ways to leverage new platforms while maintaining their editorial independence and credibility.

Conclusion

The New York Times vs. Microsoft case serves as a reminder of the ongoing evolution of the news industry in the digital age. It underscores the importance of protecting intellectual property, adapting to new technologies, and ensuring the integrity of journalism in a rapidly changing landscape. This legal battle, while specific to the two companies involved, offers valuable lessons for all news organizations navigating the complexities of the internet and its impact on the future of news.

New York Times Sues OpenAI and Microsoft Over Use of Copyrighted Work - The New York Times NY Times sues OpenAI, Microsoft for infringing copyrighted works  Reuters New York Times sues Microsoft, ChatGPT maker OpenAI, alleging copyright infringement
NY Times sues OpenAI, Microsoft over copyright - RTHK The New York Times sues OpenAI and Microsoft for training AI chatbots on its copyrighted work New York Times sues Microsoft, ChatGPT maker OpenAI over copyright infringement - Apna Tv Plus
New York Times sues Microsoft, OpenAI for copyright infringement - YouTube The New York Times sues OpenAI and Microsoft for copyright infringement  Mashable

Closure

Thus, we hope this article has provided valuable insights into ny times sues microsoft. We thank you for taking the time to read this article. See you in our next article!

Managing User Accounts In Windows 11 Pro: A Comprehensive Guide

Managing User Accounts in Windows 11 Pro: A Comprehensive Guide

Introduction

With enthusiasm, let’s navigate through the intriguing topic related to Managing User Accounts in Windows 11 Pro: A Comprehensive Guide. Let’s weave interesting information and offer fresh perspectives to the readers.

Managing User Accounts in Windows 11 Pro: A Comprehensive Guide

How to manage user account settings on Windows 11  Windows Central

Windows 11 Pro offers robust user account management features, allowing users to create, modify, and remove accounts as needed. Understanding how to effectively manage user accounts is crucial for maintaining system security, privacy, and overall system performance. This guide will delve into the intricacies of removing user accounts from Windows 11 Pro, exploring the various methods, potential scenarios, and considerations involved.

Understanding User Accounts in Windows 11 Pro

Before diving into the process of removing user accounts, it’s essential to grasp the fundamental concepts of user accounts in Windows 11 Pro. A user account serves as a unique identifier for each individual who interacts with the operating system. Each account possesses distinct permissions and settings, enabling users to personalize their experience while maintaining system integrity.

Types of User Accounts in Windows 11 Pro

Windows 11 Pro offers several types of user accounts, each designed for specific purposes and granting different levels of access and control:

  • Administrator: This account holds the highest level of privileges, enabling full control over the system, including installing and uninstalling software, modifying system settings, and managing other user accounts.
  • Standard: This account offers basic access to the system, allowing users to work with files, browse the internet, and utilize standard applications. It lacks the ability to make system-wide changes or install software without administrative approval.
  • Guest: This temporary account provides limited access to the system, restricting users from making permanent changes or accessing sensitive data. It is typically used for short-term access by visitors or for testing purposes.
  • Local Account: This account is tied to a specific device and does not rely on an online service like Microsoft Account for authentication. Local accounts are ideal for users who prefer not to connect their device to a Microsoft Account or who require offline access.
  • Microsoft Account: This account connects to an online Microsoft account, syncing settings, data, and applications across multiple devices. Microsoft Accounts offer a convenient way to manage user accounts and access online services.

Why Remove User Accounts from Windows 11 Pro?

Removing user accounts from Windows 11 Pro can be necessary for a variety of reasons, including:

  • Improving System Performance: Unnecessary user accounts can consume system resources, potentially slowing down the overall performance of the system. Removing unused accounts can free up resources and optimize system responsiveness.
  • Maintaining Security: Inactive or compromised user accounts can serve as potential security vulnerabilities. Removing such accounts mitigates the risk of unauthorized access or malicious activities.
  • Managing Storage Space: User accounts, especially those with large amounts of data, can occupy significant storage space. Removing unused accounts can free up valuable storage space, particularly on devices with limited storage capacity.
  • Privacy Concerns: Removing user accounts can enhance privacy by eliminating the possibility of unauthorized access to personal data or settings.
  • Account Management: Removing a user account may be necessary to reconfigure the system for a new user or to simplify account management for a small team or family.

Methods to Remove User Accounts from Windows 11 Pro

Windows 11 Pro provides multiple ways to remove user accounts, each with its own advantages and considerations:

1. Using Settings App

  • Navigate to Settings > Accounts > Family & other users.
  • Select the user account you wish to remove.
  • Click on Remove.
  • Confirm the action by clicking Remove account.

2. Using Control Panel

  • Open Control Panel and navigate to User Accounts.
  • Click on Manage another account.
  • Select the account you wish to remove.
  • Click on Delete the account.
  • Confirm the action by clicking Delete the account.

3. Using Command Prompt

  • Open Command Prompt as administrator.
  • Execute the following command, replacing "username" with the actual username:
    net user username /delete
  • Confirm the deletion by typing "Y" and pressing Enter.

4. Using Local Users and Groups

  • Open Local Users and Groups by searching for it in the Start menu.
  • Navigate to Users.
  • Right-click on the user account you wish to remove and select Delete.
  • Confirm the action by clicking Yes.

Important Considerations

Before removing a user account from Windows 11 Pro, it’s crucial to consider the following:

  • Data Ownership: Ensure you have proper authorization to remove the account and that all associated data is backed up or transferred to another location.
  • Account Type: Removing an administrator account can significantly impact system functionality. Ensure you have alternative administrative accounts before removing the primary administrator.
  • Software Licenses: Some software applications may be tied to specific user accounts. Removing the account may affect the ability to use those applications.
  • Shared Files and Folders: Removing a user account may affect access to shared files and folders. Consider transferring ownership of shared data before removing the account.

FAQs on Removing User Accounts from Windows 11 Pro

1. Can I remove my own account?

Yes, you can remove your own account, but you’ll need to create a new administrator account beforehand to avoid losing access to the system.

2. What happens to the user’s data when I remove an account?

The user’s data, including files, settings, and applications, will be permanently deleted. Therefore, it’s crucial to back up or transfer the data before removing the account.

3. Can I recover a deleted account?

Once an account is deleted, it cannot be recovered. However, the associated data may still be accessible using data recovery tools.

4. What happens to the account if I only log out instead of deleting it?

Logging out simply disconnects the user from the system. The account remains active, and all associated data is preserved.

5. Can I remove a Microsoft Account from my device?

Yes, you can remove a Microsoft Account from your device. However, this will also remove all associated settings, data, and applications.

Tips for Removing User Accounts from Windows 11 Pro

  • Back up Data: Always back up important data before removing a user account to prevent accidental loss.
  • Create a New Administrator Account: If removing the primary administrator account, create a new administrator account beforehand to avoid losing access to the system.
  • Check for Shared Files and Folders: Transfer ownership of shared files and folders before removing an account to avoid disrupting access.
  • Review Software Licenses: Ensure that removing an account will not affect the ability to use licensed software applications.
  • Consider Using a Third-Party Tool: For complex scenarios or large data transfers, consider using a third-party tool to simplify the process of removing user accounts and managing data.

Conclusion

Removing user accounts from Windows 11 Pro is a crucial aspect of system management, enabling users to maintain security, optimize performance, and manage storage space effectively. By understanding the different types of user accounts, the various methods for removal, and the important considerations involved, users can confidently manage user accounts and ensure a smooth and secure computing experience. Always prioritize data backup and proper authorization before removing a user account, and consult the official Windows documentation or seek assistance from Microsoft support for complex scenarios.

How to Manage User Account Settings in Windows 11 Manage user accounts Windows 11  How to Manage Windows 11 password  Windows 11 Credentials Manage Your Microsoft Account in Windows 11 โ€“ windows.do
How to Add a Local User Account on Windows 11 How to Switch User Accounts on Windows 11 How to view all user accounts on Windows 11 - Pureinfotech
Windows 11 Accounts Hereโ€™s What Windows 11โ€™s Settings App Looks Like - TECHTELEGRAPH

Closure

Thus, we hope this article has provided valuable insights into Managing User Accounts in Windows 11 Pro: A Comprehensive Guide. We appreciate your attention to our article. See you in our next article!

Understanding And Accessing Disk Drives In Windows 10

Understanding and Accessing Disk Drives in Windows 10

Introduction

In this auspicious occasion, we are delighted to delve into the intriguing topic related to Understanding and Accessing Disk Drives in Windows 10. Let’s weave interesting information and offer fresh perspectives to the readers.

Understanding and Accessing Disk Drives in Windows 10

How to Access an External Hard Drive on Windows 10

Windows 10, like its predecessors, utilizes a hierarchical file system to organize data. This system assigns letters to individual drives, such as "C," "D," "E," and so on, to distinguish them. These letters, often referred to as "drive letters," represent physical hard drives, external storage devices, or even network shares.

The "F" drive, in this context, simply refers to a specific drive in the system. It could be a hard drive installed in the computer, an external USB drive, a network drive, or even a virtual drive created by software. The exact nature of the "F" drive depends on the user’s hardware configuration and the software installed on their computer.

Accessing Drive "F" in Windows 10:

To access the contents of the "F" drive in Windows 10, users can follow these steps:

  1. Open File Explorer: This can be done by clicking the "File Explorer" icon on the taskbar or by pressing the Windows key + E.
  2. Locate the "F" Drive: In the left pane of File Explorer, under "This PC," look for the "F" drive listed.
  3. Click on the "F" Drive: Clicking the "F" drive entry will open its contents in the main window of File Explorer.

Importance of Drive Letters:

Drive letters play a crucial role in Windows 10’s file system. They act as unique identifiers, allowing the operating system to easily locate and access data stored on different drives. This system simplifies data management and ensures that files are stored and retrieved correctly.

Common Scenarios Involving Drive "F":

  • External Hard Drive: A common scenario is where the "F" drive represents an external hard drive connected to the computer via USB or other interfaces. This provides additional storage space for backups, large files, or media libraries.
  • Network Drive: The "F" drive could also be a network drive, allowing access to shared folders on another computer or a server. This enables collaboration and file sharing among users on a network.
  • Virtual Drive: Some software applications, such as virtualization software or disk imaging tools, may create virtual drives that appear as "F" or other letters. These virtual drives can be used to store virtual machines, disk images, or other data.

Factors Influencing Drive Letter Assignment:

Drive letters are typically assigned in a sequential manner, starting with "C" for the primary hard drive. However, this order can be influenced by several factors:

  • Hardware Configuration: The number and type of drives connected to the computer affect drive letter assignment.
  • Operating System Settings: Windows 10 allows users to manually change drive letters, although this should be done with caution.
  • Software Applications: Some applications may create virtual drives or modify drive letter assignments.

Troubleshooting Drive Access Issues:

If you are unable to access the "F" drive, the following troubleshooting steps may be helpful:

  • Check Drive Connection: Ensure the physical connection of the drive is secure and that the drive is powered on.
  • Check Drive Health: Use Windows built-in tools like "Disk Management" to check for errors or corruption on the drive.
  • Update Drivers: Outdated drivers for the drive or its controller can cause access issues. Update drivers to the latest versions.
  • Check for Malware: Malware can interfere with drive access. Run a full system scan with a reputable antivirus program.

FAQs Regarding Drive "F" and Drive Letters in Windows 10:

Q: What happens if I change the drive letter of my "F" drive?

A: Changing a drive letter can potentially disrupt applications or data stored on the drive, especially if the drive is used by other programs. It is generally recommended to avoid changing drive letters unless absolutely necessary.

Q: Can I have multiple drives with the same drive letter?

A: Windows 10 does not allow multiple drives to have the same drive letter. If you attempt to assign the same letter to two drives, the operating system will assign a different letter to one of them.

Q: How do I create a new drive letter?

A: You can create a new drive letter using the "Disk Management" tool in Windows 10. This involves partitioning an unallocated space on a drive and assigning a new drive letter to the partition.

Q: Why is my "F" drive missing?

A: There are several reasons why a drive might be missing. It could be disconnected, corrupted, or hidden by the operating system. Check for hardware issues, run a disk check, or use the "Disk Management" tool to investigate.

Tips for Managing Drive Letters in Windows 10:

  • Avoid Changing Drive Letters: Unless absolutely necessary, avoid changing drive letters to prevent potential issues with applications or data.
  • Use Drive Management Tools: Utilize Windows 10’s "Disk Management" tool to manage partitions, assign drive letters, and troubleshoot drive issues.
  • Check for Drive Errors: Regularly check for errors on your drives using tools like "Check Disk" or "CHKDSK" to prevent data loss.

Conclusion:

Understanding the concept of drive letters and their role in Windows 10’s file system is crucial for efficient data management. While the "F" drive can represent a variety of storage devices, its importance lies in providing a clear and organized way to access data. By understanding how drive letters are assigned, managed, and accessed, users can navigate their computer system more effectively and maintain data integrity.

Windows 10 Disk Management Explained  Sweetwater How to perform Windows 10 disk optimization  TechTarget How to Access an External Hard Drive on Windows 10
Disk info windows 10 - forwardfad Windows 10 Disk Management: Your Ultimate Disk Management Guide How to partition a hard drive in Windows 10 - IONOS
How To Access Hard Disk Drive On Windows 10  Robots.net How to perform Windows 10 disk optimization  TechTarget

Closure

Thus, we hope this article has provided valuable insights into Understanding and Accessing Disk Drives in Windows 10. We appreciate your attention to our article. See you in our next article!

Understanding Window Tinting Costs: A Guide To Finding The Best Value

Understanding Window Tinting Costs: A Guide to Finding the Best Value

Introduction

With great pleasure, we will explore the intriguing topic related to Understanding Window Tinting Costs: A Guide to Finding the Best Value. Let’s weave interesting information and offer fresh perspectives to the readers.

Understanding Window Tinting Costs: A Guide to Finding the Best Value

what is the cost to tint home windows - Jenni Brothers

Window tinting is a popular automotive upgrade, offering numerous benefits including reduced glare, enhanced privacy, and protection from harmful UV rays. However, navigating the pricing landscape can be daunting, with costs varying significantly depending on factors like vehicle size, tint darkness, film type, and location. This comprehensive guide aims to demystify window tinting costs, equipping you with the knowledge to make informed decisions and find the best value for your investment.

Factors Influencing Window Tinting Prices

Several key factors determine the price of window tinting:

1. Vehicle Size and Window Area: Larger vehicles with more windows naturally require more film and labor, resulting in higher costs.

2. Tint Darkness (VLT): The percentage of visible light transmission (VLT) dictates the tint’s darkness. Darker tints, while offering greater privacy and heat reduction, typically cost more due to the higher quality film required.

3. Film Type and Quality: Various film types exist, each offering unique benefits and price points. Ceramic films, known for their superior heat rejection and clarity, are generally more expensive than standard dyed films.

4. Installation Location and Experience: Labor costs can vary significantly based on the shop’s location, reputation, and installer’s experience.

5. Additional Features: Some shops offer additional services like ceramic coating, which adds to the overall cost.

Typical Price Ranges for Window Tinting:

It is crucial to remember that these are general estimates, and actual prices may vary based on the factors mentioned above.

  • Basic Dyed Film: $150 – $350 for a standard sedan.
  • Premium Ceramic Film: $300 – $600 for a standard sedan.
  • Full Car Tint (including windshield): $400 – $1000, depending on the film type and vehicle size.

Finding the Best Value in Window Tinting:

  1. Research Local Shops: Seek recommendations from friends, family, or online reviews. Compare multiple shops to understand their pricing structures, film options, and installation guarantees.

  2. Inquire About Film Quality: Understand the specific film type, its VLT, and warranty information. Don’t hesitate to ask about the film’s heat rejection capabilities, scratch resistance, and UV protection.

  3. Request Detailed Estimates: Ensure the quote includes all costs, such as film, labor, and any additional services. Be wary of excessively low prices, as they may indicate lower-quality film or inexperienced installers.

  4. Consider the Long-Term Value: While premium films may have a higher upfront cost, they often offer superior performance and longevity, potentially saving you money in the long run.

  5. Negotiate: Don’t be afraid to negotiate for a better price, especially if you’re getting multiple services or have a good relationship with the shop.

FAQs about Window Tinting Costs:

1. Is it legal to tint all windows? Laws regarding window tint darkness vary by state and region. It’s essential to check your local regulations before getting your windows tinted.

2. What is the warranty on window tinting? Warranties typically cover defects in the film and installation. Check the specific terms and duration of the warranty offered by the shop.

3. How long does window tinting last? With proper care, high-quality film can last for several years. However, factors like exposure to sunlight and wear and tear can affect its lifespan.

4. Can I tint my windshield? While tinting the top portion of the windshield is legal in some states, it’s crucial to adhere to local regulations and ensure the tint meets safety standards.

5. What are the benefits of ceramic film? Ceramic film offers superior heat rejection, UV protection, and clarity compared to standard dyed films.

Tips for Getting the Best Value in Window Tinting:

  1. Schedule your appointment in advance: This allows for better planning and potential discounts.

  2. Consider seasonal promotions: Many shops offer special discounts during certain times of the year.

  3. Ask about financing options: Some shops offer financing plans to make window tinting more affordable.

  4. Maintain your tinted windows: Proper cleaning and care can prolong the life of your tint and maintain its appearance.

Conclusion:

Understanding the factors influencing window tinting prices is crucial for finding the best value. By comparing shops, researching film types, and negotiating prices, you can ensure a quality installation that meets your needs and budget. Remember, investing in high-quality film and experienced installation can provide long-term benefits, enhancing your driving experience and protecting your vehicle’s interior.

Window Tinting Pricing Poster - Marketing Tint Window Tinting: How Much Does It Cost? - The Knowledge Hub How Much Does Window Tinting Cost? โ€“ A Comprehensive Guide - The Enlightened Mindset
WINDOW TINTING โ€“ classicappreciation The Ultimate Guide to Understanding the Cost of Car Window Tinting - The Enlightened Mindset Window Tinting  Snow's Auto
Car Window Tinting Prices: A Complete Guide How Much Does Window Tinting Cost? โ€“ vinylfrog

Closure

Thus, we hope this article has provided valuable insights into Understanding Window Tinting Costs: A Guide to Finding the Best Value. We appreciate your attention to our article. See you in our next article!