Archives February 2024

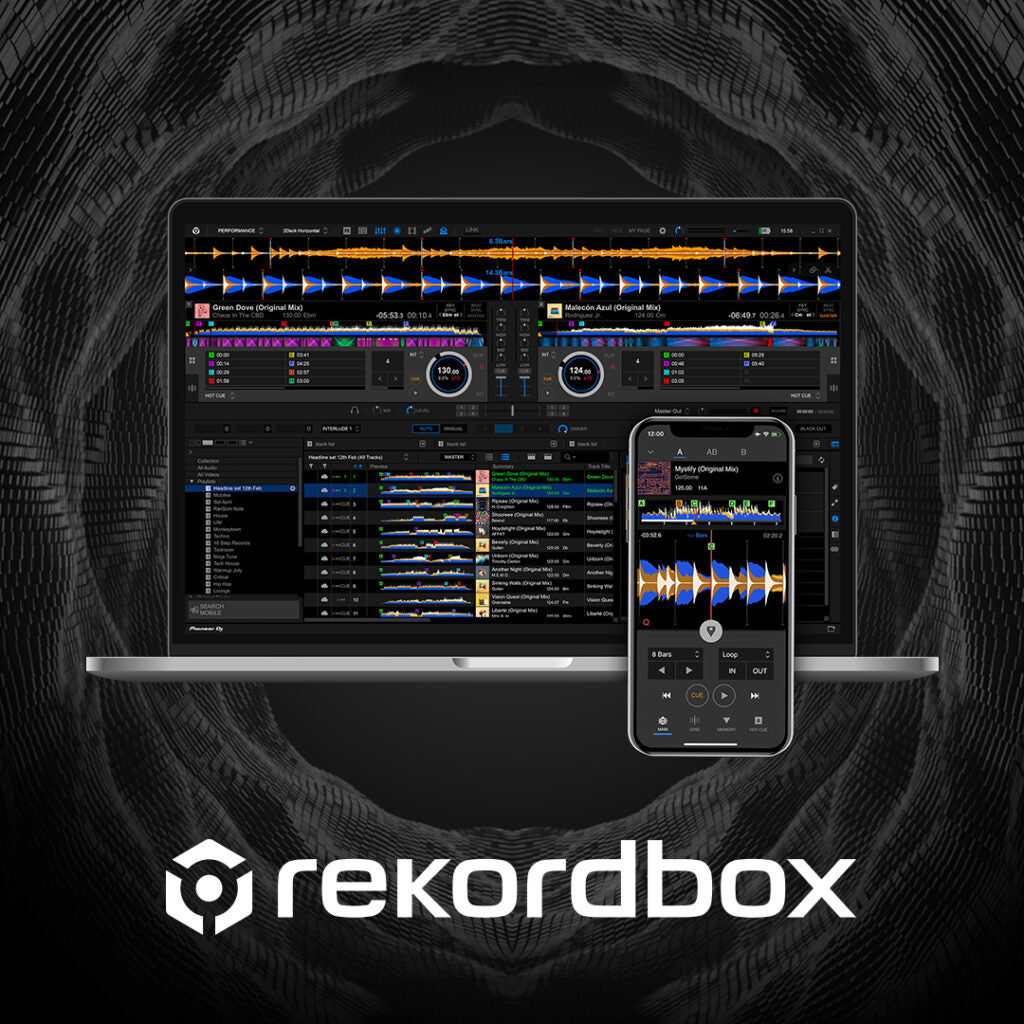
Rekordbox 6: A Comprehensive Guide For Windows 10 Users

Rekordbox 6: A Comprehensive Guide for Windows 10 Users

Introduction

In this auspicious occasion, we are delighted to delve into the intriguing topic related to Rekordbox 6: A Comprehensive Guide for Windows 10 Users. Let’s weave interesting information and offer fresh perspectives to the readers.

Rekordbox 6: A Comprehensive Guide for Windows 10 Users

Rekordbox 6 todo lo que necesitas saber - YouTube

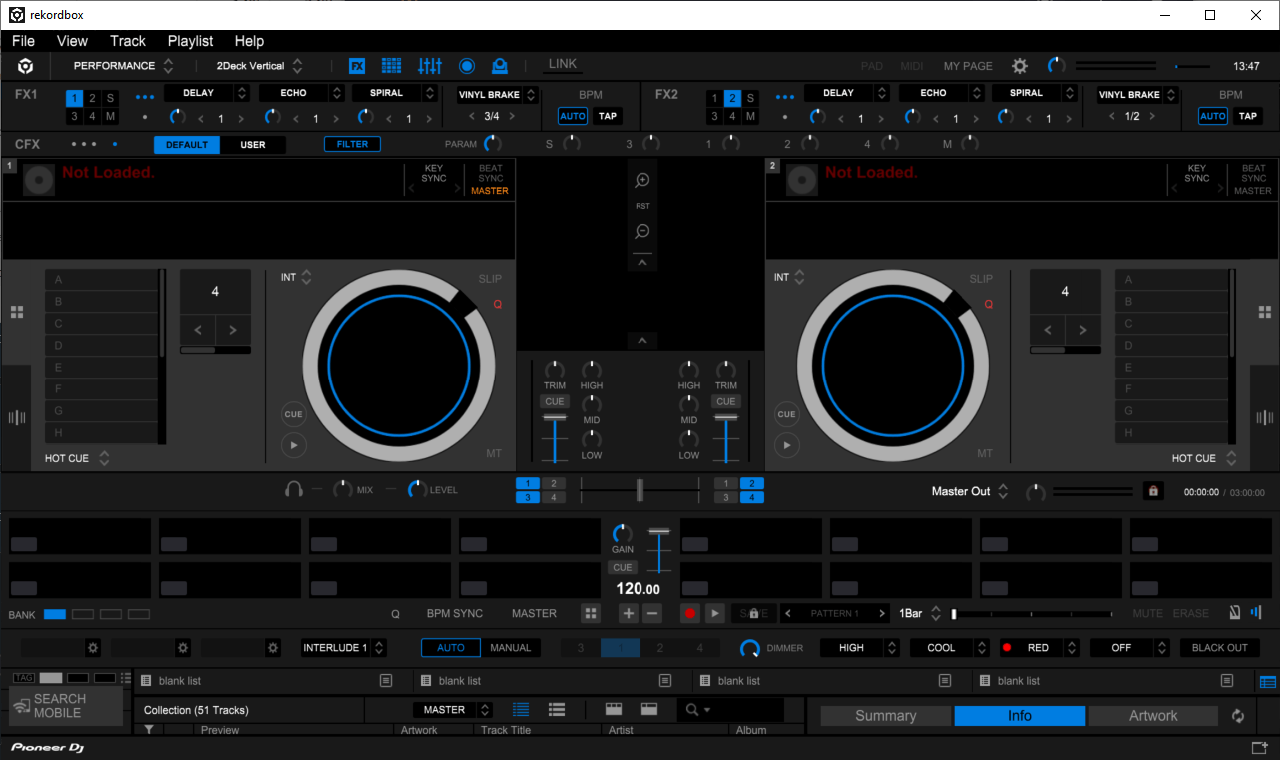
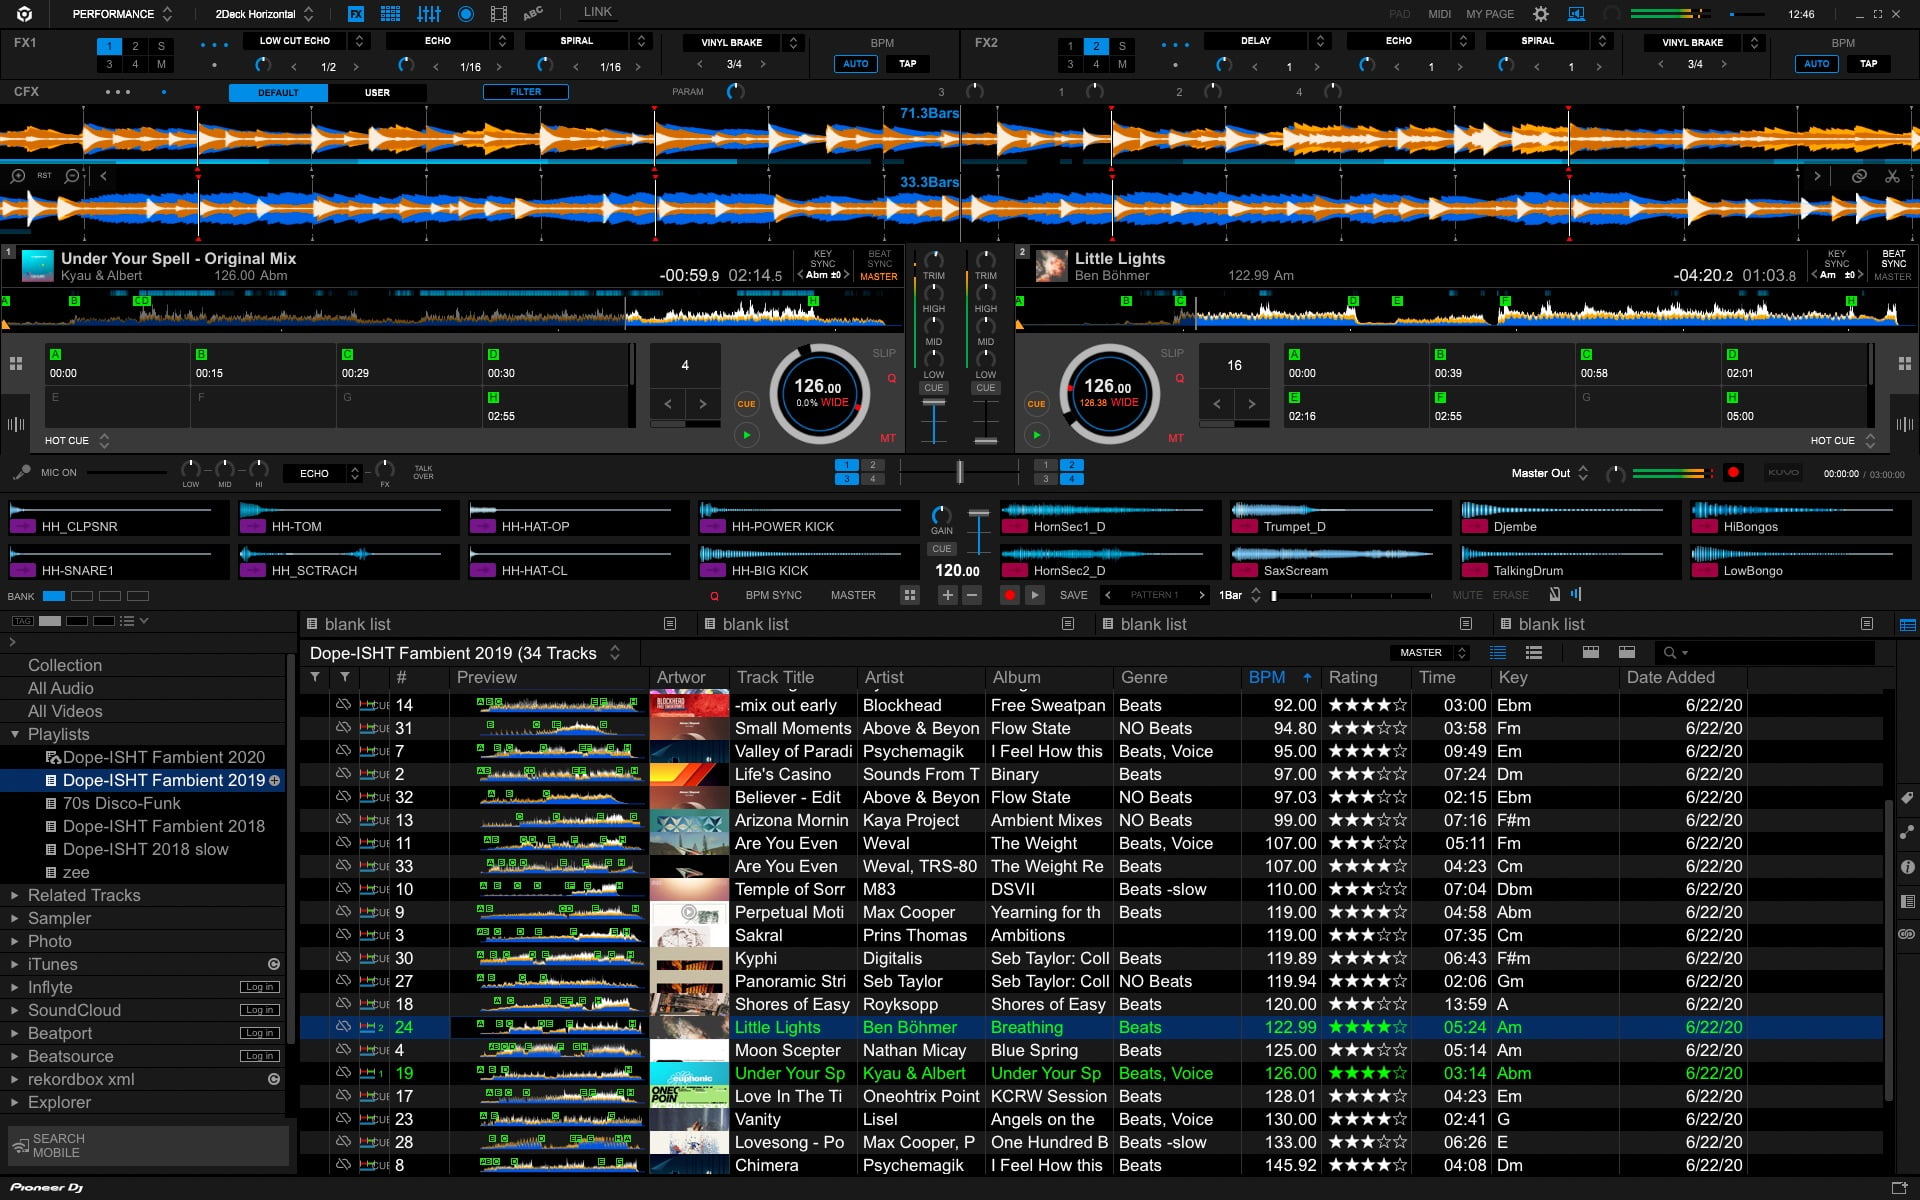
Rekordbox, a powerful music management and performance preparation software developed by Pioneer DJ, has become a cornerstone for DJs and music producers worldwide. Its comprehensive features, intuitive interface, and seamless integration with Pioneer DJ hardware have solidified its position as a leading solution for music organization and performance. This article delves into the capabilities of Rekordbox 6, exploring its key features, benefits, and how it empowers DJs and music enthusiasts on Windows 10.

Understanding the Power of Rekordbox 6

Rekordbox 6 goes beyond basic music organization, offering a robust suite of tools designed to enhance the DJ experience. It enables users to:

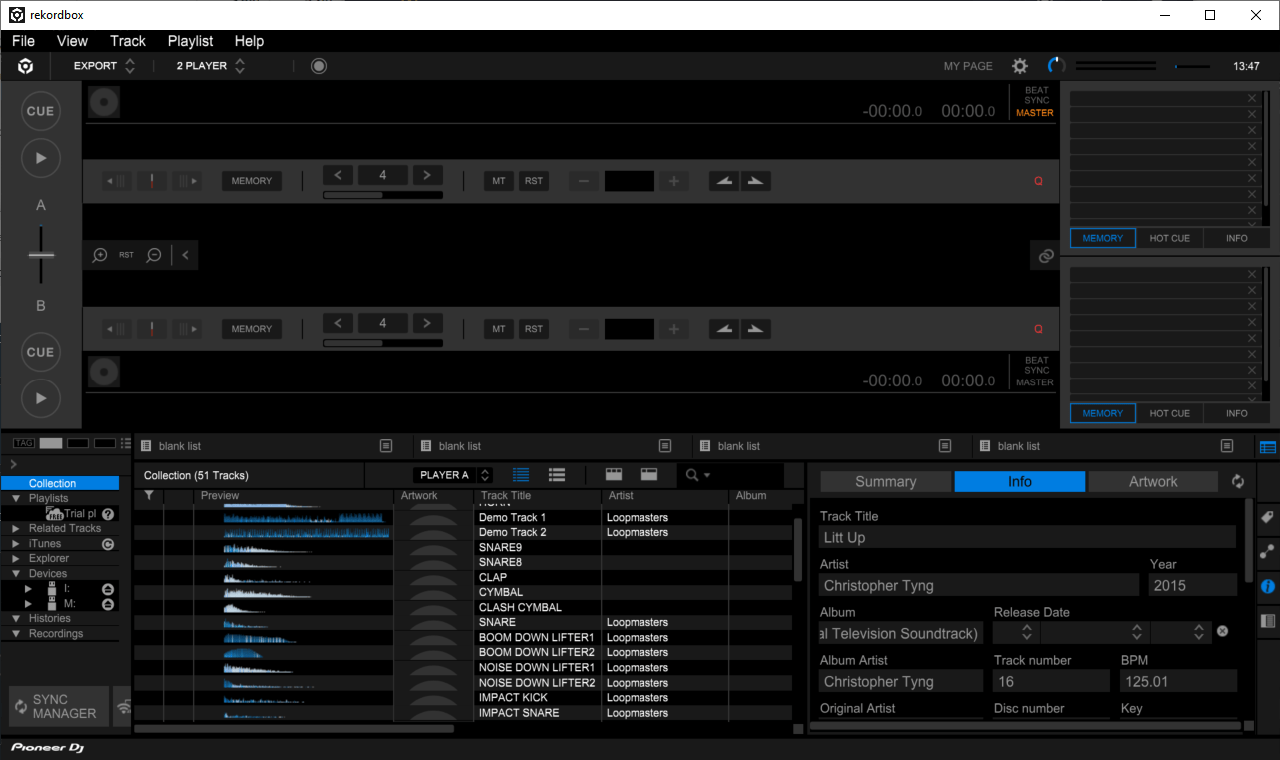
  • Import and Organize Music: Effortlessly import music from various sources, including CD, USB drive, or hard drive. Create and manage playlists, sort tracks by genre, artist, BPM, and other criteria.
  • Analyze Tracks: Rekordbox analyzes each track, extracting essential information like BPM, key, and beatgrid. This data is crucial for seamless mixing and blending during performances.
  • Prepare Sets: Create and edit playlists, arrange track order, and add cue points, loops, and hot cues for effortless transitions and dynamic performances.
  • Performance Mode: Rekordbox seamlessly transitions into performance mode, providing a dedicated interface for live mixing, cueing, and controlling tracks.
  • Hardware Integration: Rekordbox seamlessly integrates with Pioneer DJ hardware, including controllers, mixers, and CDJs, offering unparalleled control and responsiveness during performances.
  • Cloud Library Management: Rekordbox allows users to synchronize their music library across multiple devices using the cloud, ensuring access to their tracks wherever they go.
  • Advanced Features: Rekordbox offers advanced features such as beatmatching, key matching, and beat-sync, simplifying the mixing process and enhancing creative possibilities.
  • Performance Recording: Capture and record your performances directly within Rekordbox, allowing you to share your mixes, analyze your sets, and document your progress.

Benefits of Using Rekordbox 6

The benefits of using Rekordbox 6 extend beyond its feature-rich functionality, offering significant advantages for DJs and music producers:

  • Enhanced Workflow: Rekordbox streamlines the DJ workflow, allowing users to organize their music libraries, prepare sets, and manage performances efficiently.
  • Seamless Integration: The integration with Pioneer DJ hardware ensures seamless control and responsiveness during performances, eliminating technical hurdles and maximizing creative potential.
  • Professional Performance: Rekordbox empowers DJs to deliver polished and professional performances, leveraging advanced features for smooth transitions, creative mixing, and dynamic track selection.
  • Creative Exploration: The software encourages creative exploration, enabling DJs to experiment with different mixing techniques, create unique blends, and personalize their performances.
  • Music Management: Rekordbox provides a robust music management solution, enabling users to organize, categorize, and access their music libraries with ease.

Key Features of Rekordbox 6

Rekordbox 6 is packed with features designed to enhance the DJ experience:

  • Beatgrid Editor: The Beatgrid Editor allows users to manually adjust the beatgrid of tracks, ensuring accurate beatmatching and smooth transitions.
  • Cue Point Management: Create and edit cue points, marking specific points within tracks for seamless transitions and dynamic performances.
  • Loop Management: Define and edit loops, allowing DJs to repeat sections of tracks for creative effects and extended mixes.
  • Hot Cue Management: Assign hot cues to specific points within tracks, enabling DJs to trigger these points with a single button press for dynamic transitions and creative effects.
  • Performance Pads: Utilize performance pads to trigger hot cues, loops, and samples, adding dynamic elements to performances and enhancing creativity.
  • Sample Player: Load and trigger samples during performances, adding layers of sound and textures to enhance mixes and create unique soundscapes.
  • Track Analysis: Rekordbox automatically analyzes tracks, extracting essential information such as BPM, key, and beatgrid for seamless mixing and blending.
  • Beat Matching and Key Matching: Rekordbox simplifies the mixing process with automatic beatmatching and key matching features, ensuring seamless transitions and harmonic blends.
  • Performance Mode: A dedicated performance mode provides a streamlined interface for live mixing, cueing, and controlling tracks.
  • Hardware Integration: Seamless integration with Pioneer DJ hardware, including controllers, mixers, and CDJs, for precise control and responsiveness during performances.

FAQs about Rekordbox 6 for Windows 10

1. Is Rekordbox 6 free to download for Windows 10?

Rekordbox 6 offers a free version with limited features. To access all the features, including advanced performance tools, cloud library management, and full hardware integration, users need to purchase a license.

2. What are the system requirements for running Rekordbox 6 on Windows 10?

Rekordbox 6 requires a Windows 10 operating system with a minimum of 4 GB of RAM, a 2.5 GHz processor, and 1 GB of free hard disk space.

3. Can I use Rekordbox 6 with other DJ hardware besides Pioneer DJ?

While Rekordbox 6 is primarily designed for integration with Pioneer DJ hardware, it can be used with other DJ controllers and mixers through MIDI mapping. However, the level of integration and functionality may vary depending on the hardware.

4. How can I upgrade from Rekordbox 5 to Rekordbox 6?

Users with a Rekordbox 5 license can upgrade to Rekordbox 6 by purchasing an upgrade license. This typically involves a discounted price compared to a full license purchase.

5. What are the benefits of using Rekordbox 6 over other DJ software?

Rekordbox 6 offers a comprehensive feature set, intuitive interface, and seamless integration with Pioneer DJ hardware, making it a popular choice for DJs of all levels. Its focus on performance preparation, track analysis, and hardware integration sets it apart from other DJ software.

Tips for Using Rekordbox 6 Effectively

  • Organize your music library: Create playlists, categorize tracks, and utilize the search function to quickly locate specific tracks.
  • Analyze your tracks: Ensure all tracks are analyzed to extract essential information like BPM, key, and beatgrid for seamless mixing.
  • Experiment with features: Explore the various features like cue points, loops, hot cues, and performance pads to personalize your performances.
  • Practice with hardware: Practice using Rekordbox with your Pioneer DJ hardware to become familiar with its controls and functionalities.
  • Stay updated: Keep your Rekordbox software up to date with the latest version to benefit from new features and bug fixes.

Conclusion

Rekordbox 6 offers a comprehensive and powerful solution for DJs and music producers on Windows 10. Its user-friendly interface, advanced features, and seamless integration with Pioneer DJ hardware make it a valuable tool for managing music libraries, preparing sets, and delivering dynamic performances. Whether you are a beginner DJ or a seasoned professional, Rekordbox 6 empowers you to elevate your DJing experience and unleash your creative potential.

rekordbox ver. 6 subscription plans explained Rekordbox - Download Rekordbox 6.6.5, 3.0 for Windows Pioneer DJ Rekordbox 6 Professional v6.8.4, Software de dj profesional โ€บ Descargaspcpro
Top 5 New Features in Rekordbox 6 - The DJ Guide Rekordbox 6.1.1 No waveform / Beatgrid โ€“ Pioneer DJ Like It Or Not, Rekordbox 6 Has Just Started The Next DJ Music Revolution - Digital DJ Tips
Rekordbox v6 - A Step Into The Future? Rekordbox - Download Rekordbox 6.6.5, 3.0 for Windows

Closure

Thus, we hope this article has provided valuable insights into Rekordbox 6: A Comprehensive Guide for Windows 10 Users. We appreciate your attention to our article. See you in our next article!

Removing Unwanted Accounts From The Windows 11 Login Screen: A Comprehensive Guide

Removing Unwanted Accounts from the Windows 11 Login Screen: A Comprehensive Guide

Introduction

With great pleasure, we will explore the intriguing topic related to Removing Unwanted Accounts from the Windows 11 Login Screen: A Comprehensive Guide. Let’s weave interesting information and offer fresh perspectives to the readers.

Removing Unwanted Accounts from the Windows 11 Login Screen: A Comprehensive Guide

How To Remove Microsoft Account From Windows 11 Guide  yorketech

The Windows 11 login screen serves as the initial point of access to your computer. It displays a list of user accounts, allowing you to choose which one to log in with. While this feature is convenient for multi-user environments, it can become cluttered and potentially insecure if inactive or unwanted accounts remain visible. Removing these extraneous accounts from the login screen enhances security, streamlines the login process, and improves overall user experience.

Understanding the Importance of Account Management

Maintaining a clean and organized login screen is crucial for several reasons:

  • Security: Inactive or compromised accounts can be potential entry points for malicious actors. Removing them eliminates this vulnerability and strengthens overall system security.
  • Privacy: Having numerous accounts displayed on the login screen can compromise user privacy, especially in shared environments. Removing unnecessary accounts helps safeguard personal information.
  • Efficiency: A cluttered login screen with multiple accounts can slow down the login process, leading to frustration and decreased productivity. Removing irrelevant accounts streamlines the login experience.
  • Clarity: A streamlined login screen with only necessary accounts improves clarity and reduces confusion, especially for new users or those unfamiliar with multiple accounts.

Methods for Removing Accounts from the Login Screen

There are several methods for removing accounts from the Windows 11 login screen, each suited to different scenarios:

1. Removing Local Accounts:

  • Through Settings:
    • Open Settings by pressing Windows Key + I.
    • Navigate to Accounts > Family & other users.
    • Select the account you wish to remove and click Remove.
    • Confirm the removal by clicking Remove account.
  • Using Control Panel:
    • Open Control Panel by searching for it in the Start Menu.
    • Navigate to User Accounts > User Accounts.
    • Select the account you wish to remove and click Manage another account.
    • Click Remove the account.
    • Confirm the removal by clicking Delete the account.

2. Removing Microsoft Accounts:

  • Through Settings:
    • Open Settings by pressing Windows Key + I.
    • Navigate to Accounts > Family & other users.
    • Select the Microsoft account you wish to remove.
    • Click Remove.
    • Confirm the removal by clicking Remove account.

3. Hiding Accounts Temporarily:

  • Through Settings:
    • Open Settings by pressing Windows Key + I.
    • Navigate to Accounts > Sign-in options.
    • Under Privacy, toggle the switch for Show accounts on the sign-in screen to Off.
    • This hides all accounts temporarily, but they can be easily restored by toggling the switch back on.

4. Advanced Techniques for Managing Accounts:

  • Local Group Policy Editor: This advanced tool allows you to manage user accounts and their login visibility with greater control. Access it by searching for "gpedit.msc" in the Start Menu.
  • Registry Editor: The Registry Editor is a powerful tool for modifying system settings, including account management. However, it requires advanced knowledge and should be used with caution.

Important Considerations:

  • Account Ownership: Ensure you have administrative privileges to remove accounts.
  • Data Loss: Removing an account will also delete all associated data, including files, settings, and applications. Back up important data before removing an account.
  • System Impact: Removing accounts can affect system functionality, especially if it’s a user account with administrative privileges.

FAQs

Q: Can I remove my own account from the login screen?

A: No, you cannot remove your own account from the login screen. You can only remove other user accounts.

Q: What happens to the data when I remove an account?

A: The data associated with the removed account will be permanently deleted. It is highly recommended to back up any important data before removing an account.

Q: Can I restore a removed account?

A: Once an account is removed, it cannot be restored. However, you can create a new account with the same username and password.

Q: Why are some accounts not visible on the login screen?

A: Accounts that are disabled or hidden through specific settings might not be visible on the login screen.

Q: What are the security implications of leaving unwanted accounts on the login screen?

A: Unwanted accounts can be a security risk as they can potentially be used by malicious actors to gain unauthorized access to the system.

Tips for Account Management

  • Regularly review your login screen and remove any unnecessary accounts.
  • Use strong passwords for all accounts.
  • Enable two-factor authentication for added security.
  • Keep your operating system and software up to date with the latest security patches.
  • Be cautious about clicking on suspicious links or downloading files from unknown sources.

Conclusion

Removing unnecessary accounts from the Windows 11 login screen is a crucial step in maintaining a secure, efficient, and user-friendly computing environment. By understanding the importance of account management, utilizing appropriate methods, and following best practices, users can ensure a streamlined login experience and enhance the overall security of their system.

How to delete the unwanted Windows 11 User Account - YouTube How to Remove a Microsoft Account from Windows 11 Remove Account From Windows 11: Best Ways to Properly Do It
How To Remove Other User Accounts From Windows 11 - YouTube How to Remove a Microsoft Account from Windows 11 How to Remove Microsoft Account from Windows 11? - The Microsoft Windows11
How To Delete A User Account On Windows 11 - YouTube How to remove Microsoft account in Windows 11

Closure

Thus, we hope this article has provided valuable insights into Removing Unwanted Accounts from the Windows 11 Login Screen: A Comprehensive Guide. We hope you find this article informative and beneficial. See you in our next article!

Unlinking Your Microsoft Account From Windows 11 Edge: A Comprehensive Guide

Unlinking Your Microsoft Account from Windows 11 Edge: A Comprehensive Guide

Introduction

With great pleasure, we will explore the intriguing topic related to Unlinking Your Microsoft Account from Windows 11 Edge: A Comprehensive Guide. Let’s weave interesting information and offer fresh perspectives to the readers.

Unlinking Your Microsoft Account from Windows 11 Edge: A Comprehensive Guide

How to unlink microsoft account from computer - kartzoom

Microsoft Edge, the default web browser on Windows 11, offers seamless integration with your Microsoft account, providing a streamlined experience for syncing browsing data, bookmarks, passwords, and other preferences across devices. However, there are situations where disassociating your Microsoft account from Edge might be desirable. This guide aims to provide a clear and comprehensive explanation of how to unlink your Microsoft account from Windows 11 Edge, outlining the benefits and considerations involved.

Understanding the Connection:

Before delving into the process of unlinking, it’s crucial to grasp the nature of the connection between your Microsoft account and Edge. When you sign in to Edge with your Microsoft account, the browser utilizes this information to:

  • Sync your browsing data: This includes your browsing history, open tabs, saved passwords, and cookies, ensuring a consistent experience across all your Windows 11 devices.
  • Access your Microsoft services: You can effortlessly access services like OneDrive, Outlook, and other Microsoft apps directly from Edge.
  • Personalize your browsing experience: Edge utilizes your Microsoft account data to offer tailored recommendations, suggestions, and personalized settings.

Reasons for Unlinking:

While the integration offers convenience, there are specific scenarios where disassociating your Microsoft account from Edge might be advantageous:

  • Privacy concerns: Some users may prefer to maintain a higher level of privacy by avoiding the syncing of their browsing data and online activities with their Microsoft account.
  • Multiple user accounts: If you share a computer with others, unlinking your Microsoft account from Edge ensures that your browsing data and preferences remain separate.
  • Switching accounts: If you are transitioning to a different Microsoft account or wish to use Edge without any account association, unlinking is necessary.
  • Troubleshooting issues: In some cases, unlinking your Microsoft account from Edge can help resolve syncing issues, browser errors, or performance problems.

Step-by-Step Guide to Unlinking:

  1. Open Microsoft Edge: Launch the Edge browser on your Windows 11 computer.
  2. Access the Settings Menu: Click on the three horizontal dots located in the top-right corner of the browser window. This will open the Edge settings menu.
  3. Navigate to Profiles: In the settings menu, scroll down and select "Profiles."
  4. Select Your Microsoft Account: Locate the Microsoft account currently linked to Edge. It will likely display your account name and profile picture.
  5. Choose "Sign Out": Click on the "Sign Out" option next to your Microsoft account name.
  6. Confirm Unlinking: A confirmation dialog box will appear. Click "Sign Out" to proceed with unlinking your Microsoft account from Edge.

Post-Unlinking Considerations:

Once you unlink your Microsoft account, the following changes will take effect:

  • Sync data will be removed: Your browsing history, open tabs, saved passwords, and cookies will no longer be synchronized across your devices.
  • Microsoft services will be unavailable: You will need to sign in separately to access OneDrive, Outlook, and other Microsoft services within Edge.
  • Personalized features will be disabled: Edge will no longer provide tailored recommendations, suggestions, and personalized settings based on your Microsoft account data.

FAQs:

Q: Will unlinking my Microsoft account delete my browsing data?

A: No, unlinking will not delete your browsing data. It will only stop the syncing of this data across your devices. You can still access your browsing history, bookmarks, and passwords locally on your computer.

Q: Can I re-link my Microsoft account to Edge later?

A: Yes, you can re-link your Microsoft account to Edge at any time by following the same steps outlined above, but selecting "Sign In" instead of "Sign Out."

Q: What happens to my passwords stored in Edge after unlinking?

A: Your saved passwords will remain stored locally on your computer. However, they will no longer be synchronized across devices.

Q: Will unlinking affect other Microsoft apps on my computer?

A: Unlinking your Microsoft account from Edge will not affect other Microsoft apps on your computer, such as Outlook or OneDrive. These apps will continue to operate independently.

Tips:

  • Backup your data: Before unlinking, consider backing up your important browsing data, such as bookmarks and passwords, to ensure you have a copy in case of any unforeseen issues.
  • Use a password manager: If you are concerned about the security of your saved passwords, consider using a password manager to store and manage them securely.
  • Clear browsing data: After unlinking, you can clear your browsing data, including history, cookies, and cache, to ensure a fresh start.
  • Explore alternative browsers: If you are not satisfied with Edge, consider exploring other web browsers, such as Google Chrome or Mozilla Firefox, which offer different features and functionalities.

Conclusion:

Unlinking your Microsoft account from Windows 11 Edge can be a beneficial step for users who prioritize privacy, manage multiple accounts, or troubleshoot specific issues. By understanding the implications of unlinking and following the provided instructions, you can effectively manage your account association with Edge and customize your browsing experience to meet your individual needs. Remember that unlinking does not delete your browsing data, but it does stop the synchronization across devices. Consider backing up your data and exploring alternative browsers if you choose to disassociate your Microsoft account from Edge.

How do I unlink my Microsoft Account from my computer? How to Remove Microsoft Account from Windows 11 [Guide]  Beebom How do I unlink a separate Microsoft account from Windows 11? - Microsoft Community
How do I unlink a separate Microsoft account from Windows 11? - Microsoft Community How to unlink computer from microsoft account - sworldboo How do I unlink a Microsoft account from my PC? - Microsoft Community
How do I unlink my Microsoft Account from my computer? Link or Unlink OneDrive with Microsoft Account in Windows 11 - YouTube

Closure

Thus, we hope this article has provided valuable insights into Unlinking Your Microsoft Account from Windows 11 Edge: A Comprehensive Guide. We thank you for taking the time to read this article. See you in our next article!

Understanding Startup Programs In Windows 11: A Comprehensive Guide

Understanding Startup Programs in Windows 11: A Comprehensive Guide

Introduction

In this auspicious occasion, we are delighted to delve into the intriguing topic related to Understanding Startup Programs in Windows 11: A Comprehensive Guide. Let’s weave interesting information and offer fresh perspectives to the readers.

Understanding Startup Programs in Windows 11: A Comprehensive Guide

Enable or Disable Startup Programs in Windows 11 [Guide 2024]

Windows 11, like its predecessors, allows programs to automatically launch when the operating system boots up. This functionality, commonly referred to as "startup programs," can be a boon for productivity, enabling users to access essential applications immediately upon system launch. However, it can also lead to slow boot times and system performance issues if not managed properly. This article provides a comprehensive overview of startup programs in Windows 11, encompassing their benefits, potential drawbacks, and methods for managing them effectively.

The Importance of Startup Programs

Startup programs offer several advantages, streamlining workflows and enhancing user experience:

  • Immediate Access: Essential applications, such as antivirus software, cloud storage sync tools, or communication platforms, can launch automatically, ensuring their availability from the moment the system starts. This eliminates the need to manually open them, saving time and effort.
  • Background Processes: Certain programs, like background services or system utilities, require continuous operation for optimal performance. Launching them at startup guarantees their uninterrupted function, ensuring smooth system operation.
  • Personalized Workflow: Users can customize their startup experience by selecting the programs that best suit their individual needs and preferences. This personalized approach can significantly improve efficiency by readily providing access to frequently used applications.

The Potential Drawbacks of Unmanaged Startup Programs

While beneficial, poorly managed startup programs can negatively impact system performance:

  • Slower Boot Times: A large number of programs launching simultaneously can significantly prolong the boot process, leading to delays and frustration. This is particularly noticeable on older or less powerful systems.
  • Resource Consumption: Each program consumes system resources like RAM and CPU power. A high volume of startup programs can lead to resource depletion, impacting overall system responsiveness and potentially causing instability.
  • Security Risks: Malicious programs can disguise themselves as legitimate applications and launch at startup, gaining unauthorized access to the system and potentially compromising user data.

Managing Startup Programs in Windows 11: A Practical Approach

Windows 11 provides various tools and methods for managing startup programs effectively, ensuring a balanced approach between functionality and system performance.

1. Task Manager:

  • Access: Press Ctrl+Shift+Esc to open Task Manager.
  • Startup Tab: Navigate to the "Startup" tab. This tab displays a list of programs configured to launch at startup, along with their impact on boot time.
  • Disable Programs: Right-click on any program you wish to disable and select "Disable." This prevents the program from launching automatically.
  • Enable Programs: To enable a disabled program, right-click on it and select "Enable."

2. System Configuration:

  • Access: Search for "msconfig" in the Windows search bar and select "System Configuration."
  • Startup Tab: Navigate to the "Startup" tab. This tab displays a list of programs configured to launch at startup, similar to the Task Manager.
  • Disable Programs: Uncheck the boxes next to the programs you want to disable.
  • Enable Programs: Check the boxes next to the programs you want to enable.

3. Windows Settings:

  • Access: Open the "Settings" app (Windows key + I).
  • Apps: Navigate to "Apps" and then "Startup."
  • Toggle Programs: This section allows you to enable or disable programs that launch at startup.
  • Advanced Options: Some apps may offer additional startup settings, accessible through the "Advanced options" button.

4. Third-Party Tools:

  • Advanced Functionality: Several third-party tools offer more granular control over startup programs, including the ability to analyze program behavior and identify potential conflicts.
  • Examples: CCleaner, Autoruns, and Startup Manager are popular choices.

FAQs Regarding Startup Programs in Windows 11

Q: What are the most common startup programs in Windows 11?

A: Common startup programs include antivirus software, cloud storage sync tools, system monitoring utilities, and background services for essential applications like web browsers and email clients.

Q: How can I identify potentially harmful startup programs?

A: Be cautious of programs you don’t recognize or that seem to have an unusually high impact on boot time. If in doubt, research the program online to verify its legitimacy.

Q: Can I prevent specific programs from launching at startup?

A: Yes, you can disable individual programs from launching at startup using the methods described above.

Q: How can I optimize my startup performance?

A: Disable unnecessary startup programs, ensure your system is up-to-date with the latest Windows updates, and consider using a system optimization tool to identify and address performance bottlenecks.

Q: Can I create a custom startup sequence?

A: While you can’t directly control the order in which programs launch, you can prioritize certain programs by enabling them through the "System Configuration" utility.

Tips for Managing Startup Programs in Windows 11

  • Regularly Review: Periodically check your startup programs to ensure they are still necessary and not causing performance issues.
  • Prioritize Essential Programs: Focus on enabling only those programs that are critical for your daily workflow.
  • Use Diagnostic Tools: Utilize system optimization tools to analyze your startup programs and identify potential conflicts or resource-intensive applications.
  • Consider Third-Party Solutions: For advanced control and analysis, explore third-party tools designed for managing startup programs.

Conclusion

Startup programs in Windows 11 offer a convenient way to access essential applications and streamline workflows. However, it is crucial to manage them effectively to prevent performance issues and security risks. By employing the methods outlined in this article, users can optimize their startup experience, ensuring a balance between functionality and system efficiency. Regularly reviewing and managing startup programs is essential for maintaining a smooth and responsive Windows 11 environment.

Windows 11 Startup Programs  Windows 11 Startup Folder - MiniTool How to Add Programs to Startup in Windows 11 How to Manage Startup Programs on Windows 11 โ€“ WiseCleaner
How to Change Windows 11 Startup Programs - Technipages Windows 11 Startup Programs  Windows 11 Startup Folder (2022) How to Add Programs to Startup in Windows 11
How to Add a Program to Startup in Windows 11  Windows 11 Startup Programs - YouTube Windows 11 Startup Folder: Where is it & How to Use it

Closure

Thus, we hope this article has provided valuable insights into Understanding Startup Programs in Windows 11: A Comprehensive Guide. We appreciate your attention to our article. See you in our next article!

Windows 10: A Comprehensive Examination Of Its Strengths And Weaknesses

Windows 10: A Comprehensive Examination of its Strengths and Weaknesses

Introduction

With great pleasure, we will explore the intriguing topic related to Windows 10: A Comprehensive Examination of its Strengths and Weaknesses. Let’s weave interesting information and offer fresh perspectives to the readers.

Windows 10: A Comprehensive Examination of its Strengths and Weaknesses

Microsoft SWOT Analysis: A Comprehensive Overview of Its Strengths, Weaknesses, Opportunities

Windows 10, released in 2015, has become the dominant operating system (OS) for personal computers worldwide. Its widespread adoption is a testament to its strengths and the efforts Microsoft has made to cater to a diverse user base. However, like any software, it comes with its own set of drawbacks. This article delves into the pros and cons of Windows 10, providing a comprehensive analysis of its features, performance, and overall user experience.

Pros of Windows 10

1. Enhanced Security Features:

Windows 10 boasts a robust security system that has significantly improved from its predecessors. Features like Windows Defender Antivirus, SmartScreen, and Windows Hello offer real-time protection against malware, phishing attempts, and unauthorized access. These features are continuously updated to combat emerging threats, ensuring a safer computing environment.

2. User-Friendly Interface:

Windows 10 presents a visually appealing and intuitive interface, making it easy for users of all levels of technical expertise to navigate. The Start Menu, a familiar feature from earlier versions, has been redesigned with live tiles, providing quick access to frequently used apps and information. The taskbar and notification area are also streamlined for efficient multitasking and system management.

3. Seamless Integration with Microsoft Ecosystem:

Windows 10 seamlessly integrates with other Microsoft services like OneDrive, Office 365, and Cortana. This integration allows for effortless synchronization of files, documents, and settings across multiple devices. Users can access their data and applications from any Windows 10 device, enhancing productivity and convenience.

4. Universal Apps and Windows Store:

The Windows Store offers a wide variety of applications designed specifically for Windows 10. These "universal apps" are optimized for different screen sizes and devices, ensuring a consistent user experience across desktops, laptops, tablets, and even phones. The Store provides a curated selection of applications, games, and software, making it easier for users to discover and install new programs.

5. Improved Gaming Performance:

Windows 10 offers features specifically tailored for gamers. DirectX 12, a new graphics API, enhances graphics performance and provides smoother gameplay. Game Mode prioritizes game performance by allocating system resources to the active game, minimizing interruptions and maximizing frame rates.

6. Continuous Updates and Support:

Microsoft provides regular updates to Windows 10, ensuring that the operating system remains secure and performs optimally. These updates address vulnerabilities, enhance features, and improve system stability. Microsoft offers long-term support for Windows 10, guaranteeing continued updates and security patches for an extended period.

7. Enhanced Accessibility Features:

Windows 10 includes a wide range of accessibility features designed to cater to users with disabilities. These features include options for screen readers, high-contrast themes, keyboard shortcuts, and magnifiers, making the operating system more accessible and inclusive.

Cons of Windows 10

1. Resource-Intensive:

Windows 10 is a resource-intensive operating system, requiring significant system resources like RAM and storage space. This can lead to slower performance on older or less powerful computers, especially when running demanding applications or games.

2. Privacy Concerns:

Windows 10 has faced criticism regarding its data collection practices. The operating system collects user data, including browsing history, location data, and usage patterns, for various purposes, including personalized recommendations and targeted advertising. This has raised privacy concerns among some users.

3. Forced Updates:

Windows 10’s automatic update system can be intrusive. Users have limited control over the timing and installation of updates, which can sometimes interrupt workflow or cause system instability. While updates are intended to improve security and performance, the lack of user control can be frustrating.

4. Compatibility Issues:

While Windows 10 generally offers good compatibility with older software, some programs may not function properly or require specific updates. This can be a challenge for users who rely on legacy software or specialized applications that are not fully supported on the latest operating system.

5. Bloatware and Pre-Installed Apps:

Windows 10 often comes pre-installed with a number of third-party applications, known as "bloatware," which may not be desired by all users. These applications can consume system resources and clutter the user interface. While some of these apps can be uninstalled, the presence of bloatware can be a source of annoyance for many users.

6. Limited Customization Options:

Compared to previous versions of Windows, Windows 10 offers fewer customization options. The ability to personalize the operating system’s appearance and behavior is restricted, which can be a drawback for users who prefer to tailor their computing environment to their specific needs.

7. Licensing and Upgrade Costs:

While Windows 10 is generally considered a free upgrade from previous versions, certain features and functionalities require additional licensing or subscriptions. For example, accessing advanced features like Windows Defender Advanced Threat Protection or Microsoft Office 365 requires separate purchases.

FAQs

Q: Is Windows 10 free?

A: While Windows 10 was offered as a free upgrade from Windows 7 and 8.1, new installations typically require a purchase. However, Microsoft offers free versions of Windows 10 for specific purposes, such as education or for devices with limited capabilities.

Q: How often does Windows 10 update?

A: Windows 10 updates are released on a regular schedule, typically several times a year. These updates can include bug fixes, security patches, and new features. The frequency of updates may vary depending on the specific version of Windows 10.

Q: Can I customize Windows 10?

A: Windows 10 offers limited customization options compared to previous versions. Users can personalize the Start Menu, taskbar, and desktop theme, but options for deeper system customization are restricted.

Q: Is Windows 10 secure?

A: Windows 10 boasts robust security features like Windows Defender Antivirus and SmartScreen, which provide protection against malware and phishing attempts. However, it is still crucial to practice good online safety habits and keep the operating system and software up to date.

Tips

1. Optimize System Performance:

To ensure smooth performance on Windows 10, consider optimizing system resources. Regularly clean up unnecessary files, manage startup programs, and ensure sufficient RAM and storage space.

2. Customize Privacy Settings:

Review and adjust privacy settings to control data collection practices. Choose the level of data sharing that you are comfortable with, balancing personalization with privacy concerns.

3. Manage Updates:

While automatic updates are beneficial, consider scheduling updates during off-peak hours to minimize disruptions to workflow.

4. Explore Alternative Software:

Consider using alternative software solutions for tasks where Windows 10’s built-in applications may not meet your needs. Many free and paid alternatives are available, offering a wider range of features and functionality.

Conclusion

Windows 10 is a powerful and versatile operating system that offers a multitude of benefits for both individual and enterprise users. Its intuitive interface, comprehensive security features, and seamless integration with the Microsoft ecosystem make it a compelling choice for many. However, its resource-intensive nature, privacy concerns, and limited customization options can pose challenges for certain users. Ultimately, the decision of whether or not to use Windows 10 depends on individual needs, preferences, and technical capabilities. By carefully considering the pros and cons, users can make an informed decision that aligns with their specific requirements and expectations.

self-awareness strengths and weaknesses analysis class 10 it 402 cbse exam - YouTube What are your Strengths & Weaknesses? [+Best Answers Examples] - Thrive Global Identifying Strengths And Weaknesses Worksheet
How To Recognise Your Strengths Weaknesses Youtube - vrogue.co Strengths and Weaknesses Assessment - Excelas Example Swot Analysis Strengths Weaknesses Explained - vrogue.co
Strengths and Weaknesses - 15+ Examples, Format, How to Answer, PDF Strengths And Weaknesses Examples Student

Closure

Thus, we hope this article has provided valuable insights into Windows 10: A Comprehensive Examination of its Strengths and Weaknesses. We hope you find this article informative and beneficial. See you in our next article!

Mastering Python On Windows 10: A Comprehensive Guide

Mastering Python on Windows 10: A Comprehensive Guide

Introduction

In this auspicious occasion, we are delighted to delve into the intriguing topic related to Mastering Python on Windows 10: A Comprehensive Guide. Let’s weave interesting information and offer fresh perspectives to the readers.

Mastering Python on Windows 10: A Comprehensive Guide

Mastering Python: A Comprehensive Guide to Python Basics

Python, a versatile and highly popular programming language, has gained immense traction across various domains. Its readability, beginner-friendliness, and vast libraries make it a compelling choice for diverse applications, from web development and data science to automation and machine learning. This comprehensive guide will equip you with the knowledge and steps necessary to successfully install Python on your Windows 10 machine, opening the door to a world of programming possibilities.

Understanding the Importance of Python Installation

Installing Python on your Windows 10 system is the first crucial step towards harnessing its power. This process establishes the foundation for running Python code, accessing its libraries, and ultimately, creating your own programs and applications. By installing Python, you gain access to a robust ecosystem of tools, libraries, and frameworks that facilitate rapid development and efficient problem-solving.

Choosing the Right Python Version

Python offers two main versions: Python 2 and Python 3. While Python 2 is still supported, Python 3 is the recommended version for new projects due to its enhanced features, improved performance, and ongoing development. The latest release of Python 3, often referred to as the "stable" version, is generally the most suitable option for beginners and experienced programmers alike.

Step-by-Step Installation Process

  1. Downloading the Python Installer:

    • Navigate to the official Python website: https://www.python.org/
    • Click on the "Downloads" tab.
    • Select the appropriate installer for your Windows 10 system (usually the latest version of Python 3).
    • The installer will download as an executable file (e.g., python-3.11.4-amd64.exe).
  2. Running the Installer:

    • Locate the downloaded installer file.
    • Double-click the file to launch the installation wizard.
    • Follow the on-screen instructions. Ensure you carefully review the options presented.
  3. Customizing the Installation:

    • Add Python to PATH: This crucial step allows you to run Python from any directory in your command prompt. Ensure the checkbox for "Add Python to PATH" is selected during the installation.
    • Installing Optional Features: Consider selecting the "pip" option, which is the package installer for Python. This allows you to easily install and manage external libraries.
    • Choosing the Installation Directory: You can choose the location where Python will be installed. The default directory is usually sufficient, but you can modify it if needed.
  4. Verifying the Installation:

    • Open the Command Prompt (CMD) or PowerShell.
    • Type python --version and press Enter.
    • If the installation was successful, you will see the installed Python version displayed.
  5. Exploring the Python Environment:

    • Type python and press Enter to launch the Python interactive shell.
    • You can now execute Python code directly within the shell.
    • To exit the interactive shell, type exit() and press Enter.

Using pip for Package Management

pip, the package installer for Python, simplifies the process of installing and managing external libraries. These libraries provide ready-made functions and modules, significantly expanding Python’s capabilities.

Installing Libraries with pip:

  • Open the Command Prompt or PowerShell.
  • Type pip install <library_name> and press Enter.
  • Replace <library_name> with the specific library you want to install (e.g., pip install numpy).
  • pip will download and install the library and its dependencies.

Managing Installed Libraries:

  • Listing Installed Libraries: Type pip list to view the list of installed libraries.
  • Uninstalling Libraries: Type pip uninstall <library_name> to remove a library.
  • Updating Libraries: Type pip install --upgrade <library_name> to update an existing library.

Integrated Development Environments (IDEs)

While you can write and execute Python code using the command prompt or a simple text editor, using an IDE can significantly enhance your development experience. IDEs offer features like code completion, syntax highlighting, debugging tools, and project management, making programming more efficient and enjoyable.

Popular Python IDEs for Windows 10:

  • Visual Studio Code (VS Code): A lightweight and versatile IDE, widely popular for its customization options and support for various languages.
  • PyCharm: A powerful IDE specifically designed for Python development, offering advanced features like code analysis and refactoring.
  • Thonny: A beginner-friendly IDE, ideal for learning Python due to its simplified interface and built-in debugging tools.

Setting up an IDE

  • Install the IDE: Download and install your chosen IDE from its official website.
  • Configure Python Interpreter: Most IDEs allow you to specify the Python interpreter you want to use. Ensure it points to the installed Python version.
  • Create a New Project: Start a new project within the IDE, which will act as a container for your Python code and related files.

Key Benefits of Using an IDE

  • Enhanced Code Editing: IDEs provide features like syntax highlighting, code completion, and auto-indentation, improving code readability and reducing errors.
  • Debugging Tools: IDEs offer integrated debuggers, allowing you to step through code execution, inspect variables, and identify errors.
  • Project Management: IDEs facilitate project organization by managing files, dependencies, and settings.

Troubleshooting Common Installation Issues

Problem: Python not found in the Command Prompt or PowerShell.

Solution: Ensure you selected "Add Python to PATH" during the installation. If not, you may need to manually add the Python installation directory to the system PATH environment variable.

Problem: pip not found in the Command Prompt or PowerShell.

Solution: Ensure you selected the "pip" option during the installation. If not, you can install pip separately by downloading and running the installer from the official Python website.

Problem: Unable to install libraries using pip.

Solution: Ensure you have an active internet connection. If using a proxy server, configure pip to use it. Consider using a virtual environment to manage dependencies for specific projects.

FAQs: Python Installation on Windows 10

Q: What is the difference between Python 2 and Python 3?

A: Python 3 is the recommended version for new projects due to its improved features, enhanced performance, and ongoing development. Python 2 is still supported but is no longer actively developed.

Q: Can I install multiple Python versions on my system?

A: Yes, you can install multiple Python versions on your system. However, you need to ensure that you are using the correct version for your project.

Q: What is a virtual environment, and why should I use it?

A: A virtual environment is a tool that allows you to create isolated Python environments for different projects. This helps prevent conflicts between dependencies and ensures that each project uses the specific libraries it needs.

Q: How do I update Python to the latest version?

A: You can update Python by downloading and running the latest installer from the official Python website. Ensure you choose the "Upgrade" option during the installation process.

Q: Can I uninstall Python from my system?

A: Yes, you can uninstall Python using the Windows Control Panel. Navigate to "Programs and Features" and select "Python" from the list of installed programs. Click "Uninstall" to remove Python from your system.

Tips for Successful Python Installation

  • Use the Official Installer: Always download the Python installer from the official website to ensure you are installing a reliable and secure version.
  • Add Python to PATH: This crucial step simplifies the process of running Python from any directory.
  • Install pip: pip is a powerful tool for managing external libraries, making development more efficient.
  • Consider Using an IDE: IDEs provide a comprehensive environment for coding, debugging, and project management.
  • Explore Virtual Environments: Virtual environments help isolate dependencies and prevent conflicts between projects.
  • Keep Your Python Installation Updated: Regularly update Python and its libraries to benefit from new features, bug fixes, and security patches.

Conclusion

Installing Python on your Windows 10 system opens a gateway to a world of programming possibilities. This guide has provided a comprehensive overview of the installation process, emphasizing the importance of choosing the right version, customizing the installation, and utilizing essential tools like pip and IDEs. By following these steps, you can successfully set up your Python environment and embark on your programming journey. Remember, the world of Python is vast and ever-evolving, so continue exploring, learning, and building your programming skills. The journey is just beginning!

Mastering Python: From Beginner to Expert: A Comprehensive Guide to Learning and Understanding Mastering Python: A Comprehensive Guide - SoftArchive Mastering Array Methods in Python: A Comprehensive Guide
Mastering Python for beginners - Mastering Python: A Comprehensive Guide to Python Programming Mastering Python: A Comprehensive Guide from Beginner to Enthusiast "Mastering Python Operators: A Comprehensive Guide"
Python Secrets: A Comprehensive Guide to Master the Python Programming  by Teks Academy  Jun How To Master Python - YouTube

Closure

Thus, we hope this article has provided valuable insights into Mastering Python on Windows 10: A Comprehensive Guide. We appreciate your attention to our article. See you in our next article!

Understanding Overscan In Windows 11: A Comprehensive Guide

Understanding Overscan in Windows 11: A Comprehensive Guide

Introduction

With enthusiasm, let’s navigate through the intriguing topic related to Understanding Overscan in Windows 11: A Comprehensive Guide. Let’s weave interesting information and offer fresh perspectives to the readers.

Understanding Overscan in Windows 11: A Comprehensive Guide

Overscaling Or Overscan in Windows 10 and Windows 11 [Fixed]

Overscan, a phenomenon present in traditional television displays, refers to the display of an image beyond the intended boundaries of the screen. It essentially crops the edges of the image, potentially obscuring crucial information or visual elements. In the context of Windows 11, understanding and managing overscan settings is essential for achieving an optimal viewing experience, particularly on older monitors or televisions.

Overscan: A Legacy from Televisions

The concept of overscan originated in the analog television era. Television signals were designed to accommodate a range of display sizes, with the assumption that the receiver would be displaying a slightly larger image than the actual signal. This overscan ensured that viewers would see the entire picture, even if their television had a slightly different screen size. However, this practice resulted in the cropping of the image’s edges, often obscuring important information such as subtitles, menus, or crucial parts of the picture itself.

The Relevance of Overscan in Windows 11

While modern displays generally support precise pixel-to-pixel mapping, older monitors or TVs might still exhibit overscan behavior. This can lead to several issues in Windows 11, including:

  • Incomplete Display: Important visual elements, such as toolbars, menus, or system icons, may be hidden beyond the visible screen area, making them inaccessible.
  • Incorrect Aspect Ratio: Overscan can distort the aspect ratio of images and videos, resulting in stretched or squashed visuals.
  • Reduced Screen Space: The cropped edges effectively reduce the usable screen area, impacting the overall viewing experience and productivity.

Managing Overscan Settings in Windows 11

Windows 11 provides various methods to address overscan issues and ensure a complete and accurate display of content.

1. Adjusting Display Settings:

  • Scaling and Layout: The "Scaling and Layout" section in Windows 11’s display settings allows you to adjust the size and scaling of text, apps, and other elements. While not directly targeting overscan, adjusting these settings can help compensate for the cropped edges.
  • Display Resolution: Setting the display resolution to its native resolution (often referred to as the "optimal resolution") can help minimize overscan.

2. Using Display Drivers:

  • Driver Adjustments: Some display drivers offer specific settings to manage overscan. Consult the documentation for your graphics card or monitor to identify and utilize these settings.

3. Employing Third-Party Tools:

  • Display Calibration Software: Dedicated display calibration software can often identify and correct overscan issues. These tools allow for precise adjustments to the display’s geometry, ensuring a perfect fit for the screen.

4. Manual Adjustments:

  • Monitor Settings: Many monitors offer built-in overscan settings. Access the monitor’s menu (usually through buttons on the front panel) and look for options like "overscan," "aspect ratio," or "display size."
  • Windows Registry: For advanced users, manually adjusting specific registry keys can help address overscan issues. However, caution is advised, as incorrect registry modifications can lead to system instability.

Understanding the Importance of Overscan Settings

Managing overscan settings in Windows 11 is crucial for several reasons:

  • Visual Integrity: Ensuring a complete display of content, including all visual elements, is essential for a comprehensive and accurate viewing experience.
  • Usability: Hidden menus, icons, or toolbars can significantly hinder user experience and productivity.
  • Aesthetic Appeal: Maintaining the correct aspect ratio and avoiding distorted visuals enhances the overall aesthetic appeal of content.

FAQs on Overscan Settings in Windows 11

Q1: How do I know if my monitor has overscan?

A1: If you notice cropped edges, missing elements, or distorted aspect ratios in your display, it is likely that your monitor is experiencing overscan.

Q2: Can I completely eliminate overscan?

A2: While overscan can be minimized or adjusted, it might not be entirely eliminated, particularly on older monitors or televisions.

Q3: Are there any risks associated with adjusting overscan settings?

A3: While most adjustments are safe, excessive or incorrect settings can potentially distort the display or cause system instability. Consult the documentation or seek professional help if you are unsure about the appropriate settings.

Q4: Is overscan a problem on modern displays?

A4: Modern displays generally support pixel-to-pixel mapping, eliminating the need for overscan. However, older monitors or TVs might still exhibit overscan behavior.

Tips for Managing Overscan in Windows 11

  • Start with Basic Adjustments: Begin by adjusting the display settings, including resolution and scaling, to see if it resolves the overscan issue.
  • Consult Documentation: Refer to the documentation for your monitor, graphics card, and display drivers for specific instructions on managing overscan settings.
  • Experiment with Settings: Carefully adjust overscan settings in your monitor’s menu or through third-party software, noting the results and making adjustments accordingly.
  • Seek Professional Help: If you are unable to resolve overscan issues through standard methods, consult a professional for assistance.

Conclusion

Overscan, a legacy from the analog television era, can pose challenges in modern computing environments, particularly in Windows 11. By understanding the concept and effectively managing overscan settings, users can ensure a complete, accurate, and visually pleasing display experience. While modern displays generally eliminate overscan, older monitors or TVs might require specific adjustments to address this issue. By utilizing the methods outlined in this guide, users can achieve optimal display performance and enjoy a seamless and immersive computing experience.

Overscaling Or Overscan in Windows 10 and Windows 11 [Fixed] Overscaling Or Overscan in Windows 10 and Windows 11 [Fixed] Fix Overscan in Windows 11/10 to Fit to Screen
Overscaling Or Overscan in Windows 10 and Windows 11 [Fixed] Overscan in Windows 11/10 an Bildschirm anpassen - DE Atsit Overscaling Or Overscan in Windows 10 and Windows 11 [Fixed]
Buy Windows 11 User Guide for Beginners: A Comprehensive Guide to Master Windows 11 Operating Overscaling Or Overscan in Windows 10 and Windows 11 [Fixed]

Closure

Thus, we hope this article has provided valuable insights into Understanding Overscan in Windows 11: A Comprehensive Guide. We hope you find this article informative and beneficial. See you in our next article!

The Evolution Of Windows 10’s Visual Identity: A Look At The Default Desktop Backgrounds

The Evolution of Windows 10’s Visual Identity: A Look at the Default Desktop Backgrounds

Introduction

In this auspicious occasion, we are delighted to delve into the intriguing topic related to The Evolution of Windows 10’s Visual Identity: A Look at the Default Desktop Backgrounds. Let’s weave interesting information and offer fresh perspectives to the readers.

The Evolution of Windows 10’s Visual Identity: A Look at the Default Desktop Backgrounds

Default Ttl Windows 10

The Windows operating system has been a staple in the computing world for decades, and its evolution is reflected not just in its features and functionality, but also in its visual identity. The default desktop background, a seemingly innocuous element, plays a surprisingly significant role in shaping the user experience and conveying the spirit of each Windows version. In the case of Windows 10, the default desktop backgrounds have undergone a series of transformations, reflecting the operating system’s focus on versatility, adaptability, and user-centric design.

A Journey Through Windows 10’s Visual Narrative

Windows 10, released in 2015, marked a significant shift in Microsoft’s approach to operating systems. The company aimed to create a platform that could seamlessly adapt to various devices, from desktop PCs to tablets and smartphones. This ambition is reflected in the choice of default desktop backgrounds.

The initial release of Windows 10 featured a vibrant and abstract design known as "Windows 10 Hero," characterized by a swirling, colorful pattern that evokes movement and dynamism. This background, while visually striking, lacked a clear thematic connection to the operating system’s core features.

With the "Windows 10 Anniversary Update" in 2016, the default background shifted to a more minimalist design, featuring a simple gradient transitioning from dark blue to light blue. This change mirrored the operating system’s increasing focus on simplicity and user-friendliness. The gradient background, while less visually captivating than its predecessor, provided a clean and unobtrusive canvas for users to personalize their desktops.

The "Windows 10 Creators Update" in 2017 introduced a new background, "Windows 10 Default," showcasing a blurred image of a cityscape at sunset. This background incorporated a sense of depth and realism, suggesting the interconnectedness of the digital and physical worlds. It also hinted at the creative possibilities offered by the operating system, aligning with the update’s focus on content creation tools.

Subsequent updates, like the "Fall Creators Update" and the "April 2018 Update," maintained the minimalist aesthetic while incorporating subtle variations in color and texture. The "October 2018 Update" introduced a new background, "Windows 10 Default," featuring a blurred image of a forest at dawn. This background emphasized a sense of calm and serenity, reflecting the operating system’s commitment to user well-being.

The "May 2019 Update" brought a new default background, "Windows 10 Default," featuring a blurred image of a beach at sunset. This background evoked a sense of tranquility and escapism, aligning with the update’s focus on user-friendly features and improved performance.

The "November 2019 Update" introduced a new default background, "Windows 10 Default," featuring a blurred image of a mountain range at sunset. This background evoked a sense of grandeur and vastness, reflecting the operating system’s growing capabilities and global reach.

The "May 2020 Update" brought a new default background, "Windows 10 Default," featuring a blurred image of a city skyline at night. This background evoked a sense of energy and dynamism, reflecting the operating system’s adaptability and ability to power a wide range of tasks.

The "October 2020 Update" brought a new default background, "Windows 10 Default," featuring a blurred image of a forest at sunrise. This background evoked a sense of hope and renewal, reflecting the operating system’s commitment to providing a secure and reliable platform for users.

Beyond Aesthetics: The Significance of Default Backgrounds

The default desktop background is more than just a visual element; it plays a crucial role in shaping the user experience and conveying the operating system’s identity. Here are some key aspects:

  • First Impression: The default background is the first visual element users encounter when they boot up their Windows 10 device. It sets the tone for the overall user experience, influencing their perception of the operating system’s aesthetics and functionality.
  • Brand Identity: The default background contributes to the overall brand identity of Windows 10. It reinforces the operating system’s key features and values, such as its focus on user-friendliness, security, and creativity.
  • Emotional Connection: The default background can evoke specific emotions and associations in users. A serene background, for example, might promote a sense of calm and focus, while a dynamic background might inspire creativity and productivity.
  • Versatility and Personalization: While the default background serves as a starting point, users have the freedom to customize it to their liking. They can choose from a vast library of official Windows 10 backgrounds or even upload their own images. This flexibility allows users to create a desktop environment that reflects their individual preferences and needs.

Frequently Asked Questions

Q: How do I change the default desktop background in Windows 10?

A: You can change the default desktop background by following these steps:

  1. Right-click on the desktop.
  2. Select "Personalize."
  3. Choose "Background."
  4. Select the desired background from the available options.

Q: Can I use my own images as a desktop background in Windows 10?

A: Yes, you can use your own images as a desktop background in Windows 10. Simply follow these steps:

  1. Right-click on the desktop.
  2. Select "Personalize."
  3. Choose "Background."
  4. Select "Picture" from the drop-down menu.
  5. Click "Browse" and select the image you want to use.

Q: Where can I find more official Windows 10 desktop backgrounds?

A: You can find more official Windows 10 desktop backgrounds on the Microsoft Store. Simply search for "Windows 10 Themes" and browse through the available options.

Q: Are there any tips for choosing a good desktop background?

A: Here are some tips for choosing a good desktop background:

  • Consider your personal preferences: Choose a background that you find visually appealing and that reflects your personality.
  • Think about your workflow: If you work on your computer for long periods, choose a background that is calming and relaxing.
  • Choose a high-resolution image: This will ensure that the background looks sharp and clear on your screen.
  • Avoid distracting backgrounds: Choose a background that is not too busy or cluttered.

Conclusion

The default desktop background in Windows 10 is an often-overlooked but crucial element of the user experience. It serves as a visual anchor, reflecting the operating system’s identity and values, while also providing a canvas for individual personalization. As Windows 10 continues to evolve, its default backgrounds will undoubtedly continue to adapt, reflecting the changing landscape of computing and the evolving needs of users.

Windows 10 Evolution - YouTube Evolution of Microsoft Windows from 1986 to 2021 Shows Just How Far We've Come - TechEBlog Microsoft unveils the Windows 10 default wallpaper (video) โ€ข Pureinfotech
Evolution of Windows  Windows 1 to Windows 10  TechTasic - YouTube The Evolution of Windows #infographic - Visualistan The Windows 10 Evolution - YouTube
Evolution of Windows - YouTube Windows Evolution by RandomPerson1146 on DeviantArt

Closure

Thus, we hope this article has provided valuable insights into The Evolution of Windows 10’s Visual Identity: A Look at the Default Desktop Backgrounds. We appreciate your attention to our article. See you in our next article!

Windows 10: A Comprehensive Overview Of The Modern Operating System

Windows 10: A Comprehensive Overview of the Modern Operating System

Introduction

With enthusiasm, let’s navigate through the intriguing topic related to Windows 10: A Comprehensive Overview of the Modern Operating System. Let’s weave interesting information and offer fresh perspectives to the readers.

Windows 10: A Comprehensive Overview of the Modern Operating System

Windows 10  Full Overview - YouTube

Windows 10, released in 2015, represents a significant evolution in the Microsoft operating system landscape. Building upon the foundations laid by its predecessors, Windows 10 introduced a user-friendly interface, enhanced security features, and a focus on seamless integration across devices. This comprehensive overview delves into the key aspects of Windows 10, exploring its functionalities, benefits, and ongoing impact on the modern computing experience.

The User Interface: A Familiar Yet Modern Experience

Windows 10 presented a familiar yet refined user interface, designed to be intuitive and accessible for users of all skill levels. The Start Menu, a cornerstone of Windows, underwent a transformation, offering a blend of traditional functionality and modern aesthetics. The live tiles, displaying dynamic updates from apps and websites, provided a personalized and interactive experience. The taskbar, a central hub for accessing open applications, remained a familiar element, offering quick access to frequently used programs and system settings.

Enhanced Security Features: Safeguarding Data and Privacy

Security has been a paramount concern for Microsoft, and Windows 10 reflects this commitment with a robust suite of security features. Windows Defender, the built-in antivirus software, provides real-time protection against malware and other threats. Windows Hello, a biometric authentication system, utilizes facial recognition or fingerprint scanning for secure logins, enhancing user privacy and account security. BitLocker, a full-disk encryption tool, protects sensitive data by encrypting the entire hard drive, ensuring data confidentiality even in case of theft or unauthorized access.

Seamless Integration Across Devices: A Connected Ecosystem

Windows 10 emphasizes seamless integration across devices, enabling users to seamlessly transition between their computers, tablets, and smartphones. The "Continuum" feature allows users to switch between desktop and tablet modes on devices with touchscreens, providing an optimal experience for both productivity and entertainment. The "Universal Windows Platform" allows developers to create apps that run across various Windows devices, fostering a consistent and familiar user experience.

The Windows Store: A Hub for Applications and Games

The Windows Store serves as a centralized hub for accessing a vast library of applications and games. Users can browse, download, and install apps directly from the store, enjoying a secure and convenient experience. The store offers a diverse range of applications, from productivity tools and entertainment software to educational resources and creative utilities.

Regular Updates and Feature Enhancements: Continuous Improvement

Microsoft maintains a commitment to continuous improvement, delivering regular updates to Windows 10. These updates include security patches, performance enhancements, and new features, ensuring that the operating system remains secure, stable, and up-to-date. Users benefit from these updates, as they receive ongoing improvements and security enhancements without the need for manual installations.

The Impact of Windows 10: A Modern Computing Landscape

Windows 10 has profoundly impacted the modern computing landscape. It has become the dominant operating system for personal computers, powering millions of devices worldwide. Its user-friendly interface, robust security features, and seamless integration across devices have made it a preferred choice for both individuals and businesses.

Frequently Asked Questions (FAQs)

Q: What are the system requirements for running Windows 10?

A: Windows 10 requires a minimum of 1 GHz processor, 1 GB RAM for 32-bit or 2 GB RAM for 64-bit, 16 GB free hard disk space, and a DirectX 9 compatible graphics card.

Q: Is Windows 10 free to upgrade from previous versions?

A: Microsoft offered a free upgrade to Windows 10 from Windows 7 and 8.1 during a limited period. However, this offer has since expired, and users now need to purchase a license for Windows 10.

Q: How can I update Windows 10 to the latest version?

A: Windows 10 automatically checks for updates and downloads them in the background. Users can manually check for updates by navigating to Settings > Update & Security > Windows Update.

Q: What are the different editions of Windows 10?

A: Windows 10 offers various editions, including Home, Pro, Education, Enterprise, and IoT Core, each tailored to specific user needs and requirements.

Q: How can I troubleshoot common Windows 10 issues?

A: Microsoft provides comprehensive troubleshooting resources on its website, covering various issues, such as blue screen errors, slow performance, and network connectivity problems. Users can access these resources by searching for relevant keywords on the Microsoft website or contacting Microsoft support.

Tips for Optimizing Windows 10 Performance

  • Regularly clean your hard drive: Remove unnecessary files and programs to free up disk space.
  • Disable unnecessary startup programs: Reduce the number of programs that launch automatically when you start your computer.
  • Update your drivers: Ensure that your device drivers are up-to-date for optimal performance.
  • Use a performance monitor: Monitor your system’s resource usage to identify potential bottlenecks.
  • Defragment your hard drive: Organize files on your hard drive for faster access.

Conclusion

Windows 10 has emerged as a transformative operating system, offering a user-friendly interface, enhanced security features, seamless integration across devices, and a vast ecosystem of applications. Its continuous evolution, with regular updates and feature enhancements, ensures that it remains a powerful and relevant platform for the modern computing landscape. As technology continues to evolve, Windows 10 will undoubtedly continue to adapt and innovate, providing users with a secure, efficient, and engaging computing experience.

Windows Operating System: A Complete Overview Windows 10 Overview Describes the different phases of the windows operating system  Download Scientific Diagram
Microsoft Windows 10 Operating System Overview windows 10 operating system features - YouTube Windows Operating System: An Overview of Its Features, History, and Popularity โ€“ NetcronTechBlog
History And Evolution Of Windows Operating System - The Best Picture History What Is Computer Operating System and How Does It Work

Closure

Thus, we hope this article has provided valuable insights into Windows 10: A Comprehensive Overview of the Modern Operating System. We appreciate your attention to our article. See you in our next article!

Unlocking The Windows 11 Login: Understanding "Hello" Errors

Unlocking the Windows 11 Login: Understanding "Hello" Errors

Introduction

With great pleasure, we will explore the intriguing topic related to Unlocking the Windows 11 Login: Understanding "Hello" Errors. Let’s weave interesting information and offer fresh perspectives to the readers.

Unlocking the Windows 11 Login: Understanding "Hello" Errors

How to face unlock Windows 11 with Windows Hello - Digital Citizen

Windows 11’s "Hello" feature, designed for secure and convenient login using facial recognition, fingerprint scanning, or a PIN, can sometimes encounter issues, leaving users unable to access their accounts. This article aims to demystify the "Hello" unavailable error, providing a comprehensive overview of its causes, troubleshooting steps, and preventative measures.

Understanding the "Hello" Login Mechanism

Windows 11’s "Hello" login system offers a robust alternative to traditional password-based authentication. It leverages advanced hardware and software to recognize users through unique biometric identifiers or a personalized PIN. This approach enhances security by reducing the risk of unauthorized access and improves user experience by eliminating the need to remember complex passwords.

Common Reasons for "Hello" Login Issues

The "Hello" feature, while generally reliable, can be affected by various factors, leading to the "Hello" unavailable error. These factors can be categorized into:

1. Hardware-Related Issues:

  • Camera Malfunction: The webcam, essential for facial recognition, might be physically damaged or have driver issues.
  • Fingerprint Reader Problems: Fingerprint sensors can experience wear and tear, leading to inaccurate readings or complete failure.
  • Faulty Hardware Components: Other hardware components, like the motherboard or RAM, can also contribute to "Hello" errors if they malfunction.

2. Software-Related Issues:

  • Driver Conflicts or Outdated Drivers: Incompatible or outdated drivers for the webcam, fingerprint reader, or other relevant hardware can cause conflicts and hinder "Hello" functionality.
  • Operating System Errors: Software bugs or corruption within Windows 11 can affect "Hello" functionality.
  • Security Software Interference: Certain antivirus or security programs might interfere with "Hello" processes, preventing it from working correctly.

3. User-Specific Issues:

  • Incorrect PIN Entry: Repeatedly entering the wrong PIN can temporarily disable the "Hello" login option.
  • Changes in Biometric Data: Significant changes in facial features or fingerprints, such as wearing glasses or injuries, can affect "Hello" recognition.
  • Account Configuration Errors: Incorrect settings within the "Hello" configuration might prevent proper functionality.

Troubleshooting "Hello" Login Errors

When encountering "Hello" unavailable errors, a systematic approach is crucial for efficient troubleshooting. The following steps can help identify and resolve the issue:

1. Check Hardware Functionality:

  • Verify Camera Functionality: Ensure the webcam is connected and functioning properly. Test it with other applications to confirm its working order.
  • Test Fingerprint Reader: If using fingerprint recognition, check if the reader responds to touch and registers fingerprints accurately.

2. Update Drivers:

  • Update Webcam and Fingerprint Reader Drivers: Download and install the latest drivers for the webcam and fingerprint reader from the manufacturer’s website.
  • Update Windows 11: Ensure your operating system is up-to-date. Windows Updates often include driver updates and bug fixes that can resolve "Hello" issues.

3. Troubleshoot Software Conflicts:

  • Temporarily Disable Antivirus or Security Software: Disable any antivirus or security programs that might interfere with "Hello" functionality. If the error resolves, consider adjusting the software settings or using a different security solution.
  • Run System File Checker (SFC): This tool can scan for and repair corrupted system files that might be causing the "Hello" error.
  • Perform a Clean Boot: Starting Windows 11 with minimal startup programs can help isolate software conflicts.

4. Reset "Hello" Settings:

  • Remove and Re-enroll Biometric Data: Delete existing facial recognition or fingerprint data and re-enroll it. This can resolve issues caused by outdated or corrupted biometric information.
  • Reset PIN: If repeatedly entering the wrong PIN has disabled "Hello," reset the PIN by following the on-screen instructions.

5. Seek Professional Assistance:

  • Contact Microsoft Support: If the troubleshooting steps above do not resolve the issue, contact Microsoft Support for further assistance.
  • Consult a Computer Technician: If suspect hardware failure, consult a qualified computer technician for diagnosis and repair.

Preventing Future "Hello" Errors

Proactive measures can minimize the occurrence of "Hello" login issues:

  • Regular Driver Updates: Maintain up-to-date drivers for all hardware components, including the webcam and fingerprint reader.
  • Regular Windows Updates: Install the latest Windows 11 updates to benefit from bug fixes and security enhancements.
  • Avoid Unauthorized Software: Be cautious when installing software from unknown sources, as it could potentially introduce malware or conflicts that affect "Hello" functionality.
  • Maintain Hardware Integrity: Handle hardware components with care to prevent physical damage.

FAQs Regarding "Hello" Login Issues:

Q: Why does "Hello" keep asking me to enter a PIN?

A: This usually indicates a problem with the biometric recognition system. Ensure the camera or fingerprint reader is functioning correctly, update drivers, and re-enroll biometric data.

Q: Can I use "Hello" without a PIN?

A: No, a PIN is required for initial setup and acts as a backup authentication method.

Q: What if I forget my PIN?

A: You can reset your PIN by following the on-screen instructions during the login process.

Q: Can I use "Hello" with a local account?

A: Yes, "Hello" is available for both local and Microsoft accounts.

Q: How do I disable "Hello" login?

A: You can disable "Hello" login by navigating to "Settings > Accounts > Sign-in options" and turning off the "Hello" options.

Tips for Using "Hello" Effectively:

  • Ensure Proper Lighting: For facial recognition, use adequate lighting to ensure clear visibility for the webcam.
  • Keep Fingers Clean: When using fingerprint scanning, ensure your fingers are clean and dry for accurate readings.
  • Avoid Obstructions: Ensure nothing obstructs the webcam or fingerprint reader during login.

Conclusion

"Hello" login issues, while frustrating, are often solvable with proper troubleshooting. By understanding the underlying causes, applying the outlined steps, and practicing preventative measures, users can enjoy the convenience and security of "Hello" login on Windows 11. Remember to stay updated with driver and operating system updates, and don’t hesitate to seek professional assistance when necessary.

How to face unlock Windows 11 with Windows Hello - Digital Citizen How to Fix Windows 11 Login Problems Fix Windows Hello Error 0X801C0451 On Windows 11 10  thewindowsclub
[Solved] Windows Hello Error 0x801c0451 on Windows 11/10 How To Fix Windows Hello Pin Error Code 0x80090011 On Windows 11 - Vrogue How To Fix Windows 11 Login Problems - YouTube
How to Remove Windows 11 Hello PIN and Change to PASSWORD - YouTube How To Fix Windows 11 Login Problems [Tutorial] - YouTube

Closure

Thus, we hope this article has provided valuable insights into Unlocking the Windows 11 Login: Understanding "Hello" Errors. We appreciate your attention to our article. See you in our next article!