Archives February 2024

Seamless Sharing: Exploring Windows 10’s Nearby Sharing Feature

Seamless Sharing: Exploring Windows 10’s Nearby Sharing Feature

Introduction

In this auspicious occasion, we are delighted to delve into the intriguing topic related to Seamless Sharing: Exploring Windows 10’s Nearby Sharing Feature. Let’s weave interesting information and offer fresh perspectives to the readers.

Seamless Sharing: Exploring Windows 10’s Nearby Sharing Feature

Seamless File Sharing: Google Nearby Share for Windows

Windows 10 introduced a convenient method for transferring files between nearby devices: Nearby Sharing. This feature allows users to share files, links, and other content with compatible devices without the need for complex configurations or external services. This article provides a comprehensive overview of Nearby Sharing, exploring its functionality, benefits, and potential limitations.

Understanding Nearby Sharing

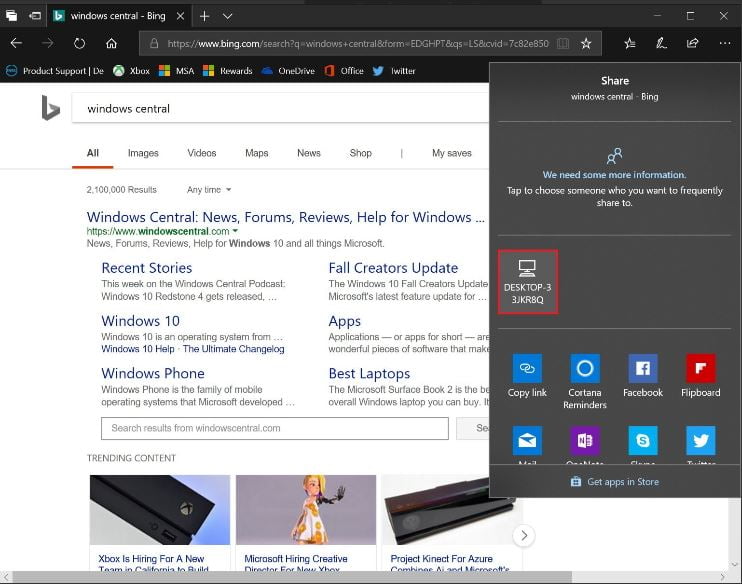
Nearby Sharing is a built-in feature in Windows 10 that utilizes Bluetooth and Wi-Fi to establish a secure connection between nearby devices. When enabled, devices discover each other within a limited range, facilitating the transfer of files and other data. It operates on a peer-to-peer basis, eliminating the need for a central server or cloud storage.

Key Features and Functionality

  • Simplicity: Nearby Sharing is incredibly user-friendly. Users can initiate a file transfer with a simple drag-and-drop action or by selecting the "Share" option from the context menu.
  • Security: Nearby Sharing prioritizes data security. It utilizes Bluetooth and Wi-Fi to establish a secure connection, ensuring that only authorized devices can access shared content.
  • Versatility: The feature supports a wide range of file types, including documents, images, videos, and even web links. This versatility makes it ideal for sharing content across different applications and scenarios.
  • Cross-Platform Compatibility: While primarily designed for Windows 10 devices, Nearby Sharing can also be used to share files with Android devices running Android 6.0 (Marshmallow) or later. This cross-platform compatibility expands its usefulness and convenience.

Benefits of Nearby Sharing

  • Effortless File Transfer: Nearby Sharing streamlines the process of transferring files between devices. It eliminates the need for cumbersome methods like email attachments or external storage devices.
  • Fast and Efficient: The transfer speeds are generally faster than traditional methods like Bluetooth, especially when sharing larger files.
  • Enhanced Collaboration: Nearby Sharing fosters seamless collaboration by enabling quick and easy sharing of documents, presentations, and other work-related files.
  • Reduced Data Usage: As a direct transfer method, Nearby Sharing does not rely on cloud storage or internet connectivity, thereby conserving data usage.
  • Increased Productivity: By simplifying the sharing process, Nearby Sharing allows users to focus on their tasks rather than spending time on tedious file transfer procedures.

Potential Limitations and Considerations

  • Limited Range: The effectiveness of Nearby Sharing depends on the range of Bluetooth and Wi-Fi signals. Devices need to be within a reasonable distance to establish a connection.
  • Compatibility Issues: While Nearby Sharing supports a wide range of file types, there might be compatibility issues with certain specific file formats or applications.
  • Security Concerns: While Nearby Sharing uses encryption to secure data transfers, it’s crucial to be aware of potential security risks associated with sharing sensitive information with unauthorized devices.

Enabling and Using Nearby Sharing

Enabling Nearby Sharing is a straightforward process:

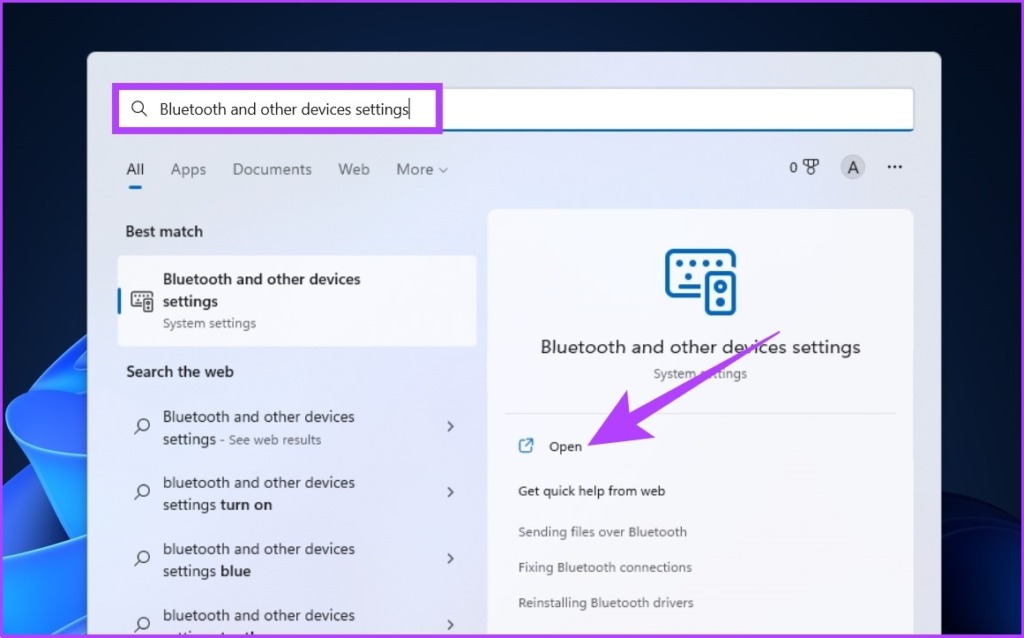
  1. Access Settings: Open the Windows Settings app by pressing the Windows key + I.
  2. Navigate to System: Select "System" from the Settings menu.
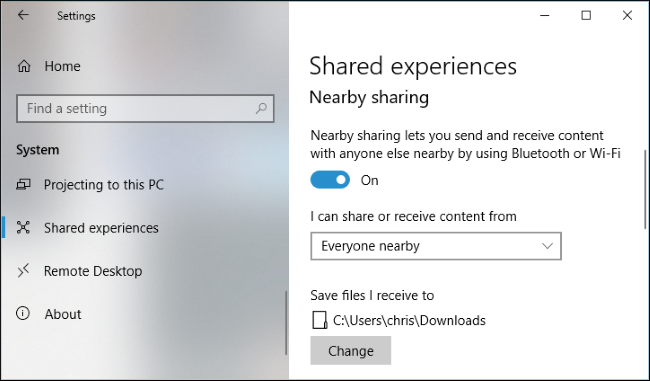
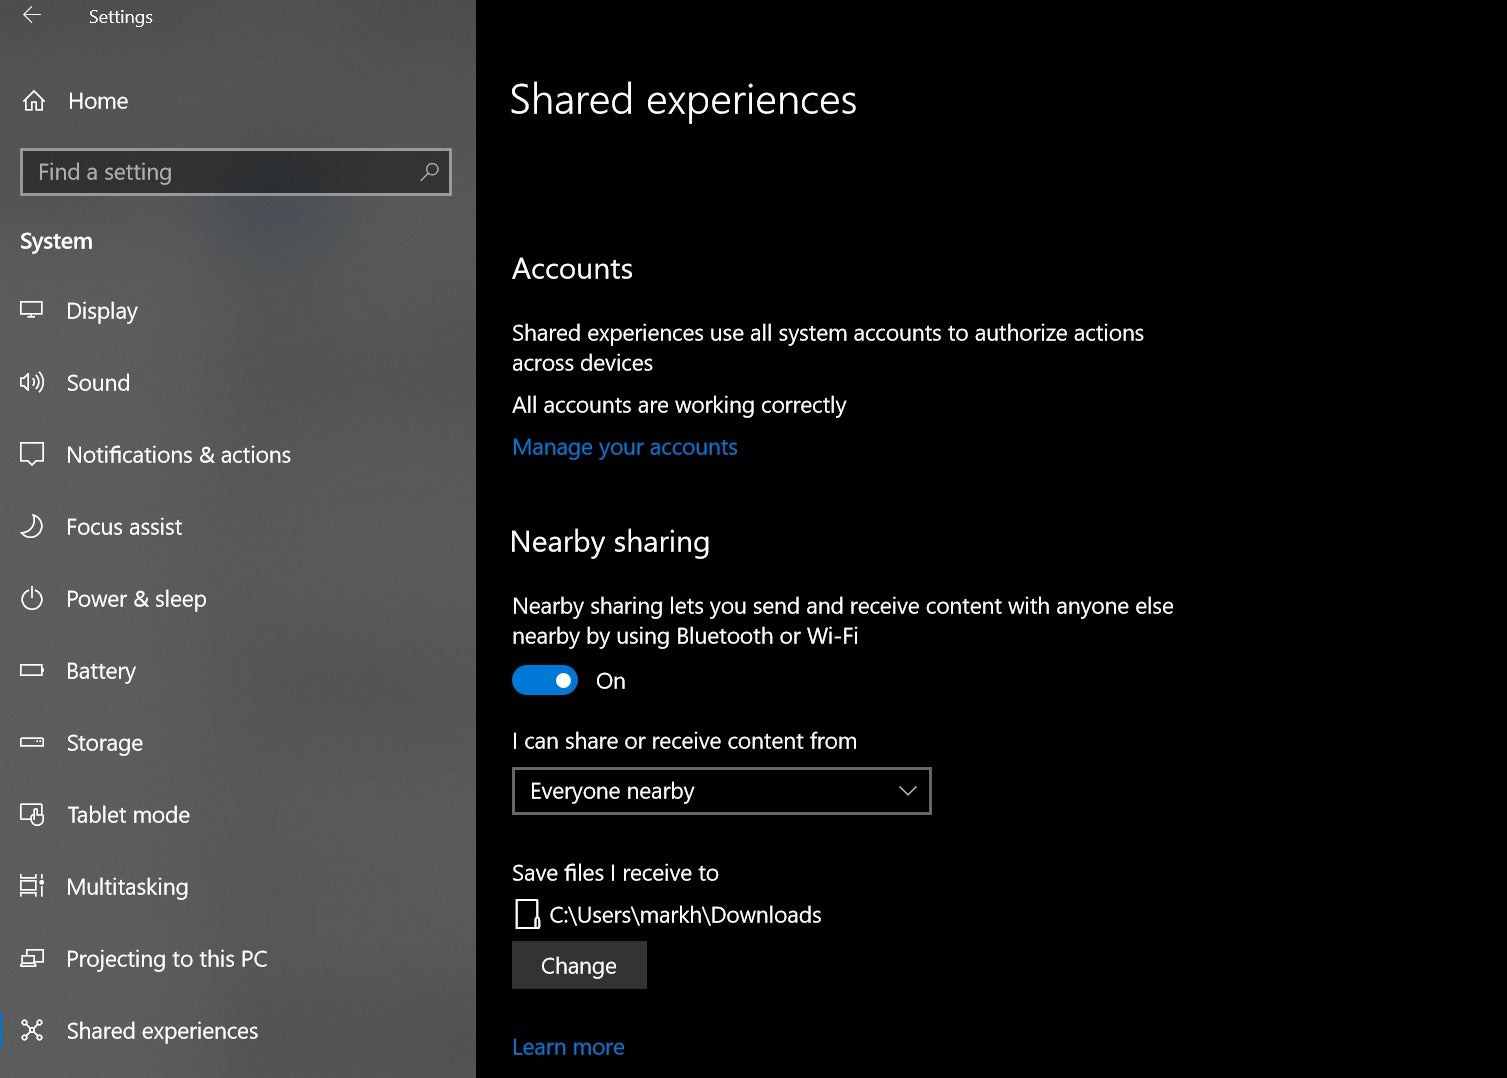
  3. Choose Shared Experiences: Click on "Shared experiences" in the left-hand pane.
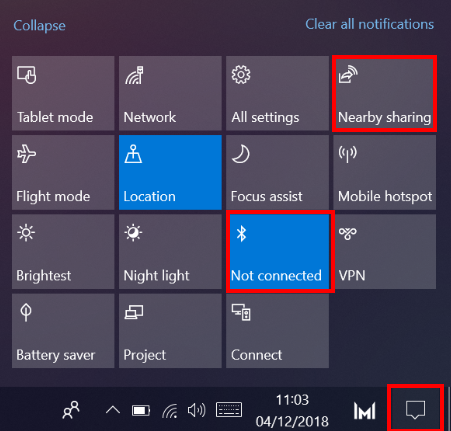
  4. Enable Nearby Sharing: Toggle the "Nearby Sharing" switch to the "On" position.
  5. Choose Sharing Options: Select the desired sharing options, including the types of content you wish to share and the devices you want to share with.

Once enabled, users can share files by:

  • Dragging and Dropping: Simply drag the desired file from one location and drop it onto another device’s icon in the Nearby Sharing window.
  • Right-Clicking and Selecting "Share": Right-click on the file or folder you want to share and select "Share" from the context menu.

FAQs on Nearby Sharing

Q: What devices are compatible with Nearby Sharing?

A: Nearby Sharing is compatible with Windows 10 devices and Android devices running Android 6.0 (Marshmallow) or later.

Q: How secure is Nearby Sharing?

A: Nearby Sharing utilizes Bluetooth and Wi-Fi encryption to protect data transfers. However, it is essential to be cautious about sharing sensitive information with unknown or untrusted devices.

Q: Can I share files with devices on different networks?

A: No, Nearby Sharing requires both devices to be on the same network or within a close proximity for the feature to function.

Q: How can I troubleshoot Nearby Sharing issues?

A: If Nearby Sharing is not working, try the following:

  • Ensure both devices have Bluetooth and Wi-Fi enabled.
  • Check for software updates on both devices.
  • Restart both devices.
  • Temporarily disable any antivirus or firewall software that might be interfering with the connection.

Tips for Optimizing Nearby Sharing

  • Ensure Bluetooth and Wi-Fi are enabled: Verify that both Bluetooth and Wi-Fi are turned on on both devices to ensure a stable connection.
  • Keep devices close: For optimal performance, keep devices within a close proximity to facilitate a strong Bluetooth and Wi-Fi signal.
  • Check for updates: Regularly update both Windows and Android devices to ensure compatibility and access the latest features.
  • Clear cache and restart: If you encounter issues, try clearing the Nearby Sharing cache and restarting both devices.

Conclusion

Nearby Sharing is a valuable feature in Windows 10 that simplifies file sharing between nearby devices. Its user-friendly interface, secure connection, and versatility make it an efficient and convenient alternative to traditional methods. By understanding its functionality and potential limitations, users can leverage this powerful tool to enhance collaboration, productivity, and overall user experience.

Nearby Share is Finally Available on Windows, Allowing for a Seamless File Sharing Experience How to Use Nearby Sharing in Windows 10 How to Use Nearby Sharing on Windows 10
How Windows 10's Near Share feature wirelessly beams files to nearby PCs  PCWorld Use Nearby sharing in Windows 10  HUAWEI Support Global How to Use Nearby Sharing in Windows 10
How to Use Nearby Sharing to Share Files in Windows 10 What Is "Near Share" In Windows 10? How To Share Files Wirelessly

Closure

Thus, we hope this article has provided valuable insights into Seamless Sharing: Exploring Windows 10’s Nearby Sharing Feature. We appreciate your attention to our article. See you in our next article!

Remove Learn About This Picture Windows 10

remove learn about this picture windows 10

Introduction

With great pleasure, we will explore the intriguing topic related to remove learn about this picture windows 10. Let’s weave interesting information and offer fresh perspectives to the readers.

It seems you’re asking about how to remove a specific learning resource or tool related to Windows 10. However, the phrase "remove learn about this picture windows 10" is unclear and doesn’t refer to a specific program or tool.

Remove Desktop

To provide accurate information, I need a clearer understanding of what you’re trying to remove. Please provide more context:

  • What is the specific tool or resource you are trying to remove? Is it a learning app, a website, a specific file, or something else entirely?
  • What is the purpose of this tool or resource? Is it for learning about Windows 10, for managing your computer, or for something else?
  • Where did you encounter this tool or resource? Was it pre-installed on your computer, downloaded from the internet, or found on a specific website?

Once you provide this information, I can give you specific instructions on how to remove it.

In the meantime, here are some general tips on how to remove software from your Windows 10 computer:

  • Use the Control Panel: The Control Panel is a built-in Windows tool that allows you to uninstall programs. You can access it by searching for "Control Panel" in the Windows search bar.
  • Use the Settings app: The Settings app is another way to uninstall programs. You can access it by pressing the Windows key + I.
  • Use the uninstaller: Many programs come with their own uninstaller. You can usually find this in the Start menu or in the program’s installation folder.
  • Use a third-party uninstaller: If you’re having trouble uninstalling a program, you can use a third-party uninstaller. These tools can help you remove stubborn programs that won’t uninstall through the standard methods.

Remember to always back up your important data before making any changes to your computer.

Remove the "Learn About This Picture" Icon from the Windows Spotlight Desktop Background - YouTube Remove Windows Spotlight "Learn about this picture" icon from Desktop How to Remove Learn About This Picture Icon in Windows?
Desktop Icons not working or clickable in Windows 11/10 Cách xóa biểu tượng Learn about this picture khi bật hình nền Spotlight trên Windows 11 22H2 Delete Windows Spotlight "Learn more about this picture" icon from Windows 11 Desktop
Remove Windows Spotlight Learn About This Picture Icon From Desktop  droidwin Remove Icon Learn About This Picture in Desktop Windows 11 - YouTube

Closure

Thus, we hope this article has provided valuable insights into remove learn about this picture windows 10. We thank you for taking the time to read this article. See you in our next article!

The Windows 10 Download Tool: A Gateway To A Seamless Upgrade

The Windows 10 Download Tool: A Gateway to a Seamless Upgrade

Introduction

With enthusiasm, let’s navigate through the intriguing topic related to The Windows 10 Download Tool: A Gateway to a Seamless Upgrade. Let’s weave interesting information and offer fresh perspectives to the readers.

The Windows 10 Download Tool: A Gateway to a Seamless Upgrade

How to upgrade to Windows 10 (Windows 10 Download Tool) – Botcrawl

The Windows 10 Download Tool, a free utility provided by Microsoft, serves as a bridge between users and the latest version of the Windows operating system. Its primary function is to simplify the process of acquiring and installing Windows 10, making it accessible even to users with limited technical expertise. This tool has become an essential resource for individuals and organizations seeking to upgrade their computers, providing a streamlined and efficient path to the latest features and security enhancements that Windows 10 offers.

Understanding the Tool’s Role:

The Windows 10 Download Tool operates as a central hub for accessing and managing the installation process. It acts as an intermediary between the user’s computer and Microsoft’s servers, ensuring a smooth and secure download of the necessary files. The tool’s core functionalities include:

  • Identifying the Appropriate Version: The tool analyzes the user’s current system configuration, including hardware specifications and existing software, to determine the optimal version of Windows 10 for their computer. This eliminates the need for users to manually search for compatible versions, ensuring a seamless transition.
  • Downloading the Installation Files: The tool facilitates a direct download of the Windows 10 installation files from Microsoft’s servers. This ensures that users receive the most up-to-date version of the operating system, free from potential corruption or errors.
  • Creating a Bootable USB Drive or ISO File: The tool allows users to create a bootable USB drive or an ISO file, providing a flexible and convenient way to install Windows 10 on their computer. This method enables users to perform clean installations or upgrades without relying on an internet connection during the installation process.
  • Managing the Installation Process: The tool provides clear and concise instructions throughout the installation process, guiding users through each step and ensuring a smooth transition to Windows 10.

Benefits of Using the Windows 10 Download Tool:

The Windows 10 Download Tool offers a multitude of benefits for users embarking on the upgrade journey. These advantages include:

  • Simplified Download and Installation: The tool streamlines the entire process, eliminating the need for manual downloads and complex configuration settings. This simplicity makes the upgrade process accessible to users of all technical skill levels.
  • Enhanced Security and Stability: By downloading directly from Microsoft’s servers, users ensure they receive a secure and verified version of Windows 10. This minimizes the risk of malware or other security vulnerabilities, ensuring a stable and reliable operating system.
  • Optimized Compatibility: The tool automatically identifies the appropriate version of Windows 10 for the user’s system, guaranteeing compatibility and optimal performance. This eliminates the risk of encountering compatibility issues or performance degradation after the upgrade.
  • User-Friendly Interface: The tool features a straightforward and intuitive interface, making it easy for users to navigate and understand the various options. Clear instructions and visual cues guide users through each step, ensuring a smooth and hassle-free experience.
  • Flexibility and Convenience: The tool allows users to create a bootable USB drive or an ISO file, providing flexibility in their installation approach. This enables users to upgrade their computers without relying on an internet connection, offering a convenient and adaptable solution.

Understanding the Different Download Options:

The Windows 10 Download Tool offers two primary options for acquiring the installation files:

  • Create Installation Media: This option allows users to create a bootable USB drive containing the Windows 10 installation files. This method is ideal for clean installations or upgrades on multiple computers.
  • Upgrade This PC Now: This option allows users to directly upgrade their existing Windows operating system to Windows 10. This method is suitable for users who wish to maintain their current applications and settings while upgrading to the latest version of Windows.

Frequently Asked Questions (FAQs) about the Windows 10 Download Tool:

Q: What are the system requirements for running the Windows 10 Download Tool?

A: The Windows 10 Download Tool requires a computer running Windows 7, Windows 8.1, or Windows 10. It also requires an internet connection to download the necessary files.

Q: Is the Windows 10 Download Tool free to use?

A: Yes, the Windows 10 Download Tool is completely free to use.

Q: Can I use the Windows 10 Download Tool to upgrade from an older version of Windows, such as Windows XP or Vista?

A: No, the Windows 10 Download Tool is designed to upgrade from Windows 7, Windows 8.1, or Windows 10. To upgrade from an older version of Windows, you may need to purchase a new Windows 10 license.

Q: Can I use the Windows 10 Download Tool to install Windows 10 on a virtual machine?

A: Yes, you can use the Windows 10 Download Tool to create an ISO file, which can then be used to install Windows 10 on a virtual machine.

Q: What happens to my existing files and settings when I upgrade to Windows 10?

A: When you upgrade to Windows 10 using the Windows 10 Download Tool, your existing files and settings will be preserved. However, it’s always recommended to create a backup of your important data before performing any major system changes.

Q: What are the differences between the different editions of Windows 10?

A: Windows 10 offers various editions, each tailored to specific needs and functionalities. These editions include Home, Pro, Enterprise, and Education. The Windows 10 Download Tool will automatically identify the appropriate edition for your system.

Tips for Using the Windows 10 Download Tool:

  • Ensure a Stable Internet Connection: A strong and reliable internet connection is crucial for downloading the installation files.
  • Back Up Your Data: It’s always recommended to back up your important data before performing any major system changes.
  • Review the System Requirements: Before downloading Windows 10, ensure your computer meets the minimum system requirements.
  • Choose the Appropriate Download Option: Select the appropriate download option based on your needs and preferences, either creating installation media or upgrading your existing system.
  • Follow the On-Screen Instructions: Carefully follow the instructions provided by the Windows 10 Download Tool to ensure a smooth and successful installation.

Conclusion:

The Windows 10 Download Tool serves as a vital resource for users seeking to upgrade their computers to the latest version of Windows. Its user-friendly interface, streamlined process, and comprehensive support make it an accessible and efficient solution for individuals and organizations alike. By providing a straightforward and secure method for acquiring and installing Windows 10, the tool empowers users to enjoy the latest features, security enhancements, and performance optimizations that the operating system offers. As technology continues to evolve, the Windows 10 Download Tool will remain an essential tool for navigating the world of Windows upgrades, ensuring a seamless and enjoyable experience for users of all skill levels.

Windows 10: Download und Upgrade Tool verfügbar - PocketPC.ch How to Upgrade to Windows 10 For Free in 2022 Windows 10 download tool - languagewes
Seamless System Upgrade Solution for Windows 10 announced by EaseUS  eNewsChannels News Download Windows 10 May 2020 Update ISO Image Now - The Redmond Cloud Upgrade to Windows 10  Tutorials
How to download and install Windows 10 ISO and install Windows 10 How to Download Windows 10 from Microsoft - Windows 10 Download Free & Easy - Full Version - YouTube

Closure

Thus, we hope this article has provided valuable insights into The Windows 10 Download Tool: A Gateway to a Seamless Upgrade. We appreciate your attention to our article. See you in our next article!

Maintaining PC Health: A Comprehensive Guide To System Optimization Tools

Maintaining PC Health: A Comprehensive Guide to System Optimization Tools

Introduction

With enthusiasm, let’s navigate through the intriguing topic related to Maintaining PC Health: A Comprehensive Guide to System Optimization Tools. Let’s weave interesting information and offer fresh perspectives to the readers.

Maintaining PC Health: A Comprehensive Guide to System Optimization Tools

How to Perform Your Own PC Health Check - NECL

In today’s digital age, personal computers are indispensable tools for work, entertainment, and communication. However, their complex internal workings can be a source of frustration and performance issues. Thankfully, a range of software tools have emerged to help users monitor and optimize their PC’s health, providing valuable insights and control over their system’s performance.

The Importance of PC Health Monitoring

Neglecting PC health can lead to a multitude of problems:

  • Slow performance: Cluttered hard drives, outdated drivers, and malware can bog down your system, making even basic tasks sluggish.
  • Frequent crashes and errors: Malfunctioning hardware components or software conflicts can cause unexpected crashes and system instability.
  • Security vulnerabilities: Outdated software and operating systems can leave your PC vulnerable to malware and cyberattacks.
  • Data loss: Hardware failures or corrupted files can result in irreplaceable data loss.

PC Health Monitoring Tools: A Powerful Arsenal

PC health monitoring tools offer a comprehensive suite of features to address these issues:

1. System Monitoring:

  • Resource Usage: These tools provide real-time insights into CPU, RAM, disk usage, and network activity, allowing users to identify resource-intensive processes and optimize performance.
  • Temperature Monitoring: Monitoring component temperatures is crucial for preventing overheating, which can lead to hardware damage.
  • System Stability: Tools can detect and alert users about potential system instability issues, such as driver conflicts or hardware failures.

2. Performance Optimization:

  • Disk Cleanup: These tools identify and remove unnecessary files, freeing up disk space and improving system performance.
  • Startup Manager: Managing startup programs can significantly reduce boot times and improve system responsiveness.
  • Driver Updates: Keeping drivers up-to-date ensures optimal hardware functionality and stability.

3. Security and Protection:

  • Malware Detection and Removal: These tools scan for and remove viruses, malware, and other threats, safeguarding your system and data.
  • Firewall Management: Monitoring and configuring firewall settings can prevent unauthorized access and protect against network attacks.
  • System Vulnerability Assessment: Tools can identify potential security vulnerabilities and recommend appropriate fixes.

4. Hardware Health:

  • Hard Drive Health: These tools monitor the health of your hard drive, detecting potential errors and predicting impending failures.
  • Component Stress Tests: Stress testing allows users to evaluate the stability and performance of their hardware components under heavy load.

Benefits of Using PC Health Monitoring Tools:

  • Improved System Performance: By identifying and resolving performance bottlenecks, these tools can significantly improve your PC’s speed and responsiveness.
  • Enhanced System Stability: Regular monitoring and maintenance can prevent system crashes and errors, ensuring a smoother and more reliable user experience.
  • Increased Security: By detecting and removing threats, these tools protect your system from malware, cyberattacks, and data loss.
  • Proactive Hardware Maintenance: Monitoring hardware health allows you to address potential issues before they escalate, preventing costly repairs or data loss.
  • Extended System Lifespan: By optimizing performance and addressing potential problems early, you can extend the lifespan of your PC.

Choosing the Right PC Health Monitoring Tool:

The best tool for your needs depends on your level of expertise and specific requirements. Consider the following factors:

  • Features: Choose a tool that offers the features you need, such as system monitoring, performance optimization, security, and hardware health.
  • Ease of Use: Opt for a tool with a user-friendly interface that is easy to understand and navigate.
  • Performance Impact: Some tools can have a significant impact on system performance. Choose a tool that is lightweight and efficient.
  • Cost: PC health monitoring tools range in price from free to paid. Choose a tool that fits your budget and offers the value you need.

Frequently Asked Questions (FAQs)

Q: Are PC health monitoring tools necessary for all users?

A: While not mandatory, these tools are highly recommended for users who want to ensure optimal PC performance, security, and stability.

Q: Can I monitor my PC’s health without installing software?

A: Some basic monitoring can be done through built-in tools like Task Manager and Resource Monitor in Windows. However, dedicated software provides more comprehensive insights and features.

Q: How often should I run a PC health check?

A: It is recommended to run a comprehensive health check at least once a month. However, you can schedule regular scans and monitoring tasks for specific components based on your needs.

Q: What are some popular PC health monitoring tools?

A: Some popular options include:

  • CCleaner: A comprehensive tool offering system cleaning, performance optimization, and security features.
  • IObit Advanced SystemCare: A powerful tool with a wide range of features, including system optimization, malware removal, and driver updates.
  • Malwarebytes: A specialized tool focused on malware detection and removal.
  • Avast Cleanup: A tool that optimizes system performance, cleans junk files, and protects against malware.
  • Auslogics BoostSpeed: A tool that focuses on improving system performance and stability.

Tips for Optimizing PC Health:

  • Regularly clean your hard drive: Remove unnecessary files and programs to free up disk space.
  • Keep your software up-to-date: Install the latest updates for your operating system and software applications.
  • Run a malware scan regularly: Protect your system from viruses and other threats.
  • Manage your startup programs: Reduce the number of programs that launch automatically at startup to improve boot times.
  • Monitor your system’s temperature: Ensure your components are not overheating, which can lead to hardware damage.
  • Back up your data regularly: Protect your important files and data from loss due to hardware failures or software errors.

Conclusion:

PC health monitoring tools are essential for maintaining optimal system performance, security, and stability. By proactively monitoring and optimizing your PC’s health, you can ensure a smooth and reliable user experience, protect your data, and extend the lifespan of your system. Choose the right tool based on your needs and use it regularly to keep your PC running smoothly.

11 Best PC Optimizer Software For Windows 11/10 (2024) OSpeedy System Optimizer - Download Advanced System Optimizer Review : Best PC Cleaning Utility Software
Best PC repair and optimizer software [2020 Guide] Advanced System Optimizer Review : Best PC Cleaning Utility Software 5+ best PC repair & optimizer tools to enhance your devices
PC Health Optimizer - FREE Download PC Health Optimizer 2.0 System Tools Utilities Is Advanced SystemCare Safe? How to Optimize Your PC? - MiniTool Partition Wizard

Closure

Thus, we hope this article has provided valuable insights into Maintaining PC Health: A Comprehensive Guide to System Optimization Tools. We hope you find this article informative and beneficial. See you in our next article!

Navigating The World Of Word Processing: A Guide To Microsoft Word 2007 On Windows 10

Navigating the World of Word Processing: A Guide to Microsoft Word 2007 on Windows 10

Introduction

With enthusiasm, let’s navigate through the intriguing topic related to Navigating the World of Word Processing: A Guide to Microsoft Word 2007 on Windows 10. Let’s weave interesting information and offer fresh perspectives to the readers.

Word 2007 Lesson 12 - Adding Navigation Tools to a Document - YouTube

The realm of word processing has evolved significantly since the advent of Microsoft Word, and while newer versions offer advanced features, Microsoft Word 2007 remains a reliable and widely used option, particularly for users familiar with its interface. This guide explores the intricacies of using Microsoft Word 2007 on Windows 10, focusing on its strengths, compatibility, and how to acquire the software.

Understanding Microsoft Word 2007 and its Relevance in 2023

Microsoft Word 2007, released in 2007, marked a significant shift in the user experience. It introduced the Ribbon interface, a more visually intuitive approach to accessing tools and commands, replacing the traditional menus. This shift, while initially met with some resistance, proved to be a positive development, streamlining the workflow for many users.

While newer versions of Microsoft Word have emerged with enhanced features and functionalities, Word 2007 remains a viable choice for several reasons:

  • Familiarity and Comfort: Many users are accustomed to the interface and functionality of Word 2007, making it a comfortable choice for tasks requiring familiarity.
  • File Compatibility: Word 2007 documents can be opened and edited in later versions of Word, ensuring seamless compatibility with modern systems.
  • Resource Efficiency: For older computers or systems with limited resources, Word 2007 might offer a more efficient performance compared to newer, resource-intensive versions.

Obtaining Microsoft Word 2007: Exploring Options

Acquiring a legitimate copy of Microsoft Word 2007 is essential for legal and ethical use. While free downloads of the software might be available online, these are often illegal copies, potentially containing malware or viruses. The following options provide legitimate avenues for obtaining Word 2007:

  • Purchase a Retail Copy: While no longer widely available in retail stores, used copies of the software might be found online from reputable sellers.
  • Microsoft’s Website: Microsoft no longer offers individual purchases of Word 2007, but it might be included in older versions of Microsoft Office suites available through authorized resellers.
  • Subscription Services: Microsoft Office 365, a subscription-based service, provides access to the latest versions of Microsoft Office applications, including Word.

Important Considerations: Compatibility and System Requirements

Before installing Word 2007 on Windows 10, it is crucial to ensure compatibility and meet the system requirements:

  • Operating System Compatibility: Word 2007 is officially compatible with Windows Vista, Windows XP, and Windows Server 2003. While it may run on Windows 10, compatibility is not guaranteed and may require workarounds or adjustments.
  • System Requirements: Word 2007 requires a minimum of 512 MB of RAM, 3 GB of hard disk space, and a 1 GHz processor. These are minimum requirements, and higher specifications are recommended for optimal performance.

Navigating the Word 2007 Interface: A User-Friendly Guide

The Ribbon interface of Word 2007, while different from earlier versions, is designed for ease of use:

  • The Ribbon: The Ribbon is divided into tabs, each containing related groups of commands. The tabs include "Home," "Insert," "Page Layout," "References," "Mailings," "Review," and "View."
  • The Quick Access Toolbar: Located at the top left corner, this toolbar provides quick access to frequently used commands, such as "Save," "Undo," and "Redo."
  • The Document Area: This is the primary workspace where you create and edit your documents.
  • The Status Bar: Located at the bottom of the window, the status bar displays information about the document, such as the page number, word count, and zoom level.

Essential Word 2007 Features: A Comprehensive Overview

Word 2007 offers a comprehensive suite of features for creating professional-looking documents:

  • Text Formatting: You can format text with various font styles, sizes, colors, and effects.
  • Paragraph Formatting: Options include alignment, indentation, spacing, and line breaks.
  • Lists and Tables: Word allows you to create numbered, bulleted, and multi-level lists, as well as tables for organizing data.
  • Images and Graphics: Insert and edit images, shapes, and charts to enhance visual appeal.
  • Document Styles: Predefined styles and templates can be applied to create consistent and professional-looking documents.
  • Collaboration Features: Word 2007 allows for real-time collaboration on documents, enabling multiple users to work simultaneously.

FAQs: Addressing Common Concerns

Q: Can I use Word 2007 on Windows 10 without any issues?

A: While Word 2007 may run on Windows 10, official compatibility is not guaranteed. You might encounter compatibility issues or performance limitations.

Q: Is it legal to download and use Word 2007 for free?

A: Downloading and using Word 2007 without a valid license is illegal and unethical. Consider purchasing a legitimate copy or opting for a subscription service.

Q: Can I upgrade from Word 2007 to a newer version?

A: You can upgrade to a newer version of Word, either through a standalone purchase or a subscription service like Microsoft Office 365.

Q: Are there any alternatives to Word 2007?

A: Several free and paid alternatives exist, such as Google Docs, LibreOffice, and OpenOffice. These offer comparable features and compatibility.

Tips for Using Word 2007 Effectively

  • Utilize the Ribbon: Familiarize yourself with the Ribbon’s tabs and groups to efficiently access commands.
  • Explore Keyboard Shortcuts: Learn common keyboard shortcuts to speed up your workflow.
  • Use Templates: Take advantage of pre-designed templates to save time and ensure consistency.
  • Save Regularly: Save your work frequently to avoid losing data in case of unexpected issues.
  • Explore Help Resources: Utilize Word’s built-in help system or online resources for assistance.

Conclusion: Navigating the Legacy of Word 2007

Microsoft Word 2007, despite being a legacy version, remains a viable option for users seeking a familiar and reliable word processing solution. While compatibility and system requirements should be carefully considered, its widespread use and compatibility with newer versions make it a valuable tool for various tasks. By understanding its features, navigating its interface, and exploring available resources, users can leverage Word 2007 effectively for their document creation needs.

MS WORD 2007 INTERFACE Curso de Microsoft Office 2007. A interface do Word 2007! Aula: 01 de 44 - YouTube What is MS Word Processing Software? - Smart Learning
Microsoft Word Training Word Processing - INFORMATION TECHNOLOGY FOR CSEC 01 microsoft office word 2007 (introduction and parts)
Working with Microsoft Office Word 2007 - HubPages Microsoft Word 2007 for Teachers Online Course  Vibe Learning

Closure

Thus, we hope this article has provided valuable insights into Navigating the World of Word Processing: A Guide to Microsoft Word 2007 on Windows 10. We appreciate your attention to our article. See you in our next article!

Navigating The Realm Of Realtek Bluetooth Drivers In Windows 11: A Comprehensive Guide

Navigating the Realm of Realtek Bluetooth Drivers in Windows 11: A Comprehensive Guide

Introduction

With enthusiasm, let’s navigate through the intriguing topic related to Navigating the Realm of Realtek Bluetooth Drivers in Windows 11: A Comprehensive Guide. Let’s weave interesting information and offer fresh perspectives to the readers.

Driver Bluetooth Windows 11 Realtek

The world of wireless communication has been revolutionized by Bluetooth technology, enabling seamless data transfer between devices. Realtek, a prominent manufacturer of network interface controllers (NICs), plays a crucial role in facilitating this connectivity through its Bluetooth drivers. These drivers act as the bridge between the Bluetooth hardware present in your computer and the Windows 11 operating system, allowing for smooth and reliable wireless communication.

This article delves into the intricacies of Realtek Bluetooth drivers in Windows 11, exploring their significance, functionality, and potential issues. We aim to equip users with a comprehensive understanding of these drivers, empowering them to troubleshoot any problems and optimize their Bluetooth experience.

Understanding Realtek Bluetooth Drivers: The Foundation of Wireless Connectivity

Realtek Bluetooth drivers are essential software components that enable Windows 11 to recognize and interact with your computer’s built-in Bluetooth hardware. These drivers facilitate the communication process between the operating system and the Bluetooth chip, allowing you to connect and utilize various Bluetooth devices.

Key Functions of Realtek Bluetooth Drivers:

  • Device Recognition and Initialization: The drivers identify the specific Bluetooth hardware present in your computer and configure it for optimal performance.
  • Bluetooth Protocol Management: Realtek drivers manage the complex Bluetooth communication protocols, ensuring seamless data transfer between devices.
  • Device Pairing and Connection: They enable the pairing process between your computer and other Bluetooth devices, allowing you to establish connections for data transfer or audio streaming.
  • Power Management: Realtek drivers optimize power consumption by managing the power state of the Bluetooth hardware, extending battery life.
  • Driver Updates and Compatibility: Regular driver updates ensure compatibility with the latest Bluetooth standards and address potential issues or security vulnerabilities.

The Importance of Realtek Bluetooth Drivers in Windows 11

Realtek Bluetooth drivers are not just a technical necessity; they are the cornerstone of a seamless and reliable Bluetooth experience in Windows 11. Their importance is reflected in the following aspects:

  • Enhanced Functionality: Up-to-date drivers unlock the full potential of your Bluetooth hardware, enabling you to connect to a wider range of devices and utilize advanced features.
  • Improved Stability and Performance: Well-maintained drivers ensure consistent connectivity, minimizing dropped connections and improving data transfer speeds.
  • Security and Compatibility: Regular driver updates address security vulnerabilities and maintain compatibility with the latest Bluetooth standards, ensuring a secure and reliable connection.
  • Troubleshooting and Error Resolution: In case of Bluetooth issues, identifying and updating the drivers can often resolve the problem, restoring functionality.

Identifying and Updating Realtek Bluetooth Drivers in Windows 11

To ensure optimal performance, it is crucial to identify and update your Realtek Bluetooth drivers regularly. This process can be accomplished through the following methods:

1. Using the Device Manager:

  • Open the Device Manager by searching for it in the Windows search bar.
  • Expand the Bluetooth category.
  • Right-click on your Bluetooth device and select Update driver.
  • Choose Search automatically for updated driver software.
  • Windows will automatically search for and install the latest driver available.

2. Visiting the Realtek Website:

  • Visit the Realtek website and navigate to the Support section.
  • Select your operating system (Windows 11) and your computer model.
  • Search for the Bluetooth driver specific to your hardware.
  • Download and install the latest driver package.

3. Using Third-Party Driver Update Software:

  • Numerous third-party driver update software programs are available online.
  • These programs scan your system for outdated drivers, including Realtek Bluetooth drivers, and provide updates.
  • Choose a reputable program and follow the instructions to scan and update your drivers.

Troubleshooting Common Realtek Bluetooth Driver Issues in Windows 11

While Realtek Bluetooth drivers generally provide a smooth experience, encountering issues is not uncommon. Here are some common problems and their potential solutions:

1. Bluetooth Device Not Recognized:

  • Solution: Check the Device Manager to ensure the Bluetooth device is listed. If it’s missing, try restarting your computer or updating the drivers.
  • Troubleshooting: Ensure the Bluetooth device is properly powered on and within range. Check for any physical obstructions between the devices.

2. Connection Issues:

  • Solution: Try re-pairing the Bluetooth device with your computer. Ensure the device is compatible with Windows 11.
  • Troubleshooting: Check for driver updates and ensure the Bluetooth service is running in Windows.

3. Audio Problems:

  • Solution: Ensure the Bluetooth device is properly configured as the audio output device in Windows. Check for driver updates and ensure the Bluetooth service is running.
  • Troubleshooting: Restart the Bluetooth service or try using a different Bluetooth device.

4. Slow Data Transfer:

  • Solution: Check for driver updates and ensure the Bluetooth device is connected at the highest possible speed.
  • Troubleshooting: Try restarting your computer or moving the devices closer together.

Frequently Asked Questions (FAQs) about Realtek Bluetooth Drivers in Windows 11

Q: How do I know if I need to update my Realtek Bluetooth driver?

A: Regularly check for driver updates using the methods described earlier. If you experience any Bluetooth connectivity issues, outdated drivers might be the culprit.

Q: What should I do if my Bluetooth driver is not working properly?

A: Try updating the driver to the latest version. If the issue persists, consult the Realtek website for troubleshooting guides or contact their support team.

Q: Can I uninstall my Realtek Bluetooth driver?

A: It is generally not recommended to uninstall the driver unless absolutely necessary. Doing so will disable Bluetooth functionality on your computer.

Q: Are Realtek Bluetooth drivers compatible with all Windows 11 devices?

A: Realtek drivers are compatible with a wide range of devices, but compatibility may vary depending on the specific hardware model. Consult the Realtek website for compatibility information.

Tips for Optimizing Realtek Bluetooth Drivers in Windows 11

  • Keep Your Drivers Updated: Regularly check for and install driver updates to ensure optimal performance and compatibility.
  • Check for Conflicts: If you experience Bluetooth issues, check for any conflicting software or hardware that might interfere with the drivers.
  • Run Troubleshooting Tools: Windows 11 includes built-in troubleshooting tools that can help identify and resolve Bluetooth connectivity issues.
  • Consider Using a Dedicated Bluetooth Adapter: If your computer’s built-in Bluetooth hardware is not performing well, consider using a dedicated Bluetooth adapter for improved performance.

Conclusion: Embracing the Power of Realtek Bluetooth Drivers in Windows 11

Realtek Bluetooth drivers are essential components for seamless wireless communication in Windows 11. By understanding their functionality, importance, and troubleshooting techniques, users can optimize their Bluetooth experience, ensuring reliable connections, enhanced performance, and access to a wide range of Bluetooth devices. Regular driver updates, proper troubleshooting, and a proactive approach to maintaining the drivers are key to maximizing the benefits of Bluetooth technology in Windows 11.

How to Update Realtek Bluetooth Driver – Windows 11 Driver Bluetooth Windows 11 Realtek How to Update Realtek Bluetooth Driver – Windows 11
Realtek Bluetooth Drivers Windows 11 How to Update Realtek Bluetooth 5.0 Driver for Windows 11/10/8/7 How to Update Realtek Bluetooth Driver – Windows 11
Driver Bluetooth Windows 11 Realtek How to Update Realtek Bluetooth Driver – Windows 11

Closure

Thus, we hope this article has provided valuable insights into Navigating the Realm of Realtek Bluetooth Drivers in Windows 11: A Comprehensive Guide. We appreciate your attention to our article. See you in our next article!

Q-Reduce Lite: A Comprehensive Guide To Optimizing Laptop Performance

Q-Reduce Lite: A Comprehensive Guide to Optimizing Laptop Performance

Introduction

With enthusiasm, let’s navigate through the intriguing topic related to Q-Reduce Lite: A Comprehensive Guide to Optimizing Laptop Performance. Let’s weave interesting information and offer fresh perspectives to the readers.

Q-Reduce Lite: A Comprehensive Guide to Optimizing Laptop Performance

QReduce Lite॥QReduce Photo Reducer/Compressor Mobile App॥ How To Reduce Photo Size॥ compress

In today’s digital landscape, laptops have become indispensable tools for work, entertainment, and communication. However, as we rely on them more heavily, they often become bogged down by a multitude of processes running in the background, leading to sluggish performance and frustrating delays. This is where a performance optimization tool like Q-Reduce Lite can be a valuable asset.

Q-Reduce Lite is a lightweight software application designed to enhance the performance of laptops by identifying and managing resource-intensive processes. Its primary function is to analyze system activity and prioritize essential tasks while minimizing the impact of non-critical processes. This results in a smoother, more responsive user experience, enabling users to maximize their productivity and enjoy a more enjoyable computing experience.

Understanding the Core Functionality of Q-Reduce Lite

Q-Reduce Lite operates by leveraging several key features:

1. Process Prioritization: The software intelligently analyzes the running processes on your laptop and categorizes them based on their resource usage and importance. It then prioritizes essential processes, such as those related to your active applications, while reducing the priority of less critical tasks. This ensures that your system resources are allocated effectively, leading to a noticeable improvement in overall performance.

2. Background Process Management: Q-Reduce Lite can effectively manage background processes that consume significant system resources without contributing directly to your current activity. These processes can range from software updates to system maintenance tasks, and they often run silently, draining your laptop’s power and impacting performance. Q-Reduce Lite allows you to control and optimize these processes, ensuring they do not hinder your workflow.

3. Resource Optimization: The software monitors system resources, including CPU, RAM, and disk usage. By analyzing these metrics, Q-Reduce Lite can identify potential bottlenecks and adjust processes accordingly to maintain optimal performance. This proactive approach ensures that your laptop operates efficiently, even when handling demanding tasks.

4. Startup Optimization: Q-Reduce Lite can help optimize the startup process of your laptop by identifying and disabling unnecessary programs that launch automatically on boot. This minimizes the time it takes for your laptop to become fully operational, enhancing the user experience and reducing frustration.

5. User-Friendly Interface: Q-Reduce Lite features a simple and intuitive interface, making it easy for users of all technical backgrounds to navigate and understand its functionalities. This accessibility ensures that even novice users can effectively utilize the software to improve their laptop’s performance without needing extensive technical knowledge.

Benefits of Utilizing Q-Reduce Lite

Implementing Q-Reduce Lite on your laptop can lead to several significant benefits:

1. Enhanced Performance: By optimizing system resources and managing background processes, Q-Reduce Lite delivers a tangible improvement in laptop performance. Users can experience faster application loading times, smoother multitasking, and a more responsive overall experience.

2. Increased Productivity: With a smoother and more efficient operating system, users can focus on their tasks without distractions caused by system lag or slowdowns. This increased productivity translates to getting more done in less time, maximizing efficiency and achieving goals faster.

3. Extended Battery Life: By managing resource-intensive processes and minimizing unnecessary background activity, Q-Reduce Lite can extend the battery life of your laptop. This is particularly beneficial for users who rely on their laptops for extended periods without access to a power source.

4. Improved System Stability: By prioritizing essential tasks and managing resource usage effectively, Q-Reduce Lite can contribute to a more stable and reliable system. This reduces the likelihood of crashes, freezes, or other performance issues that can disrupt workflows and cause frustration.

5. Reduced System Stress: By optimizing resource allocation and managing background processes, Q-Reduce Lite reduces the overall stress on your laptop’s hardware. This can extend the lifespan of your device by preventing premature wear and tear caused by excessive resource demands.

FAQs Regarding Q-Reduce Lite

1. Is Q-Reduce Lite compatible with my laptop?

Q-Reduce Lite is designed to be compatible with a wide range of laptops running various operating systems, including Windows and macOS. However, it is always advisable to check the software’s compatibility specifications before downloading and installing it.

2. Does Q-Reduce Lite require any special hardware requirements?

Q-Reduce Lite is a lightweight application and does not require any specific hardware requirements. It can run smoothly on most laptops with minimal system resources.

3. Is Q-Reduce Lite safe to use?

Q-Reduce Lite is developed with security and privacy in mind. It does not collect or transmit any personal information and only accesses system resources with your consent.

4. How do I install and configure Q-Reduce Lite?

Installing and configuring Q-Reduce Lite is a straightforward process. The software is typically available for download from the developer’s website. Once downloaded, simply follow the installation instructions provided, and you can then customize the settings according to your preferences.

5. Can I customize Q-Reduce Lite’s settings?

Yes, Q-Reduce Lite offers a range of customizable settings to tailor the software’s performance to your specific needs. You can adjust the priority levels for different processes, control the frequency of system scans, and configure other options to optimize the software’s functionality for your laptop.

Tips for Optimizing Q-Reduce Lite’s Effectiveness

1. Regularly Monitor System Performance: It is essential to monitor your laptop’s performance after installing Q-Reduce Lite to ensure it is functioning optimally. This can be done by observing application loading times, multitasking capabilities, and overall system responsiveness.

2. Adjust Settings Based on Usage Patterns: The settings of Q-Reduce Lite can be adjusted to suit your specific usage patterns. For example, if you are a heavy multitasker, you may need to prioritize certain processes to maintain a smooth workflow.

3. Regularly Update Q-Reduce Lite: Developers often release updates to improve the software’s performance, add new features, and address any security vulnerabilities. It is recommended to keep Q-Reduce Lite updated to ensure you are benefiting from the latest advancements.

4. Consider Using Other Optimization Tools: While Q-Reduce Lite is a powerful performance optimization tool, it can be combined with other system optimization tools for even greater benefits. This could include using a disk cleanup utility, a registry cleaner, or a memory optimizer to further enhance your laptop’s performance.

Conclusion

Q-Reduce Lite is a valuable tool for optimizing laptop performance and enhancing the user experience. By intelligently managing system resources, prioritizing essential tasks, and minimizing the impact of non-critical processes, Q-Reduce Lite delivers a noticeable improvement in speed, responsiveness, and overall system stability. With its user-friendly interface and customizable settings, Q-Reduce Lite is an effective solution for users seeking to unlock the full potential of their laptops and maximize their productivity.

How To Optimize A Laptop For Best Performance? 6 Aplikasi Kompres Foto di HP Paling Recommended - Rancah Post How to Optimize Laptop for Maximum Performance
10 Ways To Optimize LAPTOP/PC Speed To The Best Performance. Q Reduce Lite  Compress any File  World in Hand Mobile IT - YouTube How To Optimize Low-End PC/Laptops For Gaming & Performance in 2022  Fix Lag The Ultimate FPS
Decrease image size via mobile  using Q reduce lite app - YouTube Cara Agar Status WhatsApp Tidak Pecah Untuk Video & Foto  Titik ID

Closure

Thus, we hope this article has provided valuable insights into Q-Reduce Lite: A Comprehensive Guide to Optimizing Laptop Performance. We thank you for taking the time to read this article. See you in our next article!

Windows 11: A Comprehensive Look At The Latest Operating System

Windows 11: A Comprehensive Look at the Latest Operating System

Introduction

In this auspicious occasion, we are delighted to delve into the intriguing topic related to Windows 11: A Comprehensive Look at the Latest Operating System. Let’s weave interesting information and offer fresh perspectives to the readers.

Windows 11: A Comprehensive Look at the Latest Operating System

Windows 11 Operating System - NetAns

Windows 11, the latest iteration of Microsoft’s flagship operating system, represents a significant evolution in the user experience, offering a refined interface, enhanced security features, and a focus on performance and productivity. This article delves into the key aspects of Windows 11, exploring its functionalities, benefits, and potential impact on users.

A Modern Design and Interface

Windows 11 boasts a sleek and contemporary design, emphasizing a cleaner and more intuitive user experience. The interface features rounded corners, a centered taskbar, and a new Start menu that prioritizes pinned apps and recent documents, enhancing accessibility and navigation. The redesigned File Explorer offers a streamlined layout, making it easier to manage files and folders.

Enhanced Security Features

Security remains a paramount concern in the digital age, and Windows 11 addresses this with robust security enhancements. Microsoft has integrated advanced features like Windows Hello for secure biometric authentication, Microsoft Defender for comprehensive malware protection, and TPM 2.0 for enhanced hardware-level security. These measures provide a more secure environment for users, safeguarding their data and privacy.

Improved Performance and Productivity

Windows 11 is designed to deliver improved performance and productivity. The operating system utilizes the latest hardware advancements, including support for the latest processors and graphics cards, to ensure smooth and efficient operation. It also features optimized resource management, ensuring that applications run smoothly and efficiently.

Focus on Gaming and Entertainment

Windows 11 caters to gaming enthusiasts and entertainment aficionados with several features. The operating system supports the latest gaming technologies, including DirectX 12 Ultimate, enabling immersive and visually stunning gaming experiences. It also integrates seamlessly with Xbox Game Pass, providing access to a vast library of games.

Integration with Microsoft Services

Windows 11 seamlessly integrates with other Microsoft services, enhancing user experience and productivity. Features like Microsoft Teams, OneDrive, and Microsoft Edge are tightly integrated, enabling users to collaborate, store data, and browse the web seamlessly. This interconnected ecosystem provides a unified and efficient platform for users.

Accessibility and Inclusivity

Windows 11 prioritizes accessibility and inclusivity, offering features that cater to diverse users. The operating system includes a comprehensive set of accessibility tools, such as screen readers, magnifiers, and high contrast themes, to ensure that everyone can access and utilize the system effectively.

Frequently Asked Questions

Q: Is Windows 11 compatible with my current PC?

A: Windows 11 has specific system requirements. To check compatibility, refer to the official Microsoft website or use the PC Health Check app.

Q: What are the system requirements for Windows 11?

A: Windows 11 requires a processor with at least 1 GHz or faster, 4 GB of RAM, 64 GB of storage, and a compatible graphics card. Refer to the official Microsoft website for detailed specifications.

Q: How can I upgrade to Windows 11?

A: If your PC meets the system requirements, you can upgrade to Windows 11 from the Windows Update settings. You can also download and install the Windows 11 installation media from the Microsoft website.

Q: Is Windows 11 free?

A: Windows 11 is available as a free upgrade for eligible Windows 10 users. However, purchasing a new device with Windows 11 pre-installed may incur a cost.

Q: What are the benefits of upgrading to Windows 11?

A: Windows 11 offers a modern interface, enhanced security features, improved performance, and integration with Microsoft services. It also provides a more user-friendly experience and caters to diverse needs, including gaming, entertainment, and accessibility.

Tips for Using Windows 11

  • Explore the new Start Menu: Familiarize yourself with the redesigned Start menu, which prioritizes pinned apps and recent documents, making it easier to find what you need.
  • Customize your taskbar: Rearrange icons, pin frequently used applications, and adjust taskbar settings to personalize your workflow.
  • Utilize the new Snap Layouts: Take advantage of Snap Layouts to organize windows and maximize screen space for multitasking.
  • Enable Windows Hello: Set up Windows Hello for secure biometric authentication, enhancing your account security.
  • Explore the new Microsoft Edge: Discover the features and enhancements of the latest Microsoft Edge browser, including improved performance and integration with Microsoft services.

Conclusion

Windows 11 represents a significant evolution in the Windows ecosystem, offering a modern design, enhanced security, and improved performance. Its focus on user experience, productivity, and accessibility makes it a compelling option for individuals and businesses alike. By embracing the new features and functionalities, users can leverage the full potential of Windows 11 and experience a more efficient, secure, and enjoyable computing environment.

Microsoft has released version 11 of the Windows operating system - pictures Windows 11: this is the new Microsoft operating system - Techidence Windows 11 Revealed: A Comprehensive Overview of the New OS
Windows 11: The Ultimate Guide to the Latest Operating System by Microsoft Windows 11 Is Now Official: This Microsoft S New Operating System Has Released Version Of The Windows 11 operating system on PC screen. Windows 11 is the latest major release of Microsoft's
What the New Windows 11 Operating System Means for Businesses New Features of Windows 11 Operating System - EE-Vibes

Closure

Thus, we hope this article has provided valuable insights into Windows 11: A Comprehensive Look at the Latest Operating System. We thank you for taking the time to read this article. See you in our next article!

Parallels Desktop For Mac: A Seamless Bridge To Windows 11 23H2

Parallels Desktop for Mac: A Seamless Bridge to Windows 11 23H2

Introduction

With great pleasure, we will explore the intriguing topic related to Parallels Desktop for Mac: A Seamless Bridge to Windows 11 23H2. Let’s weave interesting information and offer fresh perspectives to the readers.

Parallels Desktop for Mac: A Seamless Bridge to Windows 11 23H2

Parallels Desktop for Mac Business Edition

Parallels Desktop for Mac has long been a cornerstone for users seeking a seamless integration of Windows within the macOS ecosystem. The latest version, supporting Windows 11 23H2, continues this tradition by offering a powerful and user-friendly environment for running Windows applications alongside macOS applications. This article explores the key features, benefits, and considerations of Parallels Desktop for Mac, focusing specifically on its compatibility with Windows 11 23H2.

Bridging the Gap: A Comprehensive Windows Experience on macOS

Parallels Desktop for Mac provides a virtual machine environment, allowing users to install and run Windows 11 23H2 directly on their Mac. This eliminates the need for dual booting, offering a streamlined workflow where users can seamlessly switch between macOS and Windows applications without restarting their computer.

Key Features of Parallels Desktop for Mac

1. Enhanced Performance and Optimization: Parallels Desktop leverages the power of Apple silicon processors, delivering exceptional performance for Windows applications. This translates to faster boot times, smoother multitasking, and improved graphics rendering, making the Windows experience on macOS feel more native.

2. Seamless Integration with macOS: The software seamlessly integrates with macOS, allowing users to drag and drop files between Windows and macOS applications, copy and paste text, and share folders and peripherals. This interoperability fosters a unified and efficient workflow.

3. Coherence Mode: A Native Windows Experience: Coherence mode presents Windows applications as if they were native macOS applications, eliminating the need for a separate Windows desktop. This feature enhances user experience by allowing for a more integrated and familiar interface.

4. DirectX 11 and OpenGL 3.3 Support: Parallels Desktop for Mac supports DirectX 11 and OpenGL 3.3, ensuring optimal performance for graphics-intensive applications, including games and design software. This enables users to run a wide range of Windows applications without sacrificing visual fidelity.

5. Customizable Resources: Users can allocate specific resources, including CPU cores, RAM, and storage space, to the Windows virtual machine. This allows for fine-tuning performance based on individual needs and application requirements.

Benefits of Using Parallels Desktop for Mac with Windows 11 23H2

1. Access to Windows-Exclusive Applications: Parallels Desktop provides access to a vast library of Windows-exclusive applications, including enterprise software, productivity tools, and creative applications, which may not be available on macOS.

2. Compatibility with Legacy Software: Many legacy applications are only compatible with Windows operating systems. Parallels Desktop allows users to run these applications seamlessly on their Mac, eliminating compatibility issues.

3. Enhanced Productivity: The ability to run Windows and macOS applications side-by-side significantly improves productivity, allowing users to take advantage of the strengths of both operating systems.

4. Flexibility and Convenience: Parallels Desktop offers flexibility in managing the Windows environment, allowing users to choose between full-screen mode, windowed mode, or Coherence mode based on their preferences and workflow.

5. Simplified Management: The software provides a user-friendly interface for managing virtual machines, including creating, configuring, and updating the Windows environment.

FAQs about Parallels Desktop for Mac and Windows 11 23H2

Q: What are the system requirements for running Parallels Desktop for Mac with Windows 11 23H2?

A: The minimum system requirements for Parallels Desktop for Mac with Windows 11 23H2 include:

  • Mac: Intel-based Macs with macOS 10.14 or later or Apple silicon Macs with macOS 11 or later.
  • Processor: Intel Core i5 or equivalent or Apple M1 chip or later.
  • Memory: 8 GB of RAM (16 GB recommended).
  • Storage: 50 GB of free disk space.

Q: Can I use Parallels Desktop for Mac to run Windows 11 23H2 on my Apple silicon Mac?

A: Yes, Parallels Desktop for Mac fully supports Windows 11 23H2 on Apple silicon Macs. It leverages the power of Apple silicon processors to deliver optimal performance for Windows applications.

Q: How do I install Windows 11 23H2 on Parallels Desktop for Mac?

A: Parallels Desktop provides a streamlined installation process. You can download the Windows 11 23H2 ISO file from Microsoft’s website and import it into Parallels Desktop. The software will then guide you through the installation process.

Q: Can I use my existing Windows 11 23H2 license with Parallels Desktop for Mac?

A: Yes, you can use your existing Windows 11 23H2 license to activate the virtual machine within Parallels Desktop.

Q: What are the performance implications of running Windows 11 23H2 on Parallels Desktop for Mac?

A: Parallels Desktop is designed to optimize performance for Windows applications. While there may be a slight performance overhead compared to running Windows natively, the software leverages hardware acceleration and optimization techniques to minimize this impact.

Tips for Using Parallels Desktop for Mac with Windows 11 23H2

1. Allocate Sufficient Resources: To ensure optimal performance, allocate sufficient CPU cores, RAM, and storage space to the Windows virtual machine.

2. Enable Hardware Acceleration: Hardware acceleration significantly improves performance for graphics-intensive applications. Ensure that hardware acceleration is enabled in Parallels Desktop settings.

3. Use Coherence Mode for a Seamless Experience: Coherence mode provides a more integrated experience by presenting Windows applications as native macOS applications.

4. Update Parallels Desktop Regularly: Regularly update Parallels Desktop to benefit from the latest performance enhancements, bug fixes, and feature additions.

5. Optimize Windows Settings: Adjust Windows settings, such as screen resolution and power management, to enhance performance and battery life.

Conclusion

Parallels Desktop for Mac offers a comprehensive and user-friendly solution for running Windows 11 23H2 on macOS. Its seamless integration, enhanced performance, and extensive feature set make it an invaluable tool for professionals, students, and anyone seeking to leverage the strengths of both operating systems. By bridging the gap between Windows and macOS, Parallels Desktop empowers users to access a wider range of applications, enhance productivity, and streamline their workflow.

Seamless Windows and Mac Integration: Parallels Desktop Review - YouTube How to Install Windows 11 on a Mac with Parallels Desktop  Petri How to Use Parallels Desktop to run Windows 11 on M1 Macs
Parallels Desktop: The Ultimate Solution for Running Windows on macOS Parallels mac windows 11 - hcplm Parallels Desktop Free Download for PC and Mac (2020 latest)  Pcmacstore.com
Parallels Desktop : un outil de virtualisation pour exécuter Windows sur Mac Parallels Desktop für Mac: Die perfekte Lösung für eine nahtlose Windows-Erfahrung

Closure

Thus, we hope this article has provided valuable insights into Parallels Desktop for Mac: A Seamless Bridge to Windows 11 23H2. We hope you find this article informative and beneficial. See you in our next article!

Unveiling The Power Of Windows 11: A Comprehensive Exploration

Unveiling the Power of Windows 11: A Comprehensive Exploration

Introduction

With enthusiasm, let’s navigate through the intriguing topic related to Unveiling the Power of Windows 11: A Comprehensive Exploration. Let’s weave interesting information and offer fresh perspectives to the readers.

Unveiling the Power of Windows 11: A Comprehensive Exploration

Windows 11: Unveiling The Exciting New Features

Windows 11, the latest iteration of Microsoft’s flagship operating system, represents a significant leap forward in terms of functionality, aesthetics, and user experience. It builds upon the foundation laid by its predecessor, Windows 10, while introducing a host of innovative features and improvements designed to enhance productivity, security, and overall user satisfaction.

A New Era of User Experience:

At its core, Windows 11 is a visually stunning operating system that embraces a modern, minimalist design language. The user interface is characterized by clean lines, rounded corners, and a refined color palette, creating a visually appealing and intuitive environment. The Start menu, a cornerstone of the Windows experience, has undergone a complete redesign, adopting a centered layout and a more streamlined approach. This shift not only enhances aesthetics but also streamlines navigation, making it easier for users to access their favorite applications and files.

Enhanced Performance and Efficiency:

Windows 11 boasts a suite of performance enhancements that contribute to a smoother and more responsive user experience. The operating system leverages the power of modern hardware, including multi-core processors and high-speed storage devices, to deliver a seamless and efficient workflow. The new "DirectStorage" feature, designed to accelerate game loading times, exemplifies this commitment to performance optimization.

Unwavering Security and Privacy:

Security and privacy remain paramount in Windows 11. The operating system incorporates robust security measures, including hardware-level protection, advanced threat detection, and enhanced privacy controls. The "Windows Hello" feature, enabling facial recognition and fingerprint authentication, further strengthens user security, while the "Microsoft Defender" suite provides comprehensive protection against malware and other cyber threats.

Seamless Integration and Cross-Device Compatibility:

Windows 11 prioritizes seamless integration across devices. The operating system seamlessly connects with other Windows devices, allowing users to share files, copy and paste content, and seamlessly transition between devices. The "Microsoft Teams" integration provides a unified platform for communication and collaboration, fostering a more connected and productive work environment.

A Platform for Innovation:

Windows 11 serves as a platform for innovation, empowering developers to create groundbreaking applications and experiences. The operating system supports the latest technologies, including artificial intelligence (AI), augmented reality (AR), and virtual reality (VR), paving the way for immersive and interactive applications.

Exploring the Benefits:

The benefits of Windows 11 extend beyond its aesthetic appeal and performance enhancements. The operating system offers a compelling value proposition for both individuals and businesses:

  • Enhanced Productivity: Windows 11 empowers users to accomplish tasks more efficiently, thanks to its streamlined interface, improved performance, and integrated productivity tools.
  • Improved Security: The enhanced security features in Windows 11 provide robust protection against cyber threats, safeguarding user data and ensuring a secure computing environment.
  • Seamless Connectivity: The operating system facilitates seamless connectivity across devices, enabling users to work seamlessly across multiple platforms and share information effortlessly.
  • Immersive Experiences: Windows 11 supports cutting-edge technologies like AI, AR, and VR, opening up a world of immersive and interactive experiences for users.
  • Future-Proofed Platform: Windows 11 is built for the future, providing a platform for developers to create innovative applications and experiences that will shape the future of computing.

Frequently Asked Questions:

Q: What are the minimum system requirements for Windows 11?

A: To run Windows 11, your computer must meet the following minimum system requirements:

  • Processor: 1 gigahertz (GHz) or faster with 2 or more cores
  • RAM: 4 gigabytes (GB)
  • Storage: 64 GB or larger storage device
  • Graphics Card: Compatible with DirectX 12 or later
  • Display: High Definition (720p) display with a minimum resolution of 960 x 720 pixels
  • Internet Connection: For initial setup and some features

Q: How can I upgrade to Windows 11?

A: If your computer meets the minimum system requirements, you can upgrade to Windows 11 directly from Windows 10. You can check for updates by going to "Settings > Update & Security > Windows Update." Alternatively, you can download the Windows 11 installation media from the Microsoft website.

Q: What are the key differences between Windows 10 and Windows 11?

A: Windows 11 introduces several key differences compared to Windows 10:

  • Redesigned User Interface: Windows 11 features a modern, minimalist design with a centered Start menu and a refined color palette.
  • Enhanced Performance: Windows 11 leverages the power of modern hardware to deliver a smoother and more responsive user experience.
  • Improved Security: Windows 11 incorporates robust security measures, including hardware-level protection and advanced threat detection.
  • Seamless Integration: Windows 11 seamlessly integrates with other Windows devices, allowing for effortless sharing and collaboration.
  • Support for New Technologies: Windows 11 supports cutting-edge technologies like AI, AR, and VR, paving the way for immersive and interactive applications.

Q: Is Windows 11 free?

A: If you are upgrading from Windows 10, Windows 11 is generally considered free. However, you may need to purchase a new license if you are installing Windows 11 on a new computer or if you are upgrading from an older version of Windows.

Tips for Optimizing Windows 11:

  • Keep Your System Updated: Regularly update Windows 11 to ensure you have the latest security patches and performance improvements.
  • Manage Startup Applications: Disable unnecessary startup applications to improve boot times and system performance.
  • Optimize Storage: Regularly clean up your hard drive and delete unnecessary files to free up storage space.
  • Adjust Power Settings: Adjust power settings to optimize battery life or performance, depending on your needs.
  • Use Windows Defender: Regularly scan your computer with Windows Defender to protect against malware and other cyber threats.

Conclusion:

Windows 11 represents a significant advancement in the world of operating systems, offering a compelling blend of aesthetics, functionality, and security. Its modern design, enhanced performance, robust security features, and seamless integration across devices make it an ideal choice for individuals and businesses alike. By embracing the power of Windows 11, users can unlock a new era of productivity, creativity, and innovation, shaping the future of computing.

How to change Power Settings on Windows 11. Unveiling the Evolution: Advantages of Windows 11 Over Windows 10 How To Watch The Windows 11 Unveiling Event - www.vrogue.co
Mastering Windows 11 Unveiling 20 Features, Tips & Tricks - IKMZIKI.COM Windows 11: A Comprehensive Guide about Features and Updates Perunity - Latest Business Story Learn Microsoft Windows 11: Comprehensive Windows 11 Course / AvaxHome
Learn Microsoft Windows 11 Comprehensive Windows 11 Course  Video Tutorials for Study Windows 11 official Release Date Out Now! - TechDecode Tutorials

Closure

Thus, we hope this article has provided valuable insights into Unveiling the Power of Windows 11: A Comprehensive Exploration. We thank you for taking the time to read this article. See you in our next article!