Archives February 2024

Uninstalling Windows Copilot: A Comprehensive Guide

Uninstalling Windows Copilot: A Comprehensive Guide

Introduction

In this auspicious occasion, we are delighted to delve into the intriguing topic related to Uninstalling Windows Copilot: A Comprehensive Guide. Let’s weave interesting information and offer fresh perspectives to the readers.

Uninstalling Windows Copilot: A Comprehensive Guide

How to Uninstall Copilot Windows 11? [2023 Update]

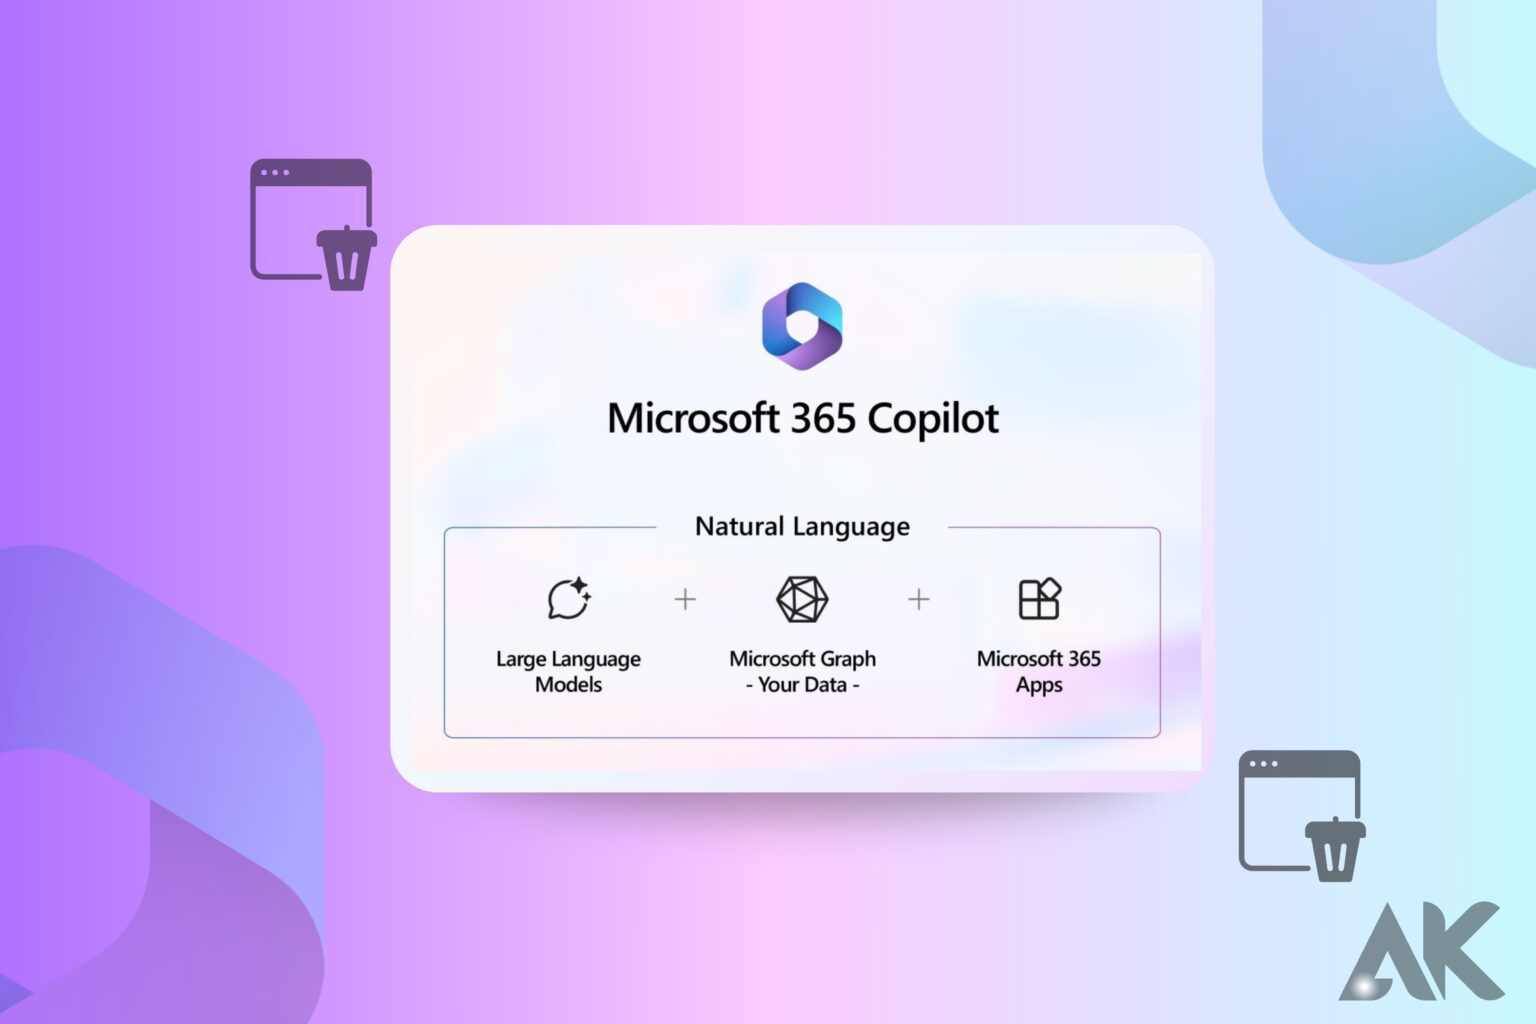
Microsoft’s Windows Copilot, an AI-powered assistant integrated into Windows 11, aims to enhance user experience by offering intelligent assistance across various tasks. However, some users may find the feature unnecessary or even intrusive, leading them to seek its removal. This guide provides a detailed explanation of how to uninstall Windows Copilot from Windows 11 Pro, highlighting the process, potential benefits, and considerations involved.

Understanding Windows Copilot and Its Functionality

Windows Copilot is a powerful tool that utilizes artificial intelligence to streamline user workflows. It leverages the capabilities of Microsoft Bing and other AI models to understand user requests, provide context-aware suggestions, and automate tasks. For instance, it can assist with:

  • Generating text: Creating emails, writing documents, or summarizing information.
  • Finding and organizing information: Searching the web, accessing files, and managing calendar events.
  • Enhancing productivity: Automating repetitive tasks, providing quick answers, and offering insights.

While these features can be beneficial for many users, certain individuals may find them redundant or prefer a more traditional approach to interacting with their operating system.

Reasons for Uninstalling Windows Copilot

Users might choose to remove Windows Copilot for several reasons:

  • Privacy Concerns: The AI assistant collects user data to improve its performance and provide personalized recommendations. This data collection might raise privacy concerns for individuals who value their data security.
  • Performance Impact: Windows Copilot can utilize system resources, potentially impacting system performance, especially on devices with limited resources.
  • Preference for Traditional Methods: Some users prefer a more traditional user interface and find the AI assistant’s presence intrusive.
  • Lack of Necessity: For users who do not frequently utilize the features offered by Windows Copilot, the feature might seem unnecessary and redundant.

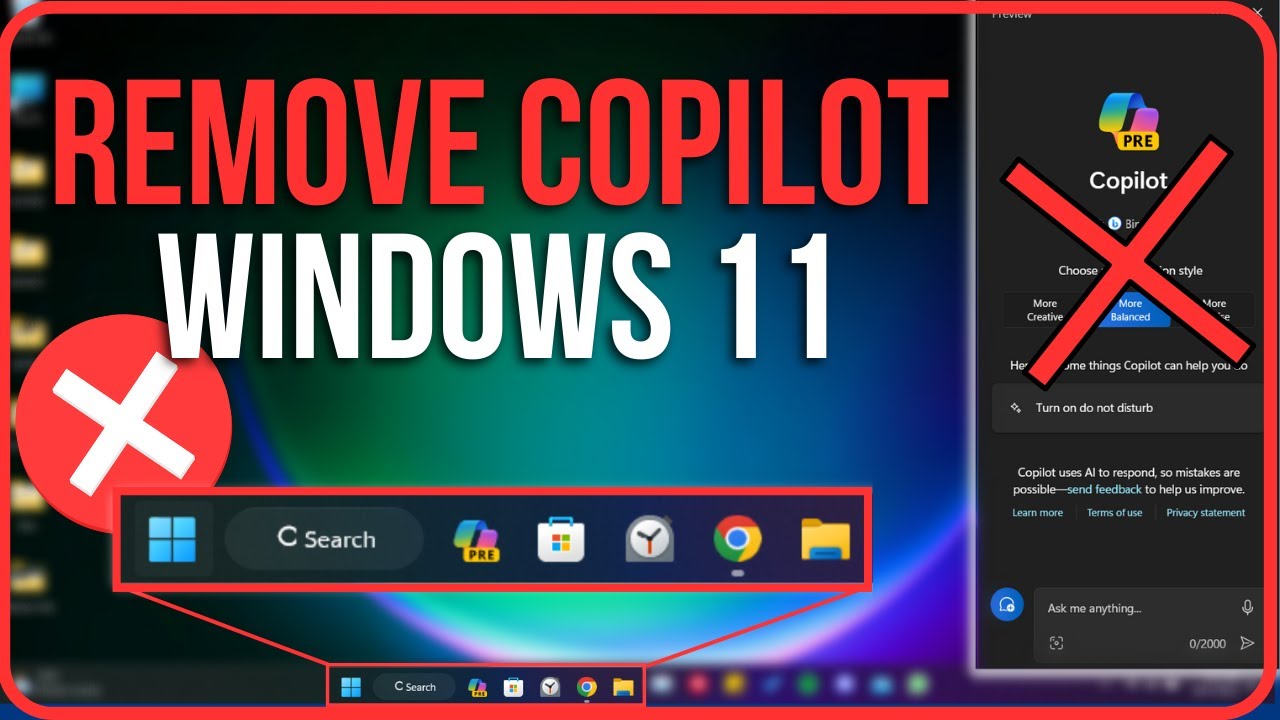
Methods for Removing Windows Copilot

While there is no official "uninstall" option for Windows Copilot, users can effectively disable or remove its functionality using several methods:

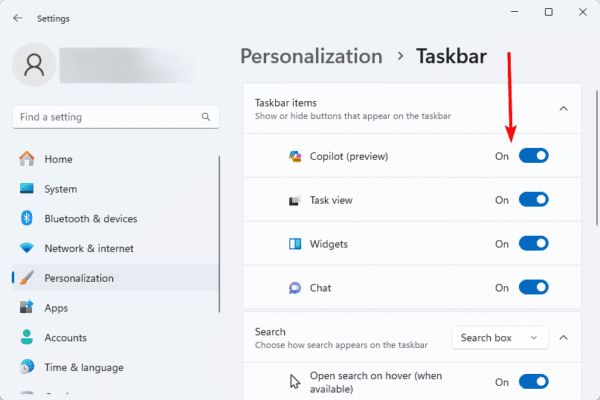
1. Disabling Windows Copilot from Settings:

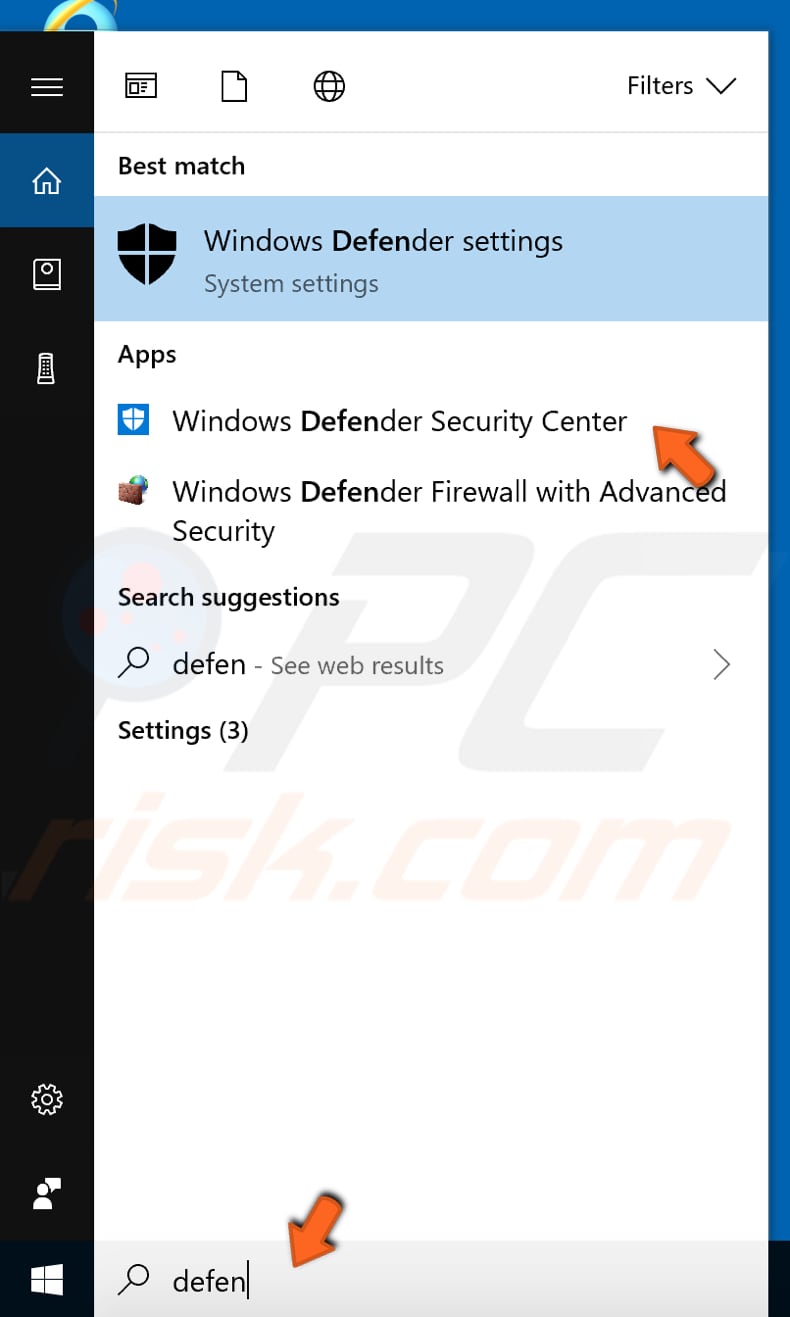
  • Step 1: Navigate to "Settings" by searching for it in the Windows search bar.
  • Step 2: Select "System" from the left-hand menu.
  • Step 3: Click on "Notifications" and then "Windows Copilot."
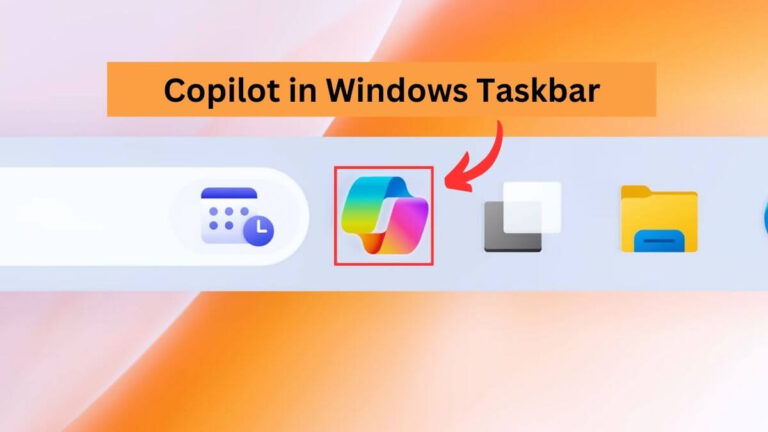
  • Step 4: Toggle off the "Show Windows Copilot" switch.

This method disables the visible presence of Windows Copilot, preventing it from appearing on the taskbar or through system prompts. However, the underlying AI service might still run in the background, potentially consuming resources.

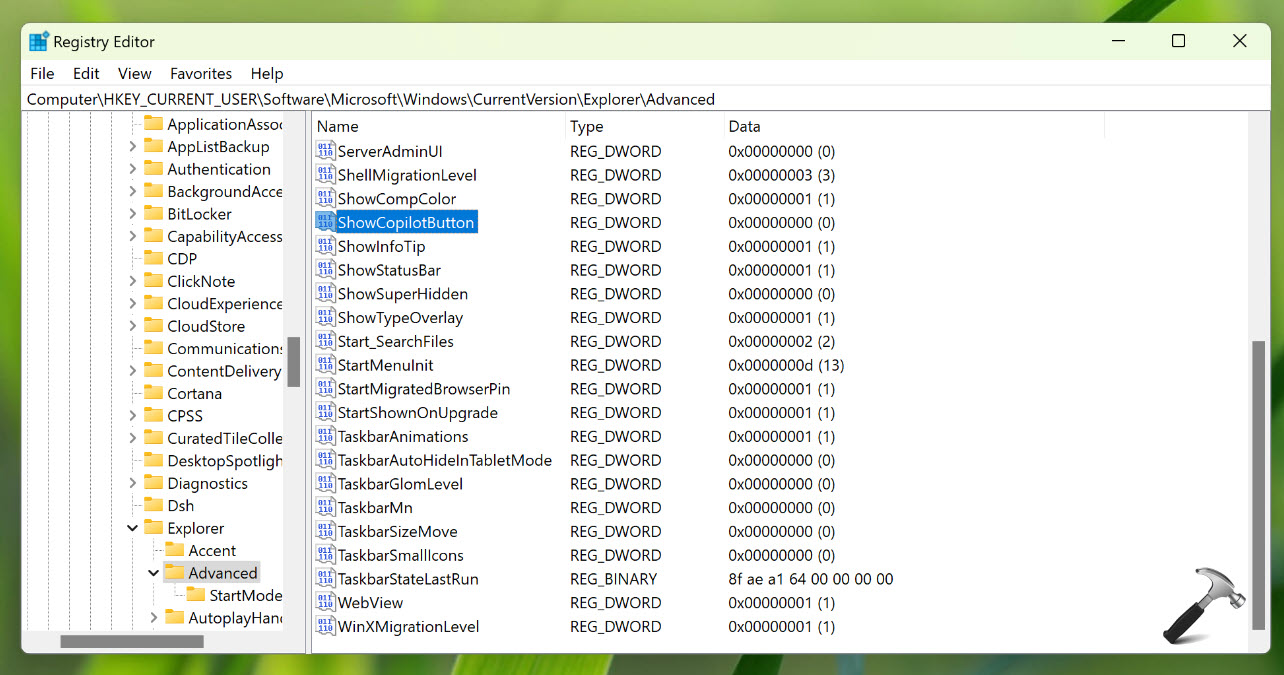
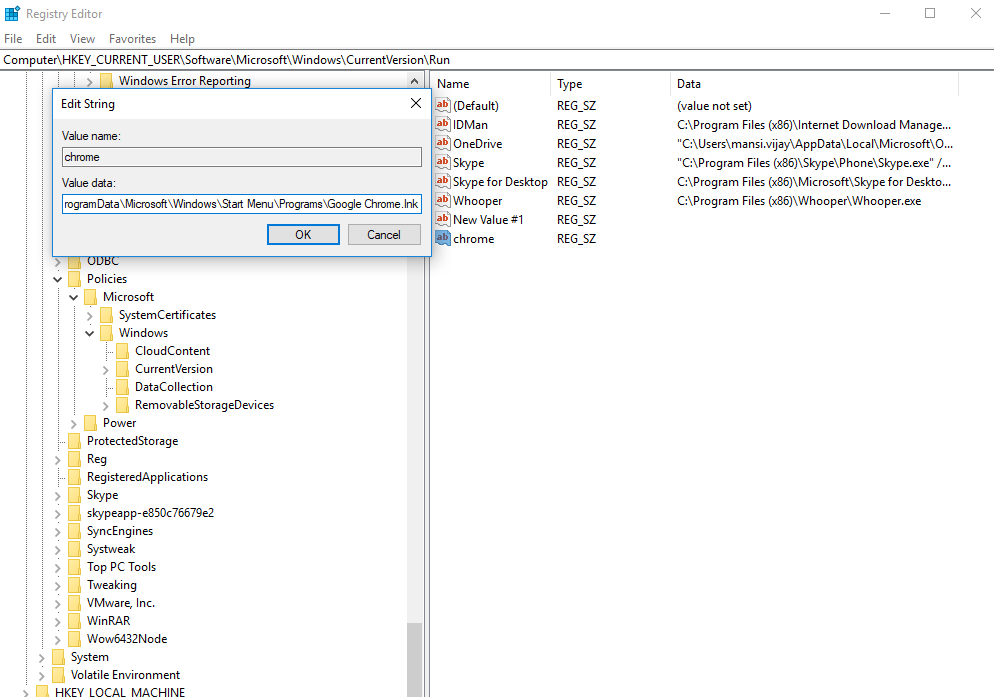
2. Using the Registry Editor:

  • Step 1: Press "Windows Key + R" to open the "Run" dialog box.
  • Step 2: Type "regedit" and press "Enter."
  • Step 3: Navigate to the following registry key: HKEY_CURRENT_USERSoftwareMicrosoftWindowsCurrentVersionWindows Copilot.
  • Step 4: Right-click on the "Windows Copilot" key and select "Delete."

This method permanently removes the Windows Copilot registry key, effectively disabling the AI assistant. However, it is recommended to back up the registry before making any changes.

3. Utilizing Third-Party Tools:

Several third-party tools are available that can help disable or remove Windows Copilot. These tools often provide a more comprehensive solution by targeting various aspects of the AI assistant’s functionality.

Important Considerations:

  • Data Privacy: While disabling Windows Copilot might limit data collection, it’s important to be aware that other Windows services might still collect data.
  • System Performance: Removing Windows Copilot might improve system performance, especially on devices with limited resources.
  • Feature Availability: Disabling Windows Copilot will remove access to its features, including text generation, information retrieval, and task automation.

FAQs

1. Does disabling Windows Copilot affect other Windows features?

Disabling Windows Copilot primarily affects its specific functionality. However, some features within Windows, such as the "Search" bar, might still utilize AI-powered capabilities, even with Windows Copilot disabled.

2. Can I re-enable Windows Copilot after disabling it?

Yes, you can re-enable Windows Copilot by following the same steps used for disabling it. However, re-enabling the feature might require restarting your computer.

3. Is it safe to remove Windows Copilot using the Registry Editor?

Using the Registry Editor requires caution. Incorrectly modifying registry entries can lead to system instability. Always back up your registry before making any changes.

4. Can I uninstall Windows Copilot completely?

There is no official "uninstall" option for Windows Copilot. The methods described above disable its functionality but do not remove it entirely from the system.

5. What if Windows Copilot keeps reappearing after disabling it?

If Windows Copilot continues to reappear despite disabling it, you might need to investigate potential conflicts with other software or system updates.

Tips

  • Back up your system: Before making any changes to your system, it is always recommended to create a system backup to ensure data recovery in case of unexpected issues.
  • Use reputable third-party tools: If you choose to utilize third-party tools, ensure they are from reputable sources to avoid potential security risks.
  • Monitor system performance: After disabling Windows Copilot, monitor your system performance to assess any improvements or potential issues.
  • Explore alternative solutions: If you find yourself missing certain features offered by Windows Copilot, explore alternative solutions such as dedicated productivity apps or other AI assistants.

Conclusion

Uninstalling Windows Copilot from Windows 11 Pro can be achieved through various methods, ranging from simple settings adjustments to more advanced registry modifications. The decision to remove the AI assistant ultimately depends on individual user preferences, privacy concerns, and system resource considerations. By understanding the functionality, benefits, and drawbacks of Windows Copilot, users can make informed decisions regarding its presence on their systems. Remember to approach any system modifications with caution and prioritize data security and system stability.

How to Uninstall Copilot in Windows 11 - YouTube Ultimate Guide: Uninstall Microsoft Copilot HOW TO REMOVE COPILOT FROM WINDOWS 11 (Easily)  How to Disable Copilot - YouTube
How To Remove Windows Copilot On Windows 11 Images An - vrogue.co Uninstall Copilot: How to Remove Copilot? (Step-by-Step Guide) How to uninstall Copilot from Windows?
Best Ways to Remove Windows Copilot on Windows 11 - NEXTOFWINDOWS.COM How to Remove Copilot From Windows 11 Taskbar with a few steps

Closure

Thus, we hope this article has provided valuable insights into Uninstalling Windows Copilot: A Comprehensive Guide. We thank you for taking the time to read this article. See you in our next article!
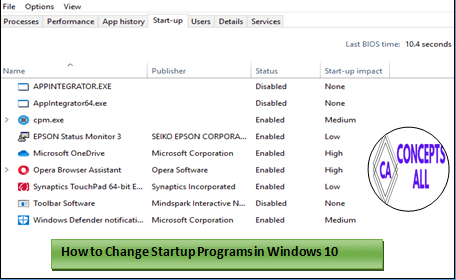
Optimizing Windows 11 Performance: A Comprehensive Guide

Optimizing Windows 11 Performance: A Comprehensive Guide

Introduction

With enthusiasm, let’s navigate through the intriguing topic related to Optimizing Windows 11 Performance: A Comprehensive Guide. Let’s weave interesting information and offer fresh perspectives to the readers.

Optimizing Windows 11 Performance: A Comprehensive Guide

Windows 11 optimization guide: get the most out of Microsoftโ€™s new OS

Windows 11, with its sleek interface and enhanced features, promises a modern and efficient computing experience. However, like any operating system, it can encounter performance issues that hinder productivity and enjoyment. This article provides a detailed exploration of common Windows 11 performance problems, their root causes, and effective solutions to restore optimal system responsiveness.

Understanding Performance Bottlenecks in Windows 11

Performance issues in Windows 11 manifest in various ways, ranging from sluggish application loading to system freezes and crashes. Identifying the root cause is crucial for selecting the appropriate solution. Common culprits include:

  • Hardware Limitations: An outdated or underpowered CPU, insufficient RAM, or a slow hard drive can significantly impact Windows 11’s performance.
  • Background Processes: Excessive background applications consuming system resources can lead to sluggish operation.
  • Startup Programs: A large number of programs automatically launching at startup can strain system resources.
  • Disk Space Issues: Insufficient storage space can hinder system performance, especially when the system drive is nearing capacity.
  • Outdated Drivers: Outdated or incompatible device drivers can cause conflicts and slowdowns.
  • Malware and Viruses: Malicious software can drain system resources and impact overall performance.
  • Overheating: Excessive heat generated by components can lead to performance throttling, reducing system speed.
  • Windows Updates: Recent Windows updates, while aiming to improve the system, can sometimes introduce performance issues.

Strategies for Enhancing Windows 11 Performance

Addressing performance issues requires a multi-pronged approach. The following strategies offer a comprehensive guide to optimizing Windows 11 performance:

1. Hardware Assessment and Upgrade:

  • CPU: A powerful CPU is essential for smooth multitasking and demanding applications. Consider upgrading to a newer generation processor if your current one is outdated.
  • RAM: Insufficient RAM can lead to excessive disk swapping, slowing down the system. Increase RAM capacity to at least 8GB for optimal performance.
  • Storage: A fast solid-state drive (SSD) offers significantly faster boot times and application loading speeds compared to traditional hard drives (HDD). Consider upgrading your boot drive to an SSD.

2. Managing Background Processes:

  • Task Manager: Utilize the Task Manager to identify resource-intensive background processes. Right-click the taskbar and select "Task Manager" or press Ctrl+Shift+Esc.
  • Startup Apps: Minimize the number of programs that automatically launch at startup. Access the Startup tab in Task Manager to disable unnecessary programs.
  • Windows Services: Review and disable services that are not actively used. Access "Services" through the "Run" dialog box (Windows key + R) by typing "services.msc".

3. Disk Space Management:

  • Clean Up: Regularly clean up temporary files, system caches, and unused programs to free up disk space. Use the built-in Disk Cleanup tool or third-party disk cleanup utilities.
  • Storage Sense: Enable Storage Sense in Windows 11 settings to automatically delete temporary files, recycle bin items, and unused downloads.
  • Large Files: Identify and remove large files that are no longer needed, such as movies, videos, or game installations.

4. Updating Drivers:

  • Device Manager: Use Device Manager to check for outdated or missing drivers. Access Device Manager by searching for "Device Manager" in the Windows search bar.
  • Manufacturer Websites: Visit the manufacturer’s website for the latest drivers specific to your hardware components.
  • Driver Update Utilities: Utilize third-party driver update utilities to automatically scan and update drivers.

5. Malware Removal:

  • Antivirus Software: Ensure a reliable antivirus program is installed and regularly updated to protect against malware.
  • Full System Scan: Perform a full system scan to detect and remove any existing malware.
  • Security Software: Consider using a comprehensive security suite that includes antivirus, firewall, and anti-spyware features.

6. Overheating Prevention:

  • Cleaning: Regularly clean the dust accumulation inside your computer, especially on the fan and heat sink.
  • Ventilation: Ensure adequate airflow around the computer by placing it in a well-ventilated area.
  • Thermal Paste: Apply fresh thermal paste to the CPU and GPU to improve heat dissipation.

7. Windows Updates and Settings Optimization:

  • Latest Updates: Keep your Windows 11 installation up-to-date with the latest updates.
  • Visual Effects: Disable unnecessary visual effects in System settings to improve performance.
  • Power Plan: Choose a power plan that prioritizes performance over battery life.
  • Background Apps: Limit the number of background apps running, particularly those that are not actively used.

Frequently Asked Questions (FAQs):

Q: Why is my Windows 11 computer so slow?

A: Several factors can contribute to slow performance, including insufficient RAM, a slow hard drive, outdated drivers, background processes consuming resources, and malware infections.

Q: How do I check my computer’s specifications?

A: Access the "System Information" window by searching for "System Information" in the Windows search bar. This will display details about your CPU, RAM, storage, and other hardware components.

Q: Is it safe to disable Windows services?

A: Disabling essential Windows services can lead to system instability. Only disable services that you understand and are not critical for system operation.

Q: Can I upgrade my hard drive to an SSD without reinstalling Windows?

A: Yes, you can typically clone your existing hard drive to an SSD using specialized software. This process transfers all your data and operating system to the new SSD without reinstalling Windows.

Q: How often should I run a full system scan for malware?

A: It is recommended to run a full system scan at least once a month and more frequently if you suspect malware infection.

Tips for Maintaining Optimal Performance:

  • Regularly clean up your hard drive: Delete unnecessary files, empty the recycle bin, and use the Disk Cleanup tool to remove temporary files.
  • Optimize your browser: Clear browsing history, cookies, and cache to improve browser speed.
  • Minimize background apps: Disable or close applications that are not actively used.
  • Keep your system updated: Install the latest Windows updates and driver updates regularly.
  • Run system maintenance tasks: Schedule regular system maintenance tasks, such as defragmenting the hard drive and checking for errors.
  • Monitor resource usage: Use the Task Manager to monitor CPU, RAM, and disk usage to identify potential bottlenecks.

Conclusion:

Optimizing Windows 11 performance requires a holistic approach, encompassing hardware upgrades, software optimization, and regular maintenance. By addressing common performance bottlenecks, users can restore system responsiveness, improve application loading times, and enhance overall computing efficiency. Remember, a proactive approach to system maintenance and optimization is crucial for a seamless and enjoyable Windows 11 experience.

How to Speed Up Windows 11 and Improve Performance Optimizing Windows 11 How to optimize Windows 11 for gaming to increase FPS & performance? - DigiStatement
*Windows 11/Windows 10* Optimization Guide. - YouTube PROFESSIONAL GUIDE TO OPTIMIZE WINDOWS 11 PROPERLY - YouTube Ultimate Windows 11 Gaming Performance Optimization Guide - Win Big Sports
Optimizing windows 11 for better Performance  Increase Windows11 performance with 5 simple Optimize Windows 11 The Ultimate Guide 101 - vrogue.co

Closure

Thus, we hope this article has provided valuable insights into Optimizing Windows 11 Performance: A Comprehensive Guide. We hope you find this article informative and beneficial. See you in our next article!

Navigating The World Of NinjaTrader 8 On Windows 10 64-bit: A Comprehensive Guide

Navigating the World of NinjaTrader 8 on Windows 10 64-bit: A Comprehensive Guide

Introduction

With enthusiasm, let’s navigate through the intriguing topic related to Navigating the World of NinjaTrader 8 on Windows 10 64-bit: A Comprehensive Guide. Let’s weave interesting information and offer fresh perspectives to the readers.

Ninjatrader 8 Download Windows 10 64 Bit - laxentoolbox

NinjaTrader 8, a powerful and versatile trading platform, has garnered significant popularity among traders seeking a robust and customizable environment for their trading endeavors. This guide aims to provide a comprehensive understanding of NinjaTrader 8 on Windows 10 64-bit, addressing its key features, download process, and essential considerations for optimal usage.

Understanding NinjaTrader 8: A Powerful Trading Platform

NinjaTrader 8 is a multi-asset trading platform that caters to a wide range of trading styles and market participants. Its core strengths lie in its intuitive interface, advanced charting capabilities, and extensive customization options. Here’s a closer look at its key features:

1. Comprehensive Charting and Analysis:

  • Multiple Charting Styles: NinjaTrader 8 offers a diverse range of chart types, including line, bar, candlestick, and Renko, allowing traders to visualize market data in various ways.
  • Advanced Technical Indicators: The platform boasts a vast library of built-in technical indicators, covering momentum, trend, volatility, and volume analysis, enabling traders to identify patterns and trends.
  • Customizable Layouts: Users can personalize chart layouts, adding indicators, drawing tools, and other elements to create a tailored trading workspace.

2. Automated Trading Capabilities:

  • Strategy Development: NinjaTrader 8 empowers users to develop and test their own trading strategies using its powerful strategy language.
  • Backtesting and Optimization: The platform allows traders to backtest strategies against historical data, optimizing parameters and assessing their performance before live deployment.
  • Real-time Execution: NinjaTrader 8 facilitates seamless and fast order execution, ensuring traders can capitalize on market opportunities promptly.

3. Market Data and Connectivity:

  • Real-time Market Data: NinjaTrader 8 provides access to real-time market data from various exchanges and brokers, enabling traders to stay informed about market movements.
  • Multiple Brokerage Integration: The platform supports integration with numerous brokerage accounts, allowing traders to manage their trading activities from a central location.

4. Community and Support:

  • Active Community: NinjaTrader boasts a vibrant online community where traders can share ideas, strategies, and support each other.
  • Comprehensive Documentation and Tutorials: The platform offers extensive documentation and tutorials, aiding users in mastering its features and functionalities.

Downloading and Installing NinjaTrader 8 on Windows 10 64-bit

The process of downloading and installing NinjaTrader 8 on Windows 10 64-bit is straightforward and user-friendly. Here’s a step-by-step guide:

1. Visit the NinjaTrader Website: Navigate to the official NinjaTrader website, https://www.ninjatrader.com/.

2. Access the Download Section: Locate the "Download" or "Get Started" section on the website.

3. Select the Windows 10 64-bit Version: Ensure you choose the correct version compatible with your operating system (Windows 10 64-bit).

4. Start the Download: Click on the download link and save the installation file to your computer.

5. Run the Installer: Once the download is complete, locate the installation file and double-click it to launch the installer.

6. Follow the On-screen Instructions: The installer will guide you through the installation process, prompting you to accept terms and conditions, select installation location, and choose any desired components.

7. Complete the Installation: After completing the installation steps, NinjaTrader 8 will be ready for use.

Essential Considerations for Optimal Usage

While NinjaTrader 8 offers a wealth of features, optimizing its usage for your specific trading needs requires careful consideration of these key aspects:

1. Hardware Requirements:

  • Processor: A multi-core processor with a minimum of 2 GHz is recommended for smooth performance.
  • RAM: At least 8 GB of RAM is essential for optimal responsiveness, especially when running complex strategies or backtesting.
  • Storage: Sufficient storage space is required for the NinjaTrader 8 installation, data files, and historical market data.

2. Brokerage Account Integration:

  • Choose a Compatible Broker: Ensure your chosen brokerage account supports integration with NinjaTrader 8.
  • Account Setup: Follow the instructions provided by NinjaTrader and your broker to link your account to the platform.

3. Market Data Subscriptions:

  • Data Providers: NinjaTrader 8 supports various data providers. Select a provider that offers the markets and data types you require.
  • Data Subscription: Choose a data subscription plan that aligns with your trading needs and budget.

4. Trading Strategies and Indicators:

  • Strategy Development: Invest time in developing and backtesting your trading strategies before live deployment.
  • Indicator Selection: Carefully choose indicators that align with your trading style and market analysis approach.

5. Risk Management and Trading Discipline:

  • Risk Management Plan: Establish a robust risk management plan that defines your position sizes, stop-loss levels, and overall risk tolerance.
  • Trading Discipline: Maintain discipline in executing your trading strategies and adhering to your risk management plan.

FAQs Regarding NinjaTrader 8 on Windows 10 64-bit

1. Is NinjaTrader 8 free to use?

NinjaTrader 8 offers a free version with limited features, including access to historical data and backtesting capabilities. The full version requires a paid subscription.

2. What are the system requirements for NinjaTrader 8?

NinjaTrader 8 requires a 64-bit operating system, at least 2 GHz processor, 8 GB RAM, and sufficient storage space.

3. How do I connect my brokerage account to NinjaTrader 8?

The connection process varies depending on your broker. Refer to NinjaTrader’s documentation and your broker’s instructions for specific guidance.

4. Can I use NinjaTrader 8 for automated trading?

Yes, NinjaTrader 8 offers powerful automated trading capabilities, allowing you to develop, test, and deploy your own trading strategies.

5. Is there a community or support available for NinjaTrader 8?

NinjaTrader has a vibrant online community and provides comprehensive documentation and tutorials to assist users.

Tips for Using NinjaTrader 8 Effectively

1. Start with a Free Trial: Before committing to a paid subscription, try the free version of NinjaTrader 8 to familiarize yourself with its features and functionalities.

2. Explore the Documentation and Tutorials: Take advantage of NinjaTrader’s extensive documentation and tutorials to learn about the platform’s capabilities and how to use them effectively.

3. Customize Your Trading Environment: Personalize your chart layouts, add indicators, and create a trading workspace that suits your preferences and trading style.

4. Backtest Your Strategies Thoroughly: Before deploying any trading strategy live, backtest it against historical data to assess its performance and identify potential weaknesses.

5. Practice Risk Management: Develop and strictly adhere to a risk management plan that defines your position sizes, stop-loss levels, and overall risk tolerance.

Conclusion

NinjaTrader 8 on Windows 10 64-bit presents a powerful and customizable trading platform for traders of all levels. Its comprehensive charting capabilities, advanced technical indicators, automated trading features, and extensive community support empower users to navigate the complexities of the financial markets. By understanding its features, navigating the download and installation process, and considering essential aspects like hardware requirements, brokerage integration, and risk management, traders can leverage NinjaTrader 8 effectively to enhance their trading endeavors.

NinjaTrader 8 Quick Start Guide - How to Setup NinjaTrader 8  Crash course, Webinar, Mentorship Ninjatrader 8 Download Windows 10 64 Bit - laxentoolbox Guided Tour of New NinjaTrader 8 User Driven Features - YouTube
How to use NinjaTrader 8 - TradaMaker NinjaTrader 8 Connection Guide - OneUp Trader  Help Desk NinjaTrader 8 Beginner's Tutorial for Traders - How to Set up a Chart - YouTube
Ninjatrader 8 Download 64 Bits - fooddarelo NinjaTrader 8 Review โ€“ Everything You Need to Know

Closure

Thus, we hope this article has provided valuable insights into Navigating the World of NinjaTrader 8 on Windows 10 64-bit: A Comprehensive Guide. We appreciate your attention to our article. See you in our next article!

Understanding The Windows 10 Startup Process: Unveiling The Programs That Power Your PC

Understanding the Windows 10 Startup Process: Unveiling the Programs That Power Your PC

Introduction

With enthusiasm, let’s navigate through the intriguing topic related to Understanding the Windows 10 Startup Process: Unveiling the Programs That Power Your PC. Let’s weave interesting information and offer fresh perspectives to the readers.

Understanding the Windows 10 Startup Process: Unveiling the Programs That Power Your PC

How to Manage Startup Programs in Windows 10 [Tutorial]

The moment you press the power button, your Windows 10 computer embarks on a complex journey to bring your desktop to life. This journey involves a carefully orchestrated sequence of events, culminating in the familiar sight of your login screen. A key aspect of this process is the loading of various programs, often referred to as "startup programs," that play a crucial role in ensuring a smooth and functional user experience.

These startup programs, ranging from essential system components to third-party applications, contribute to the overall functionality of your Windows 10 environment. They perform tasks such as:

  • System Initialization: Essential system components like drivers, services, and core processes are loaded, laying the foundation for the operating system to function.
  • Background Processes: Programs that operate silently in the background, providing vital services like network connectivity, antivirus protection, and system updates.
  • User Interface Elements: Programs responsible for the visual elements of your desktop, including the taskbar, notification area, and system icons.
  • Application Pre-loading: Certain applications are designed to launch automatically at startup, enabling quick access and improving responsiveness.

Delving Deeper into the Startup Process:

The Windows 10 startup process is a multi-layered operation, with programs loading in a specific order, ensuring that essential components are in place before others can function. This process can be broadly divided into three phases:

  1. Pre-Boot Environment (BIOS/UEFI): This stage involves the initial hardware checks and loading of the boot loader, which ultimately directs the system to the Windows operating system.
  2. Boot Loader: The boot loader, responsible for loading the Windows kernel and other critical system files, initiates the core operating system components.
  3. Windows Startup: This stage involves the loading of drivers, services, and startup programs, culminating in the display of the login screen.

Understanding the Importance of Startup Programs:

While some startup programs are essential for the proper functioning of Windows 10, others might be unnecessary or even detrimental to system performance. Understanding the role of each program and its impact on your computer’s startup time and overall performance is crucial.

Essential Startup Programs:

  • System Processes: Core Windows components like the Windows Explorer, Task Manager, and system services are vital for the operating system’s functionality.
  • Drivers: Device drivers enable communication between hardware components and the operating system, ensuring that peripherals like your keyboard, mouse, and display function correctly.
  • Security Software: Antivirus and anti-malware programs often run in the background, protecting your system from threats.
  • System Updates: Windows Update and other services ensure that your system is up-to-date with the latest security patches and features.

Optional Startup Programs:

  • Third-party Applications: Many applications, such as cloud storage services, productivity tools, and social media clients, offer the option to launch at startup. While these programs can be convenient, they can also contribute to slower startup times.
  • Background Services: Some services, while not essential for immediate functionality, provide useful features like automatic backups, synchronization, or system monitoring.

Managing Startup Programs for Optimal Performance:

Managing startup programs is crucial for optimizing your computer’s performance. By identifying and disabling unnecessary programs, you can significantly reduce the time it takes for your computer to boot up and improve its overall responsiveness.

Methods for Managing Startup Programs:

  • Task Manager: The Windows Task Manager provides a comprehensive overview of running programs and processes, allowing you to disable programs from starting at startup.
  • System Configuration: The System Configuration utility offers a more advanced method for managing startup programs, including the ability to disable services and system components.
  • Third-party Tools: Various third-party utilities offer specialized features for managing startup programs, providing detailed information and advanced customization options.

Tips for Managing Startup Programs:

  • Identify Unnecessary Programs: Carefully review the list of startup programs, paying attention to applications you don’t frequently use or those that seem unnecessary.
  • Disable Programs Gradually: Instead of disabling all unnecessary programs at once, try disabling a few programs at a time to assess the impact on your system’s performance.
  • Monitor Startup Times: Keep track of your computer’s startup time after disabling programs to evaluate the improvements.
  • Consider Alternative Solutions: For programs that you want to launch automatically but don’t need immediately at startup, consider using shortcuts or scheduling tasks to launch them at a later time.

FAQs about Startup Programs:

Q: How do I know which programs are safe to disable?

A: While disabling essential system components can lead to instability, disabling third-party applications that you don’t frequently use is generally safe. However, it’s always advisable to research the program before disabling it to ensure it’s not crucial for other applications or system functions.

Q: Can disabling startup programs impact my computer’s security?

A: Disabling essential security programs like antivirus software can compromise your system’s security. It’s important to ensure that your antivirus software is allowed to start at startup.

Q: How can I prevent programs from automatically launching at startup?

A: You can prevent programs from launching at startup by using the Task Manager, System Configuration utility, or third-party tools to disable them.

Q: Can I customize the order in which programs load at startup?

A: While you can’t directly customize the order of program loading, you can manage the startup delay for specific programs to ensure that essential components load before others.

Conclusion:

The startup process in Windows 10 is a complex and intricate operation involving a multitude of programs that contribute to the overall functionality of your computer. Understanding the role of these programs and managing their behavior can significantly improve your system’s performance, responsiveness, and overall user experience. By carefully managing startup programs, you can ensure that your computer boots up quickly, runs smoothly, and remains secure.

4 Ways to Manage  Change Startup Programs in Windows 10 A Complete Guide to the Windows Startup Settings How to Change Which Programs Run Automatically at Startup in Windows 10
How to Change Startup Programs in Windows 10 - Concepts All Configuring Startup and Troubleshooting Startup Issues : Understanding the Startup Process (part How to Add Programs to Startup in Windows 10
How to Manage Startup Programs in Windows 10 Windows 10 Pro Tip: Five ways to load the Advanced Startup Options - WinBuzzer

Closure

Thus, we hope this article has provided valuable insights into Understanding the Windows 10 Startup Process: Unveiling the Programs That Power Your PC. We appreciate your attention to our article. See you in our next article!

Navigating The Realm Of POSIFLEX PP-8800 Drivers On Windows 10: A Comprehensive Guide

Navigating the Realm of POSIFLEX PP-8800 Drivers on Windows 10: A Comprehensive Guide

Introduction

With enthusiasm, let’s navigate through the intriguing topic related to Navigating the Realm of POSIFLEX PP-8800 Drivers on Windows 10: A Comprehensive Guide. Let’s weave interesting information and offer fresh perspectives to the readers.

POSIFLEX PP-8800S SERIES ASSEMBLY MANUAL Pdf Download  ManualsLib

The POSIFLEX PP-8800, a robust and reliable point-of-sale (POS) system, is designed to streamline operations in various industries, from retail and hospitality to healthcare and beyond. Its seamless integration with Windows 10 demands the correct drivers to ensure optimal performance and functionality. This guide explores the intricacies of installing and managing POSIFLEX PP-8800 drivers on Windows 10, addressing common challenges and providing valuable tips for a smooth user experience.

Understanding the Significance of Drivers

Drivers act as the essential bridge between the POSIFLEX PP-8800 hardware and the Windows 10 operating system. They provide the necessary instructions for the system to recognize and communicate with the POS device, enabling functions like:

  • Input and Output: Drivers allow the system to process data from the POS terminal, such as customer orders, payment information, and inventory details, and transmit the data back to the POS terminal for printing receipts, displaying information, or performing other actions.
  • Peripheral Connectivity: Drivers facilitate the connection and communication between the POS terminal and peripherals like barcode scanners, receipt printers, cash drawers, and magnetic stripe readers.
  • Hardware Functionality: Drivers enable the proper operation of the POS terminal’s components, including the touchscreen, keyboard, and internal components.

Installation Process: A Step-by-Step Guide

The installation process for POSIFLEX PP-8800 drivers on Windows 10 typically involves the following steps:

  1. Driver Acquisition: Obtain the latest drivers from the POSIFLEX website or the manufacturer’s support portal. Ensure compatibility with the specific model of the POSIFLEX PP-8800 and the Windows 10 version installed.
  2. Driver Extraction: If the downloaded drivers are in a compressed archive (e.g., .zip, .rar), extract the files to a temporary location on the computer.
  3. Device Manager Access: Open the Device Manager by searching for "Device Manager" in the Windows search bar.
  4. Driver Installation: Locate the POSIFLEX PP-8800 device in the Device Manager. Right-click on the device and select "Update driver." Choose "Browse my computer for drivers" and navigate to the extracted driver files. Follow the on-screen prompts to complete the installation.
  5. System Restart: After installation, restart the computer to ensure the drivers are fully integrated into the system.

Troubleshooting Common Driver Issues

While the installation process is generally straightforward, users may encounter specific challenges:

  • Driver Compatibility: Ensure that the downloaded drivers are compatible with the specific POSIFLEX PP-8800 model and the Windows 10 version installed. Refer to the manufacturer’s documentation or support website for compatibility information.
  • Driver Conflicts: If other devices or software are interfering with the POSIFLEX PP-8800 drivers, conflicts may arise. This can be resolved by uninstalling conflicting drivers, updating outdated drivers, or disabling problematic devices.
  • Driver Corruption: Corrupted drivers can lead to malfunctions. Reinstalling the drivers or running a system scan can often resolve this issue.
  • Missing Drivers: If the system cannot locate the necessary drivers, manually install them from the POSIFLEX website or the manufacturer’s support portal.

Frequently Asked Questions (FAQs)

Q: Where can I find the latest drivers for my POSIFLEX PP-8800?

A: The latest drivers are typically available on the POSIFLEX website or the manufacturer’s support portal. Visit the POSIFLEX website and navigate to the "Downloads" or "Support" section. Enter the model number of the POSIFLEX PP-8800 and select the appropriate driver package for Windows 10.

Q: What if I encounter a driver error message?

A: Driver error messages can indicate various issues. Check the Device Manager for any error codes associated with the POSIFLEX PP-8800 device. Refer to the manufacturer’s documentation or support website for troubleshooting guidance specific to the error message.

Q: How do I update my existing drivers?

A: To update existing drivers, open the Device Manager and right-click on the POSIFLEX PP-8800 device. Select "Update driver" and follow the on-screen prompts. The system will automatically search for updated drivers or allow you to manually browse for them.

Q: Can I use generic drivers for my POSIFLEX PP-8800?

A: Using generic drivers is not recommended. Generic drivers may not provide full functionality or optimal performance for the POSIFLEX PP-8800. Always use the official drivers provided by the manufacturer.

Q: My POSIFLEX PP-8800 is not recognized by Windows 10. What should I do?

A: If the POSIFLEX PP-8800 is not recognized, ensure that the device is properly connected to the computer. Verify that the cables are secure and the device is powered on. If the issue persists, try restarting the computer or reinstalling the drivers.

Tips for Optimizing Driver Performance

  • Regular Driver Updates: Update drivers regularly to ensure optimal performance and security. The POSIFLEX website or support portal will typically notify users of available updates.
  • Driver Backup: Create a backup of the drivers before making any changes. This allows for easy restoration if any issues arise.
  • System Maintenance: Regularly run system maintenance tasks, such as disk cleanup and defragmentation, to optimize system performance and reduce driver-related issues.
  • Compatibility Verification: Before installing any new drivers, verify their compatibility with the specific POSIFLEX PP-8800 model and the Windows 10 version installed.
  • Manufacturer Support: Contact the POSIFLEX support team for assistance with driver-related issues or for specific technical advice.

Conclusion

Installing and managing POSIFLEX PP-8800 drivers on Windows 10 is crucial for ensuring optimal performance and functionality of the POS system. By following the outlined steps and addressing potential issues, users can effectively integrate the POS terminal into their Windows 10 environment. Regular driver updates, system maintenance, and seeking support from the manufacturer contribute to a seamless and reliable user experience.

POSIFLEX PP-8800S SERIES ASSEMBLY MANUAL Pdf Download  ManualsLib Posiflex AURA PP-8800/8800E User Manual  Manualzz POSIFLEX PP-8800 Thermal Receipt Printer 3" Thermal Receipt Printer
Thermal Printers - Posiflex User manual Posiflex AURA PP-8800U (English - 24 pages) POSIFLEX PP-8800 Thermal Receipt Printer India's #1st Printer and Cartridge Online Store India's
Posiflex Aura PP 8800 Receipt Printer  Best Price for Posiflex Receipt Printers at Indianbarcode.in POS (Point of Sale) - Products - Apex BARtech

Closure

Thus, we hope this article has provided valuable insights into Navigating the Realm of POSIFLEX PP-8800 Drivers on Windows 10: A Comprehensive Guide. We appreciate your attention to our article. See you in our next article!

Windows 10’s Protective Shield: Understanding And Utilizing The Quarantine Feature

Windows 10’s Protective Shield: Understanding and Utilizing the Quarantine Feature

Introduction

With enthusiasm, let’s navigate through the intriguing topic related to Windows 10’s Protective Shield: Understanding and Utilizing the Quarantine Feature. Let’s weave interesting information and offer fresh perspectives to the readers.

Windows 10’s Protective Shield: Understanding and Utilizing the Quarantine Feature

How To Use Windows Defender In Windows 10?

In the ever-evolving landscape of digital threats, operating systems are constantly evolving to provide robust protection against malicious actors. Windows 10, Microsoft’s flagship operating system, offers a powerful tool known as "quarantine" to safeguard users from potential harm. This feature acts as a secure holding area for suspicious files, preventing them from accessing the system and causing damage until their true nature is determined.

Understanding the Quarantine Concept

Quarantine, in the context of Windows 10, is a specialized system mechanism designed to isolate potentially harmful files. These files might be detected as suspicious by the operating system’s built-in security features, such as Windows Defender Antivirus, or by third-party antivirus programs. The quarantine process effectively prevents these files from executing or interacting with the system until further investigation or action is taken.

How Quarantine Works in Windows 10

Windows 10’s quarantine mechanism operates behind the scenes, automatically detecting and isolating suspicious files based on various factors:

  • Real-time File Scanning: Windows Defender Antivirus continuously monitors file activity and scans newly downloaded or modified files for known malware signatures.
  • Heuristic Analysis: This advanced technique analyzes file behavior to identify potential threats based on patterns and suspicious actions.
  • Cloud-Based Protection: Windows 10 leverages Microsoft’s cloud infrastructure to access a constantly updated database of malware signatures and threat intelligence, enhancing detection capabilities.

When a file is deemed suspicious, it is moved to the quarantine zone, effectively isolating it from the rest of the system. This prevents the file from executing or spreading malicious code, thus mitigating potential damage.

Benefits of Using Quarantine in Windows 10

The quarantine feature in Windows 10 offers several key benefits for users:

  • Protection Against Malware: Quarantine acts as a critical barrier against malware, preventing it from executing and causing harm to the system.
  • Reduced Risk of Data Loss: By isolating potentially harmful files, quarantine minimizes the risk of data loss or system corruption caused by malicious software.
  • Improved System Stability: Quarantine helps maintain system stability by preventing suspicious files from interfering with normal operations.
  • Safe File Analysis: Quarantine allows users to safely analyze suspicious files without risking system compromise.
  • User-Friendly Interface: The quarantine feature is easily accessible through the Windows Security app, providing a simple and intuitive user experience.

Managing Quarantine in Windows 10

Users can manage quarantine directly through the Windows Security app, providing a centralized control point for analyzing and managing quarantined files. The following actions can be performed:

  • View Quarantined Files: The quarantine section displays a list of quarantined files, including their name, size, and date of detection.
  • Restore Files: If a file is deemed safe, it can be restored from quarantine to its original location.
  • Delete Files: Users can permanently delete quarantined files from the system.
  • Submit Files for Analysis: If the user is unsure about a file’s safety, they can submit it to Microsoft for further analysis.

Frequently Asked Questions about Quarantine in Windows 10

Q: What happens to quarantined files?

A: Quarantined files are isolated from the system and stored in a secure location, preventing them from accessing or affecting the system.

Q: How long do files stay in quarantine?

A: Quarantined files remain in the quarantine zone indefinitely unless the user manually removes them or they are automatically removed by the system after a specific period.

Q: Can I access quarantined files?

A: Quarantined files are not accessible directly from the system. However, users can view them and manage them through the Windows Security app.

Q: Can I accidentally delete important files while managing quarantine?

A: Windows 10 provides clear warnings and confirmation prompts before deleting files from quarantine. Users should carefully review the file information before proceeding with deletion.

Q: What if I accidentally quarantined a safe file?

A: If a safe file has been quarantined, it can be restored to its original location through the Windows Security app.

Q: Can I disable the quarantine feature?

A: While it is possible to disable Windows Defender Antivirus, this is not recommended as it significantly compromises system security. Disabling quarantine is strongly discouraged.

Tips for Using Quarantine Effectively

  • Keep Windows Defender Antivirus Updated: Ensure that Windows Defender Antivirus is up-to-date with the latest virus definitions and security patches.
  • Scan for Malware Regularly: Regularly scan your system for malware using Windows Defender Antivirus or a trusted third-party antivirus program.
  • Be Cautious with Downloads: Be cautious about downloading files from unknown sources, as they may contain malware.
  • Use Strong Passwords: Use strong passwords for your accounts and avoid using the same password for multiple accounts.
  • Keep Your System Updated: Regularly update your operating system and software applications to patch security vulnerabilities.
  • Be Aware of Phishing Attacks: Be aware of phishing attacks, which aim to steal your personal information by disguising themselves as legitimate websites or emails.

Conclusion

The quarantine feature in Windows 10 plays a vital role in protecting users from malicious software. By isolating suspicious files, quarantine effectively prevents them from causing harm to the system and data. Users should familiarize themselves with the quarantine feature, its benefits, and how to manage it effectively. By utilizing this powerful tool and following best practices for online safety, users can significantly enhance their system security and minimize the risk of malware infections.

Windows Defender - Device and Productivity Software Windows Defender - Device and Productivity Software Windows Defender - Device and Productivity Software
Microsoft Defender Antivirus in the Windows Security app - Windows security  Microsoft Docs Antiviral Quarantine Concept. Quarantine Shield Protected from Virus or Bacteria. 3d Rendering The new Windows Defender Security Center aims to improve Windows 10 safety
News Details - Ministry of Health How to recover files deleted by Windows Defender?

Closure

Thus, we hope this article has provided valuable insights into Windows 10’s Protective Shield: Understanding and Utilizing the Quarantine Feature. We hope you find this article informative and beneficial. See you in our next article!

RStudio: A Powerful Tool For Data Science On Windows 11

RStudio: A Powerful Tool for Data Science on Windows 11

Introduction

With great pleasure, we will explore the intriguing topic related to RStudio: A Powerful Tool for Data Science on Windows 11. Let’s weave interesting information and offer fresh perspectives to the readers.

RStudio: A Powerful Tool for Data Science on Windows 11

IDE features - RStudio

RStudio is an integrated development environment (IDE) designed specifically for the R programming language. It offers a comprehensive suite of tools that streamline the process of data analysis, visualization, and reporting. While R itself is a powerful language for statistical computing, RStudio provides a user-friendly interface that enhances the overall workflow. This article delves into the features and benefits of using RStudio on Windows 11, exploring its capabilities and how it empowers users to leverage the full potential of R.

A Comprehensive IDE for R Programming

RStudio’s primary function is to provide a robust and intuitive environment for R programming. Its key features include:

  • Code Editor: RStudio boasts a sophisticated code editor with syntax highlighting, code completion, and integrated help. This enables users to write, edit, and debug R code efficiently. The editor also supports code folding, allowing users to collapse sections of code for better readability.
  • Console: The console serves as the primary interaction point with the R interpreter. Users can execute R commands directly, view output, and access the history of executed commands. This provides a dynamic and interactive environment for exploring data and experimenting with code.
  • Environment: The environment pane displays all active objects in the current R session, including variables, data frames, and functions. This allows users to track and manage their data and code effectively.
  • Plots: RStudio integrates seamlessly with R’s plotting capabilities, providing a dedicated pane for visualizing data. Users can view, manipulate, and export plots directly within the IDE, facilitating the exploration and communication of insights.
  • Packages: RStudio facilitates the installation and management of R packages, which extend the functionality of the language. Users can easily search for, install, and load packages, accessing a vast repository of pre-built tools for various data science tasks.
  • Projects: RStudio supports the creation of projects, which organize code, data, and outputs into a single workspace. This enables users to manage complex projects efficiently and maintain a structured workflow.
  • Version Control: Integration with version control systems like Git allows users to track changes in their code, collaborate with others, and manage different versions of their projects.

Benefits of Using RStudio on Windows 11

RStudio offers several advantages for users working with R on Windows 11, making it an indispensable tool for data scientists, statisticians, and anyone involved in data analysis.

  • Enhanced Productivity: RStudio’s comprehensive features and intuitive interface streamline the data analysis workflow, enabling users to work more efficiently. The integrated tools, such as the code editor, console, and environment pane, facilitate seamless navigation and interaction with R.
  • Improved Collaboration: The project management and version control capabilities of RStudio foster collaboration among team members. Users can easily share their code, data, and results, ensuring consistency and transparency in the project workflow.
  • Streamlined Debugging: The IDE’s debugging tools provide a comprehensive environment for identifying and resolving errors in R code. Breakpoints, step-by-step execution, and variable inspection facilitate a thorough understanding of code behavior and enable efficient debugging.
  • Comprehensive Documentation: RStudio’s integrated help system provides access to extensive documentation on R functions, packages, and concepts. This enables users to quickly find information and learn new techniques, enhancing their understanding of the language and its capabilities.
  • Visualizations and Reports: RStudio facilitates the creation of compelling data visualizations and reports. The IDE integrates seamlessly with R’s plotting capabilities, allowing users to create informative graphs and charts. Additionally, RStudio supports the creation of interactive reports using tools like R Markdown, enabling the communication of insights in a clear and engaging manner.

FAQs about RStudio on Windows 11

1. Is RStudio free to use?

RStudio offers a free and open-source version, RStudio Desktop, which provides all the core features for R development. A commercial version, RStudio Pro, offers additional features for professional users, including enhanced collaboration tools, data science team management, and support for large-scale projects.

2. What are the system requirements for RStudio on Windows 11?

RStudio has minimal system requirements, making it compatible with a wide range of Windows 11 machines. The recommended specifications include a modern processor, at least 4GB of RAM, and sufficient disk space for the installation files and project data.

3. How do I install RStudio on Windows 11?

Installing RStudio on Windows 11 is a straightforward process. Users can download the installer from the official RStudio website and follow the on-screen instructions. RStudio will install the necessary components and configure the IDE for use.

4. How do I get started with RStudio?

RStudio provides a comprehensive set of resources for beginners, including tutorials, documentation, and community forums. The RStudio website offers a wealth of information to help users learn the basics of R and RStudio.

5. Can I use RStudio with other programming languages?

While RStudio is primarily designed for R, it also supports other languages like Python through the use of plugins and extensions. Users can access tools and libraries for Python development within the RStudio environment.

Tips for Using RStudio on Windows 11

  • Customize the Interface: RStudio offers extensive customization options, allowing users to personalize the IDE to their preferences. This includes changing themes, setting keyboard shortcuts, and configuring the layout of the various panes.
  • Explore R Packages: The R package ecosystem is vast and diverse, offering specialized tools for various data science tasks. Explore the available packages and leverage their capabilities to enhance your workflow.
  • Utilize R Markdown: R Markdown is a powerful tool for creating reproducible reports and documents. It integrates code, text, and visualizations, enabling the seamless communication of insights.
  • Join the Community: The R and RStudio communities are vibrant and supportive. Participate in online forums, attend meetups, and engage with other users to learn from their experiences and contribute to the collective knowledge base.
  • Stay Updated: RStudio releases updates regularly, introducing new features and improvements. Keep your IDE updated to ensure you have access to the latest functionality and security enhancements.

Conclusion

RStudio is a powerful and versatile IDE that transforms the experience of working with the R programming language. Its comprehensive features, user-friendly interface, and seamless integration with R’s capabilities make it an essential tool for data scientists, statisticians, and anyone involved in data analysis. By leveraging RStudio’s functionality, users can streamline their workflow, enhance their productivity, and unlock the full potential of the R language on Windows 11. The platform’s open-source nature, extensive documentation, and supportive community foster a collaborative and engaging environment for learning and growth in the field of data science.

A Complete Tutorial to learn Data Science in R from Scratch Top Data Science Tools That Will Empower Your Data Exploration Processes What is RStudio? โ€“ Journey to Data Scientist
What is RStudio? Complete Guide to What is RStudio An Introduction to Learn R Programming  RStudio R Programming Download For Windows 11 2024 - Win 11 Home Upgrade 2024
Installing R, RTools & RStudio IDE for Data Science (#R, #Rstudio, #RTools, #DataScience) - YouTube How To Use Rstudio For Statistics - UNUGTP News

Closure

Thus, we hope this article has provided valuable insights into RStudio: A Powerful Tool for Data Science on Windows 11. We hope you find this article informative and beneficial. See you in our next article!

Navigating The Posiflex PP-8800 In Windows 10 64-bit: A Comprehensive Guide

Navigating the Posiflex PP-8800 in Windows 10 64-bit: A Comprehensive Guide

Introduction

With great pleasure, we will explore the intriguing topic related to Navigating the Posiflex PP-8800 in Windows 10 64-bit: A Comprehensive Guide. Let’s weave interesting information and offer fresh perspectives to the readers.

POSIFLEX PP-8800S SERIES ASSEMBLY MANUAL Pdf Download  ManualsLib

The Posiflex PP-8800, a robust and reliable point-of-sale (POS) system, finds extensive application in retail, hospitality, and various other industries. This guide delves into the intricacies of installing and utilizing the PP-8800 within the Windows 10 64-bit environment, providing a comprehensive understanding of the process.

Understanding the Importance of Drivers

Drivers act as the crucial bridge between the hardware and software, enabling seamless communication and functionality. In the context of the PP-8800, appropriate drivers are essential for Windows 10 64-bit to recognize and utilize the POS system’s peripherals, such as the receipt printer, cash drawer, and barcode scanner. Without the correct drivers, these peripherals may not function properly, leading to operational inefficiencies.

Obtaining and Installing the Drivers

The first step involves acquiring the necessary drivers. Posiflex provides these drivers on their official website, typically within the "Downloads" or "Support" sections. Locate the specific driver package for the PP-8800 and Windows 10 64-bit, ensuring compatibility.

Installation Process:

  1. Download: Download the driver package to a designated location on your computer.
  2. Extraction: Extract the downloaded file, usually a compressed archive (ZIP or RAR).
  3. Installation: Navigate to the extracted folder and locate the setup file. Double-click the file to initiate the installation process.
  4. Follow Instructions: Adhere to the on-screen instructions provided by the installation wizard. This may involve selecting the appropriate installation path and confirming driver installation.
  5. Restart: Upon successful installation, restart your computer to ensure the drivers are loaded correctly.

Troubleshooting Common Driver Issues

Driver Compatibility: Ensure the downloaded driver package is specifically designed for the PP-8800 and Windows 10 64-bit. Using incompatible drivers can lead to system instability and malfunction.

Driver Conflicts: If multiple drivers are installed for the same device, conflicts may arise. Uninstall any conflicting drivers before installing the new ones.

Device Manager: The Device Manager in Windows provides a comprehensive view of installed hardware and drivers. If the PP-8800 or its peripherals are not recognized, check the Device Manager for error messages or yellow exclamation marks. These indicate potential driver issues.

Driver Updates: Regularly check the Posiflex website for driver updates. Newer versions may address compatibility issues, enhance performance, or include security patches.

Frequently Asked Questions (FAQs)

Q: Can I use the PP-8800 with a different operating system?

A: The PP-8800 is compatible with various operating systems, including Windows 7, 8, and 10. However, specific driver packages are required for each operating system.

Q: What if I encounter an error during driver installation?

A: Refer to the Posiflex website’s troubleshooting section or contact their technical support for assistance. They can provide tailored solutions based on the specific error message.

Q: How do I ensure the drivers are installed correctly?

A: After installation, check the Device Manager for the PP-8800 and its peripherals. They should be listed without error messages or exclamation marks.

Q: Can I update the drivers manually?

A: Yes, you can manually update drivers through the Device Manager. However, it is generally recommended to use the driver packages provided by Posiflex for optimal compatibility and performance.

Tips for Optimal Performance

  • Driver Updates: Regularly check for driver updates from Posiflex to ensure optimal compatibility and performance.
  • Device Manager: Monitor the Device Manager for any error messages or exclamation marks related to the PP-8800 or its peripherals.
  • Restart: Restart your computer after installing or updating drivers to ensure they are loaded correctly.
  • Compatibility: Verify the driver package’s compatibility with your specific PP-8800 model and Windows 10 64-bit version.

Conclusion

Installing the correct drivers for the Posiflex PP-8800 in Windows 10 64-bit is crucial for seamless functionality and optimal performance. By following the steps outlined in this guide, users can ensure proper driver installation and troubleshoot any potential issues. Regularly checking for driver updates and monitoring the Device Manager for any errors are essential practices for maintaining a stable and efficient POS system.

Posiflex PP-8800S Series Manuals  ManualsLib POSIFLEX PP-8800 Thermal Receipt Printer 3" Thermal Receipt Printer Posiflex AURA PP-8800/8800E User Manual  Manualzz
Posiflex Aura PP 8800 Receipt Printer  Best Price for Posiflex Receipt Printers at Indianbarcode.in POSIFLEX PP-8800 Thermal Receipt Printer 3" Thermal Receipt Printer POSIFLEX PP-8800S SERIES ASSEMBLY MANUAL Pdf Download  ManualsLib
How to Install Posiflex Pp 8800 Printer โ€“ UnBrick.ID Bedienungsanleitung Posiflex AURA PP-8800U (24 Seiten)

Closure

Thus, we hope this article has provided valuable insights into Navigating the Posiflex PP-8800 in Windows 10 64-bit: A Comprehensive Guide. We hope you find this article informative and beneficial. See you in our next article!

A Comprehensive Guide To Overlay Clocks In Windows 10

A Comprehensive Guide to Overlay Clocks in Windows 10

Introduction

In this auspicious occasion, we are delighted to delve into the intriguing topic related to A Comprehensive Guide to Overlay Clocks in Windows 10. Let’s weave interesting information and offer fresh perspectives to the readers.

A Comprehensive Guide to Overlay Clocks in Windows 10

How to Download and Install Nak's Clock Overlay For Windows - YouTube

Overlay clocks, a common feature in modern operating systems, offer a convenient way to keep track of time without disrupting your workflow. In Windows 10, these clocks can be found in various forms, from the traditional taskbar clock to specialized software applications that provide more advanced features. This article delves into the world of overlay clocks in Windows 10, exploring their functionalities, benefits, and applications.

Understanding Overlay Clocks in Windows 10

Overlay clocks are essentially digital time displays that appear on top of other windows or applications. They are designed to be unobtrusive and easily accessible, allowing users to quickly check the current time without minimizing their active window.

Types of Overlay Clocks in Windows 10

  1. Taskbar Clock: The default taskbar clock is a basic yet essential overlay clock in Windows 10. Located in the system tray, it provides the current time, date, and day of the week. This clock can be customized with different clock styles, time formats, and color schemes.

  2. Desktop Clock Gadgets: Windows 10 offers desktop gadgets that can be used to display a larger and more prominent clock on the desktop. These gadgets can be customized with various designs and features, including alarms, timers, and world clock functionalities.

  3. Third-Party Overlay Clock Software: Numerous third-party applications offer more advanced overlay clock functionalities, such as customizable transparency, multiple clock displays, and integration with other software. These applications often provide features like:

    • World Clock: Displaying the current time in different time zones.
    • Timer and Stopwatch: Enabling users to set timers and track elapsed time.
    • Alarm Clock: Setting reminders and alarms for specific times.
    • Calendar Integration: Integrating with calendar applications for event reminders.

Benefits of Overlay Clocks in Windows 10

  1. Enhanced Productivity: Overlay clocks allow users to track time without switching windows or interrupting their workflow. This is especially beneficial for tasks that require focused attention or involve time-sensitive deadlines.

  2. Improved Time Management: By providing a constant visual reminder of the current time, overlay clocks can help users manage their time more effectively. This can lead to better time allocation, reduced procrastination, and improved efficiency.

  3. Accessibility and Convenience: Overlay clocks are easily accessible from any window or application, making it convenient to check the time without navigating through menus or switching programs.

  4. Customization and Flexibility: Many overlay clocks offer customization options, allowing users to personalize their appearance, features, and functionality to suit their individual preferences.

Applications of Overlay Clocks in Windows 10

  1. Work and Productivity: Overlay clocks are useful for professionals who need to track time accurately for billing purposes, deadlines, or project management.

  2. Gaming: Gamers can use overlay clocks to monitor game time, set timers for breaks, or track progress.

  3. Education: Students can use overlay clocks to manage their study time, schedule breaks, and stay on track with assignments.

  4. Personal Use: Overlay clocks can be helpful for individuals who need to track time for personal appointments, reminders, or simply to stay aware of the current time.

FAQs on Overlay Clocks in Windows 10

Q1. How do I change the clock style or time format on my taskbar clock?

A1. You can customize the taskbar clock by right-clicking on the clock in the system tray and selecting "Settings". This will open the "Date & Time" settings where you can adjust the clock style, time format, and other settings.

Q2. Can I use multiple overlay clocks simultaneously?

A2. Yes, you can use multiple overlay clocks simultaneously by using third-party software applications that allow for multiple clock displays.

Q3. Are there any free overlay clock software options available?

A3. Yes, there are several free overlay clock software options available online. Some popular examples include "Clock Widgets", "Time & Date", and "Overlay Clock".

Q4. How do I set an alarm using an overlay clock?

A4. Most overlay clock software offers alarm features. You can set an alarm by specifying the time and selecting the desired sound or notification.

Q5. How can I make the overlay clock more transparent or less intrusive?

A5. Many overlay clock applications allow you to adjust the transparency level, making the clock less prominent and more unobtrusive.

Tips for Using Overlay Clocks Effectively

  1. Choose the Right Clock for Your Needs: Select an overlay clock that provides the features and functionalities you require, whether it’s a simple taskbar clock or a more advanced third-party application.

  2. Customize Your Clock: Take advantage of customization options to personalize your clock’s appearance, features, and functionality to suit your preferences.

  3. Position Your Clock Strategically: Place your overlay clock in a location where it’s easily visible without being distracting.

  4. Experiment with Different Clocks: Try different overlay clocks to find the one that best fits your workflow and preferences.

Conclusion

Overlay clocks in Windows 10 offer a valuable tool for time management, productivity, and convenience. By providing a readily accessible visual reminder of the current time, overlay clocks can help users stay organized, manage their time effectively, and improve their overall workflow. Whether you choose the default taskbar clock or explore the options offered by third-party software, overlay clocks are a useful feature for any Windows 10 user.

Mastering Time: A Comprehensive Guide on How to Add Clocks from Multiple Time Zones in Windows 10 How To Download and Install Fliqlo Clock Screensaver In Windows 10 - YouTube How to show multiple clocks on multiple desktops in Windows 10 - YouTube
Best windows 10 desktop clock - verticalryte Windows 10 clock taskbar - gostwebsite Download Overlay Clock
The Windows 10 Alarms & Clocks app introduced a major UI overhaul [Tip] How to Show Multiple Clocks in Windows 10 Taskbar โ€“ AskVG

Closure

Thus, we hope this article has provided valuable insights into A Comprehensive Guide to Overlay Clocks in Windows 10. We hope you find this article informative and beneficial. See you in our next article!

Windows 11: A Comprehensive Review

Windows 11: A Comprehensive Review

Introduction

In this auspicious occasion, we are delighted to delve into the intriguing topic related to Windows 11: A Comprehensive Review. Let’s weave interesting information and offer fresh perspectives to the readers.

Windows 11: A Comprehensive Review

Windows 11 review - Your Windows Guide

Microsoft’s Windows 11, released in October 2021, represents a significant evolution in the operating system’s history. It introduces a redesigned user interface, enhanced security features, and improved performance, aiming to provide a more modern and streamlined computing experience. This article delves into the key aspects of Windows 11, examining its features, benefits, and potential drawbacks.

A New Look and Feel:

Windows 11’s most noticeable change is its redesigned user interface. The Start menu has been reimagined, featuring a central location for pinned applications and a list of recently used files. The taskbar has been moved to the center of the screen, offering a more modern aesthetic. The rounded corners on windows and icons create a softer, more visually appealing experience.

Enhanced Security Features:

Windows 11 prioritizes security, incorporating several new features designed to protect user data. Windows Hello, the facial recognition system, has been improved and integrated more seamlessly into the operating system. Microsoft Defender, the built-in antivirus software, has been strengthened with enhanced threat detection capabilities. Secure Boot, which ensures only trusted software can run on the system, is now enabled by default.

Performance Improvements:

Windows 11 boasts performance enhancements through optimized resource management and improved hardware compatibility. The new operating system utilizes the latest technology, including support for DirectX 12 Ultimate, enabling smoother graphics performance in games and other demanding applications. The introduction of Windows Subsystem for Android enables users to run Android apps directly on their Windows 11 devices.

Integration with Microsoft Services:

Windows 11 seamlessly integrates with Microsoft’s suite of online services, enhancing user productivity and connectivity. Features like Microsoft Teams integration facilitate collaborative work, while OneDrive cloud storage allows for easy file sharing and access across devices. The integration with the Microsoft Store offers a streamlined platform for downloading and managing apps.

Focus on Gaming:

Windows 11 caters to gamers with several features designed to enhance the gaming experience. Auto HDR (High Dynamic Range) technology provides richer visuals, while DirectStorage optimizes loading times and improves frame rates. The new Game Pass integration offers access to a vast library of games through a subscription service.

Accessibility and Inclusivity:

Microsoft has made significant strides in enhancing accessibility in Windows 11. The operating system includes features like Narrator, a screen reader, and Magnifier, a screen magnification tool. The redesigned user interface is more accessible, with improved contrast and larger text options.

FAQs:

Q: Is Windows 11 a significant upgrade from Windows 10?

A: While Windows 11 offers a new user interface, enhanced security features, and performance improvements, it’s not a revolutionary upgrade. Many users might not experience a significant difference in their daily workflow.

Q: What are the system requirements for Windows 11?

A: Windows 11 requires a 1GHz or faster processor with at least 2 cores, 4GB of RAM, 64GB of storage, and a compatible graphics card. Additionally, the system must have a TPM 2.0 module and a UEFI firmware that supports Secure Boot.

Q: Is Windows 11 compatible with my existing hardware?

A: While Windows 11 is designed to be compatible with a wide range of hardware, older systems might not meet the minimum requirements. It’s recommended to check the system requirements before upgrading.

Q: Can I upgrade to Windows 11 for free?

A: The free upgrade offer for Windows 11 expired in 2023. However, users can purchase a new license or upgrade from a previous version of Windows for a fee.

Q: Is Windows 11 safe and secure?

A: Windows 11 incorporates enhanced security features like Windows Hello, Microsoft Defender, and Secure Boot, making it a secure operating system. However, as with any software, it’s crucial to practice good cybersecurity habits and keep the system updated.

Tips:

1. Back up your data before upgrading: Before installing Windows 11, it’s essential to back up all important data to avoid losing it during the upgrade process.

2. Check system requirements: Ensure your computer meets the minimum system requirements for Windows 11 to avoid compatibility issues.

3. Update your drivers: Update all drivers for your hardware components to ensure optimal performance and compatibility with Windows 11.

4. Consider a clean install: For a fresh start, consider performing a clean install of Windows 11 instead of upgrading from a previous version.

5. Explore new features: Take advantage of the new features and functionalities offered by Windows 11, such as the redesigned Start menu, improved multitasking capabilities, and enhanced security features.

Conclusion:

Windows 11 represents a significant step forward for Microsoft’s operating system, offering a more modern and user-friendly experience. Its focus on security, performance, and integration with Microsoft services makes it a compelling choice for users seeking a reliable and feature-rich operating system. However, users should consider their individual needs and system requirements before making the switch. As with any operating system, it’s essential to stay informed about updates, security patches, and best practices to ensure a smooth and secure computing experience.

Windows 11 Operating System - NetAns Windows 11 First Look and Review - KAPsNotes Windows 11 Review - YouTube
Windows 11 Review - YouTube The Latest Features of Windows 11: A Comprehensive Guide Read Best Review and Top General News A comprehensive overview of Windows 11 22H2, the OSโ€™s first big yearly update  Ars Technica
Microsoft Windows 11 Review Pcmag - Riset New Windows 11 All Features: Full Depth Review Latest Windows 11

Closure

Thus, we hope this article has provided valuable insights into Windows 11: A Comprehensive Review. We hope you find this article informative and beneficial. See you in our next article!